
VTR8101 - Voice recorder PHILIPS - Free user manual and instructions
Find the device manual for free VTR8101 PHILIPS in PDF.


| Type of product | Audio/Video Recorder (Voice Recorder) |
| Model | Philips VTR8101 |
| Dimensions (W x H x D) | 56 x 78 x 25 mm |
| Weight (without clip) | 110 g |
| Battery type | Non-removable lithium-ion |
| Charging time (OFF mode) | Approximately 4 hours |
| Charging time (ON mode) | Approximately 6 hours |
| Memory card support | Micro SD/TF up to 128 GB (Class 10 recommended) |
| Video resolution options | 1920x1080 30p, 1440x1080 30p, 1280x720 30p, 848x480 30p |
| Photo resolution options | 34M, 28M, 23M, 18M, 13M, 9M, 6M, 4M |
| Audio recording format | MP3, mono 128 kbps |
| Lens | Super-wide angle F1.6 |
| Night vision | Starlight-level, color imaging in low light |
| Key features | Quick voice/video recording, OSD with ID watermark, loop recording, motion detection, segmented video, pre-recording |
| PC interface | USB 2.0, mass storage class (no driver needed) |
| Operating systems | Windows 7/8/10/Vista/XP/2000, Mac OS X, Linux |
| Operating temperature | -10°C to 55°C |
| Humidity | 10% – 90% non-condensing |
| Warranty | 1 year |
Frequently Asked Questions - VTR8101 PHILIPS
User questions about VTR8101 PHILIPS
0 question about this device. Answer the ones you know or ask your own.
Ask a new question about this device
Download the instructions for your Voice recorder in PDF format for free! Find your manual VTR8101 - PHILIPS and take your electronic device back in hand. On this page are published all the documents necessary for the use of your device. VTR8101 by PHILIPS.
USER MANUAL VTR8101 PHILIPS
natural_image
Black Philips 3D camera with lens and control buttons (no visible text or symbols beyond brand name)使用手册
User manual
目录
1 欢迎 5
1.1 产品特点 5
2 重要须知 6
2.1 安全 6
3 您的音视频记录仪 7
3.1 供货范围:7
3.2 主机概览:7
4 开始使用 8
4.1 开 / 关机 8
4.2 充电方法 8
4.3 连接电脑 9
5 录像 10
6 当前录像时长 11
7 拍照 12
8 录音 13
9 视频模式 14
9.1 视频播放 14
10 照片模式 15
11 语音模式 16
11.1 语音播放 16
12 设置模式 17
12.1 录音设置 17
12.2 录像设置 17
12.3 拍照设置 18
12.4 系统设置 19
13 背夹的装取 23
14 常见问题 24
natural_image
Line drawing of a Philips phone case with three technical illustrations below (no text or symbols on the device itself)3.2 主机概览:
natural_image
Icon of a USB plug with a USB symbol, no text or labels present
提示
录像界面说明
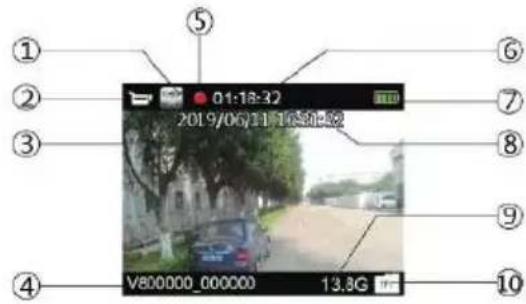
图2
8 录音
录音界面说明
① 录音状态
② 当前录音时长
③电量指示

提示
文件的删除需通过连接电脑才可以进行。
录像文件播放界面说明:
① 当前时长
②播放状态
③进度条
④ 文件总时长
⑤ 文件名
⑥ ID水印
9.1 视频播放
语音文件播放界面说明:
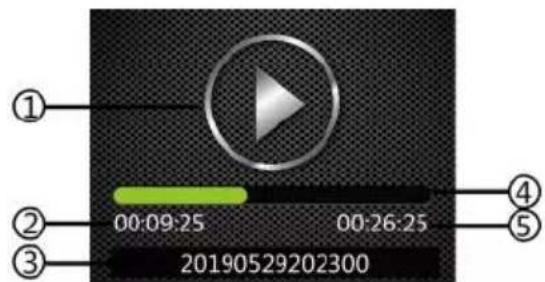
① 播放状态
② 当前播放时长
③ 时间文件名
④ 播放进度条
⑤ 文件总时长
11.1 语音播放
natural_image
Four technical line drawings of mechanical components with no visible text or symbolsI.1 Product features 28
2 Important Notice 29
2.1 Safety 29
3 Your Audio/Video Recorder 30
- I What's in the box 30
3.2 Overview of your audio recorder 30
4 Start to Use 32
4.1 Turn ON/OFF 32
4.2 Charging methods 33
4.3 Connecting to computer 33
5 Video Recording 34
6 Current Video Duration 35
7 Photo
36
8 Voice Recording 37
9 Video Mode 39
9.1 Video playing 39
10 Photo Mode 41
11 Audio Mode 42
11.1 Voice play 43
12 Setting Mode 44
12.1 Voice recording 44
12.2 Recording setting 44
12.3 Photo setting 45
12.4 System setting 46
13 Mounting of Shoulder Clip 51
14 FAQ 52
14.1 Unable to start audio and video recorder 52
14.2 Incorrect time/date 52
14.3 Unclear image 52
14.4 Fail to record audio/video 52
14.5 Unable to play audio or video files 52
14.6 How to respond to recorder failure 52
15 Technical Parameters 53
15.1 Memory 53
15.2 Dimensions and weight 53
15.3 PC Interface 53
15.4 Voice recording 53
15.5 Operating conditions 53
I Welcome
Welcome to the world of Philips! We are honored by your choice and purchase of Philips' products. You can have Philips' comprehensive technical supports from our website, e.g. user's manuals, software downloading and warranty information etc.
www.philips.com
1.1 Product features
- Quick Voice Recording: Simply press the Voice Recording button for the first time to record, and the second time to save recorded clips.
- Quick Video Recording: Simply push the Video Recording button up for the first time to record, and pull the button down to save the recorded clips.
- Super-wide angle lens to get a fuller picture.
- F1.6 super-wide angle lens with more charge to get a clearer picture.
- Starlight-level night vision to formulate color imaging in low-light environments to get a clear and visible picture.
- Toggle switch to be safe, flexible, stable and reliable in performance.
- On-Screen Display function ensures that all videos and
photos contain un-editable timing, product serial number and user serial number that ensure legal validity of such evidence.
- Super long file name: All recorded video files contain information such as product serial number, recording time and user serial number, which ensure convenient data storage and retrieval.
- All recorded video files are automatically cut and saved to prevent data loss due to incorrect operation.
• External memory card supports 128G. - High-definition speaker: Use high-quality speaker to give you a live feel during audio or video play.
• Record in a common MP3 format. - Access to the audio file and data by using high-speed USB 2.0.
- It is able to be used as a large capacity USB storage device to ensure the maximum compatibility.
- The damper shaft back clip can be adjusted at any angle, which is flexible and reliable to wear.
2 Important Notice
2.1 Safety

Notice
- Protect the cables from being pinched, particularly at plugs.

Warning
Special Announcement: Before using the product, please read the Manual carefully. The Company shall not be held liable for any data loss due to incorrect manual operation or force majeure. We specially recommend that users make additional copies of the files in the device.
3 Your Audio/Video Recorder
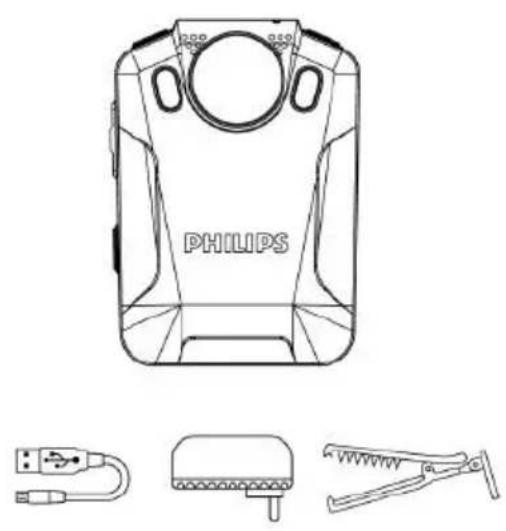
3.1 What's in the box
natural_image
Line drawing of a Philips phone device with three technical illustrations below (no text or symbols on the device itself)3.2 Overview of your audio recorder
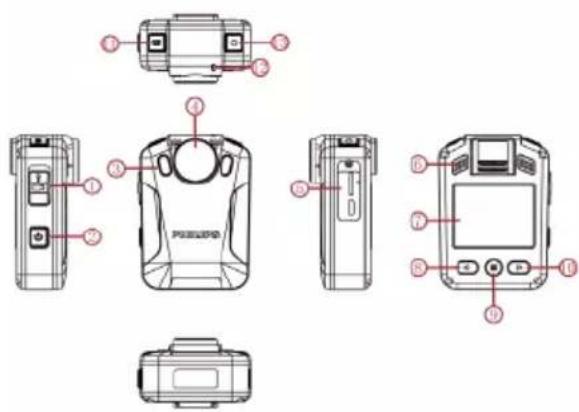
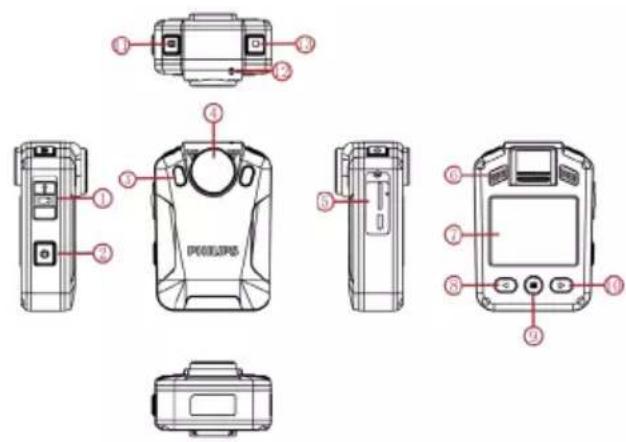
① Video recording button ② Power on / off
③ Additional light ④ Lens
⑤ USB interface / TF card socket / reset ⑥ Loudspeaker
⑦ Screen ⑧ Up / FB
⑨ Menu key / Back Key ⑩ Down / FF
⑪ Photo button ⑫ Working indicator
⑬ Recording button
4 Start to Use
4.1 Turn ON/OFF

Notice
- Please recharge the device for three hours before using it for the first time!
During shutdown mode, long press Turn ON button for 3 seconds, and the device will be turned on, showing the Philips logo, as shown below:

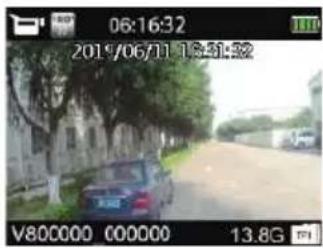
Then the device enters the preview interface, as shown in the figure below. In the preview state, the working indicator lights up in green. On this interface, press the menu button and the device returns to the setting interface. Long press
'or ' zoom in or out on the preview interface for digital zoom.

Notice
- This device is powered by a non-removable lithium battery. If you do not use the audio and video recorder for a long time, long press the power button for 3 seconds to turn off the device.
- If the record does not work properly, please check if the device is out of power.
- During the operation please do not pull out the external memory card. Otherwise, damage might be caused to the files or the device.
- When the battery sign shows this ' please charge your device in time.
4.2 Charging methods
(I) Use USB cable to connect the device with PC, the indicator will show green light during charging.
(2) Use USB cable and the connector to charge the device. The device indicator will show green light first, which will be extinguished after the device is fully charged.

Reminder
- The device can be charged either during ON or OFF mode. Normally, during OFF mode charging, it takes around 4 hours for full charging. During ON mode, it takes around 6 hours for full charging (we recommend that you use OFF mode charging).
4.3 Connecting to computer
The recorder can be used as a large-volume USB storage device, which can be connected to the computer. No software needs to be installed for VTR8101. The recorder will be shown as a portable device. The icon of connecting to computer is shown in the figure below.

natural_image
Icon of a USB plug with a USB symbol, no text or labels present
Reminder
- When the file are moved from the PC to the VideoTracer, please do not disconnect the device from the PC.
5 Video Recording
When you use the recorder for the first time, please pay attention to the requirements in this section!
(1)In the camera preview state, push the Video button up to start the video recording. The device makes the sound of 'tick' and the status indicator will flash in red.
(2) Pull the Video button down to end the recording. The device 'tick' for two times, the red indicator light goes out, the device returns to the camera preview interface, and the status indicator lights up in green.
(3)Long press'◀ or ' ▶ on the preview interface to zoom in or out on the preview interface for digital zoom.
(4) When recording in dark or dim light, long press Recording Button to turn on the illumination light.
(5) Press the 'Photo' button to capture the current recording screen.
(6) Long press the photo button during video recording. The file will be marked as important file, and the marked file will not be deleted when the loop video files are turned up.
(7) The reference video recording interface is shown below:
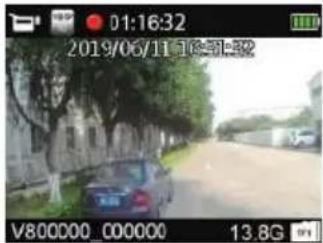
Recording Interface Illustration
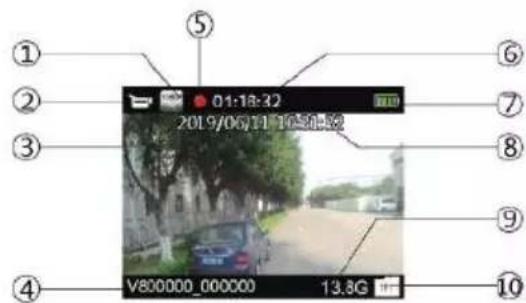
① Recording resolution
② Video icon
③ System current date and time
④ ID watermark
⑤ Recording mode
⑥ Video duration
⑦ Battery
⑧ System time
⑨ Remaining card capacity
10 Card icon
6 Current Video Duration

Notice
- When the battery icon is showing empty, it means low on battery. When the low battery icon occurs, the system will automatically shut down. If you are recording, the system will automatically save the recorded files then shut down. In case of low battery, please charge your device timely. During low battery, the device gives you 'Low Battery' notice as shown below.
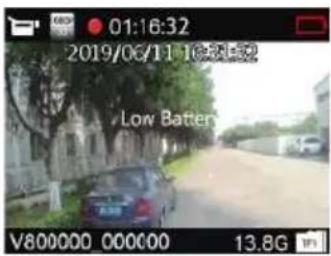

Reminder
- Before recording, please adjust the recording parameters first.
- Please delete some unnecessary files before recording.
7 Photo
When you use the device for photo taking for the first time, please read the instructions in this section! In the camera preview state, directly press the camera button to take a photo. In the state of photo taking, the red indicator lights on, and the device makes a sound of 'beep'. In the dark night or in a dark environment, the device additional light needs to be turned on for shooting (Additional light: In the preview interface, long press the recording button to turn on the additional light, then long press to turn off it. The light icon will be displayed in the upper left corner of the preview interface after the additional light is turned on, as shown in Figure 2). In the video recording state, press the camera button to capture the picture at the time. The interface of which is shown as Figure 1.
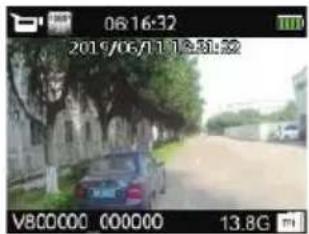
Figure 1
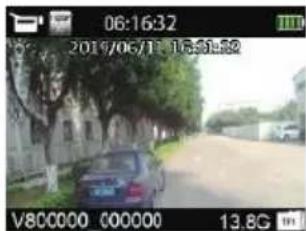
Figure 2
8 Voice Recording
When you use the device for audio recording for the first time, please read the instructions in this section!
(1) Press the 'Voice button' in the video preview state to start recording; the working indicator lights on in yellow; please point the built-in microphone to the voice source.
(2) Press the 'Voice' button to end the recording and return to the preview interface.
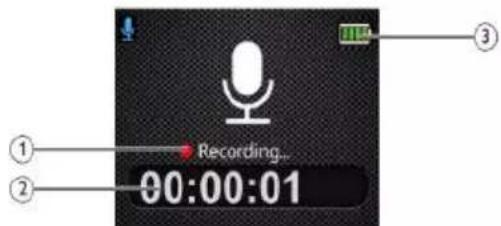
The recording interface is shown below:
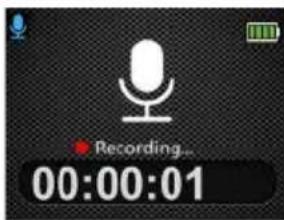
Audio recording interface
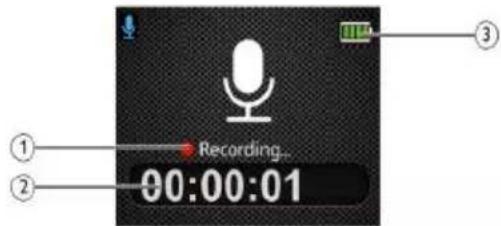
① Recording status
② Current recording duration
③ Battery status

Reminder
- Before recording, please adjust the desired recording sensitivity.
- Please delete some unnecessary files before recording.
- Please test the voice recording first to confirm that the audio and video recorder settings are correct.
- Do not pull out the memory card during audio/video recording mode. Otherwise, damage might be caused to the files.
- Do not cut off power during audio/video recording mode. Otherwise, damage might be caused to the recorder and the files might be lost or damaged.
- If you intend to use the device for a long period of time, please charge the device before recording.
9 Video Mode
On the camera preview status interface, we can use the '◀' button to enter the review playback interface, press '◀' or '▶' to select the video option, and then press the menu button to confirm the video file list interface. The video file list reference interface is shown below:
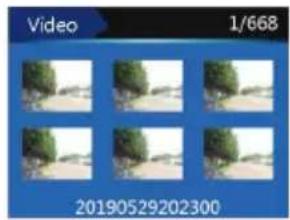
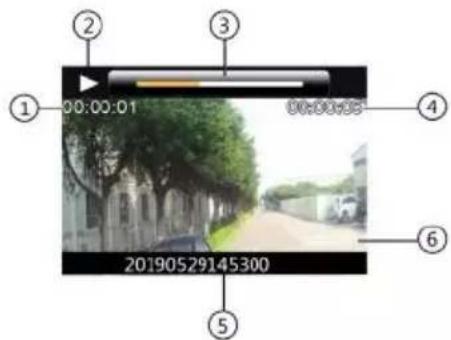
Press ^4 or ^4 to select the video file. Press the menu button to enter the video playback interface. The video playback reference interface is as shown below:
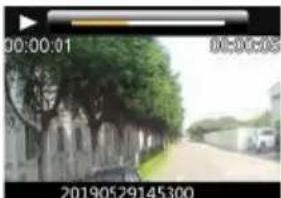
The deletion of the file can be done by connecting to a computer.
Recorded File Playing Illustration:
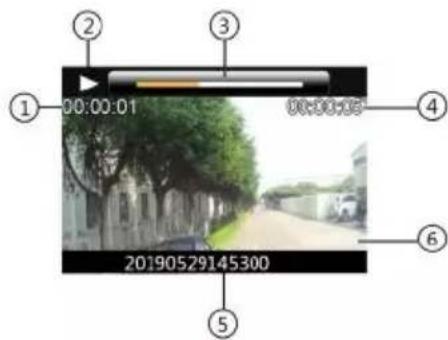
① Current duration
③ Progress bar
⑤ File name
② Current play state
④ Total file length
⑥ ID watermark
9.1 Video playing
(I)Press'◀ or '▶ select the file you need to play.
(2)Press the 'Menu' button to start playback, and the working indicator will light on in green.
(3) During playback, press the 'Menu' button to pause playback, press the 'Menu' button again, and the playback
will return to the previous position.
(4)Press '◀ or ' ▶ during playback to select 2 times, 4 times, 8 times, 16 times, 32 times, 64 times, 128 times to fast backward or fast forward the currently playing file.
10 Photo Mode
In the camera preview status interface, the 'button can be used to enter the review playback interface. Press 'or 'button to select the camera option, then press the menu button to enter the camera file list interface. The camera file list reference interface is shown below:
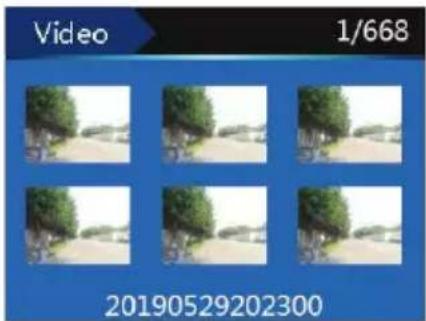
Press '◀ or ' ▶ button to select the photo file to be played; press the menu button to enter the photo browsing state, press '◀ or ' ▶ to switch the photo.
II Audio Mode
In the camera preview state, you can use the '◀' button to enter the review playback interface, press the '◀' or '▶' button to select the voice recording option, and then press the menu button to enter the voice file list interface. The voice file list reference interface is as shown below:
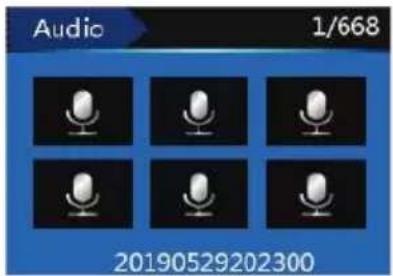
Press the '◀or' ▶button to select the audio file to be played; press the menu button to enter the voice playback interface. The voice playback reference interface is as shown below:
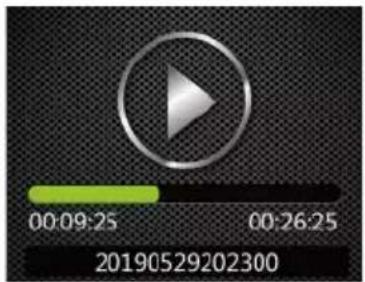
Audio File Playing Interface Illustration:
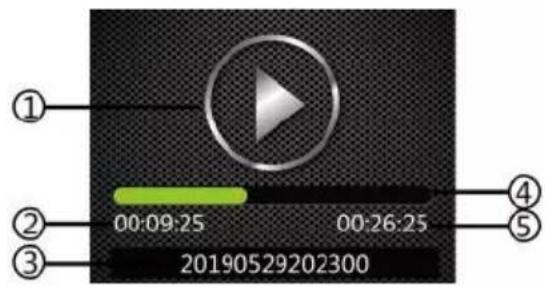
① Current play state
② Current play time
③ Time file name
④ Play progress bar
⑤ Total file length
11.1 Voice play
(1)Press'◀ or ' ▶ button to select the file you want to play.
(2)Press the 'Menu' button to start playback, the working indicator will light on in green.
(3) During playback, press the menu button to pause playback and press the menu button again to resume playback.
12 Setting Mode
Press the menu button in the camera preview status interface, the system will enter the setting interface. System settings include: voice recording setting, video recording setting, camera setting and system setting.
Press the '◀' or '▶' button to select and press the menu button to enter the selected option. Long press the 'Menu' button to return to the preview interface.
12.1 Voice recording
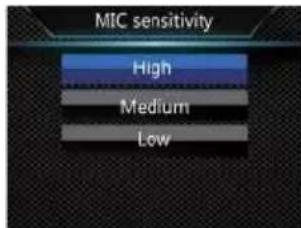
Press 'Menu' to enter the setting mode, press '←or' ▶ to select the voice recording setting menu, press 'Menu' to select, and the options of high, medium and low will pop up. Select different levels of microphone sensitivity to achieve different recording effects.
12.2 Recording setting
The video settings menu includes: resolution, video quality, video pre-recording, video delay recording.
Press '◀or' ▶to select the option you want to set, and then press the menu button to enter.
11.2.1 Resolution
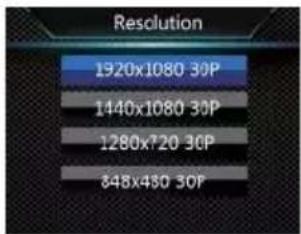
Video resolution is of four levels, namely 1920×1080 30P, 1440×1080 30P, 1280×720 30P, and 848×480 30P. Different video resolution options can meet the requirements in most application occasions. Press '◀' or '▶' to select appropriate resolution. Press the menu button when the selection is completed, and long press the menu button to return to the previous menu.
The reference interface is shown below:
12.2.2 Video quality
There are three quality options to choose from on the Video Quality menu: 'Highres', 'Good', 'Normal'. According to different needs, different quality effects are selected. The better the video quality, the larger the memory occupied by the same video length.
12.2.3 Video pre-recording
Apply the video pre-recording function to start the recording around the first ten seconds, before the record button is activated. The video pre-recording has two options: off and on. Press
'◀ or ' ▶o select, and press the menu button to confirm. Long press the menu button to return to the previous menu.
Pre-recording time: about 16 seconds.
12.2.4 Delayed recording
Apply the delayed recording function to continue the recording for a certain time after pushing the button to save the recording. There are five options for delayed recording: setting off, 5 sec, 10 sec, 20 min, 30 min. Press 'or' to select and press the menu button to confirm after the selection is completed. Long press the menu button to return to the previous menu.
12.3 Photo setting
The photo settings menu includes: photo size, photo quality, and continuous shooting. Press '◀or' ▶ select the optionyouwant,and then press themenubuttontoenter.
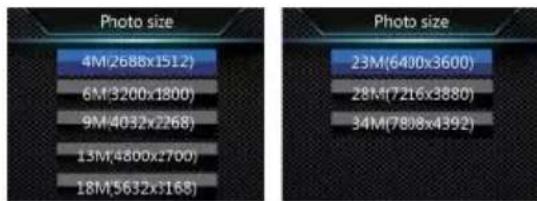
12.3.1 Photo size
The sizes of the photos are of 34M, 28M, 23M, 18M, 13M, 9M, 6M, and 4M. Press 'or' to select the appropriate resolution. After the selection is completed, press the menu button to confirm. Long press the menu button to return to the previous menu. The reference interface is shown below:
12.3.2 Photo quality
There are three quality options to choose from on the Photo Quality menu: 'Highres', 'Good', 'Normal'. According to different needs, different quality effects are selected. The better the picture quality, the larger the memory occupied by the photo.
12.3.3 Continuous shooting
Continuous shooting means press the photo button to take photos during preview or recording mode.
On the camera setting menu, select 'Continuous Shooting' and press the menu button to enter. Press '◀ or ' ▶ to select. Press the menu button to confirm after the selection is completed. Long press the menu button to return to the previous menu.
12.4 System setting
System settings menu includes: language, default settings, screen brightness, system time, auto power off, auto screen off, volume, car mode, loop video, car recording, segmented video, button tone, indicator light, motion detection, exposure compensation, ID number and system information. Press
'◀' or '▶' to select the option you want to set, and then press the menu button to enter.
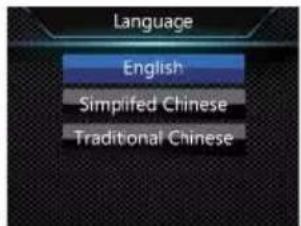
12.4.1 Language
In the language selection menu, you can select a language as the system language. The reference interface of language selection is as follow:
12.4.2 Default settings
Apply the function to reset the device's setting options.
12.4.3 Brightness
When you want to use this function, you can adjust the
brightness of the screen. The screen brightness can be set to three levels: high, medium and low. Press '◀ or ' ▶ to select the appropriate option. Press the menu button to confirm after the selection is completed. Long press the menu button to return to the previous menu.
12.4.4 System time
The system time setting interface is as shown below:
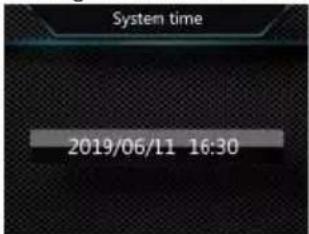
On this interface, press the menu button and '◀ or ' ▶ to set the real time. Press '◀ or ' ▶ change the value. Press the menu button to confirm after the selection is completed. Long press the menu button to return to the previous menu.
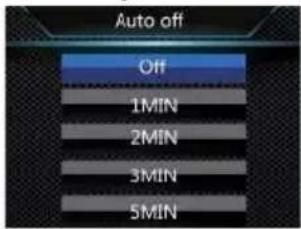
12.4.5 Auto off
If there is no operation on the device, the VideoTracer
automatically shuts down after a certain period of time. The interface looks like following:
12.4.6 Auto screen off
There are four options for the auto screen off time: Off, 30 seconds, 1 minute, 3 minutes. If no operation is done to the device within the given time, the screen will black out. If 'Off' is selected, the display will be constantly lit.
12.4.7 Volume
When you use this function, you can adjust the volume of the device.
The volume setting can be selected from 11 values between 0 and 10. Press '◀' or '▶' to select the appropriate volume value. After the selection is completed, press the menu button to confirm.
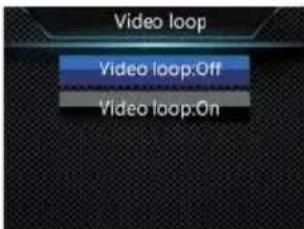
12.4.8 Loop video
On the video settings menu, select 'Loop video' and press the menu button to enter. Press '◀ or ' ▶ to choose from the two options: on and off. After the selection is completed, press the menu button to confirm. Press the menu button to return to the previous menu.
The reference interface is shown below:
12.4.9 Car recording
When the function is used, you can choose whether you want to record the sound inside the car.
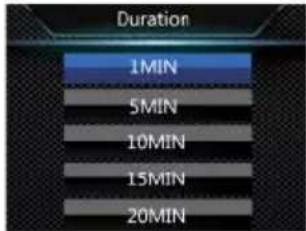
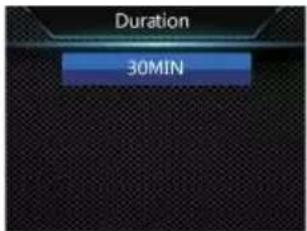
12.4.10 Segmented video
The segmented video has six levels: 1 minute, 5 minutes, 10 minutes, 15 minutes, 20 minutes, and 30 minutes. During the recording process, the segmented video automatically saves the video file in segments and automatically switches to the next video recording.
The video segmentation function reference interface is shown below :
12.4.11 Key sound
When the function is used, there will be an audible prompt for button operation.
12.4.12 Indicator light
When the function is used, you can turn on or off the status indicator as needed.
12.4.13 Motion detection
In the standby state, the audio and video recorder automatically turns on the recording function after an object enters the shooting range of the audio and video recorder. After the object leaves the shooting range, the recording function ends and the recording file is saved. The motion detection function setting can be selected: off / on.
12.4.14 Exposure compensation
Exposure compensation is an exposure control method that compensates for brighter or darker shots. You can adjust the brightness of your photos to create unique visual effects according to your own needs.
The exposure compensation setting can be selected from 13 values between -2.0 and +2.0. Press '◀ or ' ▶ to select the appropriate value. When the selection is completed, press the menu button to confirm.
12.4.15 ID number
ID number setting interface is as shown below:
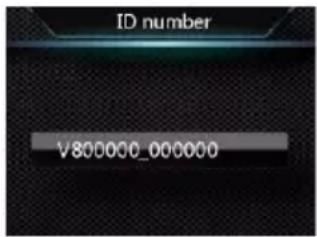
On this interface, press the menu button and '◀or ' ▶ to set the device number and user number. Press '◀ or ' ▶ to change the corresponding position value, and press the menu key to confirm. Long press the menu to return to the previous menu.
12.4.16 System information
The system information menu includes: total storage capacity, available space, available video time, available audio time, battery power and version number.
Total storage capacity: local memory size information.
Available space: remaining space information.
Available video time: the time length for the current video recording resolution.
Available audio time: the time length for the current audio recording type.
Battery level: current battery level information.
Version number: Firmware version information.
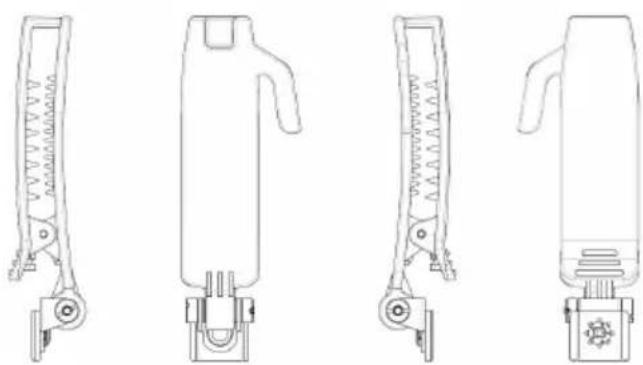
13 Mounting of Shoulder Clip
① When mounting the shoulder clip, introduce the R of the clip into the main slot, and then slowly push it until the top of the clip reaches the bottom of the slot.
② When removing the shoulder clip, hold it with one hand, hold the device body with the other hand and hold the clip. Gently pull it out. It is as shown below:
natural_image
Four technical line drawings of mechanical components, no text or symbols presentPull out the clip in the opposite direction and pull it out with the upward force.
14 FAQ
This section has listed all the frequently asked questions to help you address the simple issues during use of the voice/video recorder. If such issues persist, please consult our dealersorvisitourofficialwebsite:www.philips.com/support
14.1 Unable to start audio and video recorder
The batter has run out and you need to charge your device.
14.2 Incorrect time/date
The audio and video recorder time is not accurate, and please reset the time on the menu.
14.3 Unclear image
Unclean lens has caused it. Please use clean cloth to clean it.
14.4 Fail to record audio/video
The internal storage of audio/video recorder has run out and
52 EN
no recycling shooting mode has been turned on. Please delete some of the files or transfer such files to external storage device.
14.5 Unable to play audio or video files
The batter is used up, please charge your device.
14.6 How to respond to recorder failure
Sometimes you will encounter in the operation the problems such as failure to power on or black screen, etc. The usual processing method is to reset it. The position of the reset button: open the USB cover, and you'll find a small hole in the slot; use tweezers or pointed item to click on the hole.
Note: This operation will not cause data loss or destruction.
15 Technical Parameters
15.1 Memory
External Memory
Recording time reference(16GB): about 290 hours
Type of Internal Storage: C10 TF card
Mobile storage device (PC): Yes
15.2 Dimensions and weight
Width × Height × Depth: 56×78×25 (mm)
Weight (with battery): 110g (without back clip)
15.3 PC Interface
Operating System: Windows 7,8,10/Vista/XP/2000, Mac OS X,
Linux
Port: USB
15.4 Voice recording
Mono: The bit rate is 128kbps, and the format is MP3
15.5 Operating conditions
Temperature: -10°C \~55°C
Air humidity: 10% – 90%, non-condensing
Warranty card
质保书

year warranty
一年质保
Type: VTR8101
Serial nr:
Date of purchase
购买日期
Dealer's name, address and signature
销售商名称、地址及签字
www.philips.com/welcome
This document is printed on chlorine free produced paper
Data subject to change without notice
This product was brought to the market by Speech Processing Solutions GmbH or one of its affiliates, further referred to in this document as SPS, which is the manufacturer of the product. SPS is the warrantor in relation to the product with which this booklet was packaged.
For China only
只限中国地区
Printed in China


© 2020 Speech Processing Solutions GmbH I.
Register your product and get support at
www.philips.com/welcome
- 使用手册
- User manual
- 目录
- 常见问题 24
- 主机概览:
- 提示
- 录音
- 视频播放
- 语音播放
- Technical Parameters 53
- I Welcome
- Product features
- Important Notice
- Safety
- Notice
- Warning
- Your Audio/Video Recorder
- Start to Use
- Turn ON/OFF
- Charging methods
- Reminder
- Connecting to computer
- Video Recording
- Current Video Duration
- Photo
- Voice Recording
- Video Mode
- Video playing
- Photo Mode
- II Audio Mode
- Voice play
- Setting Mode
- Voice recording
- Recording setting
- Resolution
- Video quality
- Video pre-recording
- Delayed recording
- Photo setting
- Photo size
- Photo quality
- Continuous shooting
- System setting
- Language
- Default settings
- Brightness
- System time
- Auto off
- Auto screen off
- Volume
- Loop video
- Car recording
- Segmented video
- Key sound
- Indicator light
- Motion detection
- Exposure compensation
- ID number
- System information
- Mounting of Shoulder Clip
- FAQ
- Unable to start audio and video recorder
- Incorrect time/date
- Unclear image
- Fail to record audio/video
- Unable to play audio or video files
- How to respond to recorder failure
- Technical Parameters
- Memory
- Dimensions and weight
- PC Interface
- Voice recording
- Operating conditions
- Warranty card
- 质保书
Brand : PHILIPS
Model : VTR8101
Category : Voice recorder