
NU-SC280W - Microwave PANASONIC - Free user manual and instructions
Find the device manual for free NU-SC280W PANASONIC in PDF.


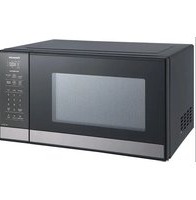
| Product Type | Countertop Microwave Oven |
| Brand | Panasonic |
| Model | NU-SC280W |
| Color | White |
| Capacity | 1.2 cu ft |
| Power Output | 1000 Watts |
| Power Consumption | 1450 Watts |
| Voltage | 120 V, 60 Hz |
| External Dimensions (W x D x H) | 20.5 x 15.8 x 12.4 inches |
| Internal Dimensions (W x D x H) | 14.0 x 13.8 x 8.8 inches |
| Turntable Diameter | 12.4 inches |
| Weight | 26.5 lbs |
| Cooking Technology | Inverter Technology |
| Sensor Cooking | Yes, Genius Sensor |
| Quick Minute | Yes |
| Keep Warm | Yes |
| Defrost | Auto Defrost (by weight) |
| Child Safety Lock | Yes |
| Display Type | Digital LED |
| Interior Material | Stainless Steel |
| Easy Clean Interior | Yes, Non-stick Coating |
| Auto Cook Menus | Yes (15+ preprogrammed) |
| Clock Timer | Yes |
| Door Opening | Left hinge, push-button |
Frequently Asked Questions - NU-SC280W PANASONIC
User questions about NU-SC280W PANASONIC
0 question about this device. Answer the ones you know or ask your own.
Ask a new question about this device
Download the instructions for your Microwave in PDF format for free! Find your manual NU-SC280W - PANASONIC and take your electronic device back in hand. On this page are published all the documents necessary for the use of your device. NU-SC280W by PANASONIC.
USER MANUAL NU-SC280W PANASONIC
Operating Instructions
Operating Instructions
Operating Instructions
Convection Steam Oven
Convection Steam Oven
Convection Steam Oven
Household Use Only
Household Use Only
Model No.
Model No.:
NU-SC280W
Important safety instructions
Read carefully and keep for future reference
Important safety instructions
Read carefully and keep for future reference
Important Safety Instructions
Important Safety Instructions....2
Precautions for Placement and Cooking .... 3
Heating Principle 4
Cooking Techniques 5
Food Characteristics....5
Feature Diagram....6-7
Cookware and Utensil Guide....8
Control Panel 9
Steam Setting....10
Healthy Fry Setting....11
Ferment Setting....12
Stew Setting 13
Convection Setting 14-15
Steam Convection Setting 16-17
Steam Shot Setting....18
Child Safety Lock Setting 19
Auto Menus Setting 20-24
Reheating Chart 25
Cooking Chart....26
Cleaning Utensils....27
Oven Cleaning Setting....28-31
Cleaning (Deodorization) 28
Cleaning (Cavity) 29
Cleaning (System) 30
Cleaning (Citric Acid) 31
Care of Your Oven....32
Before Requesting Service....33-34
Specifications 35
© Panasonic Appliances Microwave Oven (Shanghai) Co., Ltd. 2023
Important Safety Instructions
Read the manual carefully and keep it properly. Precautions for using this product for cooking: Check whether the product is damaged.
Please inspect your oven as follows before using:
- The oven door and the oven cavity are not damaged or cracked. If they are damaged or cracked, do not use.
- The oven must be grounded before use. In case of electric leakage, the ground can provide a current loop to avoid electric shock. The power supply plug must be inserted into a single-phase bipolar socket with grounding.
- Read this manual carefully before using the appliance. The oven can only be used for the purposes indicated in this manual.
Prevention Items
Forbidden items
- In the event that the oven door or door seal has been damaged, do not use the oven until a qualified technician has repaired it.
- Do not damage the safety lock of the oven door, including the door hinges.
- The appliance is not to be used by persons (including children) with reduced physical, sensory or mental capabilities, or lack of experience and knowledge, unless they have been given supervision or instruction concerning use of the appliance by a person responsible for their safety.
- Children should be supervised to ensure that they do not play with the appliance.
- Except for a qualified technician, repair is very dangerous. Do not attempt to disassemble, repair or modify the oven yourself.
- When the oven works abnormally, do not continue using it.
- Once finding any crack or notch on the water tank, do not use the product, as water leakage can lead to electric leakage or electric shock.
- When the socket hole gets loose or the power supply cord or plug is damaged, do not use the product. It must be replaced by the manufacturer, its service agent, or similarly qualified persons in order to avoid a hazard.
- Do not touch or insert/remove the power supply plug with wet hands; otherwise, an electric shock may be caused.
- Do not knock on parts such as the control panel, housing, oven cavity, and oven door; otherwise, it may lead to product failure.
- Do not place the product and power supply cord in damp places with high temperatures, e.g., near a gas stove, electrified area, or sink.
- The oven is used for household cooking only and may not be used for laboratory tests or other commercial purposes. Moreover, the product cannot be placed in a cupboard for use.
- Do not use harsh abrasive cleaners or sharp metal scrapers to clean the oven door glass, since they can scratch the surface, which may result in shattering of the glass.
- The appliance cannot operate by connecting an external timer or an independent remote control system.
- Do not block the air inlet and outlet; otherwise, a fire may be caused. Please clean the product regularly to prevent the air inlet and outlet from being blocked by foreign matter and dust.
Dangerous Items
- Do not place flammable materials around the oven or in the oven cavity; otherwise, a fire may be caused.
- Upon finding smoke, turn off the appliance or remove the power supply plug and make sure that the oven door is closed to prevent spreading fire. Press the Stop/Reset pad, and then remove the power supply plug or turn off the general power switch in the room.
- Do not use the product for purposes not mentioned in the manual, e.g., using the product to dry articles; otherwise, a fire may be caused.
- If the product is not cleaned regularly, the appliance surface will be degraded, affecting the appliance service life, and dangers may occur.
- Avoid actions or behavior that may damage the power supply cord and power supply plug, e.g., immersing the power supply cord and power supply plug into water, keeping the power supply cord at a position at a high temperature, or forcedly bending, twisting, pressing or binding the power supply cord. A damaged power supply cord or plug may lead to dangers such as short circuit, electric shock and fire. Do not immerse the appliance in water.
Safety Precautions
- During use the appliance becomes hot. Care should be taken to avoid touching heating elements inside the oven. WARNING: Accessible parts may become hot during use. Young children should be kept away.
- If white smoke appears when the convection function is used for the first time, it does not indicate a fault. The protective oil of components is volatilized to generate white smoke due to heating.
- The vessel and food temperatures are very high when you stir or turn over the food during cooking or take food out after the cooking. Please use insulation gloves or a pot clip to prevent scalding.
- If you need to open the oven door to stir, turn over or rearrange food in the process of using steam, note to keep a distance; otherwise steam may scald your face or hands.
- When the oven door is open, do not drag the container along the oven door. The weight borne by the oven door cannot exceed 6 kg.
Instruction Items
- Before using vessels of different materials, first confirm whether the vessels can withstand high temperature. When the food is cooked in a plastic or paper package, please watch it, as it could catch fire.
- Food must be placed in a proper vessel and cannot be directly placed in the oven cavity for cooking.
- The surface temperature and internal temperature of the oven are very high after cooking. Do not clean it immediately after cooking. Be sure to clean the product after it cools down; otherwise you may be scalded.
- Remove the power supply plug before cleaning. Do not use a corrosive cleaning agent; otherwise it will damage or corrode the product.
- Clean dust from the power supply plug on a regular basis. If the product will not be used for a long time, remove the power supply plug. Do not pull the power supply cord as remove the power supply plug: hold the plug to remove it.
- Fill with soft water such as distilled water. (Do not use hard water such as mineral water).
Power Supply
The product must use a separate power supply system. A special power supply system should be separate from other devices for use by the oven. If such a system is not used, the electrical appliance may blow a fuse. Fuses above 10 amperes are recommended. A high capacity fuse may not be used in the circuit.
Grounding
The product must be grounded before use. In case of electric leakage, the ground can provide a current loop to avoid electric shock. The power supply plug for the product must be inserted into a single-phase bipolar socket with grounding. Note: Improper use of the power supply plug will lead to an electric shock.
Electric Fan
After cooking ends, the electric fan will continue running for a certain period of time to cool down the cavity and electronic components. This is normal.
Precautions for Placement and Cooking
Product Placement
- The product must be placed at a position more than 85 cm above the ground. In normal use, good ventilation must be ensured around the product. The open mode must be ensured above the product. Allow 20 cm of space on the top of the oven, reserve a gap not smaller than 5 cm from the right wall, a gap not smaller than 5 cm from the left wall and a gap not less than 10 cm from the back wall. Do not block the ventilation opening. Keep the environment clean and prevent roaches and other insects from entering the product.

(a) Do not block the air inlet and outlet; otherwise a fire may be caused. Maintain the product regularly and prevent foreign matter and dust from blocking the air inlet and outlet. (b) Do not position the product at a damp place with high temperatures, e.g., near a gas stove, electrified area or sink. (c) The product must be placed level. (d) Do not remove the legs. Place the product in a solid position. (e) Do not put a heavy load on the oven door or top. (f) The product cannot be used if the indoor humidity is too high.
- This product is for household use only. This oven is intended for Counter-top use only. It is not intended for built-in use or use inside a cupboard. The oven shall not be placed in a cabinet.
- Do not use the cavity for storage purposes.
- The appliance must not be installed behind a decorative door in order to avoid overheating.
Precautions for cooking
- Cautiously take out heated liquid foods such as soups, sauces and beverages. Pay attention to the following items during cooking:
(a) Prevent over-heating; otherwise the liquid may suddenly boil and splash to scald you when you take out the food. (b) When you heat liquid food, the liquid should be loaded to at least eighty percent of the container capacity; otherwise a small amount of heated liquids may suddenly splash due to boiling. (c) Stir the food before or during the heating. (d) After heating, keep the food in the oven for a while, stir it slightly, and then take it out. (e) After you use a milk bottle or heat baby food, stir the food or shake the bottle, and check the temperature before feeding your baby so that he or she may not be hurt.
- Using a common thermometer is forbidden. You must use a meat thermometer to check the cooking effect. If cooking is insufficient, place the food into the oven again for further cooking.
- Cooking recipes provide the cooking time for reference. A lot of factors may affect the cooking time, including the desired degree of cooking, starting temperature, portion, size, food shape and container type. If you are familiar with product operations, you can properly adjust the cooking time by referring to the above factors.
- When using the convection function, you must control the cooking time and pay attention to the heated food at all times. Over-heated food may lead to smoke or fire.
Exterior oven surfaces, including air vents on the cabinet and the oven door, will get hot during use. Use care when opening or closing the door and inserting or removing food and accessories.
Caution: Hot surfaces

Warning
(a) In the event that the oven door or door seal has been damaged, do not use the oven until a qualified technician has repaired it. Do not damage the safety lock of the oven door, including the door hinges. To repair the product, please call Panasonic customer consultation service center (please refer to the warranty card) or contact the repair shop authorized by Panasonic. (b) Except for a qualified technician, repair work is very dangerous. Do not attempt to disassemble, repair, or modify the oven yourself. (c) Do not allow children or someone without knowledge of oven operation to use the oven in an unattended manner unless they get proper instructions on use and know that any improper operation may lead to danger. (d) Do not use a rough scrubbing tool or sharp metal scraper to clean the oven window; otherwise the glass will be ruptured.
Heating Principle
The diagrams shown below are examples of the accessory placements for various cooking modes. It may vary depending on the recipe/dish used.
| Cooking modes Principle and Types Uses Caution Placement | |||
Convection / Ferment / Healthy Fry  | Use the convection heater for heating.Baking pastries like puff, swiss rolls and pizza.Roasting meat and poultry, etc.Fermentation and making yogurt.Frying thin foods with high temperature, such as prawn, fish fillets and chicken pieces, etc.Preheating advised (except ferment) | Take out the food immediately after the heating; otherwise the residual heat will deepen the browning color. To maintain the temperature in the oven during heating, do not open and close the oven door in the heating process. To uniform browning color, you can readjust the food position or rotate the accessory midway. | One level cooking: lower shelf positionTwo levels cooking: upper and lower shelf position |
Steam Med / Steam Low  | Steam is used for heating to complete cooking.Steaming various seafood, poultry, meat, vegetables, rice, and Chinese desserts. | Since steam is generated during cooking, the cover (plastic wrap) cannot be used in the heating process. For individual dishes that require the plastic wrap, see the recipes. | One level cooking: middle shelf positionTwo levels cooking: upper and middle shelf position |
Stew / Steam High Steam Convection Steam Convection  | Steam combines convection heater to cooking.Stew soup and meat.Baking soft cakes, such as souffle and French creme brulee, etc.Grill soft meat such as teriyaki chicken pieces etc.Steam High can cook root vegetables quickly (such as potato cubes) and heat Convenient Foods etc.Preheat advised for Steam Convection | Cooking can remain higher temperature and lock the food moisture. It is recommended to use soup bowl with 300 ml volume and cover with lid when using Stew function. | Stew and Steam High: middle shelf positionSteam Convection: One level cooking: lower shelf positionTwo levels cooking: upper and lower shelf position |
Cooking Techniques
English
Timing
A range in heating time is given in each recipe. The time range compensates for the uncontrollable differences in food shapes, starting temperature, and regional preferences. Always cook food for the minimum cooking time given in the recipe and check for doneness. If the food is undercooked, continue cooking. It is easy to add time to an undercooked product. Once the food is overcooked, nothing can be done!
Spacing
Individual foods, such as baked potatoes, cupcakes and hors d'oeuvres, will heat more evenly if placed in the oven equal distance apart. When possible, arrange foods in a circular pattern.
Similarly, when placing foods in an accessory, arrange them around the outside of the metal tray, not lined up next to each other. Food should NOT be stacked on top of each other.


Browning
To shorten the convection cooking time and get good color effect, be sure to apply dark soy sauce or spicy sauce to the food before baking. For quick breads or muffins, brown sugar can be used in the recipe in place of granulated sugar, or the surface can be sprinkled with dark spices before baking.
Piercing
The skin or membrane on some foods will cause steam to build up during cooking. These foods must be pierced or a strip of skin should be peeled off before cooking to allow the steam to escape. It has a good performance during convection.
Potatoes — pierced with a fork.
Sausages — scratched smoked sausages. Pierce the casing with a fork.
Rotating and repositioning food
Sometimes heat cannot be redistributed by stirring the food. To achieve even cooking effect, you can reposition or rotate the food. For example, turn over the food in the cooking process, turn over large portions of food such as meat or chicken, or rotate the accessory during baking.
Food Characteristics
The cooking method is closely related to the food characteristics.
Size
Small portions cook faster than large ones.
Shape
Uniform sizes heat more evenly. To compensate for irregular shapes, place thin pieces toward the centre of the dish and thicker pieces toward the edge of the dish.

Starting Temperatures
Room temperature foods take less time to heat up than refrigerator or frozen foods.
Density
Porous, airy foods take less time to heat than heavy, compact foods.

Feature Diagram

English
Bottom Plate
- Clean the oven after cooking is finished and the bottom plate has cooled.
- Do not cook directly on the bottom plate. Always place food on accessories.
Door Safety Lock System (both sides)
To prevent injury, do not insert fingers, knives, spoons, or other objects into the latch hole.

Water Tank
- Full water level is 1000 ml. Add water to the 1000 mark.
- Fill with soft water such as distilled water. (Do not use hard water such as mineral water).
- Ensure the water tank is closed tightly and securely positioned, otherwise leakage may occur.
- Always clean the water tank.
- Fully fill the water tank, cover the lid, then install it on the lower side. (Refer to next page.)
- All cooking must use an accessory. Food cannot be placed directly on the bottom plate.
- When using the accessory, it must be placed in the shelf position.
- When using one-level cooking under the steam function, it is recommended to use the Wave Tray by placing foods directly on it in the middle shelf position. (Such as steamed vegetables, steamed Chinese buns, etc.) But for foods with a heat-proof container, please use the Metal Tray and place it in the middle shelf position. (Such as steamed fish, steamed chicken, etc.)
- When using one-level cooking under the convection function, please place foods in suitable heat-proof utensils lined with aluminum foil or baking paper on the Metal Tray, and put them in the lower shelf position.
- When using two-level cooking under the steam function, please put the Metal Tray in the upper shelf position and the Wave Tray in the middle shelf position. When using two-level cooking under the convection function, please put the Wave Tray in the upper shelf position and the Metal Tray in the lower shelf position.
- Take it out with thermal insulation gloves after use. To avoid scalding, do not touch it with your hands.
- To avoid damaging the oven door, do not drag on the oven door when handling.
- The maximum weight that can be placed on the accessory is 5 kg (this includes the total weight of food and dish).
Notes:
- The above illustration is for reference only.
- Oven accessories include a metal tray (x1) and a wave tray (x1). Other cooking utensils mentioned in the instructions should be purchased separately.
Feature Diagram
(continued)
English


Drip tray
- Take the drip tray out of the package and insert it into the oven legs according to figure 1.
- Before using the oven, the drip tray must be fitted as it collects excess water during cooking; otherwise, the cooking program cannot be performed.
- The drip tray should be removed and cleaned on a regular basis.
- To remove the drip tray, hold it with both hands and gently ease it forward. Wash it in warm soapy water. Re-position the drip tray by clicking it back onto the legs.
- DO NOT USE A DISHWASHER TO CLEAN THE DRIP TRAY.
Water Tank Installation / Removal:
Installation:
Hold the water tank horizontally, align the bayonet, and gently insert it to the bottom.
Removal:
After removing the drip tray, hold the bayonet with both hands and pull it out gently.

Note: The above illustration is for reference only.
Cookware and Utensil Guide
| Container | Convection, Healthy Fry, Steam Convection, Stew and Ferment | Steam High, Steam Med, Steam Low |
Metal tray |  |  |
Wave tray |  |  |
Heat resistant glass container |  |  |
| Non-heat resistant glass containers | Note: They can be used for constant temperature fermentation. | |
Heat resistant plastic containers | Note: They can be used for co tei  fei fei |  |
Non-heat resistant plastic containers | Note: They can be used for co tei  fei fei |  |
Ceramic • porcelain | Note: Color stripping may be found in co with int pic  no a co no a co |  |
| Container | Convection, Healthy Fry, Steam Convection, Stew and Ferment | Steam High, Steam Med, Steam Low |
Lacquerware |  |  |
Aluminum and other metal containers | Note: Meal containers with resin handles cannot be used. | Note: Easy-rusting metal container is forbidden. |
Wood • bamboo • paper containers | Note: Paper containers that have undergone heat resistant treatment and heat resistant treatment higher than setting temperature can be used. | Note: Wood and bamboo container, paper containers that have undergone heat resistant treatment can be used. |
Plastic wrap  | Note: 1 Plastic wrap will be molten under a high temperature. 2 They can be used for constant temperature fermentation. | Note: Do not use without special instructions. |
Aluminum foil (Household aluminum foil) | ||
Heat-resistant silica gel container |
Notes:
- Accessory is must used when cooking.
- Take it out with thermal insulation gloves after use. To avoid scalding, do not touch it with your hands.
- Accessories placements in all kinds of cooking modes can refer to heating principle.
- Do not use accessories or other containers in the preheating stage.
Control Panel
Panasonic
NU-SC2B0W


41
① Display Window:
A: Accessories Placing Position
B: Child Safety Lock
C: Normal Working Icon
D: Steam System Cleaning Function, Citric Acid Cleaning Function
E: Full Water Icon (when using steam function)
F: Steam Shot Icon
G: With Preheat Icon
H: Preheat End Icon


Mode:
Three modes of steam cooking:
Steam High (See page 10)
Steam Med ...... (See page 10)
Steam Low (See page 10)
Healthy Fry (See page 11)
Ferment (See page 12)
Stew...... (See page 13)
Convection ...... (See page 14-15)
Beep Sound:
| Times | Results |
| None | Did not or could not accept the instruction |
| Once Accept the instruction | |
| Twice | Between programmed stages to prompt turn over, stir, rearrange foods or error message during cooking |
| Three times | After preheating for manual setting |
| Long time beeps | After preheating for auto menu setting |
| Five times | End of any completed program |
Notes:
- The above illustration is for reference only, please subject to the actual product.
- After 6 minutes without operation after setting the cooking program, including opening or closing the oven door, the program will automatically be cancelled and revert back to "☐" or enter standby mode. If the oven is used for another time without being unplugged and plugged in again, the last program will be displayed.
- [1/2] This illustration is placement of metal tray for auto cook menus.
Steam Conv. (See page 16-17)
Auto Menus ...... (See page 20-24)
② Stop / Reset pad
③ Start / Set pad
④ Dial

Function Setting
To select a function which you desired.
Menus Setting
To choose desired menu among auto menus.
Time Setting
To set the time of cooking.
Weight/Serving/Level Setting
To set desired cooking weight/serving/level among auto menus.
Temperature Setting
To set the temperature of Ferment/Convection and Steam Conv.
Note: To ensure safety, the convection temperature will gradually decrease to 230 °C when using above 230 °C in cooling and remaining 10 minutes. If you continue to use above 230 °C, cooking time will shorter. This not influence its performance.
Steam Setting
Three modes for steam cooking, Steam High, Steam Med, Steam Low. Cooking with steam can keep foods soft and moist. For example: vegetables, seafood and so on. Additionally, it also can heat tin foods or vacuum packaged foods.


Place accessory with food in the according shelf position, then select Steam Low mode by turning the dial.
Note: Fill the tank with water before using.
Example: select Steam Low
| Steam High | Ferment Stew |
| Steam Med | Convection |
| Steam Low | Steam Conv. |
| Healthy Fry | Auto Menus |


Press Set pad to set the Steam Low mode.


Set desired cooking time by turning the dial.
Example: 5 minutes
| Steam Low | 5 min | 00 sec |


Press Start pad. Cooking will start. The time in the display window will count down.

| Mode | Suitable kinds of foods |
| Steam High | Steam High can cook root vegetables quickly (such as potato cubes) and heat Convenient Foods etc. |
| Steam Med Bun, Meat, Seafood etc. | |
| Steam Low Prawn, Chicken Breast etc. | |
Notes:
- Fill the tank with water before using.
- Max time for Steam High and Steam Low is 30 minutes.
- Max time for Steam Med is one hour.
- When cooking foods using Steam High, please ensure that utensils used in cooking are heat proof (over 130 °C).
- Flashing state "*" will flash in the display window.
Healthy Fry Setting
This mode can cook foods like fries with little or no oil. This is more healthy than traditional deep-frying and suitable for fried fish fillets, fried shrimp with bread, fried chicken etc.
1

Select Healthy Fry mode by turning the dial. Preheat is automatically set and its icon appears in the display window.
| Steam High | Ferment Stew | |
| Steam Med | Convection | |
| Steam Low | Steam Conv. | |
| Healthy Fry | Preheat | Auto Menus |
2

Press Start pad and preheating starts.

3
After preheating, the oven will beep three times and the icon “√” appears to inform preheat is done. Open the door and place accessory with food in the according shelf position quickly.

4

Set desired cooking time by turning the dial.

(Maximum setting time is 1 hour 30 minutes.)
Example: 5 minutes

5

Press Start pad. The cooking time in the display window will count down.

You can change the cooking time while cooking. Turning the dial can increase or decrease the cooking time in 1 minute increments (up to 10 minutes). Turning the dial anti-clockwise to "0" will end cooking.
Ferment Setting
Ferment has 30 °C and 40 °C modes. 30 °C can be used for fermentation of European bread and dough which rich in oil like baguette or Danish bread. 40 °C can be used for fermentation of Chinese pastry and pizza bottom.

Notes:
- Oven temperature will change according to the food and room temperature. Please adjust the fermentation time according to the situation.
- When cavity or room temperature is higher than the setting fermentation temperature, fermentation effect of food may be affected, "U50" will be appeared in the display window. Please wait until the cavity or room temperature cool down, when "U50" disappears, you can use fermentation again or ferment food at room temperature.
- Steam Shot function can be chosen when you need steam for fermentation. Please refer to page 18.
Stew Setting
This mode combines the steam and convection heater. It is suitable for stew soup and vegetables with cooking a long time. you can set cooking time only.
1

Place accessory with food in the according shelf position. Select Stew mode by turning the dial.
Note: Fill the tank with water before using.
| Steam High | Ferment Stew |
| Steam Med | Convection |
| Steam Low | Steam Conv. |
| Healthy Fry | Auto Menus |
2

Press Set pad to set the Stew mode.

3

Set desired cooking time by turning the dial.
(Setting time range from 1 hour and 30 minutes to 3 hours. One shift time is 30 minutes.)
Example: 1 hour 30 minutes

4

Press Start pad. The cooking time in the display window will count down.

Notes:
- Fill the tank with water before using.
- This mode is suitable for small soup bowl. If you stew food using large-capacity container, it is recommended to extend the cooking time appropriately.
Convection Setting
This mode has temperature ranges from 50 °C to 250 °C. It is suitable for baking meat, fish and Western desserts like cakes, pizzas, etc. Place the foods directly onto the accessory, select the suitable temperature and time, and start cooking. For evenly distributed color of cooked food, re-arrange food position or rotate the accessory during cooking.
When cooking with Preheat:
| 1 | Select Convection mode by turning the dial. (With Preheat) | Steam HighSteam MedSteam LowHealthy FryPreheatFerment StewConvectionSteam Conv.Auto Menus |
| 2 | Press Set pad to set Convection mode. (With Preheat) | 180°C ConvectionPreheat |
| 3 | Set desired cooking temperature by turning the dial. (Temperatures range from 70 °C to 250 °C. Default temperature is 180 °C.) | Example: 230 °C |
| 4 | Press Start pad to preheat.You can change the desired temperature by turning the dial during preheating. | 230°C ConvectionPreheat |
| 5 | After preheating, the oven will beep three times and the icon “√” appears to inform preheat is done. Open the door and place accessory with food in the according shelf position quickly. | 230°C ConvectionPreheat√ |
| 6 | Set desired cooking time by turning the dial. (Maximum setting time is 3 hours.) | Example: 5 minutes |
| 7 | Press Start pad. The cooking time in the display window will count down.You can change the cooking time while cooking. Turning the dial can increase or decrease the cooking time in 1 minute increments (up to 10 minutes). Turning the dial anti-clockwise to "0" will end cooking. | min sec Convection459 Convection |
Convection Setting
(continued)
When cooking without Preheat:


Place food on the accessory in the according shelf position. Select Convection mode by turning the dial. (Without Preheat)
Steam High
Steam Med
Steam Low
Healthy Fry
Ferment Stew
Convection
Steam Conv.
Auto Menus


Press Set pad to set Convection mode. (Without Preheat)

Convection


Set desired cooking temperature by turning the dial. (Temperatures range from 50 °C to 250 °C. Default temperature is 180 °C.)
Example: 230 °C

Convection


Press Set pad to set desired temperature.


Set desired cooking time by turning the dial. (Maximum Convection time is 3 hours)
Example: 5 minutes

Convection


Press Start pad. The cooking time in the display window will count down.


Convection
You can change the cooking time while cooking. Turning the dial can increase or decrease the cooking time in 1 minute increments (up to 10 minutes). Turning the dial anti-clockwise to "0" will end cooking.
Steam Convection Setting
This mode combines the steam and convection modes, adding steam while cooking in Convection mode which creates fluffier cakes and juicier meats. For more evenly distributed food grill color, re-arrange food or rotate the metal tray during cooking.
When cooking with Preheat:
| 1 | Select Steam Conv. mode by turning the dial. (With Preheat)Note: Fill the tank with water before using. | Steam HighSteam MedSteam LowHealthy FryPreheatFerment StewConvectionSteam Conv.Auto Mehus |
| 2 | Press Set pad to set Steam Conv. mode. (With Preheat) | 190°CPreheatSteam Conv. |
| 3 | Set desired cooking temperature by using the the dial.(Temperatures range are 140 °C, 190 °C to 250 °C. Default temperature is 190 °C.) | Example: 230 °C |
| 4 | Press Start pad to preheat.You can change the desired temperature by turning the dial during preheating. | 230°CPreheatSteam Conv. |
| 5 | After preheating, the oven will beep three times and the icon “√” appears to inform preheat is done. Open the door and place accessory with food in the according shelf position quickly. | 230°CPreheatSteam Conv. |
| 6 | Set desired cooking time by turning the dial.(Maximum setting time is 1 hour.) | Example: 5 minutes |
| 7 | Press Start pad. The cooking time in the display window will count down.You can change the cooking time while cooking. Turning the dial can increase or decrease the cooking time in 1 minute increments (up to 10 minutes). Turning the dial anti-clockwise to "0" will end cooking. | minsecSteam Conv. |
Steam Convection Setting
(continued)
When cooking without Preheat:


Place food on the accessory in the according shelf position.
Select Steam Conv. mode by turning the dial. (Without Preheat)
| Steam High | Ferment Stew |
| Steam Med | Convection |
| Steam Low | Steam Conv. |
| Healthy Fry | Auto Menus |
Note: Fill the tank with water before using.


Press Set pad to select Steam Conv. mode. (Without Preheat)


Set desired cooking temperature by turning the dial.
(Temperatures range are 140 °C, 190 °C to 250 °C. Default temperature is 190 °C.)
Example: 230 °C


Press Set pad to set desired temperature.


Set desired cooking time by turning the dial.
(Maximum setting time is 1 hour.)
Example: 5 minutes


Press Start pad. The cooking time in the display window will count down.
You can change the cooking time while cooking. Turning the dial can increase or decrease the cooking time in 1 minute increments (up to 10 minutes). Turning the dial anti-clockwise to "0" will end cooking.

Steam Shot Setting
This function allows you to add steam during cooking in Convection mode including Ferment (for up to 3 minutes). Adding steam during cooking can enhance moisture distribution, thus promoting the softer dessert surfaces and juicier meats. At the beginning of fermentation to use steam can increase cavity humidity. Then, it is better for dough to ferment.
Example: Add steam 1 minute during cooking in the Convection mode.
1
During cooking in Convection mode.

10
min 00 sec
Convection
2

To add steam for 1 minute, press the Start pad for 2 seconds.


Convection
3
If you want to add 3 minutes of steam, press the pad twice again within 3 seconds when the step 2 operation appears. The display window will increase by 3 minutes. (It will become "0" when you press the pad 3 times. You can reset the time by repeating the above steps.)


Convection
The key of "Steam Shot" in the cooking process:
Cooking in the Convection mode:
For cooking puffs or bread, after preheating, please add steam when heating starts. For cooking cakes, after preheating, please add steam halfway through the total heating time.
Fermentation:
When you make buns and French bread, add steam at the beginning of the fermentation.
Notes:
- Fill the tank with water before using.
- Steam shot is not available during preheating of Convection mode.
- The original Convection or Fermentation cooking time still counts down when setting steam shot.
Child Safety Lock Setting
This function allows you to prevent a young child from operating the oven; however, the door can still be opened. You can set the Child Safety Lock when "☐" shows in the display window.
To set:

Press 3 times, "☐" appears in the display window.

To cancel:

Press 3 times, "☐" appears in the display window.

Note:
To set or cancel the child safety lock, the Start/Set pad or Stop/Reset pad must be pressed 3 times within 10 seconds.
Auto Menus Setting
This feature allows you to cook most of your favourite foods by setting the weight/serving/level only. The oven determines the power setting and the cooking time automatically. Select the category of food and then just enter the weight/serving/level. Do not include the weight of any added water or the container weight. For best results, some menus need preheat oven before cooking.
Auto Menus without Preheat (Menu number: 1~17, 19~22, 24, 27~28, 30, 33~34, 37~41, 50, 63~67)
1

Select Auto Menus mode by turning the dial.
| Steam High | Ferment Stew |
| Steam Med | Convection |
| Steam Low | Steam Conv. |
| Healthy Fry | Auto Menus |
2

Press Set pad to select Auto Menus mode.
![[-] + Auto Menus](/content/2026/05/938343/images/5ce97a6e01e6947213cc071a8af9265ebf41c6d2daf424f5690e2f7b100b8e7d.jpg)
3

Select a desired cooking menu number by turning the dial.
Example: select menu number 3
![[-] 3 Auto Menus](/content/2026/05/938343/images/b68ce8bd5708b5259d11e5018080fdb3b33671f86332adaf174cee1a7f1353d9.jpg)
4

Press Set pad to set desired cooking menu number.
![[-] Level + Auto Menus](/content/2026/05/938343/images/c8fe543179ad0739ed8eab7ad9df4c4377e6015340e953f1e85924a960ba7bf8.jpg)
5

Note: If menus numbers 1, 3, 4, are selected, need steps 4 and 5.
Example: 2 Level
![[=] Level Auto Menus](/content/2026/05/938343/images/63e70644fbac048039be41e7b5fc1b6ff47a40021df48eb805679a2c6159c9a5.jpg)
6

Press Start pad. The cooking time in the display window will count down.

Auto Menus Setting
(continued)
Auto Menus with Preheat (Menu number: 18, 23, 25\~26, 29, 31\~32, 35\~36, 42\~49, 51\~62, 68\~70)
1

Select Auto Menus mode by turning the dial.
| Steam High | Ferment Stew |
| Steam Med | Convection |
| Steam Low | Steam Conv. |
| Healthy Fry | Auto Menus |
2

Press Set pad to select Auto Menus mode.
![[-] Auto Menus](/content/2026/05/938343/images/3d9de86ae47eaa10a4f277a11b03e8f771d729abb849221ce01c445e3631bd0d.jpg)
3

Select a desired cooking menu number by turning the dial.
Example: select menu number 35

4

Press Start pad to preheat.

5

After preheating, the oven will beep long time and the icon “√” appears to inform preheat is done. Open the door and place accessory with food in the according shelf position quickly.

6

Press Start pad. The cooking time in the display window will count down.
![[-] 35 Auto Menus](/content/2026/05/938343/images/d4f377b5887e23d829e5b5a23fc97f3cef92651b94a7135f844c1c6bb6fa7ddb.jpg)

Auto Menus
Notes:
- You can also quickly select your desired menu number by turning the dial in reverse.
- To ensure safety, the convection temperature will gradually decrease to 230\ °C when using above 230\ °C in cooling and remaining 10 minutes. If you continue to use this function, cooking time will shorter. This not influence its performance.
Auto Menus Setting
(continued)
| No. | Menu Weight/Serving/Level Accessories/Placement | |||||
| 1 | Steamed Fish* 200 | g | 300 g | 400 g | 500 g | Metal Tray/Middle Shelf |
| 2 | Steamed Eggs* 3 | serves | — | — | — | Metal Tray/Middle Shelf |
| 3 | Steamed Chinese Bun (Raw)* | 1 level (12 pcs) Wave Tray /Middle Shelf | ||||
| 2 levels (24 pcs) | Metal Tray/Upper Shelf, Wave Tray/Middle Shelf | |||||
| 4 | Steamed Frozen Foods* | 1 level (12 pcs) Wave Tray /Middle Shelf | ||||
| 2 levels (24 pcs) | Metal Tray/Upper Shelf, Wave Tray/Middle Shelf | |||||
| 5 | Steamed Canned Foods* 1 | can | — | — | — | Metal Tray/Middle Shelf |
| 6 | Steamed Frozen Shrimp Dumplings* | 1 level (12 pcs) | — | — | — | Wave Tray/Middle Shelf |
| 7 | Steamed Rice* 200 | g | — | — | — | Metal Tray/Middle Shelf |
| 8 | Steamed Grains* 800 | g | — | — | — | Wave Tray/Middle Shelf |
| 9 | Steamed Fresh Vegetables* | 500 g | — | — | — | Wave Tray/Middle Shelf |
| 10 | Braised Baby Cabbage in Broth* | 3 serves | — | — | — | Metal Tray/Middle Shelf |
| 11 | Steamed Sponge Gourd with Minced Meat and Tofu* | 3 serves | — | — | — | Metal Tray/Middle Shelf |
| 12 | Steamed Dried Scallops with Enoki Mushroom* | 3 serves | — | — | — | Metal Tray/Middle Shelf |
| 13 | Steamed Quail Eggs with Minced Meat and Mushrooms* | 12 pcs | — | — | — | Metal Tray/Middle Shelf |
| 14 | Shrimp with Green Vegetable* | 10 pcs | — | — | — | Metal Tray/Middle Shelf |
| 15 | Thai Lemon Shrimp* | 500 g | — | — | — | Metal Tray/Middle Shelf |
| 16 | Steamed Shanghai Crabs* | 6 pcs | — | — | — | Wave Tray/Middle Shelf |
| 17 | Steamed Clam with Lemon Juice* | 500 g | — | — | — | Metal Tray/Middle Shelf |
| 18 | Steamed Scallop with Mashed Garlic* | 8 pcs | — | — | — | Metal Tray/Lower Shelf |
| 19 | Steamed Razor Clam* | 500 g | — | — | — | Metal Tray/Middle Shelf |
| 20 | Steamed Fish Head Spicy Stew* | 1000 g | — | — | — | Metal Tray/Middle Shelf |
| 21 | Steamed Chicken with Mushrooms* | 500 g | — | — | — | Metal Tray/Middle Shelf |
| 22 | Chinese White Sliced Chicken* | 1000 g | — | — | — | Metal Tray/Middle Shelf |
| 23 | Roasted Scallop with Minced Garlic | 4 pcs | — | — | — | Metal Tray/Lower Shelf |
| 24 | Salmon Salad | 3 serves | — | — | — | Metal Tray/Lower Shelf |
| 25 | Roasted Saury with Salt 4 | pcs | — | — | — | Metal Tray/Lower Shelf |
| 26 | Teriyaki Chicken Wings* 12 | pcs | — | — | — | Metal Tray/Lower Shelf |
| 27 | Spicy Chicken with Chili Sauce | 3 serves | — | — | — | Metal Tray/Lower Shelf |
| 28 | Roasted Chicken Thigh with Honey | 3 pcs | — | — | — | Metal Tray/Lower Shelf |
| 29 | Baked Quail Eggs with Salt* | 24 pcs | — | — | — | Metal Tray/Lower Shelf |
| 30 | Duck Confit | 2 pcs | — | — | — | Metal Tray/Lower Shelf |
Auto Menus Setting
(continued)
| No. | Menu Weight/Serving/Level Accessories/Placement | |||||
| 31 | Roasted Pigeon* 2 | pcs | — | — | — | Metal Tray/Lower Shelf |
| 32 | Spicy Grilled Fish 600 | g | — | — | — | Metal Tray/Lower Shelf |
| 33 | Grilled Beef Ribs 800 | g | — | — | — | Metal Tray/Lower Shelf |
| 34 | Tender Roasted Beef 800 | g | — | — | — | Metal Tray/Lower Shelf |
| 35 | Roasted Lamb 800 | g | — | — | — | Metal Tray/Lower Shelf |
| 36 | Roasted Lamb Chops with Cumin 6 | pcs | — | — | — | Metal Tray/Lower Shelf |
| 37 | Braised Beef Shank* 500 | g | — | — | — | Metal Tray/Middle Shelf |
| 38 | Herbal Beef Brisket Soup* | 6 serves | — | — | — | Metal Tray/Middle Shelf |
| 39 | Bamboo Fungus and Duck Soup* 6 | serves | — | — | — | Metal Tray/Middle Shelf |
| 40 | Stewed Pear with Rock Sugar* | 6 serves | — | — | — | Metal Tray/Middle Shelf |
| 41 | Peach Gum and Lotus Seed Dessert* | 8 serves | — | — | — | Metal Tray/Middle Shelf |
| 42 | Grilled Fish Fillets | 1 level(16 pcs) | — | — | — | Metal Tray/Lower Shelf |
| 43 | Fried Shrimp Cutlets | 1 level(20 pcs) | — | — | — | Metal Tray/Lower Shelf |
| 44 | Fried Shrimp with Bread Crumbs | 1 level(20 pcs) | — | — | — | Metal Tray/Lower Shelf |
| 45 | Fried Frozen Spring Rolls | 1 level(12 pcs) | — | — | — | Metal Tray/Lower Shelf |
| 46 | Fried Frozen Dumplings* | 10 pcs | — | — | — | Metal Tray/Lower Shelf |
| 47 | Fried Frozen Chicken Wings | 8 pcs | — | — | — | Metal Tray/Lower Shelf |
| 48 | Curry Puff | 12 pcs | — | — | — | Metal Tray/Lower Shelf |
| 49 | Roasted Cashew Nuts | 500 g | — | — | — | Metal Tray/Lower Shelf |
| 50 | Mochi* 8 | pcs | — | — | — | Metal Tray/Middle Shelf |
| 51 | Home-made Pizza 1 | pc | — | — | — | Metal Tray/Lower Shelf |
| 52 | Chiffon Cake | 8 inch | — | — | — | Metal Tray/Lower Shelf |
| 53 | Cheese Cake* | 8 inch | — | — | — | Metal Tray/Lower Shelf |
| 54 | Butter Bread Roll | 9 pcs | — | — | — | Metal Tray Lower Shelf |
| 55 | Milk Toast | 2 pcs | — | — | — | Metal Tray/Lower Shelf |
| 56 | Seafood Toast | 4 pcs | — | — | — | Metal Tray/Lower Shelf |
| 57 | Puff* | 12 pcs | — | — | — | Metal Tray/Lower Shelf |
| 58 | Portuguese Egg Tarts | 12pcs | — | — | — | Metal Tray/Lower Shelf |
| 59 | Chocolate Cookies | 1 level(24 pcs) | — | — | — | Metal Tray/Lower Shelf |
| 60 | Almond Tuiles | 2 levels(24 pcs) | — | — | — | Wave Tray/Upper Shelf, Metal Tray/Lower Shelf |
| 61 | Sugar Free Salty Cheese Sticks | 1 level | — | — | — | Metal Tray/Lower Shelf |
| 62 | Crème Brulee 6 | serves | — | — | — | Metal Tray/Lower Shelf |
| 63 | Home-made Yogurt | 12 cups | — | — | — | Metal Tray/Lower Shelf |
| 64 | Frozen Croissant Dough (Ferment) | 9 pcs | — | — | — | Metal Tray/Lower Shelf |
Auto Menus Setting
(continued)
| No. | Menu Weight/Serving/Level Accessories | ories/Placement | ||||
| 65 | Steamed Bun Dough (Ferment) 1 p | c | — | — | — | Metal Tray/Lower Shelf |
| 66 | Pizza Dough (Ferment) 1 p | c | — | — | — | Metal Tray/Lower Shelf |
| 67 | Baby Steamed Sweet Potatoes* 150 | g | — | — | — | Wave Tray/Middle Shelf |
| 68 | Salmon Flake 300 | g | — | — | — | Metal Tray/Lower Shelf |
| 69 | Baby Yogurt Melts 1 | level | — | — | — | Metal Tray/Lower Shelf |
| 70 | Baby Mushroom Seasoning Powder | 100 g | — | — | — | Metal Tray/Lower Shelf |
| 71 | Cleaning Utensils 1 (quick)* | Utensils Cleaning Functions Wave Tray/Middle Shelf | ||||
| 72 | Cleaning Utensils 2 (standard)* | |||||
| 73 | Cleaning Utensils 3 (high temperature)* | |||||
| 74 | Cleaning (Deodorization) | Oven Cleaning Functions | — | |||
| 75 | Cleaning (Cavity) | |||||
| 76 | Cleaning (System) | |||||
| 77 | Cleaning (Citric Acid) | |||||
Notes:
- The recipes marked with “*” require steam. Be sure to fill the water tank before cooking. Add detergent before using citric acid cleaning.
- Auto Menus operation, please refer to Cookbook for details.
- Accessories placement see the table below.
| Display | Placement |
| [-] | Middle Shelf |
| [=] | Upper/Middle Shelf |
| [-] | Upper/Lower Shelf |
| [-] | Lower Shelf |
Reheating Chart
The times given in the charts below are a guideline only, and will vary depending on starting temperature, quantity and dish size.
| Foods Weight | Accessories/ Placement | Program Time | ||
| Frozen Rice Dumplings* 5 | pcs (750 g) | Wave Tray/ Middle Shelf | Steam Med | about 15-17 minutes |
| Chilled Big Meat Bun* | 120 g - 720 g(1 pc - 6 pcs) | Wave Tray/ Middle Shelf | Steam Med | about 16-18 minutes |
| Chilled Shumai* | 325 g - 650 g(6 pcs - 12 pcs) | Wave Tray/ Middle Shelf | Steam Med | about 14-16 minutes |
| Chilled Bun* | 400 g(8 pcs - 9 pcs) | Wave Tray/ Middle Shelf | Steam Med | about 13-14 minutes |
| Chilled Rice* | 150 g - 900 g(1 cup - 6 cups) | Metal Tray/ Middle Shelf | Steam Med | about 18-20 minutes |
| Chilled Convenient Foods (remove wrap)* | 400 g (1 serve) | Wave Tray/ Middle Shelf | Steam High | about 11-12 minutes |
| Chilled Croissant | 50 g - 200 g(1 pc - 4 pcs) | Metal Tray/ Lower Shelf | 160 °C Convection(without preheat) | about 5-6 minutes |
| Chilled Sandwich | 120 g - 480 g(1 pc - 4 pcs) | Metal Tray/ Lower Shelf | 180 °C Convection(without preheat) | about 6-9 minutes |
| Chilled Fried Rice* 400 | g | Metal Tray/ Lower Shelf | 190 °C Steam Conv.(without preheat) | about 13-15 minutes |
| Chilled Fried Dumpling* 220 | g (12 pcs) | Metal Tray/ Lower Shelf | 190 °C Steam Conv.(without preheat) | about 10-11 minutes |
| Chilled Fried Chicken Wing | 350 g (10 pcs) | Metal Tray/ Lower Shelf | 220 °C Convection(with preheat) | about 10-11 minutes |
Notes:
- The recipes marked with “*” require steam. Be sure to fill the water tank before cooking.
- Please use baking paper or aluminium foil and heat-resistant utensils before cooking.
- Chilled refers to storage temperature in the range of 0-3 °C.
- Frozen refers to storage temperature below -18 °C.
Cooking Chart
The times given in the charts below are a guideline only, and will vary depending on starting temperature, quantity, and dish size.
| Foods Weight | Accessories/ Placement | Program Time Statement | ||
| Frozen Big Meat Bun* | 500 g(6 pcs) | Wave Tray/Middle Shelf | Steam Med | about 24-26 minutes |
| Steamed Frozen Sticky Rice Chicken* | 320 g(4 pcs) | Wave Tray/Middle Shelf | Steam Med | about 24-26 minutes |
| Steamed Salmon* | 300 g(2 pcs) | Wave Tray/Middle Shelf | Steam Med | about 13-15 minutes |
| Steamed Broccoli* 200 g | g | Wave Tray/Middle Shelf | Steam High | about 8-9 minutes |
| Steamed Potatoes* 500 g | g | Wave Tray/Middle Shelf | Steam High | about 21-23 minutes |
| Roast Beef Skewers | 12 skewers(220 g) | Metal Tray/Lower Shelf | 190 °C Convection(with preheat) | about 12 minutes |
| Lamb Kebab | 10 skewers(400 g) | Metal Tray/Lower Shelf | 190 °C Convection(with preheat) | about 10-11 minutes |
| Fried Frozen Chicken Popcorn | 300 g | Metal Tray/Lower Shelf | 190 °C Convection(with preheat) | about 18-20 minutes |
| Roasted Vegetables 500 g | g | Metal Tray/Lower Shelf Position | 220 °C Convection(with preheat) | about 14-16 minutes |
| Roast Sweet Potato | 150 g -600 g(1-4 pcs) | Metal Tray/Lower Shelf | 230 °C Convection(with preheat) | about 35-40 minutes |
| Roast Frozen Pizza | 1 pc(480 g) | Metal Tray/Lower Shelf | 230 °C Convection(with preheat) | about 11-12 minutes |
| Grilled Sausage | 300 g(6 pcs) | Metal Tray/Lower Shelf | 190 °C Convection(with preheat) | about 12-14 minutes |
| Fried Frozen Chicken Nuggets | 400 g | Metal Tray/Lower Shelf | Healthy Fry | about 18-20 minutes |
| Fried Frozen French Fries | 250 g | Metal Tray/Lower Shelf | Healthy Fry | about 18-22 minutes |
| Defrost Minced Meat* | 400-500 g | Metal Tray/Lower Shelf | 40 °C Ferment | about 35-40 minutes |
| Defrost Chicken Drumsticks* | 500 g | Metal Tray/Lower Shelf | 40 °C Ferment | about 40 minutes |
| Defrost Chicken Wings* | 400-500 g | Metal Tray/Lower Shelf | 40 °C Ferment | about 40 minutes |
| Defrost Whole Fish* 400-500 g | g | Metal Tray/Lower Shelf | 40 °C Ferment | about 35-40 minutes |
Notes:
- The recipes marked with “*” require steam. Be sure to fill the water tank before cooking.
- Frozen refers to storage temperature below -18 °C.
- Please use baking paper or aluminium foil and heat-proof utensils before cooking.
Cleaning Utensils
This function has 3 modes: No. 71 Cleaning Utensils 1 (quick), No. 72 Cleaning Utensils 2 (standard), No. 73 Cleaning Utensils 3 (high temperature). Cleaning Utensils 1 and 2 are suitable for all kinds of baby bottles and breast pumps, etc. Cleaning Utensils 3 is suitable for all kinds of dish cleaning, etc.
1
Select Auto Menus mode by turning the dial.
| Steam High | Ferment Stew |
| Steam Med | Convection |
| Steam Low | Steamj Conv. |
| Healthy Fry | Auto Menus |
2
Press Set pad to select Auto Menus mode.
![[-] + - Auto Menus](/content/2026/05/938343/images/a219b99056b6880a75076ceb5ac7ad6d746d9a108fd9dccddb1b45c4b5b7a198.jpg)
3
Place utensils on the accessory in the according shelf position. Turn the dial until "73" appears in the display window.
Note: Fill the tank with water before using.
Example: select No. 73 Cleaning Utensils 3 (high temperature)
![[-] 73 Auto Menus](/content/2026/05/938343/images/31d725c95dfa0b9ca49cd63c198aff9084d76ccc4e19ced7b01e3ac8d786f1a9.jpg)
4
Press Start pad once.

5
At the end of the program, five beeps will be heard.

Notes:
- Fill the tank with water before using.
- High temperature will occur in the cavity when using this function. Using Cleaning Utensils 1 & 2, all utensils must be heat-proof to temperatures over 100 °C. Using Cleaning Utensils 3, all utensils must be heat-proof to temperatures over 130 °C.
- Flashing state "*" will flash in the display window.
- When cleaning bottles, it's recommended to place them horizontally in the cleaning shelf, but not stacked.
- When overheated in the cavity, "U50" will appear in the display window. Please wait until the cavity cools down and clean the utensils after "U50" disappears.
- When using Cleaning Utensils 1 to clean baby bottles, the number should not exceed 3.
Oven Cleaning Setting
Cleaning (Deodorization)
This function is suitable for ovens with odors (need 20 minutes). Before maintenance (cleaning the oven), please empty the oven.
1

Select Auto Menus mode by turning the dial.
| Steam High | Ferment Stew |
| Steam Med | Convection |
| Steam Low | Steamj Conv. |
| Healthy Fry | Auto Menus |
2

Press Set pad to set Auto Menus.
![[-] + - Auto Menus](/content/2026/05/938343/images/cbaf7bd885494fe609066a32a95f75756d87a2f2e0428470947b0cb1c8b0c9a3.jpg)
3

Turn the dial until "74" appears in the display window.

4

Press Start pad once.

Oven Cleaning Setting
(continued)
Cleaning (Cavity)
This function is suitable for cleaning a dirty oven caused by oil (need 30 minutes).
1

Select Auto Menus mode by turning the dial.
| Steam High | Ferment Stew |
| Steam Med | Convection |
| Steam Low | Steam|Conv. |
| Healthy Fry | Auto Menus |
2

Press Set pad to set Auto Menus.
![[-] + - Auto Menus](/content/2026/05/938343/images/52c3f402025b144d389c735360d35df87940a9f0a00f32492a4de4312f292e3e.jpg)
3

Turn the dial until "75" appears in the display window.

4

Press Start pad once.

Notes:
- Fill the tank with water before using.
- After cleaning, open the door and wipe it clean with a damp cloth.
Oven Cleaning Setting
(continued)
Cleaning (System)
After using steam mode, this function can make the water pump through the pipe to the drip tray.
1

Select Auto Menus mode by turning the dial.
Note: Fill water tank with 100 ml water before using and remove the water from the drip tray.
| Steam High | Ferment Stew |
| Steam Med | Convection |
| Steam Low | Steam|Conv. |
| Healthy Fry | Auto Menus |
2

Press Set pad to set Auto Menus.

3

Turning dial until "76" appear in the display window.

4

Press Start pad once.

Notes:
- Do not remove the drip tray when using this function.
- Wash the drip tray clean after cleaning.
Oven Cleaning Setting
(continued)
Cleaning (Citric Acid)
If "*" appears in the display window after cooking, you should use citric acid to clean the water piping. After using citric acid to clean, rinse with water again. Flush and clean water will be drained into the drip tray. (This takes 30 minutes.) Prepare a detergent solution by dissolving approximately 20 g of citric acid completely in 250 ml of water, and pour the mixture directly into the water tank of the oven.
1

Select Auto Menus mode by turning the dial.
| Steam High | Ferment Stew |
| Steam Med | Convection |
| Steam Low | Steamj Conv. |
| Healthy Fry | Auto Menus |
2

Press the Set pad to set Auto Menus.
Note: Empty the drip tray and check that the prepared detergent is in the water tank.
![[-] Auto Menus](/content/2026/05/938343/images/7c75eccd29300bc3dd5f3f34003b3a995122883888d35cf7facaf53dd7233e42.jpg)
3

Turn the dial until "77" appears in the display window.

4

Press the Start pad once.

5
After the program automatically pauses, you can remove the water in the drip tray and clean the water tank, then fill the tank with water.
6

Press the Start pad once. The program will continue for one minute.
Notes:
- After cleaning, please wipe the residue in the water tank and wash the drip tray clean.
- Do not remove the drip tray when using this function.
Care of Your Oven
Be sure to clean and maintain the oven after it is completely cold. Turn the oven off and remove the power supply plug from the wall socket before cleaning. A steam cleaner is not to be used. When "♦♦" icon flashes in the display window, this is the meaning prompts the customer to clean. Please clean the oven in time, for detail information, please refer to the steam system and citric acid cleaning (see page 30&31).
![graph TD A["The outside oven surfaces should be cleaned with a damp cloth. To prevent damage to the operating parts inside the oven, water should not be allowed to seep into the ventilation openings and air outlet."] --> B["Always clean the bottom plate after cooling down with a mild detergent and w…](/content/2026/05/938343/images/a15bd4ebc261e94550799f803180c9ce7bd8720f98be7ba1bc5cdb129bc09e34.jpg)
Before Requesting Service
English
PROBLEM POSSIBLE CAUSE REMEDY
No display on panel.
The oven is not plugged in securely. Remove plug from outlet, wait 10 seconds and re-insert.
Circuit breaker or fuse is tripped or blown. : Reinstall the fuse or reset the Circuit breaker.
There is a problem with the outlet. Plug another appliance into the outlet to check if the outlet is working.
Oven cannot start operation.
The door is not closed completely.: Close the oven door securely.
" pad was not pressed after programming. : Press " pad.
Another program has already been entered into the oven. Press the "☑" pad to cancel the previous program and program again.
The program has not been entered correctly. Program again according to the Operating Instructions.
The "▽" pad has been pressed accidentally. Program the oven again.
No or less steam
Check whether the water tank has water.
Check whether the water tank is installed correctly in place.
Failure to use water as required (see page 2). Please contact the service center specified by Panasonic.
"H00" appears in the display window.
There is a problem with the oven. Please contact the service center specified by Panasonic.
"U14" appears in the display window.
The water tank lacks water. Even if it is full of water, "U14" will appear in the display window in different stages. You can fill water and press the "◇" pad to continue. It is not available if "U14" appears the third time. Please fill the water tank with water again.
If it is not cleaned in time after "◇" appears in the display window, scale will accumulate around the inner wall of the water-piping. Please use the citric acid cleaning function to clean the water-piping.
"U50" appears in the display window.
The cavity or room temperature is overheated. Operate again after the cavity or room temperature cools down and "U50" disappears.
White powder found at steam outlet, drip tray, and oven cavity.
The white powder is mineral crystal from evaporation of water, it is natural substance and harmless to human body. If crystal attached to the nozzle or in the oven cavity, please wipe and clean with a wring cloth. After using steam function or cleaning, pour out the water from the drip tray and wipe with a sponge.
If it seems there is a problem with the oven, contact an authorized Service Center by Panasonic.
Before Requesting Service
(continued)
ALL THESE THINGS ARE NORMAL:
| Sounds will occur when using the Steam function. | This is caused by air mixed when the water tank is working. This is normal. |
| The sound of "Bar... Bar..." may be emitted at the back of the oven cavity during and after the use of different kinds of Convection function. | This is a cause of thermal expansion and contraction of the metal material used in the product, which is a normal phenomenon. |
| Steam accumulates on the oven door and warm air comes from the air outlet. | During cooking, steam and warm air are given off from the food. Most of the steam and warm air are removed from the air outlet by the air which circulates in the oven cavity. However, some steam will condense on cooler surfaces such as inside and/or on the oven door. This is normal and safe. |
| Steam leaks out from all four sides of the oven door. | When a function related to steam is used, a lot of steam is generated in the oven cavity during operation of the product. Some steam may leak from all four sides of the oven door. This is normal. |
| I accidentally operated my oven without any food in it. | Operating the oven empty for a short time will not damage the oven, however, it is not recommended. |
| The oven has an odour and generates smoke when using Convection and Steam Convection function. | It is essential that your oven is wiped out regularly, particularly after cooking by Convection and Steam Convection. Any fat and grease that builds up on the roof and walls of the oven will begin to smoke if not cleaned. |
| The fan motor continues operating after cooking is over. | After using the oven, the fan motor will operate for several minutes to cool the oven and electric components. This is normal. |
| The rear side of the oven's color has yellowing. | Metal ions will generate yellow marks when heated. This is normal and will not affect the use of the oven or cause harm to human health. |
| Door seal maybe deformed. | The door seal may be distorted due to high temperature. This is normal and will not affect the performance of use of the oven. |
| Some smoke will be given off from the cavity when using different kinds of Convection functions for the first time. | This is caused by the excessive oil in the cavity used for rust protection. |
| The part where the power supply cord connects to the product's bottom plate has loosened. | This is normal. |
Specifications
English
| Model Number: | NU-SC280W | |
| Power Source: 230 - 240 V ~ 50 Hz | ||
| Power Consumption: | Steam 5.5 A 1330 W | |
| Convection 5.7 A 1380 W | ||
| Steam + Convection 7.6 A 1830 W | ||
| Output Power: | Steam 1300 W | |
| Convection 1350 W | ||
| Steam + Convection 1800 W | ||
| Outside Dimensions (H × W × D): 375 mm × 494 mm × 434 mm | ||
| Outside Dimensions (With dial) (H × W × D): 375 mm × 494 mm × 484 mm | ||
| Oven Cavity Dimensions (H × W × D): 234 mm × 410 mm × 320 mm | ||
| Cavity Volume: 31 L | ||
| Weight: Approx. 18.1 k | g (Accessories included) | |
Specifications subject to change without notice.
Table of Contents
Important Safety Measures 2
Installation and Cooking Precautions....3
Heating Principle....4
Cooking Techniques....5
Food Characteristics....5
Function Indications....6-7
Choice of cooking utensils....8
Control panel 9
Steam setting....10
Air fry setting....11
Fermentation setting....12
Stew mode setting....13
Baking setting....14-15
Steam baking setting 16-17
One-touch steam setting 18
Child lock setting / cancel....19
Preset recipe setting 20-24
Reheat recipe recommended cooking time 25
Common recipe recommended cooking time....26
Cleaning container setting 27
Oven cavity cleaning setting 28-31
Cleaning (Deodorizing)....28
Cleaning (Oven Cavity)....29
Cleaning (Steam System)....30
Cleaning (Citric Acid)....31
Maintenance....32
Before Requesting Repair Service 33-34
Specifications....35
© Panasonic Appliances Microwave Oven (Shanghai) Co., Ltd. 2023
Important Safety Measures
Read Carefully and Keep for Future Reference
Precautions for Cooking with This Product
Check for Damage:
Before using this product, check the following items:

Food Browning
Initial Temperature
Function indicator


Decorative panel (water collection tray)
Steam baking... (see pages 16-17)
Function setting
Used to select different functions.
Recipe setting
Used to select your desired recipe from the preset recipes.
Time setting
Used to set the cooking time for each function.
Weight / portion / layer setting
| Steam High | Ferment Stew |
| Steam Med | Convection |
| Steam Low | Steam Conv. |
| Healthy Fry | Auto Menus |
2

Press the [OK] key to confirm the selected low-temperature steam mode.

3

Rotate the knob to set the desired cooking time.
For example: select minutes
4

| Steam High | Ferment Stew | |
| Steam Med | Convection | |
| Steam Low | Steam Conv. | |
| Healthy Fry | Preheat | Auto Menus |
2

Press the [Start] key to begin preheating.

3

4

Rotate the knob to set the desired cooking time.
(Maximum setting time is 1 hour 30 minutes)
For example: select minutes

5

Press the [Start] key, and the display will begin counting down.
Fermentation setting

5

Rotate the knob to set the desired cooking time.
(Maximum fermentation setting time is 12 hours)
For example: select minutes

sec Ferment
6

Press the [Start] key, and the display window will begin counting down.
| Steam High | Ferment Stew |
| Steam Med | Convection |
| Steam Low | Steam Conv. |
| Healthy Fry | Auto Menus |
2

Press the [OK] key to confirm the selected stewing mode.

3

Rotate the knob to set the desired cooking time.
| Steam High | Ferment Stew |
| Steam Med | Convection |
| Steam Low | Steam Conv. |
| Healthy Fry | Auto Menus |
2

5

Rotate the knob to set the desired cooking time.
(Maximum setting time is 1 hour)
For example: select clock

6

Press the [Start] key, and the display window will begin counting down.

| Steam High | Ferment Stew |
| Steam Med | Convection |
| Steam Low | Steamj Conv. |
| Healthy Fry | Auto Menus |
2

Press the [OK] key to confirm the preset recipe you have selected.
![[-] + - Auto Menus](/content/2026/05/938343/images/e9daa91661673f783b43b147053d1eb47b46def1147a5e3f8714c6adbb0b5db0.jpg)
3

Turn the knob until the display shows "74".

4

Press the [Start] key once.

Oven cavity cleaning settings
(continued)
Cleaning (oven walls)
| Steam High | Ferment Stew |
| Steam Med | Convection |
| Steam Low | Steam|Conv. |
| Healthy Fry | Auto Menus |
2

Press the [OK] key to confirm the preset recipe you have selected.
![[-] + - Auto Menus](/content/2026/05/938343/images/e0f807cbde84b9d58ace893a3742993df0803ad500e0328a2f5b7f055baf60f7.jpg)
3

Turn the knob until the display shows "76".

4

Press the [Start] key once.

Note:
| Steam High | Ferment Stew |
| Steam Med | Convection |
| Steam Low | Steamj Conv. |
| Healthy Fry | Auto Menus |
2

Press the [OK] key to confirm the preset recipe you have selected.
3

Turn the knob until the display shows "77".

4

Press the [Start] key once.

5
Important Safety Instructions....2

Description
Starting Temperature
Feature Diagram


Metal Tray

Microwave Tray
Water Tank


Drip Tray
Mode:
Three cooking modes: High Steam (See page 10) Medium Steam .... (See page 10) Low Steam .... (See page 10) Healthy Fry ....(See page 11) Ferment .... (See page 12) Stew (See page 13) Convection ....(See page 14-15)
Convection Steam ....(See page 16-17)
Automatic Menu ....(See page 20-24)
② Stop/Reset Pad
③ Start/Set Pad
④ Dial
Beep Sound:
Function Settings
| Steam High | Ferment Stew |
| Steam Med | Convection |
| Steam Low | Steam Conv. |
| Healthy Fry | Auto Menus |
2
3
| Steam Low | 5 min | 00 sec |
4
| Steam High | Ferment Stew | |
| Steam Med | Convection | |
| Steam Low | Steam Conv. | |
| Healthy Fry | Preheat | Auto Menus |
2

Press the Start pad and preheating begins.

3
4

5


| Steam High | Ferment Stew |
| Steam Med | Convection |
| Steam Low | Steam Conv. |
| Healthy Fry | Auto Menus |
5

6

To cancel:

| Steam High | Ferment Stew |
| Steam Med | Convection |
| Steam Low | Steamj Conv. |
| Healthy Fry | Auto Menus |
2
![[-] + ♠ Auto Menus](/content/2026/05/938343/images/c5be02cc9b7c514cdedf351adcb38405ddf29ca22dbb3ccba6cd26def78b4b49.jpg)
3
![[-] 73 + + Auto Menus](/content/2026/05/938343/images/12ab0a37fe881213284cfecdd0ea78afa02823940cd0734d0a65d5f24a0c94fe.jpg)
| Steam High | Ferment Stew |
| Steam Med | Convection |
| Steam Low | Steamj Conv. |
| Healthy Fry | Auto Menus |
2
![[-] + Auto Menus](/content/2026/05/938343/images/a53bd6366e2cd970c5bd07ff25fa99558e6478e2ed0708f569013d490372e3d6.jpg)
3

4

Press the Start pad once.

| Steam High | Ferment Stew |
| Steam Med | Convection |
| Steam Low | Steam|Conv. |
| Healthy Fry | Auto Menus |
2
![[-] Auto Menus](/content/2026/05/938343/images/c2f89c273d4b65c275a30682ff50453175ccf4442cbc31b463c7b3d94cf15923.jpg)
3

4

Press the Start pad once.

Note:
| Steam High | Ferment Stew |
| Steam Med | Convection |
| Steam Low | Steamj Conv. |
| Healthy Fry | Auto Menus |
2

3

4

Press the Start button once.

Note:
| Steam High | Ferment Stew |
| Steam Med | Convection |
| Steam Low | Steamj Conv. |
| Healthy Fry | Auto Menus |
2

3

Before Requesting Service
PROBLEM POSSIBLE CAUSE SOLUTION
Panasonic Appliances Microwave Oven (Shanghai) Co., Ltd. 888, 898 Long Dong Road, Pu Dong, Shanghai, 201203, China Web Site: http://www.panasonic.com
F0003CS80MP
PA0323-0
Printed in China
- IMPORTANT SAFETY INSTRUCTIONS
- READ THE MANUAL CAREFULLY AND KEEP IT PROPERLY. PRECAUTIONS FOR USING THIS PRODUCT FOR COOKING: CHECK WHETHER THE PRODUCT IS DAMAGED
- PLEASE INSPECT YOUR OVEN AS FOLLOWS BEFORE USING
- PREVENTION ITEMS
- FORBIDDEN ITEMS
- DANGEROUS ITEMS
- SAFETY PRECAUTIONS
- INSTRUCTION ITEMS
- POWER SUPPLY
- GROUNDING
- ELECTRIC FAN
- PRECAUTIONS FOR PLACEMENT AND COOKING
- PRODUCT PLACEMENT
- PRECAUTIONS FOR COOKING
- WARNING
- HEATING PRINCIPLE
- COOKING TECHNIQUES
- ENGLISH
- TIMING
- SPACING
- BROWNING
- PIERCING
- ROTATING AND REPOSITIONING FOOD
- FOOD CHARACTERISTICS
- SIZE
- SHAPE
- STARTING TEMPERATURES
- DENSITY
- FEATURE DIAGRAM
- BOTTOM PLATE
- DOOR SAFETY LOCK SYSTEM (BOTH SIDES)
- WATER TANK
- NOTES
- DRIP TRAY
- WATER TANK INSTALLATION / REMOVAL
- INSTALLATION
- REMOVAL
- COOKWARE AND UTENSIL GUIDE
- CONTROL PANEL
- ① DISPLAY WINDOW
- MODE
- FUNCTION SETTING
- MENUS SETTING
- TIME SETTING
- WEIGHT/SERVING/LEVEL SETTING
- TEMPERATURE SETTING
- STEAM SETTING
- HEALTHY FRY SETTING
- FERMENT SETTING
- STEW SETTING
- CONVECTION SETTING
- WHEN COOKING WITH PREHEAT
- WHEN COOKING WITHOUT PREHEAT
- STEAM CONVECTION SETTING
- STEAM SHOT SETTING
- EXAMPLE: ADD STEAM 1 MINUTE DURING COOKING IN THE CONVECTION MODE
- THE KEY OF "STEAM SHOT" IN THE COOKING PROCESS
- FERMENTATION
- CHILD SAFETY LOCK SETTING
- TO SET
- TO CANCEL
- AUTO MENUS SETTING
- REHEATING CHART
- COOKING CHART
- CLEANING UTENSILS
- OVEN CLEANING SETTING
- CLEANING (DEODORIZATION)
- CLEANING (CAVITY)
- CLEANING (SYSTEM)
- CLEANING (CITRIC ACID)
- CARE OF YOUR OVEN
- BEFORE REQUESTING SERVICE
- PROBLEM POSSIBLE CAUSE REMEDY
- SPECIFICATIONS
- TABLE OF CONTENTS
- IMPORTANT SAFETY MEASURES
- READ CAREFULLY AND KEEP FOR FUTURE REFERENCE
- PRECAUTIONS FOR COOKING WITH THIS PRODUCT
- CHECK FOR DAMAGE
- FOOD BROWNING
- INITIAL TEMPERATURE
- FUNCTION INDICATOR
- DECORATIVE PANEL (WATER COLLECTION TRAY)
- RECIPE SETTING
- WEIGHT / PORTION / LAYER SETTING
- FERMENTATION SETTING
- OVEN CAVITY CLEANING SETTINGS
- CLEANING (OVEN WALLS)
- NOTE
- DESCRIPTION
- STARTING TEMPERATURE
- ② STOP/RESET PAD
- ③ START/SET PAD
- ④ DIAL
- FUNCTION SETTINGS
Brand : PANASONIC
Model : NU-SC280W
Category : Microwave