
DH-3US1TW - Water heater PANASONIC - Free user manual and instructions
Find the device manual for free DH-3US1TW PANASONIC in PDF.


| Product Type | Electric Instantaneous Water Heater |
| Model | DH-3US1TW |
| Brand | Panasonic |
| Dimensions (H x W x D) | 300 mm x 200 mm x 100 mm |
| Weight | 2.5 kg |
| Power Rating | 3.5 kW |
| Voltage | 220-240 V ~ |
| Frequency | 50/60 Hz |
| Water Connection | G 1/2" |
| Temperature Range | 30 °C - 60 °C |
| Flow Rate | 3 - 5 L/min |
| Control Type | Mechanical knob |
| Safety Features | Overheat protection, thermal cut-off, IPX4 splash-proof |
| Material | ABS plastic body |
| Energy Efficiency | Class A (estimated) |
| Certifications | CE, RoHS |
| Maintenance | Periodic descaling recommended |
| Repairability | Heating element replaceable |
Frequently Asked Questions - DH-3US1TW PANASONIC
User questions about DH-3US1TW PANASONIC
0 question about this device. Answer the ones you know or ask your own.
Ask a new question about this device
Download the instructions for your Water heater in PDF format for free! Find your manual DH-3US1TW - PANASONIC and take your electronic device back in hand. On this page are published all the documents necessary for the use of your device. DH-3US1TW by PANASONIC.
USER MANUAL DH-3US1TW PANASONIC
Operating and Installation Instructions Electric Home Shower (Household Use)
natural_image
Illustration of a wall-mounted industrial device connected to a vertical control panel (no text or symbols visible)Model No. รุ่น
DH-4UD1DH -4US1
DH-3UD1DH -3US1
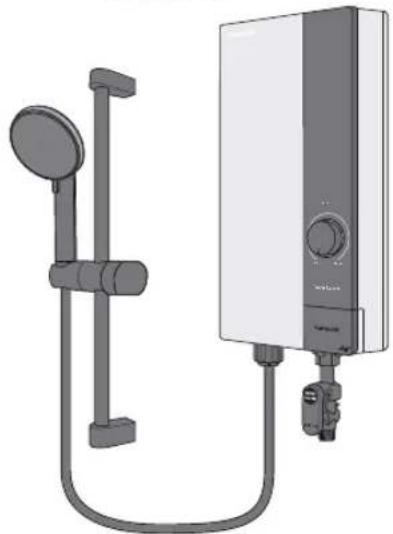
natural_image
Illustration of a wall-mounted water heater connected to a vertical pipe, with no visible text or symbols.Thank you for purchasing the Panasonic Electric Home Shower.
This appliance is intended for household use only.
For optimum performance and safety, please carefully read this Operating and Installation Instructions and keep this documentation in a safe place for future reference.
WATER FLOW RATE ADJUSTMENT ...... EN9
MAINTENANCE EN9
TROUBLESHOOTING EN10
SPECIFICATIONS EN10
HOW TO INSTALL ELECTRIC HOME SHOWER EN11
BEFORE INSTALLATION ...... EN11
HOW TO INSTALL EN12
To be followed absolutely
Before operating, please read the following "Safety Instructions" carefully.
To prevent personal injury, injury to others and property damage, the following instructions must be followed.
■ Incorrect operation caused by failure to follow instructions will cause harm or damage, the seriousness of which is classified as follow:

WARNING
This sign warns of death or serious injury.

CAUTION
This sign warns of injury to users or damage to property.
■ The instructions to be followed are classified by the following symbols:

This symbol (with a white background) denotes an action that is PROHIBITED.


This symbol (with a black background) denotes action that is COMPULSORY.

WARNING

- If the ELB Reset Lever cannot be reset even if you push it up or if it soon slides down during operation, please do not use the Electric Home Shower Unit and contact the authorized dealer immediately to avoid a hazard to users such as damage to property, serious injury or death. Never fi x the ELB Reset Lever forcibly with tape, etc.
- Do not insert finger or other objects into the Unit to avoiding physical and electric shock hazards.
- Do not replace the Shower Head, Shower Hose or any other parts of the Unit with spare parts other than genuine parts.
- Parts for other models will not fit to this model and may cause hazardous condition to user.
- Do not spray water to the Unit, nor put wet towels on it to avoid from coming into contact with any live parts etc., in order to prevent smoke emission, ignition, fi re and electric shock hazards.
● This appliance is not to be used for a potable water supply.
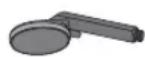

Shower Head Shower Hose
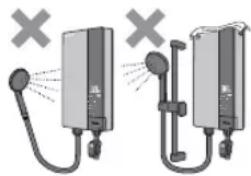
natural_image
Two identical devices with water spray and tubing, no text or symbols visible
● The Unit must be earthed.
- Improper grounding could cause electric shock.

- Stop using the Unit when any abnormality / failure occurs and turn "OFF" the Miniature Circuit Breaker (MCB). (Risk of smoke / fi re / electric shock / scalding)
Example of abnormality / failure:
- The ELB Reset Lever cannot be reset. Please refer to item no. 3. "TEST OPERATION" at page EN15.
- Burnt odor or smoke is detected during operation.
- The Front Plate / Back Plate is deformed or abnormally hot.
-
The outlet water temperature become extremely hot and cannot be controlled using the - and + button at Control Panel. → Contact your authorized dealer immediately for maintenance / repair.
-
Switch off the Miniature Circuit Breaker (MCB) before any service to avoid electric shock hazards.
- In time of lightning / thunder, switch "OFF" the Miniature Circuit Breaker (MCB) in advance to protect the Electric Home Shower Unit against possible damage.
- Inspect on the built-in ELB (once a month) to avoid a hazard to users such as damage to property, serious injury or death. Please refer to item no. 3. "TEST OPERATION" at page EN15.
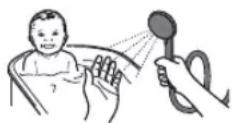
● Each time shower water is turned 'ON', check the water temperature by hand before showering. - When the shower is used by someone such as child, old person, sick person and physically handicapped person, the person responsible for their safety is kindly requested to pay attention and check the shower temperature by using hand from time to time.
● Pay attention to shower temperature when reducing the volume of water.
- The shower temperature will become very hot if the water flow rate is too low.
● This appliance is not intended for use by persons (including children) with reduced physical, sensory or mental capabilities, or lack of experience and knowledge, unless they have been given supervision or instruction concerning use of the appliance by a person responsible for their safety. Children should be supervised to ensure that they do not play with the appliance.

CAUTION

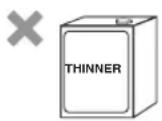
● Never use benzene, thinner, bleaching agent, etc. for cleaning purpose to avoid smoke emission, ignition, fire and electric shock hazards.
● Avoid using dirty water as it may affect heater performance and other components.
- Do not block the Shower Head with hand, towel or bend the hose. The water flow rate will drop and water temperature may become very hot.
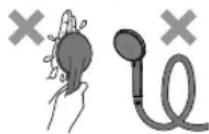
- In order to avoid a hazard due to inadvertent resetting of the thermal cut-out, this appliance must not be supplied through an external switching device, such as a timer, or connected to a circuit that is regularly switched on and off by the utility.

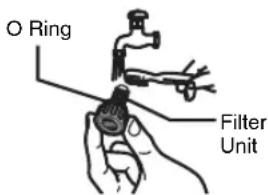
- Please make sure the O Ring is not removed and shall be free from foreign particle to avoid water leaking.
● Press Push On-Off Button before and after each shower.
- Press the Push On-Off Button only.
- Do not pull.
- Do not turn "On" and "Off" the Main Water Valve to operate the Home Shower Unit to avoid any possible damage.
ACCESSORIES
| Packing: Included Items: | |||
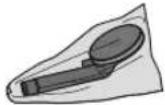 | 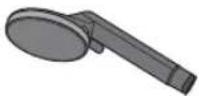 | ||
| Shower Head Packing Shower Head (1 set) | |||
 |  |  x 2 x 2 | 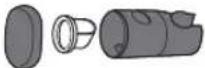 |
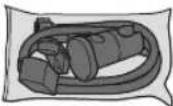
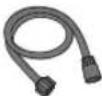
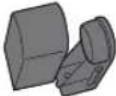
| Shower Hanger Packing | Shower Hose (1 set) Rail Holder (2 set) Shower Hanger Ass'y (1 set) | ||
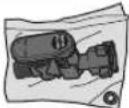 | 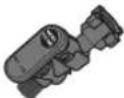 |  |  |
| Filter Body Packing Filter Body Assembly (1 set) Rubber Packing (1 pc) | Filter Body Assembly Caution Sheet (1 pc) | ||
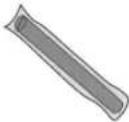 | 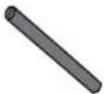 | ||
| Sliding Rail Sliding Rail (1 pc) | |||
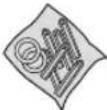 |  x 6 x 6 |  x 2 x 2 |  x 6 x 6 |
| Installation Packing Wall Plug (6 pcs) Rubber Packing (2 pcs) Screws (6 pcs) | |||
PARTS IDENTIFICATION
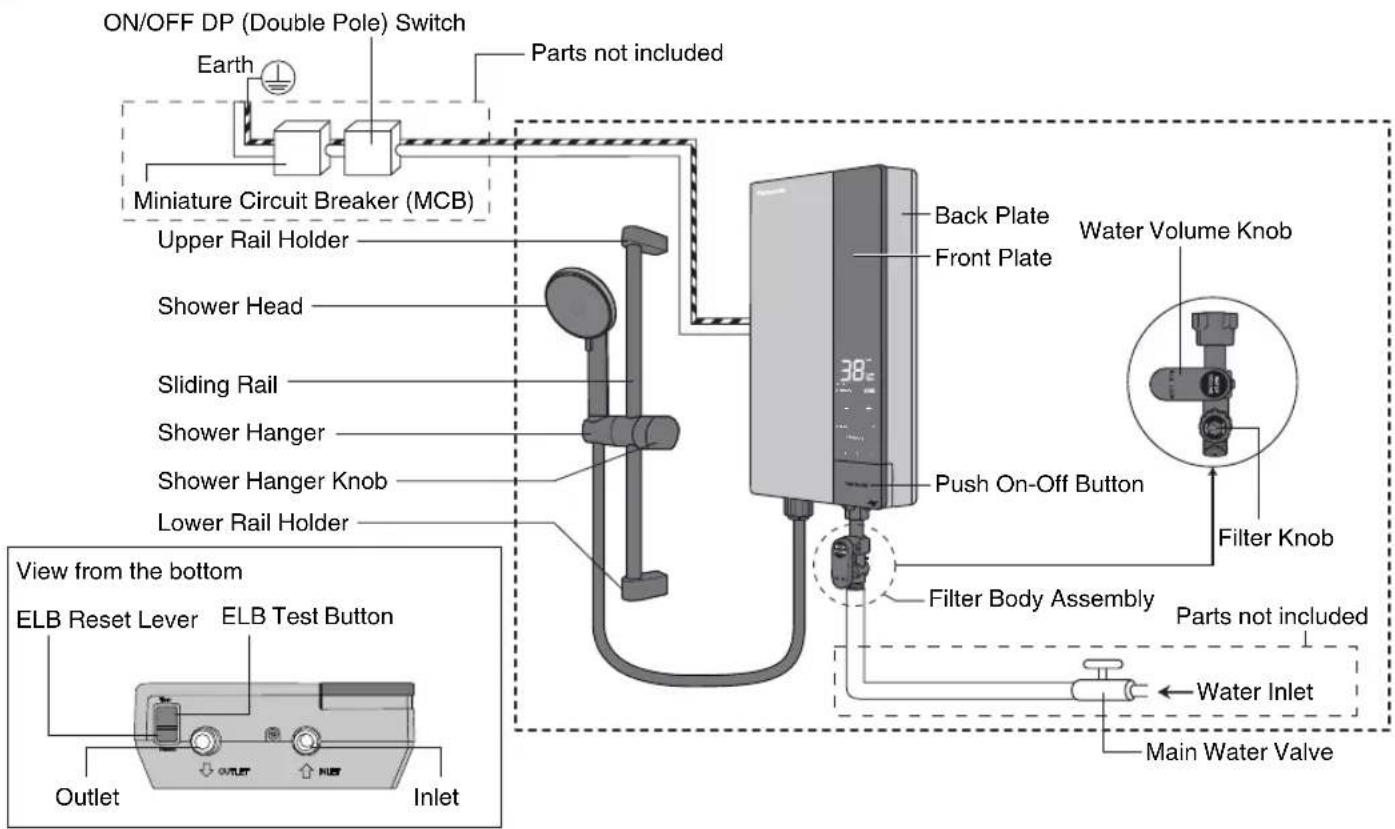
DESCRIPTION OF LCD DISPLAY & CONTROL PANEL
- U-Mode works to provide different after-shower experience depending on the individual.
- U-Mode has three modes.
a) Cool Down
• User feels refreshed after shower.
• Body temperature cool after shower.
b) Warm Up
- User feels warmth and comfort after shower.
• Body temperature will slightly warm after shower.
c) Hot & Cool
• Alternately changes hot shower to cool shower has the effects of accelerating blood vessel dilation / constriction, improving blood circulation.
- User feels relax and refresh after shower.
Note: Please be aware that the effects are different for each individual.
CAUTION

Please stop using U-Mode function immediately if any discomfort is felt during usage.
Note: For how to use the function, please refer to page EN7.
- U-Memory allows users to store a combination one data from function as below:
a) U-Mode function.
b) Shower temperature.
- U-Memory provides three different data combination that can be saved (U-Memory button [1 / 2 / 3]).
Note: For how to use the function, please refer to page EN8.
HOW TO USE
- Turn "On" the Main Water Valve.
- Switch "ON" the Miniature Circuit Breaker (MCB) and ON/OFF DP (double pole) Switch.
- Push up the ELB Reset Lever if it is down.
-
Turn the Water Volume Knob clockwise.
-
Turning it clockwise increases the volume of water thus decrease the water temperature.
- Turning it anticlockwise decreases the volume of water thus increase the water temperature.
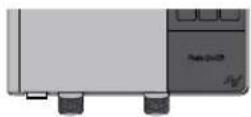
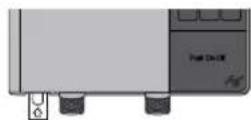
ELB: ON condition ELB: OFF condition
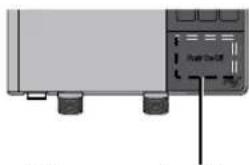
- Press the Push On-Off Button.
a) Water will flow out of the Shower Head.
b) Simultaneously,
DH-4UD1 & DH-3UD1 - LCD Display illuminates and display Temperature Indicator,
Clock & Shower Head Indicator.
(When the power ON, the temperature becomes 38°C)
c) To stop the water flow, press the Push On-Off Button again.
d) This Lever control both water and electricity supply to the set.
natural_image
Pure diagram of a device with ports and a control panel, no text or symbols presentMake sure push at the center of Push On-Off Button only.

CAUTION

Press Push On-Off Button before and after each shower.
Press the Push On-Off Button only. Do not pull.
Do not turn "On" and "Off" the Main Water Valve to operate the shower Unit to avoid any possible damage.
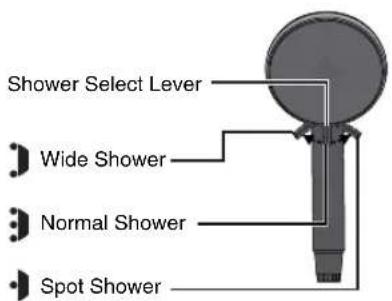
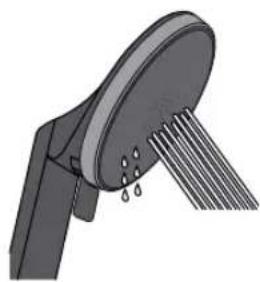
- Select the preferred shower by turn the Shower Select Lever.
natural_image
3D illustration of a showerhead with water spray and droplets (no text or symbols)Note:
When stop the water flow or change water shower selection from Wide Shower to Spot Shower, some water will continue to drip from Shower Head for less than 2 minutes. This is normal due to some water remain in the Shower Head and no abnormality to the Unit.
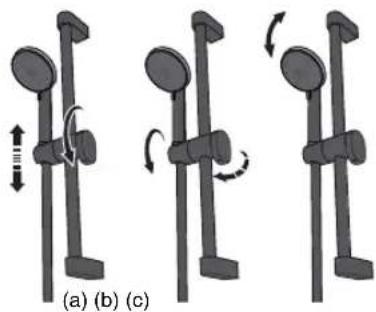
- Shower Head can be set at various positions.
a) Loosen Shower Hanger Knob and Shower Hanger can be adjusted higher or lower position.
Tighten Shower Hanger Knob.
b) Loosen Shower Hanger Knob and Shower Hanger can be adjusted to the left or right position.
Tighten Shower Hanger Knob.
c) The angle of Shower Head can be adjusted by moving the Shower Head upward and downward.
natural_image
Three mechanical diagrams showing rotational motion of a vertical pole with circular components, labeled (a), (b), and (c) — no text or symbols present.- Temperature setting.
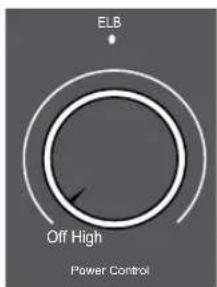
DH-4US1 & DH-3US1
a) The shower temperature can be gradually controlled by setting the Power Control Knob to the desired position.
b) If you turn the Power Control Knob clockwise the shower temperature will go up, reaching the highest temperature at "High".
c) If the Power Control Knob is at "Off" position, the water temperature will remain at inlet temperature.
d) In case of continuous usage at high temperature setting, water temperature will increase and it may cause the control device in the set to activate temporarily resulting water temperature to drop.
Temperature setting
DH-4UD1 & DH-3UD1
a) The shower temperature can be gradually controlled by pressing either - or + button.
b) Each press of the button will either reduce or increase the temperature by 1^ C.
Continuous press of the button will either continuously reduce or increase the temperature.
c) Lowest adjustable temperature is 32 °C.
d) Further press of the button will change the display to "PO" which is power off mode (Shower temperature will be same as inlet water temperature).
e) Highest adjustable temperature is 45 °C.
f) When the word "MAX" appear at the Power Display a higher temperature is required, reduce the water flow by turning the Water Volume Knob anticlockwise until "MAX" disappear (refer to Figure 1).
g) In case of continuous usage at high temperature setting, water temperature will increase and it may cause the control device to activate temporarily resulting water temperature to drop.
Water Volume Knob
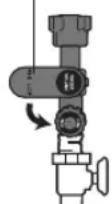
Figure 1
9. U-Mode setting.
DH-4UD1 & DH-3UD1
a) There are three types of U-Mode.
i. Cool Down Mode
ii. Warm Up Mode
iii. Hot & Cool
b) U-Mode operation will start by press U-Mode button at Control Panel.
c) The U-Mode function will vary by subsequently pressing the U-Mode button (U-Mode Cool Down -> U-Mode Warm Up -> U-Mode Hot & Cool).
d) After select the U-Mode function, Hot & Cool Indicator will flash (approximately 3 second) and selected U-Mode Indicator will illuminate depending on the selected U-Mode function.
e) Once the U-Mode process starts, Hot & Cool Indicator will flash again.
Note:
While the U-Mode process is running, the display temperature will remain, while the actual shower temperature will decrease or increase (depending on the selected U-Mode function).
f) There are few options for each of the U-Mode function. Please refer to Table below for details.
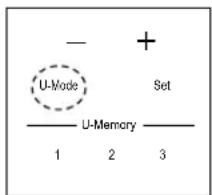
Control Panel
Press U-Mode Button

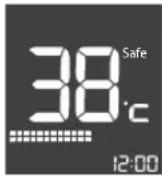
Press U-Mode Button

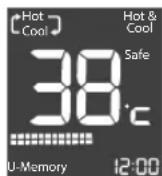
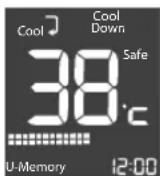

Press U-Mode Button
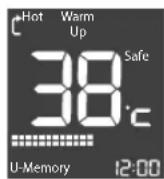

Press U-Mode Button
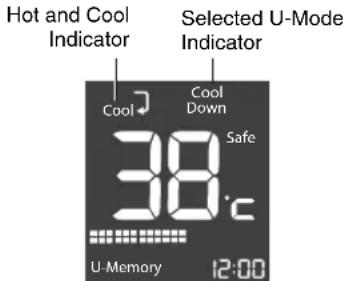
U-Mode function setup:
| Menu Display Indication Setting | ||||||
| Cool Down Mode | Temperature | Default Option [1] | Option [2] | Option [3] | ||
| -2 °C | -3 °C | -4 °C | PO**Power Off | |||
| Time | Default Option [1] | Option [2] | Option [3] | |||
| 20 s | 10 s | 40 s | 60 s | |||
| Warm Up Mode | Temperature | Default Option [1] | Option [2] | |||
| 2 °C | 3 °C | 4 °C | ||||
| Time | Default Option [1] | Option [2] | Option [3] | |||
| 20 s | 10 s | 40 s | 60 s | |||
| Hot & Cool Mode | Temperature | Default Option [1] | Option [2] | Option [3] | ||
| -4 °C | -3 °C | -2 °C | PO**Power Off | |||
| Time | Default Option [1] | Option [2] | ||||
| Hot: 40 s;Cool: 30 s | Hot: 30 s;Cool: 20 s | Hot: 50 s;Cool: 40 s | ||||
g) U-Mode temperature and timer setting.
| Steps To Do LCD Display Remarks | |||||
| 1 | Entering U-Mode setting. | Long Press the Set button until "-2" appear at temperature Display. | Now in "Cool Down" U Mode 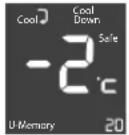 | Other U-Mode Press | U-Mode button. |
| Warm Up 1 time. | |||||
| Hot & Cool 2 times. | |||||
| 2 | Temperature Setting. | Press - or + button to set temperature. Press Set button to confi rm. | Timer indication "20" will fl ash. 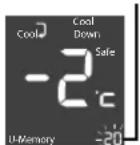 | U-Mode Timer | |
| Cool Down 20 | |||||
| Warm Up 20 | |||||
| Hot & Cool | H: 40; C:30 (Alternately) | ||||
| 3 | Timer Setting. | Press - or + button to set timer. | 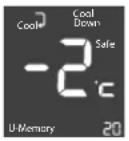 | The timer indication will continue to fl ash during selection. | |
| Press Set button to confi rm. | The display will become as default after confi rm the timer setting. | ||||
| 4 | Enter U-Mode function. | Press U-Mode button follow to desired U-Mode. | 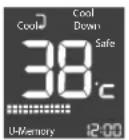 | The selected U-Mode with the New Temperature and Timer Setting appear. | |
10. U-Memory setting.
DH-4UD1 & DH-3UD1
a) U-Memory function can be selected by pressing U-Memory button.
b) U-Memory enables users to record, recall and erase data up to three memories.
| Steps To Do LCD Display | Remarks | |||
| U-Memory Data Record. | Press and hold the U-Memory [1 / 2 / 3] button until U-Memory number fl ash. | 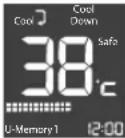 | When U-Memory number illuminates, data will be recorded. | |
| U-Memory Data Recall. | Press one of U-Memory button [1 / 2 / 3]. | 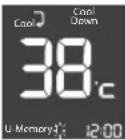 | U-Memory number will fl ash. | |
| U-Memory Data Erase. | Press and hold the U-Memory [1 / 2 / 3] button until U-Memory number disappear. | 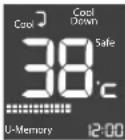 | U-Memory number disappear. (The Indication on LCD Display will blinking before the U-Memory number disappear, data will be erased). | |
11. Time Setting.
DH-4UD1 & DH-3UD1
i. Press Set button.
Time indication will fl ash.
ii. Press + or - button to set the time.
iii. Press Set button to confirm new time setting. The new time indication will illuminate.
WATER FLOW RATE ADJUSTMENT
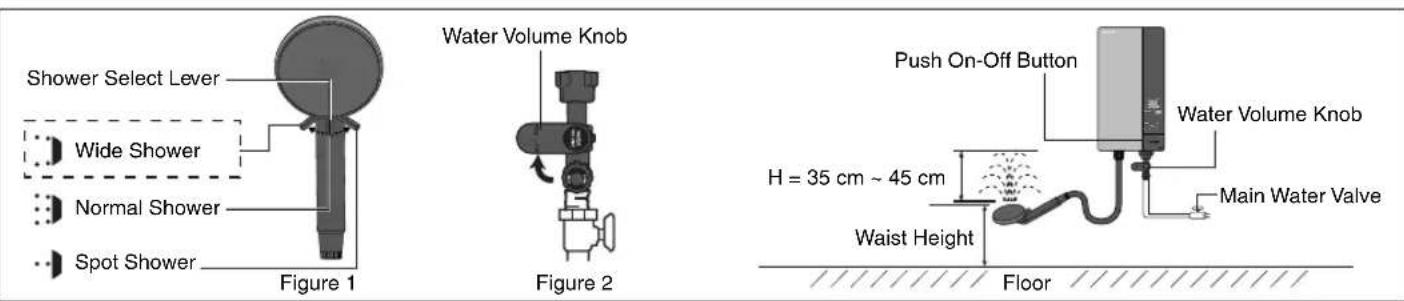
1. How to adjust to maximum water flow rate.
Step 1: Push the Push On-Off Button and select Wide Shower type on the Shower Head using the Shower Select Lever (refer Figure 1).
Step 2: Turn "Off" the Main Water Valve.
Step 3: Turn the Shower Head upward at waist height.
Step 4 : Turn the Water Volume Knob to maximum volume position (refer Figure 2).
Step 5: Gradually "On" the Main Water Valve and adjust the splashing height (H) of the shower. It is recommended to adjust the water splashing height (H) at 35cm 45cm (approximately 3L / min ). (If splashing height (H) is too high, hot water temperature will drop because of an excessive flow rate).
Note:
- Pay attention to shower temperature when reducing the volume of water.
The shower temperature will become very hot if the water flow rate is too low.
- Water Volume Knob is at maximum position at this stage (refer Step 4).
Please adjust it to suitable flow rate using the Water Volume Knob by turning it anticlockwise.
MAINTENANCE

WARNING

Switch off the Miniature Circuit Breaker (MCB) before any service to avoid electric shock hazards.
1. Main Body cleaning.
Be sure to switch "OFF" the Miniature Circuit Breaker beforehand.
1) Clean it with moist cloth.
2) Never use benzene, thinner, detergent, bleach, etc.
3) Do not spray water to the Unit, not put wet towels on it.
4) Make sure to use suitable cloth to clean the Front Plate surface to avoid scratch.
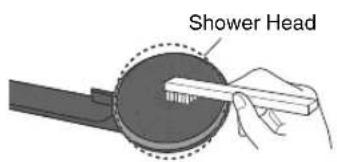
2. Shower Head cleaning.
1) Clean the Shower Head's holes by using a soft brush from time to time. (Recommended once a week).
3. Filter Unit Cleaning (Filter Unit is fixed to Filter Knob).
Clean the Filter of the Filter Unit with water once a week.
Clean the Filter Unit when hot water is not drawn normally.
Dismantle, cleaning and assemble of Filter Unit.
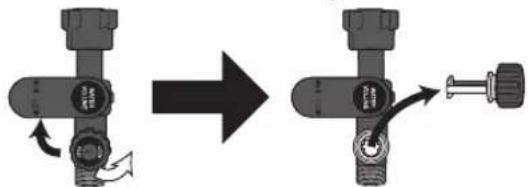
① Close the Main Water Valve.
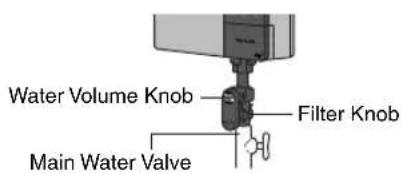
② Turn Water Volume Knob clockwise if it is blocking the Filter Knob. Turn the Filter Knob anticlockwise and pull it out.
③ Clean the Filter Unit.
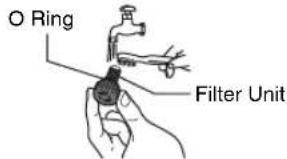
CAUTION
Please make sure the O Ring is not removed and shall be free from foreign particle to avoid water leaking.
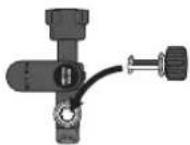
④ Insert the Filter Unit and tighten it properly (clockwise).
⑤ Turn the Water Volume Knob to its original position base on Water Flow Rate Adjustment at page EN9.
TROUBLESHOOTING
- Check the following points before asking for repair.
| Symptom Points to be checked | |
| Fault display, E3 fl ashing at display for DH-4UD1 and DH-3UD1 models. | 1. Reset the Set by turn off and turn on again by pressing the Push On-Off Button. |
| Water is not drawn normally. | 1. Check the Filter Unit. Clean the Filter if it is clogged by stain and dirt (refer Filter Unit Cleaning at page EN9).2. Check the Shower Head and Shower Plate. Clean the Shower Head and Shower Plate if it is clogged by dirt (refer Shower Head Cleaning at page EN9). |
| No hot water comes out from the outlet (no electric supply to the Unit). | 1. Make sure the Push On-Off is at “On” position.2. Make sure the ELB Reset Lever is not slide down.Push up the ELB Reset Lever to reset the ELB (see TEST OPERATION at page EN15).3. Make sure to switch On the ON/OFF DP (double pole) Switch.4. Make sure to switch On the Miniature Circuit Breaker (MCB). |
| No water flows out from the Shower Head at all. | 1. Check the Main Water Valve. Turn “On” the Main Water Valve if it is closed (refer HOW TO USE at page EN6).2. Check the Push On-Off Button. If the LCD Panel still light “OFF”.Please do not use the Unit and contact the authorized dealer immediately. |
| Water not hot enough. 1. C | Check the WATER FLOW RATE ADJUSTMENT as in page EN9. |
-
If abnormalities as mentioned below are found during usage, please do not use the Unit and contact your authorized dealer immediately.
-
Water leakage.
- No water flow.
• Water temperature cannot be controlled. -
No display on LCD.
-
Special skill is required for repairing. Never try to repair the Unit by yourself.
-
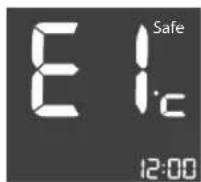
For DH-4UD1 and DH-3UD1 model, in case of continuous faulty (E1, E2 or E3 fl ashing at
Temperature Indication display), do not use the Unit and contact your authorized dealer immediately.
SPECIFICATIONS
| Model No. DH-4UD1 DH-4US1 DH-3UD1 | DH-3US1 | |||
| Voltage | 220 V a.c. 50 Hz | |||
| Power Consumption | 4800 W | 3800 W | ||
| Electric Temperature Control | Inlet Water Temp. PO (Off), 32 °C - 45 °C | - | Inlet Water Temp. PO (Off), 32 °C - 45 °C | - |
| Electric Power Control | - | Inlet Water Temp. (Off), 4800 W | - | Inlet Water Temp. (Off), 3800 W |
| Min. Water Pressure | 9.8 kPa / 0.1 kgf/cm2 / 1.42 psi | |||
| Max. Water Pressure | 380 kPa / 3.87 kgf/cm2 / 55 psi | |||
| Dimension | 385 (H) mm x 210 (W) mm x 78 (D) mm | |||
| Weight | 2.0 kg | 1.6 kg | 1.9 kg | 1.5 kg |
| Outlet System | Single Point System (Open Outlet) | |||

WARNING

● Proper size of Flexible Cord and electric wiring must be installed to avoid smoke emission and fire hazards.
● During installation process make sure electric and water supply is turn "OFF".
● The home shower must be permanently connected to the electric supply through the ON/OFF DP (double pole) Switch having a contact separation of at least 3 mm in all poles incorporated in the fi xed wiring. This switch must be clearly identifiable but out of reach of a person using a fi xed bath or shower.

● The Unit must be earthed.
- Improper grounding could cause electric shock.

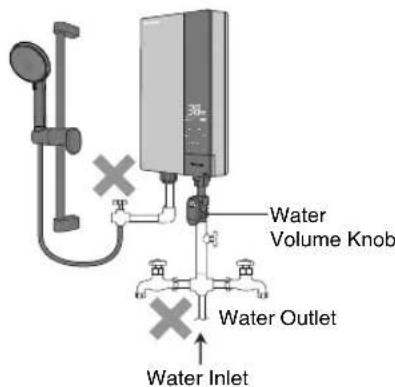
● Never install Filter Body Assembly at the outlet, inlet water cannot be filtered and allows foreign particles to enter the Unit. It will cause Heater Unit and Shower Head to clog up.
- Do not install, remove or reinstall the Unit by yourself.
- Improper installation will cause leakage, electric shock or fire. Installation and wiring must be done by competent personnel.
- Do not share the inlet and outlet pipe of the Home Shower Unit with other outlets.
- The pressure may drop due to water being drawn off at other point. The shower temperature may become very hot.
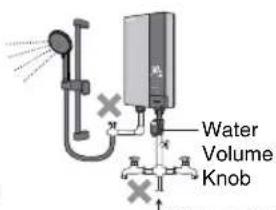
Water InletWater Outle

CAUTION

● Flexible Cord must enter the Unit thru designated point only (do not make additional holes).
BEFORE INSTALLATION
1. Make sure water flow pressure.
Min. water pressure : 9.8 kPa / 0.1 kgf/cm² / 1.42 psi
Max. water pressure : 380 kPa / 3.87 kgf/cm² / 55 psi
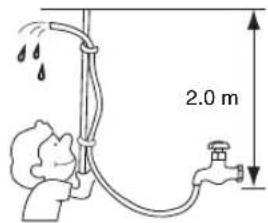
- How to measure the water pressure is as illustrated. Water should flow out of the Hose 2.0 m above the Main Water Valve.
Note:
When removing the Unit from package, some water may be found inside.
This is normal as the Unit is tested during the manufacturing process.

WARNING

During installation process make sure electric and water supply is turn "OFF".
1. Where to install the Unit.
- Be sure to install the Unit on the wall as illustrated in Figure 1 (vertical condition only).
- Do not install the Unit away from wall surface as shown in Figure 2.
- The Unit must be installed at 1.5 m \~ 1.7 m above the floor.
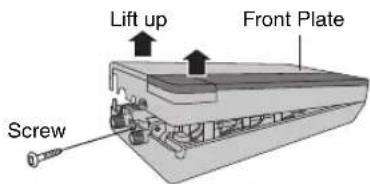
2. How to remove the Front Plate.
DH-4UD1 & DH-3UD1
① Remove the screw at the bottom of the Unit.
② Remove the Front Plate by lifting up the bottom side and then unhook the top side.
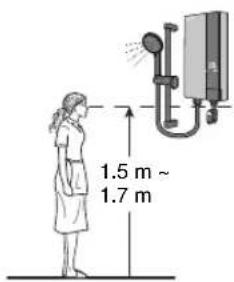
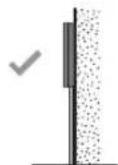
Figure 1
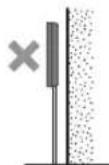
Figure 2
DH-4US1 & DH-3US1
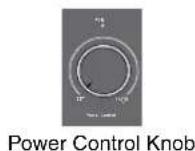
① Make sure the Power Control Knob is at "Off" condition.
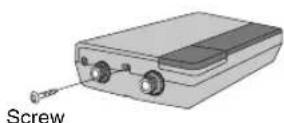
② Remove the Screw at the bottom of the Unit.
③ Lift up the Power Control Knob to make it free (Power Control Knob is attached to "VR Shaft" inside the Unit). Make sure the Power Control Knob is not detached from the Front Plate.
Note:
Power Control Knob attached to Front Plate.
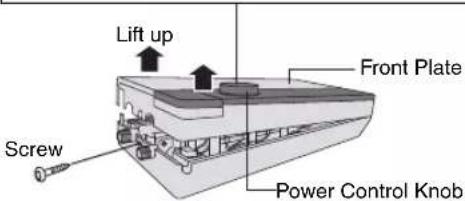
④ Remove the Front Plate by lifting up the bottom side and then unhook the top side.
3. How to fix Electric Home Shower.
① The distance of the Unit should be more than 250 mm at right and left of the wall.
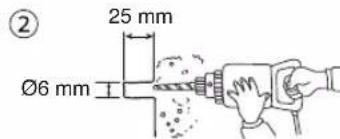
② Make 4 holes in the wall using a drill. The location of the hole position as shown in the INSTALLATION TEMPLATE provided.
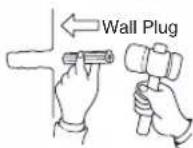
③ Drive a Wall Plug into the hole.
①
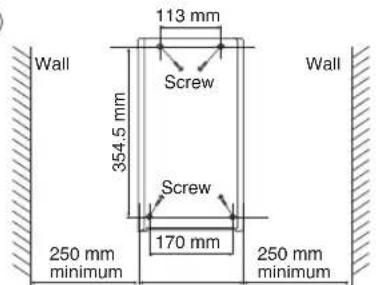
Figure 1
③
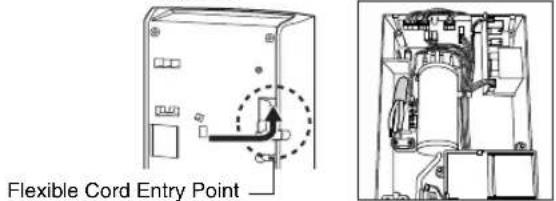
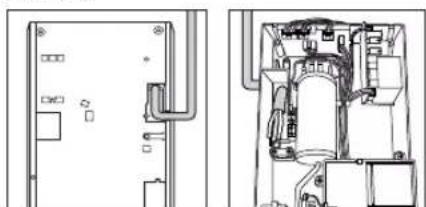
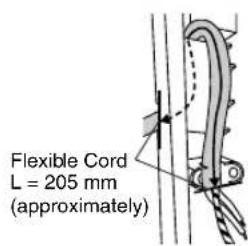
④ Lead the Flexible Cord to the set thru Portion 1 or 2 as shown below for electric wiring process.
Portion 1:
Portion 2:
natural_image
Technical line drawings of a mechanical or electrical component, showing internal components and mounting points (no text or symbols)
CAUTION

Flexible Cord must enter the Unit thru designated point only (do not make additional holes).
⑤ Mount the Unit on the wall with 4 screws.
- Drive each Screw into the two upper Wall Plugs through the screw holes on the Back Plate.
• After tighten up the two upper Screws, tighten up the remaining two Screws.
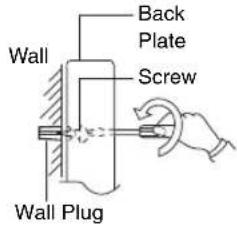
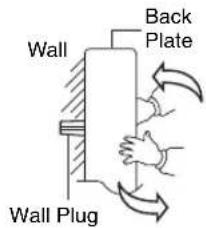
⑥ Please ensure the Unit fixed tightly on wall by shaking it left and right.
Note: The Back Plate must be mounted with 4 Screws.
4. Electric wiring.

WARNING

WARNING

Proper size of Flexible Cord and electric wiring must be installed to avoid smoke emission and fire hazards.

The Home Shower must be permanently connected to the electric supply through the ON/OFF DP (double pole) Switch having a contact separation of at least 3 mm in all poles incorporated in the fi xed wiring. This switch must be clearly identifiable but out of reach of a person using a fi xed bath or shower.
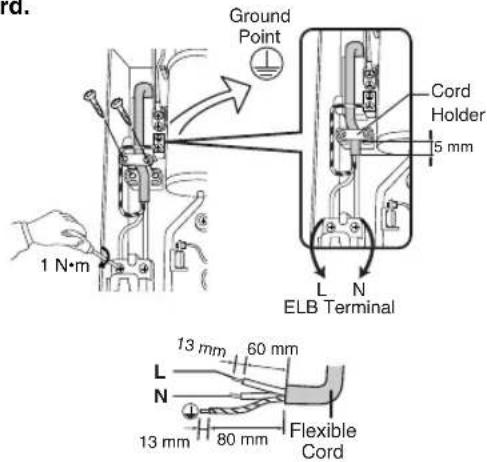
① Lead the Flexible Cord connected to ELB terminal inside the Unit: 2.5 mm ^4 , 3 core Flexible Cord.
② Unscrew the Cord Holder and fi x the Flexible Cord. Strip the lead wire (coating). Fasten the live wire (L) and neutral wire (N) to the ELB (L,N) and earth wire to the Ground Point with 1 N·m (10 kgf.cm) torque. Fix back the Cord Holder to its position to clamp the Flexible Cord.
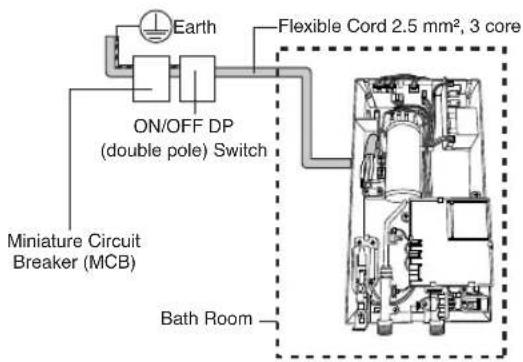
③ Connect wires in correct polarity (L,N).
- Connect the wires in wrong polarity (L,N) causes an abnormal condition which may lead to electric leaking, burning, etc.
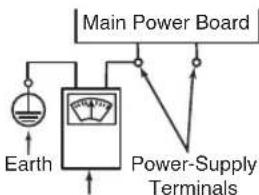
- Before wiring, please check polarity (L,N) with voltage range of a tester or voltmeter by connecting one terminal of the meter to earth while the other to one of the Power Supply terminals.
- When the needle of the meter deflects greatly, the polarity of the Power Supply terminal is 'L'.
④ Earth Rod.

WARNING

The Unit must be earthed.
Improper grounding could cause an electric shock.
• The Unit must be earthed.
- Earth Rod fixing procedure. Select suitable place to bury the optional Earth Rod (DQ-6H) for at least 70 cm below ground surface.
- Ensure that the ground resistance is less than 100 Ω. If it is not, drive the Rod deeper into ground surface or use 2 or 3 Rods.

5. Piping installation procedure.
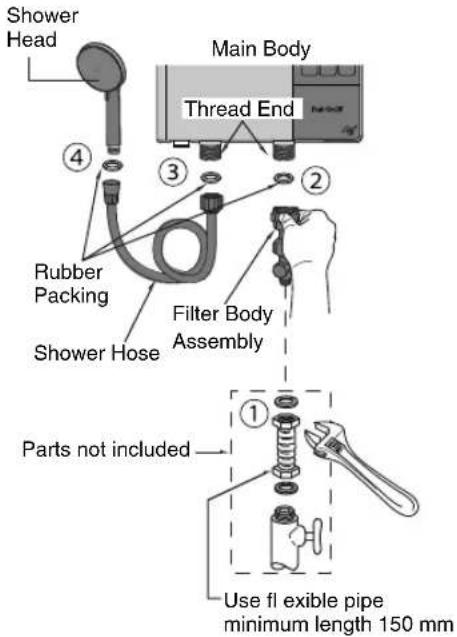
① Place Rubber Packing between Filter Body Assembly and Flexible Pipe. Do not use Piping Tape. Tighten it by Spanner firmly.
② Place Rubber Packing between Filter Body Assembly and Main Body. Do not use Piping Tape. Tighten it by hand firmly.
③ Place Rubber Packing between Shower Hose and Main Body. Do not use Piping Tape. Tighten it by hand firmly.
④ Place Rubber Packing between Shower Hose and Shower Head. Do not use Piping Tape. Tighten it by hand firmly.
⑤ The Filter Body Assembly should be placed in the front direction of the Unit.
! WARNING

Do not share the inlet or outlet pipe of Home Shower Unit with other outlets.
The pressure may drop due to water being drawn off at other point. The shower water temperature may become very hot.
CAUTION

Avoid using dirty water as it may affect heater performance and other components.
| Note: | Make sure no water leaks from pipe connection. |
| Note: | When glue is used for external piping connection, must wait for the glue to dry before proceed to test run with water. |
6. How to fix the Front Plate.
DH-4UD1 & DH-3UD1
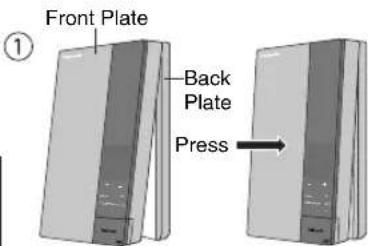
① Close the Front Plate of the Unit according to the sequence as illustrated (Close from top to bottom).
② Fix the screw at the bottom of the Unit.
Note:
Do not push the ELB Test Button during fi xing the Front Plate.
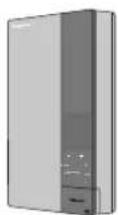
②
DH-4US1 & DH-3US1
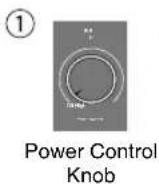
① Make sure the Power Control Knob on Front Plate and it is at "Off" position.
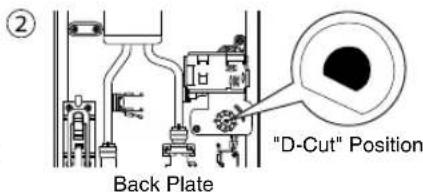
② Make sure the "D-Cut" position of the VR Shaft are located as shown.
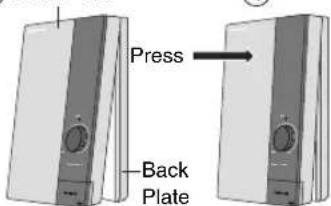
③ Close the Front Plate of the Unit according to the sequence as illustrated.
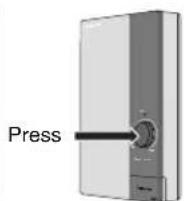
④ Push in the Power Control Knob until it is fully insert
⑤ Fix the Screw at the bottom of the Unit.
Note:
- Do not push the ELB Test Button during fixing the Front Plate.
- Do not apply extreme force to insert the Power Control Knob during fi xing the Front Plate because it will damage the switch inside the Unit.
③ Front Plate
④
⑤
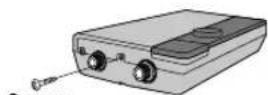
7. Shower Hanger installation.
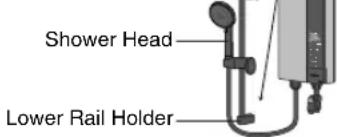
① Install the Rail Holder so that the Shower Head height not higher than the unit top.
Make sure the wall level must be same to the Rail Holder fi xing position. If the wall is not at the same level, please use spacer (not included) to fi x the accessory.
Upper Rail Holder
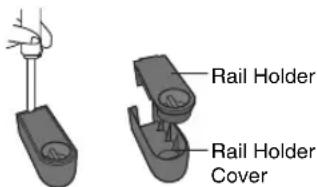
② Push the Rail Holder Cover (in detaching direction) at back of wall edge using suitable tool to detach it from Rail Holder.
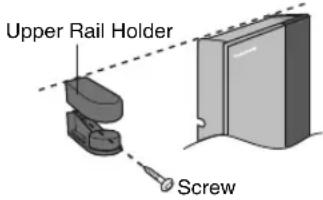
③ Install the Upper Rail Holder on the wall but not higher than the Unit top. Tighten the Upper Rail Holder with 1 screw.
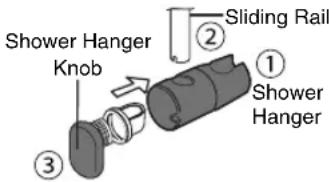
④ Prepare the Shower Hanger and Sliding Rail, remove the Shower Hanger Knob by rotating it (anticlockwise) then install the parts following the number ① and . ③
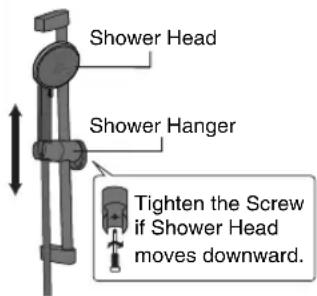
⑤ Tighten the Shower Hanger with Shower Hanger Knob.
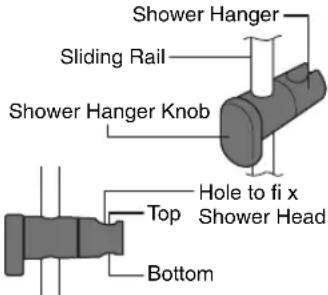
* Shower Hanger will drop off easily once the knob is loosen.
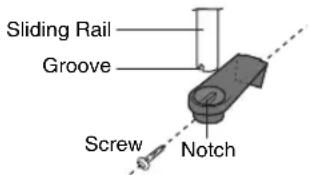
⑥ Install to the Upper and Lower Rail Holder with the Grooves of the Sliding Rail inserted to the Rail Holder's Notches. Tighten the Lower Rail Holder with 1 Screw. (Make sure to insert the Wall Plugs into the screw hole)
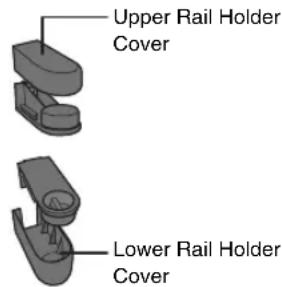
⑦ Cover the Upper and Lower Rail Holder with the Rail Holder Covers.
⑧ Adjust the Shower Hanger at the required level and hang the Shower Head as shown in diagram below.
TEST OPERATION
-
• Before switch "ON" electricity supply check the wiring.
-
Switch "ON" the Miniature Circuit Breaker (MCB) and ON/OFF DP (double pole) Switch.
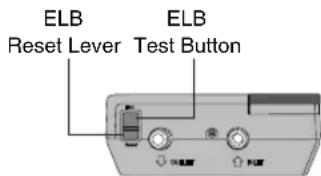
- Set the ELB of the Unit to "On". (Push up the ELB Reset Lever if it is down)
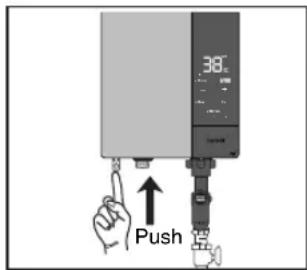
- Push the ELB Test Button.
- It is normal if the ELB turns "Off" (the ELB Reset Lever falls) and push the ELB Reset Lever up. Refer figure as shown.
- Inspection on the built-in ELB (once a month) to avoid a hazard to users such as damage to property, serious injury or death.
! WARNING

If the ELB Reset Lever cannot be reset even if you push it up or if it soon slides down during operation, please do not use the Unit and contact the authorized dealer immediately to avoid a hazard to users such as damage to property, serious injury or death. Never fix the ELB Reset Lever forcibly with tape, etc.
-
• Turn "On" the Main Water Valve.
-
Turn the Water Volume Knob clockwise.
-
Check if water leaks from the Pipe Line.
-
• Press the Push On-Off Button once, the LCD Panel (DH-4UD1 & DH-3UD1) or ELB lamp lights (DH-4US1 & DH-3US1) will be activated and water start flowing out of the Shower Head.
- Adjust the water temperature.
- • Refer detail for HOW TO USE and WATER FLOW RATE ADJUSTMENT on page EN6 & EN9.
natural_image
Two identical devices with water spray and heating elements, no text or symbols visible
อุปกรณ์เสริม
natural_image
3D illustration of a showerhead with fins and droplets (no text or symbols)การตั้งอุณหภูมิ
DH-4UD1 & DH-3UD1
natural_image
Cross-sectional diagram of an industrial machine or device with internal components (no visible text or labels)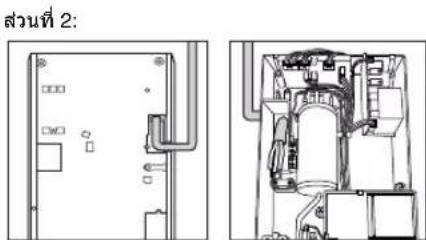
Stamp of dealer Name
** This Warranty card is completed. Please keep it for evidence**(Don't return to Panasonic company)
Register Club Panasonic
Download English version
- Operating and Installation Instructions Electric Home Shower (Household Use)
- HOW TO INSTALL ELECTRIC HOME SHOWER EN11
- WARNING
- CAUTION
- ACCESSORIES
- PARTS IDENTIFICATION
- DESCRIPTION OF LCD DISPLAY & CONTROL PANEL
- HOW TO USE
- Press Push On-Off Button before and after each shower.
- DH-4US1 & DH-3US1
- DH-4UD1 & DH-3UD1
- U-Mode setting.
- Note:
- U-Memory setting.
- Time Setting.
- WATER FLOW RATE ADJUSTMENT
- How to adjust to maximum water flow rate.
- MAINTENANCE
- Main Body cleaning.
- Shower Head cleaning.
- Filter Unit Cleaning (Filter Unit is fixed to Filter Knob).
- Dismantle, cleaning and assemble of Filter Unit.
- TROUBLESHOOTING
- SPECIFICATIONS
- BEFORE INSTALLATION
- Make sure water flow pressure.
- Where to install the Unit.
- How to remove the Front Plate.
- How to fix Electric Home Shower.
- Electric wiring.
- Piping installation procedure.
- ! WARNING
- How to fix the Front Plate.
- Shower Hanger installation.
- TEST OPERATION
- อุปกรณ์เสริม
Brand : PANASONIC
Model : DH-3US1TW
Category : Water heater