MTM4872GR - Monitor Mitsai - Free user manual and instructions
Find the device manual for free MTM4872GR Mitsai in PDF.


| Product Type | Monitor |
| Brand | Mitsai |
| Model | MTM4872GR |
| Screen Size | 24 inches (60.96 cm) |
| Optimal Resolution | 1920 x 1080 @ 60 Hz |
| Aspect Ratio | 16:9 |
| Connectivity | VGA, HDMI, Headphone Jack |
| Power Supply | External adapter, 100-240V AC, 50/60 Hz |
| Tilt Angle | -5° to +15° |
| Color Temperature Modes | Warm, Cool, Normal, sRGB, User (RGB adjust) |
| OSD Controls | Luminance, Image Setup, Color Setup, OSD Setup, Reset, Extra (Input Select, Volume) |
| Included Accessories | HDMI cable, Adapter, Base/Stand, User Manual |
| Cleaning | Use a dry soft cloth; do not use alcohol or ammonia-based liquids |
| Safety Features | Do not open back panel; avoid humidity; use only specified power supply |
| Environmental Compliance | WEEE (Directive 2012/19/EU) |
| Warranty | 2 years from date of purchase (manufacturing defects) |
Frequently Asked Questions - MTM4872GR Mitsai
User questions about MTM4872GR Mitsai
0 question about this device. Answer the ones you know or ask your own.
Ask a new question about this device
Download the instructions for your Monitor in PDF format for free! Find your manual MTM4872GR - Mitsai and take your electronic device back in hand. On this page are published all the documents necessary for the use of your device. MTM4872GR by Mitsai.
USER MANUAL MTM4872GR Mitsai
natural_image
Scenic view of colorful hot air balloons floating above a misty landscape at sunset, with no visible text or symbols.MONITOR 24/27"
MTM4872GR / MTM4873GR
EN
MONITOR 24/27"
INSTRUCTION MANUAL
Dear client,
Thank you for purchasing this product.
The quality of this appliance has been certified by several laboratory tests. This instructions manual is provided to simplify the use of the appliance as well as to guarantee a safe use.
Please read carefully the instructions and safety measures described in this manual.
We sincerely hope you will be satisfied when using your new appliance.
INDEX
1. Safety Instructions 3
1.1. Power Supply 4
1.2. Power Cord and Other Cables 4
1.3. Humidity and Water 5
1.4. Cleaning 5
1.5. General Precautions 5
2. Operating Instructions 6
2.1. Product usage 6
2.2. Troubleshooting 16
3. Technical Specifications 17
-
Post-Sale Service 22
-
Environmental Protection 23
2
1. SAFETY INSTRUCTIONS

WARNING RISK OF ELECTRIC SHOCK DO NOT OPEN

WARNING: TO AVOID THE RISK OF ELECTRIC SHOCK, DO NOT REMOVE THE COVER. THE INTERIOR DOES NOT CONTAIN ANY PARTS THAT CAN BE REPAIRED BY THE USER. ASK FOR ASSISTANCE FROM THE CUSTOMER SUPPORT SERVICE.
Important Warnings
Before using your appliance read these instructions manual carefully and keep it in a safe place as you may need to consult it in the future.
Before turning on your appliance, and to ensure a safe and correct operation, do not use if:
- It has fallen to the ground;
- You notice any evidence of damage;
- Any anomaly occurs during its operation.
To avoid hazards or deterioration of your appliance through incorrect use it is advisable to read these instructions thoroughly.
Your appliance should not be used for other purposes than the ones intended and solely for household use. Any damage resulting from using the appliance outside this scope, any incorrect use, as well as any manual modifications to the product will not be covered and automatically voids the warranty.
EN
MONITOR 24/27"
Assistance
In case of malfunction, take your appliance to the Customer Support Service for assistance.
This appliance can be used by children from the age of 8 and by people with reduced physical, sensorial or mental capabilities and/or lack of experience and knowledge if they have been given instructions on using the appliance safely and if they understand the hazards involved. Children may not play with the appliance. Cleaning and maintenance must not be carried out by children without supervision.
These instructions are also available at
www.suporteworten.pt
1.1. Power Supply
Make sure the main voltage is compatible with the appliance's. If this is not the case, please consult the Customer Support Service.
1.2. Power Cord and Other Cables
Do not tangle the cord or pull it to disconnect the appliance. Also, keep the cord away from warm surfaces. Never use the appliance if it has a damaged cable or socket.
Take it to the Customer Support Service for replacement.
1.3. Humidity and Water
Do not use your appliance in humid places. Do not allow the appliance to become wet under any circumstances as this may be dangerous. To avoid fire hazard or electric shock do not expose your appliance to humidity or water. Furthermore, do not place your appliance under water (e.g. for cleaning).
1.4. Cleaning
Before cleaning, be sure to switch off the appliance and remove the plug from the main power supply. Always allow the unit to cool down before cleaning.
To clean the exterior of the product, use a dry soft cloth only.
1.5. General Precautions
- Please follow the instructions in the user manual which will help you to properly install and operate this product and enjoy its advanced features. Please keep the instructions for future reference.
- Read all instructions before using the product.
- Maintenance and service operations are only to be carried out by authorized professionals.
- Any damage caused by manual modifications to the product is not covered by the warranty.
- If this product is used for other purposes than the ones originally intended, or if it is not correctly connected, the
EN
MONITOR 24/27"
product may become damaged and the warranty will be voided.
2. OPERATING INSTRUCTIONS
2.1. Product usage
WARNING: Before installing or operating the monitor, please refer to the information on the outside of the monitor's packaging for electrical and safety information.
- Unplug the monitor before cleaning it.
- It is recommended to use a dry cloth to clean the screen.
- Do not use alcohol or ammonia-based liquids.
- This monitor is designed with ventilation holes on the back; please do not block or cover them.
- Avoid placing the monitor near any direct heat or in an enclosed room with no ventilation.
- Do not insert any matter or spray any liquid on the monitor.
- Do not position the monitor on any unstable surfaces. This is to avoid the monitor falling and becoming damaged or causing any harm to the user.
- Unplug the monitor if it is not going to be in use for an extended period of time.
- Do not place heavy items on the monitor or on the electric cord.
- To avoid shock, do not open the monitors back panel as this contains a high voltage current.
- The symbol means that only power supplies listed in the user instructions can be used.
Installation Accessories
Adapter

Base/racket (according to model)
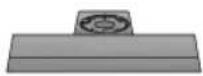
HDMI cable

Owner's manual
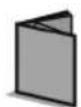
EN
MONITOR 24/27"
Installing the base
- Place the monitor on a soft surface, place the vertical shaft into the groove at the lower middle by aligning it from the top down with the mounting hole and tighten the screw clockwise.

- Align the coverplate with the mounting hole at the upper end of the vertical shaft and press it.

natural_image
Technical line drawing of a mechanical assembly with no visible text or symbols- Align the base with the mounting hole at the lower end of the vertical shaft and tighten the screw clockwise.
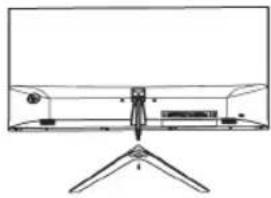
natural_image
Line drawing of a flat-screen monitor with stand and control panel (no text or symbols)- The installation is complete.

natural_image
Line drawing of a flat-screen monitor with stand and rear panel (no text or symbols)Angle adjustment
-
The screen can be tilted forward or backward. The angles of adjustment depend on the monitor's model. In most cases, the forward tilting angle is 532 degrees and the backward tilting angle is 1532 degrees.
-
When adjusting the angle of the monitor, don't touch or press the screen area.

natural_image
Line drawing of two hands holding a blank board with a circular symbol above (no text or labels)
natural_image
Two identical line drawings of a flat-screen monitor with stand (no text or symbols)Connecting the monitor to a PC

1
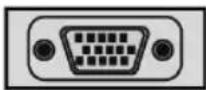
2

3

4
Before connecting the liquid crystal monitor to your PC, shut off the PC and monitor's power.
EN
MONITOR 24/27"
- HDMI interface Connect the HDMI cable to the HDMI IN port at the back of the monitor (monitor support needed)

- Headphone interface Connect the headphone cord to the headphone port at the back of the monitor (monitor support needed)

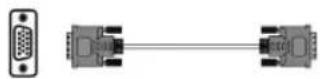
- VGA interface Connect the signal cable to the 15-pin D-SUB port at the back of the monitor (monitor support needed)
- Power outlet Connect the monitor's power cord to the POWER port at the back of the monitor.

natural_image
Simple line drawing of a cable and plug connecting a wall-mounted device (no text or symbols)Note: Please use power lines and adapter with standard configurations (The above pictures are schematic diagrams. The real objects shall prevail.)
User preferences Schematic diagram for the keys

Function of keys
| 1 | Power switch: press this button to switch on/off the power of the display. | |
| 2 | Push leftward | If the menu has been activated, press this key to choose the function of pushing leftward.When the menu is closed, press the key to enter the main menu. |
| 3 | Push rightward | Return to the menu at the previous level (if you are in the main menu, press the key to exit it.) |
| 4 Push upward | When the menu is opened, press this key to select the upward function with increasing progress bar values. When the menu is closed, it serves as a designated hot key under the express mode. | |
| 5 | Push downward | When the menu is opened, press this key to select the downward function with decreasing progress bar values. |
Note: the function of the keys for a specific model shall be subject to the monitor's model actually used.
EN
MONITOR 24/27"
Functions of the operation menu (OSD)
| Main Menu Item | Icon | Submenu Item | Sub-submenu Item | Description |
| Luminance | Brightness None | Adjusts the monitor brightness | ||
| Contrast None | Adjusts the monitor's contrast ratio | |||
| ECOModo | Standard Normal use mode | |||
| Movie | Movie playing application mode | |||
| RTS | RTS game mode (monitor support needed) | |||
| FPS | FPS game mode (monitor support needed) | |||
| Game Game application mode | ||||
| LowBlue Low blue light mode | ||||
| DCR | On Enables DCR | |||
| Off Disables DCR | ||||
| Luminance | Ov  'e 'e | Off | Adjusts the response time.The image can be blurred if the user turns on the OverDrive in Strong Level.User can adjust the OverDrive level base under the user's preferences or turn it off. | |
| Strong | ||||
| Medium | ||||
| Weak | ||||
| Image Setup |  | H. Position | None | Adjusts the picture's horizontal position |
| V. Position | None | Adjusts the picture's vertical position | ||
| Clock None | Adjusts the picture's clock to reduce the vertical noise | |||
| Phase None | Adjusts the picture's phase to reduce the horizontal noise | |||
| Image Ration | Wide | Adjusts the image's aspect ratio as wide-screen mode | ||
| 4:3 | Adjusts the image's aspect ratio as 4:3 mode | |||
| Colour Setup |  | Warm None | Set the colour temperature as warm | |
| Cool None | Set the colour temperature as cold | |||
EN
MONITOR 24/27"
| Colour Setup |  | Normal Normal usage mode | ||
| sRGB None Set the sRGB pattern | ||||
| User | Red | Fine tunes the red colour temperature | ||
| Green | Fine tunes the green colour temperature | |||
| Blue | Fine tunes the blue colour temperature | |||
| OSD Setup |  | Language None | Selects the language displayed on the OSD menu | |
| H. Position None | Adjusts the OSD's horizontal position | |||
| V. Position None | Adjusts the OSD's vertical position | |||
| Timeout None | Adjusts the OSD's display time | |||
| Transpa-rency | None | Adjusts the OSD's transparency | ||
| Reset |  | Auto Config. | None | Auto adjusts the horizontal / vertical position focus and clock of the image |
| Auto Colour | None | Adjusts the white balance | ||
| Reset |  | Reset None | Restores the factory setting | |
| Off Timer None | The options are 00-24. The default value is 00; “power-off. 01” means “automatic power-off in 1 hour”, “02” means “automatic power-off in 2 hours”, et cetera. | |||
| Extra |  | Input select | VGA | VGA (analogue) signal input |
| HDMI | HDMI (digital) signal input (option) | |||
| Volume None | Adjust volumes (only available for models with audio) | |||
Note: the above functions may be different according to the monitor models or can be adjusted due to an upgrading of the software version. The functions of the monitor models actually used shall prevail.
EN
MONITOR 24/27"
2.2. Troubleshooting
| Failures Possible solutions | |
| The power indicator does not work. | Make sure the power is switched on.Make sure the power cord is connected. |
| The plug-and-play function does not work. | Make sure the PC matches the plug-and-play function.Make sure the monitor card matches the plug-and-play function.Make sure the 15-pin D type joint of the signal cable is curved. |
| Dim image. • Adjust the brightness and contrast. | |
| Unsteady image or picture ruffling. | Some nearby electric equipment may cause electronic interference. |
| The indicator lamp of the power works (flickers) but there is no image on the display. | Check to see whether the power of the computer is switched on.Check to see if the computer's graphics card is inserted correctly.Check to see if the monitor's signal cable is properly connected to the computer.Check the plug of the monitor's signal cable and confirm that each pin is not curved.Observe the indicator lamp by tapping the Caps Lock key.Look at the PC keyboard and confirm whether the computer is working. |
| Colour loss (red, green, blue) | Check the signal cable of the display and confirm that each pin is not curved. |
| Chromatic aberration in the picture (the white colour doesn’t look white) | • Adjust the RGB colour or reselect the colour temperature |
| Improper monitor colours under VGA signals | • Choose the “Auto Colour Adjustment” in the OSD in a white output picture for correction. |
3. TECHNICAL SPECIFICATIONS
Please use the best resolution corresponding to the dimensions described on the monitor's box
| Diagonal size | Dimen-sion scale | Picture size (mm) | Dot pitch (mm) | Optimal resolution |
| 47 cm (18.5") 16 | 9 409.8*230 | 4 0.3 1360*768 | @ 60 Hz | |
| 48.3 cm (19") 16 | 10 408.2*25 | 5.2 0.283 1440*9 | 00 @ 60 Hz | |
| 49.5 cm (19.5") 16 | 9 442.8*24 | 9.075 0.27 1600* | 900 @ 60 | Hz |
| 49.5 cm (19.5") 16 | 9 440.38* | 244.5 0.317 | 1360*768 | @ 60 Hz |
| 49.4 cm (19.45") | 16:10 | 418.61*262.35 | 0.291 | 1440*900 @ 60 Hz |
| 49.6 cm (19.53") | 16:9 434 | 4.88*238.68 0.22 | 1920* | 080 @60Hz |
| 55 cm (21.5" FHD) | 16:9 | 477.5*268.6 | 0.248 | 1920*1080 @60Hz |
EN
MONITOR 24/27"
| 55.4 cm (23") 16:9 509.2*28 | 6.4 0.265 1920*10 | 80 @60Hz | |
| 60 cm (23.6") 16:9 521.3*293 | 2 0.271 1920*1080 | @60Hz | |
| 60.45 cm (23.8") 16:9 527 | 0.04*296.46 0.274 | 5 1920*1080 | @60Hz |
| 60.96 cm (24") 16:9 | 531.4*298.9 | 0.276 | 1920*1080 @60Hz |
| 63.50 cm (25") 16:9 543.74*3 | 02.62 0.283 19 | 20*1080 | @60Hz |
| 63.44 cm (25" QHD) 16:9 | 552.96*311.04 | 0.216 | 2560*1440 @ 60 Hz |
| 68.6 cm (27" THD) 16:9 | 597.9*336.3 0.3114 | 19 | 20*1080 @60Hz |
| 68.47 cm (27" QHD) 16:9 | 596.7*335.6 | 0.2331 | 2560*1440 @ 60 Hz |
| 80.0 cm (31,5" FHD) 16:9 | 698.4*392.85 | 0.3637 | 1920*1080 @60Hz |
| 80.0 cm (31.5" QHD) 16:9 | 509.18*288.41 | 0.27 | 2560*1440 @ 60 Hz |
| 81.28 cm (32" QHD) 16:9 708 | 48*398.52 0.277 | 2560*1440 @ 60 Hz | |
| 86.36 cm (34") 21:9 | 797.22*333.72 0.23175 | 3440*1440 @ 60 Hz | |
| 86.61 cm (34.1") 21:9 | 819.3*363 | 0.2325 | 3440*1440 @ 60 Hz |
| 97.8 cm (38.5") 16:9 853.92*4 | 80.33 0.44 | 1920*1080 @60Hz | |
| 99 cm (39") 16:9 853.92*48 | 0.33 0.44 | 1920*1080 @60Hz | |
| 100.33 cm (39.5") 16:9 | 878.12*485.35 | 0.4494 | 1920*1080 @60Hz |
| Ambient temperature | Storage Temp | -20 °C to 45 °C |
| Operation temperature | 0 °C to 40 °C | |
| Humidity | Relative humidity for operation | 10 % to 85 %0.27451920*1080 @60Hz |
Attention: When the resolution is 2560*1440 @ 60 Hz / 3440*1440 @ 60 Hz / 1920*1080 @ 144 Hz / 2560*1440 @ 144 Hz / 3840*2160 @ 60 Hz and the DVI interface is used, the double-channel DVI cord with 24+1 pins should be chosen.
Note: The above detailed parameters are subject to the monitor's models actually used.
EN
MONITOR 24/27"
Default resolution/ refresh rate
| Display scale | Display scale | 720x400 (70Hz) | 640x480 (60/75/ 72.8Hz) | 800x600 (60/72/ 75Hz) | 1024x768 (60/70/ 75Hz) | 1280x1024 (60/75Hz) | 1360x768 (60Hz) | 1440x900 (60Hz) | 1600x900 (60Hz) | 1680x1050 (60Hz) | 1920x1080 (60Hz) | 2560x1440 (60Hz) | 3440x1440 (60Hz) |
| 18.5”16:9 | ○○ | ○○×○ | ××××××× | ||||||||||
| 19”/ 19.45” | 16:10 | ○○ | ○○○× | ○××××× | |||||||||
| 19.5”16:9 | ○○ | ○○○× | ×○×××× | ||||||||||
| 19.5”16:9 | ○○ | ○○×○ | ×××××× | ||||||||||
| 19.53”/ 21.5”/ 23”/ 23.6”/ 23.8”/ 24”/ 25”/ 27”/ 38.5’/ 39” | 16:9 | ○○ | ○○○× | ○×○○×× | |||||||||
Default resolution/ refresh rate
| Display scale | Display scale | 640x480 (60Hz) | 800x600 (60Hz) | 1024x768 (60Hz) | 1280x1024 (60Hz) | 1360x768 (60Hz) | 1440x900 (60Hz) | 1600x900 (60Hz) | 1680x1050 (60Hz) | 1920x1080 (60Hz) | 2560x1440 (60Hz) | 3440x1440 (60Hz) |
| 25”/ 27”/ 31.5” QHD/ 32” QHD/ | 16:9 | ○○○○×○ | ×○○○× | |||||||||
| 31.5”/ 39.5” FHD | 16:9 | ○○○○×○ | ×○○×× | |||||||||
| 34” UHD/ 34.1” UHD/ | 21:9 | ○○○○×○ | ×○○×○ |
Attention:
O means supporting the corresponding resolution and refresh rate.
X means not supporting the corresponding resolution and refresh rate
Note: The above detailed parameters are subject to the types actually used.
EN
MONITOR 24/27"
4. POST-SALE SERVICE
MITSAI has designed this appliance in order to guarantee maximum reliability. However, if a problem occurs do not attempt to open the appliance - there is a risk of electrical shock. If you are not able to solve the problem, please contact the Customer Support Service of any Worten, Modelo or Continente store in order to be assisted. Worten Equipamentos para o Lar provides a 2-year warranty for manufacturing defects from the date of purchase of the appliance.
WARNING: any attempt to repair the appliance without contacting the manufacturer or seller will void the warranty.
All users must be familiar with these instructions. Knowing what could go wrong can help prevent problems from occurring.
5. ENVIRONMENTAL PROTECTION
In order to protect the environment, we strive to reduce the volume of packaging used, limiting it to three easily sorted materials: cardboard, paper and plastic. The appliance is manufactured using recyclable materials after disassembled by a specialized company. Please comply with local regulations concerning the recycling of all materials.
natural_image
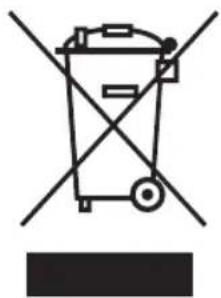
Simple line drawing of a trash bin with crossed lines indicating no waste or restriction (no text or symbols)The European directive 2012/19/EU on Waste Electrical and Electronic Equipment (WEEE) requires that old household electrical appliances must not be disposed of in the normal unsorted municipal waste stream. Old appliances must be collected separately in order to optimize the recovery and recycling of the materials they contain, and reduce the impact on human health and the environment.
The crossed out “wheeled bin” symbol on the product reminds you of your obligation, that when you dispose of the appliance, it must be separately collected.
Consumers should contact their local authority or retailer for information concerning the correct disposal of their old appliance.
ES
MONITOR 24/27"
natural_image
Simple line drawing of a monitor setup with stand and legs (no text or symbols)natural_image
Line drawing of a flat-screen monitor with stand and rear panel (no text or symbols)natural_image
Line drawing of a flat-screen TV with stand and rear panel (no text or symbols)Ajuste del ángulo
natural_image
Line drawing of two hands holding a blank board with a circular symbol above (no text or labels)
natural_image
Two identical line drawings of a computer monitor stand, no text or symbols presentnatural_image
Simple line drawing of a power cord with plug and cable, no text or symbols presentnatural_image
Simple line drawing of a trash bin with crossed lines indicating no waste or discharge (no text or symbols)natural_image
Simple line drawing of a monitor setup with stand and legs, no text or symbols presentnatural_image
Line drawing of a flat-screen monitor with stand and control panel (no text or symbols)natural_image
Line drawing of a flat-screen monitor with stand and rear panel (no text or symbols)Ajuste de ângulo
natural_image
Line drawing of two hands holding a blank rectangular board with a circular symbol above (no text or labels)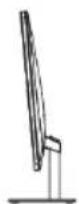

natural_image
Simple line drawing of a cable and plug connected to a circular component (no text or symbols)natural_image
Simple line drawing of a trash bin with crossed lines indicating no waste or discharge (no text or symbols)natural_image
Abstract grid pattern with white circles connected by dashed lines on a dark background (no text or symbols)
Magically Connected
Imported, Produced and Distributed by: Importado, Producido y Distribuido por: Importado, Produzido e Distribuído por:
- EN
- MONITOR 24/27"
- INSTRUCTION MANUAL
- INDEX
- Safety Instructions 3
- Operating Instructions 6
- Technical Specifications 17
- SAFETY INSTRUCTIONS
- WARNING RISK OF ELECTRIC SHOCK DO NOT OPEN
- Important Warnings
- Assistance
- Power Supply
- Power Cord and Other Cables
- Humidity and Water
- Cleaning
- General Precautions
- OPERATING INSTRUCTIONS
- Product usage
- Installation Accessories
- Installing the base
- Angle adjustment
- Connecting the monitor to a PC
- User preferences Schematic diagram for the keys
- Troubleshooting
- TECHNICAL SPECIFICATIONS
- POST-SALE SERVICE
- ENVIRONMENTAL PROTECTION
- ES
- Ajuste del ángulo
- Ajuste de ângulo
Brand : Mitsai
Model : MTM4872GR
Category : Monitor