
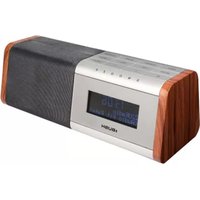
KS537 - Radio BUSH - Free user manual and instructions
Find the device manual for free KS537 BUSH in PDF.


| Product Type | DAB/FM Mono Radio |
| Power Supply - Mains | DC 5V 1A adapter (included) |
| Power Supply - Battery | 4 x AA 1.5V alkaline (not included) |
| Frequency Range DAB | Band III 5A-13F |
| Frequency Range FM | 87.5 – 108 MHz |
| Audio Output Power | 1 x 1W RMS |
| Antenna | Telescopic antenna |
| Headphone Jack | 3.5mm mono (headphones not included) |
| Preset Stations | 10 presets per mode (DAB and FM) |
| Alarm | 2 alarms with snooze function |
| Sleep Timer | 15, 30, 45, 60, or 90 minutes |
| Display | LCD with backlight |
| DAB Functions | Auto/manual scan, DRC, prune, display modes (PTY, ensemble, frequency, signal error, bit rate, time, radio text, signal strength) |
| FM Functions | Auto/manual tuning, RDS display (time, date, radio text, PTY, frequency, audio mode) |
| Clock Synchronization | Automatic via DAB/FM time signal |
| Standby Mode | Yes, via Mode button |
| Safety Features | Keep dry; avoid extreme temperatures; do not immerse; do not block ventilation slots; use specified batteries only |
| Cleaning Instructions | Wipe with a soft cloth; use damp cloth with mild detergent if needed; dry thoroughly before use |
| Guarantee | 12 months from date of purchase |
Frequently Asked Questions - KS537 BUSH
User questions about KS537 BUSH
0 question about this device. Answer the ones you know or ask your own.
Ask a new question about this device
Download the instructions for your Radio in PDF format for free! Find your manual KS537 - BUSH and take your electronic device back in hand. On this page are published all the documents necessary for the use of your device. KS537 by BUSH.
USER MANUAL KS537 BUSH
natural_image
Black and gold portable electronic device with textured surface and circular grip, set against a geometric grid background (no text or symbols visible)You will be soon be enjoying your BUSH DAB Mono Radio.
It all begins here, with your instructions Don't worry, there's nothing too technical coming up, just simple step by step guidance to get you up and running quickly, Sound good?
Then Let's get started.
Help and Guidance
We're here to help you get the most from your BUSH Mono Radio.
Should you require any guidance, a simple solution can often be found online at :
www.argos-support.co.uk
If you still require further assistance ,call one of our expert on 0345 604 0105.
If you require any technical guidance or find that your product is not operating as intended a simple solution can often be found in the Troubleshooting section of these instructions, or online at www.argos-support.co.uk if you still require further assistance, call one of our experts on 0345 604 0105.
Contents
1 Safety information
Safety information 6
2 Getting to know your DAB Mono Radio
Ready? Let's begin 9
Product Overview 9
Setting Time 11
3 Using your DAB Mono Radio
GETTING STARTED 14
Using the Radio - DAB Mode 15
Using the Radio - FM Mode 16
Using the Radio - PROGRAMMED STATION FUNCTION 17
System Setting 19
Care and Maintenance 19
4 Other information
Specifications 22
5 Product support
Troubleshooting 25
Disposal 25
Help and assistance 26
Guarantee 27

natural_image
Geometric pattern composed of triangles and squares forming a grid, with no text or symbols present.
Important safety information
Your BUSH DAB Mono Radio should be treated with care. The information below has been provided in the interest of safety and will help you to enjoy this product and the benefits it brings for many years.
- Keep the product and all its parts out of reach of children.
- This product is not intended for use by persons (including children) with reduced physical, sensory or mental capabilities, or lack of experience and knowledge, unless they have been given supervision or instruction concerning the use of the appliance by a person responsible for their safety.
- Keep it dry, avoid exposure to precipitation, humidity and liquids which could all affect the product circuitry.
- Do not leave it in high temperatures as electronic devices and plastic parts may rap in heat.
- Do not leave it in low temperatures as moisture can form inside the product, which may damage the circuit board.
- Do not block or cover slots, holes or opening on the product by placing on soft furnishings such as carpets, rugs, or beds as these are provided or functionality and /or ventilation to ensure safe operation of the products.
- Do not store in dusty or dirty areas.
- Do not attempt to remove any covers.
Remove the battery from the battery compartment, when the product is
• unused for a long period of time and during thunder storms.
- Do not immerse the main unit, any accessories in Water or any other liquid.
- Do not expose this product to dripping or splashing or stand any vessel containing liquid on or near this product.
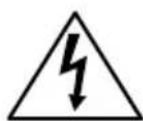
CAUTION
RISK OF ELECTRIC SHOCK DO NOT OPEN
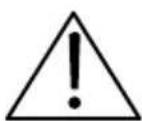
CAUTION: TO REDUCE THE RISK OF ELECTRIC SHOCK, DO NOT REMOVE COVER(OR BACK). NO USER SERVICEABLE PARTS INSIDE. REFER SERVICING TO QUALIFIED SERVICE PERSONNEL.
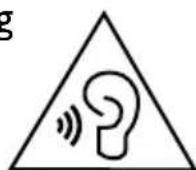
To prevent possible hearing damage, do not listen at high volume levels of long periods.
Getting to know your
BUSH DAB MONO RADIO

natural_image
Geometric pattern composed of triangles and squares forming a grid, with no text or symbols present.Getting to know your BUSH DAB MONORADIO
You'll be up and running in no time
Ready? Let's Begin
Please read these instructions carefully. They contain important information which will help you get the best from your product and ensure safe and correct installation and operation.
If you require any further assistance, our technical experts are happy to help. For full details ,refer to the product support section at the end of these instructions .
Product Overview
Front View
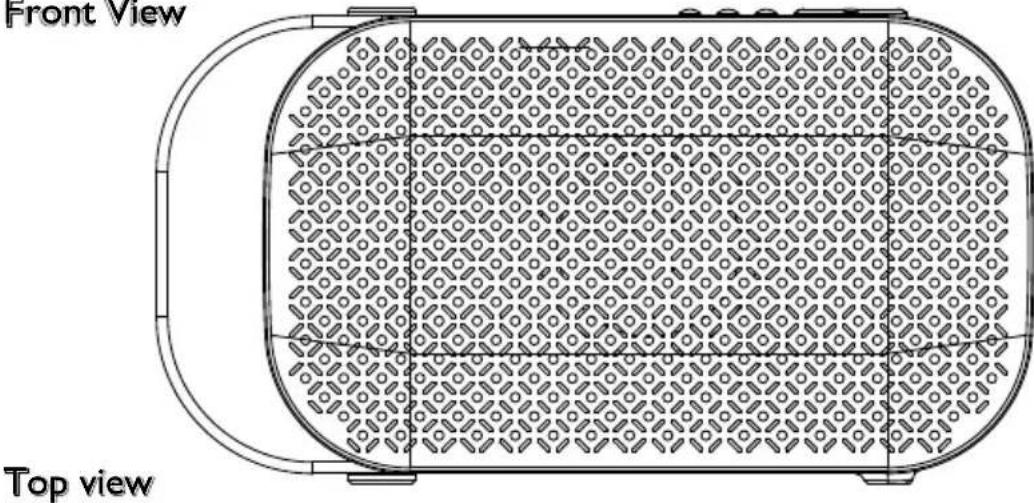
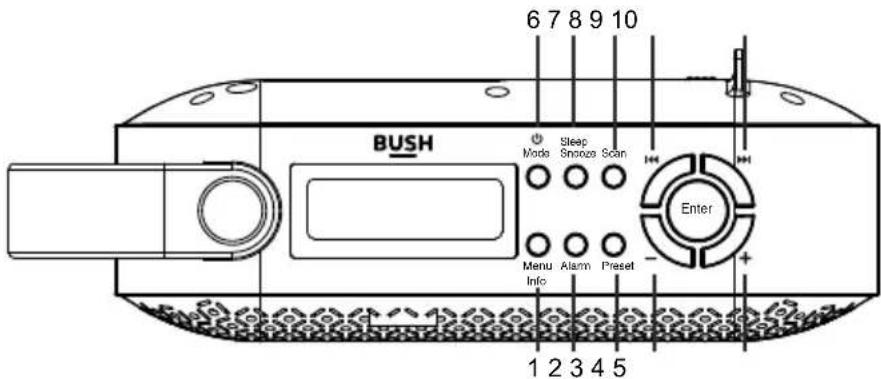
I. Info /Menu button
2. Alarm button
3. Preset button
4. Volume down (-) button
5. Volume up (+) button
6. Power/Mode button
7. Sleep /snooze button
8. Scan button
9. Previous ( ◀◀ ) button
10. Next (▶) button
Getting to know your BUSH DAB MONO RADIO
You'll be up and running in no time

- On/off switch
- DC in socket
- Headphone Port
- Battery compartment
- Telescopic antenna
Connecting to your Mains adaptor
Mains adaptor supplied Operation
Before using ,connect the supplied power cable to the mains cable socket at rear of the radio and the main adaptor to the wallet socket.
Remark: If the AC adaptor voltage is over than 6V, it will possible make the main unit damage.
Battery supplied Operation
To use the appliance with batteries ensure that the power cord is Not connected to the mains and install the batteries into the battery compartment.
I .Lift off the battery compartment cover from the reverse of the radio.
2. Insert 4 x AA 1.5V alkaline batteries (not included) in accordance with the diagram in the battery compartment. Take care to observe the correct polarity (+/-).
3. Refit the battery compartment cover.
4. Do not expose the batteries or the installed batteries to excessive heat (e.g. fire, sunshine or position close to radiators etc.).
Getting to know your BUSH DAB MONO RADIO
You'll be up and running in no time
Notes:
All DAB radio's use more power during use than ‘traditional’ radios and so will run batteries down within a few hours. Therefore use of mains power (or batteries) is recommended for extended listening.
Always switch off using the ON/OFF switch at rear when not in use. Standby mode continues to use power and (if in battery mode) will flatten the batteries within a couple of days.
BATTERY SAFETY AND DISPOSAL
CAUTION – Danger of explosion if batteries are incorrectly fitted / replaced.
Only use ‘AA’ 1.5V batteries in this appliance.
Be sure to insert batteries correctly taking care to observe the correct polarity (+ and -).
Use only batteries of the same or equivalent type as recommended.
Do not recharge non-rechargeable batteries.
Remove rechargeable batteries from appliance before recharging.
Never mix old and new batteries (replace all batteries at the same time).
Never try to dismantle batteries.
Do not short-circuit the supply terminals.
Always remove exhausted or dead batteries from the product.
Remove batteries from the product before extended storage.
Dispose of batteries responsibly at local authority household waste recycling facility.
Do not dispose of batteries in a fire as the batteries may explode.
Setting Time
The Clock in this radio is equipped to receive a DAB and FM radio frequency time signal.
I. Place the appliance on a flat and table surface.
- Connect the mains lead into the socket at the rear of the radio, plug in and switch on at the mains .The display backlight will illuminate for a few seconds ,a message
"Welcome to Digital Radio ' will appear in the display briefly and the clock (00:00:00) will flash in the display and a message "time is not set ' will appear.
3 When you first turn your BUSH DAB MONO RADIO on, it will be automatically synchronised to the local time by searching the DAB signal.
Welcometo Digital Radio
Using your
BUSH DAB MONO RADIO

natural_image
Geometric pattern composed of triangles and squares forming a grid, with no text or symbols present.Using your BUSH DAB Mono Radio
Let's get started
Basic operation –getting started
I. Connect the mains adaptor to the DC jack, fully extend the telescopic antenna, plug in and switch on at the mains and at the ON/OFF switch at the rear of the radio.
2.Slide the ON/OFF switch on rear of units to ON position. The display backlight will illuminate for a few seconds, a welcome message "Welcome to Digital Radio ' will appear in the display briefly and the clock (00:00:00) will flash in the display . the DAB mode will automatically be selected and the first time the radio is connected to the supply the radio will perform a quick scan The display will show 'Scanning a slide bar that indicates the progress of the scan, the name of the last station found and the total number of stations found so far.
Scanning... 0
The image contains no text. The OCR result "
Welcometo Digital Radio
- When the scan is finished the radio will play the first alphanumerically found station. If the radio does not find any stations, 'No DAB Station' displayed.
- Adjust the volume to the desired level using the VOL (+/-) buttons
- Press the Previous (◀◀) or Next (▶◀) buttons to scroll through the located stations.
Once the station of choice is located , Press the Enter button to select the station . - To switch your radio between DAB and FM mode, press Mode ⏻ button .
- Press and hold the Mode (⏻) Standby button on the top of the radio will go into 'Standby' mode.
- To completely switch of the radio and the display, slide the switch on the rear of the radio to 'Off'.
Using the radio - DAB MODE
DAB differs from analogue radio, the separate signals from a number of stations are grouped together and transmitted as a single frequency. These groups are referred to as multiplexes and ensembles. Each time a group has been found the name of the group will be shown on the lower half of the display.
DAB Mode - Auto tune
This function allows the radio to search automatically for DAB, Band III channels.
I. In DAB mode, Press the ‘Scan’ button to begin a local search for stations. The display will change to ‘Scanning...’ A progress bar will show the progress of the scan and the number of stations found during the scan will also be displayed.
2. When the scan is finished, the radio will return to the station played before the scan was initiated but any new stations found will have been added.
DAB Mode-Manual tune
This function allows a specific or new ensemble to be manually added to the stations already available on the radio.
Using your BUSH DAB Mono Radio
- In DAB mode, press and hold INFO/Menu button and press the Previous (▶) or Next (▶) buttons. Until "Manual tune is displayed, press Enter button to accept.
- Use the Previous (◀) or Next (▶) buttons until the desired frequency shown in the display and then press the Enter button The frequency and name of the ensemble and the signal strength will be displayed in display.
Press the Enter button again to add the ensemble and automatically tune to the station.
DAB Mode -Prune
This function allows unavailable stations to be removed from the station list. press and hold INFO/Menu button into tuning menu .
I. Press the Previous (◀) or Next (▶) buttons until “Prune” is displayed and press the Enter button to confirm.
- Press the Previous (◀) or Next (▶buttons to select (yes) to confirm and delete. If (No) is select the operation will be cancelled.
DAB Mode -DRC
This function allows unavailable stations to be removed from the station list .
I. In DAB Mode, press and hold Info/menu button, then press the Previous (◀◀) or Next (▶◀) buttons until “DRC” is displayed and press the Enter button to confirm.
- Press the Previous (or Next () buttons to cycle, off, high, low level then press Enter button to confirm your choice.
DAB Mode -display mode
This function allows information relating to the current station to be shown in the second line of the display.
Press the INFO/Menu button repeatedly to scroll through the following.

flowchart
graph TD
    A["Programme type"] --> B["Ensemble (Group name)"]
    B --> C["Frequency"]
    C --> D["Signal error"]
    D --> E["Audio bit rate"]
    E --> F["Power"]
    F --> G["Time"]
    G --> H["Radio text"]
    H --> I["Signal strength"]
    I --> J["Programme type"]
DLS (dynamic label segment)/Radio text-The broadcaster may include a scrolling message about the current programme.
Ensemble/Multiplex (Group name) - The ensemble / multiplex is a group of station that are bundled and transmitted together in a single frequency. There are national and local multiplexes, local ones contain stations that are specific to the local area.
Signal strength - the display will show a slide bar to indicate the strength of the signal. The stronger the signal, the longer the bar.
Using your BUSH DAB Mono Radio
Frequency - the display will show the frequency of the station being broadcast.
Signal error - This is displayed as a number between 0-99. It would not be possible to satisfactorily listen to a ratio station with a signal error rate of 30 or above.
Audio Bit rate - The display will show the digital audio bit rate being received.
Programme type - this describes the style of the programme. If the information is not available the display will show ‘
Audio mode - the display will show if the station beingreceived is stereo or mono.
Power - display power supply status.
Time and date - the time and date will be automatically updated by the radio time signal.
DAB Mode -Factory reset
Moving the radio to another location in the country the pre-tuned and stored DAB stations may no longer be available and it will be necessary to reset the radio back to the factory settings.
I. Press and hold INFO/Menu button, use the Previous (◀◀) or Next (▶◀) buttons until “system” is displayed and press the Enter button to confirm.
- Press the Previous (◀◀) or Next (▶▶) buttons to skip to Factory reset, press Enter button to confirm your choice ,the “Factory Reset?” will be displayed, using the Previous (◀◀) or Next (▶▶) buttons to choose “Yes “ and press Enter button confirm to restart your radio. The message “Restarting …” will be showing on display to restart. If “NO” to cancel your choice.
Factory Reset?
No
Using the radio - FM MODE
I. Turn the radio on, press Mode (⏻) Standby button and select the FM mode. The display will show ‘FM’ and the radio will automatically tune to the nearest station and then the display will show the station name, or frequency if RDS not available.
-
To search manually, press the Previous (◀◀) or Next (▶◀) buttons, each press will increment the frequency by 0.05MHz.
-
To activate auto search, press and hold Previous (◀◀) or Next (▶◀) buttons or press scan button, and the radio starts to scan up the frequency band, the display will show “scanning …”, and it will stop automatically once station has been found.
97.75MHz Scanning...
FM Display Modes
This function allows information relating to the current station to be shown in the
Using your BUSH DAB Mono Radio
display, Press the INFO/Menu button repeatedly to scroll through the following.

flowchart
graph TD
    A["Time"] --> B["Date"]
    B --> C["Radio text"]
    C --> D["Programme type"]
    D --> E["Frequency"]
    E --> F["Audio mode"]
    F --> G["Power"]
    G --> A
RDS (SCROLLING TEXT): The broadcaster may include a scrolling message about the current programme.
PROGRAMME TYPE: This describes the style of the programme being broadcast.
Station Name : such as BBC RD
Audio Mode : the display will show if the station being received is stereo or mono.
Time /date : the time and date will be automatically updated by the radio time signal.
Using the radio -- PROGRAMMED STATIONFUNCTION
This function allows up to 10 stations to be programmed into the memory and stored in the DAB and FM modes.
Storing DAB station as preset
I. Follow the directions above to select a radio station.
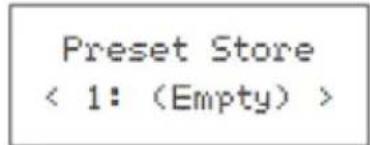
- Press and hold the 'Preset' button on the top of your radio. 'X (Empty)' is displayed. if no previous station has been stored.

-
Press the Previous (◀◀) or Next (▶◀) buttons to scroll through the Preset location that you would like to store the radio station to (1 - 10).
-
Press the Enter Button to store the station. The message "Preset XX saved" will appear on the display.
Recalling DAB Stations Preset
You could recall your presets by pressing the Preset button ,then using Previous (◀◀) or Next (▶◀) buttons browse through your presets and press the Enter button to tune to the station you choose.
If you choose a preset that has not been allocated a station, then "preset empty" will be displayed.
Setting and using the alarm
Setting the time manually
Manual time settings such as the time and the date format can be accessed using the System settings .To change the time and the date setting :
I. Press and hold the Info button.
- Use Previous (◀◀) or Next (▶◀) button repeatedly until "System" is shown on the
Using your BUSH DAB Mono Radio
display .Press the Enter button to confirm .
- Select the "Time" option using the Previous ( ) or Next ( ) button ,press Enter button to confirm .
In this menu you can automatic updated the time (Auto updated), set the time format (set 12/24 hour), set the date format (set date format) and set the time and date (set time/date).
Use Previous (◀) or Next (▶) button and Press the Enter button to select and change options within this menu.
Alarm setting
Note: Check that the radio has the correct time and date before you set an alarm. In DAB or FM mode:
I. Press the ‘Alarm’ button on the front of the radio, ‘Alarm I Setup’ is displayed. Press ‘Enter’
Note: Press the 'Alarm' button twice to enter the Alarm 2 setup.
-
'Alarm I Wizard' is displayed and the hour digits for the alarm will flash.
-
Use Previous (◀◀) or Next (▶buttons button to scroll to the hour for the alarm. Press 'Enter' to confirmed.
-
Use Previous (◀◀) or Next (▶▶) buttons to scroll minute for the alarm. Press 'Enter' to confirmed.
-
Use Previous (◀◀) or Next (▶◀) buttons to scroll to the duration for the alarm. You can choose from 15, 30, 45, 60, 90 and 120 minutes. Press 'Enter' to confirm.
-
Use Previous (◀◀) or Next (▶◀) buttons button to scroll to the sound source for the Alarm. You can choose from Buzzer, DAB or FM. Press ‘Enter’ to confirmFor FM or DAB mode you can choose between your preset or “Last listened “ radio stations using Previous (◀◀) or Next (▶◀) button and Enter to confirm.
-
Use Previous (◀) or Next (▶) buttons to scroll to the frequency for the Alarm. You can choose from Daily, Once, Weekends or Weekdays. Press 'Enter' to confirm
-
Use Previous (◀) or Next (▶) buttons button to set the volume for your alarm. Press 'Enter' to confirm.
-
Use the Previous (◀) or Next (▶) button to turn the alarm On or Off .Press the Enter to save your alarm.
-
Alarm 2 Setting please repeat 2-9 steps.
Note: The alarm volume will increase progressively until it reaches the alarm volume you have set.
Stop the Alarm
When the alarm sounds press the ‘Standby’ or ‘Alarm’ button to stop the Alarm. ‘Alarm off’ will be displayed.
Turn of the Alarm
In Standby mode:
Briefly press the ‘Alarm’ button repeatedly to turn Alarm 1 and Alarm 2 ‘On’ or ‘Off’.
Using your BUSH DAB Mono Radio
Snooze Function
When the alarm sounds, you can press the 'Snooze' button on the front of the radio. Repeatedly press the 'Snooze' button to increase the Snooze time.the default time for this feature is approximately 5 minutes.
Note: You can press the 'Standby' button to stop the Snooze function.
Sleep timer
You can set your radio to turn of automatically using the sleep timer. You can choose from 15, 30, 45, 60 and 90 minutes or OFF
I Press the 'Sleep' button on the front of the radio.
-
Use the Previous (◀◀) or Next (▶◀) button to scroll to the sleep time you would like (15, 30, 45, 60 or 90 minutes) Press ‘Enter’ to confirm.
-
You can press the 'Sleep' button to check the sleep time remaining. Use the Previous (◀◀) or Next (▶◀) buttons to modify or turn of the sleep timer. Press 'Enter' to confirm.
USING HEADPHONES (not included)
A mono headphone jack has been provided so that the unit can be used without disturbing others. Plug in the headphones at the point marked 📤 and adjust the listening volume to your chosen level. Excessive sound pressure from earphones and headphones can cause hearing loss. The speakers will not operate when earphones are fitted.
System Setting
Your radio features a number of extra setting to allow you to customise backlight as well as allowing you to identify the radio's software version. Press and hold INFO/Menu button.
Press the Previous (◀◀) or Next (▶◀) buttons until “system” is displayed and press the OK button to confirm.
Press the Previous (◀◀) or Next (▶◀) buttons to make changing s to the setting.
Care and Maintenance
Wipe external surfaces with a soft cloth. If the unit is very dirty, switch it off and use a damp cloth soaked in a weak solution of washing up liquid and water. Allow to dry thoroughly before reusing.

natural_image
Geometric pattern composed of triangles and squares forming a grid, with no text or symbols present.Other Information
Helpful technical information
Specification
Power adaptor: Output: DC 5V IA
Input: AC ↑H00-
Batteries: 4 xAA (Optional, not supplied)
Output: ↑ x IW RMS
Frequency range:
DAB(BAND III 5A-13F)
FM(87.5MHz-108MHz)

natural_image
Geometric pattern composed of triangles and squares forming a grid, with no text or symbols present.Product Support
Help is always at hand
TROUBLESHOOTING GUIDE
| Observation Potential cause / solution | |
| The unit does not work on mains | Has the mains adaptor been correctly plugged into the mains and the DC input jack at the rear of the unit? Does the mains socket that is being used have power? Has the ON/OFF switch (at rear of unit) been moved to the ON position? |
| Poor battery life | Has the advice been followed? Always switch the ON/OFF switch to the OFF position when not in use. |
| No sound | Is the volume control set at minimum? Are headphones fitted in the phones jack? |
| Radio Reception noisy (FM) | FM stereo – if weak switch to MONO as this re less signal strength. |
| ‘No signal DAB’ | This normally means the signal is very weak, not that there is no signal. Try moving the radio to a different location and re-scanning. |
Disposal
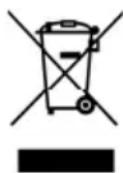
You should now recycle your waste electrical goods and in doing so help the environment.
This symbol means an electrical product should not be disposed of with normal household waste. Please ensure it is taken to a suitable facility for disposal when finished with.
Visit www.recycle-more.co.uk, click on “bank locator” and enter your postcode to find your nearest recycling site.
Product support
Help is always at hand
Help and assistance
If you require any technical guidance or find that your DAB/FM Digital Radio is not operating as intended, a simple solution can often be found in the Troubleshooting section of these instructions or online at www.argos-support.co.uk
If you still require further assistance, call one of our experts on 0345 604 0105. To help give us give you a fast and e sufficient service please have the following information ready:
Model Ref.
Serial number
You can find these on the rating plate - a small information panel (usually a sticker or metal plate) on the rear of your product.
Date of purchase
This will be shown on your receipt
Local call rates applies*
Line open 8am-7pm Monday to Saturday and 10am-4pm Sunday
*Calls to Argos enquiry lines may attract a charge and set up fee from residential lines depending on your call plan/tariff. Mobile and other providers costs may vary, see www.bt.com/pricing for details.
For security and training purposes, telephone calls to and from customer service centres may be recorded and monitored. Calls from Republic of Ireland will attract international call charges.
Call us now and activate your 12 month guarantee
Thank you for choosing Bush. Your new product is guaranteed against faults and breakdowns for 12 months. Don't forget to register it with us today so we can provide you with our best possible after-sales service and useful updates.
www.bushregistration.co.uk
FREEPHONE\* 0800 597 8548
Lines are open 8am - 8pm, 365 days a year. *Calls may be recorded and monitored.
Your Bush Guarantee
This product is guaranteed for twelve months from the date of original purchase. Any defect that arises due to faulty materials or workmanship will be repai red free of charge (or if applicable the product will be replaced or the purchase price refunded) where possible during this period by the dealer from who your purchased the unit.
The guarantee is subject to the following provisions:
The guaranteed does not cover accidental damage, misuse, cabinet parts, knobs or consumable items.
The product must be correctly installed and operated in accordance with the instructions contained in the manual.
It must be used solely for domestic purposes. The guarantee will be rendered invalid if the product is
re-sold or has been damaged by inexpert repair.
Specifications are subject to change without notice.
Bush disclaim any liability for loss or damage arising from the breakdown of the product.
This guarantee is in addition to and does not diminish your statutory or legal rights.
Contact:
www.argos-support.co.uk
Helpline: 0345 604 0105

- Help and Guidance
- www.argos-support.co.uk
- Contents
- Safety information
- Getting to know your DAB Mono Radio
- Using your DAB Mono Radio
- Other information
- Product support
- Important safety information
- CAUTION
- Getting to know your
- BUSH DAB MONO RADIO
- Getting to know your BUSH DAB MONORADIO
- Product Overview
- Front View
- Getting to know your BUSH DAB MONO RADIO
- Connecting to your Mains adaptor
- Mains adaptor supplied Operation
- Battery supplied Operation
- Notes:
- BATTERY SAFETY AND DISPOSAL
- Setting Time
- Using your
- Using your BUSH DAB Mono Radio
- Basic operation –getting started
- Using the radio - DAB MODE
- DAB Mode - Auto tune
- DAB Mode-Manual tune
- DAB Mode -Prune
- DAB Mode -DRC
- DAB Mode -display mode
- DAB Mode -Factory reset
- Using the radio - FM MODE
- FM Display Modes
- Using the radio -- PROGRAMMED STATIONFUNCTION
- Setting and using the alarm
- Setting the time manually
- Alarm setting
- Stop the Alarm
- Turn of the Alarm
- Snooze Function
- Sleep timer
- USING HEADPHONES (not included)
- System Setting
- Care and Maintenance
- Other Information
- Helpful technical information
- Specification
- Product Support
- Help is always at hand
- TROUBLESHOOTING GUIDE
- Disposal
- Help and assistance
- Line open 8am-7pm Monday to Saturday and 10am-4pm Sunday
- Call us now and activate your 12 month guarantee
- www.bushregistration.co.uk
- FREEPHONE\* 0800 597 8548
- Your Bush Guarantee
Brand : BUSH
Model : KS537
Category : Radio