
GH609WNL - Range hood Philco - Free user manual and instructions
Find the device manual for free GH609WNL Philco in PDF.


| Product Type | Built-in Range Hood |
| Brand | Philco |
| Model | GH609WNL |
| Installation Type | Under-cabinet |
| Width | 852 mm |
| Depth | 280 mm |
| Power Supply | 220-240 V, 50 Hz (refer to rating plate) |
| Motor Speeds | 3 speeds (Low, Medium, High) |
| Control Type | Slide switches (light, fan, speed) |
| Lighting | Replaceable lamp (type as per rating plate) |
| Grease Filter | Aluminium, washable (monthly) |
| Charcoal Filter | Activated carbon, replace every 3 months |
| Duct Connection | Ø120 mm adapter, Ø125 mm flexible duct |
| Minimum Distance from Hob | 650 mm |
| Special Feature | Retractable hood (pull-out up to 160 mm) |
| Electrical Class | Class II (double insulated, no earth) |
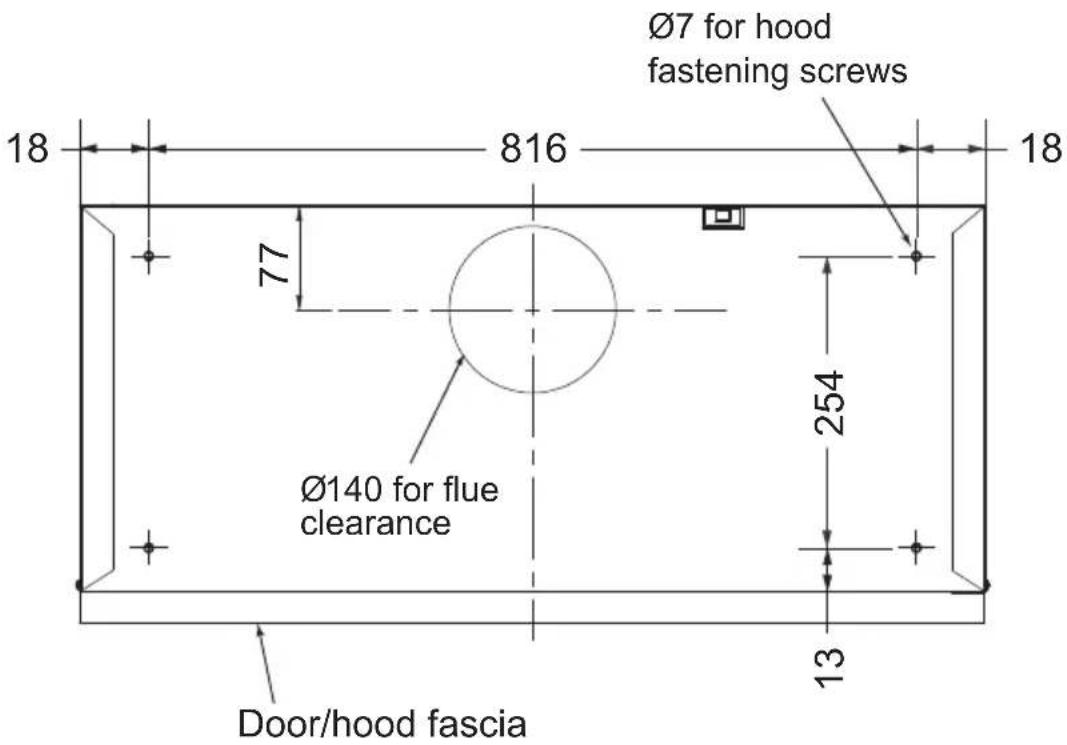
| Installation Cutout | Ø140 mm for flue clearance |
| Mounting Screws | 4 x M6 x 40 mm (supplied) |
| Rear Spacer | Included (reversible to adjust depth) |
| Usage | Domestic use only |
Frequently Asked Questions - GH609WNL Philco
User questions about GH609WNL Philco
0 question about this device. Answer the ones you know or ask your own.
Ask a new question about this device
Download the instructions for your Range hood in PDF format for free! Find your manual GH609WNL - Philco and take your electronic device back in hand. On this page are published all the documents necessary for the use of your device. GH609WNL by Philco.
USER MANUAL GH609WNL Philco
USER MANUAL
用戶手冊
GH609 NL
EN
Dear Customer
Thank you for buying our range hood. Please read the user manual carefully and store in a handy place for later reference.
This hood is designed for fitting in a cabinet.
Read the following carefully to avoid damage or injury.

SAFETY AND WARNINGS
- Where applicable, this appliance is supplied with fixings. Please ensure you use the correct fixings suitable for the substrate where the appliance will be installed and that they are able to support the weight of the appliance.
- Before connecting the hood, check that the supplied voltage and frequency match with that indicated on the appliance rating plate. If in doubt, ask for advice instore or from a qualified installer..
- If the supply cord is damaged, it must be replaced by the manufacturer, its service agent or similarly qualified persons in order to avoid a safety hazard.
- Use only the same size of fittings and mounting screws as recommended in this instruction manual. Failure to follow these instructions may result in electrical hazards.
- Means for full disconnection must be incorporated in the fixed wiring in accordance with the local wiring installation rules for your country. An all-pole disconnection switch having a contact separation of at least 3mm in all poles should be connected during installation.
- When the extractor hood is located above an appliance, the minimum distance between the supporting surface for the cooking vessels on the hob and the lowest part of the hood shall be at least 650mm.
- Consult local regulations regarding extraction outlets and ensure these are complied with. Do not connect the hood to a ventilation
or hot air duct containing combustion fumes from burning gas or other fuels. Confirm that room ventilation is appropriate with the local authorities.
- The air must not be discharged into a flue that is used for exhausting fumes from appliances burning gas or other fuels
- The hood may stop working during an electrostatic discharge (e.g. lightning). This involves no risk of damage. Switch off the electricity supply to the hood and reconnect after one minute.
- This appliance can be used by children aged from 8 years and above and persons with reduced physical, sensory or mental capabilities or lack of experience and knowledge if they have been given supervision or instruction concerning use of the appliance in a safe way and understand the hazards involved. Children shall not play with the appliance. Cleaning and user maintenance shall not be made by children without supervision.
- This appliance is not intended for use by persons (including children) with reduced physical, sensory or mental capabilities, or lack of experience and knowledge, unless they have been given supervision or instruction concerning use of the appliance by a person responsible for their safety.
- Children should be supervised to ensure that they do not play with the appliance.
- Do not install the appliance outdoors in a damp place or in an area which may be prone to water leaks such as under or near a sink unit. In the event of a water leak affecting the appliance, do not use and contact customer services to arrange for inspection. Do not use flammable sprays in close vicinity to the appliance.
- Please dispose of the packing material carefully. There is a fire risk if cleaning is not carried out in accordance with the instructions. Refer to the Care and Maintenance sections carefully for details on how to clean and replace the aluminium and carbon filters (if fitted).
- Refer to the Care and Maintenance section for details on the type of lamps that can be used and how to replace them.
- Do not use a steam cleaner for care and maintenance.
- The appliance is not intended to be operated by means of an
external timer or separate remote control system.
- There shall be adequate ventilation of the room when the hood is used at the same time as appliances burning gas or other fuels. Ensure that the negative pressure of the installation site does not exceed 4 Pa (0.04 mbar) to ensure combustion fumes are not drawn back into the room.
- Do not use the hood if it shows signs of damage or imperfection. Contact customer services for assistance.
Switch off the appliance at the mains supply before carrying out any maintenance work or cleaning.
- CAUTION: Accessible parts may become hot when used with cooking appliances.
- Do not flambé under the hood. To avoid the risk of fire, clean or replace the grease filter regularly and closely monitor pans containing hot oil.
- The manufacturer declines all liability for personal or material damage as a result of misuse or incorrect installation of this appliance.
- The appliance is for domestic use only as an extractor hood.
INSTALLATION INSTRUCTIONS
All installation must be carried out by a competent person or qualified electrician. Before connecting the mains supply ensure that the mains voltage corresponds to the voltage on the rating plate.
The appliance must be connected directly to the mains using an omnipolar circuit breaker with a minimum opening of 3mm between the contacts.
The installer must ensure that the correct electrical connection has been made and that it complies with the wiring diagram.
Regularly check the power plug and power cord for damage. If the supply cord is damaged, it must be replaced by a special cord or assembly available from the manufacturer or its service agent.

WARNING: This is a Class II appliance and MUST NOT be
earthed.
Contents of packaging
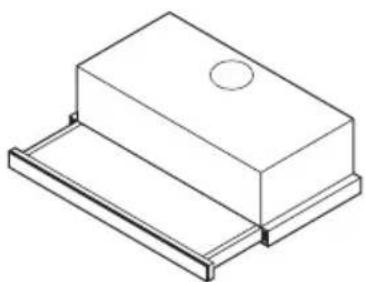
Rangehood (1)

∅120mm
Ducting adapter (1)

Screw M6 x 40mm (including washer) (4)
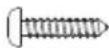
Screw ST3 x 12mm (2)

Rear Spacer (1)
INSTALLATION
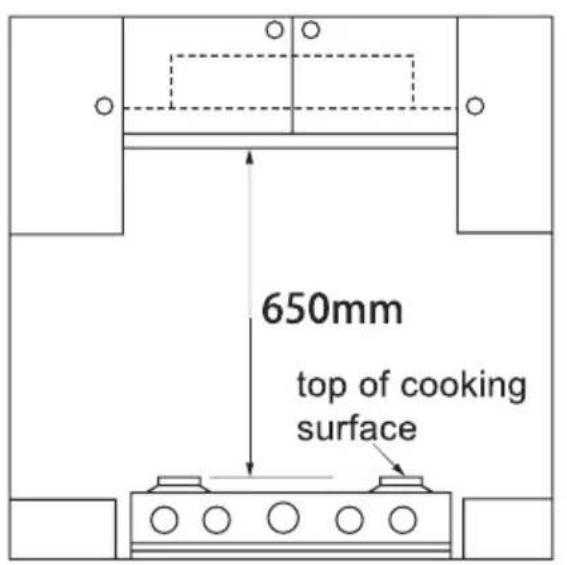
Positioning
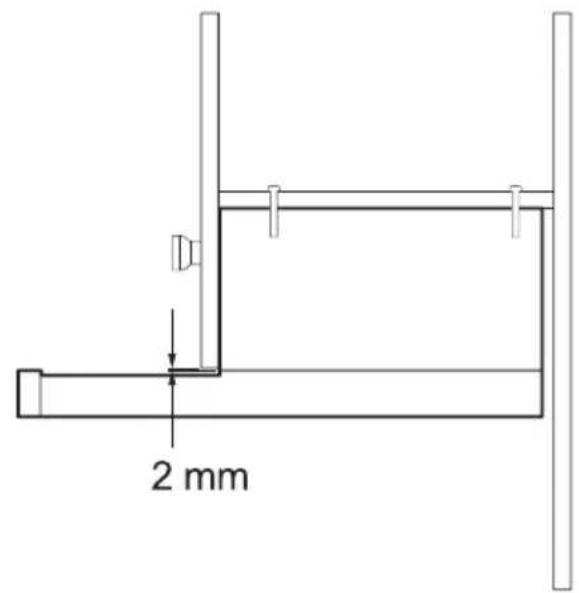
Fixing dimensions


WARNING!
Failure to install the screws or fixing device in accordance with these instructions may result in electrical hazards.
Drilling holes
Drill the holes on top of wooden cupboard
- drill ∅ 7mm hole
- cut ∅ 140mm hole
Fixing the ducting adapter
Connect ∅120mm ducting adapter to the blower outlet.

Mounting the rangehood to the underside of cupboard
Attach the rangehood to wooden support and fix it with the 4 screws supplied.

Fixing the Rear Spacer
Use suitable Rear Spacer to cover the space between the wall and the rangehood and fix it with 2 screws.

Rear spacer can be reversed to suit gap at rear
Fixing flexible duct
Connect ∅125 mm flexible duct to the adapter and fix it.

OPERATING INSTRUCTIONS
Control panel features
To operate the rangehood, pull out the retractable hood and select the extraction level.
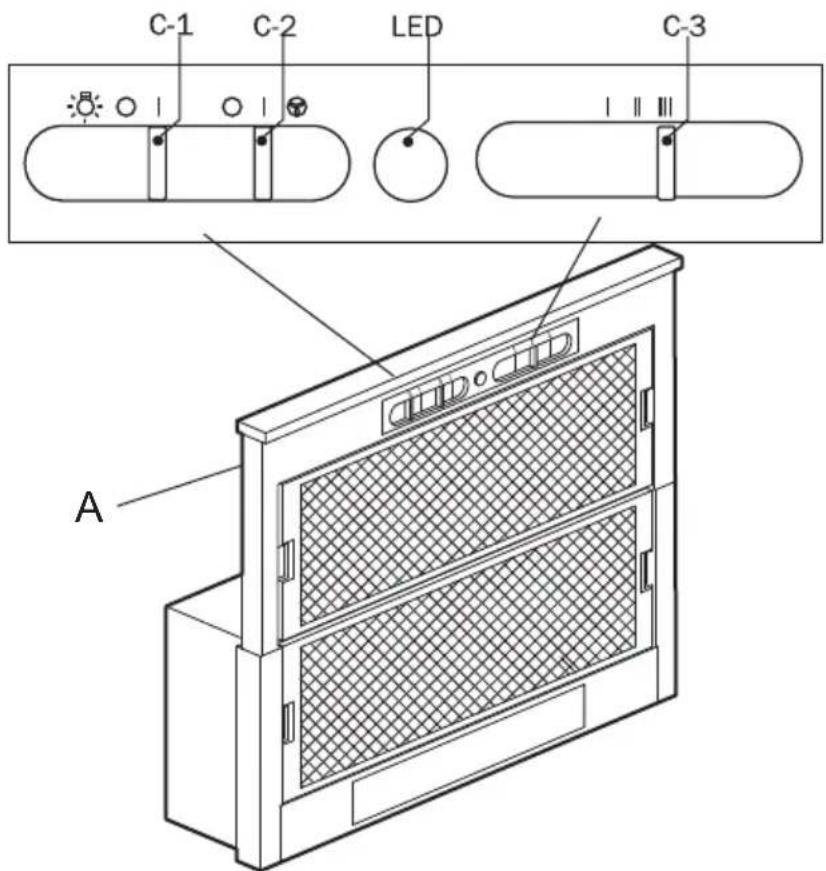
- Pull out the grill (A) as far as possible to 160 mm to achieve the ideal smoke efficiency.
- Slide the switch (C-1) from position "O" to "I" to turn on the light.
- Slide the switch (C-2) from position "O" to "I" to turn on the extractor fan.
- Slide the switch (C-3) to different position "I", "II" and "III" to select low, medium or high speed.

Warning: the lighting should not be used as permanent light source but only for cooking.
CLEANING AND MAINTENANCE

Warning: always switch off the electricity supply before carrying out maintenance work on the hood. In the event of a fault, contact an official distributor or Customer Service.
Exterior Cleaning : Use non-corrosive, liquid detergent and avoid the use of abrasive cleaning products.
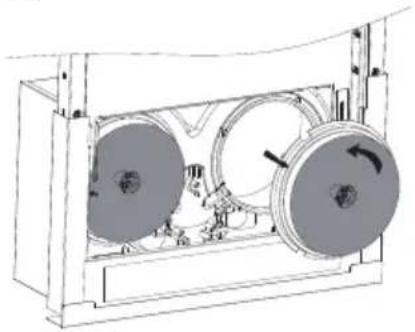
Replacing the lamp
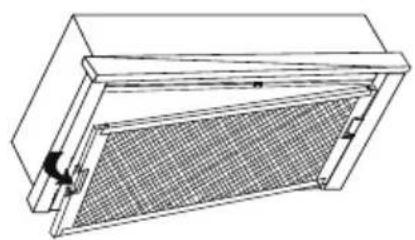
Ensure that the rangehood is unplugged, then slide out the retractable hood and remove the filters. Turn the lamp anti-clockwise to remove then replace the lamp by turning it clockwise.
Note that lamps become hot when in use. Allow the lamps to cool down for a few minutes before changing them.
![graph LR A["Light bulb with upward arrow"] --> B["No protection symbol"] B --> C["Rotating switch 10°"] C --> D["Fuse OFF switch"]](/content/2026/05/933962/images/af48496fb547ae6819dddfa341e893bf4bb3b46c5cb0be049e30644aafaf8ecb.jpg)
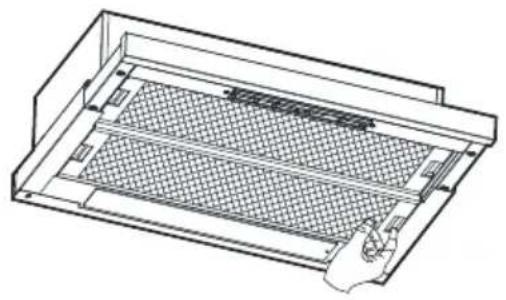

Cleaning Aluminium grease filters
Important! increase the filter cleaning/replacement frequency if the hood is used for more than 2 hours a day. Always use genuine filters from the manufacturer.

1 MONTH


≤ 65°C

Replacing Activated charcoal filters
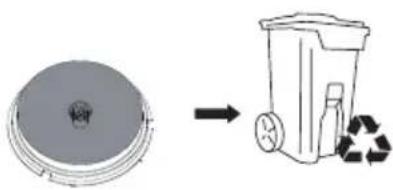
Replace Activated charcoal every 3 months

3 MONTHS


Troubleshooting
| Problem Possible cause Solution | ||
| Excessive vibration. The | appliance is not installed properly on the brackets. | Take down the appliance and check it is properly fixed. |
| The fan blade is damaged. | Switch off the appliance. Repair to be carried out by qualified service personnel only. | |
| The fan motor is not fixed tightly. | ||
| The light is on, but the fan does not work. | The fan blade is jammed. | |
| The motor is damaged. | ||
| Both the light and motor do not work. | Light bulb blown. Replace with a bulb | of the correct rating. |
| Power connection loose. Check power supply. | ||
| Suction performance reduced. | Speed may be too low. Select a higher speed. | |
| Aluminium filters are dirty. Care and maintenance section. | Clean the aluminium filters. (See on). | |
| Top vent might be obstructed. | Clear any obstruction. | |
| Optional vent kit might be twisted. Ensure that the vent kit is fitted according to the manufacturer's instructions. | ||
| The installation may not comply with the manufacturers instructions. | The vent hose should be correct diameter throughout with no reductions or restriction.(See installation section). | |
| Works normally but cooking smells linger. | Carbon filter is not fitted in recirculation mode or is full of grease. maintenance section). | Fit carbon filter or replace the carbon filter (See Care and |
Recycling & disposal
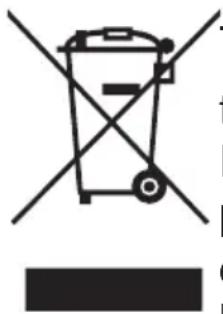
The symbol on the product or on its packaging indicates that this product may not be treated as household waste
Instead it shall be handed over to the applicable collection point for the recycling of electrical and electronic equipment.
By ensuring this product is disposed of correctly,
you will help prevent potential negative consequences for the environment and human health, which could otherwise be caused by inappropriate waste handling of this product.
For more detailed information about recycling of this product, please contact your local city office, your household waste disposal service or the shop where you purchased the product.
中文
親愛的顧客
抽油煙機
(1)

∅120毫米
排氣管接合器
(1)
後方收口墊片
(1)
安装

抽油煙機安裝到廚櫃的下面
使用抽油煙機
控制面板


清潔抽油煙機金屬濾網

≤ 65°C

更換活性碳過濾網
請每三個月更換一次活性碳過濾網。

3個月

故障排除
Customer Service Hotline 等
Service E-mail 電郵地址:8210service@gilman-group.com
Please register now at 請即上網登記:www.toolbox.hk
Website 網址:www.gilman-group.com

Gilman
since 1841

a Gilman Group Company
- USER MANUAL
- EN
- DEAR CUSTOMER
- SAFETY AND WARNINGS
- INSTALLATION INSTRUCTIONS
- CONTENTS OF PACKAGING
- INSTALLATION
- FIXING DIMENSIONS
- WARNING
- DRILLING HOLES
- FIXING THE DUCTING ADAPTER
- MOUNTING THE RANGEHOOD TO THE UNDERSIDE OF CUPBOARD
- FIXING THE REAR SPACER
- FIXING FLEXIBLE DUCT
- OPERATING INSTRUCTIONS
- CONTROL PANEL FEATURES
- CLEANING AND MAINTENANCE
- REPLACING THE LAMP
- CLEANING ALUMINIUM GREASE FILTERS
- REPLACING ACTIVATED CHARCOAL FILTERS
- RECYCLING & DISPOSAL
- 中文
- 親愛的顧客
- 抽油煙機安裝到廚櫃的下面
- 使用抽油煙機
- 控制面板
- 清潔抽油煙機金屬濾網
- 更換活性碳過濾網
Brand : Philco
Model : GH609WNL
Category : Range hood