
Ascent Two - Receiver Phoenix Audio - Free user manual and instructions
Find the device manual for free Ascent Two Phoenix Audio in PDF.


| Product Type | Stereo Receiver |
| Brand | Phoenix Audio |
| Model | Ascent Two |
| Dimensions (W x H x D) | 430 mm x 100 mm x 360 mm |
| Weight | 10 kg |
| Power Output | 50 W per channel (8 ohms, 20 Hz – 20 kHz, THD < 0.08%) |
| Frequency Response | 20 Hz – 20 kHz ±0.5 dB |
| Signal-to-Noise Ratio | 100 dB (IHF-A weighted) |
| Total Harmonic Distortion | < 0.03% (at rated power) |
| Input Sensitivity | 200 mV (line) |
| Input Impedance | 47 kΩ |
| Audio Inputs | 3 x RCA, 1 x Phono (MM), 1 x Digital Coaxial, 1 x Optical |
| Audio Outputs | 1 x Pre-out, 1 x Subwoofer, 1 x Headphone (6.3 mm) |
| Speaker Impedance | 4 – 16 ohms |
| Power Supply | AC 110–240 V, 50/60 Hz |
| Power Consumption | 250 W (max), < 0.5 W (standby) |
| Remote Control | Included (IR) |
| Cabinet Finish | Brushed aluminum / Black |
| Warranty | 2 years |
Frequently Asked Questions - Ascent Two Phoenix Audio
User questions about Ascent Two Phoenix Audio
0 question about this device. Answer the ones you know or ask your own.
Ask a new question about this device
Download the instructions for your Receiver in PDF format for free! Find your manual Ascent Two - Phoenix Audio and take your electronic device back in hand. On this page are published all the documents necessary for the use of your device. Ascent Two by Phoenix Audio.
USER MANUAL Ascent Two Phoenix Audio
Firstly, let us congratulate you on your purchase of the Ascent Two EQ Microphone Pre-Amplifier/DI/Eq. The Ascent Two EQ is a 4 Band Gyratory-based Eq with 12 selectable frequencies, and Mic, Line, and DI inputs We know you will be as pleased with it's sonic qualities as we are.
You are now the proud owner of a Mic-pre/DI/Eq that has the advantages of more than 25 years experience in audio engineering, today's component and manufacturing technology, but still retaining "that sound" uniquely achievable through Class A design.
As you can tell, Phoenix Audio is dedicated to the development of Class A discrete technology used within high build-quality equipment.
The Ascent Two EQ uses our well proven and loved Class A output stage (DSOP-2), but also has our latest breakthrough in transformer-less Class A, Discrete, truly-balanced Mic Input Technology which gives a "valve-like" sound. It also incorporates our high input impedance DI circuitry.
You CAN hear the difference!!!
Ascent Two EQ Specifications
1U rack space unit: With 240V/110V mains voltage input selector switch
Class A (DSOP-2) Output specs. Frequency response: 20Hz to 20kHz +- 0.5dB,
Maximum Output Level: +26dBu @ 1kHz
Noise: -90dB @ 20Hz to 20kHz.
Output connections: XLR and TSR 1/4" Jack on rear
Phoenix Audio's unique Class A, transformer-less, True balanced Mic input stage.
Microphone/Line input: XLR on Rear Panel
DI inputs: 14 " TSR Jack on Front Panel
Individual Earth Lift: Push-button Switches
Gain Range (Mic input): -30 to -70 in 5dB steps With 10dB more available on the fader.
Gain reduction: -15dB pad push-button Mic/Line switch (Mic input)
High Input Impedance DI: Mono 1/4" Jack on front panel (no FETs)
Gain Meter: LED Metering. (Green = 0dB, Yellow = +8dB, corresponding to "4" and "6" on a PPM Meter).
Phantom Power: Switchable phantom on Push-button Switch
High Pass Filter: Roll-off starts at 80Hz @ 6dB per Octave.
Phase Reverse: on Push-button Switch
Frequency Response Mic Input Stage: -0.4dB @ 40Hz, -0.3dB @ 25kHz
Frequency Response: DI Input Stage: -0.3dB @ 40Hz, -0.5dB @ 25kHz
Typical Headroom: +26dB on Mic-Pre stage
Gyratory-based EQ Frequency Centres: (4 Bands) High - 25K (Sheen) 15K, 10K, Hi Mid - 6K, 3K, 1K6, Low Mid - 800Hz, 400Hz, 200Hz, Low - 130Hz, 80Hz, 40Hz
EQ Cut/Boost Levels: 16dB Cut/Boost Per Band with fully detented pots in 21 positions
DI Stage gain: Maximum of 30dB gain range
CONNECTIONS AND CONTROLS
Front Panel
Rotary Gain Sensitivity Switch: The sensitivity switch operates in both Mic and Line Mode. For Microphone mode the switch's gain range is marked from -30dB to -70dB. When the Pad switch is pressed in the sensitivity of the gain control is -15dB lower than the marked gain.
Output Level Rotary knob: The Output level knob controls the level at the output XLR on the rear panel only. It does not affect the input sensitivity.
Level LED's: The LED's are marked 0 (Green) and +8 (Red). These are set to illuminate at 0dB and +8dB (Corresponding to 4 and 6 on a PPM Meter). The LED's are PPM style metering and have some hysteresis to allow a better view of fast changing levels.
These LED's are connected to the OUTPUT stage of the unit to give you a clear view of what level is being sent to external equipment.
DI Input ¼" Jack socket: The Jack socket is a TS socket wired Tip-Hot, Sleeve-Cold. The DI input is a high input impedance circuit (without the use of FETs), and is capable of accepting a wide range of instruments, from keyboards to guitars and more.
EQL Push Button: Engages the Gyratory Based Eq circuit when depressed.
DI Push Button: Disconnects the Input XLR and engages the DI Jack on the front panel.
HPF Push Button: Engages the High Pass Filter. The filter is active regardless of which input is being used.
Phase Push Button: Reverses the Phase of the Input XLR only.
+48V Push Button: Applies 48V Phantom Power to the Input XLR. The phantom power will be applied to the XLR in both Mic and Line mode.
Mic/Line Pad Push Button: Switches the Input XLR between Mic/Line and a 15db lower level (depressed) mode and is always lit orange.

Earth Lift Push Button: Disconnects internal 0v from the chassis earth. This is for use when using microphones with their own PSU, or can be useful in situations where hum is being created by an earth loop. This push-button does not disconnect the chassis safety earth from the mains earth.
REAR PANEL
Mic Input XLR: This XLR accepts both Microphone and Line level inputs. These can be balanced or unbalanced inputs.
Output XLR: Transformer balanced output. Can be used at the same time as the Output 14 " TRS Jack, as long as total loading does not exceed 200R.
INPUT and OUTPUT connections:
The Ascent Two EQ is fitted with an XLR input on the rear panel. The XLR's are industry-standard Pin 1 - Ground, Pin 2 - Hot, Pin 3 - Cold.
The DI input is a standard 1/4" (6.35mm) mono jack socket (wired Standard - Tip-hot, Sleeve-Ground)
The Output of the unit is on the rear of the unit and is available on both a 3 Pin XLR (wired as the input XLR), and a Stereo 1/4" (6.35mm) Jack socket (wired Tip-Hot, Ring-Cold, Sleeve-Ground). The outputs are wired in parallel.
ASCENT TWO EQ SETUP INSTRUCTIONS
The Ascent Two EQ has two LED's to indicate level. These LED's are connected to the OUTPUT of the unit, NOT the mic-pre section. This makes the LED's indication much more useful for setting up levels on the Mic-Pre and the DI, and to give you a clear view of what level is being sent to external equipment.
The LED's are marked 0 (Green) and +8 Yellow. These are set to illuminate at 0dB and +8dB (4 and 6 on a PPM Meter).
The Yellow LED has some hysteresis so that the signal peaks can be seen.
The Mic GAIN Knob and the OUTPUT level knob work independently of each other. The mic GAIN knob has no effect on the DI input.
The simplest method of setup is to plug a microphone into the Mic input, turn the Mic GAIN knob to it's minimum position (-30dB) and set the OUTPUT level knob to around the 2 'O' Clock position.
While a constant sound source is applied to the microphone, turn the Mic GAIN knob one click at a time, until the 0dB (Green) Led is just illuminated.
The Mic gain is now set to optimum, but with PLENTY of headroom available, and the output will be around 0dB.
The OUTPUT level knob is provided to allow OUTPUT level adjustment. If you prefer to have a “hotter” output, turn the OUTPUT knob up to suit. You can turn the OUTPUT knob fully up without any distortion as there is plenty of headroom on the output stage.
Also, if you prefer to have a LOWER level on the output (I.E.: for semi-pro outboard gear which requires around -10dB input), simply turn the OUTPUT knob down to taste.
When using the DI input, plug the external signal source into the mono jack on the front panel, and adjust the OUTPUT Level so that the Green Led is just illuminated. This will give an output Level of 0dB and can be adjusted to taste.
Additional Setup Information
Firstly, unlike a lot of mic-pre's, the yellow LED is not a warning that the output of the unit is clipping. It is purely there to indicate +8dB output level.
The DRS units were originally fitted with a Green LED (0dB) and a Red LED (+8dB), but we found that the Red LED was making users believe that the unit was clipping (Red = danger = clipping) which was NOT the case, so this was changed to a Yellow LED in later models so that users tended to not regard it as a "Clipping" LED.
You can turn the output knob all the way up to maximum and still be sure the output of the unit will not clip. The amount of headroom on both the input AND output stage is HUGE!!! There will never be a time when you can't get a hot enough output, only occasionally too hot an input (then you just simply turn down the input gain knob (in Mic mode), or switch to line mode.
The best thing to do is ignore the Yellow LED if you want a very hot output, and set the unit up as follows:
When the Ascent Two EQ is switched into DI mode, the Mic/Line Sensitivity switch and Mic/Line push button become disconnected and are not used in DI mode.
For Microphone Input:
1: Set the output knob to about the 2 'O' Clock position. (or just over half-way)
2: Set the mic input level so that the green LED is just beginning to come on solidly. (this indicates 0dB OUTPUT level)
3: If the Yellow LED is coming on (+8dB OUTPUT level) and you think the unit is clipping it is NOT the output stage, just step the input gain knob back one click.
4: Turn the output knob up to the level you would like (If you wanted a very hot output level, ignore the red (or Yellow) LED).
We'll try to explain a little more......The LED's on the front panel are there to give you an indication of output level only (0dB and +8dB, corresponding to 4 and 6 on a PPM Meter), this is because most semi-pro (and indeed, a lot of Professional!) equipment cannot handle the full output of the Ascent Two EQ, and the LED's give you a good indication of output level so that you can determine where in the audio chain you may be getting clipping. They do NOT indicate that the Ascent Two EQ is clipping.
The only place you might get clipping on the Ascent Two EQ is in the INPUT stage (although the headroom on the INPUT stage is very high!)....... So if you believe the Ascent Two EQ IS clipping, just turn the INPUT down, but the OUTPUT can be turned up to maximum if you wanted.
The Ascent Two EQ is capable of handling a huge input range, from -70dB right up to 0dB (Mic mode), and STILL have 10dB of headroom. The output stage can easily deliver +25dB!!! Please don't automatically believe the Ascent Two EQ is clipping!
Each of the four EQ bands has 16db cut and boost so its very powerful and each click of the detented pots will equate to around 1.5db in either cut or boost. How they are used in application settings could be like this :
Vocals :
Boost at 25k to inject some air into the vocal
Boost at either 800hz or 400hz
Cut at 3k
Cut at 130hz or 80hz
Acoustic guitar :
Boost at 10k or 15k
Cut at 200hz
Electric Guitar :
Cut at 130hz
Boost at 200hz
Boost at 6k
Cut at 10k
Drums :
Kick Drum: HI-PASS, Boost 80hZ, Cut 400hZ, Boost 6kHz, Cut 10kHz
Snare Drum: HI-PASS, Cut 80hZ, Boost 200hZ, Cut 1kHz, Boost 10kHz
Rack Tom: HI-PASS, Boost 130hZ, Cut 400hZ, Boost 6kHz, Cut 10kHz
Floor Tom: Boost 80HZ, Cut 800HZ, Boost 6kHz, Cut 10kHz
For DI input:
Simply insert the input signal into the DI jack, and turn up the level using the Output knob only, (remember, the -30dB pad push-button and Mic-sensitivity switch are not operable in the DI mode).
If the Green LED is Just lit, then the unit will be sending a level of 0dB to the output XLR, and if the Yellow LED is lit, then it is sending +8dB to the output XLR. this is NOT the maximum levels the unit will output, but is purely and indication" of level. If you want a much "Hotter" output, then simply turn up the output level knob to whatever you need. You can turn the output level knob to almost maximum without any fear of distortion in the output stage.(This still leaves +10dB of headroom).
Both output connections are wired in parallel and both can be used at the same time (for instance, the XLR connected to external recorder, the Jack to monitor).
Also, "Y" cables and splitters can be used to send the output signal to various destinations at one time.
Users should be aware that using both outputs together will mutually load the output transformer of the Ascent Two EQ, and loading should not exceed a total of 200R.

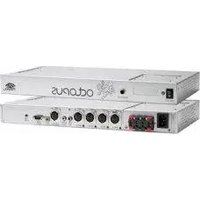


Brand : Phoenix Audio
Model : Ascent Two
Category : Receiver