
DRS-1R/500 - Receiver Phoenix Audio - Free user manual and instructions
Find the device manual for free DRS-1R/500 Phoenix Audio in PDF.


| Product Type | Professional Audio Receiver |
| Model | DRS-1R/500 |
| Brand | Phoenix Audio |
| Dimensions (W x H x D) | 482 x 44 x 250 mm (19" rack mount, 1U) |
| Weight | 2.5 kg |
| Power Supply | 100-240 V AC, 50/60 Hz |
| Power Consumption | 30 W |
| Frequency Response | 20 Hz – 20 kHz ±0.5 dB |
| Signal-to-Noise Ratio | ≥ 90 dB |
| Total Harmonic Distortion | < 0.05% at 1 kHz |
| Input Sensitivity | 0 dBm nominal |
| Output Level | +24 dBu maximum |
| Audio Inputs | 2x XLR, 2x RCA, 1x AES/EBU |
| Audio Outputs | 2x XLR balanced, 1x RCA unbalanced |
| Control Interface | RS-232, GPI |
| Operating Temperature | 0°C to 40°C |
| Storage Temperature | -20°C to 60°C |
| Relative Humidity | 20% to 80% non-condensing |
| Cooling | Convection, no fan |
| Certifications | CE, FCC, RoHS |
| Included Accessories | Power cord, rack ears, user manual |
Frequently Asked Questions - DRS-1R/500 Phoenix Audio
User questions about DRS-1R/500 Phoenix Audio
0 question about this device. Answer the ones you know or ask your own.
Ask a new question about this device
Download the instructions for your Receiver in PDF format for free! Find your manual DRS-1R/500 - Phoenix Audio and take your electronic device back in hand. On this page are published all the documents necessary for the use of your device. DRS-1R/500 by Phoenix Audio.
USER MANUAL DRS-1R/500 Phoenix Audio
Firstly, let us congratulate you on your purchase of the DRS-1R/500 Microphone Pre-Amplifier designed for the API 500 series Lunchbox or suitable compatible rack.
We know you will be as pleased with it's sonic qualities as we are.
You are now the proud owner of a mic-pre/DI that has the advantages of more than 40 years experience in audio engineering, today's component and manufacturing technology, but still retaining "that sound" uniquely achievable through Class A design.
As you can tell, Phoenix Audio is dedicated to the development of Class A discrete echnology used within high build-quality equipment.
The DRS-1 Mic-Pre/DI uses our well proven and loved Class A output stage (DSOP2), but also has our latest breakthrough in transformer-less Class A, Discrete Mic Input Technology which gives a "valve-like" sound. It also incorporates our high input impedance DI circuitry.
You CAN hear the difference!!!
DRS-1R/500 Specifications
API 500 series compatible rack unit:
Class A (DSOP2) Output specs. Frequency response: 20Hz to 20kHz + 0.5dB,
Maximum Output = +26dBu @ 1kHz, Noise = -90dB @ 20Hz to 20kHz.
Input connections: TRS 1/4" Jack on front for DI input
Phoenix Audio's unique Class A, transformer-less, True electronically balanced Mic input stage.
Gain Range (Mic input): -30 to -70 in 5dB steps With 10dB more available on the output fader.
Gain reduction: -30dB pad push-button Mic/Line switch (Mic input)
High Input Impedance DI: Mono 1/4" Jack on front panel
Gain Meter: LED Metering. ((Green = -2dbu, +4dbu & 10dBu, Yellow = +13dbu Red = +16dBu)
Phantom Power: Switchable phantom on Push-button Switch
High Pass Filter: on Push-button Switch set at 120hz 6db roll off per octave
Phase Reverse: on Push-button Switch
Mute : on Push-button Switch
Frequency Response Mic Input Stage: -0.4dB @ 40Hz, -0.3dB @ 25kHz
Frequency Response: DI Input Stage: -0.3dB @ 40Hz, -0.5dB @ 25kHz
Typical Headroom: +24dB on Mic-Pre stage
DI Stage gain: Maximum of 30dB
NOTE: The MIC/Line input selection push-button stays illuminated until the input source is changed to the 1/4" jack socket by pressing the DI button.
DRS-1R/500 SETUP INSTRUCTIONS
The DRS-1R has a vertical row of LED's to indicate level. These LED's are

connected to the OUTPUT of the unit, NOT the mic-pre section. This makes the LED's indication much more useful for setting up levels on the Mic-Pre and the DI, and to give you a clear view of what level is being sent to external equipment.
The LED's are marked -2, +4 and +10 (Green) and +13 (Yellow) and +18 (Red). When the Red Led lights, this isn't a sign of clipping as the Pre-amp will have at least another 8db of headroom.
The Mic Sensitivity Knob and the OUTPUT level knob work independently of each other. The Mic Sensitivity knob has no effect on the DI input.
The simplest method of setup is to plug a microphone into the Mic input, turn the Mic sens. knob to it's minimum position (-30dB) and set the OUTPUT level knob to around the 2 'O' Clock position.
While a constant sound source is applied to the microphone, turn the Mic sens. knob one click at a time, until the 0dB (Green) Led is just illuminated.
The Mic gain is now set to optimum, but with PLENTY of headroom Available and the output will be around 0dB.
The OUTPUT level knob is provided to allow OUTPUT level adjustment. If you prefer to have a “hotter” output, turn the OUTPUT knob up to suit. You can turn the OUTPUT knob fully up without any distortion as there is plenty of headroom on the output stage.
Also, if you prefer to have a LOWER level on the output (I.E.: for semi-pro outboard gear which requires around -10dB input), simply turn the OUTPUT knob down to taste.
When using the DI input, plug the external signal source into the 1/4" jack on the front panel, and adjust the OUTPUT Level so that the 0dB Green Led is just illuminated. This will give an output Level of 0dB and can be adjusted to taste.
The combination of the Class A discrete output stage and our custom wound coupled transformer will impart second harmonics into your music and also a form of compression, similar to tape compression. If you wanted to have a fairly clean tone for say acoustic music then you would employ more input gain and less output gain. For the complete opposite where you use a lot of output gain and less input gain, you will get far more colouration and saturation, this maybe a good setting for rock music. For a degree of both settings you should use some input gain and some output gain, this might be a good setting for RnB/pop music.
Additional Setup Information
Firstly, unlike a lot of mic-pre's, the Red LED is not a warning that the output of the unit is clipping. It is purely there to indicate +16dB output level.
You can turn the output knob all the way up to maximum and still be sure the output of the unit will not clip. The amount of headroom on both the input AND output stage is HUGE!!! There will never be a time when you can't get a hot enough output, only occasionally too hot an input (then you just simply turn down the Mic Sens. knob (in Mic mode).
When the DRS-1R is switched into DI mode, the Mic-Sensitivity switch becomes disconnected and not in use in DI mode.
For Microphone Input:
1: Set the output knob to about the 12 'O' Clock position. (or just over half-way)
2: Set the mic input level so that the 0dB green LED is just beginning to come on solidly. (this indicates around 0dB OUTPUT level)
3: If the Red LED is coming on (+16dB OUTPUT level) and you think the unit is clipping it is NOT the output stage, just step the input gain knob back one click or two.
4: Turn the output knob up to the level you would like (If you wanted a very hot output level, ignore the Red LED.
Lets try to explain a little more......The LED's on the front panel are there to give you an indication of output level only. This is because most semi-pro (and indeed, a lot of Professional!) equipment cannot handle the full output of the DRS-1R, and the LED's give you a good indication of output level so that you can determine where in the audio chain you may be getting clipping. They do NOT indicate that the DRS-1R's OUTPUT stage is clipping.
The only place you might get clipping on the DRS-1R is in the INPUT stage (although the headroom on the INPUT stage is very high!)....... So if you believe the DRS-1R IS clipping, just turn the INPUT down, but the OUTPUT can be turned up to maximum if you wanted. The DRS-1R is capable of handling a huge input range, from -70dB right up to 0dB, and STILL have 10dB of headroom. The output stage can easily deliver +26dB!!! Please don't automatically believe the DRS-1R is clipping!
For DI input:
Simply insert the input signal into the DI jack, and turn up the level using the Output knob only, (remember, the Mic-sensitivity switch is not operable in the DI mode).
If the first (bottom) Green LED is Just lit, then the unit will be sending a level of -2dB to the output XLR the green LEDs go up to +10dbu, and if the Yellow LED is lit, then it is sending +13dB to the output XLR, and finally the Red LED is set at +16dbu. This is NOT the maximum levels the unit will output, but is purely and indication" of level. If you want a much "Hotter" output, then simply turn up the output level knob to whatever you need. You can turn the output level knob to almost maximum without any fear of distortion in the output stage (This still leaves +10dB of headroom, above the RED led level.
INPUT and OUTPUT connections:
The DRS1R is fitted with an XLR input and output on both the rear panel of your API rack or API approved rack.
If the +48V phantom power is button is engaged it will apply +48V to the XLR input on the rack.
The DI input is a standard 1/4" (6.35mm) mono jack socket (wired Standard – Tip-hot, Sleeve-Ground). It will also accept a 1/4" stereo jack.

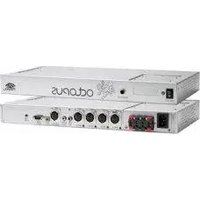

Brand : Phoenix Audio
Model : DRS-1R/500
Category : Receiver