LT3 - Lawn mower Baumr-AG - Free user manual and instructions
Find the device manual for free LT3 Baumr-AG in PDF.


| Product Type | Lawn Mower |
| Brand | Baumr-AG |
| Model | LT3 |
| Cutting Width | 45 cm (18 inches) |
| Engine Type | 4-Stroke Petrol Engine |
| Engine Displacement | 140 cc |
| Cutting Height Adjustment | 25-75 mm (6 positions) |
| Grass Collection Bag Capacity | 50 liters |
| Weight | 28 kg |
| Dimensions (L x W x H) | 80 x 60 x 40 cm |
| Power Source | Unleaded Petrol |
| Deck Material | Steel |
| Starting System | Recoil Starter with Pull Cord |
| Wheel Size (Front/Rear) | 20 cm (8") / 25 cm (10") |
| Drive System | Manual Push (No Self-Propelled) |
| Safety Features | Blade Brake, Operator Presence Control |
| Noise Level | 95 dB(A) |
| Vibration Level | < 2.5 m/s² |
| Oil Capacity | 0.5 litres |
| Fuel Tank Capacity | 1.0 litre |
| Frame Material | Steel |
| Warranty | 2 Years |
| Included Accessories | Grass Bag, Fuel Measuring Bottle, Spark Plug Wrench |
Frequently Asked Questions - LT3 Baumr-AG
User questions about LT3 Baumr-AG
0 question about this device. Answer the ones you know or ask your own.
Ask a new question about this device
Download the instructions for your Lawn mower in PDF format for free! Find your manual LT3 - Baumr-AG and take your electronic device back in hand. On this page are published all the documents necessary for the use of your device. LT3 by Baumr-AG.
USER MANUAL LT3 Baumr-AG
[Revision 6.0 May 2023]
THE BATTERY MAY HAVE SOME CHARGE ON ARRIVAL, IT IS IMPORTANT HOWEVER THAT THE BATTERY IS CHARGED PRIOR TO USE.
Safety
Safety messages are designed to alert you to possible dangers or hazards that could cause death, injury or equipment or property damage if not understood or followed. Safety messages have the following symbols:

You WILL be KILLED or SERIOUSLY INJURED if you do not follow instructions.
It is vital that you read and understand this user manual before using the product, including safety warnings, and any assembly and operating instructions. Keep the manual for future reference.
Safety precautions and recommendations detailed here must be fully understood and followed to reduce the risk of injury, fire, explosion, electrical hazard, and/or property damage.
Safety information presented here is generic in nature – some advice may not be applicable to every product. The term "equipment" refers to the product, be it electrical mains powered, battery powered or combustion engine powered.
- Before Use - If you are not familiar with the safe operation/handling of the equipment or are in any way unsure of any aspect of suitability or correct use for your application, you should complete training conducted by a person or organization qualified in safe use and operation of this equipment, including fuel/electrical handling and safety.
- Do NOT operate the equipment in flammable or explosive environments, such as in the presence of flammable liquids, gases or dust. The equipment may create sparks or heat that may ignite flammable substances.
- Keep clear of moving parts.
- Equipment may be a potential source of electric shock or injury if misused.
- Do NOT operate the equipment if it is damaged, malfunctioning or is in an excessively worn state.
- Do NOT allow others to use the equipment unless they have read this manual and are adequately trained.
- Keep packaging away from children - risk of suffocation! Operators must use the equipment correctly. When using the equipment, consider conditions and pay due care to persons and property.
General Work Area Safety
• Work areas should be clean and well it.
- Do not operate the equipment if bystanders, animals etc are within operating range of the equipment or the general work area.
- If devices are provided for connecting dust extraction / collection facilities, ensure these are connected and used properly. Dust collection can reduce dust-related hazards.

You CAN be KILLED or SERIOUSLY INJURED if you do not follow instructions.

You CAN be INJURED if you do not follow instructions or equipment damage may occur.
General Personal Safety
- Wear appropriate protective equipment when operating, servicing, or when in the operating area of the equipment to help protect from eye and ear injury, poisoning, burns, cutting and crush injuries. Protective equipment such as safety goggles, respirators, non-slip safety footwear, hard hat, hearing protection etc should be used for appropriate equipment / conditions. Other people nearby should also wear appropriate personal protective equipment. Do not wear loose clothing or jewellery, which can be caught in moving parts. Keep hair and clothing away from the equipment.
- Stay alert and use common sense when operating the equipment. Do not overreach. Always maintain secure footing and balance.
- Do not use the equipment if tired or under the influence of drugs, alcohol or medication.
- This equipment is not intended for use by persons with reduced physical, sensory or mental capabilities.
General Fuel Safety
- Petrol/fuel/gasoline is extremely flammable – keep clear of naked flames or other ignition sources.
- Do not spill fuel. If you spill fuel, wipe it off the equipment immediately – if fuel gets on your clothing, change clothing.
- Do NOT smoke near fuel or when refuelling.
- Always shut off the engine before refuelling.
- Do NOT refuel a hot engine.
- Open the fuel cap carefully to allow any pressure build-up in the tank to release slowly.
• Always refuel in well ventilated areas. - Always check for fuel leakage. If fuel leakage is found, do not start or run the engine until all leaks are fixed.
General Carbon-Monoxide Safety
- Using a combustion engine indoors CAN KILL IN MINUTES. Engine exhaust contains carbon-monoxide – a poison you cannot smell or see.
- Use combustion engines OUTSIDE only, and far away from windows, doors and vents.
General Equipment Use and Care
- The equipment is designed for domestic use only.
- Handle the equipment safely and carefully.
- Before use, inspect the equipment for misalignment or binding of moving parts, loose components, damage or any other condition that may affect its operation. If damaged, have the equipment repaired by an authorised service centre or technician before use.
- Prevent unintentional starting of the equipment - ensure equipment and power switches are in the OFF position before connecting or moving equipment. Do not carry equipment with hands or fingers touching any controls. Remove any tools or other items that are not a part of the equipment from it before starting or switching on.
- Do not force the equipment. Use the correct equipment for your application. Equipment will perform better and be safer when used within its design and usage parameters.
- Use the equipment and accessories etc. in accordance with these instructions, considering working conditions and the work to be performed. Using the equipment for operations different from those intended could result in hazardous situations.
- Always keep equipment components (engines, hoses, handles, controls, frames, housings, guards etc) and accessories (cutting tools, nozzles, bits etc) properly maintained. Keep the equipment clean and, where applicable, properly lubricated.
- Store the equipment out of reach of children or untrained persons. To avoid burns or fire hazards, let the equipment cool completely before transporting or storing. Never place or store the equipment near flammable materials, combustible gases or liquids etc.
- The equipment is not weather-proof, and should not be stored in direct sunlight, at high ambient temperatures or locations that are damp or humid.
- Do not clean equipment with solvents, flammable liquids or harsh abrasives.
- For specific equipment safety use and care, see Equipment Safety.
General Electrical Safety
- Inspect electrical equipment, extension cords, power bars, and electrical fittings for damage or wear before each use. Repair or replace damaged equipment immediately.
- Ensure all power sources conform to equipment voltage requirements and are disconnected before connecting or disconnecting equipment.
- When wiring electrically powered equipment, follow all electrical and safety codes.
- Wherever possible, use a residual current device (RCD).
- High voltage / high current power lines may be present. Use extreme caution to avoid contact or interference with power lines. Electrical shock can be fatal.
General Electrical Safety
- Electrically grounded equipment must have an approved cord and plug and be connected to a grounded electrical outlet.
- Do NOT bypass the ON/OFF switch and operate equipment by connecting and disconnecting the electrical cord.
- Do NOT use equipment that has exposed wiring, damaged switches, covers or guards.
- Do NOT use electrical equipment in wet conditions or in damp locations.
- Do NOT use electrical cords to lift, move or carry equipment.
- Do NOT coil or knot electrical cords, and ensure electrical cords are not trip hazards.
General Service Information
- The equipment must be serviced or repaired at authorised service centres by qualified personnel only.
- Replacement parts must be original equipment manufacturer (OEM) to ensure equipment safety is maintained.
- Do NOT attempt any maintenance or repair work not described in this manual.
- After use, the equipment and components may still be hot – allow the equipment to cool and disconnect spark plugs and/or electrical power sources and/or batteries from it before adjusting, changing accessories or performing repair or maintenance.
- Do NOT adjust while the equipment is running.
- Perform service related activities in suitable conditions, such as a workshop.
- Replace worn, damaged or missing warning/safety labels immediately.
Danger! When using the equipment, a few safety precautions must be observed to avoid injuries and damage. Please read the complete operating instructions and safety regulations with due care. Keep this manual in a safe place, so that the information is available at all times. If you give the equipment to any other person, hand over these operating instructions and safety regulations as well. We cannot accept any liability for damage or accidents which arise due to a failure to follow these instructions and the safety instructions.
Warning! Read all safety warnings, instructions, illustrations and specifications provided with this power tool. Failure to follow all instructions listed below may result in electric shock, fire and/or serious injury.
Save all warnings and instructions for future reference.
The term "power tool" in the warnings refers to your mains-operated (corded) power tool or battery-operated (cordless) power tool.
WORK AREA SAFETY
- Keep work area clean and well lit. Cluttered or dark areas invite accidents.
- Do not operate power tools in explosive atmospheres, such as in the presence of flammable liquids, gases or dust. Power tools create sparks which may ignite the dust or fumes.
- Keep children and bystanders away while operating a power tool. Distractions can cause you to lose control.
ELECTRICAL SAFETY
- Power tool plugs must match the outlet. Never modify the plug in any way. Do not use any adapter plugs with earthed (grounded) power tools. Unmodified plugs and matching outlets will reduce risk of electric shock.
- Avoid body contact with earthed or grounded surfaces, such as pipes, radiators, ranges, and refrigerators. There is an increased risk of electric shock if your body is earthed or grounded.
- Do not expose power tools to rain or wet conditions. Water entering a power tool will increase the risk of electric shock.
- Do not abuse the cord. Never use the cord for carrying, pulling, or unplugging the power tool. Keep cord away from heat, oil, sharp edges or moving parts. Damaged or entangled cords increase the risk of electric shock.
- When operating a power tool outdoors, use an extension cord suitable for outdoor use. Use of a cord suitable for outdoor use reduces the risk of electric shock.
- If operating a power tool in a damp location is unavoidable, use a residual current device (RCD) protected supply. Use of an RCD reduces the risk of electric shock.
PERSONAL SAFETY
- Stay alert, watch what you are doing and use common sense when operating a power tool. Do not use a power tool while you are tired or under the influence of drugs, alcohol or medication. A moment of inattention while operating power tools may result in serious personal injury.
- Use personal protective equipment. Always wear eye protection. Protective equipment such as a dust mask, non-skid safety shoes, hard hat or hearing protection used for appropriate conditions will reduce personal injuries.
- Prevent unintentional starting. Ensure the switch is in the off-position before connecting to power source and/or battery pack, picking up or carrying the tool. Carrying power tools with your finger on the switch or energising power tools that have the switch on invites accidents.
- Remove any adjusting key or wrench before turning the power tool on. A wrench or a key left attached to a rotating part of the power tool may result in personal injury.
- Do not overreach. Keep proper footing and balance at all times. This enables better control of the power tool in unexpected situations.
- Dress properly. Do not wear loose clothing or jewellery. Keep your hair and clothing away from moving parts. Loose clothes, jewellery or long hair can be caught in moving parts.
- If devices are provided for the connection of dust extraction and collection facilities, ensure these are connected and properly used. Use of dust collection can reduce dust-related hazards.
- Do not let familiarity gained from frequent use of tools allow you to become complacent and ignore tool safety principles. A careless action can cause severe injury within a fraction of a second.
POWER TOOL USE AND CARE
- Do not force the power tool. Use the correct power tool for your application. The correct power tool will do the job better and safer at the rate for which it was designed.
- Do not use the power tool if the switch does not turn it on and off. Any power tool that cannot be controlled with the switch is dangerous and must be repaired.
- Disconnect the plug from the power source and/or remove the battery pack, if detachable, from the power tool before making any adjustments, changing accessories, or storing power tools. Such preventive safety measures reduce the risk of starting the power tool accidentally.
- Store idle power tools out of the reach of children and do not allow persons unfamiliar with the power tool or these instructions to operate the power tool. Power tools are dangerous in the hands of untrained users.
- Maintain power tools and accessories. Check for misalignment or binding of moving parts, breakage of parts and any other condition that may affect the power tool's operation. If damaged, have the power tool repaired before use. Many accidents are caused by poorly maintained power tools.
- Keep cutting tools sharp and clean. Properly maintained cutting tools with sharp cutting edges are less likely to bind and are easier to control.
- Use the power tool, accessories and tool bits etc. in accordance with these instructions, taking into account the working conditions and the work to be performed. Use of the power tool for operations different from those intended could result in a hazardous situation.
- Keep handles and grasping surfaces dry, clean and free from oil and grease. Slippery handles and grasping surfaces do not allow for safe handling and control of the tool in unexpected situations.
SERVICE
- Have your power tool serviced by a qualified repair person using only identical replacement parts. This will ensure that the safety of the power tool is maintained.
BATTERY TOOL USE AND CARE
- Ensure the switch is in the off position before inserting battery pack. Inserting the battery pack into power tools that have the switch on invites accidents.
- Recharge only with the charger specified by the manufacturer. A charger that is suitable for one type of battery pack may create a risk of fire when used with another battery pack.
- Use power tools only with specifically designated battery packs. Use of any other battery packs may create a risk of injury and fire.
- When battery pack is not in use, keep it away from other metal objects like paper clips, coins, keys, nails, screws, or other small metal objects that can make a connection from one terminal to another. Shorting the battery terminals together may cause burns or a fire.
- Under abusive conditions, liquid may be ejected from the battery; avoid contact. If contact accidentally occurs, flush with water. If liquid contacts eyes, additionally seek medical help. Liquid ejected from the battery may cause irritation or burns.
ADDITIONAL SAFETY INSTRUCTIONS FOR THE CHARGER
- Your tool with Lithium Ion batteries may only be charged with the specific designed Lithium Ion battery charger purchased with the tool. IT IS DANGEROUS TO USE ANY OTHER BATTERY CHARGER TO CHARGE YOUR TOOL. Do not attempt to charge the battery pack with any other charger than the one supplied.
- Before using the charger, read all the instructions, labels and cautionary markings on the charger and battery pack as well as the instructions on using the battery pack.
- Do not use the charger if it has been subjected to a heavy knock, dropped or otherwise damaged in anyway. Take the charger to an authorised service centre for a check or repair.
- Do not disassemble the charger. Opening or removing covers may expose you to dangerous voltages or other risks. Incorrect reassembly can cause electric shock when you use the tool or charger again. Take the charger to a power tool repair centre when service or repair is required.
- DANGER. If the battery pack is cracked or damaged in any other way, do not insert it in the charger. Do not plug anything other than your tool into the charger, as other objects may touch dangerous voltage points or short out parts, which could result in fire or electric shock.
- Do not place the tool or charger on an uneven surface, as a fall may cause serious damage.
- Never place the tool or charger near or over a heat source such as a radiator or heater.
- Do not operate the charger in a cabinet or other enclosure unless proper ventilation is provided.
- Use the battery charger indoors only.
- WARNING. Do not allow any liquid to come into contact with the charger. There is a danger of electric shock. Do not position the tool or battery charger near water, for example, near a sink, wash bowl or toilet. Do not spill liquid of any kind on the tool or charger. Doing so may short out parts. Causing damage to the product and creating the risk of fire or electric shock.
- To reduce the risk of an electric shock, unplug the charger from the power supply before attempting to clean it. To clean tool or charger, wipe with a damp cloth. Use of any other cleaners is not recommended.
- Do not place any object on to or allow anything to rest on the charger.
- Make sure that the charger cable is positioned where it will not be stepped on, tripped over or otherwise subjected to damage or stress. Keep the lead away from operating machinery.
- Do not pull on the lead of the charger to disconnect it from the mains power socket.
- Do not use an extension cord unless it is absolutely necessary. The use of an improper extension cord could cause the risk of fire, electric shock or electrocution.
- Never attempt to connect two chargers together.
- Do not charge batteries or use the tool and battery pack in locations where the temperature may be below 40^(4^) or exceed 104^(40^) such as alongside sheds or metal structures.
- If you wish to charge a second battery pack, unplug the charger from the mains supply and leave it for at least 15 minutes. After this time you can charge a second battery pack.
ADDITIONAL SAFETY INSTRUCTIONS RELATED TO THE BATTERY PACK AND BATTERY SAFETY
- Use only supplier-approved batteries supplied with the Tool or other supplier-approved replacements.
- Do not use the battery to power any device other than the tool it was sold with.
- Charge the battery only with the supplier-approved charger supplied with the tool or other supplier-approved replacements and according to the instructions in this User Manual.
- Do not charge the battery in a place where static electricity is generated nor let the battery touch something that is statically charged.
- The battery can be stored at temperatures between 40^(4^) and 104^(40^) .
- Never store or leave your lithium ion battery in temperatures over that recommended otherwise fire may occur.
- DO NOT store the Lithium Ion battery anywhere that the temperature can easily reach higher temperatures than recommended -this includes garden type sheds, and Vehicles where the inside temperature can climb to dangerous levels in the direct sunlight and on high temperature days. THINK BEFORE LEAVING YOUR LITHIUM ION BATTERY PACK IN STORAGE.
- The battery can be charged or operated at temperatures between 40°F(4°C) and 104°F(40°C). NEVER CHARGE YOU LITHIUM ION BATTERY BELOW OR ABOVE TEMPERATURES RECOMMENDED OTHERWISE FIRE OR SERIOUS DAMAGE TO THE BATTERY PACK MAY OCCUR.
- The most suitable temperatures to charge the battery pack are between 68^(20^) - 77^(25^) .
• Always allow the battery pack to cool down after charging, do not place it in a hot environment such as a metal shed or open trailer left in the sun.
- Take care where the tool is stored. Do not store in areas of corrosive fumes, or salt air or similar conditions. Try and store the tool in the packaging supplied with the tool.
- Do not dispose of the battery in a fire or put the battery into a microwave oven, conventional oven, dryer, or high-pressure container. Under these conditions, the battery may explode.
- Never attempt to open the battery pack, puncture the battery or subject the battery to strong physical shock.
- If the plastic housing of the battery pack breaks open or cracks, immediately discontinue its use and do not recharge it. Ensure the battery pack clip is in good condition and will not allow the pack to fall free from the tool. If the clip is damaged or for any reason is not locking the pack in place, Do Not continue to use.
- Stop using the battery if it exhibits abnormal heat, odour, colour, deformation, or is in an abnormal condition.
- If you detect leakage or a foul odour, it is especially important to keep the battery away from fire. If battery liquid leaks onto your skin or clothes, wash well with clean water immediately. If liquid leaking from the battery gets into your eyes, do not rub your eyes. Rinse your eyes well (for at least 10 minutes) with clean water, and consult a doctor immediately.
- Do not use a leaking battery.
- Handle batteries with care to avoid shorting the battery with conducting materials, such as nails, screws, metal watch bands, rings, bracelets, and keys. The battery may overheat and could burn you.
- After the battery has reached the end of its useful life, we recommend recycling the materials at your local municipal council recycling centre. DO NOT attempt to replace the battery cells in the battery pack, repair or modify any part of the battery pack assembly.
- When recycling, make it nonconductive by applying insulating tape to the terminals located on the battery.
WHEN TO CHARGE THE BATTERY
- New batteries are shipped in a low charged condition and should be fully charged before Use.
- The battery pack can be recharged at any time during use, provided the pack is not overheated.
- If the battery pack starts to cut out due to low voltage, or previous tasks undertaken can no longer be performed, it is suggested to stop using the tool and recharge the battery.
- For storage, it is suggested to recharge the battery between 50% and 75% charge.
LINE TRIMMER SPECIFIC SAFETY INSTRUCTIONS
- Keep the handles dry and free of grease.
- Make sure to always wear personal protective clothing when operating
- Make sure you are positioned firmly and with a natural stance when working with the device.
• Always hold the unit tightly with both hands. - Before starting work, check the area for animal and objects. Remove all objects that may be blown away by the unit, or that the thread may become caught on.
- Before starting work check the area and remove all objects which may damage the cutting mechanism.
• Always ensure sufficient distance to the cutting mechanism. - In the vicinity of 15m around the cutting area, there should be no people or animal as they can get hurt from flying objects.
- Only work with good light and visibility.
- Do not work above hip height! Do not bend forwards or lean over backwards!
- The clothing of the operator should be close-fitting. Avoid wearing loosely fitting clothing. Wear sturdy footwear and long work trousers.
- Pay attention when walking backwards. Danger of stumbling!
- The cutting tool will continua to rotate even after the engine has been switched off.
- Risk of injury caused by the cutting blades! After pulling out a new thread, always keep the machine in the normal working position before switching on.
-
Ensure that the ventilation slots are kept free from dirt.
-
Never mount metal cutting elements.
- Children should be supervised to ensure that they do not play with the device.
- Remember that moving parts may also be located behind ventilation and venting slots.
- Symbols affixed to your tools may not be removed or covered. Information on the device that is no longer legible must be replaced immediately.
- WARNING: Some dust created by power sanding, sawing, grinding, drilling and other construction activities contains chemicals known to cause cancer, birth defects of other reproductive harm. Some examples of these chemicals are:
- Lead from lead-based paints
- Crystalline silica from bricks and cement and other masonry products.
- Arsenic and chromium from chemically treated lumber.
- Your risk from these exposures varies, depending on how often you do this type of work. To reduce your exposure to these chemicals: work in a well-ventilated area, and work with approved safety equipment, such as those dust masks that are specially designed to filter out microscopic particles.
- Due to modern mass production techniques, it is unlikely that your Power Tool is faulty or that a part is missing. If you find anything wrong, do not operate the tool until the parts have been replaced or the fault has been rectified. Failure to do so could result in serious personal injury.
Safety Symbols
The product may have safety warning labels attached to it, explained below. Understand the symbols on your product and their meanings. If any stickers become unreadable, unattached etc., replace them.
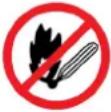 Flammable Material HazardFlammable liquids, gases or substances etc may present.Avoid ignition sources and open flames. Danger of fire. Flammable Material HazardFlammable liquids, gases or substances etc may present.Avoid ignition sources and open flames. Danger of fire. |  Read User ManualRead and fully understand product safety warnings, operation, procedures etc before using the product. Read User ManualRead and fully understand product safety warnings, operation, procedures etc before using the product. |  Use Hand ProtectionWear appropriate hand protection and take due care as the product or use of the product may present hand hazards. Use Hand ProtectionWear appropriate hand protection and take due care as the product or use of the product may present hand hazards. |  Exhaust FumesCarbon-Monoxide HazardDo not use the product in confined areas or without adequate ventilation. Carbon-monoxide poisoning can be fatal. Exhaust FumesCarbon-Monoxide HazardDo not use the product in confined areas or without adequate ventilation. Carbon-monoxide poisoning can be fatal. |
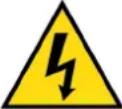 Electrocution / Electrical Shock HazardHigh voltage or high current electricity may be present or required by the product. Take due care when handling electrical products, cables, plugs and leads. Electrical shock can be fatal. Electrocution / Electrical Shock HazardHigh voltage or high current electricity may be present or required by the product. Take due care when handling electrical products, cables, plugs and leads. Electrical shock can be fatal. |  Toxic Fumes / Dust HazardUsing the product or by-products from use may produce fumes, smoke or particles that could be harmful if inhaled. Wear appropriate breathing protection and have adequate ventilation. Toxic Fumes / Dust HazardUsing the product or by-products from use may produce fumes, smoke or particles that could be harmful if inhaled. Wear appropriate breathing protection and have adequate ventilation. | 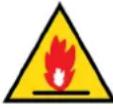 Explosive Material HazardCombustible liquids, gases or substances etc may be present.Avoid ignition sources and open flames. Danger of explosion. Explosive Material HazardCombustible liquids, gases or substances etc may be present.Avoid ignition sources and open flames. Danger of explosion. |  Cutting / Amputation HazardThe product may have blades, edges or mechanical devices that can cause severe cut injury to fingers, limbs etc. Take due care when handling and using the product. Cutting / Amputation HazardThe product may have blades, edges or mechanical devices that can cause severe cut injury to fingers, limbs etc. Take due care when handling and using the product. |
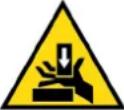 Crush HazardThe product may have blades, edges or mechanical devices that can cause severe crush injury to fingers, limbs etc. Take due care when handling and using the product. Crush HazardThe product may have blades, edges or mechanical devices that can cause severe crush injury to fingers, limbs etc. Take due care when handling and using the product. |  Single Operator OnlyThe product must be operated by a single person only. More than one person operating the product may introduce additional hazards. Single Operator OnlyThe product must be operated by a single person only. More than one person operating the product may introduce additional hazards. |  Use Face ProtectionWear appropriate full-face protection and take due care as the product or use of the product may present face and eye hazards. Use Face ProtectionWear appropriate full-face protection and take due care as the product or use of the product may present face and eye hazards. |  Use Foot ProtectionWear appropriate foot protection and take due care as the product or use of the product may present foot hazards. Use Foot ProtectionWear appropriate foot protection and take due care as the product or use of the product may present foot hazards. |
 Use Eye / Ear / Head ProtectionWear appropriate eye and / or ear and / or head protection and take due care as the product or use of the product may present eye, hearing and head hazards. Use Eye / Ear / Head ProtectionWear appropriate eye and / or ear and / or head protection and take due care as the product or use of the product may present eye, hearing and head hazards. |  Running HazardDo not run on or near the product as doing so may present a fall hazard. Running HazardDo not run on or near the product as doing so may present a fall hazard. |  Diving HazardDo not dive into the product as doing so may present a neck / head injury hazard. Diving HazardDo not dive into the product as doing so may present a neck / head injury hazard. |  Adult Supervision RequiredAlways supervise children and other users of a product to prevent drowning or injury. Adult Supervision RequiredAlways supervise children and other users of a product to prevent drowning or injury. |
 Skin Penetration / Puncture HazardThe product may produce pressure, emit liquids or objects that can cause severe injury to fingers, limbs, blood etc. Take due care when handling and using the product. Skin Penetration / Puncture HazardThe product may produce pressure, emit liquids or objects that can cause severe injury to fingers, limbs, blood etc. Take due care when handling and using the product. |  Hot Surface HazardBe aware that the product may produce high temperatures and hot surfaces that can cause burn injuries. Hot Surface HazardBe aware that the product may produce high temperatures and hot surfaces that can cause burn injuries. |  Flying Debris HazardBe aware that the product or use of the product may present hazards produced by flying debris. Wear appropriate clothing and protective devices. Flying Debris HazardBe aware that the product or use of the product may present hazards produced by flying debris. Wear appropriate clothing and protective devices. | 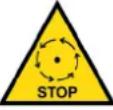 Moving Parts HazardBe aware that the product contains or uses mechanical devices that move or rotate. Always wait for moving parts to stop fully before handling the product, adjusting, maintenance etc. Moving Parts HazardBe aware that the product contains or uses mechanical devices that move or rotate. Always wait for moving parts to stop fully before handling the product, adjusting, maintenance etc. |
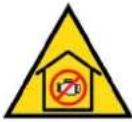 Carbon-Monoxide HazardDo not use the product in confined areas or without adequate ventilation. Carbon-monoxide poisoning can be fatal. Carbon-Monoxide HazardDo not use the product in confined areas or without adequate ventilation. Carbon-monoxide poisoning can be fatal. | 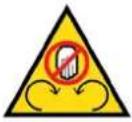 Pull HazardBe aware that the product contains or uses mechanical devices that can pull in objects and can cause severe injury to fingers, limbs etc. Take due care when handling and using the product. Pull HazardBe aware that the product contains or uses mechanical devices that can pull in objects and can cause severe injury to fingers, limbs etc. Take due care when handling and using the product. | 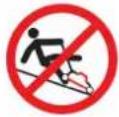 Slope / Fall Injury HazardBe aware that using the product on sloping surfaces or in slippery conditions may present additional dangers from falls and contact with blades, moving parts, hot surfaces etc. Slope / Fall Injury HazardBe aware that using the product on sloping surfaces or in slippery conditions may present additional dangers from falls and contact with blades, moving parts, hot surfaces etc. | 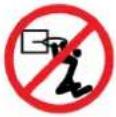 "Slam Dunk" WarningDo NOT attempt "slam dunk" manoeuvres as this may result in severe injury due to falling, product breakage or collapse etc. "Slam Dunk" WarningDo NOT attempt "slam dunk" manoeuvres as this may result in severe injury due to falling, product breakage or collapse etc. |
 Electrocution / Electrical Shock Hazard - OutdoorHigh voltage or high current electricity may be present or required by the product. Do NOT use in rain, damp or wet conditions. Electrical shock can be fatal. Electrocution / Electrical Shock Hazard - OutdoorHigh voltage or high current electricity may be present or required by the product. Do NOT use in rain, damp or wet conditions. Electrical shock can be fatal. | 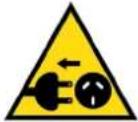 Electrocution / Electrical Shock Hazard - DisconnectHigh voltage or high current electricity may be present or required by the product. Always disconnect the product from the electrical supply before handling the product, adjusting, maintenance etc. Electrocution / Electrical Shock Hazard - DisconnectHigh voltage or high current electricity may be present or required by the product. Always disconnect the product from the electrical supply before handling the product, adjusting, maintenance etc. | 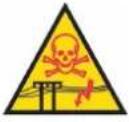 Power Line Electrocution HazardHigh voltage / high current power lines may be present. Use extreme caution to avoid contact or interference with power lines.Electrical shock can be fatal. Power Line Electrocution HazardHigh voltage / high current power lines may be present. Use extreme caution to avoid contact or interference with power lines.Electrical shock can be fatal. |  "Kick-Back" HazardHigh level of "kick-back" hazard that can cause the machine to suddenly rotate towards operator.Kick-back injury can be fatal. "Kick-Back" HazardHigh level of "kick-back" hazard that can cause the machine to suddenly rotate towards operator.Kick-back injury can be fatal. |
 Winch Operator Position HazardDo NOT stand between winch and load. Do NOT use winch to move people. Winch Operator Position HazardDo NOT stand between winch and load. Do NOT use winch to move people. | 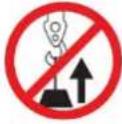 Winch Lift HazardDo NOT LIFT load vertically. Use machine to PULL only. Winch Lift HazardDo NOT LIFT load vertically. Use machine to PULL only. | 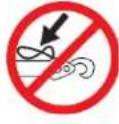 Cable HazardEnsure that load bearing cable is not kinked or knotted. Cable HazardEnsure that load bearing cable is not kinked or knotted. | 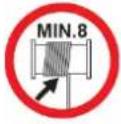 Winch Cable HazardEnsure that there is a minimum number of cable coils on winching mechanism. Winch Cable HazardEnsure that there is a minimum number of cable coils on winching mechanism. |
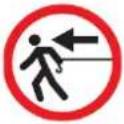 Winch Hook HazardCarry hook to load – do NOT throw or run. Winch Hook HazardCarry hook to load – do NOT throw or run. |  Flash / Blinding HazardWear appropriate eye protection for welding. Direct exposure to weld arcs may cause permanent eye injury. Flash / Blinding HazardWear appropriate eye protection for welding. Direct exposure to weld arcs may cause permanent eye injury. |  Laser HazardLaser may be in use – do NOT look directly at laser or allow others to. Laser HazardLaser may be in use – do NOT look directly at laser or allow others to. |
Table of Contents
Safety 2
Safety Symbols....7
Parts Identification ....10
Assembly....11
Fitting the Safety Guard....11
Fitting the Flower Guard....11
Fitting the Auxiliary Handle....12
Operation....13
Removing and Inserting the Battery Pack....13
Checking the Remaining Capacity of the Battery....13
Battery Capacity Indicator 13
Proper Position....14
Setting the Length of the Unit....14
Setting the Angle of the Cutting Head....15
Adjusting Edging Function....15
Switching ON and OFF....15
Feeding the Line Manually 16
Working Advice....17
Trimming Edges....17
Replacing the Nylon Line Spool ....18
Lithium Battery Care and Maintenance 19
Top 3 Battery Care Requirements....19
DANGER - CHARGING THE BATTERY ....20
Maintenance and Storage 21
Battery Maintenance....21
Storage 21
Troubleshooting 22
Charger Indicators....22
Specifications 23
Parts Identification
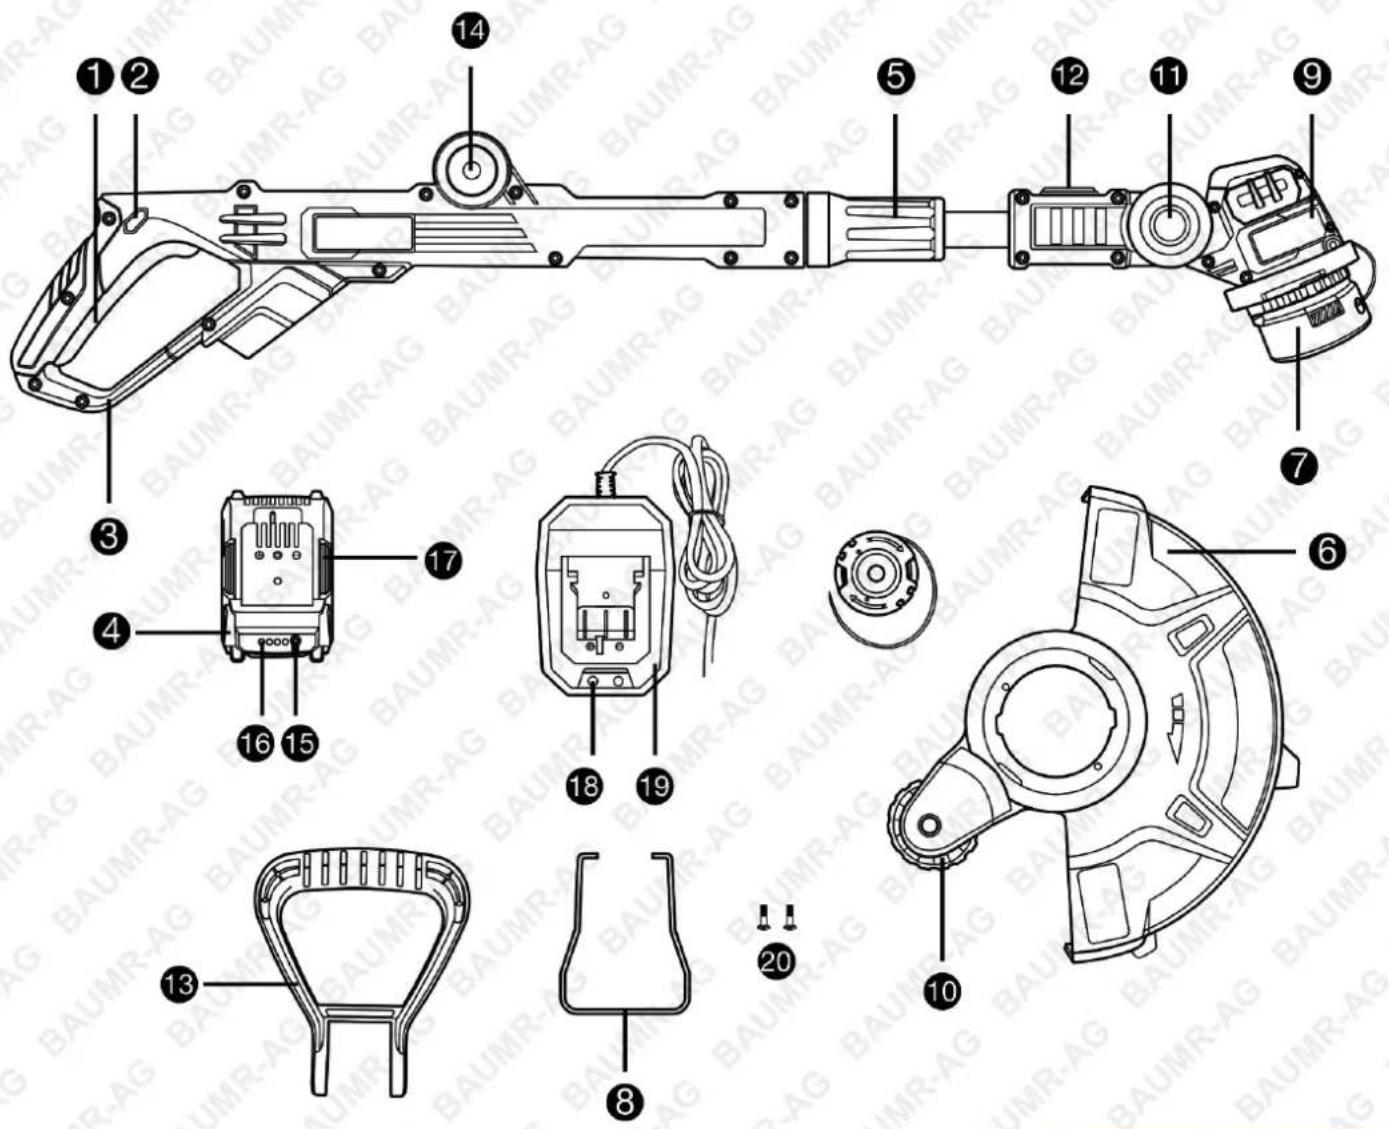
| No. | Name | No. | Name |
| 1 | ON/OFF switch | 11 | Lock for cutting head inclination |
| 2 | Safety lock | 12 | Edging function convert button |
| 3 | Operating handle | 13 | Auxiliary handle |
| 4 | Battery pack | 14 | Push button for adjusting the front handle |
| 5 | Shaft adjustment collar | 15 | Push button for capacity display |
| 6 | Safety hood | 16 | Display for remaining capacity |
| 7 | Spool and line | 17 | Locking button for releasing battery |
| 8 | Flower guard | 18 | Control lights |
| 9 | Cutting head | 19 | Battery charger |
| 10 | Edging wheel | 20 | Screws for fitting the safety hood |
Spare parts available for purchase, scan QR code below:

Assembly

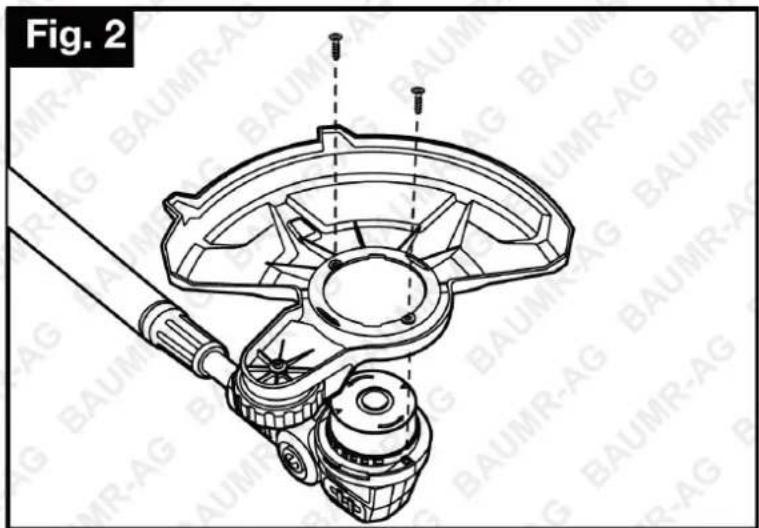
CAUTION! Risk of injury! On the underside of the safety hood, there is a sharp blade designed to cut the thread.
Fitting the Safety Guard
-
Turn the grass trimmer upside down. Mount the protective hood on the motor head.
-
Then fix the safety guard with 2 screws (20).
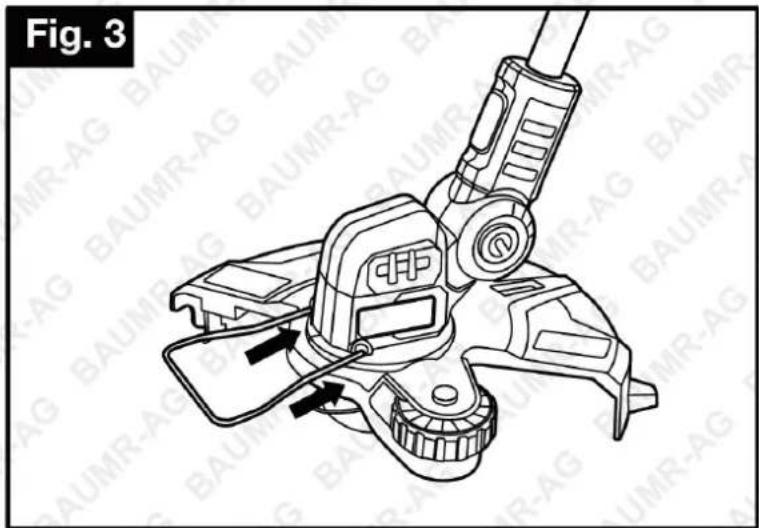
Fitting the Flower Guard
Attach the flower guard (8) to the motor housing.
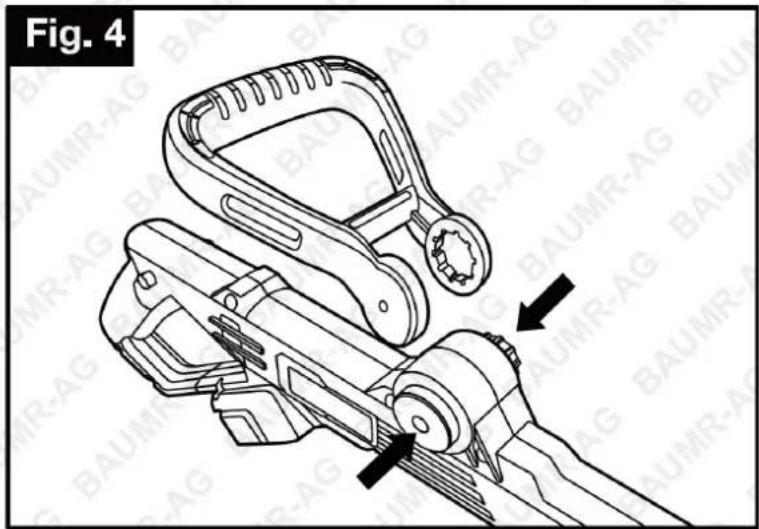
Fitting the Auxiliary Handle
- Push the button (14) and mount the auxiliary handle into the operating handle.
- Rotate the auxiliary handle to the required angle.
- Release the button and ensure the handle clicks into a locked position.
Operation

CAUTION! RISK OF INJURY! RISK OF DAMAGE TO THE UNIT! Do not allow the battery pack to deep discharge. Do not press the ON/OFF switch after the device has deactivated automatically. Note: The Li-Ion battery pack can be charged at any time without affecting the lifetime of the unit. Interrupting the charging process will not damage the battery pack. Note: If the battery is fully loaded, the charger automatically switches over to the maintenance charge function. The battery can thus remain in the charger permanently.
Removing and Inserting the Battery Pack
WARNING! Make sure that the tool is "OFF".
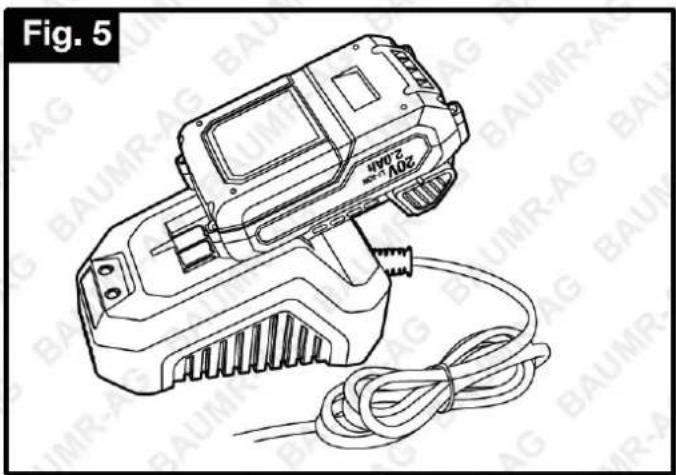
The battery pack must be charged prior to the first start-up, charging time: around: 60 minutes.
- Press in the locking button (17) and remove the battery from the device.
- Insert the battery pack (4) into the charger (19).
- Plug the charger (19) into the power supply. The charging status is displayed by the control lights (18).
- Slot the battery pack (4) into the device and make sure it clicks into place correctly (see Fig. 5 & 6).
natural_image
Line drawing of a handheld electric shock absorber with attached wires (no text or symbols)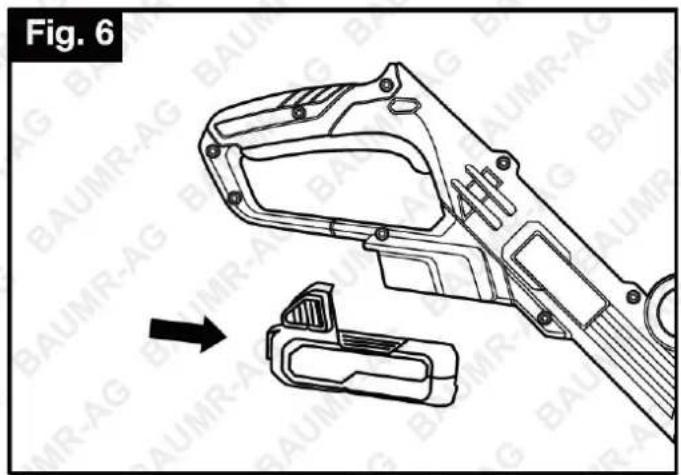
Checking the Remaining Capacity of the Battery
- Press the button (15).
- The remaining capacity of the battery is displayed by the control lights (16).
Battery Capacity Indicator
Press the battery capacity indicator switch. The battery capacity indicator shows the charge status of the battery using 4 LEDs.
• All 4 LEDs are lit: The battery is fully charged.
• 3 or 2 or 1 LED(s) are lit: The battery has an adequate remaining charge.
• 1 LED blinks: The battery is empty, recharge the battery.
- All LEDs blink: The battery pack is too hot (e.g. due to direct sunshine or prolonged use) or too cold (below 4 °C), Do not use or charge the battery pack. Make sure the battery temperature to between 40°F{4°C} and 104°F(40°C).
Check before starting the device!

DANGER! Risk of injury! The device may only be put into operation if there are no defects. If a part is defective it must be replaced before the device is used again. Before starting work check a and remove all objects which may be kicked up by the unit.
Check to make sure the device is in safe operating condition:
- Check to make sure there are no visible defects.
- Check to make sure all device components are correctly mounted.
Proper Position
Hold the unit with the left hand on the front handle, and the right hand at approximately hip level on the operating handle, balanced in a comfortable way.
Setting the Length of the Unit
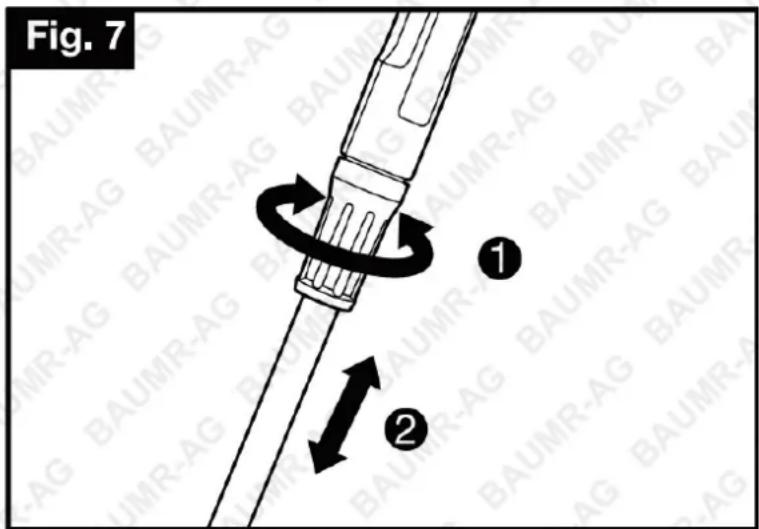
- Slacken the Shaft Adjustment Collar (5)
- Pull the telescopic pole to the desired length.
- Retighten the Shaft Adjustment Collar (5) again.
Setting the Angle of the Cutting Head
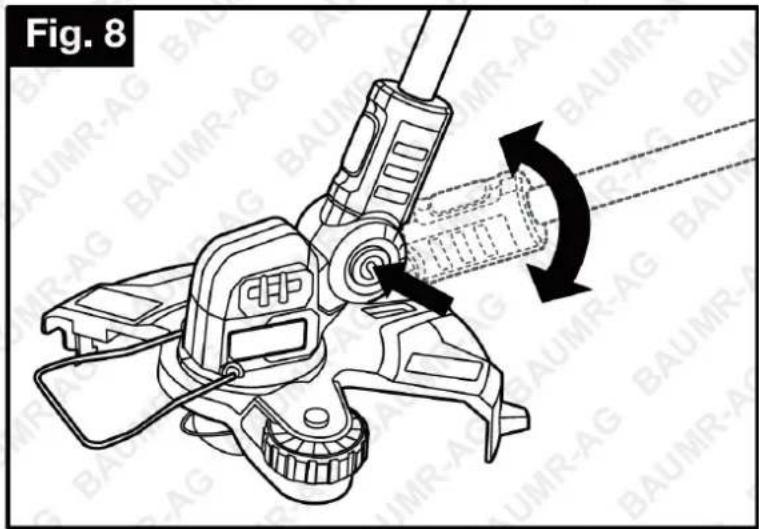
- Press in and hold the locking button (11).
- Tilt the cutting head (10) to the required position.
- Release the locking button (11) and ensure the head clicks into a locked position.
Adjusting Edging Function
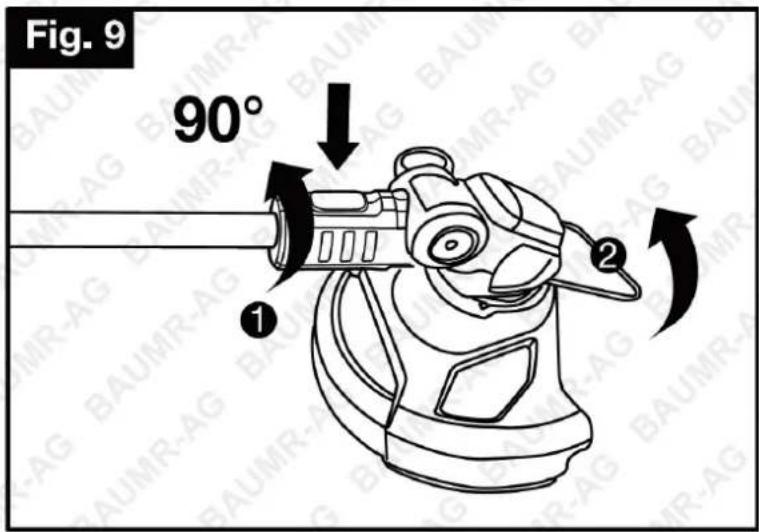
- Adjust the trimmer head to 90 degrees for edging by pressing the locking button (12).
- Twist the flower protector to an angle of 90^ .
Switching ON and OFF
- Switching ON: Press the switch lock (2) and simultaneously press the On/Off switch (1).
- Switching OFF: Release the on-off switch (1).
Feeding the Line Manually
- Switch off the tool and remove the battery.
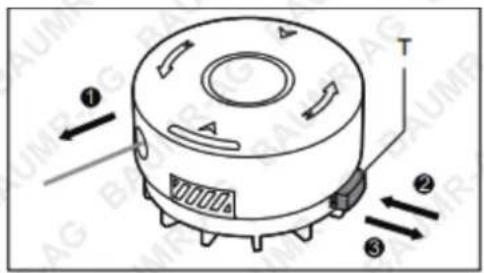
- Pull the line and keep pulling, then press and release the line feed button (T).
- After line feeding, always return the tool to its normal operating position before switching ON.
- Feed the line regularly to maintain full cutting circle.
- When the motor runs without load and no grass is cut, the cutting line is stuck, worn or broken; rewind the spool or replace the spool system.
Working Advice
Cutting grass
- Always hold the trimmer at a safe distance from body and adopt a safe stance.
- Switch on the unit.
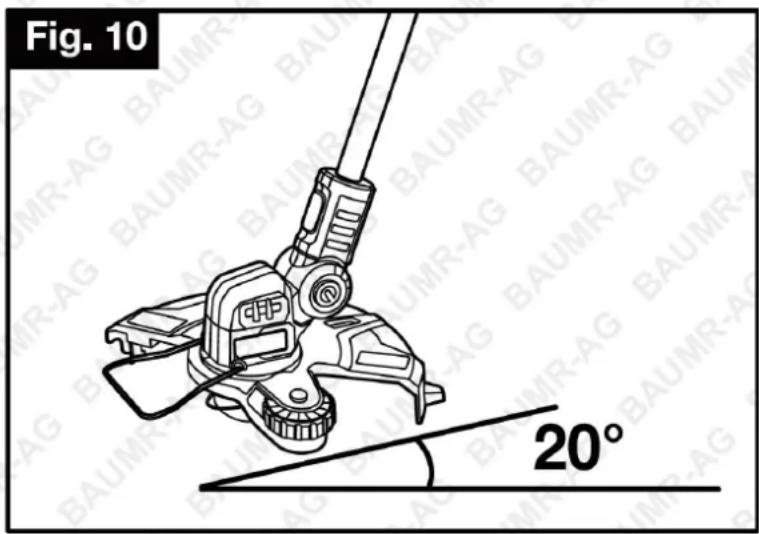
- Hold the trimmer at an angle of about 20' to the ground and guide the trimmer in a semicircular motion around your standing position.
NOTE: For a good cutting performance, cut high grass in stages. Starting from the tip.
Trimming Edges
This grass trimmer can be not only used for trimming grass but also used for cutting the lawn edge. Especially, when the lawn edge is close to wall, fence, etc. The edging function of this device is very helpful, to deal with this kind of situation.
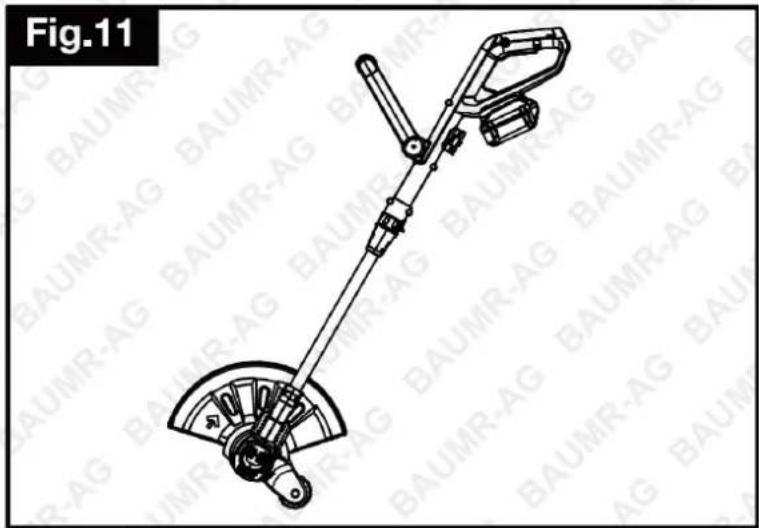
- To convert to cutting edge function (see Fig. 9 & 11):
- Depress the edging function convert button and hold it in place.
- Turn the operating handle by 90^ , for changing its function to edging mode. Then release the edging function covert button to lock it in place. Now you have converted the grass trimmer to an edge trimmer for cutting the lawn edge.
natural_image
Technical line drawing of a handheld metal detector (no text or symbols on the device itself)
NOTE: While edging, only allow the tip of the line to make contact with the area being worked. Do not force the line. The edging wheel helps to protect the unit and keep the unit from contacting the ground.
Take extra caution while edging as objects can be throw from the trimmer line.
TIPS:
- For best results, do not cut wet grass because it tends to stick to the cutting head and guard, prevents proper discharge of grass trimmings, and could cause you to slip and fall.
- Pay special attention when performing the work close to trees and bushes. The cutting head could damage sensitive bark, and damage fence posts.
• Use the flower protector to avoid cutting device contact with hard objects such as walls and stones.
Replacing the Nylon Line Spool

WARNING! Before performing any assembly, always ensure that the battery pack has been removed. If the nylon cutting line is broken and the nylon spool needs replacing. Never use steel, wire, rope, string, etc. which can break off and become a dangerous projectile.
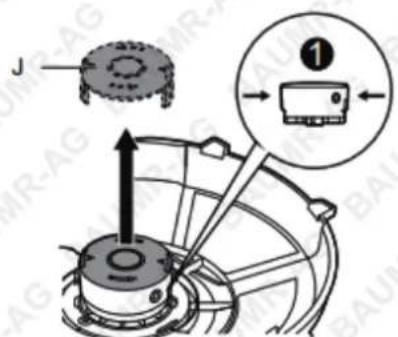
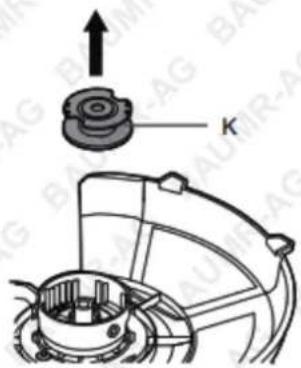
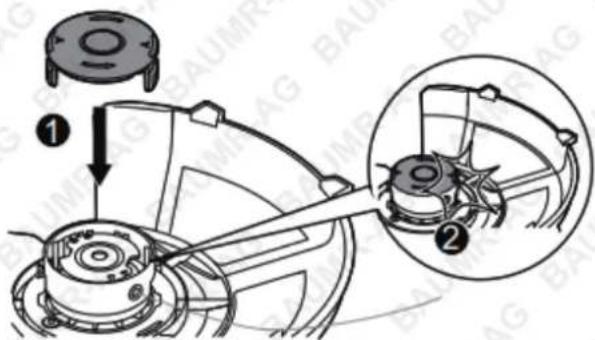
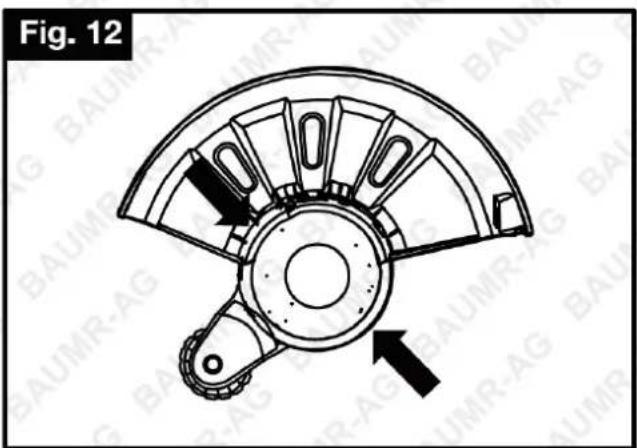
- Press together both locking devices at the spool cover and remove the spool cover, remove the old spool.
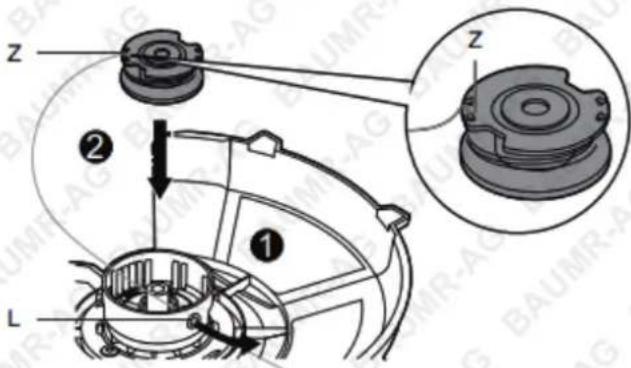
- Thread the new/refilled spool line through the eyehole in the trimmer head.
- Fit the line spool in the trimmer head.
- Refit the line spool cover.
natural_image
Technical line drawing of a mechanical component with directional arrows indicating motion or force (no text or symbols)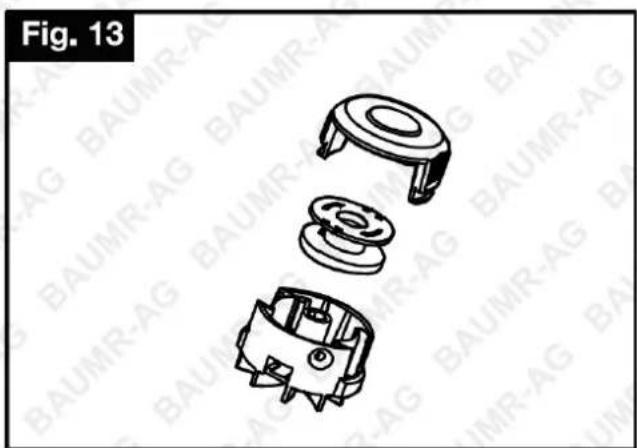
natural_image
Exploded view diagram of a mechanical component (no text or symbols)Lithium Battery Care and Maintenance
Top 3 Battery Care Requirements
- Charge battery before first use. The battery may arrive with some charge, regardless of this the battery must be charged for 60 minutes on the initial charge and 60 minutes for each subsequent charge.
- Charge battery immediately when it is depleted. Do not store a depleted battery. This will permanently impact the life of the battery. If the battery is going to be stored for a period of time, fully charge the battery before storing.
- Disconnect battery when not in use. To prolong the life of a battery, disconnect it from the unit when not in use. Disconnect chargers from the battery once charged.

To ensure the battery maintains optimum performance, follow the guidelines outlined below.
• For best results, charge batteries in temperatures between 10°C and 30°C
- When battery is charged, disconnect the charger from the power supply and remove the battery from the charger.
- If a battery is stored or otherwise unused for an extended period, and the battery has no charge remaining when you check it, consider it to be damaged. Do not attempt to recharge it or to use it. Replace it with a new battery.
• Use only with the battery charger specified by the manufacturer.
- Ensure that the battery charger electrical cord is not subjected to damage or stress. Do not operate the battery charger if it has a damaged electrical cord or plug.
- Do not use the charger in wet areas or expose it to rain or water.
- The typical estimated life of a Lithium-Ion battery is about two to three years or 300 to 500 charge cycles, whichever occurs first. One charge cycle is a period of use from fully charged, to fully discharged, and fully recharged again
- Explosion hazard – protect the battery against heat; for example, direct sunlight and fire. Do not store batteries in vehicles or locations subject to heat.
- Batteries can explode in the presence of an ignition source, such as a pilot light. To reduce the risk of serious personal injury, never use any cordless product in the presence of open flame. Exploding batteries can propel debris and chemicals.
- Do not open the battery – danger of short-circuiting and/or explosion.
- Do not attempt to destroy or disassemble the battery pack or remove any of its components.
- Do not touch the battery terminals with metal objects and/or body parts as short-circuit and/or personal injury may result.
- Explosion hazard – do not open and/or short-circuit the battery.
- Poison hazard – battery leakage (liquid ejection). Under extreme conditions, liquid may be ejected from the battery – avoid contact. If contact accidentally occurs, immediately seek medical attention, and flush with water. If liquid contacts eyes, immediately seek medical attention, flush with clean water for at least 10 minutes. Liquid ejected from the battery may cause irritation or burns.
- Dispose of non-serviceable batteries in an environmentally responsible manner and according to local regulations.
Failure to adhere to the requirements above may result in the battery becoming inoperative or battery life being reduced. In extreme cases or abuse, battery overheating or fire may result.
DANGER - CHARGING THE BATTERY
Like mobile phones, laptops, cordless vacuum cleaners etc., this product contains a lithium-ion battery pack. Lithium-ion batteries allow fast charging and high capacities, however care must be taken to reduce chances of a fault and increase safety in case a fault occurs. Catastrophic faults with larger lithium-ion batteries have a tendency to result in large amounts of smoke and fire. Be sure to follow the points below to reduce the likelihood of danger while charging.
• Never charge a battery that has been damaged or subjected to a forceful impact.
• Never charge a battery that has been exposed to moisture or water.
- Never charge a battery with a charger that wasn't supplied with the battery.
- Never use a battery in a device that it wasn't specifically designed for.
• Never use a battery with a modified or damaged device.
• Never modify the battery, product, charger, circuitry, or wiring.
- Never charge a battery when the battery or charger is displaying a problem or charging incorrectly.
• Always charge batteries on a non-combustible surface, for example, on a concrete floor.
- Never charge a battery in an exit path that may be used by people to leave a room or building in case of an emergency, for example, the hallway or foyer of a residence.
- Never charge a battery in an area or building that doesn't have the recommended number of working smoke detectors that have been tested in accordance with local guidelines.
- Always charge batteries at least 3m away from anything combustible, such as floors, wall surfaces, furniture, storage shelves etc.
- Always charge batteries in an open area (outside if possible) ensuring the battery and charger are away from moisture and water.
• Always ensure batteries are charged under adult supervision. Do not charge batteries while no one is home or while people are sleeping.
Maintenance and Storage

Before performing any repair work, always remove the battery pack and wait until the cutting blade has come to a standstill. Do not spray the unit with water. Ingress of water may destroy the battery pack and the electric motor. Clean the unit with a cloth, hand brush, etc. Keep all nuts, bolts and screws tight to be sure the equipment is in safe working condition. Replace worn or damaged parts for safety.
Battery Maintenance
Use the following procedures to enable optimum usage of the battery:
- Protect the battery against moisture and water.
- Store the battery only within a temperature range from 40°F to 104°F. As an example, do not leave the battery in a vehicle or in the trimmer in direct sunlight.
- Clean the ventilation slots of the battery occasionally with a soft, clean and dry brush. A considerably shortened operating time after charging is an indication that the battery is exhausted and must be replaced.
- If you do not use the product for a long time, please charge and discharge the battery park once every 6 months.
Storage
- Clean the exterior of the machine thoroughly using a soft brush and cloth,
• Do not use water, solvents, or polishes. - Store the machine in a dry place. Do not place other objects on top of the machine.
Troubleshooting

DANGER! RISK OF INJURY! Unprofessional repairs may mean that your unit will no longer operate safely. This can put you in danger. Malfunctions are often caused by minor faults. You can easily remedy most of these yourself. Please consult the following table before contacting an authorised technician or service centre.
| Error/Fault Cause Remedy | ||
| Product not running | Battery discharge? Charge the battery | |
| Battery pack does not sit its place correctly? | Install the battery pack again. | |
| Device defective? Contact an authorised service centre. | ||
| The tool is vibrating | Is the tool clean?Are there more grasses accumulated in the line spool and safety guard? | Clean the tool, remove grass in-between the line spool and the safety guard. |
| Has the line spool been installed correctly? | Insert the line spool correctly. | |
NOTE: If you cannot fix the fault yourself, contact a qualified technician or an authorised service centre. Please be aware that any improper repairs will also invalidate the warranty and additional costs may be incurred.
Charger Indicators
| Indicator Status | Explanations and Actions | |
| Red LED | Green LED | |
| ON OFF | Ready for useThe charger is connected to the mains power and is ready for use; there is no battery pack in the charger. | |
| OFF | Quick Flashing (2Hz) | Low-current safety chargingAs the battery pack voltage is under 15V, the charger is in low-current charging mode. The charging current is below 0.5A. This can maximum the life of the battery. |
| OFF | Slow Flashing (1Hz) | High-current chargingAs the battery pack voltage is above 15V, the charger is in quick charge mode, the charging current is at 2.3-2.4A.Important! The actual charging times may vary slightly from the stated charging times depending on the existing battery charge. |
| OFF ON | The battery is charged and ready to use.The battery is fully charged and ready to use.Action: Take the battery pack out of the charger. Disconnect the charger from the mains supply. | |
| Quick Flashing (2Hz) | OFF | FaultCharging is no longer possible. The battery pack maybe defective.Action: Never charge a defective battery pack. Take the battery pack out of the charger. |
| Slow Flashing (1Hz) | OFF | Temperature faultThe battery pack is too hot (e.g. due to direct sunshine/prolonged use) or too cold (below 40° F).Action: Remove the battery pack and keep it at room temperature (approx. 68° F) for 3 Hours. |
Specifications
| Power source | Battery, cordless |
| Battery type Lithium | |
| Battery | 20v 2.0 ah Battery - 18650 cells |
| Battery life cycle(times) | More than 300 cycles of normal charge and discharge |
| Charger 240V | |
| Plug SAA | |
| Running time 25min | |
| Charing time 60 min | |
| Noise Level < 96db | |
| Cutting Diameter 300mm (12") | |
| Line Diameter 1.6mm (0.065") | |
| Single line Yes | |
| Auto-feed | Yes |
| No Load Speed | 6500RPM+/-10% |
| Adjustable Handle | Yes |
| Flower guard | Yes |
| Adjustable head with 4 position (0 – 90°), edge function | Yes |
| Max. length | 115cm |
| Shaft material | Aluminium tube (6063-T5) |
| Spool | Wire diameter ø 1.6mm |
| Trimmer head Single | |
| Trimmer line | ∅1.6mm |
| Height adjustable shaft | Yes |
| Safety lock | Yes |
| Push button for adjusting front handle | Yes |
| Adjustable cutting head for rotating | Yes |

Some experts believe that the incorrect or prolonged use of almost any product may cause serious injury or death. To help reduce your risk of serious injury or death, refer to the information below. For more information, see www.datastreamserver.com/safety
-
Consult all documentation, packaging and product labelling before use. Note that some products feature documentation available online. It is recommended to print and retain the documentation.
■ Before each use, check the product for loose/broken/damaged/missing parts, wear or leaks (if applicable). Never use a product with loose/broken/damaged/missing parts, wear or leaks.
■ Products must be inspected and serviced (if applicable) by a qualified technician every 6 months. This is based on average residential use by persons of average size and strength, and on a property of average metropolitan size. Use beyond these recommendations may require more frequent inspections/servicing.
■ Ensure that all users of the product have completed a suitable industry recognised training course before being allowed access to the product. -
The product has been supplied by a general merchandise retailer that may not be familiar with your specific application or description of application. Be sure to attain third-party approval from a qualified specialist for your application before use, regardless of any assurances from the retailer or its representatives.
This product is not intended for use where fail-safe operation is required. As with any product (for example, automobile, computer, toaster), there is the possibility of technical issues that may require the repair or replacement of parts, or the product itself. If the possibility of such failure and the associated time it may take to rectify could in any way inconvenience the user, business or employee, or financially affect the user, business or employee, then the product is not suitable for your requirements. This product is not intended for use where incorrect operation or a failure of any kind, including but not limited to, a condition requiring product return, replacement, parts replacement or service by a technician may cause financial loss, loss of employee time or an inconvenience requiring compensation.
If this product has been purchased in error when considering the information presented here, contact the retailer directly for details of their returns policy, if required.

edisons
.com.au
©2023 Baumr-AG. All rights reserved. No part of this document, including descriptive content, concepts, ideas, diagrams or images may be reproduced or transmitted in any form or by any means, electronic or mechanical, including photocopying, scanning or recording, or any information storage and retrieval system, without express permission or consent from the publisher.
- Safety
- General Work Area Safety
- General Personal Safety
- General Fuel Safety
- General Carbon-Monoxide Safety
- General Equipment Use and Care
- General Electrical Safety
- General Service Information
- WORK AREA SAFETY
- ELECTRICAL SAFETY
- PERSONAL SAFETY
- POWER TOOL USE AND CARE
- SERVICE
- BATTERY TOOL USE AND CARE
- ADDITIONAL SAFETY INSTRUCTIONS FOR THE CHARGER
- ADDITIONAL SAFETY INSTRUCTIONS RELATED TO THE BATTERY PACK AND BATTERY SAFETY
- WHEN TO CHARGE THE BATTERY
- LINE TRIMMER SPECIFIC SAFETY INSTRUCTIONS
- Safety Symbols
- Table of Contents
- Safety 2
- Parts Identification ....10
- Assembly....11
- Operation....13
- Lithium Battery Care and Maintenance 19
- DANGER - CHARGING THE BATTERY ....20
- Maintenance and Storage 21
- Troubleshooting 22
- Charger Indicators....22
- Specifications 23
- Assembly
- Fitting the Safety Guard
- Fitting the Flower Guard
- Fitting the Auxiliary Handle
- Operation
- Removing and Inserting the Battery Pack
- Checking the Remaining Capacity of the Battery
- Battery Capacity Indicator
- Check before starting the device!
- Check to make sure the device is in safe operating condition:
- Proper Position
- Setting the Length of the Unit
- Setting the Angle of the Cutting Head
- Adjusting Edging Function
- Switching ON and OFF
- Feeding the Line Manually
- Working Advice
- Cutting grass
- Trimming Edges
- TIPS:
- Replacing the Nylon Line Spool
- Lithium Battery Care and Maintenance
- Top 3 Battery Care Requirements
- DANGER - CHARGING THE BATTERY
- Maintenance and Storage
- Battery Maintenance
- Storage
- Troubleshooting
- Some experts believe that the incorrect or prolonged use of almost any product may cause serious injury or death. To help reduce your risk of serious injury or death, refer to the information below. For more information, see www.datastreamserver.com/safety
- edisons
Brand : Baumr-AG
Model : LT3
Category : Lawn mower