620ZRX - Lawn mower Baumr-AG - Free user manual and instructions
Find the device manual for free 620ZRX Baumr-AG in PDF.


| Product Type | Lawn Mower |
| Brand | Baumr-AG |
| Model | 620ZRX |
| Cutting Width | 62 cm (24.4 inches) |
| Engine Type | 4-Stroke, Overhead Valve (OHV) |
| Engine Displacement | 196 cc |
| Power Output | 6.5 HP (4.8 kW) |
| Fuel Type | Unleaded Petrol (Gasoline) |
| Fuel Tank Capacity | 1.0 L (0.26 gal) |
| Oil Capacity | 0.6 L (0.16 gal) |
| Starting System | Recoil Start (Pull Start) |
| Drive Type | Rear-Wheel Drive, Self-Propelled |
| Speed Control | Variable Speed (Adjustable) |
| Cutting Height Adjustment | Central Single-Lever, 6 Positions (25–75 mm) |
| Deck Material | Steel, Anti-Rust Coated |
| Grass Collection | 60 L Grass Catcher Bag Included |
| Mulching Capability | Yes (Mulch Plug Included) |
| Side Discharge | Yes (Chute Included) |
| Safety Features | Blade Brake Clutch, Operator Presence Control, Safety Shield |
| Wheel Size | Front: 8 inches, Rear: 11 inches |
| Dimensions (L x W x H) | 160 x 62 x 105 cm |
| Weight | 42 kg (92.6 lbs) |
| Maintenance Intervals | Oil Change: Every 25 hours; Air Filter: Clean every 10 hours, Replace yearly |
| Warranty | 2 Years (Parts and Labor) |
Frequently Asked Questions - 620ZRX Baumr-AG
User questions about 620ZRX Baumr-AG
0 question about this device. Answer the ones you know or ask your own.
Ask a new question about this device
Download the instructions for your Lawn mower in PDF format for free! Find your manual 620ZRX - Baumr-AG and take your electronic device back in hand. On this page are published all the documents necessary for the use of your device. 620ZRX by Baumr-AG.
USER MANUAL 620ZRX Baumr-AG
natural_image
Exterior view of a red and black quadrupedal mobility lawn mower with visible branding (no text or symbols on the main body)620ZRX Zero Turn Ride On Mower
User Manual
[Revision 1.0 February 2024]
READ THIS MANUAL CAREFULLY BEFORE USE – FAILURE TO DO SO MAY RESULT IN INJURY, PROPERTY DAMAGE AND MAY VOID WARRANTY. • KEEP THIS MANUAL FOR FUTURE REFERENCE. • Products covered by this manual may vary in appearance, assembly, inclusions, specifications, description, and packaging.


The product is NOT supplied with engine oil, although traces of oil from the manufacturing process may be present. It is essential to add adequate engine oil of the correct type to the engine before use. Failure to add engine oil will void the product warranty.
THE BATTERY MAY HAVE SOME CHARGE ON ARRIVAL, IT IS IMPORTANT HOWEVER THAT THE BATTERY IS CHARGED PRIOR TO USE.
Safety
Safety messages are designed to alert you to possible dangers or hazards that could cause death, injury or equipment or property damage if not understood or followed. Safety messages have the following symbols:

You WILL be KILLED or SERIOUSLY INJURED if you do not follow instructions.
It is vital that you read and understand this user manual before using the product, including safety warnings, and any assembly and operating instructions. Keep the manual for future reference.
Safety precautions and recommendations detailed here must be fully understood and followed to reduce the risk of injury, fire, explosion, electrical hazard, and/or property damage.
Safety information presented here is generic in nature – some advice may not be applicable to every product. The term "equipment" refers to the product, be it electrical mains powered, battery powered or combustion engine powered.
- Before Use - If you are not familiar with the safe operation/handling of the equipment or are in any way unsure of any aspect of suitability or correct use for your application, you should complete training conducted by a person or organization qualified in safe use and operation of this equipment, including fuel/electrical handling and safety.
- Do NOT operate the equipment in flammable or explosive environments, such as in the presence of flammable liquids, gases, or dust. The equipment may create sparks or heat that may ignite flammable substances.
- Keep clear of moving parts.
- Equipment may be a potential source of electric shock or injury if misused.
- Do NOT operate the equipment if it is damaged, malfunctioning or is in an excessively worn state.
- Do NOT allow others to use the equipment unless they have read this manual and are adequately trained.
- Keep packaging away from children - risk of suffocation! Operators must use the equipment correctly. When using the equipment, consider conditions and pay due care to persons and property.
General Work Area Safety
• Work areas should be clean and well it.
- Do not operate the equipment if bystanders, animals etc are within operating range of the equipment or the general work area.
- If devices are provided for connecting dust extraction / collection facilities, ensure these are connected and used properly. Dust collection can reduce dust-related hazards.

You CAN be KILLED or SERIOUSLY INJURED if you do not follow instructions.

You CAN be INJURED if you do not follow instructions or equipment damage may occur.
General Personal Safety
- Wear appropriate protective equipment when operating, servicing, or when in the operating area of the equipment to help protect from eye and ear injury, poisoning, burns, cutting and crush injuries. Protective equipment such as safety goggles, respirators, non-slip safety footwear, hard hat, hearing protection etc should be used for appropriate equipment / conditions. Other people nearby should also wear appropriate personal protective equipment. Do not wear loose clothing or jewellery, which can be caught in moving parts. Keep hair and clothing away from the equipment.
- Stay alert and use common sense when operating the equipment. Do not overreach. Always maintain secure footing and balance.
- Do not use the equipment if tired or under the influence of drugs, alcohol, or medication.
- This equipment is not intended for use by persons with reduced physical, sensory, or mental capabilities.
General Fuel Safety
- Petrol/fuel/gasoline is extremely flammable – keep clear of naked flames or other ignition sources.
- Do not spill fuel. If you spill fuel, wipe it off the equipment immediately – if fuel gets on your clothing, change clothing.
- Do NOT smoke near fuel or when refuelling.
- Always shut off the engine before refuelling.
- Do NOT refuel a hot engine.
- Open the fuel cap carefully to allow any pressure build-up in the tank to release slowly.
• Always refuel in well-ventilated areas. - Always check for fuel leakage. If fuel leakage is found, do not start, or run the engine until all leaks are fixed.
General Carbon-Monoxide Safety
- Using a combustion engine indoors CAN KILL IN MINUTES. Engine exhaust contains carbon-monoxide – a poison you cannot smell or see.
- Use combustion engines OUTSIDE only, and far away from windows, doors, and vents.
General Equipment Use and Care
- The equipment is designed for domestic use only.
- Handle the equipment safely and carefully.
- Before use, inspect the equipment for misalignment or binding of moving parts, loose components, damage, or any other condition that may affect its operation. If damaged, have the equipment repaired by an authorised service centre or technician before use.
- Prevent unintentional starting of the equipment - ensure equipment and power switches are in the OFF position before connecting or moving equipment. Do not carry equipment with hands or fingers touching any controls. Remove any tools or other items that are not a part of the equipment from it before starting or switching on.
- Do not force the equipment. Use the correct equipment for your application. Equipment will perform better and be safer when used within its design and usage parameters.
- Use the equipment and accessories etc. in accordance with these instructions, considering working conditions and the work to be performed. Using the equipment for operations different from those intended could result in hazardous situations.
- Always keep equipment components (engines, hoses, handles, controls, frames, housings, guards etc) and accessories (cutting tools, nozzles, bits etc) properly maintained. Keep the equipment clean and, where applicable, properly lubricated.
- Store the equipment out of reach of children or untrained persons. To avoid burns or fire hazards, let the equipment cool completely before transporting or storing. Never place or store the equipment near flammable materials, combustible gases, or liquids etc.
- The equipment is not weather-proof, and should not be stored in direct sunlight, at high ambient temperatures or locations that are damp or humid.
- Do not clean equipment with solvents, flammable liquids, or harsh abrasives.
- For specific equipment safety use and care, see Equipment Safety.
General Electrical Safety
- Inspect electrical equipment, extension cords, power bars, and electrical fittings for damage or wear before each use. Repair or replace damaged equipment immediately.
- Ensure all power sources conform to equipment voltage requirements and are disconnected before connecting or disconnecting equipment.
- When wiring electrically powered equipment, follow all electrical and safety codes.
• Always use a Residual Current Device (RCD) (GFCI) / Earth Leakage Circuit Breaker / Safety Switch when operating this item (electrical items only). - High voltage / high current power lines may be present. Use extreme caution to avoid contact or interference with power lines. Electrical shock can be fatal.
General Electrical Safety
- Electrically grounded equipment must have an approved cord and plug and be connected to a grounded electrical outlet.
- Do NOT bypass the ON/OFF switch and operate equipment by connecting and disconnecting the electrical cord.
- Do NOT use equipment that has exposed wiring, damaged switches, covers or guards.
- Do NOT use electrical equipment in wet conditions or in damp locations.
- Do NOT use electrical cords to lift, move or carry equipment.
- Do NOT coil or knot electrical cords, and ensure electrical cords are not trip hazards.
General Service Information
- The equipment must be serviced or repaired at authorised service centres by qualified personnel only.
- Replacement parts must be original equipment manufacturer (OEM) to ensure equipment safety is maintained.
- Do NOT attempt any maintenance or repair work not described in this manual.
- After use, the equipment and components may still be hot – allow the equipment to cool and disconnect spark plugs and/or electrical power sources and/or batteries from it before adjusting, changing accessories, or performing repair or maintenance.
- Do NOT adjust while the equipment is running.
- Perform service-related activities in suitable conditions, such as a workshop.
- Replace worn, damaged or missing warning/safety labels immediately.
Child Choking Hazard!
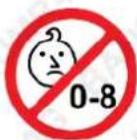
- WARNING: CHOKING HAZARD - CHILDREN UNDER 8 YRS. CAN CHOKE OR SUFFOCATE ON SMALL PARTS. ADULT SUPERVISION REQUIRED.
- Carefully inspect anything a baby or child could gain access to, including this product & packaging.
- Dangers include anything of a size that could become stuck or lodged in a baby or child's airway.
• Dangers include things like raw, hard fruit and vegetable pieces, large pieces of meat, bones or sausage skins, popcorn, nuts,
hard lollies and corn chips, small magnets and batteries, coins, beads, marbles and small uninflated balloons, broken toys and smaller toys, buttons, keys, and coins. But there are also many more.
- Pay particular attention to accessories, nuts, bolts, screws, washers, caps, covers, loose parts, parts that could be removed or break off, pieces of packaging, staples, tape etc.
- In the case of any doubt, secure the item of concern in an appropriate manner, or completely remove the possibility of access by a baby or child.
DANGER
Using an engine or wood/charcoal/gas fuelled appliance indoors CAN KILL YOU IN MINUTES
Engine exhaust and wood/charcoal/gas fumes contain carbon monoxide. This is a poison you cannot see or smell.
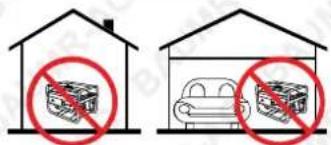
NEVER use inside a building, home, garage, boat, caravan or tent EVEN IF doors and windows are open.
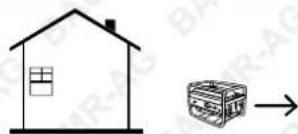
Only use OUTSIDE and far away from windows, doors, and vents.
Avoid other hazards - READ MANUAL BEFORE USE.
GENERAL:
- Do not operate in a hazardous location. Such areas include where there is a risk of explosion of petrol fumes, leaking gas or explosive dusts.
- Do not operate in a confined area where exhaust gases or wood/charcoal/gas fumes could reach dangerous concentrations.
PRODUCTS FEATURING AN ENGINE
- Follow all warnings in the section titled "GENERAL".
- Explosion hazard - never smoke while refuelling.
• Take care not to spill fuel. When refuelling the engine, ensure that the engine has been allowed to cool. Prevent spilling of fuel as this may also ignite with a hot engine.
- Never refuel while engine is running.
GENERATORS
- Follow all warnings in the sections titled "GENERAL" and "PRODUCTS FEATURING AN ENGINE".
- The output of this generator is potentially lethal. The generator should not be connected to a fixed electrical installation except by an appropriately licensed person.
- Not weatherproof – protect your machine. This machine is not weatherproof and should not be exposed to direct sunlight, high ambient temperature, damp conditions, wet conditions or high humidity conditions.

DANGER

Running combustion engines in confined areas CAN KILL IN MINUTES. Engine exhaust fumes contain carbon-monoxide – a deadly gas that you cannot smell or see.
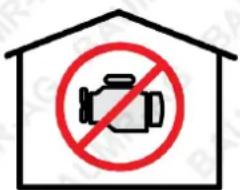
NEVER run a combustion engine in confined areas EVEN IF windows and doors are open. ONLY run petrol engines OUTDOORS and away from doors, windows, and vents.
Do not operate the equipment in hazardous locations, such as where there may be a risk of fire or explosions from flammable liquids, gases or dust.
Do not operate the equipment in confined areas where exhaust gases, smoke or fumes could reach dangerous concentrations.
Do not refuel a combustion engine while it is running on or hot.
Never smoke while refuelling combustion engines or handling flammable substances.
For generators, the electrical output is potentially lethal and must only be connected to a fixed electrical installation by an appropriately licensed person.
Be aware that the equipment may include hazardous components, such as blades, hot surfaces and moving parts.
Handle any flammable substance with extreme caution.
- Be aware that the equipment may include hazardous components, such as blades, hot surfaces and moving parts.
- Moving blades can cause serious injury and even death if used improperly or without sufficient PPE.
- Do not use this equipment on uneven surfaces and always maintain good balance when using this equipment. Failure to do so may cause serious injury.
- Maintain a secure grip of the trigger assembly at all times.
Safety Information and Warnings
- WARNING! The engine exhaust from this product contains chemicals known to potentially cause cancer, birth defects, or other reproductive harm.
- This equipment may create sparks that can start fires around dry vegetation. In some areas, it is unlawful to use or operate an internal combustion engine on any forest-covered, brush-covered, or grass-covered land unless the engine is equipped with a spark arrester maintained in effective working order. A spark arrester is a device constructed of non-flammable materials specifically for the purpose of removing and retaining carbon and other flammable particles over 0.0232 of an inch in size from the exhaust flow of an internal combustion engine that uses hydrocarbon fuels or which is qualified and rated by an expert organization. Other states or federal areas may have similar laws. The operator should contact local fire agencies for laws or regulations relating to fire prevention requirements. CONTACT THE ENGINE MANUFACTURER IF YOUR AREA REQUIRES A SPARK ARRESTER.
- CAUTION! POTENTIAL HAZARD! If you leave the wire on the spark plug, someone could start the engine.
- What can happen: accidental starting or engine could seriously injure you or other bystanders.
- How to avoid the hazard: pull wire off spark plug before you do any maintenance. Also push wire aside so it doesn't accidentally contact spark plug.
- WARNING! POTENTIAL HAZARD! Engine exhaust contain carbon monoxide, which is an odourless, deadly poison.
- WHAT CAN HAPPEN: Carbon monoxide can kill you and is also known to potentially cause birth defects.
- HOW TO AVOID THE HAZARD: Do not run engine Indoors or in an enclosed area.
- DANGER! POTENTIAL HAZARD! In certain conditions gasoline is extremely flammable and highly explosive.
- WHAT CAN HAPPEN: A fire or explosion from gasoline can burn you, others, and cause property damage.
- HOW TO AVOID THE HAZARD: Use a funnel and fill the fuel tank outdoors, in an open area, when the engine is cold. Wipe up any gasoline that spills. Do not fill the fuel tank completely full. Add gasoline to the fuel tank until the level is 14 to 12 (6mm to 13 mm below the bottom of the filler neck. This empty space in the tank allows gasoline to expand. Never smoke when handling gasoline and stay away from an open flame or where gasoline fumes may be ignited by a spark. Store gasoline in an approved container and keep it out of reach of children. Never buy more than a 30-day supply of gasoline.
- WARNING! POTENTIAL HAZARD! Wet grass or leaves can cause you to slip and contact blade.
• WHAT CAN HAPPEN: Blade contact can seriously injure you.
- HOW TO AVOID THE HAZARD: Mow only in dry conditions.
- DANGER! POTENTIAL HAZARD! Grass clippings and other objects can be thrown from an open discharge tunnel.
WHAT CAN HAPPEN: Objects thrown with enough force could cause serious personal injury or death to operator or bystander.
- HOW TO AVOID THE HAZARD: Never open door on discharge tunnel when engine is running unless the optional grass bag, optional side discharge attachment or discharge tunnel plug is securely installed.
• DANGER! POTENTIAL HAZARD! Blade is sharp.
• WHAT CAN HAPPEN: Contact with sharp blade can cause serious personal injury.
- HOW TO AVOID THE HAZARD: Wear gloves or wrap sharp edges of the blade with a rag.
- WARNING! POTENTIAL HAZARD! A worn or damaged blade could break, and a piece of blade could be thrown in operator's or bystander's direction.
WHAT CAN HAPPEN: A thrown piece of blade could cause serious personal injury or death to operator or bystanders.
- HOW TO AVOID THE HAZARD: Inspect blade periodically for wear or damage. Replace a worn or damaged blade.
- WARNING! POTENTIAL HAZARD! Gasoline is extremely flammable, highly explosive and under certain conditions can cause personal injury or property damage.
- WHAT CAN HAPPEN: Tipping mower may cause fuel leakage from carburettor or fuel tank.
- HOW TO AVOID THE HAZARD: Avoid fuel spills by running engine dry or remove gas with band pump, never siphon.
- WARNING! POTENTIAL HAZARD! Gasoline can vaporise if stored over long periods of time.
WHAT CAN HAPPEN: Vaporised fuel can explode if it comes into contact with open flame.
- HOW TO AVOID THE HAZARD: Do not store gasoline (fuel) over long periods of time. Do not store mower with fuel in the lank in an enclosure with an open flame. (Example: furnace or water heater pilot light). Allow the engine to cool before storing in any enclosure.
• DANGER! POTENTIAL HAZARD! Thrown objects may result if discharge door does not close completely.
- WHAT CAN HAPPEN: Thrown objects can cause serious personal injury or death.
- HOW TO AVOID THE HAZARD: If discharge door cannot be closed because grass clippings clog discharge area, stop engine and gently move discharge door handle hack and forth until door can be closed completely. If door still cannot be closed, remove obstruction with a stick, not your hand.
• DANGER! POTENTIAL HAZARD! Adjusting height-of-cut levers could bring hands into contact with moving blade.
• WHAT CAN HAPPEN: Contact with rotating blade can cause serious injury.
- HOW TO AVOID THE HAZARD: Stop engine and wait for all movement to stop before adjusting cutting height. Do not put fingers under housing when adjusting height-of-cut.
- DANGER! POTENTIAL HAZARD! Tipping mower may cause fuel leakage from carburettor or fuel tank.
WHAT CAN HAPPEN: Gasoline is extremely flammable, highly explosive and under certain conditions can cause personal injury or property damage.
- HOW TO AVOID THE HAZARD: Avoid fuel spills by running engine dry or remove gas with hand pump, never siphon.
Getting Started
- WARNING! BLADES, BELTS, GASOLINE, GASOLINE VAPOURS AND CARBON DIOXIDE CAN ALL CAUSE SERIOUS INJURY OR EVEN DEATH.
- Use this piece of equipment with caution.
- Keep others including pets a safe distance from the mower and from the discharge chute.
- Clean up any gasoline you may spill.
- Do not operate on hills where the mower may roll down the hill and strike the operator or others.
- Clear all debris from the lawn before starting to cut grass.
- Remove the spark plug and turn the fuel valve off before attempting any maintenance.
- Turn the fuel valve off and drain the carburettor before storing this mower.
Operator Responsibility
- It is the owner's responsibility that all operators and mechanics must be trained and read this manual before operating the mower as well as being physically able individuals.
• They should be instructed about safe operating and mechanical procedures. - If they cannot read or understand English, it is the owner's responsibility to explain all safety operating instructions. The owner or operator is responsible for accidents or injuries occurring to themselves, other people or property.
- Potential misfortunate incidents can be prevented by the owner/user.
Mower Inspection
For your safety, inspect the lawn mower before each use. Before you begin your inspection, be sure the following conditions are met the lawn mower should be on a level surface, with the ignition switch off, the key removed, the brake set, and the blades disengaged. Also, disconnect the spark plug wires from the spark plugs and ground them against the engine to prevent inadvertent starting.
- Walk around the mower and look for any fluid spills or leaks on or underneath the mower. Remove any and all excessive debris, dirt, and fluids.
- Look for signs of damage or excessive wear. Check the tightness of all nuts, bolts, pins, and screws. Tighten any that may be loose and replace any that are missing.
- Be sure the safety interlock controls are operating properly so that the engine cannot be started unless the ground speed control lever is in neutral and the blades are disengaged.
- Check the mower blades for any damage or abnormal wear. If replacement is required, replace in sets so that they are balanced.
-
Cheek the tyre pressure on all four tyres. Do not exceed the recommended maximum indicated on the tyre.
-
Check the belts for wear and correct tension.
- Check engine oil and air filters as recommended in the engine manufacturer's manual.
Training
- Read, understand, and follow all instructions on the machine and manual(s) before attempting to assemble and operate.
- Operator must be familiar with all controls, their operations, and how to stop the engine and disengage the controls quickly.
- Never allow children to operate this machine.
- Never allow adults to operate this machine without proper instruction.
- Keep bystanders, helpers, pets, and children at a safe distance from the machine while it is in operation.
- Keep area of operation clear of objects that can be thrown by the machine.
- Wear eye and ear protection while operating the machine.
Children
- Never allow children to operate or ride on mowers.
• Always keep children at a safe distance when operating or servicing a mower - Make sure to always look out for children before you make turns or reverse.
- Never let children or untrained people operate or service the equipment. Local regulations may restrict the age of the operator.
Passengers
WARNING! DO NOT USE YOUR LAWN MOWER TO CARRY PASSEYGERS. KEEP BYSTANDERS, HELPERS, PETS, AND CHILDREN AT A SAFE DISTANCE FROM THE MACHINE WHILE IT IS IN OPERATION. INSPECT THE AREA WHERE THE EQUIPMENT IS TO BE USED AND REMOVE ALL OBJECTS SUCH AS ROCKS, TOYS, AND WIRES WHICH CAN BE THROWN BY THE MACHINE CAUSING SERIOUS INJURY OR DEATH.
Proper Equipment
Wear appropriate clothing including hard hat, safety glasses and hearing protection. Long hair, loose clothing or jewellery may get tangled in moving parts.
Preparation: Safety Precautions
- Evaluate the terrain to determine what accessories and attachments are needed to perform the job properly and safely. Only use accessories and attachments approved by the manufacturer.
- Never operate the mower on slopes greater than 15 degrees.
- Inspect the area where the equipment is to be used and remove all objects such as rocks, toys, and wire which can be thrown by the machine causing serious injury or death.
- People, pets, and most importantly children must not be near the area being mowed. Do not operate the mower in their presence.
- Never operate mower with damaged guards, shields or covers.
- All users of the mower must be alert and pay attention to safety alerts, symbols, and safety signs.
- Be sure to inspect mower before each use.
- Always use roll bar when possible and never remove or modify the roll bar in any way or form.
- Be sure to always wear your seatbelt when the roll bar is raised. DO NOT wear the seatbelt when the roll bar is down.
- Check the controls and shields to make sure that they are functioning properly before operating. Do not operate if any are damaged or missing.
- Never operate with discharge deflector raised, removed, or altered, unless a grass catcher is being used.
• Install, and maintain in working order, a spark arrester before using equipment on forest covered, grass-covered, or brush-covered unimproved land. - Do not operate the mower with defective guards, shields, or without the safety devices securely in place.
Gasoline and Other Fuels: Safety Precautions
- Use extra care when handling gasoline and other fuels as they are flammable, and vapours can explode.
- Only use gasoline approved containers for storage and keep out of reach from children.
- Do not fill fuel tank completely full. Overfilling may result in fuel leakage. Leave a reasonable amount of space for fuel to expand.
- If fuel is spilled, do not start the engine. Move the mower away from the area, wipe up the spill thoroughly and wait until fuel vapours have evaporated before starting engine.
- Do not fill gasoline containers inside a vehicle or on a truck/trailer bed.
- Never remove gas cap or add fuel when engine is running.
- Avoid prolonged breathing of gasoline vapours.
- Never refuel or drain the machine indoors.
- Keep face away from nozzle and gas tank opening.
- Keep gas and other fuels away from skin and eyes.
- Never use the mouth to siphon gas.
- Never refuel the mower until all moving parts on the mower have stopped.
- Be sure to inspect mower before each use.
-
Always use roll bar when possible and never remove or modify the roll bar in any way or form.
-
Be sure to always wear your seatbelt when the roll bar is raised. DO NOT wear the seatbelt when the roll bar is down.
- Check the controls and shields to make sure that they are functioning properly before operating. Do not operate if any are damaged or missing.
- Never operate with discharge deflector raised, removed, or altered, unless a grass catcher is being used.
- Install, and maintain in working order, a spark arrester before using equipment on forest covered, grass-covered, or brush-covered unimproved land.
- Never smoke when handling fuels and stay away from an open flame where fumes can be ignited by a spark.
• Always place gasoline containers on the ground away from your vehicles prior to filling.
• Gasoline is harmful or fatal if swallowed. - DANGER: GASOLINE IS HIGHLY FLAMMABLE AND EXPLOSIVE. Do not add fuel while the engine is running or is hot. Keep open flames, sparks, and heat away from the fuel and store fuel in containers specifically designed for that purpose. ADD FUEL OUTDOORS ONLY. IF THE FUEL IS SPILLED, DO NOT START THE ENGINE. Manually push the mower away from the spill and wipe up immediately.
Equipment Operation: Safety Precautions
- Do not operate the engine in a confined space where dangerous carbon monoxide fumes can collect. Carbon monoxide is odorless, tasteless, and can be fatal.
- Do not operate the mower on slopes greater than 15 degrees.
- Mow only in daylight or under good lighting conditions.
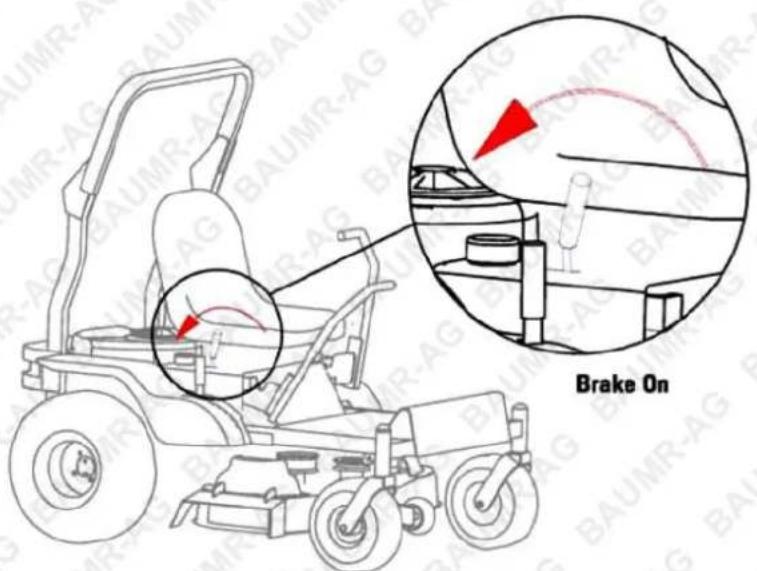
- Make sure the mower is in neutral, parking brake is engaged, blades are disengaged, seat belt on, roll bar is raised and the operator is sitting in the proper position before attempting to start the engine.
- Never operate on wet grass.
- Watch for pedestrian or vehicular traffic when moving the mower while not in use (i.e., loading, unloading, or transporting).
- Never operate the mower with defective guards or shields, or without the safety devices securely mounted in place and functioning properly.
- Be aware of discharge and never direct discharge of material toward bystanders nor al low anyone, especially children, near the mower du ring operation.
- Do not change the governor settings or over speed the engine.
• Always stop the engine when you leave the mower, even for a moment. - To help reduce fire hazard, keep the engine and the area around the engine free of grass, leaves, or any other type of foreign material.
- Beware of cutting edges. For safety always wear gloves when performing blade maintenance activities. Beware on multiple blade units since the rotation of one blade may cause the rotation of the other blade.
- Do not operate the mower with the grass chute deflector in the raised position. Serious injury could occur.
- If lightning is seen or thunder is heard in the operator's vicinity, do not operate machine. Instead find shelter, as lightning may cause injury/death.
- Never raise the mower deck while the blades are running.
- Stop on a level ground, disengage drive, engage parking brake, and shut off engine before leaving operator's position for any reason including clearing grass catcher or unclogging the chute.
- Stop the mower immediately and inspect blades after striking objects or if an abnormal vibration occurs and discontinue use until repaired.
- Keep hands and feet away from cutting unit. This product is capable of amputating hands and feet and throwing objects.
- Be alert and slow down when making turns. Also look left, right, and behind before changing directions and reversing to be sure there is a clear path.
- Disengage blades, slowdown, and drive cautiously when crossing roads and sidewalks.
- Never operate mower under the influence of alcohol and drugs.
- Use care when loading or unloading the machine into a trailer or truck.
- Use ca re when approaching blind corners, shrubs, trees, or other objects that may obstruct vision.
• Always disengage blades when not cutting grass. - Never listen to music with headphones/earphones while operating the mower.
- WARNING! DO NOT OPERATE ON SLOPES EXCEEDING 15 DEGREES! OPERATING ON SLOPES EXCEEDING 15 DEGREES INCREASES THE RISK OF A ROLLOVER RESULTING IN SERIOUS INJURY.
- OPERATING ON SLOPES EXCEEDING 15 DEGREES ALSO CAUSES PREMATURE WEAR ON HYDRAULIC DRIVES.
• ALWAYS MOW ACROSS SLOPES. DO NOT MOW UP AND DOWN.
Slope Operation: Safety Precautions
- Do not mow on slopes g re ate r than 15 degrees.
- Be extremely careful when operating the mower on a slope. Reduced traction could cause sliding. Do not stop or start suddenly when going uphill.
- Slow down and use caution when making turns and when changing direction on slopes.
- Do not operate a riding mower near steep slopes, ditches, or water. Use a walk behind mower or a hand trimmer for these areas.
- Roll bar should be raised and locked with seat belt buckled even before engine is turned on.
- Should it be necessary to lower the roll bar, seat belt should not be used.
- If tyres loose traction, disengage the blades and drive slowly and cautiously off the slope.
- Use extreme care with attachments as they can change the stability of the mower and cause loss of control.
-
Slow down and drive extra carefully on hillsides. Be sure to drive in the recommended direction on hillsides. Turf conditions can affect the machine's stability.
-
The parking brake may not hold the mower if parked on a slope.
- IMPORTANT! The mower belts are adjusted to ensure the blades stop turning within seven (7) seconds of releasing the blade control lever. If you are making any belt adjustments whatsoever, for your safety and the safety of others around you, you must ensure the belts are re-adjusted to achieve this design specification.
- DANGER: DO NOT BYPASS, MODIFY, ALTER, OR DISCONNECT THE SAFETY SYSTEM. MAKE SURE THAT THE SAFETY INTERLOCK SYSTEM IS FULLY OPERATIONAL EACH TIME BEFORE MOWING.
- Before attempting to use your mower, make sure you are familiar with all of the components and have read the manual.
- GASOLINE IS HIGHLY FLAMMABLE AND EXPLOSIVE. FUEL LEAKS, A LOOSE FUEL TANK, OR A LOOSE FUEL VALVE CAN LEAD TO SEVERE INJURY OR DEATH. DO NOT OPERATE THIS MOWER IF ANY COMPONENT OF THE FUEL SYSTEM IS LOOSE OR LEAKS GASOLINE!
- Before setting up your mower, disconnect the spark plug wires from the spark plugs and ground them against the engine to prevent inadvertent starting. This step should be taken as a precaution whenever you are working on this machine.
Roll Over Protective Structure (ROPS)
- This mower is equipped with a roll over protective structure (ROPS) and a seat belt. Do not remove the ROPS or seat belt. ROPS reduces the chance of injury in the event of a rollover. Overturning the machine without ROPS can result in serious injury or death. ALWAYS use the seat belt when the ROPS is in the raised position.
- If the ROPS must be lowered for clearance, return ROPS to raised position when clearance is no longer required. NEVER use the seat belt when the ROPS is in the lowered position. If the ROPS is lowered for transportation, return it to the raised position before operating the machine.
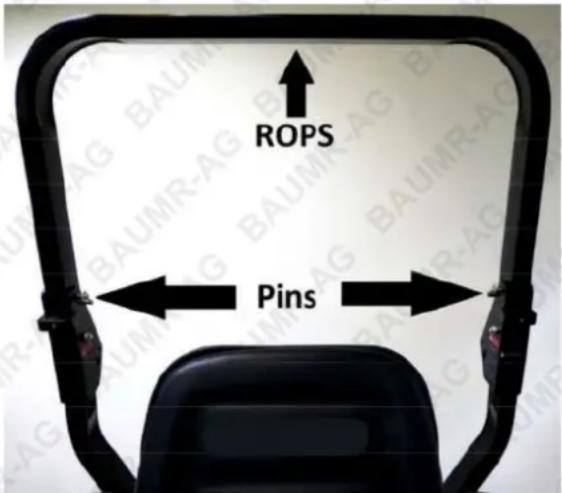
- WARNING! ALWAYS use the seat belt when the ROPS is in the raised position. Failure to do so could result in serious injury or death in the event of a rollover. NEVER use the seat belt with the ROPS in the lowered position.
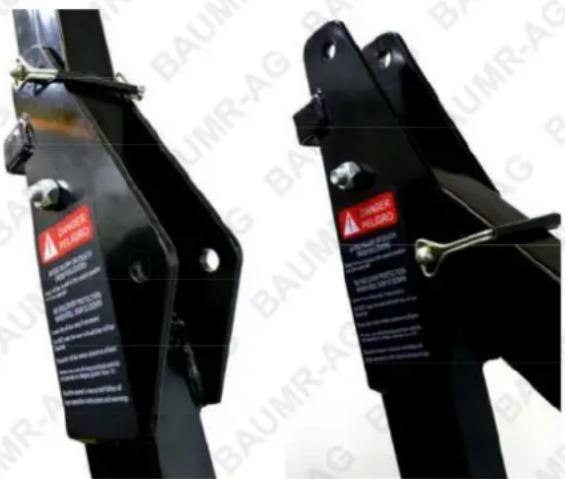
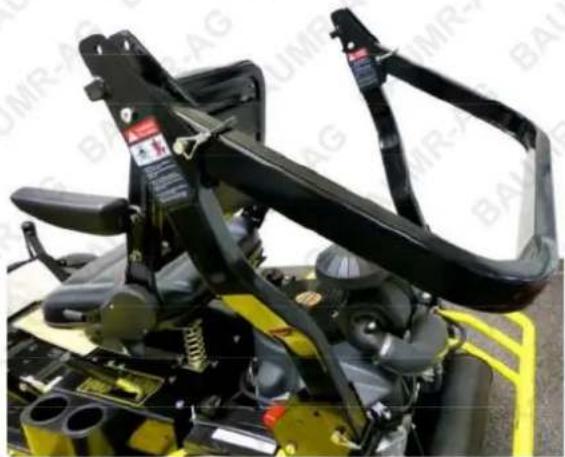
Lowering ROPS
- If additional clearance is needed the ROPS may be lowered. Lower the ROPS using the following steps:
- Remove the two retaining pins.
- Place the ROPS in the lowered position.
- Insert the pins into the lowered position holes.
- NEVER use the seatbelt when the ROPS is in the lowered position. Return ROPS to the raised position when additional clearance is no longer required.
natural_image
Close-up of a yellow robotic vehicle's mechanical components, including black frame, suspension, and control panels (no visible text or symbols)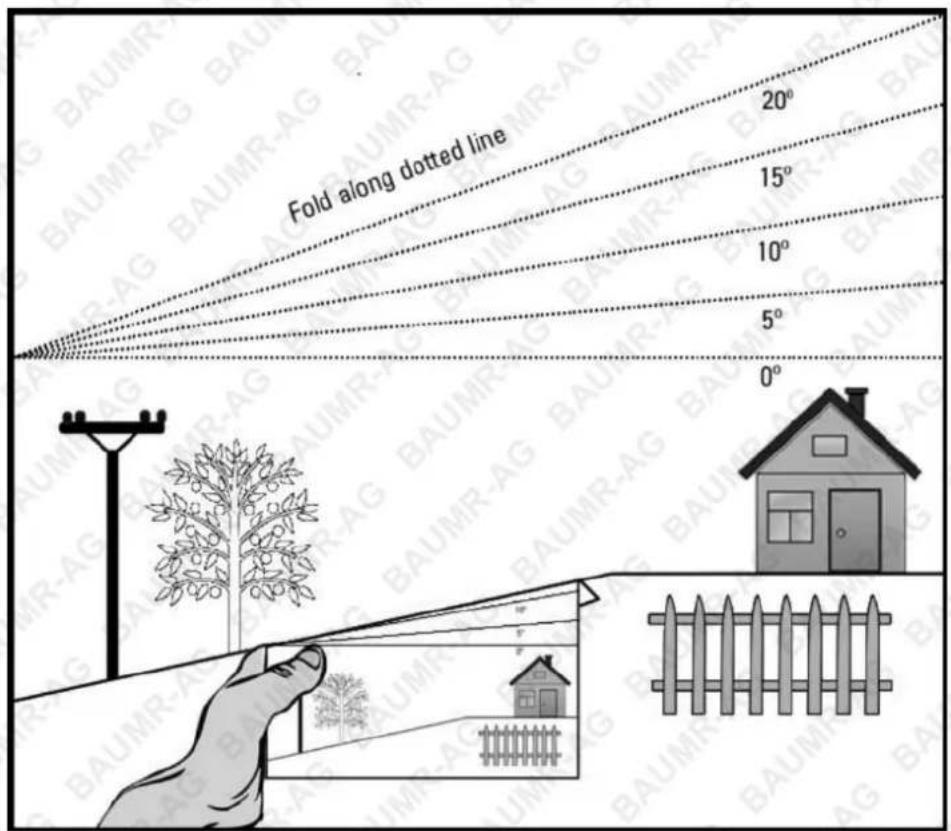
- The maximum slope angle you can safely operate your mower on is 15 degrees. Do not exceed 15 degrees with your mower.
- Lineup the side of this page with a vertical object to gauge the angle of the slope.
- Fold this sheet along the dotted line and verify the slope is not in excess of 15 degrees.
- WARNING! DO NOT OPERATE ON SLOPES EXCEEDING 15 DEGREES! OPERATING ON SLOPES EXCEEDING 15 DEGREES INCREASES THE RISK OF A ROLLOVER RESULTING IN SERIOUS INJURY.
• OPERATING ON SLOPES EXCEEDING 15 DEGREES ALSO CAUSES PREMATURE WEAR ON HYDRAULIC DRIVES.
• ALWAYS MOW ACROSS SLOPES. DO NOT MOW UP AND DOWN.
Safety Symbols
The product may have safety warning labels attached to it, explained below. Understand the symbols on your product and their meanings. If any stickers become unreadable, unattached etc., replace them.
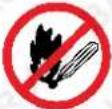 Flammable Material HazardFlammable liquids, gases, or substances etc may present.Avoid ignition sources and open flames. Danger of fire. Flammable Material HazardFlammable liquids, gases, or substances etc may present.Avoid ignition sources and open flames. Danger of fire. |  Read User ManualRead and fully understand product safety warnings, operation, procedures etc before using the product. Read User ManualRead and fully understand product safety warnings, operation, procedures etc before using the product. |  Use Hand ProtectionWear appropriate hand protection and take due care as the product or use of the product may present hand hazards. Use Hand ProtectionWear appropriate hand protection and take due care as the product or use of the product may present hand hazards. |  EXHAUST FUMESCarbon-Monoxide HazardDo not use the product in confined areas or without adequate ventilation. Carbon-monoxide poisoning can be fatal. EXHAUST FUMESCarbon-Monoxide HazardDo not use the product in confined areas or without adequate ventilation. Carbon-monoxide poisoning can be fatal. |
 Electrocution / Electrical Shock HazardHigh voltage or high current electricity may be present or required by the product. Take due care when handling electrical products, cables, plugs and leads. Electrical shock can be fatal. Electrocution / Electrical Shock HazardHigh voltage or high current electricity may be present or required by the product. Take due care when handling electrical products, cables, plugs and leads. Electrical shock can be fatal. |  Toxic Fumes / Dust HazardUsing the product or by-products from use may produce fumes, smoke or particles that could be harmful if inhaled. Wear appropriate breathing protection and have adequate ventilation. Toxic Fumes / Dust HazardUsing the product or by-products from use may produce fumes, smoke or particles that could be harmful if inhaled. Wear appropriate breathing protection and have adequate ventilation. |  Explosive Material HazardCombustible liquids, gases, or substances etc may be present.Avoid ignition sources and open flames. Danger of explosion. Explosive Material HazardCombustible liquids, gases, or substances etc may be present.Avoid ignition sources and open flames. Danger of explosion. |  Cutting / Amputation HazardThe product may have blades, edges or mechanical devices that can cause severe cut injury to fingers, limbs etc. Take due care when handling and using the product. Cutting / Amputation HazardThe product may have blades, edges or mechanical devices that can cause severe cut injury to fingers, limbs etc. Take due care when handling and using the product. |
 Crush HazardThe product may have blades, edges or mechanical devices that can cause severe crush injury to fingers, limbs etc. Take due care when handling and using the product. Crush HazardThe product may have blades, edges or mechanical devices that can cause severe crush injury to fingers, limbs etc. Take due care when handling and using the product. |  Single Operator OnlyThe product must be operated by a single person only. More than one person operating the product may introduce additional hazards. Single Operator OnlyThe product must be operated by a single person only. More than one person operating the product may introduce additional hazards. |  Use Face ProtectionWear appropriate full-face protection and take due care as the product or use of the product may present face and eye hazards. Use Face ProtectionWear appropriate full-face protection and take due care as the product or use of the product may present face and eye hazards. |  Use Foot ProtectionWear appropriate foot protection and take due care as the product or use of the product may present foot hazards. Use Foot ProtectionWear appropriate foot protection and take due care as the product or use of the product may present foot hazards. |
 Use Eye / Ear / Head ProtectionWear appropriate eye and / or ear and / or head protection and take due care as the product or use of the product may present eye, hearing, and head hazards. Use Eye / Ear / Head ProtectionWear appropriate eye and / or ear and / or head protection and take due care as the product or use of the product may present eye, hearing, and head hazards. | 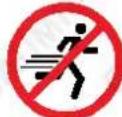 Running HazardDo not run on or near the product as doing so may present a fall hazard. Running HazardDo not run on or near the product as doing so may present a fall hazard. |  Diving HazardDo not dive into the product as doing so may present a neck / head injury hazard. Diving HazardDo not dive into the product as doing so may present a neck / head injury hazard. |  Adult Supervision RequiredAlways supervise children and other users of a product to prevent drowning or injury. Adult Supervision RequiredAlways supervise children and other users of a product to prevent drowning or injury. |
 Skin Penetration / Puncture HazardThe product may produce pressure, emit liquids or objects that can cause severe injury to fingers, limbs, blood etc. Take due care when handling and using the product. Skin Penetration / Puncture HazardThe product may produce pressure, emit liquids or objects that can cause severe injury to fingers, limbs, blood etc. Take due care when handling and using the product. | 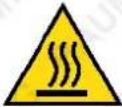 Hot Surface HazardBe aware that the product may produce high temperatures and hot surfaces that can cause burn injuries. Hot Surface HazardBe aware that the product may produce high temperatures and hot surfaces that can cause burn injuries. |  Flying Debris HazardBe aware that the product or use of the product may present hazards produced by flying debris. Wear appropriate clothing and protective devices. Flying Debris HazardBe aware that the product or use of the product may present hazards produced by flying debris. Wear appropriate clothing and protective devices. | 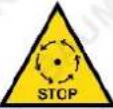 Moving Parts HazardBe aware that the product contains or uses mechanical devices that move or rotate. Always wait for moving parts to stop fully before handling the product, adjusting, maintenance etc. Moving Parts HazardBe aware that the product contains or uses mechanical devices that move or rotate. Always wait for moving parts to stop fully before handling the product, adjusting, maintenance etc. |
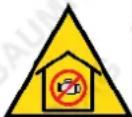 Carbon-Monoxide HazardDo not use the product in confined areas or without adequate ventilation. Carbon-monoxide poisoning can be fatal. Carbon-Monoxide HazardDo not use the product in confined areas or without adequate ventilation. Carbon-monoxide poisoning can be fatal. |  Pull HazardBe aware that the product contains or uses mechanical devices that can pull in objects and can cause severe injury to fingers, limbs etc. Take due care when handling and using the product. Pull HazardBe aware that the product contains or uses mechanical devices that can pull in objects and can cause severe injury to fingers, limbs etc. Take due care when handling and using the product. | 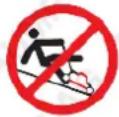 Slope / Fall Injury HazardBe aware that using the product on sloping surfaces or in slippery conditions may present additional dangers from falls and contact with blades, moving parts, hot surfaces etc. Slope / Fall Injury HazardBe aware that using the product on sloping surfaces or in slippery conditions may present additional dangers from falls and contact with blades, moving parts, hot surfaces etc. | 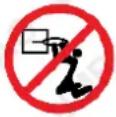 "Slam Dunk" WarningDo NOT attempt "slam dunk" manoeuvres as this may result in severe injury due to falling, product breakage or collapse etc. "Slam Dunk" WarningDo NOT attempt "slam dunk" manoeuvres as this may result in severe injury due to falling, product breakage or collapse etc. |
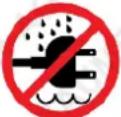 Electrocution / Electrical Shock Hazard - OutdoorHigh voltage or high current electricity may be present or required by the product. Do NOT use in rain, damp, or wet conditions. Electrical shock can be fatal. Electrocution / Electrical Shock Hazard - OutdoorHigh voltage or high current electricity may be present or required by the product. Do NOT use in rain, damp, or wet conditions. Electrical shock can be fatal. | 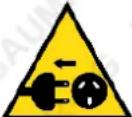 Electrocution / Electrical Shock Hazard - DisconnectHigh voltage or high current electricity may be present or required by the product. Always disconnect the product from the electrical supply before handling the product, adjusting, maintenance etc. Electrocution / Electrical Shock Hazard - DisconnectHigh voltage or high current electricity may be present or required by the product. Always disconnect the product from the electrical supply before handling the product, adjusting, maintenance etc. |  Power Line Electrocution HazardHigh voltage / high current power lines may be present. Use extreme caution to avoid contact or interference with power lines. Electrical shock can be fatal. Power Line Electrocution HazardHigh voltage / high current power lines may be present. Use extreme caution to avoid contact or interference with power lines. Electrical shock can be fatal. | 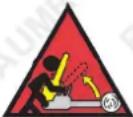 "Kick-Back" HazardHigh level of "kick-back" hazard that can cause the machine to suddenly rotate towards operator. Kick-back injury can be fatal. "Kick-Back" HazardHigh level of "kick-back" hazard that can cause the machine to suddenly rotate towards operator. Kick-back injury can be fatal. |
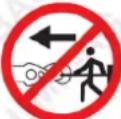 Winch Operator Position HazardDo NOT stand between winch and load. Do NOT use winch to move people. Winch Operator Position HazardDo NOT stand between winch and load. Do NOT use winch to move people. | 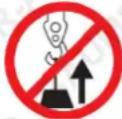 Winch Lift HazardDo NOT LIFT load vertically. Use machine to PULL only. Winch Lift HazardDo NOT LIFT load vertically. Use machine to PULL only. | 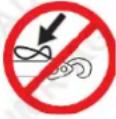 Cable HazardEnsure that load bearing cable is not kinked or knotted. Cable HazardEnsure that load bearing cable is not kinked or knotted. | 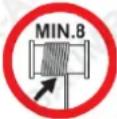 Winch Cable HazardEnsure that there is a minimum number of cable coils on winching mechanism. Winch Cable HazardEnsure that there is a minimum number of cable coils on winching mechanism. |
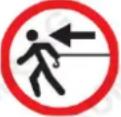 Winch Hook HazardCarry hook to load – do NOT throw or run. Winch Hook HazardCarry hook to load – do NOT throw or run. |  Flash / Blinding HazardWear appropriate eye protection for welding. Direct exposure to weld arcs may cause permanent eye injury. Flash / Blinding HazardWear appropriate eye protection for welding. Direct exposure to weld arcs may cause permanent eye injury. |  Laser HazardLaser may be in use – do NOT look directly at laser or allow others to. Laser HazardLaser may be in use – do NOT look directly at laser or allow others to. | 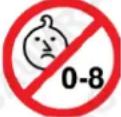 Choking HazardChildren under 8 yrs. Can choke or suffocate on small parts. Adult supervision required. Choking HazardChildren under 8 yrs. Can choke or suffocate on small parts. Adult supervision required. |
Table of Contents
Safety 2
Safety Symbols....10
Control Panel and Lawn Mower Components ....14
Control Panel....14
Lawn Mower Component Identification ....15
Operation....16
Starting the Engine....16
Operating the Mower 17
Changing the Cutting Height 18
How to Change the Cutting Height....18
Mowing 19
Disengaging the Hydrostatic Drive Units....20
Quick Start Guide Diagrams....21
Lead-Acid Battery Care and Maintenance....24
Top 3 Battery Care Requirements....24
Maintenance 25
The Importance of Maintenance....25
Fuel 25
Tyre Pressure 25
Air Filter 26
Engine Oil 26
Blades 26
Maintenance Schedule 26
Cleaning the Mower....27
Return to Neutral 27
Deck Belt Tension....28
Deck Belt 29
Deck Belt Routing....29
Deck Belt Retainers....30
Verifying Deck Belt Retainers....30
Spindle Brake Inspection and Replacement ....31
Removing the Blades 32
Engine-to-Hydrostatic Drives Belt Adjustment (Hydro Input Belt)....33
Hydraulic Drive System Adjustment....34
Safety System Adjustments....35
Tracking Adjustments 36
Lubrication 37
Changing the Battery....37
620ZRX Zero Turn Ride On Mower
Bäumr-AG®
Charging the Battery....38
Short Term Storage....38
Extended Storage....39
Troubleshooting 40
Specifications 42
Control Panel and Lawn Mower Components
Throughout this manual, instructions are given on the operation of your mower. We recommend that while going through this manual, you have your mower available for quick and easy access in order to orient yourself with the controls, maintenance, and orientation of different parts. Please read through the manual before operating.
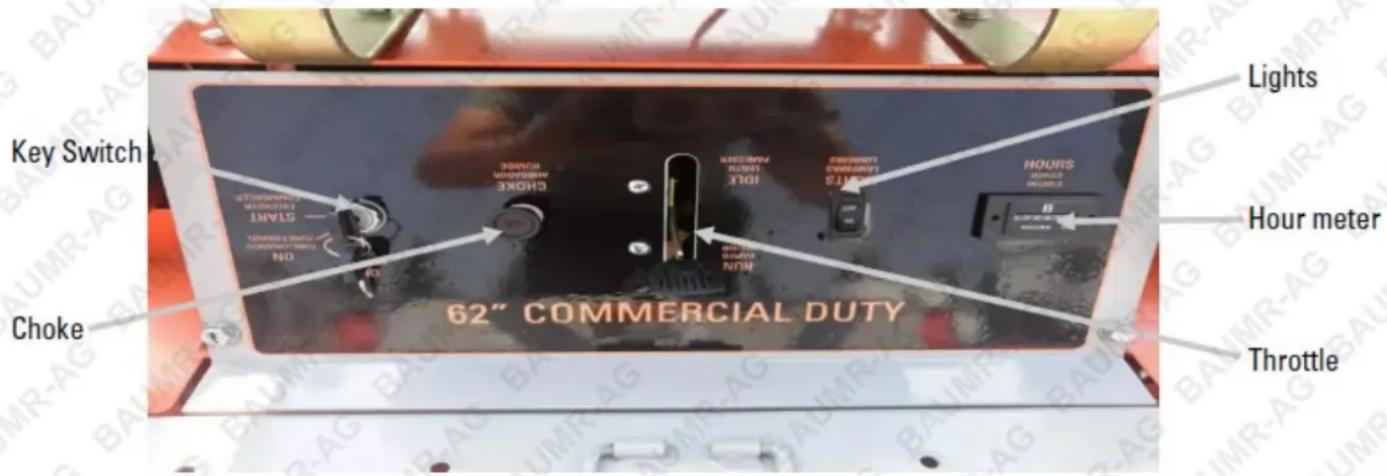
Control Panel
Below, you will find a diagram of the control panel. Please take the time to familiarize yourself with the mower controls. NOTE: There might be slight differences of appearances between image below and your unit.
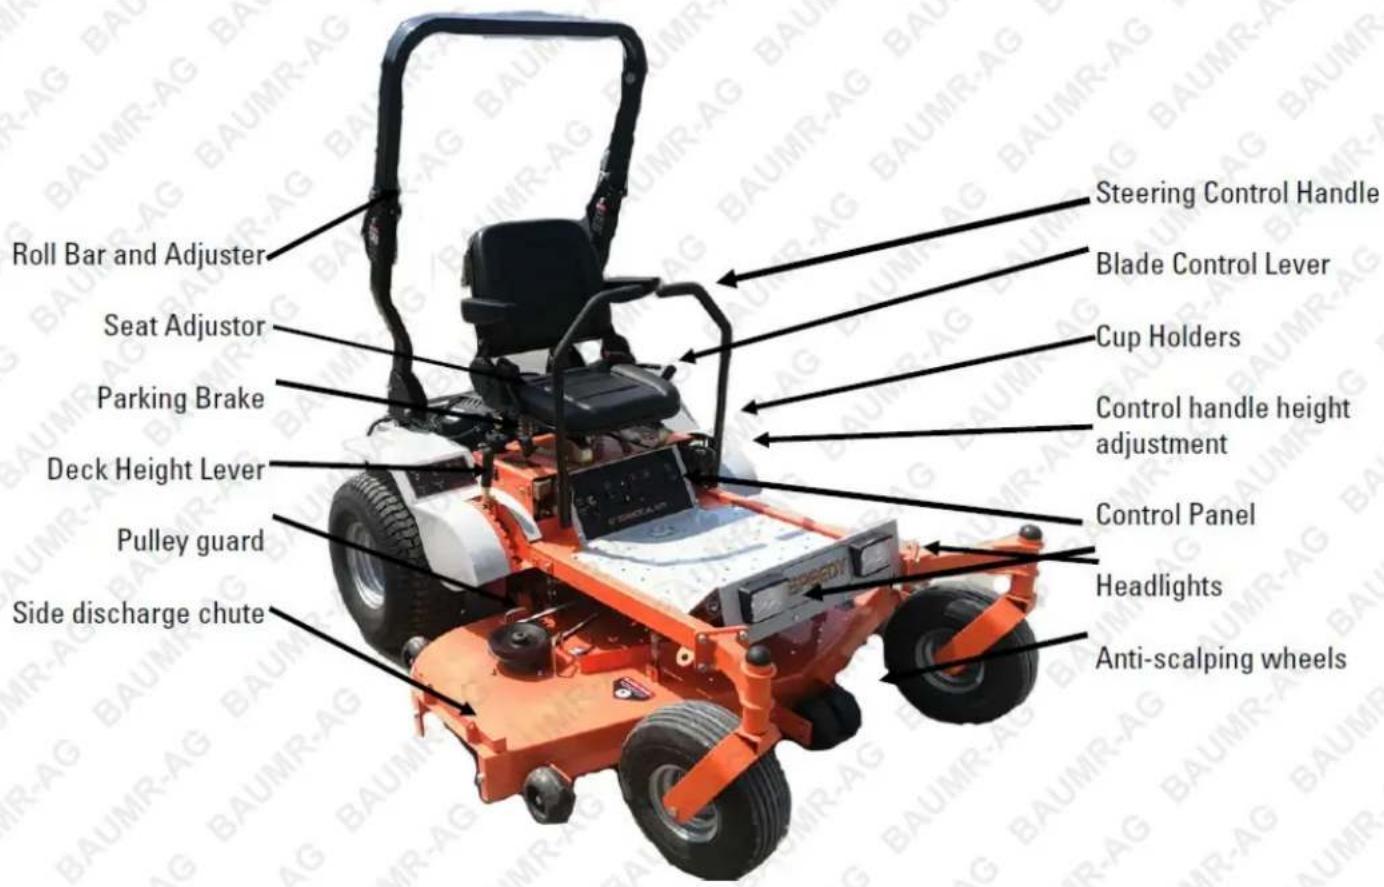
Lawn Mower Component Identification
NOTE: Some components may appear different than shown, depending on the model.
Operation
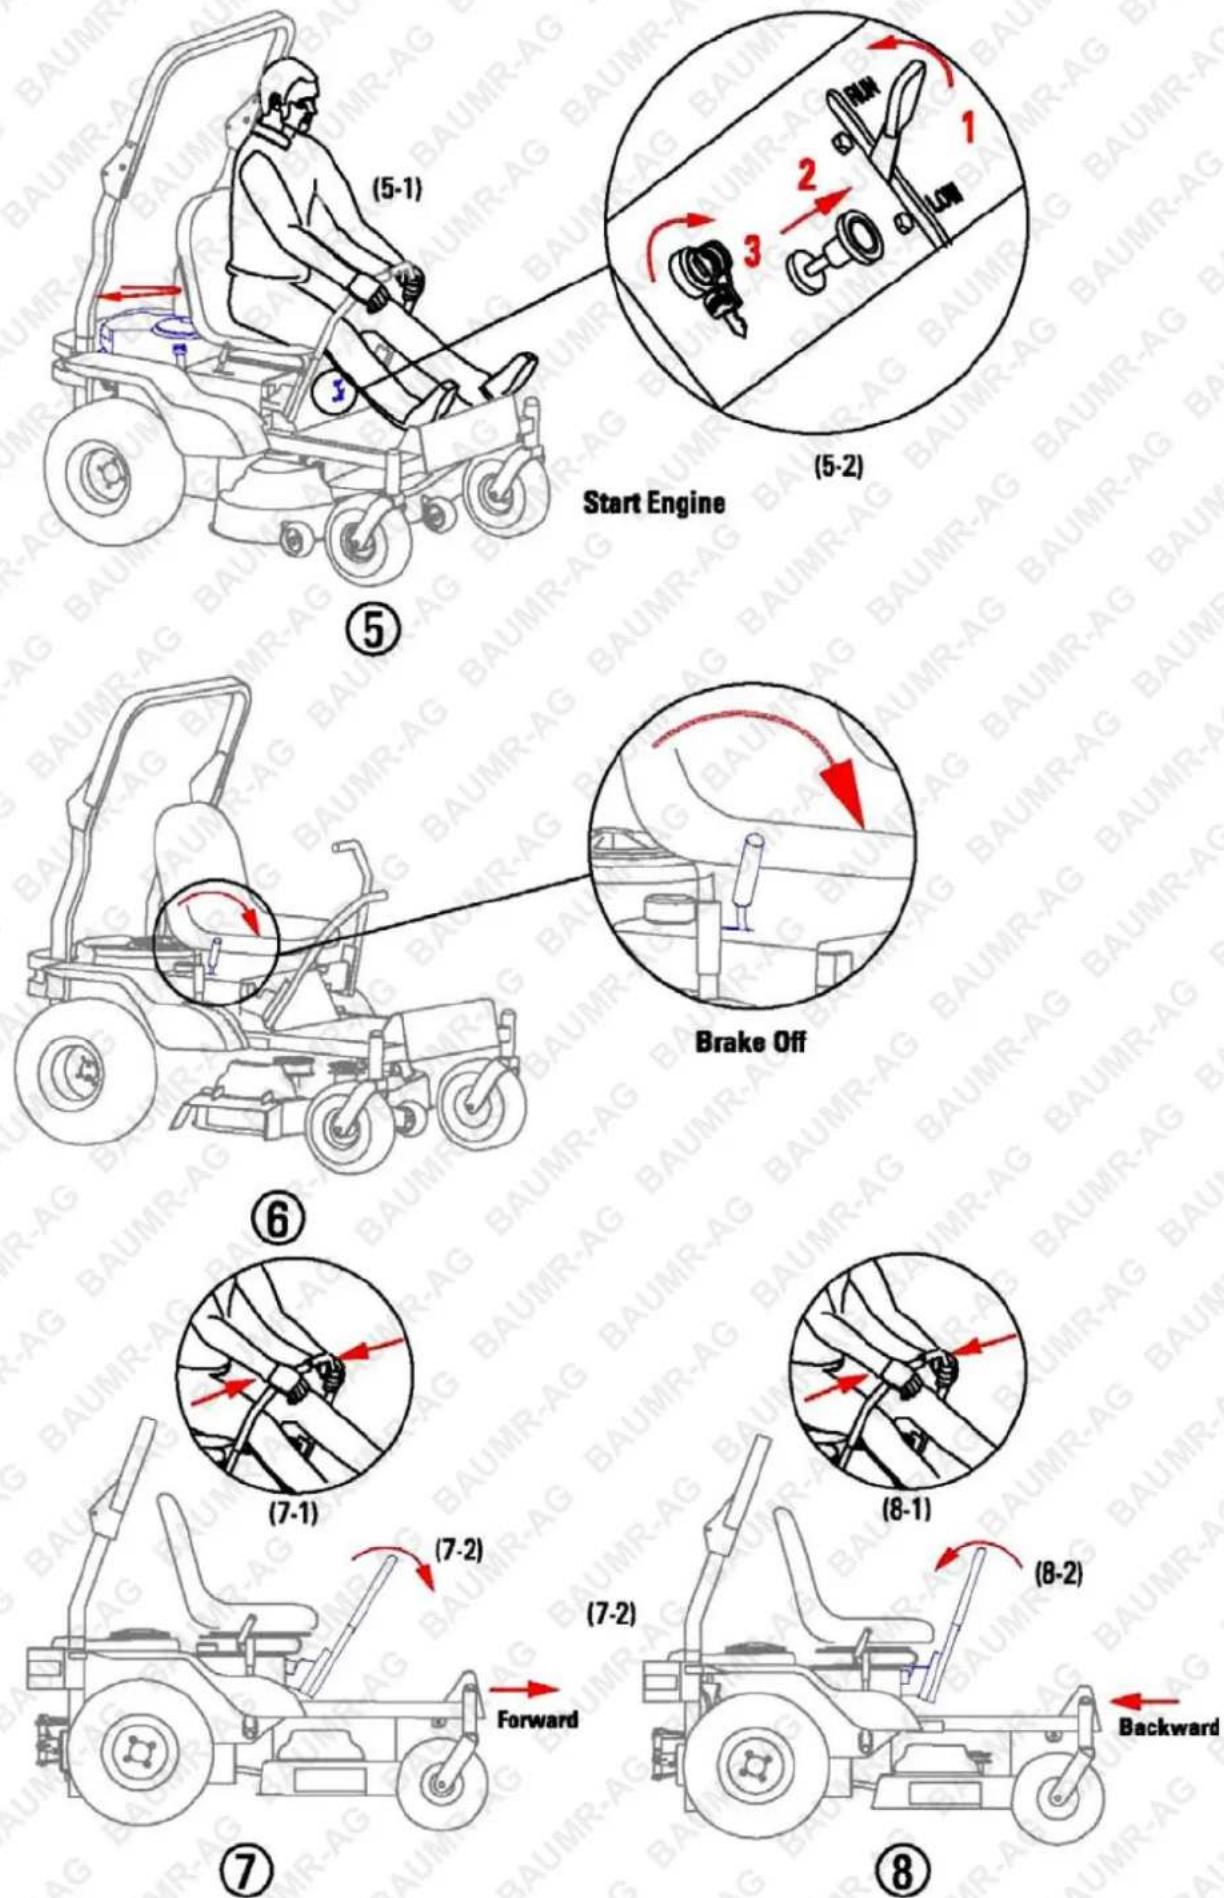
Starting the Engine
DANGER! Before attempting to use your mower, make sure you are familiar with all of the components and have read the manual.
DANG ER! Exhaust contains poisonous carbon monoxide, a colourless and odourless gas. Breathing exhaust can ca use loss of consciousness and may lead to death. Do not operate the engine in a confined space where dangerous carbon monoxide fumes can collect.
NOTE: Be sure to add fresh unleaded gasoline and fill the engine to the proper level with manufacturers recommended motor oil before starting your mower.
- Make sure the shut off valve, located at the bottom of the tank, is in the ON position.
natural_image
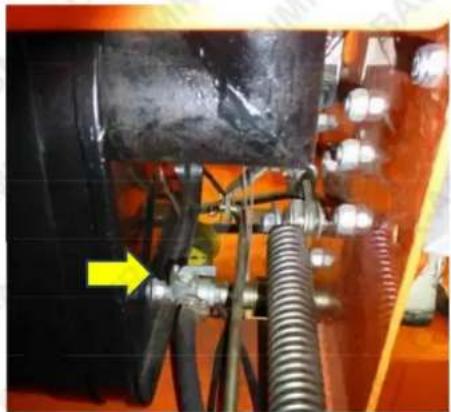
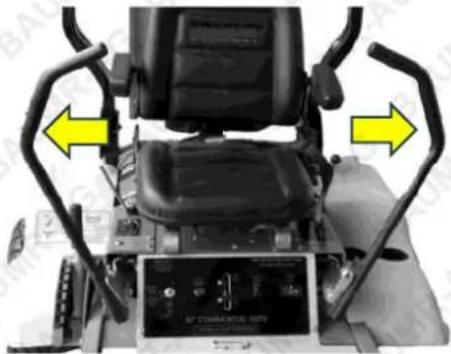
Close-up of industrial machinery components with hoses and a yellow arrow pointing to a component (no visible text or symbols)- Make sure the brake is set and the 2 control handles are spread open into their neutral position.
natural_image
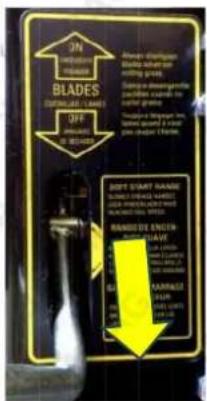
Top-down view of a mechanical device with visible brackets and control panel (no text or symbols)- Make sure the blade control lever is in the OFF position.
-
Pull CHOKE and set the throttle to its midpoint.
-
Turn the key clockwise to the START position and allow it to return to the ON position when the engine starts.
- When the engine starts to run and the key returns to the ON position, push CHOKE off.
Operating the Mower
- Make sure the brake has been moved to the OFF Position.
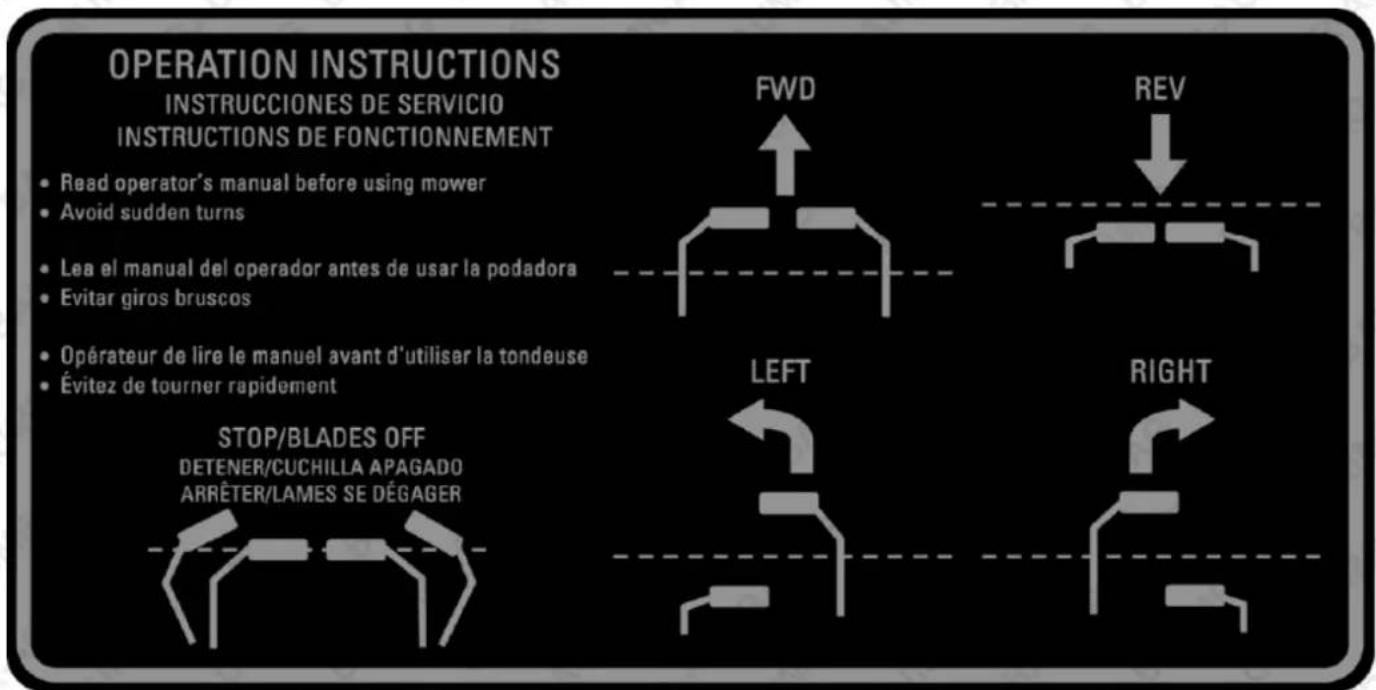
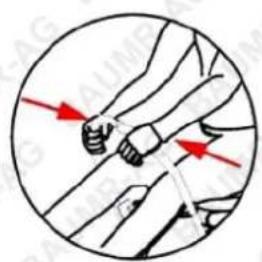
- Pull both handles to the centre.
- To drive the mower forward, push both handlebars forward away from the chest. The forward speed is directly proportional to the degree these handles are moved forward.
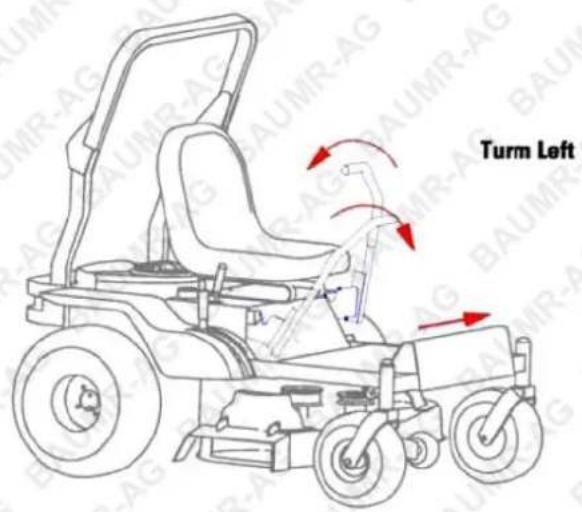
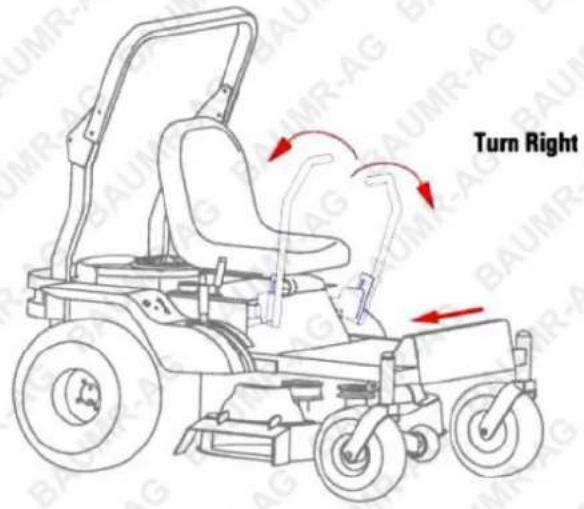
- To turn the mower left, push the right handle further forward than the left handle.
- To turn the mower right, push the left handle further forward than the right handle.
- To stop the forward motion of the mower, move both the handles to the centre/neutral position.
- To drive the mower backwards, pull both handles backwards toward the chest.
- To turn to the left in reverse, pull the right handle further back than the left handle.
- To turn right in reverse, pull the left handle further back than the right handle.
- To zero turn to the right, push the left handle forwards and the right handle backwards.
- To zero turn to the left, push the right handle forwards and the left handle backwards.
- When in the neutral position, the hydraulic system prevents the mower from moving easily. However, on a grade, the mower can move very slowly (with the engine off or running). Be sure to set the manual parking brake any time the mower is left unattended or is being transported.
- When the handles are in the middle position, they can be pushed away from each other to lock the mower in the neutral.
NOTE: the hydraulic drive units are shipped with summer oil. At cooler temperatures the hydraulic drive units may require 5 to 10 minutes of warm up for optimum performance. This warm up may be longer in cool weather and shorter in warm weather.
flowchart
graph TD
    A["READ OPERATOR'S MANUAL BEFORE USING MOWER"] --> B["LEA EL MANUAL DEL OPERATOR ANTES DE USAR LA PODADORA"]
    B --> C["Evitar GIROS BRUSCOS"]
    C --> D["OPÉRATEUR DE LIRE LE MANUEL AVANT D'UTILISER LA TONDEUSE"]
    D --> E["ÉVITEZ DE TOURNER RAPIDEMENT"]
    E --> F["STOP/BLADES OFF DETENER/CUCHILLA APAGADO ARRÊTER/LAMES SE DÉGAGER"]
    F --> G["FWD ↑"]
    G --> H["LEFT"]
    H --> I["REV ↓"]
    I --> J["RIGHT ↑"]
Changing the Cutting Height
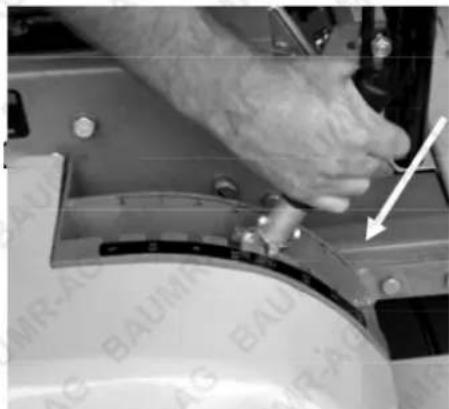
Your mower is equipped with an easily adjustable floating deck, which can be adjusted for cut heights approximately 1 12 inches to 5 inches in approximately 1 / 2 -inch increments. The deck height adjuster is located on the right side of the mower.
How to Change the Cutting Height
- Disengage the blades.
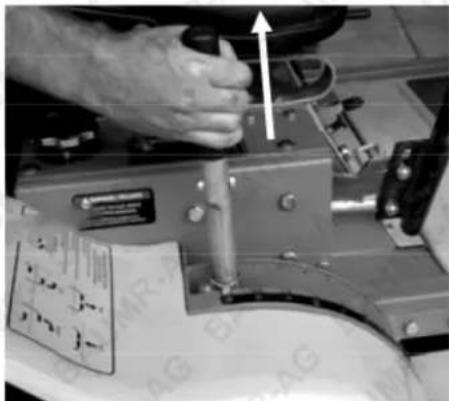
- Extend the blade control lever by pulling it up.
natural_image
Close-up of a hand operating a mechanical device with a white arrow indicating direction (no visible text or symbols)- Pull the deck height handle to toward the seat and pivot back or forward to shift the deck up or down to the desired height.
- Push the deck height handle away from the seat to lock it in the desired position.
natural_image
Close-up of a hand adjusting a mechanical component with a white arrow pointing to a detail (no visible text or symbols)- After deck height is changed the lever should be pushed back down to its original position.
NOTE: After mowing, remember to raise the deck to its highest position to avoid scraping or any other kind of damage to the blades or deck.
Mowing
WARNING! Thoroughly inspect the area where you plan to use the mower. Look for items such as stones, sticks, wire, and other foreign objects. If struck by the mower, these and other objects may become projectiles that could lead to serious injury or death. Clear area of all debris. Keep people and pets at a safe distance.
WARNING! Do not operate the mower with defective guards, shields, or without the safety devices securely in place.
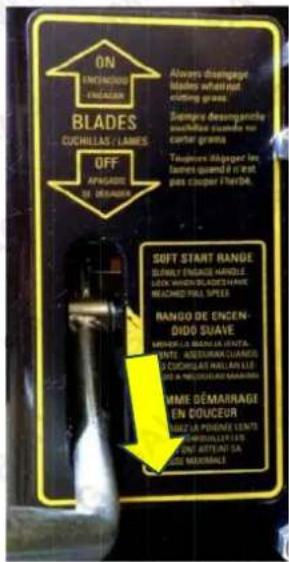
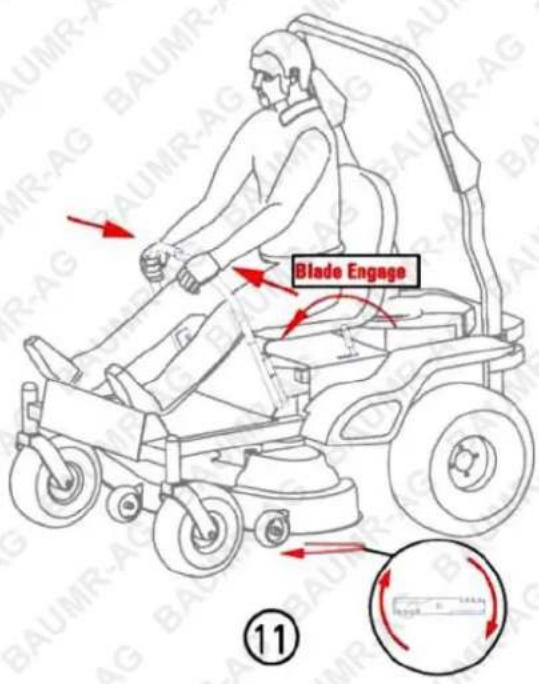
This mower is equipped with a Soft Start feature. The Soft Start feature gradually engages the blades to increase belt, clutch, and engine life. NEVER “slam” the blade on/off handle from off to on without pausing an adequate time in the Soft Start range. Doing so will cause excess wear to the belt, clutch, and engine.
- When the mower is in position on the area to be mowed, move the throttle to its full speed.
- SLOWLY push the blade control lever forward into the soft start range.
- When the blades have reached full speed push the blade control lever fully into the on position.
- Begin mowing as described on the previous page, always using safe/ comfortable speeds.
- To stop the blades, pull the blade control lever back to the OFF position.
IMPORTANT! The mower belts are adjusted to ensure the blades stop turning within seven (7) seconds of releasing the blade control lever. If you are making any belt adjustments whatsoever, for your safety and the safety of others around you, you must ensure the belts are re-adjusted to achieve this design specification.
Disengaging the Hydrostatic Drive Units
Before physically moving the mower when the engine is NOT running, the hydrostatic drive units need to be disengaged into free-wheel mode.
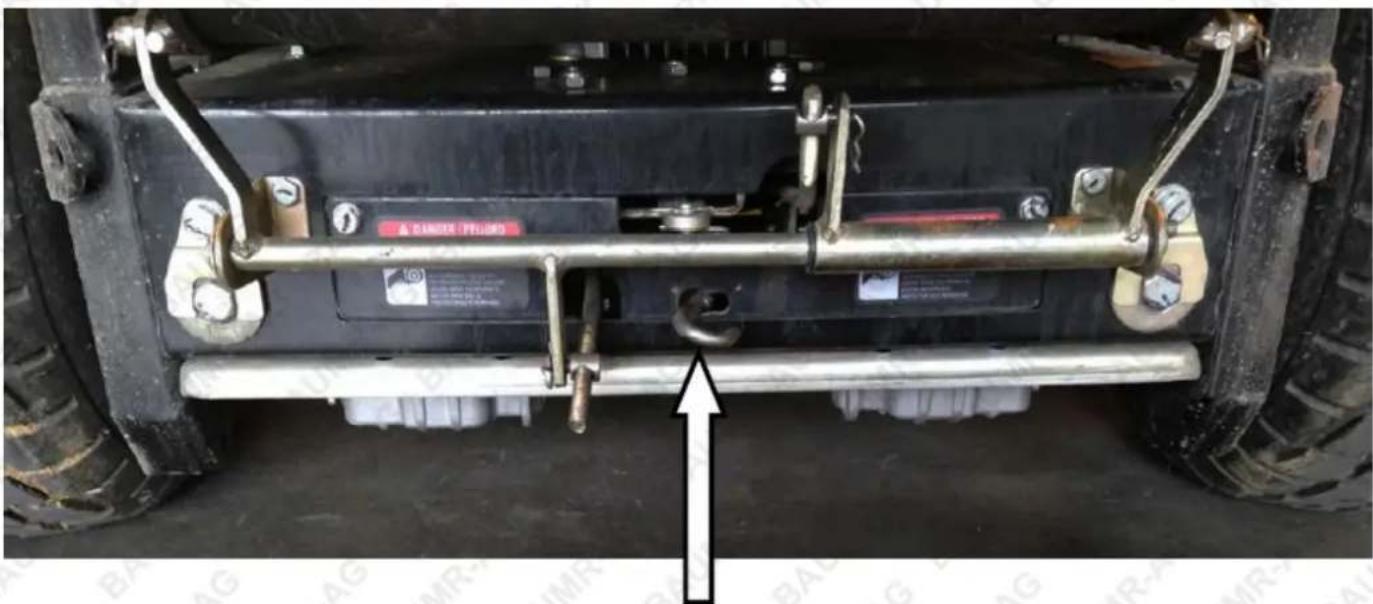
To disengage the hydraulic drive units:
- Stand at the rear of the mower and locate the hydraulic drive disengagement mechanism.
- Pull the disengagement mechanism outward toward the rear of the mower until the thickened section of the rod is outside of the access panel. (Note this may take a large amount of force as the springs inside are very stiff).
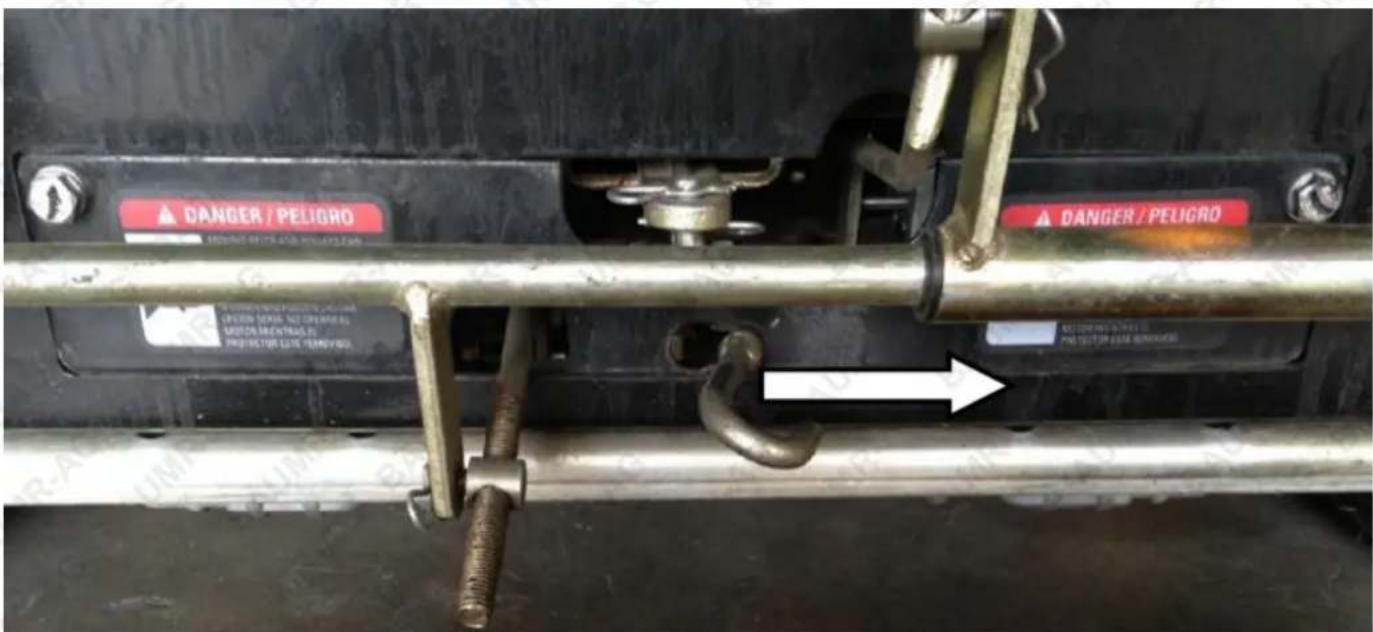
-
Slide the disengagement mechanism to the right so that the thickened section of the rod is captured in the narrow end of the slot. In the lower picture the disengagement mechanism is shown in the disengaged position.
-
To reengage the hydraulic drive units, pull the disengagement mechanism out, slide it to the left, and release. Make sure the thickened section of the rod passes back through the wide end of the slot.
Quick Start Guide Diagrams
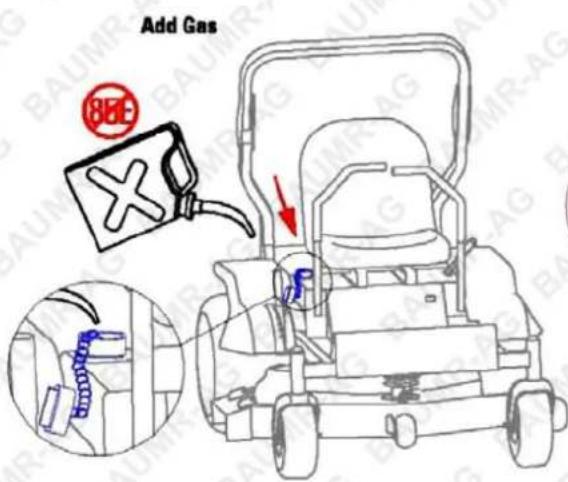
①
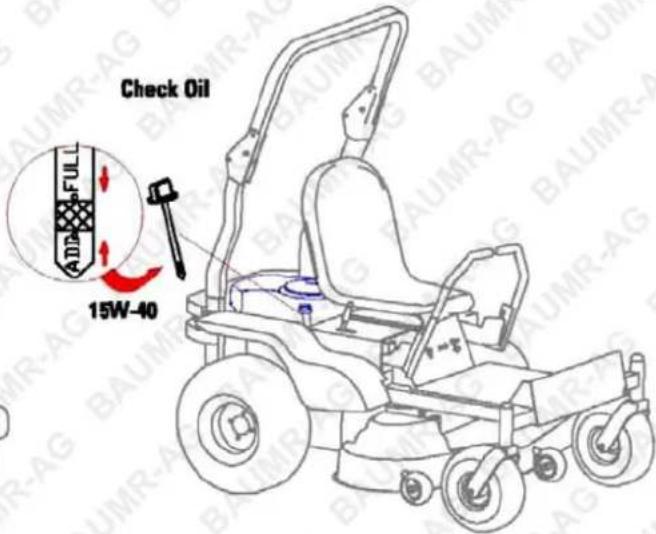
②
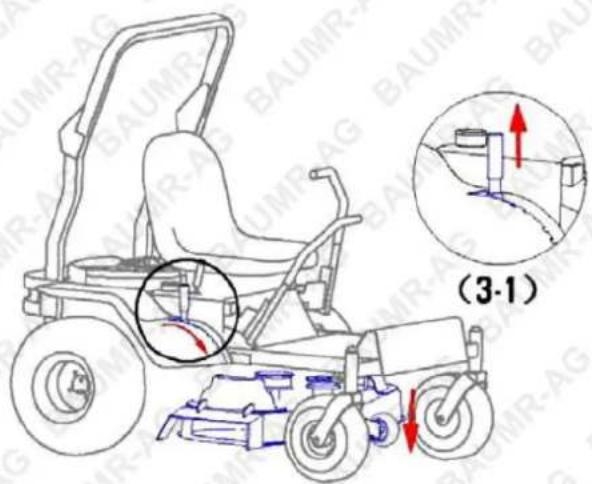
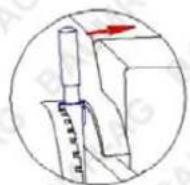
(3-2)
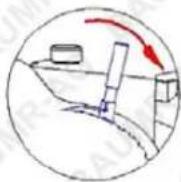
(3-3)
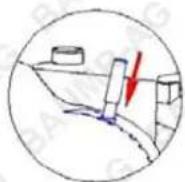
(3-4)
Deck Down
③
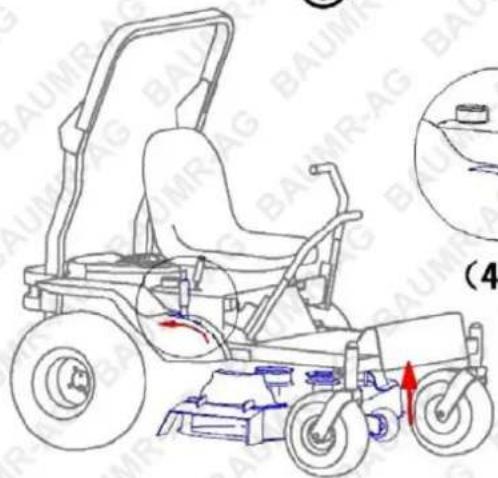
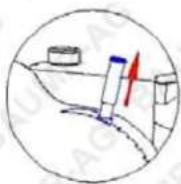
(4-1)
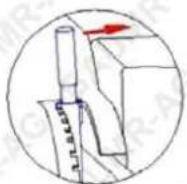
(4-2)
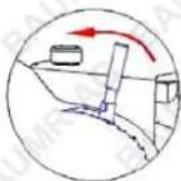
(4-3)
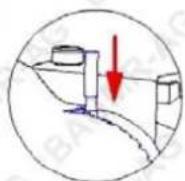
(4-4)
Deck Up
④
⑨
10
natural_image
Illustration of a hand performing a physical maneuver with red arrows indicating motion direction (no text or symbols)(4-1)
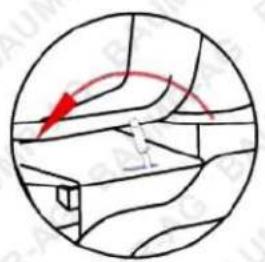
natural_image
Circular diagram showing intersecting road lines with a red arrow indicating direction (no text or symbols)(4-2)
Blade engage
⑫
Lead-Acid Battery Care and Maintenance
Top 3 Battery Care Requirements
- Charge battery before first use. The battery may arrive with some charge, regardless of this the battery must be charged on the initial charge and for each subsequent charge.
- Charge battery immediately when it is depleted. Do not store a depleted battery. This will permanently impact the life of the battery. If the battery is going to be stored for a period of time, fully charge the battery before storing.
- Disconnect battery when not in use. To prolong the life of a battery, disconnect it from the unit when not in use. Disconnect chargers from the battery once charged.

To ensure the battery maintains optimum performance, follow the guidelines outlined below.
• For best results, charge batteries in temperatures between 10^ C and 30^ C
- When battery is charged, disconnect the charger from the power supply and remove the battery from the charger.
- Inspect the terminals, screws, clamps and cables for breakage, damage, or loose connections. These should be clean, tight, and free of corrosion.
• Use only with the battery charger specified by the manufacturer.
- Ensure that the battery charger electrical cord is not subjected to damage or stress. Do not operate the battery charger if it has a damaged electrical cord or plug.
- Do not use the charger in wet areas or expose it to rain or water.
- Keep the battery clean, dry, free of dirt and grime. A dirty battery can discharge across the grime on top of the battery casing.
- Apply a thin coating of high temperature grease to posts and cable connections for added protection.
- Inspect the battery case for obvious signs of physical damage or warpage. This usually indicates the battery has been overheated or has been overcharged.
- Batteries can explode in the presence of an ignition source, such as a pilot light. To reduce the risk of serious personal injury, never use any cordless product in the presence of open flame. Exploding batteries can propel debris and chemicals.
- Do not open the battery – danger of short-circuiting and/or explosion.
- Do not attempt to destroy or disassemble the battery pack or remove any of its components.
- Do not touch the battery terminals with metal objects and/or body parts as short-circuit and/or personal injury may result.
- Explosion hazard – protect the battery against heat, for example, direct sunlight and fire. Do not store batteries in vehicles or locations subject to heat.
- Explosion hazard – do not open and/or short-circuit the battery.
- Poison hazard – battery leakage (liquid ejection). Under extreme conditions, liquid may be ejected from the battery – avoid contact. If contact accidentally occurs, immediately seek medical attention, and flush with water. If liquid contacts eyes, immediately seek medical attention, flush with clean water for at least 10 minutes. Liquid ejected from the battery may cause irritation or burns.
- Dispose of non-serviceable batteries in an environmentally responsible manner and according to local regulations.
Failure to adhere to the requirements above may result in the battery becoming inoperative or battery life being reduced. In extreme cases or abuse, battery overheating, or fire may result.
Maintenance

ATTENTION: Surface corrosion will occur on metal surfaces over time and the rate of oxidation depends on factors such as proximity to the ocean and humidity or condensation of water vapour on metal surfaces. To mitigate this, WD40 can be used to remove surface corrosion then, when applied periodically, it will prevent rust from forming.
The Importance of Maintenance
- Regular maintenance is essential to ensure your mower continues to deliver safe and high-quality performance.
• To help you properly care for your mower, the following pages include a recommended maintenance schedule, routine inspection procedures, and simple maintenance procedures using basic hand tools. - Maintenance is the responsibility of the owner and must be performed regularly. More difficult service tasks or tasks that require special tools are best handled by a recommended service technician or other qualified mechanic.
- The maintenance schedule applies to mowers used under normal operating conditions. If you operate your mower under severe conditions, such as sustained prolonged use or high temperature operations, or use it in unusually wet, dusty, or rocky conditions, consult your servicing dealer for recommendations applicable to your individual needs and use.
- Be sure to use genuine manufacturer-approved mower replacement parts when servicing your mower to assure the best quality, safety, and performance.
Fuel
DANGER: Gasoline is highly flammable and explosive. Do not add fuel while the engine is running or is hot. Keep open flames, sparks, and heat away from the fuel and store fuel in containers specifically designed for that purpose. Add fuel outdoors only and if the fuel is spilled, do not start the engine. Manually push the mower away from the spill and wipe up immediately.
• Refer to the Engine Owner's Manual for the type of fuel to use.
- A fuel shut off valve is located on the bottom of the fuel tank. It is recommended that the fuel be shut off when transporting between job sites and when storing the mower for extended periods of time.
CAUTION! Before making any adjustments and/or servicing to your mower, make sure the mower is on a level surface, with the ignition switch off, the key removed, the brake set, and the blades disengaged. Also, disconnect the spark plug wires from the spark plugs and ground them against the engine to prevent inadvertent starting.
- If you are performing adjustments or maintenance after operating the mower, allow the unit to cool and always wear protective clothing.
Tyre Pressure
Incorrect tyre pressure may cause the mower to pull to one side and/or result in uneven cut. Use caution when filling the tyres. NEVER exceed the recommended maximum tyre pressure as stated on the tyres.
Air Filter
Refer to the Engine Owner's Manual for the recommended maintenance.
Engine Oil
CHECK ENGINE OIL BEFORE EACH USE. RECOMMENDED ENGINE OIL: 10W-30/10W-40. Refer to the Engine Owner's Manual for the type of oil to use, oil change intervals, and the proper procedures to check and change oil.
Blades
- Inspect blades daily for nicks, bends, and excessive wear. If the blades are worn, cracked, bent, or damaged, replace them before using the mower. Choose genuine manufacturer-approved mower replacement blades to ensure quality and performance.
- When sharpening the blades, sharpen only the cutting edges and try to maintain the original angle of the blade. Do not make the cutting edge razor sharp. Remove the same amount from each side of the blade so that balance in maintained.
CAUTION: Always wear work gloves when performing blade maintenance and beware of the cutting edges. Be sure the engine is off, the key removed, and the spark plug wires are disconnected from the spark plugs to prevent inadvertent starting.
Maintenance Schedule
| Item Procedure | Time Interval | |||||
| Break-in(first 5 hrs.) | Every 8hrs. (daily) | Every40 hrs.(weekly) | Every 100hrs. (bi-weekly) | Every 200hrs. (monthly) | ||
| Belts Inspect (adjust if needed) | √ | √ | ||||
| Blades Inspect and/or sharpen | √ | |||||
| Engine Air Filter | Inspect (see EngineOwner's Manual) | √ | ||||
| Engine CoolingAreas | Clean (see EngineOwner's Manual) | √ | ||||
| Engine Oil | Check (see EngineOwner's Manual) | √ | √ | |||
| Change (see EngineOwner's Manual) | ||||||
| Engine Oil Filter | Change (see EngineOwner's Manual) | |||||
| Engine SparkPlug | Inspect (see EngineOwner's Manual) | |||||
| Fuel Filter Replace | √ | |||||
| Fuel Line Check | √ | |||||
| Grease Fittings | SeeLubrication Points | |||||
| Hardware | Check for proper tightness | √ | √ | |||
| Mower Main Frame | Remove debris from under belt cover | √ | ||||
| Safety Interlock System | Check Operations and Switches | √ | ||||
| Tyres Check air pressure | √ | |||||
| Spindle/Blade Brakes | √ | |||||
Cleaning the Mower
It is recommended that the lawn mower be cleaned on a daily basis. Excessive accumulation of dirt, debris, oil, etc. on cutting units, drives, mufflers, and engine may present a potential safety hazard. Also refer to the engine owner's manual for additional cleaning instructions.
Return to Neutral
DANGER! Make certain the engine comes to a complete stop before putting your hands in the access panel.
If the mower creeps or will not stop as desired when the handles are in neutral position, adjustments are necessary.
CAUTION: Be sure the engine is OFF before you open the hydraulic drive access panel.
- Remove the bolts to access hydraulic drive access panel.
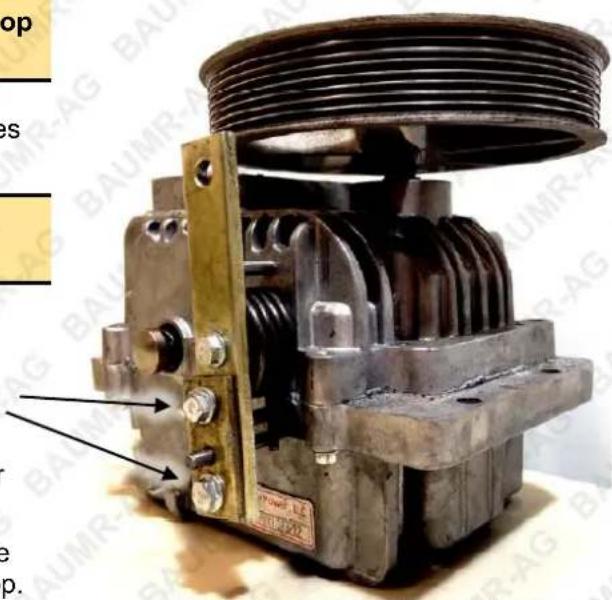
- Using an 8 mm wrench, reach through the bottom of the hydraulic drive access panel to the return-to neutral set pin bolts. Loosen bolts on the side that needs adjusting.
- Be sure the brake is in the OFF position. In a safe operator position, start the engine.
- With the engine running, slowly move the handle on the side needing adjustment until that side comes to a complete stop.
If the mower creeps forward, pull handle in reverse, If the mower creeps backward, pull the handle forward. - When the mower stops moving completely, the hydraulic drive is in the neutral position.
- Turn off the engine.
- Slowly tighten the bolts without moving the plate.
- With the bolts tightened, move to a safe operator position, and start the engine.
- If the creep has returned, repeat the process. Multiple iterations may be required.
- Reinstall hydraulic drive access panel.
Deck Belt Tension
It is recommended to check and adjust, if necessary, the deck belt tension after the initial 5 hours of use on the hour meter. The new belt will seat into pulley grooves and may need adjusting. After the initial break in period, it is recommended to inspect belt tension and adjust, if necessary, every 8 hours. Follow the steps below to inspect belt tension. Follow ALL safety precautions mentioned in this manual when doing any maintenance on your mower.
NOTE: Failure to inspect and adjust the deck belt tension can result in poor mowing performance and pre-mature belt wear.
DANGER: Before making any adjustments or servicing your mower, make sure the mower is on level ground, the blades are disengaged, the brake set, the key is removed, the engine is off, and the spark plug wires are disconnected from the spark plugs to prevent inadvertent starting. If maintenance or adjustments are being performed after operation of the mower, allow the unit to cool since heat build-up could cause severe burns.
- Ensure the blade engagement handle is in the "OFF" position.
- Set your deck height to its LOWEST setting (1.5 inches)
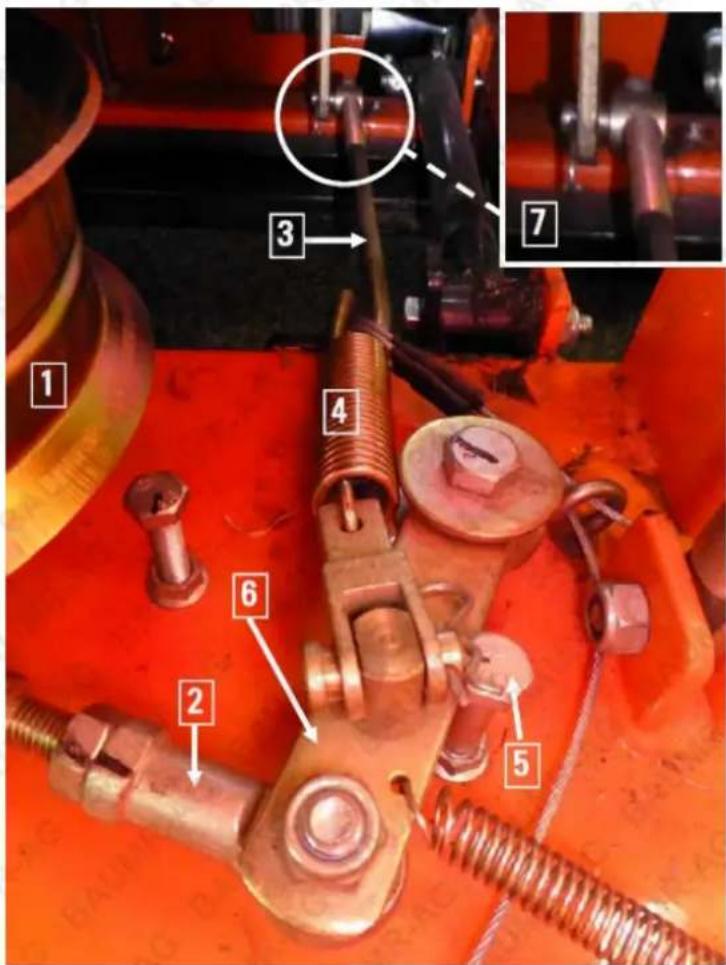
- Open the floorboard and locate the idle/clutch pulley (1) and turnbuckle (2).
- Check the clutch linkage pre-load.
- If the threaded rod and spring assembly (3 & 4) is too tight, the clutch will not contact the return stop bolt (5). The clutch pivot arm (6) should stop within a 1/4" of the stop bolt (5).
- If the threaded rod and spring assembly (3 & 4) is too loose, the spring will contact the deck surface.
- To adjust the pre-load, remove the cotter pin from the slack adjuster on the threaded rod (3) and slide the linkage off the arm (7). Thread the linkage pivot in or out to set pre-load as stated above.
- Move the blade engagement handle to the "ON" position.
- Using your hand, press the clutch pulley (7) in the direction indicated with about 20-25lbs of pressure. Ensure that the swing arm (8) stops within 1 inch to 1.5 inches from the stop bolt (9).
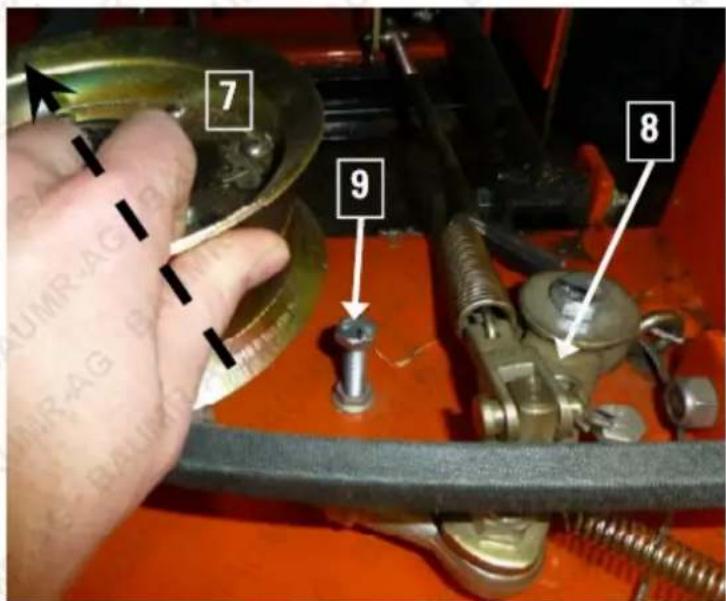
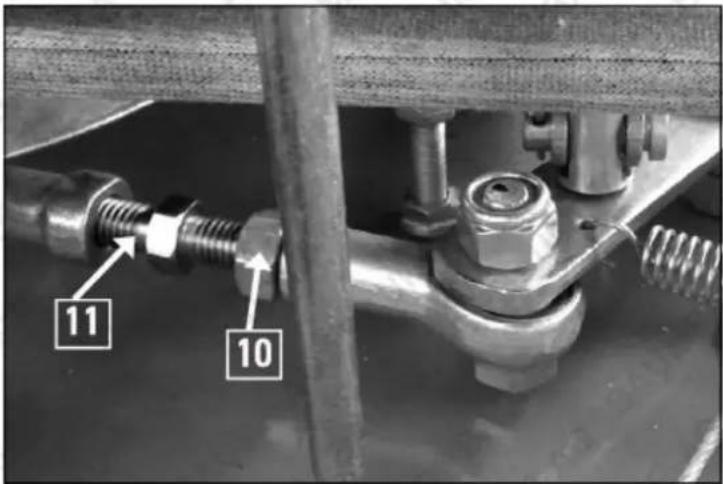
- If the swing arm reaches the stop bolt, the tension is too loose. Move the blade engagement handle to the "OFF" position. Loosen the turn-buckle locknut (10). Adjust the turnbuckle linkage (11), extending the pulley. Move the blade engagement handle back to the "ON" position and repeat test by applying 20-25 lbs of pressure and check the stop bolt clearance. The swing arm should be 1" - 1.5" away from the stop bolt.
- If the swing arm has a clearance greater than 1.5" the tension is too tight. This may result in pre-mature belt wear as well excess stress on the springs of the clutch. Adjust the turnbuckle as mentioned above.
Deck Belt
It is recommended to do a quick visual inspection of the deck belt retainers at the same interval as inspecting the deck belt tension. This check should be performed every 8 hours. The engine pulley retainer should be inspected when replacing the deck belt, or if the belt is slipping off the engine pulley.
DANGER: Before making any adjustments or servicing your mower, make sure the mower is on level ground, the blades are disengaged, the brake set, the key is removed, the engine is off, and the spark plug wires are disconnected from the spark plugs to prevent inadvertent starting. If maintenance or adjustments are being performed after operation of the mower, allow the unit to cool since heat buildup could cause severe burns.
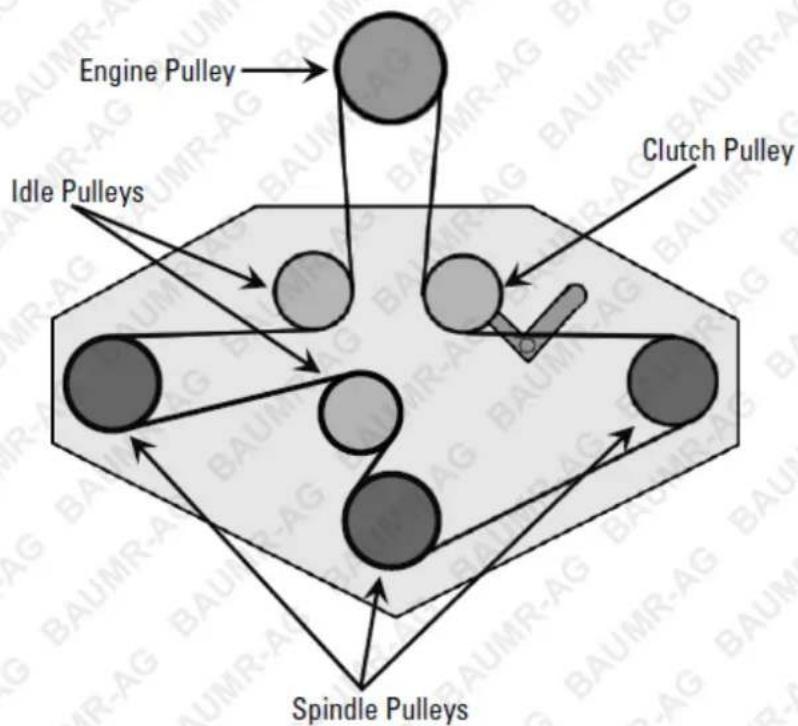
Deck Belt Routing
- Serial numbers beginning with 62ZB10XXX use a 62ZTR V Belt.
• All other serial numbers use a 62ZTR V Belt.
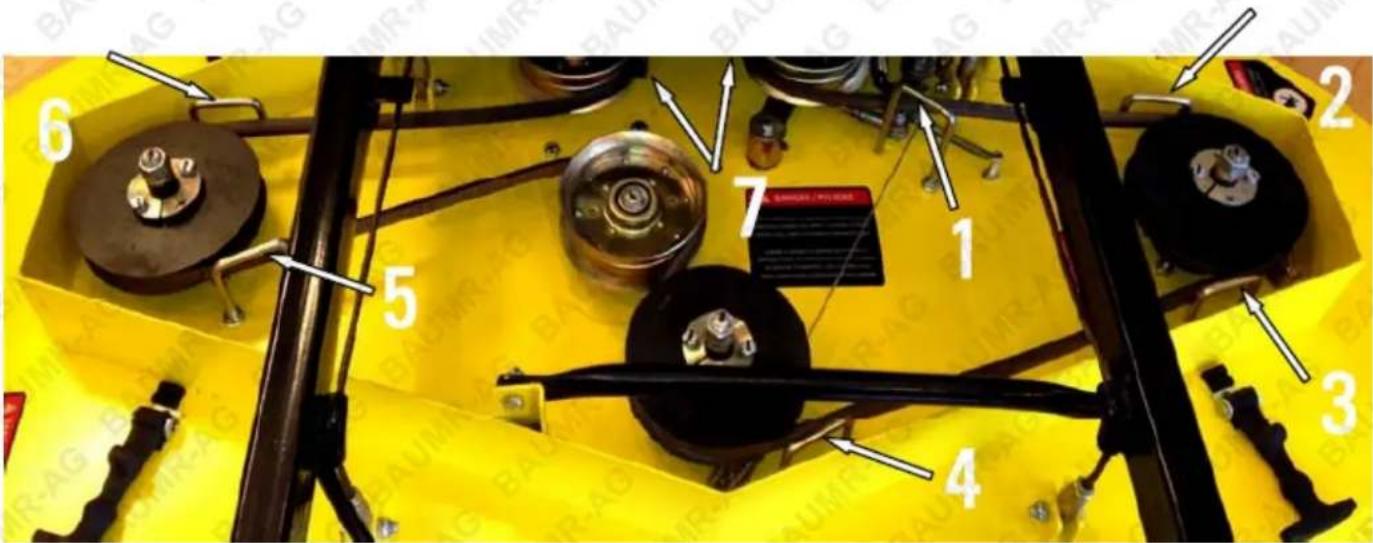
There are 8 main deck retainers.
• 6 "J" shaped retainers (1, 2, 3, 4, 5, 6).
• 2 idle pulley retainers (7).
- To adjust the retainers, loosen the top nut slightly and rotate the retainer into place. After adjusting hold the retainer in place and tighten the nut.
Verifying Deck Belt Retainers
Follow ALL safety precautions mentioned in this manual when doing any maintenance on your mower. The clearances for the retainers are listed below and measured with the blades engaged and engine OFF.
DANGER: Before making any adjustments or servicing your mower, make sure the mower is on level ground, the blades are disengaged, the brake set, the key is removed, the engine is off, and the spark plug wires are disconnected from the spark plugs to prevent inadvertent starting. If maintenance or adjustments are being performed after operation of the mower, allow the unit to cool since heat buildup could cause severe burns.
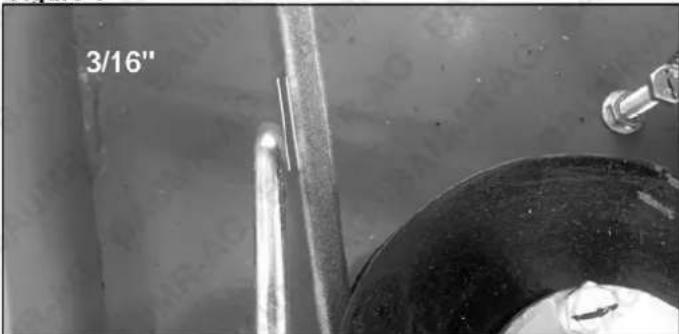
Figure 1:
• The clearance for the "J" shaped retainers is 3/16".
- To adjust the retainers, loosen the top nut slightly and rotate into position. Hold the retainer in place while retightening the nut.
Figure 1
natural_image
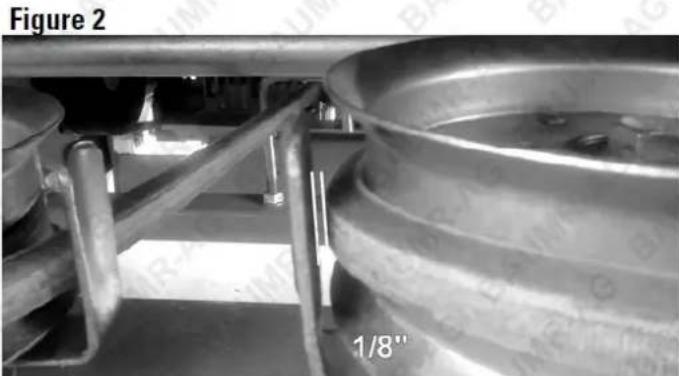
Close-up of a metal pipe joint with a 3/16-inch label, no readable text or symbols beyond the label.Figure 2:
• The clearance for the idle pulley retainers is 1/8".
- To adjust the idle pulley retainers, loosen the nut on the top of the pulley and bottom slightly. Slide the retainer into place and tighten the nut back.
natural_image
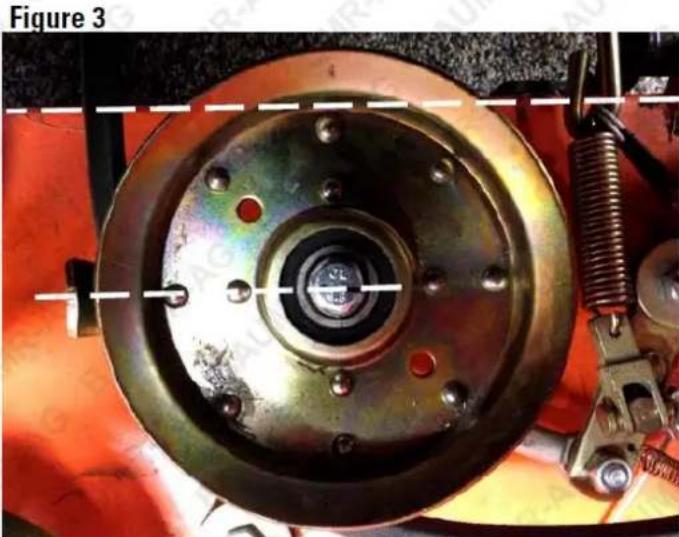
Mechanical setup with two large metal wheels and a central shaft, labeled Figure 2 (no readable text or symbols)Figure 3:
- A line drawn from the centre of the deck clutch pulley to its belt retainer should be parallel to the rear of the deck when the blades are not engaged.
- To adjust the position of the deck clutch pulley belt retainer, loosen the bolt slightly. Pivot the retainer into place and retighten the bolt.
natural_image
Close-up of a mechanical component with a central bearing and mounting holes, labeled as Figure 3 (no text or symbols on the main subject)Spindle Brake Inspection and Replacement
IMPORTANT! The mower belts are adjusted to ensure the blades stop turning within seven (7) seconds of releasing the blade control lever. If you are making any belt adjustments whatsoever, for your safety and the safety of others around you, you must ensure the belts are re-adjusted to achieve this design specification.
Blade and pulley brake inspections should be performed every 100 blade on and off cycles.
Before beginning service, park the unit on a level surface, turn the blades off, turn the engine off, set the brake, take the key out of the switch, wait an adequate time to make certain no blades a returning, and remove spark plug wires from spark plugs.
-
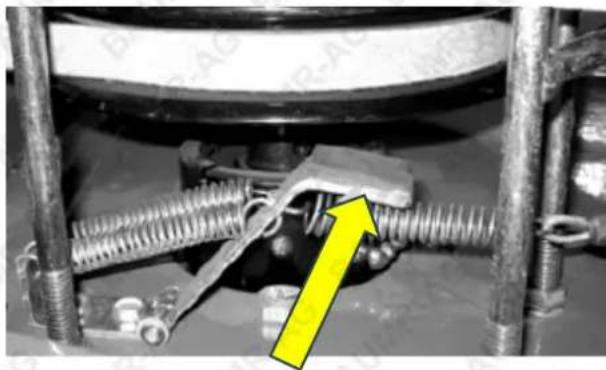
Engage the blade handle (make certain the engine cannot start) to pull the brakes off the pulleys.
-
Remove the pulley guard from the deck.
- Visually inspect the brake pads for wear. Make certain that no metal is touching the pulleys.
natural_image
Close-up of a mechanical assembly with coiled spring and metal components, no visible text or symbols- The brake pad material should be approximately 1/8-inch thick. Replace the brakes if the material is less than 1/16-inch thick.
NOTE: Replacing both brakes is recommended if replacement of one brake is required.
- To replace the brake, use a pair of pliers to remove the springs.
- Remove the two mounting bolts and disconnect the spring from the cable.
- Discard all these parts. DO NOT reuse springs. New brakes are equipped with new springs for proper braking.
- Install the new brakes by reversing the procedure in steps 5 and 6.
- Disengage the blade handle and inspect the brake contact surface. All the brake pad contacting material should be contacting the bottom of the pulley.
NOTE: Springs may vary from those pictured based on the application.
Removing the Blades
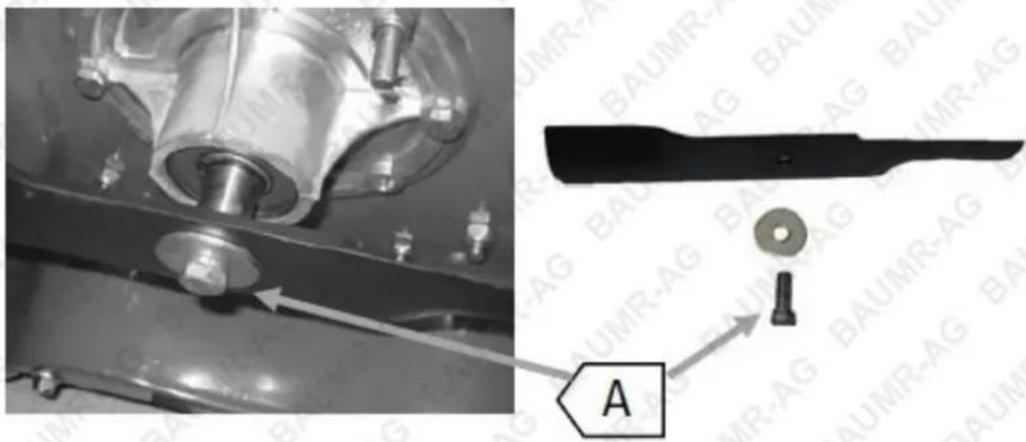
Required tools: 18mm Wrench
CAUTION! Beware of the cutting edges on the blades. The rotation of one blade may cause the other blade(s) to rotate. Always wear work gloves when handling blades.
- Park the mower on level ground, set the brake and block the rear wheels to prevent accidental rollback.
- Raise the front end of the mower and place on a jack stand.
- Use one wrench to loosen nut A while carefully holding the blade.
natural_image
Mechanical assembly diagram showing a component with bolts and a labeled part (A), no readable text or symbols present.- To reinstall, insert the bolt with lock washer and large flat washer into the spindle.
- IMPORTANT: The number of spacers should always be the same on each blade bolt. NEVER put the spacers below the blade and NEVER straighten or weld the blades.
IMPORTANT! The mower belts are adjusted to ensure the blades stop turning within 7 seconds of releasing the blade control lever. If you are making any belt adjustments whatsoever, for your safety and the safety of others around you, you must ensure the belts are re-adjusted to achieve this design specification.
Engine-to-Hydrostatic Drives Belt Adjustment (Hydro Input Belt)
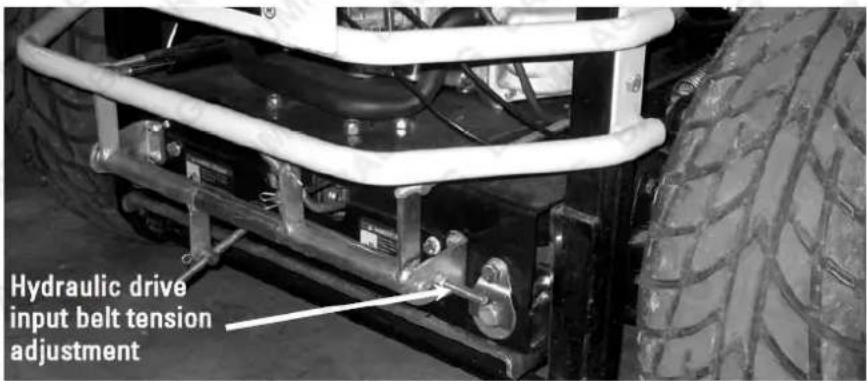
The hydraulic drive input belt is located underneath the chassis at the rear of the mower. The belt should move
approximately 1/8 to 3/16-inch with three (3) to five (5) pounds of pressure applied to the belt midway between the hydraulic drive pulleys when initially installed.
After approximately 1 hour of running time, verify that the belt tension is still correct and tighten if necessary.
Important: Do not over-tighten the belt.
• To adjust the belt, turn the nut on the threaded tension rod found on the right, rear corner of the mower.
- Do not over-tighten. This could cause damage to the hydraulic drive systems.
• The hydraulic drive input belt is an 8PK 1740 multi ribbed v belt.
CAUTION! Over tightening the input belt will damage the output shaft.
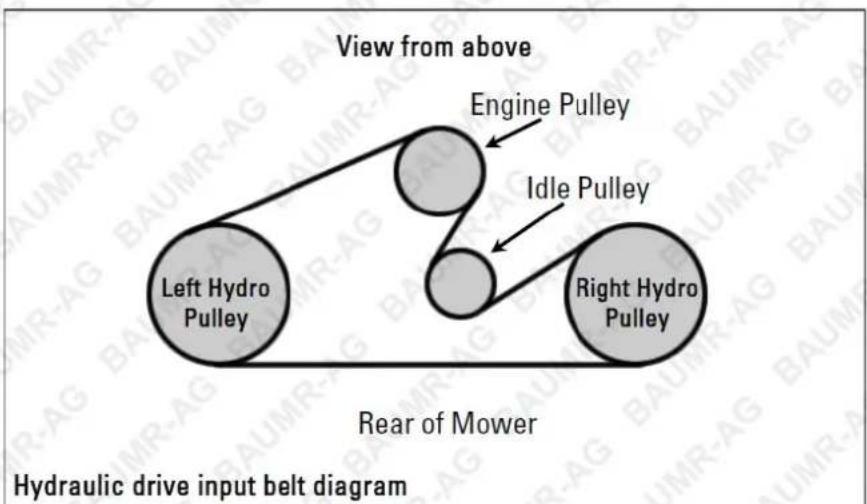
flowchart
graph LR
    A["Left Hydro Pulley"] --> B["Engine Pulley"]
    B --> C["Right Hydro Pulley"]
    C --> D["Idle Pulley"]
    D --> E["Rear of Mower"]
Hydraulic Drive System Adjustment
The hydraulic drives are coupled to the final drives with a multi-v belt. Occasional re-tensioning of the belt may be necessary. If performance decreases or hydraulic drive control handles are activated and the wheels do not turn, inspect the multi-v belt. Before beginning the following test, read all warnings in this manual. If you are uncomfortable with this procedure please contact the manufacturer, a qualified technician, or an authorised service centre to be set up for service.
Normal service interval: seasonally or every 100 hrs.
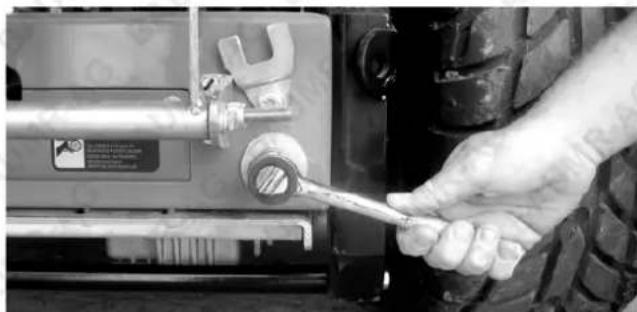
- Adjust the hydraulic drive adjustment bolts by tightening the two large 21mm nuts on the rear of the mower. Tighten the final drive belt so there is approximately 3/4" belt deflection in the centre of the belt with about 10lbs of pressure applied.
natural_image
Close-up of a hand using a wrench to adjust or install a mechanical component (no visible text or symbols)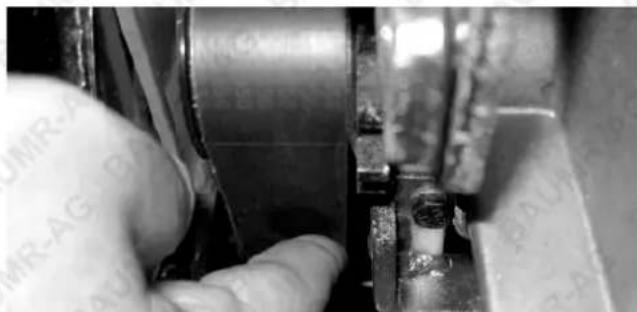
natural_image
Close-up of a hand operating a mechanical component with a cylindrical shaft and base (no visible text or symbols)- The next step is to perform a "wall test." Drive the mower against a padded stationary object. For accurate results, a smooth brushed concrete surface works best. Stand next to the mower with one hand on the seat. Start the mower with one hand on the seat to engage the safety switch. Engage the left side handle into the drive position. Quickly move the handle to full forward position for about half a second. Now perform the same procedure on the right side. If the belt squeals and the wheel does not spin on either side, tighten each adjustment bolt one half turn. Always turn both bolts the same amount whenever adjustment is required. Repeat the test until both tires will break traction and spin. Repeat the test until both tyres will break traction and spin.
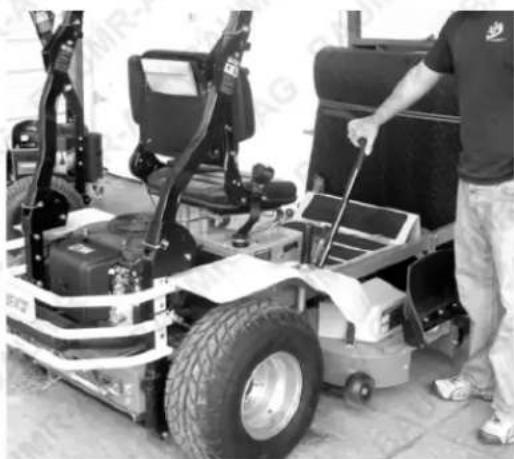
natural_image
Person operating a small wheeled vehicle with visible battery and wheels (no text or symbols)- Once you have the tension set so each wheel will just barely break traction, mark the bolt on one side of the hex head as shown. Now tighten the bolt (turn clockwise) one sixth of a turn. This will set tension, so the belt does not squeal, and provides ample torque for driving and mowing without causing belt or hydraulic drive damage.
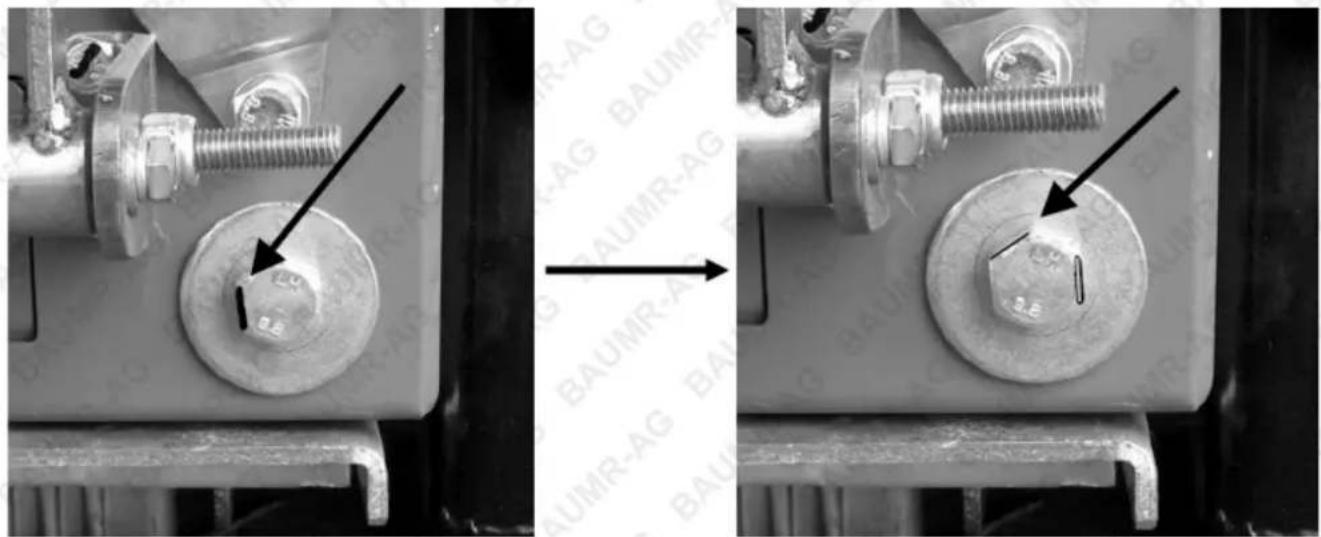
natural_image
Close-up of two mechanical components with bolts and a central bolt, showing a transformation from left to right (no text or symbols visible)- Now drive the mower on a grassy surface. Perform several Zero Turns. Drive the unit aggressively. If the performance is "sloppy" or you have excessive belt chirping, tighten the bolt 1/6th of a rotation and re-test. Re-Install the adjustment bolt retainer clips after adjustments.
- If the mower is too nimble, or you want to reduce the power output to prevent damage to the turf, loosen the bolt 1/6th of a rotation and re-test. Occasional belt chirping is permitted. If the belt squeals excessively tighten 1/6th of a rotation and re-test.
Safety System Adjustments
WARNING: Do not bypass, modify, alter, or disconnect the safety system. Make sure that the safety interlock system is fully operational each time before mowing. Failure to do so could present danger to you and others around you.
There are generally three (3) ways to adjust the sensitivity of a safety switch. The most appropriate way to adjust each switch depends upon the application, location, and the nature of the problem you are encountering.
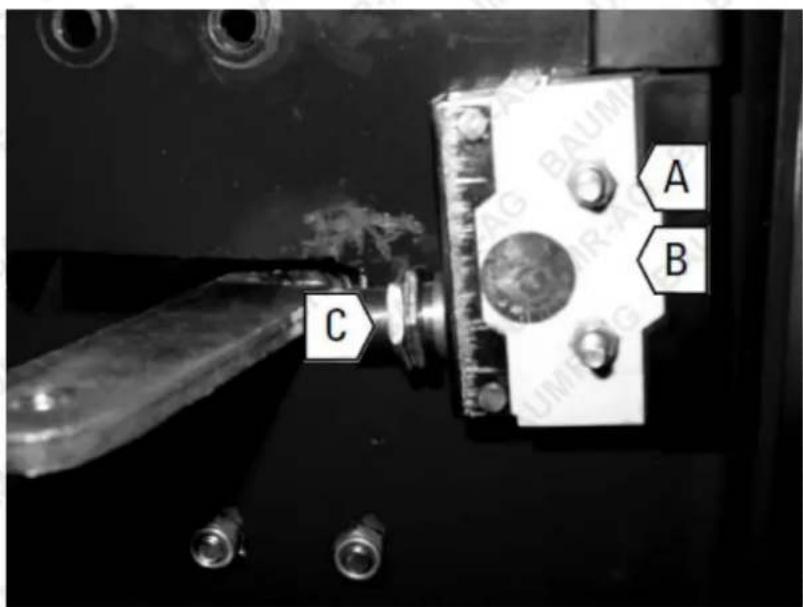
Method 1: Adjust location using the mounting screws.
- Move the blade control lever to OFF.
- Loosen screws (A) until safety switch (B) moves freely.
- Slide safety switch (B) firmly against blade bell crank (C).
- Tighten screws (A) and check that safety switch (B) does not move.
Method 2: Adjust location using adjustment nuts on switch body.
- Loosen locking nut (C) on the sensor shaft.
- Adjust switch location by turning the nuts.
- Tighten the locking nut when proper adjustment is achieved.
Tracking Adjustments
WARNING! ALLOW THE MUFFLER TO COOL BEFORE MAKING THIS ADJUSTMENT! This adjustment is made in close proximity to the muffler. The muffler on can reach extremely hot temperatures and can burn you instantly on contact.
For mowers with serial numbers 62ZB18XXXX:
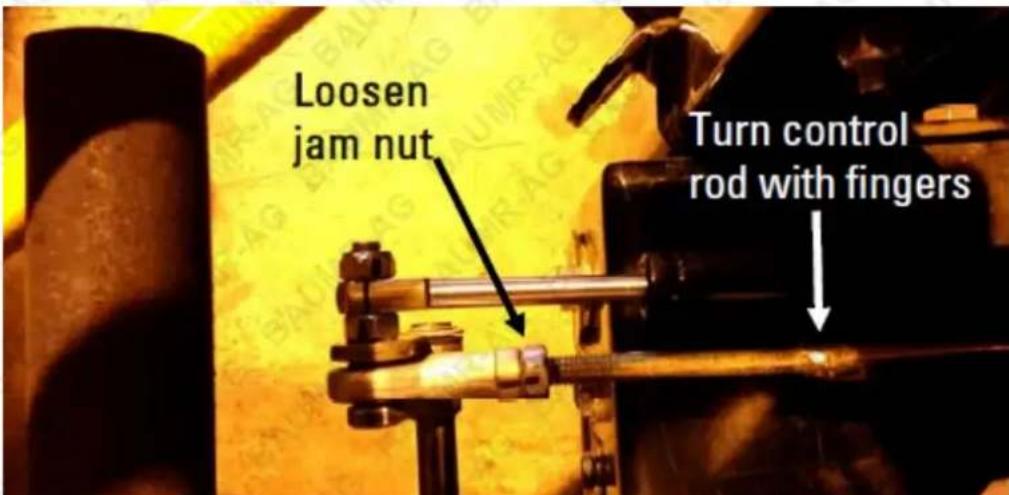
- Loosen the jam nut on the control rod on the side that is moving slower.
- Turn the control rod one turn clockwise while facing the rear of the mower.
- Tighten the jam nut.
- Drive mower in straight line and adjust again if necessary.
For mowers with all other serial numbers:
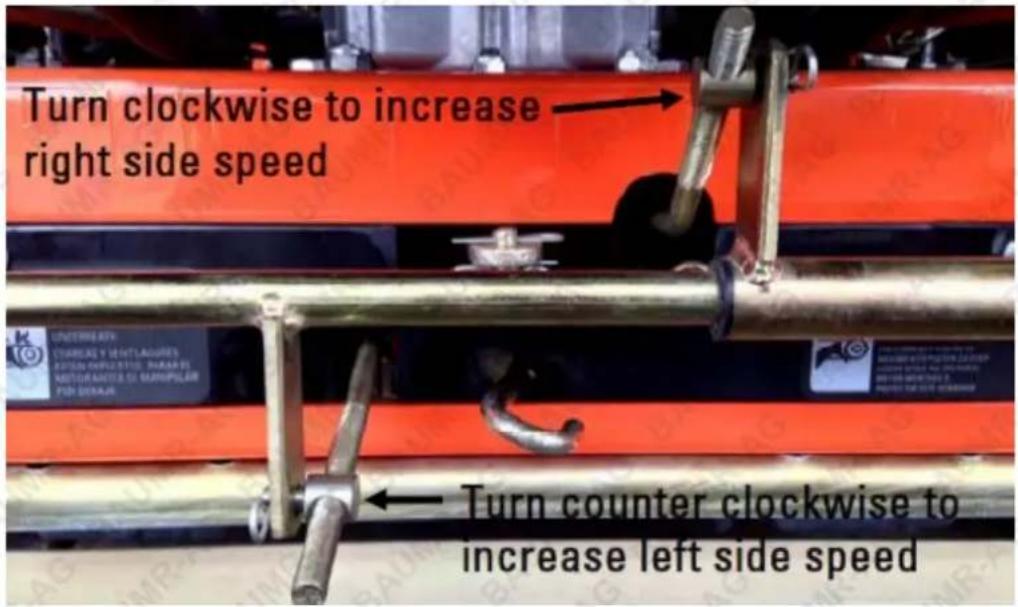
Remove pin and turn adjuster one turn at a time until mower tracks are straight.
Lubrication
To ensure proper lubrication of moving parts, the manufacturer recommends that you lubricate the following components with a high-quality, EP2 high-temperature-based grease or equivalent. Should the conditions of operation be more severe than normal, the lubrication interval may need to be shortened. GTR/OPE grease is the recommended lubricant.
Lubrication Point Locations: 54-inch & 62-inch mowers have 8 lubrication points.
Lubricate after every 50 hours of usage:
Front wheels (2 locations, 1 on each wheel shaft).
Mower deck clutch pulley pivot.
natural_image
Close-up of a mechanical component with a yellow arrow pointing to a specific part (no visible text or symbols)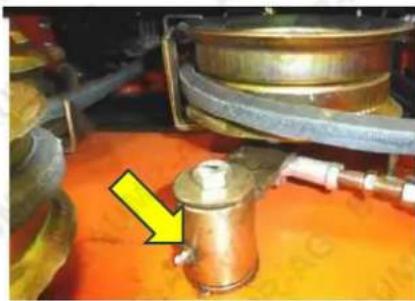
natural_image
Close-up of a metallic cylindrical device mounted on an orange surface, with a yellow arrow pointing to it (no visible text or symbols)Changing the Battery
When disconnecting the battery, make sure to disconnect the negative terminal first and the positive last. When reconnecting, connect the positive first and the negative last.
natural_image
Close-up of a black automotive battery pack with attached plug and cable (no visible text or symbols)These batteries are compatible with your mower:
Note: some may require that you change terminals.
| Battery | Part # | Store | Terminal Part # |
| U1-3 | U1-3 | Advance Auto Parts | AC171/A1500102 |
| GT-XHD-MT | 4700042 | Tractor Supply | |
| 10U1L | 543215 | Lowe's | |
| BCI#U1 | BAT 8229 | NAPA | NW 728248 |
| U1-3 | U1-3 | AutoZone | 6069 |
| U1LUH | U1LUH | O'Reilly Auto Parts | SK7401 |
Charging the Battery
Always charge battery in an open, well-ventilated area, away from sparks and flames. Unplug charger before connecting or disconnecting from battery and always wear protective clothing and use insulated tools.
DANGER: Battery electrolyte has sulfuric acid which can cause severe burns and is a deadly poison. Never drink and always avoid contact by wearing gloves and safety glasses when servicing the battery.
WARNING: Do not allow battery terminals to touch any metal parts of the mower when removing the battery. Never allow metal tools to short between the battery terminals and metal parts of the mower as this may cause sparks. Sparks can also cause the battery gasses to explode which can result in injury/death.
Short Term Storage
- Let engine cool before storing and do not store near flame, high heat, and possible ignitions from sparks.
• Always clean off all flammable material as well as grime and dirt before storage. -
Never use a pressure washer and avoid drenching the control panel, motor, engine, and hydro pumps with water.
-
Wash with mild detergent and water only.
• After washing the machine engage the engine at high and let the mower run for 5 minutes. - Shut off fuel for storing or transporting.
- Carefully release pressure from components with stored energy.
• Store mower only on the ground. - Do not drain fuel indoors or near a flame.
• Use jack stands to support components when required.
• Always park machine on level ground and set the parking brake when storing. - Store the machine in a clean and dry environment.
• Always remove the key from the ignition. - Add a petroleum-based conditioner in the gas tank and run for 5 minutes to distribute through mower.
Extended Storage
In addition to the measures taken for short term storage, the following measures should be taken for long term storage:
- Change air filter.
• Make sure all fuel is drained before storing.
• To ensure all fuel is drained from the mower, run the mower until it runs out of gas before storage. - Check the spark plugs condition and pour two tablespoons of engine oil in the spark plug holes and leave the spark plug wire off.
• Cover the machine when in storage. - Remove Battery and clean terminals and cable connectors. Store battery in a cool dry place.
Troubleshooting
| Problem | Possible Causes | Solution |
| Engine will not start. | 1. Key in the OFF position.2. Insufficient fuel in the tank.3. Air bubble in the fuel line.4. Fuel valve in OFF position.5. Choke not ON.6. Choke linkage out of adjustment.7. Low engine oil.8. Blade c antral in ON position.9. Loose spark plug wire.10. Fouled spark plug.11. Plugged or dirty air filter.12. Bad gasoline.13. Plugged or dirty fuel filter.14. Safety switches out of alignment or loose.15. Dead battery (electric start models) | 1. Turn key to ON position.2. Add gasoline.3. Prime engine or shake bubble out.4. Turn valve ON.5. Turn choke ON.6. Refer to Engine Owner's manual.7. Add engine oil.8. Push lever to OFF position.9. Tighten wire or connections.10. lean or replace the plug.11. Clean or replace the air filter.12. Drain and replace with fresh gasoline.13. Replace the fuel filter.14. Adjust or tighten switches – please read warnings.15. Recharge or replace battery. |
| Engine will not keep/quits. | 1. Water in the fuel.2. Loose safety switch.3. Fuel valve is OFF.4. Dirty fuel filter.5. Dirty air filter.6. Low engine oil. | 1. Drain and replace with fresh fuel.2. Adjust switch.3. Turn fuel valve ON.4. Replace fuel filter.5. Clean or replace air filter.6. Add engine oil. |
| Engine stops when blades are engaged. | 1. Loose safety switch.2. Belt tension too high.3. Blades jammed with foreign material. | 1. Adjust switch.2. Adjust belt.3. Remove foreign material.Note: Firmly pushing the blade control lever into the OFF position to ensure the safety switch is fully engaged can sometimes resolve this problem. |
| Blades do not turn. | 1. Broken belt.2. Loose belt.3. Blade activation linkage out of adjustment. | 1. Replace belt.2. Adjust belt.3. Adjust linkage. |
| Belts squeal when blades are engaged. | 1. Incorrect belt tension.2. Excessive belt wear. | 1. Adjust belt tension.2. Replace belt. |
| Belts slip when blades are engaged. | 1. Incorrect belt tension.2. Excessive belt wear. | 1. Adjust belt tension.2. Replace belt. |
| Mower will not move forward or reverse. | 1. Brake ON.2. Bypass levers pulled out.3. Hydraulic drive oil has not reached optimal temperature. | 1. Release brake on control panel.2. Ensure bypass pins are retracted.3. Allow 5 to 10 minutes for hydraulic drive oil to warm up. |
| Cannot move mower when the engine is off | Bypass not engaged. | Pull bypass rod and set it in the slot in the chassis. |
| Engine is overheating. | 1. Dirt in the fuel line.2. Dirty air filter3. Low engine oil4. Fouled spark plug5. Misuse of the mower6. Dull blades7. Spindle bearing failure | 1. Replace fuel filter and flush tank.2. Clean or replace the air filter.3. Add engine oil.4. Replace spark plug.5. Mow slower, wait for grass to dry out.6. Sharpen cutting blades.7. Take in for service. |
| Grass not cut smoothly or cleanly. | 1. Dull blades.2. Mowing too fast for conditions.3. Grass is wet or bent over.4. Blade is bent.5. Tyre pressure not equal.6. Deck is set at uneven heights.7. Blades are set upside down.8. Excessive grass and debris build up underneath the deck. | 1. Sharpen blades.2. Slow down while cutting.3. Let grass dry to stand up.4. Replace blade.5. Add air pressure to low tyres.6. Set deck at equal heights.7. Take blades off and install correctly.8. Clean out debris. |
| Mower always pulls to one side. | 1. Controls out of adjustment.2. Transmission failure. | 1. Adjust controls.2. Take in for service. |
Specifications
| Motor | Air-cooled V Twin engine |
| Rated Engine Power 24hp | |
| Engine Type V twin engine | |
| Engine Displacement 803cc | |
| Engine Oil | 10W-30 / 10W-40 |
| Fuel Tank Capacity 25L | |
| Fuel Type | Petrol Regular Unleaded 95+ RON |
| Starting System Electric start | |
| Cutting Width 62" | |
| Deck Material | Heavy Duty Fabricated Steel |
| Height Adjustment 8 positions | |
| Cutting Height | 38 - 127 mm |
| Propulsion Type | Hydrostatic Transmission |
| Rated Engine Speed 2800RPM | |
| Front Wheels | 15 x 6" |
| Rear Wheels | 22 x 10" |
| Max Speed (forward) | 14 km/h |
| Max Speed (reverse) | 9 km/h |
| Blade Qty 3 | |
| Turning Circle Radius | 0cm |
| Certificate | Euro 5 |
| Noise Level | 101.3 dB(A) |

Some experts believe that the incorrect or prolonged use of almost any product may cause serious injury or death. To help reduce your risk of serious injury or death, refer to the information below. For more information, see www.datastreamserver.com/safety
- Consult all documentation, packaging, and product labelling before use. Note that some products feature documentation available online. It is recommended to print and retain the documentation.
■ Before each use, check the product for loose/broken/damaged/missing parts, wear, or leaks (if applicable). Never use a product with loose/broken/damaged/missing parts, wear, or leaks.
■ Products must be inspected and serviced (if applicable) by a qualified technician every 6 months. This is based on average residential use by persons of average size and strength, and on a property of average metropolitan size. Use beyond these recommendations may require more frequent inspections/servicing.
■ Ensure that all users of the product have completed a suitable industry recognised training course before being allowed access to the product.
The product has been supplied by a general merchandise retailer that may not be familiar with your specific application or description of application. Be sure to attain third-party approval from a qualified specialist for your application before use, regardless of any assurances from the retailer or its representatives.
This product is not intended for use where fail-safe operation is required. As with any product (for example, automobile, computer, toaster), there is the possibility of technical issues that may require the repair or replacement of parts, or the product itself. If the possibility of such failure and the associated time it may take to rectify could in any way inconvenience the user, business, or employee, or financially affect the user, business, or employee, then the product is not suitable for your requirements. This product is not intended for use where incorrect operation or a failure of any kind, including but not limited to, a condition requiring product return, replacement, parts replacement, or service by a technician may cause financial loss, loss of employee time or an inconvenience requiring compensation.
If this product has been purchased in error when considering the information presented here, contact the retailer directly for details of their returns policy, if required.

edisons
.com.au
©2024 Baumr-AG. All rights reserved. No part of this document, including descriptive content, concepts, ideas, diagrams, or images may be reproduced or transmitted in any form or by any means, electronic or mechanical, including photocopying, scanning, or recording, or any information storage and retrieval system, without express permission or consent from the publisher.
- 620ZRX Zero Turn Ride On Mower
- Safety
- General Work Area Safety
- General Personal Safety
- General Fuel Safety
- General Carbon-Monoxide Safety
- General Equipment Use and Care
- General Electrical Safety
- General Service Information
- Child Choking Hazard!
- DANGER
- GENERAL:
- PRODUCTS FEATURING AN ENGINE
- GENERATORS
- Safety Information and Warnings
- Getting Started
- Operator Responsibility
- Mower Inspection
- Training
- Children
- Passengers
- Proper Equipment
- Preparation: Safety Precautions
- Gasoline and Other Fuels: Safety Precautions
- Equipment Operation: Safety Precautions
- Slope Operation: Safety Precautions
- Roll Over Protective Structure (ROPS)
- Lowering ROPS
- Safety Symbols
- Table of Contents
- Safety 2
- Control Panel and Lawn Mower Components ....14
- Operation....16
- Quick Start Guide Diagrams....21
- Lead-Acid Battery Care and Maintenance....24
- Maintenance 25
- Control Panel and Lawn Mower Components
- Control Panel
- Lawn Mower Component Identification
- Operation
- Starting the Engine
- Operating the Mower
- Changing the Cutting Height
- How to Change the Cutting Height
- Mowing
- Disengaging the Hydrostatic Drive Units
- To disengage the hydraulic drive units:
- Quick Start Guide Diagrams
- Lead-Acid Battery Care and Maintenance
- Top 3 Battery Care Requirements
- Maintenance
- The Importance of Maintenance
- Fuel
- Tyre Pressure
- Air Filter
- Engine Oil
- Blades
- Cleaning the Mower
- Return to Neutral
- Deck Belt Tension
- Deck Belt
- Deck Belt Routing
- Verifying Deck Belt Retainers
- Figure 1:
- Figure 2:
- Figure 3:
- Spindle Brake Inspection and Replacement
- NOTE: Replacing both brakes is recommended if replacement of one brake is required.
- Removing the Blades
- Engine-to-Hydrostatic Drives Belt Adjustment (Hydro Input Belt)
- Important: Do not over-tighten the belt.
- CAUTION! Over tightening the input belt will damage the output shaft.
- Hydraulic Drive System Adjustment
- Normal service interval: seasonally or every 100 hrs.
- Safety System Adjustments
- Method 1: Adjust location using the mounting screws.
- Method 2: Adjust location using adjustment nuts on switch body.
- Tracking Adjustments
- Lubrication
- Lubricate after every 50 hours of usage:
- Changing the Battery
- Charging the Battery
- Short Term Storage
- Extended Storage
- Some experts believe that the incorrect or prolonged use of almost any product may cause serious injury or death. To help reduce your risk of serious injury or death, refer to the information below. For more information, see www.datastreamserver.com/safety
- edisons
Brand : Baumr-AG
Model : 620ZRX
Category : Lawn mower