
DCMIST25 - Household Fan DIMPLEX - Free user manual and instructions
Find the device manual for free DCMIST25 DIMPLEX in PDF.


| Product Type | 2.5L Misting Fan / Evaporative Cooler |
| Model | DCMIST25 |
| Color | Grey/White |
| Power Supply | 220-240V~ 50Hz |
| Rated Power | 80W |
| Speed Settings | 4 (Low to High) |
| Modes | 3 (Normal, Natural, Sleep) |
| Blade Diameter | 300mm |
| Water Tank Capacity | 2.5L |
| Remote Control | Yes (requires 2x AA batteries) |
| Timer | 0-8 hours (1-hour increments) |
| Swing Function | 360° rotating grill (oscillation) |
| Controls | Button with LED display |
| Max. Room Size | 20 m² |
| Water Consumption | 160 ml/h (at high speed) |
| Net Weight | 6.4 kg |
| Dimensions (W x D x H) | 382 x 228 x 836 mm |
| Safety Features | Water shortage protection, tank removal protection, auto-off after 15 hours of inactivity |
| Cleaning | Monthly water tank cleaning with mild soapy water; de-calcify every 6 months |
| Warranty | Refer to warranty card in box (not specified) |
| Intended Use | Indoor domestic household use only |
| Additional Functions | Memory function (saves last settings), display auto-off after 40s |
Frequently Asked Questions - DCMIST25 DIMPLEX
User questions about DCMIST25 DIMPLEX
0 question about this device. Answer the ones you know or ask your own.
Ask a new question about this device
Download the instructions for your Household Fan in PDF format for free! Find your manual DCMIST25 - DIMPLEX and take your electronic device back in hand. On this page are published all the documents necessary for the use of your device. DCMIST25 by DIMPLEX.
USER MANUAL DCMIST25 DIMPLEX
natural_image
Line drawing of a portable air conditioner with fan grille and wheels (no text or symbols)2.5L Misting Fan
Model: DCMIST25
For domestic household use only.
CAUTION: FAILURE TO FOLLOW THESE INSTRUCTIONS MAY CAUSE INJURY AND/OR DAMAGE AND MAY INVALIDATE YOUR WARRANTY
Please read the operating instructions carefully before using your Misting Fan for the first time and keep them in a safe place.
WARNING - This appliance must not be used in a bathroom.
WARNING - Do not use this appliance in the immediate surroundings of a bath, a shower or a swimming pool.
- If the mains lead is damaged it must only be replaced by the manufacturers service agent or a similarly qualified person in order to avoid a hazard.
- This appliance is not intended for use by persons (including children) with reduced physical, sensory or mental capabilities, or lack of experience and knowledge, unless they have been given supervision or instruction concerning use of the appliance by a person responsible for their safety.
• Children should be supervised to ensure they do not play with the appliance. - Prior to cleaning or other maintenance, the appliance must be disconnected from the supply mains.
- Never immerse the appliance in water or other liquids.
- Operate this unit only on a firm, flat surface to avoid the risk of water leakage. Ensure that the unit is kept upright at all times.
- Do not place on soft, unstable or non-horizontal/angled surfaces.
- Never operate the appliance if a cable or connector has been damaged, after appliance malfunction or if the appliance was dropped or is otherwise damaged.
- Please ask a professional service agent to repair the product. Improper repair may cause danger to users.
- Disconnect the appliance from mains power whenever it is not in use, before relocating it, and before cleaning or filling.
- Operate the appliance only at the voltage specified on the rating label.
- Only connect the unit to a properly installed and easily accessible socket so that you can quickly disconnect the plug if necessary.
- Do not connect this product to the mains using an extension lead.
- This evaporative cooler is only intended for INDOOR RESIDENTIAL applications. This evaporative cooler should not be used for commercial or industrial or leisure applications or in small enclosed spaces.
- Never use the mains lead as a carrying strap or pulling lead.
- To avoid a fire or electrocution hazard, NEVER put the cord near heat registers, radiator, stoves or heaters.
• DO NOT cover cord with carpeting, throw rugs, runners, or similar coverings. -
DO NOT route cord under furniture or appliances. Take care to position the cord away from traffic areas and where it will not be a tripping hazard.
-
DO NOT use the unit near windows or where water collects. Rain and water collection may lead to a risk of fire or electric shock.
- Only operate this appliance with a minimum of 50cm clearance all around i.e. away from walls, furniture and overhanging objects such as curtains or a shelf.
- To prevent spillage, empty the water tank before lifting or relocating the appliance.
- WARNING: To avoid danger of suffocation please remove all packaging materials particularly plastic and EPS and keep these away from vulnerable people, children and babies.
- NEVER drop or insert any object or fingers into any openings.
- Do not use the appliance in locations where paint, petrol or other flammable liquids are used or stored.
- Do not use bug sprays or other flammable cleansers/vapour sprays on or around the unit.
• Always switch off the unit and take the plug out of the socket:
• If you are not using the unit - Before you clean or carry out maintenance on the unit
- If a fault occurs
• In the event of an electrical storm. - Avoid electromagnetic interference. Keep the unit at least 1 metre away from electrical appliances such as televisions & radios.

Exposed to the weather outdoors
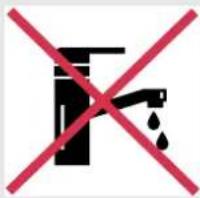
Near water If the power cable wires are frayed or cut

wires are frayed or cut

natural_image
Black silhouette of a person running with a red X symbol (no text or numbers present)Where small children may be left unattended
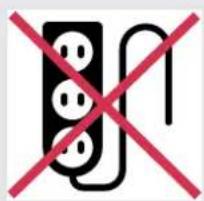
If an extension lead may become overloaded

Where the power cable may be damaged

natural_image
Symbol of a black block with two red X marks, representing restriction or prohibition (no text present)On a slope or uneven surface
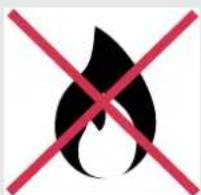
Where there is risk of fire or close to a naked flame

Where it may be damaged by chemicals

Where there is a risk of interference by foreign objects

This product is not made for DIY repair
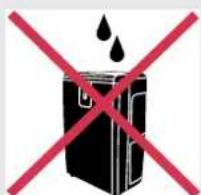
If there is a risk of water falling on the unit
Specification
| Model no. DCMIST25 | |
| Colour | Grey/White |
| Power supply | 220-240V~ 50Hz |
| Rated power | 80W |
| Speed settings | 4 |
| Modes 3 (natural, normal & sleep) | |
| Blade diameter 300mm | |
| Water tank capacity 2.5L | |
| Remote control Y | |
| Timer 0-8 hours | |
| Swing function 360° rotating grill | |
| Controls | Button with LED display |
| Max. room size | 20m2 |
| Water consumption | 160ml/h (high speed) |
| Weight (net) 6.4kg | |
| Dimensions (w x d x h) 382 x 228 x 836mm |
- For greater precision, please always refer to the rating label placed on the product.
Parts
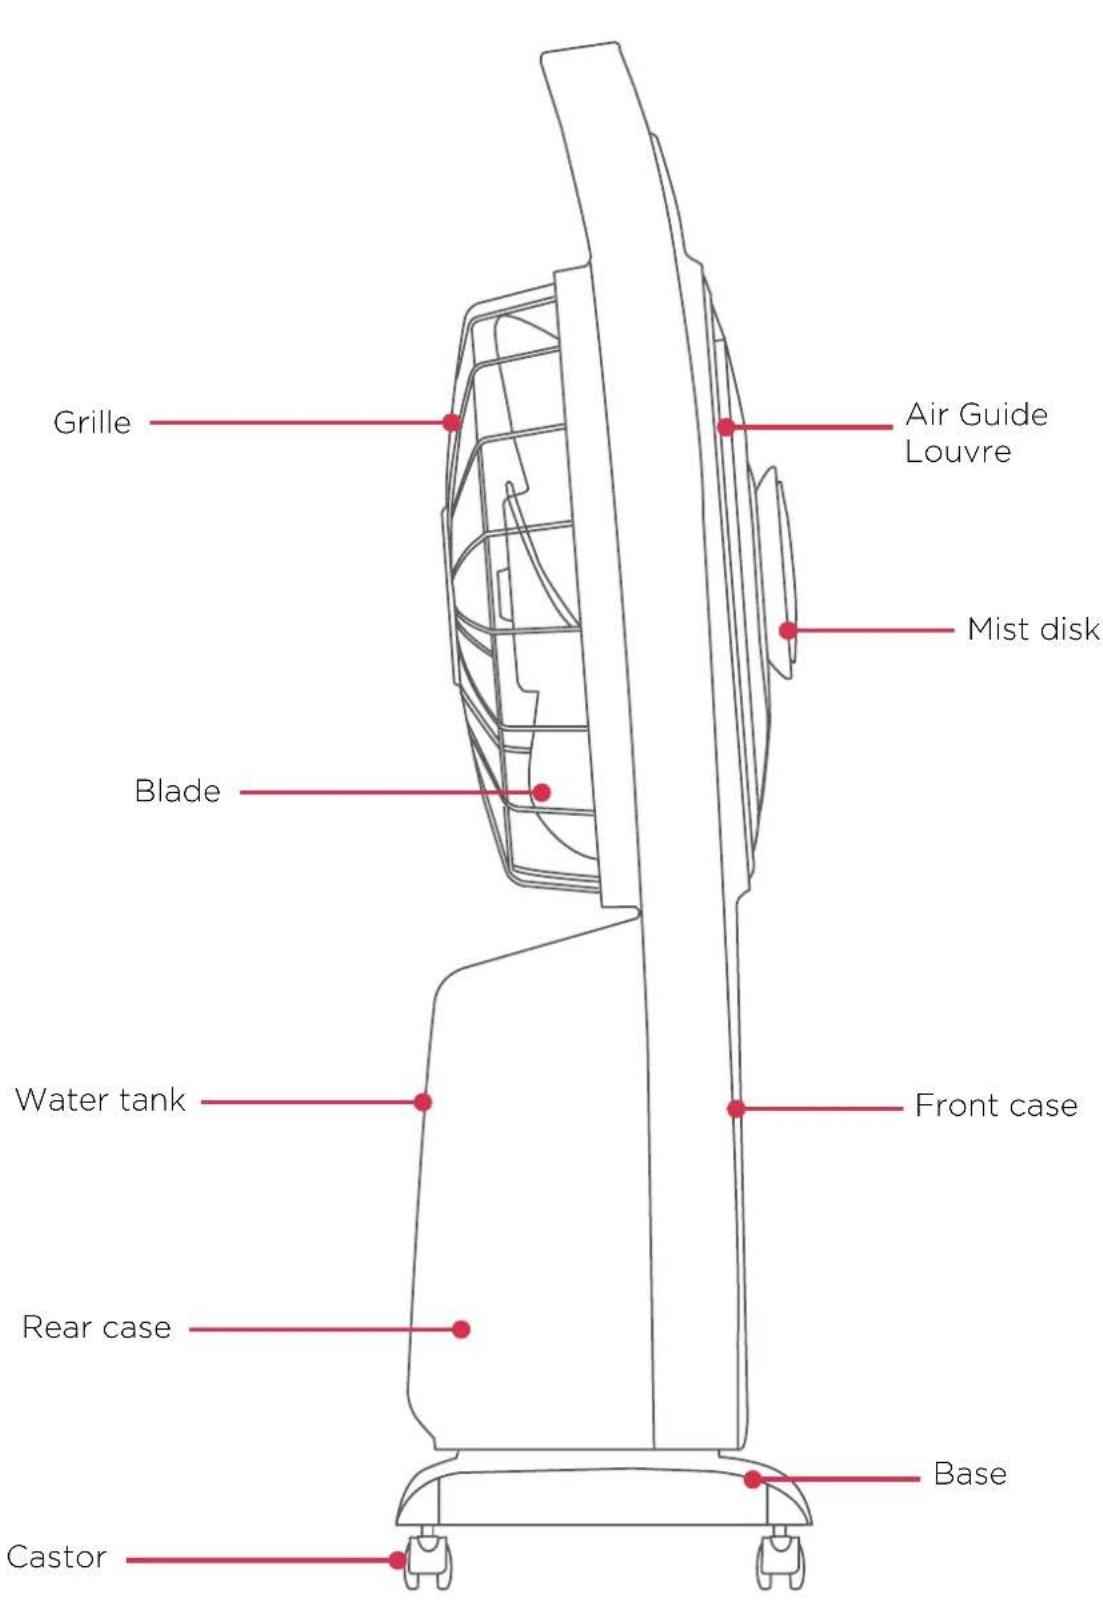
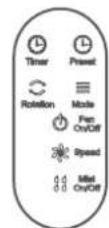
Remote
Display & Control Panel
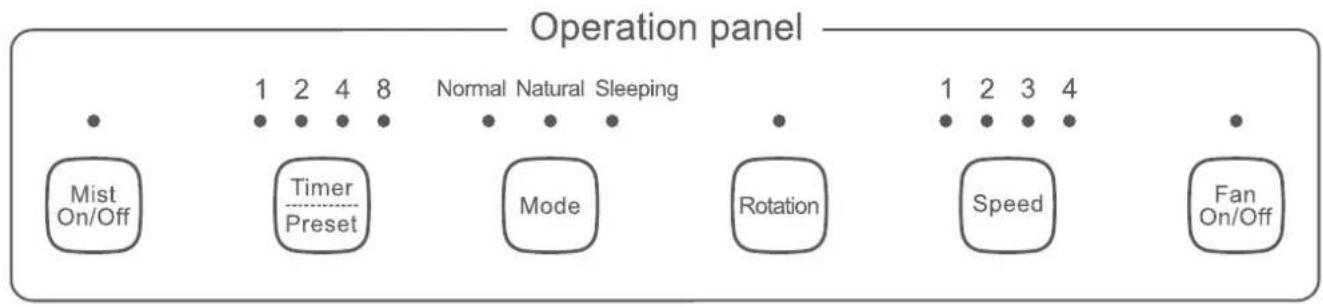
flowchart
graph LR
    A["Mist On/Off"] --> B["Timer Preset"]
    B --> C["Mode"]
    C --> D["Rotation"]
    D --> E["Speed"]
    E --> F["Fan On/Off"]
    style A fill:#f9f,stroke:#333
    style B fill:#ccf,stroke:#333
    style C fill:#cfc,stroke:#333
    style D fill:#fcc,stroke:#333
    style E fill:#cff,stroke:#333
    style F fill:#ffc,stroke:#333
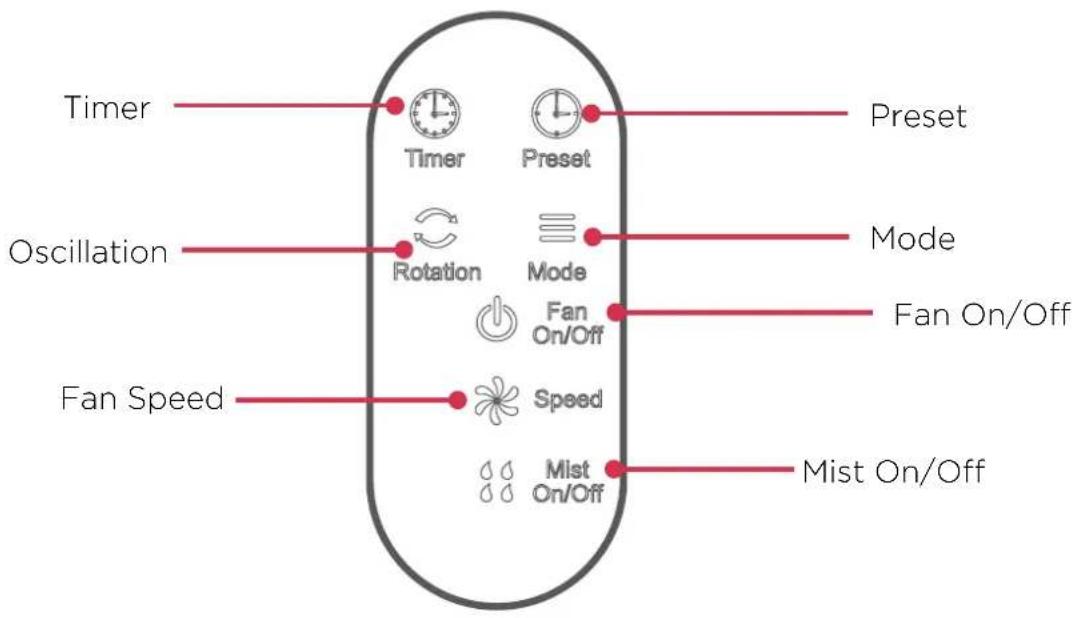
Remote Control
Functions
Before first use, remove any packaging and tape stuck on the unit.
ON/OFF
After connecting the cord to a power outlet press the ON/OFF button to turn the unit ON. To turn the unit OFF press this button again.
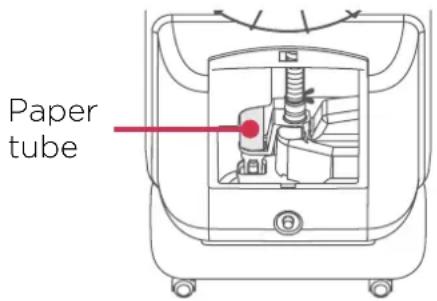
FAN SPEED
The unit has 4 FAN SPEEDS and is adjusted from the lowest speed to the highest speed. The selected fan speed LED indicator light will illuminate according to the FAN SPEED selected.
ROTATION
Press the ROTATION button to activate 360 degree rotation. The ROTATION LED indicator light will illuminate. Press the button again to turn off the function.
MODE
The unit has 3 different modes, as described below, and the default mode after turning ON is normal. Press the MODE button to select modes in this sequence: normal > natural > sleep. The MODE indicator light will illuminate accordingly.
Normal: Constant wind speed.
Natural: Changing wind speeds to simulate natural wind.
Sleep: Changing wind speeds to simulate natural wind, however the unit will automatically turn off after 8 hours.
TIMER / PRESET
The auto-off TIMER can be set in 1 hour increments up to a maximum of 8 hours. Press the TIMER button while the unit is ON until the desired time is shown on the LED indicators on the display panel. The unit will automatically turn OFF.
To activate the PRESET mode, press the button while the unit is in Standby mode, and the unit will be set to turn ON after the PRESET time is complete. The PRESET time will show on the indicator lights.
Functions
MIST
To activate the MIST function, press the MIST button once to turn on. Ensure there is enough water in the water tank. The LED indicator light will illuminate once activated. Press this button again to turn off the MIST function, and to use as a fan only. The unit is also equipped with the below functions.
DISPLAY OFF
When the unit is working, after 40 seconds of any buttons being pressed, the indicator lights will turn OFF. Press any button (except for the ON/OFF button) and the indicator lights will reactivate.
MEMORY FUNCTION
This unit has a memory function. When the fan is turned OFF, it memorises the settings previously used. When the unit is turned ON again, it will start in the same settings as previously used (unless the power supply was fully disconnected). If the unit was in SLEEP mode previously, it will start in natural wind mode.
AUTO OFF
If there isn't any change in settings after 15 hours of constant use, the unit will turn OFF automatically. This is an additional safety feature in case the unit is left ON accidentally.
REMOTE CONTROL
This unit comes with a remote control, and all settings can be controlled via the remote.
Filling the water tank
Filling the water tank:
Place the unit on a flat surface and fill the water tank according to the following 3 steps.
Press water tank button and remove the tank.
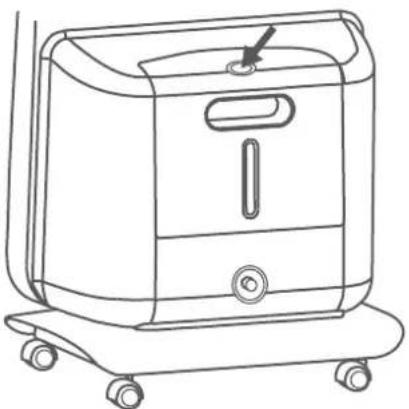
natural_image
Line drawing of a medical device with wheels and a handle (no text or symbols)Turn the water tank upside down and unscrew the cap. Fill the tank with clean cold filtered water.
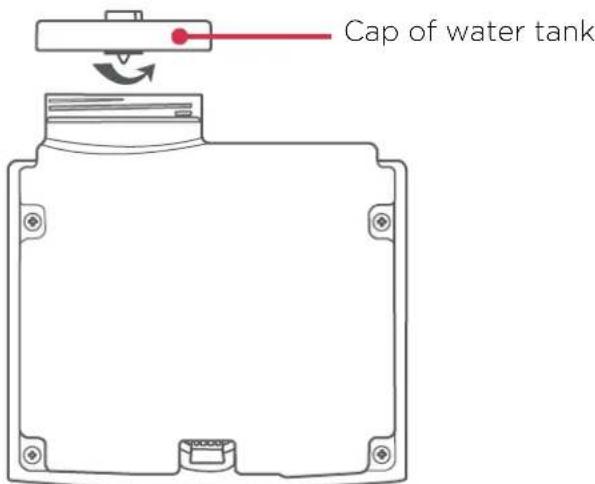
Replace the cap, ensure it is secured tightly, and replace the tank back into the unit.
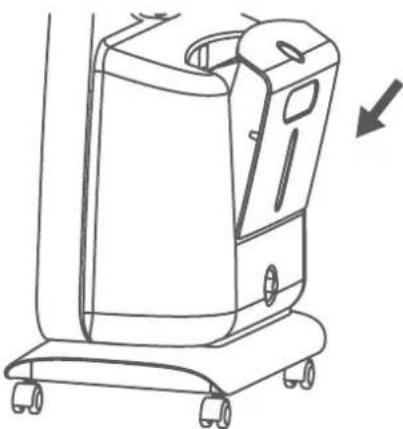
natural_image
Line drawing of a mobile medical or cleaning device with wheels and a directional arrow (no text or symbols)Operation & Set Up
- Remove the unit from its packaging & place on a firm stable surface.
- To use the MIST function, fill the water tank as instructed on the previous page.
- Plug into a power outlet and press the ON/OFF button to turn ON the unit.
- The unit will operate initially on a continual basis. If a set period of operation is required, please follow the TIMER/PRESET instructions on page 8.
- Select the desired fan FAN SPEED by pressing the FAN SPEED button. Refer to page 8 for different settings.
- Select the operation MODE as required, by pressing the MODE button. Refer to page 8 for different settings.
- Press the ROTATION button if 360 degree rotation is required.
- To switch the unit off at any time, press the OFF button.
Precautions
- Do not overfill the water tank (check the MAX fill line).
- Use only cold, clean filtered water.
- The unit is equipped with a number of safety devices, including water shortage protection & tank removal protection.
- Do not allow the same water to sit in the machine for a prolonged period.
- It is recommended that any water left in the machine for 3 days or more be removed and replaced with clean water.
- The control panel must not come in contact with water or any other liquids.
Using the Remote Control
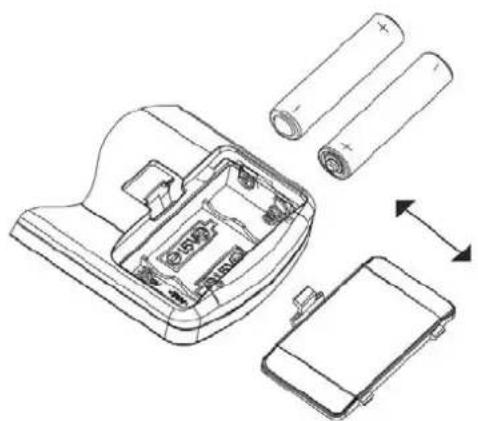
- Open the battery cover of the remote control, and insert 2 x AA batteries.
- Please point to the receiver when using the remote control.
- If the battery voltage is low, please open the battery cover as per the diagram and replace with a new battery (2 x AA). Then replace the battery cover.
natural_image
Technical line drawing of a battery pack assembly with cylindrical batteries and internal components (no text or symbols)Cleaning
Due to the nature of the product, the unit should be cleaned regularly. Always turn the unit OFF and disconnect from the power supply before commencing any cleaning.
De-calcifying the water tank
In areas with hard water, deposits will build up, so it is recommended to de-calcify the unit every six months. The cartridge retains calcium and mineral particles, thus preventing such substances from being emitted with the vapor and causing white deposits on furniture etc.
Caution: When cleaning the appliance, never use window cleaner, furniture polish, thinner, hot water over 50 degrees Celsius.
Water Tank
The water tank should be cleaned regularly. If not cleaned, deposits may build up affecting the efficiency of the unit. Cleaning the tank with mild soapy water once every month is recommended. To do this, following the steps below:
- Disconnect the appliance from the main supply.
- Completely remove the water tank from the unit.
- Remove any deposits or dirt from the tank with a mild soapy detergent and cloth.
- Flush the tank with clean water.
- Reverse the procedure and make sure the tank is in place before use.
Outside Cabinet
- Turn the unit OFF and disconnect the appliance from the power supply.
- Remove any dust build up with a soft brush.
- Wipe the surface of the unit with a soft damp cloth. Mild detergent can be used for any stubborn marks.
Do not use abrasive sponges, scouring pads, or a stiff brush to clean the
IMPORTANT
The control panel and other parts must not come into contact with water or any other liquids.
Storage
If not using the unit for an extended period of time. After cleaning please:
- Turn the unit off, unplug and take care of the mains lead & plug.
- Cover the unit and store it upright in a location where it will not receive direct sunlight. NB- Prolonged exposure to direct sunlight will discolour the enclosure.
Maintenance
If you have lost your user manual of the unit fails to operate efficiently, is broken or other problems arise, unplug and do not operate. Ask for advice by calling your local after sales service agent or the Customer Care Centre on 1300 556 816 (AU) / 0800 666 2824 (NZ).
Warranty
Please refer to the warranty card in the box for warranty information. For any troubleshooting advice, please contact the relative Customer Care Centre below.
Glen Dimplex Australia Pty Ltd Glen Dimplex New Zealand Ltd
1340 Ferntree Gully Road, 38 Harris Road, East Tamaki,
Scoresby 3179, Victoria Auckland 2013
Australia New Zealand
Ph: 1300 556 816 Ph: 0800 666 2824
natural_image
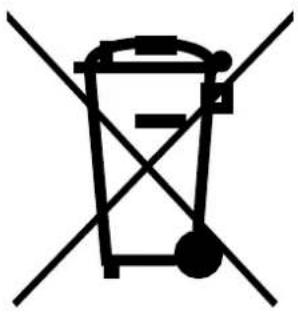
Symbol of a trash bin crossed with two diagonal lines, representing waste sorting or disposal (no text or labels)Recycling: Do not dispose of electrical appliances as unsorted municipal waste. Use separate collection facilities. Contact your local government for information regarding the collection systems available. If electrical appliances are disposed of in landfills or dumps, hazardous substances can leak into the ground water, polluting the food chain and damaging health and well-being.
DCDimplex®
Customer Care: 1300 556 816
customer.care@glendimplex.com.au
www.dimplex.com.au
Supplied by Glen Dimplex Australia
1340 Ferntree Gully Road, Scoresby, Victoria, 3179
- 2.5L Misting Fan
- CAUTION: FAILURE TO FOLLOW THESE INSTRUCTIONS MAY CAUSE INJURY AND/OR DAMAGE AND MAY INVALIDATE YOUR WARRANTY
- Specification
- Parts
- Display & Control Panel
- Remote Control
- Functions
- Before first use, remove any packaging and tape stuck on the unit.
- ON/OFF
- FAN SPEED
- ROTATION
- MODE
- TIMER / PRESET
- MIST
- DISPLAY OFF
- MEMORY FUNCTION
- AUTO OFF
- Filling the water tank
- Filling the water tank:
- Operation & Set Up
- Precautions
- Using the Remote Control
- Cleaning
- De-calcifying the water tank
- Water Tank
- Outside Cabinet
- IMPORTANT
- Storage
- Maintenance
- Warranty
- Glen Dimplex Australia Pty Ltd Glen Dimplex New Zealand Ltd
Brand : DIMPLEX
Model : DCMIST25
Category : Household Fan