
Refine 500 E5GS1-89BM - Steam cleaner ELECTROLUX - Free user manual and instructions
Find the device manual for free Refine 500 E5GS1-89BM ELECTROLUX in PDF.


| Product Type | Garment Steamer |
| Brand | Electrolux |
| Model | Refine 500 E5GS1-89BM |
| Motor Type | DC Motor (DC Max) |
| Steam Settings | Adjustable via rotary selector (E5GS1-8xxx models) |
| Water Type | Tap water; recommended distilled or 50% distilled / 50% tap water |
| Water Tank | Removable, with screw knob |
| Drain Valve | Yes, for draining heating unit |
| Descaling Interval | Every 2 months (medium hardness) or monthly (hard water) |
| Accessories Included | Combined brush, static brush, line clip, trousers rack with 2 clips, garment clip, protective glove, ironing board for collar/sleeve, auxiliary ironing board, accessory bag |
| Safety Features | Protective glove, automatic power-off when not in use (manual), do not immerse in water |
| Components | Steam nozzle, clothes rack, support frame, locking sleeves, steam hose, support locking ring, steam inlet seat, steam outlet, base unit, wheels |
| Power Light | Yes, indicates heating |
| Foldable Clothes Rack | Yes, adjustable height |
| Locking Sleeves | Yes, for adjusting support height |
| Use | Domestic only |
| Cleaning | Empty water tank and drain heating unit after each use; descale regularly |
Frequently Asked Questions - Refine 500 E5GS1-89BM ELECTROLUX
User questions about Refine 500 E5GS1-89BM ELECTROLUX
0 question about this device. Answer the ones you know or ask your own.
Ask a new question about this device
Download the instructions for your Steam cleaner in PDF format for free! Find your manual Refine 500 E5GS1-89BM - ELECTROLUX and take your electronic device back in hand. On this page are published all the documents necessary for the use of your device. Refine 500 E5GS1-89BM by ELECTROLUX.
USER MANUAL Refine 500 E5GS1-89BM ELECTROLUX
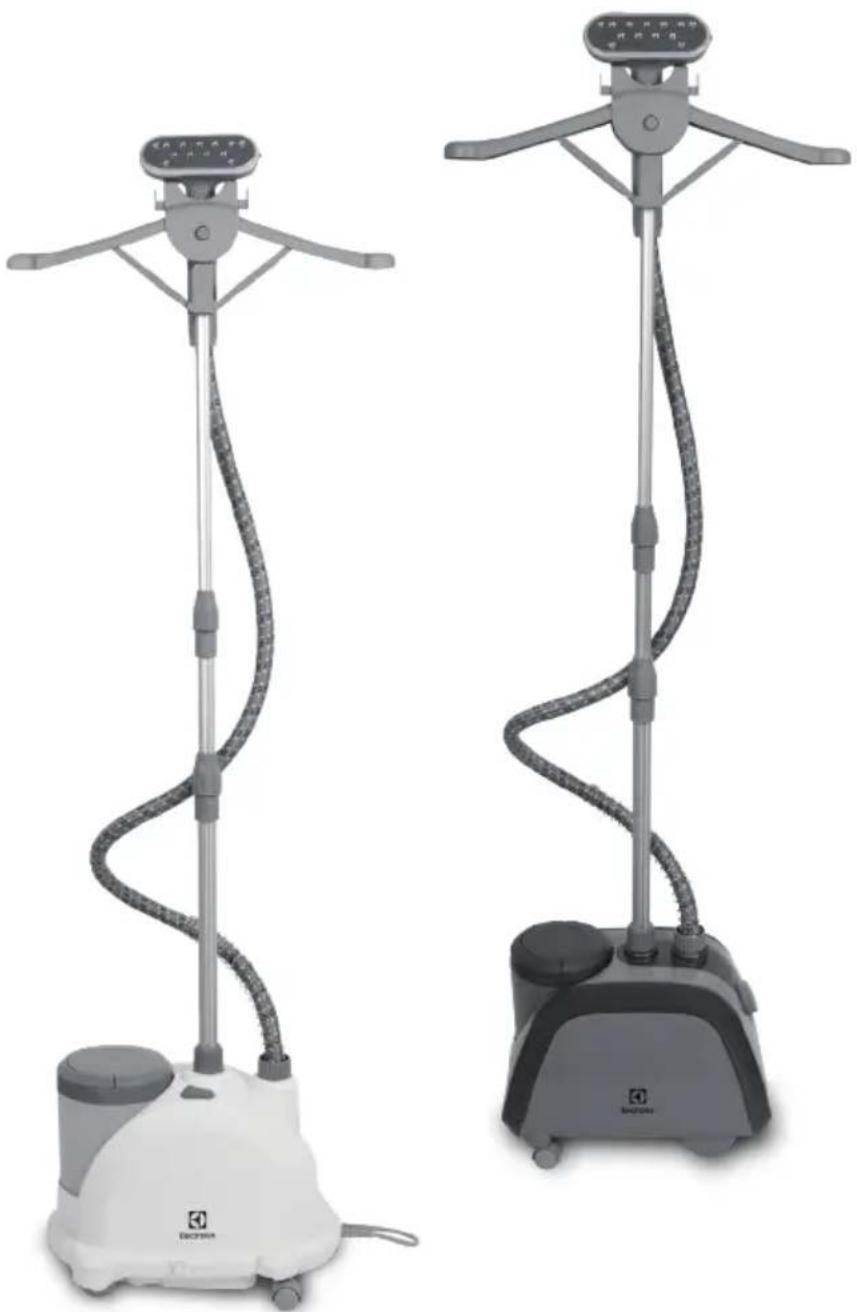
Refine 500 Garment steamer
E5GS1-55DB
E5GS1-89BM
natural_image
Two identical electric steam purifiers with adjustable arms and connecting cables, shown from different angles (no text or symbols visible)EN INSTRUCTION BOOK
CNS 说明书
CNT 說明手冊
ID Buku Panduan
| E5GS1-55DB E5GS1-89BM | |||
| 01 | 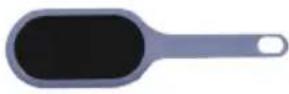 | √ | √ |
| 02 | 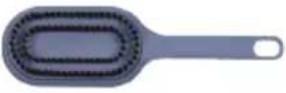 | √ | √ |
| P | 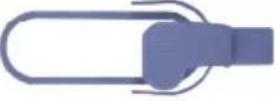 | √ | √ |
| Q |  | √ | √ |
| R | 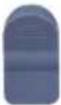 | √ | √ |
| S | 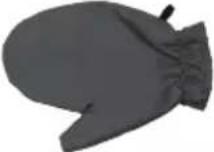 | √ | √ |
| T** | 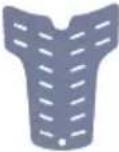 | √ | |
| U** |  | √ | |
| V** |  | √ | |
natural_image
Four-panel illustration showing a robotic device with directional arrows indicating motion or flow, no text or symbols present.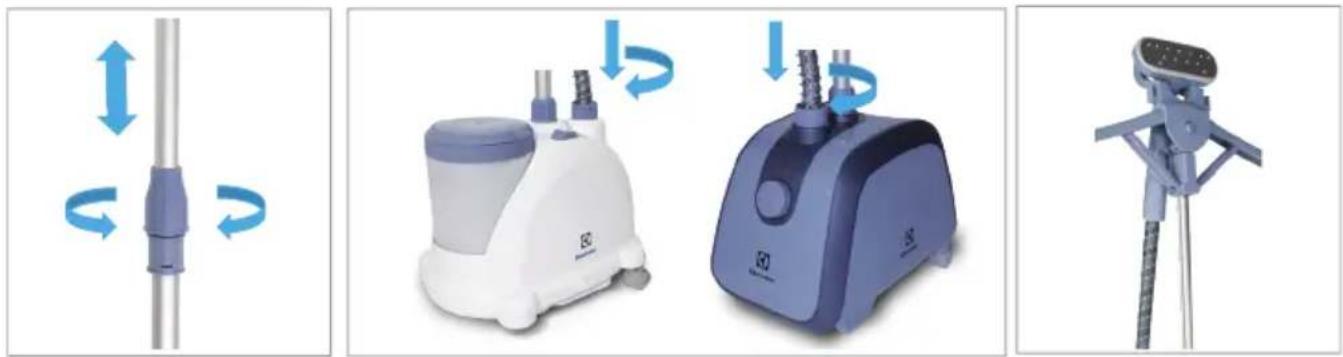
natural_image
Four-panel image showing different types of household appliances: a vertical rod, a washing machine with blue filter, a digital washing machine with blue filter, and a tripod-mounted device (no visible text or symbols)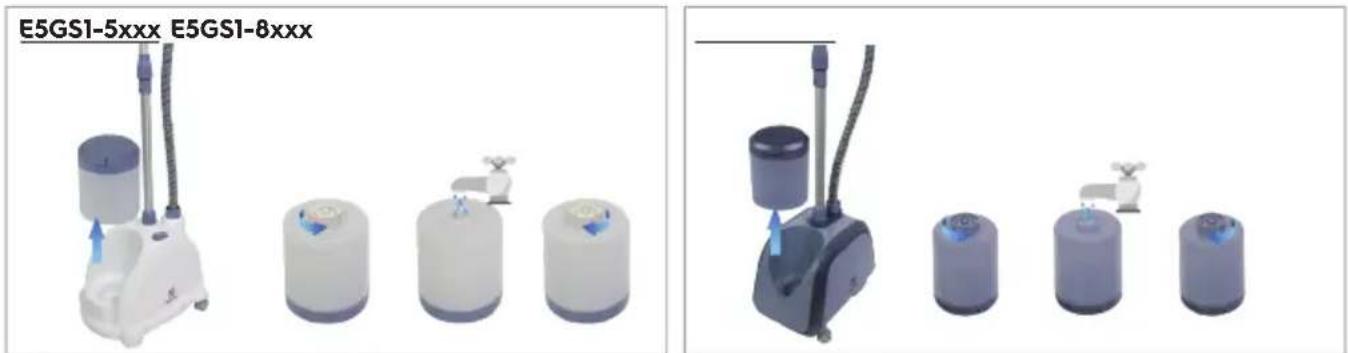
natural_image
Four different types of air purifiers with blue and white coloring, shown from front to side views (no text or symbols visible)INSTRUCTION MANUAL
Graphics and drawings in this manual are solely for illustration purposes and are subject to variations from actual product.
Read all instructions carefully before using the appliance for the first time.
Keep this manual for future reference.
COMPONENTS
A. Steam nozzle
B. Clothes rack
C. Support frame
D. Locking sleeves
E. Steam hose
F. Support locking ring
G. Steam inlet seat
H. Steam outlet
I. Water tank
J. Base unit
K. ON/OFF switch button* (only on E5GS1-5xxx models)
L. Steam setting selector* (only on E5GS1-8xxx models)
M. Wheels
N. Drain valve
o. Combined brush
01. Brush
O2. Static brush
P. Line clip
Q. Trousers rack with 2 garment clips
R. Garment clip
S. Protective glove
T. Ironing board for collar and sleeve**
U. Auxiliary ironing board**
V. Accessory bag**
** Specifications vary by models
SAFETY ADVICE
- This appliance is not intended for use by persons (including children) with reduced physical, sensory or mental capabilities, or lack of experience and knowledge, unless they have been given supervision or instruction concerning the use of the appliance by a person responsible for their safety.
- Keep the appliance and its power cord out of reach of children. Children should be supervised to ensure that they do not play with the appliance.
- Cleaning and user maintenance shall not be performed by children without supervision.
- The appliance can only be connected to a power supply which voltage and frequency comply with the specifications on the rating plate.
- The appliance is not to be used if it has been dropped, if there are visible signs of damage on the appliance or its cord or if it is leaking.
- The appliance must only be connected to an earthed socket.
- If the appliance or the supply cord is damaged, it must be replaced by the manufacturer, its service agent or similar qualified person, in order to avoid hazard.
- The appliance must be used and rested on a stable surface.
- Never leave the appliance unattended while connected to the supply mains.
- The appliance must be switched off and the main plug withdrawn each time after use, before cleaning and maintenance.
- The plug must be remove from the socket outlet before the water tank is filled with water.
- The main cable must not come into contact with any hot parts of the appliance.
- Do not immerse the appliance in water or any other liquid.
- Do not exceed the maximum filling volume as indicated on the appliances.
- This appliance is intended for domestic use only. The manufacturer cannot accept any liability for possible damage caused by improper or incorrect use.
- Do not bend the steam hose or block the steam outlet or else accidents may happen because of overpressure.
- Do not pull the steam hose when the appliance is in use.
- Do not fill hot water into the water tank or else the water tank may deform.
- To avoid irregular steam or water droplets spitting from the steam nozzle, lift the steam nozzle in upright position to remove condensation when there is a bubbling sound.
GETTING STARTED
Before first use, remove all adhesive remains and gently rub with a dampened cloth. Rinse the water tank to remove foreign particles. When switched on for the first time, temporary vapours/odours may occur.
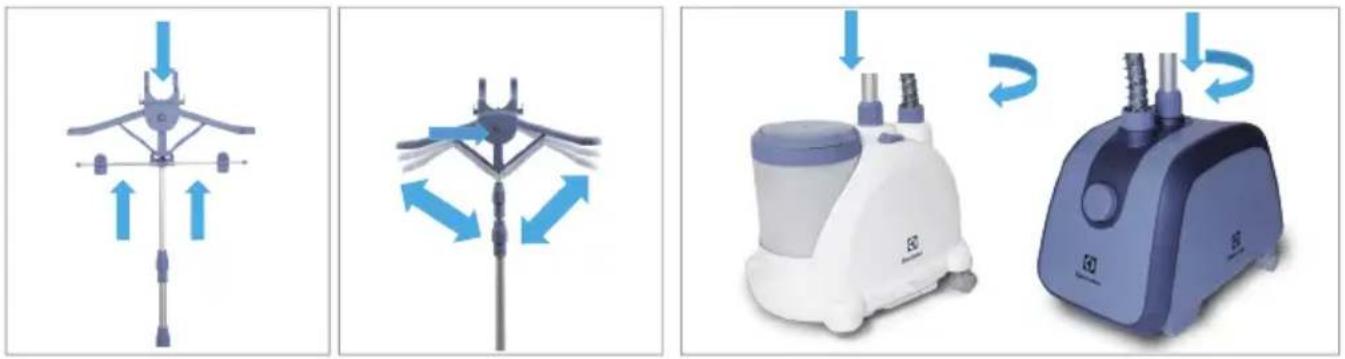
Take out the support frame and the clothes rack, press down to install the clothes rack and lift it. If the clothes rack is stationary, it has been properly installed.
2 Press the clothes rack button, hold the clothes rack support with hands and unfold and fold the clothes rack to adjust it.
3 Insert the support into the corresponding hole on the product and rotate the support locking ring to lock the support.
4 Loosen the locking sleeves, lift the support, adjust it to the proper position and then lock the support locking sleeves.
5 Insert the steam inlet seat into the steam outlet along the direction in the figure and then tighten it turning clockwise.
6 Place the steam nozzle on the clothes rack hook.
7 Take out the water tank, unscrew the knob at its bottom, fill water into it. This product is appropriate for use with tap water. It is recommended to use distilled water or a mix of 50% distilled, 50% tap water. Never put scented water, vinegar or ironing aids in the water tank. This may cause brown spitting and staining.
8 Place the water tank in the base unit, then insert the plug into the power socket.
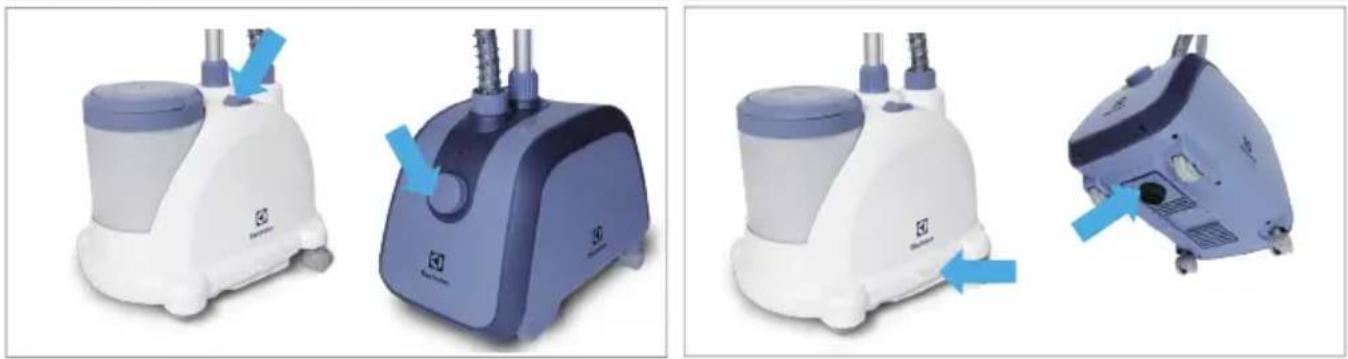
For E5GS1-5xxx models, press the ON/OFF switch button to heat up the product.
For E5GS1-8xxx models, select the desired steam setting by turning the steam setting selector.
| Icon Fabric | |
| OFF position | |
| Thinner clothes such as silk clothes and shirts. | |
| Thicker clothes such as cotton clothes and chemical fiber clothes. | |
| Thicker clothes such as fur coats and linen coats. |
9 The power light will be on and steam will be released soon. Hang clothes on the clothes rack. Always steam the clothes from up to down.
CAUTION: The steam hose becomes warm during steaming. This is normal.
NOTE: Do not release steam towards people or animals.
ACCESSORIES
| PROBLEM POSSIBLE CAUSE | |
| Brush For removing fluff and hair from garments. | |
| Static brush For removing the slight dust/fluff by the special static strip on it. | |
| Line clip For ironing the shirt sleeves and collars. Just clip it to the tab on the underside of the nozzle. Place the garment between the nozzle and the line clip. | |
| Trousers rack with 2 garment clips | For hanging trousers and skirts. Push up the trouser rack along the support, it is properly installed after its locking knob hooks the support of the clothes rack. Evenly hang a pair of trousers or skirt in the middle of the trousers rack and firmly clip the garment with trousers clips. |
| Garment clip For holding sleeves, dresses and other longer items in place for quick steaming. | |
| Protective glove For protection against scalding from the steam released from the steam nozzle. | |
| Ironing board for collar and sleeve | For ironing collar, sleeves and pockets. |
| Auxiliary ironing board For smoother and better steaming results, hold the auxiliary ironing board underneath the garment while steaming the garment. | |
| Accessory bag For storage of accessories. | |
CLEANING AND CARE
Switch off the product and unplug from the mains. Allow the product to cool down for at least 30 minutes.
10 Remove the water tank from the base unit, drain the remaining water from the water tank.
11 Open the drain valve to thoroughly drain the remaining water from the heating unit and wipe the remaining water on the steam outlet and the base unit to prevent scaling. After draining, close the drain valve.
In areas with medium water hardness, we recommend to descale the product every 2 months, while in areas with very hard water, we recommend to descale every 1 month or after 10 sessions.
12 Mix a descaler agent and water at the specified ratio, prepare at least 300ml descaler mixture. (Use the recommended ratio for the mixture. If there is much scaling, properly increase the proportion of descaler.)
Note: Please follow the water/descaler liquid ratio instructions on the bottle.
13 Fill the mixture into the water tank, tighten the knob and then place the water tank in the base unit. Soak for one to two hours under room temperature (if there is much scaling, increase the soaking time; however, the soaking time should not be longer than 8 hours).
CAUTION: Do not switch on the product during soaking.
14 Pour out the mixture from the water tank and the base unit (refer to Cleaning and Care section, point 10 and 11)
15 Fill in clean water via the steam hose joint and into the water tank and then pour it out. Repeat this step for several times until the scales in the product are removed and there is no longer a descaler smell.
16 Reassemble the accessories to continue using it.
TROUBLESHOOTING
| PROBLEM POSSIBLE CAUSE SOLUTION | ||
| No steam is released and the power light is off. | Connection problem. | Check main power supply cable, plug and outlet. |
| The appliance is not switched on. | For E5GS1-5xxx models, press the ON/OFF switch button.For E5GS1-8xxx models, please turn the steam setting selector to the desired setting. | |
| No steam is released but the power light is on. | The water level in the water tank is too low. | Fill water into the water tank. |
| Water leakage from steam nozzle. | The steam nozzle cracked. Replace with a new set of steam hose. | |
| Condensation from the steam hose. | Lift the steam nozzle in up-right position. | |
| Water leakage from the steam hose joint. | The steam hose joint has loosen. Tighten the steam hose joint. | |
| Water flowing out from the water tank. | The water tank cracked. Replace with a new water tank. | |
| The steam hose is in U-shape or bent for a long period of time. | Lift the steam hose in up-right position. | |
| The water tank is deformed. | Filling up the water tank with hot water. | Replace with a new water tank. |
| Chemical residue from inadequate cleaning process. | ||
| The steam output is too little. | Scales accumulation in heating unit. | Please refer to "CLEANING AND CARE" section, point 12-15 for descaling process. |
| The switch or the heating unit is damaged. | Please contact Electrolux Customer Service team for further assistance. | |
| There is a bubbling sound when appliance is in operation. | Condensation from the steam hose. | Lift the steam nozzle in up-right position. |
| The steam hose is in U-shape or bent for a long period of time. | Lift the steam hose in up-right position. | |
DISPOSAL
Recycle the materials with the symbol 📋. Put the packaging in applicable containers to recycle it. Help protect the environment and human health and to recycle waste of electrical and electronic appliances.
Do not dispose appliances marked with the symbol ■ with the household waste. Return the product to your local recycling facility or contact your municipal office.
CUSTOMER CARE AND SERVICE
When contacting Service, ensure that you have the following data available: Model, PNC, Serial Number. The information can be found on the rating plate.
Due to the Electrolux policy of continual product development; specifications, colours, and details of our products and those mentioned in this manual are subject to change without notice.
使用手册
Electrolux Korea limited
9F, Pine Avenue B,
100 Euljiro, Jung-gu, Seoul, Korea 04551
Korea
Tel: +82 2 6020-2200
Fax: +82 2 6020-2271\~3
Customer Care Services : +82 1566-1238
Email: homecare.krh@electrolux.com
Website: www.electrolux.co.kr
INDONESIA
Electrolux Building 2nd Floor
Electrolux Philippines, Inc.
10th Floor. W5th Avenue Building
5th Avenue Corner 32nd Street
Bonifacio Global City,
Taguig Philippines 1634
Trunkline: +63 2 737 4756
Domestic Toll Free: 1 800 10 845 care 2273
Customer Care Services: +63 2 845 care 2273
Email: wecare@electrolux.com
Website: www.electrolux.com.ph
THAILAND
Electrolux Thailand Co Ltd
Electrolux Building
14th Floor 1910 New Petchburi Road
Bangkapi, Huay Kwang
Bangkok 10310
Thailand
Tel: +66 2 725 9100
Fax: +66 2 725 9299
Customer Care Services: +66 2 725 9000
Email: customercarethai@electrolux.com
Website: www.electrolux.co.th
VIETNAM
Electrolux Vietnam Ltd
Floor 9th, A&B Tower
76 Le Lai Street
Ben Thanh Ward - District 1
Ho Chi Minh City
Vietnam
Tel: +84 8 3910 5465
Fax: +84 8 3910 5470
Customer Care Services: 1800-58-8899
Email: vncare@electrolux.com
Website: www.electrolux.vn
MALAYSIA
Electrolux Home Appliances Sdn Bhd
Lot C6, No. 28, Jalan 15/22,
Taman Perindustrian Tiong Nam,
40200 Shah Alam, Selangor
Malaysia
Customer Care Services Tel: +60 3 5525 0800
Customer Care Services Fax: +60 3 5524 2521
Email: malaysia.customercare@electrolux.com
Website: www.electrolux.com.my
SINGAPORE
Electrolux SEA Pte Ltd
1 Fusionopolis Place, Galaxis
07-10 (West Lobby)
Singapore 138522
Customer Care Services: +65 6727 3699
Fax: +65 6727 3611
Email: customer-care.sin@electrolux.com
Website: www.electrolux.com.sg
AUSTRALIA
Electrolux Home Products Pty Ltd
ABN 51 004 762 341
163 O'Riordan Street, Mascot, NSW 2020, Australia
Customer Service Phone: 1300 365 305
Website: www.electrolux.com
NEW ZEALAND
Electrolux Small Appliances
A division of Electrolux (NZ) Limited
3-5 Niall Burgess Road, Mt. Wellington, Auckland,
New Zealand
Phone: (09) 9573 2220
Customer Service Phone: 0508 730 730
Website: www.electrolux.com

natural_image
Abstract geometric design with white and black shapes forming a symmetrical pattern (no text or symbols)Share more of our thinking at
www.electrolux.com
Due to the Electrolux policy of continual product development; specifications, colours, and details of our products and those mentioned in this manual are subject to change without notice.

Brand : ELECTROLUX
Model : Refine 500 E5GS1-89BM
Category : Steam cleaner