
CM7105DN - Printer PANTUM - Free user manual and instructions
Find the device manual for free CM7105DN PANTUM in PDF.


| Product Type | Color laser multifunction printer (Print, Copy, Scan, Fax) |
| Model | Pantum CM7105DN |
| Control Panel | 4.3-inch touch-screen display with numeric keypad |
| Print Speed | Up to 25 pages per minute (color and mono) |
| Automatic Document Feeder (ADF) | Supports plain paper, 52–120 g/m², duplex scanning |
| Paper Input Capacity | Standard 250-sheet tray + manual feeder + multipurpose feeder (100-sheet); optional up to 650-sheet duo tray or 550-sheet tray |
| Paper Output Capacity | Standard bin (typical ~150 sheets) |
| Supported Media Sizes | A4, A5, A6, Letter, Legal, Executive, Oficio, Folio, Statement, Hagaki, Universal, Envelopes (7 3/4, 9, 10, DL, C5, B5, Monarch, Other Envelope) |
| Duplex Printing | Automatic two-sided printing |
| Connectivity | Ethernet, USB 2.0, Fax (analog line), optional wireless (Wi-Fi Direct, Wi-Fi), Google Cloud Print, AirPrint, Mopria |
| Mobile Printing | AirPrint, Mopria Print Service, Google Cloud Print |
| Fax | Analog fax, fax forwarding, junk fax blocking, fax scheduling, fax log |
| Scan | Scan to FTP, email, USB drive, computer (Scan Profiles), network folder |
| Power Consumption | Printing: 530W (one-sided), 360W (two-sided); Copy: 530W; Scan: 28.5W; Ready: 35W; Sleep: 1.9W; Hibernate: 0.2W; Off: 0.2W |
| Operating Temperature | 10 to 32.2°C (50 to 90°F) |
| Safety | Class 1 laser product, complies with DHHS and IEC 60825-1 |
| Maintenance | Replace toner cartridges (CMYK), imaging kit, waste toner bottle, fuser maintenance kit; cleaning interior/exterior/scanner |
| Accessibility | Voice Guidance, Magnification mode, spoken passwords, keyboard on display |
Frequently Asked Questions - CM7105DN PANTUM
User questions about CM7105DN PANTUM
0 question about this device. Answer the ones you know or ask your own.
Ask a new question about this device
Download the instructions for your Printer in PDF format for free! Find your manual CM7105DN - PANTUM and take your electronic device back in hand. On this page are published all the documents necessary for the use of your device. CM7105DN by PANTUM.
USER MANUAL CM7105DN PANTUM
Pantum CM7100 Series
Color laser multifunction printer

natural_image
Abstract grayscale curved band design with no text or symbolsIt is recommended that you read this Guide carefully before using the printer
Contents
Safety information....7
Conventions....7
Product statements....7
Learning about the printer....10
Selecting a location for the printer....10
Printer configurations....11
Attaching cables....12
Using the control panel....14
Panel with 4.3-inch touch-screen display....14
Understanding the status of the power button and indicator light....14
Setting up and using the home screen applications....16
Using the home screen....16
Customizing the home screen....17
Using Display Customization....17
Setting up Scan Center....18
Setting up Card Copy....18
Using Shortcut Center....19
Setting up Device Quotas....19
Using QR Code Generator....19
Configuring Eco-Settings....20
Using Customer Support....20
Managing bookmarks....20
Creating bookmarks....20
Creating folders 21
Managing contacts....21
Adding contacts....21
Adding groups....21
Editing contacts or groups....22
Deleting contacts or groups....22
Setting up and using the accessibility features.... 23
Activating Voice Guidance....23
Navigating the screen using gestures....23
Enabling Magnification mode....24
Adjusting the Voice Guidance speech rate....24
Using the keyboard on the display....24
Enabling spoken passwords or personal identification numbers.... 24
Loading paper and specialty media....25
Setting the paper size and type....25
Configuring Universal paper settings.... 25
Loading trays....25
Loading the multipurpose feeder....27
Loading the manual feeder....29
Linking trays....30
Paper support.... 31
Supported paper sizes....31
Supported paper types....33
Supported paper weights....34
Printing....36
Printing from a computer....36
Printing from a mobile device....36
Printing from a flash drive....37
Supported flash drives and file types.... 38
Configuring confidential jobs....39
Printing confidential and other held jobs....39
Printing a font sample list....40
Copying....41
Making a copy....41
Copying photos....41
Copying on letterhead....41
Copying on both sides of the paper....42
Reducing or enlarging copies....42
Collating copies....42
Placing separator sheets between copies.... 42
Copying multiple pages onto a single sheet....43
Creating a copy shortcut....43
E-mailing....44
Setting up the e-mail function....44
Configuring e-mail settings....44
Sending an e-mail....44
Creating an e-mail shortcut....44
Faxing....46
Setting up the printer to fax....46
Sending a fax....52
Scheduling a fax....53
Creating a fax destination shortcut....53
Changing the fax resolution....53
Adjusting the fax darkness....54
Viewing a fax log....54
Blocking junk faxes....54
Holding faxes....54
Forwarding a fax....55
Scanning....56
Scanning to an FTP server....56
Creating an FTP shortcut.... 56
Scanning to a flash drive....56
Sending scanned documents to a computer....57
Understanding the printer menus....58
Menu map....58
Device....59
Print....72
Paper....82
Copy....84
Fax....87
E-mail....100
FTP....107
USB Drive....112
Network/Ports....117
Security....129
Reports....137
Help....138
Troubleshooting....138
Printing the Menu Settings Page....139
Securing the printer....140
Locating the security slot....140
Erasing printer memory....140
Erasing printer hard disk memory....140
Encrypting the printer hard disk....141
Restoring factory default settings....141
Statement of Volatility....141
Maintaining the printer....143
Adjusting the speaker volume....143
Networking....144
Cleaning printer parts....146
Ordering parts and supplies....149
Replacing parts and supplies....150
Moving the printer....162
Saving energy and paper....163
Clearing jams....165
Avoiding jams....165
Identifying jam locations....166
Paper jam in trays....167
Paper jam in door A....167
Paper jam in the standard bin....171
Paper jam in the multipurpose feeder....173
Paper jam in the manual feeder....174
Paper jam in door C....174
Troubleshooting.... 176
Network connection problems....176
Hardware options problems....178
Issues with supplies....179
Paper feed problems....180
Printing problems....183
Color quality problems....209
Faxing problems.... 212
Scanning problems.... 215
Contacting customer support....219
Upgrading and migrating....220
Hardware....220
Software....230
Firmware....231
Notices....232
Index......237
Safety information
Conventions
Note: A note identifies information that could help you.
Warning: A warning identifies something that could damage the product hardware or software.
CAUTION: A caution indicates a potentially hazardous situation that could injure you.
Different types of caution statements include:

CAUTION—POTENTIAL INJURY: Indicates a risk of injury.

CAUTION—SHOCK HAZARD: Indicates a risk of electrical shock.

CAUTION—HOT SURFACE: Indicates a risk of burn if touched.

CAUTION—TIPPING HAZARD: Indicates a crush hazard.

CAUTION—PINCH HAZARD: Indicates a risk of being caught between moving parts.

CAUTION—ROTATING FAN BLADES: Indicates a risk of laceration from moving fan blades.
Product statements

CAUTION—POTENTIAL INJURY: To avoid the risk of fire or electrical shock, connect the power cord to an appropriately rated and properly grounded electrical outlet that is near the product and easily accessible.

CAUTION—POTENTIAL INJURY: To avoid the risk of fire or electrical shock, use only the power cord provided with this product or the manufacturer's authorized replacement.

CAUTION—POTENTIAL INJURY: Do not use this product with extension cords, multioutlet power strips, multioutlet extenders, or UPS devices. The power capacity of these types of accessories can be easily overloaded by a laser printer and may result in a risk of fire, property damage, or poor printer performance.

CAUTION—POTENTIAL INJURY: Do not use this product with an inline surge protector. The use of a surge protection device may result in a risk of fire, property damage, or poor printer performance.

CAUTION—POTENTIAL INJURY: To reduce the risk of fire, use only a 26 AWG or larger telecommunications (RJ-11) cord when connecting this product to the public switched telephone network. For users in Australia, the cord must be approved by the Australian Communications and Media Authority.

CAUTION—SHOCK HAZARD: To avoid the risk of electrical shock, do not place or use this product near water or wet locations.

CAUTION—SHOCK HAZARD: To avoid the risk of electrical shock, do not set up this product or make any electrical or cabling connections, such as the power cord, fax feature, or telephone, during a lightning storm.
CAUTION—POTENTIAL INJURY: Do not cut, twist, bind, crush, or place heavy objects on the power cord. Do not subject the power cord to abrasion or stress. Do not pinch the power cord between objects such as furniture and walls. If any of these things happen, a risk of fire or electrical shock results. Inspect the power cord regularly for signs of such problems. Remove the power cord from the electrical outlet before inspecting it.
CAUTION—SHOCK HAZARD: To avoid the risk of electrical shock, make sure that all external connections (such as Ethernet and telephone system connections) are properly installed in their marked plug-in ports.
CAUTION—SHOCK HAZARD: To avoid the risk of electrical shock, if you are accessing the controller board or installing optional hardware or memory devices sometime after setting up the printer, then turn the printer off, and unplug the power cord from the electrical outlet before continuing. If you have any other devices attached to the printer, then turn them off as well, and unplug any cables going into the printer.
CAUTION—SHOCK HAZARD: To avoid the risk of electrical shock, do not use the fax feature during a lightning storm.
CAUTION—SHOCK HAZARD: To avoid the risk of electrical shock when cleaning the exterior of the printer, unplug the power cord from the electrical outlet and disconnect all cables from the printer before proceeding.
CAUTION—POTENTIAL INJURY: If the printer weight is greater than 18 kg (40 lb), then it requires two or more trained personnel to lift it safely.
CAUTION—POTENTIAL INJURY: When moving the printer, follow these guidelines to avoid personal injury or printer damage:
- Make sure that all doors and trays are closed.
- Turn off the printer, and then unplug the power cord from the electrical outlet.
- Disconnect all cords and cables from the printer.
- If the printer has separate floor-standing optional trays or output options attached to it, then disconnect them before moving the printer.
- If the printer has a caster base, then carefully roll it to the new location. Use caution when passing over thresholds and breaks in flooring.
- If the printer does not have a caster base but is configured with optional trays or output options, then remove the output options and lift the printer off the trays. Do not try to lift the printer and any options at the same time.
•Always use the handholds on the printer to lift it.
- Any cart used to move the printer must have a surface able to support the full footprint of the printer.
- Any cart used to move the hardware options must have a surface able to support the dimensions of the options.
- Keep the printer in an upright position.
- Avoid severe jarring movements.
- Make sure that your fingers are not under the printer when you set it down.
- Make sure that there is adequate clearance around the printer.
CAUTION—TIPPING HAZARD: Installing one or more options on your printer or MFP may require a caster base, furniture, or other feature to prevent instability causing possible injury. For more information on supported configurations, contact the place where you purchased the printer.
CAUTION—TIPPING HAZARD: To reduce the risk of equipment instability, load each tray separately. Keep all other trays closed until needed.
CAUTION—HOT SURFACE: The inside of the printer might be hot. To reduce the risk of injury from a hot component, allow the surface to cool before touching it.
CAUTION—PINCH HAZARD: To avoid the risk of a pinch injury, use caution in areas marked with this label. Pinch injuries may occur around moving parts, such as gears, doors, trays, and covers.
CAUTION—ROTATING FAN BLADES: To avoid the risk of laceration from moving fan blades, turn off the printer and unplug the power cord from the electrical outlet before accessing areas marked with this symbol.
CAUTION—POTENTIAL INJURY: This product uses a laser. Use of controls or adjustments or performance of procedures other than those specified in the User's Guide may result in hazardous radiation exposure.
CAUTION—POTENTIAL INJURY: The lithium battery in this product is not intended to be replaced. There is a danger of explosion if a lithium battery is incorrectly replaced. Do not recharge, disassemble, or incinerate a lithium battery. Discard used lithium batteries according to the manufacturer's instructions and local regulations.
This product is designed, tested, and approved to meet strict global safety standards with the use of specific manufacturer's components. The safety features of some parts may not always be obvious. The manufacturer is not responsible for the use of other replacement parts.
Refer service or repairs, other than those described in the user documentation, to a service representative.
This product uses a printing process that heats the print media, and the heat may cause the media to release emissions. You must understand the section in your operating instructions that discusses the guidelines for selecting print media to avoid the possibility of harmful emissions.
This product may produce small amounts of ozone during normal operation, and may be equipped with a filter designed to limit ozone concentrations to levels well below the recommended exposure limits. To avoid high ozone concentration levels during extensive usage, install this product in a well-ventilated area and replace the ozone and exhaust filters if instructed to do so in the product maintenance instructions. If there are no references to filters in the product maintenance instructions, then there are no filters requiring replacement for this product.
SAVE THESE INSTRUCTIONS.
Learning about the printer
Selecting a location for the printer
- Leave enough room to open trays, covers, and doors and to install hardware options.
- Set up the printer near an electrical outlet.

CAUTION—POTENTIAL INJURY: To avoid the risk offire or electrical shock, connect the power cord to an appropriately rated and properly grounded electrical outlet that is near the product and easily accessible.

CAUTION—SHOCK HAZARD: To avoid the risk of electrical shock, do not place or use this product near water or wet locations.
- Make sure that airflow in the room meets the latest revision of the ASHRAE 62 standard or the CEN Technical Committee 156 standard.
- Provide a flat, sturdy, and stable surface.
- Keep the printer:
—Clean, dry, and free of dust
—Away from stray staples and paper clips
- Away from the direct airflow of air conditioners, heaters, or ventilators
—Free from direct sunlight and humidity extremes
- Observe the temperature range.
Operating temperature 10 to 32.2ircC (50 to 90ircF )
- Allow the following recommended amount of space around the printer for proper ventilation:

| 1 Top 305 mm (12 in.) | |
| 2 Rear 102 mm (4 in.) | |
| 3 Right side 76 mm (3 in.) | |
| 4 Front 508 mm (20 in.)Note: The minimum space needed in front of the machine is 76 mm (3 in.). | |
| 5 Left side 76 mm (3 in.) |
Printer configurations

CAUTION—TIPPING HAZARD: Installing one or more options on your printer or MFP may require a caster base, furniture, or other feature to prevent instability causing possible injury. For more information on supported configurations, contact the place where you purchased the printer.

CAUTION—TIPPING HAZARD: To reduce the risk of equipment instability, load each tray separately. Keep all other trays closed until needed.
You can configure your printer by adding an optional 650-sheet duo tray or a 550-sheet tray. For more information, see "Installing optional trays" on page 229.
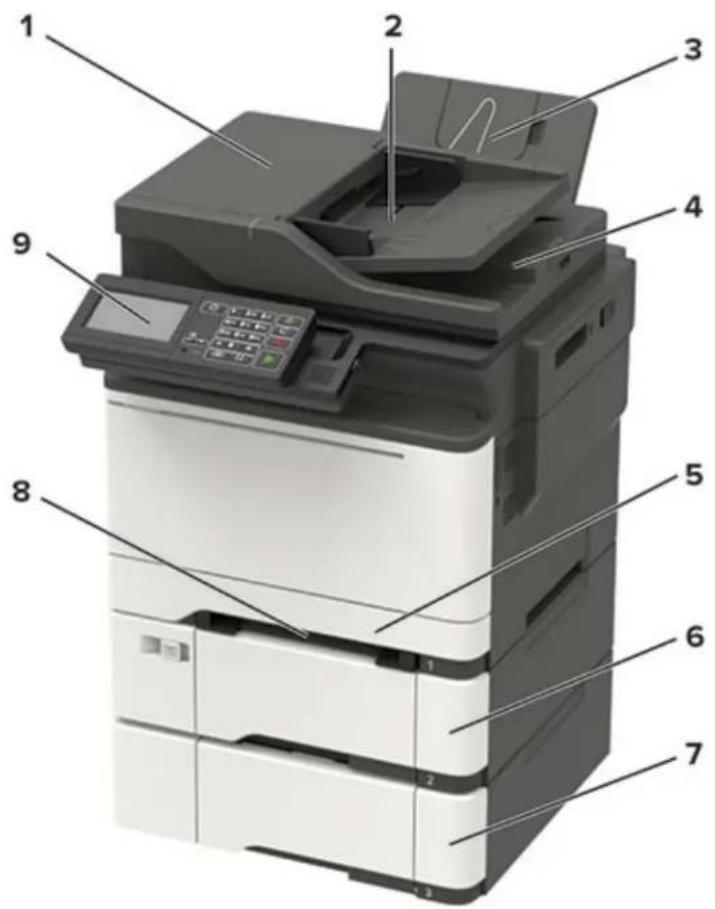
| 1 Automatic document feeder (ADF) | |
| 2 ADF tray | |
| 3 Standard bin | |
| 4 ADF bin | |
| 5 Standard 250-sheet tray | |
| 6 | Optional 650-sheet duo trayNote: This tray is available only in some printer models. |
| 7 Optional 550-sheet trayNote: This tray is available only in some printer models. | |
| 8 Manual feeder | |
| 9 Control panelNote: The appearance may vary depending on your printer model. | |
Attaching cables
CAUTION—SHOCK HAZARD: To avoid the risk of electrical shock, do not set up this product or make any electrical or cabling connections, such as the power cord, fax feature, or telephone, during a lightning storm.
CAUTION—POTENTIAL INJURY: To avoid the risk offire or electrical shock, connect the power cord to an appropriately rated and properly grounded electrical outlet that is near the product and easily accessible.
CAUTION—POTENTIAL INJURY: To avoid the risk of fire or electrical shock, use only the power cord provided with this product or the manufacturer's authorized replacement.
CAUTION—POTENTIAL INJURY: To reduce the risk of fire, use only a 26 AWG or larger telecommunications (RJ-11) cord when connecting this product to the public switched telephone network. For users in Australia, the cord must be approved by the Australian Communications and Media Authority.
Warning—Potential Damage: To avoid loss of data or printer malfunction, do not touch the USB cable, any wireless network adapter, or the printer in the areas shown while actively printing.
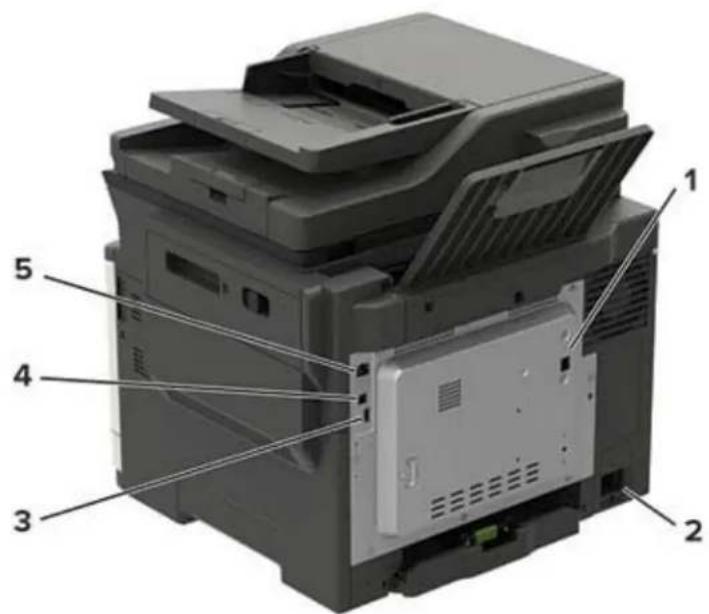
| Use the To | ||
| 1 | LINE port | Connect the printer to an active telephone line through a standard wall jack (RJ-11), DSL filter, or VoIP adapter, or any other adapter that allows you to access the telephone line to send and receive faxes. |
| 2 | Power cord socket | Connect the printer to a properly grounded electrical outlet. |
| 3 | USB port Attach a keyboard | Board or any compatible option.Note: This port is available only in some printer models. |
| 4 | USB printer port Connect | the printer to a computer. |
| 5 | Ethernet port Connect | the printer to a network. |
Using the control panel
Panel with 4.3-inch touch-screen display

| Use the To | ||
| 1 | Display | •View the printer messages and supply status.•Set up and operate the printer. |
| 2 | Home button Go to the home screen. | |
| 3 | Numeric keypad Enter numbers or symbols in an input field. | |
| 4 | Power button | •Turn on or turn off the printer.Note:To turn off the printer, press and hold the power button for five seconds.•Set the printer to Sleep or Hibernate mode.•Wake the printer from Sleep or Hibernate mode. |
| 5 | Clear all or Reset button | Reset the default settings of a function such as copying, faxing, or scanning. |
| 6 | Stop or Cancel button Stop the current printer task. | |
| 7 | Start button | Start a job, depending on which mode is selected. |
| 8 | Pause button Place a dial pause in a fax number. | |
| 9 | Backspace button Move the cursor backward and delete a character in an input field. | |
| 10 | Indicator light Check the printer status. | |
| 11 | Volume buttons | Adjust the speaker volume. |
Understanding the status of the power button and indicator light
| Indicator light | Printer status |
| Off | The printer is off or in Hibernate mode. |
| Blue | The printer is ready or processing data. |
| Indicator light Printer status | |
| Red The printer requires user intervention. | |
| Power button light Printer status | |
| Off The printer is off, ready, or processing data. | |
| Solid amber The printer is in Sleep mode. | |
| Blinking amber The printer is in Hibernate mode. | |
Setting up and using the home screen applications
Note: These applications are supported only in some printer models.
Using the home screen
Note: Your home screen may vary depending on your home screen customization settings, administrative setup, and active embedded solutions.

| Touch To | ||
| 1 Copy Make copies. | ||
| 2 | Send e-mails. | |
| 3 Settings Access the printer menus. | ||
| 4 Fax Send fax. | ||
| 5 | Address Book | Manage a contact list that other applications on the printer can access. |
| 6 Status/Supplies | • Show a printer warning or error message whenever the printer requires intervention to continue processing.• View more information on the printer warning or message, and on how to clear it.Note: You can also access this setting by touching the top section of the home screen. | |
| 7 U$B Drive | •Print photos and documents from a flash drive.•Scan photos and documents to a flash drive | |
| 8 Job Queue Show all the current print jobs. | Note: You can also access this setting by touching the top section of the home screen. | |
| 9 | Held Jobs | Show the print jobs that are held in the printer memory. |
| 10 | Shortcut Center | Organize all shortcuts. |
| 11 | App Profiles | Access application profiles. |
| 12 | Scan Profiles | Scan and save documents directly to the computer. |
| 13 | FTP Scan and save documents directly to an FTP server. | |
| 14 | Bookmarks Organize all bookmarks. | |
| 15 | Change Language Change the language on the display. | |
Customizing the home screen
1 Open a web browser, and then type the printer IP address in the address field.
Notes:
- View the printer IP address on the printer home screen. The IP address appears as four sets of numbers separated by periods, such as 123.123.123.123. - If you are using a proxy server, then temporarily disable it to load the web page correctly.
2 Click Settings > Device > Visible Home Screen Icons.
3 Select the icons that you want to appear on the home screen.
4 Apply the changes.
Using Display Customization
Before using the application, make sure to do the following:
- From the Embedded Web Server, click Apps > Display Customization > Configure.
- Enable and configure the screen saver, slideshow, and wallpaper settings.
Managing screen saver and slide show images
1 From the Screen Saver and Slideshow Images section, add, edit, or delete an image.
Notes:
•You can add up to 10 images.
- When enabled, the status icons appear on the screen saver only when there are errors, warnings, or cloud-based notifications.
2 Apply the changes.
Changing the wallpaper image
1 From the home screen, touch Change Wallpaper.
2 Select an image to use.
3 Apply the changes.
Running a slide show from a flash drive
1 Insert a flash drive into the USB port.
2 From the home screen, touch Slideshow.
Images appear in alphabetical order.
Note: You can remove the flash drive after the slide show starts, but the images are not stored in the printer. If the slide show stops, then insert the flash drive again to view the images.
Setting up Scan Center
1 From the home screen, touch Scan Center.
2 Select and create a destination, and then configure the settings.
Notes:
- When creating a network destination, make sure to validate and adjust the settings until no errors occur.
- Only destinations created from the Embedded Web Server are saved. For more information, see the documentation that came with the solution.
3 Apply the changes.
Setting up Card Copy
1 Open a web browser, and then type the printer IP address in the address field.
Notes:
- View the printer IP address on the printer home screen. The IP address appears as four sets of numbers separated by periods, such as 123.123.123.123.
- If you are using a proxy server, then temporarily disable it to load the web page correctly.
2 Click Apps > Card Copy > Configure.
Notes:
•Make sure that Display Icon is enabled.
- Make sure that E-mail Settings and Network Share Settings are configured.
- When scanning a card, make sure that the scan resolution does not exceed 200 dpi for color and 400 dpi for black and white.
- When scanning multiple cards, make sure that the scan resolution does not exceed 150 dpi for color and 300 dpi for black and white.
3 Apply the changes.
Note: You need a printer hard disk to scan multiple cards.
Using Shortcut Center
1 From the home screen, touch Shortcut Center, and then select a printer function.
2 Touch Create Shortcut, and then configure the settings.
3 Touch Save, and then type a unique shortcut name.
4 Apply the changes.
Setting up Device Quotas
You may need administrative rights to access the application.
1 Open a Web browser, and then type the printer IP address in the address field.
Notes:
- View the printer IP address on the printer home screen. The IP address appears as four sets of numbers separated by periods, such as 123.123.123.123.
- If you are using a proxy server, then temporarily disable it to load the Web page correctly.
2 Click Apps > Device Quotas > Configure.
3 From the User Accounts section, add or edit a user, and then set the user quota.
4 Apply the changes.
Note: For information on how to configure the application and its security settings, see the Device Quotas Administrator's Guide.
Using QR Code Generator
You may need administrative rights to access the application.
1 Open a Web browser, and then type the printer IP address in the address field.
Notes:
- View the printer IP address on the printer home screen. The IP address appears as four sets of numbers separated by periods, such as 123.123.123.123.
- If you are using a proxy server, then temporarily disable it to load the Web page correctly.
2 Click Apps > QR Code Generator > Configure.
3 Do either of the following:
- Select a default QR code value.
- Type a QR code value.
4 Apply the changes.
Configuring Eco-Settings
1 From the home screen, touch Eco-Settings.
2 Configure Eco-Mode or Schedule Power Modes.
3 Apply the changes.
Using Customer Support
1 From the home screen, touch Customer Support.
2 Print or e-mail the information.
Note: For information on configuring the application settings, see the Customer Support Administrator's Guide.
Managing bookmarks
Creating bookmarks
Use bookmarks to print frequently accessed documents that are stored in servers or on the web.
1 Open a web browser, and then type the printer IP address in the address field.
Notes:
- View the printer IP address on the printer home screen. The IP address appears as four sets of numbers separated by periods, such as 123.123.123.123.
- If you are using a proxy server, then temporarily disable it to load the web page correctly.
2 Click Bookmark Setup > Add Bookmark, and then type a unique name for the bookmark.
3 Select an Address protocol type, and then do one of the following:
- For HTTP and HTTPS, type the URL that you want to bookmark.
- For HTTPS, make sure to use the host name instead of the IP address. For example, type myWebsite.com/sample.pdf instead of typing 123.123.123.123/sample.pdf. Make sure that the host name also matches the Common Name (CN) value in the server certificate. For more information on obtaining the CN value in the server certificate, see the help information for your web browser.
- For FTP, type the FTP address. For example, myServer/myDirectory. Enter the FTP port. Port 21 is the default port for sending commands.
- For SMB, type the network folder address. For example, myServer/myShare/myFile.pdf. Type the network domain name.
- If necessary, select the Authentication type for FTP and SMB.
To limit access to the bookmark, enter a PIN.
Note: The application supports the following file types: PDF, JPEG, TIFF, and HTML-based web pages. Other file types such as DOCX and XLXS are supported in some printer models.
4 Click Save.
Note: To manage bookmarks, click Bookmark Setup.
Creating folders
1 Open a web browser, and then type the printer IP address in the address field.
Notes:
- View the printer IP address on the printer home screen. The IP address appears as four sets of numbers separated by periods, such as 123.123.123.123.
- If you are using a proxy server, then temporarily disable it to load the web page correctly.
2 Click Bookmark Setup > Add Folder, and then type a unique name for the folder.
Note: To limit access to the folder, enter a PIN.
3 Click Save.
Notes:
- You can create folders or bookmarks inside a folder. To create a bookmark, see "Creating bookmarks" on page 20.
• To manage folders, click Bookmark Setup.
Managing contacts
Adding contacts
1 Open a web browser, and then type the printer IP address in the address field.
Notes:
- View the printer IP address on the printer home screen. The IP address appears as four sets of numbers separated by periods, such as 123.123.123.123.
- If you are using a proxy server, then temporarily disable it to load the web page correctly.
2 Click Address Book.
3 From the Contacts section, add a contact.
Note: You can assign the contact to one or more groups.
4 If necessary, specify a login method to allow application access.
5 Apply the changes.
Adding groups
1 Open a web browser, and then type the printer IP address in the address field.
Notes:
- View the printer IP address on the printer home screen. The IP address appears as four sets of numbers separated by periods, such as 123.123.123.123.
- If you are using a proxy server, then temporarily disable it to load the web page correctly.
2 Click Address Book.
3 From the Contact Groups section, add a group name.
Note: You can assign one or more contacts to the group.
4 Apply the changes.
Editing contacts or groups
1 Open a web browser, and then type the printer IP address in the address field.
Notes:
- View the printer IP address on the printer home screen. The IP address appears as four sets of numbers separated by periods, such as 123.123.123.123.
- If you are using a proxy server, then temporarily disable it to load the web page correctly.
2 Click Address Book.
3 Do either of the following:
- From the Contacts section, click a contact name, and then edit the information.
- From the Contact Groups section, click a group name, and then edit the information.
4 Apply the changes.
Deleting contacts or groups
1 Open a web browser, and then type the printer IP address in the address field.
Notes:
- View the printer IP address on the printer home screen. The IP address appears as four sets of numbers separated by periods, such as 123.123.123.123.
- If you are using a proxy server, then temporarily disable it to load the web page correctly.
2 Click Address Book.
3 Do either of the following:
- From the Contacts section, select a contact that you want to delete.
- From the Contact Groups section, select a group name that you want to delete.
Setting up and using the accessibility features
Note: These features are supported only in some printer models.
Activating Voice Guidance
From the control panel
1 Press and hold the 5 key until you hear a voice message.
2 Select OK.
From the keyboard
1 Press and hold the 5 key until you hear a voice message.
2 Press Tab to navigate the focus cursor to the OK button, and then press Enter.
Notes:
• Voice Guidance is also activated when you insert headphones into the headphone jack.
- To adjust the volume, use the volume buttons at the bottom part of the control panel.
Navigating the screen using gestures
Notes:
- The gestures are applicable only when Voice Guidance is activated.
- Enable Magnification to use the zoom and pan gestures.
- Use a physical keyboard to type characters and adjust certain settings.
| Gesture Function | |
| Double-tap Select an option or item on the screen. | |
| Triple-tap Zoom in or zoom out text and images. | |
| Swipe right or swipe down Move to the next item on the screen. | |
| Swipe left or swipe up Move to the previous item on the screen. | |
| Pan Access parts of the zoomed image that are beyond the limits of the screen.Note: This gesture requires the use of two fingers to drag across a zoomed image. | |
| Swipe up then left Exit an application and return to the home screen. | |
| Swipe down then left | Cancel a job.Go back to the previous setting.Exit the screen that appears without changing any setting or value. |
| Swipe up then down Repeat a spoken prompt. | |
Enabling Magnification mode
1 From the control panel, press and hold the 5 key until you hear a voice message.
2 Select Magnification mode.
3 Select OK.
For more information on navigating a magnified screen, see "Navigating the screen using gestures" on page 23.
Adjusting the Voice Guidance speech rate
1 From the home screen, select Settings > Device > Accessibility > Speech Rate.
2 Select the speech rate.
Using the keyboard on the display
Do one or more of the following:
- Drag a finger over the key to announce the character.
- Lift the finger to enter or type the character in the field.
- Select Backspace to delete characters.
- To hear the content in the input field, select Tab, and then select Shift + Tab.
Enabling spoken passwords or personal identification numbers
1 From the home screen, select Settings > Device > Accessibility > Speak Passwords/PINs.
2 Enable the setting.
Loading paper and specialty media
Setting the paper size and type
1 From the control panel, navigate to:
Settings > Paper > Tray Configuration > Paper Size/Type > select a paper source
For non-touch-screen printer models, press OK to navigate through the settings.
2 Set the paper size and type.
Configuring Universal paper settings
1 From the control panel, navigate to:
Settings > Paper > Media Configuration > Universal Setup
For non-touch-screen printer models, press OK to navigate through the settings.
2 Configure the settings.
Loading trays

CAUTION—TIPPING HAZARD: To reduce the risk of equipment instability, load each tray separately. Keep all other trays closed until needed.
1 Remove the tray.
Note: To avoid paper jams, do not remove trays while the printer is busy.

natural_image
Close-up of a printer's internal component being placed with a red downward arrow indicating compression (no text or symbols visible)2 Adjust the guides to match the size of the paper that you are loading.
Note: Use the indicators on the bottom of the tray to position the guides.

natural_image
Two views of a mechanical component with red arrows indicating motion or force direction (no text or symbols present)3 Flex, fan, and align the paper edges before loading.

4 Load the paper stack with the printable side faceup, and then make sure that the side guides fit snugly against the paper.

natural_image
Diagram of a mechanical device with arrows indicating motion or force direction (no text or symbols)Notes:
- Load letterhead faceup with the header toward the front of the tray for one-sided printing.
- Load letterhead facedown with the header toward the back of the tray for two-sided printing.
- Do not slide paper into the tray.
• To avoid paper jams, make sure that the stack height is below the maximum paper fill indicator.

natural_image
Close-up of a mechanical component with a magnified inset showing a detail (no text or symbols visible)5 Insert the tray.
If necessary, set the paper size and paper type from the control panel to match the paper loaded.
Loading the multipurpose feeder
1 Open the multipurpose feeder.
Note: The multipurpose feeder is available only in some printer models.
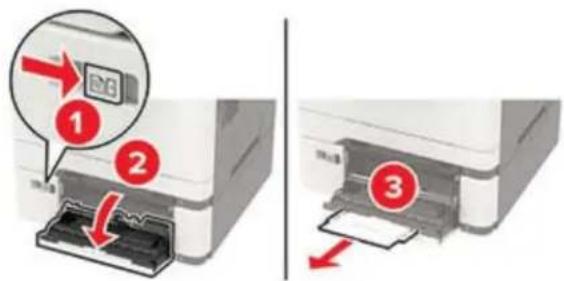
2 Adjust the guide to match the size of the paper that you are loading.

natural_image
Close-up of a printer with a red arrow pointing to its internal structure (no text or symbols visible)3 Flex, fan, and align the paper edges before loading.

4 Load paper with the printable side facedown.
- Load letterhead with the printable side facedown and the top edge entering the printer first for one-sided printing.

natural_image
Close-up of a printer's paper being inserted into a paper holder, with a red arrow indicating the paper's direction (no text or symbols visible)- Load letterhead with the printable side faceup and the top edge entering the printer last for two-sided printing.
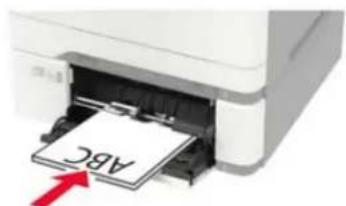
natural_image
Close-up of a printer's paper being inserted into a paper, with a red arrow indicating the paper's edge (no text or symbols visible)- Load envelopes with the flap side up and against the right side of the paper guide.

natural_image
Close-up of a printer's internal structure with red arrows indicating movement or assembly (no text or symbols visible)Warning—Potential Damage: Do not use envelopes with stamps, clasps, snaps, windows, coated linings, or self-stick adhesives.
5 From the control panel, set the paper size and paper type to match the paper loaded.
Loading the manual feeder
1 Adjust the guide to match the size of the paper that you are loading.

natural_image
Diagram showing a device with a highlighted component and arrow, no readable text or symbols present2 Load a sheet of paper with the printable side facedown.
- Load letterhead with the printable side facedown and the top edge entering the printer first for one-sided printing.

- Load letterhead with the printable side faceup and the top edge entering the printer last for two-sided printing.

- Load envelope with the flap side up and against the right side of the paper guide.

natural_image
Close-up of a white appliance with a red arrow pointing to a folded paper or plastic sheet (no text or symbols visible)3 Feed the paper until its leading edge gets pulled in.
Warning—Potential Damage: To avoid paper jams, do not force paper into the manual feeder.
Linking trays
1 Open a web browser, and then type the printer IP address in the address field.
Notes:
- View the printer IP address on the printer home screen. The IP address appears as four sets of numbers separated by periods, such as 123.123.123.123.
- If you are using a proxy server, then temporarily disable it to load the web page correctly.
2 Click Settings > Paper > Tray Configuration.
3 Set the same paper size and paper type for the trays that you are linking.
4 Save the settings.
5 Click Settings > Device > Maintenance > Configuration Menu > Tray Configuration.
6 Set Tray Linking to Automatic.
7 Save the settings.
To unlink trays, make sure that no trays have the same paper size and paper type settings.
Warning—Potential Damage: The temperature of the fuser varies according to the specified paper type. To avoid printing issues, match the paper type setting in the printer with the paper loaded in the tray.
Paper support
Supported paper sizes
Note: Your printer model may have a 650-sheet duo tray, which consists of a 550-sheet tray and an integrated 100-sheet multipurpose feeder. The 550-sheet tray of the 650-sheet duo tray supports the same paper sizes as the optional 550-sheet tray. The integrated multipurpose feeder supports different paper sizes, types, and weights.
| Paper size and dimension | Standard 250-sheet tray | Manual feeder | Optional 650-sheet duo tray | Optional 550-sheet tray | Two-sided printing | |
| 550-sheet tray | Multipurpose feeder | |||||
| A4210 x 297 mm(8.27 x 11.7 in.) | √ | √ | √ | √ | √ | √ |
| A51,2 148 x 210 mm(5.83 x 8.27 in.) | √ | √ | √ | √ | √ | X |
| A6105 x 148 mm(4.13 x 5.83 in.) | √ | √ | XX | X√ | ||
| JIS B5182 x 257 mm(7.17 x 10.1 in.) | √ | √ | √ | √ | √ | X |
| Letter215.9 x 279.4 mm(8.5 x 11 in.) | √ | √ | √ | √ | √ | √ |
| Legal215.9 x 355.6 mm(8.5 x 14 in.) | √ | √ | √ | √ | √ | √ |
| Executive184.2 x 266.7 mm(7.25 x 10.5 in.) | √ | √ | √ | √ | √ | X |
| Oficio (Mexico)215.9 x 340.4 mm(8.5 x 13.4 in.) | √ | √ | √ | √ | √ | √ |
| 1 Load this paper size into tray 1 and the manual feeder with the long edge entering the printer first. 2 Load this paper size into tray 2, tray 3, and the multipurpose feeder with the short edge entering the printer first. 3 When Universal is selected, the page is formatted for 215.9 x 355.6 mm (8.5 x 14 in.) unless the size is specified by the software application. 4 Load narrow paper with the short edge entering the printer first. 5 When Other Envelope is selected, the page is formatted for 215.9 x 355.6 mm (8.5 x 14 in.) unless the size is specified by the software application. | ||||||
| Folio215.9 x 330.2 mm(8.5 x 13 in.) | √ | √ | √ | √ | √ | √ |
| Statement139.7 x 215.9 mm(5.5 x 8.5 in.) | √ | √ | XX | X√ | ||
| Hagaki100 x 148 mm(3.94 x 5.83 in.) | √ | √ | XX | X√ | ||
| Universal3,4 98.4 x 148 mm to215.9 x 355.6 mm(3.87 x 5.83 in. to8.5 x 14 in.) | √ | √ | XX | X√ | ||
| Universal3,4 76.2 x 127 mm to215.9 x 355.6 mm(3 x 5 in. to 8.5 x 14 in.) | X | √ | XX | X√ | ||
| Universal3,4 148 x 210 mm to215.9 x 355.6 mm(5.83 x 8.27 in. to8.5 x 14 in.) | √ | √ | √ | √ | √ | X |
| Universal3,4 210 x 250 mm to215.9 x 355.6 mm(8.27 x 9.84 in. to8.5 x 14 in.) | √ | √ | √ | √ | √ | √ |
| 7 3/4 Envelope98.4 x 190.5 mm(3.875 x 7.5 in.) | √ | √ | XX | X√ | ||
| 9 Envelope98.4 x 225.4 mm(3.875 x 8.9 in.) | √ | √ | XX | X√ | ||
| 1 Load this paper size into tray 1 and the manual feeder with the long edge entering the printer first. 2 Load this paper size into tray 2, tray 3, and the multipurpose feeder with the short edge entering the printer first. 3 When Universal is selected, the page is formatted for 215.9 x 355.6 mm (8.5 x 14 in.) unless the size is specified by the software application. 4 Load narrow paper with the short edge entering the printer first. 5 When Other Envelope is selected, the page is formatted for 215.9 x 355.6 mm (8.5 x 14 in.) unless the size is specified by the software application. | ||||||
| 10 Envelope104.8 x 241.3 mm(4.12 x 9.5 in.) | √ | √ | XX | X√ | ||
| DL Envelope110 x 220 mm(4.33 x 8.66 in.) | √ | √ | XX | X√ | ||
| C5 Envelope162 x 229 mm(6.38 x 9.01 in.) | √ | √ | XX | X√ | ||
| B5 Envelope176 x 250 mm(6.93 x 9.84 in.) | √ | √ | XX | X√ | ||
| Monarch98.425 x 190.5 mm(3.875 x 7.5 in.) | √ | √ | XX | X√ | ||
| Other Envelope598.4 x 162 mm to176 x 250 mm(3.87 x 6.38 in. to6.93 x 9.84 in.) | √ | √ | XX | X√ | ||
| 1 Load this paper size into tray 1 and the manual feeder with the long edge entering the printer first. 2 Load this paper size into tray 2, tray 3, and the multipurpose feeder with the short edge entering the printer first. 3 When Universal is selected, the page is formatted for 215.9 x 355.6 mm (8.5 x 14 in.) unless the size is specified by the software application. 4 Load narrow paper with the short edge entering the printer first. 5 When Other Envelope is selected, the page is formatted for 215.9 x 355.6 mm (8.5 x 14 in.) unless the size is specified by the software application. | ||||||
Supported paper types
Notes:
- Your printer model may have a 650-sheet duo tray, which consists of a 550-sheet tray and an integrated 100-sheet multipurpose feeder. The 550-sheet tray of the 650-sheet duo tray supports the same paper type as the 550-sheet tray. The integrated multipurpose feeder supports different paper sizes, types, and weights.
- Labels, envelopes, and card stock always print at 25 pages per minute.
•The ADF supports only plain paper.
| Paper type Standard | 250-sheet tray | Manual feeder | Optional 650-sheet duo tray | Optional 550-sheet tray | Two-sided printing | |
| 550-sheet tray | Multipurpose feeder | |||||
| Plain paper | √ | √ | √ | √ | √ | √ |
| Card stock X | √ | √ | √ | √ | √ | |
| Envelopes | √ | √ | XX | X | ||
| Paper labels | √ | √ | √ | √ | √ | √ |
| Vinyl labels X | √ | √ | √ | √ | √ | |
Supported paper weights
Notes:
- Your printer model may have a 650-sheet duo tray, which consists of a 550-sheet tray and an integrated 100-sheet multipurpose feeder. The 550-sheet tray of the 650-sheet duo tray supports the same paper types as the 550-sheet tray. The integrated multipurpose feeder supports different paper sizes, types, and weights.
- Labels, envelopes, and card stock always print at 25 pages per minute.
•The ADF supports 52–120 g/m 2 (14–32 lb bond) paper.
| Paper type and weight | Standard 250-sheet tray | Manual feeder | Optional 650-sheet duo tray | Optional 550-sheet tray | Two-sided printing | |
| 550-sheet tray | Multipurpose feeder | |||||
| Light paper1 60–74.9 g/m2 grain long (16–19.9-lb bond) | √ | √ | √ | √ | √ | √ |
| Plain paper 75–90.3 g/m2 grain long (20–24-lb bond) | √ | √ | √ | √ | √ | √ |
| Heavy paper 90.3–105 g/m2 grain long (24.1–28-lb bond) | √ | √ | √ | √ | √ | √ |
1 Paper less than 75 g/m 2 (20 lb) must be printed with Paper Type set to Light Paper. Failure to do so may cause excessive curl which can lead to feeding errors, especially in more humid environments.
2 Labels and other specialty media are supported for occasional use and must be tested for acceptability.
3 Paper labels up to 105 g/m 2 (28-lb bond) are supported.
4 100% cotton content maximum weight is 24-lb bond.
5 28-lb bond envelopes are limited to 25% cotton content.
| Paper type and weight | Standard 250-sheet tray | Manual feeder | Optional 650-sheet duo tray | Optional 550-sheet tray | Two-sided printing | |
| 550-sheet tray | Multipurpose feeder | |||||
| Card stock105.1–162 g/m2grain long (28.1–43-lb bond) | ✓ | ✓ | ✓ | ✓ | ✓ | X |
| Card stock105.1–200 g/m2grain long (28.1–53-lb bond) | ✓ | ✓ | X | X | X | |
| Paper Labels2131 g/m2(35-lb bond) | ✓ | ✓ | ✓ | ✓ | ✓ | heckmark3 |
| Vinyl Labels2131 g/m2(35-lb bond) | ✓ | ✓ | ✓ | ✓ | ✓ | X |
| Envelopes4,560–105 g/m2(16–28-lb bond) | ✓ | ✓ | XX | XY | ||
| 1 Paper less than 75 g/m2(20 lb) must be printed with Paper Type set to Light Paper. Failure to do so may cause excessive curl which can lead to feeding errors, especially in more humid environments.2 Labels and other specialty media are supported for occasional use and must be tested for acceptability.3 Paper labels up to 105 g/m2(28-lb bond) are supported.4 100% cotton content maximum weight is 24-lb bond.5 28-lb bond envelopes are limited to 25% cotton content. | ||||||
Printing
Printing from a computer
Note: For labels, card stock, and envelopes, set the paper size and type in the printer before printing the document.
1 From the document that you are trying to print, open the Print dialog.
2 If necessary, adjust the settings.
3 Print the document.
Printing from a mobile device
Note: Mobile printing is available only in some printer models.
Printing from a mobile device using Google Cloud Print
Google Cloud Print ™ is a mobile printing service that allows enabled applications on mobile devices to print to any Google Cloud Print-ready printer.
Note: This feature is available only in some printer units.
1 From the home screen of your mobile device, launch an enabled application.
2 Tap Print, and then select a printer.
3 Print the document.
Printing from a mobile device using Mopria Print Service
Mopria® Print Service is a mobile printing solution for mobile devices running on Android version 4.4 or later. It allows you to print directly to any Mopria-certified printer.
Note: Before printing, make sure that the Mopria Print Service is enabled.
1 From the home screen of your mobile device, launch a compatible application.
2 Tap Print, and then select a printer.
3 Print the document.
Printing from a mobile device using AirPrint
The AirPrint software feature is a mobile printing solution that allows you to print directly from Apple devices to an AirPrint-certified printer.
Notes:
- This application is supported only in some Apple devices.
- This application is supported only in some printer units.
1 From the home screen of your mobile device, launch a compatible application.
2 Select an item to print, and then tap the share icon.
3 Tap Print, and then select a printer.
4 Print the document.
Printing from a flash drive
1 Insert the flash drive.

natural_image
Close-up of a computer keyboard key with a red arrow pointing to the button (no text or symbols visible)Notes:
- If you insert the flash drive when an error message appears, then the printer ignores the flash drive.
- If you insert the flash drive while the printer is processing other print jobs, then Busy appears on the display.
2 Select the document that you want to print.
If necessary, configure other print settings.
3 Print the document.
To print another document, select USB Drive.
Warning—Potential Damage: To avoid loss of data or printer malfunction, do not touch the flash drive or the printer in the area shown while actively printing, reading, or writing from the memory device.

Supported flash drives and file types
Flash drives
Notes:
- The printer supports high-speed USB flash drives with full-speed standard.
- USB flash drives must support the File Allocation Table (FAT) system.
Many flash drives are tested and approved for use with the printer. For more information, contact the place where you purchased the printer.
File types
Documents
•PDF (version 1.7 or earlier)
HTML
•XPS
- Microsoft file formats (.doc, .docx, .xls, .xlsx, .ppt, .pptx)
Images
- .dcx
•.gif
• JPEG or .jpg
•.bmp
.pcx
•.TIFF or .tif
.png
Configuring confidential jobs
1 From the control panel, navigate to:
Settings > Security > Confidential Print Setup
For non-touch-screen printer models, press OK to navigate through the settings.
2 Configure the settings.
| Use To | |
| Max Invalid PIN Set the number of times an invalid PIN can be entered. Note: When the limit is reached, the print jobs for that user name are deleted. | |
| Confidential Job Expiration | Set the expiration time for confidential print jobs. Note: Confidential held jobs are stored in the printer until they are released or deleted manually. |
| Repeat Job Expiration Set the expiration time for a repeat print job. Note: Repeat held jobs are stored in the printer memory for reprinting. | |
| Verify Job Expiration | Set the expiration time that the printer prints a copy before printing the remaining copies. Note: Verify jobs print one copy to check if it is satisfactory before printing the remaining copies. |
| Reserve Job Expiration Set the expiration time that the printer stores print jobs. Note: Reserve held jobs are automatically deleted after printing. | |
| Require All Jobs to be Held | Set the printer to hold all print jobs. |
Printing confidential and other held jobs
For Windows users
1 With a document open, click File > Print.
2 Click Properties, Preferences, Options, or Setup.
3 Click Print and Hold.
4 Select Use Print and Hold, and then assign a user name.
5 Select the print job type (Confidential, Repeat, Reserve, or Verify).
If the print job is confidential, then enter a four-digit PIN.
6 Click OK or Print.
7 From the printer home screen, release the print job.
- For confidential print jobs, navigate to:
Held jobs > select your user name > Confidential > enter the PIN > select the print job > configure the settings > Print
- For other print jobs, navigate to:
Held jobs > select your user name > select the print job > configure the settings > Print
For Macintosh users
1 With a document open, choose File > Print.
If necessary, click the disclosure triangle to see more options.
2 From the print options or Copies & Pages menu, choose Job Routing.
3 Select the print job type (Confidential, Repeat, Reserve, or Verify).
If the print job is confidential, then assign a user name and a four-digit PIN.
4 Click OK or Print.
5 From the printer home screen, release the print job.
- For confidential print jobs, navigate to:
Held jobs > select your user name > Confidential > enter the PIN > select the print job > configure the settings > Print
- For other print jobs, navigate to:
Held jobs > select your user name > select the print job > configure the settings > Print
Printing a font sample list
1 From the control panel, navigate to:
Settings > Reports > Print > Print Fonts
For non-touch-screen printer models, press OK to navigate through the settings.
2 Select a font sample.
Copying
Making a copy
1 Load an original document into the ADF tray or on the scanner glass.
Note: To avoid a cropped image, make sure that the original document and the output have the same paper size.
2 From the control panel, select Copy, and then specify the number of copies.
If necessary, adjust the other settings.
3 Copy the document.
Note: To make a quick copy, from the control panel, press

Copying photos
1 Place a photo on the scanner glass.
2 From the control panel, navigate to:
Copy > Settings > Content > Content Type > Photo
For non-touch-screen printer models, press OK to navigate through the settings.
3 From the Content Source menu, select the setting that best matches the original photo.
4 Copy the document.
Copying on letterhead
1 Load an original document into the ADF tray or on the scanner glass.
2 From the control panel, navigate to:
Copy > Copy From > select the size of the original document > Copy To > select a paper source If you are loading into the multipurpose feeder, then navigate to:
Copy To > Multipurpose Feeder > select a paper size > Letterhead
For non-touch-screen printer models, press OK to navigate through the settings.
3 Copy the document.
Copying on both sides of the paper
1 Load an original document into the ADF tray or on the scanner glass.
2 From the control panel, navigate to:
Copy > Settings > Paper Setup
For non-touch-screen printer models, press OK to navigate through the settings.
3 Adjust the settings.
4 Copy the document.
Reducing or enlarging copies
1 Load an original document into the ADF tray or on the scanner glass.
2 From the control panel, navigate to:
Copy > Settings > Scale > specify a scale value
For non-touch-screen printer models, press OK to navigate through the settings.
Note: Changing the size of the original document or output after setting Scale restores the scale value to Auto.
3 Copy the document.
Collating copies
1 Load an original document into the ADF tray or on the scanner glass.
2 From the control panel, navigate to:
Copy > Settings > Collate > On [1,2,1,2,1,2]
3 Copy the document.
Placing separator sheets between copies
1 Load an original document into the ADF tray or on the scanner glass.
2 From the control panel, navigate to:
Copy > Settings > Separator Sheets > On
For non-touch-screen printer models, press OK to navigate through the settings.
3 Adjust the settings.
4 Copy the document.
Copying multiple pages onto a single sheet
1 Load an original document into the ADF tray or on the scanner glass.
2 From the control panel, navigate to:
Copy > Settings > Pages Per Side
For non-touch-screen printer models, press OK to navigate through the settings.
3 Adjust the settings.
4 Copy the document.
Creating a copy shortcut
Note: You may need administrative rights to create a shortcut.
1 Open a web browser, and then type the printer IP address in the address field.
Notes:
- View the printer IP address on the home screen. The IP address appears as four sets of numbers separated by periods, such as 123.123.123.123.
- If you are using a proxy server, then temporarily disable it to load the web page correctly.
2 Click Shortcuts > Add Shortcut.
3 From the Shortcut Type menu, select Copy, and then configure the settings.
4 Apply the changes.
E-mailing
Setting up the e-mail function
1 Open a web browser, and then type the printer IP address in the address field.
Notes:
- View the printer IP address on the home screen. The IP address appears as four sets of numbers separated by periods, such as 123.123.123.123.
- If you are using a proxy server, then temporarily disable it to load the web page correctly.
2 Click Settings > E-mail > E-mail Setup.
3 Configure the settings.
4 Apply the changes.
Configuring e-mail settings
1 Open a Web browser, and then type the printer IP address in the address field.
Notes:
- View the printer IP address on the printer home screen. The IP address appears as four sets of numbers separated by periods, such as 123.123.123.123.
- If you are using a proxy server, then temporarily disable it to load the Web page correctly.
2 Click Settings > E-mail.
3 Enter the needed information.
4 Apply the changes.
Sending an e-mail
1 Load an original document into the ADF tray or on the scanner glass.
2 From the control panel, select E-mail, and then enter the needed information.
For non-touch-screen printer models, press #, and then enter the shortcut number using the keypad.
Note: You can also enter the recipient using the address book.
3 If necessary, configure the output file type settings.
4 Send the e-mail.
Creating an e-mail shortcut
Note: You may need administrative rights to create a shortcut.
1 Open a web browser, and then type the printer IP address in the address field.
Notes:
- View the printer IP address on the home screen. The IP address appears as four sets of numbers separated by periods, such as 123.123.123.123.
- If you are using a proxy server, then temporarily disable it to load the web page correctly.
2 Click Shortcuts > Add Shortcut.
3 From the Shortcut Type menu, select E-mail, and then configure the settings.
4 Apply the changes.
Faxing
Setting up the printer to fax
Notes:
- The following connection methods are applicable only in some countries or regions.
- During the initial printer setup, clear the fax function check box and any other function you plan to set up later, and then touch Continue.
- The indicator light may blink red if the fax function is enabled and not fully set up.
Warning—Potential Damage: Do not touch cables or the printer in the area shown while actively sending or receiving a fax.

Setting up the fax function
1 From the control panel, navigate to:
Settings > Device > Preferences > Run Initial Setup
For non-touch-screen printer models, press OK to navigate through the settings.
2 Tum off the printer, wait for about 10 seconds, and then turn on the printer.
3 From the Before You Begin screen, select Change the Settings and Continue with the Wizard.
4 From the Fax/Email Server Setup screen, enter the needed information.
5 Finish the setup.
Setting up fax using a standard telephone line

CAUTION—SHOCK HAZARD: To avoid the risk of electrical shock, do not set up this product or make any electrical or cabling connections, such as the power cord, fax feature, or telephone, during a lightning storm.

CAUTION—SHOCK HAZARD: To avoid the risk of electrical shock, do not use the fax feature during a lightning storm.

CAUTION—POTENTIAL INJURY: To reduce the risk of fire, use only a 26 AWG or larger telecommunications (RJ-11) cord when connecting this product to the public switched telephone network. For users in Australia, the cord must be approved by the Australian Communications and Media Authority.
Setup 1: Printer is connected to a dedicated fax line

1 Connect one end of the telephone cable to the line port of the printer.
2 Connect the other end of the cable to an active analog wall jack.
Notes:
- You can set the printer to receive faxes automatically (Auto Answer On) or manually (Auto Answer Off).
- If you want to receive faxes automatically, then set the printer to pick up on a specified number of rings.
Setup 2: Printer is sharing the line with an answering machine
Note: If you subscribe to a distinctive ring service, then make sure that you set the correct ring pattern for the printer. Otherwise, the printer does not receive faxes even if you have set it to receive faxes automatically.
Connected to different wall jacks
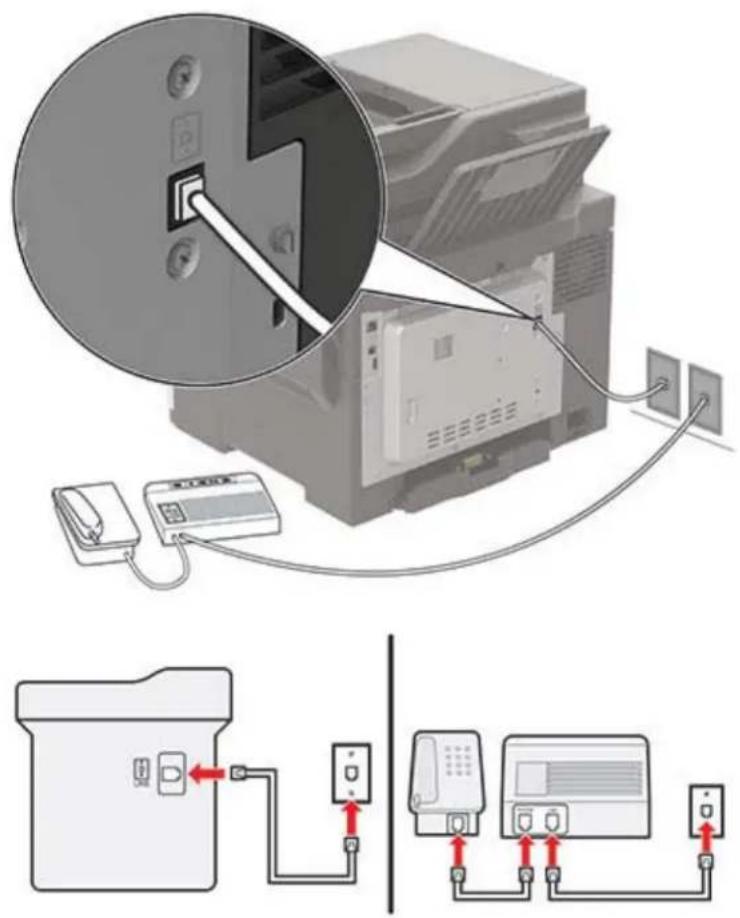
1 Connect one end of the telephone cable to the line port of the printer.
2 Connect the other end of the cable to an active analog wall jack.
Notes:
- If you have only one telephone number on your line, then set the printer to receive faxes automatically.
- Set the printer to pick up calls two rings after the answering machine. For example, if the answering machine picks up calls after four rings, then set the printer Rings to Answer setting to six.
Setting up fax in countries or regions with different telephone wall jacks and plugs
CAUTION—SHOCK HAZARD: To avoid the risk of electrical shock, do not set up this product or make any electrical or cabling connections, such as the power cord, fax feature, or telephone, during a lightning storm.
CAUTION—SHOCK HAZARD: To avoid the risk of electrical shock, do not use the fax feature during a lightning storm.
CAUTION—POTENTIAL INJURY: To reduce the risk of fire, use only a 26 AWG or larger telecommunications (RJ-11) cord when connecting this product to the public switched telephone network. For users in Australia, the cord must be approved by the Australian Communications and Media Authority.
The standard wall jack adopted by most countries or regions is RJ11. If the wall jack or equipment in your facility is not compatible with this type of connection, then use a telephone adapter. An adapter for your country or region may not come with your printer, and you may need to purchase it separately.
There may be an adapter plug installed in the telephone port of the printer. Do not remove the adapter plug from the telephone port of the printer if you are connecting to a serial or cascaded telephone system.

Connecting the printer to a non-RJ11 wall jack
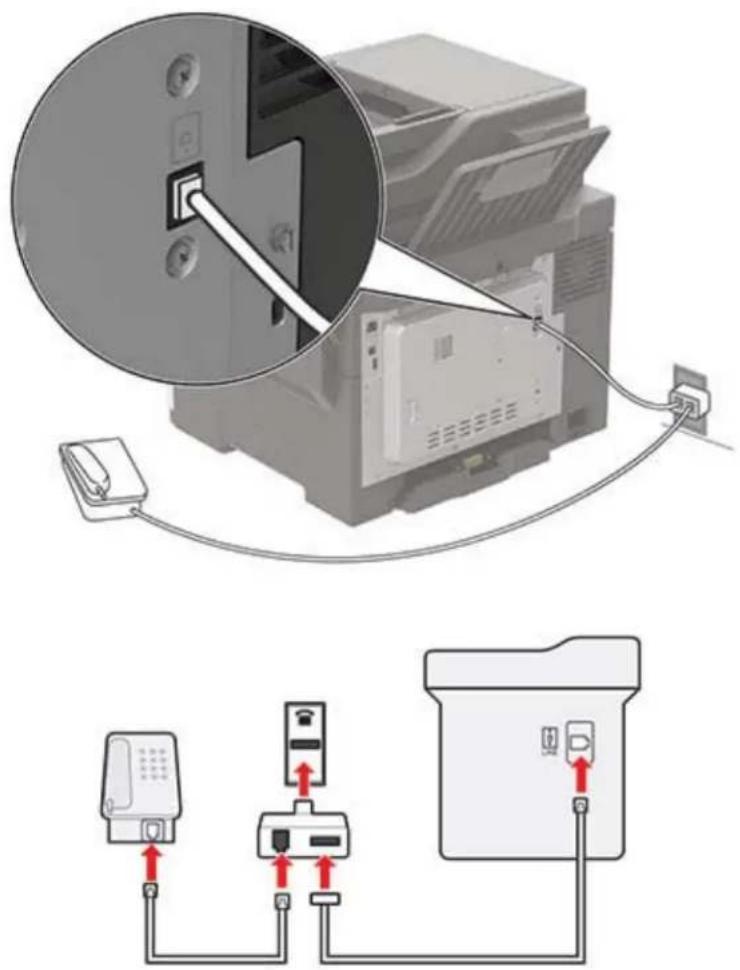
1 Connect one end of the telephone cable to the line port of the printer.
2 Connect the other end of the cable to the RJ11 adapter, and then connect the adapter to the wall jack.
3 If you want to connect another device with a non-RJ11 connector to the same wall jack, then connect it directly to the telephone adapter.
Connecting the printer to a wall jack in Germany
The German wall jack has two kinds of ports. The N ports are for fax machines, modems, and answering machines. The F port is for telephones. Connect the printer to any of the N ports.

1 Connect one end of the telephone cable to the line port of the printer.
2 Connect the other end of the cable to the RJ11 adapter, and then connect the adapter to an N port.
3 If you want to connect a telephone and answering machine to the same wall jack, then connect the devices as shown.
Connecting to a distinctive ring service
A distinctive ring service lets you have multiple telephone numbers on one telephone line. Each telephone number is assigned a different ring pattern.
1 From the control panel, navigate to:
Settings > Fax > Analog Fax Setup > Fax Receive Settings > Admin Controls > Answer On
For non-touch-screen printer models, press OK to navigate through the settings.
2 Select a ring pattern.
3 Apply the changes.
Setting the fax date and time
1 From the control panel, navigate to:
Settings > Device > Preferences > Date and Time > Configure
For non-touch-screen printer models, press OK to navigate through the settings.
2 Configure the settings.
Configuring daylight saving time
1 From the control panel, navigate to:
Settings > Device > Preferences > Date and Time > Configure
For non-touch-screen printer models, press OK to navigate through the settings.
2 From the Time Zone menu, select (UTC+user) Custom.
3 Configure the settings.
Sending a fax
Using the control panel
1 Load the original document into the ADF tray or on the scanner glass.
2 From the control panel, select Fax, and then enter the needed information.
3 If necessary, configure other fax settings.
4 Fax the document.
Using the computer
For Windows users
1 From the document that you are trying to fax, open the Print dialog.
2 Select the printer, and then click Properties, Preferences, Options, or Setup.
3 Click Fax > Enable fax, and then enter the recipient number.
4 If necessary, configure other fax settings.
5 Fax the document.
For Macintosh users
1 With a document open, choose File > Print.
2 Select the printer, and then enter the recipient number.
3 If necessary, configure other fax settings.
4 Fax the document.
Scheduling a fax
1 Load the original document into the ADF tray or on the scanner glass.
2 From the control panel, navigate to:
Fax > To > enter the fax number > Done
For non-touch-screen printer models, press OK to navigate through the settings.
3 Select Send Time to configure the date and time, and then select Done.
If necessary, configure other fax settings.
4 Send the fax.
Creating a fax destination shortcut
Note: You may need administrative rights to create a shortcut.
1 Open a web browser, and then type the printer IP address in the address field.
Notes:
- View the printer IP address on the home screen. The IP address appears as four sets of numbers separated by periods, such as 123.123.123.123.
- If you are using a proxy server, then temporarily disable it to load the web page correctly.
2 Click Shortcuts > Add Shortcut.
3 From the Shortcut Type menu, select Fax, and then configure the settings.
4 Apply the changes.
Changing the fax resolution
1 Load an original document into the ADF tray or on the scanner glass.
2 From the control panel, select Fax, and then enter the needed information.
3 In the Resolution menu, select a setting.
4 Send the fax job.
Adjusting the fax darkness
1 Load an original document into the ADF tray or on the scanner glass.
2 From the control panel, select Fax, and then enter the needed information.
3 From the Darkness menu, adjust the setting.
4 Fax the document.
Viewing a fax log
Note: You may need administrative rights to view the fax logs.
1 Open a web browser, and then type the printer IP address in the address field.
Notes:
- View the printer IP address on the printer home screen. The IP address appears as four sets of numbers separated by periods, such as 123.123.123.123.
- If you are using a proxy server, then temporarily disable it to load the web page correctly.
2 Click Settings > Reports > Fax.
3 Click Fax Job Log or Fax Call Log.
Blocking junk faxes
1 From the control panel, navigate to:
Settings > Fax > Analog Fax Setup > Fax Receive Settings > Admin Controls
For non-touch-screen printer models, press OK to navigate through the settings.
2 Set Block No Name Fax to On.
Holding faxes
1 From the control panel, navigate to:
Settings > Fax > Analog Fax Setup > Fax Receive Settings > Holding Faxes
For non-touch-screen printer models, press OK to navigate through the settings.
2 Select a mode.
Forwarding a fax
1 From the control panel, navigate to:
Settings > Fax > Analog Fax Setup > Fax Receive Settings > Admin Controls
For non-touch-screen printer models, press OK to navigate through the settings.
2 In the Fax Forwarding menu, select Print and Forward or Forward, and then configure the "Forward to" and fax destination settings.
Scanning
Scanning to an FTP server
1 Load the original document into the ADF tray or on the scanner glass.
2 From the control panel, select FTP, and then enter the needed information.
For non-touch-screen printer models, press #, and then enter the shortcut number using the keypad.
3 If necessary, configure other FTP settings.
4 Scan the document.
Creating an FTP shortcut
Note: You may need administrative rights to create a shortcut.
1 Open a web browser, and then type the printer IP address in the address field.
Notes:
- View the printer IP address on the printer home screen. The IP address appears as four sets of numbers separated by periods, such as 123.123.123.123.
- If you are using a proxy server, then temporarily disable it to load the web page correctly.
2 Click Shortcuts > Add Shortcut.
3 From the Shortcut Type menu, select FTP, and then configure the settings.
4 Apply the changes.
Scanning to a flash drive
1 Load an original document into the ADF tray or on the scanner glass.
2 Insert the flash drive.

natural_image
Close-up of a computer mouse key with a red arrow pointing to the button (no text or symbols visible)3 Select Scan to USB and adjust the settings if necessary.
Note: If the USB Drive screen does not appear, then select USB Drive on the control panel.
4 Scan the document.
Warning—Potential Damage: To avoid loss of data or printer malfunction, do not touch the flash drive or the printer in the area shown while actively printing, reading, or writing from the memory device.

Sending scanned documents to a computer
1 Load an original document into the ADF tray or on the scanner glass.
2 From the control panel, navigate to:
Scan Profiles > Scan to Computer
For non-touch-screen printer models, press OK to navigate through the settings.
3 Select the scan profile where you want to save the document.
Understanding the printer menus
Menu map
| Device | PreferencesRemote Operator PanelNotificationsPower ManagementAccessibility | Restore Factory DefaultsMaintenanceVisible Home Screen IconsAbout this Printer |
| LayoutSetupQualityJob AccountingXPS | PDFPostScriptPCLHTMLImage | |
| Paper | Tray Configuration | Media Configuration |
| Copy | Copy Defaults | |
| Fax | Fax ModeAnalog Fax Setup | Fax Server Setup |
| E-mail SetupE-mail Defaults | Web Link Setup | |
| FTP | FTP Defaults | |
| USB Drive | Flash Drive Scan | Flash Drive Print |
| Network/Ports | Network OverviewWirelessEthernetTCP/IPSNMPIPSec | LPD ConfigurationHTTP/FTP SettingsThinPrintUSBGoogle Cloud Print |
| Security | Login MethodsSchedule USB DevicesSecurity Audit LogLogin RestrictionsConfidential Print Setup | Disk EncryptionErase Temporary Data FilesSolutions LDAP SettingsMobile Services ManagementMiscellaneous |
| Reports | Menu Settings PageDevicePrint | ShortcutsFaxNetwork |
| Help | •Print All Guides•Color Quality Guide•Connection Guide•Copy Guide•E-mail Guide•Fax Guide | •Information Guide•Media Guide•Moving Guide•Print Quality Guide•Scan Guide•Supplies Guide |
| Troubleshooting Print Quality Test Pages | ||
Device
Preferences
| Menu item Description | |
| Display Language[List of languages] | Set the language of the text that appears on the display. |
| Country/Region[List of countries or regions] | Identify the country or region where the printer is configured to operate. |
| Run initial setupOnOff* | Run the setup wizard. |
| KeyboardKeyboard Type[List of languages] | Select a language as a keyboard type.Notes:All the Keyboard Type values may not appear or may require special hardware to appear.This menu item appears only in some printer models. |
| Displayed informationDisplay Text 1 [IP Address*]Display Text 2 [Date/Time*]Custom Text 1Custom Text 2 | Specify the information to appear on the home screen.Note:Custom Text 1 and Custom Text 2 appear only in some printer models. |
| Date and TimeConfigureCurrent Date and TimeManually Set Date and TimeDate Format [MM-DD-YYYY*]Time Format [12 hour A.M./P.M.*]Time Zone [GMT*] | Configure the printer date and time. |
| Note: An asterisk (*) next to a value indicates the factory default setting. | |
| Date and TimeNetwork Time ProtocolEnable NTP [On*]NTP ServerEnable Authentication | Configure the settings for Network Time Protocol (NTP).Notes:Enable Authentication appears only in some printer models.When Enable Authentication is set to MD5 key, Key ID and Password appear. |
| Paper SizesU.S.*Metric | Specify the unit of measurement for paper sizes.Note:The country or region selected in the initial setup wizard determines the initial paper size setting. |
| Screen Brightness20–100% (100*) | Adjust the brightness of the display.Note:This menu item appears only in some printer models. |
| Flash Drive AccessEnabled*Disabled | Enable access to the flash drive. |
| Allow Background RemovalOn*Off | Specify whether background removal is allowed. |
| Allow Custom Job scansOn*Off | Scan multiple jobs to one file. |
| One Page Flatbed ScanningOnOff* | Set copies from the scanner glass to only one page at a time. |
| Audio FeedbackButton FeedbackOn*Off | Enable audio feedback for button presses, panel interactions, paper loaded prompts, and error notifications.Note:This menu item appears only in some printer models. |
| Audio FeedbackVolume1–10 (5*) | Adjust the volume of the printer speakers.Notes:Changes to the volume are applied after the current user session ends.This menu item appears only in some printer models. |
| Screen Timeout10–300 (60*) | Set the idle time in seconds before the display shows the home screen, or before the printer logs off a user account automatically. |
| Note:An asterisk (*) next to a value indicates the factory default setting. | |
Remote Operator Panel
| Menu item Description | |
| External VNC ConnectionDon’t Allow*Allow | Connect an external Virtual Network Computing (VNC) client to the remote control panel. |
| Authentication TypeNone*Standard Authentication | Set the authentication type when accessing the VNC client server.Note:When set to Standard Authentication, VNC Password appears. |
| Note:An asterisk (*) next to a value indicates the factory default setting. | |
Notifications
| Menu item Description | |
| Error LightingOffOn* | Set the indicator light to come on when a printer error occurs.Note: This menu item appears only in some printer models. |
| ADF Loaded BeepOffOn* | Enable a sound when loading paper into the ADF. |
| Alarm ControlOffSingle*Continuous | Set the number of times that the alarm sounds when the printer requires user intervention.Note: This menu item appears only in some printer models. |
| SuppliesShow Supply EstimatesShow estimates*Do not show estimates | Show the estimated status of the supplies. |
| SuppliesCartridge AlarmOffSingle*Continuous | Set the number of times that the alarm sounds when the toner cartridge is low.Note: This menu item appears only in some printer models. |
| E-mail Alerts SetupE-mail SetupPrimary SMTP Gateway | Type the IP address or host name of the primary SMTP server for sending e-mail.Note: This menu item appears only in some printer models. |
| E-mail Alerts SetupE-mail SetupPrimary SMTP Gateway Port1-65535 (25*) | Enter the port number of the primary SMTP server.Note: This menu item appears only in some printer models. |
| Note: An asterisk (*) next to a value indicates the factory default setting. | |
| E-mail Alerts SetupE-mail SetupSecondary SMTP Gateway | Type the server IP address or host name of your secondary or backup SMTP server.Note: This menu item appears only in some printer models. |
| E-mail Alerts SetupE-mail SetupSecondary SMTP Gateway Port1-65535 (25*) | Enter the server port number of your secondary or backup SMTP server.Note: This menu item appears only in some printer models. |
| E-mail Alerts SetupE-mail SetupSMTP Timeout5-30 seconds (30*) | Specify how long before the printer times out if the SMTP server does not respond.Note: This menu item appears only in some printer models. |
| E-mail Alerts SetupE-mail SetupReply Address | Specify a reply address in the e-mail.Note: This menu item appears only in some printer models. |
| E-mail Alerts SetupE-mail SetupAlways use SMTP default Reply AddressOff*On | Use the SMTP default Reply Address.Note: This menu item appears only in some printer models. |
| E-mail Alerts SetupE-mail SetupUse SSL/TLSDisabled*NegotiateRequired | Send an e-mail using an encrypted link.Note: This menu item appears only in some printer models. |
| E-mail Alerts SetupE-mail SetupRequire Trusted CertificateOffOn* | Require a trusted certificate when accessing the SMTP server.Note: This menu item appears only in some printer models. |
| E-mail Alerts SetupE-mail SetupSMTP Server AuthenticationNo authentication required*Login / PlainNTLMCRAM-MD5Digest-MD5Kerberos 5 | Set the authentication type for the SMTP server.Note: This menu item appears only in some printer models. |
| Note: An asterisk (*) next to a value indicates the factory default setting. | |
| E-mail Alerts SetupE-mail SetupDevice-Initiated E-mailNone*Use Device SMTP Credentials | Set whether credentials are required for device-initiated e-mails.Note: This menu item appears only in some printer models. |
| E-mail Alerts SetupE-mail SetupUser-Initiated E-mailNoneUse Device SMTP CredentialsUse Session User ID and PasswordUse Session E-mail address and Password*Prompt user | Set whether credentials are required for user-initiated e-mails.Note: This menu item appears only in some printer models. |
| E-mail Alerts SetupE-mail SetupUse Active Directory Device CredentialsOffOn* | Enable user credentials and group designations to connect to the SMTP server.Note: This menu item appears only in some printer models. |
| E-mail Alerts SetupE-mail SetupDevice Userid | Specify the user ID to connect to the SMTP server.Note: This menu item appears only in some printer models. |
| E-mail Alerts SetupE-mail SetupDevice Password | Specify the password to connect to the SMTP server.Note: This menu item appears only in some printer models. |
| E-mail Alerts SetupE-mail SetupKerberos 5 REALM | Specify the realm for the Kerberos 5 authentication protocol.Note: This menu item appears only in some printer models. |
| E-mail Alerts SetupE-mail SetupNTLM Domain | Specify the domain name for the NTLM security protocol.Note: This menu item appears only in some printer models. |
| E-mail Alerts SetupE-mail SetupDisable “SMTP server not set up” errorOff*On | Disable an SMTP setup error message to appear on the display.Note: This menu item appears only in some printer models. |
| Error PreventionJam AssistOffOn* | Set the printer to flush blank pages or pages with partial prints automatically after a jammed page has been cleared. |
| Note: An asterisk (*) next to a value indicates the factory default setting. | |
| Error PreventionAuto ContinueOffOn* (5 seconds) | Let the printer continue processing or printing a job automatically after clearing certain printer conditions that require user intervention. |
| Error PreventionAuto RebootAuto RebootReboot when idleReboot always*Reboot never | Set the printer to restart when an error occurs. |
| Error PreventionAuto RebootMax Auto Reboots1-20 (2*) | Set the number of automatic reboots that the printer can perform. |
| Error PreventionAuto RebootAuto Reboot Window1-525600 (720*) | Set the number of seconds before the printer performs an automatic reboot. |
| Error PreventionAuto RebootAuto Reboot Counter | Show a read-only information of the reboot counter. |
| Error PreventionAuto RebootReset Auto Reboot CounterCancelContinue | Reset Auto Reboot Counter.Note: This menu item appears only in some printer models. |
| Error PreventionDisplay Short Paper ErrorOnAuto-clear* | Set the printer to show a message when a short paper error occurs.Note: Short paper refers to the size of the paper loaded. |
| Error PreventionPage ProtectOff*On | Set the printer to process the entire page into the memory before printing it. |
| Jam Content RecoveryJam RecoveryOffOnAuto* | Set the printer to reprint jammed pages. |
| Note: An asterisk (*) next to a value indicates the factory default setting. | |
| Jam Content RecoveryScanner Jam RecoveryJob levelPage level* | Specify how to restart a scan job after resolving a paper jam. |
| Note: An asterisk (*) next to a value indicates the factory default setting. | |
Power Management
| Menu item Description | |
| Sleep Mode ProfilePrint With Display OffDisplay on when printingAllow printing with display off* | Allow printing with the display turned off. |
| TimeoutsSleep Mode1–120 minutes (15*) | Set the idle time before the printer begins operating in Sleep mode. |
| TimeoutsHibernate TimeoutDisabled1 hour2 hours3 hours6 hours1 day2 days3 days*1 week2 weeks1 month | Set the time before the printer enters Hibernate mode. |
| TimeoutsHibernate Timeout on ConnectionHibernateDo Not Hibernate* | Set the printer to Hibernate mode even when an active Ethernet connection exists. |
| Eco-ModeOff*EnergyEnergy/PaperPaper | Minimize the use of energy, paper, or specialty media.Note: Setting Eco-Mode to Energy or Paper may affect printer performance, but not print quality. |
| Schedule Power ModesSchedules | Schedule the printer when to enter Sleep or Hibernate mode.Note: This menu item appears only in some printer models. |
| Note: An asterisk (*) next to a value indicates the factory default setting. | |
Accessibility
Note: This menu appears only in some printer models.
| Menu item Description | |
| Duplicate Key Strike Interval0-5 (0*) | Set the interval in seconds during which the printer ignores duplicate key presses on an attached keyboard. |
| Key Repeat Initial Delay0.25-5 (1*) | Set the initial length of delay in seconds before a repeating key starts repeating.Note: This menu item appears only when a keyboard is attached to the printer. |
| Key Repeat Rate0.5-30 (30*) | Set the number of presses per second for a repeating key.Note: This menu item appears only when a keyboard is attached to the printer. |
| Prolong Screen TimeoutOff*On | Let the user remain in the same location and reset the Screen Timeout timer when it expires instead of returning to the home screen. |
| Headphone Volume1-10 (5*) | Adjust the headphone volume.Note: This menu item appears only when a headphone is attached to the printer. |
| Enable Voice Guidance When Headphone Is AttachedOff*On | Enable Voice Guidance when a headphone is attached to the printer. |
| Speak Passwords/PINsOff*On | Set the printer to read out loud passwords or personal identification numbers.Note: This menu item appears only when a headphone or a speaker is attached to the printer. |
| Speech RateVery SlowSlowNormal*FastFasterVery FastRapidVery RapidFastest | Set the Voice Guidance speech rate.Note: This menu item appears only when a headphone or a speaker is attached to the printer. |
| Note: An asterisk (*) next to a value indicates the factory default setting. | |
| Menu item Description | |
| USB ConfigurationUSB PnP1*2 | Change the USB driver mode of the printer to improve its compatibility with a personal computer.Note: This menu item appears only in some printer models. |
| USB Scan to LocalOn*Off | Set whether the USB device driver enumerates as a USB Simple device (single interface) or as a USB Composite device (multiple interfaces). |
| USB ConfigurationUSB SpeedFullAuto* | Set the USB port to run at full speed and disable its high-speed capabilities.Note: This menu item appears only in some printer models. |
| Tray ConfigurationTray LinkingAutomatic*Off | Set the printer to link the trays that have the same paper type and paper size settings. |
| Tray ConfigurationShow Tray Insert MessageOff*On | Show the Tray Insert message. |
| Tray ConfigurationPaper PromptsAuto*Multipurpose FeederManual PaperEnvelope PromptsAuto*Multipurpose FeederManual Paper | Set the paper source that the user fills when a prompt to load paper or envelope appears.Notes:The multipurpose feeder is available only in some printer models.For Multipurpose Feeder to appear, set Configure MP to Cassette from the Paper menu. |
| Note: An asterisk (*) next to a value indicates the factory default setting. | |
| Tray ConfigurationAction for PromptsPrompt user*ContinueUse current | Set the printer to resolve paper- or envelope-related change prompts. |
| ReportsMenu Settings PageEvent LogEvent Log SummaryHealthCheck Statistics | Print reports about printer menu settings, status, and event logs. |
| Supply Usage And CountersClear Supply Usage History | Reset the supply usage history, such as number of pages and days remaining, to the factory shipped level. |
| Supply Usage And CountersReset Maintenance Counter | Reset the counter after installing a new maintenance kit. |
| Supply Usage And CountersTiered Coverage Ranges | Adjust the range for the amount of color coverage on the printed page. |
| Printer EmulationsPPDS EmulationOff*On | Set the printer to recognize and use the PPDS data stream. |
| Fax ConfigurationFax Low Power SupportDisable SleepPermit SleepAuto* | Set fax to enter Sleep mode whenever the printer determines that it should. |
| Fax ConfigurationFax Storage LocationDiskNAND* | Set the storage location for all faxes. |
| Print ConfigurationBlack Only ModeOff*On | Print color content in grayscale. |
| Print ConfigurationColor TrappingOff12*345 | Enhance the printed output to compensate for misregistration in the printer. |
| Note: An asterisk (*) next to a value indicates the factory default setting. | |
Note: An asterisk (*) next to a value indicates the factory default setting.
| Menu item Description | |
| Print ConfigurationFont Sharpening0-150 (24*) | Set a text point-size value below which the high-frequency screens are used when printing font data.For example, if the value is 24, then all fonts sized 24 points or less use the high-frequency screens. |
| Device OperationsQuiet ModeOff*On | Set the printer to operate in Quiet Mode.Note: Enabling this setting slows down the printer performance. |
| Device OperationsPanel MenusOffOn* | Enable access to the control panel menus. |
| Device OperationsCustom Supply LevelsOff*On | Let printservice read and edit values from the Embedded Web Server. |
| Device OperationsSafe ModeOff*On | Set the printer to operate in a special mode, in which it attempts to continue offering as much functionality as possible, despite known issues.For example, when set to On, and the duplex motor is nonfunctional, the printer performs one-sided printing of the documents even if the job is two-sided printing. |
| Device OperationsMinimum Copy Memory80 MB*100 MB | Set the minimum memory allocation for storing copy jobs. |
| Device OperationsClear Custom Status | Erase user-defined strings for the Default or Alternate custom messages. |
| Device OperationsClear all remotely-installed messages | Erase messages that were remotely installed. |
| Device OperationsAutomatically Display Error ScreensOffOn* | Show existing error messages on the display after the printer remains inactive on the home screen for a length of time equal to the Screen Timeout setting. |
| Device OperationsHonor orientation on fast path copyOnOff* | Enable the printer to use the orientation setting under the Copy menu when sending quick copy jobs. |
| Note: An asterisk (*) next to a value indicates the factory default setting. | |
| Device OperationsEnable Optional Parallel PortOff*On | Enable an optional parallel port.Note:When set to On, the printer restarts. |
| Toner patch sensor setupCalibration frequency preferenceDisabledFewest color adjustmentFewer color adjustmentNormal*Better color accuracyBest color accuracy | Set the printer to put down the correct amount of toner to maintain color consistency. |
| Toner patch sensor setupFull calibration | Run the full color calibration. |
| Toner patch sensor setupPrint TPS information page | Print a diagnostic page that contains information on toner patch sensor calibration. |
| Scanner ConfigurationScanner Manual RegistrationPrint Quick Test | Print a Quick Test target page.Note:Make sure that the margin spacing on the target page is uniform all the way around the target. If it is not, then the printer margins may need to be reset. |
| Scanner ConfigurationScanner Manual RegistrationFront ADF RegistrationRear ADF RegistrationFlatbed Registration | Manually register the flatbed and ADF after replacing the ADF, scanner glass, or controller board. |
| Scanner ConfigurationEdge EraseFlatbed Edge Erase0-6 (3*)ADF Edge Erase0-6 (3*) | Set the size, in millimeters, of the no-print area around an ADF or flatbed scan job. |
| Scanner ConfigurationADF DeskewADF Mechanical DeskewOffOnAuto* | Set the printer to perform ADF mechanical skew adjustment. |
| Note:An asterisk (*) next to a value indicates the factory default setting. | |
| Scanner ConfigurationDisabled ScannerEnabled*DisabledADF Disabled | Disable the scanner when it is not working properly. |
| Scanner ConfigurationTiff Byte OrderCPU Endianness*Little EndianBig Endian | Set the byte order of a TIFF-formatted scan output. |
| Scanner ConfigurationExact Tiff Rows Per StripOn*Off | Set the RowsPerStrip tag value of a TIFF-formatted scan output. |
| Note: An asterisk (*) next to a value indicates the factory default setting. | |
Out of Service Erase
| Menu item Description | |
| Out of Service EraseMemory Last SanitizedHard Disk Last Sanitized | Show information on when the printer memory or hard disk was last sanitized.Note: Hard Disk Last Sanitized appears only in printers with a hard disk installed. |
| Out of Service EraseSanitize all information on nonvolatile memorySanitize all information on hard diskErase all printer and network settings | Clear all settings and applications that are stored in the printer memory or hard disk.Note: Sanitize all information on hard disk appears only in printers with a hard disk installed. |
Visible Home Screen Icons
Note: This menu appears only in some printer models.
| Menu Description | |
| Copy | Specify which icons to show on the home screen. |
| Fax | |
| Status/Supplies | |
| Job Queue | |
| Change Language | |
| Shortcut Center | |
| Address Book | |
| Bookmarks | |
| Held Jobs | |
| USB | |
| FTP | |
| Scan Profiles | |
| App Profiles | |
| Forms and Favorites | |
| Scan Center | |
| Card Copy |
About this Printer
| Menu item Description | |
| Asset Tag1 | Describe the printer. The maximum length is 32 characters. |
| Printer's Location1 | Identify the printer location. The maximum length is 63 characters. |
| Contact1 | Personalize the printer name. The maximum length is 63 characters. |
| Export Configuration File to USB2 | Export configuration files to a flash drive. |
| Export Compressed Logs to USB2 | Export compressed log files to a flash drive. |
| 1 In some printer models, this menu item can be configured only from the Embedded Web Server. 2 This menu item appears only in some printer models. | |
Layout
| Menu item Description | |
| Sides1-sided*2-sided | Specify whether to print on one side or two sides of the paper. |
| Note: An asterisk (*) next to a value indicates the factory default setting. | |
| Flip StyleLong Edge*Short Edge | Determine which side of the paper (long edge or short edge) is bound when performing two-sided printing.Note: Depending on the option selected, the printer automatically offsets each printed information of the page to bind the job correctly. |
| Blank PagesPrintDo Not Print* | Print blank pages that are included in a print job. |
| CollateOff [1,1,2,2,2]*On [1,2,1,2,1,2] | Keep the pages of a print job stacked in sequence, particularly when printing multiple copies of the job. |
| Separator SheetsNone*Between CopiesBetween JobsBetween Pages | Insert blank separator sheets when printing. |
| Separator Sheet SourceTray [x](1*)Multipurpose Feeder | Specify the paper source for the separator sheet.Note: The multipurpose feeder is available only in some printer models. |
| Pages per SideOff*2 pages per side3 pages per side4 pages per side6 pages per side9 pages per side12 pages per side16 pages per side | Print multiple page images on one side of a sheet of paper. |
| Pages per Side OrderingHorizontal*Reverse HorizontalVerticalReverse Vertical | Specify the positioning of multiple page images when using Pages per Side.Note: The positioning depends on the number of page images and their page orientation. |
| Pages per Side OrientationAuto*LandscapePortrait | Specify the orientation of a multiple-page document when using Pages per Side. |
| Pages per Side BorderNone*Solid | Print a border around each page image when using Pages per Side. |
| Copies1-9999 (1*) | Specify the number of copies for each print job. |
| Note: An asterisk (*) next to a value indicates the factory default setting. | |
| Print AreaNormal*Fit to pageWhole Page | Set the printable area on a sheet of paper. |
| Note: An asterisk (*) next to a value indicates the factory default setting. | |
Setup
| Menu item Description | |
| Printer LanguagePCL EmulationPS Emulation* | Set the printer language.Note:Setting a printer language default does not prevent a software program from sending print jobs that use another printer language. |
| Job WaitingOff*On | Preserve print jobs requiring supplies so that jobs not requiring the missing supplies can print.Note:This menu item appears only when a printer hard disk is installed. |
| Job Hold Timeout0–255 (30*) | Set the time in seconds that the printer waits for user intervention before it holds jobs that require unavailable resources and continues to print other jobs in the print queue.Note:This menu item appears only when a printer hard disk is installed. |
| Printer UsageMax SpeedMax Yield* | Determine how the color imaging unit operates during printing.Notes:When set to Max Yield, the color imaging unit slows or stops while printing groups of black-only pages.When set to Max Speed, the color imaging unit always runs while printing, whether color or black pages are being printed. |
| Download TargetRAM*Disk | Specify where to save all permanent resources, such as fonts and macros, that have been downloaded to the printer.Note:This menu item appears only when a printer hard disk is installed. |
| Resource SaveOff*On | Determine what the printer does with downloaded resources, such as fonts and macros, when it receives a job that requires more than the available memory.Notes:When set to Off, the printer retains downloaded resources only until memory is needed. Resources associated with the inactive printer language are deleted.When set to On, the printer preserves all the permanent downloaded resources across all language switches. When necessary, the printer shows memory full messages instead of deleting permanent resources. |
| Note:An asterisk (*) next to a value indicates the factory default setting. | |
| Print All OrderAlphabetical*Newest FirstOldest First | Specify the order in which held and confidential jobs are printed when Print All is selected.Note: This menu item appears only when a printer hard disk is installed. |
| Note: An asterisk (*) next to a value indicates the factory default setting. | |
Quality
| Menu item Description | |
| Print ModeBlack and WhiteColor* | Set the print mode. |
| Print Resolution4800 CQ*1200 dpi | Set the resolution for the printed output.Note: 4800 CQ provides high-quality output at maximum speed. |
| Toner Darkness1 to 5 (4*) | Determine the lightness or darkness of text images. |
| HalftoneNormal*Detail | Enhance the printed output to have smoother lines with sharper edges. |
| Color SaverOff*On | Reduce the amount of toner used to print graphics and images. |
| RGB Brightness-6 to 6 (0*) | Adjust the brightness, contrast, and saturation for color output.Note: This setting does not affect files where CMYK color specifications are used. |
| RGB Contrast0 to 5 (0*) | |
| RGB Saturation0 to 5 (0*) | |
| Note: An asterisk (*) next to a value indicates the factory default setting. | |
Advanced Imaging
| Menu item Description | |
| Color BalanceCyan-5 to 5 (0*)Magenta-5 to 5 (0*)Yellow-5 to 5 (0*)Black-5 to 5 (0*)Reset Defaults | Adjust the amount of toner that is used for each color. |
| Color CorrectionOffAuto*ManualColor Correction Content | Modify the color settings used to print documents.Notes:Off sets the printer to receive the color correction from the software.Auto sets the printer to apply different color profiles to each object on the printed page.Manual allows the customization of the RGB or CMYK color conversions applied to each object on the printed page.Color Correction Content is available only when Color Correction is set to Manual. |
| Color SamplesPrint Color Samples | Print sample pages for each of the RGB and CMYK color conversion tables used in the printer. |
| Color Adjust Calibrate the printer | to adjust color variations in the printed output. |
| Spot Color ReplacementSet Custom CMYK | Assign specific CMYK values to twenty named spot colors. |
| RGB Replacement | Match the colors of the output with that of the original document.Notes:This menu item requires that you select the Display-True-Black color table.This menu item appears only in the Embedded Web Server. |
| Note: An asterisk (*) next to a value indicates the factory default setting. | |
Job Accounting
Note: This menu appears only when a printer hard disk is installed.
| Menu item Description | |
| Job AccountingOff*On | Set the printer to create a log of the print jobs that it receives. |
| Note: An asterisk (*) next to a value indicates the factory default setting. | |
| Accounting Log FrequencyDailyWeeklyMonthly* | Specify how often the printer creates a log file. |
| Log Action at End of FrequencyNone*E-mail Current LogE-mail & Delete Current LogPost Current LogPost & Delete Current Log | Specify how the printer responds when the frequency threshold expires.Note:The value defined in Accounting Log Frequency determines when this action is triggered. |
| Log Near Full LevelOff*On | Specify the maximum size of the log file before the printer executes the Log Action at Near Full. |
| Log Action at Near FullNone*E-mail Current LogE-mail & Delete Current LogE-mail & Delete Oldest LogPost Current LogPost & Delete Current LogPost & Delete Oldest LogDelete Current LogDelete Oldest LogDelete All But CurrentDelete All Logs | Specify how the printer responds when the hard disk is nearly full.Note:The value defined in Log Near Full Level determines when this action is triggered. |
| Log Action at FullNone*E-mail & Delete Current LogE-mail & Delete Oldest LogPost & Delete Current LogPost & Delete Oldest LogDelete Current LogDelete Oldest LogDelete All But CurrentDelete All Logs | Specify how the printer responds when disk usage reaches the maximum limit (100MB). |
| URL to Post Log Specify where the | printer posts job accounting logs. |
| E-mail Address to Send Logs | Specify the e-mail address to which the printer sends job accounting logs. |
| Log File Prefix Specify the prefix for | the log file name.Note:The current host name defined in the TCP/IP menu is used as the default log file prefix. |
| Note: An asterisk (*) next to a value indicates the factory default setting. | |
XPS
| Menu item Description | |
| Print Error PagesOff*On | Print a test page that contains information on errors, including XML markup errors. |
| Minimum Line Width1–30 (2*) | Set the minimum stroke width.Notes:Jobs printed in 1200 dpi use the value directly.Jobs printed in 4800 CQ use half the value. |
| Note: An asterisk (*) next to a value indicates the factory default setting. | |
| Menu item Description | |
| Scale to FitOff*On | Scale the page content to fit the selected paper size. |
| AnnotationsPrintDo Not Print* | Specify whether to print annotations in the PDF. |
| Note: An asterisk (*) next to a value indicates the factory default setting. | |
PostScript
| Menu item Description | |
| Print PS ErrorOff*On | Print a page that describes the PostScript® error.Note:When an error occurs, processing of the job stops, the printer prints an error message, and the rest of the print job is flushed. |
| Minimum Line Width1–30 (2*) | Set the minimum stroke width.Notes:Jobs printed in 1200 dpi use the value directly.Jobs printed in 4800 CQ use half the value. |
| Lock PS Startup ModeOff*On | Disable the SysStart file. |
| Image SmoothingOff*On | Enhance the contrast and sharpness of low-resolution images.Note:This setting has no effect on images with a resolution of 300 dpi or higher. |
| Note:An asterisk (*) next to a value indicates the factory default setting. | |
| Font PriorityResident*Flash/Disk | Establish the font search order.Notes:•Resident sets the printer to search its memory for the requested font before searching the flash memory or printer hard disk.• Flash/Disk sets the printer to search the flash memory or printer hard disk for the requested font before searching the printer memory.• This menu item appears only when a flash memory or printer hard disk is installed. |
| Wait TimeoutOffOn* (40 seconds) | Set the printer to wait for more data before canceling a print job. |
| Note: An asterisk (*) next to a value indicates the factory default setting. | |
PCL
| Menu item Description | |
| Font SourceResident*DiskFlashAll | Choose the source which contains the default font selection.Notes:Flash and Disk appear only in some printer models.For Flash and Disk to appear, make sure that they are not read- or write-protected. |
| Font Name[List of available fonts] (Courier*) | Select a font from the specified font source. |
| Symbol Set[List of available symbol set] (10U PC-8*) | Specify the symbol set for each font name.Note:A symbol set is a set of alphabetic and numeric characters, punctuation, and special symbols. Symbol sets support the different languages or specific programs such as math symbols for scientific text. |
| Pitch0.08–100 (10*) | Specify the pitch for fixed or monospaced fonts.Note:Pitch refers to the number of fixed-space characters in a horizontal inch of type. |
| OrientationPortrait*Landscape | Specify the orientation of text and graphics on the page. |
| Note:An asterisk (*) next to a value indicates the factory default setting. | |
| Lines per Page1–255 | Specify the number of lines of text for each page printed through the PCL® datastream.Notes:This menu item activates vertical escapement that causes the selected number of requested lines to print between the default margins of the page.60 is the U.S. factory default setting. 64 is the international factory default setting. |
| PCL5 Minimum Line Width1–30 (2*) | Set the initial minimum stroke width.Notes:Jobs printed in 1200 dpi use the value directly.Jobs printed in 4800CQ use half the value. |
| PCLXL Minimum Line Width1–30 (2*) | |
| A4 Width198 mm*203 mm | Set the width of the logical page on A4-size paper.Note:Logical page is the space on the physical page where data is printed. |
| Auto CR after LFOff*On | Set the printer to perform a carriage return after a line feed control command.Note:Carriage return is a mechanism that commands the printer to move the position of the cursor to the first position on the same line. |
| Auto LF after CROff*On | Set the printer to perform a line feed after a carriage return control command. |
| Tray RenumberAssign MP FeederAssign Tray [x]Assign Manual PaperAssign Manual Envelope | Configure the printer to work with a different print driver or custom application that uses a different set of source assignments to request a given paper source.Choose from the following options:Off*—The printer uses the factory default paper source assignments.None—The paper source ignores the Select Paper Feed command.0–199—Select a numeric value to assign a custom value to a paper source.Note:The multipurpose feeder is available only in some printer models. |
| Tray RenumberView Factory Defaults | Show the factory default value assigned for each paper source. |
| Tray RenumberRestore Defaults | Restore the tray renumber values to their factory defaults. |
| Print TimeoutOffOn* [90] | Set the printer to end a print job after it has been idle for the specified amount of time in seconds. |
| Note:An asterisk (*) next to a value indicates the factory default setting. | |
HTML
| Menu item Description | |
| Font Name[List of fonts] (Times*) | Set the font to use for HTML documents. |
| Font Size1–255 (12*) | Set the font size to use for HTML documents. |
| Scale1–400% (100*) | Scale HTML documents. |
| OrientationPortrait*Landscape | Set the page orientation for HTML documents. |
| Margin Size8–255 mm (19*) | Set the page margin for HTML documents. |
| BackgroundsDo Not PrintPrint* | Print background information or graphics for HTML documents. |
| Note: An asterisk (*) next to a value indicates the factory default setting. | |
Image
| Menu item Description | |
| Auto FitOnOff* | Select the best available paper size and orientation setting for an image.Note:When set to On, this menu item overrides the scaling and orientation settings for the image. |
| InvertOff*On | Invert bitonal monochrome images.Note:This menu item does not apply to GIF or JPEG image formats. |
| ScalingAnchor Top LeftBest Fit*Anchor CenterFit Height/WidthFit HeightFit Width | Adjust the image to fit the printable area.Note:When Auto Fit is set to On, Scaling is automatically set to Best Fit. |
| OrientationPortrait*LandscapeReverse PortraitReverse Landscape | Specify the orientation of text and graphics on the page. |
| Note:An asterisk (*) next to a value indicates the factory default setting. | |
Paper
Tray Configuration
| Menu item Description | |
| Default SourceTray [x] (1*)Multipurpose FeederManual PaperManual Envelope | Set the paper source for all print jobs.Note: Multipurpose Feeder only appears when Configure MP is set to Cassette. |
| Paper Size/TypeTray [x]Multipurpose FeederManual PaperManual Envelope | Specify the paper size or paper type loaded in each paper source. |
| Substitute SizeOffStatement/A5Letter/A4All Listed* | Set the printer to substitute a specified paper size if the requested size is not loaded in any paper source.Notes:Off prompts the user to load the required paper size.Statement/A5 prints an A5-size document on statement when loading statement, and statement-size jobs on A5 paper size when loading A5.Letter/A4 prints an A4-size document on letter when loading letter, and letter-size jobs on A4 paper size when loading A4.All Listed substitutes Letter/A4. |
| Note: An asterisk (*) next to a value indicates the factory default setting. | |
Media Configuration
Universal Setup
| Menu item Description | |
| Units of MeasureInchesMillimeters | Specify the unit of measurement for the universal paper.Note: Inches is the U.S. factory default setting. Millimeters is the international factory default setting. |
| Portrait Width3–14.17 inches (8.50*)76–359.91 mm (216*) | Set the portrait width of the universal paper. |
| Portrait Height3–14.17 inches (14*)76–359.91 mm (356*) | Set the portrait height of the universal paper. |
| Note: An asterisk (*) next to a value indicates the factory default setting. | |
| Feed DirectionShort Edge*Long Edge | Set the printer to pick paper from the short edge or long edge direction.Note: Long Edge appears only when the longest edge is shorter than the maximum width supported. |
| Note: An asterisk (*) next to a value indicates the factory default setting. | |
Custom Scan Sizes
| Menu item Description | |
| Custom Scan Size [x]Scan Size NameWidth1–8.50 inches (8.50*)25–216 mm (216*)Height1–14 inches (14*)25–356 mm (297*)OrientationPortrait*Landscape2 scans per sideOff*On | Assign a scan size name and configure the scan settings. |
Media Types
| Menu item Description | |
| PlainCard StockRecycledGlossyLabelsVinyl LabelsBondEnvelopeLetterheadPreprintedColored PaperLightHeavyRough/CottonCustom Type [x] | Specify the texture and weight of the paper loaded. |
Copy
Copy Defaults
| Menu item Description | |
| Content TypeTextText/Photo*PhotoGraphics | Improve the output result based on the content of the original document. |
| Content SourceBlack and White LaserColor Laser*InkjetPhoto/FilmMagazineNewspaperPressOther | Improve the output result based on the source of the original document. |
| Sides1 sided to 1 sided*1 sided to 2 sided2 sided to 1 sided2 sided to 2 sided | Specify the scanning behavior based on the original document. |
| Separator SheetsNone*Between CopiesBetween JobsBetween Pages | Specify whether to insert blank separator sheets when printing. |
| Separator Sheet SourceTray [x] (*)Multipurpose Feeder | Specify the paper source for the separator sheet. |
| ColorOffOn*Auto | Specify whether to print copies in color. |
| Pages per SideOff*2 Portrait pages4 Portrait pages2 Landscape pages4 Landscape pages | Specify the number of page images to print on one side of a sheet of paper. |
| Note: An asterisk (*) next to a value indicates the factory default setting. | |
| Print Page BordersOff*On | Place a border around each image when printing multiple pages on a single page. |
| CollateOff [1,1,2,2,2]On [1,2,1,2,1,2]* | Print multiple copies in sequence. |
| “Copy from” Size[List of paper sizes] | Set the paper size of the original document.Notes:Letter is the U.S. factory default setting. A4 is the international factory default setting.This menu item may vary depending on your printer model. |
| “Copy to” SourceTray [x] (1*)Multipurpose FeederAuto Size Match | Specify the paper source for the copy job. |
| Temperature-4 to 4 (0*) | Specify whether to generate a cooler or warmer output. |
| Darkness-4 to 4 (0*) | Adjust the darkness of the scanned image. |
| Number of Copies1–9999 (1*) | Specify the number of copies. |
| Header/FooterTop leftTop middleTop rightBottom leftBottom middleBottom right | Apply a header or footer on the printed output. |
| OverlayConfidentialCopyDraftUrgentCustomOff* | Specify the overlay text printed on each page of the copy job. |
| Custom overlay Type a custom overlay text. | |
| Note: An asterisk (*) next to a value indicates the factory default setting. | |
Advanced Imaging
| Menu item Description | |
| Color Balance-4 to 4 (0*) | Adjust the amount of toner being used in each color. |
| Color DropoutNone*RedGreenBlueDefault Red Threshold0–255 (128*)Default Green Threshold0–255 (128*)Default Blue Threshold0–255 (128*) | Specify which color to drop during scanning, and adjust the dropout setting for that color. |
| Auto Color DetectColor Sensitivity1–9 (5*)Area Sensitivity1–9 (5*) | Set the amount of color that the printer detects from the original document. |
| ContrastBest for Content*012345 | Specify the contrast of the output. |
| Background RemovalBackground DetectionContent-based*FixedLevel-4 to 4 (0*) | Adjust the amount of background visible on a scanned image.Note:If you want to remove the background color from the original document, then set Background Detection to Content-based. If you want to remove image noise from a photo, then set Background Detection to Fixed. |
| Auto CenterOff*On | Align the content at the center of the page. |
| Mirror ImageOff*On | Create a mirror image of the original document. |
| Note:An asterisk (*) next to a value indicates the factory default setting. | |
| Negative ImageOff*On | Create a negative image of the original document. |
| Shadow Detail-4 to 4 (0*) | Adjust the amount of shadow detail visible on a scanned image. |
| Scan Edge to EdgeOff*On | Allow edge-to-edge scanning of the original document. |
| Sharpness1–5 (3*) | Adjust the sharpness of a scanned image. |
| Note: An asterisk (*) next to a value indicates the factory default setting. | |
Admin Controls
| Menu item Description | |
| Allow Color CopiesOffOn* | Print copies in color. |
| Allow Priority CopiesOffOn* | Interrupt a print job to copy a page or document. |
| Custom Job ScanningOff*On | Turn on scanning of custom jobs by default. |
| Allow Save as ShortcutOffOn* | Save custom copy settings as shortcuts. |
| Sample Copy Print a sample copy. | |
| Note: An asterisk (*) next to a value indicates the factory default setting. | |
Fax
Fax Mode
| Menu item Description | |
| Fax ModeAnalog*Fax ServerDisabled | Select a fax mode. |
| Note: An asterisk (*) next to a value indicates the factory default setting. | |
Analog Fax Setup
General Fax Settings
| Menu item Description | |
| Fax NameIdentify your fax machine. | |
| Fax NumberIdentify your fax number. | |
| Fax IDFax NameFax Number* | Notify fax recipients of your fax name or fax number. |
| Enable Manual FaxOff*On | Set the printer to fax manually.Notes:This menu item does not appear if Fax Transport is set to T.38 or G711.This menu item requires a line splitter and a telephone handset.Use a regular telephone line to answer an incoming fax job and to dial a fax number.To go directly to the Manual Fax function, touch # and 0 on the keypad. |
| Memory UseAll receiveMostly receiveEqual*Mostly sendAll send | Set the amount of internal printer memory allocated for faxing.Note: This menu item prevents memory buffer conditions and failed faxes. |
| Cancel FaxesAllow*Don't Allow | Cancel outgoing faxes before they are transmitted, or cancel incoming faxes before they finish printing. |
| Caller IDOffOn*Alternate | Show the telephone number of the person sending the fax. |
| Fax Number MaskingOff*From LeftFrom Right | Specify the format for masking an outgoing fax number. |
| Digits to Mask0-58 (0*) | Specify the number of digits to mask in an outgoing fax number. |
| Enable Line Connected DetectionOffOn* | Determine whether a telephone line is connected to the printer.Notes:Detection takes place when turning on the printer and before each call.This menu item does not appear if Fax Transport is set to T.38. |
| Note: An asterisk (*) next to a value indicates the factory default setting. | |
| Enable Line In Wrong Jack DetectionOff*On | Determine whether a telephone line is connected to the correct port on the printer.Notes:•Detection takes place when turning on the printer and before each call.• This menu item does not appear if Fax Transport is set to T.38. |
| Enable Extension in Use SupportOffOn* | Determine whether a telephone line is used by another device such as another phone on the same line.Notes:• This menu item is monitored continuously after turning on the printer.• This menu item does not appear if Fax Transport is set to T.38. |
| Optimize Fax Compatibility | Configure the printer fax functionality for optimal compatibility with other fax machines. |
| Note: An asterisk (*) next to a value indicates the factory default setting. | |
Fax Send Settings
| Menu item Description | |
| ResolutionStandard*FineSuper FineUltra Fine | Set the resolution of the scanned image.Note:A higher resolution increases fax transmission time and requires higher memory. |
| Original Size[List of paper sizes] | Specify the size of the original document.Note:Mixed Sizes is the U.S. factory default setting. A4 is the international factory default setting. |
| OrientationPortrait*Landscape | Specify the orientation of the original document. |
| SidesOff*Long EdgeShort Edge | Specify the page orientation of text and graphics when scanning a two-sided document. |
| Content TypeText*Text/PhotoPhotoGraphics | Improve the output result based on the content of the original document. |
| Note:An asterisk (*) next to a value indicates the factory default setting. | |
| Content SourceBlack and White Laser*Color LaserInkjetPhoto/FilmMagazineNewspaperPressOther | Improve the output result based on the source of the original document. |
| Darkness-4 to 4 (0*) | Adjust the darkness of the scanned image. |
| Behind a PABXOff*On | Set the printer to dial a fax number without waiting to recognize the dial tone.Note:Private Automated Branch Exchange (PABX) is a telephone network that allows a single access number to offer multiple lines to outside callers. |
| Dial ModeTone*Pulse | Specify the dial mode for incoming or outgoing faxes. |
| Note:An asterisk (*) next to a value indicates the factory default setting. | |
Advanced Imaging
| Menu item Description | |
| Color Balance-4 to 4 (0*) | Adjust the amount of toner used for each color. |
| Color DropoutNone*RedGreenBlueDefault Red Threshold0–255 (128*)Default Green Threshold0–255 (128*)Default Blue Threshold0–255 (128*) | Specify which color to drop during scanning, and adjust the dropout setting for that color. |
| Note: An asterisk (*) next to a value indicates the factory default setting. | |
| ContrastBest for Content*012345 | Set the contrast of the output. |
| Background RemovalBackground DetectionContent-based*FixedLevel-4 to 4 (0*) | Adjust the amount of background visible on a scanned image.Note:If you want to remove the background color from the original document, then set Background Detection to Content-based. If you want to remove image noise from a photo, then set Background Detection to Fixed. |
| Mirror ImageOff*On | Create a mirror image of the original document. |
| Negative ImageOff*On | Create a negative image of the original document. |
| Shadow Detail-4 to 4 (0*) | Adjust the amount of shadow detail visible on a scanned image. |
| Scan Edge to EdgeOff*On | Allow edge-to-edge scanning of the original document. |
| Sharpness1–5 (3*) | Adjust the sharpness of the scanned image. |
| Temperature-4 to 4 (0*) | Specify whether to generate a cooler or warmer output. |
| Note: An asterisk (*) next to a value indicates the factory default setting. | |
Admin Controls
| Menu item Description | |
| Automatic Redial0–9 (5*) | Adjust the number of redial attempts based on the activity levels of recipient fax machines. |
| Redial Frequency1–200 minutes (3*) | Increase the time between redial attempts to increase the chance of sending fax successfully. |
| Enable ECMOffOn* | Activate Error Correction Mode (ECM) for fax jobs.Note: ECM detects and corrects errors in the fax transmission process that are caused by telephone line noise and poor signal strength. |
| Note: An asterisk (*) next to a value indicates the factory default setting. | |
| Enable Fax ScansOffOn* | Fax documents that are scanned at the printer. |
| Driver to FaxOffOn* | Allow the print driver to send fax. |
| Allow Save as ShortcutOffOn* | Save fax numbers as shortcuts in the printer. |
| Max Speed33600*14400960048002400 | Set the maximum speed for sending fax. |
| Custom Job ScanningOff*On | Turn on scanning of custom jobs by default.Note: This menu item appears only when a hard disk is installed. |
| Scan PreviewOff*On | Show a preview of the scan on the display.Note: This menu item appears only when a hard disk is installed. |
| Enable Color Fax ScansOff by default*On by defaultNever useAlways use | Enable color scans for fax. |
| Auto Convert Color Faxes to Mono FaxesOffOn* | Convert all outgoing color faxes to black and white. |
| Confirm Fax NumberOff*On | Ask the user to confirm the fax number. |
| Dial Prefix Set a dialing prefix. | |
| Dialing Prefix RulesPrefix Rule [x] | Establish a dialing prefix rule. |
| Note: An asterisk (*) next to a value indicates the factory default setting. | |
Fax Receive Settings
| Menu item Description | |
| Fax Job WaitingNone*TonerToner and Supplies | Remove fax jobs that request specific unavailable resources from the print queue. |
| Rings to Answer1-25 (3*) | Set the number of rings for incoming fax. |
| Auto ReductionOffOn* | Scale incoming fax to fit on the page. |
| Paper SourceTray [x]Multipurpose FeederAuto* | Set the paper source for printing incoming fax. |
| SidesOff*On | Print on both sides of the paper. |
| Separator SheetsNone*Before JobAfter Job | Specify whether to insert blank separator sheets when printing. |
| Separator Sheet SourceTray [x] (1*)Multipurpose Feeder | Specify the paper source for the separator sheet. |
| Output BinStandard Bin | Specify the output bin for received faxes. |
| Fax FooterOnOff* | Print the transmission information at the bottom of each page from a received fax. |
| Fax Footer Time StampReceive*Print | Print the time stamp at the bottom of each page from a received fax. |
| Holding FaxesHeld Fax ModeOff*Always OnManualScheduled | Hold received faxes from printing until they are released. |
| Note: An asterisk (*) next to a value indicates the factory default setting. | |
Admin Controls
| Menu item Description | |
| Enable Fax ReceiveOffOn* | Set the printer to receive fax. |
| Enable Color Fax ReceiveOffOn* | Set the printer to receive fax in color. |
| Enable Caller IDOffOn* | Show the number that is sending the incoming fax. |
| Block No Name FaxOff*On | Block incoming faxes sent from devices with no station ID or fax ID specified. |
| Banned Fax ListAdd Banned Fax | Specify the phone numbers that you want to block. |
| Answer OnAll Rings*Single Ring OnlyDouble Ring OnlyTriple Ring OnlySingle or Double Rings OnlySingle or Triple Rings OnlyDouble or Triple Rings Only | Set a distinctive ring pattern for incoming fax. |
| Auto AnswerOffOn* | Set the printer to receive fax automatically. |
| Manual Answer Code0-9 (9*) | Manually enter a code on the telephone number pad to begin receiving fax.Notes:This menu item appears only when the printer shares a line with a telephone.This menu item appears only when you set the printer to receive fax manually. |
| Fax ForwardingPrint*Print and ForwardForward | Specify how to forward received fax. |
| Forward toDestination [x]TypeShortcut Number | Specify where to forward received fax. |
| Note: An asterisk (*) next to a value indicates the factory default setting. | |
| Confirmation E-mail | Send a confirmation e-mail when fax forwarding is successful.Note:The e-mail is sent only when forwarding to FTP or Network Share destinations. |
| Max Speed33600*14400960048002400 | Set the maximum speed for transmitting fax. |
| Note:An asterisk (*) next to a value indicates the factory default setting. | |
Fax Cover Page
| Menu item Description | |
| Fax Cover PageOff by Default*On by DefaultNever UseAlways Use | Configure the settings for the fax cover page. |
| Include To fieldOff*On | |
| Include From fieldOff*On | |
| From | |
| Include Message FieldOff*On | |
| Message: | |
| Include LogoOff*On | |
| Include Footer [x]Off*On | |
| Footer [x] | |
| Note: An asterisk (*) next to a value indicates the factory default setting. | |
Fax Log Settings
| Menu item Description | |
| Transmission LogPrint log*Do Not Print LogPrint Only For Error | Print a log for successful fax transmission or transmission error. |
| Receive Error LogPrint Never*Print on Error | Print a log for fax-receive failures. |
| Auto Print LogsOn*Off | Print all fax activity. |
| Log Paper SourceTray [x] (*)Multipurpose Feeder | Specify the paper source for printing logs. |
| Logs DisplayRemote Fax Name*Dialed Number | Identify the sender by remote fax name or fax number. |
| Enable Job LogOn*Off | View a summary of all fax jobs. |
| Enable Call LogOn*Off | View a summary of fax dialing history. |
| Log Output BinStandard Bin*Bin [x] | Specify the output bin for printed logs. |
| Note: An asterisk (*) next to a value indicates the factory default setting. | |
Speaker Settings
| Menu item Description | |
| Speaker ModeAlways OffAlways OnOn until Connected* | Set the fax speaker mode. |
| Speaker VolumeLow*High | Adjust the fax speaker volume. |
| Note: An asterisk (*) next to a value indicates the factory default setting. | |
| Ringer VolumeOffOn* | Enable the ringer volume. |
| Note: An asterisk (*) next to a value indicates the factory default setting. | |
Fax Server Setup
General Fax Settings
| Menu item Description | |
| To Format Specify a fax recipient. | Note: If you want to use the fax number, then type the number sign (#) before a number. |
| Reply Address Specify a reply address for sending fax. | |
| Subject Specify the fax subject and message. | |
| Message | |
| Enable analog receive Off* On | Set the printer to receive analog faxes. |
| Note: An asterisk (*) next to a value indicates the factory default setting. | |
Fax Server E-mail Settings
| Menu item Description | |
| Primary SMTP Gateway | Type the IP address or host name of the primary Simple Mail Transfer Protocol (SMTP) server for sending e-mail. |
| Primary SMTP Gateway Port 1-65535 (25*) | Enter the port number of the primary SMTP server. |
| Secondary SMTP Gateway | Type the server IP address or host name of your secondary or backup SMTP server. |
| Secondary SMTP Gateway Port 1-65535 (25*) | Enter the server port number of your secondary or backup SMTP server. |
| SMTP Timeout 5-30 (30*) | Set the time before the printer times out if the SMTP server does not respond. |
| Reply Address Specify a reply address for sending fax. | |
| Always use SMTP default Reply Address Off On* | Specify the SMTP reply address for sending fax. |
| Note: An asterisk (*) next to a value indicates the factory default setting. | |
| Use SSL/TLSDisabled*NegotiateRequired | Specify whether to send fax using an encrypted link. |
| Require Trusted CertificateOffOn* | Specify a trusted certificate when accessing the SMTP server. |
| SMTP Server AuthenticationNo authentication required*Login / PlainNTLMCRAM-MD5Digest-MD5Kerberos 5 | Set the authentication type for the SMTP server. |
| Device-Initiated E-mailNone*Use Device SMTP Credentials | Specify whether credentials are required for device-initiated e-mail. |
| User-Initiated E-mailNone*Use Device SMTP CredentialsUse Session User ID andPasswordUse Session E-mail addressand PasswordPrompt user | Specify whether credentials are required for user-initiated e-mail. |
| Use Active Directory Device CredentialsOffOn* | Enable user credentials and group destinations to connect to the SMTP server. |
| Device Userid Specify the user ID | and password to connect to the SMTP server. |
| Device Password | |
| Kerberos 5 REALM | Specify the realm for the Kerberos 5 authentication protocol. |
| NTLM Domain | Specify the domain name for the NTLM security protocol. |
| Disable "SMTP server not setup" errorOff*On | Hide the “SMTP server not set up” error message. |
| Note: An asterisk (*) next to a value indicates the factory default setting. | |
Fax Server Scan Settings
| Menu item Description | |
| Image FormatTIFF (.tif)PDF (.pdf)*XPS (.xps)TXT (.txt)RTF (.rtf)DOCX (.docx) | Specify the file format for the scanned image. |
| Content TypeTextText/Photo*PhotoGraphics | Improve the output result based on the content of the original document. |
| Content SourceBlack and White LaserColor Laser*InkjetPhoto/FilmMagazineNewspaperPressOther | Improve the output result based on the source of the original document. |
| Fax ResolutionStandard*FineSuper FineUltra Fine | Set the fax resolution. |
| Darkness1-9 (5*) | Set the darkness of the output. |
| OrientationPortrait*Landscape | Specify the orientation of text and graphics on the page. |
| Original Size[List of paper sizes] | Set the paper size of the original document.Notes:Mixed Sizes is the U.S. factory default setting. A4 is the international factory default setting.This setting may vary depending on your printer model. |
| Use Multi-Page TIFFOffOn* | Choose between single- and multiple-page TIFF files. |
| Note: An asterisk (*) next to a value indicates the factory default setting. | |
E-mail Setup
| Menu item Description | |
| Primary SMTP Gateway | Type the IP address or host name of the primary SMTP server for sending e-mail. |
| Primary SMTP Gateway Port 1-65535 (25*) | Enter the port number of the primary SMTP server. |
| Secondary SMTP Gateway | Type the server IP address or host name of your secondary or backup SMTP server. |
| Secondary SMTP Gateway Port 1-65535 (25*) | Enter the server port number of your secondary or backup SMTP server. |
| SMTP Timeout 5-30 seconds (30*) | Set the time before the printer times out if the SMTP server does not respond. |
| Reply Address | Specify a reply address in the e-mail. |
| Always use SMTP default Reply AddressOn*Off | Always use the default reply address in the SMTP server. |
| Use SSL/TLSDisabled*NegotiateRequired | Specify whether to send e-mail using an encrypted link. |
| Require Trusted CertificateOffOn* | Require a trusted certificate when accessing the SMTP server. |
| SMTP Server AuthenticationNo authentication required*Login / PlainNTLMCRAM-MD5Digest-MD5Kerberos 5 | Set the authentication type for the SMTP server. |
| Device-Initiated E-mailNone*Use Device SMTP Credentials | Specify whether credentials are required for device-initiated e-mail. |
| Note: An asterisk (*) next to a value indicates the factory default setting. | |
| User-Initiated E-mailNone*Use Device SMTP CredentialsUse Session User ID and PasswordUse Session E-mail address and PasswordPrompt user | Specify whether credentials are required for user-initiated e-mail. |
| Use Active Directory Device CredentialsOffOn* | Enable user credentials and group designations to connect to the SMTP server. |
| Device Userid Specify the user ID | and password to connect to the SMTP server. |
| Device Password | |
| Kerberos 5 REALM | Specify the realm for the Kerberos 5 authentication protocol. |
| NTLM Domain | Specify the domain name for the NTLM security protocol. |
| Disable "SMTP server not set up" errorOff*On | Hide the “SMTP server not set up” error message. |
| Note: An asterisk (*) next to a value indicates the factory default setting. | |
E-mail Defaults
| Menu item Description | |
| Subject | Specify the e-mail subject and message. |
| Message | |
| File Name Specify the file name for | the scanned image. |
| FormatPDF (.pdf)*TIFF (.tif)JPEG (.jpg)XPS (.xps)TXT (.txt)RTF (.rtf)DOCX (.docx) | Specify the file format for the scanned image. |
| Note: An asterisk (*) next to a value indicates the factory default setting. | |
| Global OCR SettingsRecognized LanguagesAuto RotateDespeckleAuto Contrast Enhance | Configure the settings for optical character recognition (OCR).Note: This menu item appears only if you have purchased and installed an OCR solution. |
| PDF SettingsPDF Version1.31.41.5*1.61.7Archival VersionA-1a*A-1bHighly CompressedOff*OnSecureOff*OnSearchableOff*OnArchival (PDF/A)Off*On | Set the PDF format of the scanned image. |
| Content TypeTextText/Photo*PhotoGraphics | Improve the output result based on the content of the original document. |
| Content SourceBlack and White Laser*Color LaserInkjetPhoto/FilmMagazineNewspaperPressOther | Improve the output result based on the original document. |
| Note: An asterisk (*) next to a value indicates the factory default setting. | |
| ColorBlack and WhiteGrayColor*Auto | Specify the color when scanning an image. |
| Resolution75 dpi150 dpi*200 dpi300 dpi400 dpi600 dpi | Set the resolution of the scanned image. |
| Darkness-4 to 4 (0*) | Adjust the darkness of the scanned image. |
| OrientationPortrait*Landscape | Specify the orientation of text and graphics on the page. |
| Original Size[List of paper sizes] | Set the paper size of the original document.Note:Mixed Sizes is the factory default setting. |
| SidesOff*Long EdgeShort Edge | Specify the page orientation of text and graphics when scanning a two-sided document. |
| Note:An asterisk (*) next to a value indicates the factory default setting. | |
Advanced Imaging
| Menu item Description | |
| Color BalanceCyan to Red-4 to 4 (0*)Magenta to Green-4 to 4 (0*)Yellow to Blue-4 to 4 (0*) | Adjust the color intensity during scanning. |
| Note: An asterisk (*) next to a value indicates the factory default setting. | |
| Color DropoutColor DropoutNone*RedGreenBlueDefault Red Threshold0-255 (128*)Default Green Threshold0-255 (128*)Default Blue Threshold0-255 (128*) | Specify which color to drop during scanning, and adjust the dropout setting for that color. |
| Auto Color DetectColor Sensitivity1-9 (5*)Area Sensitivity1-9 (5*)E-mail Bit Depth1 bit*8 bit | Set the amount of color that the printer detects from the original document.Note: This menu item appears only when Color is set to Auto. |
| JPEG QualityBest for content*5-95 | Set the quality of a JPEG-format scanned image.Notes:5 reduces the file size, but lessens the image quality.95 provides the best image quality, but produces a large file size. |
| ContrastBest for content*012345 | Specify the contrast of the output. |
| Background RemovalBackground DetectionContent-based*FixedLevel-4 to 4 (0*) | Adjust the amount of background visible on a scanned image.Note: If you want to remove the background color from the original document, then set Background Detection to Content-based. If you want to remove image noise from a photo, then set Background Detection to Fixed. |
| Mirror ImageOff*On | Create a mirror image of the original document. |
| Note: An asterisk (*) next to a value indicates the factory default setting. | |
| Negative ImageOff*On | Create a negative image of the original document. |
| Shadow Detail-4 to 4 (0*) | Adjust the amount of shadow detail visible on a scanned image. |
| Scan Edge to EdgeOff*On | Allow edge-to-edge scanning of the original document. |
| Sharpness1–5 (3*) | Adjust the sharpness of a scanned image. |
| Temperature-4 to 4 (0*) | Specify whether to generate a cooler or warmer output. |
| Blank PagesBlank Page RemovalBlank Page Sensitivity | Specify whether to include blank pages. |
| Note: An asterisk (*) next to a value indicates the factory default setting. | |
Admin Controls
| Menu item Description | |
| Max E-mail Size0–65535 (0*) | Set the allowable file size for each e-mail. |
| Size Error Message | Specify an error message that the printer sends when an e-mail exceeds its allowable file size.Note: You can type up to 1024 characters. |
| Limit Destinations | Limit sending of e-mail only to the specified list of domain names.Note: Use a comma to separate each domain. |
| Send Me a CopyNever appears*On by DefaultOff by DefaultAlways On | Send a copy of the e-mail to yourself. |
| Limit E-mail RecipientsOff*On | Limit the number of e-mail recipients. |
| Use cc:/bcc:Off*On | Enable carbon copy and blind carbon copy in e-mail. |
| Note: An asterisk (*) next to a value indicates the factory default setting. | |
| Use Multi-Page TIFFOn*Off | Choose between single- and multiple-page TIFF files. |
| TIFF CompressionLZW*JPEG | Set a compression option for TIFF files. |
| Text Default5–95 (75*) | Set the quality of text on a scanned image. |
| Text/Photo Default5–95 (75*) | Set the quality of text or photo on a scanned image. |
| Photo Default5–95 (50*) | Set the quality of a photo on a scanned image. |
| Transmission LogPrint log*Do Not Print LogPrint Only For Error | Print a log for successful e-mail transmission. |
| Log Paper SourceTray [x] (*)Multipurpose Feeder | Specify the paper source for printing logs. |
| Custom Job ScanningOff*On | Turn on scanning of custom jobs by default.Note: This menu item appears only when a hard disk is installed. |
| Scan PreviewOffOn* | Show the scan preview on the display.Note: This menu item appears only when a printer hard disk is installed. |
| Allow Save as ShortcutOffOn* | Save e-mail addresses as shortcuts.Note: When set to Off, the Save As Shortcut button does not appear on the e-mail Destination screen. |
| E-mail Images Sent AsAttachment*Web Link | Specify how to send the images in e-mail. |
| Reset E-mail Information After SendingOffOn* | Restore the default e-mail information after sending an e-mail. |
| Note: An asterisk (*) next to a value indicates the factory default setting. | |
Web Link Setup
| Menu item Description | |
| Server | Set the printer to send e-mail as a web link. |
| Login | |
| Password | |
| Path | |
| File Name | |
| Web Link |
FTP
FTP Defaults
| Menu item Description | |
| FormatPDF (.pdf)*TIFF (.tif)JPEG (.jpg)XPS (.xps)TXT (.txt)RTF (.rtf)DOCX (.docx) | Specify the file format for the scanned image.Note:The menu items may vary depending on your printer model. |
| Global OCR SettingsRecognized LanguagesAuto RotateDespeckleAuto Contrast Enhance | Configure the settings for optical character recognition (OCR).Note:This menu appears only if you have purchased and installed an OCR solution. |
| Note:An asterisk (*) next to a value indicates the factory default setting. | |
| PDF SettingsPDF Version1.31.41.5*1.61.7Archival VersionA-1a*A-1bSecureOff*OnArchival (PDF/A)Off*On | Set the PDF format for the scanned image. |
| Content TypeTextText/Photo*GraphicsPhoto | Improve the output result based on the content of the original document. |
| Content SourceBlack and White LaserColor Laser*InkjetPhoto/FilmMagazineNewspaperPressOther | Improve the output result based on the source of the original document. |
| ColorBlack and WhiteGrayColor*Auto | Specify the color when scanning an image. |
| Resolution75 dpi150 dpi*200 dpi300 dpi400 dpi600 dpi | Set the resolution of the scanned image. |
| Note: An asterisk (*) next to a value indicates the factory default setting. | |
| Darkness-4 to 4 (0*) | Adjust the darkness of the scanned image. |
| OrientationPortrait*Landscape | Specify the orientation of text and graphics on the page. |
| Original Size[List of paper sizes] | Set the paper size of the original document.Notes:Letter is the U.S. factory default setting. A4 is the international factory default setting.The menu items may vary depending on your printer model. |
| SidesOff*Long EdgeShort Edge | Specify the page orientation of text and graphics when scanning a two-sided document. |
| File Name Specify the file name of | the scanned image. |
| Note: An asterisk (*) next to a value indicates the factory default setting. | |
Advanced Imaging
| Menu item Description | |
| Color Balance-4 to 4 (0*) | Adjust the amount of toner used for each color in scan output. |
| Color DropoutColor DropoutNone*RedGreenBlueDefault Red Threshold0–255 (128*)Default Green Threshold0–255 (128*)Default Blue Threshold0–255 (128*) | Specify which color to drop during scanning, and adjust the dropout setting for that color. |
| Auto Color DetectColor Sensitivity1–9 (5*)Area Sensitivity1–9 (5*) | Set the amount of color that the printer detects from the original document.Note: This menu item appears only when Color is set to Auto. |
| Note: An asterisk (*) next to a value indicates the factory default setting. | |
| JPEG QualityBest for content*5-95 | Set the quality of a JPEG-format image.Notes:5 reduces the file size, but lessens the image quality.90 provides the best image quality, but produces a large file size. |
| ContrastBest for content*012345 | Specify the contrast of the output. |
| Background RemovalBackground DetectionContent-based*FixedLevel-4 to 4 (0*) | Adjust the amount of background visible on a scanned image.Note:If you want to remove the background color from the original document, then set Background Detection to Content-based. If you want to remove image noise from a photo, then set Background Detection to Fixed. |
| Mirror ImageOff*On | Create a mirror image of the original document. |
| Negative ImageOff*On | Create a negative image of the original document. |
| Shadow Detail-4 to 4 (0*) | Adjust the amount of shadow detail visible on a scanned image. |
| Scan Edge to EdgeOff*On | Allow edge-to-edge scanning of the original document. |
| Sharpness1-5 (3*) | Adjust the sharpness of a scanned image. |
| Temperature-4 to 4 (0*) | Specify whether to generate a cooler or warmer output. |
| Blank PagesBlank Page RemovalBlank Page Sensitivity | Specify whether to include blank pages. |
| Note:An asterisk (*) next to a value indicates the factory default setting. | |
Admin Controls
| Menu item Description | |
| Text Default5-95 (75*) | Set the quality of text on a scanned image. |
| Text/Photo Default5-95 (75*) | Set the quality of text or photo image on a scanned image. |
| Photo Default5-95 (50*) | Set the quality of a photo image on a scanned image. |
| Use Multi-Page TIFFOn*Off | Choose between single- and multiple-page TIFF files. |
| TIFF CompressionLZW*JPEG | Set a compression option for TIFF files. |
| Transmission LogPrint Log*Do Not Print LogPrint Only For Error | Print a log for successful FTP scan transmission. |
| Log Paper SourceTray [x] (1*)Multipurpose Feeder | Specify the paper source for printing FTP logs. |
| FTP Bit Depth1 bit8 bit* | Enable the Text/Photo mode to have smaller file sizes by using 1-bit image.Note: This menu item appears only when Color is set to Gray. |
| Custom Job ScanningOff*On | Turn on scanning of custom jobs by default.Note: This menu item appears only when a hard disk is installed. |
| Scan PreviewOffOn* | Show a preview of the scan on the display.Note: This menu item appears only when a hard disk is installed. |
| Allow Save as ShortcutOffOn* | Save custom FTP settings as shortcuts. |
| Note: An asterisk (*) next to a value indicates the factory default setting. | |
USB Drive
Flash Drive Scan
| Menu item Description | |
| FormatPDF (.pdf)*TIFF (.tif)JPEG (.jpg)XPS (.xps) | Specify the file format for the scanned image.Note: The settings may vary depending on your printer model. |
| Global OCR SettingsRecognized LanguagesAuto RotateDespeckleAuto Contrast Enhance | Configure the settings for optical character recognition (OCR).Note: This menu appears only if you have purchased and installed an OCR solution. |
| PDF SettingsPDF Version1.31.41.5*1.61.7Archival VersionA-1a*A-1bSecureOff*OnArchival (PDF/A)Off*On | Set the PDF format for the scanned image. |
| Content TypeTextText/Photo*GraphicsPhoto | Improve the output result based on the content of the original document. |
| Note: An asterisk (*) next to a value indicates the factory default setting. | |
| Content SourceBlack and White LaserColor Laser*InkjetPhoto/FilmMagazineNewspaperPressOther | Improve the output result based on the source of the original document. |
| ColorBlack and WhiteGrayColor*Auto | Specify the color when scanning an image. |
| Resolution75 dpi150 dpi*200 dpi300 dpi400 dpi600 dpi | Set the resolution of the scanned image. |
| Darkness1-9 (5*) | Adjust the darkness of the scanned image. |
| OrientationPortrait*Landscape | Specify the orientation of text and graphics on the page. |
| Original Size[List of paper sizes] | Set the paper size of the original document.Notes:Letter is the U.S. factory default setting. A4 is the international factory default setting.This menu item may vary depending on your printer model. |
| SidesOff*Long edgeShort edge | Specify the page orientation of text and graphics when scanning a two-sided document. |
| File Name Specify the file name of | the scanned image. |
| Note: An asterisk (*) next to a value indicates the factory default setting. | |
Advanced Imaging
| Menu item Description | |
| Color Balance Adjust the amount of toner used for each color. | |
| Color DropoutColor DropoutNone*RedGreenBlueDefault Red Threshold0-255 (128*)Default Green Threshold0-255 (128*)Default Blue Threshold0-255 (128*) | Specify which color to drop during scanning, and adjust the dropout setting for that color. |
| Auto Color DetectColor Sensitivity1-9 (5*)Area Sensitivity1-9 (5*) | Set the amount of color that the printer detects from the original document.Note: This menu item appears only when Color is set to Auto. |
| JPEG QualityBest for content*5-95 | Set the quality of a JPEG-format image.Notes:5 reduces the file size, but lessens the image quality.90 provides the best image quality, but produces a large file size. |
| ContrastBest for content*012345 | Specify the contrast of the output. |
| Background RemovalBackground DetectionContent-based*FixedLevel-4 to 4 (0*) | Adjust the amount of background visible on a scanned image.Note: If you want to remove the background color from the original document, then set Background Detection to Content-based. If you want to remove image noise from a photo, then set Background Detection to Fixed. |
| Mirror ImageOff*On | Create a mirror image of the original document. |
| Note: An asterisk (*) next to a value indicates the factory default setting. | |
| Negative ImageOff*On | Create a negative image of the original document. |
| Shadow Detail-4 to 4 (0*) | Adjust the amount of shadow detail visible on a scanned image. |
| Scan Edge to EdgeOff*On | Allow edge-to-edge scanning of the original document. |
| Sharpness1–5 (3*) | Adjust the sharpness of a scanned image. |
| Temperature-4 to 4 (0*) | Specify whether to generate a cooler or warmer output. |
| Blank PagesBlank Page RemovalBlank Page Sensitivity | Specify whether to include blank pages. |
| Note: An asterisk (*) next to a value indicates the factory default setting. | |
Admin Controls
| Menu item Description | |
| Text Default5–95 (75*) | Set the quality of text on a scanned image. |
| Text/Photo Default5–95 (75*) | Set the quality of text or photo on a scanned image. |
| Photo Default5–95 (75*) | Set the quality of a photo on a scanned image. |
| Use Multi-Page TIFFOn*Off | Choose between single- and multiple-page TIFF files. |
| TIFF CompressionLZW*JPEG | Set the compression for TIFF files. |
| Scan Bit Depth1 bit8 bit* | Enable the Text/Photo mode to have smaller file sizes by using 1-bit image.Note: This menu item appears only when Color is set to Gray. |
| Custom Job ScanningOff*On | Turn on scanning of custom jobs by default.Note: This menu item appears only when a hard disk is installed. |
| Note: An asterisk (*) next to a value indicates the factory default setting. | |
| Scan PreviewOffOn* | Show a preview of the scan on the display.Note: This menu item appears only when a hard disk is installed. |
| Note: An asterisk (*) next to a value indicates the factory default setting. | |
Flash Drive Print
| Menu item Description | |
| Number of Copies1–9999 (1*) | Set the number of copies. |
| Paper SourceTray [x] (1*)Multipurpose FeederManual PaperManual Envelope | Set the paper source for the print job.Note:The multipurpose feeder is available only in some printer models. |
| ColorOffOn* | Print the output in color. |
| Collate(1,1,1) (2,2,2)(1,2,3) (1,2,3)* | Print multiple copies in sequence. |
| Sides1-Sided*2-Sided | Specify whether to print on one side or two sides of the paper. |
| Flip StyleLong Edge*Short Edge | Determine which side of the paper (long edge or short edge) is bound when performing two-sided printing.Note:Depending on the option selected, the printer automatically offsets each printed information of the page to bind the job correctly. |
| Pages per SideOff*2 pages per side3 pages per side4 pages per side6 pages per side9 pages per side12 pages per side16 pages per side | Print multiple page images on one side of a sheet of paper. |
| Note:An asterisk (*) next to a value indicates the factory default setting. | |
| Pages per Side OrderingHorizontal*Reverse HorizontalReverse VerticalVertical | Specify the positioning of multiple page images when using Pages per Side.Note:The positioning depends on the number of page images and their page orientation. |
| Pages per Side OrientationAuto*LandscapePortrait | Specify the orientation of a multiple-page document when using Pages per Side. |
| Pages per Side BorderNone*Solid | Print a border around each page image when using Pages per Side. |
| Separator SheetsOff*Between CopiesBetween JobsBetween Pages | Specify whether to insert blank separator sheets when printing. |
| Separator Sheet SourceTray [x] (*)Multipurpose Feeder | Specify the paper source for the separator sheet.Note:The multipurpose feeder is available only in some printer models. |
| Blank PagesDo Not Print*Print | Specify whether to print blank pages in a print job. |
| Note: An asterisk (*) next to a value indicates the factory default setting. | |
Network/Ports
Network Overview
| Menu item Description | |
| Active AdapterAuto*Standard Network | Specify how a network is connected. |
| Network Status Show the connection status of the printer network. | |
| Display Network Status on PrinterOn*Off | Show the network status on the display. |
| Speed, Duplex Show the speed of the currently active network card. | |
| Note: An asterisk (*) next to a value indicates the factory default setting. | |
| IPv4 Show the IPv4 address. | |
| All IPv6 Addresses Show all IPv6 addresses. | |
| Reset Print Server Reset all active network connections to the printer.Note: This setting removes all network configuration settings. | |
| Network Job TimeoutOffOn* (90 seconds) | Set the time before the printer cancels a network print job. |
| Banner PageOff*On | Print a banner page. |
| Scan to PC Port Range9751:12000* | Specify a valid port range for printers that are behind a port blocking firewall. |
| Note: An asterisk (*) next to a value indicates the factory default setting. | |
Wireless
Note: This menu is available only in printers connected to a Wi-Fi network or printers that have a wireless network adapter.
| Menu item Description | |
| Setup On Printer PanelChoose NetworkAdd Wi-Fi NetworkNetwork NameNetwork ModeInfrastructureWireless Security ModeDisabled*WEPWPA2/WPA - PersonalWPA2 - Personal802.1x - RADIUS | Configure the Wi-Fi connection using the control panel.Note: 802.1x - RADIUS can be configured only from the Embedded Web Server. |
| Wi-Fi Protected SetupWPS Auto DetectOffOn*Start Push Button MethodStart PIN Method | Establish a Wi-Fi network and enable network security.Notes:WPS Auto Detect appears only when the Wireless Security Mode is set to WEP.Start Push-Button Method connects the printer to a Wi-Fi network when buttons on both the printer and the access point (wireless router) are pressed within a given time.Start PIN Method connects the printer to a Wi-Fi network when a PIN on the printer is entered into the wireless settings of the access point. |
| Network ModeBSS TypeInfrastructure* | Specify the network mode. |
| Enable Wi-Fi DirectOnOff* | Enable Wi-Fi Direct-capable devices to connect directly to the printer. |
| Compatibility802.11b/g/n (2.4GHz)*802.11a/b/g/n/ac (2.4GHz/5GHz)802.11a/n/ac (5GHz) | Specify the standard for the Wi-Fi network.Note: 802.11a/b/g/n/ac (2.4GHz/5GHz) and 802.11a/n/ac (5GHz) only appear when a Wi-Fi option is installed. |
| Wireless Security ModeDisabled*WEPWPA2/WPA-PersonalWPA2-Personal802.1x - RADIUS | Set the security mode for connecting the printer to Wi-Fi devices.Note: 802.1x - RADIUS can be configured only from the Embedded Web Server. |
| WEP Authentication ModeAuto*OpenShared | Set the type of Wireless Encryption Protocol (WEP) for the printer.Note: This menu item appears only when the Wireless Security Mode is set to WEP. |
| Set WEP Key | Specify a WEP password for secure Wi-Fi connection. |
| WPA2/WPA PersonalAES | Enable Wi-Fi security through Wi-Fi Protected Access (WPA).Note: This menu item appears only when the Wireless Security Mode is set to WPA2/WPA-Personal. |
| Set Pre-Shared Key | Set the password for secure Wi-Fi connection. |
| WPA2-PersonalAES | Enable Wi-Fi security through WPA2.Note: This menu item appears only when the Wireless Security Mode is set to WPA2-Personal. |
| 802.1x Encryption ModeWPA+WPA2* | Enable Wi-Fi security through 802.1x standard.Notes:This menu item appears only when the Wireless Security Mode is set to 802.1x - RADIUS.802.1x - RADIUS can be configured only from the Embedded Web Server. |
| IPv4Enable DHCPOn*OffSet Static IP AddressIP AddressNetmaskGateway | Enable and configure IPv4 settings in the printer. |
| IPv6Enable IPv6On*OffEnable DHCPv6OnOff*Stateless Address AutoconfigurationOn*OffDNS Server AddressManually Assigned IPv6 AddressManually Assigned IPv6 RouterAddress PrefixAll IPv6 AddressesAll IPv6 Router Addresses | Enable and configure IPv6 settings in the printer. |
| Network AddressUAA LAA | View the network addresses. |
| PCL SmartSwitchOffOn* | Set the printer to switch automatically to PCL emulation when a print job requires it, regardless of the default printer language.Note:If PCL SmartSwitch is off, then the printer does not examine incoming data and uses the default printer language specified in the Setup menu. |
| PS SmartSwitchOffOn* | Set the printer to switch automatically to PS emulation when a print job requires it, regardless of the default printer language.Note:If PS SmartSwitch is off, then the printer does not examine incoming data and uses the default printer language specified in the Setup menu. |
| Job BufferingOnOff* | Temporarily store print jobs in the printer hard disk before printing.Note:This menu item appears only when a hard disk is installed. |
| Mac Binary PSAuto*OnOff | Set the printer to process Macintosh binary PostScript print jobs.Notes:On processes raw binary PostScript print jobs.Off filters print jobs using the standard protocol. |
Ethernet
| Menu item Description | |
| Network Speed Show the speed of | an active network adapter. |
| IPv4Enable DHCPOn*Off | Enable Dynamic Host Configuration Protocol (DHCP).Note: DHCP is a standard protocol that allows a server to dynamically distribute IP addressing and configuration information to clients. |
| IPv4Set Static IP AddressIP AddressNetmaskGateway | Set the static IP address of your printer. |
| Network AddressUAA LAA | Show the printer Media Access Control (MAC) addresses: Locally Administered Address (LAA) and Universally Administered Address (UAA).Note: You can change the printer LAA manually. |
| PCL SmartSwitchOffOn* | Set the printer to switch automatically to PCL emulation when a print job requires it, regardless of the default printer language.Note: If PCL SmartSwitch is off, then the printer does not examine incoming data and uses the default printer language specified in the Setup menu. |
| PS SmartSwitchOffOn* | Set the printer to switch automatically to PS emulation when a print job requires it, regardless of the default printer language.Note: If PS SmartSwitch is off, then the printer does not examine incoming data and uses the default printer language specified in the Setup menu. |
| Job BufferingOffOn* | Temporarily store jobs on the printer hard disk before printing.Notes:This menu item appears only when a hard disk is installed.This menu item appears only in some printer models. |
| Mac Binary PSAuto*OnOff | Set the printer to process Macintosh binary PostScript print jobs.Notes:On processes raw binary PostScript print jobs.Off filters print jobs using the standard protocol. |
| Note: An asterisk (*) next to a value indicates the factory default setting. | |
| Energy Efficient EthernetOffOn* | Reduce power consumption when the printer does not receive data from the Ethernet network. |
| Note: An asterisk (*) next to a value indicates the factory default setting. | |
TCP/IP
Note: This menu appears only in network printers or printers attached to print servers.
| Menu item Description | |
| Set Hostname Set the current TCP/IP host name. | |
| Domain Name Set the domain name. Note: This menu item appears only in some printer models. | |
| Allow DHCP/BOOTP to update NTP server Off On* | Allow the DHCP and BOOTP clients to update the NTP settings of the printer. |
| Zero Configuration Name Specify a service name for the zero configuration network. Note: This menu item appears only in some printer models. | |
| Enable Auto IP Off On* | Assign an IP address automatically. |
| DNS Server Address Specify the current Domain Name System (DNS) server address. | |
| Backup DNS Server Address Specify the backup DNS server addresses. | |
| Backup DNS Server Address 2 | |
| Backup DNS Server Address 3 | |
| Domain Search Order | Specify a list of domain names to locate the printer and its resources that reside in different domains on the network. Note: This menu item appears only in some printer models. |
| Enable DDNS Off On* | Update the Dynamic DNS settings. |
| DDNS TTL Specify the current DDNS settings. | |
| Default TTL | |
| DDNS Refresh Time | |
| Enable mDNS Off On* | Update multicast DNS settings. |
| Note: An asterisk (*) next to a value indicates the factory default setting. | |
| WINS Server Address | Specify a server address for Windows Internet Name Service (WINS). |
| Enable BOOTPOff*On | Allow the BOOTP to assign a printer IP address. |
| Restricted Server List Specify an | IP address for the TCP connections.Notes:Use a comma to separate each IP address.You can add up to 50 IP addresses. |
| Restricted Server List OptionsBlock All Ports*Block Printing OnlyBlock Printing and HTTP Only | Specify how the IP addresses in the list can access the printer functionality. |
| MTU | Specify a maximum transmission unit (MTU) parameter for the TCP connections. |
| Raw Print Port1-65535 (9100*) | Specify a raw port number for printers connected on a network. |
| Outbound Traffic Maximum SpeedOff*On | Enable the printer maximum transfer rate. |
| Enhanced TLS SecurityOff*On | Enhance printer privacy and data integrity. |
| Note: An asterisk (*) next to a value indicates the factory default setting. | |
SNMP
Note: This menu appears only in network printers or printers that are attached to print servers.
| Menu item Description | |
| SNMP Versions 1 and 2cEnabledOffOn*Allow SNMP SetOffOn*Enable PPM MIBOffOn*SNMP Community | Configure Simple Network Management Protocol (SNMP) versions 1 and 2c to install print drivers and applications. |
| Note: An asterisk (*) next to a value indicates the factory default setting. | |
| SNMP Version 3EnabledOffOn*Set Read/Write CredentialsUser NamePasswordSet Read-only CredentialsUser NamePasswordAuthentication HashMD5SHA1*Minimum Authentication LevelNo Authentication, No PrivacyAuthentication, No PrivacyAuthentication, Privacy*Privacy AlgorithmDESAES-128* | Configure SNMP version 3 to install and update the printer security. |
| Note: An asterisk (*) next to a value indicates the factory default setting. | |
IPSec
Note: This menu appears only in network printers or printers that are attached to print servers.
| Menu item Description | |
| Enable IPSecOff*On | Enable Internet Protocol Security (IPSec). |
| Base ConfigurationDefault*CompatibilitySecure | Set the IPSec base configuration.Note: This menu item appears only when Enable IPSec is set to On. |
| IPSec Device Certificate Specify an IPSec certificate | Note: This menu item appears only when Base Configuration is set to Compatibility. |
| Note: An asterisk (*) next to a value indicates the factory default setting. | |
| Pre-Shared Key Authenticated ConnectionsHost [x]AddressKey | Configure the authenticated connections of the printer.Note: These menu items appear only when Enable IPSec is set to On. |
| Certificate Authenticated ConnectionsHost [x] Address[/subnet]Address[/subnet] | |
| Note: An asterisk (*) next to a value indicates the factory default setting. | |
802.1x
Note: This menu appears only in network printers or printers that are attached to print servers.
| Menu item Description | |
| ActiveOff*On | Let the printer join networks that require authentication before allowing access.Note: To configure the settings of this menu item, access the Embedded Web Server. |
| Note: An asterisk (*) next to a value indicates the factory default setting. | |
LPD Configuration
Note: This menu appears only in network printers or printers that are attached to print servers.
| Menu item Description | |
| LPD Timeout0–65535 seconds (90*) | Set the time-out value to stop the Line Printer Daemon (LPD) server from waiting indefinitely for hung or invalid print jobs. |
| LPD Banner PageOff*On | Print a banner page for all LPD print jobs.Note:A banner page is the first page of a print job used as a separator of print jobs and to identify the originator of the print job request. |
| LPD Trailer PageOff*On | Print a trailer page for all LPD print jobs.Note:A trailer page is the last page of a print job. |
| LPD Carriage Return ConversionOff*On | Enable carriage return conversion.Note:Carriage return is a mechanism that commands the printer to move the position of the cursor to the first position on the same line. |
| Note:An asterisk (*) next to a value indicates the factory default setting. | |
HTTP/FTP Settings
Note: This menu appears only in network printers or printers attached to print servers.
| Menu item Description | |
| Enable HTTP ServerOffOn* | Access the Embedded Web Server to monitor and manage the printer. |
| Enable HTTPSOffOn* | Configure the Hypertext Transfer Protocol Secure (HTTPS) settings. |
| Enable FTP/TFTPOffOn* | Send files using FTP. |
| Local Domains | Specify domain names for HTTP and FTP servers.Note: This menu item appears only in some printer models. |
| HTTP Proxy IP Address Configure the HTTP and FTP server settings. | |
| FTP Proxy IP Address | Note: These menu items appear only in some printer models. |
| HTTP Default IP Port1-65535 (80*) | |
| HTTPS Device Certificate | |
| FTP Default IP Port1-65535 (21*) | |
| Timeout for HTTP/FTP Requests1-299 (30*) | Specify the amount of time before the server connection stops. |
| Retries for HTTP/FTP Requests1-299 (3*) | Set the number of retries to connect to the HTTP/FTP server. |
| Note: An asterisk (*) next to a value indicates the factory default setting. | |
ThinPrint
| Menu item Description | |
| Enable ThinPrintOffOn* | Print using ThinPrint. |
| Port Number4000–4999 (4000*) | Set the port number for the ThinPrint server. |
| Bandwidth (bits/sec)100–1000000 (0*) | Set the speed to transmit data in a ThinPrint environment. |
| Note: An asterisk (*) next to a value indicates the factory default setting. | |
| Packet Size (kbytes)0–64000 (0*) | Set the packet size for data transmission. |
| Note: An asterisk (*) next to a value indicates the factory default setting. | |
USB
| Menu item Description | |
| PCL SmartSwitchOffOn* | Set the printer to switch to PCL emulation when a print job received through a USB port requires it, regardless of the default printer language.Note:If PCL SmartSwitch is off, then the printer does not examine incoming data and uses the default printer language specified in the Setup menu. |
| PS SmartSwitchOffOn* | Set the printer to switch to PS emulation when a print job received through a USB port requires it, regardless of the default printer language.Note:If PS SmartSwitch is off, then the printer does not examine incoming data and uses the default printer language specified in the Setup menu. |
| Job BufferingOff*On | Temporarily store jobs on the printer hard disk before printing.Note:This menu item appears only when a hard disk installed. |
| Mac Binary PSOnAuto*Off | Set the printer to process Macintosh binary PostScript print jobs.Notes:When set to On, the printer processes raw binary PostScript print jobs from computers using the Macintosh operating system.When set to Auto, the printer processes print jobs from computers using either Windows or Macintosh operating systemsWhen set to Off, the printer filters PostScript print jobs using the standard protocol. |
| Enable USB PortOffOn* | Enable the standard USB port. |
| Note:An asterisk (*) next to a value indicates the factory default setting. | |
Google Cloud Print
Note: This feature is available only in some printer units.
| Menu item Description | |
| RegistrationRegister | Register the printer to the Google Cloud Print server. |
| Note: An asterisk (*) next to a value indicates the factory default setting. | |
| OptionsEnable Google Cloud PrintOffOn* | Print directly from your Google account. |
| OptionsEnable Local DiscoveryOffOn* | Allow the registered user and other users on the same subnet to send jobs to the printer locally. |
| OptionsEnable SSL Peer VerificationOffOn* | Verify authenticity of the peer certificate to connect to your Google account. |
| OptionsAlways Print As ImageOff*On | Set the printer to process PDF files as an image for faster printing. |
| Note: An asterisk (*) next to a value indicates the factory default setting. | |
Wi-Fi Direct
Note: This menu appears only when a direct Wi-Fi network is the active network.
| Menu item Description | |
| SSID | Specify the service set identifier (SSID) of the Wi-Fi network. |
| Set Preshared Key | Set the preshared key (PSK) to authenticate and validate users on a Wi-Fi connection. |
| Show PSK on Setup PageOffOn* | Show the PSK on the Network Setup Page. |
| Group Owner IP Address | Specify the IP address of the group owner. |
| Auto-Accept Push Button RequestsOff*On | Accept requests to connect to the network automatically.Note: Accepting clients automatically is not secured. |
| Note: An asterisk (*) next to a value indicates the factory default setting. | |
Security
Login Methods
Manage Permissions
| Menu item Description | |
| Function AccessAccess Address Book in AppsModify Address BookManage ShortcutsCreate ProfilesManage BookmarksFlash Drive PrintFlash Drive Color PrintingFlash Drive ScanCopy FunctionCopy Color PrintingColor DropoutE-mail FunctionFax FunctionFTP FunctionRelease Held FaxesHeld Jobs AccessUser ProfilesCancel Jobs at the DeviceChange LanguageInternet Printing Protocol (IPP)Initiate Scans RemotelyB/W PrintColor Print | Control access to the printer functions. |
| Administrative MenusSecurity MenuNetwork/Ports MenuPaper MenuReports MenuFunction Configuration MenusSupplies MenuOption Card MenuSE MenuDevice Menu | Control access to the printer menu settings. |
| Device ManagementRemote ManagementFirmware UpdatesApps ConfigurationOperator Panel LockImport/Export All SettingsOut of Service Erase | Control access to the printer management options. |
| AppsNew AppsCard CopyScan CenterScan Center Custom 1Scan Center Custom 2Scan Center Custom 3Scan Center Custom 4Scan Center Custom 5Scan Center Custom 6Scan Center Custom 7Scan Center Custom 8Scan Center Custom 9Scan Center Custom 10Forms and Favorites | Control access to printer applications. |
Local Accounts
| Menu item Description | |
| Manage Groups/PermissionsAdd GroupImport Access ControlsFunction AccessAdministrative MenusDevice ManagementAppsAll UsersImport Access ControlsFunction AccessAdministrative MenusDevice ManagementAppsAdmin | Control group or user access to the printer functions, applications, and security settings. |
| Add UserUser Name/PasswordUser NamePasswordPIN | Create local accounts to manage access to the printer functions. |
| User Name/Password AccountsAdd User | |
| User Name AccountsAdd User | |
| Password AccountsAdd User | |
| PIN AccountsAdd User |
Schedule USB Devices
| Menu item Description | |
| SchedulesAdd New Schedule | Schedule access to the USB ports. |
Security Audit Log
| Menu item Description | |
| Enable AuditOff*On | Record the events in the secure audit log and remote syslog. |
| Enable Remote SyslogOff*On | Send audit logs to a remote server. |
| Remote Syslog Server Specify the remote syslog server. | |
| Remote Syslog Port1–65535 (514*) | Specify the remote syslog port. |
| Remote Syslog MethodNormal UDP*Stunnel | Specify a syslog method to transmit logged events to a remote server. |
| Note: An asterisk (*) next to a value indicates the factory default setting. | |
| Remote Syslog Facility0 - Kernel Messages1 - User-Level Messages2 - Mail System3 - System Daemons4 - Security/Authorization Messages*5 - Messages Generated Internally by Syslogs6 - Line Printer Subsystem7 - Network News Subsystem8 - UUCP Subsystem9 - Clock Daemon10 - Security/Authorization Messages11 - FTP Daemon12 - NTP Subsystem13 - Log Audit14 - Log Alert15 - Clock Daemon16 - Local Use 0 (local0)17- Local Use 1 (local1)18 - Local Use 2 (local2)19 - Local Use 3 (local3)20 - Local Use 4 (local4)21 - Local Use 5 (local5)22 - Local Use 6 (local6)23 - Local Use 7 (local7) | Specify a facility code that the printer uses when sending log events to a remote server. |
| Severity of Events to Log0 - Emergency1 - Alert2 - Critical3 - Error4 - Warning*5 - Notice6 - Informational7 - Debug | Specify the priority level cutoff for logging messages and events. |
| Remote Syslog Non-Logged EventsOff*On | Send all events, regardless of severity level, to the remote server. |
| Admin's E-mail Address | Send e-mail notification of logged events to the administrator. |
| Note: An asterisk (*) next to a value indicates the factory default setting. | |
| E-mail Log Cleared AlertOff*On | Send e-mail notification to the administrator when a log entry is deleted. |
| E-mail Log Wrapped AlertOff*On | Send e-mail notification to the administrator when the log becomes full and begins to overwrite the oldest entries. |
| Log Full BehaviorWrap Over Older Entries*E-mail Log Then Delete All Entries | Resolve log storage issues when the log fills its allotted memory. |
| E-mail % Full AlertOff*On | Send e-mail notification to the administrator when the log fills its allotted memory. |
| % Full Alert Level1-99 (90*) | |
| E-mail Log Exported AlertOff*On | Send e-mail notification to the administrator when a log is exported. |
| E-mail Log Settings Changed AlertOff*On | Send e-mail notification to the administrator when Enable Audit is set. |
| Log Line EndingsLF (\n)*CR (\r)CRLF (\r\n) | Specify how the log file terminates the end of each line. |
| Digitally Sign ExportsOff*On | Add a digital signature to each exported log file. |
| Clear Log Delete all audit logs. | |
| Export LogSyslog (RFC 5424)Syslog (RFC 3164)CSV | Export a security log to a flash drive. |
| Note: An asterisk (*) next to a value indicates the factory default setting. | |
Login Restrictions
| Menu item Description | |
| Login failures1–10 (3*) | Specify the number of failed login attempts before the user gets locked out. |
| Failure time frame1–60 minutes (5*) | Specify the time frame between failed login attempts before the user gets locked out. |
| Lockout time1–60 minutes (5*) | Specify the lockout duration. |
| Web Login Timeout1–120 minutes (10*) | Specify the delay for a remote login before the user is logged off automatically. |
| Note: An asterisk (*) next to a value indicates the factory default setting. | |
Confidential Print Setup
| Menu item Description | |
| Max Invalid PIN2–10 | Set the number of times an invalid PIN can be entered.Notes:A value of zero turns off this setting.When the limit is reached, the print jobs for that user name and PIN are deleted.This menu item appears only when a hard disk is installed. |
| Confidential Job ExpirationOff*1 Hour4 Hours24 Hours1 Week | Set the expiration time for confidential print jobs.Notes:If this menu item is changed while confidential print jobs reside in the printer memory or hard disk, then the expiration time for those print jobs does not change to the new default value.If the printer is turned off, then all confidential jobs held in the printer memory are deleted. |
| Repeat Job ExpirationOff*1 Hour4 Hours24 Hours1 Week | Set the expiration time for a print job that you want to repeat. |
| Verify Job ExpirationOff*1 Hour4 Hours24 Hours1 Week | Set the expiration time that the printer prints a copy for the user to examine its quality, before printing the remaining copies. |
| Note: An asterisk (*) next to a value indicates the factory default setting. | |
| Reserve Job ExpirationOff*1 Hour4 Hours24 Hours1 Week | Set the expiration time that the printer stores print jobs for printing later. |
| Require All Jobs to be HeldOff*On | Set the printer to hold all print jobs. |
| Keep duplicate documentsOff*On | Set the printer to print other documents with the same file name without overwriting any of the print jobs. |
| Note: An asterisk (*) next to a value indicates the factory default setting. | |
Disk Encryption
Note: This menu appears only when a printer hard disk is installed.
| Menu item Description | |
| StatusEnabledDisabled | Determine whether Disk Encryption is enabled. |
| Start encryption | Prevent the loss of sensitive data in case the printer or its hard disk is stolen.Note: Enabling disk encryption erases all contents in the hard disk. If necessary, back up important data from the printer before starting the encryption. |
Erase Temporary Data Files
| Menu item Description | |
| Stored in onboard memoryOff*On | Delete all files stored on the printer memory. |
| Stored on hard disk1 Pass Erase*3 Pass Erase7 Pass Erase | Delete all files stored on the printer hard disk. |
| Note: An asterisk (*) next to a value indicates the factory default setting. | |
Solutions LDAP Settings
| Use To | |
| Follow LDAP ReferralsOff*On | Search the different servers in the domain for the logged-in user account. |
| LDAP Certificate VerificationNo*Yes | Enable verification of LDAP certificates. |
Mobile Services Management
Note: This feature is available only in some printer units.
| Use To | |
| AirPrint | Enable functions in the AirPrint software feature. |
| Scan | |
| Fax |
Miscellaneous
| Menu item Description | |
| Protected FeaturesShow*Hide | Show all the features that Function Access Control (FAC) protects regardless of the security permission that the user has.Note:FAC manages access to specific menus and functions or disables them entirely. |
| Print PermissionOff*On | Let the user log in before printing. |
| Default Print Permission Login Set | the default login for Print Permission. |
| Security Reset JumperEnable “Guest” access*No Effect | Specify the effect of using the security reset jumper.Notes:The jumper is located beside a lock icon on the controller board.Enable “Guest” access provides full access control to users who are not logged in.No Effect means that the reset has no effect on the printer security configuration. |
| Minimum Password Length0–32 (0*) | Specify the minimum characters that are allowed for a password. |
| Note:An asterisk (*) next to a value indicates the factory default setting. | |
Reports
Menu Settings Page
| Menu item Description | |
| Menu Settings Page | Print a report that contains the printer preferences, settings, and configurations. |
Device
| Menu item Description | |
| Device Information Print a report that contains information about the printer. | |
| Device Statistics | Print a report about printer usage and supply status. |
| Profile List | Print a list of profiles that are stored in the printer. |
| Asset Report Print a report that contains the printer serial number and model name. | |
| Menu item Description | |
| Print FontsPCL FontsPS Fonts | Print samples and information about the fonts that are available in each printer language. |
| Print Directory | Print the resources that are stored in the flash drive or printer hard disk.Note: This menu item appears only when a flash drive or printer hard disk is installed. |
Shortcuts
| Menu item Description | |
| All Shortcuts Print a report that lists the shortcuts that are stored in the printer. | |
| Fax Shortcuts | |
| Copy Shortcuts | |
| E-mail Shortcuts | |
| FTP Shortcuts | |
| Network Folder Shortcuts | |
Fax
| Menu item Description | |
| Fax Job Log Print a report about the last 200 completed fax jobs. Note: This menu item appears only when Enable Job Log is set to On. | |
| Fax Call Log Print a report about the last 100 attempted, received, and blocked calls. Note: This menu item appears only when Enable Job Log is set to On. | |
Network
| Menu item Description | |
| Network Setup Page | Print a page that shows the configured network and wireless settings on the printer.Note: This menu item appears only in network printers or printers connected to print servers. |
Help
| Menu item Description | |
| Print All Guides Prints all the guides | |
| Color Quality Guide Provides information about solving color quality issues | |
| Connection Guide | Provides information about connecting the printer locally (USB) or to a network |
| Copy Guide Provides information about making a copy and configuring the settings | |
| E-mail Guide | Provides information about sending an e-mail and configuring the settings |
| Fax Guide Provides information about sending a fax and configuring the settings | |
| Scan Guide Provides information about scanning a document and configuring the settings | |
| Information Guide Provides information about the printer | |
| Media Guide Provides information about loading paper and specialty media | |
| Moving Guide Provides information about moving, locating, or shipping the printer | |
| Print Quality Guide Provides information about solving print quality issues | |
| Supplies Guide | Provides information about ordering supplies |
Troubleshooting
Troubleshooting
| Menu item Description | |
| Print Quality Test Pages | Print sample pages to identify and correct print quality defects. |
| Cleaning the Scanner | Print instructions on how to clean the scanner. |
Printing the Menu Settings Page
From the control panel, navigate to:
Settings > Reports > Menu Settings Page
For non-touch-screen printer models, press OK to navigate through the settings.
Securing the printer
Note: The hard disk is supported only in some printer models.
Locating the security slot
The printer is equipped with a security lock feature. Attach a security lock compatible with most laptop computers in the location shown to secure the printer in place.

natural_image
Stacked printer image showing internal components and a magnified inset of a door handle (no text or symbols visible)Erasing printer memory
To erase volatile memory or buffered data in your printer, turn off the printer.
To erase non-volatile memory or individual settings, device and network settings, security settings, and embedded solutions, do the following:
1 From the control panel, navigate to:
Settings > Device > Maintenance > Out of Service Erase > Sanitize all information on nonvolatile memory
For non-touch-screen printer models, press OK to navigate through the settings.
2 Depending on your printer model, select ERASE or Continue.
3 Follow the instructions on the display.
Erasing printer hard disk memory
1 From the home screen, touch Settings > Device > Maintenance > Out of Service Erase.
2 Select the Sanitize all information on hard disk check box, and then touch ERASE.
3 Follow the instructions on the display.
Note: This process can take from several minutes to more than an hour, making the printer unavailable for other tasks.
Encrypting the printer hard disk
This process erases all contents in the hard disk. If necessary, back up important data from the printer before starting the encryption.
1 From the home screen, touch Settings > Security > Disk Encryption > Start encryption.
2 Follow the instructions on the display.
Notes:
- To avoid loss of data, do not turn off the printer during the encryption process.
- This process can take from several minutes to more than an hour, making the printer unavailable for other tasks.
• After encryption, the printer automatically restarts.
Restoring factory default settings
1 From the control panel, navigate to:
Settings > Device > Restore Factory Defaults
For non-touch-screen printer models, press OK to navigate through the settings.
2 In the Restore Settings menu, select the settings that you want to restore.
3 Select RESTORE.
4 Follow the instructions on the display.
Statement of Volatility
| Type of memory Description | |
| Volatile memory The printer uses standard random access | memory (RAM)to buffer temporarily user data during simple print and copy jobs. |
| Non-volatile memory The printer may use two forms of non-volatile memory:EEPROM and NAND (flash memory). Both types are used to store the operating system, printer settings, network information, scanner and bookmark settings, and embedded solutions. | |
| Hard disk memory Some printers may have a hard disk drive installed. The printer hard disk is designed for printer-specific functionality. The hard disk lets the printer retain buffered user data from complex print jobs, form data, and font data. | |
Erase the content of any installed printer memory in the following circumstances:
•The printer is decommissioned.
•The printer hard disk is replaced.
•The printer is moved to a different department or location.
- The printer is serviced by someone from outside your organization.
- The printer is removed from your premises for service.
•The printer is sold to another organization.
Disposing of a printer hard disk
- Degaussing—Flushes the hard disk with a magnetic field that erases stored data
- Crushing—Physically compresses the hard disk to break component parts and render them unreadable
- Milling—Physically shreds the hard disk into small metal bits
Note: To guarantee that all data are completely erased, destroy physically each hard disk where data is stored.
Maintaining the printer
Warning—Potential Damage: Failure to maintain optimum printer performance, or to replace parts and supplies, may cause damage to your printer.
Adjusting the speaker volume
Adjusting the default internal speaker volume
Note: The speaker is available only in some printer models.
1 From the control panel, touch Settings > Device > Preferences > Audio Feedback.
2 Adjust the volume.
Notes:
- If Quiet Mode is enabled, then audible alerts are turned off. This setting also slows the printer performance.
- The volume resets to the default value after the session is logged out or when the printer wakes from Sleep or Hibernate mode.
Adjusting the default headphone volume
Note: The headphone jack is available only in some printer models.
1 From the control panel, navigate to:
Settings > Device > Accessibility
2 Adjust Headphone Volume.
Note: The volume resets to the default value after the session is logged out or when the printer wakes from Sleep or Hibernate mode.
Configuring the fax speaker settings
Note: This feature is available only in some printer models.
1 From the control panel, navigate to:
Settings > Fax > Analog Fax Setup > Speaker Settings
For non-touch-screen printer models, press OK to navigate through the settings.
2 Do the following:
- Set the Speaker Mode to Always On.
- Set the Speaker Volume to High.
- Activate the Ringer Volume.
Networking
Connecting the printer to a Wi-Fi network
1 From the printer control panel, navigate to:
Settings > Network/Ports > Wireless
For non-touch-screen printer models, press OK to navigate through the settings.
2 Select Setup On Printer Panel and then follow the instructions on the display.
Note: For Wi-Fi-network-ready printer models, a prompt for Wi-Fi network setup appears during initial setup.
Connecting the printer to a wireless network using Wi-Fi Protected Setup (WPS)
Before you begin, make sure that:
- The access point (wireless router) is WPS-certified or WPS-compatible. For more information, see the documentation that came with your access point.
- A wireless network adapter is installed in your printer. For more information, see the instructions that came with the adapter.
Using the Push Button method
1 From the control panel, navigate to:
Settings > Network/Ports > Wireless > Wi-Fi Protected Setup > Start Push Button Method
For non-touch-screen printer models, press OK to navigate through the settings.
2 Follow the instructions on the display.
Using the personal identification number (PIN) method
1 From the control panel, navigate to:
Settings > Network/Ports > Wireless > Wi-Fi Protected Setup > Start PIN Method
For non-touch-screen printer models, press OK to navigate through the settings.
2 Copy the eight-digit WPS PIN.
3 Open a Web browser, and then type the IP address of your access point in the address field.
Notes:
- View the printer IP address on the printer home screen. The IP address appears as four sets of numbers separated by periods, such as 123.123.123.123.
- If you are using a proxy server, then temporarily disable it to load the web page correctly.
4 Access the WPS settings. For more information, see the documentation that came with your access point.
5 Enter the eight-digit PIN, and then save the changes.
Deactivating the Wi-Fi network
1 From the printer control panel, navigate to:
Settings > Network/Ports > Network Overview > Active Adapter > Standard Networking
For non-touch-screen printer models, press OK to navigate through the settings.
2 Follow the instructions on the display.
Changing the printer port settings after installing an internal solutions port
Notes:
- If the printer has a static IP address, then do not change the configuration.
- If the computers are configured to use the network name instead of an IP address, then do not change the configuration.
- If you are adding a wireless internal solutions port (ISP) to a printer previously configured for an Ethernet connection, then disconnect the printer from the Ethernet network.
For Windows users
1 Open the printers folder.
2 From the shortcut menu of the printer with the new ISP, open the printer properties.
3 Configure the port from the list.
4 Update the IP address.
5 Apply the changes.
For Macintosh users
1 From System Preferences in the Apple menu, navigate to the list of printers, and then select + > IP.
2 Type the IP address in the address field.
3 Apply the changes.
Cleaning printer parts
Cleaning the printer

CAUTION—SHOCK HAZARD: To avoid the risk of electrical shock when cleaning the exterior of the printer, unplug the power cord from the electrical outlet and disconnect all cables from the printer before proceeding.
Notes:
- Perform this task after every few months.
- Damage to the printer caused by improper handling is not covered by the printer warranty.
1 Turn off the printer, and then unplug the power cord from the electrical outlet.
2 Remove paper from the standard bin and multipurpose feeder.
3 Remove any dust, lint, and pieces of paper around the printer using a soft brush or vacuum.
4 Wipe the outside of the printer with a damp, soft, lint-free cloth.
Notes:
- Do not use household cleaners or detergents, as they may damage the finish of the printer. - Make sure that all areas of the printer are dry after cleaning.
5 Connect the power cord to the electrical outlet, and then turn on the printer.

CAUTION—POTENTIAL INJURY: To avoid the risk of fire or electrical shock, connect the power cord to an appropriately rated and properly grounded electrical outlet that is near the product and easily accessible.
Cleaning the scanner
1 Open the scanner cover.
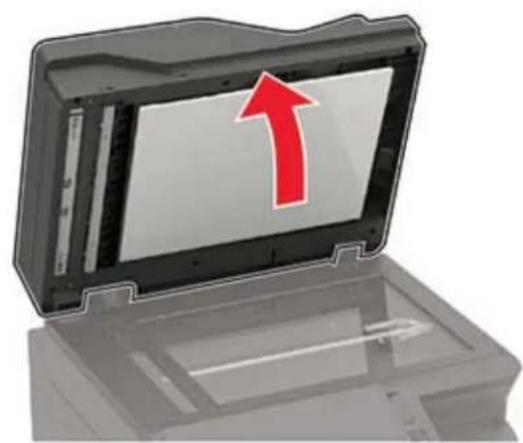
natural_image
Illustration of a computer with an open case and a red upward arrow, no text or symbols present.2 Using a damp, soft, lint-free cloth, wipe the following areas:
- ADF glass

natural_image
Illustration of a laptop computer with an open screen and a magnified inset showing the hand holding a device (no text or symbols visible)- ADF glass pad

natural_image
Illustration of a printer with a close-up view showing the lid and paper edge (no text or symbols)- Scanner glass
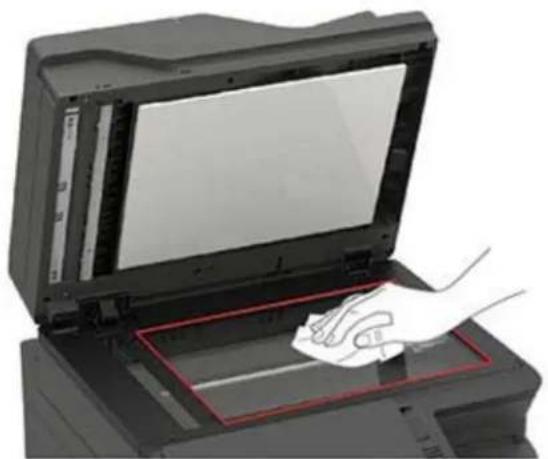
natural_image
Illustration of a hand pressing down on a printer's front panel with a red border (no text or symbols visible)- Scanner glass pad

natural_image
Illustration of a hand cleaning a printer's cover with a cloth (no text or symbols visible)3 Close the scanner cover.
If your printer has another ADF glass inside door C, then continue with the following steps.
4 Open door C.
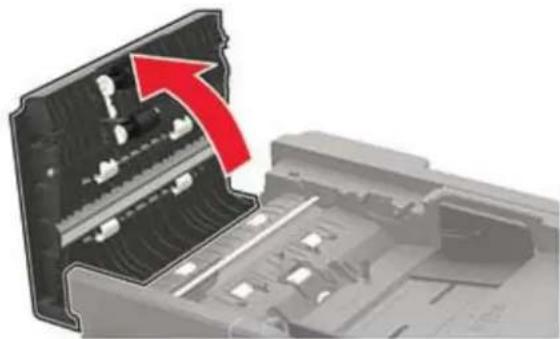
natural_image
Close-up of a mechanical device showing internal components and a red arrow indicating direction (no text or symbols)5 Using a damp, soft, lint-free cloth, wipe the following areas:
- ADF glass pad in door C

natural_image
Close-up of a mechanical device showing internal components and a magnified view of a tool interacting with a gear (no text or symbols visible)- ADF glass in door C

natural_image
Close-up of a mechanical device with a magnified inset showing a hand holding a tool (no visible text or symbols)6 Close the door.
Ordering parts and supplies
To order parts and supplies, contact the place where you purchased the printer.
Note: All life estimates for printer supplies assume printing on letter- or A4-size plain paper.
Checking the status of parts and supplies
1 From the control panel, navigate to:
Settings > Reports > Device > Device Statistics
For non-touch-screen printer models, press OK to navigate through the settings.
2 From the Supply Information section of the pages printed, check the status of parts and supplies.
Ordering a toner cartridge
Notes:
- The estimated cartridge yield is based on the ISO/IEC 19798 standard.
- Extremely low print coverage for extended periods of time may negatively affect actual yield.
To order a toner cartridge, contact the place where you purchased the printer.
Ordering an imaging kit
To order an imaging kit, contact the place where you purchased the printer.
Ordering a waste toner bottle
To order a waste toner bottle, contact the place where you purchased the printer.
Ordering a maintenance kit
To order a maintenance kit, contact the place where you purchased the printer.
Configuring supply notifications
1 Open a web browser, and then type the printer IP address in the address field.
Notes:
- View the printer IP address on the printer home screen. The IP address appears as four sets of numbers separated by periods, such as 123.123.123.123. - If you are using a proxy server, then temporarily disable it to load the web page correctly.
2 Click Settings > Device > Notifications.
3 From the Supplies menu, click Custom Supply Notifications.
4 Select a notification for each supply item.
5 Apply the changes.
Replacing parts and supplies
Replacing a toner cartridge
1 Open door B.
Warning—Potential Damage: To prevent damage from electrostatic discharge, touch any exposed metal frame of the printer before accessing or touching interior areas of the printer.

natural_image
Illustration of a printer with a paper roll and red arrow indicating compression (no text or symbols)2 Remove the used toner cartridge.


natural_image
3D rendered mechanical component with highlighted section and numbered annotation (no readable text or symbols)3 Unpack the new toner cartridge.
4 Insert the new toner cartridge.

natural_image
3D printer image showing internal components with a red downward arrow overlay (no text or symbols)5 Close door B.

Replacing the waste toner bottle
1 Open door B.
Warning—Potential Damage: To prevent damage from electrostatic discharge, touch any exposed metal frame of the printer before accessing or touching interior areas of the printer.
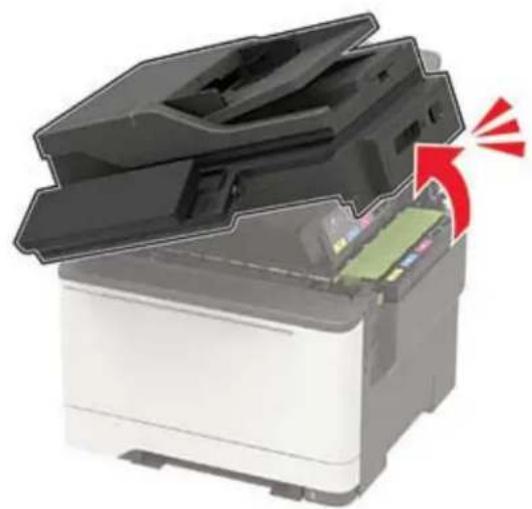
natural_image
Illustration of a printer with a paper airplane being inserted, showing internal components and a red arrow indicating motion (no text or symbols)2 Open door A.

CAUTION—HOT SURFACE: The inside of the printer might be hot. To reduce the risk of injury from a hot component, allow the surface to cool before touching it.

natural_image
3D illustration of a printer with red arrows indicating process flow or movement (no text or symbols)3 Remove the right side cover.

4 Remove the used waste toner bottle.

Note: To avoid spilling the toner, place the bottle in an upright position.
5 Unpack the new waste toner bottle.
6 Insert the new waste toner bottle.

natural_image
Mechanical assembly diagram showing a component being inserted into a housing, with a red arrow and numbered label (1) pointing to the component.
natural_image
Close-up of a mechanical component with red arrows and number 2, no visible text or symbols7 Insert the right side cover.

natural_image
Diagram showing a device with a red arrow pointing to a black plastic component, labeled with number 1 (no text or symbols on the diagram itself)
8 Close door B.

9 Close door A.
Replacing an imaging kit
1 Open door B.
Warning—Potential Damage: To prevent damage from electrostatic discharge, touch any exposed metal frame of the printer before accessing or touching interior areas of the printer.
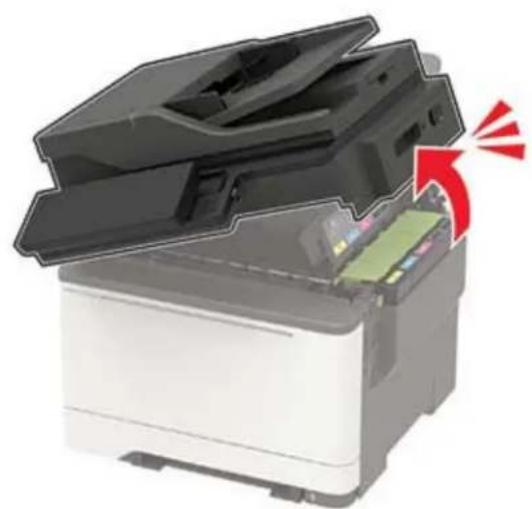
natural_image
Illustration of a printer with a paper airplane being inserted, showing internal components and a red arrow indicating motion (no text or symbols)2 Open door A.
CAUTION—HOT SURFACE: The inside of the printer might be hot. To reduce the risk of injury from a hot component, allow the surface to cool before touching it.

natural_image
Diagram of a printer's internal structure showing two red arrows indicating assembly or disassembly (no text or symbols present)3 Remove the right side cover.

4 Remove the waste toner bottle.
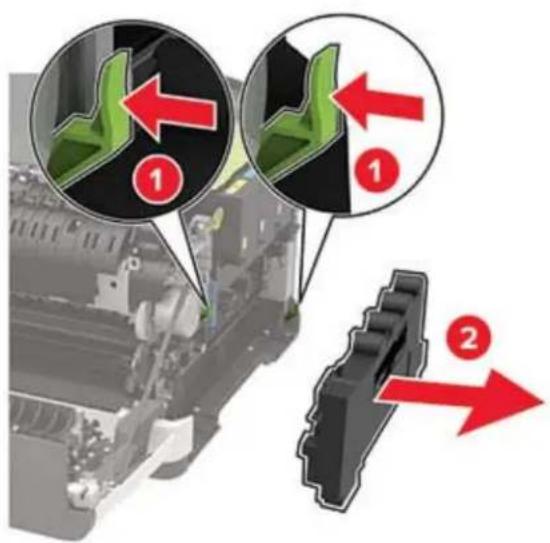
5 Remove the toner cartridges.

6 Remove the used imaging kit.

7 Unpack the new imaging kit.
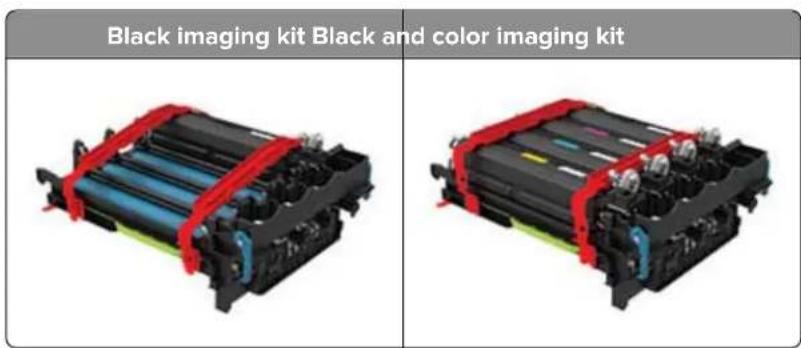
Notes:
- The black imaging kit includes the imaging kit and the black developer unit.
- The black and color imaging kit includes the imaging kit and the black, cyan, magenta, and yellow developer units.
- When replacing the black imaging kit, save the cyan, magenta, and yellow developer units from the used imaging kit.
8 Remove the packing material.

Note: If you are replacing the black imaging kit, then insert the magenta, cyan, and yellow developer units into the new imaging kit.
Warning—Potential Damage: Do not expose the imaging kit to direct light. Extended exposure to light may cause print quality problems.
Warning—Potential Damage: Do not touch the photoconductor drum. Doing so may affect the quality of future print jobs.

9 Insert the imaging kit until it is fully seated.

10 Insert the toner cartridges.

natural_image
Diagram of a printer internal structure with a red arrow indicating compression or disassembly (no text or symbols present)11 Insert the waste toner bottle.
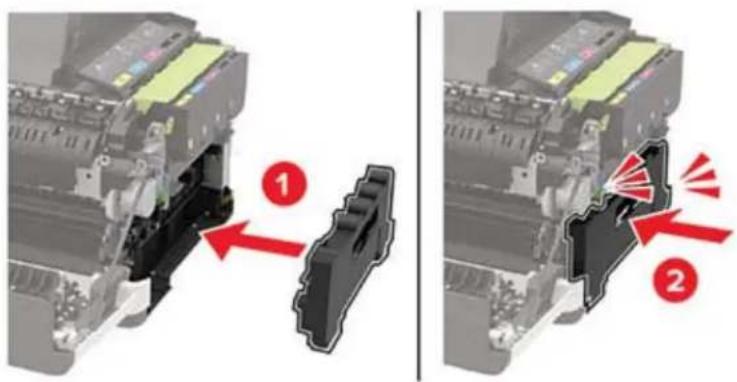
12 Insert the right side cover.
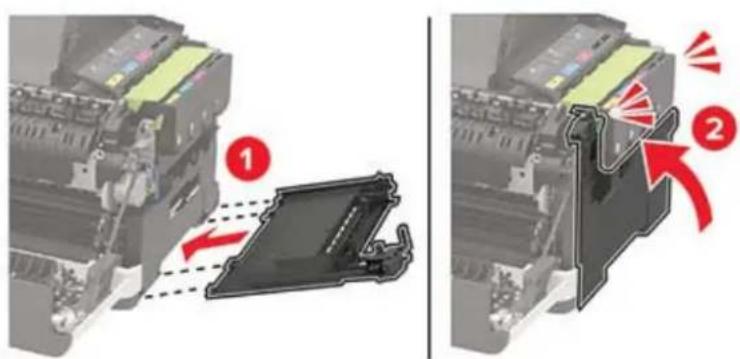
13 Close door B.

14 Close door A.
Moving the printer
Moving the printer to another location

CAUTION—POTENTIAL INJURY: If the printer weight is greater than 18 kg (40 lb), then it requires two or more trained personnel to lift it safely.

CAUTION—POTENTIAL INJURY: To avoid the risk of fire or electrical shock, use only the power cord provided with this product or the manufacturer's authorized replacement.

CAUTION—POTENTIAL INJURY: When moving the printer, follow these guidelines to avoid personal injury or printer damage:
•Make sure that all doors and trays are closed.
- Turn off the printer, and then unplug the power cord from the electrical outlet.
- Disconnect all cords and cables from the printer.
- If the printer has separate floor-standing optional trays or output options attached to it, then disconnect them before moving the printer.
- If the printer has a caster base, then carefully roll it to the new location. Use caution when passing over thresholds and breaks in flooring.
- If the printer does not have a caster base but is configured with optional trays or output options, then remove the output options and lift the printer off the trays. Do not try to lift the printer and any options at the same time.
- Always use the handholds on the printer to lift it.
- Any cart used to move the printer must have a surface able to support the full footprint of the printer.
- Any cart used to move the hardware options must have a surface able to support the dimensions of the options.
- Keep the printer in an upright position.
- Avoid severe jarring movements.
- Make sure that your fingers are not under the printer when you set it down.
- Make sure that there is adequate clearance around the printer.
Note: Damage to the printer caused by improper moving is not covered by the printer warranty.
Shipping the printer
When shipping the printer, use the original packaging or contact the place where you purchased the printer.
Saving energy and paper
Configuring the power save mode settings
For non-touch-screen printer models, press to navigate through the settings.
Eco-Mode
1 From the control panel, navigate to:
Settings > Device > Power Management > Eco-Mode
2 Select a setting.
Sleep mode
1 From the control panel, navigate to:
Settings > Device > Power Management > Timeouts > Sleep Mode
2 Specify the amount of time that the printer stays idle before it enters Sleep mode.
Hibernate mode
1 From the control panel, navigate to:
Settings > Device > Power Management > Timeouts > Hibernate Timeout
2 Select the amount of time that the printer stays idle before it enters Hibernate mode.
Notes:
- For Hibernate Timeout to work, set Hibernate Timeout on Connection to Hibernate.
- The Embedded Web Server is disabled when the printer is in Hibernate mode.
Adjusting the brightness of the display
Note: This setting is available only in some printer models.
1 From the control panel, navigate to:
Settings > Device > Preferences
For non-touch-screen printer models, press OK to navigate through the settings.
2 In the Screen Brightness menu, adjust the setting.
Conserving supplies
- Print on both sides of the paper.
Note: Two-sided printing is the default setting in the print driver.
- Print multiple pages on a single sheet of paper.
- Use the preview feature to see how the document looks like before printing it.
- Print one copy of the document to check its content and format for accuracy.
Clearing jams
Avoiding jams
Load paper properly
•Make sure that the paper lies flat in the tray.

- Do not load or remove a tray while the printer is printing.
- Do not load too much paper. Make sure that the stack height is below the maximum paper fill indicator.
- Do not slide paper into the tray. Load paper as shown in the illustration.

natural_image
Stacked printer with a red downward arrow indicating compression or disassembly (no text or symbols)- Make sure that the paper guides are positioned correctly and are not pressing tightly against the paper or envelopes.
- Push the tray firmly into the printer after loading paper.
Use recommended paper
- Use only recommended paper or specialty media.
- Do not load paper that is wrinkled, creased, damp, bent, or curled.
•Flex, fan, and align the paper edges before loading.

- Do not use paper that has been cut or trimmed by hand.
- Do not mix paper sizes, weights, or types in the same tray.
- Make sure that the paper size and type are set correctly on the computer or printer control panel.
- Store paper according to manufacturer recommendations.
Identifying jam locations
Notes:
- When Jam Assist is set to On, the printer flushes blank pages or pages with partial prints after a jammed page has been cleared. Check your printed output for blank pages.
- When Jam Recovery is set to On or Auto, the printer reprints jammed pages.

| Jam location | |
| 1 | Automatic document feeder (ADF) |
| 2 | Standard bin |
| 3 | In the fuser |
| 4 | Below the fuser |
| 5 | Duplex unit |
| 6 | Trays |
| 7 | Multipurpose feeder |
| 8 | Manual feeder |
Paper jam in trays
1 Remove the tray.

natural_image
Diagram showing a printer being inserted into a paper holder with a red downward arrow indicating compression (no text or symbols present)2 Remove the jammed paper.
Note: Make sure that all paper fragments are removed.
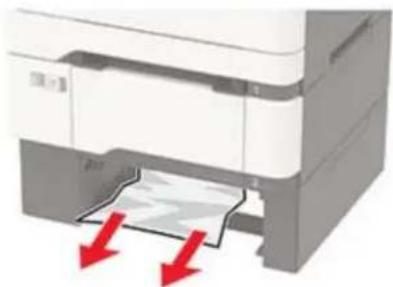
natural_image
Diagram of a printer with two red arrows indicating compression or disassembly (no text or symbols present)3 Insert the tray.
Paper jam in door A
Paper jam in the fuser
1 Open doors A and B.

CAUTION—HOT SURFACE: The inside of the printer might be hot. To reduce the risk of injury from a hot component, allow the surface to cool before touching it.
Warning—Potential Damage: To prevent damage from electrostatic discharge, touch any exposed metal frame of the printer before accessing or touching interior areas of the printer.

natural_image
Two-step diagram showing a printer's internal structure with red arrows indicating motion, no text or symbols present.2 Remove the jammed paper.
Note: Make sure that all paper fragments are removed.

natural_image
3D rendering of a printer with visible internal structure and red arrows indicating parts (no text or symbols)3 Open the fuser access door, and then remove the jammed paper.
Note: Make sure that all paper fragments are removed.
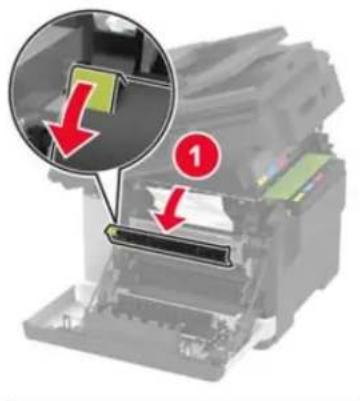

natural_image
3D diagram of a printer with highlighted parts and arrows indicating motion (no text or symbols)4 Close doors B and A.
Paper jam in the duplex unit
1 Open door A.

CAUTION—HOT SURFACE: The inside of the printer might be hot. To reduce the risk of injury from a hot component, allow the surface to cool before touching it.
Warning—Potential Damage: To prevent damage from electrostatic discharge, touch any exposed metal frame of the printer before accessing or touching interior areas of the printer.

natural_image
Diagram of a printer with red arrows indicating internal components (no text or symbols present)2 Remove the jammed paper.
Note: Make sure that all paper fragments are removed.

natural_image
3D rendering of a printer with visible internal structure and red arrows indicating parts of the paper (no text or symbols)3 Close door A.
Paper jam in the standard bin
1 Open door B, and then remove the jammed paper.
Warning—Potential Damage: To prevent damage from electrostatic discharge, touch any exposed metal frame of the printer before accessing or touching interior areas of the printer.
Note: Make sure that all paper fragments are removed.
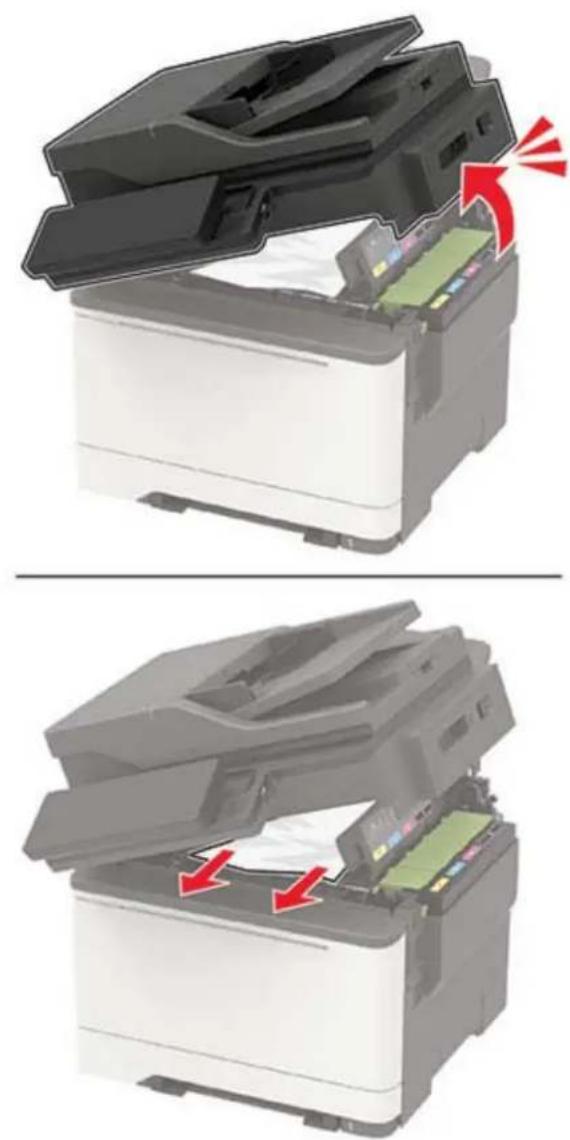
natural_image
Two-panel illustration of a printer with open lid and internal compartments, showing paper movement (no text or symbols)2 Open door A.

CAUTION—HOT SURFACE: The inside of the printer might be hot. To reduce the risk of injury from a hot component, allow the surface to cool before touching it.
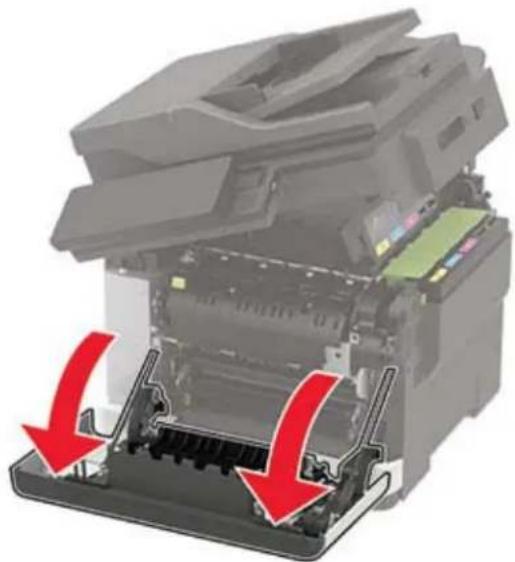
natural_image
Diagram of a printer's internal structure showing two red arrows indicating assembly or disassembly (no text or symbols present)3 Open the fuser access door, and then remove the jammed paper.
Note: Make sure that all paper fragments are removed.


natural_image
3D diagram of a printer with two red arrows indicating compression or disassembly (no text or symbols present)4 Close doors A and B.
Paper jam in the multipurpose feeder
Note: The multipurpose feeder is available only in some printer models.
1 Remove paper from the multipurpose feeder.

2 Remove the jammed paper.
Note: Make sure that all paper fragments are removed.
3 Flex, fan, and align the paper edges before loading.
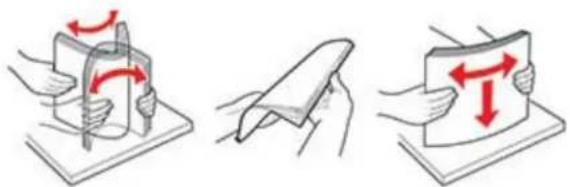
4 Reload paper.
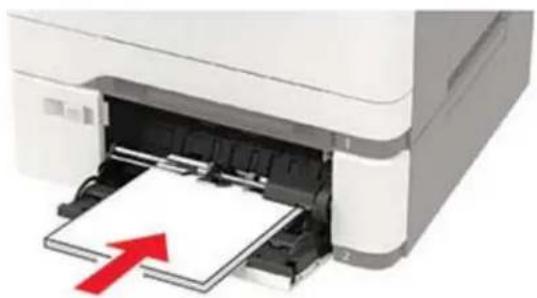
natural_image
Close-up of a printer's paper being inserted into a paper holder, with a red arrow indicating the paper's direction (no text or symbols visible)Paper jam in the manual feeder
1 Remove the tray.

natural_image
Close-up of a printer's internal structure with a red downward arrow indicating compression (no text or symbols visible)2 Remove the jammed paper.
Note: Make sure that all paper fragments are removed.
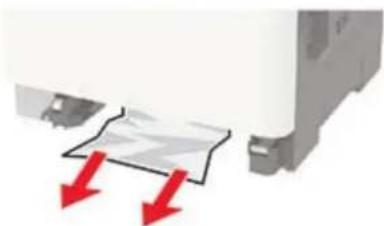
natural_image
Diagram showing a printer with red arrows indicating compression or disassembly process (no text or symbols present)3 Insert the tray.
Paper jam in door C
1 Remove all original documents from the ADF tray.
2 Open door C.
Warning—Potential Damage: To prevent damage from electrostatic discharge, touch any exposed metal frame of the printer before accessing or touching interior areas of the printer.
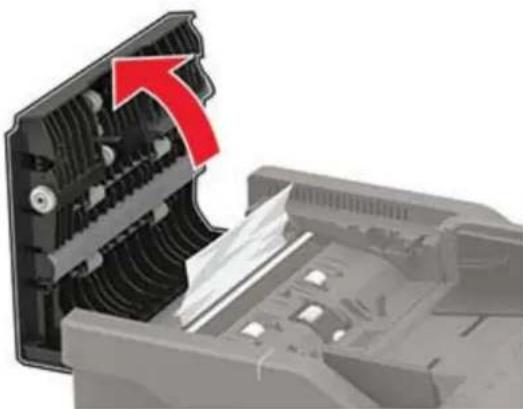
natural_image
Close-up of a mechanical device showing internal components and a red arrow indicating a process or operation (no text or symbols present)3 Remove the jammed paper.
Note: Make sure that all paper fragments are removed.

natural_image
3D diagram of a computer motherboard showing internal components and red arrows indicating flow or movement (no text or symbols)4 Close door C.
Troubleshooting
Network connection problems
Cannot open Embedded Web Server
| Action Yes No | ||
| Step 1Check if the printer is on.Is the printer on? | Go to step 2. Turn on | the printer. |
| Step 2Make sure that the printer IP address is correct.View the printer IP address:From the home screenFrom the TCP/IP section in the Network/Ports menuBy printing a network setup page or menu settings page, and then finding the TCP/IP sectionNote: An IP address appears as four sets of numbers separated by periods, such as 123.123.123.123.Is the printer IP address correct? | Go to step 3. Type the | correct printer IP address in the address field. |
| Step 3Check if you are using a supported browser:Internet Explorer® version 11 or laterMicrosoft EdgeTMSafari version 6 or laterGoogle ChromeTMversion 32 or laterMozilla Firefox version 24 or laterIs your browser supported? | Go to step 4. Install a | supported browser. |
| Step 4Check if the network connection is working.Is the network connection working? | Go to step 5. Contact | your administrator. |
| Step 5Make sure that the cable connections to the printer and print server are secure. For more information, see the documentation that came with the printer.Are the cable connections secure? | Go to step 6. Secure | the cable connections. |
| Step 6Check if the web proxy servers are disabled.Are the web proxy servers disabled? | Go to step 7. Contact your administrator. | |
| Step 7Access the Embedded Web Server.Did the Embedded Web Server open? | The problem is solved. | Contact customer support. |
Unable to read flash drive
| Action Yes No | ||
| Step 1Check if the printer is not busy processing another print, copy, scan, or fax job.Is the printer ready? | Go to step 2. Wait for the printer to finish processing the other job. | |
| Step 2Check if the flash drive is inserted into the front USB port.Note:The flash drive does not work when it is inserted into the rear USB port.Is the flash drive inserted into the correct port? | Go to step 3. Insert the flash drive into the correct port. | |
| Step 3Check if the flash drive is supported. For more information, see “Supported flash drives and file types” on page 38.Is the flash drive supported? | Go to step 4. Insert a supported flash drive. | |
| Step 4a Check if the USB port is enabled. For more information, see “Enabling the USB port” on page 177.b Remove, and then insert the flash drive.Does the printer recognize the flash drive? | The problem is solved. | Contact customer support. |
Enabling the USB port
From the control panel, navigate to:
Settings > Network/Ports > USB > Enable USB Port
For non-touch-screen printer models, press OK to navigate through the settings.
Checking the printer connectivity
1 Print the Network Setup Page.
From the control panel, navigate to:
Settings > Reports > Network > Network Setup Page
For non-touch-screen printer models, press OK to navigate through the settings.
2 Check the first section of the page and confirm that the status is connected.
If the status is not connected, then the LAN drop may be inactive or the network cable may be unplugged or malfunctioning. Contact your administrator for assistance.
Hardware options problems
Cannot detect internal option
| Action Yes No | ||
| Step 1Turn off the printer, wait for about 10 seconds, and then turn on the printer.Does the internal option operate correctly? | The problem is solved. | Go to step 2. |
| Step 2Print the Menu Settings Page, and then check if the internal option appears in the Installed Features list.Is the internal option listed in the menu settings page? | Go to step 4. Go to step 3. | |
Step 3Check if the internal option is installed properly into the controller board.a Turn off the printer, and then unplug the power cord from the electrical outlet.b Make sure that the internal option is installed in the appropriate connector in the controller board.c Connect the power cord to the electrical outlet, and then turn on the printer. CAUTION—POTENTIAL INJURY:To avoid the risk of fire or electrical shock, connect the power cord to an appropriately rated and properly grounded electrical outlet that is near the product and easily accessible.Does the internal option operate correctly? CAUTION—POTENTIAL INJURY:To avoid the risk of fire or electrical shock, connect the power cord to an appropriately rated and properly grounded electrical outlet that is near the product and easily accessible.Does the internal option operate correctly? | The problem is solved. | Go to step 4. |
| Step 4a Check if the internal option is available in the print driver.Note: If necessary, manually add the internal option in the print driver to make it available for print jobs. For more information, see “Adding available options in the print driver” on page 230.b Resend the print job.Does the internal option operate correctly? | The problem is solved. | Contact customer support. |
Defective flash detected
Try one or more of the following:
-Replace the defective flash memory.
- From the printer control panel, select Continue to ignore the message and continue printing.
- Cancel the current print job.
Not enough free space in flash memory for resources
Try one or more of the following:
- From the printer control panel, select Continue to clear the message and continue printing.
- Delete fonts, macros, and other data stored in the flash memory.
• Install flash memory with larger capacity.
Note: Downloaded fonts and macros that are not previously stored in the flash memory are deleted.
Unformatted flash detected
Try one or more of the following:
- From the control panel, select Continue to stop the defragmentation and continue printing.
- Format the flash memory.
Note: If the error message remains, then the flash memory may be defective and needs to be replaced.
Issues with supplies
Replace cartridge, printer region mismatch
Install the correct toner cartridge.
Non-Printer Manufacturer supply
The printer has detected an unrecognized supply or part installed in the printer.
Your printer is designed to function best with genuine supplies and parts made by the printer manufacturer. Use of third-party supplies or parts may affect the performance, reliability, or life of the printer and its imaging components.
All life indicators are designed to function with supplies and parts from the printer manufacturer and may deliver unpredictable results if third-party supplies or parts are used. Imaging component usage beyond the intended life may damage your printer or associated components.
Warning—Potential Damage: Use of third-party supplies or parts can affect warranty coverage. Damage caused by the use of third-party supplies or parts may not be covered by the warranty.
To accept any and all of these risks and to proceed with the use of non-genuine supplies or parts in your printer, from the control panel, press and hold X and # simultaneously for 15 seconds.
If you do not want to accept these risks, then remove the third-party supply or part from your printer and install a genuine supply or part from the printer manufacturer.
Scanner maintenance required, use ADF Kit
The printer is scheduled for maintenance. Contact customer support or your service representative, and then report the message.
Paper feed problems
Envelope seals when printing
| Action Yes No | ||
| Step 1a Use an envelope that has been stored in a dry environment.Note: Printing on envelopes with high moisture content can seal the flaps.b Send the print job.Does the envelope seal when printing? | Go to step 2. The problem is solved. | |
| Step 2a Make sure that paper type is set to Envelope.From the control panel, navigate to:Settings > Paper > Tray Configuration > Paper Size/TypeFor non-touch-screen printer models, press OK to navigate through the settings.b Send the print job.Does the envelope seal when printing? | Contact customer support. | The problem is solved. |
Collated printing does not work
| Action Yes No | ||
| Step 1a From the printer control panel, navigate to:Settings > Print > Layout > CollateFor non-touch-screen printer models, press OK to navigate through the settings.b Set Collate to On.c Print the document.Are the pages collated correctly? | The problem is solved. | Go to step 2. |
| Step 2a From the document that you are trying to print, open the Print dialog, and then select Collate.b Print the document.Are the pages collated correctly? | The problem is solved. | Go to step 3. |
| Step 3a Reduce the number of pages to print.b Print the document.Are the pages collated correctly? | The problem is solved. | Contact customer support. |
Tray linking does not work
| Action Yes No | ||
| Step 1a Check if the trays contain the same paper size and paper type.b Check if the paper guides are positioned correctly.c Print the document.Do the trays link correctly? | The problem is solved. | Go to step 2. |
| Step 2a From the control panel, navigate to:Settings > Paper > Tray Configuration > Paper Size/TypeFor non-touch-screen printer models, press OK to navigate through the settings.b Set the paper size and paper type to match the paper loaded in the linked trays.c Print the document.Do the trays link correctly? | The problem is solved. | Go to step 3. |
| Step 3a Make sure that Tray Linking is set to Automatic. For more information, see “Linking trays” on page 30.b Print the document.Do the trays link correctly? | The problem is solved. | Contact customer support. |
Paper frequently jams
| Action Yes No | ||
| Step 1a Remove the tray.b Check if paper is loaded correctly.Notes:Make sure that the paper guides are positioned correctly.Make sure that the stack height is below the maximum paper fill indicator.Make sure to print on recommended paper size and type.c Insert the tray.d Print the document.Do paper jams occur frequently? | Go to step 2. The problem is solved. | |
| Step 2a From the control panel, navigate to:Settings > Paper > Tray Configuration > Paper Size/TypeFor non-touch-screen printer models, pressOKto navigate through the settings.b Set the correct paper size and type.c Print the document.Do paper jams occur frequently? | Go to step 3. The problem is solved. | |
| Step 3a Load paper from a fresh package.Note:Paper absorbs moisture due to high humidity. Store paper in its original wrapper until you are ready to use it.b Print the document.Do paper jams occur frequently? | Contact customer support. | The problem is solved. |
Jammed pages are not reprinted
| Action Yes No | ||
| a From the control panel, navigate to:Settings > Device > Notifications > Jam Content RecoveryFor non-touch-screen printer models, press OK to navigate through the settings.b Select On or Auto, and then apply the changes.c Print the document.Are the jammed pages reprinted? | The problem is solved. | Contact customer support. |
Printing problems
Print quality is poor
Blank or white pages

natural_image
Blank white image with a thin border (no text, symbols, or markings)Note: Before solving the problem, print the Print Quality Test Pages. From the control panel, navigate to Settings > Troubleshooting > Print Quality Test Pages. For non-touch-screen printer models, press OK to navigate through the settings.
| Action Yes No | ||
| a Remove, and then insert the imaging kit.Warning—Potential Damage: Do not expose the imaging kit to direct light. Extended exposure to light may cause print quality problems.Warning—Potential Damage: Do not touch the photoconductor drum under the imaging kit. Doing so may affect the quality of future print jobs.b Print the document.Is the printer printing blank or white pages? | Contact customer support. | The problem is solved. |
Dark print

Note: Before solving the problem, print the Print Quality Test Pages. From the control panel, navigate to
Settings > Troubleshooting > Print Quality Test Pages. For non-touch-screen printer models, press to navigate through the settings.
| Action Yes No | ||
| Step 1a Perform Color Adjust.From the control panel, navigate to:Settings > Print > Quality > Advanced Imaging > Color Adjustb Print the document.Is the print too dark? | Go to step 2. The problem is solved. | |
| Step 2a Depending on your operating system, reduce toner darkness from the Printing Preferences or Print dialog.Note: You can also change the setting on the printer control panel. Navigate to:Settings > Print > Quality > Toner Darknessb Print the document.Is the print too dark? | Go to step 3. The problem is solved. | |
| Step 3a Depending on your operating system, specify the paper type from the Printing Preferences or Print dialog.Notes:Make sure that the setting matches the paper loaded.You can also change the setting on the printer control panel. Navigate to:Settings > Paper > Tray Configuration > Paper Size/Typeb Print the document.Is the print too dark? | Go to step 4. The problem is solved. | |
| Step 4Check if the paper has texture or rough finishes.Are you printing on textured or rough paper? | Go to step 5. Go to step 6. | |
| Step 5a Replace textured or rough paper with plain paper.b Print the document.Is the print too dark? | Go to step 6. The problem is solved. | |
| Step 6a Load paper from a fresh package.Note: Paper absorbs moisture due to high humidity. Store paper in its original wrapper until you are ready to use it.b Print the document.Is the print too dark? | Contact customer support. | The problem is solved. |
Ghost images

Note: Before solving the problem, print the Print Quality Test Pages. From the control panel, navigate to Settings > Troubleshooting > Print Quality Test Pages. For non-touch-screen printer models, press OK to navigate through the settings.
| Action Yes No | ||
| Step 1a Load the tray with the correct paper type.b Print the document.Do ghost images appear on prints? | Go to step 2. The problem is solved. | |
| Step 2a Depending on your operating system, specify the paper type from the Printing Preferences or Print dialog.Notes:Make sure that the setting matches the paper loaded.You can also change the setting on the printer control panel. Navigate to:Settings > Paper > Tray Configuration > Paper Size/Typeb Print the document.Do ghost images appear on prints? | Go to step 3. The problem is solved. | |
| Step 3a Perform Color Adjust.From the control panel, navigate to:Settings > Print > Quality > Advanced Imaging > Color Adjustb Print the document.Do ghost images appear on prints? | Go to step 4. The problem is solved. | |
| Step 4a Remove, and then insert the imaging kit.Warning—Potential Damage: Do not expose the imaging kit to direct light. Extended exposure to light may cause print quality problems.Warning—Potential Damage: Do not touch the photoconductor drum under the imaging kit. Doing so may affect the quality of future print jobs.b Print the document.Do ghost images appear on prints? | Contact customer support. | The problem is solved. |
Gray or colored background

Note: Before solving the problem, print the Print Quality Test Pages. From the control panel, navigate to
Settings > Troubleshooting > Print Quality Test Pages. For non-touch-screen printer models, press OK to navigate through the settings.
| Action Yes No | ||
| Step 1a Perform Color Adjust.From the control panel, navigate to:Settings > Print > Quality > Advanced Imaging > Color Adjustb Print the document.Does gray or colored background appear on prints? | Go to step 2. The problem is solved. | |
| Step 2a Remove, and then insert the imaging kit.Warning—Potential Damage: Do not expose the imaging kit to direct light. Extended exposure to light may cause print quality problems.Warning—Potential Damage: Do not touch the photoconductor drum under the imaging kit. Doing so may affect the quality of future print jobs.b Print the document.Does gray or colored background appear on prints? | Contact customer support. | The problem is solved. |
Incorrect margins
| Action Yes No | ||
| Step 1a Adjust the paper guides to the correct position for the paper loaded.b Print the document.Are the margins correct? | The problem is solved. | Go to step 2. |
| Step 2a Set the paper size from the control panel. Navigate to:Settings > Paper > Tray Configuration > Paper Size/Typeb Print the document.Are the margins correct? | The problem is solved. | Go to step 3. |
| Step 3a Depending on your operating system, specify the paper size from the Printing Preferences or Print dialog.Note: Make sure that the setting matches the paper loaded.b Print the document.Are the margins correct? | The problem is solved. | Contact customer support. |
Light print

Note: Before solving the problem, print the Print Quality Test Pages. From the control panel, navigate to Settings > Troubleshooting > Print Quality Test Pages. For non-touch-screen printer models, press OK to navigate through the settings.
| Action Yes No | ||
| Step 1a Perform Color Adjust.From the control panel, navigate to:Settings > Print > Quality > Advanced Imaging > Color Adjustb Print the document.Is the print light? | Go to step 2. The problem is solved. | |
| Step 2a Depending on your operating system, increase toner darkness from the Printing Preferences or Print dialog.Note: You can also change the setting on the printer control panel. Navigate to:Settings > Print > Quality > Toner Darknessb Print the document.Is the print light? | Go to step 3. The problem is solved. | |
| Step 3a Turn off Color Saver.From the control panel, navigate to:Settings > Print > Quality > Color Saverb Print the document.Is the print light? | Go to step 4. The problem is solved. | |
| Step 4a Depending on your operating system, specify the paper type from the Printing Preferences or Print dialog.Notes:Make sure that the setting matches the paper loaded.You can also change the setting on the printer control panel. Navigate to:Settings > Paper > Tray Configuration > Paper Size/Typeb Print the document.Is the print light? | Go to step 5. The problem is solved. | |
| Step 5Check if paper has texture or rough finishes.Are you printing on textured or rough paper? | Go to step 6. Go to step 7. | |
| Step 6a Replace textured or rough paper with plain paper.b Print the document.Is the print light? | Go to step 7. The problem is solved. | |
| Step 7a Load paper from a fresh package.Note:Paper absorbs moisture due to high humidity. Store paper in its original wrapper until you are ready to use it.b Print the document.Is the print light? | Go to step 8. The problem is solved. | |
| Step 8a Remove, and then insert the imaging kit.Warning—Potential Damage: Do not expose the imaging kit to direct light. Extended exposure to light may cause print quality problems.Warning—Potential Damage: Do not touch the photoconductor drum under the imaging kit. Doing so may affect the quality of future print jobs.b Print the document.Is the print light? | Contact customer support. | The problem is solved. |
Missing colors
natural_image
Three horizontal color bands in yellow, white, and gray (no text or symbols)Note: Before solving the problem, print the Print Quality Test Pages. From the control panel, navigate to Settings > Troubleshooting > Print Quality Test Pages. For non-touch-screen printer models, press OK to navigate through the settings.
| Action Yes No | ||
| a Remove the toner cartridge of the missing color.b Remove the imaging kit.Warning—Potential Damage: Do not expose the imaging kit to direct light. Extended exposure to light may cause print quality problems.Warning—Potential Damage: Do not touch the photoconductor drum under the imaging kit. Doing so may affect the quality of future print jobs.c Remove, and then insert the developer unit of the missing color.d Insert the imaging kit.e Insert the toner cartridge.f Print the document.Are some colors missing on prints? | Contact customer support. | The problem is solved. |
Mottled print and dots

Note: Before solving the problem, print the Print Quality Test Pages. From the control panel, navigate to
Settings > Troubleshooting > Print Quality Test Pages. For non-touch-screen printer models, press to navigate through the settings.
| Action Yes No | ||
| Step 1Check the printer for leaked toner contamination.Is the printer free of leaked toner? | Go to step 2. Contact | customer support. |
| Step 2a From the control panel, navigate to:Settings > Paper > Tray Configuration > Paper Size/Typeb Check if the paper size and paper type settings match the paper loaded.Note: Make sure that paper does not have texture or rough finishes.Do the settings match? | Go to step 4. Go to step 3. | |
| Step 3a Depending on your operating system, specify the paper size and paper type from the Printing Preferences or Print dialog.Note: Make sure that the settings match the paper loaded.b Print the document.Is the print mottled? | Go to step 4. The problem is solved. | |
| Step 4a Load paper from a fresh package.Note: Paper absorbs moisture due to high humidity. Store paper in its original wrapper until you are ready to use it.b Print the document.Is the print mottled? | Go to step 5. The problem is solved. | |
| Step 5a Remove, and then insert the imaging kit.Warning—Potential Damage: Do not expose the imaging kit to direct light. Extended exposure to light may cause print quality problems.Warning—Potential Damage: Do not touch the photoconductor drum under the imaging kit. Doing so may affect the quality of future print jobs.b Print the document.Is the print mottled? | Contact customer support. | The problem is solved. |
Paper curl
| Action Yes No | ||
| Step 1a Adjust the guides in the tray to the correct position for the paper loaded.b Print the document.Is the paper curled? | Go to step 2. The problem is solved. | |
| Step 2a Depending on your operating system, specify the paper type from the Printing Preferences or Print dialog.Notes:Make sure that the setting matches the paper loaded.You can also change the setting on the printer control panel. Navigate to:Settings > Paper > Tray Configuration > Paper Size/Typeb Print the document.Is the paper curled? | Go to step 3. The problem is solved. | |
| Step 3Print on the other side of the paper.a Remove paper, flip it over, and then reload paper.b Print the document.Is the paper curled? | Go to step 4. The problem is solved. | |
| Step 4a Load paper from a fresh package.Note: Paper absorbs moisture due to high humidity. Store paper in its original wrapper until you are ready to use it.b Print the document.Is the paper curled? | Contact customer support. | The problem is solved. |
Print crooked or skewed
Note: Before solving the problem, print the Print Quality Test Pages. From the control panel, navigate to Settings > Troubleshooting > Print Quality Test Pages. For non-touch-screen printer models, press OK to navigate through the settings.
| Action Yes No | ||
| Step 1a Adjust the paper guides in the tray to the correct position for the paper loaded.b Print the document.Is the print crooked or skewed? | Go to step 2. The problem is solved. | |
| Step 2a Load paper from a fresh package.Note: Paper absorbs moisture due to high humidity. Store paper in its original wrapper until you are ready to use it.b Print the document.Is the print crooked or skewed? | Go to step 3. The problem is solved. | |
| Step 3a Check if the paper loaded is supported.Note: If paper is not supported, then load a supported paper.b Print the document.Is the print crooked or skewed? | Contact customer support. | The problem is solved. |
Solid color or black images

natural_image
Solid dark gray image with no visible content, text, or symbols.Note: Before solving the problem, print the Print Quality Test Pages. From the control panel, navigate to Settings > Troubleshooting > Print Quality Test Pages. For non-touch-screen printer models, press OK to navigate through the settings.
| Action Yes No | ||
| a Remove, and then reinstall the imaging kit.Warning—Potential Damage: Do not expose the imaging kit to direct light. Extended exposure to light may cause print quality problems.Warning—Potential Damage: Do not touch the photoconductor drum under the imaging kit. Doing so may affect the quality of future print jobs.b Print the document.Is the printer printing solid color or black images? | Contact customer support. | The problem is solved. |
Text or images cut off

Note: Before solving the problem, print the Print Quality Test Pages. From the control panel, navigate to Settings > Troubleshooting > Print Quality Test Pages. For non-touch-screen printer models, press OK to navigate through the settings.
| Action Yes No | ||
| Step 1a Adjust the paper guides in the tray to the correct position for the paper loaded.b Print the document.Are text or images cut off? | Go to step 2. The problem is solved. | |
| Step 2a Depending on your operating system, specify the paper size from the Printing Preferences or Print dialog.Notes:Make sure that the setting matches the paper loaded.You can also change the setting on the printer control panel. Navigate to:Settings > Paper > Tray Configuration > Paper Size/Typeb Print the document.Are text or images cut off? | Go to step 3. The problem is solved. | |
| Step 3a Remove, and then insert the imaging kit.Warning—Potential Damage: Do not expose the imaging kit to direct light. Extended exposure to light may cause print quality problems.Warning—Potential Damage: Do not touch the photoconductor drum under the imaging kit. Doing so may affect the quality of future print jobs.b Print the document.Are text or images cut off? | Contact customer support. | The problem is solved. |
Toner easily rubs off
Note: Before solving the problem, print the Print Quality Test Pages. From the control panel, navigate to Settings > Troubleshooting > Print Quality Test Pages. For non-touch-screen printer models, press OK to navigate through the settings.
| Action Yes No | ||
| Step 1a Depending on your operating system, specify the paper type from the Printing Preferences or Print dialog.Notes:Make sure that the setting matches the paper loaded.You can also change the setting on the printer control panel. Navigate to:Settings > Paper > Tray Configuration > Paper Size/Typeb Print the document.Does toner easily rub off? | Go to step 2. The problem is solved. | |
| Step 2a Check if the paper weight is supported.Note: If paper weight is not supported, then load a supported one.b Print the document.Does toner easily rub off? | Go to step 3. The problem is solved. | |
| Step 3a Load paper from a fresh package.Note: Paper absorbs moisture due to high humidity. Store paper in its original wrapper until you are ready to use it.b Print the document.Does toner easily rub off? | Contact customer support. | The problem is solved. |
Uneven print density

Note: Before solving the problem, print the Print Quality Test Pages. From the control panel, navigate to Settings > Troubleshooting > Print Quality Test Pages. For non-touch-screen printer models, press OK to navigate through the settings.
| Action Yes No | ||
| a Remove, and then insert the imaging kit.Warning—Potential Damage: Do not expose the imaging kit to direct light. Extended exposure to light may cause print quality problems.Warning—Potential Damage: Do not touch the photoconductor drum under the imaging kit. Doing so may affect the quality of future print jobs.b Print the document.Is the print density uneven? | Contact customer support. | The problem is solved. |
Horizontal dark lines
Notes:
- Before solving the problem, print the Print Quality Test Pages. From the control panel, navigate to
Settings > Troubleshooting > Print Quality Test Pages. For non-touch-screen printer models, press to navigate through the settings.

- If horizontal dark lines keep appearing on the prints, then see the "Repeating defects" topic.
| Action Yes No | ||
| Step 1a Depending on your operating system, specify the paper type from the Printing Preferences or Print dialog.Notes:Make sure that the setting matches the paper loaded.You can also change the setting on the printer control panel. Navigate to:Settings > Paper > Tray Configuration > Paper Size/Typeb Print the document.Do dark lines appear on prints? | Go to step 2. The problem is solved. | |
| Step 2a Load paper from a fresh package.Note: Paper absorbs moisture due to high humidity. Store paper in its original wrapper until you use it.b Print the document.Do dark lines appear on prints? | Go to step 3. The problem is solved. | |
| Step 3a Remove, and then insert the imaging kit.Warning—Potential Damage: Do not expose the imaging kit to direct light. Extended exposure to light may cause print quality problems.Warning—Potential Damage: Do not touch the photoconductor drum under the imaging kit. Doing so may affect the quality of future print jobs.b Print the document.Do dark lines appear on prints? | Contact customer support. | The problem is solved. |
Vertical dark lines
Note: Before solving the problem, print the Print Quality Test Pages. From the control panel, navigate to Settings > Troubleshooting > Print Quality Test Pages. For non-touch-screen printer models, press OK to navigate through the settings.
| Action Yes No | ||
| Step 1Using a blank sheet of paper, make a two-sided copy using the ADF.Do vertical dark lines or streaks appear on prints? | Go to step 2. Go to step 3. | |
Step 2Using a damp, soft, lint-free cloth, wipe the following areas:•ADF glass pad (A) and ADF glass (B) •ADF glass pad (A) and ADF glass (B) in door C •ADF glass pad (A) and ADF glass (B) in door C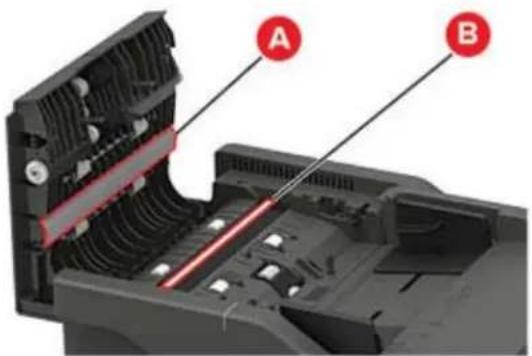 Do vertical dark lines or streaks appear on prints? Do vertical dark lines or streaks appear on prints? | Go to step 3. The problem is solved. | |
| Step 3a Depending on your operating system, specify the paper type from the Printing Preferences or Print dialog.Notes:Make sure that the setting matches the paper loaded.You can also change the setting on the printer control panel. Navigate to:Settings > Paper > Tray Configuration > Paper Size/Typeb Print the document.Do vertical dark lines or streaks appear on prints? | Go to step 4. The problem is solved. | |
| Step 4a Load paper from a fresh package.Note: Paper absorbs moisture due to high humidity. Store paper in its original wrapper until you use it.b Print the document.Do vertical dark lines or streaks appear on prints? | Go to step 5. The problem is solved. | |
| Step 5a Remove, and then insert the imaging kit.Warning—Potential Damage: Do not expose the imaging kit to direct light. Extended exposure to light can cause print quality problems.Warning—Potential Damage: Do not touch the photoconductor drum under the imaging kit. Doing so may affect the quality of future print jobs.b Print the document.Do vertical dark lines or streaks appear on prints? | Contact customer support. | The problem is solved. |
Horizontal white lines

Notes:
- Before solving the problem, print the Print Quality Test Pages. From the control panel, navigate to
Settings > Troubleshooting > Print Quality Test Pages. For non-touch-screen printer models, press to navigate through the settings.

- If horizontal white lines keep appearing on your prints, then see the "Repeating defects" topic.
| Action Yes No | ||
| Step 1a Depending on your operating system, specify the paper type from the Printing Preferences or Print dialog.Notes:Make sure that the setting matches the paper loaded.You can also change the setting on the printer control panel. Navigate to:Settings > Paper > Tray Configuration > Paper Size/Typeb Print the document.Do horizontal white lines appear on prints? | Go to step 2. The problem is solved. | |
| Step 2a Remove, and then insert the imaging kit.Warning—Potential Damage: Do not expose the imaging kit to direct light. Extended exposure to light can cause print quality problems.Warning—Potential Damage: Do not touch the photoconductor drum under the imaging kit. Doing so may affect the quality of future print jobs.b Print the document.Do horizontal white lines appear on prints? | Contact customer support. | The problem is solved. |
Vertical white lines

Note: Before solving the problem, print the Print Quality Test Pages. From the control panel, navigate to
Settings > Troubleshooting > Print Quality Test Pages. For non-touch-screen printer models, press to navigate through the settings.
| Action Yes No | ||
| Step 1a Depending on your operating system, specify the paper type from the Printing Preferences or Print dialog.Notes:Make sure that the setting matches the paper loaded.You can also change the setting on the printer control panel. Navigate to:Settings > Paper > Tray Configuration > Paper Size/Typeb Print the document.Do vertical white lines appear on prints? | Go to step 2. The problem is solved. | |
| Step 2Check if you are using the recommended paper type.a Load the paper source with the recommended paper type.b Print the document.Do vertical white lines appear on prints? | Go to step 3. The problem is solved. | |
| Step 3a Remove, and then insert the imaging kit.Warning—Potential Damage: Do not expose the imaging kit to direct light. Extended exposure to light may cause print quality problems.Warning—Potential Damage: Do not touch the photoconductor drum under the imaging kit. Doing so may affect the quality of future print jobs.b Print the document.Do vertical white lines appear on prints? | Contact customer support. | The problem is solved. |
Repeating defects
Note: Before solving the problem, print the Print Quality Test Pages. From the control panel, navigate to
Settings > Troubleshooting > Print Quality Test Pages. For non-touch-screen printer models, press to navigate through the settings.
| Action Yes No | ||
| a Using the Print Quality Test Pages, measure the distance between the repeating defects on the affected color page.b Check if the repeating defects match any of the following measurements:Imaging kit94.20 mm (3.71 in.)29.80 mm (1.17 in.)23.20 mm (0.91 in.)Developer unit43.90 mm (1.73 in.)45.50 mm (1.79 in.)Transfer module37.70 mm (1.48 in.)78.50 mm (3.09 in.)55 mm (2.17 in.)Fuser79.80 mm (3.14 in.)94.30 mm (3.71 in.)Do the repeating defects match any of the measurements? | Take note of the distance, and then contact customer support. | Take note of the distance, and then contact customer support. |
Confidential and other held documents do not print
| Action Yes No | ||
| Step 1a From the control panel, check if the documents appear in the Held Jobs list.Note: If the documents are not listed, then print the documents using the Print and Hold options.b Print the documents.Are the documents printed? | The problem is solved. | Go to step 2. |
| Step 2The print job may contain a formatting error or invalid data.•Delete the print job, and then send it again.•For PDF files, generate a new file, and then print the documents.Are the documents printed? | The problem is solved. | Go to step 3. |
| Step 3If you are printing from the Internet, then the printer may be reading the multiple job titles as duplicates.For Windows usersa Open the Printing Preferences dialog.b From the Print and Hold section, selectKeep duplicate documents.c Enter a PIN.d Resend the print job.For Macintosh usersa Save and name each job differently.b Send the job individually.Are the documents printed? | The problem is solved. | Go to step 4. |
| Step 4a Delete some held jobs to free up printer memory.b Resend the print job.Are the documents printed? | The problem is solved. | Go to step 5. |
| Step 5a Add printer memory.b Resend the print job.Are the documents printed? | The problem is solved. | Contact customer support. |
Slow printing
| Action Yes No | ||
| Step 1Make sure that the printer cable is securely connected to the printer and to the computer, print server, option, or other network device.Is the printer printing slow? | Go to step 2. The problem is solved. | |
| Step 2a Make sure that the printer is not in Eco-Mode or Quiet Mode.•From the control panel, navigate to:Settings > Device > Power Management > Eco-Mode•From the control panel, navigate to:Settings > Device > Maintenance > Configuration Menu >Device Operations > Quiet ModeFor non-touch-screen printer models, pressOKto navigate through the settings.b Print the document.Is the printer printing slow? | Go to step 3. The problem is solved. | |
| Step 3a Depending on your operating system, specify the print resolution from the Printing Preferences or Print dialog.b Set the resolution to 4800 CQ.c Print the document.Is the printer printing slow? | Go to step 4. The problem is solved. | |
| Step 4a From the control panel, navigate to:Settings > Print > Quality > Print ResolutionFor non-touch-screen printer models, pressOKto navigate through the settings.b Set the resolution to 4800 CQ.c Print the document.Is the printer printing slow? | Go to step 5. The problem is solved. | |
| Step 5a Depending on your operating system, specify the paper type from the Printing Preferences or Print dialog.Notes:Make sure that the setting matches the paper loaded.You can also change the setting on the printer control panel.Heavier paper prints more slowly.Paper narrower than letter, A4, and legal may print more slowly.b Print the document.Is the printer printing slow? | Go to step 6. The problem is solved. | |
| Step 6a Make sure that the printer settings for Media Texture and Media Weight match the paper being loaded.From the control panel, navigate to:Settings > Paper > Media Configuration > Media TypesFor non-touch-screen printer models, pressOKto navigate through the settings.Note: Rough paper textures and heavy paper weights may print more slowly.b Print the document.Is the printer printing slow? | Go to step 7. The problem is solved. | |
| Step 7Remove held jobs.Is the printer printing slow? | Go to step 8. The problem is solved. | |
| Step 8a Make sure that the printer is not overheating.Notes:Allow the printer to cool down after a long print job.Observe the recommended ambient temperature for the printer. For more information, see “Selecting a location for the printer” on page 10.b Print the document.Is the printer printing slow? | Go to step 9. The problem is solved. | |
| Step 9a Add more printer memory.b Print the document.Is the printer printing slow? | Contact customer support. | The problem is solved. |
Print jobs do not print
| Action Yes No | ||
| Step 1a From the document you are trying to print, open the Print dialog, and then check if you have selected the correct printer.b Print the document.Is the document printed? | The problem is solved. | Go to step 2. |
| Step 2a Check if the printer is on.b Resolve any error messages that appear on the display.c Print the document.Is the document printed? | The problem is solved. | Go to step 3. |
| Step 3a Check if the ports are working and if the cables are securely connected to the computer and the printer.For more information, see the setup documentation that came with the printer.b Print the document.Is the document printed? | The problem is solved. | Go to step 4. |
| Step 4a Turn off the printer, wait for about 10 seconds, and then turn on the printer.b Print the document.Is the document printed? | The problem is solved. | Go to step 5. |
| Step 5a Remove, and then reinstall the print driver.b Print the document.Is the document printed? | The problem is solved. | Contact customer support. |
The printer is not responding
| Action Yes No | ||
| Step 1Check if the power cord is connected to the electrical outlet.⚠️ CAUTION—POTENTIAL INJURY: To avoid the risk of fire or electrical shock, connect the power cord to an appropriately rated and properly grounded electrical outlet that is near the product and easily accessible.Is the printer responding? | The problem is solved. | Go to step 2. |
| Step 2Check if the electrical outlet is turned off by a switch or breaker.Is the electrical outlet turned off by a switch or breaker? | Turn on the switch or reset the breaker. | Go to step 3. |
| Step 3Check if the printer is on.Is the printer on? | Go to step 4. Turn on | the printer. |
| Step 4Check if the printer is in Sleep or Hibernate mode.Is the printer in Sleep or Hibernate mode? | Press the power button to wake the printer. | Go to step 5. |
| Step 5Check if the cables connecting the printer and the computer are inserted to the correct ports.Are the cables inserted to the correct ports? | Go to step 6. Insert the | cables to the correct ports. |
| Step 6Turn off the printer, install the hardware options, and then turn on the printer.For more information, see the documentation that came with the option.Is the printer responding? | The problem is solved. | Go to step 7. |
| Step 7Install the correct print driver.Is the printer responding? | The problem is solved. | Go to step 8. |
| Step 8Turn off the printer, wait for about 10 seconds, and then turn on the printer.Is the printer responding? | The problem is solved. | Contact customer support. |
Job prints from the wrong tray or on the wrong paper
| Action Yes No | ||
| Step 1a Check if you are printing on the correct paper.b Print the document.Is the document printed on the correct paper? | Go to step 2. Load the correct paper size and paper type. | |
| Step 2a Depending on your operating system, specify the paper size and paper type from the Printing Preferences or Print dialog.Note: You can also change the settings on the printer control panel. Navigate to:Settings > Paper > Tray Configuration > Paper Size/TypeFor non-touch-screen printer models, press OK to navigate through the settings.b Make sure that the settings match the paper loaded.c Print the document.Is the document printed on the correct paper? | The problem is solved. | Go to step 3. |
| Step 3a Check if the trays are linked.For more information, see “Linking trays” on page 30.b Print the document.Is the document printed from the correct tray? | The problem is solved. | Contact customer support. |
Color quality problems
Adjusting toner darkness
1 From the control panel, navigate to:
Settings > Print > Quality > Toner Darkness

For non-touch-screen printer models, press
to navigate through the settings.
2 Adjust the setting.
3 Apply the changes.
Modifying the colors in printed output
For non-touch-screen printer models, press to navigate through the settings.
1 From the control panel, navigate to:
Settings > Print > Quality > Advanced Imaging > Color Correction
2 From the Color Correction menu, select Manual > Color Correction Content.
3 Choose the appropriate color conversion setting.
| Object type Color conversion tables | |
| RGB ImageRGB TextRGB Graphics | •Vivid—Produces brighter, more saturated colors and may be applied to all incoming color formats.• sRGB Display—Produces an output that approximates the colors displayed on a computer monitor. Black toner usage is optimized for printing photographs.• Display-True Black—Produces an output that approximates the colors displayed on a computer monitor. This setting uses only black toner to create all levels of neutral gray.• sRGB Vivid—Provides an increased color saturation for the sRGB Display color correction. Black toner usage is optimized for printing business graphics.•Off |
| CMYK ImageCMYK TextCMYK Graphics | •US CMYK—Applies color correction to approximate the Specifications for Web Offset Publishing (SWOP) color output.• Euro CMYK—Applies color correction to approximate Euroscale color output.•Vivid CMYK—Increases the color saturation of the US CMYK color correction setting.•Off |
FAQ about color printing
What is RGB color?
RGB color is a method of describing colors by indicating the amount of red, green, or blue used to produce a certain color. Red, green, and blue light can be added in various amounts to produce a large range of colors observed in nature. Computer screens, scanners, and digital cameras use this method to display colors.
What is CMYK color?
CMYK color is a method of describing colors by indicating the amount of cyan, magenta, yellow, and black used to reproduce a particular color. Cyan, magenta, yellow, and black inks or toners can be printed in various amounts to produce a large range of colors observed in nature. Printing presses, inkjet printers, and color laser printers create colors in this manner.
How is color specified in a document to be printed?
Software programs are used to specify and modify the document color using RGB or CMYK color combinations. For more information, see the software program Help topics.
How does the printer know what color to print?
When printing a document, information describing the type and color of each object is sent to the printer and is passed through color conversion tables. Color is translated into the appropriate amounts of cyan, magenta, yellow, and black toner used to produce the color you want. The object information determines the application of color conversion tables. For example, it is possible to apply one type of color conversion table to text while applying a different color conversion table to photographic images.
What is manual color correction?
When manual color correction is enabled, the printer employs user-selected color conversion tables to process objects. Manual color correction settings are specific to the type of object being printed (text, graphics, or images). It is also specific to how the color of the object is specified in the software program (RGB or CMYK combinations). To apply a different color conversion table manually, see "Modifying the colors in printed output" on page 210.
If the software program does not specify colors with RGB or CMYK combinations, then manual color correction is not useful. It is also not effective if the software program or the computer operating system controls the adjustment of colors. In most situations, setting the Color Correction to Auto generates preferred colors for the documents.
How can I match a particular color (such as a corporate logo)?
From the printer Quality menu, nine types of Color Samples sets are available. These sets are also available from the Color Samples page of the Embedded Web Server. Selecting any sample set generates multiple-page prints consisting of hundreds of colored boxes. Each box contains a CMYK or RGB combination, depending on the table selected. The observed color of each box is obtained by passing the CMYK or RGB combination labeled on the box through the selected color conversion table.
By examining Color Samples sets, you can identify the box with color closest to the color being matched. The color combination labeled on the box can then be used for modifying the color of the object in a software program. For more information, see the software program Help topics. Manual color correction may be necessary to use the selected color conversion table for the particular object.
Selecting which Color Samples set to use for a particular color-matching problem depends on:
- The Color Correction setting being used (Auto, Off, or Manual)
- The type of object being printed (text, graphics, or images)
- How the color of the object is specified in the software program (RGB or CMYK combinations)
If the software program does not specify colors with RGB or CMYK combinations, then the Color Samples pages are not useful. Additionally, some software programs adjust the RGB or CMYK combinations specified in the program through color management. In these situations, the printed color may not be an exact match of the Color Samples pages.
The print appears tinted
| Action Yes No | ||
| Step 1Perform Color Adjust.aFrom the control panel, navigate to:Settings > Print > Quality > Advanced Imaging > Color AdjustFor non-touch-screen printer models, press OK to navigate through the settings.bPrint the document.Does the print appear tinted? | Go to step 2. The problem is solved. | |
| Step 2aFrom the control panel, navigate to:Settings > Print > Quality > Advanced Imaging > Color BalanceFor non-touch-screen printer models, press OK to navigate through the settings.bAdjust the settings.cPrint the document.Does the print appear tinted? | Contact customer support. | The problem is solved. |
Faxing problems
Cannot send or receive faxes
| Action Yes No | ||
| Step 1Resolve any error messages that appear on the display.Can you send or receive a fax? | The problem is solved. | Go to step 2. |
| Step 2Make sure that the cable connections for the following equipment are secure:•Telephone•Handset•Answering machineCan you send or receive a fax? | The problem is solved. | Go to step 3. |
| Step 3Check for a dial tone.•Call the fax number to check if it is working properly.•If you are using the On Hook Dial feature, then turn up the volume to check if you hear a dial tone.Can you hear a dial tone? | Go to step 5. Go to step 4. | |
| Step 4Check the telephone wall jack.a Connect the analog telephone directly to the wall jack.b Listen for a dial tone.c If you do not hear a dial tone, then use a different telephone cable.d If you still do not hear a dial tone, then connect the analog telephone to a different wall jack.e If you hear a dial tone, then connect the printer to that wall jack.Can you send or receive a fax? | The problem is solved. | Go to step 5. |
| Step 5Check if the printer is connected to an analog phone service or to the correct digital connector.•If you are using an Integrated Services for Digital Network (ISDN) telephone service, then connect to an analog telephone port of an ISDN terminal adapter. For more information, contact your ISDN provider.•If you are using DSL, then connect to a DSL filter or router that supports analog use. For more information, contact your DSL provider.•If you are using a private branch exchange (PBX) telephone service, then make sure that you are connecting to an analog connection on the PBX. If none exists, then consider installing an analog telephone line for the fax machine.Can you send or receive a fax? | The problem is solved. | Go to step 6. |
| Step 6Temporarily disconnect other equipment and disable other telephone services.a Disconnect other equipment (such as answering machines, computers, modems, or telephone line splitters) between the printer and the telephone line.b Disable call waiting and voice mail. For more information, contact your telephone company.Can you send or receive a fax? | The problem is solved. | Go to step 7. |
| Step 7Scan the original document one page at a time.a Dial the fax number.b Scan the document.Can you send or receive a fax? | The problem is solved. | Contact customer support. |
Can receive but not send faxes
| Action Yes No | ||
| Step 1Load the original document properly into the ADF tray or on the scanner glass.Can you send faxes? | The problem is solved. | Go to step 2. |
| Step 2Set up the shortcut number properly.•Check if the shortcut number is set for the telephone number that you want to dial.•Dial the telephone number manually.Can you send faxes? | The problem is solved. | Contact customer support. |
Can send but not receive faxes
| Action Yes No | ||
| Step 1Make sure that the paper source is not empty.Can you receive faxes? | The problem is solved. | Go to step 2. |
| Step 2Check the ring count delay settings.From the control panel, navigate to:Settings > Fax > Analog Fax Setup > Fax Receive Settings > Rings to AnswerFor non-touch-screen printer models, press OK to navigate through the settings.Can you receive faxes? | The problem is solved. | Go to step 3. |
| Step 3If the printer is printing blank pages, then see “Blank or white pages” on page 183.Can you receive faxes? | The problem is solved. | Contact customer support. |
Poor fax print quality
| Action Yes No | ||
| Step 1Make sure that there are no print quality defects.aFrom the control panel, navigate toSettings>Troubleshooting>Print Quality Test Pages. For non-touch-screen printer models, pressOKto navigate through the settings.b Correct any print quality defects. For more information, see“Print quality is poor” on page 183.Is the fax print quality satisfactory? | The problem is solved. | Go to step 2. |
| Step 2Decrease the incoming fax transmission speed.aFrom the control panel, navigate to:Settings>Fax>Analog Fax Setup>FaxReceive Settings>Admin ControlsFor non-touch-screen printer models, pressOKto navigate through the settings.b From the Max Speed menu, select a lower transmission speed.Is the fax print quality satisfactory? | The problem is solved. | Contact customer support. |
Scanning problems
Cannot scan from a computer
| Action Yes No | ||
| Step 1a Turn off the printer, wait for about 10 seconds, and then turn it back on.b Resend the scan job.Can you send the scan job? | The problem is solved. | Go to step 2. |
| Step 2a Make sure that the cables between the printer and the print server are secure.For more information, see the setup documentation that came with the printer.b Resend the scan job.Can you send the scan job? | The problem is solved. | Contact customer support. |
Partial copies of document or photo
| Action Yes No | ||
| Step 1a Make sure that the document or photo is loaded facedown on the upper left corner of the scanner glass.b Copy the document or photo.Is the document or photo copied correctly? | The problem is solved. | Go to step 2. |
| Step 2a Match the paper size setting and the paper loaded in the tray.b Copy the document or photo.Is the document or photo copied correctly? | The problem is solved. | Contact customer support. |
Poor copy quality
| Action Yes No | ||
| Step 1a Clean the scanner glass and the ADF glass with a damp, soft, lint-free cloth. If your printer has a second ADF glass inside the ADF, then also clean that glass.For more information, see “Cleaning the scanner” on page 146.b Make sure that the document or photo is loaded facedown on the upper left corner of the scanner glass.c Copy the document or photo.Is the copy quality satisfactory? | The problem is solved. | Go to step 2. |
| Step 2a Check the quality of the original document or photo.b Adjust the scan quality settings.c Copy the document or photo.Is the copy quality satisfactory? | The problem is solved. | Contact customer support. |
Scan job was not successful
| Action Yes No | ||
| Step 1Check the cable connections.a Make sure that the Ethernet or USB cable is securely connected to the computer and the printer.b Resend the scan job.Is the scan job successful? | The problem is solved. | Go to step 2. |
| Step 2Check the file you want to scan.a Make sure that the file name is not already used in the destination folder.b Make sure that the document or photo you want to scan is not open in another application.c Resend the scan job.Is the scan job successful? | The problem is solved. | Go to step 3. |
| Step 3a Make sure that the Append time stamp or the Overwrite existing file check box is selected in the destination configuration settings.b Resend the scan job.Is the scan job successful? | The problem is solved. | Contact customer support. |
Scanner does not close
| Action Yes No | ||
| Remove obstructions that keep the scanner unit open. | The problem is solved. | Contact customer support. |
| Did the scanner unit close correctly? |
Scanning takes too long or freezes the computer
| Action Yes No | ||
| Close all applications that are interfering with the scan.Does scanning take too long or freeze the computer? | Contact customer support. | The problem is solved. |
Scanner does not respond
| Action Yes No | ||
| Step 1a Check if the power cord is connected properly to the printer and the electrical outlet.⚠️ CAUTION—POTENTIAL INJURY: To avoid the risk offire or electrical shock, connect the power cord to an appropriately rated and properly grounded electrical outlet that is near the product and easily accessible.b Copy or scan the document.Is the scanner responding? | The problem is solved. | Go to step 2. |
| Step 2a Check if the printer is turned on.b Resolve any error messages that appear on the display.c Copy or scan the document.Is the scanner responding? | The problem is solved. | Go to step 3. |
| Step 3a Turn off the printer, wait for about 10 seconds, and then turn the printer on.b Copy or scan the document.Is the scanner responding? | The problem is solved. | Contact customer support. |
Adjusting scanner registration
1 From the control panel, navigate to:
Settings > Device > Maintenance > Configuration Menu > Scanner Configuration > Scanner Manual Registration
For non-touch-screen printer models, press OK to navigate through the settings.
2 From the Print Quick Test menu, select Start.
3 Place the Print Quick Test page on the scanner glass, and then select Flatbed Registration.
4 From the Copy Quick Test menu, select Start.
5 Compare the Copy Quick Test page with the original document.
Note: If the margins of the test page are different from the original document, then adjust Left Margin and Top Margin.
6 Repeat step 4 and step 5 until the margins of the Copy Quick Test page closely match the original document.
Adjusting ADF registration
1 From the control panel, navigate to:
Settings > Device > Maintenance > Configuration Menu > Scanner Configuration > Scanner Manual Registration
For non-touch-screen printer models, press OK to navigate through the settings.
2 From the Print Quick Test menu, select Start.
3 Place the Print Quick Test page on the ADF tray.
4 Select Front ADF Registration or Rear ADF Registration.
Notes:
- To align Front ADF Registration, place the test page faceup, short edge first into the ADF.
- To align Rear ADF Registration, place the test page facedown, short edge first into the ADF.
5 From the Copy Quick Test menu, select Start.
6 Compare the Copy Quick Test page with the original document.
Note: If the margins of the test page are different from the original document, then adjust Horizontal Adjust and Top Margin.
7 Repeat step 5 and step 6 until the margins of the Copy Quick Test page closely match the original document.
Contacting customer support
Before contacting customer support, make sure to have the following information:
- Printer problem
- Error message
- Printer model type and serial number
Visit the place where you purchased your printer.
Upgrading and migrating
Hardware
Available internal options
- Memory cards
-PCIe
-DDR3 DRAM
-Flash memory
- Optional cards
-Font cards
-Firmware cards
- Forms and Bar Code
- PRESCRIBE
•Printer hard disk (SATA)
Note: Some options are available only in some printer models.
Accessing the controller board

CAUTION—SHOCK HAZARD: To avoid the risk of electrical shock, if you are accessing the controller board or installing optional hardware or memory devices sometime after setting up the printer, then turn the printer off, and unplug the power cord from the electrical outlet before continuing. If you have any other devices attached to the printer, then turn them off as well, and unplug any cables going into the printer.
1 Turn off the printer.
2 Unplug the power cord from the electrical outlet, and then from the printer.
3 Using a flat-head screwdriver, remove the controller board access cover.
Warning—Potential Damage: Controller board electronic components are easily damaged by static electricity. Touch a metal surface on the printer before touching any controller board electronic components or connectors.
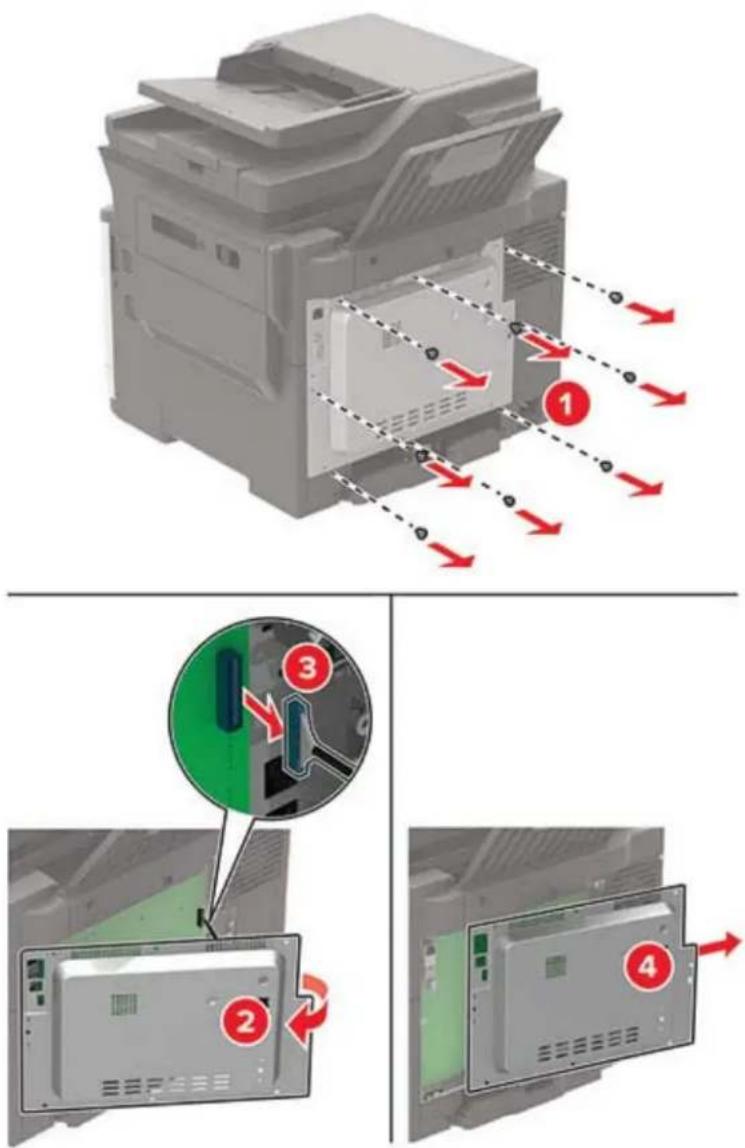
4 Attach the access cover.

5 Connect the power cord to the printer, and then to the electrical outlet.

CAUTION—POTENTIAL INJURY: To avoid the risk of fire or electrical shock, connect the power cord to an appropriately rated and properly grounded electrical outlet that is near and easily accessible.
6 Turn on the printer.
Installing a memory card

CAUTION—SHOCK HAZARD: To avoid the risk of electrical shock, if you are accessing the controller board or installing optional hardware or memory devices sometime after setting up the printer, then turn the printer off, and unplug the power cord from the electrical outlet before continuing. If you have any other devices attached to the printer, then turn them off as well, and unplug any cables going into the printer.
1 Turn off the printer.
2 Unplug the power cord from the electrical outlet, and then from the printer.
3 Using a flat-head screwdriver, open the controller board access cover.
Warning—Potential Damage: Controller board electronic components are easily damaged by static electricity. Touch a metal surface on the printer before touching any controller board components or connectors.

4 Unpack the memory card.
Warning—Potential Damage: Do not touch the connection points along the edge of the card.
5 Insert the memory card until it clicks into place.

natural_image
Diagram of a device component with a green circuit board and red arrow indicating direction (no text or symbols)6 Close the access cover.
7 Connect the power cord to the printer, and then to the electrical outlet.

CAUTION—POTENTIAL INJURY: To avoid the risk offire or electrical shock, connect the power cord to an appropriately rated and properly grounded electrical outlet that is near the product and easily accessible.
8 Turn on the printer.
Installing an optional card

CAUTION—SHOCK HAZARD: To avoid the risk of electrical shock, if you are accessing the controller board or installing optional hardware or memory devices sometime after setting up the printer, then turn the printer off, and unplug the power cord from the electrical outlet before continuing. If you have any other devices attached to the printer, then turn them off as well, and unplug any cables going into the printer.
1 Turn off the printer.
2 Unplug the power cord from the electrical outlet, and then from the printer.
3 Using a flat-head screwdriver, remove the controller board access cover.
Warning—Potential Damage: Controller board electronic components are easily damaged by static electricity. Touch a metal surface on the printer before touching any components or connectors.

4 Unpack the optional card.
Warning—Potential Damage: Do not touch the connection points along the edge of the card.
5 Push the card firmly into place.

natural_image
Aerial view of a green building with a red arrow pointing to it, surrounded by roads and vehicles (no visible text or symbols)Note: The entire length of the connector on the card must touch and be flush against the controller board.
Warning—Potential Damage: Improper installation of the card may cause damage to the card and the controller board.
6 Attach the access cover.
7 Connect the power cord to the printer, and then to the electrical outlet.
CAUTION—POTENTIAL INJURY: To avoid the risk of fire or electrical shock, connect the power cord to an appropriately rated and properly grounded electrical outlet that is near the product and easily accessible.
8 Turn on the printer.
Installing a printer hard disk

CAUTION—SHOCK HAZARD: To avoid the risk of electrical shock, if you are accessing the controller board or installing optional hardware or memory devices sometime after setting up the printer, then turn the printer off, and unplug the power cord from the electrical outlet before continuing. If you have any other devices attached to the printer, then turn them off as well, and unplug any cables going into the printer.
1 Tum off the printer.
2 Unplug the power cord from the electrical outlet, and then from the printer.
3 Using a flat-head screwdriver, remove the controller board access cover.
Warning—Potential Damage: Controller board electronic components are easily damaged by static electricity. Touch a metal surface on the printer before touching any controller board components or connectors.

4 Unpack the printer hard disk.
5 Attach the hard disk, and then connect the hard disk interface cable to the controller board.
Warning—Potential Damage: Do not touch or press the center of the hard disk.

6 Attach the access cover.
7 Connect the power cord to the printer, and then to the electrical outlet.
CAUTION—POTENTIAL INJURY: To avoid the risk offire or electrical shock, connect the power cord to an appropriately rated and properly grounded electrical outlet that is near the product and easily accessible.
8 Turn on the printer.
Installing optional trays
Note: Depending on your printer model, you may install a 650-sheet duo tray, a 550-sheet tray, or both.

CAUTION—SHOCK HAZARD: To avoid the risk of electrical shock, if you are accessing the controller board or installing optional hardware or memory devices sometime after setting up the printer, then turn the printer off, and unplug the power cord from the electrical outlet before continuing. If you have any other devices attached to the printer, then turn them off as well, and unplug any cables going into the printer.
1 Turn off the printer.
2 Unplug the power cord from the electrical outlet, and then from the printer.
3 Unpack the optional tray, and then remove all packing material.
4 Align the printer with the optional tray, and then lower the printer into place.

CAUTION—POTENTIAL INJURY: If the printer weight is greater than 18 kg (40 lb), then it requires two or more trained personnel to lift it safely.

natural_image
Diagram of a printer with a red arrow indicating a process or operation, showing internal components and a base (no text or symbols present)Note: If you are installing both the optional trays, then place the 550-sheet tray below the 650-sheet duo tray.
5 Connect the power cord to the printer, and then to the electrical outlet.

CAUTION—POTENTIAL INJURY: To avoid the risk offire or electrical shock, connect the power cord to an appropriately rated and properly grounded electrical outlet that is near the product and easily accessible.
6 Turn on the printer.
Add the tray in the print driver to make it available for print jobs. For more information, see “Adding available options in the print driver” on page 230.
Software
Installing the printer software
1 Obtain a copy of the software installer package.
- From the software CD that came with your printer.
- From our website or the place where you purchased the printer.
2 Run the installer, and then follow the instructions on the computer screen.
3 For Macintosh users, add the printer.
Note: Obtain the printer IP address from the TCP/IP section in the Network/Ports menu.
Adding available options in the print driver
For Windows users
1 Open the printers folder.
2 Select the printer you want to update, and then do either of the following:
- For Windows 7 or later, select Printer properties.
- For earlier versions, select Properties.
3 Navigate to the Configuration tab, and then select Update Now - Ask Printer.
4 Apply the changes.
For Macintosh users
1 From System Preferences in the Apple menu, navigate to your printer, and then select Options & Supplies.
2 Navigate to the list of hardware options, and then add any installed options.
3 Apply the changes.
Firmware
Exporting or importing a configuration file
You can export the configuration settings of your printer into a text file, and then import the file to apply the settings to other printers.
1 Open a web browser, and then type the printer IP address in the address field.
Notes:
- View the printer IP address on the printer home screen. The IP address appears as four sets of numbers separated by periods, such as 123.123.123.123.
- If you are using a proxy server, then temporarily disable it to load the web page correctly.
2 Export or import a configuration file for one or multiple applications.
For one application
a From the Embedded Web Server, click Apps > the application that you want > Configure.
b Click Export or Import.
For multiple applications
a From the Embedded Web Server, click Export Configuration or Import Configuration.
b Follow the instructions on the screen.
Updating firmware
Some applications require a minimum device firmware level to operate correctly.
For more information on updating the device firmware, contact your sales representative.
1 From the Embedded Web Server, click Settings > Device > Update Firmware.
2 Browse to locate the required flash file.
3 Apply the changes.
Notices
Product information
Product name:
Color Laser MFP
Machine type:
7529
Model(s):
081, 230, 238, 436, 496, 636, 638, 698, 836, 838, 898, and their equivalent models
Edition notice
September 2018
The following paragraph does not apply to any country where such provisions are inconsistent with local law: THIS PUBLICATION IS PROVIDED "AS IS" WITHOUT WARRANTY OF ANY KIND, EITHER EXPRESS OR IMPLIED, INCLUDING, BUT NOT LIMITED TO, THE IMPLIED WARRANTIES OF MERCHANTABILITY OR FITNESS FOR A PARTICULAR PURPOSE. Some states do not allow disclaimer of express or implied warranties in certain transactions; therefore, this statement may not apply to you.
This publication could include technical inaccuracies or typographical errors. Changes are periodically made to the information herein; these changes will be incorporated in later editions. Improvements or changes in the products or the programs described may be made at any time.
Licensing notices
All licensing notices associated with this product can be viewed from the CD:\NOTICES directory of the installation software CD.
Noise emission levels
The following measurements were made in accordance with ISO 7779 and reported in conformance with ISO 9296.
Note: Some modes may not apply to your product.
| 1-meter average sound pressure, dBA | |
| Printing 53 (One-sided); 55 (Two-sided) | |
| Scanning 53 | |
| Copying 56 | |
| Ready 16 | |
Waste from Electrical and Electronic Equipment (WEEE) directive

The WEEE logo signifies specific recycling programs and procedures for electronic products in countries of the European Union. We encourage the recycling of our products. If you have further questions about recycling options, contact your local sales office.
Product disposal
Do not dispose of the printer or supplies in the same manner as normal household waste. Consult your local authorities for disposal and recycling options.
Static sensitivity notice

This symbol identifies static-sensitive parts. Do not touch the areas near these symbols without first touching a metal surface in an area away from the symbol.
To prevent damage from electrostatic discharge when performing maintenance tasks such as clearing paper jams or replacing supplies, touch any exposed metal frame of the printer before accessing or touching interior areas of the printer even if the symbol is not present.
Temperature information
| Operating temperature and relative humidity 10 | to 32.2°C (50 to 90°F) and 15 to 80% RH |
| Printer / cartridge / imaging unit long-term storage1 | 15.3 to 32.2°C (60 to 90°F) and 8 to 80% RHMaximum wet bulb temperature2 : 22.8°C (73°F)Non-condensing environment |
| Printer / cartridge / imaging unit short-term shipping | -40 to 43.3°C (-40 to 110°F) |
| 1 Supplies shelf life is approximately 2 years. This is based on storage in a standard office environment at 22°C (72°F) and 45% humidity. 2 Wet-bulb temperature is determined by the air temperature and the relative humidity. | |
Laser notice
The printer is certified in the U.S. to conform to the requirements of DHHS 21 CFR, Chapter I, Subchapter J for Class I (1) laser products, and elsewhere is certified as a Class I laser product conforming to the requirements of IEC 60825-1: 2014.
Class I laser products are not considered to be hazardous. The printer contains internally a Class IIIb (3b) AlGaInP laser that is nominally 15 milliwatts operating in the wavelength region of 650–670 nanometers and enclosed in a non-serviceable printhead assembly. The laser system and printer are designed so there is never any human access to laser radiation above a Class I level during normal operation, user maintenance, or prescribed service conditions.
Power consumption
Product power consumption
The following table documents the power consumption characteristics of the product.
Note: Some modes may not apply to your product.
| Mode Description Power consumption | (Watts) | |
| Printing | The product is generating hard-copy output from electronic inputs. | 530 (One-sided); 360 (Two-sided) |
| Copy | The product is generating hard-copy output from hard-copy original documents. | 530 |
| Scan The product is scanning hard-copy documents. 28.5 | ||
| Ready The product is waiting for a print job. 35 | ||
| Sleep Mode | The product is in a high-level energy-saving mode. | 1.9 |
| Hibernate | The product is in a low-level energy-saving mode. | 0.2 |
| Off The product is plugged into an electrical outlet, but the power switch is turned off. | 0.2 | |
The power consumption levels listed in the previous table represent time-averaged measurements. Instantaneous power draws may be substantially higher than the average.
Sleep Mode
This product is designed with an energy-saving mode called Sleep Mode. The Sleep Mode saves energy by lowering power consumption during extended periods of inactivity. The Sleep Mode is automatically engaged after this product is not used for a specified period of time, called the Sleep Mode Timeout.
| Factory default Sleep Mode Timeout for this product (in minutes): | 15 |
By using the configuration menus, the Sleep Mode Timeout can be modified between 1 minute and 120 minutes. Setting the Sleep Mode Timeout to a low value reduces energy consumption, but may increase the response
time of the product. Setting the Sleep Mode Timeout to a high value maintains a fast response, but uses more energy.
Hibernate Mode
This product is designed with an ultra-low power operating mode called Hibernate mode. When operating in Hibernate Mode, all other systems and devices are powered down safely.
The Hibernate mode can be entered in any of the following methods:
•Using the Hibernate Timeout
•Using the Schedule Power modes
Factory default Hibernate Timeout for this product in all countries or regions 3 days
The amount of time the printer waits after a job is printed before it enters Hibernate mode can be modified between one hour and one month.
Off mode
If this product has an off mode which still consumes a small amount of power, then to completely stop product power consumption, disconnect the power supply cord from the electrical outlet.
Total energy usage
It is sometimes helpful to estimate the total product energy usage. Since power consumption claims are provided in power units of Watts, the power consumption should be multiplied by the time the product spends in each mode in order to calculate energy usage. The total product energy usage is the sum of each mode's energy usage.
Regulatory notices for telecommunication terminal equipment
This section contains regulatory information pertaining to products that contain the analog facsimile card:
Regulatory Type/Model Number:
LEX-M14-002
Modular component notice
This product may contain the following modular component(s):
Regulatory Type/Model LEX-M07-001
日本の VCCI 規定
Notice to users of Class A products in Brazil
This is a product that complies with the emission requirements of EN55022 and EN55032 Class A limits and immunity requirements of EN55024. This product is not intended to be used in residential/domestic environments.
This is a Class A product. In a domestic environment, this product may cause radio interference, in which case the user may be required to take adequate measures.
Index
A
accessing the controller
board 220
activating Voice Guidance 23
adapter plug 49
adding contacts 21
adding groups 21
adding hardware options print driver 230
adding internal options print driver 230
adjusting
ADF registration 219
scanner registration 218
adjusting speech rate Voice Guidance 24
adjusting the brightness display 164
adjusting the default headphone volume 143
adjusting the default speaker volume 143
adjusting the fax darkness 54
adjusting toner darkness 209
AirPrint
using 36
answering machine setting up 47
attaching cables 12
avoiding paper jams 165
B
blocking junk faxes 54
bookmarks
creating 20
creating folders for 21
C
can send but not receive
faxes 214
cannot open Embedded Web
Server 176
Card Copy
setting up 18
card stock
loading 27
changing the fax resolution 53
changing the printer port settings after installing ISP 145
changing the wallpaper 17
checking the printer
connectivity 178
checking the status of parts and
supplies 149
cleaning
exterior of the printer 146
interior of the printer 146
scanner 146
cleaning the printer 146
cleaning the scanner 138
clearances around the printer 10
clearing jam
in the multipurpose feeder 173
in trays 167
collated printing does not
work 181
collating copies
copying 42
Color Correction manual 210
Color Correction Content 210
confidential print jobs 39
printing from a Macintosh computer 39
printing from Windows 39
configuring daylight saving time 52
configuring Eco-Mode setting 20
configuring Eco-Settings 20
configuring e-mail settings 44
configuring fax speaker settings 143
configuring supply
notifications 150
configuring Universal paper 25
connecting the printer to a wireless network 144
connecting to a distinctive ring service 52
connecting to a wireless network using PIN method 144
using Push Button method 144
conserving supplies 164
contacting customer support 219
contacts
adding 21
deleting 22
editing 22
controller board
accessing 220
copy troubleshooting
partial copies of documents or photos 216
poor copy quality 216
scanner does not respond 218
scanner unit does not close 217
copying
both sides of the paper 42
creating a shortcut 43
using the ADF 41
using the scanner glass 41
copying multiple pages 43
copying multiple pages onto a single sheet 43
copying on letterhead 41
copying photos 41
creating a copy shortcut 43
creating a fax destination
shortcut 53
creating a shortcut copy 43
e-mail 44
fax destination 53
FTP address 56
creating an e-mail shortcut 44
creating an FTP shortcut 56
creating bookmarks 20
creating folders
for bookmarks 21
Customer Support using 20
customer support contacting 219
customizing the display 17
D
date and time
fax settings 52
daylight saving time configuring 52
deactivating the Wi-Fi
network 145
default headphone volume adjusting 143
default speaker volume adjusting 143
Defective flash detected 179
deleting contacts 22
deleting groups 22
Device Quotas setting up 19
display brightness adjusting 164
Display Customization using 17
distinctive ring service, fax connecting to 52
documents, printing from a mobile device 36
E
Eco-Mode
configuring 163
Eco-Settings
configuring 20
editing contacts 22
editing groups 22
emission notices 232, 236
enabling Magnification mode 24
enabling personal identification numbers 24
enabling spoken passwords 24
enabling the USB port 177
encrypting
printer hard disk 141
enlarging a copy 42
envelopes
loading 27, 29
environmental setting Eco-Mode 163
Hibernate mode 163 sleep mode 163
erasing non-volatile memory 140
erasing printer hard disk memory 140
erasing printer memory 140, 141
erasing volatile memory 140
Ethernet cable 12
Ethernet port 12
exporting a configuration file using the Embedded Web Server 231
creating a shortcut 44
setting up 44
e-mailing
configuring e-mail settings 44
using a shortcut number 44
using the address book 44
using the printer 44
F
factory default settings
restoring 141
FAQ about color printing 210
fax log
viewing 54
fax resolution
changing 53
fax setup
country- or region-specific 49
standard telephone line connection 47
fax speaker settings
configuring 143
fax troubleshooting
cannot receive faxes 214
cannot send faxes 214
cannot send or receive faxes 212
poor fax print quality 215
faxing
adjusting darkness 54
blocking junk faxes 54
changing resolution 53
creating a shortcut 53
fax setup 46
forwarding faxes 55
holding faxes 54
setting the date and time 52
viewing a fax log 54
firmware
update 231
flash drive
printing from 37
scanning to 56
font sample list
printing 40
forwarding faxes 55
FTP address
creating a shortcut 56
FTP server, scanning to
using the control panel 56
fuser maintenance kit ordering 150
G
Google Cloud Print using 36
groups
adding 21
deleting 22
editing 22
H
hardware options
memory card 223
trays 229
hardware options, adding print driver 230
held faxes 54
held jobs 39
printing from a Macintosh computer 39
printing from Windows 39
Hibernate mode configuring 163
holding faxes 54
home screen
customizing 17
showing icons 17
home screen icons using 16
HTTP/FTP Settings menu 126
humidity around the printer 233
|
icons on the home screen showing 17
imaging kit
ordering 149
replacing 155
importing a configuration file
using the Embedded Web Server 231
indicator light
understanding the status 14
installing a memory card 223
installing an optional card 224
installing options
printer hard disk 226
installing the printer
software 230
installing trays 229
internal option is not
detected 178
internal options
firmware card 220
memory card 220
printer hard disk 220
internal options, adding
print driver 230
J
jams
avoiding 165
locating jam areas 166
locations 166
jams, clearing
in the automatic document
feeder 174
in the duplex unit 167
in the fuser 167
in the manual feeder 174
K
keyboard on the display
using 24
L
letterhead
copying on 41
loading 27, 29
LINE port 12
linking trays 30
loading the manual feeder 29
loading the multipurpose
feeder 27
loading trays 25
locating the security slot 140
M
Magnification mode
enabling 24
making a copy 41
managing screen saver 17
manual color correction
applying 210
manual feeder
loading 29
memory card
installing 223
menu
802.1x 125
About this Printer 72
Accessibility 66
Confidential Print Setup 134
Configuration Menu 67
Copy Defaults 84
Custom Scan Sizes 83
Device 137
Erase Temporary Data Files 135
Ethernet 121
E-mail Defaults 101
E-mail Setup 100
Fax 137
Fax Cover Page 95
Fax Log Settings 96
Fax Mode 87
Fax Receive Settings 93
Fax Send Settings 89
Fax Server E-mail Settings 97
Fax Server Scan Settings 99
Flash Drive Print 116
Flash Drive Scan 112
FTP Defaults 107
General Fax Settings 88, 97
Google Cloud Print 127
Help 138
HTML 81
HTTP/FTP Settings 126
Image 81
IPSec 124
Job Accounting 76
Layout 72
Local Accounts 130
Login Restrictions 134
LPD Configuration 125
Manage Permissions 129
Media Types 83
Menu Settings Page 137
Miscellaneous 136
Mobile Services
Management 136
Network 138
Network Overview 117
Notifications 61
Out of Service Erase 71
PCL 79
PDF 78
PostScript 78
Power Management 65
Preferences 59
Print 137
Quality 75
Remote Operator Panel 61
Restore Factory Defaults 67
Security Audit Log 131
Setup 74
Shortcuts 137
SNMP 123
Solutions LDAP Settings 136
Speaker Settings 96
TCP/IP 122
ThinPrint 126
Tray Configuration 82
Troubleshooting 138
Universal Setup 82
USB 127
Visible Home Screen Icons 71
Web Link Setup 107
Wi-Fi Direct 128
XPS 78
menu map 58
Menu Settings Page
printing 139
menus
Disk Encryption 135
Schedule USB Devices 131
Wireless 118
mobile device
printing from 36
Mopria Print Service
using 36
moving the printer 162
multipurpose feeder
loading 27
N
navigating the screen
using gestures 23
navigating the screen using
gestures 23
noise emission levels 232
Non-Printer Manufacturer
supply 179
non-volatile memory 141
Not enough free space in flash
memory for resources 179
notices 232, 233, 234, 235, 236
O
optional card
installing 224
ordering
fuser maintenance kit 150
ordering a black and color
imaging kit 149
ordering a black imaging kit 149
ordering a waste toner bottle 149
ordering supplies
imaging kit 149
toner cartridge 149
waste toner bottle 149
P
paper jam clearing
standard bin 171
paper jam in door A 167
paper jam in the automatic
document feeder 174
paper jam in the multipurpose
feeder 173
paper jam in the standard bin 171
paper jam in trays 167
paper jam, clearing
in the automatic document
feeder 174
paper jams
avoiding 165
paper jams, clearing
in the duplex unit 167
in the fuser 167
in the manual feeder 174
personal identification number
method 144
personal identification numbers
enabling 24
photos
copying 41
placing separator sheets
between copies 42
poor fax print quality 215
power button light
understanding the status 14
power cord socket 12
print driver
hardware options, adding 230
print jobs not printed 207
print quality
cleaning the scanner 146
print quality troubleshooting
blank pages 183
crooked print 193
dark print 184
ghost images on prints 185
gray or colored
background 186
horizontal dark lines 197
horizontal white lines 200
light print 188
missing colors 190
mottled print and dots 191
paper curl 192
print appears tinted 212
repeating defects 202
skewed print 193
solid color or black images 194
text or images cut off 194
toner easily rubs off 195
uneven print density 196
vertical colored lines or banding 198
vertical white lines 201
white pages 183
print troubleshooting
confidential and other held documents do not print 203
envelope seals when printing 180
incorrect margins 187
jammed pages are not reprinted 183
job prints from the wrong tray 209
job prints on the wrong paper 209
paper frequently jams 182
print jobs do not print 207
slow printing 205
tray linking does not work 181
unable to read flash drive 177
printer
fully configured 11
shipping 163
printer configurations 11
printer connectivity checking 178
printer hard disk
encrypting 141
installing 226
printer hard disk memory 141 erasing 140
printer is not responding 208
printer location selecting 10
printer menus 58
printer messages
Defective flash detected 179
Non-Printer Manufacturer supply 179
Not enough free space in flash memory for resources 179
Replace cartridge, printer region mismatch 179
Scanner maintenance required, use ADF Kit 180
Unformatted flash detected 179
printer options troubleshooting cannot detect internal option 178
printer port settings
changing 145
printer ports 12
printer settings
restoring factory default 141
printer software, installing 230
printer status 14
printing
font sample list 40
from a computer 36
from a flash drive 37
from a mobile device 36
Menu Settings Page 139
quality test pages 138
printing confidential and other
held jobs
from a Macintosh computer 39
from Windows 39
printing from a flash drive 37
Push Button method 144
Q
QR codes
adding 19
R
reducing a copy 42
removing paper jam
in the multipurpose feeder 173
in trays 167
repeat print jobs 39
printing from a Macintosh computer 39
printing from Windows 39
repeating defects 202
Replace cartridge, printer region
mismatch 179
replacing supplies
black and color imaging kit 155
black imaging kit 155
toner cartridge 150
waste toner bottle 152
reserve print jobs
printing from a Macintosh computer 39
printing from Windows 39
restoring factory default
settings 141
RJ11 adapter 49
running a slideshow 17
s
safety information 8, 9
saving paper 43
Scan Center
setting up 18
Scan to Computer
setting up 57
scan troubleshooting
cannot scan from a
computer 215
partial copies of documents or photos 216
poor copy quality 216
scan job was not successful 217
scanner does not respond 218
scanner unit does not close 217
scanning freezes the computer 218
scanning takes too long 218
scanner
cleaning 146
Scanner maintenance required,
use ADF Kit 180
scanning
to an FTP server 56
scanning to a computer 57
scanning to a flash drive 56
scanning to an FTP server using the control panel 56
scheduling a fax 53
scheduling power modes 20
securing printer memory 141
security slot
locating 140
selecting a location for the
printer 10
sending a fax
scheduled 53
using the computer 52
using the control panel 52
sending an e-mail 44
separator sheets between
copies
placing 42
setting the fax date and time 52
setting the paper size 25
setting the paper type 25
setting up Device Quotas 19
setting up e-mail function 44
setting up fax
country- or region-specific 49
standard telephone line connection 47
setting up fax function 46
shipping the printer 163
Shortcut Center using 19
showing icons on the home
screen 17
sleep mode
configuring 163
speaker
default volume 143
spoken passwords enabling 24
statement of volatility 141
status of parts
checking 149
status of supplies checking 149
storing print jobs 39
supplies
conserving 164
supply notifications configuring 150
supported file types 38
supported flash drives 38
supported paper sizes 31
supported paper types 33
supported paper weights 34
T
TCP/IP menu 122
temperature around the
printer 10, 233
toner cartridge
ordering 149
replacing 150
toner darkness
adjusting 209
trays
installing 229
loading 25
troubleshooting
cannot open Embedded Web Server 176
FAQ about color printing 210
printer is not responding 208
troubleshooting, copy
partial copies of documents or photos 216
poor copy quality 216
scanner does not respond 218
scanner unit does not close 217
troubleshooting, fax
cannot send faxes 214
cannot send or receive faxes 212
troubleshooting, print
collated printing does not work 181
confidential and other held documents do not print 203
envelope seals when printing 180
incorrect margins 187
jammed pages are not reprinted 183
job prints from the wrong tray 209
job prints on the wrong paper 209
paper frequently jams 182
print jobs do not print 207
slow printing 205
tray linking does not work 181
troubleshooting, print quality blank pages 183
crooked print 193
dark print 184
ghost images on prints 185
gray or colored background 1
horizontal dark lines 197
horizontal white lines 200
light print 188
missing colors 190
mottled print and dots 191
paper curl 192
print appears tinted 212
repeating defects 202
skewed print 193
solid color or black images 194
text or images cut off 194
toner easily rubs off 195
uneven print density 196
vertical colored lines or banding 198
vertical white lines 201
white pages 183
troubleshooting, printer options
cannot detect internal option 178
troubleshooting, scan
cannot scan from a computer 215
partial copies of documents or photos 216
poor copy quality 216
scan job was not successful 217
scanner does not respond 218
scanner unit does not close 217
two-sided copying 42
volatile memory 141
W
waste toner bottle
replacing 152
Wireless menu 118
wireless network
connecting the printer to 144
Wi-Fi Protected Setup 144
wireless networking 144
Wi-Fi network
deactivating 145
Wi-Fi Protected Setup
wireless network 144
U
unable to read flash drive
troubleshooting, print 177
Unformatted flash detected 179
Universal paper
configuring 25
unlinking trays 30
updating firmware
flash file 231
USB cable 12
USB port 12
enabling 177
using Customer Support 20
using Display Customization 17
using QR Code Generator 19
using the control panel
panel with 4.3-inch
touch-screen display 14
using the home screen 16
V
verify print jobs 39
printing from a Macintosh
computer 39
printing from Windows 39
virtual keyboard
using 24
Voice Guidance
activating 23
speech rate 24
Voice Guidance speech rate
adjusting 24

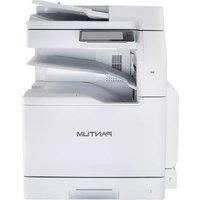
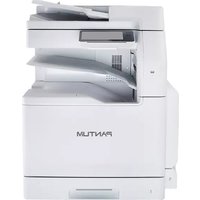
- Pantum CM7100 Series
- Contents
- Safety information....7
- Learning about the printer....10
- Using the control panel....14
- Setting up and using the home screen applications....16
- Setting up and using the accessibility features.... 23
- Loading paper and specialty media....25
- Paper support.... 31
- Printing....36
- Copying....41
- E-mailing....44
- Faxing....46
- Scanning....56
- Understanding the printer menus....58
- Securing the printer....140
- Maintaining the printer....143
- Clearing jams....165
- Troubleshooting.... 176
- Upgrading and migrating....220
- Notices....232
- Index......237
- Safety information
- Conventions
- Product statements
- Learning about the printer
- Selecting a location for the printer
- Printer configurations
- Attaching cables
- Using the control panel
- Panel with 4.3-inch touch-screen display
- Understanding the status of the power button and indicator light
- Setting up and using the home screen applications
- Using the home screen
- Customizing the home screen
- Notes:
- Using Display Customization
- Managing screen saver and slide show images
- Changing the wallpaper image
- Running a slide show from a flash drive
- Setting up Scan Center
- Setting up Card Copy
- Using Shortcut Center
- Setting up Device Quotas
- Using QR Code Generator
- Configuring Eco-Settings
- Using Customer Support
- Managing bookmarks
- Creating bookmarks
- Click Save.
- Creating folders
- Managing contacts
- Adding contacts
- Adding groups
- Editing contacts or groups
- Deleting contacts or groups
- Setting up and using the accessibility features
- Activating Voice Guidance
- From the control panel
- From the keyboard
- Navigating the screen using gestures
- Enabling Magnification mode
- Adjusting the Voice Guidance speech rate
- Using the keyboard on the display
- Enabling spoken passwords or personal identification numbers
- Loading paper and specialty media
- Setting the paper size and type
- Configuring Universal paper settings
- Loading trays
- Loading the multipurpose feeder
- Loading the manual feeder
- Linking trays
- Paper support
- Supported paper sizes
- Supported paper types
- Supported paper weights
- Printing
- Printing from a computer
- Printing from a mobile device
- Printing from a mobile device using Google Cloud Print
- Printing from a mobile device using Mopria Print Service
- Printing from a mobile device using AirPrint
- Printing from a flash drive
- Supported flash drives and file types
- Flash drives
- File types
- Configuring confidential jobs
- Printing confidential and other held jobs
- For Windows users
- For Macintosh users
- Printing a font sample list
- Copying
- Making a copy
- Copying photos
- Copying on letterhead
- Copying on both sides of the paper
- Reducing or enlarging copies
- Collating copies
- Placing separator sheets between copies
- Copying multiple pages onto a single sheet
- Creating a copy shortcut
- E-mailing
- Setting up the e-mail function
- Configuring e-mail settings
- Sending an e-mail
- Creating an e-mail shortcut
- Faxing
- Setting up the printer to fax
- Setting up the fax function
- Setting up fax using a standard telephone line
- Setup 1: Printer is connected to a dedicated fax line
- Setup 2: Printer is sharing the line with an answering machine
- Connected to different wall jacks
- Setting up fax in countries or regions with different telephone wall jacks and plugs
- Connecting the printer to a non-RJ11 wall jack
- Connecting the printer to a wall jack in Germany
- Connecting to a distinctive ring service
- Setting the fax date and time
- Configuring daylight saving time
- Sending a fax
- Using the computer
- Scheduling a fax
- Creating a fax destination shortcut
- Changing the fax resolution
- Adjusting the fax darkness
- Viewing a fax log
- Blocking junk faxes
- Holding faxes
- Forwarding a fax
- Scanning
- Scanning to an FTP server
- Creating an FTP shortcut
- Scanning to a flash drive
- Sending scanned documents to a computer
- Understanding the printer menus
- Device
- Accessibility
- Visible Home Screen Icons
- Job Accounting
- Paper
- Media Configuration
- Copy
- Fax
- Analog Fax Setup
- Fax Server Setup
- FTP
- USB Drive
- Network/Ports
- Wireless
- TCP/IP
- SNMP
- IPSec
- 802.1x
- LPD Configuration
- HTTP/FTP Settings
- Google Cloud Print
- Wi-Fi Direct
- Security
- Login Methods
- Disk Encryption
- Erase Temporary Data Files
- Mobile Services Management
- Reports
- Troubleshooting
- Printing the Menu Settings Page
- Securing the printer
- Locating the security slot
- Erasing printer memory
- Erasing printer hard disk memory
- Encrypting the printer hard disk
- Restoring factory default settings
- Statement of Volatility
- Disposing of a printer hard disk
- Maintaining the printer
- Adjusting the speaker volume
- Adjusting the default internal speaker volume
- Adjusting the default headphone volume
- Configuring the fax speaker settings
- Networking
- Connecting the printer to a Wi-Fi network
- Connecting the printer to a wireless network using Wi-Fi Protected Setup (WPS)
- Using the Push Button method
- Using the personal identification number (PIN) method
- Deactivating the Wi-Fi network
- Changing the printer port settings after installing an internal solutions port
- Cleaning printer parts
- Cleaning the printer
- Cleaning the scanner
- Ordering parts and supplies
- Checking the status of parts and supplies
- Ordering a toner cartridge
- Ordering an imaging kit
- Ordering a waste toner bottle
- Ordering a maintenance kit
- Configuring supply notifications
- Replacing parts and supplies
- Replacing a toner cartridge
- Replacing the waste toner bottle
- Replacing an imaging kit
- Moving the printer
- Moving the printer to another location
- Shipping the printer
- Saving energy and paper
- Configuring the power save mode settings
- Eco-Mode
- Sleep mode
- Hibernate mode
- Adjusting the brightness of the display
- Conserving supplies
- Clearing jams
- Avoiding jams
- Load paper properly
- Use recommended paper
- Identifying jam locations
- Paper jam in trays
- Paper jam in door A
- Paper jam in the fuser
- Paper jam in the duplex unit
- Paper jam in the standard bin
- Paper jam in the multipurpose feeder
- Paper jam in the manual feeder
- Paper jam in door C
- Network connection problems
- Enabling the USB port
- Checking the printer connectivity
- Hardware options problems
- Defective flash detected
- Not enough free space in flash memory for resources
- Unformatted flash detected
- Issues with supplies
- Replace cartridge, printer region mismatch
- Non-Printer Manufacturer supply
- Scanner maintenance required, use ADF Kit
- Paper feed problems
- Paper frequently jams
- Jammed pages are not reprinted
- Printing problems
- Print quality is poor
- Blank or white pages
- Dark print
- Ghost images
- Gray or colored background
- Incorrect margins
- Light print
- Missing colors
- Mottled print and dots
- Paper curl
- Print crooked or skewed
- Solid color or black images
- Text or images cut off
- Toner easily rubs off
- Uneven print density
- Horizontal dark lines
- Vertical dark lines
- Horizontal white lines
- Vertical white lines
- Repeating defects
- Color quality problems
- Adjusting toner darkness
- Modifying the colors in printed output
- FAQ about color printing
- What is RGB color?
- What is CMYK color?
- How is color specified in a document to be printed?
- How does the printer know what color to print?
- What is manual color correction?
- How can I match a particular color (such as a corporate logo)?
- Faxing problems
- Can receive but not send faxes
- Can send but not receive faxes
- Scanning problems
- Scan job was not successful
- Scanner does not close
- Scanning takes too long or freezes the computer
- Scanner does not respond
- Adjusting scanner registration
- Adjusting ADF registration
- Contacting customer support
- Upgrading and migrating
- Hardware
- Available internal options
- Accessing the controller board
- Installing a memory card
- Installing an optional card
- Installing a printer hard disk
- Installing optional trays
- Software
- Installing the printer software
- Adding available options in the print driver
- Firmware
- Exporting or importing a configuration file
- For one application
- For multiple applications
- Updating firmware
- Notices
- Product information
- Edition notice
- Licensing notices
- Noise emission levels
- Waste from Electrical and Electronic Equipment (WEEE) directive
- Product disposal
- Static sensitivity notice
- Temperature information
- Laser notice
- Power consumption
- Product power consumption
- Off mode
- Total energy usage
- Regulatory notices for telecommunication terminal equipment
- Modular component notice
- 日本の VCCI 規定
- Notice to users of Class A products in Brazil
- Index
- A
- B
- C
- D
- E
- F
- G
- H
- |
- J
- K
- L
- M
- N
- O
- P
- Q
- R
- s
- T
- W
- U
- V
Brand : PANTUM
Model : CM7105DN
Category : Printer