
Ear V971N - Thermometer Vicks - Free user manual and instructions
Find the device manual for free Ear V971N Vicks in PDF.


| Product Type | Infrared Ear Thermometer |
| Model | V971N |
| Brand | Vicks |
| Measuring Range | 32.0 – 45.2 °C (85.8 – 100.0 °F) |
| Accuracy | ±0.2 °C (±0.4 °F) (laboratory) |
| Measurement Time | Approximately 1 second |
| Display | LCD with 0.1 °F resolution |
| Memory | Auto-display of last reading; recall of up to 12 readings |
| Power Source | 2 AAA batteries (1.5 V) |
| Battery Life | Not specified; replace when low battery symbol appears |
| Auto Power Off | After approx. 1 minute |
| Operating Temperature | 20 °C to 50 °C (68 °F to 122 °F) |
| Storage Temperature | -25 °C to 55 °C (-13 °F to 131 °F) |
| Dimensions (L x W x H) | 127 mm x 44 mm x 63 mm |
| Weight | Approximately 70 g (with batteries) |
| Cleaning | Wipe with alcohol swab; do not immerse in water |
| Safety | Not waterproof; use with probe cover for hygiene; keep out of reach of children |
| Spare Parts | Sensor covers (Vicks branded); replacement batteries (AAA) |
| Warranty | 1 year limited warranty (excluding batteries) |
| Certifications | Compliant with EN 12470-5 and ASTM E-1965 |
Frequently Asked Questions - Ear V971N Vicks
User questions about Ear V971N Vicks
0 question about this device. Answer the ones you know or ask your own.
Ask a new question about this device
Download the instructions for your Thermometer in PDF format for free! Find your manual Ear V971N - Vicks and take your electronic device back in hand. On this page are published all the documents necessary for the use of your device. Ear V971N by Vicks.
USER MANUAL Ear V971N Vicks
10. Cleaning and Storage
Use an alcohol swab or cotton swab moistened with alcohol (PDS (sugrophy)) to clean the thermometer casing and the measuring sensor lens. Ensure that no liquid enters the interior of the thermometer. Never use abrasive cleaning agents, thinners or berrains for cleaning and never immerse the instrument in water or other cleaning liquids. Take care not to scratch the surface of the display. After cleaning, replace Protective Cap

Remove the battery from the instrument if it is not required for extended periods of time in order to avoid damage to the thermometer resulting from a leaking battery.
11. Replacing the Battery
The VICKS Ear Thermometer is supplied with two AAA batteries. Replace with new AAA batteries when the low battery symbol appears on the display. Remove the battery cover and replace batteries. Replace the cover.
Low battery symbol
12. Warranty
Your WICKS' Ear Thermometer is durable and manufactured for a lifetime of normal household use. Following directions carefully will ensure years of dependable operation. If for any reason (either neither misuse or normal battery replacement) you are dissatisfied with your WICKS' Ear Thermometer, we will repair or replace it, all our options, free for one year from the date of purchase. This Warranty gives you specific legal rights as well as other rights which may vary from state to state.
If the thermometer does not function properly, first check the battery. Replace it necessary. If repair is necessary call, our Consumer Service Department at 1 800 477 0457, email us at: consumer.service@ka.com, or write to KAZ Thermometer Service Department, P.O. Box 564, Hudson, NY 12534, explaining just how the thermometer is improperly working. Our consumer service representative will provide further instruction on how to correct the trouble yourself or will ask you to return the thermometer for repair or replacement.

Manufacturing Quality Healthcare Products for Over 75 Years
Kaz, Incorporated • Thermometer Service Dept. • P.O. Box 544 • Hudson, NY 12634 • www.kaz.com Distributed by Kaz, Inc. under license from The Proctor & Gamble Company, Cincinnati, Ohio USA. WICKS is a registered trademark of The Proctor & Gamble Company
© 2013 KAZ, Incorporated Mace and printed in China
VICKS®
Ear Thermometer

natural_image
Black-and-white photo of a woman and a young girl applying a product to their ear (no visible text or symbols)Questions?
Call Kaz toll free at 1-800-477-0457
or E-mail: consumerservice@kaz.com www.kaz.com

QUICK START GUIDE for
VICKS® Ear Thermometer Model V871N
FIRST TIME USE:
- "Pull" plastic strip from Battery Compartment. Discard.
- Remove 98.6F label from the LCD display. Discard.
1
Remove and Save Protective Cap.


Pull Probe Cover Into Position on Dispenser. Insert Thermometer Tip Straight and Push Firmly until "Click."
2



Turn Unit "ON". Display Indicates Ready to Measure.
3
Gently Pull Outer Ear to Straighten Ear Canal.



4

Push Start Button



5

Turn Unit "OFF".
Please Note: Unit Reads "Oral" Equivalent Temperature. Add One Degree for "Rectal" Equivalent. Take 3 or More Measurements Especially if Readings Appear Low.
Need Assistance?
Call Kaz at 1-800-477-0457 • e-mail: consumerservice@kaz.com • www.kaz.com
Some Helpful Guidelines For Best Results When Using the Vicks OneSecond Ear Thermometer,
• Practice until you receive consistent readings.
- Unit is calibrated with a Sensor Cover. Accuracy can only be assured when Sensor Covers are used.
- Call your doctor when your child has diarrhea, vomiting or changes in appetite, lethargy (sluggishness) or is unusually sleepy.
- It is important to know each individual's "Normal" temperature when they are well. This is the only way to accurately diagnose a fever. Take multiple readings when healthy to determine "Normal" temperature.
- A child's normal temperature can be as high as 99.9^ . Re-measure with a standard digital thermometer for confirmation.
VICKS® Ear Thermometer
Instruction Manual
Thank you for purchasing the VICKS Ear Thermometer (V971N).
The VICKS Ear Thermometer incorporates the latest technology and is tested in accordance with international standards. With its unique technology, the thermometer provides a stable, heal-interference-free reading with each measurement. The instrument performs a self-test every time it is switched on to always guarantee the specified accuracy of measurements.
The VICKS Ear Thermometer is intended for intermittent measurements and monitoring of human body temperature in the home. It is appropriate for use on people of all ages.
Please read these instructions carefully before using this instrument and keep the instructions and the thermometer in a sale place.
Table of Contents
-
The Advantages of your VICKS Ear Thermometer
-
Important Safety Instructions
-
Product Description
-
How the VICKS Ear Thermometer Measures Ear Temperature
-
How to Read the Display
-
How to Apply a New Sensor Cover
-
Directions for Use
-
Error Messages
-
Technical Specifications
-
Cleaning and Storage
-
Replacing the Battery
-
Warranty
1. The Advantages of your VICKS ^® Ear Thermometer
Measurement in 1 second
This innovative infrared technology enables users to measure body temperature in only 1 second.
Accurate and reliable
Due to the unique patented sensor assembly configuration, the advanced infrared sensor, and the complete calibration process, this unit offers a very accurate and reliable way of measuring body temperature.
Gentle and Easy to Use
- Soft lip sensor for comfort.
- Special ergonomic design of the unit, makes its use simple and easy.
- The VICKS Ear Thermometer can be used without interference to daily lifestyle. A
measurement can be taken even while a child is sleeping.
- The VICKS Ear Thermometer is more pleasant to use and less threatening to children than a rectal thermometer and is more pleasant to use than an oral thermometer.
Auto-Display Memory
The thermometer displays the last reading automatically for 3 seconds when the unit is switched ON.
Safe and Hygienic
- No risk of broken glass or mercury ingestion.
- Sale for children.
- Disposable sensor covers help prevent the spread of germs.
2. Important Safety Instructions
- Never use the thermometer for purposes other than body temperature measurement. Please follow the safety precautions when using on children.
- Always use the thermometer with a new undamaged Probe Cover for each measurement to prevent infection. Readings taken without probe covers will not be accurate. Only VICKS branded probe covers can ensure that you get an accurate measurement from the Ear
- Never immerse the VICKS Ear Thermometer into water or other liquids (not waterproof). For cleaning and disinfecting please follow the instructions in the "Cleaning and Storage" (Section 10).
- Keep the instrument and the probe covers away from direct exposure to the sun and store in a dust-free, dry area at a temperature between 41°F - 104°F.
- Do not use the thermometer if there are signs of damage on the measuring tip or on the instrument itself. If damaged, do not attempt to repair the instrument!
- Earwax in subject's ear canal may cause a lower temperature reading. Before taking measurement make sure the ear canal is clean to ensure an accurate reading.
- The VICKS Ear Thermometer consists of high quality precision parts. Do not drop it! Protect it from severe impact and shock. Replace protective cap when not in use.
WARNING:
- Please keep the sensor covers out of the reach of children.
- Use of this thermometer is not intended as a substitute for consultation with your physician.
- This thermometer is not waterproof! NEVER immerse into liquids!
- Cleaning the ear canal using improper techniques can harm the inner ear. Follow doctors instructions for proper cleaning.
- Product Description

4. How the VICKS * Ear Thermometer Measures Ear Temperature
The WICKS Ear Thermometer measures inferred energy radiated from the cerdrum and the surrounding tissue. This energy is collected through the sensing lens and converted to a temperature value. The measured reading obtained directly from the cerdrum (HypnicoMembrane) can ensure the most accurate ear temperature. Measurements taken from the surrounding tissue of the ear canal generate lower readings and may result in misdiagnosis of a fever.
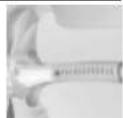
To avoid an inaccurate measurement:
- Use VICKS sensor covers. The unit is calibrated to work with sensor covers.
- Straighten the car canal by gently pulling the middle of the car back and up. Pull the car straightback for newborns to age 1.
- Place the sensor firmly into the ear canal. Press the Start button and keep the sensor in the ear until the thermometer beeps to indicate correlation of the measurement.
The VICKS Ear Thermometer has been clinically tested to meet ASTM standard E-1065 as pertains to infrared thermometers. It is proven to be safe and accurate when used in accordance with this operating instruction manual.
- How to Read the Display
| Display Display Meaning | Description | |
| Still check resource process functioning. | Press the ON/OFF buffer to turn on the unit. At I locs will be shown for 2 seconds. | |
| 97.1° | Recall of last reading. | The last reading will be shown on the display automatically for 3 seconds. |
| Recovery in measurement. | The unit looks much and the "I locs will keep flashing. | |
| 98.2° | Measurement complaint. | The reading will be shown on the LCD display. When the "F starts to finish the unit is ready for next temperature. |
| 98.2° | Live last day indicators Unit will not take accurate measurements. | The last day you will finish when the unit is on to alert you. To resolve the batteries. |
- How to Apply a New Sensor Cover

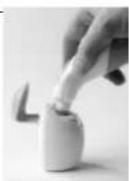
(1) Reduce product dose from thermometer. Full sensor cover into position over the hole in the top of dispenser.

[3] Completely push the tip into the sensor cover holder hole. Push firmly.
NOTE:
- Unit is calibrated to work with sensor covers. Only use of VICKS sensor covers ensures accuracy and hygienic use.
- In order to avoid spreading germs, please use a new sensor cover for each measurement.
- Check to ensure sensor cover is fitted on firmly before use. If the sensor cover is broken, discard and apply a new one immediately.
- Failure to use sensor covers each time will result in low, misreadings.

(7) With Proactive Cap off, push the thermometer vertically into the center part of the sensor cover.

(4) After feeling a slight click, take out the sensor with cover attached tightly.
7. Directions for Use
BEFORE FIRST USE:
- Remove insulating plastic strip from Battery Cover.
Important: Prior to each measurement, fit a new undamaged sensor cover onto sensor. Failure to do so may result in an incorrect temperature measurement.
-
Press the ON/OFF button. The display is activated to show all symbols for 2 seconds.
-
The last measurement reading with an "M" icon will be shown on the display automatically for 3 seconds.
-
When a beep sound is heard and the ^2 F symbol starts flashing, the thermometer is ready to measure.
-
Straighten the ear canal by pulling the ear up and back to give a clear view of the eardrum.
• For children under 1 year:
- Put this ear straight back.
- Children ages 1 year to adult - Pull the ear up and back.
(Caution: Many pediatricians suggest use of ear thermometers for children older than 6 months.)
-
While pulling the ear, insert the sensor snugly into the ear canal and press and release the "START" button. When you hear a beep sound, this indicates measurement is complete.
-
Remove the thermometer from the ear canal. The display shows the measured temperature.
-
Replace the sensor cover after each measurement. To do this, please follow the instructions in Section 6 "How to Apply a New Probe Cover."
-
In order to assure accurate readings, please wait at least 30 seconds after 3-5 continuous measurements.


1 year-court

Newborn-1 year

Readings Recall Sequence
- Press the SHAH1 Button to enter Recall Mode when the power is off. The memory con "M" will flash.


- Press and release the START Button to recall the latest reading. The LCD will display 1 alone with the memory icon when the button is pressed and the most recent reading when the button is released.


- Press and release the START Button again to recall the second latest reading.


-
Press and release the START Button consecutively to recall readings in succession, up to the last 12 readings.
-
To clear memory:
al Press and hold START Button.
bl While holding START Button, press and release ON/OFF Button.
After a few seconds the unit will turn on and display the last reading. When the last
reading comes up, release the START Button before the reading disappears. The "N" will
disappear from the Display indicating memory is cleaned. When "F" starts Fashing, the
thermometer is ready to take a temperature.
Pressing and releasing the START button after the last 12 readings have all been recalled will resume the above sequence from reading 1.
NOTE:
- For an infant, it is best to have the child lie on its back with head turning sideways and one of the ears is facing upwards. For an older child or adult, it is best to stand behind and slightly to the side of the patient.
- Always take measurements in the same ear as the temperature in the right ear may be different from that in the left ear.
- Please wait for a few minutes to take the car temperature after sleeping.
- In the following situations, it is recommended that three temperatures in the same car be taken and the highest one taken as the reading: 1) In where income in the first 10% down
2) Children under three years of age with a compromised immune system and for whom the presence or absence of lever is critical.
3) When the user is learning how to use the car thermometer for the first time until he/she has familiarized himself/horse with the instrument and obtains consistent readings.
Caution:
If you are not confident of the readings obtained, confirm temperature with a standard VICKS digital thermometer.
- Error Messages
| Display | Meaning | Possible cause and remedy |
| Measured temperature too high | Displays "1" when measured temperature is higher than 100.0 °F. Respond taking temperature and confirm with digital thermometer. | |
| Measured temperature too low | Displays "2" when measured temperature is lower than 930 °F. See Section 7 for proper technique. |
* Caution: High fever requires immediate medical attention!
| Display / Problem Display | Meaning | Possible cause and fault remedy |
| Room temperature too high | Displays "H" in conjunction with the "c" when room temperature is higher than 104.0°F. | |
| Room temperature too low | Displays "H" in conjunction with the "c" when room temperature is lower than 41.0°F. | |
| Error function display | Check battery. Possible damage from dropping or write. | |
| Blank display | Please check if battery is blocked correctly. | |
| Dead battery indication | If the steady battery icon is the only symbol shown, the battery should be replaced immediately. |
- Technical Specifications
| Type | Digital Infrared Thermometer IR 10A1 |
| Measuring Range: | 32.0 - 45.2 °C or 85.8 - 100.0 °F |
| Accuracy | Laboratory : 45.2 °C, 32.0 - 42.2 °C40.4 °F, 90.6 - 130.8 °F |
| Display | Liquid Capsule Display with C-1 °C (C-1) P resolution. |
| Beeps When: | a. The unit is turned ON and ready for the measurement1 short "bees" sounds.b. Measurement complete 1 long beep sound.c. System error, malfunction, or "HI" Low measurement3 short "bees" sounds.d. Refer alert if measurement >USE, multiple beep sound occurred at a single beep |
| Memory: | Automatically displays the last measured temperature. |
| Illumina of Display(Back Life) | a. The display will be lighted for 4 seconds when the unitis turned ONb. The display will be lighted again for 5 seconds whenthe measurement has been completed. |
| Densefing Temperature: | 20°C in ~50°C (24°F to +122°F). |
| Storage/transport temperature: | 25 °C to +55 °C (-13°F to 131°F). |
| Automatic Switch off | Approx. 1 minute after last measurement has been taken. |
| Bottanc: | 2 AAA batteries |
| Dimensions: | 12mm (L x 44 mm (M x 63 mm H) |
| Weight: | 30g with batteries; 70g by/o batteries |
| Standard: | Complex with European PDV12470-5 and U.S. ASTM C-1905impairments. |
Please observe the applicable disposal regulations.
- Cleaning and Storage
- Replacing the Battery
- Warranty
- VICKS®
- Ear Thermometer
- QUICK START GUIDE for
- Some Helpful Guidelines For Best Results When Using the Vicks OneSecond Ear Thermometer,
- VICKS® Ear Thermometer
- Table of Contents
- The Advantages of your VICKS ® Ear Thermometer
- Measurement in 1 second
- Accurate and reliable
- Gentle and Easy to Use
- Auto-Display Memory
- Safe and Hygienic
- Important Safety Instructions
- WARNING:
- To avoid an inaccurate measurement:
- Directions for Use
- Readings Recall Sequence
- Pressing and releasing the START button after the last 12 readings have all been recalled will resume the above sequence from reading 1.
- NOTE:
- Caution:
Brand : Vicks
Model : Ear V971N
Category : Thermometer