
AS700 - Iron BLACK & DECKER - Free user manual and instructions
Find the device manual for free AS700 BLACK & DECKER in PDF.


| Product Type | Steam Iron |
| Brand | Black & Decker |
| Model | AS700 |
| Dimensions (L x W x H) | 12.5 x 5.5 x 6.5 inches (approx.) |
| Weight | 3.5 lbs (approx.) |
| Power Supply | 120V ~ 60Hz |
| Power Consumption | 1500W |
| Water Tank Capacity | 12 oz (350 ml) |
| Soleplate Material | Stainless Steel |
| Variable Steam | Yes |
| Spray Function | Yes |
| Burst of Steam | Yes |
| Vertical Steaming | Yes |
| Automatic Shut-Off | Yes |
| Self-Cleaning | Yes |
| Anti-Drip | Yes |
| Anti-Calc System | Yes |
| Retractable Cord | Yes |
| Warranty | 2 years limited |
Frequently Asked Questions - AS700 BLACK & DECKER
User questions about AS700 BLACK & DECKER
0 question about this device. Answer the ones you know or ask your own.
Ask a new question about this device
Download the instructions for your Iron in PDF format for free! Find your manual AS700 - BLACK & DECKER and take your electronic device back in hand. On this page are published all the documents necessary for the use of your device. AS700 by BLACK & DECKER.
USER MANUAL AS700 BLACK & DECKER
Please Read and Save this Use and Care Book

BLACK & DECKER®
Power Pro ^TM
Plancha
Iron
natural_image
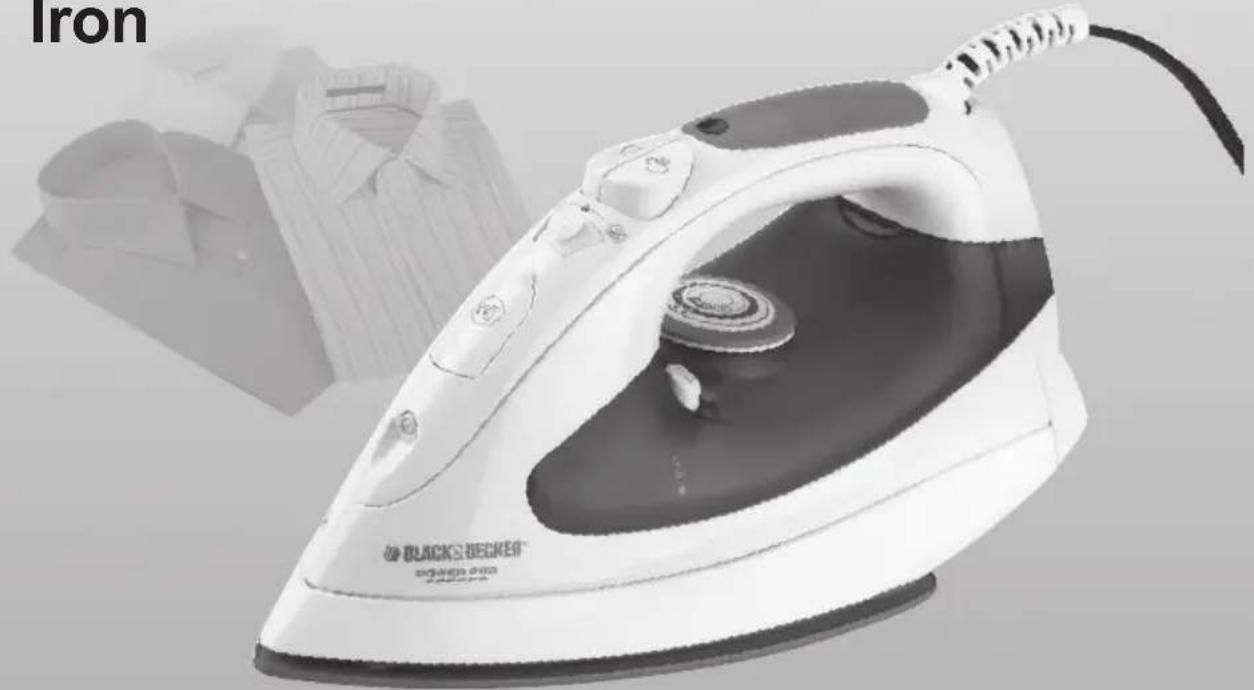
Black and white iron iron iron (£) with a pair of folded shirts in the background (no text or symbols visible on the iron itself)
USA/Canada 1-800-231-9786
Mexico 01-800-714-2503
www.blackanddecker.com
Accessories/Parts (USA/Canada)
1-800-738-0245
Modelo
Model
□ AS700
Símbolos
IMPORTANT SAFETY INSTRUCTIONS
When using your iron, basic safety precautions should always be followed, including the following:
☐ READ ALL INSTRUCTIONS BEFORE USING.
□ Use iron only for its intended use.
☐ To protect against a risk of electric shock, do not immerse the iron in water or other liquid.
☐ The iron should always be turned off (refer to "How to Use" section) before plugging into or unplugging from an outlet. Never yank cord to disconnect from outlet; instead grasp plug and pull to disconnect.
☐ Do not allow cord to touch hot surfaces. Let iron cool completely before putting away. Loop cord loosely around cord wrap when storing.
□ Always disconnect iron from electrical outlet when filling with or emptying of water, and when not in use.
☐ Do not operate iron with a damaged cord or if the iron has been dropped or damaged. To avoid the risk of electric shock, do not disassemble the iron, take it to a qualified serviceman for examination and repair. Or, call the appropriate toll-free number listed on the cover of this manual. Incorrect reassembly can cause a risk of electric shock when the iron is used.
☐ Close supervision is necessary for any appliance being used by or near children. Do not leave iron unattended while connected or on an ironing board.
□ Burns can occur from touching hot metal parts, hot water, or steam. Use caution when you turn a steam iron upside down or use the surge of steam — there may be hot water in the water tank. Avoid rapid movement of iron to minimize hot water spillage.
SPECIAL INSTRUCTIONS
☐ To avoid a circuit overload, do not operate another high-wattage appliance on the same circuit.
☐ If an extension cord is absolutely necessary, a 10-ampere cord should be used. Cords rated for less amperage may overheat. Care should be taken to arrange the cord so that it cannot be pulled or tripped over.
SAVE THESE INSTRUCTIONS.
Soft-Touch Parts
Note: The soft-touch parts of this unit are free of natural rubber and latex. They are safe for individuals allergic or sensitive to these materials.
POLARIZED PLUG (120V Models Only)
This appliance has a polarized plug (one blade is wider than the other). To reduce the risk of electric shock, this plug will fit into a polarized outlet only one way. If the plug does not fit fully in the outlet, reverse the plug. If it still does not fit, contact a qualified electrician. Do not attempt to modify the plug in any way.
TAMPER-RESISTANT SCREW
Warning: This appliance is equipped with a tamper-resistant screw to prevent removal of the outer cover. To reduce the risk of fire or electric shock, do not attempt to remove the outer cover. There are no user-serviceable parts inside. Repair should be done only by authorized service personnel.
Note: If the power supply cord is damaged, it should be replaced by qualified personnel or in Latin America by an authorized service center.
Product may vary slightly from what is illustrated.
Symbols

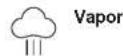
Steam

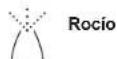
Spray

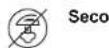
Dry
How to Use
This appliance is for household use only.
GETTING STARTED
Remove any labels, stickers or tags attached to the body or soleplate of the iron. Note: Use ordinary tap water for ironing. Do not use water processed through a home softening system.
Important: For optimum performance, let the iron stand for 90 seconds before beginning to iron.
IRONING WITH STEAM
Filling Water Tank
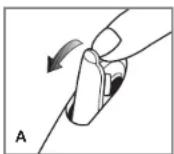
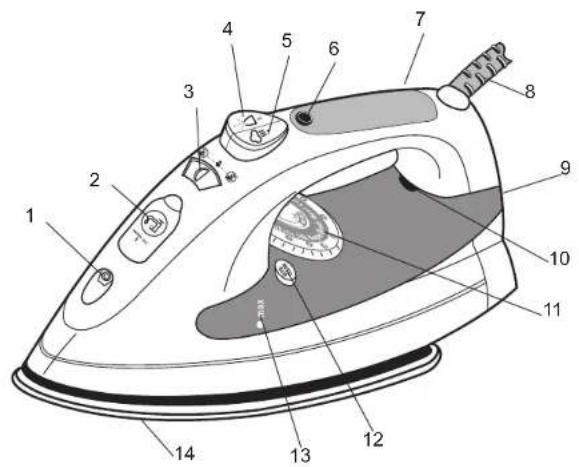
- Open the water-fill cover (A).
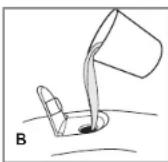
-
Tilt the iron and using a clean measuring cup, pour water into opening until the water reaches the MAX level mark on the water tank (B). Do not overfill.
-
Close the water-fill cover.
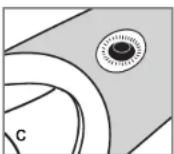
- Plug in the iron. The temperature-ready light glows (C). Tip: If unsure of a garment's fiber, test a small area (on an inside seam or hem) before ironing.
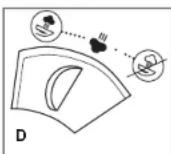
- Move the dry/steam selector to the desired steam level (D).
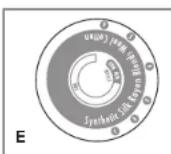
- Turn the fabric-select dial to appropriate steam setting (between 4 and 6) for your fabric (E). Read garment's label to help you determine fabric type.
- The temperature-ready light glows until it reaches the appropriate temperature.
• It then glows on and off during ironing. This is normal.
- When finished ironing, turn the fabric-select dial to lowest heat setting, move the dry/steam selector to and unplug the iron.
Surge of Steam
Use to remove stubborn creases.
- With water tank filled to the MAX mark, turn the fabric-select dial to at least setting 4 and wait for the temperature-ready light to go off.
- To remove tough wrinkles, pump the button at 5-second intervals for a concentrated blast of steam.
- When finished ironing, turn the fabric-select dial to lowest heat setting, move the dry/steam selector to and unplug the iron.
Vertical Steam
Use for removing wrinkles from hanging clothes and drapes.
- Hang the garment to be steamed on a clothes hanger (curtains or drapes can be steamed once they are hung).
-
Move the dry/steam selector to 🙏
-
Hold the iron close to, but not touching, the fabric.
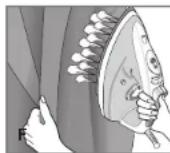
- Pull the fabric tight in your free hand and pump the button as you move the iron over the fabric (F).
- When finished ironing, turn the fabric-select dial to lowest heat setting, move the dry/steam selector to and unplug the iron.
IRONING WITH SPRAY
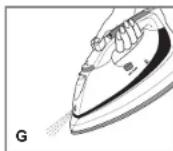
Use to dampen tough wrinkles at any setting (G)
1. Be sure the iron is filled with water.
2. On first use, pump the button several times.
DRY IRONING
-
Make sure dry/steam selector is set to 📊You may want to empty the water (see "Emptying Water Tank After Ironing - Optional").
-
Turn the fabric-select dial to the desired setting.
Read garment's label to help you determine fabric type.
- The temperature-ready light glows until it reaches the appropriate temperature.
• It then glows on and off during ironing. - When finished ironing, turn fabric-select dial to lowest setting, unplug the iron and place it on its heel rest.
- Move the dry/steam selector to
EMPTYING WATER TANK AFTER IRONING (OPTIONAL)
Note: It is not necessary to empty the water after each use.
- Turn the fabric-select dial to the lowest setting.
- Unplug the iron and let it cool.
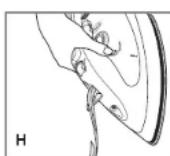
- Open the water-fill cover.
- Empty the water by holding the iron over a sink with the tip pointing down. Water will empty out of water-fill opening (H).
SPECIAL FEATURES
3-WAY AUTOMATIC SHUTOFF
The automatic shutoff feature in your iron works as follows:
- Once the iron reaches appropriate temperature, it will turn off after 30 seconds of inactivity if left on its soleplate or tipped over on its side. If left vertically on its heel rest, it will shut off after 8 minutes.
- As soon as you pick up the iron, it will start heating again. Wait for iron to reheat completely before resuming operation
Care and Cleaning
This product contains no user serviceable parts. Refer service to qualified service personnel.
CLEANING OUTSIDE SURFACES
- Make sure iron is unplugged and has cooled completely.
- Wipe the soleplate and outer surfaces with a soft cloth dampened with water and a mild household detergent. Never use abrasives, heavy-duty cleansers, vinegar or scouring pads that may scratch or discolor the iron.
- After cleaning, plug in the iron.
- Steam iron over an old cloth to remove any residue from the steam vents.
AUTO CLEANING
To keep the steam vents free of any buildup, follow these instructions about once a month.
- Fill the tank with water well below the MAX line.
- Plug in the iron.
- Turn the fabric-select dial to 6 and stand the iron on its heel rest. Allow it to heat until the auto shutoff indicator light goes out and comes on again.
- Turn fabric-select dial to lowest setting, unplug the iron and hold over a sink with the soleplate facing down.
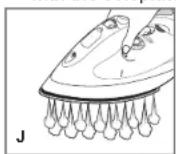
-
Press and hold the AUTO CLEAN button. Be careful, as hot water and steam will come out of the steam vents (J). Continue to hold AUTO CLEAN button until all the water has emptied, or until you feel all mineral deposits have been flushed. If necessary, rock iron side to side and front to back.
-
When finished, release the button, stand the iron on its
heel rest and plug it in. Heat for about 2 minutes to dry out any remaining water.
STORING YOUR IRON
- Unplug the iron and allow it to cool.
- Check that the dry/steam selector is set to ☑.
- Store vertically on its heel rest to prevent water leaking from the soleplate.
NOTES
¿NECESITA AYUDA?
For service, repair or any questions regarding your appliance, call the appropriate "800" number on the cover of this book. Do not return the product to the place of purchase. Do not mail the product back to the manufacturer nor bring it to a service center. You may also want to consult the website listed on the cover of this manual.
Two-Year Limited Warranty
(Applies only in the United States and Canada)
What does it cover?
- Any defect in material or workmanship; provided; however, Applica's liability will not exceed the purchase price of the product.
For how long?
• Two years after the date of original purchase.
What will we do to help you?
- Provide you with a reasonably similar replacement product that is either new or factory refurbished.
How do you get service?
• Save your receipt as proof of the date of sale.
- Check our on-line service site at www.prodprotect.com/applica, or call our toll-free number, 1-800-231-9786, for general warranty service.
• If you need parts or accessories, please call 1-800-738-0245.
What does your warranty not cover?
• Damage from commercial use
• Damage from misuse, abuse or neglect
• Products that have been modified in any way
• Products used or serviced outside the country of purchase
• Glass parts and other accessory items that are packed with the unit
• Shipping and handling costs associated with the replacement of the unit
- Consequential or incidental damages (Please note, however, that some states do not allow the exclusion or limitation of consequential or incidental damages, so this limitation may not apply to you.)
How does state law relate to this warranty?
- This warranty gives you specific legal rights, and you may also have other rights that vary from state to state or province to province.
Póliza de Garantía
San Jose, Costa Rica
Tel.: (506) 257-5716/223-0136
Ecuador
Castelcorp
Km 2-1/2 Avenida Juan T.
Guatemala City, Guatemala
Tel.: (502) 331-5020
360-0521
Honduras
Lady Lee
Centro Comercial Mega Plaza
Carretera a la Lima
San Pedro Sula, Honduras
Tel.: (504) 553-1612
México
Authorized Service Center
Electrodomésticos, S.A.
33 Independence Square,
Port of Spain
Trinidad, W.I.
Tel.: (868) 623-4696
Venezuela
Centro Comercial City Market
Diagonal al hotel Melia,
Sabana Grande,
Mivel plaza local 153.
Caracas Venezuela
Tel. 0212-3240969 y
0412-5926308
Col. Chapultepec Morales, México DF
Copyright © 2006 - 2009 Applica Consumer Products, Inc.
Importado por/ Imported by:
Applica Manufacturing S. de R. L. de C. V.
Presidente Mazarik No. 111 1er Piso
Col. Chapultepec Morales, México DF
- BLACK & DECKER®
- Plancha
- Iron
- IMPORTANT SAFETY INSTRUCTIONS
- SPECIAL INSTRUCTIONS
- SAVE THESE INSTRUCTIONS.
- Soft-Touch Parts
- POLARIZED PLUG (120V Models Only)
- TAMPER-RESISTANT SCREW
- How to Use
- GETTING STARTED
- IRONING WITH STEAM
- Filling Water Tank
- Surge of Steam
- Vertical Steam
- IRONING WITH SPRAY
- DRY IRONING
- EMPTYING WATER TANK AFTER IRONING (OPTIONAL)
- SPECIAL FEATURES
- 3-WAY AUTOMATIC SHUTOFF
- Care and Cleaning
- CLEANING OUTSIDE SURFACES
- AUTO CLEANING
- STORING YOUR IRON
- NOTES
- ¿NECESITA AYUDA?
- Two-Year Limited Warranty
- (Applies only in the United States and Canada)
- What does it cover?
- For how long?
- What will we do to help you?
- How do you get service?
- What does your warranty not cover?
- How does state law relate to this warranty?
- Póliza de Garantía
- Ecuador
- Honduras
- México
- Venezuela
Brand : BLACK & DECKER
Model : AS700
Category : Iron