
GX88 - Mouse Genesis - Free user manual and instructions
Find the device manual for free GX88 Genesis in PDF.


| Product Type | Gaming Mouse |
| Brand | Genesis |
| Model | GX88 |
| Number of Buttons | 11 programmable + 5 modes |
| Sensor Type | Avago 9500 Laser |
| DPI Range | 200 - 8200 DPI (adjustable in 200 DPI steps) |
| Default DPI Levels | 800 / 1600 / 2400 / 3200 DPI |
| Polling Rate | 1000 Hz |
| Tracking Speed | 150 inches per second |
| Frame Rate | 12000 FPS |
| Scrolling | 4-way scrolling (up/down/left/right) with Till Wheel |
| Lift Distance Adjustment | Yes, programmable button for surface optimization |
| Feet Material | Ceramic footpads |
| Side Grips | Changeable side grips |
| Connection Type | USB Full Speed |
| Software | Gaming software for macro recording and DPI settings (included CD) |
| Macro Storage | Up to 64 lines, 5788 bytes total, per profile |
| Dimensions (approx.) | 125 x 70 x 40 mm |
| Weight (approx.) | 150 g |
| Power Source | USB bus powered |
| Safety | Class 1 Laser (IEC 60825-1); do not direct at eyes |
| Compliance | FCC, CE |
| Maintenance | Clean with a dry, soft cloth; avoid liquids |
| Spare Parts / Reparability | Ceramic feet may be replaceable; software updates via Genesis support |
Frequently Asked Questions - GX88 Genesis
User questions about GX88 Genesis
0 question about this device. Answer the ones you know or ask your own.
Ask a new question about this device
Download the instructions for your Mouse in PDF format for free! Find your manual GX88 - Genesis and take your electronic device back in hand. On this page are published all the documents necessary for the use of your device. GX88 by Genesis.
USER MANUAL GX88 Genesis
GX88
natural_image
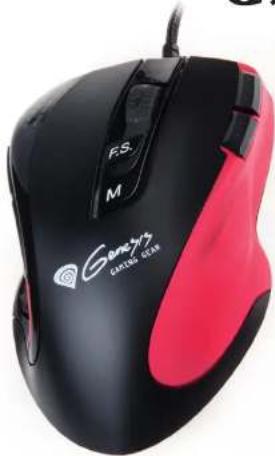
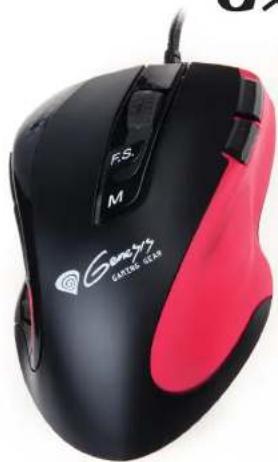
Close-up of a black and red Goonyi Dating Gear computer mouse (no visible text or symbols on the device body)User's Guide
Introduction
The most revolutionary gaming mouse, built-in the highest advanced laser engine--Avago 9500, reveals a professional gaming spirit and creates the perfect handy match for pioneer gaming users. Innovative changeable side grips provide the best touch and comfortable handling for gaming users, especially for different operational needs of RTS, FPS and online games.
Macro setting technology with inventive gaming software is another smart and efficient feature for expert gamers. This fanciful gaming software tool provides a unique platform for gamers to record, read, and edit scripts which can be saved and assigned to any specific gaming buttons of the mouse.
This powerful feature will help gamers getting rid of repeated practice, reducing burdens, and the most important having more fun. Furthermore, this advanced gaming mouse is equipped innovative ceramic footpads to achieve the most precise and fluidity movement. This unprecedented performance gaming mouse is the ultimate solution for the gamer who are enjoying the pleasure and becoming the winner of game competition at the same time.
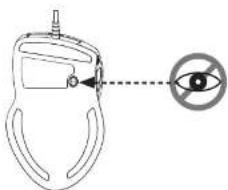
Safety Notice
- This product complies with IEC 60825-1, Class Laser product - Your product complies with FCD and CE rues.

Please DO NOT direct the laser beam at anyone's eye.
Features:
- Unique 11 programmable buttons plus 5 gaming modes to customize gamers' desired scripts.
• 9+2 buttons USB Gaming Mouse.
• Built to be a winner for gamers in gaming competitions. - Programmable buttons feature as both gaming buttons or Internet buttons.
• Using state-of-art laser technology. - 16 bit ultra-data path for ultimate performance.
- Polling rate 1000 Hz.
• Full speed USB. - 800/1600/2400/3200 dpi switchable.( Max. to 8200 dpi)
• 4-way scrolling.
• Avago ultimate sensor.(12000 Frame Rate) - Tracking Speed: 150 inch/sec.
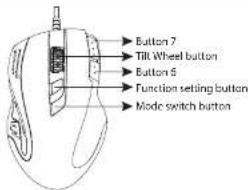
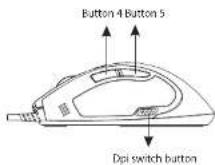
Dpi Settings
-
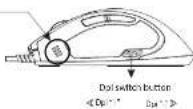
Press the dpi switch button to change the different resolution.
-
The default dpi setting:
Dpi light indicator
* 800 dpi : One Blue LED 'On'
* 1600 dpi Two Blue LED "On"
2400 dpi : Three Blue LED On * 3200 dpi : Four Blue LED 'On'
3.User can change default dpi settings to the
range of 200-8200 dpi with the gaming
software tool included.
Gaming Modes Setting
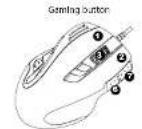
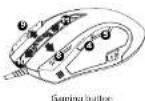
* Users can record a macro or get a built-in function from script library, and then save and assign a macro or a function to one of available modes at each gaming button.
* The 4th/5th buttons default is Internet Forward & Backward.
1. There are 11 programming gaming buttons for users to assign
a macro function
2. There are 5 modes switchable.
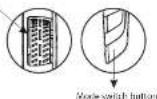
5. The mode switch button is on the top of the mouse.
Mode light indicator
• Red light on - Mode 1
- Green light on - Mode 2
* Blue light on - Mode 3
* Pink light on - Mode 4
^a Cyan light on - Mode 5
Adjust Lift Button
To have an Adjust Lift Button, please program one button to be the Adjust Lift Button by the gaming software.
To optimize the vertical distance from the surface for stopping cursor moving, please follow the below steps :
-
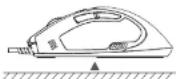
Put the gaming mouse on the surface you are going to use
-
Press and hold the "adjust lift" button.
-
Move the mouse on the surface as thoroughly as possible while pressing the "adjust lift" button. Do not lift the mouse off the surface, or you need to re-start from the step one.
-
While the mouse is collecting the surface information, the dpi LED is blinking. After the dpi LED stop blinking, release the "adjust lift" button. Now the optimized vertical distance from this surface to stop cursor moving has been set up.
Caution
While the mouse is in the air, do not click the "adjust lift" button, or the cursor will be stopped. There are 2 ways to recover:
(1) un-plug and re-plug the USB cable
(2) press and hold the "adjust lift" button while the mouse is on a surface,
lift the mouse off the surface, and then release the "adjust lift" button.
Dpl Setting
A. Status inspection
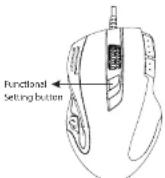
To click F.S. (functional setting) button is the way to switch setting mode.
- X axis - DPI status: click F.S. once, the X axis LED will light on and indicate the X axis resolution is.

- Y axis - DPI status: click F.S. twice, the Y axis LED will light on and indicate the Y axis resolution is.

- Wheel count calculation status: click F.S. 3rd time, the wheel scrolling image graph will light on and indicate how many count of wheel scrolling is.
- X axis setting
press and hold F.S for 3-sec. to enter X axis dpi setting mode, the X axis image graph will flash. The LED will indicate the current resolution, and can be adjusted by wheel scrolling up or down to increase or decrease dpi. Each of squares on behalf of 200 dpi. Scrolling up one count means to increase 200 dpi; contrarily, scroll down one count to decrease 100 dpi. Below shows how to recognize dpi level. The dpi range is from 200 dpi to 8200 dpi maximum with 41 levels. After setting, press F.S. for 3-sec. to save into memory and drop out of the setting mode.
- Y axis setting
press and hold F.S for 3-sec. is X axis dpi setting mode and then click F.S. once to enter Y axis setting mode, the Y axis image graph will flash. The LED will indicate the current resolution is, and can be adjusted by wheel scrolling up or down to increase or decrease dpi. Each of squares on behalf of 200 dpi. Scrolling up one count means to increase 200 dpi; contrarily, scroll down one count to decrease 200 dpi. Below shows how to recognize dpi level. The dpi range is from 200 dpi to 8200 dpi maximum with 41 levels. After setting, press F.S. for 3-sec. to save into memory and drop out of the setting mode.
Remark :
200 dpi \~ 800 dpi : LED down >>> up (1st to 4th LED light on)
1000 dpi : the 5th LED light on only
1200 dpi \~ 1800 dpi : LED up >>> down (5th LED to 1st LED light on)

200 dpi 400 dpi 600 dpi 800 dpi 1000 dpi 1200 dpi 1400 dpi

1600 dpi 1800 dpi 2000 dpi 4000 dpi 6000 dpi 8000 dpi
- Scrolling count setting
Press F.S. for 3-sec. and then click F.S. twice to enter count calculation mode, the arrow image will flash, and show the current count number. Adjust count calculation to by scrolling wheel, scroll up to increase the count, and scroll down to decrease the count oppositely. Press F.S. for 3-sec. to save into memory and drop out setting mode.
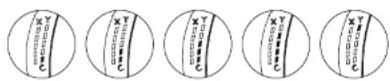
Count 1 Count 2 Count 3 Count 4 Count 5
1. Hardware Installation
Connect the Mouse to the USB port.
- Users need to wait around 10–15 seconds for moving the cursor at the first time usage.
2. Software Installation
• Install the Gaming Mouse Software
For gaming button settings and dpi adjustment, please install the gaming software in the accompanied CD.
(The Till Wheel function will be activated only after the gaming software is installed.)
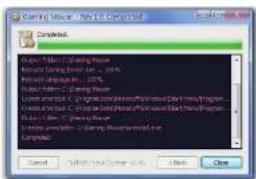
Please assign the destination folder and go to "Install"
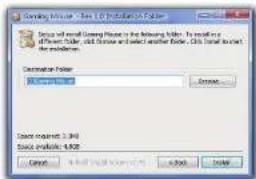
Please "Close" window when the installation has been completed successfully.
• Uninstall the Gaming Mouse Software
Please find the Gaming Mouse from the windows program list, and click the 'uninstall' to uninstall the gaming software from the PC.
3. Customize Your Settings
Please choose the function that you would like to make your personal settings.
(1) Button Settings Instruction
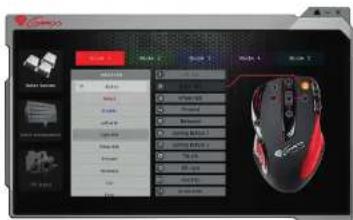
The mouse offer 5 modes for saving macros. There are Red, Green, Blue, Purple and Cyan light to indicate each mode / profile obviously. What more, each mode / profile is able to record 11 scripts.

Profile Selection / Naming
- Move the cursor to the Profile area and click any color from Red.Green, Blue, Purple, Cyan to define the profile name.
- Each profile represents a customized gaming button setting group. In addition, users can define each profile according to different games.
- Please be noted that the Profile name can consist of maximum 8 letters.
Button Function Settings
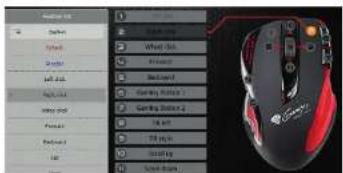
- There are 11 gaming buttons for users to set up functions.
- For each of the 11 programmable gaming buttons, users may choose a function from the Function List, and draw it to the button list to assign a new function.
(2) Macro Settings Instruction
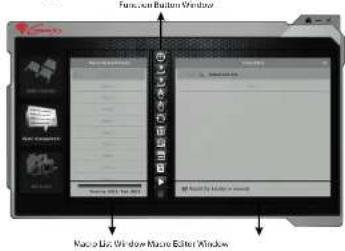
I. Macro List Window
Macro List has maximum 64 lines to be set up by users. Every line can be named to indicate the meaning of the macro. The Macro List provides 5788 Bytes totally.
Please be noted that the space per line can accommodate 14 letters at most.
II. Macro Editor Window
This window is for gamers to record all the keyboard and mouse commands through this powerful recording function.

Before starting Macro recording, you have to choose one command from "Excute One Time", "Loop mode" or "Firekey mode" in the first line of Macro Editor Window. Click twice on this line to check the next command until your required command appears.

Excute One Time
The recorded script will be executed once.

Run Loop :
After you click once a gaming button, the assigned function will be repeatedly executed until you click again the button.

Firekey mode :
The assigned function will be repeatedly executed while you keep pressing the gaming button, and will stop once you release the button.
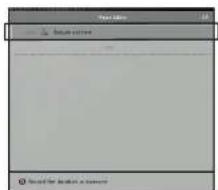

Duration
This is to allow you to record the duration of a command or intervals between two commands. The default is positive. You can cancel if it is wrong because I cannot be directed.
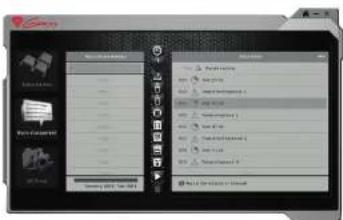
III. Function Button Window
Please kindly use below command icons to amend / insert the script details when you have done the record.

Insert Duration of Intervals :
Drag "Insert Duration of Intervals" icon to Macro Editor area and insert into between two single scripts. Double-click the new duration and key in the specific second.
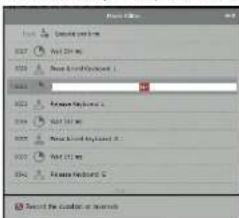

Insert Key-Down Command :
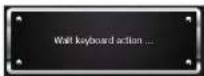
Drag "Insert Key-Down Command" icon to Macro Editor area and insert into between 2 script. A message of "Please press a keyboard" will pop-up, meanwhile, please press a key on keyboard to insert the key-down into scripts.

Insert Click Mouse Button Command :
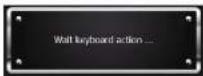
Drag "Insert Click Mouse Button Command" icon to Macro Editor area and insert into between 2 scripts. A message of "Please click a mouse button" will pop-up, at the same time, please click any mouse button to insert the mouse button function into scripts.

Insert Release Mouse Button Command
Drag "Insert Release Mouse Button Command" icon to Macro Editor area and insert into between 2 scripts. A message of "Please click a mouse button" will pop-up, at the same time, please click any mouse button to insert the "release mouse button" function into scripts.

Insert Scrolling Command :
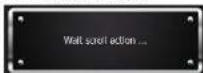
Drag "Insert Scrolling Command" icon to the Macro Editor area and insert into between 2 scripts. A message of "Please scroll the wheel" will pop-up, at the same time, please scroll the wheel up or down to insert scrolling up or down function into scripts.

Recycle :
Choose and drag the specific scripts, which you want to delete to the "Recycle" icon. The scripts will be deleted forever.

Reset:
Click "Reset" to get back to the default status, clearing all the recorded contents by gamers. Before starting Macro recording, you have to choose one command from "Execute One Time", "Loop mode" or "Firekey mode" in the first line of Macro Editor Window. Click twice on this line to check the next command until your required command appears.

Import Macro / Script :
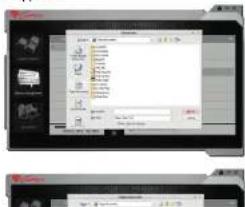
"Import" allows you to have the scripts / macros as the same as what your friends have. Save the scripts / macros provided from your friends in a certain path. Then, click "Import" from software panel and choose the scripts / macros you need. Congratulations! You have imported macros successfully.

Export Macro / Script :
Click "Export" and the scripts / macros which you set through the gaming software will be saved to


Stop Recording:
Click the "start" icon to start recording. Click the "stop" icon to stop recording. Between the 2 clicks, all of your operations on keyboard and mouse are recorded and shown on the Macro Editor Window. To press the "Pause/Break" button on keyboard can also stop recording.
(3) DPI & Tools Instruction
The product provide 4 levels resolution switch, and the default is 800 (One Blue LED On) /1600 (Two Blue LED On) /2400 (Three Blue LED On) / 3200 (Four Blue LED On). Users can define the own resolution from 200 dpi \~ 8200 dpi for each of the 4 level. Furthermore, the X axis and Y axis resolution can be set up individually by users.
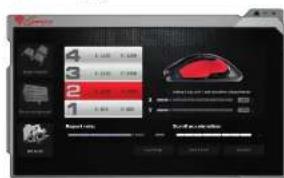
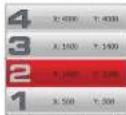
a. Click the level of DPI you are going to adjust. There are 4 levels available.
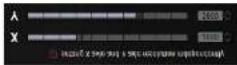
b. In the DPI adjustment area, drag the axis along the DPI scale. Meanwhile, the DPI figure is changing and shown on the right side of the DPI scale.
Note: The computer will save new resolution into mouse automatically.
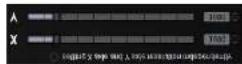
c. Tick the option of "Setting X axle and Y axle resolution independently" if you would like to adjust the 2 axes individually.

GX88
natural_image
Close-up of a black and red GoMy Computer mouse with visible branding (no text or symbols on the device itself)Instrukcja obsługi
Wprowadzenie
I. Lista makr
√ Record the duration or inverse
Czas trwania :


- Introduction
- Safety Notice
- Features:
- Dpi Settings
- Dpi light indicator
- Gaming Modes Setting
- Mode light indicator
- Adjust Lift Button
- Dpl Setting
- Hardware Installation
- Software Installation
- • Install the Gaming Mouse Software
- • Uninstall the Gaming Mouse Software
- Customize Your Settings
- Button Settings Instruction
- Profile Selection / Naming
- Button Function Settings
- Excute One Time
- Run Loop :
- Firekey mode :
- Duration
- Function Button Window
- Insert Duration of Intervals :
- Insert Key-Down Command :
- DPI & Tools Instruction
- Wprowadzenie
Brand : Genesis
Model : GX88
Category : Mouse