
XD-DV90 - Home Theater KENWOOD - Free user manual and instructions
Find the device manual for free XD-DV90 KENWOOD in PDF.


| Product Type | Home Theater System (DVD Receiver with Speakers) |
| Brand | Kenwood |
| Model | XD-DV90 |
| Dimensions (W x H x D) | 430 mm x 150 mm x 330 mm |
| Weight | 5.0 kg |
| Power Supply | AC 230V, 50Hz |
| Power Consumption | 150 W |
| Output Power | 100 W per channel (6 ohms, 1 kHz, 10% THD) |
| Supported Discs | DVD, DVD-R/RW, CD, CD-R/RW, MP3, JPEG |
| Radio Tuner | AM/FM with presets |
| Surround Sound | Dolby Digital, DTS, Dolby Pro Logic II |
| Audio Inputs | 2 x RCA, 1 x Optical, 1 x Coaxial |
| Video Outputs | Composite, Component, S-Video |
| USB Port | Yes (MP3 playback) |
| Remote Control | Included |
| Frequency Response | 20 Hz - 20 kHz |
| Signal-to-Noise Ratio | > 90 dB |
| Maintenance | Clean with a soft dry cloth; do not use solvents |
| Safety | Avoid moisture, ensure proper ventilation, disconnect power during storms |
| Spare Parts | Contact Kenwood authorized service center |
| General Information | User manual included; designed for home entertainment |
Frequently Asked Questions - XD-DV90 KENWOOD
User questions about XD-DV90 KENWOOD
0 question about this device. Answer the ones you know or ask your own.
Ask a new question about this device
Download the instructions for your Home Theater in PDF format for free! Find your manual XD-DV90 - KENWOOD and take your electronic device back in hand. On this page are published all the documents necessary for the use of your device. XD-DV90 by KENWOOD.
USER MANUAL XD-DV90 KENWOOD
This instruction manual is used to describe multiple models listed above. Model availability and features (functions) may differ depending on the country and sales area.



Before applying power
Caution : Read this section carefully to ensure safe operation.
Units are designed for operation as follows.
U.S.A. and Canada AC 120 V only
Europe and U.K. AC 230 V only
Australia AC 240 V only
*Other countries ....AC 110-120 / 220-240 V switchable
For the United Kingdom
Factory fitted moulded mains plug
- The mains plug contains a fuse. For replacement, use only a 3-Amp ASTA-approved (BS 1362) fuse.
- The fuse cover must be refitted when replacing the fuse in the moulded plug.
- Do not cut off the mains plug from this equipment. If the plug fitted is not suitable for the power points in your home or the cable is too short to reach.
A power point, then obtain an appropriate safety approved extension lead or adapter, or consult your dealer. If nonetheless the mains plug is cut off, remove the fuse and dispose of the plug immediately, to avoid a possible shock hazard by inadvertent.
Connection to the mains supply.
IMPORTANT :
The wires in the mains lead are coloured in accordance with the following code:
Blue : Neutral
Brown : Live
Do not connect those leads to the earth terminal of a three-pin plug.
\*For other countries
AC voltage selection
The AC voltage selector switch on the rear panel is set to the voltage that prevails in the area to which the unit is shipped. Before connecting the power cord to your AC outlet, make sure that the setting position of these switches matches your line voltage. If not, it must be set to your voltage in accordance with the following direction.
AC voltage selector switches
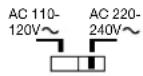
Move switch lever to match your line voltage with a small screwdriver or other pointed tool.
Note:
Our warranty does not cover damage caused by excessive line voltage due to improper setting of the AC voltage selector switch.
Safety precautions
Caution : Read this section carefully to ensure safe operation.
WARNING : TO PREVENT FIRE OR ELECTRIC SHOCK, DO NOT EXPOSE THIS APPLIANCE TO RAIN OR MOISTURE.
 | CAUTIONRISK OF ELECTRIC SHOCKDO NOT OPEN | CAUTION: TO REDUCE THE RISK OF ELECTRIC SHOCK, DO NOT REMOVE COVER (OR BACK). NO USER-SERVICEABLE PARTS INSIDE, REFER SER-VICING TO QUALIFIED SERVICE PERSONNEL. | |
 | THE LIGHTNING FLASH WITH ARROWHEAD SYMBOL, WITHIN AN EQUILATERAL TRI-ANGLE, IS INTENDED TO ALERT THE USER TO THE PRESENCE OF UNINSULATED “DAN-GEROUS VOLTAGE” WITHIN THE PRODUCT’S ENCLOSURE THAT MAY BE OF SUFFICIENT MAGNITUDE TO CONSTITUTE A RISK OF ELECTRIC SHOCK TO PERSONS. | ||
 | THE EXCLAMATION POINT WITHIN AN EQUILATERAL TRIANGLE IS INTENDED TO ALERT THE USER TO THE PRESENCE OF IMPORTANT OPERATING AND MAINTENANCE (SER-VICING) INSTRUCTIONS IN THE LITERATURE ACCOMPANYING THE APPLIANCE. | ||
The marking of products using lasers (Except for some areas)
CLASS 1 LASER PRODUCT
The marking is located on the rear panel and says that the component uses laser beams that have been classified as Class 1. It means that the unit is utilizing laser beams that are of a weaker class. There is no danger of hazardous radiation outside the unit.
Unpacking
Unpack the unit carefully and make sure that all accessories are put aside so they will not be lost.
Examine the unit for any possibility of shipping damage. If your unit is damaged or fails to operate, notify your dealer immediately. If your unit was shipped to you directly, notify the shipping company without delay. Only the consignee (the person or company receiving the unit) can file a claim against the carrier for shipping damage.
We recommend that you retain the original carton and packing materials for use should you transport or ship the unit in the future.
Keep this manual handy for future reference.
Accessories
Please confirm that the following accessories are present.
Accessories packed with the main unit
FM indoor antenna (1) Loop antenna (1)
Remote control unit (1) Batteries (R6/AA) (2)
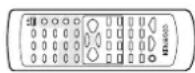
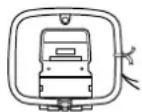
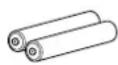
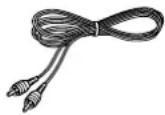
Video cord (1)
*AC plug adaptor (1)
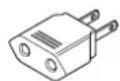
* Use to adapt the plug on the power cord to the shape of the wall outlet.
(Accessory only for regions where use is necessary.)
Speaker model names and accessories packed with the speakers
| System Front | speakers Surround Speakers and accessories | |
| XD-DV90 | LS-N90V (Left speaker and right speaker) | CRS-N90V (Center speaker · 1, surround speakers · 2, speaker cords· 3, speaker stabilizer· 12) |
| XD-DV80 | LS-N70V (Left speaker and right speaker) | CRS-N90V (Center speaker · 1, surround speakers · 2, speaker cords· 3, speaker stabilizer· 12) |
| XD-DV70 LS-N | N90V (Left speaker and right speaker) – | |
| XD-DV60 LS-N | N70V (Left speaker and right speaker) – | |
| XD-DV50 LS-N | N50V (Left speaker and right speaker) – | |
| XD-A850DV LS-N | S-N50V (Left speaker and right speaker) – |
CHANNEL SPACE setting (Except for the U.S.A., Canada, U.K., Europe and Australia)
The space between radio channels has been set to the one that prevails in the area to which the system is shipped. However, if the current channel space setting does not match the setting in the area where the system is to be used, for instance when you move from area 1 or area 2 shown in the following table or vice versa, proper reception of AM/FM broadcasts cannot be expected. In this case, change the channel space setting in accordance with your area by referring to the following table.
| Area | CHANNELSPACE frequency | |
| 1 | USA, Canada and South American countries | FM: 100 kHzAM: 10 kHz |
| 2 | Other countries | FM: 50 kHzAM: 9 kHz |
Setting the CHANNEL SPACE
① Set the POWER key to standby (power off) mode.
② Press and hold the STOP (■) key for more than 2 seconds.
Each press for more than 2 seconds switches the modes as follows.

① "FM100/AM10 kHz" STEP
② "FM 50/AM 9 kHz" STEP
In regard to demonstration
When this unit is switched on for the first time or after the power cable has been disconnected for a long time, it will enter automatically into demonstration mode (only display). During the demonstration, the display changes in sequence but the audio does not change. The demonstration can be canceled with the following procedure.
Cancellation of Demonstration mode
⑦ Set the POWER key to ON.
② Press the DISPLAY/DEMO key.
DISPLAY/DEMODISPLAY/DEMO
To start demonstration:
Press and hold The DISPLAY/DEMO key for more than 2 seconds.
Special features
This document classifies the applications of each feature using the following marks
DVD : Description of a feature that can be used with DVD.
VCD : Description of a feature that can be used with Video CD.
CD : Description of a feature that can be used with CD.
 | Higher video quality than S-VHS video and LaserDisc |
 | Higher audio quality than music CD |
 CD VCD CD VCD | Graphical user interface (GUI) compatibility |
 | 6-Channel independent outputs using built-in Dolby Digital (AC-3) decoder(only for XD-DV90/XD-DV80) |
 | Versatile DVD playback features |
 CD CD | DTS digital output compatibility |
Please read all of the safety and operating instructions before operating this appliance. Adhere to all warnings on the appliance and in the instruction manual. Follow all the safety and operating instructions. These safety and operating instructions should be retained for future reference.
- Power sources – The appliance should be connected to a power supply only of the type described in the instruction manual or as marked on the appliance. If you are not sure of the type of power supply to your home, consult your appliance dealer or local power company. For appliances intended to operate from battery power, or other sources, refer to the instruction manual.
-
Power-cord protection – Power-supply cords should be routed so that they are not likely to be walked on or pinched by items placed upon or against them, pay particular attention to cords at plugs, convenience receptacles, and the point where they exit from the appliance.
-
CAUTION – Polarization – This appliance may be equipped with a polarized alternating-current line plug (a plug having one blade wider than the other). This plug will fit into the power outlet only one way. This is a safety feature. If you are unable to insert the plug fully into the outlet, try reversing the plug. If the plug should still fail to fit, contact your electrician to replace your obsolete outlet. Do not defeat the safety purpose of the polarized plug.
-
Ventilation – Slots and openings in the cabinet are provided for ventilation and to ensure reliable operation of the appliance and to protect it from overheating, and these openings must not be blocked or covered. The appliance should be situated so that its location or position does not interfere with its proper ventilation.
To maintain good ventilation, do not put records or a tablecloth on the appliance. Place the appliance at least 10 cm away from the walls.
Do not use the appliance on a bed, sofa, rug or similar surface that may block the ventilation openings. This appliance should not be placed in a built-in installation such as a bookcase or rack unless proper ventilation is provided or the manufacturer's instructions have been adhered to.
-
Water and moisture – The appliance should not be used near water - for example, near a bathtub, washbowl, kitchen sink, laundry tub, in a wet basement, or near a swimming pool, etc.
-
Temperature - The appliance may not function properly if used at extremely low, or freezing temperatures. The ideal ambient temperature is above +5^ (41°F).
- Heat - The appliance should be situated away from heat sources such as radiators, heat registers, stoves, or other appliances (including amplifiers) that produce heat.
-
Electric shock – Care should be taken so that objects do not fall and liquid is not spilled into the enclosure through openings. If a metal objects, such as a hair pin or a needle, comes into contact with the inside of this appliance, a dangerous electric shock may result. For families with children, never permit children to put anything, especially metal, inside this appliance.
-
Enclosure removal – Never remove the enclosure. If the internal parts are touched accidentally, a serious electric shock might occur.
-
Magnetic fields - Keep the appliance away from sources of magnetic fields such as TV sets, speaker systems, radios, motorized toys or magnetized objects.
- Cleaning - Unplug this appliance from the wall outlet before cleaning. Do not use volatile solvents such as alcohol, paint thinner, gasoline, or benzine, etc. to clean the cabinet. Use a clean dry cloth.
-
Accessories – Do not place this appliance on an unstable cart, stand, tripod, bracket, or table. The appliance may fall, causing serious injury to a child or adult, and serious damage to the appliance. Use only with a cart, stand, tripod, bracket, or table recommended by the manufacturer, or sold with the appliance. Any mounting of the appliance should follow the manufacturer's instructions, and should use a mounting accessory recommended by the manufacturer. An appliance and cart combination should be moved with care. Quick stops, excessive force, and uneven surfaces may cause the appliance and cart combination to overturn.
-
Lightning – For added protection for this appliance during a lightning storm, or when it is left unattended and unused for long periods of time, unplug it from the wall outlet and disconnect the antenna or cable system. This will prevent damage to the appliance due to lightning and power-line surges.
-
Abnormal smell – If an abnormal smell or smoke is detected, immediately turn the power OFF and unplug the appliance from the wall outlet. Contact your dealer or nearest service center.
-
Damage requiring service – The appliance should be serviced by qualified service personnel when:
A. The power-supply cord or the plug has been damaged.
B. Objects have fallen, or liquid has been spilled into the appliance.
C. The appliance has been exposed to rain or water.
D. The appliance does not appear to operate normally by following the instruction manual. Adjust only those controls that are covered by the instruction manual as an improper adjustment of other controls may result in damage and will often require extensive work by a qualified technician to restore the appliance to its normal operation.
E. The appliance has been dropped, or the enclosure damaged.
F. The appliance exhibits a marked change in performance.
- Servicing - The user should not attempt to service the appliance beyond that described in the instruction manual. All other servicing should be referred to qualified service personnel.
- Outdoor antenna grounding – If an outside antenna is connected to the appliance, be sure the antenna system is grounded so as to provide some protection against voltage surges and built up static charges. Article 810 of the National Electrical Code ANSI/NFPA 70, provides information with respect to proper grounding of the mast and supporting structure, grounding of the lead-in wire to an antenna discharge unit, size of grounding conductors, location of antenna discharge unit, connection to grounding electrodes, and requirements for the grounding electrode. See Figure.
EXAMPLE OF ANTENNA GROUNDING AS PER NATIONAL ELECTRICAL CODE
ANTENNA LEAD IN WIRE
GROUND CLAMPS
ANTENNA DISCHARGE UNIT (NEC SECTION 810-20)
ELECTRIC SERVICE EQUIPMENT
GROUNDING CONDUCTORS (NEC SECTION 810-21)
NEC - NATIONAL ELECTRICAL CODE
GROUND CLAMP POWER SERVICE GROUNDING ELECTRODE SYSTEM (NEC ART 250, PART H)
- Power lines – An outside antenna system should not be located in the vicinity of overhead power lines or other electric light or power circuits, or where it can fall into such power lines or circuits. When installing an outside antenna system, extreme care should be taken to keep from touching such power lines or circuits as contact with them might be fatal.
-
AC outlets – Do not connect other audio equipment with a power consumption larger than that specified to the AC outlet on the rear panel. Never connect other electrical appliances, such as an iron or toaster, to it to prevent fire or electric shock.
-
Overloading - Do not overload wall outlets, extension cords, or integral convenience receptacles as this can result in a risk of fire or electric shock.
- Attachment – Do not use attachments not recommended by the appliance manufacturer as they may cause hazards.
- Replacement parts – When replacement parts are required, be sure the service technician has used replacement parts specified by the manufacturer or have the same characteristics as the original parts. Unauthorized substitutions may result in fire, electric shock, or other hazards.
- Safety check – Upon completion of any service or repairs to this appliance, ask the service technician to perform safety checks to determine that the appliance is in proper operating condition.
Notes:
- Item 3 is not required except for grounded or polarized equipment.
- Item 17 and 18 are not required except for units provided with antenna terminals.
- Item 17 complies with UL in the U.S.A.
Preparation section
Introduction 2
⚠️ Before applying power ...... 2
⚠ Safety precautions.... 2
Accessories 3
CHANNEL SPACE setting 3
In regard to demonstration.... 4
Special features 4
IMPORTANT SAFEGUARDS 5
Contents 7
Region codes 8
Region codes in the world 8
Examples of TV screen display of each video format .... 8
Video formats 9
Video formats of DVD discs that can be played on this unit....9
Discs information 10
Recording systems and types of playable discs 10
Unplayable discs 10
Icons on the DVD discs 10
Handling of discs and tapes.... 11
⚠️ System Connections.... 12
AM loop antenna.... 12
FM antenna 12
Connection of the front speakers.... 13
Connection of the sub woofre or super woofer (optional) 13
Connection of the surround speaker system 14
Connection of the TV monitor (optional) and VCR (optional) ..... 15
Connection of the MD recorder/CD recorder (optional) 15
Controls and indicators.... 16
Main unit (1) 16
Main unit (2) 17
DISPLAY 17
Operation of remote control unit.... 18
SMART MENU operation/Clock adjustment ..... 19
SMART MENU operation 19
Clock adjustment 19
Operation Knowledge section
Let's put out some sound 21
Basic use method 21
Changing the Tone 22
Playback of discs 24
Sequential playback from the first track or chapter 24
Playback from the desired track or chapter 25
Repeat play 26
A-B repeat play 26
Random play 27
Program play (Using the On-screen display)(DVD/CD/VCD)......28
Using the On-screen banner display.... 30
Selecting a Title 31
Selecting a Chapter or Track ....31
Changing the Audio Language ....32
Changing the Subtitle Language 32
Changing the Camera angle.... 33
Using IntroScan function.... 33
Using Bookmarks.... 34
Receiving broadcast station 35
Storing the broadcast stations (one-by-one presetting) 36
Using RDS function (for Europe and U.K. only).... 37
Playback of tapes 39
Normal Recording (TAPE B only) 40
CD Direct Recording (TAPE B only) 41
CD Program Recording (TAPE B only) 42
TAPE DUBBING 43
Menu playback.... 44
Hierarchical structure of VCD menus (P.B.C.) 44
Enjoying karaoke singing (only for some areas) 45
Set Up functions 46
Set up menu 46
Select Audio Language.... 47
Select Subtitle Language 47
Select Menu Language 48
Select Rating (Palental Lock) 48
Password.... 49
TV aspect 51
Dynamic Range 52
Digital Audio Out....52
Setting up surround mode 53
What are surround modes? 53
Setting up audio options.... 45
SPEAKER SETUP.... 54
Timer function 58
Sleep timer 58
Timer Play 59
Timer recording 60
AUTO POWER SAVE function.... 61
Knowledge 62
Important items.... 63
Maintenance....63
Reference 63
In case of difficulty 64
Specifications.... 68
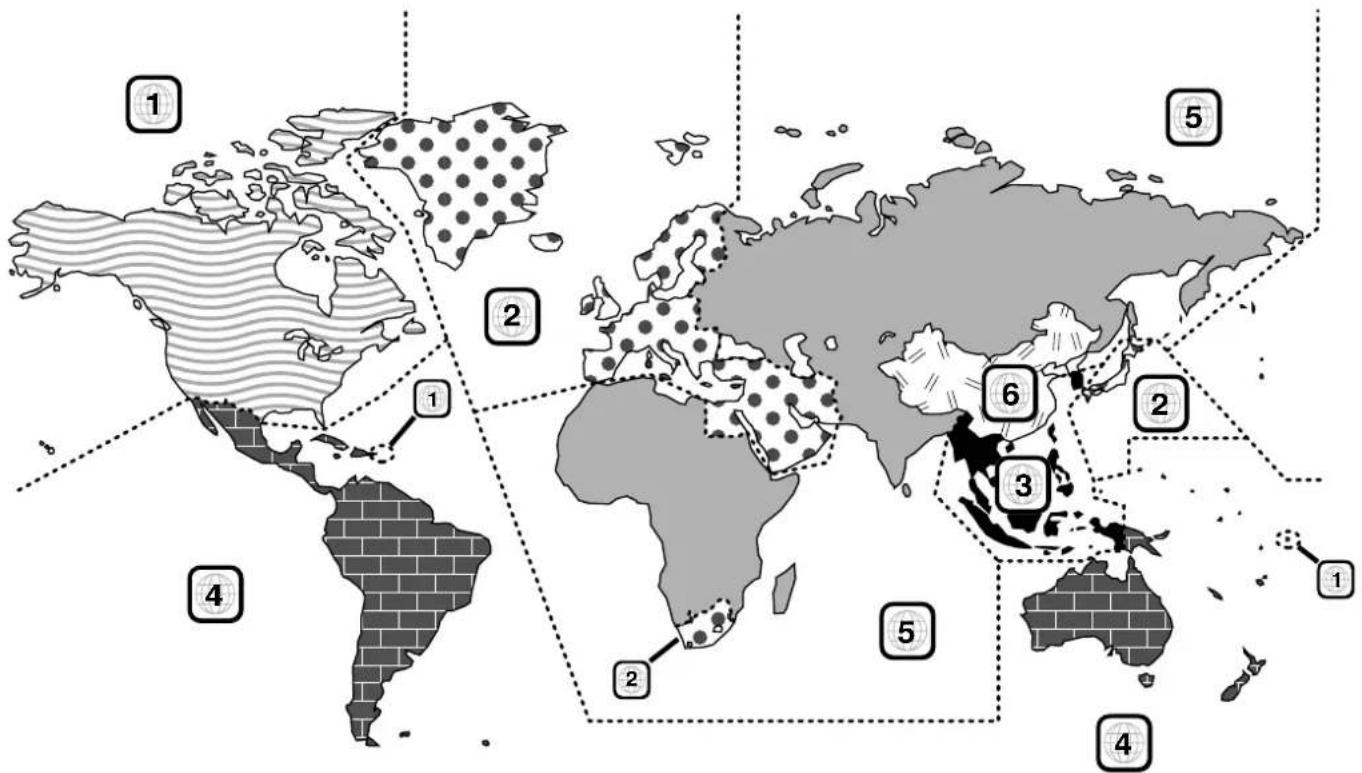
Every player of this model has a certain region code assigned to it based on the country where the player is used. When the player is used to play back DVD discs, it can only play the DVD discs carrying the region codes matching the region code of the player.
The region code for this player is described on the rear panel of the player.
Region codes in the world
The DVD players are given a region code according to the country or area it is marketed, as shown in the following map.
Examples of TV screen display of each video format
When your TV is switchable between PAL/NTSC
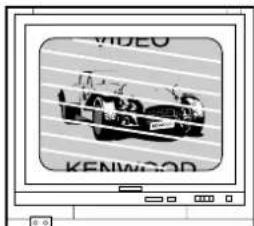
Try play a disc. If the picture is black and white or as shown on the right, stop playback and switch the screen display formats of this unit and the TV to another format. This will improve the played picture quality.
natural_image
Black-and-white illustration of a vintage car and a vehicle, displayed within a computer monitor (no text or symbols visible)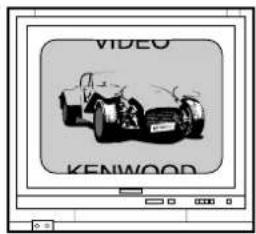
When your TV is compatible only with the PAL format
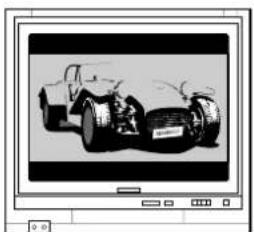
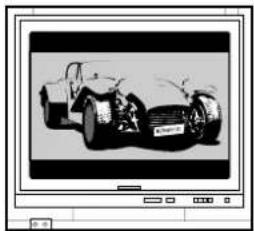
With certain discs, the playback picture may have black spaces above and below it (as shown on the right). This is because the disc has been recorded in the NTSC format. The screen may be somewhat hard to see but this is not malfunction.
natural_image
Black-and-white illustration of a vintage car and two motorcycles displayed in a monitor (no text or symbols visible)When your TV is compatible only with the NTSC format
With certain discs, the playback picture may be cut above and below it (as shown on the right). This is because the disc has been recorded in the PAL or SECAM format. The screen may be somewhat hard to see but this is not malfunction.
XD-DV series (EN/K,M,T,X,Y)
The video signals used to display TV pictures and video disc pictures are mainly based on two types of signal formats (PAL, SECAM and NTSC), which are assigned to each country or area as shown on the right. As a result, it is required to select discs according to the video format used with your TV monitor (in your country or area).
TV formats of major countries
| TV Format | Major Countries & Areas |
| NTSC | Japan, Taiwan, Korea, U.S.A., Canada, Mexico, Philippines, Chile, etc. |
| PAL | China, North Korea, U.K., Germany, Australia, New Zealand, Kuwait, Singapore, etc. |
| SECAM | France, Eastern Europe |
Video formats of DVD discs that can be played on this unit
Set the video formats of the DVD discs to be played on this unit as described below.

Check the video format(s) used by your TV monitor.
●Refer to the operating instructions of your TV monitor for details.

Select DVD discs or VCD discs recorded with the playable video format by referring to the following table.
- See the region code table on the bottom of this page for details on districts ① to ⑥.
| Your TV format | Playable Disc Formats | ||||||||
| District 1 | District 2-1 | District 2-2 | District 2-3 | District 3 | District 4-1 | District 4-2 | District 5 | District 6 | |
| NTSC only | NTSC | NTSC*PAL* | NTSC | NTSCPAL* | NTSCPAL* | NTSC*PAL* | NTSC | NTSC*PAL* | NTSCPAL* |
| PAL only | NTSC* | NTSCPAL | NTSC* | NTSC*PAL | NTSC*PAL | NTSCPAL | NTSC* | NTSCPAL | NTSC*PAL |
| NTSC/PAL switchable | NTSC | NTSCPAL | NTSC | NTSCPAL | NTSCPAL | NTSCPAL | NTSC | NTSCPAL | NTSCPAL |

Normal video may not be reproduced when a disc recorded with the video format marked * in the above table is played. See "Examples of TV screen display of each video format" for details.

When your TV is switchable between NTSC and PAL,
- Districts ①, ②-2 and ④-2: Set the TV to NTSC.
●Districts 2-1, 4-1 and 5: Set the TV to PAL. - Districts 2-3, 3 and 6: Set the TV according to each disc to be played.
Region code table
| District 1 | District 2-1 | District 2-2 | District 2-3 | District 3 | District 4-1 | District 4-2 | District 5 | District 6 | |
| Area or Country Name, Region Code | North America1 | U. K. and Europe2 | Japan2 | Middle East2 | Southeast Asia3 | Oceania4 | South America4 | Russia5 | China6 |
Restrictions due to difference between discs
Some DVD and VCD discs can be played only in certain playback modes according to the intentions of the software producers. As this player plays discs according to their intentions, some functions may not work as intended by you. Please be sure to read the instructions provided with each disc. When an inhibition icon is displayed on the TV screen connected to the player, it indicates that the disc being played is under the restriction as described above.
Inhibition icon

Recording systems and types of playable discs
The system using this unit does not only play music from CD but can also play the discs listed below to offer you high-quality entertainment of video of movies and live concerts.
| Playable Disc | DVD CD | VCD | ||||
| Logo mark on disc |  VIDEO VIDEO |  DIGITAL AUDIO DIGITAL AUDIO |  [DIGITAL VIDEO] [DIGITAL VIDEO] | |||
| Disc size |  8cm 8cm |  12cm 12cm |  8cm 8cm |  12cm 12cm |  12cm 12cm | |
| Played sides | One or both One or both | One side only One | side only | One side only | ||
| Contents | Video + Audio | Approx. 41 min.(1 side, 1 layer)Approx. 75 min.(1 side, 2 layers)Approx. 82 min.(2 sides, 1 layer)Approx. 150 min.(2 sides, 2 layers) | Approx. 133 min.(1 side, 1 layer)Approx. 242 min.(1 side, 2 layers)Approx. 266 min.(2 sides, 1 layer)Approx. 484 min.(2 sides, 2 layers) | Max. 74 min. | ||
| Audio | Max. 20 min., digital | Max. 74 min., digital | ||||
Unplayable discs
This player cannot play back any of the following discs.
- DVD-ROM discs
• DVD-R/DVD-RAM discs -
CD-ROM discs
• VSD discs -
CDV discs (Only the audio part can be reproduced.)
- CD-G/CD-EG/CD-EXTRA discs (Only the audio can be reproduced.)
- CD-R/CD-RW discs (Never attempt to play them.)
- Photo CD discs (Never attempt to play them.)
Icons on the DVD discs
| Icon | Description |
 | Indicates the region code where the disc can be played. |
 | Number of voice languages recorded with the audio function. The number in the icon indicates the number of voice languages. (Max. 8 languages) |
 | Number of subtitle languages recorded with the subtitle function. The number in the icon indicates the number of subtitle languages. (Max. 32 languages) |
 | Number of angles provided by the angle function. The number in the icon indicates the number of angles. (Max. 9 angles) |
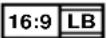 | Aspect ratios that can be selected. “LB” stands for Letter Box and “PS” for Pan/Scan. In the example on the left, the 16:9 video can be converted into letter box video. |
Disc handling precautions
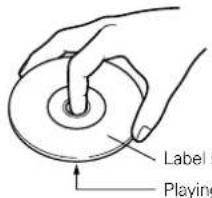
Handling
Hold the discs so that you do not touch the playing surface.
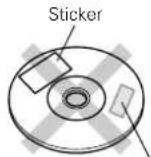
Sticky paste
Do not attach paper or tape to either the playing side or the label side of the discs.
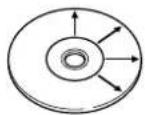
Cleaning
If fingerprints or foreign matter become attached to the disc, lightly wipe the disc with a soft cotton cloth (or similar) from the center of the disc outwards in a radial manner.
Storage
When a disc is not to be played for a long period of time, remove it from the player and store it in its case.
Never play a cracked or warped disc
During playback, the disc rotates at high speed in the player. Therefore, to avoid danger, never use a cracked or deformed disc or a disc repaired with tape or adhesive agent. Please do not use discs which are not round because they may cause a malfunction.
Disc accessories
The disc accessories (stabilizer, protection sheet, protection ring, etc.) which are marketed for improving the sound quality or protecting discs as well as the disc cleaner should not be used with this system because they may cause malfunction.
Notes on cassette tape
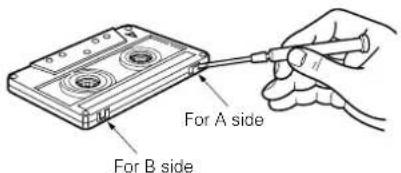
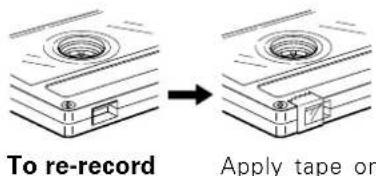
Safety tab (accidental erasure prevention tab)
After an important recording has been finished, break the safety tab, to prevent the recorded contents from being erased or recorded on accidentally.
To store cassette tapes
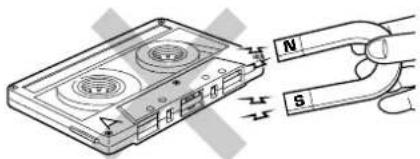
Do not store the tapes in a place which is subject to direct sunlight, or near equipment that generates heat. Keep the cassette tapes away from any magnetic field.
When there is slack in the tape
In such a case, insert a pencil into the reel hole and wind the reel hub to remove the slack.
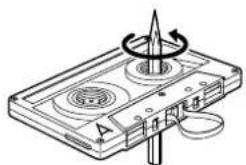
natural_image
Diagram of a cassette tape with a rotating knob and base mount (no text or symbols)
1. Longer tape than 90 minutes cassette tape
Since longer tape than 90 minutes cassette tape is very thin, the tape could adhere to the pinch roller or be easily cut. It is recommended that these tapes not be used with this unit to prevent possible damage.
2. Endless tapes
Do not use an endless tape, as this could damage the mechanism of the unit.
Make connections as shown below.
When connecting the related system components, refer also to the instruction manuals of the related components.
Caution:
Do not plug in the power lead until all connections are completed.
Caution
Be sure to adhere followings. Or proper ventilation will be blocked causing damage or fire hazard.
- Do not place any objects impairing heat radiation onto the top of unit.
- Leave a space around the unit (from the largest outside dimension including projection) equal or greater than, shown below.
Top panel : 50 cm
Side panel : 10 cm
Back panel : 10 cm
Malfunction of microcomputer
If operation is not possible or erroneous display appears even though all connections have been made properly, reset the microcomputer referring to "In case of difficulty". → [55]
AM loop antenna

flowchart
graph LR
    A["Device with scroll arrow"] --> B["Square Panel with scroll arrow"]
    B --> C["Computer monitor with scroll arrow"]
AM loop antenna connection
The supplied antenna is for indoor use. Place it as far as possible from the main system, TV set, speaker cords and power cord, and set it to a direction which provides the best reception.
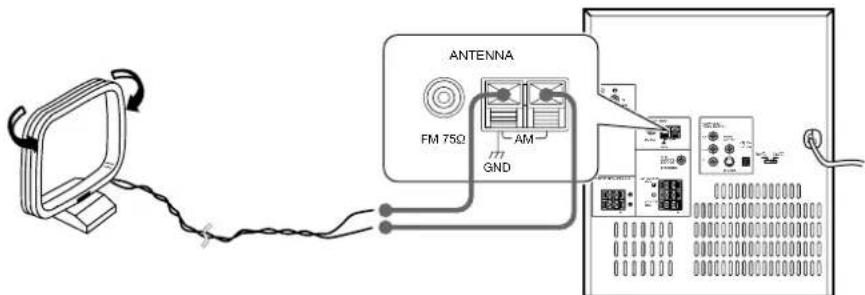
Example of the XD-DV90
FM antenna
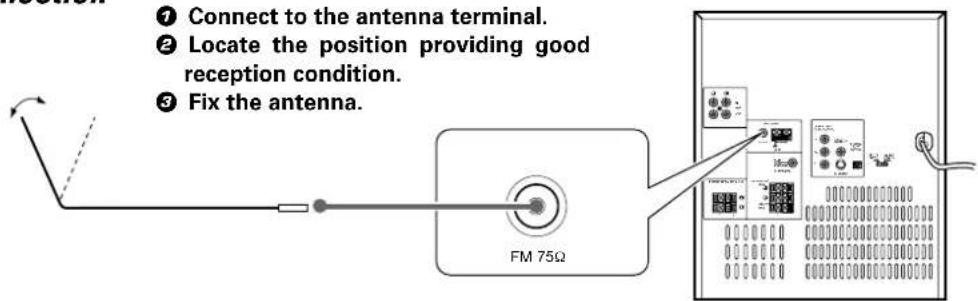
FM indoor antenna connection
The accessory antenna is for temporary indoor use only. For stable signal reception we recommend using an outdoor antenna. Remove the indoor antenna if you connect one outdoors.
FM outdoor antenna (commercially available)
Lead the 75Ω coaxial cable connected to the FM outdoor antenna into the room and connect it to the FM 75Ω terminal.
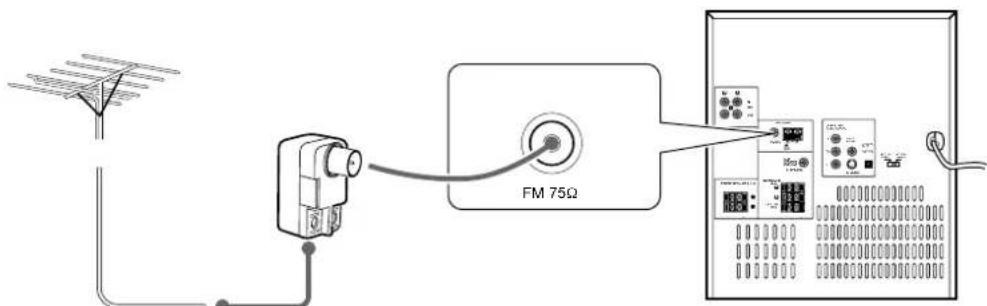
Example of the XD-DV90
Connection of the front speakers
Do not plug the power cord into the power outlet until all of the required connections have been made.
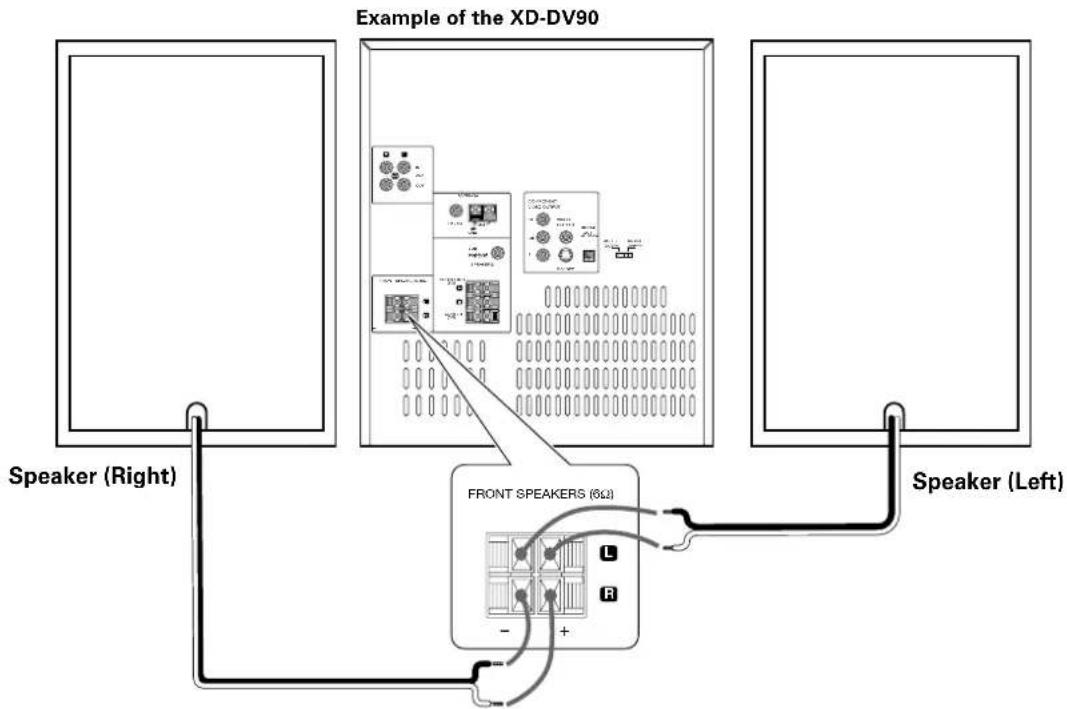
flowchart
graph TD
    A["Speaker (Right)"] --> B["Front Speakers (6Ω)"]
    C["Speaker (Left)"] --> B
    B --> D["Example of the XD-DV90"]
    style A fill:#f9f,stroke:#333
    style C fill:#f9f,stroke:#333
    style D fill:#ccf,stroke:#333
- Never short-circuit the + and - speaker cords.
- If the left and right speakers are connected inversely or if the speaker cords are connected with reversed polarity, the sound becomes unnatural with ambiguous acoustic image positioning. Be sure to connect the speakers and speaker cords correctly.
Connection of the sub woofre or super woofer (optional)

For XD-DV90/XD-DV80For XD-DV70/XD-DV60
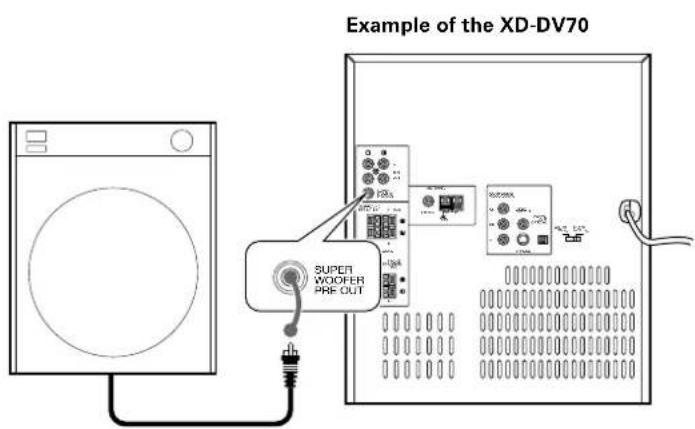
Powered Super woofer
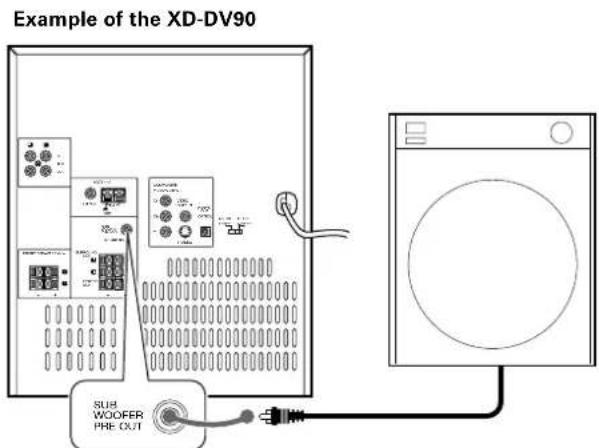
Powered Sub woofer
Connection of the surround speaker system
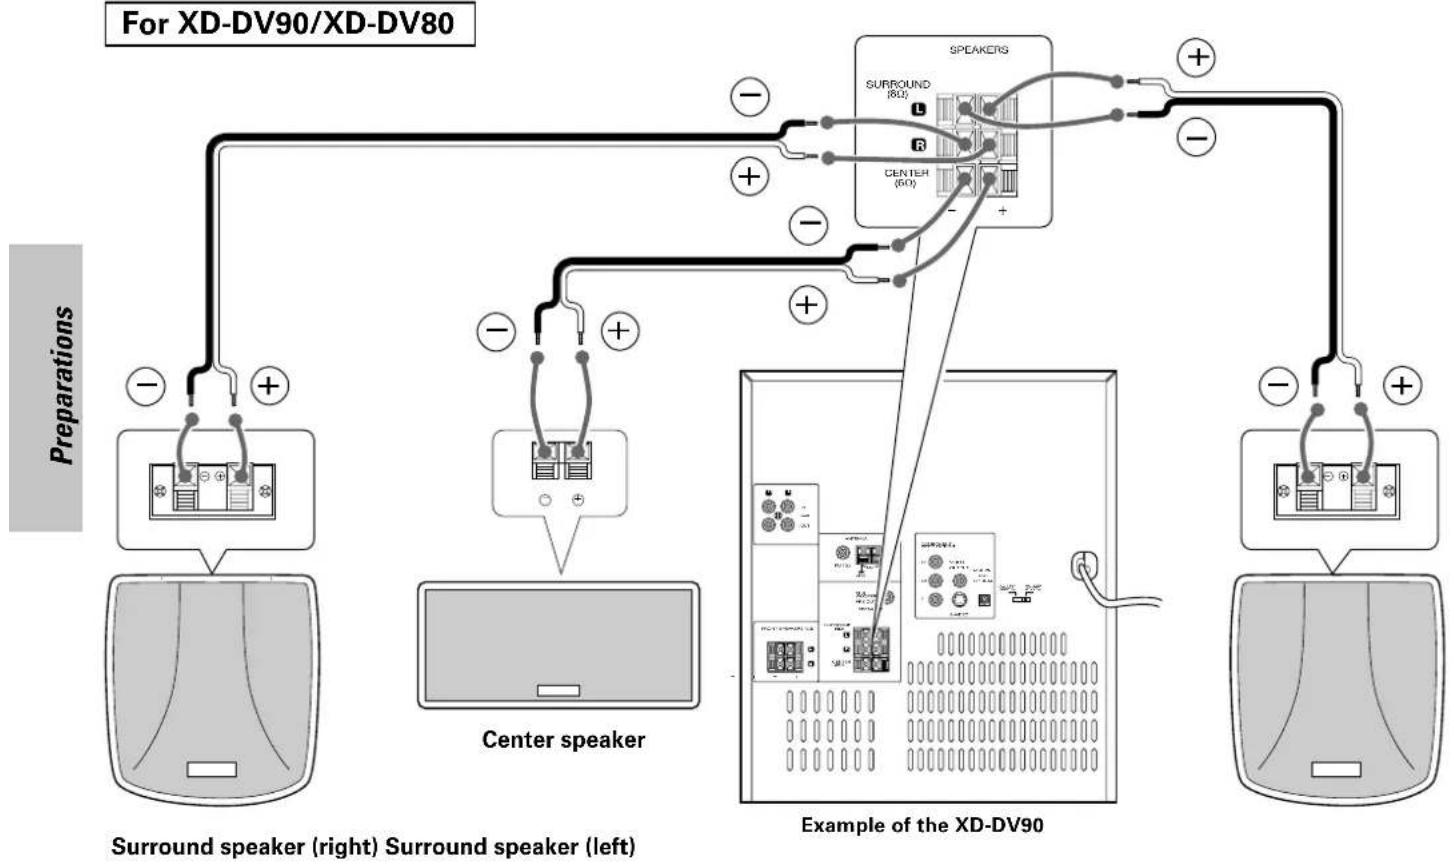
flowchart
graph TD
    A["Center speaker"] --> B["Speaker"]
    C["Preparations"] --> D["Speaker"]
    E["Example of the XD-DV90"] --> F["Speaker"]
    G["Surround speaker (right) Surround speaker (left)"] --> H["Speaker"]
    I["SURROUND (80)"] --> J["Speaker"]
    K["CENTER (60)"] --> L["Speaker"]
    M["Preparation"] --> N["Speaker"]
    O["Preparation"] --> P["Speaker"]
    Q["Preparation"] --> R["Speaker"]
Use of the speaker stabilizer (only for XD-DV90 and XD-DV80)
Please attach this to the rear of the speaker when the center speaker or the surround speaker is not stable.
For XD-DV70/XD-DV60/XD-DV50/XD-A850
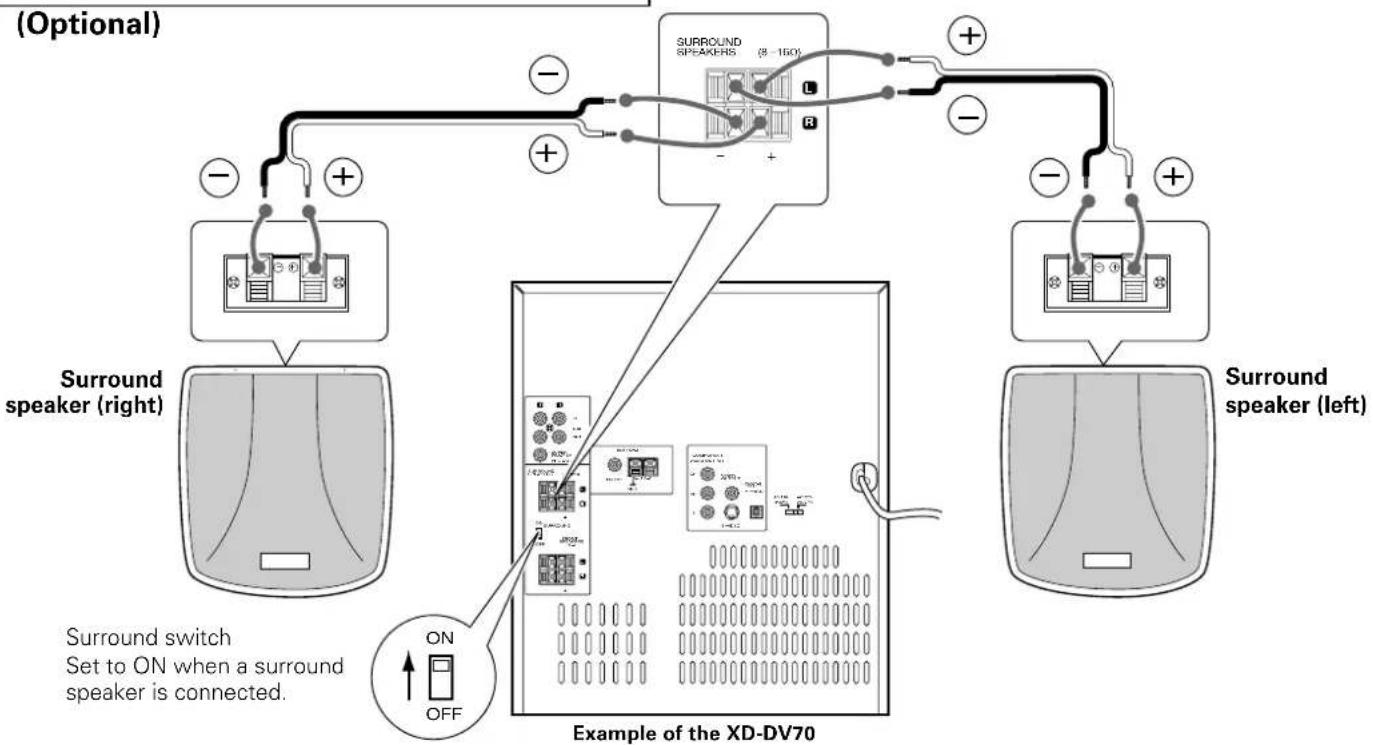
flowchart
graph TD
    A["Surround speaker (right)"] -->|+| B["Example of the XD-DV70"]
    A -->|-| C["Surround speaker (left)"]
    B -->|+| D["Surround speaker (8-160)"]
    B -->|-| E["Surround speaker (left)"]
    style B fill:#f9f,stroke:#333
    note right of B: "ON" (on switch) when a surround speaker is connected.
    note left of B: "OFF" (on switch).
Connection of the TV monitor (optional) and VCR (optional)
This product is compatible with the MacroVision type copy protection. Some discs contain the recording of copy inhibit signals, and the video may be disturbed when the video of such discs is recorded onto a VCR and played back.
For XD-DV90/XD-DV80/XD-DV70/XD-DV60
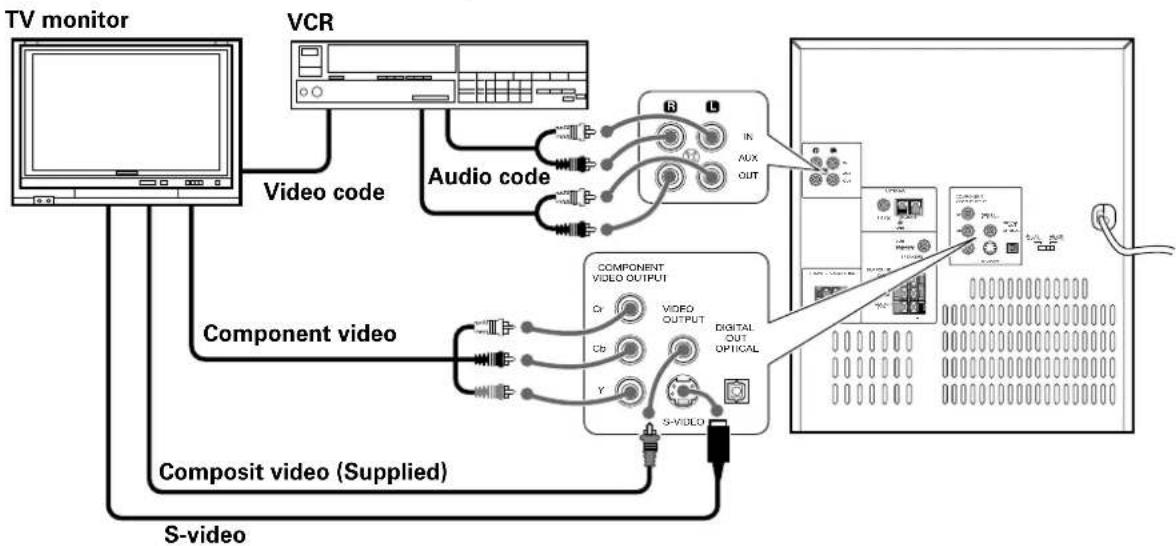
flowchart
graph TD
    A["TV monitor"] --> B["Video code"]
    B --> C["Audio code"]
    C --> D["Component video"]
    D --> E["Composit video (Supplied)"]
    E --> F["S-video"]
    G["VCR"] --> H["Video output"]
    H --> I["Component video"]
    I --> J["Composit video (Supplied)"]
    J --> K["S-video"]
    L["Monitor"] --> M["Display module"]
    M --> N["Component video"]
    N --> O["Composit video (Supplied)"]
For XD-DV50/XD-A850DV
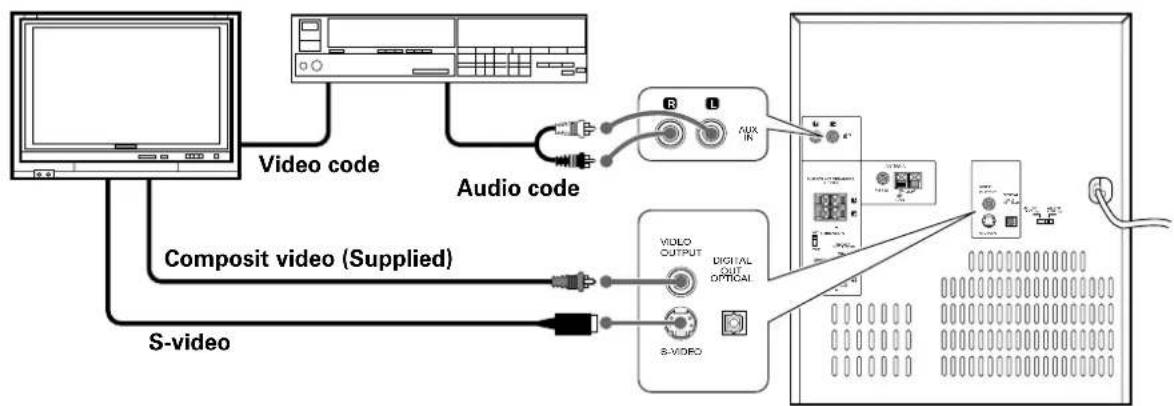
flowchart
graph TD
    A["Computer"] --> B["Video code"]
    B --> C["Audio code"]
    C --> D["Composit video (Supplied)"]
    D --> E["S-video"]
    E --> F["Video OUTPUT"]
    F --> G["Digital OUT Optical"]
    G --> H["S-VIDEO"]
    H --> I["Monitor 1"]
    I --> J["Monitor 2"]
    J --> K["Monitor 3"]
    K --> L["Monitor 4"]
    L --> M["Monitor 5"]
    M --> N["Monitor 6"]
Connection of the MD recorder/CD recorder (optional)
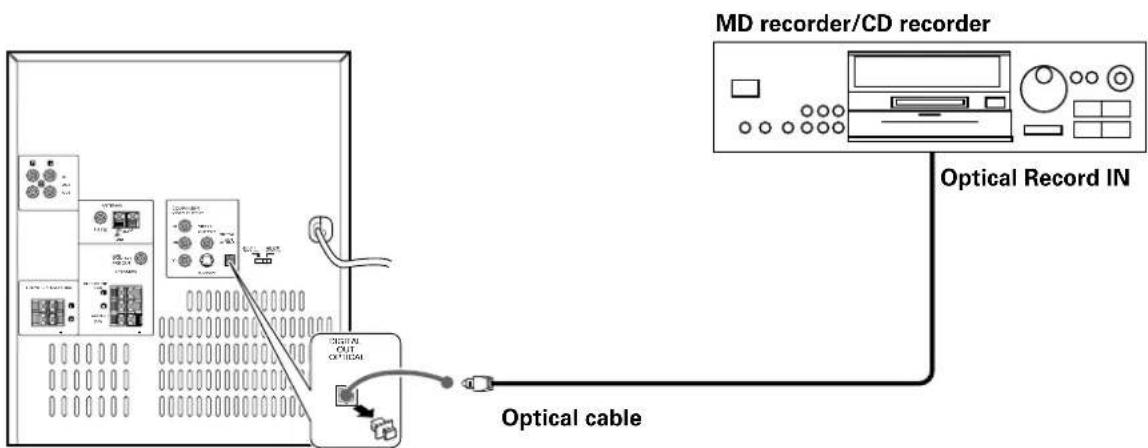
flowchart
graph TD
    A["Optical cable"] --> B["MD recorder/CD recorder"]
    B --> C["Optical Record IN"]
    C --> D["Device with control panel"]
    D --> E["Control panel with buttons and labels like 'OUT' and 'DC54'"]
    style A fill:#f9f,stroke:#333
    style B fill:#ccf,stroke:#333
    style C fill:#cfc,stroke:#333
    style D fill:#fcc,stroke:#333
    style E fill:#cff,stroke:#333
Main unit (1)
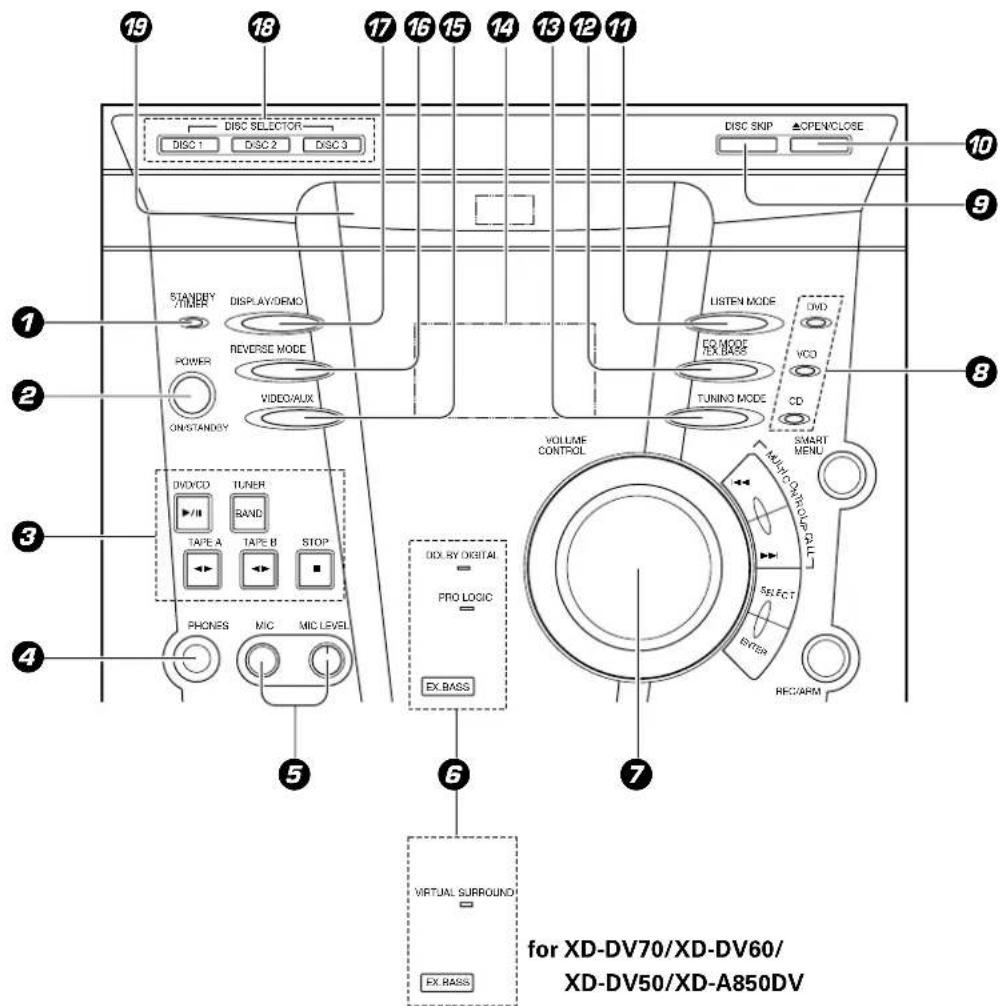
⑦ STANDBY/TIMER indicator - 16
② POWER ON/STANDBY (/○) key → 16
③ DVD/CD play/pause ▶/■ key - [17]
TUNER /BAND key - 17
TAPE A play (◀) key / direction key - 17
TAPE B play (◀) key / direction key → 17
STOP (■) key → [19]
④ PHONES jack → 17
⑤ MIC jack (only for some areas) → 41
MIC LEVEL. control knob (only for some areas) → 41
⑥ DOLBY DIGITAL indicator
(for XD-DV90/XD-DV80) → 45
PRO LOGIC indicator (for XD-DV90/XD-DV80) - 48
VIRTUAL SURROUND indicator (for XD-DV70/
XD-DV60/XD-DV50/XD-A850DV) → 48
EX. BASS indicator → 18
⑦ VOLUME CONTROL knob
→17
8 DVD indicator - 38
VCD indicator -38
CD indicator - 38
⑤ DISC SKIP key -19
10 OPEN/CLOSE (▲) key → 19
LISTEN MODE key (for XD-DV90/XD-DV80) →44
VIRTUAL SORROUND key
(for XD-DV70/XD-DV60/XD-DV50/XD-A850DV) → 44
⑫ EQ MODE/EX. BASS key - 18
13 TUNING MODE key → 19
14 Display section - 14
15 VIDEO/AUX key - 19
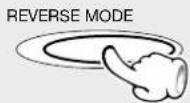
16 REVERSE MODE key - 19
⑰ DISPLAY/DEMO key → 19
⑱ DISC SELECTOR keys - [19]
19 Disc tray - 19
STANDBY mode of ON/STANDBY (1/0) switch
When the power cable plug of this unit is inserted into a receptacle, a minute current flows for memory protection. This status is referred to as the STANDBY mode, and the unit in the STANDBY mode can be turned ON from the remote control unit.
XD-DV series (EN/K,M,T,X,Y)
Main unit (2)
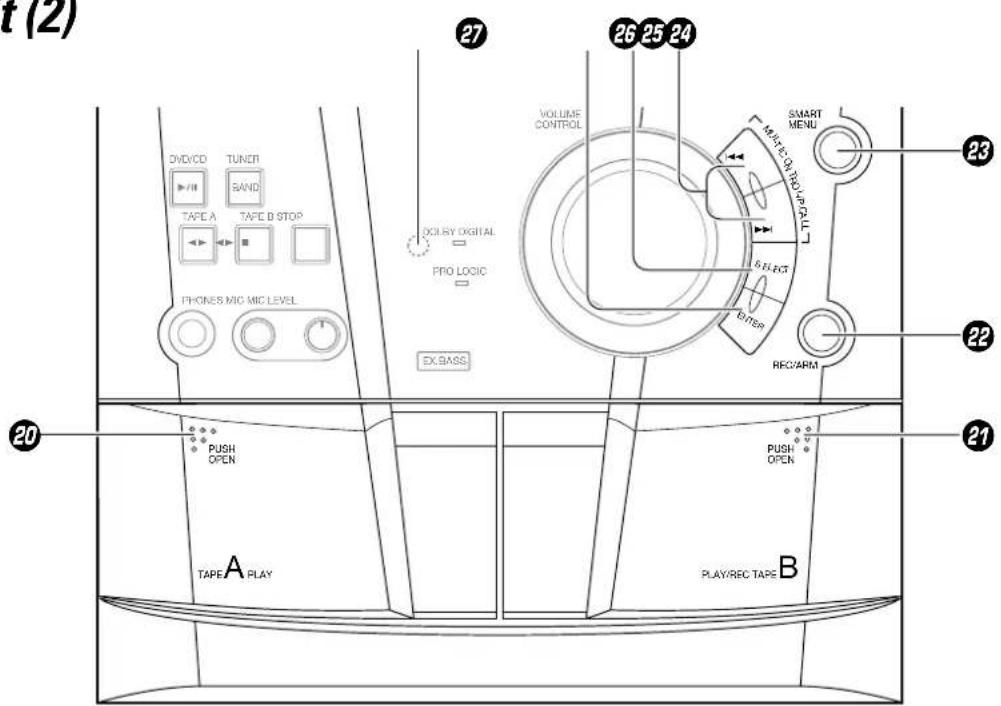
20 Cassette holder (TAPE A) - 38
Press the area marked "PUSH OPEN" to load or eject a tape.
21 Cassette holder (TAPE B) → 38
Press the area marked "PUSH OPEN" to load or eject a tape.
22 REC/ARM key - 39
23 SMART MENU key → 34
24 MULTI CONTROL/P.CALL/◄◄, ►►| key - 16
25 SELECT key → 16
26 ENTER key → 40
27 Remote sensor → 15
DISPLAY
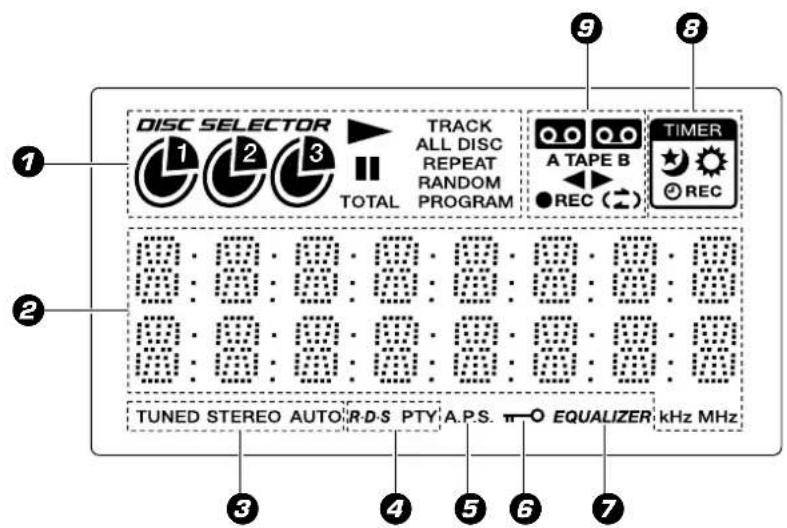
① CD (DVD or VCD)-related indicators
This section contains the CD (DVD or VCD) play and pause mode indicators.
② Character information display
Displays the input selection, frequency, volume level etc.
③ Tuner-related indicators
④ R.D.S., PTY indicators
(Only for Europe and U.K.)
⑤ A.P.S. (Auto Power Save) indicators
⑥ PARENTAL lock indicator
⑦ EQUALIZER indicator
⑧ Timer-related indicators
⑨ Cassette deck-related indicators
This section contains the cassette deck operation indicators. The indicated information includes the tape reverse mode and tape transport direction.
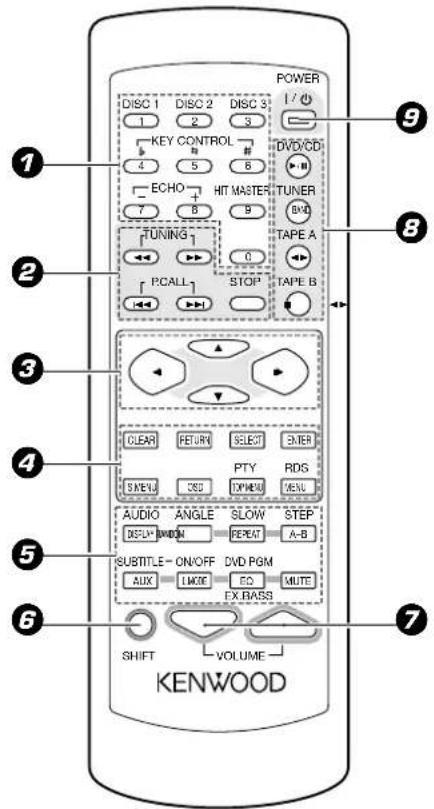
Model : RC-DV90 (for U.S.A., Canada, Australia and U.S. Military)
RC-DV90E (for Europe and U.K.)
RC-DV90M (for Other countries)
Infrared ray system
The keys on the remote control unit with the same names as on the main unit have the same function as the keys on the main unit.
① Numeric keys → 22
Disc selector keys (DISC1, DISC2, DISC3)
KARAOKE keys (only for some areas)
KEY CONTROL keys
ECHO keys
HIT MASTER key
② Search (◀◀, ▶▶)/TUNING
keys - 19
Skip (◀◀, ▶▶) /P.CALL keys
→19
Stop (■) key - 19
③ Cursor Up, Down, Left and Right keys → 20
④ CLEAR key - 19
RETURN key - 19
SELECT key → 19
ENTER key → 19
S.MENU (Smart Menu) key
→19
OSD (On screen display) key
19
TOP MENU key (PTY key for
only U.K. and Europe) - 19
MENU key (RDS key for only U.K. and Europe) - 19
⑤ DISPLAY/AUDIO key → 16
RANDOM/ANGLE key - 50
REPEAT/SLOW key - 18
A-B (A-B repeat)/STEP key
→38
→29
AUX/SUBTITLE key - 29
L.MODE (Listen mode)/
→53
(SUBTITLE) ON/OF key
EQ (Equalizer)/EX. BASS/
DVD PGM (Program) key - 18
MUTE key → 40
⑥ SHIFT key → 17
⑦ VOLUME (up/down) keys
→17
⑧ DVD/CD play pause (▶/Ⅲ) key
-20
TUNER/BAND key → 25
TAPE A play/direction
→27
TAPE B play/direction
→27
⑨ POWER (/○) key
Power ON/OFF switching is executed.
Use of the SHIFT key
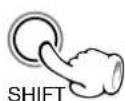
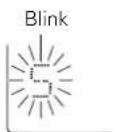
When a key corresponding to the SHIFT function is pressed within 5 seconds of pressing the SHIFT key ("S" flashes on the display), a different function from the normal function will operate. For example, when the REPEAT (SLOW) key is pressed after the SHIFT key, SLOW operation mode will be reached. While the "S" indication is flashing, operation of the SHIFT function is possible without pressing the SHIFT key.
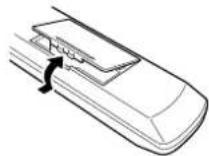
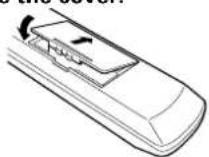
Loading batteries
① Remove the cover.
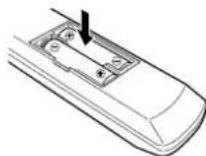
② Insert batteries.
③ Close the cover.
- Insert two R6/LR6 ("AA"-size) batteries following the polarity indications.
- Align the poles (+ and -) properly when inserting the batteries
Operation
Plug the power cord into the mains power outlet and press the on/standby (I/O POWER) key of the remote control unit to turn power ON. After the power has been turned ON, press the desired key.
To turn power off, press the on/standby (I/O POWER) key again.
- When pressing more than one remote control keys successively, press the keys securely by leaving an interval of 1 second or more between keys.
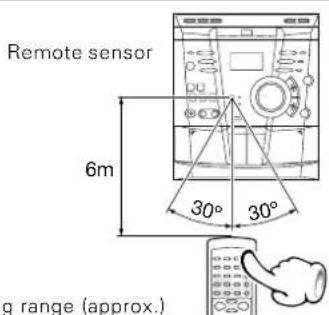

-
The provided batteries are intended for use in operation checking, and their service life may be short.
-
When the remote controllable distance becomes short, replace both of the batteries with new ones.
-
If direct sunlight or the light of a high-frequency fluorescent lamp (inverter type, etc.) is incident to the remote sensor, malfunction may occur. In such a case, change the installation position to avoid malfunction.
-
The provided batteries are intended for use in operation checking, and their service life may be short.
- When the remote controllable distance becomes short, replace both of the batteries with new ones.
- If direct sunlight or the light of a high-frequency fluorescent lamp (inverter type, etc.) is incident to the remote sensor, malfunction may occur. In such a case, change the installation position to avoid malfunction.
SMART MENU operation
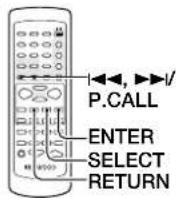
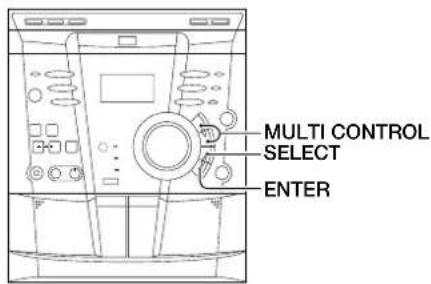
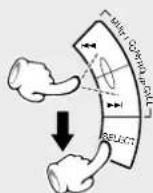
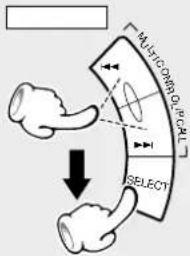
When one of the MULTI CONTROL keys (i◀◀, ▶▶/P.CALL keys) is pressed after the SMART MENU key (S.MENU key) has been pressed, various operations can be performed while watching the display.
SELECT key → Selects an item. ENTER key → Confirms the selected contents. RETURN key → Returns to the previous operation.
Clock adjustment Adjust the clock before setting the timer.
1 Switching the power ON.
MAIN UNIT
POWER

ON/STANDBY
REMOTE
POWER
2 Press the SMART MENU key.
MAIN UNIT
REMOTE
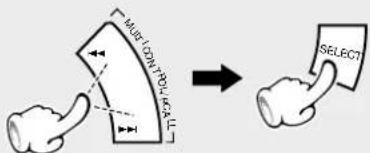
3 Select "CLOCK OPTION", then press the SELECT key.
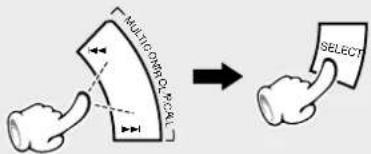
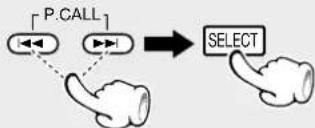
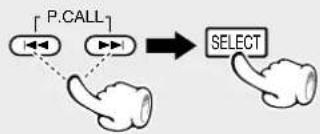
- When operating on the remote control unit, Press the ◀◀◀, ▶▶▶ keys to select "Clock Option", then press the SELECT key.
4 Select "ADJUST TIME", then press the SELECT key.
- When operating on the remote control unit, Press the ◀◀, ▶▶ keys to select "ADJUST TIME", then press the SELECT key.
This unit incorporates a clock function. Be sure to adjust the correct time before using the timer function. The time is displayed only while the power is off.
Goes off
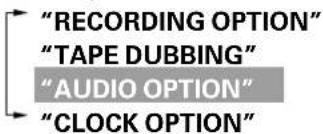
The following items can be selected by pressing the MULTI CONTROL keys.
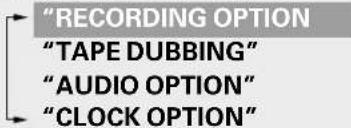
"RECORDING OPTION"
"TAPE DUBBING"
"AUDIO OPTION"
"CLOCK OPTION"
The following items can be selected by pressing the MULTI CONTROL keys.
"SLEEP TIMER" "ADJUST TIME"
"TIMER PLAY"
"AUTO POWER SAVE"
5 Select "TIME 24H" or "TIME 12H", then press the SELECT key.
- When operating on the remote control unit, Press the |◀◀,▶▶| keys to select "TIME 24H" or "TIME 12H", then press the SELECT key.
6 Enter the figure of hour, then press the SELECT key.
- When operating remote control unit, Press the Cursor ◀◀◀, ▶▶ keys to select figure of hour, then press the SELECT key.
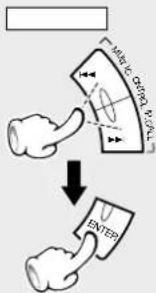
7 Enter the figure of minute, then press the ENTER key.
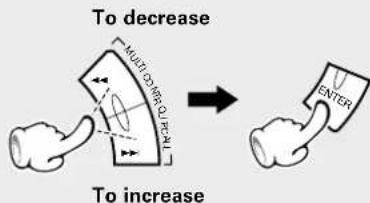
- When operating remote control unit, Press the Cursor ◀◀◀, ▶▶ keys to select figure of minut, then press the ENTER key.
The following items can be selected by pressing the MULTI CONTROL keys.
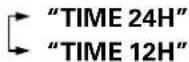
23:00 1:00
Example of the 24 hour display.
Example of the 12 hour display.
- The time display starts to blink.
"TIME 24H" mode Blink
"TIME 12H" mode Blink
● The minute display starts to blink.
"TIME 24H" mode Blink
"TIME 12H" mode Blink
Display the clock
MAIN UNIT
REMOTE
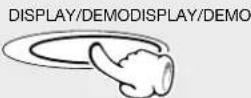
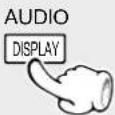
- When the DISPLAY/DEMO key is pressed while the power is off, the present time will be displayed for about 5 seconds.
In regard to input switching between VIDEO and AUX
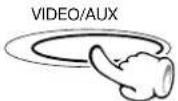
When the VIDEO/AUX key is pressed, the input is switched to the AUX terminal at the rear of the unit. Each time the VIDEO/AUX key is pressed for more than 2 seconds, the display is switched between VIDEO and AUX.
Basic use method
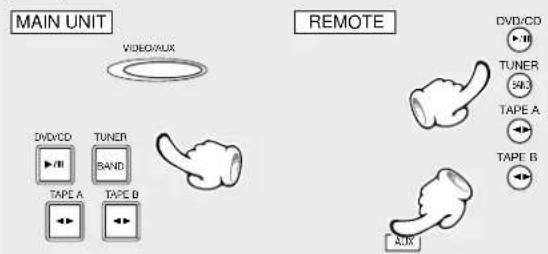
1 Selecting the desired input
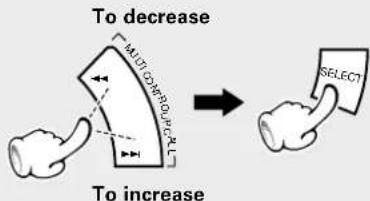
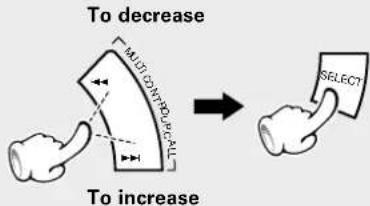
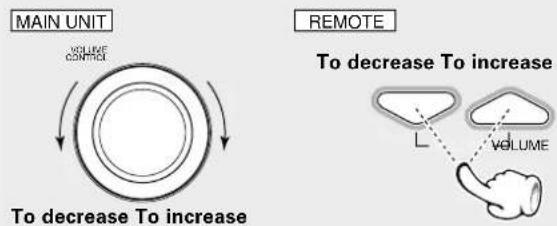
2 Volume adjustment
flowchart
graph TD
    A["MAIN UNIT"] --> B["To decrease To increase"]
    C["REMOTE"] --> D["To decrease To increase"]
    style A fill:#f9f,stroke:#333
    style C fill:#f9f,stroke:#333
    style B fill:#ccf,stroke:#333
    style D fill:#cfc,stroke:#333
- When one of the keys on the left is pressed while the power is off, the power will be switched on automatically and the input will be selected.
- When a disc is set in the disc tray and the DVD/CD key is pressed, disc playback will start automatically. Trays without a disc will be skipped.
- When a cassette is set in the holder and the TAPE key is pressed, tape playback will start.
The mark of the disk being played flashes.
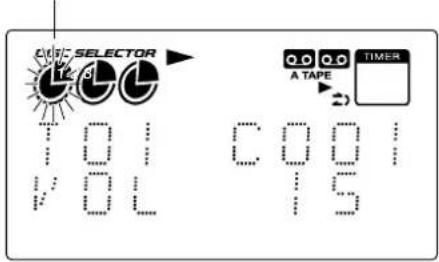
An example of DVD
Muting the sound temporarily
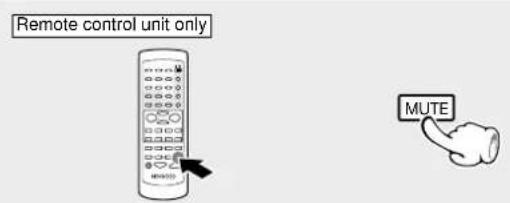
- Press MUTE key.
- Press again to resume the original volume.
- The sound muting is also cancelled when the volume is controlled.
Listening through headphone
Insert the headphone plug into the PHONES jack.
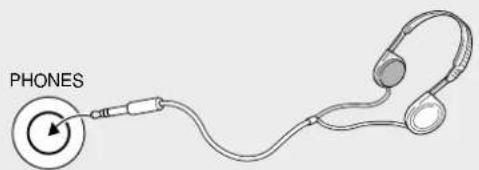
● The sounds from all speakers are cut off.
This unit offers various surround modes, but it switches automatically to stereo mode when headphones are connected.
For listening via the speakers, disconnect the headphones plug and set the listening mode again. (See page 52.)
Changing the Tone
This unit is equipped with various preset equalizers and three custom equalizers, which can be preset freely, so that various sounds can be enjoyed. In addition, it has an EX-BASS function for one-touch bass correction.
Extra Bass
When the EX. BASS function is switched on, richer bass tones can be reproduced.
Press and hold the EX. BASS key for more than 2 seconds.
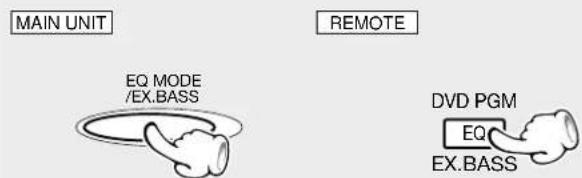
Each press switches the EX-BASS on or off.
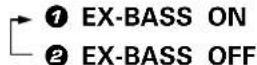
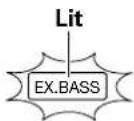
- Switching is not possible when the DOLBY DIGITAL indicator is lit. (Only XD-DV90/VD-DV80) This does not function when the listening mode is DOLBY DIGITAL. (See page 52)
Selecting the desired Tone
The desired sound can be selected from five preset equalizers and three custom equalizers.
Press the EQ MODE (EQ) key.
MAIN UNIT
REMOTE
Each press switches the mode.
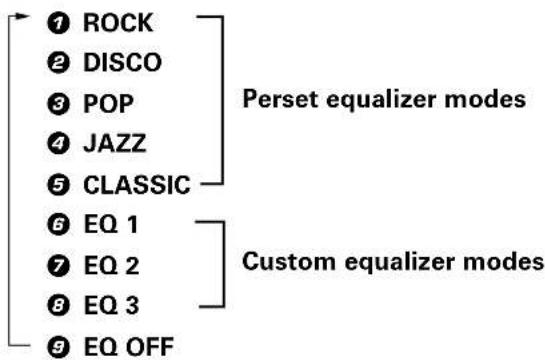
For use of a CUSTOM equalizer effect, the parameters must be set in advance.
To set the CUSTOM EQ.
① Press the SMART MENU key.
MAIN UNIT
REMOTE
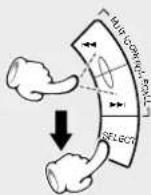
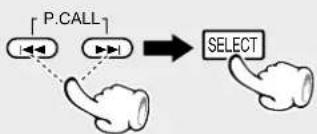
② Select "AUDIO OPTION", then press the SELECT key.
MAIN UNIT
REMOTE
flowchart
graph TD
    A["P.CALL"] --> B["Hand gesture"]
    C["SELECT"] --> B
    B --> D["Arrow pointing to the hand gesture"]
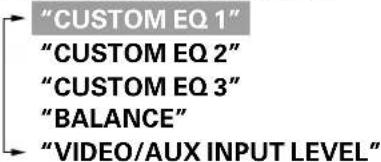
③ Select "CUSTOM EQ 1", then press the SELECT key.
MAIN UNIT
REMOTE
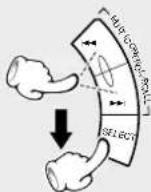
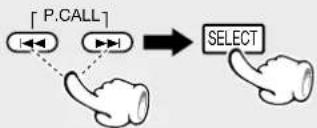
flowchart
graph TD
    A["Input"] --> B{P.CALL}
    B --> C["Hand Interaction"]
    C --> D["SELECT"]
    D --> E["Hand Interaction"]
④ Select desired BASS level ("BASS -8" to "BASS +8"), then press the SELECT key.
MAIN UNIT
REMOTE
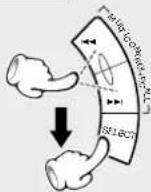
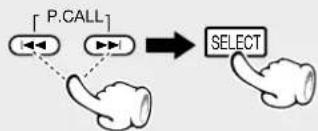
flowchart
graph TD
    A["P.CALL"] --> B["Select"]
    style A fill:#f9f,stroke:#333
    style B fill:#ccf,stroke:#333
⑤ Select desired MID level ("MID -8" to "MID +8"), then press the SELECT key.
MAIN UNIT
REMOTE
flowchart
graph TD
    A["Hand with left-pointing arrow"] --> B["Hand with right-pointing arrow"]
    B --> C["Select"]
    style A fill:#f9f,stroke:#333
    style B fill:#ccf,stroke:#333
    style C fill:#cfc,stroke:#333
The following items can be selected by pressing the MULTICON-TROL keys.
The following items can be selected by pressing the MULTICONTROL keys or cursor keys on the remote.
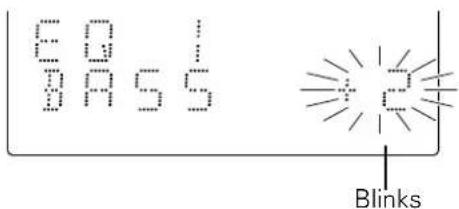
⑥ Select desired HIGH level ("HIGH - 8" to "HIGH +8"), then press the ENTER key.
MAIN UNIT
REMOTE
The same setting as with 1 to 6 also is possible for CUSTOM EQ 2 and CUSTOM EQ 3.
Sequential playback from the first track or chapter
1 Open the tray and place a disc
2 Close the tray
3 Press the DVD/CD (▶/II) key
● Each press pauses and plays the disc alternately.
To change the disc of another tray during playback, do the following.
①Press the OPEN/CLOSE key.
②Set the disc.
③Press the OPEN/CLOSE key to close the tray.
The disc being played back remains as it is, while the other discs can be exchanged.
- The tray opens when the key is pressed and closes when the key is pressed again.
The label must be on top.
Disc number
- Depending on the disc, playback may start automatically.
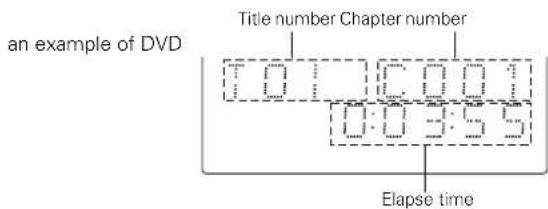
When a Disc Menu appears on the screen (DVD or VCD)
In case of interactive DVDs, a Disc Menu appears on the screen. Then press ENTER to select specific menu you want to play by using Cursor keys.
The operation method may differ according to the disc.
DVD CD VCD Select a Different Disc
MAIN UNIT
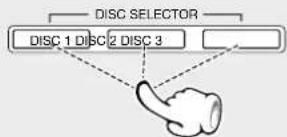
flowchart
graph TD
    A["DISC SELECTOR"] --> B["DISC 1 DISC 2 DISC 3"]
    B --> C["Hand icon"]
    style A fill:#f9f,stroke:#333
    style B fill:#ccf,stroke:#333
    style C fill:#cfc,stroke:#333
REMOTE
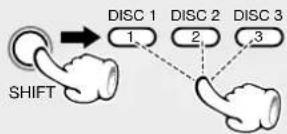
DVD CD VCD To pause playback
MAIN UNIT
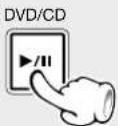
REMOTE
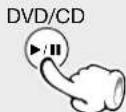
● Each press pauses and plays the disc alternately.
- With some VCD discs, return to the menu screen is done with pause at the time of P.B.C. ON.
DVD CD VCD To stop playback
MAIN UNIT
REMOTE
- Press the ■ key twice to cancel playback.
RESUME playback
When playback has been stopped while watching a movie, it may be desired to restart playback from the stopped part. This unit memorizes the stop position even when the power is switched off, and when the unit is switched on again, it is possible to continue playback from the previous stop position. This function is called the RESUME function.
When the ■ key has been pressed once during playback to stop the playback, and then playback is started again, play will start from the point where the playback had been stopped. When the ■ key is pressed again during stop, the RESUME function is cancelled.
RESUME is cancelled when 5 minutes have passed in RESUME status.
Playback from the desired track or chapter
DVD CD VCD Skipping tracks or chapters
MAIN UNIT
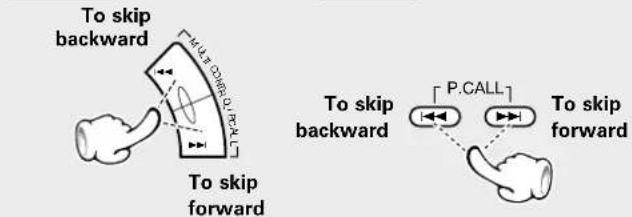
REMOTE
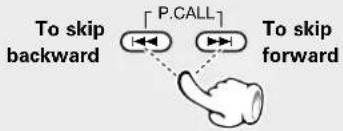
flowchart
graph TD
    A["To skip backward"] --> B["P.CALL"]
    B --> C["Hand gesture pointing inward"]
    C --> D["To skip forward"]
High-speed search in forward and reverse directions
Remote control unit only
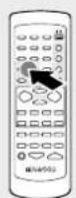
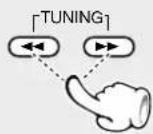
DVD VCD Step Motion playback
Remote control unit only
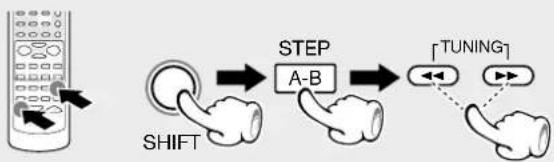
flowchart
graph LR
    A["Radio System"] --> B["SHIFT"]
    B --> C["STEP A-B"]
    C --> D["TUNING"]
    D --> E["Output"]
DVD VCD Slow motion playback
Remote control unit only
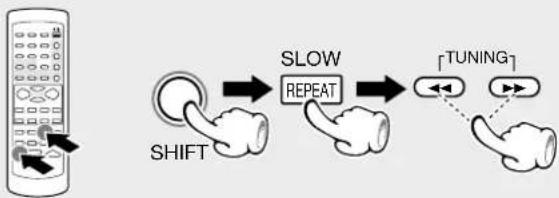
flowchart
graph LR
    A["Shelf"] --> B["SLOW REPEAT"]
    B --> C["TFUNING"]
    C --> D["Feedback Loop"]
    D -.-> E["Shelf"]
- The chapter (or track) in the direction of the key pressed is skipped, and the selected chapter (or track) will be played from the beginning.
- When the ◀◀◀ key is pressed once during playback, the chapter (or track) being played will be played from the beginning.
-
When P.B.C. (see page 00) is switched ON at the time of VCD playback, there will be no return to the preceding track.
-
During playback, press the ◀◀ or ▶▶ key
● Each press switches the searching speed.
DVD (At the time of DVD playback)
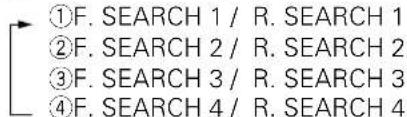
CD VCD (At the time of CD/VCD playback)
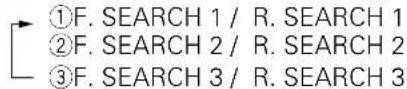
- Press the ▶/■ key at any time to resume normal playback.
Press the SHIFT key and then press the STEP key within 5 seconds. Press the ◀◀ or ▶▶ key.
● Each time the ◀◀ or ▶▶ key is pressed, a new frame will appear.
- Press ▶/■ key to resume normal playback.
Press the SHIFT key and then press the SLOW key within 5 seconds. Press the ◀◀ or ▶▶ key.
● Each press switches the searching speed.
DVD (At the time of DVD playback)
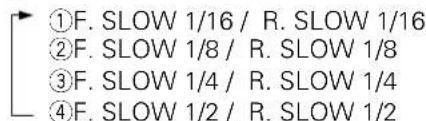
CD VCD (At the time of CD/VCD playback)
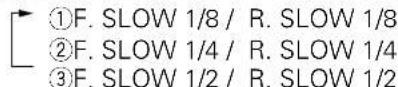
- Press the ▶/■ key at any time to resume normal playback.
DVD CD VCD Repeat play
Desired tracks or all discs can be played back repeatedly.
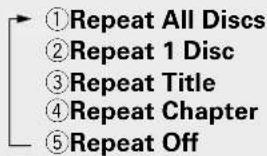
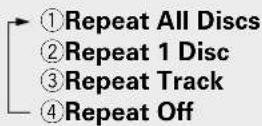
- All Disc – Repeat all discs.
- 1 Disc- Repeat the disc that is playing.
- Title – Repeat the title that is playing.
- Chapter – Repeat the chapter that is playing.
- Track – Repeat the track that is playing.
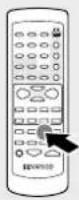
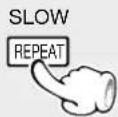
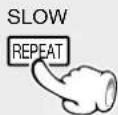
① During playback, press REPEAT on the remote.
LED display
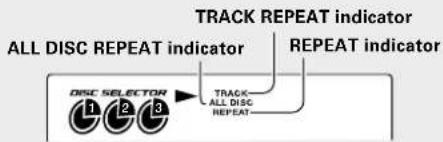
flowchart
graph TD
    A["DISC SELECTOR 1"] --> B["TRACK REPEAT indicator"]
    C["ALL DISC REPEAT indicator"] --> D["TRACK REPEAT indicator"]
    E["REPEAT indicator"] --> F["TRACK ALL DISC REPEAT"]
Each press the key switches the RE-PEAT mode.
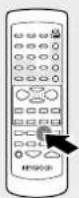
At the time of DVD playback
At the time of CD and VCD playback
- To cancel repeat playback, press the REPEAT key and select "Repeat off".
At the time of VCD playback, this function operates only when P.B.C. is OFF.
DVD CD VCD A-B Repeat play
The A-B repeat function lets you mark a segment to repeat between the beginning "A" and the end "B" of the segment you want to replay.
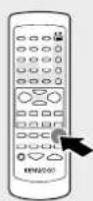
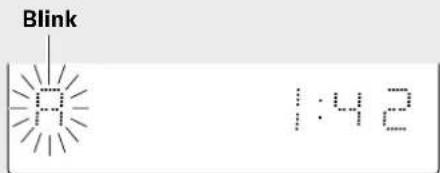
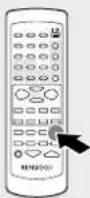
7 Press the A-B key on the remote when you want to choose a scene (sound) as the beginning point.
The Repeat A- display appears
② Press the A-B key again to choose a scene (sound) as the end point.
The Repeat A-B display appears
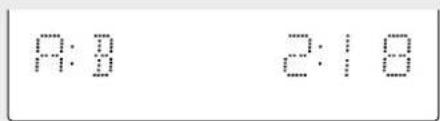
- To cancel A-B Repeat playback, press the A-B key and select "Repeat off".
CD VCD Random play
The tracks of the disc are played in random order.
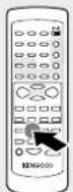
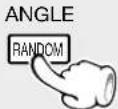
① During playback or stop mode, press RANDOM on the remote.
The Random Play display appears
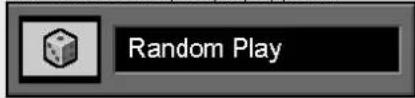
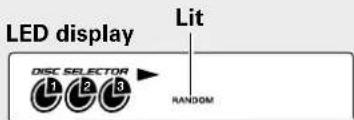
Each time you press RANDOM on the remote, random play would be on and off.
①"Random Play" ②"Standard Play"
The Standard Play display appears when random is off.
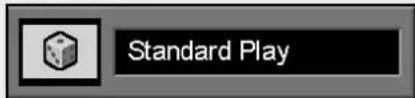
- The menu is switched off when no operation is performed for about 3 seconds.
-
When the RANDOM key is pressed during playback, the tracks of the disc being played will be selected in random order for playback.
● After all tracks of a disc have been played in random order, playback will stop. (Random mode will be cancelled.) -
When the RANDOM key is pressed during random playback, return to normal playback will be made from that track on.
- When All Disc Repeat is selected and the RANDOM key is pressed, random playback will be performed for the disc being played, and then the unit will shift to random playback of the next disc. When a DVD disc is set at this time, the random mode will be cancelled when the unit shifts to the DVD disc, and return to normal playback will be made. The random function does not operate with DVD discs.
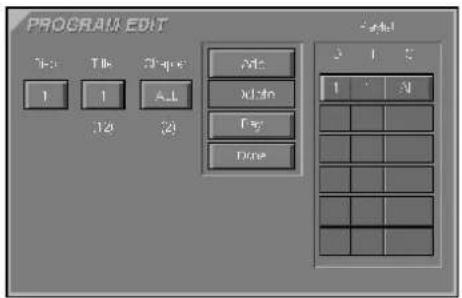
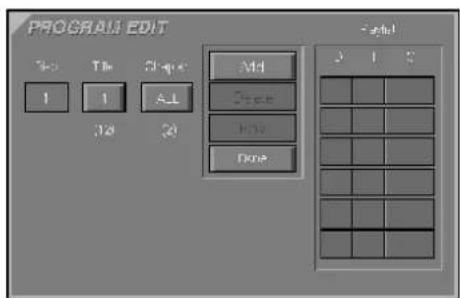
Program Edit
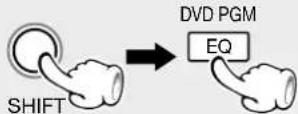
⑦ During stop mode, press the SHIFT key on the remote, then press the DVD PGM key on the remote.
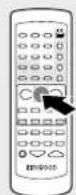
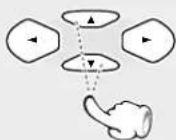
② Select desired disc number, title, chapter or track by Press Cursor up/down (▲/▼) keys or numeric keys.
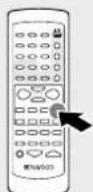
③ Press the ENTER key.
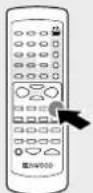
4 Select Add icon on the screen to register selected value onto Playlist, then press the ENTER key.
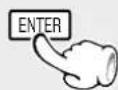
⑤ You can select maximum 32 values by repeating step ② - ④.
⑥ Press the PLAY key to start play-back.
Delete Program
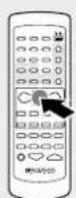
⑦ Use the Cursor up/down (▲/▼) keys to select the column to be deleted from the "Play list". (The color of the column where the Cursor is located will change.)
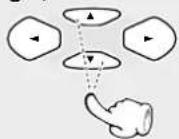
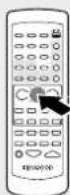
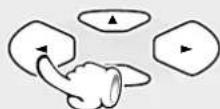
2 Press the Cursor left (◀) key, use the Cursor up/down keys to move the Cursor to the Delete icon, and press the ENTER key.
Selected chapter (track) deletes
Program edit display appears.
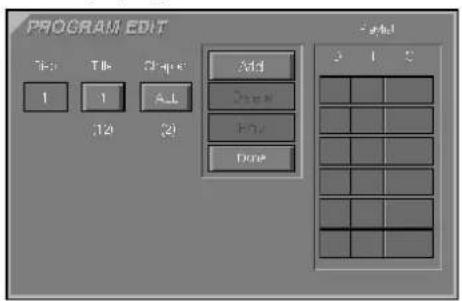
(An example of DVD program edit menu)

: (blue) Selected icon
: An icon which can be selected
: An icon which presently can not be selected
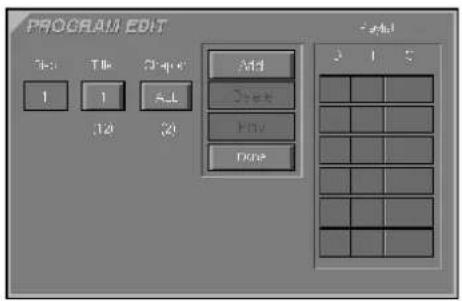
- When you don't add values onto "Playlist" and return to play mode, select Done icon and press ENTER key on the remote.
- To return to standard play, press SHIFT key, then press DVD PGM key on the remote.
- While a disc is playing, press SHIFT key, then press DVD PGM key on the remote to start Program play.
- When the Done button is selected and the ENTER key is pressed, the program input mode is cancelled.
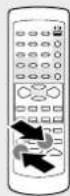
It is possible to delete all programs by one of the following methods.
- Press the OPEN/CLOSE key to open the tray or
- Switch off the power.
Insert chapter or track
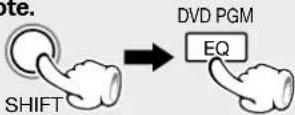
⑦ Press the SHIFT key on the remote, then press the DVD PGM key on the remote.
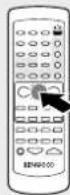
2 Select specific title/chapter or track to insert by Press Cursor up/down (▲/▼) keys or numeric keys.
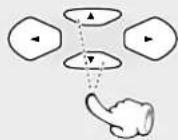
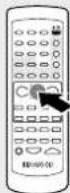
③ Move the cursor with the Cursor right (▶) key to the "Play list" and select the column to be added with the Cursor up/down (▲/▼) keys.
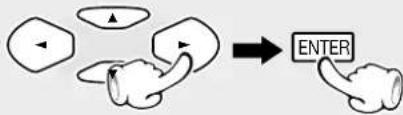
flowchart
graph TD
    A["Start"] --> B{Decision}
    B -->|Yes| C["Process Step"]
    B -->|No| D["End"]
(The color of the column where the Cursor is located will change.)
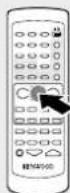
4 Move the cursor with the Cursor left (◀) key to the Insert icon and press the ENTER key.
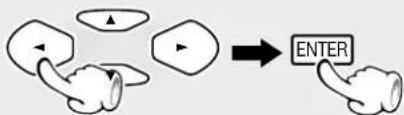
flowchart
graph TD
    A["Start"] --> B{Decision Point}
    B -->|Yes| C["Process Step"]
    B -->|No| D["End"]
The new chapter or track will be inserted before (above) the selected column.
Program edit display appears.
(An example of DVD program edit menu)
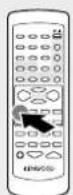
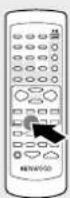
The on-screen Banner Display contains many playback features. To see the Banner Display, press OSD key on the remote while a disc is playing. Use the Cursor (Up/Down/Left/Right) keys on the remote to move through the different features in the Banner Display. Each feature is illustrated with an icon.
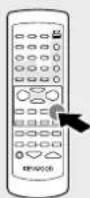
① During playback, press the OSD key on the remote.
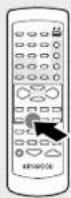
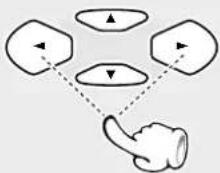
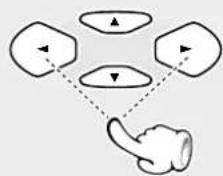
② Press the Cursor left/right (◄/►) keys to highlight a banner display icon.
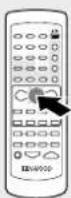
③ Press the ENTER key.
To display disappear from the screen
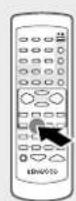
Press the OSD key or CLEAR key
or
When playing a DVD
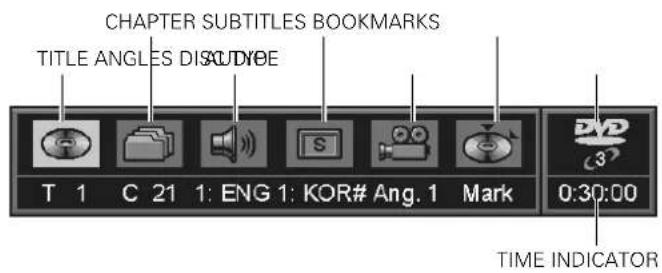
When playing a CD
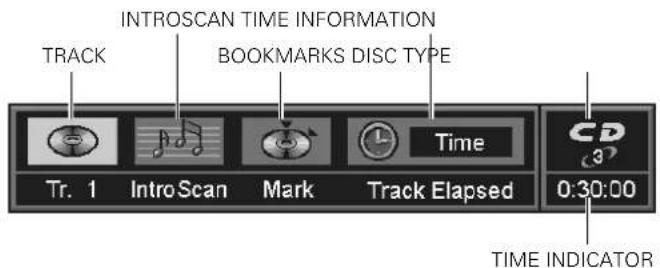
Switch the CD time indicator as follows.
⑦ Select the time information with the cursor key.
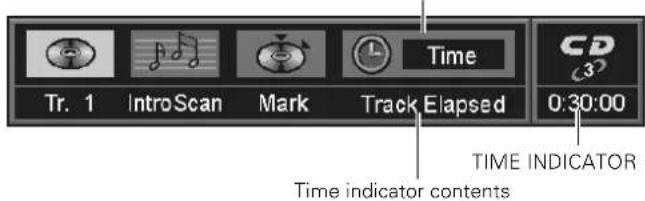
② Each time the ENTER key is pressed, the time indicator changes as follows.
① Track Elapsed (elapsed time of the track being played)
② Track Remain (remaining time of the track being played)
③ Disc Elapsed (elapsed time of the disc being played)
④ Disc Remain (remaining time of the disc being played)
TIME INFORMATION

- You can only access the banner display when you're playing a disc.
- The banner display feature are only available if the disc was created with that particular feature (i.e., if you select the Subtitle icon, you won't be able to change the subtitle language unless the author of the disc created the disc with subtitles).
- The invalid symbol appears on the screen when you press a key that doesn't have any function. If one of the icons is "grayed out," the banner display feature isn't available for the disc you're playing.
DVD Selecting a Title
Some discs contain more than one title. For example, there might be four movies on one disc (each movie might be considered a title).
① During playback, press the OSD key on the remote.
2 Press the Cursor left/right (◄/►) keys until the TITLE icon is highlighted.
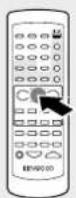
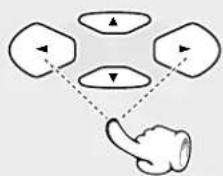
flowchart
graph TD
    A["Input Node 1"] --> B["Output Node 1"]
    C["Input Node 2"] --> D["Output Node 2"]
    E["Input Node 3"] --> F["Output Node 3"]
    G["Input Node 4"] --> H["Output Node 4"]
③ Press the ENTER key. ("T_" appears)
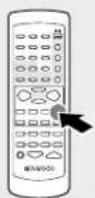
④ Use the ◀◀◀ / ▶▶▶ keys or the numeric keys to enter the title number.
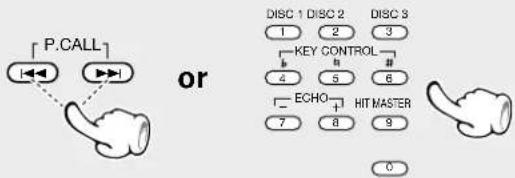
flowchart
graph TD
    A["P.CALL"] --> B["1"]
    A --> C["2"]
    B --> D["OR"]
    C --> D
    D --> E["OR"]
    F["DISC 1 DISC 2"] --> G["1"]
    F --> H["2"]
    F --> I["3"]
    J["DISC 3"] --> K["KEY CONTROL"]
    K --> L["4"]
    K --> M["5"]
    K --> N["6"]
    O["ECHO"] --> P["7"]
    O --> Q["8"]
    O --> R["9"]
    S["HIT MASTER"] --> T["0"]
When you enter a one-digit Title number, you may have to press ENTER on the remote after pressing the numeric key on the remote. Otherwise press 0 first and the other value. Then play starts. This varies depending on number of Title within the disc you're playing.

Some discs only have one title.
DVD CD Selecting a Chapter or Track
Because DVD discs use digital technology, a title can be divided into individual chapters (similar to tracks on a CD). You can skip a specific chapter by using the Chapter section in the Banner Display.
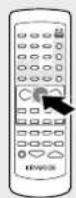
① During playback, press the OSD key on the remote.
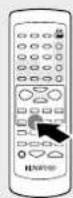
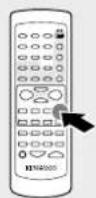
② Press the Cursor left/right (◄/►) keys until the CHAPTER or TRACK icon is highlighted.
flowchart
graph TD
    A["Top Node"] --> B["Bottom Node"]
    C["Top Node"] --> D["Bottom Node"]
    E["Bottom Node"] --> F["Bottom Node"]
    G["Bottom Node"] --> H["Bottom Node"]
    I["Bottom Node"] --> J["Bottom Node"]
    K["Bottom Node"] --> L["Bottom Node"]
    M["Bottom Node"] --> N["Bottom Node"]
③ Press the ENTER key. ("C_" or "Tr_" appears)
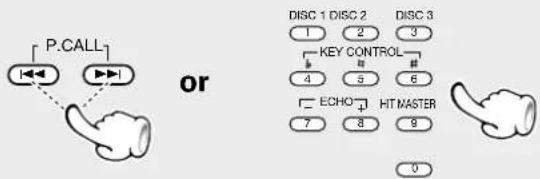
④ Use the |◀◀ / ▶▶| keys or the numeric keys to enter the chapter or title number.
flowchart
graph TD
    A["P.CALL"] --> B["Hand"]
    C["OR"] --> D["Hand"]
    E["DISC 1 DISC 2 DISC 3"] --> F["1"]
    E --> G["2"]
    E --> H["3"]
    I["KEY CONTROL"] --> J["4"]
    I --> K["5"]
    I --> L["6"]
    M["ECHO"] --> N["7"]
    M --> O["8"]
    P["HT MASTER"] --> Q["9"]
When you enter a one-digit chapter or title number, you may have to press ENTER on the remote after pressing the numeric key on the remote. Otherwise press 0 first and the other value. Then play starts. This varies depending on number of chapter or track within the disc you're playing.

The Chapter feature won't work if the disc isn't formatted with separate chapters.
DVD Changing the Audio Language
If the disc was created with different language tracks, you can use the Banner Display to temporarily change the DVD player's Audio setting.
DVD Changing the Subtitle Language
You can change the Subtitle language while you're watching a disc (but only if the disc was created with subtitles).
Using the on-screen banner display Using the on-screen banner display
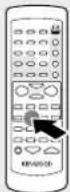
① During playback, press the OSD key on the remote.
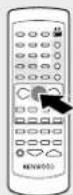
② Press the Cursor left/right (◄/►) keys until the AUDIO icon is highlighted.
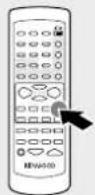
③ Press the ENTER key.
The audio menu appears
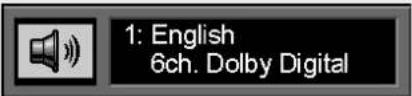
④ Select the audio language with press the ENTER key.
- The menu is switched off when no operation is performed for about 3 seconds.
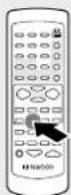
① During playback, press the OSD key on the remote.
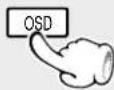
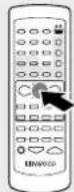
② Press the Cursor left/right (◀/▶) keys until the SUBTITLE icon is highlighted.
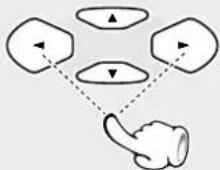
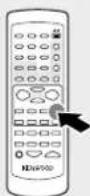
③ Press the ENTER key.
The subtitle menu appears
Displayed when SUB TITLE is ON
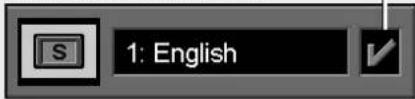
④ Select the subtitle language with press the ENTER key.
⑤ Press the SUB TITLE ON/OFF key to sub title ON or OFF.
- The menu is switched off when no operation is performed for about 3 seconds.
Using the AUDIO key on the remote Using the SUB TITLE key on the remote
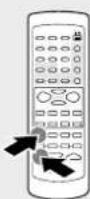
⑦ During playback, press the SHIFT key, then press the AUDIO key on the remote.
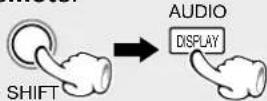
② Select the audio language with press the ENTER key or AUDIO key.
- The menu is switched off when no operation is performed for about 3 seconds.

-
The language feature only works if the disc was created with multiple audio tracks.
-
When you chose an audio language from the Banner Display, you only override the audio language setting in the DVD Player's main menu (in the Language Preferences menu within Setup menu) temporarily.
⑦ During playback, press the SHIFT key, then press the SUB TITLE key on the remote
② Select the subtitle language with press the ENTER key or SUB TITLE key.
② When the SUB TITLE ON/OFF key is pressed, subtitles will be displayed. Switching between display of subtitles and no display of subtitles is done each time the key is pressed.
Displayed when
SUB TITLE is ON


- The subtitle feature only works if the disc was created with multiple audio tracks.
DVD Changing the Camera angle
Some disc contains multiple angles particular scene or sequence. If the disc only has one angle, this feature won't work.
Using the on-screen banner display
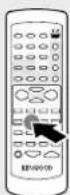
⑦ During playback, press the OSD key on the remote.
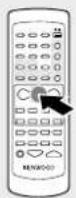
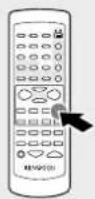
② Press the Cursor left/right (◄/►) keys until the ANGLE icon is highlighted.
③ Press the ENTER key.
The ANGLE menu appears
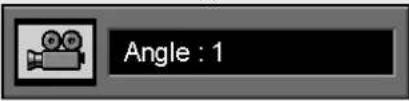
④ Select the angle with press the ENTER key.
- The menu is switched off when no operation is performed for about 3 seconds.
Using the ANGLE key on the remote
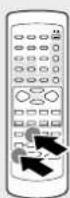
① During playback, press the SHIFT key, then press the ANGLE key on the remote.
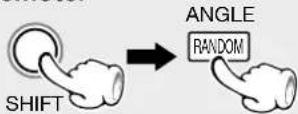
② Select the Camera angle with press the ENTER key or ANGLE key.
- The menu is switched off when no operation is performed for about 3 seconds.
CD VCD Using IntroScan function
IntroScan plays the first few seconds of each track on the CD similar to the scan feature that's on many car radios.
Using the on-screen banner display
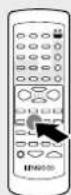
① During playback, press the OSD key on the remote.
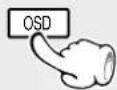
② Press the Cursor left/right (◄/►) keys until the IntroScan icon is highlighted.
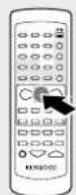
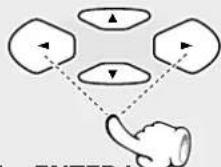
③ Press the ENTER key.
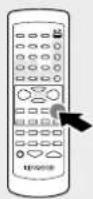
● The first 10 seconds of each track play.
- After Intro Scan goes through all of the tracks, it stops.
- If you want to stop IntroScan while it's in progress, just press STOP (■) key on the remote.
DVD CD VCD Using Bookmarks
The bookmark feature lets you mark a point on the disc that you can go to quickly. You can store up to 9 bookmarks.
Create the bookmark Recalling a bookmarked scene
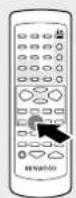
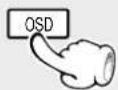
① During playback, press the OSD key on the remote.
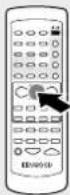
② Press the Cursor left/right (◄/►) keys until the BOOKMARK icon is highlighted.
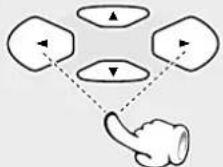
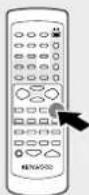
③ Press the ENTER key.
The bookmark menu appears

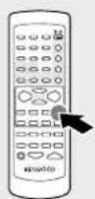
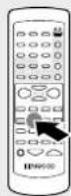
④ When you reach the scene you want to mark, press ENTER.
The bookmark appears on under square

- Press the ON SCREEN key or CLEAR key to switch the menu off.
Clearing a bookmark
The bookmark is cleared each time a disc is removed from the player or when the power is turned off.

- If all 9 bookmarks are in use, you can still mark new scenes, but the previous bookmarks will be erased.
- Depending on the disc, the Bookmark function may not work.
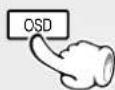
⑦ During playback, press the OSD key on the remote.
2 Press the Cursor left/right (◄/►) keys until the BOOKMARK icon is highlighted.
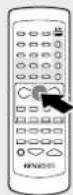
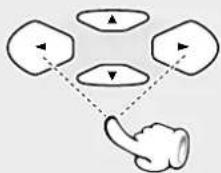
③ Press the ENTER key.
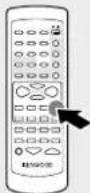
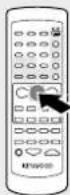
The bookmark appears on under square

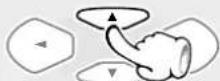
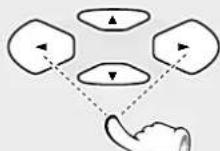
4 Press the Cursor up (▲) key on the remote to go the parts of the Bookmark menu.

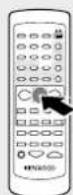
⑤ Use the Cursor left/right (◄/►) keys on the remote to select the bookmarked scene you want to activate.
⑥ Press the ENTER key to active the bookmark.
- Press the OSD key or CLEAR key to switch the menu off.
XD-series (EN/T,M,X)
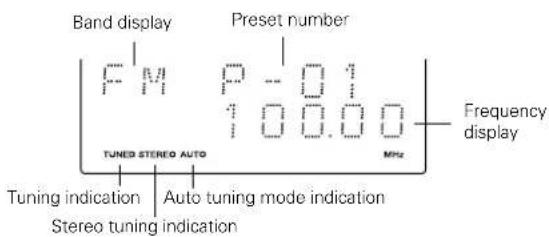
It is also possible to receive them by one-touch operations by storing up to 45 stations in the preset memory. (see page 36)
1 Select the TUNER input
REMOTEMAIN UNIT
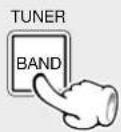
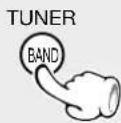
2 Select the broadcast band
REMOTEMAIN UNIT
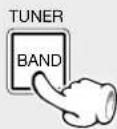
3 Select a tuning mode
REMOTEMAIN UNIT
When the BAND key is pressed, this unit will be switched on automatically.
Each press changes the band.

Each press switches the mode

①auto tuning mode ②manual tuning mode
4 Select a station
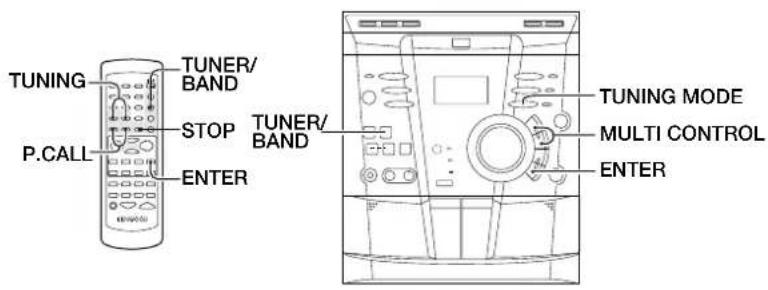
P.CALL (preset call) AUTO (auto tuning) MANUAL (manual tuning)
REMOTEMAIN UNIT
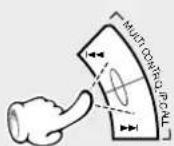
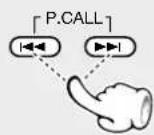
Press the MULTI CONTROL keys or press the P.CALL keys to select a preset station.
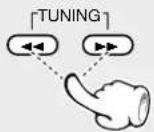
Press the TUNING key to receive the next tuned station automatically
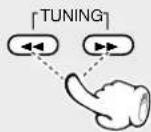
Use the manual tuning mode when reception is noisy due to weak reception. (In the manual mode, stereo broadcasts are received in monaural.)
XD-series (EN/T,M,X)
You can store up to 45 stations in the memory and recall with a single touch of the key.
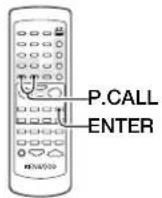
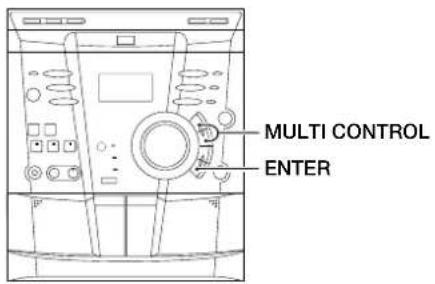
Storing the broadcast stations (one-by-one presetting)
1 Select a station (auto tuning or manual tuning) → 34
2 Press the ENTER key
REMOTE
3 Select the desired preset number
REMOTE
4 Press the ENTER key
REMOTE
Repeat steps 1 to 4 to preset other stations.
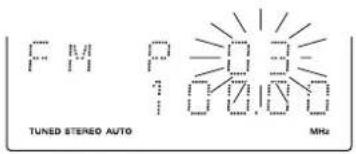
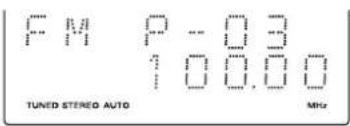
In case of input with the number keys, a preset number will be decided simply by input of a 2-digit number without pressing the ENTER key.
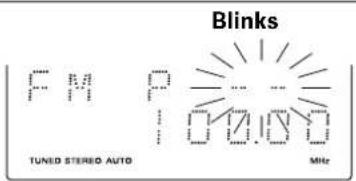
Blinks
XD-series (EN/T,M,X)
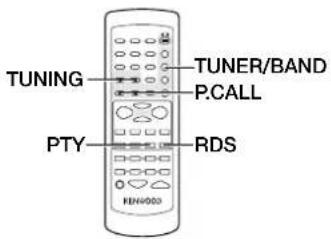
RDS is a system which transmits useful information (digital data) for FM broadcasts together with the broadcast signal. Tuners and receivers designed for RDS reception can extract the information from the broadcast signal for use with various functions such as automatic display of the station name.
Using RDS function ( for Europe and U.K. only)
Functions made possible with RDS
PTY (Program Type Identification) Search :
The tuner automatically searches for a station which is currently broadcasting a specified program type (genre).
PS (Program Service Name) Display :
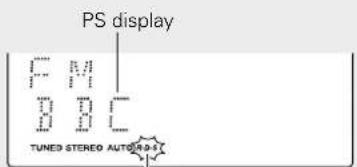
When an RDS broadcast is received, the station name is automatically displayed.
RT (Radio text) :
Displays the radio text data transmitted by some RDS stations when you select the RT mode.
CT (Clock Time) :
Decodes the real time clock from the FM frequency.
Using the RDS Display function
1 Select the FM broadcast station
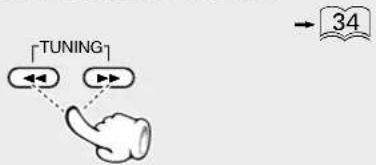
flowchart
graph TD
    A["←"] --> B["→"]
    C["→"] --> D["→"]
    style A fill:#f9f,stroke:#333
    style B fill:#bbf,stroke:#333
    style C fill:#f9f,stroke:#333
    style D fill:#bbf,stroke:#333
2 Press the SHIFT key, then press the RDS key
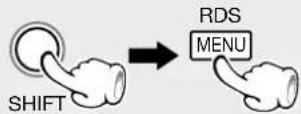
Each press switches the display mode as follows.
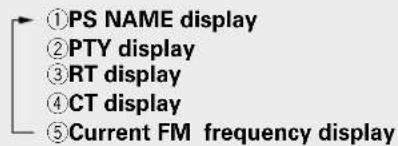
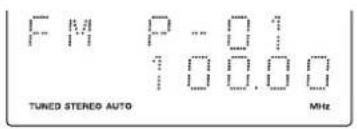
PS NAME
- If the PS information is being received, the PS name (BBC, AFO, NDR, etc.) is shown on the display.
- If the PS information is not received, the original FM frequency is shown.
- Even though no RDS key is pressed, the reception of PS information ensues the PS name is displayed.
RT display
- Text data accompanying the RDS broadcast scrolls across the display (64 characters can be displayed).
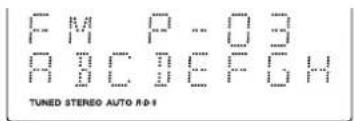
- Scrolled display
- If the RT information is not received, the "NO RT" is shown on the display.
CT display
- If the CT information will take up to 2 minutes to be decoded therefore the clock is not displayed immediately.
- If the CT information is not received, the "NO CT" is shown on the display.
- The CT clock does not update the system clock.
PTY function
The PTY information is composed of an identification symbol, which helps the FM radio to recognize the program type of each FM station.
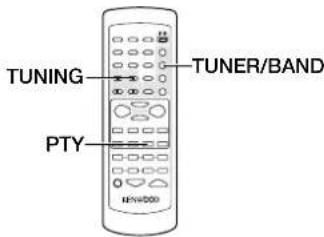
The 29 PTY modes are shown in the display by pressing the PTY key.
Using the PTY search function
1 Select the FM band
→ 34
2 Press the PTY key

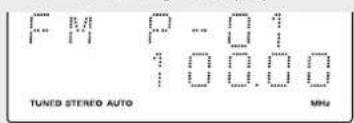
- The PTY MODE (POPM, ROCK M etc.) appears on the display.
3 Press the P.CALL (|◀◀/▶▶|) keys to select the desired program type.
4 When the program type is selected, press the PTY key.
Auto-search the station sequentially
- Press again during search to cancel.
PTY found
Lit
PTY not found
Return to the original display
RDS Program types
| Program Type Name | Receiver Display |
| News NEWS | |
| Current Affairs AFFAIRS | |
| Information INFO | |
| Sport SPORT | |
| Education EDUCATE | |
| Drama DRAMA | |
| Culture CULTURE | |
| Science SCIENCE | |
| Varied VARIED | |
| Pop Music POP M | |
| Rock Music ROCK M | |
| Easy Listening Music EASY M | |
| Light Classical Music LIGHT M | |
| Serious Classical Music | CLASSICS |
| Other Music | OTHER M |
| Weather | WEATHER |
| Finance FINANCE | |
| Children's programmes | CHILDREN |
| Social affairs | SOCIAL |
| Religion | RELIGION |
| Phone in | PHONE IN |
| Travel | TRAVEL |
| Leisure | LEISURE |
| Jazz Music | JAZZ |
| Country Music COUNTRY | |
| National Music | NATION M |
| Oldies Music | OLDIES |
| Folk Music | FOLK M |
| Documentary | DOCUMENT |
XD-series (EN/T,M,X)
This unit can only use tape for the normal position (Type I).

Longer tape than 90 minutes cassette tape: Since longer tape than 90 minutes cassette tape is very thin, the tape could adhere to the pinch roller or be easily cut. It is recommended that these tapes not be used with this unit to prevent possible damage.
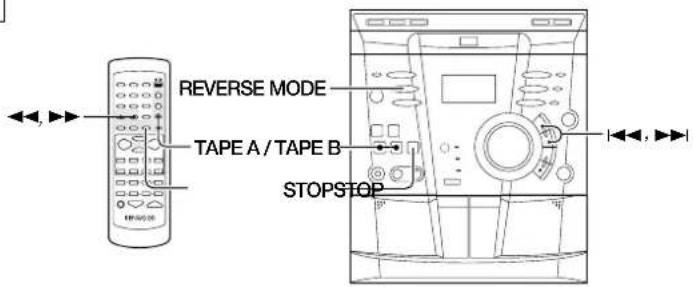
1 Load a cassette tape
① Open the door.
② Insert a tape
③ close the door.
- Remove tape slack before loading.
- Close the door securely.
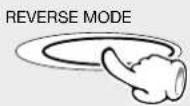
2 Select reverse mode
MAIN UNIT
4 Start playback
REMOTEMAIN UNIT
Press the area marked PUSH
OPEN to load or eject a tape.
Each press switches the modes as follows
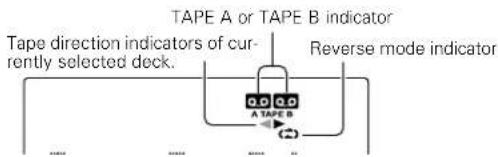
① "⊃": playback stops after having played both side of tape in a deck. ② "(⊃): Endless playback of both sides of tape. ③ "≡": playback stops after having played one side of tape.
- If the tape transport direction is opposite to the desired direction, press the play key corresponding to this.
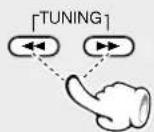
To wind tape at high speed
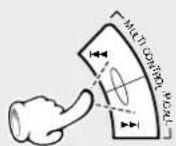
REMOTEMAIN UNIT
To stop playback
REMOTEMAIN UNIT
This unit can only use tape for the normal position (Type I).
To record a DOLBY SURROUND disc, please switch the listening mode to STEREO.
Preparation
⑦ Open the door.
Press the area marked
PUSH OPEN to load or
eject a tape
② Insert a tape.
③ close the door.
- Remove tape slack before loading.
- Close the door securely.
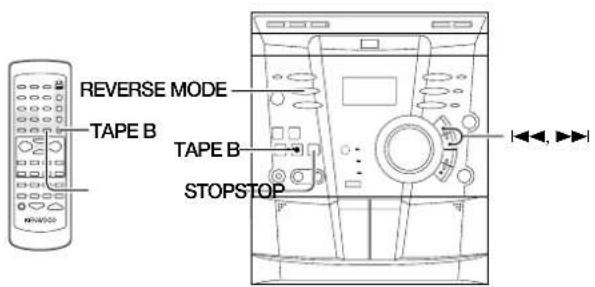
1 Select reveres mode
MAIN UNIT
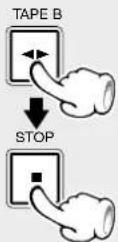
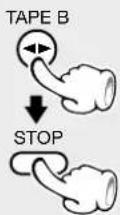
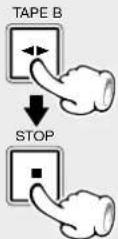
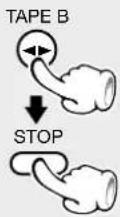
2 Select tape transport direction, Then press the STOP (■) key.
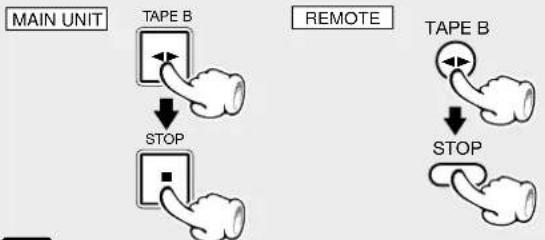
flowchart
graph TD
    A["MAIN UNIT"] --> B["TAPE B"]
    B --> C["STOP"]
    D["REMOTE"] --> E["TAPE B"]
    E --> F["STOP"]
3 Select the source to be recorded
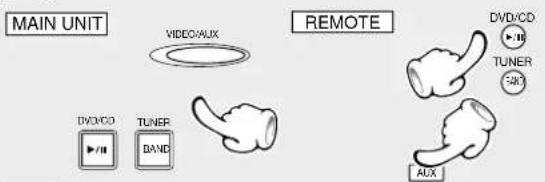
4 Start recording
MAIN UNIT ONLY
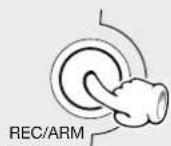
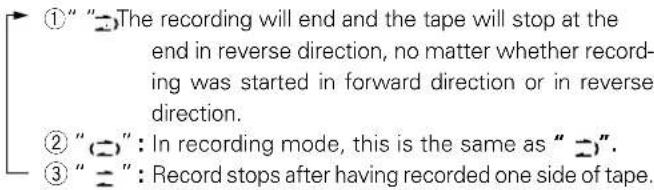
Each press switches the modes as follows
①" "The recording will end and the tape will stop at the end in reverse direction, no matter whether recording was started in forward direction or in reverse direction.
② “(=)”: In recording mode, this is the same as “=”).
③ “=”: Record stops after having recorded one side of tape.
- If the tape transport direction is opposite to the desired direction, press the play key corresponding to this.
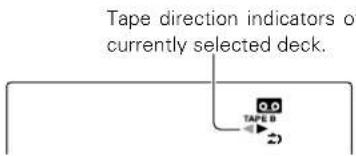
Tape direction indicators of currently selected deck.
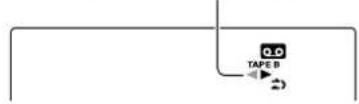
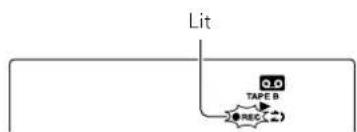
- Start playback the source, then press the REC/ARM key.
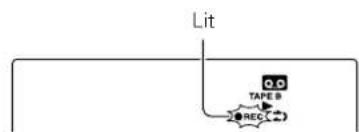
flowchart
graph TD
    Lit --> OCD["OCD TAPE B REC"]
    OCD -->|Loop| Rec1["REC"]
    Rec1 -->|Loop| Rec2["REC"]
To pause recording To stop recording
MAIN UNIT ONLY
This flashes quickly during ARM and slowly during pause.
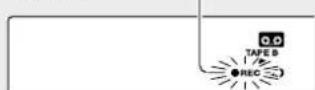
- Pressing the key pauses recording after leaving a non-recorded space of about 4 seconds (ARM function).
- If the key is pressed again in less than 4 seconds after it has been pressed, recording resumes from that instant.
REMOTEMAIN UNIT
XD-series (EN/T,M,X)
This unit can only use tape for the normal position (Type I).
CD Direct recording is not possible for a DOLBY SURROUND disc. Please switch the listening mode to STEREO and perform normal recording. (See page 52)
With CD Direct recording, an entire CD is recorded and CD and TAPE stop automatically.
Preparation
See "Preparation" on page 40.

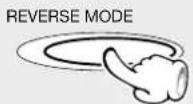
Select reveres mode

MAIN UNIT

Select tape transport direction, Then press the STOP (■) key. → 39
MAIN UNIT
REMOTE
REMOTE

Press the SMART MENU (S. MENU) key.
[Non-Text]
REMOTEMAIN UNIT

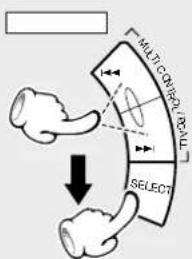
Select "RECORDING OPTION", then press the SELECT key.
flowchart
graph TD
    A["Multi-Control Panel"] --> B["SELECT"]
    style A fill:#f9f,stroke:#333
    style B fill:#ccf,stroke:#333
REMOTEMAIN UNIT
flowchart
graph TD
    A["P.CALL"] --> B["Input Device 1"]
    A --> C["Input Device 2"]
    B --> D["Select"]
    C --> D
    D --> E["Output"]
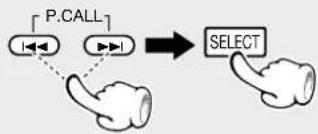
The following items can be selected by pressing the MULTI CONTROL keys.

Select "CD DIRECT RECORDING", then press the SELECT key.
REMOTEMAIN UNIT
flowchart
graph TD
    A["P.CALL"] --> B["Hand gesture"]
    C["SELECT"] --> B
    B --> D["Arrow pointing to the 'P.CALL' node"]
The following items can be selected by pressing the MULTI CONTROL keys or cursor keys on the remote.

"CD DIRECT RECORDING"
"TIMER RECORDIND"
- PUT TAPE IN DECK B* will be displayed when there is no tape in TAPE B. Please set a tape into TAPE B.

Select disc number, then press the SELECT key.
REMOTEMAIN UNIT
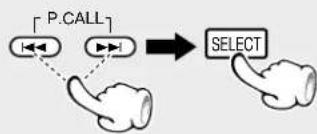
flowchart
graph TD
    A["P.CALL"] --> B["Hand"]
    B --> C["Select"]

Press the ENTER key to stert recording.
REMOTEMAIN UNIT

CD Program Recording (TAPE B only)
XD-series (EN/T,M,X)
This unit can only use tape for the normal position (Type I).
CD Program recording is not possible for a DOLBY SURROUND disc. Please switch the listening mode to STEREO and perform normal recording. (See page 52)
Preparation
See "Preparation" on page 40.

Select reveres mode
39
MAIN UNIT

Select tape transport direction, then press the STOP (■) key. → 39
MAIN UNIT
REMOTE

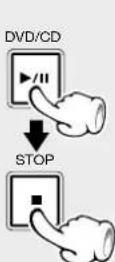
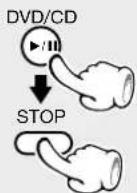
Playback a disc, then press the STOP (■) key.
[Empty]
REMOTEMAIN UNIT

Edit program
See page 28
REMOTE

Press the REC/ARM key
MAIN UNIT
Each press switches the modes as follows
- If the tape transport direction is opposite to the desired direction, press the play key corresponding to this.
flowchart
graph TD
    A["Lit"] --> B["Q.D."]
    B --> C["TAPE B"]
    C --> D["REC"]
    D --> E["Ground"]
This unit can only use tape for the normal position (Type I).
Tapes can be copied easily using the tape dubbing function.

Select reveres mode

MAIN UNIT

Press the SMART MENU (S. MENU) key.
REMOTEMAIN UNIT

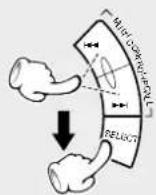
Select "TAPE DUBBING", then press the SELECT key, then press the SELECT key.
REMOTEMAIN UNIT
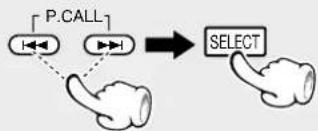
flowchart
graph TD
    A["Hand gestures"] --> B["P.CALL"]
    B --> C["Select button"]
The following items can be selected by pressing the MULTI CONTROL keys.
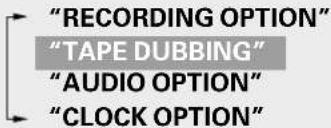
- "PUT TAPE IN DECK A/B" will be displayed when there is no tape in TAPE A/B. Please set a tape into TAPE A and TAPE B.

Select tape transport direction of TAPE A, then press the SELECT key.
REMOTEMAIN UNIT
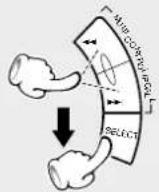
flowchart
graph TD
    A["P.CALL"] --> B["Input Port"]
    A --> C["Output Port"]
    D["Select"] --> E["Output Port"]
The following items can be selected by pressing the MULTI CONTROL keys or cursor keys on the remote.
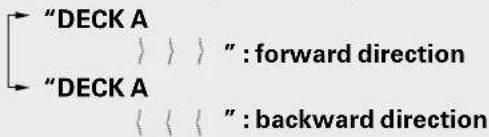

Select tape transport direction of TAPE B, then press the SELECT key.
MAIN UNIT
REMOTE
flowchart
graph TD
    A["←P.CALL"] --> B["→SELECT"]
    C["←Hand gestures"] -.-> A
    D["→Hand gestures"] -.-> C
The following items can be selected by pressing the MULTI CONTROL keys or cursor keys on the remote.
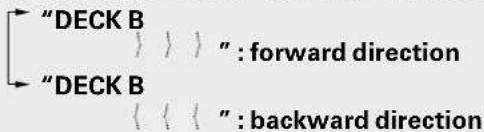

Press the ENTER key to stert recording.
MAIN UNIT
REMOTE

Hierarchical structure of VCD menus (P.B.C.)
When an item is selected on the menu screen during playback of a P.B.C.-compatible VCD, another menu with more details items may be displayed. When a number of menus are connected in multiple layers in this way, it is said that the menus have a hierarchical structure. In this structure, the desired scene can be reached by repeating item selections on the menu screens.
Example for a hierarchical structure
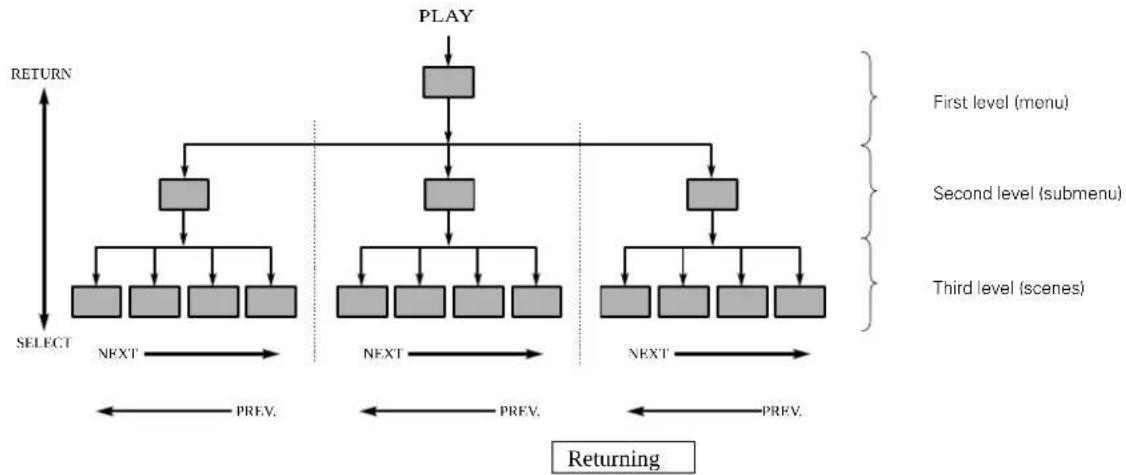
flowchart
graph TD
    A["PLAY"] --> B["First level (menu)"]
    A --> C["Second level (submenu)"]
    A --> D["Third level (scenes)"]
    B --> E["SELECT"]
    B --> F["NEXT"]
    C --> G["NEXT"]
    C --> H["NEXT"]
    D --> I["NEXT"]
    D --> J["NEXT"]
    E --> K["RETURN"]
    F --> L["RETURN"]
    G --> M["RETURN"]
    H --> N["RETURN"]
    I --> O["RETURN"]
    J --> P["RETURN"]
    K --> Q["RETURN"]
    L --> R["RETURN"]
    M --> S["RETURN"]
    N --> T["RETURN"]
    O --> U["RETURN"]
    P --> V["RETURN"]
    Q --> W["RETURN"]
    R --> X["RETURN"]
    S --> Y["RETURN"]
    T --> Z["RETURN"]
    U --> AA["RETURN"]
    V --> AB["RETURN"]
    W --> AC["RETURN"]
    X --> AD["RETURN"]
    Y --> AE["RETURN"]
    Z --> AF["RETURN"]
    AA --> AG["RETURN"]
    AB --> AH["RETURN"]
    AC --> AI["RETURN"]
    AD --> AJ["RETURN"]
    AE --> AK["RETURN"]
    AF --> AL["RETURN"]
    AG --> AM["RETURN"]
    AH --> AN["RETURN"]
    AI --> AO["RETURN"]
    AJ --> AP["RETURN"]
    AK --> AQ["RETURN"]
    AL --> AR["RETURN"]
    AM --> AS["RETURN"]
    AN --> AT["RETURN"]
    AO --> AU["RETURN"]
    AP --> AV["RETURN"]
    AQ --> AW["RETURN"]
    AR --> AX["RETURN"]
    AS --> AY["RETURN"]
    AT --> AZ["RETURN"]
    AU --> BA["RETURN"]
    AV --> BB["RETURN"]
    AW --> BC["RETURN"]
When an item is selected on the menu screen with the ▶ key or the numeric keys, advance is made to the next lower menu level. When the advance destination is the “scene” to be played, the contents will be played.
Each time the RETURN key is pressed, return is made to the next higher menu.
- When several menus (scenes) can be selected in each level, screen switching is possible with the keys ▶▶▶ and ◀◀◀.
Examples of operation keys and indications used during VCD playback
| Soft jacket indication | ||||
| KENWOOD operation key | ▶/II | RETURN | SKIP DOWN | SKIP UP |
- Depending on the software, the jacket indication may differ from the above.
Playback without using the menu playback function (In case of a P.B.C.-compatible VCD)
Press the TOP MENU key on the remote control unit.
- For the track numbers, refer to the disc jacket or other material.
- P.B.C. off mode: Without using menu playback function.
To return to menu playback
Press the TOP MENU key again.
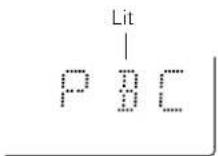
Software with which this function is available:

Start playback
1 Load a disc
2 Connect a microphone
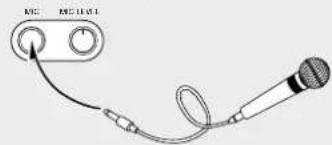
3 Start playback
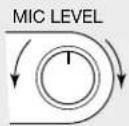
4 Press the SHIFT key, then adjust the ECHO level
Remote control unit only
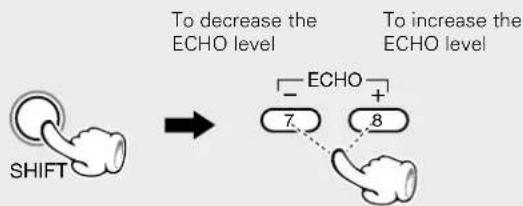
flowchart
graph LR
    A["SHIFT"] --> B["To decrease the ECHO level"]
    B --> C["To increase the ECHO level"]
    C --> D["7."]
    C --> E["8"]
HIT MASTER function
The sound level of the vocal part of the disc is suppressed, so that it can be used in the same way as a KARAOKE disc.
Remote control unit only

flowchart
graph LR
    A["SHIFT"] --> B["HIT MASTER"]
    B --> C["9"]
    C --> D["HIT MUSTER ON HIT MUSTER OFF"]
Depending on the disc, the suppression amount may be smaller.

Karaoke mode operation is possible only when a microphone is connected.
- Press ▶/■ key to start playback
- Adjust volume level of the microphone.
An echo effect can be applied to the microphone voice to make karaoke singing sound better. The echo effect can be varied from 0 to 9.
- Press the next key within 5 seconds of pressing the SHIFT key. Within 5 seconds of pressing the next key, operation is possible without pressing the SHIFT key.
Controlling the key of the music (KEY CONTROL)
This feature allows to transpose the key of the music according to the key of the singer's voice.
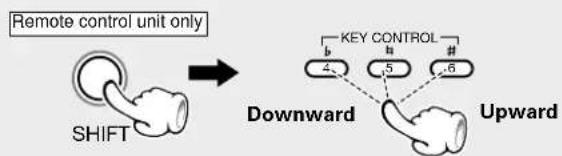
flowchart
graph TD
    A["Remote control unit only"] --> B["SHIFT"]
    B --> C["Downward"]
    B --> D["Upward"]
    C --> E["KEY CONTROL 4, 5, 6"]
KEY CONTROL can be varied from -5 to +5.

- Before applying power
- For the United Kingdom
- Factory fitted moulded mains plug
- \*For other countries
- AC voltage selection
- Safety precautions
- WARNING : TO PREVENT FIRE OR ELECTRIC SHOCK, DO NOT EXPOSE THIS APPLIANCE TO RAIN OR MOISTURE.
- The marking of products using lasers (Except for some areas)
- Unpacking
- Accessories
- Accessories packed with the main unit
- CHANNEL SPACE setting (Except for the U.S.A., Canada, U.K., Europe and Australia)
- Setting the CHANNEL SPACE
- In regard to demonstration
- Cancellation of Demonstration mode
- To start demonstration:
- Special features
- Notes:
- Preparation section
- Introduction 2
- IMPORTANT SAFEGUARDS 5
- Contents 7
- Region codes 8
- Video formats 9
- Discs information 10
- Handling of discs and tapes.... 11
- ⚠️ System Connections.... 12
- Controls and indicators.... 16
- Operation of remote control unit.... 18
- SMART MENU operation/Clock adjustment ..... 19
- Operation Knowledge section
- Let's put out some sound 21
- Playback of discs 24
- Set Up functions 46
- Setting up surround mode 53
- SPEAKER SETUP.... 54
- Timer function 58
- Knowledge 62
- Important items.... 63
- In case of difficulty 64
- Specifications.... 68
- Region codes in the world
- Examples of TV screen display of each video format
- When your TV is switchable between PAL/NTSC
- When your TV is compatible only with the PAL format
- When your TV is compatible only with the NTSC format
- Video formats of DVD discs that can be played on this unit
- Check the video format(s) used by your TV monitor.
- Select DVD discs or VCD discs recorded with the playable video format by referring to the following table.
- When your TV is switchable between NTSC and PAL,
- Restrictions due to difference between discs
- Recording systems and types of playable discs
- Unplayable discs
- Disc handling precautions
- Never play a cracked or warped disc
- Disc accessories
- Notes on cassette tape
- Safety tab (accidental erasure prevention tab)
- To store cassette tapes
- When there is slack in the tape
- Longer tape than 90 minutes cassette tape
- Endless tapes
- Caution:
- Caution
- Malfunction of microcomputer
- AM loop antenna
- AM loop antenna connection
- FM antenna
- FM indoor antenna connection
- FM outdoor antenna (commercially available)
- Connection of the front speakers
- Connection of the sub woofre or super woofer (optional)
- Connection of the surround speaker system
- Connection of the TV monitor (optional) and VCR (optional)
- Connection of the MD recorder/CD recorder (optional)
- STANDBY mode of ON/STANDBY (1/0) switch
- Use of the SHIFT key
- Loading batteries
- Operation
- SMART MENU operation
- Clock adjustment Adjust the clock before setting the timer.
- Switching the power ON.
- Press the SMART MENU key.
- Select "CLOCK OPTION", then press the SELECT key.
- Select "ADJUST TIME", then press the SELECT key.
- Select "TIME 24H" or "TIME 12H", then press the SELECT key.
- Enter the figure of hour, then press the SELECT key.
- Enter the figure of minute, then press the ENTER key.
- Display the clock
- In regard to input switching between VIDEO and AUX
- Basic use method
- Muting the sound temporarily
- Listening through headphone
- Changing the Tone
- Extra Bass
- Selecting the desired Tone
- To set the CUSTOM EQ.
- Sequential playback from the first track or chapter
- Open the tray and place a disc
- Close the tray
- Press the DVD/CD (▶/II) key
- To change the disc of another tray during playback, do the following.
- When a Disc Menu appears on the screen (DVD or VCD)
- DVD CD VCD Select a Different Disc
- DVD CD VCD To pause playback
- DVD CD VCD To stop playback
- RESUME playback
- Playback from the desired track or chapter
- DVD CD VCD Skipping tracks or chapters
- High-speed search in forward and reverse directions
- DVD VCD Step Motion playback
- DVD VCD Slow motion playback
- DVD (At the time of DVD playback)
- CD VCD (At the time of CD/VCD playback)
- Press the SHIFT key and then press the STEP key within 5 seconds. Press the ◀◀ or ▶▶ key.
- Press the SHIFT key and then press the SLOW key within 5 seconds. Press the ◀◀ or ▶▶ key.
- DVD CD VCD Repeat play
- Desired tracks or all discs can be played back repeatedly.
- ① During playback, press REPEAT on the remote.
- DVD CD VCD A-B Repeat play
- Press the A-B key on the remote when you want to choose a scene (sound) as the beginning point.
- ② Press the A-B key again to choose a scene (sound) as the end point.
- CD VCD Random play
- ① During playback or stop mode, press RANDOM on the remote.
- Program Edit
- Delete Program
- Insert chapter or track
- To display disappear from the screen
- DVD Selecting a Title
- DVD CD Selecting a Chapter or Track
- DVD Changing the Audio Language
- DVD Changing the Subtitle Language
- Using the on-screen banner display Using the on-screen banner display
- Using the AUDIO key on the remote Using the SUB TITLE key on the remote
- DVD Changing the Camera angle
- Using the on-screen banner display
- Using the ANGLE key on the remote
- CD VCD Using IntroScan function
- DVD CD VCD Using Bookmarks
- Create the bookmark Recalling a bookmarked scene
- Clearing a bookmark
- Select the TUNER input
- Select the broadcast band
- Select a tuning mode
- Select a station
- P.CALL (preset call) AUTO (auto tuning) MANUAL (manual tuning)
- Storing the broadcast stations (one-by-one presetting)
- Using RDS function ( for Europe and U.K. only)
- Functions made possible with RDS
- PTY (Program Type Identification) Search :
- PS (Program Service Name) Display :
- RT (Radio text) :
- CT (Clock Time) :
- Using the RDS Display function
- Select the FM broadcast station
- Press the SHIFT key, then press the RDS key
- PS NAME
- RT display
- CT display
- PTY function
- Using the PTY search function
- Select the FM band
- Press the PTY key
- Press the P.CALL (|◀◀/▶▶|) keys to select the desired program type.
- When the program type is selected, press the PTY key.
- Load a cassette tape
- Select reverse mode
- Start playback
- Each press switches the modes as follows
- To wind tape at high speed
- To stop playback
- Preparation
- Select reveres mode
- Select tape transport direction, Then press the STOP (■) key.
- Select the source to be recorded
- Start recording
- To pause recording To stop recording
- CD Program Recording (TAPE B only)
- Select reveres mode
- Press the SMART MENU (S. MENU) key.
- Select "TAPE DUBBING", then press the SELECT key, then press the SELECT key.
- Select tape transport direction of TAPE A, then press the SELECT key.
- Select tape transport direction of TAPE B, then press the SELECT key.
- Press the ENTER key to stert recording.
- Hierarchical structure of VCD menus (P.B.C.)
- Examples of operation keys and indications used during VCD playback
- Playback without using the menu playback function (In case of a P.B.C.-compatible VCD)
- To return to menu playback
- Start playback
- Load a disc
- Connect a microphone
- Start playback
- Press the SHIFT key, then adjust the ECHO level
- HIT MASTER function
- Controlling the key of the music (KEY CONTROL)
Brand : KENWOOD
Model : XD-DV90
Category : Home Theater