
DVT-7300 - Home Theater KENWOOD - Free user manual and instructions
Find the device manual for free DVT-7300 KENWOOD in PDF.


| Product Type | Home Theater System |
| Brand | Kenwood |
| Model | DVT-7300 |
| Dimensions (W x H x D) | 430 x 80 x 320 mm |
| Weight | 4.5 kg |
| Power Supply | AC 120V, 60 Hz |
| Power Consumption | 150 W |
| Disc Playback | DVD, CD, MP3 |
| Tuner | FM/AM |
| Audio Output | 5.1 channel surround |
| Video Output | Composite, S-Video |
| Maintenance | Clean with soft dry cloth; do not use solvents |
| Safety | Do not expose to rain or moisture; unplug during storms |
| Spare Parts | Contact Kenwood authorized service center |
| Repairability | Serviceable by qualified technician only |
| General Information | Manufactured by Kenwood Corporation |
Frequently Asked Questions - DVT-7300 KENWOOD
User questions about DVT-7300 KENWOOD
0 question about this device. Answer the ones you know or ask your own.
Ask a new question about this device
Download the instructions for your Home Theater in PDF format for free! Find your manual DVT-7300 - KENWOOD and take your electronic device back in hand. On this page are published all the documents necessary for the use of your device. DVT-7300 by KENWOOD.
USER MANUAL DVT-7300 KENWOOD
This instruction manual is for some models. Model availability and features (functions) may differ depending on the country and sales area.

MP3 / WMA



Before applying power

Caution : Read this page carefully to ensure safe operation.
Units are designed for operation as follows.
U.S.A. and Canada AC 120 V only
Europe and U.K. AC 230 V only
Australia AC 240 V only
Safety precautions

Caution : Read this page carefully to ensure safe operation.
WARNING : TO PREVENT FIRE OR ELECTRIC SHOCK, DO NOT EXPOSE THIS APPLIANCE TO RAIN OR MOISTURE.
 |  |  | CAUTION: TO REDUCE THE RISK OF ELECTRIC SHOCK, DO NOT REMOVE COVER (OR BACK). NO USER-SERVICEABLE PARTS INSIDE. REFER SERVICING TO QUALIFIED SERVICE PERSONNEL. |
 | THE LIGHTNING FLASH WITH ARROWHEAD SYMBOL, WITHIN ANEQUILATERAL TRIANGLE, IS INTENDED TO ALERT THE USER TO THE PRESENCE OF UNINSULATED "DANGEROUS VOLTAGE" WITHIN THE PRODUCT'S ENCLOSURE THAT MAY BE OF SUFFICIENT MAGNITUDE TO CONSTITUTE A RISK OF ELECTRIC SHOCK TO PERSONS. | ||
 | THE EXCLAMATION POINT WITHIN AN EQUILATERAL TRIANGLE IS INTENDED TO ALERT THE USER TO THE PRESENCE OF IMPORTANT OPERATING AND MAINTENANCE (SERVICING) INSTRUCTIONS IN THE LITERATURE ACCOMPANYING THE APPLIANCE. | ||
The marking of products using lasers
(For countries other than U.S.A. and Canada)
The marking this product has been classified as Class 1. It means that there is no danger of hazardous radiation outside the product.
Location: Back panel
DVR-6300 (EN/K,P,E,X)
Unpacking
Unpack the unit carefully and make sure that all the accessories are present.
If any accessories are missing, or if the unit is damaged or fails to operate, notify your dealer immediately. If the unit was shipped to you directly, notify your shipper immediately. Kenwood recommends that you retain the original carton and packing materials in case you need to move or ship the unit in the future.
Keep this manual handy for future reference.
Accessories
Please confirm that the following accessories are present.
FM indoor antenna (1)
(For Europe) (For U.S.A., Canada and Australia)
Loop antenna (1)
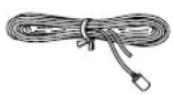
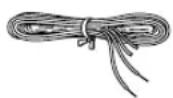
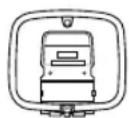
Video cord (Yellow)(1) Remote control unit (1) Batteries (R03/AAA) (2)
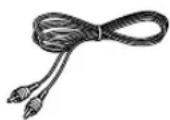
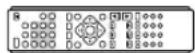
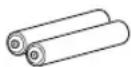
Accessories for speaker part (For DVT-6300 and DVT-7300)
Speaker cords (6)
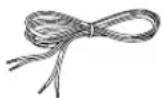
| Length | |
| For Front (2) 4.5 m (177-3/16") | |
| For Center (1) 3 m (118-1/8") | |
| For Rear (2) 8 m (314-15/16") | |
| For Subwoofer (1) 4.5 m (177-3/16") | |
Cushion (15)
(Small: 11 pcs × 1 sheet) (Big: 4 pcs × 1 sheet)
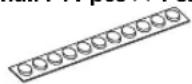
For the U.S.A.
CAUTION:
Use of controls or adjustments or performance of procedures other than those specified herein may result in hazardous radiation exposure.
In compliance with Federal Regulations, the following are reproductions of labels on, or inside the product relating to laser product safety.
KENWOOD CORPORATION
2967-3, ISHIKAWA-CHO,
HACHIOJI-SHI,
TOKYO, JAPAN
KENWOOD CORP. CERTIFIES THIS EQUIPMENT CONFORMS TO DHHS REGULATIONS NO. 21 CFR 1040.10, CHAPTER 1, SUBCHAPTER J.
Location: Back Panel
For the U.S.A.
Note to CATV system installer
This reminder is provided to call the CATV system installer's attention to Article 820-40 of the NEC that provides guidelines for proper grounding and, in particular, specifies that the cable ground shall be connected to the grounding system of the building, as close to the point of cable entry as practical.
For Canada
NOTICE: This Class B digital apparatus complies with Canadian ICES-003.
For the U.S.A.
FCC WARNING
This equipment may generate or use radio frequency energy. Changes or modifications to this equipment may cause harmful interference unless the modifications are expressly approved in the instruction manual. The user could lose the authority to operate this equipment if an unauthorized change or modification is made.
NOTE:
This equipment has been tested and found to comply with the limits for a Class B digital device, pursuant to Part 15 of the FCC Rules. These limits are designed to provide reasonable protection against harmful interference in a residential installation. This equipment may cause harmful interference to radio communications, if it is not installed and used in accordance with the instructions. However, there is no guarantee that interference will not occur in a particular installation. If this equipment does cause harmful interference to radio or television reception, which can be determined by turning the equipment off and on, the user is encouraged to try to correct the interference by one or more of the following measures:
-- Reorient or relocate the receiving antenna.
-- Increase the separation between the equipment and receiver.
-- Connect the equipment into an outlet on a circuit different from that to which the receiver is connected.
- - Consult the dealer or an experienced radio / TV technician for help.
Special features
This document classifies the applications of each feature using the following marks.
DVD : Description of a feature that can be used with DVD.
CD : Description of a feature that can be used with CD.
VCD : Description of a feature that can be used with VCD.
♦ Higher video quality than S-VHS video and LaserDisc DVD
♦ Higher audio quality than music CD DVD
◆ On screen Display (OSD) DVD CD VCD
◆ MP3, WMA and JPEG files playback
♦ Dolby Digital, DTS Decoder built-in DVD CD VCD
♦ Dolby Pro Logic II Decoder built-in DVD CD VCD
Contents
Caution : Read the pages marked ⚠️ carefully to ensure safe operation.
Preparations
Introduction....2
⚠️ Before applying power ...... 2
⚠️ Safety precautions ...... 2
Contents 4
Discs information 5
Types of playable discs 5
Unplayable discs 5
Icons on the DVD VIDEO discs .... 5
Region Codes 6
Region codes in the world 6
Video formats....7
Important items 8
Maintenance 8
Reference 8
System Connections 9
Loudspeakers 9
AM loop antenna 10
FM antenna 10
Connecting to a TV....11
Connecting to a Satellite Tuner ....11
Connecting to Audio video equipments 12
Controls and indicators 13
Operation of remote control unit 14
Set Up functions 15
Preparation for Set Up.... 15
Set up menu 15
Language 16
TV Aspect 16
LOCK (Parental Control) 16
Country Code 17
5.1 Speaker Setup....17
Progressive Scan 17
Others 18
Hierarchical structure of VCD menus (P.B.C. function) ...... 18
DVD menu language code list 19
Country Code list 19
Setting up Listen mode 20
What are Listen modes? 20
To set the LISTEN mode manually ....21
Speaker setting 22
Operations
Before operation 23
Let's put out some sound....24
Basic use method 24
Receiving broadcast station 25
Storing the broadcast stations (one-by-one presetting) ...... 26
Using RDS function (for Europe only) 27
Playback of disc 29
Basic play 29
Disc playback features 30
Various playback functions 32
Select Audio Language 32
Select the Audio channel 32
Select Subtitle Language 32
Using Marker 32
Select Camera angle 33
Title Menu / Disc Menu 33
To use the Disc Menu 33
Repeat play 34
A-B Repeat play 34
Zoom function 34
3D Surround 35
Time Search 35
Using the TV screen to start CD playback 35
Program play 36
MP3 /WMA/JPEG media playback 38
Guidance of MP3/WMA/JPEG 38
Playing back MP3/WMA/JPEG files 39
Searching (only for MP3/WMA files) 40
Skipping files 40
Repeat play (only for MP3/WMA files) 40
Change the Slide speed (only for JPEG files) 40
To flip picture (only for JPEG files) 40
To rotate picture (only for JPEG files) 40
MP3 /WMA program playback 41
Other function 42
Knowledge
In case of difficulty.... 43
Specifications 46
Types of playable discs
DVR-6300 (EN/K,P,E,X)
The system using this unit does not only play music from CD but can also play the discs listed below to offer you high-quality entertainment of video of movies and live concerts.
| Playable Disc | DVD VIDEO CD (CD-R, CD-RW) | VCD (SVCD*) | |||||
| Logo mark on disc |   |  |   | ||||
| Disc size |  8cm 8cm |  12cm 12cm |  8cm 8cm |  12cm 12cm |  8cm 8cm |  12cm 12cm | |
| Played sides | One or both One or both | One side only One side only | One side only | One side only | |||
| Contents | Video + Audio | Approx. 41 min.(1 side, 1 layer)Approx. 75 min.(1 side, 2 layers)Approx. 82 min.(2 sides, 1 layer)Approx. 150 min.(2 sides, 2 layers) | Approx. 133 min.(1 side, 1 layer)Approx. 242 min.(1 side, 2 layers)Approx. 266 min.(2 sides, 1 layer)Approx. 484 min.(2 sides, 2 layers) | Max. 20 min. | Max. 74 min. | ||
| (In case of an SVCD, the possible play-back time becomes shorter.) | |||||||
| Audio | Max. 20 min., digital | Max. 80 min., digital | |||||
MP3 WMA media and JPEG picture CD those can be played back with this equipment (CD-R, CD-RW)

- * This unit can play SVCDs, but some functions will not work.
- This unit can play back DVD-R and DVD-RW discs recorded in the DVD VIDEO format and DVD+R and DVD+RW discs, but depending on the recording unit, the disc manufacturer, etc., playback sometimes may not be possible.
● This unit may also be incapable of playing certain CD-R/RW discs depending on their properties, recording conditions, etc.
Unplayable discs
This player cannot play back any of the following discs.
DVD AUDIO discs
DVD-ROM discs
DVD-RAM discs
SACD discs
CD-ROM discs (Except MP3, WMA and JPEG discs [ISO 9660 level 1])
VSD discs
CDV discs (Only the audio part can be reproduced.)
CD-G/CD-EG/CD-EXTRA discs (Only the audio can be reproduced.)
Photo CD discs (Never attempt to play them.)
- A DVD VIDEO disc with a region code which does not match this unit or without a region code. For details, see "Region Codes".
- When the video format of a disc differs from that of the TV in use, the disc cannot be played normally. For details, see "Video Formats". → 10
Icons on the DVD VIDEO discs
| Icon Description | |
 | Indicates the region code where the disc can be played. |
 | Number of voice languages recorded with the audio function. The number in the icon indicates the number of voice languages. (Max. 8 languages) |
 | Number of subtitle languages recorded with the subtitle function. The number in the icon indicates the number of subtitle languages. (Max. 32 languages) |
 | Number of angles provided by the angle function. The number in the icon indicates the number of angles. (Max. 9 angles) |
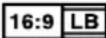 | Aspect ratios that can be selected. "4:3 Letter box" stands for Letter Box and "4:3 Panscan" for Pan/Scan. →16In the example on the left, the 16:9 video can be converted into letter box video. |
Every player of this model has a certain region code assigned to it based on the country where the player is used. When the player is used to play back DVD VIDEO discs, it can only play the DVD VIDEO discs carrying the region codes matching the region code of the player.
The region code for this player is described on the rear panel of the player.
Region codes in the world
The DVD players are given a region code according to the country or area it is marketed, as shown in the following map.
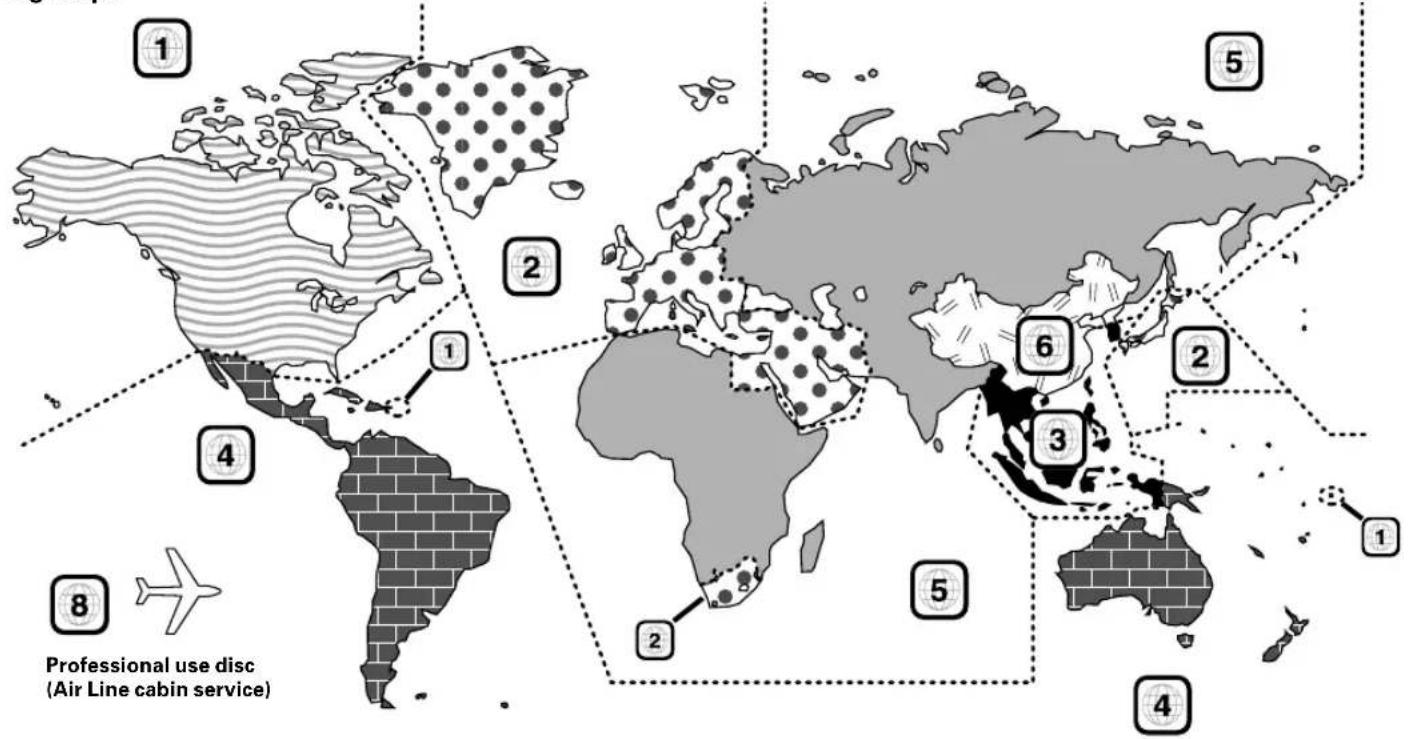
Region codes of the DVD VIDEO discs that can be played with this player
This player can play back a DVD VIDEO disc which carries the corresponding code to the region code of the player shown in the table above, a marking containing the region code of the player or the "ALL" marking shown below. Even when a DVD VIDEO disc does not carry any indication of the region code, it may sometimes unable to be played on this player due to certain restrictions.

Restrictions due to difference between discs
Some DVD and VCD discs can be played only in certain playback modes according to the intentions of the software producers. As this player plays discs according to their intentions, some functions may not work as intended by you. Please be sure to read the instructions provided with each disc. When an inhibition icon is displayed on the TV screen connected to the player, it indicates that the disc being played is under the restriction as described above.
Inhibition icon

The TV picture display and disc signal systems can be divided roughly into two TV formats (NTSC and PAL).
They are variable depending on countries and areas.
TV formats of major countries
| TV Format | Major Countries & Areas |
| NTSC | Japan, Taiwan, Korea, USA, Canada, Mexico, Philippines, Chile, etc. |
| PAL | China, U.K., Germany, Australia, New Zealand, Kuwait, Singapore, etc. |
This unit has a function for changing the video format according to the TV type. Please confirm the type of your TV.
Checking the Video Format
Check the video format of the TV to be used
When the video formats are different :
Try playing the disc. If the video formats of the disc and TV do not match, the played video may be black and white or become as shown below.
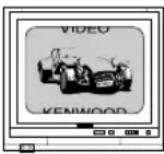
Top and bottom edges are not displayed.
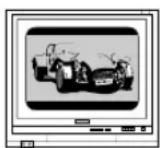
Top and bottom areas are dark.
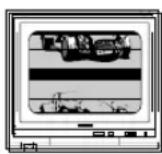
Picture turbulence due to sync unmatching.
To select TV Type (For Europe and Australia)
⑦ Remove the disc from the unit, then close the tray.
2Press and hold the PAUSE key on the front panel for more than 5 seconds to be able to select a TV type (PAL, NTSC or AUTO).
II /ST./MONO
Maintenance
Maintenance of the unit
When the front panel or case becomes dirty, wipe with a soft, dry cloth. Do not use thinner, benzine, alcohol, etc. for these agents may cause discoloration.
In regard to contact cleaner
Do not use contact cleaners because it could cause a malfunction. Be specially careful not to use contact cleaners containing oil, for they may deform the plastic component.
Reference
Disc handling precautions
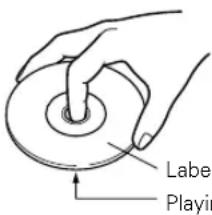
Handling
Hold the disc so that you do not touch the playing surface.
Sticker
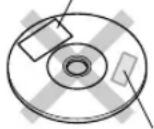
Sticky paste
Do not attach paper or tape to either the playing side or the label side of the disc.
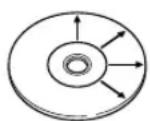
Cleaning
If there are fingerprint marks or foreign matter found on the disc, lightly wipe the disc with a soft cotton cloth (or similar) from the center of the disc outwards in a radial manner.
Storage
When a disc is not to be played for a long period of time, remove it from the player and store it in its case.
Never play a cracked or warped disc
During playback, the disc rotates at high speed in the player. Therefore, to avoid danger, never use a cracked or deformed disc or a disc repaired with tape or adhesive agent. Please do not use discs which are not round because they may cause malfunction.
Disc accessories
The disc accessories (stabilizer, protection sheet, protection ring, etc.) which are marketed for improving the sound quality or protecting discs as well as the disc cleaner should not be used with this system because they may cause malfunction.
Note related to transportation and movement
Before transporting or moving this unit, carry out the following operations.
- Set the POWER ON/OFF switch to the ON without loading a disc.
- Wait a few seconds and verify that the display shown appears.
"NO DISC"
- Set the POWER ON/OFF switch to OFF.
Caution on condensation
Condensation (of dew) may occur inside the unit when there is a great difference in temperature between this unit and the outside. This unit may not function properly if condensation occurs. In this case, leave the unit for a few hours and restart the operation after the condensation has dried up.
Be specially cautious against condensation in the following circumstances:
When this unit is carried from one place to another across a large difference in temperature, when the humidity in the room where this unit is installed increases, etc.
Make connections as shown below.
When connecting the related system components, refer also to the instruction manuals of the related components.
DVR-6300 (EN/K,P,E,X)
Caution:
Do not plug in the power lead until all connections are completed.
Caution
Be sure to adhere followings. Or proper ventilation will be blocked causing damage or fire hazard.
- Do not place any objects impairing heat radiation onto the top of unit.
- Leave a space around the unit (from the largest outside dimension including projection) equal or greater than, shown below.
Top panel : 50 cm
Side panel : 10 cm
Back panel : 10 cm
Malfunction of microcomputer
If operation is not possible or erroneous display appears even though all connections have been made properly, reset the microcomputer referring to "In case of
difficulty". → 43
Loudspeakers
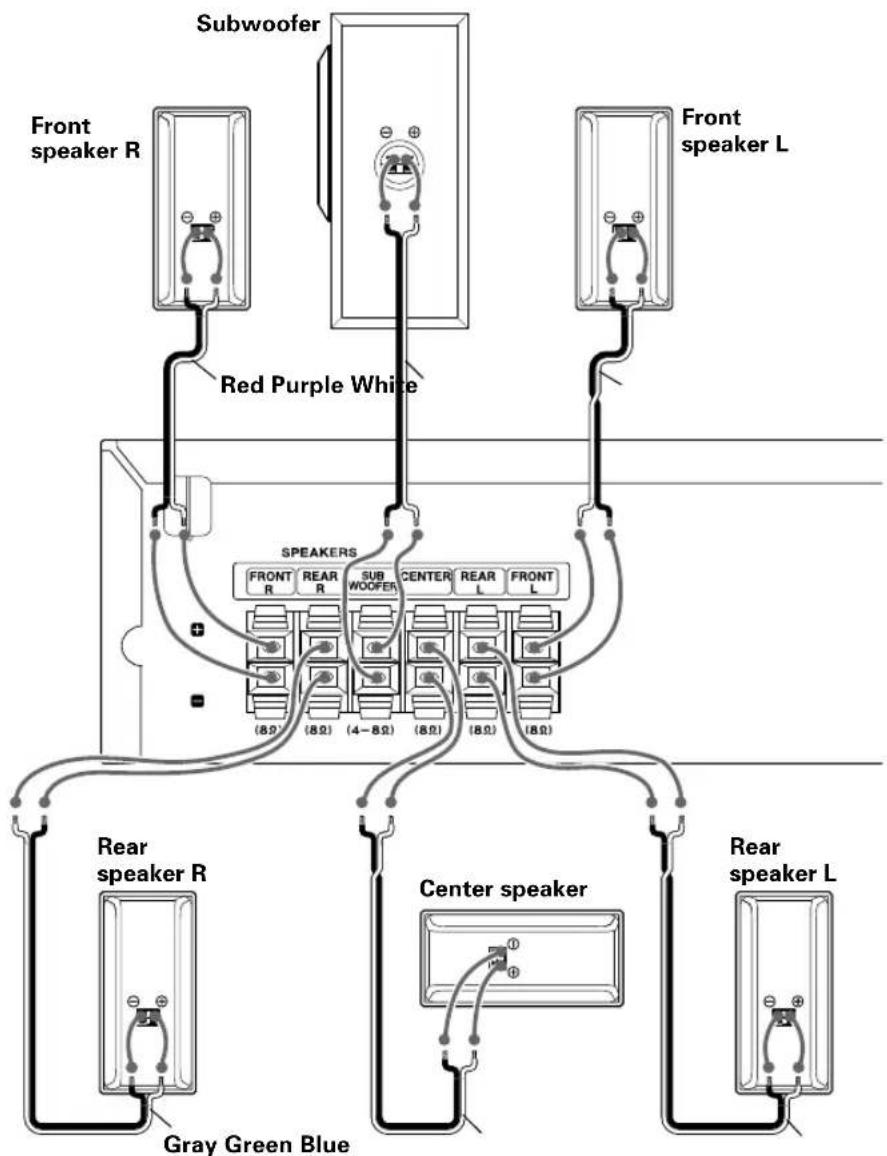
flowchart
graph TD
    A["Front speaker R"] --> B["Red Purple White"]
    C["Subwoofer"] --> D["SPEAKERS"]
    E["Front speaker L"] --> F["Gray Green Blue"]
    G["Rear speaker R"] --> H["Center speaker"]
    I["Rear speaker L"] --> J["Gray Green Blue"]
    B --> D
    D --> H
    D --> J
    style A fill:#f9f,stroke:#333
    style C fill:#f9f,stroke:#333
    style E fill:#f9f,stroke:#333
    style G fill:#f9f,stroke:#333
    style I fill:#f9f,stroke:#333
    style B fill:#ccf,stroke:#333
    style D fill:#ccf,stroke:#333
    style F fill:#ccf,stroke:#333
    style H fill:#ccf,stroke:#333
    style J fill:#ccf,stroke:#333
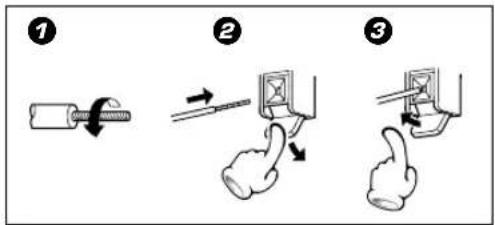

Excessive insertion of the cable can cause defective contact.
Attaching the cushions
(For DVT-6300 and DVT-7300)
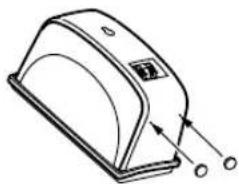
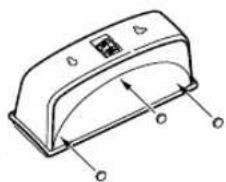
Attach cushions to the base of the speaker as shown below. The cushions prevent the speaker from sliding, and dampen its vibrations.
Front speakers,
Surround speakers
natural_image
Line drawing of a device casing with a curved lid and two circular ports, no text or symbols present.Center speaker
natural_image
Technical line drawing of a device casing with control panel and mounting holes (no text or symbols)Subwoofer
Attach four cushions to the base of the subwoofer, one at each corner.
Speaker model name
| System model name | Speaker system name | Remark | |
| Front L, R, Center Rear L, R | Subwoofer | ||
| DVT-6300 KSW-6300 | |||
| DVT-7300 KSW-7300 Refer to instruction manual for speaker stand in speaker part. | |||
| DVT-8300 KS-908HT SW-18HT | Refer to each instruction manual for speaker system in speaker part. | ||
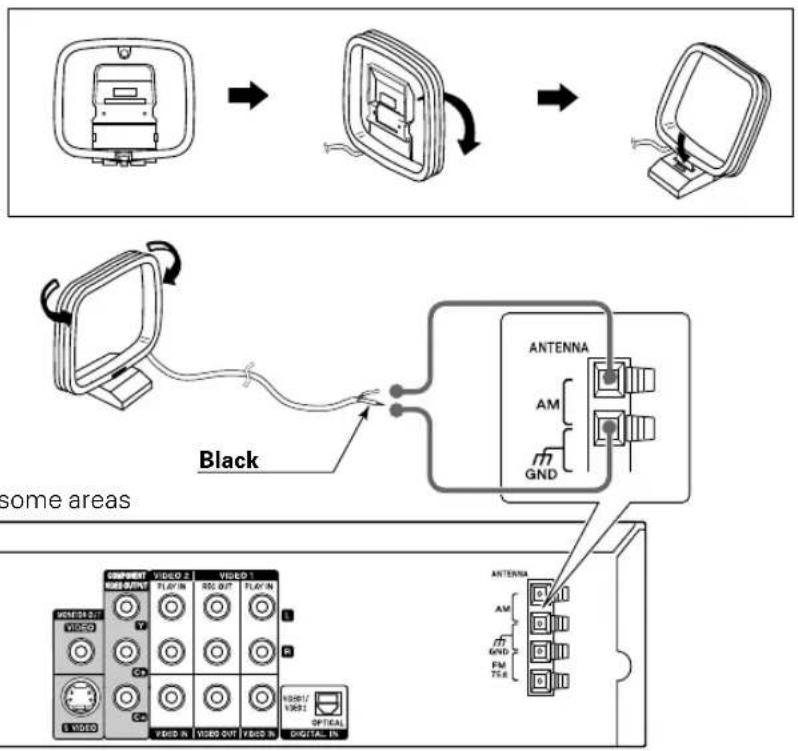
AM loop antenna
AM loop antenna connection
The supplied antenna is for indoor use. Place it as far as possible from the main system, TV set, speaker cords and power cord, and set it to a direction which provides the best reception.
flowchart
graph TD
    A["Device 1"] --> B["Device 2"]
    B --> C["Computer"]
    D["Computer"] --> E["Antenna"]
    E --> F["Antenna"]
    G["Black"] --> H["Some areas"]
    I["COMPONENT VIDEO 2"] --> J["VIDEO 1"]
    K["VIDEO"] --> L["VIDEO OUT"]
    M["VIDEO"] --> N["VIDEO OUT"]
    O["VIDEO"] --> P["VIDEO OUT"]
    Q["VIDEO"] --> R["VIDEO OUT"]
    S["VIDEO"] --> T["VIDEO OUT"]
    U["VIDEO"] --> V["VIDEO OUT"]
    W["VIDEO"] --> X["VIDEO OUT"]
    Y["VIDEO"] --> Z["VIDEO OUT"]
FM antenna
FM indoor antenna connection
The accessory antenna is for temporary indoor use only. For stable signal reception we recommend using an outdoor antenna. Remove the indoor antenna if you connect one outdoors.
①Connect to the antenna terminal.
②Locate the position providing good reception condition.
③Fix the antenna.
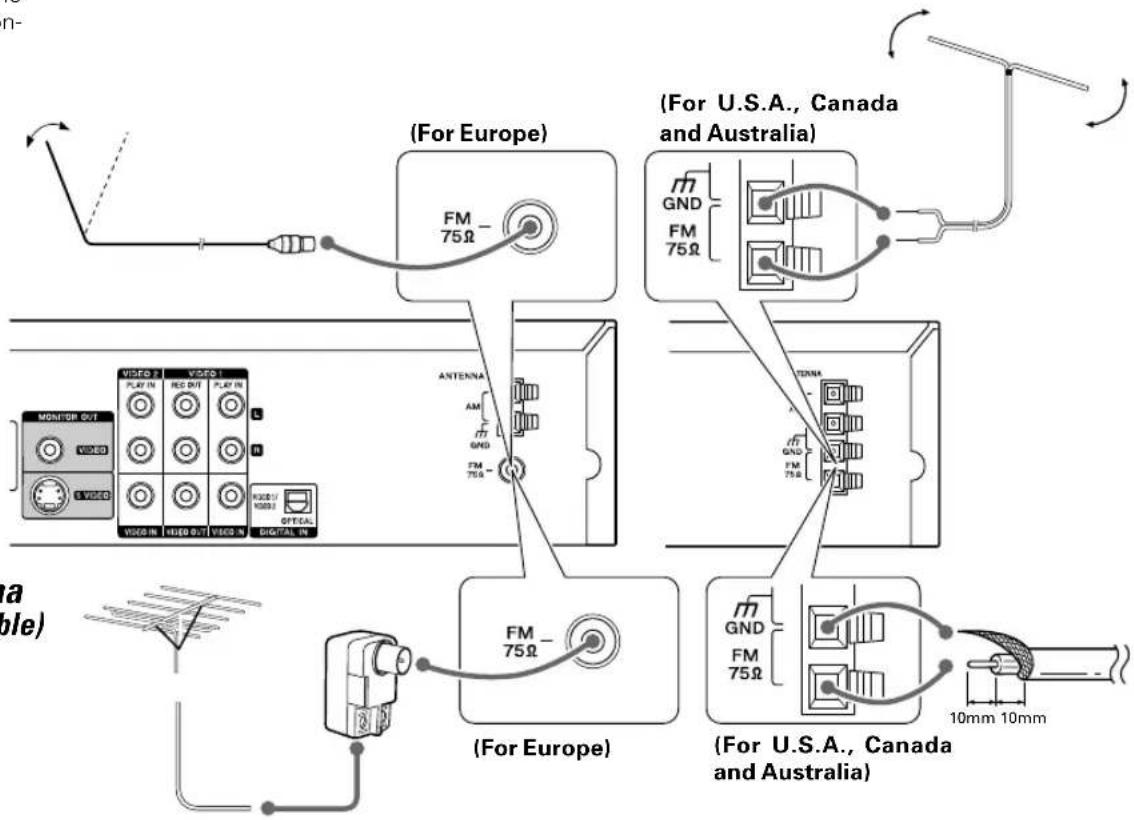
FM outdoor antenna (commercially available)
Lead the 75 Ω coaxial cable connected to the FM outdoor antenna into the room and connect it to the FM 75 Ω terminal.
Connecting to a TV (for U.S.A., Canada and Australia)

The S-Video output terminal of this unit is only for output of the built-in DVD player. The output of equipment connected toVIDEO1 or VIDEO2 is put out as a composite signal.
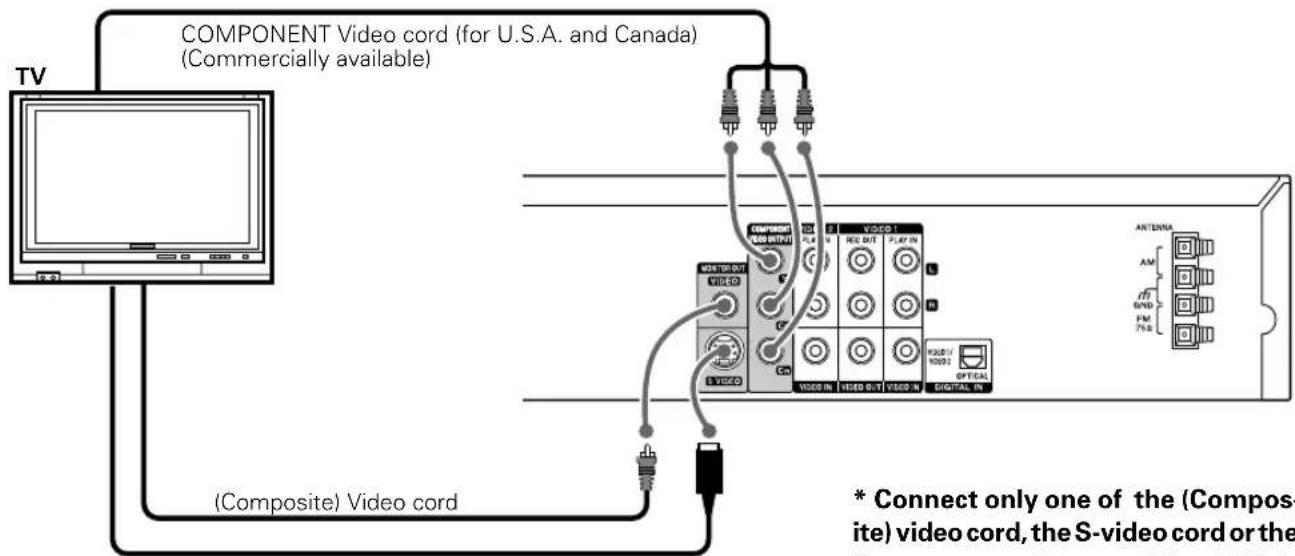
S-Video cord (Commercially available)
* Connect only one of the (Composite) video cord, the S-video cord or the Component video cord (for U.S.A. and Canada).
Connecting to a TV (for Europe)

The S-Video output terminal of this unit is only for output of the built-in DVD player. The output of equipment connected to VIDEO1 or VIDEO2 is put out as a composite signal.
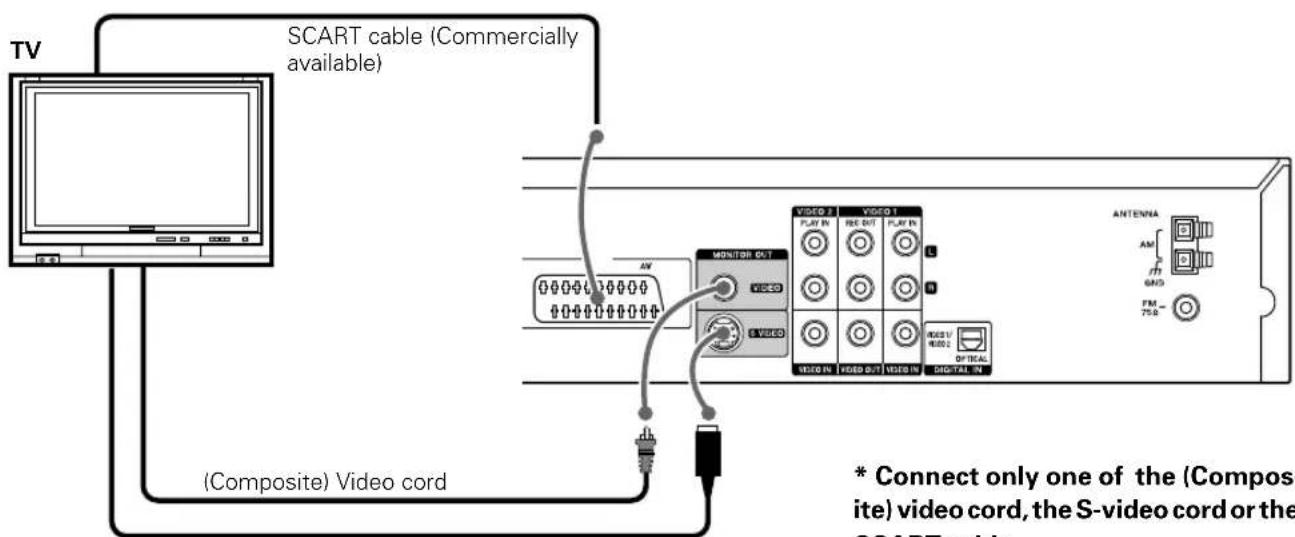
S-Video cord (Commercially available)
* Connect only one of the (Composite) video cord, the S-video cord or the SCART cable.
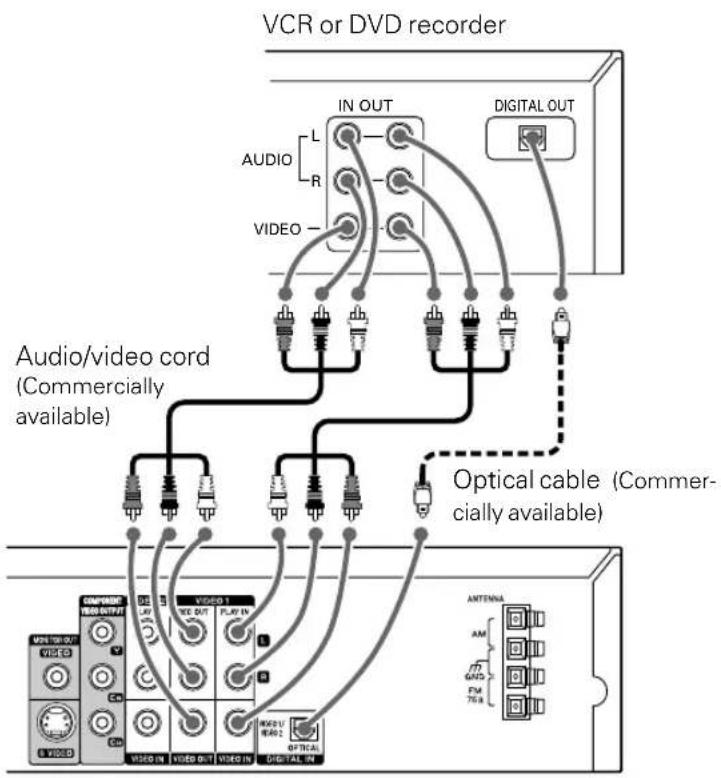
Connecting to Audio video equipments
flowchart
graph TD
    A["Audio/video cord (Commercially available)"] --> B["IN OUT"]
    A --> C["Optical cable (Commercially available)"]
    A --> D["DIGITAL OUT"]
    B --> E["VIDEO"]
    C --> F["VIDEO"]
    D --> G["VIDEO"]
    E --> H["AM"]
    E --> I["GND"]
    E --> J["FM"]
    E --> K["75k"]
    F --> L["ANTenna"]
    F --> M["AVOC"]
    F --> N["VR/VR1"]
    F --> O["VR/VR2"]
    F --> P["VR/VR3"]
    F --> Q["VR/VR4"]
    F --> R["VR/VR5"]
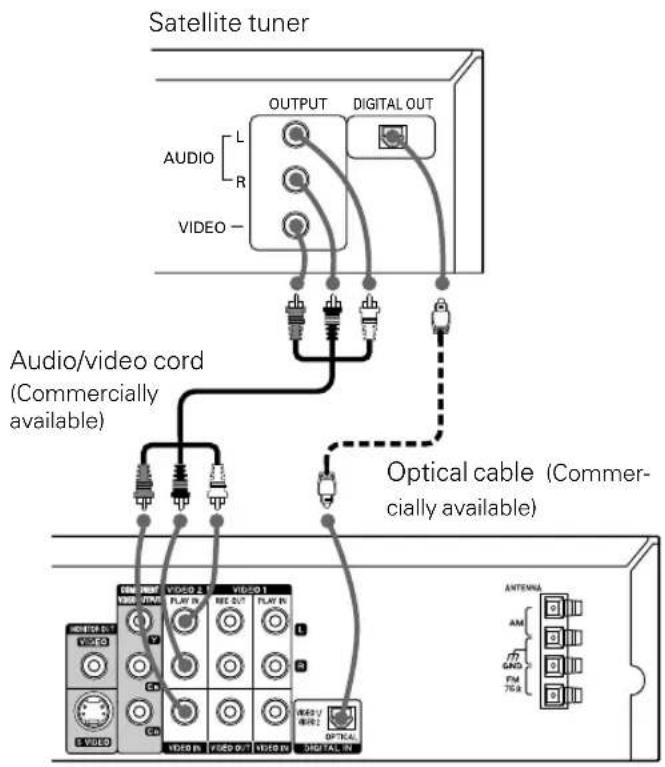
When the equipment connected to VIDEO1 or VIDEO2 of this unit has an optical digital output, an optical cable can be used for connection. (Only VIDEO1 or VIDEO2 can be connected.)
DTS disclaimer clause
DTS Digital Surround™ is a discrete 5.1 channel digital audio format available on CD, LD, and DVD software which consequently cannot be decoded and played back inside most CD, LD, or DVD players. For this reason, when DTS-encoded software is played back through the analog outputs of the CD, LD, or DVD player, excessive noise will be exhibited. To avoid possible damage to the audio system, proper precautions should be taken by the consumer if the analog outputs are connected directly to an amplification system. To enjoy DTS Digital Surround™ playback, an external 5.1 channel DTS Digital Surround™ decoder system must be connected to the digital output (S/P DIF, AES/EBU, or TosLink) of the CD, LD or DVD player.
This unit is equipped with DTS Digital Surround™ decoder.
DVR-6300 (EN/K,P,E,X)
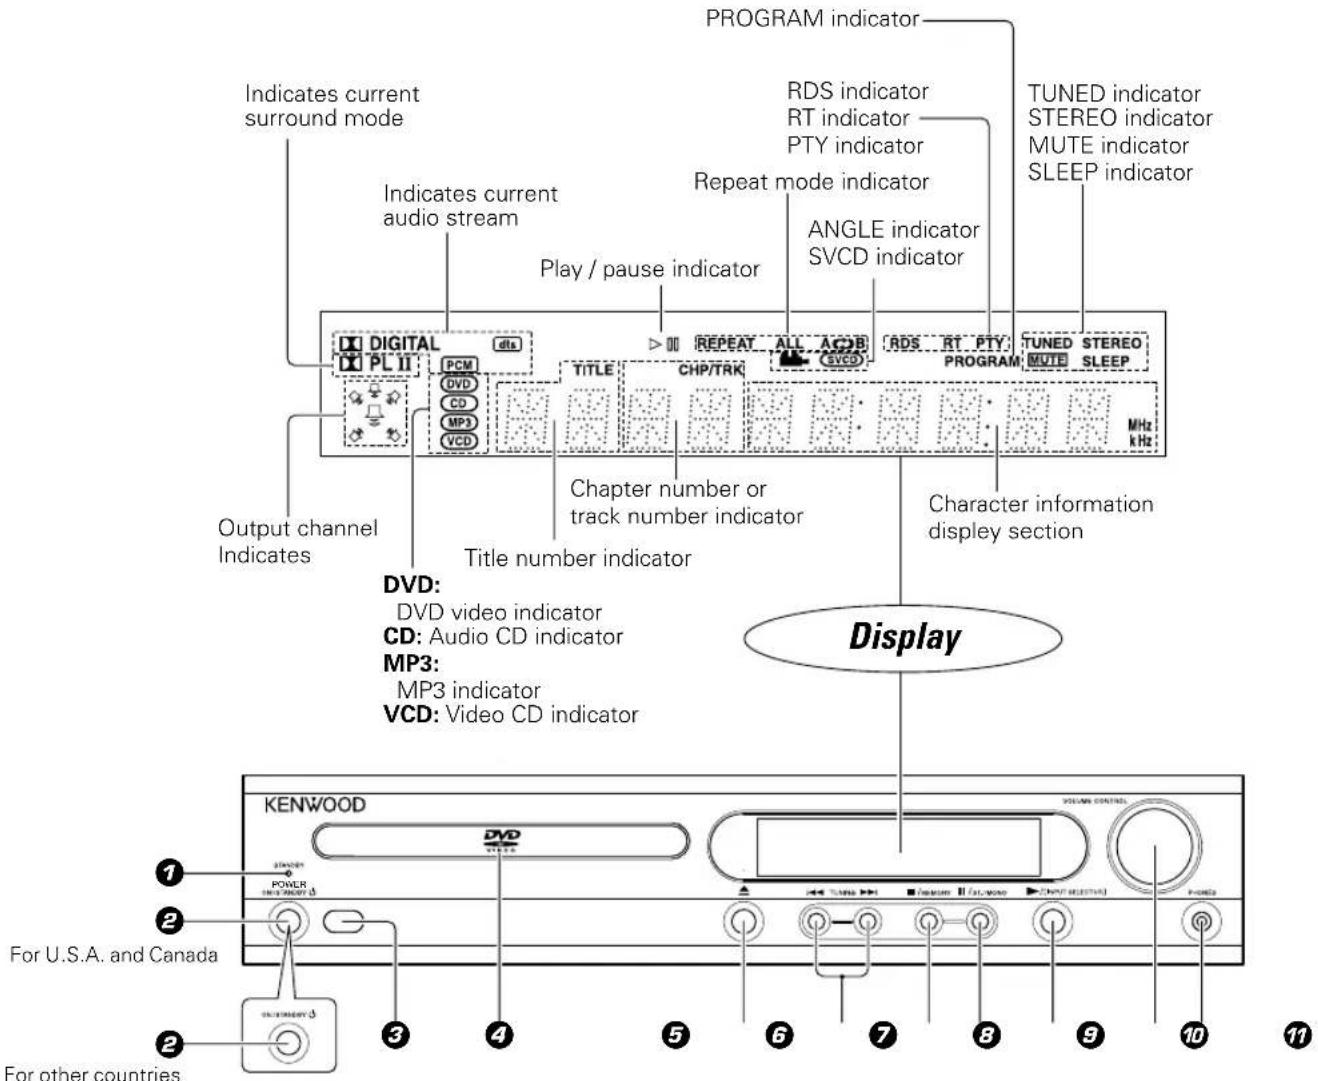
⑦STANDBY indicator
2POWER on/off (ON/STANDBY) key
(For U.S.A. AND Canada) → 15 → 24
②ON/STANDBY key
(For other countries) - 15 - 24
③ Remote sensor → 14
④Disc tray → 29
⑤ OPEN/CLOSE (▲) key → 29
⑥SKIP (◀◀, ▶▶) / TUNING keys → 25 → 30
⑦ STOP (■) /MEMORY key → 26
⑧ PAUSE (Ⅱ) / ST/MONO key → 25 → 29
⑨ PLAY (▶) / [INPUT SELECTOR] key→24→29
10 VOLUME CONTROL knob → 24
⑰ PHONES jack → 24
Standby mode
While the standby indicator is lit, a small amount of power is supplied to the system to back up the memory. This is called standby mode. Under the condition, the system can be turned ON by the remote control unit.
DVR-6300 (EN/K,P,E,X)
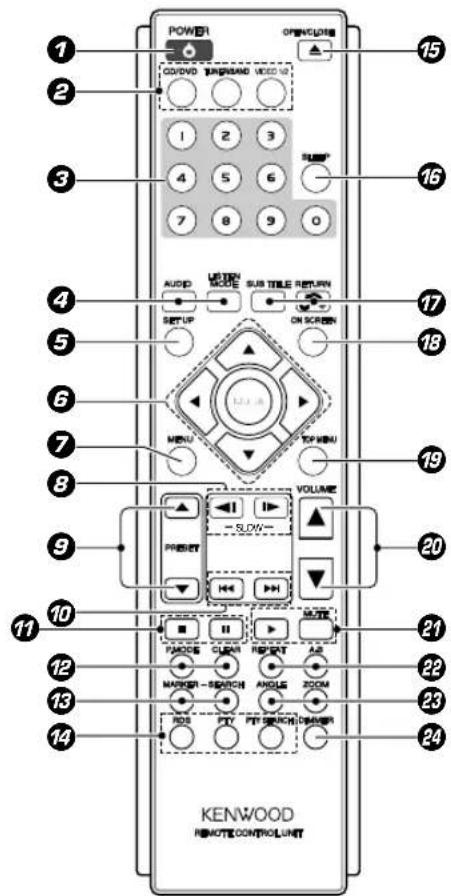
Model : RC-R0311E (for Europe) RC-R0311 (for other countries) Infrared ray system
The keys on the remote control unit with the same names as on the main unit have the same function as the keys on the main unit.
①POWER key → 24
② INPUT SELECTOR keys → 24
CD/DVD key
TUNER/BAND key
VIDEO 1/2 key
③Numeric keys → 25 → 31
④AUDIO key → 21
LISTEN MODE key → 21
⑤SET UP key → 15
⑥ Cursor Up (▲), Down (▼), Left (◀) and Right (▶) keys → 15 ENTER key → 15
⑦MENU key → 29
⑧SLOW (◀I,1▶keys → 31
⑨PRESET keys → 25
10 |◀◀,▶▶| (Skip) keys - [25] - [30]
11 ■ (stop) key -26 -29
■ (pause) key -25 -29
⑫P.MODE key - 36
CLEAR key → 37
13 MARKER key → 32
(MARKER)-SEARCH key → 32
14 RDS key (for Europe only) - 27 PTY key (for Europe only) - 28 PTY SEARCH key
(for Europe only) →28
⑮OPEN/CLOSE (▲) key → 29
16 SLEEP key → 42
⑰ SUB TITLE key RETURN (○) key → 32 → 39
18 ON SCREEN key → 23
⑲ TOP MENU key - [29]
20VOLUME
Up (▲), Down (▼) keys →24
27 ▶ (play) key → 29
MUTE key →24
22 REPEAT key → 34
(REPEAT) A-B key +34
20 ANGLE key -33
ZOOM key → 34
24 DIMMER key → 42
Loading batteries
① Remove the cover.
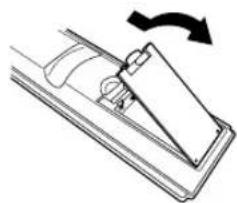
natural_image
Diagram of a mechanical device with an arrow indicating rotational motion (no text or symbols)② Insert batteries.
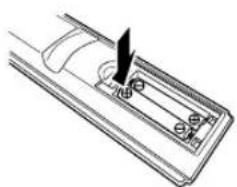
natural_image
Diagram of a car interior showing a hand operating a button with a tool (no text or symbols)- Insert two R03 ("AAA"-size) batteries following the polarity indications.
③ Close the cover.
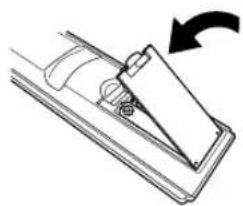
natural_image
Diagram of a mechanical component with an arrow indicating rotation (no text or symbols present)Operation
Insert the power plug into a power outlet, press the POWER (ON/STANDBY) key of the main unit or POWER key on the remote control to on, then press the desired remote control key.
- When pressing more than one remote control keys successively, press the keys securely by leaving an interval of 1 second or more between pressing of keys.
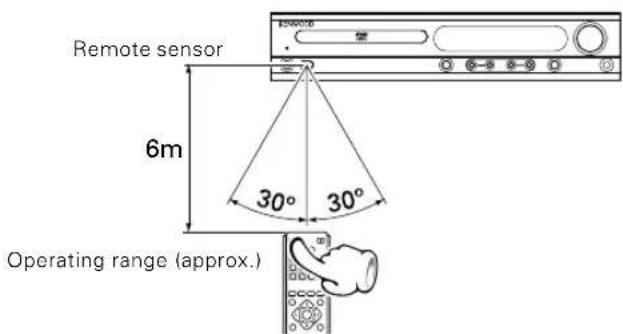

-
The provided batteries are intended for use in operation checking, and their service life may be short.
-
When the remote controllable distance becomes short, replace both of the batteries with new ones.
-
If direct sunlight or the light of a high-frequency fluorescent lamp (inverter type, etc.) is incident to the remote sensor, malfunction may occur. In such a case, change the installation position to avoid malfunction.
-
The provided batteries are intended for use in operation checking, and their service life may be short.
- When the remote controllable distance becomes short, replace both of the batteries with new ones.
- If direct sunlight or the light of a high-frequency fluorescent lamp (inverter type, etc.) is incident to the remote sensor, malfunction may occur. In such a case, change the installation position to avoid malfunction.
Preparation for Set Up
⑦ Set the POWER key (ON/STANDBY key) to power on.
② Set Video Format according to the connected TV type. (To select TV Type - 7) MAIN UNIT (For Europe and Australia)
MAIN UNIT
If the video formats of the disc and TV do not match, press and hold PAUSE key on the front panel for more than 5 seconds to be able to select a TV type (PAL, NTSC or AUTO). (No disc inserted)
Set up menu
Initial Settings
By using the Setup menu, you can make various adjustments to items such as picture and sound.
You can also set a language for the subtitles and the Setup menu, among other things. For details on each Setup menu item, see pages 16 to 18.
To display and exit the Menu:
Press SETUP key to display the menu. A second press of SETUP key will take you back to initial screen.
To go to the next level:
Press the Cursor right (▶) key on the remote.

To go back to the previous level:
Press the Cursor left (◀) key on the remote.
General Operation
①Press SETUP key.
The Setup menu appears.
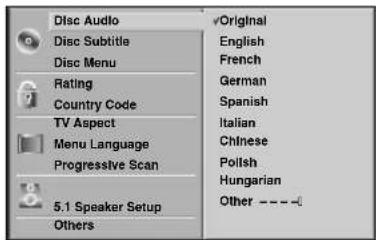
② Use the Cursor up/down (▲/▼) keys on the remote to select the desired option, then press the Cursor right (▶) key to move to the second level.
The screen shows the current setting for the selected item, as well as alternate setting(s).
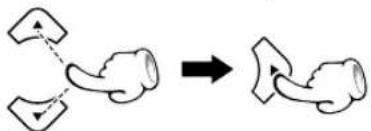
flowchart
graph TD
    A["Figure 1"] --> B["Arrow"]
    C["Figure 2"] --> B
    style A fill:#f9f,stroke:#333
    style B fill:#bbf,stroke:#333
③ Use the Cursor up/down (▲/▼) keys on the remote to select the second desired option, then press the Cursor right (▶) key to move to the third level.
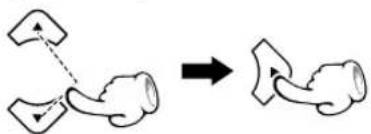
natural_image
Diagram showing a mechanical or anatomical transformation between two connected components, with no visible text or symbols.4 Use the Cursor up/down (▲/▼) keys on the remote to select the desired setting, then press ENTER key to confirm your selection. Some items require additional steps.
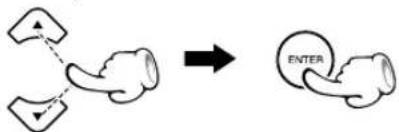
flowchart
graph TD
    A["Input Node 1"] --> B["Transfer to ENTER"]
    C["Input Node 2"] --> B
    style A fill:#f9f,stroke:#333
    style B fill:#ccf,stroke:#333
⑤Press SETUP key, RETURN key or PLAY key to exit the Setup menu.
Language
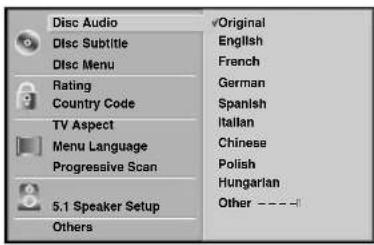
Disc Audio/Disc Subtitle/Disc Menu

Select the language you prefer for the audio Track (Disc Audio), Subtitles, and the Disc Menu
Original: Refers to the original language in which the disc was recorded.
Other: To select another language, press numeric keys then ENTER key to enter the corresponding digit number according to the language code list (→19) in the reference chapter. If You enter the wrong Language code, press CLEAR key.
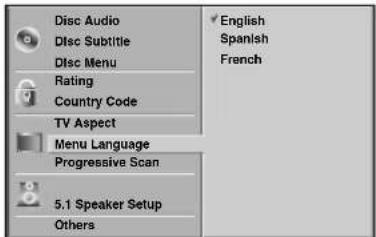
Menu Language
Select a language for the Setup menu. This is the menu you see when you press SETUP key.
TV Aspect
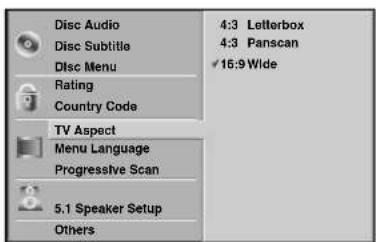
TV Aspect

4:3 Letterbox: Select when a standard 4:3 TV is connected. Displays a wide picture with bands on the upper and lower portions of the screen.
4:3 Panscan: Select when a standard 4:3 TV is connected. Automatically displays the wide Picture on the entire screen and cuts off the portions that do not fit.
16:9 Wide : Select when a 16:9 wide TV is connected.
LOCK (Parental Control)
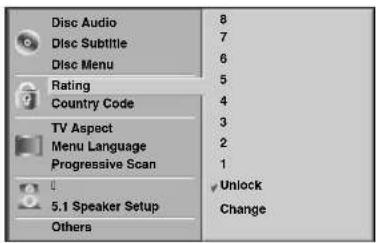
Rating

Some movies contain scenes that may not be suitable for children to view. Many of these discs contain parental control information that applies to the complete disc or to certain scenes on the disc. Movies and scenes are rated from 1 to 8, depending on the country. Some discs offer more suitable scenes as an alternative.
The parental control feature allows you to block access to scenes below the rating you input, thereby preventing your children from being able to view material you believe is unsuitable.
① Select "Rating" on the setup menu then press the Cursor right (▶) key.
When you have not entered a password;
Enter a 4-digit password using the numeric keys to create a personal 4-digit security password. then press ENTER key. Enter the 4-digit password again and press ENTER key to verify.
When you have already registered a password;
Enter a 4-digit password using the numeric keys to confirm the personal 4-digit security password, then press ENTER key.
If you make a mistake before pressing ENTER key, press CLEAR key and enter 4-digit security password again.
③ Select a rating from 1 to 8 using the Cursor up/down (▲/▼) keys.
Rating 1-8: Rating one (1) has the most restrictions and rating eight (8) is the least restrictive.
Unlock
If you select unlock, parental control is not active and the disc plays in full.

If you set a rating for the player, all disc scenes with the same rating or lower are played. Higher rated scenes are not played unless an alternate scene is available on the disc. The alternative must have the same rating or a lower one. If no suitable alternative is found, playback stops. You must enter the 4-digit password or change the rating level in order to play the disc.

Press ENTER key to confirm your rating selection, then press SETUP key to exit the menu.

This function may not work for some DVDs.
LOCK (Continued)
Changing the Password (4-digit code)
① Select LOCK on the setup menu then press the Cursor right (▶) key.
② Enter the old 4-digit code, then press ENTER key.
③ Select "Change" using the Cursor up/down (▲/▼) keys. then press ENTER.
④ Enter the new 4-digit code, then press ENTER key. Input it again to verify.
⑤ Press SETUP key to exit the menu.
If you forget Password
If you forget your security code you can clear using the following steps:
① Press SETUP key to display the Setup menu.
② Input the 6-digit number "210499" and the password is cleared.
③ Enter a new code as described above.
Country Code DVD
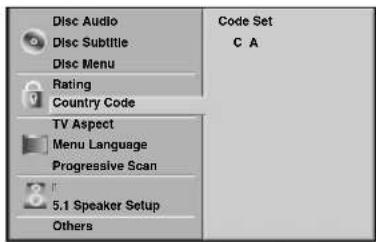
Enter the code of the country/area whose standards were used to rate the DVD video disc, based on the list in the reference chapter. Ratings are country-dependent.
① Select "Country Code" (→19) on the setup menu, then press the Cursor right (▶).
② Follow step ② of "Rating" on page 16.
③ Select the first character using the Cursor up/down (▲/▼) keys.
4 Shift the cursor using the Cursor right (▶) key. and select the second character using the Cursor up/down (▲/▼) keys.
⑤ Press ENTER to confirm your country code selection.
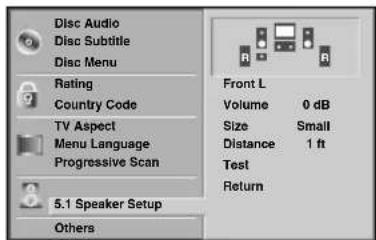
5.1 Speaker Setup DVD
Select speaker settings, including volume balance and delay time, or test the speaker settings.
Speaker settings are only active on the Analog Multi-Channel Output.
Refer to "Speaker setting".→22
Progressive Scan DVD (for U.S.A. and Canada)
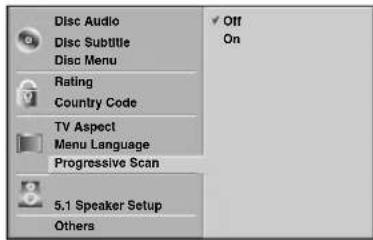
Progressive Scan Video provides the highest quality pictures with less flickering.
If you are using the COMPONENT VIDEO OUT/PROGRESSIVE SCAN jacks, but are connecting the DVD Player to a standard (analog) television, set Progressive Scan to Off.
If you are using the Component Video jacks for connection to a TV or monitor that is compatible with a progressive scan signal, set Progressive Scan to On.

Once the setting for progressive scan output is entered, an image will only be visible on a progressive scan compatible TV or monitor. If you set Progressive Scan to On in error, you must reset the unit.
① Press ■ (stop) key to stop any disc that is playing.
② Press ■ (stop) key again for more than 5 seconds.
The video output will be restored to the standard setting, and a picture will once again be visible on a conventional analog TV or monitor.
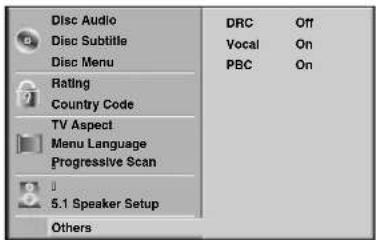
Others
The DRC, Vocal and PBC settings can be changed.
Press the Cursor up/down (▲/▼) keys to select the desired item and press ENTER key. The setting of the selected item is changed between On and Off.
Dynamic Range Control (DRC) DVD
With the DVD format, you can hear a program's soundtrack in the most accurate and realistic presentation possible, thanks to digital audio technology. However, you may wish to compress the dynamic range of the audio output (the difference between the loudest sounds and the quietest ones). This allows you to listen to a movie at a lower volume without losing clarity of sound. Set DRC to On for this effect.
This function operates only at the time of playback of DVDs recorded with Dolby Digital.
Vocal DVD
Set to on only when a multi-channel karaoke DVD is playing. The karaoke channels on the disc mix into normal stereo sound.
PBC VCD
Set Playback Control (PBC) to On or Off.
On: Video CDs with PBC are played according to the PBC.
Off: Video CDs with PBC are played the same way as Audio CDs.
Hierarchical structure of VCD menus (P.B.C. function)
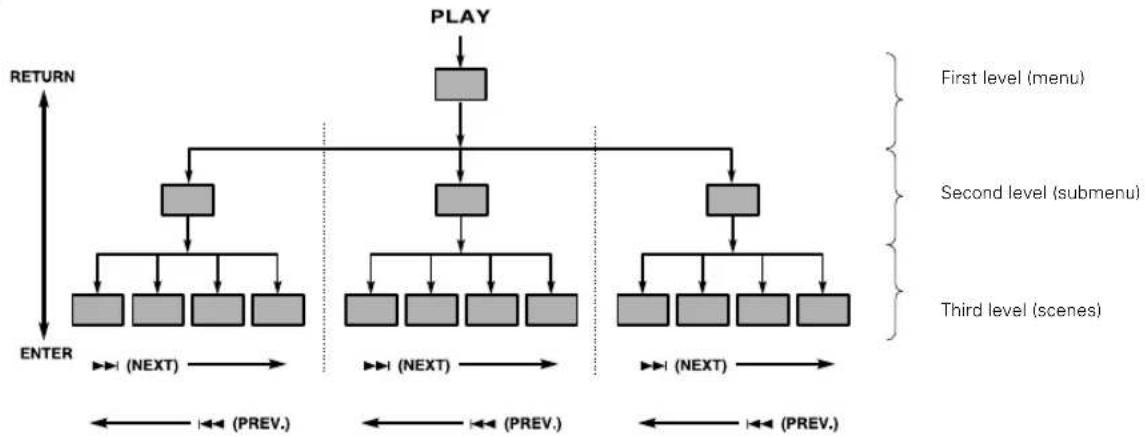
When an item is selected on the menu screen during playback of a P.B.C.-compatible VCD, another menu with more details items may be displayed. When a number of menus are connected in multiple layers in this way, it is said that the menus have a hierarchical structure. In this structure, the desired scene can be reached by repeating item selections on the menu screens.
Example for a hierarchical structure
flowchart
graph TD
    A["PLAY"] --> B["First level (menu)"]
    A --> C["Second level (submenu)"]
    A --> D["Third level (scenes)"]
    B --> E["ENTER"]
    C --> F["(NEXT)"]
    D --> G["(NEXT)"]
    E --> H["PREV."]
    F --> I["(NEXT)"]
    G --> J["(NEXT)"]
    H --> K["PREV."]
    I --> L["(NEXT)"]
    J --> M["(NEXT)"]
    K --> N["PREV."]
    L --> O["PREV."]
    M --> P["PREV."]
    N --> Q["RETURN"]
    O --> R["RETURN"]
    P --> S["RETURN"]
Advancing
When an item is selected on the menu screen with the ENTER (Select) key or the numeric keys, advance is made to the next lower menu level. When the advance destination is the "scene" to be played, the contents will be played.
- When several menus (scenes) can be selected in each level, screen switching is possible with the keys ▶▶▶ (NEXT) and ◀◀◀ (PREV.).
Returning
Each time the RETURN key is pressed, return is made to the next higher menu.
DVD menu language code list
| Language Code | |
| Abkhazian 6566 | |
| Afar 6565 | |
| Afrikaans 6570 | |
| Albanian 8381 | |
| Ameharic 6577 | |
| Arabic 6582 | |
| Armenian 7289 | |
| Assamese 6583 | |
| Aymara 6588 | |
| Azerbaijani 6590 | |
| Bashkir 6665 | |
| Basque 6985 | |
| Bengali; Bangla 6678 | |
| Bhutani 6890 | |
| Bihari 6672 | |
| Breton 6682 | |
| Bulgarian 6671 | |
| Burmese 7789 | |
| Byelorussian | 6669 |
| Cambodian | 7577 |
| Catalan | 6765 |
| Chinese | 9072 |
| Corsican | 6779 |
| Croatian | 7282 |
| Czech | 6783 |
| Danish | 6865 |
| Dutch | 7876 |
| English 6978 | |
| Esperanto 6979 | |
| Estonian | 6984 |
| Faroese 7079 | |
| Language Code | |
| Fiji | 7074 |
| Finnish | 7073 |
| French 7082 | |
| Frisian | 7089 |
| Galician | 7176 |
| Georgian | 7565 |
| German | 6869 |
| Greek | 6976 |
| Greenlandic | 7576 |
| Guarani | 7178 |
| Gujarati | 7185 |
| Hausa | 7265 |
| Hebrew 7387 | |
| Hindi | 7273 |
| Hungarian | 7285 |
| Icelandic | 7383 |
| Indonesian | 7378 |
| Interlingua | 7365 |
| Irish | 7165 |
| Italian | 7384 |
| Japanese 7465 | |
| Javanese | 7487 |
| Kannada | 7578 |
| Kashmiri 7583 | |
| Kazakh | 7575 |
| Kirghiz | 7589 |
| Korean | 7579 |
| Kurdish | 7585 |
| Laothian | 7679 |
| Latin | 7665 |
| Latvian, Lettish | 7686 |
| Language Code | |
| Lingala | 7678 |
| Lithuanian | 7684 |
| Macedonian | 7775 |
| Malagasy 7771 | |
| Malay | 7783 |
| Malayalam | 7776 |
| Maltese | 7784 |
| Maori 7773 | |
| Marathi 7782 | |
| Moldavian 7779 | |
| Mongolian | 7778 |
| Nauru | 7865 |
| Nepali 7869 | |
| Norwegian | 7879 |
| Oriya | 7982 |
| Panjabi 8065 | |
| Pashto, Pushto | 8083 |
| Persian 7065 | |
| Polish | 8076 |
| Portuguese | 8084 |
| Quechua 8185 | |
| Rhaeto-Romance | 8277 |
| Rumanian 8279 | |
| Russian 8285 | |
| Samoan | 8377 |
| Sanskrit | 8365 |
| Scots Gaelic | 7168 |
| Serbian | 8382 |
| Serbo-Croatian | 8372 |
| Shona 8378 | |
| Sindhi 8368 |
| Language Code | |
| Singhalese | 8373 |
| Slovak 8375 | |
| Slovenian | 8376 |
| Somali | 8379 |
| Spanish | 6983 |
| Sudanese 8385 | |
| Swahili 8387 | |
| Swedish | 8386 |
| Tagalog | 8476 |
| Tajik | 8471 |
| Tamil | 8465 |
| Tatar | 8484 |
| Telugu | 8469 |
| Thai | 8472 |
| Tibetan | 6679 |
| Tigrinya | 8473 |
| Tonga | 8479 |
| Turkish 8482 | |
| Turkmen | 8475 |
| Twi | 8487 |
| Ukrainian | 8575 |
| Urdu | 8582 |
| Uzbek | 8590 |
| Vietnamese | 8673 |
| Volapük | 8679 |
| Welsh | 6789 |
| Wolof | 8779 |
| Xhosa | 8872 |
| Yiddish 7473 | |
| Yoruba | 8979 |
| Zulu | 9085 |
Country Code list
| Country | Code |
| Afghanistan | AF |
| Argentina | AR |
| Australia | AU |
| Austria | AT |
| Belgium | BE |
| Bhutan | BT |
| Bolivia BO | |
| Brazil | BR |
| Cambodia KH | |
| Canada CA | |
| Chile | CL |
| China | CN |
| Colombia CO | |
| Congo | CG |
| Costa Rica CR | |
| Croatia | HR |
| Czech Republic | CZ |
| Denmark | DK |
| Ecuador | EC |
| Egypt EG | |
| El Salvador | SV |
| Country | Code |
| Ethiopia | ET |
| Fiji | FJ |
| Finland FI | |
| France | FR |
| Germany | DE |
| Great Britain | GB |
| Greece | GR |
| Greenland | GL |
| Islands | HM |
| Hong Kong HK | |
| Hungary | HU |
| India | IN |
| Indonesia | ID |
| Israel | IL |
| Italy | IT |
| Jamaica | JM |
| Japan | JP |
| Kenya | KE |
| Kuwait | KW |
| Libya | LY |
| Luxembourg | LU |
| Country | Code |
| Malaysia MY | |
| Maldives | MV |
| Mexico | MX |
| Monaco | MC |
| Mongolia MN | |
| Morocco | MA |
| Nepal NP | |
| Netherlands | NL |
| Netherlands Antilles | AN |
| New Zealand | NZ |
| Nigeria | NG |
| Norway | NO |
| Oman | OM |
| Pakistan | PK |
| Panama | PA |
| Paraguay | PY |
| Philippines | PH |
| Poland | PL |
| Portugal | PT |
| Romania RO | |
| Russian Federation | RU |
| Country | Code |
| Saudi Arabia | SA |
| Senegal | SN |
| Singapore | SG |
| Slovak Republic | SK |
| Slovenia | SI |
| South Africa | ZA |
| South Korea | KR |
| Spain | ES |
| Sri Lanka | LK |
| Sweden | SE |
| Switzerland | CH |
| Taiwan TW | |
| Thailand | TH |
| Turkey | TR |
| Uganda UG | |
| Ukraine UA | |
| United States | US |
| Uruguay | UY |
| Uzbekistan UZ | |
| Vietnam | VN |
| Zimbabwe | ZW |
What are LISTEN modes?
You can experience true home-theater sound with your new system. This system incorporates several listen modes to let you enjoy surround sound with a wide variety of program sources. Each produces multiple channels of surround-sound, but each does it differently.
- Dolby Digital: Dolby Digital uses an encode/decode process based on its theatrical digital surround sound technology. The five main channels are full-frequency and independent, so sound can completely envelop you or soar anywhere in the room, just like at the movies.
Compared with Dolby Pro Logic, Dolby Digital has more clarity, greater surround envelopment, and more realistic sound movement between channels.
- Dolby Pro Logic/Dolby Pro Logic II: Dolby Pro Logic reproduces a surround sound like in a movie theater from Dolby Surround-encoded program source (videotape or LaserDisc software carrying the Dolby Surround logo), and features excellent sound movement on the front and a surrounding atmosphere of movie theaters. Meanwhile, Dolby Pro Logic II decodes a signal encoded in 2 channels into 5-channel signals composed of the left/right front signals, center signal and surround left/right signals.
Dolby Pro Logic II is an advanced version of the decoding technology used with Dolby Pro Logic. It inputs 2-channel signals from a Dolby Surround-encoded source and reproduces 5-channel signals in which the surround channel is divided into independent channels for the left and right. Dolby Pro Logic II has the MOVIE mode and MUSIC mode.
MOVIE mode:
The Movie mode is for use with stereo television shows and all programs encoded in Dolby Surround. The result is enhanced soundfield directionality that approaches the quality of discrete 5.1-channel sound.
MUSIC mode:
The Music mode is for use with any stereo music recordings.
MATRIX mode:
The Matrix mode is the same as the Music mode except that the directional enhancement logic is turned off. It may be used to enhance mono signals by making them seem “larger.” The Matrix mode may also find use in auto systems, where the fluctuations from poor FM stereo reception can otherwise cause disturbing surround signals from a logic decoder. The ultimate “cure” for poor FM stereo reception may be simply to force the audio to mono.
- DTS: DTS has five full-frequency channels that create effects nearly identical to those in a theater. Sounds seem to zoom from one place to another or entirely surround you. Like Dolby Digital, DTS has much-improved clarity, surround and sound movement capability compared with Dolby Pro Logic. This listen mode is available on CD, LD, and DVD media. DTS is a strictly digital format that can be supplied only by a CD, LD, or DVD player that supports DTS sound.
- Stereo: Stereo listen mode provides standard stereo sound to the front left and right speakers.
● 3D Surround: To produce a 3D surround effect that simulates multi-channel audio from two stereo speakers.
● BYPASS : Software with multichannel surround audio signals is played according to the way it was recorded.

- When you play sound tracks with 96kHz sampling frequency, the output signals will be converted to 48kHz (sampling frequency).
● Sound Mode is not applicable when headphone is used.
Manufactured under license from Dolby Laboratories. "DOLBY", the double-D symbol and "PRO LOGIC" are trademarks of Dolby Laboratories.

"DTS" and "DTS Digital Surround" are registered trademarks of Digital Theater Systems, Inc.
To set the LISTEN mode manually
According to the contents of the disc played in this unit, the LISTEN MODE (selected by the LISTEN MODE key) can be selected.
At the time of PCM or DOLBY DIGITAL (2 ch) source
⑦Press the LISTEN MODE key.
REMOTE
Each press switches the modes as shown below. (Display) / (OSD)
①PRO LOGIC / PROL (Dolby Pro Logic)
② PLII MOVIE / MOVIE (Dolby Pro Logic II Movie)
③ PLII MUSIC / MUSIC (Dolby Pro Logic II Music)
④ PLII MATRIX / MTRX (Dolby Pro Logic II Matrix)
⑤3D SURR /3D SUR (3D Surround)
⑥ BYPASS / BYPASS
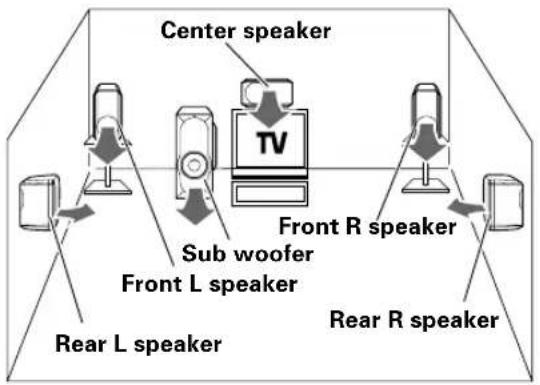
Positioning the speakers
To achieve the optimum effects obtainable with this SURROUND SOUND system, it is important to position the speakers properly. Refer to the following illustration to find the best location in your room.

Operation near a TV
If the Subwoofer is installed near a TV set, the TV reception may be affected and interfered with color irregularities. Should color irregularities observed on TV screen, separate the Subwoofer from the TV until its reception becomes normal.
Speaker level (volume)
For this unit, the speaker levels have been set in advance so that the best volume balance is obtained with standard use.
Initial set values for the speaker level
Front Left channel : 0dB
Center channel : 0dB
Front Right channel : 0dB
Rear Right channel : 0dB
Rear Left channel : 0dB
Subwoofer(SW) : 0dB
Reset as follows to match your listening environment.
Settings
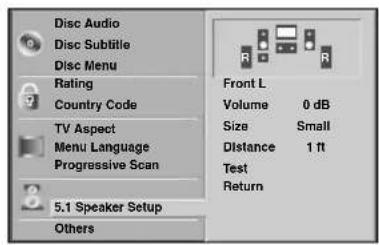
①Press SETUP key to display the menu.
②Select "5.1 Speaker Setup" on the setup menu then press the Cursor right (▶) key.
③ Press the Cursor right (▶) key to select the desired speaker.
4 Adjust options by using Cursor (▲/▼/◄/►) keys on the remote.
Speaker selection
Select a speaker that you want to adjust.
Front speakers (Left), Front speakers (Right), Centre Speaker, Rear speakers (Left), Rear speakers (Right), or Subwoofer

Certain speaker settings are prohibited by the Dolby Digital licensing agreement.
Volume
Press the Cursor left/right (◀/▶) keys on the remote to adjust the output level of the selected speaker. (-6dB \~ +6dB)
Size
Since the speaker settings are fixed, you cannot change the settings.
Distance
Setting the Distance lets the speakers know how far the sound has to travel to reach your set listening point. This allows the sound from each speaker to reach the listener at the same time. (1 ft = 30.48 cm) (0.3 m \~ 6 m, 1 ft \~ 20 ft)

You can not set the distance of subwoofer speaker.
Test
Press ENTER to test the signals of each speaker. Adjust the volume to match the volume of test signals memorized in the system.
Front Left (L) → Centre → Front Right (R) →
Rear Right (R) → Rear Left (L) → Subwoofer
Return
Press ENTER to return to the previous menu.

On screen display
The on-screen Banner Display contains many playback features. To see the Banner Display, press ON SCREEN key on the remote while a disc is playing. Use the Cursor (▲/▼/◄/►) keys on the remote to move through the different features in the Banner Display. Each feature is illustrated with an icon.
Example:
On-Screen Display during playing DVD
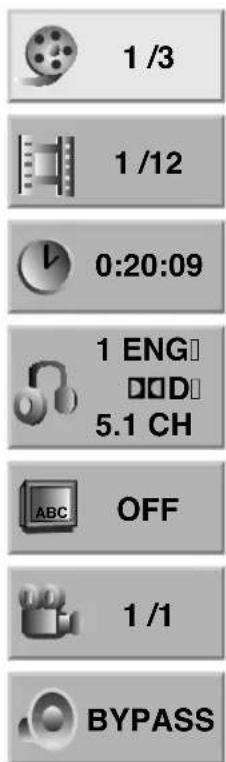
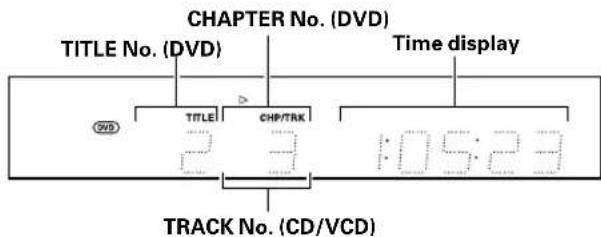
Title Number
Chapter Number
Time search
Audio language and Digital Audio Output mode
Subtitle language
Angle
Sound
Example:
On-Screen Display during playing VCD
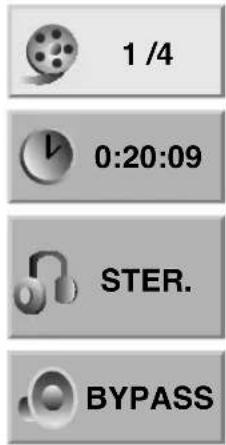
Track Number (or PBC mode)
Time search
Audio Channel
Sound

Last Scene Memory
This player memorizes last scene from the last disc that is viewed. The last scene remains in memory even if you remove the disc from the player or switch off the player. If you load a disc that has the scene memorized, the scene is automatically recalled.
If you don't want to use the Last Scene Memory, press the STOP key during stop.

This player does not memorize the scene of a disc if you switch off the player before commencing to play the disc.
Preparation
Turn on the POWER.
![POWER INPUT SELECTOR VOLUME MUTE POWER/ON STANDBY VOLUME CONTROL PHONES ▶/[INPUT SELECTOR]](/content/2026/05/1021886/images/831f0dbab82de36340f238769325abc862ef15e4dfafb8aaf1bf7d867468438e.jpg)
Basic use method
1 Selecting the desired input
MAIN UNIT
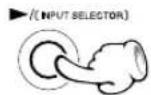
① Press ▶/[INPUT SELECTOR] key for more than 3 seconds.
2 Press ▶/[INPUT SELECTOR] key repeatedly. each press switches the mode.
REMOTE
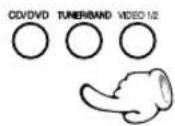
When press VIDEO 1/2 key on the remote, switches input modes as shown below.
① VIDEO 1 (audio, video)
② VIDEO 1 (video) + OPT (digital audio input)
③ VIDEO 2 (audio, video)
④ VIDEO 2 (video) + OPT (digital audio input)
⑤ TV-AUDIO (for Europe, input from SCART cable)
2 Volume adjustment
MAIN UNIT
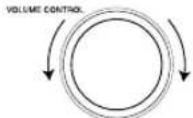
To decrease
To increase
REMOTE
To increase
To decrease
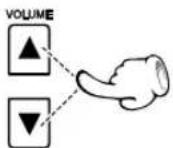
- The power will be switched on and the respective operation will be performed also when the ▲ key on the main unit is pressed during STANDBY mode.
- When a disc is set in the disc tray and the CD/DVD key is pressed, disc playback will start automatically.
After press ▶/[INPUT SELECTOR] key for more than 3 seconds, each press ▶/[INPUT SELECTOR] key switches input modes as shown below.
① CD/DVD - 29
② VIDEO 1 (audio, video)
③ VIDEO 1 (video) + OPT (digital audio input)
④ VIDEO 2 (audio, video)
⑤ VIDEO 2 (video) + OPT (digital audio input)
⑥ TV-AUDIO (for Europe, input from SCART cable)
⑦ FM (frequency display) → 25
⑧ AM (frequency display) → 25
Normally "VOL MAX" is displayed when the volume settings set to the maximum value.
Muting the sound temporarily
REMOTE

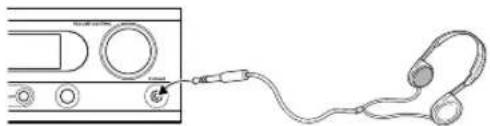
Listening through headphone
Insert the headphone plug into the PHONES jack.
natural_image
Line drawing of a computer interface with an attached audio jack connected to a headset (no text or symbols)- Press MUTE key.
- Press again to resume the original volume.
- The sound muting is also cancelled when the volume is controlled.
This unit offers various surround modes, but it switches automatically to stereo mode when headphones are connected.
● The sounds from all speakers are cut off.
DVR-6300 (EN/K,P,E,X)
It is also possible to receive them by one-touch operations by storing up to 30 stations in the preset memory. (-26)
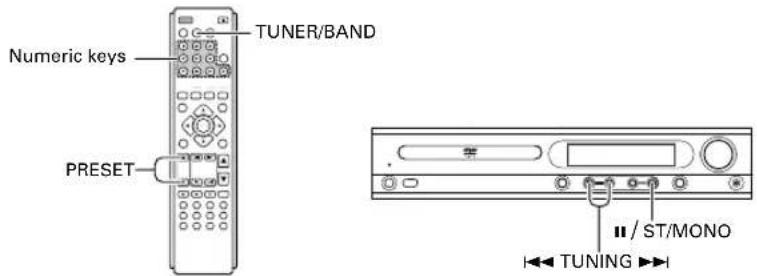

Select the TUNER input
Press the TUNER/BAND key on the remote.
REMOTE

Select the broadcast band
Press the TUNER/BAND key on the remote.
REMOTE

Select a tuning mode
Press the II / ST./MONO key on the remote.
MAIN UNIT
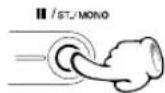
When the key is pressed, this unit will be switched on automatically.
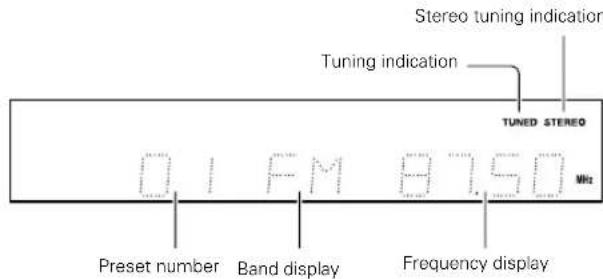
Each press changes the band.

Each press switches the mode


Select a station
P.CALL (preset call) Auto tuning Manual tuning
REMOTE
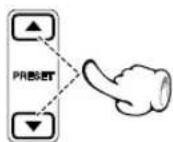
or
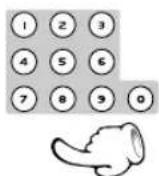
Press the PRESET (▲/▼) keys on the remote control to select a preset station. In case of input with the numeric keys. (Example)
To select preset No.3 : 3
To select preset No.14 : 1 4
(within 3 seconds)
MAIN UNIT
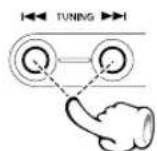
Press the TUNING (|◄◄/►►|) keys on the main unit for more than 2 seconds to receive the next tuned station automatically
MAIN UNIT
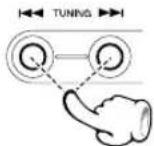
Each time a key is pressed, the frequency is changed by one step.
Use the manual tuning mode when reception is noisy due to weak reception.
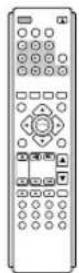
You can store up to 30 stations for FM and AM (MW) in the memory and recall with a single touch of the key.
Storing the broadcast stations (one-by-one presetting)
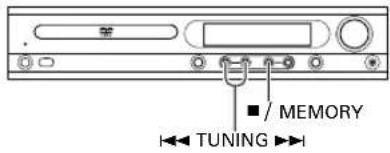
1 Select a station (auto tuning or manual tuning) → 25
2 Press the ■/MEMORY key on the main unit.
MAIN UNIT
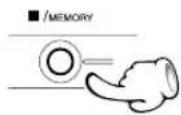
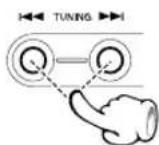
3 Select the desired preset number.
MAIN UNIT
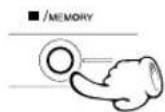
4 Press the ■/MEMORY key on the main unit.
MAIN UNIT
Repeat steps 1 to 4 to preset other stations.
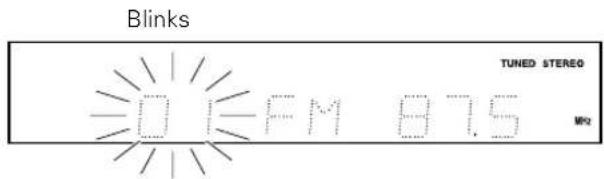
Please perform the next operation while the indicator is blinking.
RDS is a system which transmits useful information (digital data) for FM broadcasts together with the broadcast signal. Tuners and receivers designed for RDS reception can extract the information from the broadcast signal for use with various functions such as automatic display of the station name.
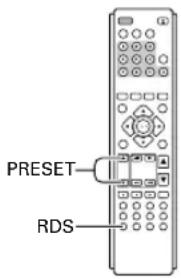
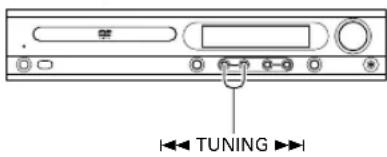
Using RDS function (for Europe only)
Functions made possible with RDS
PTY (Program Type Identification) Search :
The tuner automatically searches for a station which is currently broadcasting a specified program type (genre).
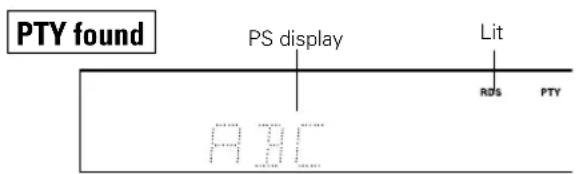
PS (Program Service Name) Display :
When an RDS broadcast is received, the station name is automatically displayed.
RT (Radio text) :
Displays the radio text data transmitted by some RDS stations when you select the RT mode.
CT (Clock Time) :
Decodes the real time clock from the FM frequency.
Using the RDS Display function
1 Select the FM broadcast station.
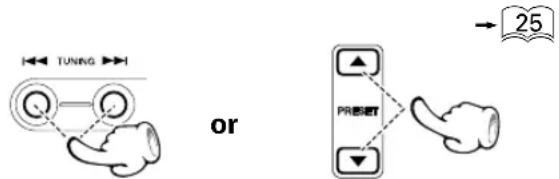
flowchart
graph TD
    A["OR"] --> B["TUNING"]
    B --> C["AND"]
    C --> D["OR"]
    D --> E["OR"]
    E --> F["OR"]
    F --> G["OR"]
    G --> H["OR"]
    H --> I["OR"]
    I --> J["OR"]
    J --> K["OR"]
    K --> L["OR"]
    L --> M["OR"]
    M --> N["OR"]
    N --> O["OR"]
    O --> P["OR"]
    P --> Q["OR"]
    Q --> R["OR"]
    R --> S["OR"]
    S --> T["OR"]
    T --> U["OR"]
    U --> V["OR"]
    V --> W["OR"]
    W --> X["OR"]
    X --> Y["OR"]
    Y --> Z["OR"]
    Z --> AA["OR"]
    AA --> AB["OR"]
    AB --> AC["OR"]
    AC --> AD["OR"]
    AD --> AE["OR"]
    AE --> AF["OR"]
    AF --> AG["OR"]
    AG --> AH["OR"]
    AH --> AI["OR"]
    AI --> AJ["OR"]
    AJ --> AK["OR"]
    AK --> AL["OR"]
    AL --> AM["OR"]
    AM --> AN["OR"]
    AN --> AO["OR"]
    AO --> AP["OR"]
    AP --> AQ["OR"]
    AQ --> AR["OR"]
    AR --> AS["OR"]
2 Press the RDS. key on the remote.
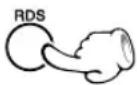
Each press switches the display mode as follows.
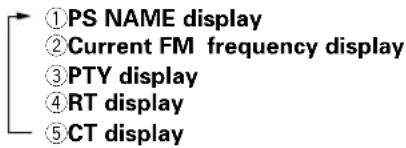

PS NAME
- If the PS information is being received, the PS name (BBC, AFO, NDR, etc.) is shown on the display.
- If the PS information is not received, the original FM frequency is shown.
- Even though no RDS key is pressed, the reception of PS information ensues the PS name is displayed.
RT display
- Text data accompanying the RDS broadcast scrolls across the display.

- If the RT information is not received, the "RT NONE" is shown on the display.
CT display
- If the CT information will take up to 2 minutes to be decoded therefore the clock is not displayed immediately.
- If the CT information is not received, the "CT NONE" is shown on the display.
● The CT clock does not update the system clock.
DVR-6300 (EN/K,P,E,X)
PTY function
The PTY information is composed of an identification symbol, which helps the FM radio to recognize the program type of each FM station.
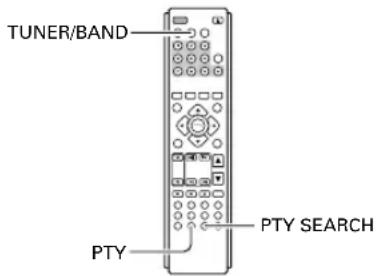
The 31 PTY modes are shown in the display by pressing the PTY key.
Using the PTY search function

Select the FM band.
REMOTE
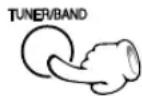
→25

Press the PTY key.
REMOTE
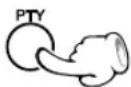
- The PTY MODE (POP M, ROCK M etc.) appears on the display.

Press the PTY key to select the desired program type.
REMOTE
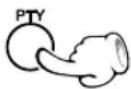

When the program type is selected, press the PTY SEARCH key.
REMOTE
Auto-search the station sequentially
- Press again during search to cancel.
PTY not found
After display of NO PTY, return is made to the normal display.
RDS Program types
| Program Type Name | Receiver Display |
| News NEWS | |
| Current Affairs AFFAIRS | |
| Information INFO | |
| Sport SPORT | |
| Education EDUCATE | |
| Drama DRAMA | |
| Culture CULTURE | |
| Science SCIENCE | |
| Varied VARIED | |
| Pop Music POP M | |
| Rock Music ROCK M | |
| Easy Listening Music EASY M | |
| Light Classical Music LIGHT M | |
| Serious Classical Music CLASSICS | |
| Other Music | OTHER M |
| Weather | WEATHER |
| Finance FINANCE | |
| Children's programs | CHILDREN |
| Social affairs | SOCIAL |
| Religion | RELIGION |
| Phone in | PHONE IN |
| Travel | TRAVEL |
| Leisure | LEISURE |
| Jazz Music | JAZZ |
| Country Music COUNTRY | |
| National Music | NATION M |
| Oldies Music | OLDIES |
| Folk Music | FOLK M |
| Documentary | DOCUMENT |
| Station Alarm Test Message | TEST |
| Emergency Broadcast Information | ALARM 1 |
DVR-6300 (EN/K,P,E,X)
Basic play
Preparation
Turn on the POWER.
![POWER OPEN/CLOSE MENU ■ (PAUSE) TOP MENU ■ / ST./MONO ■ / MEMORY (PLAY) ■ (STOP) POWER/ON/STANDBY ▲ (OPEN/CLOSE) ▶/[INPUT SELECTOR]](/content/2026/05/1021886/images/7106763d1d8afa4cc6df0ffca39fa38ae07488e60e317110cce543290de94ac5.jpg)
1 Load a disc.
MAIN UNIT
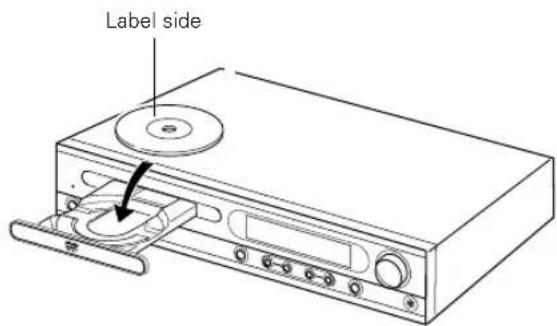
① Open the tray.
② Place a disc.
2 Start playback.
MAIN UNIT
REMOTE
- When the ▶ key is pressed while a tray is open, the tray closes automatically, and then playback begins.
- READING appears on the TV screen.

When a Disc Menu appears on the screen
In case of interactive DVDs, a Disc Menu appears on the screen. Then press ENTER to select specific menu you want to play by using Cursor keys.
To stop playback
MAIN UNIT
REMOTE
To pause playback
MAIN UNIT REMOTE
- During DVD playback, step operation is performed each time this key is pressed. (→31)
When a menu screen is recorded on the DVD disc, the menu screen will be displayed when the TOP MENU key or MENU key on the remote is pressed. At the menu screen, the menu can be selected by pressing the Cursor keys.

or
Disc playback features

- You won't hear the sound (audio) on the DVD and VCD when you're using the Skip, Search, Step or Slow motion features.
- Playback features are not available during the opening credits of a movie.
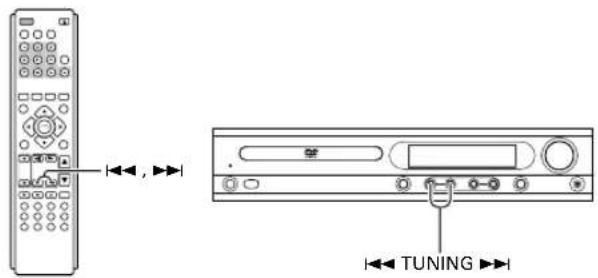
CD DVD VCD Skipping chapters or tracks
MAIN UNIT REMOTE
◀◀: To skip backward
▶◀: To skip forward
- The chapter (or track) in the direction of the key pressed is skipped, and the selected chapter (or track) will be played from the beginning.
- When the ◀◀◀ key is pressed once during playback, the chapter (or track) being played will be played from the beginning.
- When the ◄◀ key is pressed within 3 seconds after the start of chapter (or track) playback, playback starts from the start of the preceding chapter (or track).

- The Chapter feature won't work if the disc isn't formatted with separate chapters.
CD DVD VCD Searching
⑦ During playback, press ◀◀◀ or ▶▶▶| key for more than 2 seconds.
MAIN UNIT REMOTE
② Press and hold ◀◀◀ or ▶▶▶ key repeatedly.
MAIN UNIT REMOTE
◀◀ : To search backward (FR)
▶◀◀ : To search forward (FF)
● Each press and hold switches the searching speed.
(At the time of DVD playback)
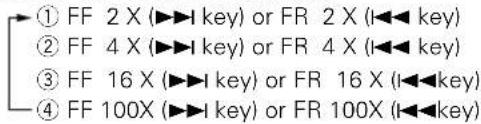
(At the time of CD/VCD playback)
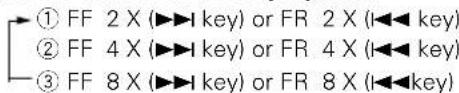
- Press the ▶ key at any time to resume normal playback.
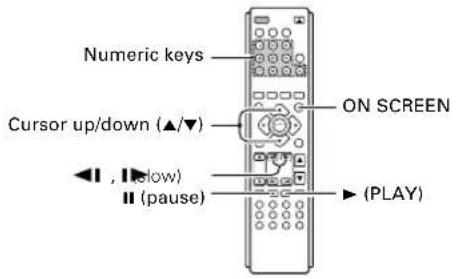
DVD VCD STEP (freeze frame and frame advance)
REMOTE
- During playback, press the II (pause) key.
- Each time you press the key, the picture advances one frame.
- Press the ▶ key to resume normal playback.
DVD VCD Slow motion playback
REMOTE
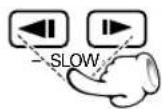
- During playback, press the ▶ (slow) keys.
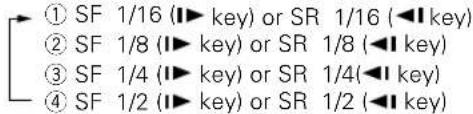
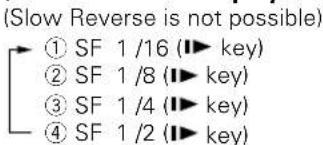
● Each press switches the motion speed.
(At the time of DVD playback)
(At the time of VCD playback)
- Press the ▶ key to resume normal playback.
CD DVD VCD Playback from desired title, chapter or track.
Because DVD VIDEO discs use digital technology, a title can be divided into individual chapters (similar to tracks on a CD).
(At the time of DVD playback)
REMOTE
⑦ Press ON SCREEN key.
② Press the Cursor up/down (▲/▼) keys on the remote to select the title or chapter icon.
Title icon
Chapter icon
③ Press the Cursor right (▶) key or numeric keys.
(Example) To select track No. 23 : 2 3
(within 3 seconds)
or
- The display is switched off when no operation is performed for about 10 seconds.
(At the time of CD/VCD playback)
REMOTE
① Press the numeric keys.
(Example) To select track No. 23 : 2 3 (within 3 seconds)

- P.B.C. on mode of VCD, the Selecting a Track function may not work. → 18

- The Chapter feature won't work if the disc isn't formatted with separate chapters.
DVD Select Audio Language
If the disc was created with different language tracks, you can use the AUDIO key on the remote to temporarily change the DVD player's Audio setting.
During playback, press the AUDIO key on the remote. Audio language icon
Audio language icon
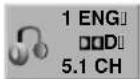
The language and digital audio output is switched each time the AUDIO key is pressed.
- The display is switched off when no operation is performed for about 5 seconds.

- The language feature only works if the disc was created with multiple audio tracks.
- When you chose an audio language by the AUDIO key, you only override the audio language setting in the DVD Player's main menu (in the Language Preferences menu within Setup menu) temporarily.
CD VCD Select the Audio channel
You can choose to play back only the right or the left channel of audio recorded on the disc, or you can select stereo playback.
During VCD or CD playback, press the AUDIO key on the remote.
Audio cannel icon
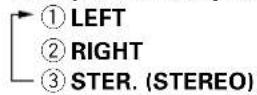
Each press the key switches the mode.
DVD Select Subtitle Language
You can change the Subtitle language while you're watching a disc (but only if the disc was created with subtitles).
During playback, press the SUBTITLE key on the remote.
Subtitle language icon
The language is switched each time the SUB-TITLE key is pressed.
- The display is switched off when no operation is performed for about 5 seconds.

- The subtitle feature only works if the disc was created with multiple subtitle tracks.
- The subtitle menu of the disc appears in some discs.
DVD VCD Using Marker
The marker feature lets you mark a point on the disc that you can go to quickly. You can store up to 9 marker points
Create the Marker
⑦ When you reach the scene you want to mark, press MARKER key.
Marker icon
● The marker icon appears on the TV screen briefly.
- Repeat to enter up to 9 marker points.
To recall or clear a marked scene
① During playback, press the SEARCH key on the remote.
Marker search icon
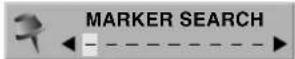
● The marker search menu appears on the screen.
② Within 10 seconds, press the Cursor left/right (◄/►) keys on the remote to select a marker number that you want to recall or clear.
③ Press the ENTER key to playback from the marked scene or press the CLEAR key to clear the selected number.
To recall
To clear

- If all 9 marker points are in use, you can still mark new scenes, but the previous marker points will be erased.
- Depending on the disc, the marker function may not work.
Clearing all marker points
● The marker points are cleared each time a disc is removed from the player or when the power is turned off.
DVD Select Camera angle
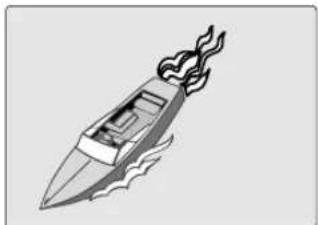
Some disc contains multiple angles particular scene or sequence. If the disc only has one angle, this feature won't work.
⑦During playback, press the ANGLE key on the remote.
Angle icon
natural_image
Illustration of a boat with flames and wavy water lines (no text or symbols)②Select the Camera angle with press the ANGLE key.
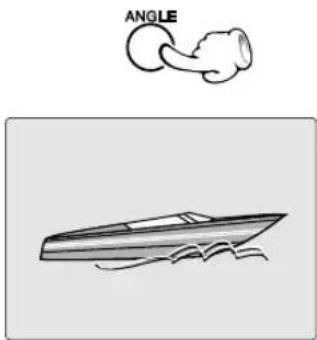
- The display is switched off when no operation is performed for about 5 seconds.
DVD Title Menu / Disc Menu
DVDs may offer menus that allow you to access special features.
To use the Title Menu
①Press the TOP MENU key on the remote.
- If the current title has a menu, the menu will appear on the screen. Otherwise, the disc menu may appear.
- The menu can list camera angles, audio language and subtitle options, and chapters for the title.
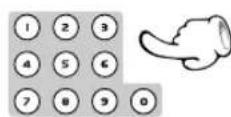
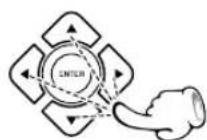
② Press the numeric keys or the Cursor keys (▲/▼/◄/►) on the remote to select an option, then press ENTER key.
or
- To remove the title menu, press TOP MENU key again.
To use the Disc Menu
①Press the MENU key on the remote.
● The disc menu is displayed.
② Press the numeric keys or the Cursor keys (▲/▼/◄/►) on the remote to select an option, then press ENTER key.
or
- To remove the title menu, press MENU key again.
DVD CD VCD Repeat play
Desired title, chapter, track or disc can be played back repeatedly.
At the time of DVD playback.
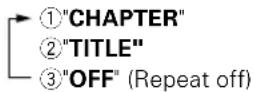
- "CHAPTER": Repeat the chapter that is playing.
- "TITLE": Repeat the title that is playing.
At the time of CD/VCD playback.
- "TRACK" : Repeat the track that is playing.
- "ALL": Repeat the disc that is playing.
During playback, press the REPEAT key on the remote.
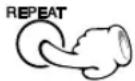
Repeat icon (TITLE)

Each press the key switches the REPEAT mode At the time of DVD playback.
At the time of CD/VCD playback.
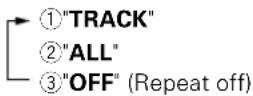
- To cancel repeat playback, press the REPEAT key and select "OFF".

If you press SKIP (▶▶) once during Repeat Track playback, the repeat playback cancels.
"MP3/WMA Repeat play" → 40

P.B.C. on mode of VCD, the Repeat play function does not work. → 18
DVD CD VCD A-B Repeat play
The A-B repeat function lets you mark a segment to repeat between the beginning "A" and the end "B" of the segment you want to replay.
⑦ Press the A-B key on the remote when you want to choose a scene (sound) as the beginning point. A-B
Repeat A icon
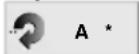
- "A *" display appears.
2 Press the A-B key again to choose a scene (sound) as the end point.
Repeat A-B icon
- "A - B" display appears and the repeat sequence begins.
- To cancel A-B Repeat playback, press the A-B key.
DVD VCD Zoom function
Use zoom to enlarge the video image.
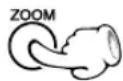
① During playback, press the ZOOM key on the remote.
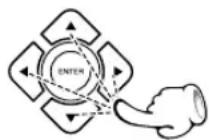
② Press the Cursor (◄/►/▲/▼) keys on the remote to move through the zoomed picture.
- To resume normal playback, press ZOOM key repeatedly or press CLEAR key.

Zoom may not work on some DVDs.
DVD Time Search
To start playing at any chosen time on the disc.
① During playback, press the ON SCREEN key on the remote.
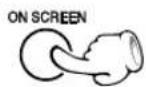
The time search box shows the elapsed playing time.
2 Press Cursor up/down (▲/▼) keys on the remote to select the time clock icon.
Time clock icon
- "--:" appears.
- The display is switched off when no operation is performed for about 10 seconds.
③ Input the required start time in hours, minutes and seconds from left to right.
- If you enter the wrong numbers, press CLEAR to remove the numbers you entered. Then input the correct numbers.
④ Press ENTER to confirm.
- Playback starts from the selected time.

Depending on the disc, the Time Search function may not work.
CD Using the TV screen to start CD playback
Once you insert an audio CD a menu appears on the TV screen.
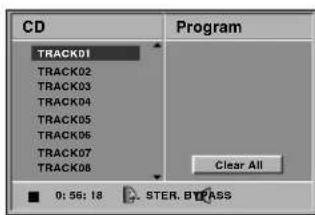
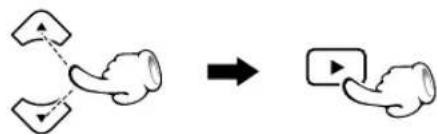
⑦ Press the Cursor up/down (▲/▼) keys on the remote to select a track then press PLAY (▶) or ENTER and playback starts.
flowchart
graph TD
    A["Process Node"] --> B["Output Node"]
    style A fill:#f9f,stroke:#333
    style B fill:#bbf,stroke:#333
- Press TOP MENU to move to the next page.
- Press MENU to move to the previous page.
You can listen to the desired tracks of the current CD or VCD in any desired order.
Program Edit
① Insert a disc and close the tray.
2 Press P.MODE key to enter the Program edit mode.
③ Select specific track by press Cursor up/down
(▲/▼) keys.
4 Press ENTRE key to register selected value onto Program list.
⑤ You can select maximum 30 values by repeating step ③ - ④.
⑥ Press Cursor right (▶) key.
The programmed track you selected last is highlighted on the program list.
⑦ Select the track you want to start playing on the Program list.
- Press TOP MENU to move to the next page.
- Press MENU to move to the previous page.
⑧ Press PLAY key to start.
Playback begins in the order in which you programmed tracks. Playback stops after all of the tracks on the Program list have played once.
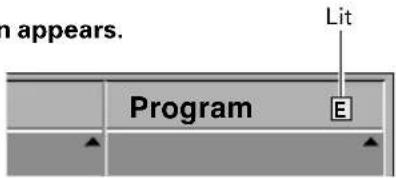
Program edit screen appears.
Example of CD playback
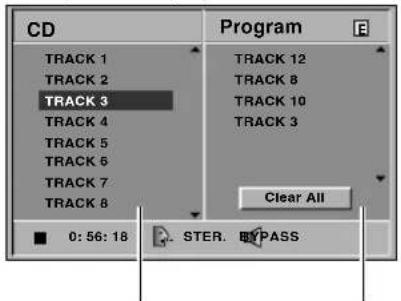
Track list
Program list
- MP3/WMA program playback → 41
- The unit stops when the STOP (■) key is pressed. To restart program play, press the PLAY key.
- Press P.MODE key to exit the Program edit mode.

P.B.C. on mode of VCD, the Program play function does not work. → 18
To repeat program play
During program playback, press the REPEAT key on the remote.
Each press the key switches the mode.
① "TRACK" : repeats the current track. ② "ALL" : repeats all the tracks on programmed list. ③ "OFF" : repeat off

If you press SKIP (▶▶) once during Repeat Track playback, the repeat playback cancels.
Delete a track from Program list
⑦ Press the Cursor (◄/►/▲/▼) keys to select the track that you wish to delete from the Program list.
②Press CLEAR key.
Delete the complete Program list
⑦Select "Clear All" icon, then press ENTER key.
The complete program for the disc is deleted.
- The programs are also cleared when the disc is removed.

P.B.C. on mode of VCD, the Program play function does not work. → 18
Guidance of MP3/WMA/JPEG
MP3/WMA/JPEG media that can be played back with this equipment
Usable media : CD-ROM, CD-R, CD-RW
Usable formats : ISO9660 level 1 (excluding expanded formats)
Files that can be played back : MP3 files, WMA files and JPEG files
Creating media for playing back on this equipment
Compressing MP3/WMA
Please set up the transfer bit rate setting for the compression software when compressing MP3/WMA files as follow.
MP3 Files : 128kbps recommended (32kbps-320kbps)
WMA Files : 128kbps recommended (40kbps-192kbps)
- This unit is compatible with 32 kHz, 44.1 kHz(recommended) and 48 kHz sampling frequencies.
● This unit is compatible with ID3-TAG Ver. 1. - DIGITAL output of MP3/WMA data is done not as MP3/WMA data, but as PCM data.
Naming folders and files
Single-byte characters between A and Z, single-byte numerals between 0 and 9, and the single-byte underscore(_) can be displayed. Ensure that the "mp3" (MP3 files), "wma" (WMA files) or "jpg" (JPEG files) extension log is attached to all file names
- Never add the "mp3" (or "wma") extension log to any files other than MP3 (or WMA) files. If the "mp3" (or "wma") extension log is added to any files other than MP3 (or WMA) files, the equipment will assume that they can be played back, and this will produce loud noises in the speakers, resulting in damage of adverse effects.
- Never add the "jpg" extension log to any files other than JPEG files. If the "jpg" extension log is added to any files other than JPEG, the unit will not operate normally.
Confirming media and files
Check to ascertain that MP3/WMA files can be played back correctly on the personal computer in use prior to saving them onto the media. Check to ensure that the saved file can be played back normally.
- It is not possible to confirm that files can be played back correctly while they are being saved onto the media.
When saving files onto media
Ensure that the session is closed or finalized when data has been written on media. There are cases where media on which the session has not be closed or finalized will not be played back correctly with this equipment.
- There are cases where the folder names and file names will not be displayed correctly depending on the software used to save them.
- Do not store files or folders other than MP3, WMA or JPEG on media to be played back with this equipment.
- It is recommended that ten or less sessions are stored when recording MP3/WMA files onto a media.
- In case of a multisession disc, some time may be required until playback begins.
- There are cases where playback is not possible when MP3/WMA/JPEG files (CD-ROM) and music CD information (CD-DA) are saved on the same media.
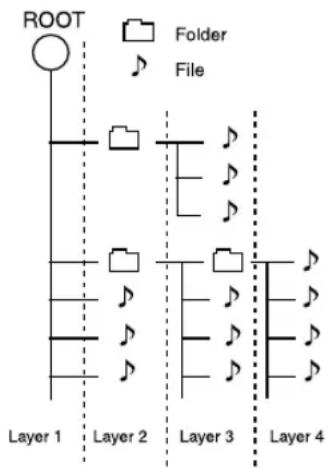
Example for a hierarchical structure
flowchart
graph TD
    A["ROOT"] --> B["Layer 1"]
    A --> C["Layer 2"]
    A --> D["Layer 3"]
    A --> E["Layer 4"]
    B --> F["Folder Icon"]
    C --> G["Folder Icon"]
    D --> H["Folder Icon"]
    E --> I["Folder Icon"]
    style A fill:#fff,stroke:#000
    style B fill:#fff,stroke:#000
    style C fill:#fff,stroke:#000
    style D fill:#fff,stroke:#000
    style E fill:#fff,stroke:#000

Folder names and file names are displayed up to 8 characters. When folder names and file names are recorded with more than 8 characters, the names will be displayed in abbreviated form.
Playing back MP3/WMA/JPEG files
- It is not possible to play back folders and files that exceed the maximum limitations of the media.
- A certain amount of time is required for the player to confirm the media on which MP3/WMA/JPEG files have been recorded before playback will commence.
Playback
①Insert a disc and close the tray.
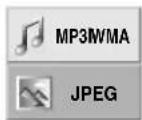
- The MP3/WMA-JPEG choice menu appears on the TV screen.
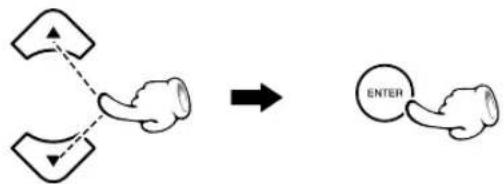
② Press Cursor up/down (▲/▼) keys on the remote to select MP3/WMA or JPEG, then press the ENTER.
flowchart
graph TD
    A["Input 1"] --> C["Splitter"]
    B["Input 2"] --> C["Splitter"]
    C --> D["ENTER"]
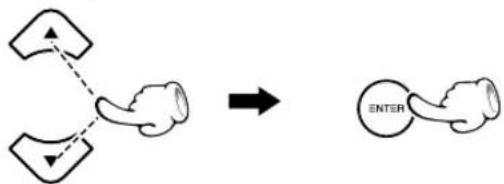
③ Press Cursor up/down (▲/▼) keys on the remote to select desired folder, then press the ENTER key
flowchart
graph TD
    A["Left Arrow"] --> B["Right Arrow"]
    B --> C["ENTER"]
    style A fill:#fff,stroke:#000
    style B fill:#fff,stroke:#000
    style C fill:#fff,stroke:#000
Press RETURN key to move to the MP3/WMA-JPEG choice menu.
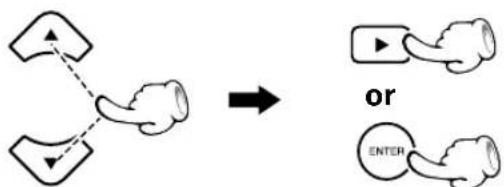
4 Press Cursor up/down (▲/▼) keys on the remote to select desired file, then press the PLAY key or the ENTER key to start playback.
flowchart
graph TD
    A["Node 1"] --> B["Node 2"]
    B --> C["Node 3"]
    style A fill:#f9f,stroke:#333
    style B fill:#bbf,stroke:#333
    style C fill:#dfd,stroke:#333
    D["OR"] --> E["OR"]
    E --> F["ENTER"]
- Press TOP MENU to move to the next page.
- Press MENU to move to the previous page.
- When JPEG files are displayed, the display is switched automatically from one file to the next. (Slide Show) ("Change the Slide speed" [40])
To stop playback press the ■ (stop) key.
To pause playback (Still picture)
Press the II key during playback (MP3/WMA), or press the II key during slide show (JPEG).
MAIN UNIT
REMOTE
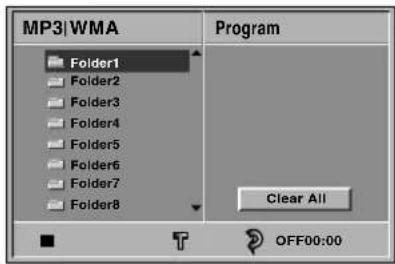
A list of files in the folder appears.
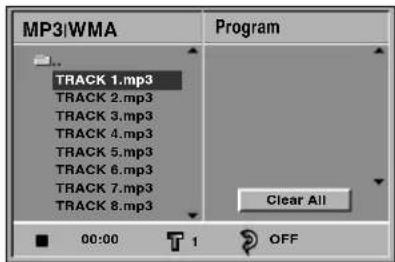
If you are in a file list and want to return to the Folder list, use the Cursor up/down (▲/▼) keys on the remote to highlight ▶- icon and press ENTER to return to the previous menu screen.
Playback start. (MP3/WMA files)
Viewing the file proceeding starts. (JPEG files)
During viewing a file, press RETURN key on the remote to move to the previous menu (JPEG menu).
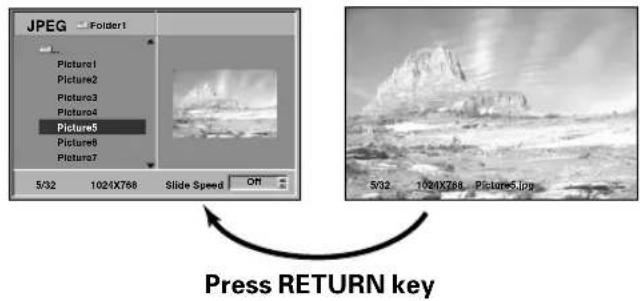
To return to the playback or slide show, press the ▶ (play) key or press the II (pause) key.
Searching (only for MP3/WMA files)→ 30
① During playback, press the ◀◀◀ or ▶▶▶ key for more than 2 seconds.
MAIN UNIT
REMOTE
② Press and hold the ◀◀ or ▶▶ key repeatedly.
● Each press switches the searching speed.
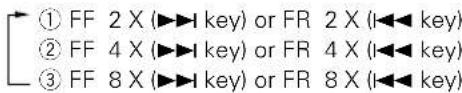
- Press the ▶ key at any time to resume normal playback.
Skipping files→30
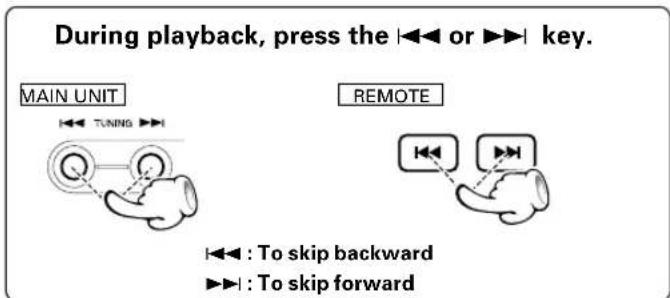
Repeat play (only for MP3/WMA files)→ 34
Desired file can be played back repeatedly.
- "Track": Repeat the file that is playing.
- "All": Repeat the folder that is playing.
During playback, press the REPEAT key on the remote.
Each press the key switches the REPEAT mode
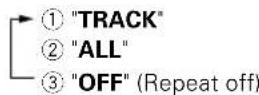
- To cancel repeat playback, press the REPEAT key and select "OFF".

If you press SKIP (▶▶) once during Repeat Track (file) playback, the repeat playback cancels.
Change the Slide speed (only for JPEG files)
The Slide show function can be used to switch photo images automatically from one file to the next. There are four Slide speed options.
① Playback a JPEG file. → 39
2 Press Cursor (◄/►/▲/▼) keys on the remote to highlight the speed icon.
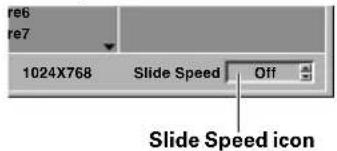
③ Press Cursor up/down (▲/▼) keys on the remote to select the option you want to use then press ENTER key.
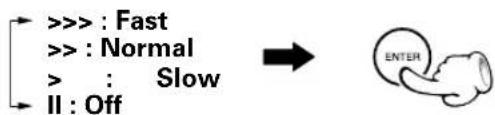
flowchart
graph TD
    A[">>> : Fast"] --> B[">> : Normal"]
    B --> C["> : Slow"]
    C --> D["II : Off"]
    D --> A
To flip picture (only for JPEG files)
Press the Cursor up/down (▲/▼) keys on the remote to flip the picture horizontally or a vertically.
To rotate picture (only for JPEG files)
Press the Cursor left/right (◄/►) keys on the remote to rotate the picture clockwise or counter clockwise.
MP3/WMA program playback (→ 36)
You can listen to the desired files of the current MP3/WMA disc in any desired order.
Program Edit
① Insert a disc and close the tray.
2 Press P.MODE key to enter the Program edit mode.
③ Select specific file by press Cursor up/down (▲/▼) keys.
4 Press ENTRE key to register selected value onto Program list.
⑤ You can select maximum 30 values by repeating step ③ - ④.
6 Press Cursor right (▶) key.
The programmed track you selected last is highlighted on the program list.
⑦ Select the track you want to start playing on the Program list.
- Press TOP MENU to move to the next page.
- Press MENU to move to the previous page.
⑧ Press PLAY key to start.
Playback begins in the order in which you programmed files. Playback stops after all of the files on the Program list have played once.
Program edit screen appears.
To repeat program play
During program playback, press the REPEAT key on the remote.
Each press the key switches the mode.
① "TRACK": repeats the current file.
② "ALL": repeats all the files on programmed list.
③ "OFF"

If you press SKIP (▶▶) once during Repeat Track playback, the repeat playback cancels.
Delete a track from Program list
① Press the Cursor up/down (▲/▼) keys to select the file that you wish to delete from the Program list.
② Press CLEAR key.
Delete the complete Program list
⑦ Select "Clear All" icon, then press ENTER key.
The complete program for the disc is deleted.
● The programs are also cleared when the disc is removed.
Sleep Timer
You can set this receiver to turn off automatically at a specified time.
Press SLEEP key on the remote to set the desired sleep time.
The SLEEP indicator and sleep time appears in the display window.
- Each time you press SLEEP key the setting changes in the following order.

flowchart
graph LR
    A["(SLEEP) 90→80→70→···→20→10→OFF"] --> B["↑"]
- You can check the time remaining before the DVD/CD receiver turns off.
Press SLEEP key. The remaining time appears in the display window.
DIMMER function
The display brightness of the main unit can be changed.
Press the DIMMER key to dim or bright.
DVR-6300 (EN/K,P,E,X)
What appears to be a malfunction may not always be serious. If your unit should not perform as expected, consult the table below to see if the problem can be corrected before seeking help from your dealer or service representative.
Operation to reset
The microprocessor may fall into malfunction (impossibility to operate erroneous display, etc.) when the power cord is unplugged while power is ON or due to an external factor.
In this case, switch off the power, wait for several seconds, and then switch the power on again.
Remote control unit
| RemedyCauseSymptom | ||
| Remote control operation is not possible. | ● Batteries are exhausted.● The remote control is too far away from the system, the controlling angle is deviated or there is an obstacle in between. | ● Replace with new batteries.● Operate the unit inside the remote controllable range. |
Receiver, speakers
| RemedyCauseSymptom | ||
| Sound is not produced. | The speaker cords are disconnected.TheMUTEkey of remote control unit is switched ON.The headphone plug is inserted into the jack. | Connect properly referring to "System connections".SwitchMUTEOFF.Unplug the headphone plug. |
| Sound is not produced from the left or right speakers. | The speaker cords are disconnected. | Connect properly referring to "System connections". |
| Radio stations cannot be received. | The antennas have not been connected.A proper broadcasting band has not been selected.The frequency of the station to be received is not tuned. | Connect antennas.Select a band.Tune to the frequency of the desired station. |
| Noise interferes. | Car ignition noise.Influence of an electric appliance.A TV set is installed near the system. | Install the outdoor antenna in an apart position from the road.Switch the suspected electric appliance OFF.Install the TV or the system at an increased distance between them. |
| A station has been preset but it cannot be received by pressing the PRE-SET key. | The frequency of the preset station is not tunable.The preset memory has been cleared because the power cord has been unplugged for a long period. | Preset stations with tunable frequencies.Preset stations again. |
| No sound from the surround speakers | The LISTEN mode is STEREO. | Select Surround with the LISTEN MODE key. |
DVD player unit
| Symptom | RemedyCause | |
| Playback does not start when the ► key is pressed. | ● There is no disc in the player.● There are no signals recorded on the side of the disc being played. | ● Load a disc and press the ► key.● Turn the disc over and properly place it on the disc tray. |
| Playback starts but no image/sound is seen heard. | ● The TV is not turned on.● The connection cords are not properly connected. | ● Turn on the TV.● Properly reconnect the connection cords.→5 |
| The picture is disrupted when the image is fast forwarded or fast reversed. | ● The picture is slightly disrupted during fast forward and fast reverse operations. | ● This is not a malfunction. |
| No sound is heard. | ● The volume control of the TV or amplifier is not adjusted properly.● The player is in a special playback mode. | ● Set the sound volume to an appropriate level.● Press the ► key to resume normal play-back mode. |
| No picture is displayed. | ● Setting to progressive mode has been done for a TV not compatible with progressive mode. | ● Return to interlaced mode is made when the ■ (stop) key is pressed for at least 5 seconds. |
| The picture does not look good or the picture/sound quality is poor. | ● A nearby device is generating noise.● The disc is dirty.● The disc is damaged.● There is condensation on the optical lens. | ● Separate this unit as far as possible from the device you think is generating the noise.● Refer to the 'Disc handling precautions' section and wipe dirt from the disc. →8● Use a new disc.● Refer to the 'Caution on condensation' section and evaporate the condensation. →6 |
| It takes a while for the disc to start playing. | ● Time is required for the unit to detect the disc type and size and for the rotation of the motor to stabilize. This is not a malfunction. | ● Approximately 10 to 20 seconds are required for a disc to start playing, although the time differs depending on the disc. |
| The tray opens automatically. | ● The disc is not placed horizontally. | ● Properly place the disc on the tray. |
| The top and bottom of the screen cannot be seen, or the screen becomes black-and-white. | ● The video format of the disc being played does not match that of the connected TV monitor. | ● Refer to the 'Video formats' section ,and use a disc with the appropriate video format for your TV or a TV with the appropriate video format for the disc.→7 |
| The subtitle is not displayed. | ● The DVD disc being played does not contain the recording of subtitles.● The subtitle mode is set to off. | ● The subtitle cannot be displayed when the DVD disc being played does not contain the recording of subtitles.● Press the SUBTITLE key to switch on the subtitle mode.→32 |
| The voice (or subtitle) language cannot be changed. | ● The DVD disc being played does not contain the recording of more than one audio (or subtitle) language. | ● The voice (or subtitle) language cannot be changed when the DVD disc being played does not contain the recording of more than one voice (or subtitle) language. |
| The viewing angle cannot be changed. | ● The DVD disc being played does not contain the recording of more than one angle.● You are attempting to switch the angle in a DVD section where more than one angle is not recorded. | ● The viewing angle cannot be changed when the DVD disc being played does not contain the recording of more than one angle.● More than one viewing angle may be recorded only in limited sections in a disc. |
DVD player unit
DVR-6300 (EN/K,P,E,X)
| RemedyCauseSymptom | ||
| Playback will not start even after a title is selected. | A viewing restriction (PARENTAL) has been set for the disc. | Check the viewing restriction level (PA-RENTAL) setting. |
| The parental level cannot be changed. | You have forgotten the password. | Set the initial setup to the factory setup with the following procedure.1Press theSETUPkey on the remote to display the Setup menu.2Input the 6-digit number "210499" and the security code is cleared.3Enter a new code. |
| The voice or subtitle language selected in the initial setting is not played. | The DVD disc being played does not contain the recording of the selected voice or subtitle language.The initial playback language is specified by the DVD disc.The DVD specifications provide for selection at the menu screen. | Use a DVD disc containing the recording of the selected voice or subtitle language.PressSUBTITLEor theAUDIOkey on the remote and select the language.→32Select at the menu screen of the disc. |
| Menu screen messages are not shown in the desired language. | The menu language function (MENU) is not set to desired language. | Select disc menu language.→33 |
| A VCD cannot be played using menus. | The VCD disc being played is not compatible with P.B.C. | Menu playback is available only with VCD discs recorded with P.B.C. |
Inhibition icon
| RemedyCauseSymptom | ||
| The inhibition icon is displayed and remote control is not possible. | ● Playback is restricted intentionally by the software producer. | ● The operation is inhibited. Please try another operation. |
This product incorporates copyright protection technology that is protected by U.S. patents and other intellectual property rights. Use of this copyright protection technology must be authorized by Macrovision, and is intended for home and other limited viewing uses only unless otherwise authorized by Macrovision. Reverse engineering or disassembly is prohibited.
CONSUMERS SHOULD NOTE THAT NOT ALL HIGH DEFINITION TELEVISION SETS ARE FULLY COMPATIBLE WITH THIS PRODUCT AND MAY CAUSE ARTIFACTS TO BE DISPLAYED IN THE PICTURE. IN CASE OF 525 PROGRESSIVE SCAN PICTURE PROBLEMS, IT IS RECOMMENDED THAT THE USER SWITCH THE CONNECTION TO THE "STANDARD DEFINITION" OUTPUT. IF THERE ARE QUESTIONS REGARDING OUR TV SET COMPATIBILITY WITH THIS MODEL 525P DVD PLAYER, PLEASE CONTACT OUR CUSTOMER SERVICE CENTER.
Main unit
[Amplifier section]
Effective output power during STEREO operation
1 kHz, 10 % T.H.D. at 8 Ω ....55 W + 55 W
Effective output power during SURROUND operation
Front (1 kHz, 10 % T.H.D. at 8 Ω, one channel driven) 55 W + 55 W
Center (1 kHz, 10 % T.H.D. at 8 Ω, one channel driven) ...55 W
Surround (1 kHz, 10 % T.H.D. at 8 Ω, one channel driven) 55 W + 55 W
Subwoofer (100 Hz, 10 % T.H.D. at 4 Ω, one channel driven) 100 W
Input sensitivity / impedance
Tuning frequency range 87.5 MHz \~ 108 MHz
AM Tuner section
Tuning frequency range (for Europe and Australia) 522 kHz \~ 1,611 kHz
Tuning frequency range (for U.S.A. and Canada) 530 kHz \~ 1,720 kHz
[ DVD/CD/VIDEO CD player section ]
Signal read system ...... Semiconductor laser
Video output format (for U.S.A. and Canada) ..... NTSC
Video output format (for Europe and Australia) .... PAL/NTSC
[Video section]
input level / impedance
(for U.S.A. and Canada)
Y-signal 1 Vp-p /75 Ω
C_B / C_R -signal 0.7 Vp-p /75 Ω
RGB output (SCART) (for Europe)....0.7 Vp-p /75 Ω
[General]
Power consumption.... 70 W
Dimensions ...... W: 360 mm (14-3/16")
H: 74 mm (2-15/16")
D: 375 mm (14-13/16")
Weight (net) 4.4 kg (9.7 lb)
Speaker system
[ KSW-6300 ]
(Front/Center)
Enclosure ...... Bass-Refresh (Magnetically shielded)
Speaker configuration .... 50 mm (2"), cone type
Impedance 8 Ω
Power Handling Capacity (DVR-6300) 60 W
Dimensions W: 80 mm (3-1/8")
H: 160 mm (6-5/16")
D: 98 mm (3-7/8")
Weight (net) 0.5 kg (1.1 lb)(1 piece)
(Surround)
Enclosure ...... Bass-Refrex
Speaker configuration .... 50 mm (2"), cone type
Impedance 8 Ω
Power Handling Capacity (DVR-6300) 60 W
Dimensions W: 80 mm (3-1/8")
H: 160 mm (6-5/16")
D: 98 mm (3-7/8")
Weight (net) 0.4 kg (0.9 lb) (1 piece)
(Subwoofer)
Enclosure ...... Bass-reflex type
Speaker configuration
Woofer 160 mm (6-1/2"), cone type
Impedance 4 Ω
Power Handling Capacity (DVR-6300) 100 W
Dimensions....W: 140 mm (5-1/2")
H: 350 mm (13-3/4")
D:325 mm (12-13/16")
Weight (net) 4.0 kg (8.8 lb)
Speaker system (continued)
[ KSW-7300 ]
(Front)
Enclosure ...... Bass-Refresh (Magnetically shielded)
Speaker configuration .... 50 mm (2"), cone type × 2
Impedance 8 Ω
Power Handling Capacity (DVR-6300) 60 W
Dimensions W: 124 mm (4-7/8")
H: maximum 337 mm (13-1/4")
D: 150 mm (5-7/8")
Weight (net) ..... 1.4 kg (3.1 lb)(1 piece, including the stand)
(Center)
Enclosure ...... Bass-Refrex (Magnetically shielded)
Speaker configuration .... 50 mm (2"), cone type × 2
Impedance 8 Ω
Power Handling Capacity (DVR-6300) 60 W
Dimensions W: 210 mm (8-1/4")
H: 80 mm (3-1/8")
D: 98 mm (3-7/8")
Weight (net) 0.8 kg (1.8 lb)
(Surround)
Enclosure ...... Bass-Refrex
Speaker configuration .... 50 mm (2"), cone type
Impedance 8 Ω
Power Handling Capacity (DVR-6300) 60 W
Dimensions W: 80 mm (3-1/8")
H: 160 mm (6-5/16")
D: 98 mm (3-7/8")
Weight (net) 0.4 kg (0.9 lb) (1 piece)
(Subwoofer)
Enclosure ...... Bass-reflex type
Speaker configuration
Woofer 160 mm (6-1/2"), cone type
Impedance 4 Ω
Power Handling Capacity (DVR-6300) 100 W
Dimensions ...... W: 140 mm (5-1/2")
H: 350 mm (13-3/4")
D:325 mm (12-13/16")
Weight (net) 4.0 kg (8.8 lb)
KENWOOD
For your records
Record the serial number, found on the back of the unit, in the spaces designated on the warranty card, and in the space provided below. Refer to the model and serial numbers whenever you call upon your dealer for information or service on this product.

- Before applying power
- Safety precautions
- WARNING : TO PREVENT FIRE OR ELECTRIC SHOCK, DO NOT EXPOSE THIS APPLIANCE TO RAIN OR MOISTURE.
- The marking of products using lasers
- Unpacking
- Accessories
- For the U.S.A.
- CAUTION:
- Note to CATV system installer
- For Canada
- FCC WARNING
- NOTE:
- Special features
- Contents
- Preparations
- Operations
- Knowledge
- Types of playable discs
- Unplayable discs
- Icons on the DVD VIDEO discs
- Region codes in the world
- Region codes of the DVD VIDEO discs that can be played with this player
- Restrictions due to difference between discs
- Checking the Video Format
- Check the video format of the TV to be used
- When the video formats are different :
- To select TV Type (For Europe and Australia)
- ⑦ Remove the disc from the unit, then close the tray.
- 2Press and hold the PAUSE key on the front panel for more than 5 seconds to be able to select a TV type (PAL, NTSC or AUTO).
- Maintenance
- Maintenance of the unit
- In regard to contact cleaner
- Reference
- Disc handling precautions
- Handling
- Cleaning
- Storage
- Never play a cracked or warped disc
- Disc accessories
- Note related to transportation and movement
- Before transporting or moving this unit, carry out the following operations.
- Caution on condensation
- Caution
- Malfunction of microcomputer
- Loudspeakers
- Attaching the cushions
- (For DVT-6300 and DVT-7300)
- Subwoofer
- AM loop antenna
- AM loop antenna connection
- FM antenna
- FM indoor antenna connection
- FM outdoor antenna (commercially available)
- Connecting to a TV (for U.S.A., Canada and Australia)
- Connecting to a TV (for Europe)
- Connecting to Audio video equipments
- DTS disclaimer clause
- Standby mode
- Operation
- Preparation for Set Up
- Set up menu
- Initial Settings
- To display and exit the Menu:
- General Operation
- Language
- Disc Audio/Disc Subtitle/Disc Menu
- Select the language you prefer for the audio Track (Disc Audio), Subtitles, and the Disc Menu
- Menu Language
- TV Aspect
- LOCK (Parental Control)
- Rating
- When you have already registered a password;
- Unlock
- LOCK (Continued)
- Changing the Password (4-digit code)
- If you forget Password
- Country Code DVD
- Speaker Setup DVD
- Progressive Scan DVD (for U.S.A. and Canada)
- Others
- Dynamic Range Control (DRC) DVD
- Vocal DVD
- PBC VCD
- Hierarchical structure of VCD menus (P.B.C. function)
- Advancing
- Returning
- What are LISTEN modes?
- MOVIE mode:
- MUSIC mode:
- MATRIX mode:
- To set the LISTEN mode manually
- At the time of PCM or DOLBY DIGITAL (2 ch) source
- Positioning the speakers
- Operation near a TV
- Speaker level (volume)
- Settings
- Speaker selection
- Volume
- Size
- Distance
- Test
- Return
- On screen display
- Example:
- On-Screen Display during playing DVD
- On-Screen Display during playing VCD
- Last Scene Memory
- Preparation
- Basic use method
- Selecting the desired input
- Volume adjustment
- Muting the sound temporarily
- Listening through headphone
- Select the TUNER input
- Select the broadcast band
- Select a tuning mode
- Select a station
- P.CALL (preset call) Auto tuning Manual tuning
- Storing the broadcast stations (one-by-one presetting)
- Using RDS function (for Europe only)
- Functions made possible with RDS
- PTY (Program Type Identification) Search :
- PS (Program Service Name) Display :
- RT (Radio text) :
- CT (Clock Time) :
- Using the RDS Display function
- Select the FM broadcast station.
- Press the RDS. key on the remote.
- PS NAME
- RT display
- CT display
- PTY function
- Using the PTY search function
- PTY not found
- Basic play
- Load a disc.
- MAIN UNIT
- Start playback.
- REMOTE
- When a Disc Menu appears on the screen
- To stop playback
- To pause playback
- MAIN UNIT REMOTE
- Disc playback features
- CD DVD VCD Skipping chapters or tracks
- CD DVD VCD Searching
- (At the time of DVD playback)
- (At the time of CD/VCD playback)
- DVD VCD STEP (freeze frame and frame advance)
- DVD VCD Slow motion playback
- CD DVD VCD Playback from desired title, chapter or track.
- DVD Select Audio Language
- CD VCD Select the Audio channel
- DVD Select Subtitle Language
- DVD VCD Using Marker
- Create the Marker
- To recall or clear a marked scene
- Clearing all marker points
- DVD Select Camera angle
- DVD Title Menu / Disc Menu
- To use the Title Menu
- To use the Disc Menu
- DVD CD VCD Repeat play
- DVD CD VCD A-B Repeat play
- DVD VCD Zoom function
- DVD Time Search
- CD Using the TV screen to start CD playback
- Program Edit
- To repeat program play
- Delete a track from Program list
- Delete the complete Program list
- Guidance of MP3/WMA/JPEG
- MP3/WMA/JPEG media that can be played back with this equipment
- Creating media for playing back on this equipment
- Compressing MP3/WMA
- Naming folders and files
- Confirming media and files
- When saving files onto media
- Playing back MP3/WMA/JPEG files
- Playback
- To pause playback (Still picture)
- Searching (only for MP3/WMA files)→ 30
- Skipping files→30
- Repeat play (only for MP3/WMA files)→ 34
- Change the Slide speed (only for JPEG files)
- To flip picture (only for JPEG files)
- To rotate picture (only for JPEG files)
- MP3/WMA program playback (→ 36)
- Sleep Timer
- Press SLEEP key on the remote to set the desired sleep time.
- DIMMER function
- Operation to reset
- [Amplifier section]
- [ DVD/CD/VIDEO CD player section ]
- [Video section]
- [General]
- Speaker system
- [ KSW-6300 ]
- (Front/Center)
- (Surround)
- (Subwoofer)
- Speaker system (continued)
- (Front)
- (Center)
- Speaker configuration
- KENWOOD
- For your records
Brand : KENWOOD
Model : DVT-7300
Category : Home Theater