
DVT-6200 - Home Theater KENWOOD - Free user manual and instructions
Find the device manual for free DVT-6200 KENWOOD in PDF.


| Product Type | Home Theater System |
| Brand | Kenwood |
| Model | DVT-6200 |
| Color | Black |
| Dimensions (Main Unit) | 430 x 350 x 100 mm (16.9 x 13.8 x 3.9 in) |
| Weight (Main Unit) | 5.0 kg (11.0 lbs) |
| Power Supply | AC 120V, 60Hz (US) / AC 230V, 50Hz (EU) |
| Power Consumption | 120W (standby: <1W) |
| Amplifier Output Power | 5 x 100W (RMS, 8 ohms, 1% THD) |
| Supported Disc Formats | DVD-Video, DVD-R/RW, CD, CD-R/RW, MP3, JPEG |
| Audio Decoding | Dolby Digital, DTS, PCM |
| Video Outputs | Component, Composite, S-Video, HDMI (optional) |
| Audio Inputs | 2 x Analog RCA, 1 x Optical, 1 x Coaxial |
| Speaker Configuration | 5.1 channel (front L/R, center, surround L/R, subwoofer) |
| Remote Control | Included (IR) |
| FM Tuner | Yes, with RDS |
| Front Panel Display | FL display with basic controls |
| Maintenance | Clean with dry soft cloth; avoid liquids |
| Safety Features | Overheat protection, auto power-off after 30 min idle |
| Repairability | User-replaceable fuse; professional service for internal components |
Frequently Asked Questions - DVT-6200 KENWOOD
User questions about DVT-6200 KENWOOD
0 question about this device. Answer the ones you know or ask your own.
Ask a new question about this device
Download the instructions for your Home Theater in PDF format for free! Find your manual DVT-6200 - KENWOOD and take your electronic device back in hand. On this page are published all the documents necessary for the use of your device. DVT-6200 by KENWOOD.
USER MANUAL DVT-6200 KENWOOD
Before applying power

Caution : Read this page carefully to ensure safe operation.
Units are designed for operation as follows.
U.S.A. AC 120V only
Europe AC 230 V only
Australia AC 240 V only
Safety precautions

Caution : Read this page carefully to ensure safe operation.
WARNING : TO PREVENT FIRE OR ELECTRIC SHOCK, DO NOT EXPOSE THIS APPLIANCE TO RAIN OR MOISTURE.

CAUTION
RISK OF ELECTRIC SHOCK DO NOT OPEN


CAUTION: TO REDUCE THE RISK OF ELECTRIC SHOCK, DO NOT REMOVE COVER (OR BACK). NO USER-SERVICEABLE PARTS INSIDE. REFER SERVICING TO QUALIFIED SERVICE PERSONNEL.
THE LIGHTNING FLASH WITH ARROWHEAD SYMBOL, WITHIN AN EQUILATERAL TRIANGLE, IS INTENDED TO ALERT THE USER TO THE PRESENCE OF UNINSULATED "DANGEROUS VOLTAGE" WITHIN THE PRODUCT'S ENCLOSURE THAT MAY BE OF SUFFICIENT MAGNITUDE TO CONSTITUTE A RISK OF ELECTRIC SHOCK TO PERSONS.
THE EXCLAMATION POINT WITHIN AN EQUILATERAL TRIANGLE IS INTENDED TO ALERT THE USER TO THE PRESENCE OF IMPORTANT OPERATING AND MAINTENANCE (SERVICING) INSTRUCTIONS IN THE LITERATURE ACCOMPANYING THE APPLIANCE.
The marking of products using lasers
(For countries other than U.S.A. and U.S.-Military)
CLASS 1 LASER PRODUCT
The marking this product has been classified as Class 1. It means that there is no danger of hazardous radiation outside the product.
Location: Back panel
CAUTION
VISIBLE AND INVISIBLE LASER RADIATION WHEN OPEN. DO NOT STARE INTO THE BEAM OR VIEW DIRECTLY WITH OPTICAL INSTRUMENTS.
DO NOT PRESS ON THIS SURFACE
Inside this laser product, a laser diode classified as Class 2 laser radiation is contained as alerted by the internal caution label shown above. Do not stare into beam or view directly with optical instruments.
Location: DVD laser pick-up unit cover inside this product
Contents
Caution : Read the pages marked carefully to ensure safe operation.
Preparations
Introduction 2
Before applying power 2
⚠ Safety precautions 2
Contents 3
Accessories 4
IMPORTANT SAFEGUARDS 5
Important items....7
Discs information 8
Types of playable discs....8
Unplayable discs 8
Icons on the DVD VIDEO discs 8
Region Codes 9
Region codes in the world 9
Video formats 10
System Connections 11
Loudspeakers.... 11
AM loop antenna 12
FM antenna 12
Connecting to a TV.... 13
Connecting to a Satellite Tuner 13
Connecting to Audio video equipments.... 14
Controls and indicators.... 15
Operation of remote control unit 16
Set Up functions 18
Preparation for Set Up 18
Set up menu 18
Select TV Display 20
Select Picture Mode 20
Select ANGLE mark ON or OFF 21
Select OSD Language 21
Select CAPTIONS ON or OFF (NTSC only).... 22
Select Screen Saver on or off 22
Select Dynamic Range.... 23
Select VIDEO Output (only for some areas) 23
Select Audio Language.... 24
Select Subtitle Language 24
Select Disc Menu Language.... 25
Select Parental level 25
Change Password 26
Put back to the Defalt Setting.... 26
DVD menu language code list 27
Setting up LISTEN mode 28
What are LISTEN modes? 28
To set the LISTEN mode manually .... 29
Speaker setting 30
Speaker level setting 30
Delay time setting 31
Level setting using a music source 32
Operations
Let's put out some sound 34
Basic use method 34
Receiving broadcast station 36
Storing the broadcast stations (one-by-one presetting) ...... 37
Using RDS function (for Europe only).... 38
Playback of disc 40
Basic play 40
Disc playback features 41
On screen display 42
Various playback functions 43
Select Audio Language 43
Select the Audio channel 43
Select Subtitle Language 43
Select Camera angle 44
Random play 44
Repeat play 45
A-B Repeat play 45
Using Bookmarks 46
Using IntroScan function 46
Program play 47
Menu playback 49
Hierarchical structure of VCD menus 49
Playback without using the menu playback function
(In case of a P.B.C.-compatible VCD) (To P.B.C. On or Off) ..... 50
MP3/JPEG media playback 51
Guidance of MP3/JPEG 51
Playing back MP3/JPEG files 52
Selects the files to be played back directly 53
Rotating a picture (JPEG files only) 53
MP3/JPEG Repeat play 54
MP3/JPEG Random play 54
MP3 /JPEG program playback 55
Knowledge
In case of difficulty 56
Specifications.... 59
Unpacking
Unpack the unit carefully and make sure that all accessories are put aside so they will not be lost.
Examine the unit for any possibility of shipping damage. If your unit is damaged or fails to operate, notify your dealer immediately. If your unit was shipped to you directly, notify the shipping company without delay. Only the consignee (the person or company receiving the unit) can file a claim against the carrier for shipping damage.
We recommend that you retain the original carton and packing materials for use should you transport or ship the unit in the future.
Keep this manual handy for future reference.
Accessories
Please confirm that the following accessories are present.
Accessories packed with the main unit
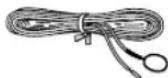
FM indoor antenna (1) Loop antenna (1)
(For U.S.A.) (For Europe and Australia)
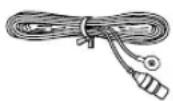
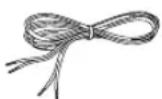
Speaker cords (6)
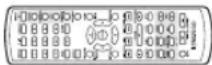
Remote control unit (1) Batteries (R6/AA) (2)
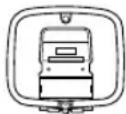
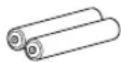
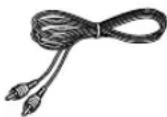
Video cord (1)
SCART plug (1) (for Europe only)
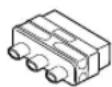
For the U.S.A.
CAUTION:
Use of controls or adjustments or performance of procedures other than those specified herein may result in hazardous radiation exposure.
In compliance with Federal Regulations, following are reproductions of labels on, or inside the product relating to laser product safety.
KENWOOD CORPORATION
2967-3, ISHIKAWA-CHO,
HACHIOJI-SHI,
TOKYO, JAPAN
KENWOOD CORP. CERTIFIES THIS EQUIPMENT CONFORMS TO DHHS REGULATIONS NO. 21 CFR
1040.10, CHAPTER 1, SUBCHAPTER J.
Location: Back Panel
For the U.S.A.
Note to CATV system installer
This reminder is provided to call the CATV system installer's attention to Article 820-40 of the NEC that provides guidelines for proper grounding and, in particular, specifies that the cable ground shall be connected to the grounding system of the building, as close to the point of cable entry as practical.
For the U.S.A.
FCC WARNING
This equipment may generate or use radio frequency energy. Changes or modifications to this equipment may cause harmful interference unless the modifications are expressly approved in the instruction manual. The user could lose the authority to operate this equipment if an unauthorized change or modification is made.
NOTE:
This equipment has been tested and found to comply with the limits for a Class B digital device, pursuant to Part 15 of the FCC Rules. These limits are designed to provide reasonable protection against harmful interference in a residential installation. This equipment may cause harmful interference to radio communications, if it is not installed and used in accordance with the instructions. However, there is no guarantee that interference will not occur in a particular installation. If this equipment does cause harmful interference to radio or television reception, which can be determined by turning the equipment off and on, the user is encouraged to try to correct the interference by one or more of the following measures:
-- Reorient or relocate the receiving antenna.
-- Increase the separation between the equipment and receiver.
-- Connect the equipment into an outlet on a circuit different from that to which the receiver is connected.
-- Consult the dealer or an experienced radio / TV technician for help.
DVT-6200 (EN/K,E,X)
Please read all of the safety and operating instructions before operating this appliance. Adhere to all warnings on the appliance and in the instruction manual. Follow all the safety and operating instructions. These safety and operating instructions should be retained for future reference.
-
Power sources – The appliance should be connected to a power supply only of the type described in the instruction manual or as marked on the appliance. If you are not sure of the type of power supply to your home, consult your appliance dealer or local power company. For appliances intended to operate from battery power, or other sources, refer to the instruction manual.
-
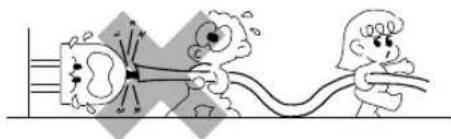
Power-cord protection – Power-supply cords should be routed so that they are not likely to be walked on or pinched by items placed upon or against them, pay particular attention to cords at plugs, convenience receptacles, and the point where they exit from the appliance.
natural_image
Illustration of two cartoon characters pulling a rope, with no visible text or symbols-
CAUTION - Polarization - This appliance may be equipped with a polarized alternating-current line plug (a plug having one blade wider than the other). This plug will fit into the power outlet only one way. This is a safety feature. If you are unable to insert the plug fully into the outlet, try reversing the plug. If the plug should still fail to fit, contact your electrician to replace your obsolete outlet. Do not defeat the safety purpose of the polarized plug.
-
Ventilation – Slots and openings in the cabinet are provided for ventilation and to ensure reliable operation of the appliance and to protect it from overheating, and these openings must not be blocked or covered. The appliance should be situated so that its location or position does not interfere with its proper ventilation.
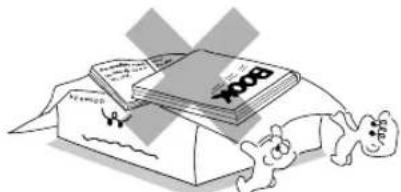
To maintain good ventilation, do not put records or a tablecloth on the appliance. Place the appliance at least 10 cm away from the walls.
Do not use the appliance on a bed, sofa, rug or similar surface that may block the ventilation openings. This appliance should not be placed in a built-in installation such as a bookcase or rack unless proper ventilation is provided or the manufacturer's instructions have been adhered to.
natural_image
Cartoon illustration of a person lying on a large box with an open book and a cat nearby (no text or symbols)-
Water and moisture - The appliance should not be used near water - for example, near a bathtub, washbowl, kitchen sink, laundry tub, in a wet basement, or near a swimming pool, etc.
-
Temperature - The appliance may not function properly if used at extremely low, or freezing temperatures. The ideal ambient temperature is above +5^ (41°F).
-
Heat - The appliance should be situated away from heat sources such as radiators, heat registers, stoves, or other appliances (including amplifiers) that produce heat.
-
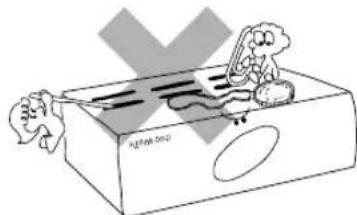
Electric shock – Care should be taken so that objects do not fall and liquid is not spilled into the enclosure through openings. If a metal objects, such as a hair pin or a needle, comes into contact with the inside of this appliance, a dangerous electric shock may result. For families with children, never permit children to put anything, especially metal, inside this appliance.
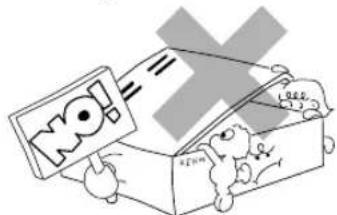
- Enclosure removal – Never remove the enclosure. If the internal parts are touched accidentally, a serious electric shock might occur.
- Magnetic fields - Keep the appliance away from sources of magnetic fields such as TV sets, speaker systems, radios, motorized toys or magnetized objects.
11.Cleaning – Unplug this appliance from the wall outlet before cleaning. Do not use volatile solvents such as alcohol, paint thinner, gasoline, or benzine, etc. to clean the cabinet. Use a clean dry cloth.
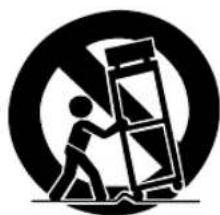
- Accessories – Do not place this appliance on an unstable cart, stand, tripod, bracket, or table. The appliance may fall, causing serious injury to a child or adult, and serious damage to the appliance. Use only with a cart, stand, tripod, bracket, or table recommended by the manufacturer, or sold with the appliance. Any mounting of the appliance should follow the manufacturer's instructions, and should use a mounting accessory recommended by the manufacturer. An appliance and cart combination should be moved with care. Quick stops, excessive force, and uneven surfaces may cause the appliance and cart combination to overturn.
natural_image
Symbolic icon of a person lifting a ladder inside a circle (no text or symbols)- Lightning – For added protection for this appliance during a lightning storm, or when it is left unattended and unused for long periods of time, unplug it from the wall outlet and disconnect the antenna or cable system. This will prevent damage to the appliance due to lightning and power-line surges.
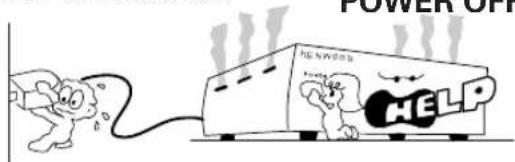
- Abnormal smell – If an abnormal smell or smoke is detected, immediately turn the power OFF and unplug the appliance from the wall outlet. Contact your dealer or nearest service center. POWER OFF!
- Damage requiring service – The appliance should be serviced by qualified service personnel when:
A. The power-supply cord or the plug has been damaged.
B. Objects have fallen, or liquid has been spilled into the appliance.
C. The appliance has been exposed to rain or water.
D. The appliance does not appear to operate normally by following the instruction manual. Adjust only those controls that are covered by the instruction manual as an improper adjustment of other controls may result in damage and will often require extensive work by a qualified technician to restore the appliance to its normal operation.
E. The appliance has been dropped, or the enclosure damaged.
F. The appliance exhibits a marked change in performance.
- Servicing - The user should not attempt to service the appliance beyond that described in the instruction manual. All other servicing should be referred to qualified service personnel.
- Outdoor antenna grounding – If an outside antenna is connected to the appliance, be sure the antenna system is grounded so as to provide some protection against voltage surges and built up static charges. Article 810 of the National Electrical Code ANSI/NFPA 70, provides information with respect to proper grounding of the mast and supporting structure, grounding of the lead-in wire to an antenna discharge unit, size of grounding conductors, location of antenna discharge unit, connection to grounding electrodes, and requirements for the grounding electrode. See Figure.
EXAMPLE OF ANTENNA GROUNDING AS PER NATIONAL ELECTRICAL CODE
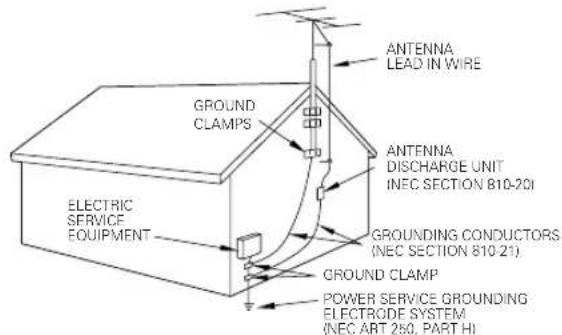
NEC - NATIONAL ELECTRICAL CODE
- Power lines - An outside antenna system should not be located in the vicinity of overhead power lines or other electric light or power circuits, or where it can fall into such power lines or circuits. When installing an outside antenna system, extreme care should be taken to keep from touching such power lines or circuits as contact with them might be fatal.
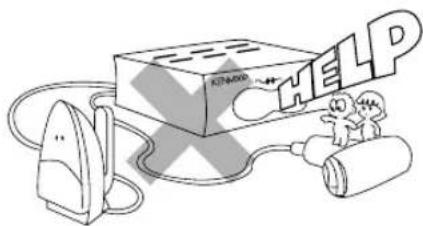
- AC outlets – Do not connect other audio equipment with a power consumption larger than that specified to the AC outlet on the rear panel. Never connect other electrical appliances, such as an iron or toaster, to it to prevent fire or electric shock.
- Overloading – Do not overload wall outlets, extension cords, or integral convenience receptacles as this can result in a risk of fire or electric shock.
- Attachment – Do not use attachments not recommended by the appliance manufacturer as they may cause hazards.
- Replacement parts – When replacement parts are required, be sure the service technician has used replacement parts specified by the manufacturer or have the same characteristics as the original parts. Unauthorized substitutions may result in fire, electric shock, or other hazards.
- Safety check – Upon completion of any service or repairs to this appliance, ask the service technician to perform safety checks to determine that the appliance is in proper operating condition.
Notes:
- Item 3 is not required except for grounded or polarized equipment.
- Item 17 and 18 are not required except for units provided with antenna terminals.
- Item 17 complies with UL in the U.S.A.
Maintenance
Maintenance of the unit
When the front panel or case becomes dirty, wipe with a soft, dry cloth. Do not use thinner, benzine, alcohol, etc. for these agents may cause discoloration.
In regard to contact cleaner
Do not use contact cleaners because it could cause a malfunction. Be specially careful not to use contact cleaners containing oil, for they may deform the plastic component.
Reference
Disc handling precautions
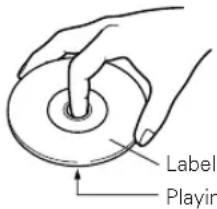
Handling
Hold the disc so that you do not touch the playing surface.
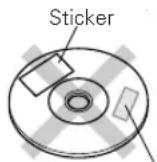
Sticky paste
Do not attach paper or tape to either the playing side or the label side of the disc.
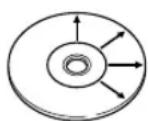
Cleaning
If there are fingerprint marks or foreign matter found on the disc, lightly wipe the disc with a soft cotton cloth (or similar) from the center of the disc outwards in a radial manner.
Storage
When a disc is not to be played for a long period of time, remove it from the player and store it in its case.
Discs which can be played with this unit
Use discs that comply with the IEC standard, for example a disc carrying the disc marking on the label surface.
Never play a cracked or warped disc
During playback, the disc rotates at high speed in the player. Therefore, to avoid danger, never use a cracked or deformed disc or a disc repaired with tape or adhesive agent. Please do not use discs which are not round because they may cause malfunction.
Disc accessories
The disc accessories (stabilizer, protection sheet, protection ring, etc.) which are marketed for improving the sound quality or protecting discs as well as the disc cleaner should not be used with this system because they may cause malfunction.
Note related to transportation and movement
Before transporting or moving this unit, carry out the following operations.
- Set the POWER ON/OFF switch to the ON without loading a disc.
- Wait a few seconds and verify that the display shown appears.
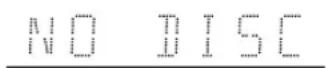
- Set the POWER ON/OFF switch to OFF.
Caution on condensation
Condensation (of dew) may occur inside the unit when there is a great difference in temperature between this unit and the outside. This unit may not function properly if condensation occurs. In this case, leave the unit for a few hours and restart the operation after the condensation has dried up.
Be specially cautious against condensation in the following circumstances:
When this unit is carried from one place to another across a large difference in temperature, when the humidity in the room where this unit is installed increases, etc.
Types of playable discs
The system using this unit does not only play music from CD but can also play the discs listed below to offer you high-quality entertainment of video of movies and live concerts.
| Playable Disc | DVD VIDEO CD (CD-R, CD-RW) | VCD (SVCD*) | |||||
| Logo mark on disc |   |  |   | ||||
| Disc size |  | 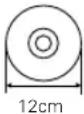 |  | 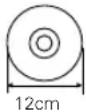 | 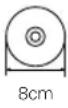 | 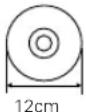 | |
| Played sides | One or both One or both | One side only One side only | One side only | One side only | |||
| Contents | Video + Audio | Approx. 41 min.(1 side, 1 layer)Approx. 75 min.(1 side, 2 layers)Approx. 82 min.(2 sides, 1 layer)Approx. 150 min.(2 sides, 2 layers) | Approx. 133 min.(1 side, 1 layer)Approx. 242 min.(1 side, 2 layers)Approx. 266 min.(2 sides, 1 layer)Approx. 484 min.(2 sides, 2 layers) | Max. 20 min. | Max. 74 min. | ||
| (In case of an SVCD, the possible play-back time becomes shorter.) | |||||||
| Audio | Max. 20 min., digital | Max. 80 min., digital | |||||
MP3 media and JPEG picture CD those can be played back with this equipment (CD-R, CD-RW) → 51
- * This unit can play SVCDs, but some functions will not work.
- This unit can play DVD-R, DVD+R, DVD-RW, and DVD+RW discs, but depending on the recording unit, the disc manufacturer, etc., playback sometimes may not be possible.
● This unit may also be incapable of playing certain CD-R/RW discs depending on their properties, recording conditions, etc.
Unplayable discs
This player cannot play back any of the following discs.
DVD AUDIO discs
DVD-ROM discs
DVD-RAM discs
SACD discs
CD-ROM discs (Except MP3 and JPEG discs [ ISO 9660 level 1])
VSD discs
CDV discs (Only the audio part can be reproduced.)
CD-G/CD-EG/CD-EXTRA discs (Only the audio can be reproduced.)
Photo CD discs (Never attempt to play them.)
- A DVD VIDEO disc with a region code which does not match this unit or without a region code. For details, see "Region Codes". →
- When the video format of a disc differs from that of the TV in use, the disc cannot be played normally. For details, see "Video Formats". → 10
Icons on the DVD VIDEO discs
| Icon Description | |
 | Indicates the region code where the disc can be played. |
 | Number of voice languages recorded with the audio function. The number in the icon indicates the number of voice languages. (Max. 8 languages) |
| [A8BK] | Number of subtitle languages recorded with the subtitle function. The number in the icon indicates the number of subtitle languages. (Max. 32 languages) |
| [HCSC] | Number of angles provided by the angle function. The number in the icon indicates the number of angles. (Max. 9 angles) |
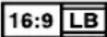 | Aspect ratios that can be selected. "NORMAL/LB" stands for Letter Box and "NORMAL/PS" for Pan/Scan. → [18] In the example on the left, the 16:9 video can be converted into letter box video. |
Every player of this model has a certain region code assigned to it based on the country where the player is used. When the player is used to play back DVD VIDEO discs, it can only play the DVD VIDEO discs carrying the region codes matching the region code of the player.
The region code for this player is described on the rear panel of the player.
Region codes in the world
The DVD players are given a region code according to the country or area it is marketed, as shown in the following map.
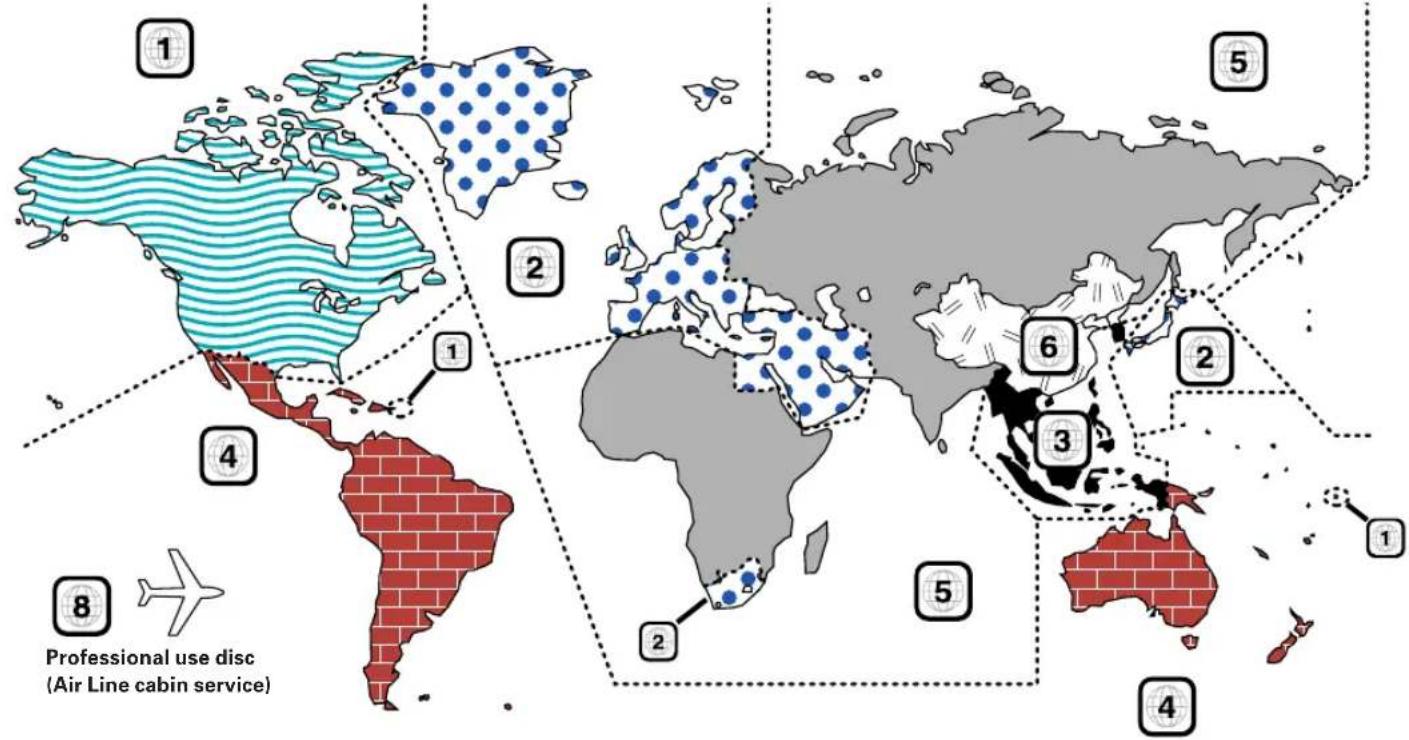
Region codes of the DVD VIDEO discs that can be played with this player
This player can play back a DVD VIDEO disc which carries the corresponding code to the region code of the player shown in the table above, a marking containing the region code of the player or the "ALL" marking shown below. Even when a DVD VIDEO disc does not carry any indication of the region code, it may sometimes unable to be played on this player due to certain restrictions.

Restrictions due to difference between discs
Some DVD and VCD discs can be played only in certain playback modes according to the intentions of the software producers. As this player plays discs according to their intentions, some functions may not work as intended by you. Please be sure to read the instructions provided with each disc. When an inhibition icon is displayed on the TV screen connected to the player, it indicates that the disc being played is under the restriction as described above.
Inhibition icon

The TV picture display and disc signal systems can be divided roughly into two TV formats (NTSC and PAL).
They are variable depending on countries and areas.
TV formats of major countries
| TV Format | Major Countries & Areas |
| NTSC | Japan, Taiwan, Korea, USA, Canada, Mexico, Philippines, Chile, etc. |
| PAL | China, U.K., Germany, Australia, New Zealand, Kuwait, Singapore, etc. |
(For Europe and Australia)
This unit has a function for changing the video format according to the TV type. (→18) The initial setting of this unit for "TV Type" is PAL. Please confirm the type of your TV.
(For other countries)
This unit has a function for changing the video format according to the TV type. (→18) The initial setting of this unit for "TV Type" is NTSC. Please confirm the type of your TV.
Checking the Video Format ("Preparation for Set Up" → 18)
Check the video format of the TV to be used
When the video formats are different :
Try playing the disc. If the video formats of the disc and TV do not match, the played video may be black and white or become as shown below.
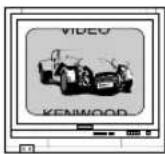
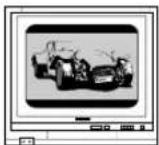
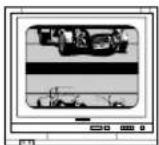
Top and bottom edges are not displayed.
Top and bottom areas are dark.
Picture turbulence due to sync unmatching.
Make connections as shown below.
When connecting the related system components, refer also to the instruction manuals of the related components.
Caution:
Do not plug in the power lead until all connections are completed.
Caution
Be sure to adhere followings. Or proper ventilation will be blocked causing damage or fire hazard.
- Do not place any objects impairing heat radiation onto the top of unit.
- Leave a space around the unit (from the largest outside dimension including projection) equal or greater than, shown below.
Top panel : 50 cm
Side panel : 10 cm
Back panel : 10 cm
Malfunction of microcomputer
If operation is not possible or erroneous display appears even though all connections have been made properly, reset the microcomputer referring to "In case of difficulty". - [56]
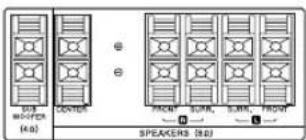
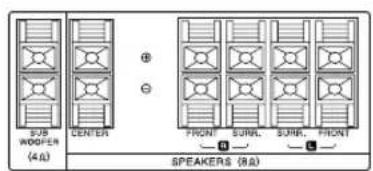
Loudspeakers
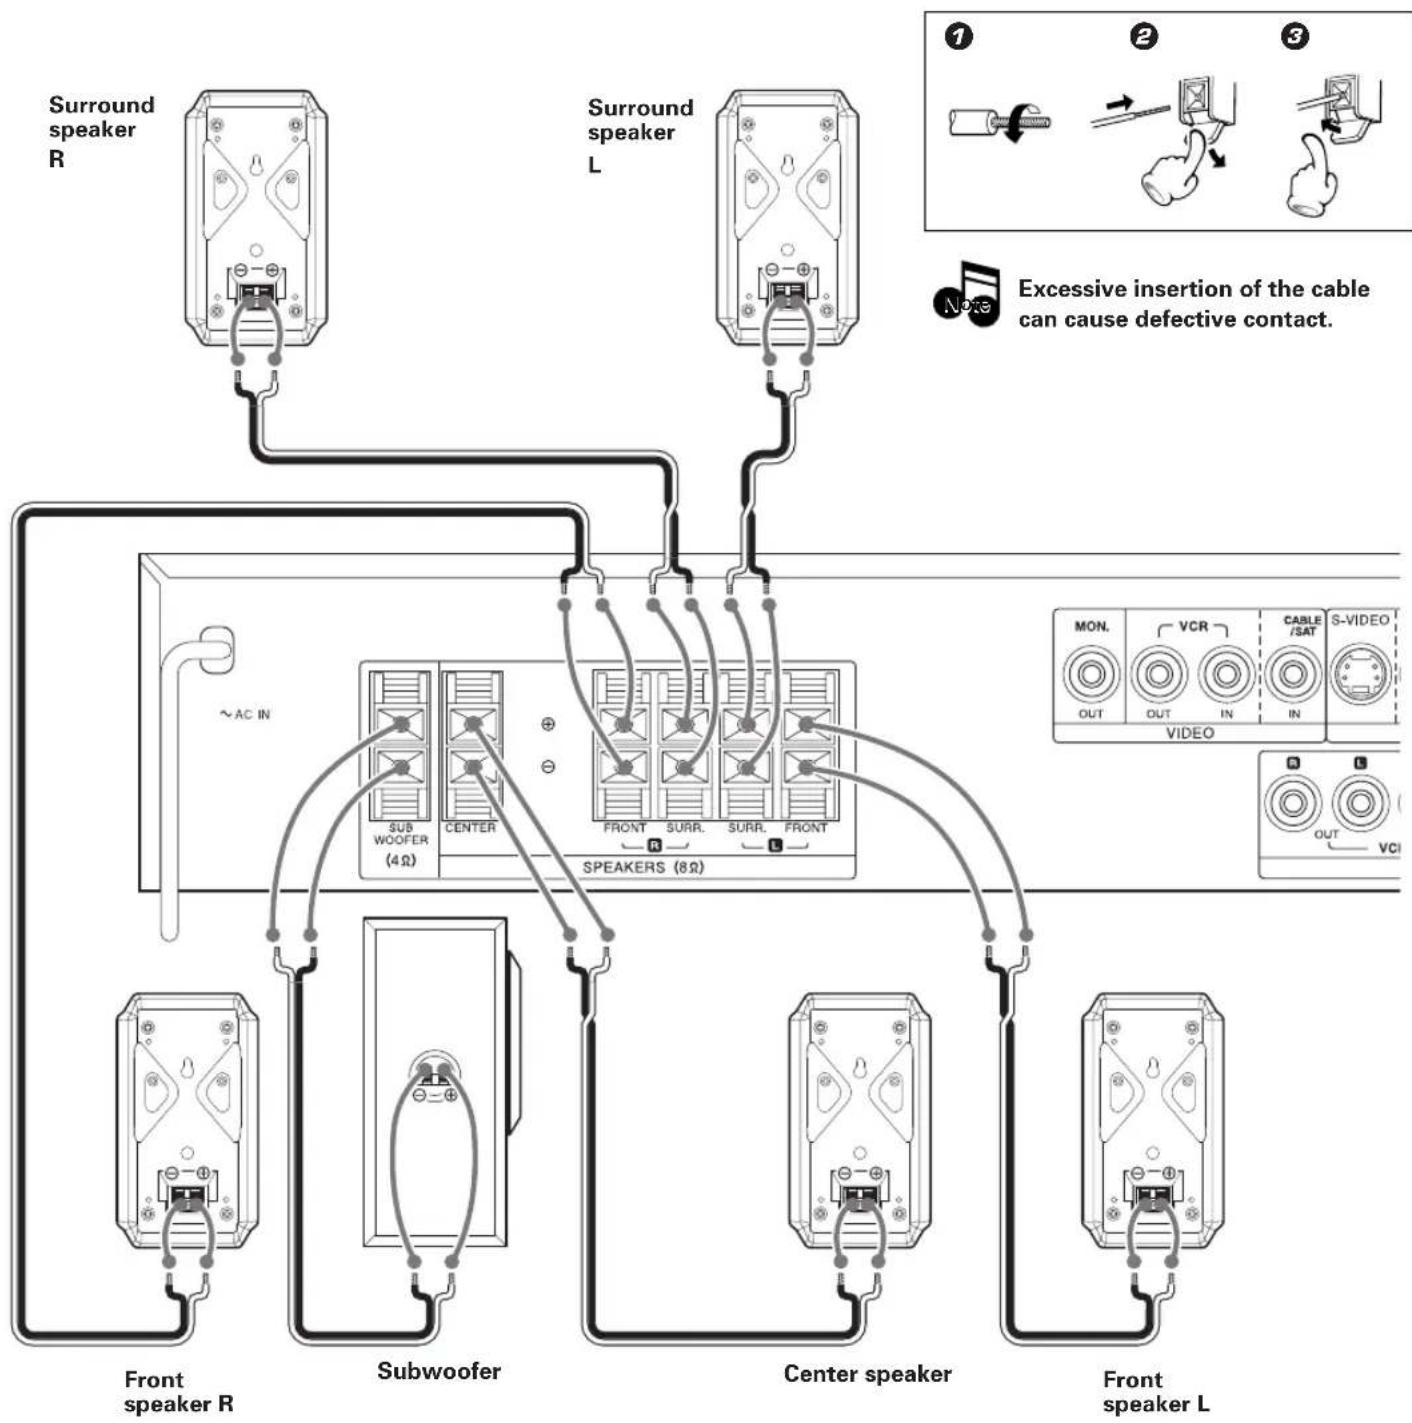
flowchart
graph TD
    A["Front speaker R"] --> B["Subwoofer"]
    B --> C["Center speaker"]
    C --> D["Front speaker L"]
    E["Subwoofer"] --> F["Speaker 4Ω"]
    G["Center speaker"] --> H["Speaker 8Ω"]
    I["Speaker 4Ω"] --> J["Back to Subwoofer"]
    K["Speaker 8Ω"] --> L["Back to Center Speaker"]
    M["Back to Front Speaker"] --> N["Back to Video"]
    style A fill:#f9f,stroke:#333
    style B fill:#ccf,stroke:#333
    style C fill:#cfc,stroke:#333
    style D fill:#fcc,stroke:#333
    style E fill:#ffc,stroke:#333
    style F fill:#cff,stroke:#333
    style G fill:#ffc,stroke:#333
    style H fill:#ffc,stroke:#333
    style I fill:#ffc,stroke:#333
    style J fill:#ffc,stroke:#333
    style K fill:#ffc,stroke:#333
    style L fill:#ffc,stroke:#333

Caution : Read this page carefully to ensure safe operation.
DVT-6200 (EN/K,E,X)
AM loop antenna
AM loop antenna connection
The supplied antenna is for indoor use. Place it as far as possible from the main system, TV set, speaker cords and power cord, and set it to a direction which provides the best reception.
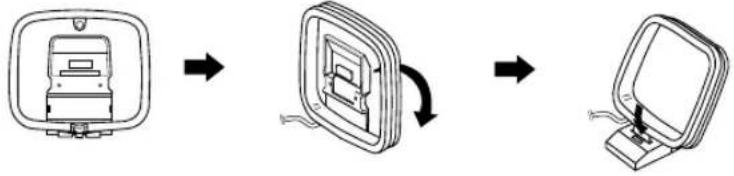
flowchart
graph LR
    A["Front View"] --> B["Internal Component"]
    B --> C["Computer Monitor"]
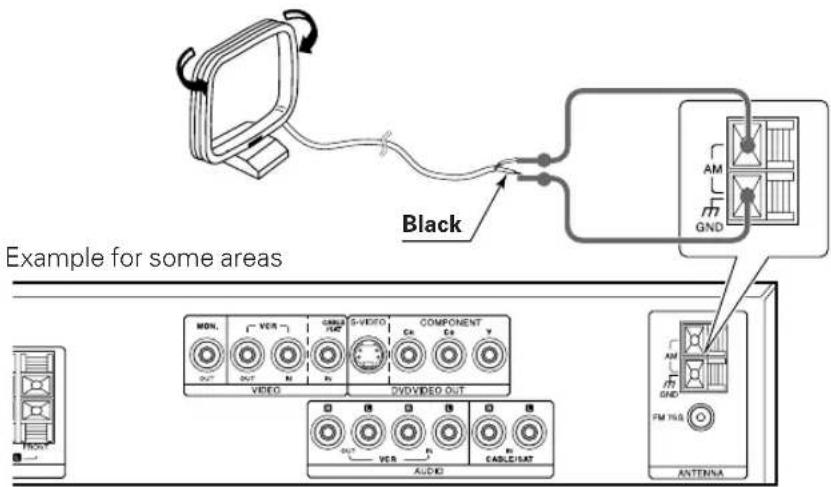
FM antenna
FM indoor antenna connection
The accessory antenna is for temporary indoor use only. For stable signal reception we recommend using an outdoor antenna. Remove the indoor antenna if you connect one outdoors.
①Connect to the antenna terminal.
②Locate the position providing good reception condition.
③Fix the antenna.
Example for some areas
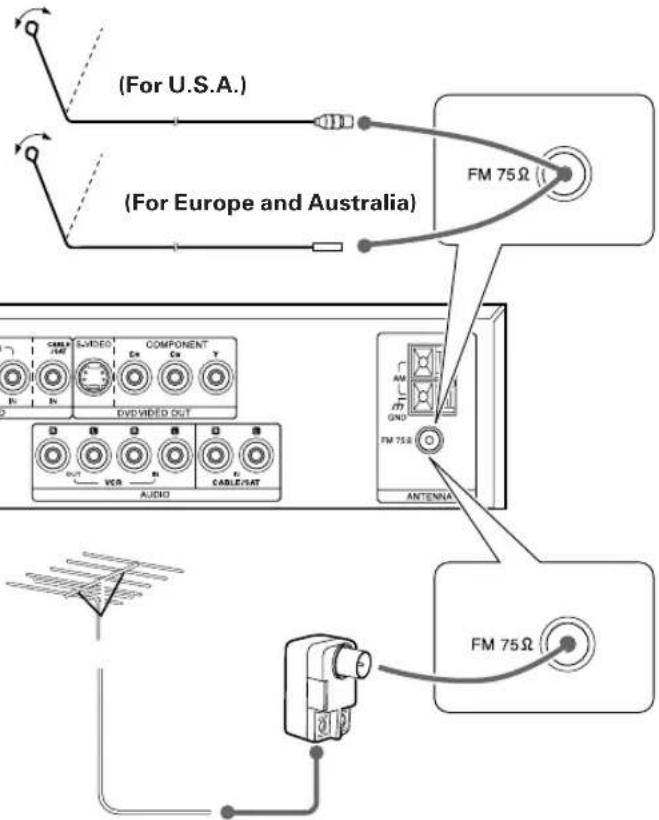
FM outdoor antenna (commercially available)
Lead the 75 Ω coaxial cable connected to the FM outdoor antenna into the room and connect it to the FM 75 Ω terminal.
Connecting to a TV
TV
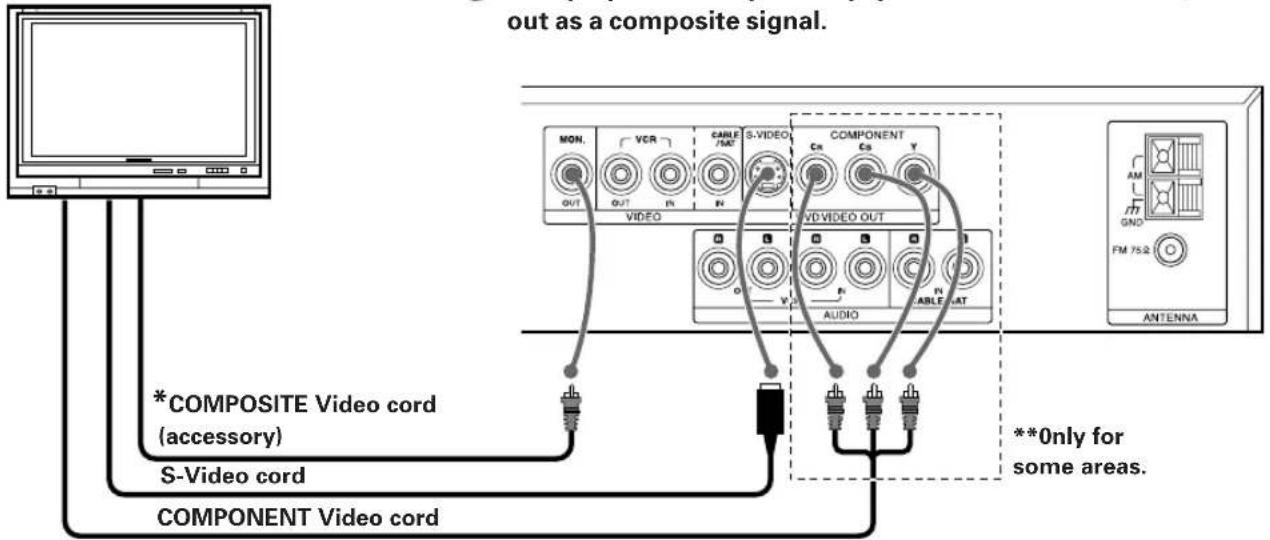

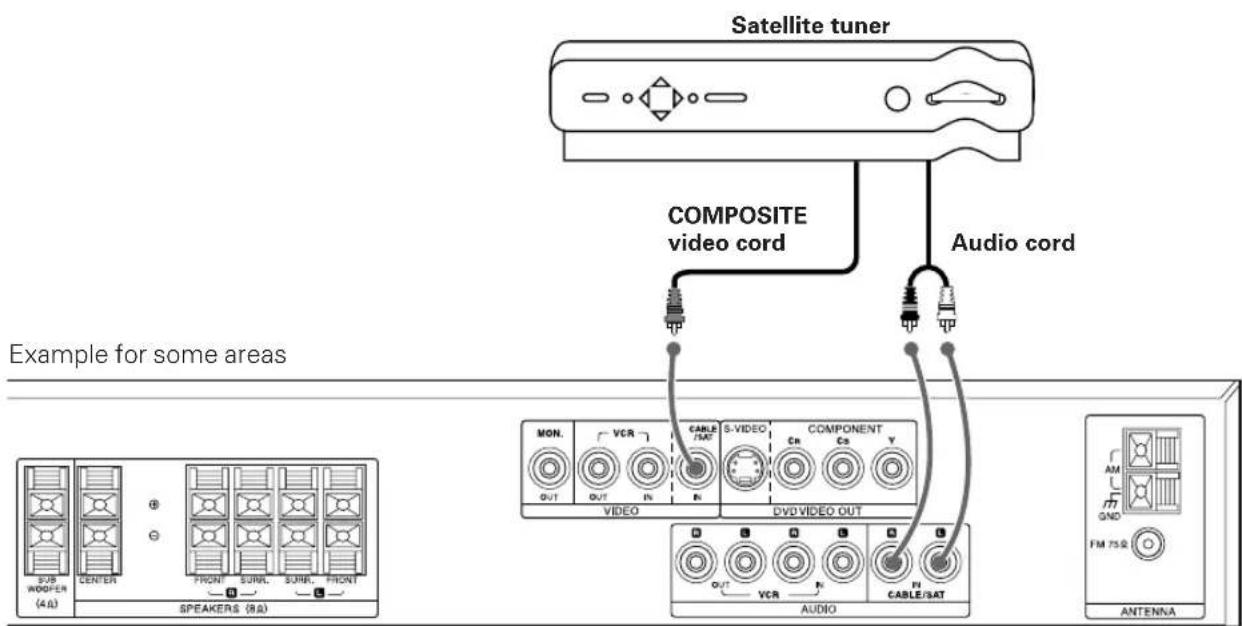
The S-Video output terminal of this unit is only for output of the built-in DVD player. The output of equipment connected to VCR, CABLE/SAT is put out as a composite signal.
\* For Europe only
If your TV set has a SCART terminal, connect the accessory SCART plug to the SCART terminal of the TV and connect the COMPOSITE video cord.

**COMPONENT connection corresponds only to some areas.
When the TV has a COMPONENT terminal, the DVD image will be played back with higher picture quality in case of COMPONENT connection. Connect the S-video or the COMPOSITE video cable also in this case.
Select the scanning method of the Component Video output using the PROGRESSIVE (ACTIVE EQ.) key on the front panel.
Depressed and keep pressing the key. Each time the key is being held down, the setting changes as follows.
ON: When progressive scanning is unavailable with certain discs, the scanning method is switched automatically to interlaced scanning. When the scanning method is changed, the scanning status will be displayed for a few seconds. OFF: Scanning method is fixed at interlaced scanning.
Connecting to a Satellite Tuner
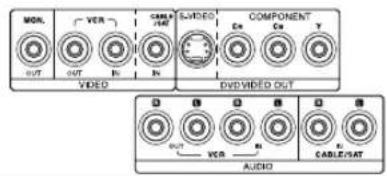
Connecting to Audio video equipments
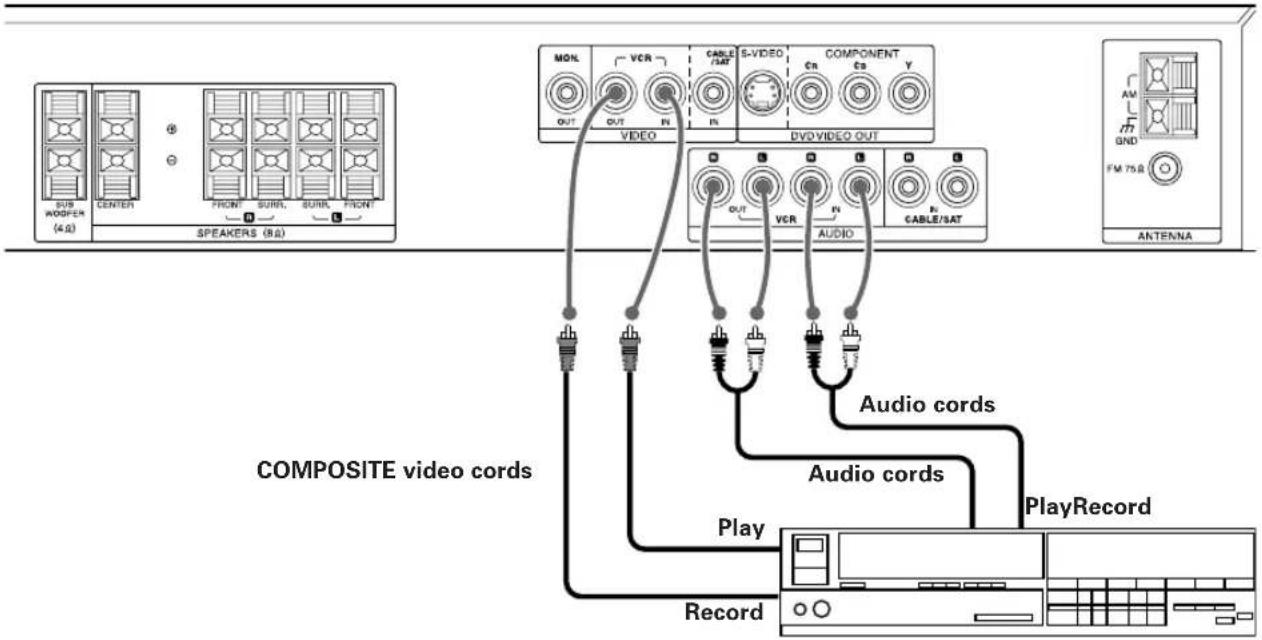
flowchart
graph TD
    A["COMPOSITE video cords"] --> B["Play"]
    A --> C["Audio cords"]
    A --> D["PlayRecord"]
    A --> E["Record"]
    B --> F["COMPOSITE video cords"]
    C --> G["Audio cords"]
    D --> H["PlayRecord"]
    I["SPEAKERS (8.6)"] --> J["SUB WOOPER (4.0)"]
    I --> K["CENTER"]
    I --> L["FRONT"]
    I --> M["SURRL"]
    I --> N["SURRL"]
    I --> O["FRONT"]
    I --> P["VIDEO OUT"]
    Q["MONL"] --> R["VER"]
    Q --> S["CABLE/SAT"]
    T["S-VIDEO"] --> U["Cn"]
    T --> V["Cs"]
    W["COMPONENT"] --> X["V"]
    W --> Y["DVD/VIDEO OUT"]
    Z["AM"] --> AA["GND FM 75.8"]
    AB["ANTENNA"] --> AC["FM 75.8"]

Recording from the VCR OUT terminal of this unit is only possible when the LISTEN MODE is set to STEREO.
DTS disclaimer clause
DTS Digital Surround™ is a discrete 5.1 channel digital audio format available on CD, LD, and DVD software which consequently cannot be decoded and played back inside most CD, LD, or DVD players. For this reason, when DTS-encoded software is played back through the analog outputs of the CD, LD, or DVD player, excessive noise will be exhibited. To avoid possible damage to the audio system, proper precautions should be taken by the consumer if the analog outputs are connected directly to an amplification system. To enjoy DTS Digital Surround™ playback, an external 5.1 channel DTS Digital Surround™ decoder system must be connected to the digital output (S/P DIF, AES/EBU, or TosLink) of the CD, LD or DVD player.
This unit is equipped with DTS Digital Surround™ decoder.
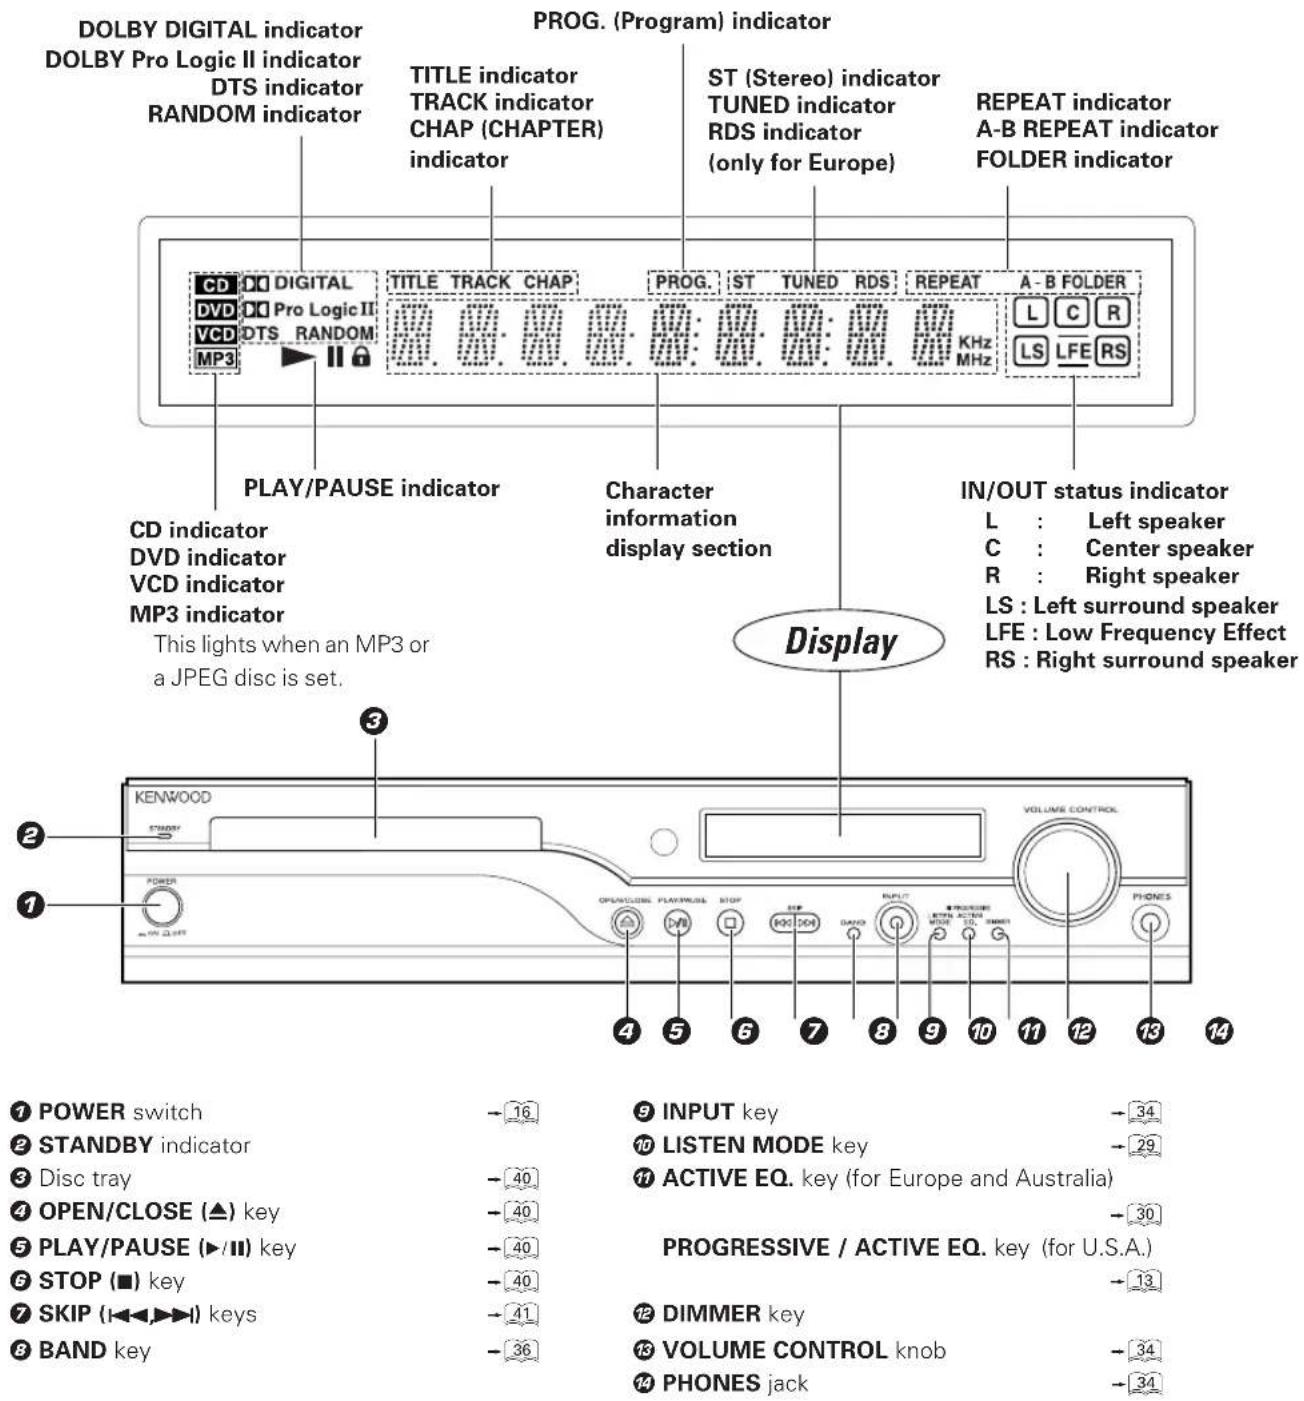
CAUTION
The power in this equipment will not be completely cut off from the AC wall outlet when the main switch is turned OFF.
Standby mode
While the standby indicator is lit, a small amount of power in supplied to the system to back up the memory.
This is called standby mode. Under the condition, the system can be turned ON by the remote control unit.
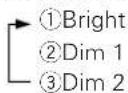
DIMMER function
The display brightness of the main unit can be changed.
DIMMER
Switching as shown below is done each time the DIMMER key on the remote control is pressed.
DVT-6200 (EN/K,E,X)
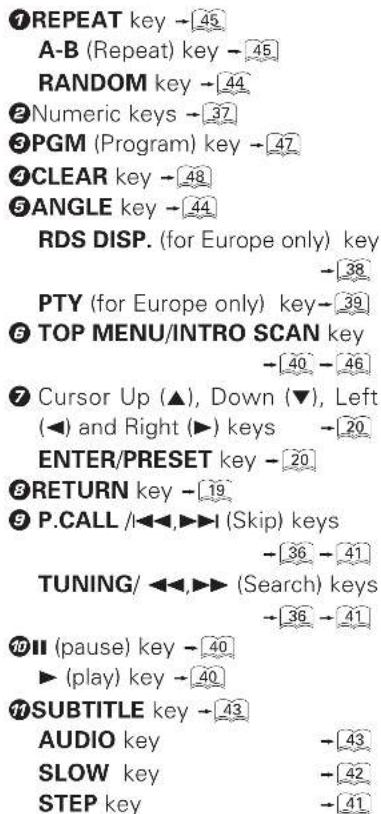
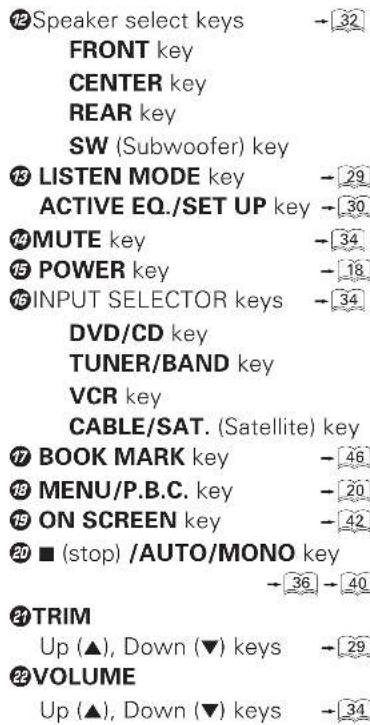
The keys on the remote control unit with the same names as on the main unit have the same function as the keys on the main unit.
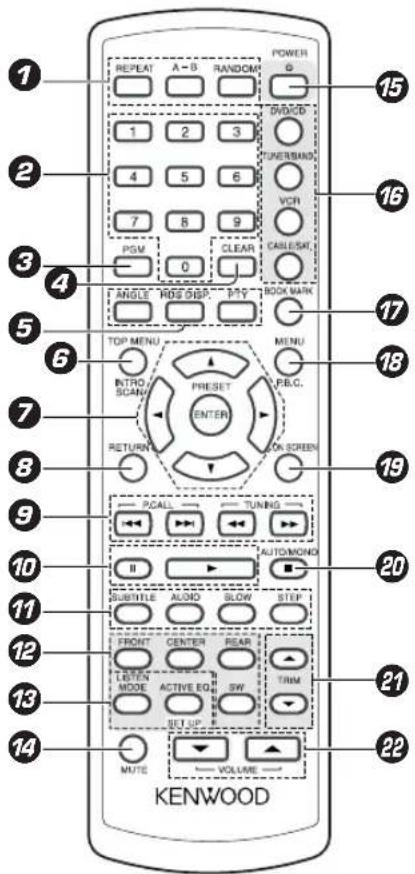
Model : RC-R0310E (for Europe) RC-R0310 (for other countries) Infrared ray system
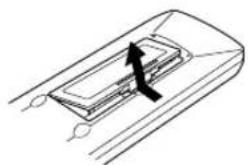
Loading batteries
① Remove the cover.
natural_image
Diagram of a device interior with a black arrow indicating rotation or movement (no text or symbols)② Insert batteries.
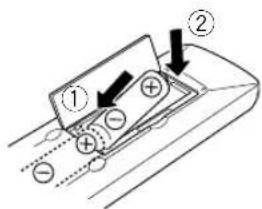
- Insert two R6 ("AA"-size) batteries following the polarity indications.
③ Close the cover.
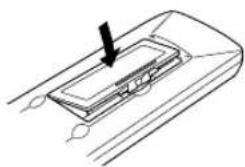
natural_image
Diagram of a device interior with a black arrow pointing to a component (no text or symbols)Operation
Insert the power plug into a power outlet, press the POWER switch of the main unit to ON, then press the POWER key on the remote control.
- When pressing more than one remote control keys successively, press the keys securely by leaving an interval of 1 second or more between pressing of keys.
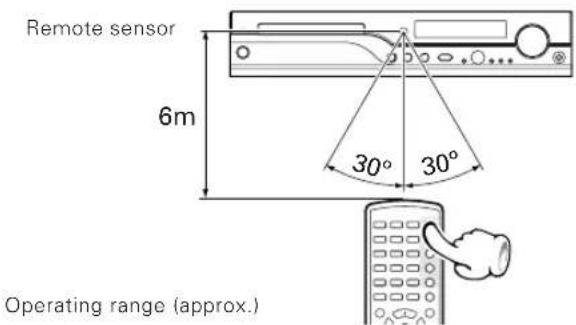

- The provided batteries are intended for use in operation checking, and their service life may be short.
- When the remote controllable distance becomes short, replace both of the batteries with new ones.
- If direct sunlight or the light of a high-frequency fluorescent lamp (inverter type, etc.) is incident to the remote sensor, malfunction may occur. In such a case, change the installation position to avoid malfunction.
DVT-6200 (EN/K,E,X)
natural_image
Line drawing of a vintage gramophone with a leafy top (no text or symbols)Preparation for Set Up
①Turn on the POWER.
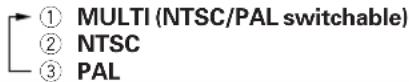
②Set TV Format according to the connected TV type.
(Initial Settings → 10)


While no disc is inserted, hold the DIMMER key on the main unit depressed and press the SUBTITLE key on the remote control. Each time the SUBTITLE key is pressed, the setting changes as follows.
Set up menu
The SETUP functions are the following diverse functions. Please change them according to your use environment.
GENERAL SETUP
TV DISPLAY
This sets the screen size (4:3 or 16:9 aspect ratio) according to the connected TV.
NORMAL/PS (Pan Scan)
Choose this setting if you want the movie to fill the entire screen of your TV. You won't see part of the picture (particularly the right and left edge).
Some disc produced in a wide screen format can't be cropped in this fashion, which means the black bars would appear at the top and the bottom of the screen.
NORMAL/LB (Letter Box)
Choose this setting if you would prefer to see movies in their original aspect ratio. You will see the entire frame of the movie, but it will occupy a smaller portion of the screen. This setting may result in the movie appearing with black bars at the top and bottom of the screen.
WIDE
Choose this setting if your DVD player is connected to a widescreen TV.
PIC MODE
This adjusts the screen quality according to the material being played back.
AUTO
The picture quality is adjusted automatically.
FILM
Choose this setting to reproduce the picture quality of FILM material.
VIDEO
Choose this setting to reproduce the picture quality of VIDEO material.
SMART
Choose this setting to reproduce progressive and interlaced materials with limited motion.
SSMART
Choose this setting to reproduce progressive and interlaced materials with motion (motion adaptive deinterlacing).
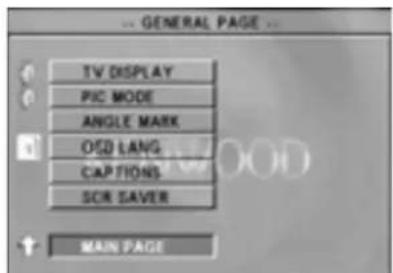
ANGLE MARK
When this is set to ON, the ANGLE mark (💡) will be displayed when a multiangle scene is reached during playback of a DVD. (OFF)
OSD LANG
This switches the language for the on-screen display.(ENGLISH)
CAPTION (NTSC only)
This switches the CLOSED CAPTION ON or OFF. (OFF)
"closed caption" is a subtitle display system developed for hearing-impaired persons, but it is also a very effective system for learning foreign languages. When your TV is compatible with "closed caption" and you select ON, you can use the CLOSED CAPTION function.
SCR SAVER
This switches the screen saver ON or OFF. (OFF)
When SCR SAVER is ON, the screen saver function will operate after approx. 3 minutes have passed with a still picture (display of KENWOOD).
The items in □ are the initial set values.
AUDIO SETUP
DYNAMIC
At the time of Dolby digital DVD playback, the difference of the maximum volume and the minimum volume are compressed. Adjustment is possible in 8 steps, and the range is largest (compression ratio 0) at the time of "OFF" and smallest (large compression ratio) at the time of "FULL". (OFF)
PREFERENCES
VIDEO OUTPUT (only for some areas)
Choose "S-VIDEO" in case of connection to the S-VIDEO terminals on the rear, choose "RGB" in case of connection to the AV terminal or choose "COMPONENT" in case of connection to COMPONENT terminal. Output will not be made to the not selected terminals. (-13 - 14) (S-VIDEO)
AUDIO
Choose the language for the AUDIO output. (ENGLISH *)
SUB TITLE
Choose the language for SUB TITLE. (ENGLISH *)
DISC MENU
Choose the language for the menu recorded on the DISC. (ENGLISH *)
PARENTAL
This can restrict playback of adult-oriented DVD discs that you do not want to be seen by children.
However, even when a DVD disc is marked "Adult-oriented" or so on the label, its viewing cannot be restricted unless the restriction level is recorded in the disc itself. (8)
Parental lock level;
Level 8: All DVDs can be played back.(Factory preset)
Level 7 to 2: DVDs for general audiences/children can be played back. (DVDs for adults are prohibited.)
Level 1: DVDs for children can be played back. (DVDs for adults/general audiences are prohibited.)
PASSWORD
The password for PARENTAL setting, change, cancellation, etc. is set.
The password set at the time of shipping from the factory is "0000".
DEFAULTS
This resets all settings, except for PARENTAL and PASSWORD, to the factory defaults.
When the language marked with an asterisk (*) is specified by the disc, that specification has priority.
How to use the RETURN key
When the RETURN key is pressed, the display returns to the MAIN PAGE.
RETURN
Please refer to pages 18 and 19 for setup.
DVD VCD Select TV Display
⑦During stop mode, press MENU key on the remote.
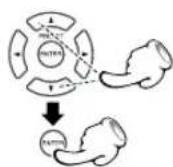
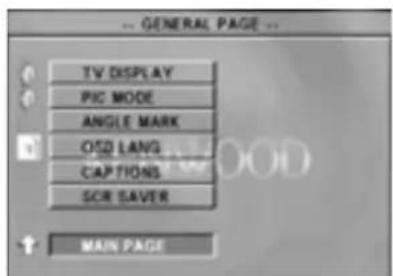
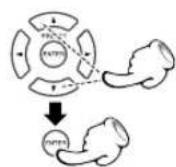
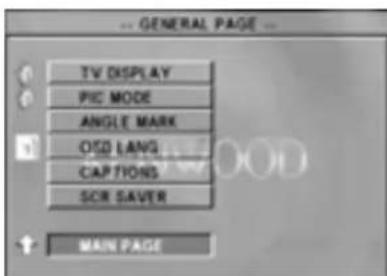
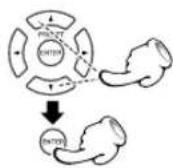
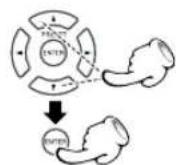
② Press Cursor up/down (▲/▼) keys on the remote to select the GENERAL SETUP, then press the ENTER key to access the sub features
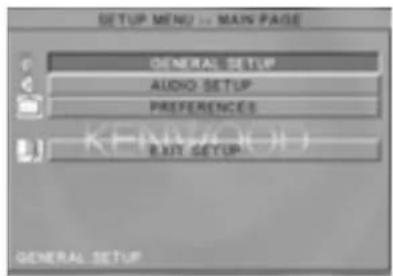
③ Press Cursor up/down (▲/▼) keys on the remote to select TV DISPLAY, then press the Cursor right (▶) key to access the sub features
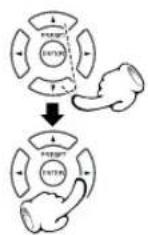
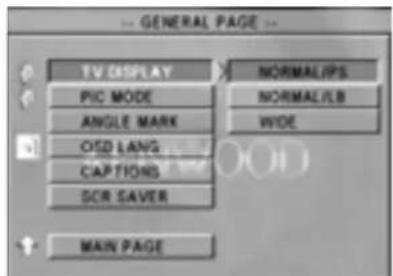
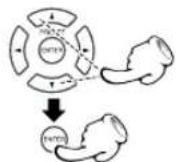
4 Press Cursor up/down (▲/▼) keys on the remote to select TV Display type, then press the ENTER key.
⑤ Press Cursor left (◀) key on the remote to return to previous menu.
⑥ Press Cursor up/down (▲/▼) keys on the remote to select MAIN PAGE, then press the ENTER key.
⑦ Press Cursor up/down (▲/▼) keys on the remote to select EXIT SETUP, then press the ENTER key.
DVD VCD Select Picture Mode
①During stop mode, press MENU key on the remote.
2 Press Cursor up/down (▲/▼) keys on the remote to select the GENERAL SETUP, then press the ENTER key to access the sub features
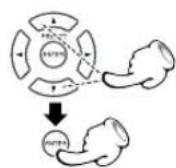
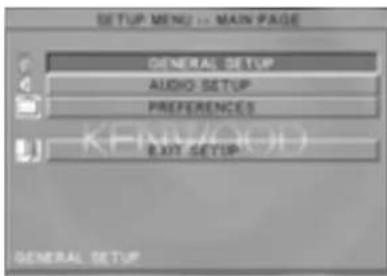
③ Press Cursor up/down (▲/▼) keys on the remote to select PIC MODE, then press the Cursor right (▶) key to access the sub features
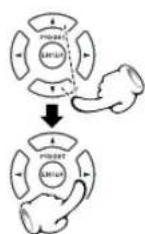
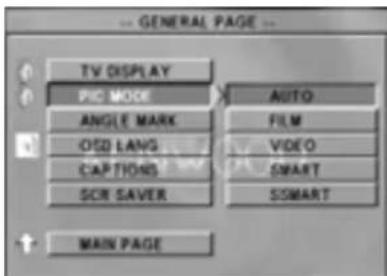
④ Press Cursor up/down (▲/▼) keys on the remote to select specific mode, then press the ENTER key.
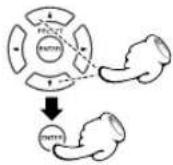
⑤ Press Cursor left (◀) key on the remote to return to previous menu.
⑥ Press Cursor up/down (▲/▼) keys on the remote to select MAIN PAGE, then press the ENTER key.
⑦ Press Cursor up/down (▲/▼) keys on the remote to select EXIT SETUP, then press the ENTER key.
Please refer to pages 18 and 19 for setup.
DVD Select ANGLE mark ON or OFF
DVT-6200 (EN/K,E,X)
⑦During stop mode, press MENU key on the remote.
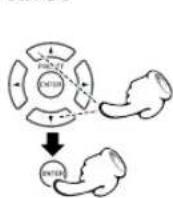
② Press Cursor up/down (▲/▼) keys on the remote to select the GENERAL SETUP, then press the ENTER key to access the sub features
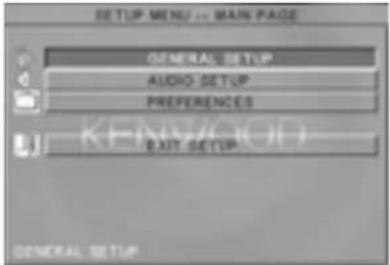
③ Press Cursor up/down (▲/▼) keys on the remote to select ANGLE MARK, then press the Cursor right (▶) key to access the sub features
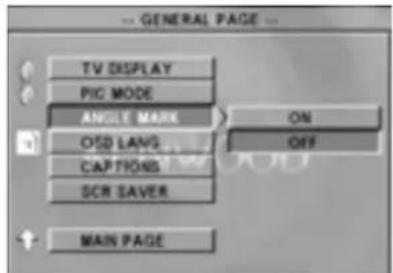
4 Press Cursor up/down (▲/▼) keys on the remote to select ON or OFF, then press the ENTER key.
⑤ Press Cursor left (◀) key on the remote to return to previous menu.
⑥ Press Cursor up/down (▲/▼) keys on the remote to select MAIN PAGE, then press the ENTER key.
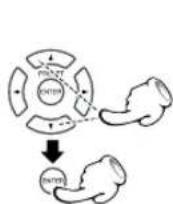
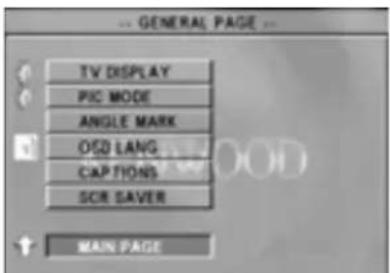
⑦ Press Cursor up/down (▲/▼) keys on the remote to select EXIT SETUP, then press the ENTER key.
Select OSD Language
⑦During stop mode, press MENU key on the remote.
② Press Cursor up/down (▲/▼) keys on the remote to select the GENERAL SETUP, then press the ENTER key to access the sub features
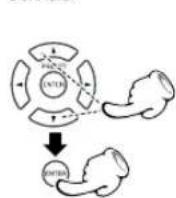
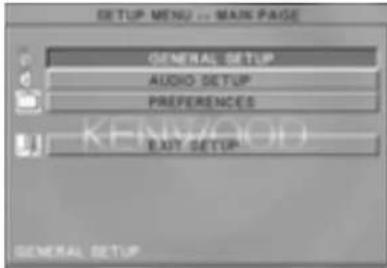
③ Press Cursor up/down (▲/▼) keys on the remote to select OSD LANG, then press the Cursor right (▶) key to access the sub features
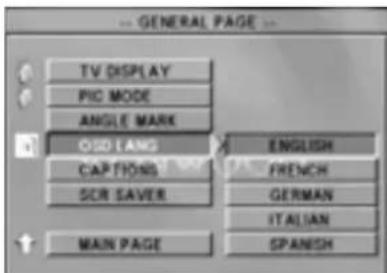
④ Press Cursor up/down (▲/▼) keys on the remote to select specific language, then press the ENTER key.
⑤ Press Cursor left (◀) key on the remote to return to previous menu.
⑥ Press Cursor up/down (▲/▼) keys on the remote to select MAIN PAGE, then press the ENTER key.
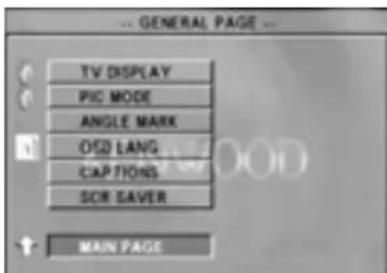
⑦ Press Cursor up/down (▲/▼) keys on the remote to select EXIT SETUP, then press the ENTER key.
Please refer to pages 18 and 19 for setup.
DVD Select CAPTIONS ON or OFF (NTSC only)
⑦During stop mode, press MENU key on the remote.
2 Press Cursor up/down (▲/▼) keys on the remote to select the GENERAL SETUP, then press the ENTER key to access the sub features
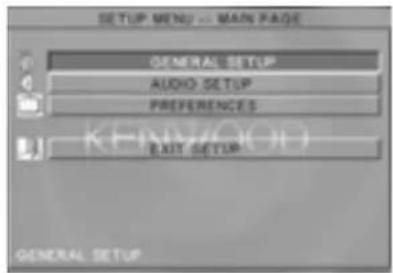
⑨ Press Cursor up/down (▲/▼) keys on the remote to select CAPTIONS, then press the Cursor right (▶) key to access the sub features
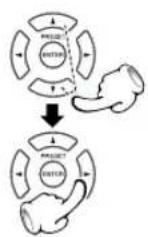
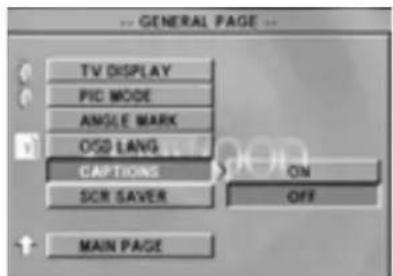
4 Press Cursor up/down (▲/▼) keys on the remote to select ON or OFF, then press the ENTER key.
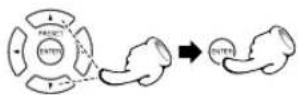
⑤ Press Cursor left (◀) key on the remote to return to previous menu.
⑥ Press Cursor up/down (▲/▼) keys on the remote to select MAIN PAGE, then press the ENTER key.
⑦ Press Cursor up/down (▲/▼) keys on the remote to select EXIT SETUP, then press the ENTER key.
DVD VCD CD
Select Screen Saver on or off
①During stop mode, press MENU key on the remote.
② Press Cursor up/down (▲/▼) keys on the remote to select the GENERAL SETUP, then press the ENTER key to access the sub features
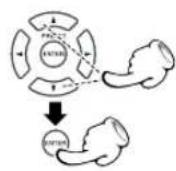
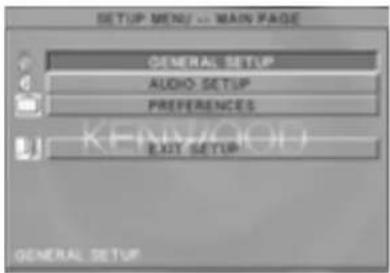
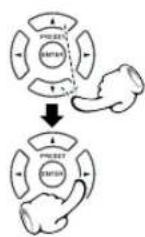
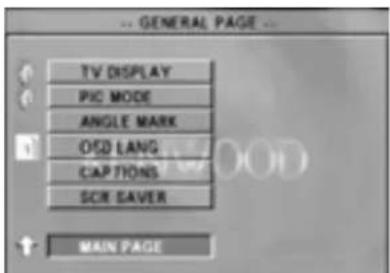
③ Press Cursor up/down (▲/▼) keys on the remote to select SCR SAVER, then press the Cursor right (▶) key to access the sub features
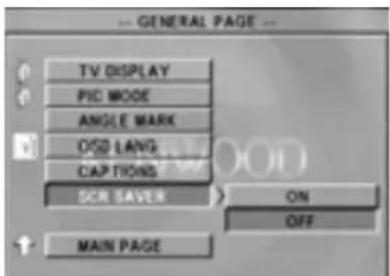
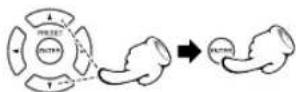
④ Press Cursor up/down (▲/▼) keys on the remote to select ON or OFF, then press the ENTER key.
⑤ Press Cursor left (◀) key on the remote to return to previous menu.
⑥ Press Cursor up/down (▲/▼) keys on the remote to select MAIN PAGE, then press the ENTER key.
⑦ Press Cursor up/down (▲/▼) keys on the remote to select EXIT SETUP, then press the ENTER key.
Please refer to pages 18 and 19 for setup.
DVD Select Dynamic Range
This function operates only at the time of playback of DVDs recorded with Dolby Digital.
⑦During stop mode, press MENU key on the remote.
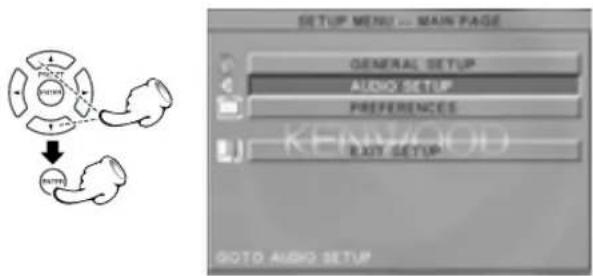
② Press Cursor up/down (▲/▼) keys on the remote to select the AUDIO SETUP, then press the ENTER key to access the sub features
flowchart
graph TD
    A["SETUP MENU ... MAIN PAGE"] --> B["GENERAL SETUP"]
    A --> C["AUDIO SETUP"]
    A --> D["PREFERENCES"]
    A --> E["BOTY SETUP"]
    A --> F["GPIO AUDIO SETUP"]
③ Press Cursor up/down (▲/▼) keys on the remote to select DYNAMIC, then press the Cursor right (▶) key to access the sub features
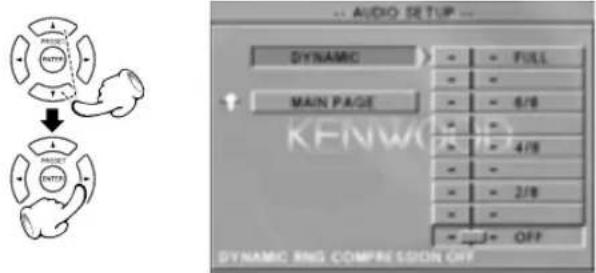
4 Press Cursor up/down (▲/▼) keys on the remote to select specific dynamic range, then press the ENTER key.
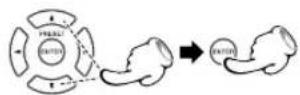
⑤ Press Cursor left (◀) key on the remote to return to previous menu.
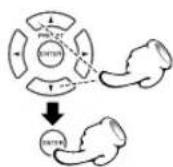
⑥ Press Cursor up/down (▲/▼) keys on the remote to select MAIN PAGE, then press the ENTER key.
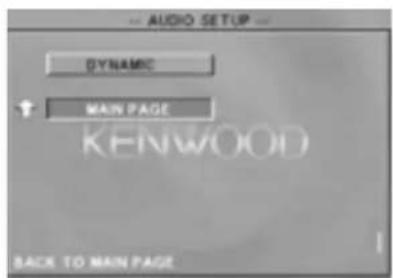
⑦ Press Cursor up/down (▲/▼) keys on the remote to select EXIT SETUP, then press the ENTER key.
DVT-6200 (EN/K,E,X)
DVD VCD Select VIDEO Output (only for some areas)
⑦During stop mode, press MENU key on the remote.
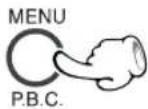
② Press Cursor up/down (▲/▼) keys on the remote to select the PREFERENCE, then press the ENTER key to access the sub features
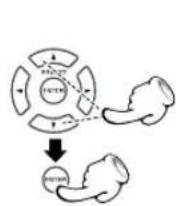
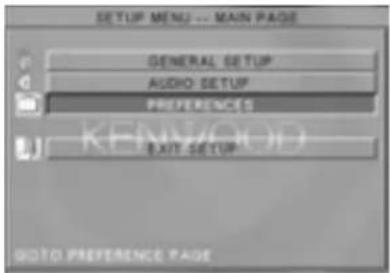
③ Press Cursor up/down (▲/▼) keys on the remote to select VIDEO OUTPUT, then press the Cursor right (▶) key to access the sub features
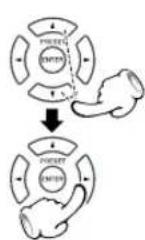
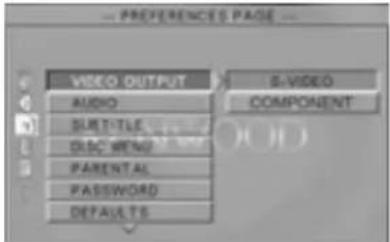
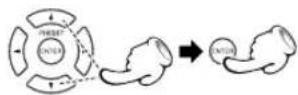
④ Press Cursor up/down (▲/▼) keys on the remote to select S.VIDEO or COMPONENT then press the ENTER key.
⑤ Press Cursor left (◀) key on the remote to return to previous menu.
⑥ Press Cursor up/down (▲/▼) keys on the remote to select MAIN PAGE, then press the ENTER key.
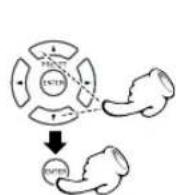
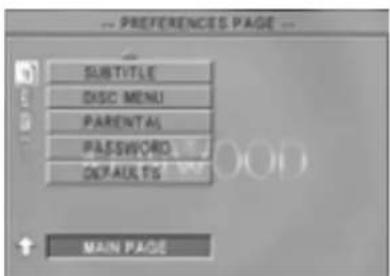
⑦ Press Cursor up/down (▲/▼) keys on the remote to select EXIT SETUP, then press the ENTER key.
Please refer to pages 18 and 19 for setup.
DVD Select Audio Language
⑦During stop mode, press MENU key on the remote.
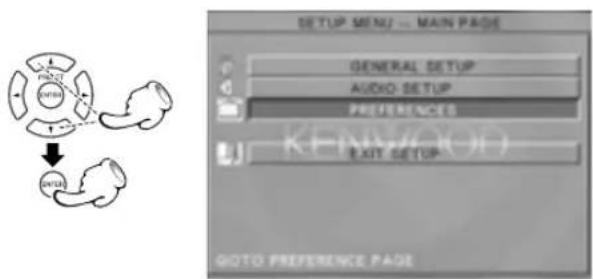
2 Press Cursor up/down (▲/▼) keys on the remote to select the PREFERENCE, then press the ENTER key to access the sub features
flowchart
graph TD
    A["Main Page"] --> B{General Setup}
    B --> C["Audio Setup"]
    C --> D["Preferences"]
    D --> E["Exit Setup"]
    style A fill:#f9f,stroke:#333
    style B fill:#ccf,stroke:#333
    style C fill:#cfc,stroke:#333
    style D fill:#fcc,stroke:#333
    style E fill:#cff,stroke:#333
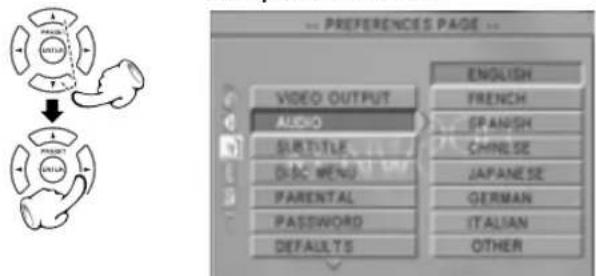
③ Press Cursor up/down (▲/▼) keys on the remote to select AUDIO, then press the Cursor right (▶) key to access the sub features
example for some areas
flowchart
graph TD
    A["VIDEO OUTPUT"] --> B["ALICO"]
    B --> C["SIR-TITLE"]
    C --> D["DISC MENU"]
    D --> E["PARENTAL"]
    E --> F["PASSWORD"]
    F --> G["DEFAULTS"]
    H["ENGLISH"] --> I["FRENCH"]
    I --> J["SPANISH"]
    J --> K["CHINESE"]
    K --> L["JAPANESE"]
    L --> M["GERMAN"]
    M --> N["ITALIAN"]
    N --> O["OTHER"]
4 Press Cursor up/down (▲/▼) keys on the remote to select specific language, then press the ENTER key.
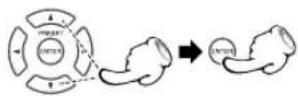
To select other language
①Select "OTHER" and press the ENTER key.
②Input 4 digit code by press numeric keys on the remote.
③Press the ENTER key.
(DVD menu language code list - 27)
⑤ Press Cursor left (◀) key on the remote to return to previousmenu.
⑥ Press Cursor up/down (▲/▼) keys on the remote to select MAIN PAGE, then press the ENTER key.
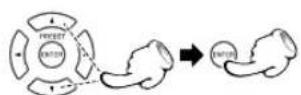
⑦ Press Cursor up/down (▲/▼) keys on the remote to select EXIT SETUP, then press the ENTER key.
DVD Select Subtitle Language
⑦During stop mode, press MENU key on the remote.
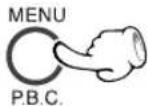
② Press Cursor up/down (▲/▼) keys on the remote to select the PREFERENCE, then press the ENTER key to access the sub features
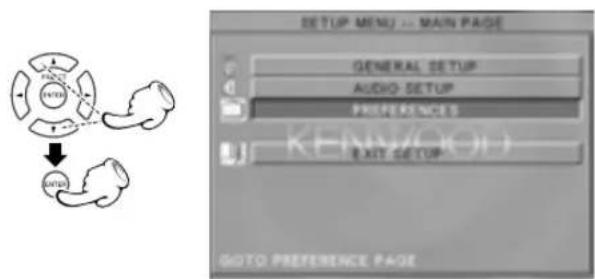
③ Press Cursor up/down (▲/▼) keys on the remote to select SUBTITLE, then press the Cursor right (▶) key to access the sub features
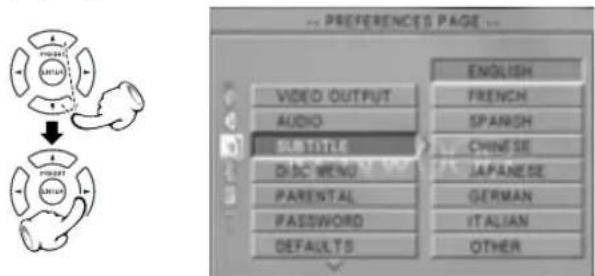
④ Press Cursor up/down (▲/▼) keys on the remote to select specific language, then press the ENTER key.
To select other language
①Select "OTHER" and press the ENTER key.
②Input 4 digit code by press numeric keys on the remote.
③Press the ENTER key.
(DVD menu language code list - 27)
⑤ Press Cursor left (◀) key on the remote to return to previousmenu.
⑥ Press Cursor up/down (▲/▼) keys on the remote to select MAIN PAGE, then press the ENTER key.
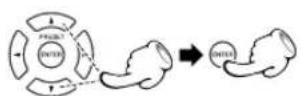
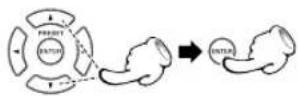
⑦ Press Cursor up/down (▲/▼) keys on the remote to select EXIT SETUP, then press the ENTER key.
Please refer to pages 18 and 19 for setup.
DVD Select Disc Menu Language
⑦During stop mode, press MENU key on the remote.
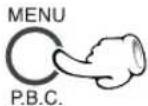
2 Press Cursor up/down (▲/▼) keys on the remote to select the PREFERENCE, then press the ENTER key to access the sub features
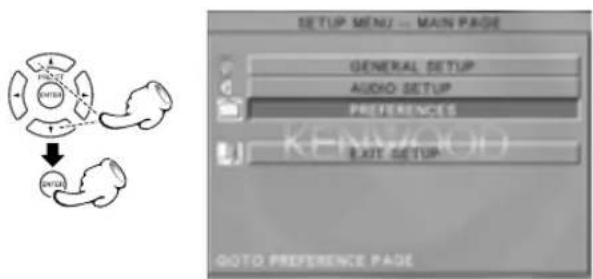
flowchart
graph TD
    A["Input"] --> B["Output"]
    C["GENERAL SETUP"] --> D["AUDIO SETUP"]
    E["PREFERENCES"] --> F["EXIT SETUP"]
    G["GIOTO PREFERENCE PAGE"] --> H["Output"]
③ Press Cursor up/down (▲/▼) keys on the remote to select DISC MENU, then press the Cursor right (▶) key to access the sub features
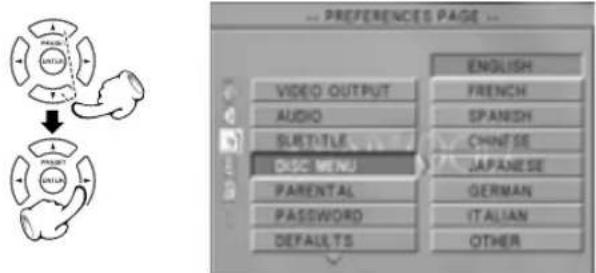
4 Press Cursor up/down (▲/▼) keys on the remote to select specific language, then press the ENTER key.
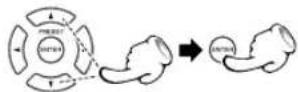
To select other language
①Select "OTHER" and press the ENTER key.
②Input 4 digit code by press numeric keys on the remote.
③Press the ENTER key.
(DVD menu language code list - 27)
⑤ Press Cursor left (◀) key on the remote to return to previousmenu.
⑥ Press Cursor up/down (▲/▼) keys on the remote to select MAIN PAGE, then press the ENTER key.
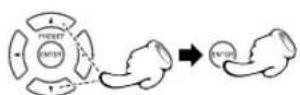
⑦ Press Cursor up/down (▲/▼) keys on the remote to select EXIT SETUP, then press the ENTER key.
DVT-6200 (EN/K,E,X)
DVD Select Parental level
This part of DVD rating lets you determine how your player will react discs that contain movies that are rated (in the U.S.A. the Motion Pictures Association of America rates movies as G, PG, PG-13, etc.).
①During stop mode, press MENU key on the remote.
② Press Cursor up/down (▲/▼) keys on the remote to select the PREFERENCE, then press the ENTER key to access the sub features
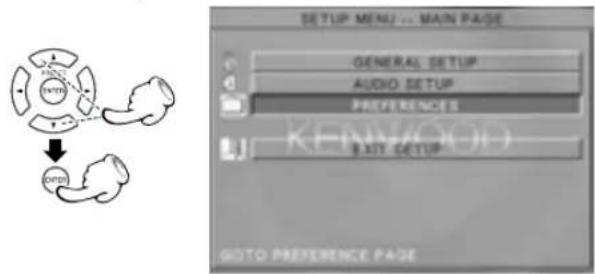
flowchart
graph TD
    A["Start"] --> B["Entry"]
    B --> C["QUIPMENT"]
    C --> D["Menu... MAIN PAGE"]
    D --> E["GENERAL SETUP"]
    D --> F["AUDIO SETUP"]
    D --> G["PREFERENCE"]
    G --> H["EXIT SETUP"]
    H --> I["GOTO PREFERENCE PAGE"]
3 Press Cursor up/down (▲/▼) keys on the remote to select PARENTAL, then press the Cursor right (▶) key to access the sub features
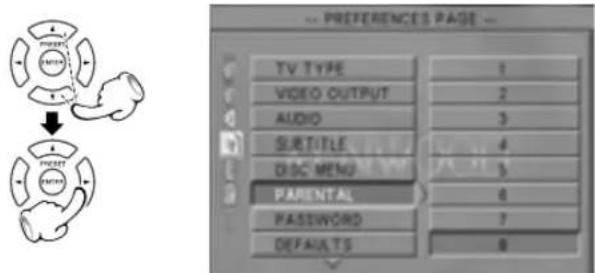
④ Press Cursor up/down (▲/▼) keys on the remote to select specific level, then press the ENTER key.
⑤Enter the password, then press the ENTER key.
The password set at the time of shipping from the factory is "0000". Refer to the item "Change Password" when the password is to be changed.
⑥ Press Cursor left (◀) key on the remote to return to previousmenu.
⑦ Press Cursor up/down (▲/▼) keys on the remote to select MAIN PAGE, then press the ENTER key.
⑧ Press Cursor up/down (▲/▼) keys on the remote to select EXIT SETUP, then press the ENTER key.
Please refer to pages 18 and 19 for setup.
DVD Change Password
DVT-6200 (EN/K,E,X)
⑦During stop mode, press MENU key on the remote.
② Press Cursor up/down (▲/▼) keys on the remote to select the PREFERENCE, then press the ENTER key to access the sub features
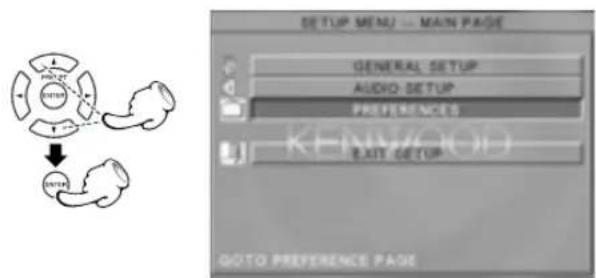
flowchart
graph TD
    A["SETUP MENU"] --> B["GENERAL SETUP"]
    A --> C["AUDIO SETUP"]
    A --> D["PREFERENCES"]
    A --> E["EXIT SETUP"]
    B --> F["OUTPUT Preference PAGE"]
③ Press Cursor up/down (▲/▼) keys on the remote to select PASSWORD, then press the Cursor right (▶) key to access the sub features
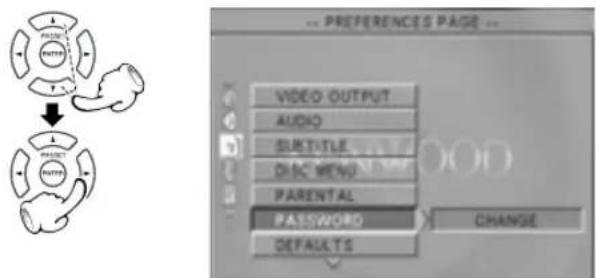
④press the ENTER key to select CHANGE.
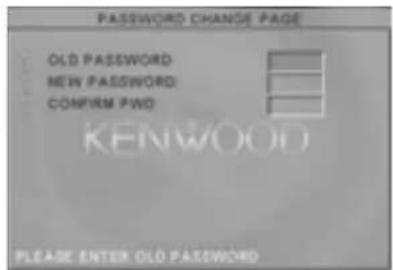
⑤Enter old password, new password and enter new password again to confirm, then press the ENTER key. (The password set at the time of shipping from the factory is "0000".)
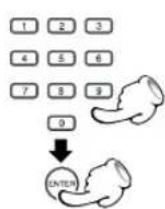
⑥ Press Cursor up/down (▲/▼) keys on the remote to select MAIN PAGE, then press the ENTER key.
⑦ Press Cursor up/down (▲/▼) keys on the remote to select EXIT SETUP, then press the ENTER key.
Put back to the Defalt Setting
⑦During stop mode, press MENU key on the remote.
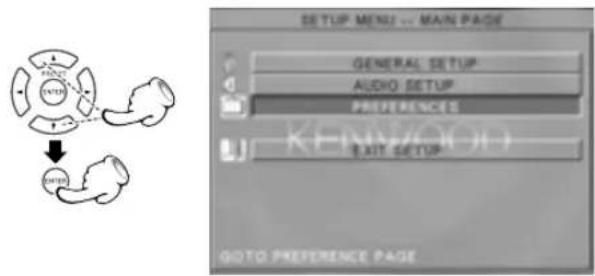
2 Press Cursor up/down (▲/▼) keys on the remote to select the PREFERENCE, then press the ENTER key to access the sub features
flowchart
graph TD
    A["Input"] --> B{Audio Setup}
    B --> C["General Setup"]
    B --> D["Audio Setup"]
    B --> E["Preference"]
    B --> F["Exit Setup"]
    G["Output"] --> H["Preference Page"]
③ Press Cursor up/down (▲/▼) keys on the remote to select DEFAULTS, then press the Cursor right (▶) key to access the sub features
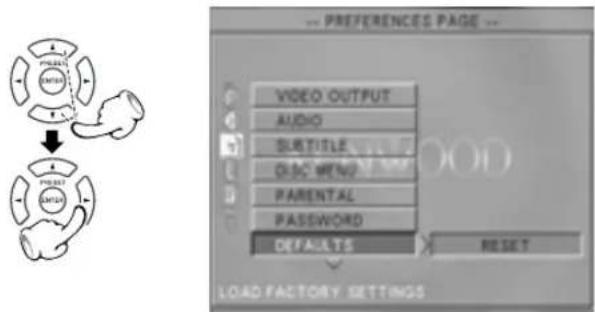
④press the ENTER key to select RESET.
5 Press Cursor up/down (▲/▼) keys on the remote to select EXIT SETUP, then press the ENTER key.
DVD menu language code list
| Code No. Language |
| 1027 Afar |
| 1028 Abkhazian |
| 1032 Afrikaans |
| 1039 Amharic |
| 1044 Arabic |
| 1045 Assamese |
| 1051 Aymara |
| 1052 Azerbaijani |
| 1053 Bashkir |
| 1057 Byelorussian |
| 1059 Bulgarian |
| 1060 Bihari |
| 1069 Bislama |
| 1066 Bengali; Bangla |
| 1067 Tibetan |
| 1070 Breton |
| 1079 Catalan |
| 1093 Corsican |
| 1097 Czech |
| 1103 Welsh |
| 1105 Danish |
| 1109 German |
| 1130 Bhutani |
| 1142 Greek |
| 1144 English |
| 1145 Esperanto |
| 1149 Spanish |
| 1150 Estonian |
| 1151 Basque |
| 1157 Persian |
| 1165 Finnish |
| 1166 Fiji |
| 1171 Faeroese |
| 1174 French |
| 1181 Frisian |
| 1183 Irish |
| 1186 Scots Gaelic |
| 1194 Galician |
| 1196 Guarani |
| 1203 Gujarati |
| 1209 Hausa |
| 1217 Hindi |
| 1226 Croatian |
| 1229 Hungarian |
| 1233 Armenian |
| 1235 Interlingua |
| Code No. Language |
| 1239 Interlingue |
| 1245 Inupiak |
| 1248 Indonesian |
| 1253 Icelandic |
| 1254 Italian |
| 1257 Hebrew |
| 1261 Japanese |
| 1269 Yiddish |
| 1283 Javanese |
| 1287 Georgian |
| 1297 Kazakh |
| 1298 Greenlandic |
| 1299 Cambodian |
| 1300 Kannada |
| 1301 Korean |
| 1305 Kashmiri |
| 1307 Kurdish |
| 1311 Kirghiz |
| 1313 Latin |
| 1326 Lingala |
| 1327 Laothian |
| 1332 Lithuanian |
| 1334 "Latvian, Lettish" |
| 1345 Malagasy |
| 1347 Maori |
| 1349 Macedonian |
| 1350 Malayalam |
| 1352 Mongolian |
| 1353 Moldavian |
| 1356 Marathi |
| 1357 Malay |
| 1358 Maltese |
| 1363 Burmese |
| 1365 Nauru |
| 1369 Nepali |
| 1376 Dutch |
| 1379 Norwegian |
| 1393 Occitan |
| 1403 (Afan) Oromo |
| 1408 Oriya |
| 1417 Punjabi |
| 1428 Polish |
| 1435 "Pashto, Pushto" |
| 1436 Portuguese |
| 1463 Quechua |
| 1481 Rhaeto-Romance |
| LanguageCode No | |
| 1482 Kirundi | |
| 1483 Romanian | |
| 1489 Russian | |
| 1491 Kinyarwanda | |
| 1495 Sanskrit | |
| 1498 Sindhi | |
| 1501 Sangro | |
| 1502 Serbo-Croatian | |
| 1503 Shinghalese | |
| 1505 Slovak | |
| 1506 Slovenian | |
| 1507 Samoan | |
| 1508 Shona | |
| 1509 Somali | |
| 1511 Albanian | |
| 1512 Serbian | |
| 1513 Siswati | |
| 1514 Sesotho | |
| 1515 Sundanese | |
| 1516 Swedish | |
| 1517 Swahili | |
| 1521 Tamil | |
| 1525 Tegulu | |
| 1527 Tajik | |
| 1528 Thai | |
| 1529 Tigrinya | |
| 1531 Turkmen | |
| 1532 Tagalog | |
| 1534 Setswana | |
| 1535 Tonga | |
| 1538 Turkish | |
| 1539 Tsonga | |
| 1540 Tatar | |
| 1543 Twi | |
| 1557 Ukrainian | |
| 1564 Urdu | |
| 1572 Uzbek | |
| 1581 Vietnamese | |
| 1587 Volapuk | |
| 1613 Wolof | |
| 1632 Xhosa | |
| 1665 Yoruba | |
| 1684 Chinese | |
| 1697 Zulu | |
What are LISTEN modes?
You can experience true home-theater sound with your new system. This system incorporates several listen modes to let you enjoy surround sound with a wide variety of program sources. Each produces multiple channels of surround-sound, but each does it differently.
- Dolby Digital: Dolby Digital uses an encode/decode process based on its theatrical digital surround sound technology. The five main channels are full-frequency and independent, so sound can completely envelop you or soar anywhere in the room, just like at the movies.
Compared with Dolby Pro Logic, Dolby Digital has more clarity, greater surround envelopment, and more realistic sound movement between channels.
- Dolby Pro Logic/Dolby Pro Logic II: Dolby Pro Logic reproduces a surround sound like in a movie theater from Dolby Surround-encoded program source (videotape or LaserDisc software carrying the Dolby Surround logo), and features excellent sound movement on the front and a surrounding atmosphere of movie theaters. Meanwhile, Dolby Pro Logic II decodes a signal encoded in 2 channels into 5-channel signals composed of the left/right front signals, center signal and surround left/right signals.
Dolby Pro Logic II is an advanced version of the decoding technology used with Dolby Pro Logic. It inputs 2-channel signals from a Dolby Surround-encoded source and reproduces 5-channel signals in which the surround channel is divided into independent channels for the left and right. Dolby Pro Logic II has the MOVIE mode and MUSIC mode, and the MUSIC mode enables independent adjustment of three parameters including Panorama mode, Dimension and Center Width.
- DTS: DTS has five full-frequency channels that create effects nearly identical to those in a theater. Sounds seem to zoom from one place to another or entirely surround you. Like Dolby Digital, DTS has much-improved clarity, surround and sound movement capability compared with Dolby Pro Logic. This listen mode is available on CD, LD, and DVD media. DTS is a strictly digital format that can be supplied only by a CD, LD, or DVD player that supports DTS sound.
- Stereo: Stereo listen mode provides standard stereo sound to the front left and right speakers.

Do not switch the LISTEN mode while recording to VCR.
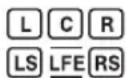
The INPUT/OUTPUT status indicator becomes an input indicator at the time of DOLBY DIGITAL and DTS source and an output indicator at all other times.
Manufactured under license from Dolby Laboratories. "DOLBY", the double-D symbol and "PRO LOGIC" are trademarks of Dolby Laboratories.

"DTS" and "DTS Digital Surround" are registered trademarks of Digital Theater Systems, Inc.
To set the LISTEN mode manually
According to the contents of the disc played in this unit, the LISTEN MODE (selected by the LISTEN MODE key) can be found in the following table
At the time of DTS or DOLBY DIGITAL (5.1 ch) source
Press the LISTEN MODE key.
MAIN UNIT
REMOTE
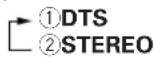
Each press switches the modes as shown below.
(At the time of DTS source)
(At the time of DOLBY DIGITAL (5.1 ch) source)

At the time of PCM or DOLBY DIGITAL (2 ch) source
①Press the LISTEN MODE key.
MAIN UNIT
REMOTE
② When the TRIM (▲/▼) keys on the remote or the SKIP (|◄◄/►►|) keys on the main unit are pressed at a time other than display of STEREO, PRO LOGIC, PL II MOVIE, or PL II MUSIC is switched.
MAIN UNIT
REMOTE
Each press switches the modes as shown below.

Each press switches the modes as shown below.

When the SET UP key is pressed at the time of PL II MUSIC, switching of Panorama mode, Dimension, and Center Width is possible.
Description of Dolby Pro Logic II: Music mode
Panorama mode
: Expands the image of front-channel stereo to the surround speakers to create a sound environment that fills your surroundings. (To change the Panorama mode, press SET UP key at the time of Dolby Pro Logic II Music mode. Display the PANOR OFF or ON, then press the TRIM (▲/▼) keys to select on or off.)
Dimension
: This controls the balance between the Front and Rear in 2 steps on the front and 2 steps on the rear. Set this parameter to one of the Front steps if the surround effect is too strong, or to one of the Back steps if it is too weak. (To change the Dimension, press SET UP key twice at the time of Dolby Pro Logic II Music mode. Display the DIMEN 0 (or other value), then press the TRIM (▲/▼) keys to select F-2, F-3, R-2 or R-3.)
Center Width : The center channel signal can be divided and distributed to the Front L/R channels.
The adjustment for distributing the center channel signal to the front channels can be applied in eight steps from 0 to 7. Use this adjustment when the center image seems to be too strong. (To change the Center Width, press SET UP key 3 times at the time of Dolby Pro Logic II Music mode. Display the C-WIDTH 0 (or other value), then press the TRIM (▲/▼) keys to select 0 \~7.)
Positioning the speakers
To achieve the optimum effects obtainable with this SURROUND SOUND system, it is important to position the speakers properly. Refer to the following illustration to find the best location in your room.
Preparation
Turn on the POWER.
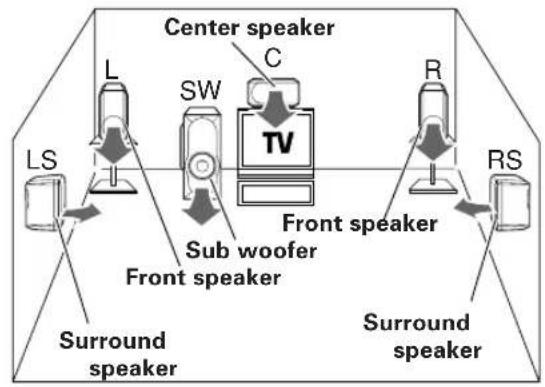
For this unit, the speaker levels have been set in advance so that the best volume balance is obtained with standard use.
Initial set values for the speaker level
Left Front channel (Lch)(L) : 0dB
Center channel (Cch)(C) : 0dB
Right Front channel (Rch)(R) : 0dB
Right Surround channel (RSch)(RS) : 0dB
Left Surround channel (LSch)(LS) : 0dB
Subwoofer(SW) : 0dB
Reset as follows to match your listening environment.
Speaker level setting
①Press SET UP key for more than 3 seconds
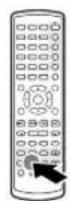
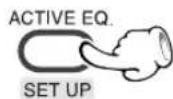
② Press the TRIM (▲/▼) keys to control the speaker level.
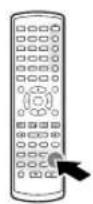
- After all speakers have been adjusted, operate the Delay time setting (→31).
The test tone is played back from the Left Front speaker. Adjust the VOLUME CONTROL so that it is slightly loud and fix it there.
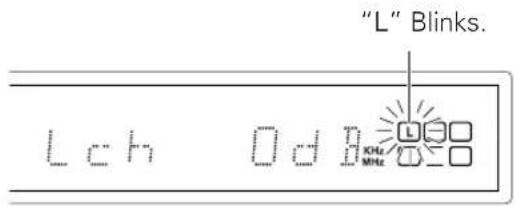
The speakers will be switched as follows in intervals of about 2 seconds.

flowchart
graph LR
    A["L"] --> B["C"]
    B --> C["R"]
    C --> D["RS"]
    D --> E["LS"]
    E --> F["SW"]
Adjust the volume with the TRIM (▲/▼) keys while the indicator is flashing so that the volume from all speakers except the subwoofer (SW) appears the same. Level adjustment is possible in the range from -10 dB to +10 dB.

As the subwoofer (SW) has a special playback band, normal adjustment is not possible with the test tone. Please adjust the subwoofer while listening to actual music. (-32)
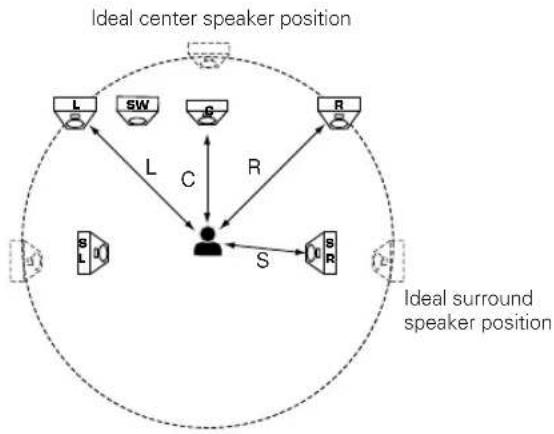
The ideal listening position for 6-channel surround playback is the point at equal distance from all speakers. By setting the delay time for the center and surround speakers, this item realizes the ideal listening position virtually. (The center and surround speakers can be set as if they are laid out on the dotted line circle shown below.)
flowchart
graph TD
    A["Ideal center speaker position"] --> B["L"]
    A --> C["SW"]
    A --> D["R"]
    A --> E["S"]
    F["Ideal surround speaker position"] --> G["Center Node"]
    G --> H["Node"]
    H --> I["S"]
    H --> J["SR"]
    H --> K["SL"]
    style A fill:#f9f,stroke:#333
    style F fill:#f9f,stroke:#333
    style G fill:#ccf,stroke:#333
Delay time setting
This operation is performed following the adjustment of the speaker level setting on page 30.
①Press SET UP key.
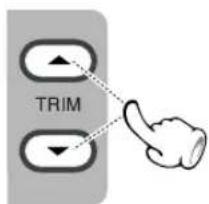
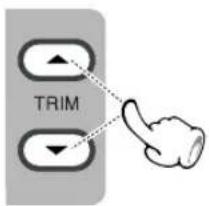
② Press the TRIM (▲/▼) keys to select the speaker distance.
③Press SET UP key.
④ Press the TRIM (▲/▼) keys to select the speaker distance.
How to set the delay time
Delay time setting sets the delay time converted to the distance from the speaker to the listening position.
The front speakers (L/R) can be adjusted between 40 feet (12 m) and 3 feet (0.9 m).
The range which can be set for the center speaker (C) and the surround speakers (LS/RS) duffers according to the setting for the front speakers. A longer distance than for the front speakers can not be set.
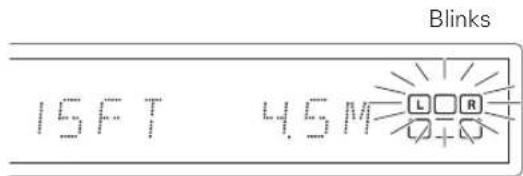
Return to the original display is made when no operation is performed for about 5 seconds.
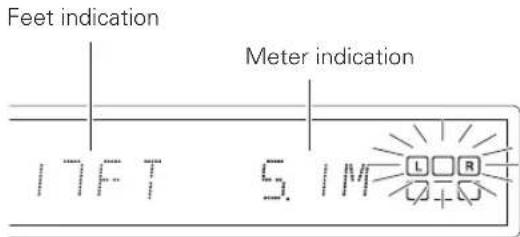
The process advances to center speaker adjustment when the SETUP key is pressed.
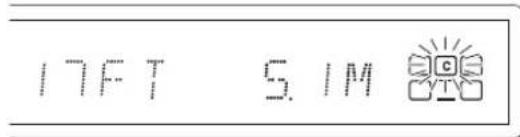
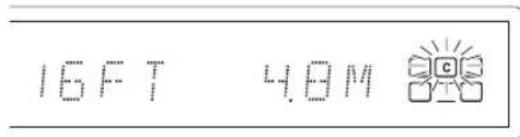
Repeat ③ and ④ in the same way to adjust the surround speakers.
- Press the SET UP key to end speaker setting.
Level setting using a music source
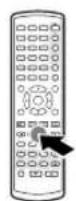
A music source can be used for speaker level setting and subwoofer level setting.
⑦Play a disc.
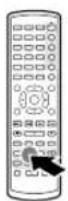
②Select the speaker.
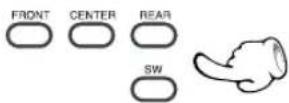
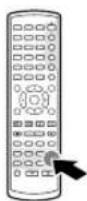
③ Press the TRIM (▲/▼) key to setting the speaker level.
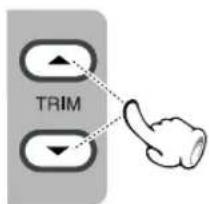
Speaker level adjustment can be performed by pressing the keys FRONT, CENTER, REAR, and SW.
FRONT: Front speakers
Switching is done as follows each time the switch is pressed.
①L ch : Left speaker ②R ch : Right speaker
CENTER: Center speaker
REAR: Rear (Surround) speakers
Switching is done as follows each time the switch is pressed.
①LS ch : Left surround speaker
②RS ch : Right surround speaker
SW: Subwoofer
The speaker level can be changed in the range from -10 dB to +10 dB.

natural_image
Stylized black-and-white illustration of roses and a circular emblem (no text or symbols)Preparation
Turn on the POWER.
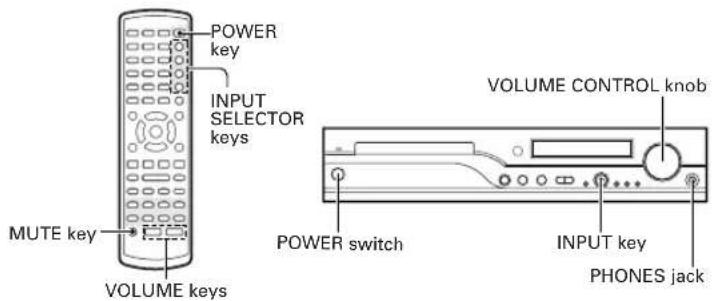
Basic use method
1 Selecting the desired input
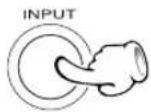
REMOTEMAIN
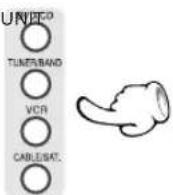
Switching is done as follows when the INPUT key of the main unit is pressed.
① Tuner (frequency display)
② DVD/CD
③ VCR
④ CABLE/SAT
2 Volume adjustment
MAIN UNIT
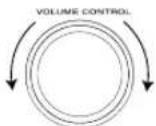
To decrease
To increase
REMOTE
To decrease
To increase
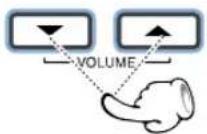
- When one of the keys on the left is pressed while STANDBY mode, the power will be switched on automatically and the input will be selected.
- The power will be switched on and the respective operation will be performed also when the EJECT key, the PLAY/PAUSE key, the BAND key or the INPUT keys on the main unit is pressed during STANDBY mode.
- When a disc is set in the disc tray and the DVD CD key is pressed, disc playback will start automatically.
In case of operation with the remote control unit, first select the input or device to be operated with the INPUT SELECTOR keys etc., and then perform the desired operation.
The present mode of the remote control unit may not coincide with the equipment to be operated.
Normally "MAX" is displayed when the volume settings set to the maximum value.
Depending on the speaker setting value has been set to "ON", (-30), "MAX" will not be displayed.
Muting the sound temporarily
REMOTE

MUTE
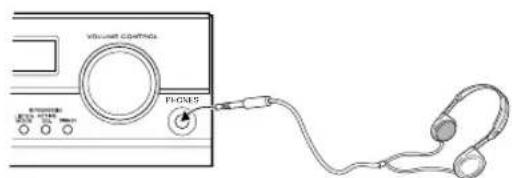
Listening through headphone
Insert the headphone plug into the PHONES jack.
- Press MUTE key.
- Press again to resume the original volume.
- The sound muting is also cancelled when the volume is controlled.
This unit offers various surround modes, but it switches automatically to stereo mode when headphones are connected.
● The sounds from all speakers are cut off.
Selecting the ACTIVE EQ.
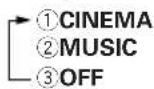
This function provides for better playback of movies (CINEMA) etc.
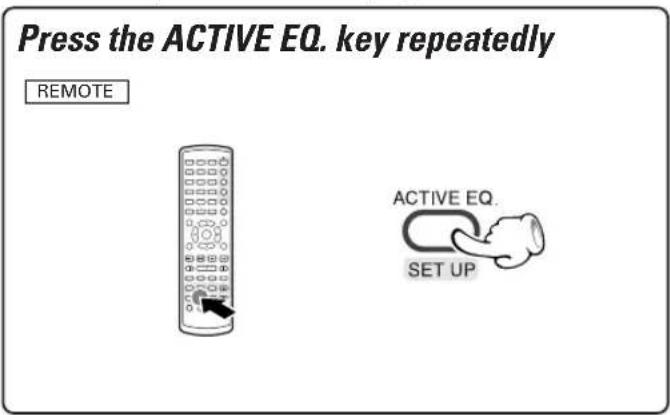
Each press switches the mode
It is also possible to receive them by one-touch operations by storing up to 40 stations in the preset memory. (see page 37)
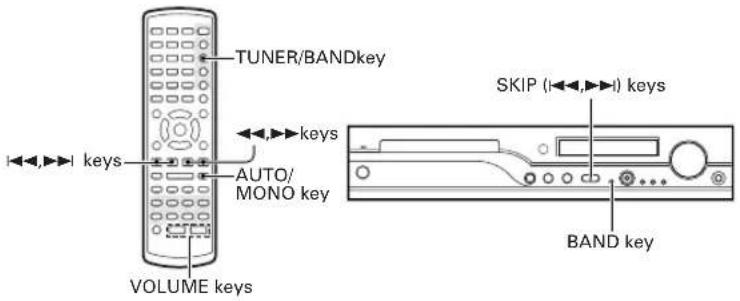
1 Select the TUNER input
REMOTEMAIN UNIT
2 Select the broadcast band
REMOTEMAIN UNIT
3 Select a tuning mode
REMOTE
When the BAND key is pressed, this unit will be switched on automatically.
Each press changes the band.
Each press switches the mode

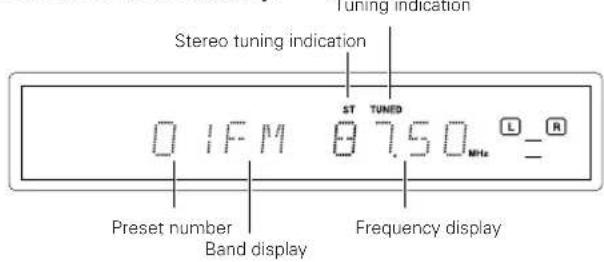
When the TUNING keys are pressed in AUTO mode, a station will be tuned in automatically and tuning will stop. Stereo reception will be made automatically when a stereo broadcast with sufficient signal strength is received.
4 Select a station
P.CALL (preset call) "AUTO" mode
MAIN UNIT REMOTE
REMOTE
Press the ◀◀◀, ▶▶▶ keys to select a preset station.
(auto tuning)
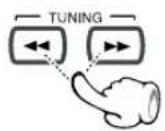
Press the TUNING keys to receive the next tuned station automatically
"MONO" mode (manual tuning)
REMOTE
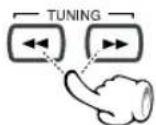
Each time a key is pressed, the frequency is changed by one step.
When a key is pressed continuously, the frequency changes continuously.
Use the manual tuning mode when reception is noisy due to weak reception. (In the manual mode, stereo broadcasts are received in monaural.)
You can store up to 40 stations in the memory and recall with a single touch of the key.
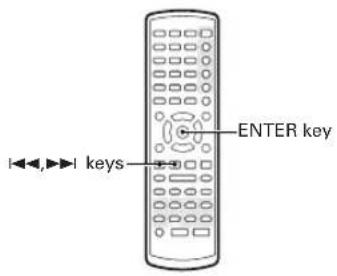
Storing the broadcast stations (one-by-one presetting)
1 Select a station (auto tuning or manual tuning) → 36
2 Press the ENTER key
REMOTE
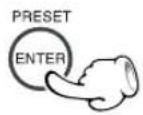
3 Select the desired preset number
REMOTE
4 Press the ENTER key
REMOTE
Repeat steps 1 to 4 to preset other stations.
Presetting can be done with mixing of FM and AM stations. (Example)
01: FM 90.00
02: AM 531
03: FM 88.00
Blinks
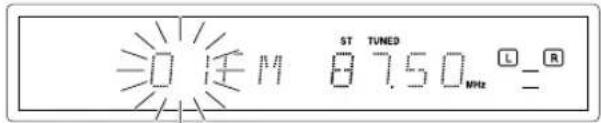
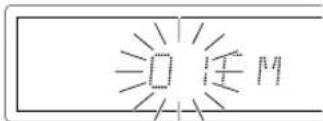
Please perform the next operation while the indicator is blinking.
In case of input with the numeric keys, a preset number will be decided simply by input of a 2-digit number without pressing the ENTER key.
RDS is a system which transmits useful information (digital data) for FM broadcasts together with the broadcast signal. Tuners and receivers designed for RDS reception can extract the information from the broadcast signal for use with various functions such as automatic display of the station name.
Using RDS function (for Europe only)
Functions made possible with RDS
PTY (Program Type Identification) Search :
The tuner automatically searches for a station which is currently broadcasting a specified program type (genre).
PS (Program Service Name) Display :
When an RDS broadcast is received, the station name is automatically displayed.
RT (Radio text) :
Displays the radio text data transmitted by some RDS stations when you select the RT mode.
CT (Clock Time) :
Decodes the real time clock from the FM frequency.
Using the RDS Display function
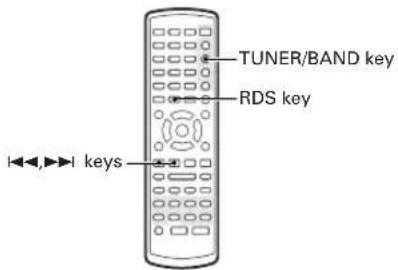
1 Select the FM broadcast station

or
2 Press the RDS DISP. key
Each press switches the display mode as follows.
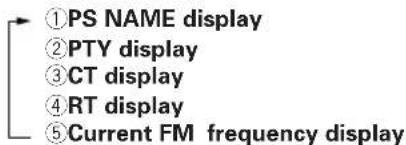

PS NAME
- If the PS information is being received, the PS name (BBC, AFO, NDR, etc.) is shown on the display.
- If the PS information is not received, the original FM frequency is shown.
- Even though no RDS key is pressed, the reception of PS information ensues the PS name is displayed.
RT display
- Text data accompanying the RDS broadcast scrolls across the display (64 characters can be displayed).
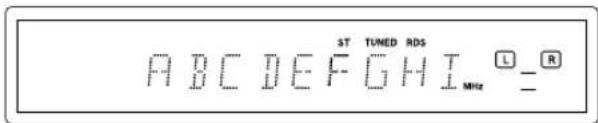
- If the RT information is not received, the "NO TEXT" is shown on the display.
CT display
- If the CT information will take up to 2 minutes to be decoded therefore the clock is not displayed immediately.
- If the CT information is not received, the "NO TIME" is shown on the display.
● The CT clock does not update the system clock.
PTY function
The PTY information is composed of an identification symbol, which helps the FM radio to recognize the program type of each FM station.
The 29 PTY modes are shown in the display by pressing the PTY key.
Using the PTY search function
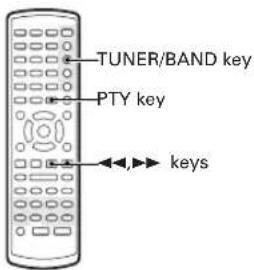
1 Select the FM band
TUNER/BAND

2 Press the PTY key
- The PTY MODE (POP M, ROCK M etc.) appears on the display.
3 Press the PTY key to select the desired program type.
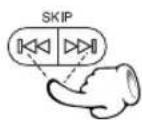
4 When the program type is selected, press the TUNING (◄◄/►►) keys.
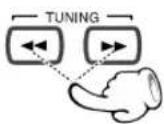
Auto-search the station sequentially
- Press again during search to cancel.
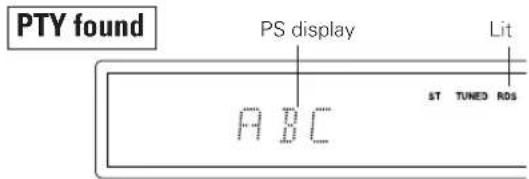
PTY not found
After display of NO PTY, return is made to the normal display.
RDS Program types
| Program Type Name | Receiver Display |
| News NEWS | |
| Current Affairs AFFAIRS | |
| Information INFO | |
| Sport SPORT | |
| Education EDUCATE | |
| Drama DRAMA | |
| Culture CULTURE | |
| Science SCIENCE | |
| Varied VARIED | |
| Pop Music POP M | |
| Rock Music ROCK M | |
| Easy Listening Music EASY M | |
| Light Classical Music LIGHT M | |
| Serious Classical Music CLASSICS | |
| Other Music OTHER M | |
| Weather | WEATHER |
| Finance FINANCE | |
| Children's programs | CHILDREN |
| Social affairs | SOCIAL |
| Religion | RELIGION |
| Phone in | PHONE IN |
| Travel | TRAVEL |
| Leisure | LEISURE |
| Jazz Music | JAZZ |
| Country Music COUNTRY | |
| National Music | NATION M |
| Oldies Music | OLDIES |
| Folk Music | FOLK M |
| Documentary | DOCUMENT |
Basic play
Preparation
Turn on the POWER.
TOP MENU key
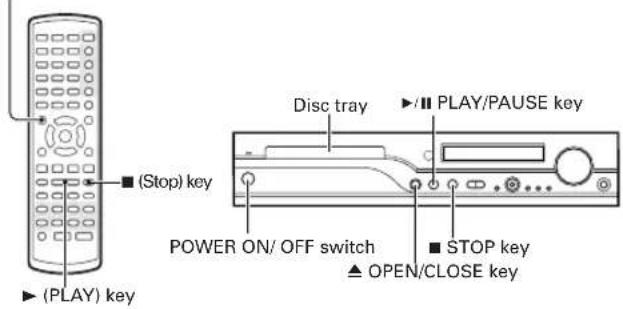
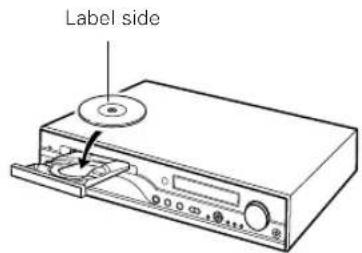
1 Load a disc.
MAIN UNIT
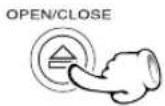
① Open the tray.
② Place a disc.
2 Start playback.
MAIN UNIT
REMOTE
PLAY/PAUSE
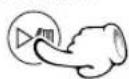
or
OPEN/CLOSE
- When the ▶/■ key, ▶ key or open/close (▲) key is pressed while a tray is open, the tray closes automatically, and then playback begins.
To pause playback
MAIN UNIT
PLAY/PAUSE
REMOTE
● Each press the PLAY/PAUSE key on the main unit, pauses and plays the disc alternately.
- Press the II (pause) key on the remote.

When a Disc Menu appears on the screen
In case of interactive DVDs, a Disc Menu appears on the screen. Then press ENTER to select specific menu you want to play by using Cursor keys.
To stop playback
MAIN UNIT
REMOTE
When a menu screen is recorded on the DVD disc, the menu screen will be displayed when the TOP MENU key or MENU key is pressed. At the menu screen, the menu can be selected by pressing the Cursor keys.
or
RESUME playback (only DVD)
When the ■ (Stop) key has been pressed once during playback to stop the playback, and then playback is started again, play will start from the point where the playback had been stopped. This is called the RESUME function. When the ■ (Stop) key is pressed again during stop, the RESUME function is cancelled.
Disc playback features

- You won't hear the sound (audio) on the DVD and VCD when you're using the Skip, Search, Step or Slow motion features.
- Playback features are not available during the opening credits of a movie.
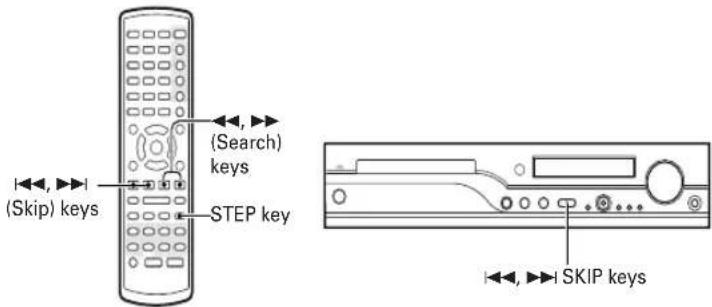
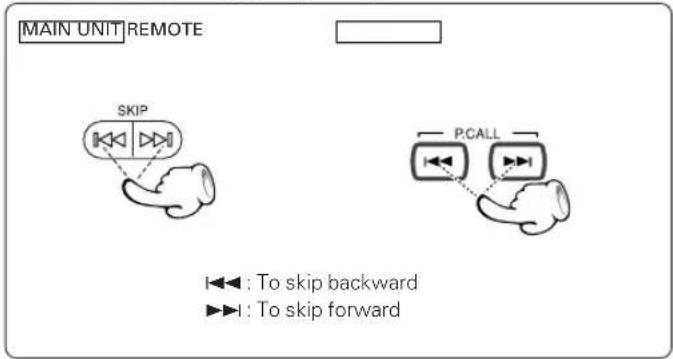
CD DVD VCD Skipping chapters or tracks
flowchart
graph TD
    A["MAIN UNIT REMOTE"] --> B["SKIP"]
    B --> C["Backward: I←→: To skip backward"]
    B --> D["Backward: I→→: To skip forward"]
    E["P.CALL"] --> F["Backward: I←→: P.CALL"]
    E --> G["Backward: I→→: P.CALL"]
    style A fill:#f9f,stroke:#333
    style E fill:#ccf,stroke:#333
- The chapter (or track) in the direction of the key pressed is skipped, and the selected chapter (or track) will be played from the beginning.
- When the ◀◀◀ key is pressed once during playback, the chapter (or track) being played will be played from the beginning.

- The Chapter feature won't work if the disc isn't formatted with separate chapters.
CD DVD VCD Searching
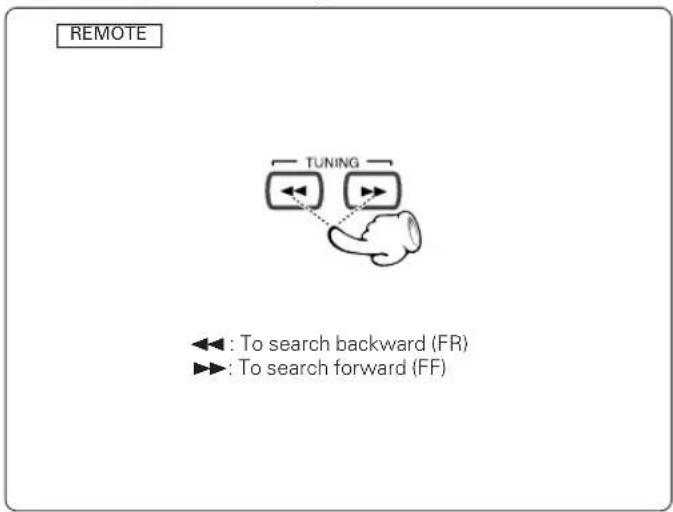
- During playback, press the ◀◀ or ▶▶ key.
• Each press switches the searching speed.
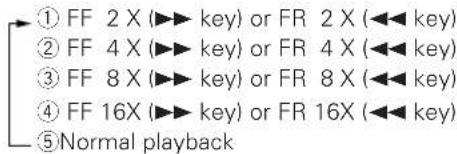
- Press the ▶ key at any time to resume normal playback.
DVD VCD STEP (freeze frame and frame advance)
- During playback, press the STEP key.
● Each time you press the keys, the picture advances one frame. - Press the ▶ key to resume normal playback.
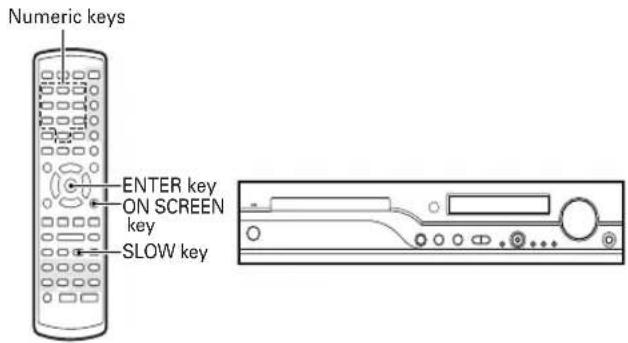
DVD VCD Slow motion playback
REMOTE
- During playback, press the SLOW keys.
● Each press switches the motion speed.
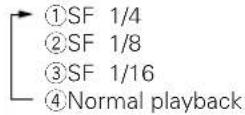
- Press the ▶ key to resume normal playback.
CD DVD VCD Playback from desired track or title
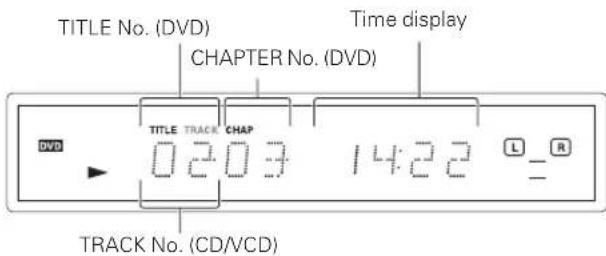
Because DVD VIDEO discs use digital technology, a title can be divided into individual chapters (similar to tracks on a CD).
REMOTE

- Select the desired track No. (CD, VCD) or title No. (DVD)
⑦ Press the numeric keys as shown below
(Example) To select track No. 23 : 2 3
②Press the ENTER key.

- P.B.C. on mode of VCD, the Selecting a Track function may not work. → 50
DVD CD VCD On screen display
The elapsed time or the remaining time for the chapter or the track can be displayed on the monitor (TV) screen.
Press the ON SCREEN key on the remote.
Each press the key switches the display.
At the time of DVD playback.
①Title number and chapter number display. (Example) TITLE 01/02 CHAPTER 005/015 00:05:12 (elapsed time of the title)
②"TITLE REMAIN"
Remaining time of the title being played.
③"CHAPTER ELAPSED"
Elapsed time of the chapter being played.
④"CHAPTER REMAIN"
Remaining time of the chapter being played.
⑤"OFF"
At the time of CD/VCD playback.
①"SINGLE ELAPSED"
Elapsed time of the track being played.
(Example) 22:23 TRACK 05/15
②"SINGLE REMAIN"
Remaining time of the track being played.
③"TOTAL ELAPSED"*
Elapsed time of the disc being played.
④"TOTAL REMAIN"*
Remaining time of the disc being played.
⑤"OFF"
Items marked by * are not displayed in P.B.C. on mode of VCD.
DVD Select Audio Language
If the disc was created with different language tracks, you can use the AUDIO KEY on the remote to temporarily change the DVD player's Audio setting.
During playback, press the AUDIO key on the remote.
AUDIO 1/2:DTS5.1 ENGLISH
natural_image
Illustration of a vintage car with two wheels and a license plate (KENV002) at the front, no text or symbols present.The language is switched each time the AUDIO key is pressed.
- The display is switched off when no operation is performed for about 2 seconds.

- The language feature only works if the disc was created with multiple audio tracks.
- When you chose an audio language by the AUDIO key, you only override the audio language setting in the DVD Player's main menu (in the Language Preferences menu within Setup menu) temporarily.
VCD Select the Audio channel
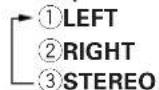
You can choose to play back only the right or the left channel of audio recorded on the disc, or you can select stereo playback.
During VCD playback, press AUDIO key on the remote.
Each press the key switches the mode.
DVD Select Subtitle Language
You can change the Subtitle language while you're watching a disc (but only if the disc was created with subtitles).
During playback, press the SUBTITLE key on the remote.
SUBTITLE 03/03:FRENCH
natural_image
Black-and-white illustration of a vintage car with large tires and front grille (no text or symbols)The language is switched each time the SUB-TITLE key is pressed.
- The display is switched off when no operation is performed for about 2 seconds.
When subtitles are not to be displayed, press the SUBTITLE key repeatedly to get rid of the display.

- The subtitle feature only works if the disc was created with multiple subtitle tracks.
- The subtitle menu of the disc appears in some discs.
DVD Select Camera angle
Some disc contains multiple angles particular scene or sequence. If the disc only has one angle, this feature won't work.
⑦During playback, press the ANGLE key on the remote.
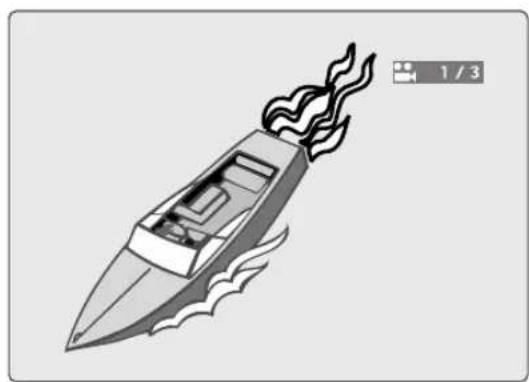
natural_image
Illustration of a speedboat with steam rising, no text or symbols present②Select the Camera angle with press the ANGLE key.
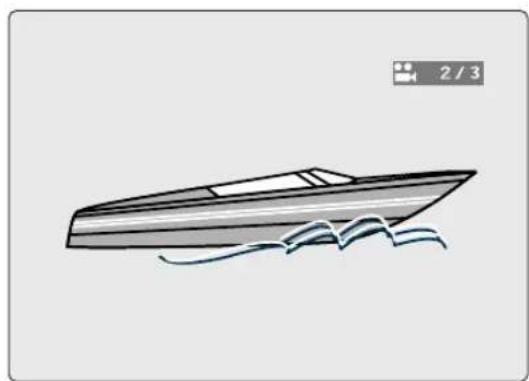
natural_image
Illustration of a boat with wavy water lines, no text or symbols present
The angle mark (☐) will be displayed only when the angle mark is set to ON in the Set Up function.
CD VCD Random play
The tracks of the disc are played in random order.
①During stop mode, press the RANDOM key on the remote.
The Random Play display appears
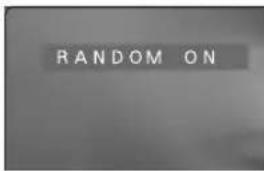
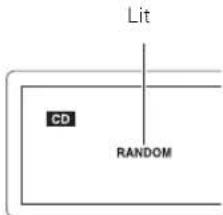
Display
Each time you press RANDOM key on the remote, random play would be on and off.
② Press the play (▶) key to start random playback.
- The menu is switched off when no operation is performed for about 2 seconds.
"MP3/JPEG Random play" → 54
To cancel random play
① Press the stop (■) key to stop playback.
②Press the RANDOM key to cancel random playback.
To repeat random play
During random playback, press the REPEAT key on the remote.
Each press the key switches the mode.
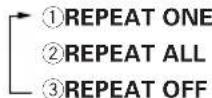

● After all tracks of a disc have been played in random order, playback will stop.
- When playing a DVD, the Random mode does not work.
- When switching to RANDOM mode with a VCD in P.B.C. ON mode, the P.B.C. mode will become OFF.
DVD CD VCD Repeat play
Desired title, chapter, track or disc can be played back repeatedly.
At the time of DVD playback.
- "CHAPTER REPEAT": Repeat the chapter that is playing.
- "TITLE REPEAT": Repeat the title that is playing.
At the time of CD/VCD playback.
- "REPEAT ONE": Repeat the track that is playing.
- "REPEAT ALL": Repeat the disc that is playing.
During playback, press the REPEAT key on the remote.
Each press the key switches the REPEAT mode
At the time of DVD playback.
① "CHAPTER REPEAT ON": The "REPEAT" display is lit and the "CHAP" display blinks.
② "TITLE REPEAT ON": The "REPEAT" display is lit and the "TITLE" display blinks.
③"REPEAT OFF"
At the time of CD/VCD playback.
① "REPEAT ONE": The "REPEAT" display is lit and the "TRACK" display blinks.
② "REPEAT ALL": The "REPEAT" display is lit.
③"REPEAT OFF"
[Example for the CHAPTER REPEAT]
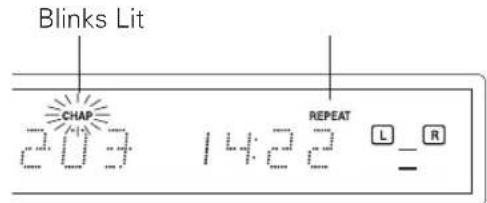
Display
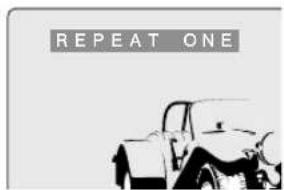
- To cancel repeat playback, press the REPEAT key repeatedly until the "REPEAT" display goes out.
- The menu is switched off when no operation is performed for about 2 seconds.
"MP3/JPEG Repeat play" → 54

P.B.C. on mode of VCD, the Repeat play function does not work. → 50
DVD CD VCD A-B Repeat play
The A-B repeat function lets you mark a segment to repeat between the beginning "A" and the end "B" of the segment you want to replay.
⑦Press the A-B key on the remote when you want to choose a scene (sound) as the beginning point.
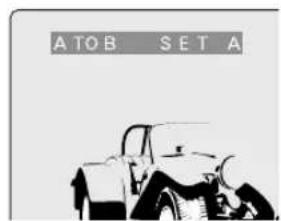
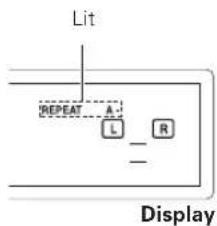
②Press the A-B key again to choose a scene (sound) as the end point.
The Repeat B (Repeat A-B) display appears
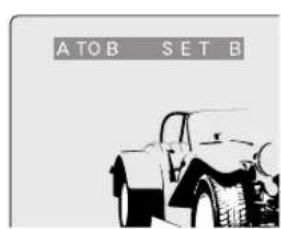
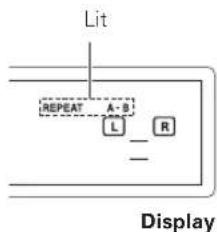
- To cancel A-B Repeat playback, press the A-B key.
- The menu is switched off when no operation is performed for about 2 seconds.
DVD CD VCD Using Bookmarks
The bookmark feature lets you mark a point on the disc that you can go to quickly. You can store up to 14 bookmarks.
Create the bookmark
⑦During playback, press the BOOK MARK key on the remote.
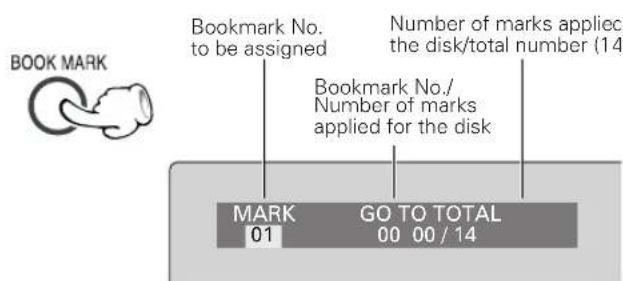
2 Press Cursor up/down (▲/▼) keys on the remote to select desired bookmark number.
③When you reach the scene you want to mark, press ENTER key.
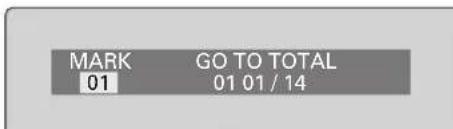
- Up to 14 bookmarks can be applied in the same way for one disc.
- When the ENTER key is pressed at a previously marked bookmark, that mark will be changed to the new point.
Recalling a bookmarked scene
①During playback, press the BOOK MARK key on the remote. BOOK MARK
2 Press the Cursor right (▶) key on the remote to recalling a bookmark number.
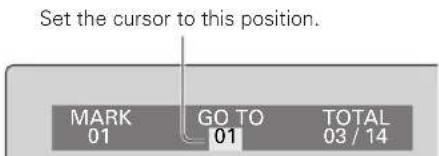
③ Press the Cursor up/down (▲/▼) key on the remote to select the bookmark number you want to activate, then press ENTER key.

- If all 14 bookmarks are in use, you can still mark new scenes, but the previous bookmarks will be erased.
- Depending on the disc, the Bookmark function may not work.
- P.B.C. on mode of VCD, the Bookmark function does not work.
CD VCD Using IntroScan function
CD IntroScan playback
It is possible to play back approx. 10 seconds of the beginning of each track.
①During stop mode, press the INTRO SCAN key on the remote.
-
INTRO
-
EXIT
②Press the "1" key on the remote to select INTRO, then press the ENTER key.
● The first 10 seconds of each track play.
● After Intro Scan goes through all of the tracks, it stops.
- When the ENTER key or the INTRO SCAN key is pressed during introScan of a track, the unit will return to normal playback starting with that track.
IntroScan ends when 2 (EXIT) is selected.
VCD IntroScan playback
The VCD IntroScan function has three modes.
- INTRO : The first approx. 8 seconds of each track will be played one after another.
- DISC : The beginning of each of the first nine tracks of the disc will be played back sequentially and displayed on the screen. When SKIP key is pressed, the next nine screens will be played back and displayed.
- TRACK: The selected track will be played back with the screen display divided into nine parts.
①During stop mode, press the INTRO SCAN key on the remote.
②Select 1 (INTRO), 2 (DISC), or 3 (TRACK) with the numeric keys of the remote control and press the ENTER key.
At the time of "DISC" or "TRACK", the screen will be displayed divided into nine pictures.
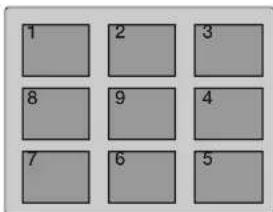
The next nine pictures (nine tracks) will be displayed when the skip up (▶▶) key is pressed.
When the number of one of the pictures is selected with the numeric keys, playback will start from that picture.
P.B.C. on mode of VCD, the IntroScan function does not work.
You can listen to the desired tracks of the current CD or VCD in any desired order.
Program Edit
①During stop mode, press the PGM key on the remote.
②Select specific track by Press Cursor up/down (▲/▼) keys.
③Select "ADD" icon on the screen to register selected value onto PROGRAM LIST, then press the ENTER key.
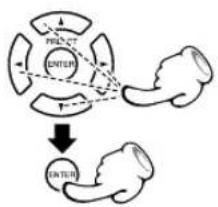
flowchart
graph TD
    A["Input"] --> B{Neuron}
    B --> C["Output"]
    style A fill:#f9f,stroke:#333
    style B fill:#ccf,stroke:#333
    style C fill:#cfc,stroke:#333
④You can select maximum 21 values by repeating step ② - ③.
⑤Select "PLAY" icon on the screen. then press the ENTER key to start program play.
To repeat program play
During program playback, press the REPEAT key on the remote.
Each press the key switches the mode.
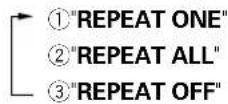
Program edit screen appears.
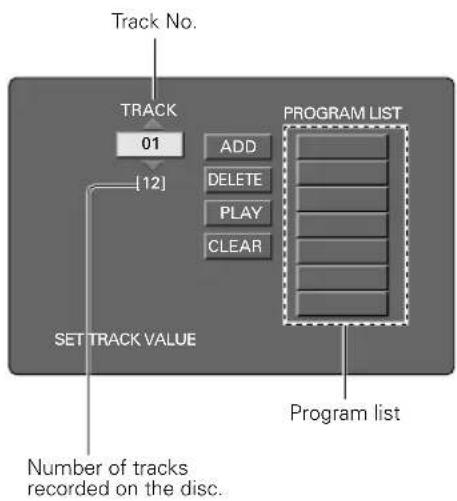
flowchart
graph TD
    A["Track No."] --> B["TRACK"]
    B --> C["01"]
    C --> D["[12"]]
    D --> E["ADD"]
    D --> F["DELETE"]
    D --> G["PLAY"]
    D --> H["CLEAR"]
    I["SET TRACK VALUE"] --> J["Number of tracks recorded on the disc."]
    K["PROGRAM LIST"] --> L[" "]
    K --> M[" "]
    K --> N[" "]
    K --> O[" "]
    K --> P[" "]
    K --> Q[" "]
    K --> R[" "]
    K --> S[" "]
    K --> T[" "]
    K --> U[" "]
    K --> V[" "]
    K --> W[" "]
    K --> X[" "]
    K --> Y[" "]
    K --> Z[" "]

"ADD" icon : Add value onto "PROGRAM LIST"
"DELETE" icon: Delete value from "PROGRAM LIST"
"INSERT" icon : Insert value in "PROGRAM LIST"
"PLAY" icon : Play program play
"CLEAR" icon : When this icon is selected and the ENTER key is pressed, the entire contents of the PROGRAM LIST will be deleted, and the Program edit screen also will disappear.
- MP3/JPEG discs can not be programmed with this program mode. (MP3/JPEG program playback → 55)
- The unit stops when the STOP (■) key is pressed. To restart program play, press the PGM key, display the program screen, select the "PLAY" icon, and press the ENTER key.
Insert track
During stop mode, press the PGM key on the remote
⑦Select specific track to insert by press Cursor up/down (▲/▼) keys.
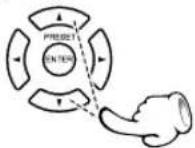
2 Move the cursor with the Cursor right (▶) key to the "PROGRAM LIST" and select the column to be added with the Cursor up/down (▲/▼) keys. (The color of the column where the Cursor is located will change.)
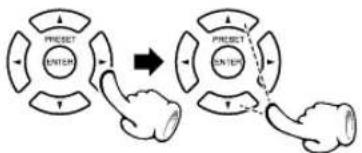
flowchart
graph TD
    A["UNITED"] --> B["UNITED"]
    style A fill:#f9f,stroke:#333
    style B fill:#bbf,stroke:#333
③ Press the Cursor left (◀) key, use the Cursor up/down (▲/▼) keys to move the Cursor to the "INSERT" icon, and press the ENTER key.
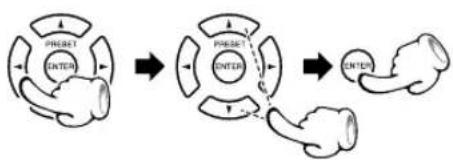
flowchart
graph TD
    A["Brain with PHASE1"] --> B["Brain with ENTER"]
    B --> C["Brain with ENTER"]
The new track will be inserted after (below) the selected column.
Delete Program
During stop mode, press the PGM key on the remote
7 Move the cursor with the Cursor right (▶) key to the "PROGRAM LIST" and select the column to be deleted with the Cursor up/down (▲/▼) keys. (The color of the column where the Cursor is located will change.)
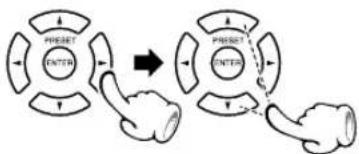
flowchart
graph TD
    A["PRESER"] --> B["OUTR"]
    B --> C["→"]
    C --> D["PRESER"]
    D --> E["OUTR"]
    E --> F["←"]
2 Press the Cursor left (◀) key, use the Cursor up/down (▲/▼) keys to move the Cursor to the "DELETE" icon, and press the ENTER key.
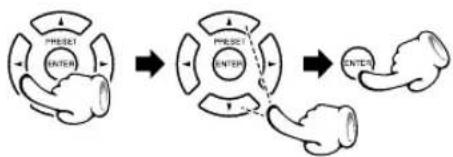
flowchart
graph TD
    A["Brain-like structure with labeled parts: H2H21, ENTER"] --> B["Cellular structure with labeled parts: H2H21, ENTER"]
    B --> C["Biological structure with labeled parts: ENTER"]
    C --> D["Final biological structure"]
Selected value deletes
Program edit screen appears.
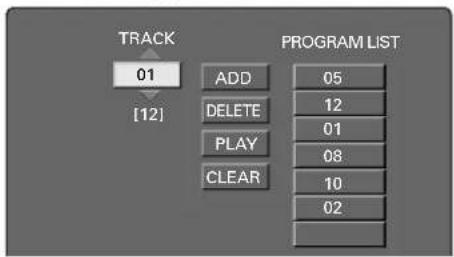
flowchart
graph TD
    A["TRACK 01 [12"]] --> B["ADD"]
    A --> C["DELETE"]
    A --> D["PLAY"]
    A --> E["CLEAR"]
    B --> F["PROGRAM LIST 05"]
    C --> G["01"]
    D --> H["08"]
    E --> I["10"]
    F --> J["PROGRAM LIST 12"]
    G --> K["PROGRAM LIST 02"]
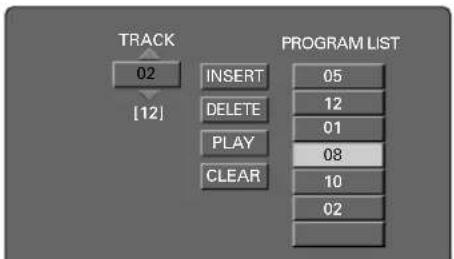
flowchart
graph TD
    A["TRACK"] --> B["02"]
    B --> C["[12"]]
    C --> D["INSERT"]
    D --> E["DELETE"]
    E --> F["PLAY"]
    F --> G["CLEAR"]
    G --> H["08"]
    H --> I["10"]
    I --> J["02"]
    J --> K["PROGRAM LIST"]
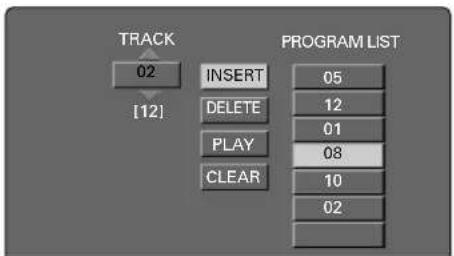
flowchart
graph TD
    A["TRACK 02 [12"]] --> B["INSERT"]
    B --> C["DELETE"]
    C --> D["PLAY"]
    D --> E["CLEAR"]
    F["PROGRAM LIST 05"] --> G["12"]
    G --> H["01"]
    H --> I["08"]
    I --> J["10"]
    J --> K["02"]
![TRACK 02 [12] INSERT DELETE PLAY CLEAR PROGRAM LIST 05 12 01 02 08 10 02](/content/2026/05/1021885/images/fd35002139f1ac2d55e2bbb8e937bd75fd0c8ee3d1dfa8ed2b70eec8852e5ec0.jpg)
Release Program play
In following case, Program play would be released.
- When you open and close tray.
- When you turn power off and on.
- Press the CLEAR key during display of the Program edit screen.
Hierarchical structure of VCD menus
When an item is selected on the menu screen during playback of a P.B.C.-compatible VCD, another menu with more details items may be displayed. When a number of menus are connected in multiple layers in this way, it is said that the menus have a hierarchical structure. In this structure, the desired scene can be reached by repeating item selections on the menu screens.
Example for a hierarchical structure
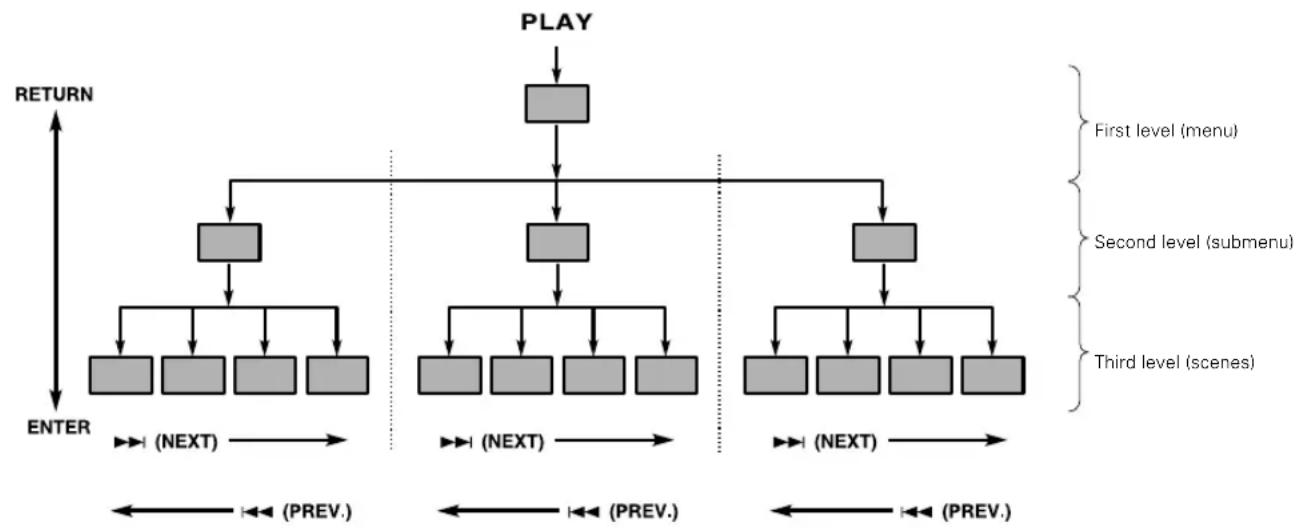
flowchart
graph TD
    A["PLAY"] --> B["First level (menu)"]
    A --> C["Second level (submenu)"]
    A --> D["Third level (scenes)"]
    B --> E["ENTER"]
    C --> F["ENTER"]
    D --> G["ENTER"]
    E --> H["(NEXT)"]
    F --> I["(NEXT)"]
    G --> J["(NEXT)"]
    H <--> K["(PREV.)"]
    I <--> L["(PREV.)"]
    J <--> M["(PREV.)"]
    K <--> N["(PREV.)"]
    L <--> O["(PREV.)"]
    M <--> P["(PREV.)"]
    N <--> Q["(PREV.)"]
    O <--> R["(PREV.)"]
    P <--> S["(PREV.)"]
    Q <--> T["(PREV.)"]
    R <--> U["(PREV.)"]
    S <--> V["(PREV.)"]
    T <--> W["(PREV.)"]
Advancing
When an item is selected on the menu screen with the ENTER (Select) key or the numeric keys, advance is made to the next lower menu level. When the advance destination is the "scene" to be played, the contents will be played.
- When several menus (scenes) can be selected in each level, screen switching is possible with the keys ▶▶▶ (NEXT) and ◀◀◀ (PREV.).
Returning
Each time the RETURN key is pressed, return is made to the next higher menu.
Examples of operation keys and indications used during VCD playback
| Soft jacket indication | ▶ | ◀ | ◀◀ | ▶▶ | ▶ (Select) |
| KENWOOD operation key | ▶ | RETURN | ◀◀ | ▶▶ | ENTER |
- Depending on the software, the jacket indication may differ from the above.

Playback without using the menu playback function (In case of a P.B.C.-compatible VCD) (To P.B.C. On or Off)
During VCD playback, press the MENU (P.B.C.) key on the remote control unit.
- For the track numbers, refer to the disc jacket or other material.
- P.B.C. off mode: Without using menu playback function.
P.B.C. off mode
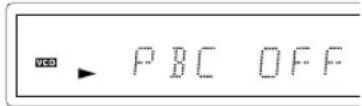
To return to menu playback
Press the MENU (P.B.C.) key again.
P.B.C. on mode
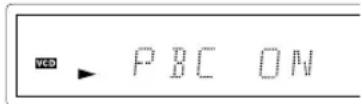

Playback will stop when P.B.C. is switched on or off during playback.
Guidance of MP3/JPEG
MP3/JPEG media that can be played back with this equipment
Usable media : CD-ROM, CD-R, CD-RW
Usable formats : ISO9660 level 1 (excluding expanded formats)
Files that can be played back : MP3 files and JPEG files
Creating media for playing back on this equipment
Compressing MP3
Please set up the transfer bit rate setting for the compression software when compressing MP3 files as follow.
MP3 Files : 128kbps recommended (32kbps-320kbps)
- This unit is compatible with 32 kHz, 44.1 kHz(recommended) and 48 kHz sampling frequencies.
- This unit is compatible with ID3-TAG Ver. 1.
- DIGITAL output of MP3 data is done not as MP3 data, but as PCM data.
Naming folders and files
Single-byte characters between A and Z, single-byte numerals between 0 and 9, and the single-byte underscore(_) can be displayed. Ensure that the "mp3" (MP3 files) or "jpg" (JPEG files) extension log is attached to all file names
- Never add the "mp3" extension log to any files other than MP3 files. If the "mp3" extension log is added to any files other than MP3 files, the equipment will assume that they can be played back, and this will produce loud noises in the speakers, resulting in damage of adverse effects.
- Never add the "jpg" extension log to any files other than JPEG files. If the "jpg" extension log is added to any files other than JPEG, the unit will not operate normally.
Confirming media and files
Check to ascertain that MP3 files can be played back correctly on the personal computer in use prior to saving them onto the media. Check to ensure that the saved file can be played back normally.
- It is not possible to confirm that files can be played back correctly while they are being saved onto the media.
When saving files onto media
Ensure that the session is closed or finalized when data has been written on media. There are cases where media on which the session has not be closed or finalized will not be played back correctly with this equipment.
- There are cases where the folder names and file names will not be displayed correctly depending on the software used to save them.
- Do not store files or folders other than MP3 or JPEG on media to be played back with this equipment.
- It is recommended that ten or less sessions are stored when recording MP3 files onto a media.
- In case of a multisession disc, some time may be required until playback begins.
- There are cases where playback is not possible when MP3/JPEG files (CD-ROM) and music CD infomation (CD-DA) are saved on the same media.
Example for a hierarchical structure
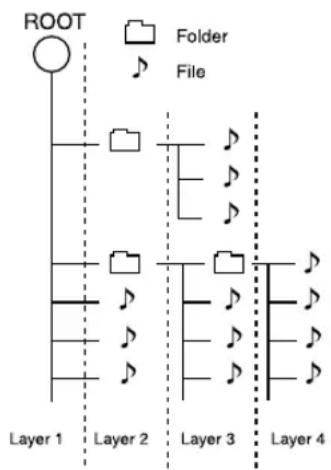
flowchart
graph TD
    A["ROOT"] --> B["Folder File"]
    B --> C["Layer 1"]
    B --> D["Layer 2"]
    B --> E["Layer 3"]
    B --> F["Layer 4"]
    style A fill:#fff,stroke:#000
    style B fill:#fff,stroke:#000
    style C fill:#fff,stroke:#000
    style D fill:#fff,stroke:#000
    style E fill:#fff,stroke:#000
    style F fill:#fff,stroke:#000
Example for the playback sequence
Playback is made in the order of ① to ⑪ in the following example.
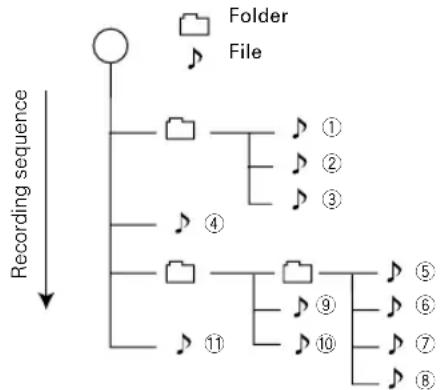
flowchart
graph TD
    A[" "] --> B[" "] --> C[" "] --> D[" "] --> E[" "] --> F[" "] --> G[" "] --> H[" "] --> I[" "] --> J[" "] --> K[" "] --> L[" "] --> M[" "] --> N[" "] --> O[" "] --> P[" "] --> Q[" "] --> R[" "] --> S[" "] --> T[" "] --> U[" "] --> V[" "] --> W[" "] --> X[" "] --> Y[" "] --> Z[" "] --> AA[" "] --> AB[" "] --> AC[" "] --> AD[" "] --> AE[" "] --> AF[" "] --> AG[" "] --> AH[" "] --> AI[" "] --> AJ[" "] --> AK[" "] --> AL[" "] --> AM[" "] --> AN[" "] --> AO[" "] --> AP[" "] --> AQ[" "] --> AR[" "] --> AS[" "] --> AT[" "] --> AU[" "] --> AV[" "] --> AW[" "] --> AX[" "] --> AY[" "]
    style A fill:#f9f,stroke:#333
    style B fill:#ccf,stroke:#333
    style C fill:#cfc,stroke:#333
    style D fill:#fcc,stroke:#333
    style E fill:#cff,stroke:#333
    style F fill:#ffc,stroke:#333
    style G fill:#cfc,stroke:#333
    style H fill:#cfc,stroke:#333
    style I fill:#cfc,stroke:#333
    style J fill:#cfc,stroke:#333
    style K fill:#cfc,stroke:#333
    style L fill:#cfc,stroke:#333
    style M fill:#cfc,stroke:#333
    style N fill:#cfc,stroke:#333
    style O fill:#cfc,stroke:#333
    style P fill:#cfc,stroke:#333
    style Q fill:#cfc,stroke:#333
    style R fill:#cfc,stroke:#333
    style S fill:#cfc,stroke:#333
    style T fill:#cfc,stroke:#333
    style U fill:#cfc,stroke:#333
    style V fill:#cfc,stroke:#333
    style W fill:#cfc,stroke:#333
    style X fill:#cfc,stroke:#333
    style Y fill:#cfc,stroke:#333
    style Z fill:#cfc,stroke:#333

Folder names and file names are displayed up to 8 characters. When folder names and file names are recorded with more than 8 characters, the names will be displayed in abbreviated form.
Playing back MP3/JPEG files
- It is not possible to play back folders and files that exceed the maximum limitations of the media.
- A certain amount of time is required for the player to confirm the media on which MP3/JPEG files have been recorded before playback will commence.
Playback
⑦During stop mode, press REPEAT key on the remote to select play mode.
2 Press Cursor up/down (▲/▼) keys on the remote to select desired file, then press the ENTER key to start playback.
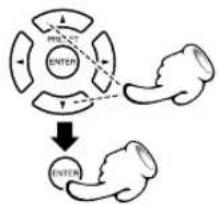
flowchart
graph TD
    A["ENTER"] --> B["ENTER"]
    style A fill:#f9f,stroke:#333
    style B fill:#bbf,stroke:#333
- When JPEG files are displayed, the display is switched automatically from one file to the next. The switching speed differs according to the file size.
To stop playback press the ■ (STOP) key.
Skipping files
During playback, press the |◀◀ or ▶▶| key.
MAIN UNIT
REMOTE
◀◀: To skip backward
▶▶: To skip forward

When the play mode is "FOLDER", "FOLDER REPEAT" or "REPEAT ONE", skipping to outside the folder being played is not possible.
This lights when an MP3 or a JPEG disc is set.
- The SMART NAVI screen will be displayed when an MP3 or JPEG disc is set.
Each press switches the play mode.
① FOLDER : Playback the folder that is selected.
② DISC : Playback all files on the disc.
③ FOLDER REPEAT : Repeat the folder that is selected.
④DISC REPEAT : Repeat all files on the disc.
⑤ REPEAT ONE : Repeat the file that is selected.
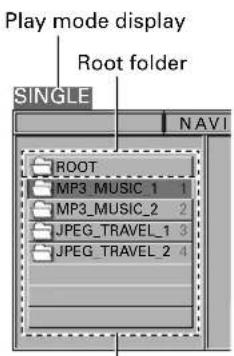
Folders and files in the root folder
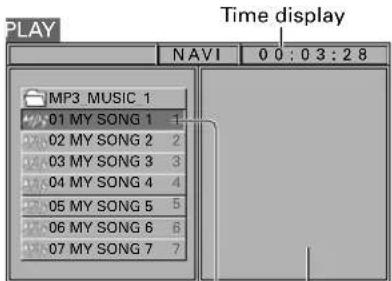
Selected file
Program window
Searching (only for MP3 files)
During playback, press the ◀◀ or ▶▶ key.
REMOTE
● Each press switches the searching speed.
① FF 2 X (▶▶ key) or FR 2 X (◀◀ key)
② FF 4 X (▶▶ key) or FR 4 X (◀◀ key)
③ FF 6 X (▶▶ key) or FR 6 X (◀◀ key)
④ FF 8 X (▶▶ key) or FR 8 X (◀◀ key)
⑤Normal playback
Selects the files to be played back directly
Press the numeric keys on the remote to enter the desired file number or folder number.
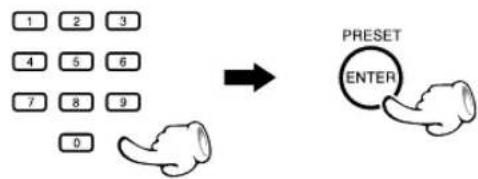
flowchart
graph LR
    A["1 2 3"] --> C["0"]
    B["4 5 6"] --> C
    D["7 8 9"] --> E["PRESET ENTER"]
    F["0"] --> G["Anaphase Icon"]
(Example)
To select file No. 23 : 2 3
- When a folder is selected, the contents of the selected folder will be displayed.
- When a file is selected, playback of the selected file will start.
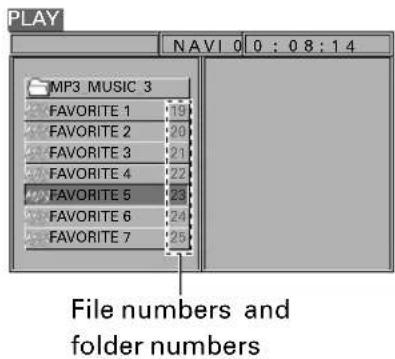

For selection of a number, refer to the file numbers on the SMART NAVI screen.
The file numbers shown on the display of the main unit differ from the file numbers entered directly with the numeric keys, as the numbers for each folder are displayed.
Rotating a picture (JPEG files only)
It is possible to rotating a picture.
During JPEG file playback, press the Cursor (◄/►/▲/▼) keys on the remote.
Display examples
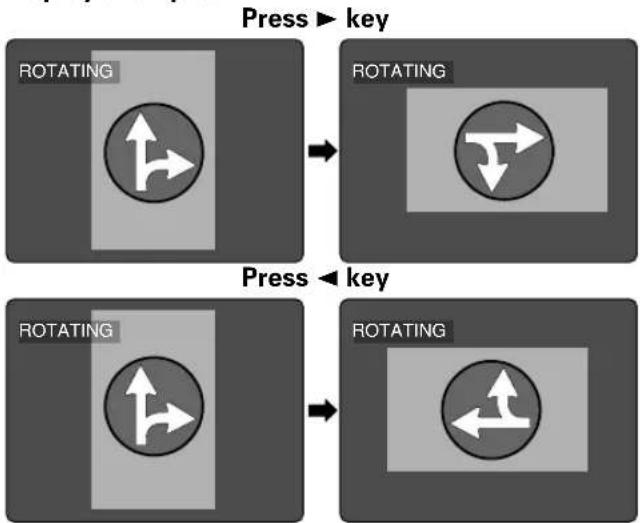
flowchart
graph TD
    A["Press key"] --> B["Rotating"]
    C["Press key"] --> D["Rotating"]
    E["Press key"] --> F["Rotating"]
Switching as shown below is done when the cursor keys are pressed.
▶ key: 90° rotation in clockwise direction
◀ key : 90° rotation in counterclockwise direction
▲ key : Vertical mirror image
▼ key : Horizontal mirror image
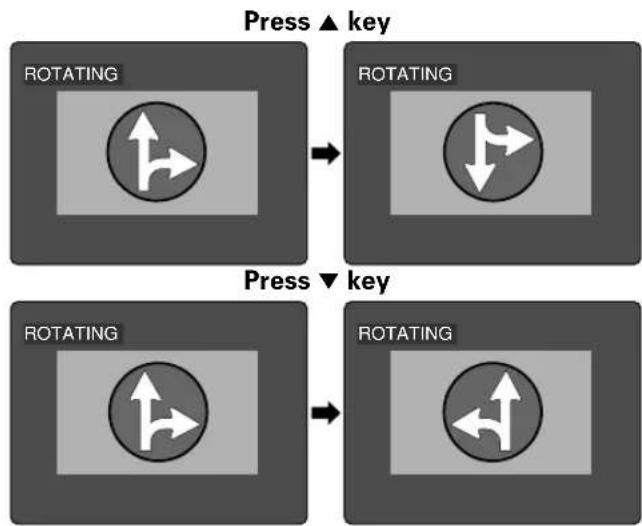
flowchart
graph TD
    A["ROTATING"] --> B["↑"]
    B --> C["↓"]
    D["ROTATING"] --> E["↑"]
    E --> F["↓"]
    G["ROTATING"] --> H["↑"]
    H --> I["↓"]
    J["ROTATING"] --> K["↑"]
    K --> L["↓"]
    M["ROTATING"] --> N["↑"]
    N --> O["↓"]
MP3/JPEG Repeat play
Preform operation in REPEAT mode always under observation of the SMART NAVI screen.
Desired folders or discs can be played back repeatedly.
- "REPEAT ONE": Repeat the file that is selected.
- "FOLDER REPEAT": Repeat the folder that is selected.
- "DISC REPEAT": Repeat the disc that is played.
⑦During stop mode, press the REPEAT key on the remote.
At the time of REPEAT mode "REPEAT" is light.
Display
2 Press Cursor up/down (▲/▼) keys on the remote to select desired file, then press the ENTER key or the play (▶) key to start playback.
Each press switches the play mode.
① FOLDER : Playback the folder that is selected.
② DISC : Playback all files on the disc.
③ FOLDER REPEAT : Repeat the folder that is selected.
④ DISC REPEAT : Repeat all files on the disc.
⑤ REPEAT ONE : Repeat the file that is selected.

Do not select DISC REPEAT when files other than MP3 and JPEG have been recorded on the disc.
MP3/JPEG Random play
The files of a folder are played in random order.
- "RANDOM ON": The fils of a folder being played will be selected in random order for playback.
⑦During stop mode, press the RANDOM key on the remote.
At the time of RANDOM mode "RANDOM" is light.
Display
Each time you press RANDOM key on the remote, random play would be on and off.
②Select a file in the folder to be played, press the play (▶) key, and start random playback.
To cancel random play
① Press the stop (■) key to stop playback.
②Press the RANDOM key to cancel random play-back.
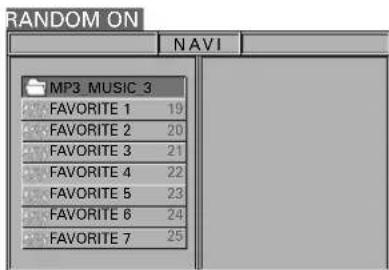
- In case of RANDOM ON mode, playback will stop after all files in the folder have been played back once.
To random repeat play
During stop mode, press the RANDOM key, then press the REPEAT key on the remote.
- In case of RANDOM REP mode, all files in the folder will be played back repeatedly. It is also possible that the same file will be played back twice in a row.
To cancel random repeat play
Press the stop (■) key to stop random repeat playback, then press the REPEAT or RANDOM key.
MP3/JPEG program playback
You can listen to the desired files of the current MP3/JPEG disc in any desired order.
Program Edit
①During stop mode, press the PGM key on the remote.
② Press Cursor up/down (▲/▼) keys on the remote to select the file, then press the ENTER key.
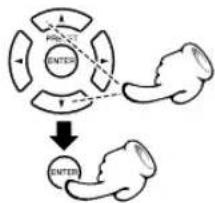
flowchart
graph TD
    A["Input"] --> B{Decision}
    B -->|Yes| C["Process"]
    B -->|No| D["Output"]
    C --> E["Final Output"]
    D --> E
● The selected file go to program window.
- You can select a maximum of about 100 files by repeating step 2. However, note that the maximum number of programmable files depending on the number of files and folders in the MP3/JPEG disc and on the total number of characters used in the file and folder names.
③ Press the ■ (Stop) key and confirm the program.
- After the ■ (Stop) key has been pressed and the program has been confirmed, the program no longer can be changed.
④ Press ▶ key to start program playback.
- Confirm that the cursor is at the position of a "file" and press the ▶ key. Playback is not possible when the cursor is at the position of a "folder".
Delete Program
During program edit mode, press the Cursor up/down keys in the program window, select the file to be deleted, and press the CLEAR key.
- After the ■ (Stop) key has been pressed and the program has been confirmed, the program no longer can be changed.
- All programs can be canceled by pressing the PGM key during stop in program mode. All programs also can be canceled by opening the disc tray.
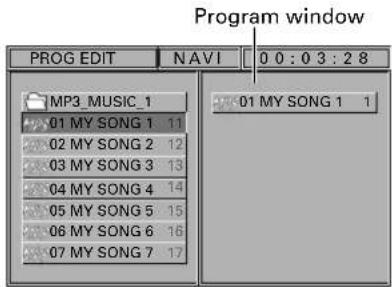
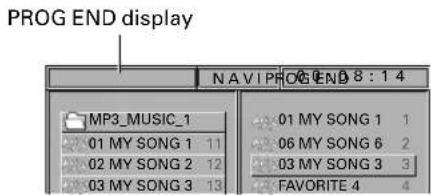
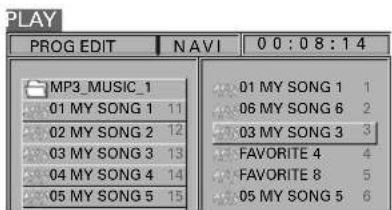
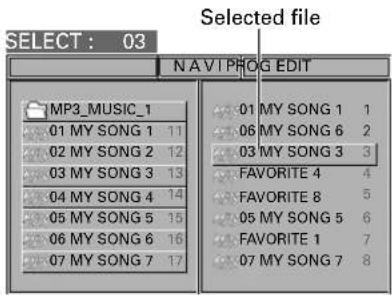
What appears to be a malfunction may not always be serious. If your unit should not perform as expected, consult the table below to see if the problem can be corrected before seeking help from your dealer or service representative.
Operation to reset
The microprocessor may fall into malfunction (impossibility to operate erroneous display, etc.) when the power cord is unplugged while power is ON or due to an external factor.
In this case, switch off the power, wait for several seconds, and then switch the power on again.
Return to the factory defaults by resetting the microprocessor is done as shown as follows.
① Press the MENU key on the remote to enter SETUP MENU.
2 Select the PREFERENCE, then press the ENTER key.
3 Select DEFAULTS, press the Curso right (▶) key to select RESET.
④ Press the numeric keys as shown below.
Press 1, 3, 9, 7, then press the ENTER key.
When resetting is done according to this method, all settings, including the settings for password and parental level, will be reset to the factory defaults.
Receiver, speakers
| RemedyCauseSymptom | ||
| Sound is not produced. | ●The speaker cords are disconnected.●The MUTE switch of remote control unit is switched ON.●The headphone plug is inserted into the jack. | ●Connect properly referring to “System connections”.→11●Switch MUTE OFF.→34●Unplug the headphone plug.→34 |
| Sound is not produced from the left or right speakers. | ●The speaker cords are disconnected. | ●Connect properly referring to “System connections”.→11 |
| Radio stations cannot be received. | ●The antennas have not been connected.●A proper broadcasting band has not been selected.●The frequency of the station to be received is not tuned. | ●Connect antennas.→12●Select a band.→36●Tune to the frequency of the desired station.→36 |
| Noise interferes. | ●Car ignition noise.●Influence of an electric appliance.●A TV set is installed near the system. | ●Install the outdoor antenna in an apart position from the road.→12●Switch the suspected electric appliance OFF.●Install the TV or the system at an increased distance between them. |
| A station has been preset but it cannot be received by pressing the P.CALL key. | ●The frequency of the preset station is not tunable.●The preset memory has been cleared because the power cord has been unplugged for a long period. | ●Preset stations with tunable frequencies.●Preset stations again.→37 |
| The STANDBY indicator flashes red. | ●The speaker connection is abnormal. | ●Check the speaker connection.●Check the speaker connection. If this does not help, contact your dealer for service. |
| No sound from the surround speakers | ●The LISTEN mode is STEREO. | ●Select Surround with the LISTEN MODE key.→29 |
DVD player unit
| Symptom | RemedyCause | |
| Playback does not start when the ▶/II key is pressed. | ●There is no disc in the player.●There are no signals recorded on the side of the disc being played. | ●Load a disc and press the ▶/II key.●Turn the disc over and properly place it on the disc tray. |
| Playback starts but no image/sound is seen heard. | ●The TV is not turned on.●The connection cords are not properly connected. | ●Turn on the TV.●Properly reconnect the connection cords.→11 |
| The picture is disrupted when the image is fast forwarded or fast reversed. | ●The picture is slightly disrupted during fast forward and fast reverse operations. | ●This is not a malfunction. |
| No sound is heard. | ●The audio output cords are not properly connected.●The volume control of the TV or amplifier is not adjusted properly.●The player is in a special playback mode. | ●Properly connect the audio cords.→11●Set the sound volume to an appropriate level.●Press the ▶/II key to resume normal play-back mode. |
| The picture does not look good or the picture/sound quality is poor. | ●A nearby device is generating noise.●The disc is dirty.●The disc is damaged.●There is condensation on the optical lens. | ●Separate this unit as far as possible from the device you think is generating the noise.●Refer to the "Disc handling precautions" section and wipe dirt from the disc.→7●Use a new disc.●Refer to the "Caution on condensation" section and evaporate the condensation.→7 |
| It takes a while for the disc to start playing. | ●Time is required for the unit to detect the disc type and size and for the rotation of the motor to stabilize. This is not a malfunction. | ●Approximately 10 to 20 seconds are required for a disc to start playing, although the time differs depending on the disc. |
| The tray opens automatically. | ●The disc is not placed horizontally. | ●Properly place the disc on the tray. |
| The top and bottom of the screen cannot be seen, or the screen becomes black-and-white. | ●The video format of the disc being played does not match that of the connected TV monitor. | ●Refer to the "Video formats" section ,and use a disc with the appropriate video format for your TV or a TV with the appropriate video format for the disc.→10 |
| The subtitle is not displayed. | ●The DVD disc being played does not contain the recording of subtitles.●The subtitle mode is set to off. | ●The subtitle cannot be displayed when the DVD disc being played does not contain the recording of subtitles.●Press the SUBTITLE key to switch on the subtitle mode.→43 |
| The voice (or subtitle) language cannot be changed. | ●The DVD disc being played does not contain the recording of more than one audio (or subtitle) language. | ●The voice (or subtitle) language cannot be changed when the DVD disc being played does not contain the recording of more than one voice (or subtitle) language. |
| The viewing angle cannot be changed. | ●The DVD disc being played does not contain the recording of more than one angle.●You are attempting to switch the angle in a DVD section where more than one angle is not recorded. | ●The viewing angle cannot be changed when the DVD disc being played does not contain the recording of more than one angle.●More than one viewing angle may be recorded only in limited sections in a disc. |
DVD player unit
DVT-6200 (EN/K,E,X)
| RemedyCauseSymptom | ||
| Playback will not start even after a title is selected. | A viewing restriction (PARENTAL) has been set for the disc. | Check the viewing restriction level (PA- RENTAL) setting. |
| The parental level cannot be changed. | You have forgotten the password. | Set the initial setup to the factory setup with the following procedure.1 Press the MENU key on the remote to enter SETUP MENU.2Select the PREFERENCE, then press the ENTER key.3Select DEFAULTS, press the Cursor right (▶) key to select RESET.4Press the numeric keys as shown below. Press 1, 3, 9, 7, then press the ENTER key.The password set at the time of shipping from the factory is "0000". |
| The voice or subtitle language selected in the initial setting is not played. | The DVD disc being played does not contain the recording of the selected voice or subtitle language.The initial playback language is specified by the DVD disc.The DVD specifications provide for selection at the menu screen. | Use a DVD disc containing the recording of the selected voice or subtitle language.Press SUBTITLE or the AUDIO key on the remote and select the language.→43Select at the menu screen of the disc. |
| Menu screen messages are not shown in the desired language. | The menu language function (MENU) is not set to desired language. | Select disc menu language.→25 |
| A VCD cannot be played using menus. | The VCD disc being played is not compatible with P.B.C. | Menu playback is available only with VCD discs recorded with P.B.C. |
| "THE PLAYER IS LOCKED" will be displayed on the TV screen (the 🔒 mark on the display of the main unit will be lit), and disk tray opening/closing operation will not be accepted. | Operation is prohibited. | Press the MENU key of the remote control for several seconds while holding the stop (■) key on the main unit pressed."THE PLAYER IS UNLOCKED" will be displayed (the 🔒 mark will not be lit, and operation will become possible. |
Remote control unit
| RemedyCauseSymptom | ||
| Remote control operation is not possible. | ● Batteries are exhausted.●The remote control is too far away from the system, the controlling angle is deviated or there is an obstacle in between. | ●Replace with new batteries.●Operate the unit inside the remote controllable range. |
Inhibition icon
| RemedyCauseSymptom | |||
 | The inhibition icon is displayed and remote control is not possible. | ●Playback is restricted intentionally by the software producer. | ●The operation is inhibited. Please try another operation. |
Manufactured under license from Dolby Laboratories. "Dolby" and the double-D symbol are trademarks of Dolby Laboratories.
Main unit
[Amplifier section]
Effective output power during STEREO operation
1 kHz, 10 % T.H.D. at 8 Ω ....55 W + 55 W
Effective output power during SURROUND operation
Front (1 kHz, 10 % T.H.D. at 8 Ω) ....55 W + 55 W
Center (1 kHz, 10 % T.H.D. at 8 Ω) 55 W
Surround (1 kHz, 10 % T.H.D. at 8 Ω)....55 W + 55 W
Subwoofer (100 Hz, 10 % T.H.D. at 4 Ω) ..... 100 W
Input sensitivity / impedance
CABLE/SAT / VCR 250 mV / 27 kΩ
Output level / impedance
VCR 250 mV / 1 kΩ
[ Tuner section ]
FM tuner section
Tuning frequency range 87.5 MHz \~ 108 MHz
AM Tuner section
Tuning frequency range (for Europe and Australia) 531 kHz \~ 1,602 kHz
Tuning frequency range (for U.S.A.) 530 kHz \~ 1,700 kHz
[ DVD/CD/VIDEO CD player section ]
Signal read system ...... Semiconductor laser
Wave length.... For DVD;640 to 660 nm For CD; 770 to 810 nm
Power class .... Class 2 (IEC)
Wow and flutter .... Less than unmeasurable Limit
Video output format .... NTSC/PAL
VIDEO OUTPUT
Composite video output level/impedance 1 Vp-p (75 Ω)
S-video output
Y output level/impedance .... 1 Vp-p (75 Ω)
C output level/impedance
NTSC 0.286 Vp-p (75 Ω)
PAL 0.3 Vp-p (75 Ω)
Component video output (only for some areas)
Y output level/impedance .... 1 Vp-p (75 Ω)
C/b output level/impedance .... 0.684 Vp-p (75 Ω)
C/r output level/impedance .... 0.684 Vp-p (75 Ω)
RGB output level (SCART).... 0.7 Vp-p (75 Ω)
Compression format ...... MPEG1/MPEG2
[General]
Power consumption....100 W
Dimensions W:400 mm (15-3/4")
H: 78 mm (3-1/16")
D:390 mm (15-3/8")
Weight (net) 5.0 kg
KSW-6200 Speakers (Front/Center)
Enclosure ...... Bass-Refresh (Magnetically shielded)
Speaker configuration .... 80 mm (3"), cone type Impedance .... 8 Ω
Power Handling Capacity (DVR-6200) 55 W
Dimensions W: 100 mm (3-15/16")
H: 180 mm (7-1/16")
D: 124 mm (4-7/8")
Weight (net) 0.9 kg (1 piece)
KSW-6200 Speakers (Surround)
Enclosure ...... Bass-Refresh
Speaker configuration 80 mm (3"), cone type
Impedance 8 Ω
Power Handling Capacity (DVR-6200) 55 W
Dimensions W: 100 mm (3-15/16")
H: 180 mm (7-1/16")
D: 124 mm (4-7/8")
Weight (net) 0.7 kg (1 piece)
KSW-6200 Speaker (Subwoofer)
Enclosure ...... Bass-reflex type
Speaker configuration
Woofer 160 mm (6-1/2"), cone type
Impedance 4 Ω
Power Handling Capacity (DVR-6200) 100 W
Dimensions W:170 mm (6-11/16")
H: 355 mm (14")
D:341 mm (13-7/16")
Weight (net) 5.2 kg

KENWOOD follows a policy of continuous advancements in development. For this reason specifications may be changed without notice.
● Sufficient performance may not be exhibited at extremely cold locations (Where water freezes).
KENWOOD
For your records
Record the serial number, found on the back of the unit, in the spaces designated on the warranty card, and in the space provided below. Refer to the model and serial numbers whenever you call upon your dealer for information or service on this product.

- Before applying power
- Safety precautions
- WARNING : TO PREVENT FIRE OR ELECTRIC SHOCK, DO NOT EXPOSE THIS APPLIANCE TO RAIN OR MOISTURE.
- The marking of products using lasers
- CAUTION
- Contents
- Caution : Read the pages marked carefully to ensure safe operation.
- Preparations
- Operations
- Knowledge
- Unpacking
- Accessories
- Accessories packed with the main unit
- For the U.S.A.
- CAUTION:
- Note to CATV system installer
- FCC WARNING
- NOTE:
- Notes:
- Maintenance
- Maintenance of the unit
- In regard to contact cleaner
- Reference
- Disc handling precautions
- Handling
- Cleaning
- Storage
- Discs which can be played with this unit
- Never play a cracked or warped disc
- Disc accessories
- Note related to transportation and movement
- Caution on condensation
- Types of playable discs
- Unplayable discs
- Icons on the DVD VIDEO discs
- Region codes in the world
- Region codes of the DVD VIDEO discs that can be played with this player
- Restrictions due to difference between discs
- Checking the Video Format ("Preparation for Set Up" → 18)
- When the video formats are different :
- Malfunction of microcomputer
- AM loop antenna
- AM loop antenna connection
- FM antenna
- FM indoor antenna connection
- FM outdoor antenna (commercially available)
- Connecting to a TV
- \* For Europe only
- Connecting to a Satellite Tuner
- Connecting to Audio video equipments
- DTS disclaimer clause
- Standby mode
- DIMMER function
- Operation
- Preparation for Set Up
- Set up menu
- GENERAL SETUP
- TV DISPLAY
- NORMAL/PS (Pan Scan)
- NORMAL/LB (Letter Box)
- WIDE
- PIC MODE
- AUTO
- FILM
- VIDEO
- SMART
- SSMART
- ANGLE MARK
- OSD LANG
- CAPTION (NTSC only)
- SCR SAVER
- AUDIO SETUP
- DYNAMIC
- PREFERENCES
- VIDEO OUTPUT (only for some areas)
- AUDIO
- SUB TITLE
- DISC MENU
- PARENTAL
- Parental lock level;
- PASSWORD
- DEFAULTS
- How to use the RETURN key
- DVD VCD Select TV Display
- DVD VCD Select Picture Mode
- DVD Select ANGLE mark ON or OFF
- Select OSD Language
- DVD Select CAPTIONS ON or OFF (NTSC only)
- DVD VCD CD
- Select Screen Saver on or off
- DVD Select Dynamic Range
- DVD VCD Select VIDEO Output (only for some areas)
- DVD Select Audio Language
- To select other language
- DVD Select Subtitle Language
- DVD Select Disc Menu Language
- DVD Select Parental level
- DVD Change Password
- Put back to the Defalt Setting
- What are LISTEN modes?
- To set the LISTEN mode manually
- At the time of DTS or DOLBY DIGITAL (5.1 ch) source
- At the time of PCM or DOLBY DIGITAL (2 ch) source
- Description of Dolby Pro Logic II: Music mode
- Positioning the speakers
- Preparation
- Initial set values for the speaker level
- Speaker level setting
- Delay time setting
- How to set the delay time
- Level setting using a music source
- Speaker level adjustment can be performed by pressing the keys FRONT, CENTER, REAR, and SW.
- Basic use method
- Selecting the desired input
- Volume adjustment
- Muting the sound temporarily
- Listening through headphone
- Selecting the ACTIVE EQ.
- Select the TUNER input
- Select the broadcast band
- Select a tuning mode
- Select a station
- P.CALL (preset call) "AUTO" mode
- (auto tuning)
- "MONO" mode (manual tuning)
- Storing the broadcast stations (one-by-one presetting)
- Select a station (auto tuning or manual tuning) → 36
- Press the ENTER key
- Select the desired preset number
- Press the ENTER key
- Using RDS function (for Europe only)
- Functions made possible with RDS
- PTY (Program Type Identification) Search :
- PS (Program Service Name) Display :
- RT (Radio text) :
- CT (Clock Time) :
- Using the RDS Display function
- Select the FM broadcast station
- Press the RDS DISP. key
- PS NAME
- RT display
- CT display
- PTY function
- Using the PTY search function
- Select the FM band
- Press the PTY key
- Press the PTY key to select the desired program type.
- When the program type is selected, press the TUNING (◄◄/►►) keys.
- PTY not found
- Basic play
- Load a disc.
- MAIN UNIT
- Start playback.
- REMOTE
- To pause playback
- When a Disc Menu appears on the screen
- To stop playback
- RESUME playback (only DVD)
- Disc playback features
- CD DVD VCD Skipping chapters or tracks
- CD DVD VCD Searching
- DVD VCD STEP (freeze frame and frame advance)
- DVD VCD Slow motion playback
- CD DVD VCD Playback from desired track or title
- DVD CD VCD On screen display
- At the time of CD/VCD playback.
- VCD Select the Audio channel
- DVD Select Camera angle
- CD VCD Random play
- To cancel random play
- To repeat random play
- DVD CD VCD Repeat play
- DVD CD VCD A-B Repeat play
- DVD CD VCD Using Bookmarks
- Create the bookmark
- Recalling a bookmarked scene
- CD VCD Using IntroScan function
- CD IntroScan playback
- VCD IntroScan playback
- Program Edit
- To repeat program play
- Insert track
- Delete Program
- Release Program play
- Hierarchical structure of VCD menus
- Advancing
- Returning
- Playback without using the menu playback function (In case of a P.B.C.-compatible VCD) (To P.B.C. On or Off)
- To return to menu playback
- Guidance of MP3/JPEG
- MP3/JPEG media that can be played back with this equipment
- Creating media for playing back on this equipment
- Compressing MP3
- Naming folders and files
- Confirming media and files
- When saving files onto media
- Example for a hierarchical structure
- Playing back MP3/JPEG files
- Playback
- Skipping files
- Searching (only for MP3 files)
- Selects the files to be played back directly
- Rotating a picture (JPEG files only)
- MP3/JPEG Repeat play
- MP3/JPEG Random play
- To random repeat play
- To cancel random repeat play
- MP3/JPEG program playback
- Operation to reset
- [Amplifier section]
- [ Tuner section ]
- [ DVD/CD/VIDEO CD player section ]
- KSW-6200 Speakers (Front/Center)
- KSW-6200 Speakers (Surround)
- KSW-6200 Speaker (Subwoofer)
- KENWOOD
- For your records
Brand : KENWOOD
Model : DVT-6200
Category : Home Theater