
Mitra - Mp3 player Sunstech - Free user manual and instructions
Find the device manual for free Mitra Sunstech in PDF.


| Product Type | Portable MP3 Player |
| Brand | Sunstech |
| Model | Mitra |
| Dimensions | Approx. 80 x 40 x 10 mm |
| Weight | Approx. 30 g |
| Power Supply | Built-in rechargeable lithium-ion battery |
| Battery Capacity | 200 mAh |
| Playback Time | Up to 10 hours |
| Charging | Via USB 2.0 (cable included) |
| Internal Storage | 4 GB |
| Expandable Storage | microSD card slot (up to 32 GB) |
| Display | 1.5-inch TFT color screen |
| Audio Formats | MP3, WMA, WAV, FLAC |
| Radio | FM tuner with presets |
| Recording | Voice recording via built-in microphone |
| Additional Functions | E-book reader, photo viewer, stopwatch |
| Connectivity | USB 2.0, 3.5mm headphone jack |
| Controls | Physical buttons: play/pause, volume, next/prev, menu |
| Maintenance | Clean with a soft, dry cloth. Do not use liquids. |
| Safety | Keep away from water and extreme temperatures. Do not disassemble. |
| Spare Parts and Repairability | Contact Sunstech authorized service center for genuine parts. |
| General Information | Portable MP3 player with FM radio, voice recording, and microSD expansion. |
Frequently Asked Questions - Mitra Sunstech
User questions about Mitra Sunstech
0 question about this device. Answer the ones you know or ask your own.
Ask a new question about this device
Download the instructions for your Mp3 player in PDF format for free! Find your manual Mitra - Sunstech and take your electronic device back in hand. On this page are published all the documents necessary for the use of your device. Mitra by Sunstech.
USER MANUAL Mitra Sunstech
natural_image
Digital photo editing interface showing a red flame over a dark object, with a thermometer on the right (no readable text or symbols)natural_image
Smartphone home screen with navigation buttons and a horizontal bar (no readable text or symbols)es 0
natural_image
Three-panel image showing a blue industrial machine with control panel and three identical icons below (no readable text or symbols)- Obturador
- Conector USB
- Ranhura do Cartão MICRO SD
- Conector de auscultadores
- Retroceder
- Power ON/OFF
(ligar/desligar)
- Câmara
3. Utilização
a) Power ON/OFF (ligar/desligar)
Ligar:
natural_image
Digital photo of a red, flame-like object with smoke or vapor rising from it, displayed in a software interface (no readable text or symbols)natural_image
Digital app interface with navigation buttons and a speed bar (no readable text or symbols)Clique 📋: Tirar foto.
Congratulations for the purchasing of the Player. The high integration reduces the device weight and the dimensions and the use is comfortable. The big display with TFT technology offers clear and sharp information and the USB 2.0 interface make easier the data transfer operation from/to the computer. The MP4 Player has built-in a Li-Polymer battery rechargeable by computer USB port. By the microphone inside it is possible to record voice messages and play them directly with the device or by computer.
Before using this product, please read this manual and retain the instruction for future reference.
2. Description
Here below you will find a product description

- Shutter
- USB connector
- MICRO SD Card slot
- Earphone connector
- Return
- Power ON /OFF
- Camera
3. Use
a) Power ON/OFF
Powering On:.
- Turn on On/Off button to On position
- Hold the Return button for 2 seconds to power on screen
Powering Off:
-
Hold the Return key for 4 seconds to switch to standby mode.
-
Then, turn the On/Off button to Off position.
-
Under the state of stop, the player may power off automatically if a sleep time is predefined in System Menu.
b) Recharge the Player
MP3 player is supplied of a rechargeable battery. It is advised to long charge the player at first use!
During charging, You should first turn on your PC and your player, and then connect the player to the PC through the USB cable. The player should be fully charged in 3 to 4 hours.
4. Main Menu
After powering on the MP3 player, you can see the main menu with 16 submenus, which allow you to select different functions and options. You can select the desire option, and then press menu icon to confirm the selection.

The available options are:
Standby Select this option to lock the device
Music: Select this option to play song.
Video: Select this option to play video.
Radio: Select this option to use the FM radio.
Picture: Select this option to browse and see photos.
Ebook: Select this option to read text.
Record: Select this option to record voice messages by the microphone inside.
Browser: Select this option to explore the Folder on the memory
Camera: Select this option to take pictures
Video Record Select this option to video record
stopwatch: Select this option to use stopwatch
calculator: Select this option to use calaulator
Calendar: Select this option to use calendar
Setting: Select this option to access at system setup.
PC camera: Select this option to use the player like a webcam
Flash: Select this option to Play Games
Touch screen key function
Under the main menu, you can touch to select the function, and enter the submenu.
Note:
Don't touch too heavy, otherwise will cause the touch function is not sensitive or display broken.
When find touch is not sensitive, you can adjust the screen under Setting menu
When the unit is dead due operate is not correctly, push the power key to Off position to power off.
a) Music Mode
The music player option allows playing songs which are saved on memory. To activate this option please follow here below instruction:
- Power ON the MP3 Player, Then press the Return button, The screen will display the main menu
- Press enter into music menu, there are some submenu below the interface, which can help you to browse your own musical library.
Click: to return to main menu.
Click: list the music played last time and highlight the one from which exited last
time.
Click: list all the music files stored under MUSIC directory in the player.
Click: List all songs of this atists
Click: List all songs of this album
Click: List all songs of this genre
Click: five lists in total; each list contains the music classified by user.
Click: list all record files.
Click: list all the music tag set by user; supporting up to 32 tag lists.
-
Then press the music file to to start playing.
-
Click 🏠 to select the previous file, click 🏠 to select the next file. Click
to play /pause, When playing the song, Slide
the to adjust the Volume,
Fast forward or Fast backward: Slide


to adjust the playing point.
EQ Setting: Under playing status, Click "NORMAL" to choose EQ mode, Including Normal, Rock, Pop, Classic, Soft, Jazz, DBB and User EQ,
A-B Repeat: Under playing status, Click "A" to set repeat start point A, And then click "B" to set repeat end point B. The player will then loop-play the content between point A and B.
Play mode: Under playing status, Click to choose play mode, Including Sequence, Repeat One, Repeat All, shuffle and Intro.
Setting: Click 📄 to enter setting menu and browse available options by moving the menu towards up.
Variable Speed Playback: set music playing speed from -4 to 4.
Add Tag: The now-playing music with its current time point will be added to Tag List and the system then will return to playing interface.
Delete: Delete specific song you want.
Information: Check the information of now playing music.
Add to My playlist: select one list to add to music file.
User EQ: this option allows you to adjust the range manually.
Advanced: Click Advanced to enter setting menu, Including Replay Times, Replay Gap and Fade in/out.
Synchronous Lyric Display
The player supports lyric files with *.LRC suffix, and displays synchronously.
How to use lyric files?
Please make sure the lyric has the same name to the music
For example:
Music file: My heart will go on.mp3
Lyric file: My heart will go on.Irc
Click ♪ to switch EQ Animation, lyric display and album cover
NOTE: While is playing the bars dissappear unless to touch the screen, The bars will appear again.
B) Picture Mode
Under main interface,Click to enter.
Click: ← to return to main menu.
Click: to show all the images inserted in the PICTURE folder.
Click: to show all photos (included those taken by the player).
Click: to show Camera PIC.
Click: to choose display mode, Including List Mode and Thumbnail Mode.
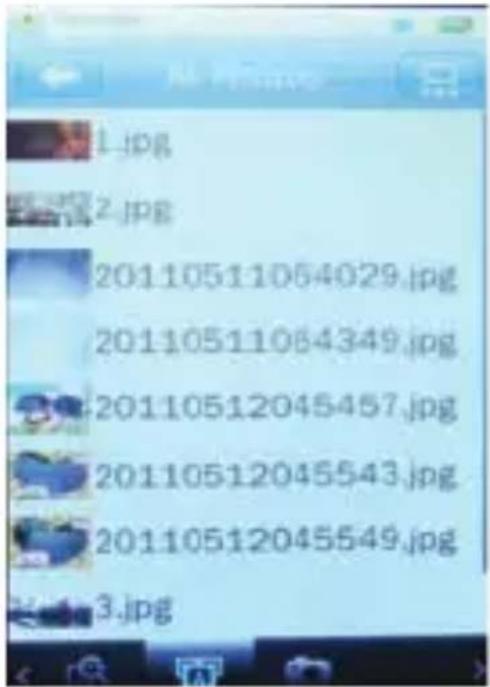
Press the picture you desire to start browsing the file
Click to return to the previous menu, When the picture is shown, you can select from list.
Click 📊 to switch manual browse and automatic browse mode
Click to start picture rotation.

natural_image
Digital photo of a red, flame-like object with smoke or vapor against a dark background, next to a vertical white line (no text or symbols)Using the scrolling bar over the image it is possible to modify the dimensions, click to return original picture size.
Setting: Click to enter setting submenu.
Slide Effect: set special playing effect, Including Move Page, Louver and Fade Display.
Delete: Delete specific picture you want.
Information: Check the information of now playing picture.
Screen Size: To choose screen size, including Full Screen, Original size and Scale.
C) Video Mode
Under main interface, Click ∞ to enter.
Click to return to the previous menu。
Click: ▶ list the video played last time and highlight the one from which exited last time.
Click: list all the Video files stored under Video directory in the player.

Click: list all the video files having tags, supporting up to 32 tags.
Click: 📄 list all the video files recorded with the player.
Press the video file you desire to start playing
Click to select the previous file, click to select the next file. Click to play/pause, When playing the Video, Slide the to adjust the Volume,
Fast forward or Fast backward: Slide to adjust the playing point.

Setting: Click 📷 to enter setting menu, Press relevant menu to enter into setting submenu, you can set the menu by moving.
Playback Mode: Sequence, Repeat One, Repeat All, Shuffle and Shuffle+Repeat.
Add Tag: The now-playing video with its current time point will be added to Tag List and the system then will return to playing interface.
Screen Size: To choose screen size, Including Full Screen, Original size and Scale.
Delete: Delete specific Video you want.
Information: Check the information of now playing video.
NOTE: While is playing the bars dissappearunless to touch the screen,The bars
will appear again.
How to convert the movie files
Support format : AVI, WMV, FLV, RM, RMVB, MP4, 3GP, MPEG, VOB, DAT.
Note: to convert some formats it is necessary to install the related codec (ex. Quicktime© for “.mov” or DivX Codec© for some “.avi” files)
Installation: insert a CD in your computer, execute the file "Setup.exe" in the folder "MediaPlayerUtilities_V5.23" to start the program installation.
At the end of installation, you will find MediaPlayerUtilities_V5.23 programs on your PC; select Video Converter to start the conversion.
- Run "Video Converter", click to choose the folder where to save the files, then click to select the position where the original files are.

- Select the file to be converted, then click 📄, the icon will be highlighted into 🔒 and a dialog box will show. Choosing the setting of Video Type AVI (XVID) and the resolution between 400x240 and 320x240 with related aspect ratio.

- Click to start converting.

- after conversion, the file will be automatically played. Now you can copy on the micro SD card and play it with your player!
D) Camera Mode
Under main interface, Click to enter.
Click: ← to return to main menu.
Click: to choose Brightness:, Value range from -3\~+3. Default is 0
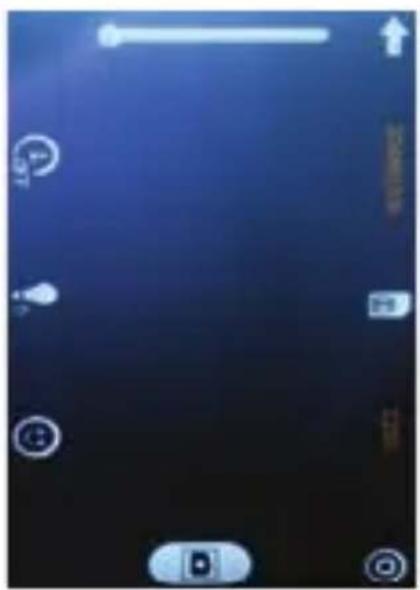
natural_image
Smartphone home screen with navigation buttons and a speedometer (no readable text or symbols)Click: Take picture.
Setting:Click to enter setting menu. Press relevant menu to enter into setting submenu, you can set the menu by moving.
White Balance: auto, Fine, Cloudy, Filament Lamp, Fluorescent Lamp.
Exposure Mode: auto, indoor, outdoor, The default is auto.
Special Effect: off, black & white, sepia, negative; the default is off.
Resolution: 640×480, 1024×768, 1280×960, 1600×1200, 2048×1536。
Memory Free Space: To see memory free space.
Self-timer: To choose the self-timer between 5/10/15/20 seconds.
Shutter Sound: To choose the shutter sound when you take a photo.
Date Stamp: To add the date and time to the photos taken.
E) Record Mode
Under main interface, Click to enter recording menu.
Click ← : to return to main menu.
Click :To star recording or pause
recording.
Click : To stop recording.
Click 📁: To choose recording quality, Including High, Medium and Low.
Click :T o choose choose the recording VOL between1/2/3/4/5.

Setting: Click 📷 to enter setting memu.
Record Format: To choose recording format between WAV/MP3.
Save Path: To choose recording path between Internal memory / Card Memory.
F) FM Radio
Under main interface, Click to enter FM radio menu.
Slide to adjust channel by manual, Slide 24 to adjust volume
Click : to return to main menu.
Click 🔒: The system will start auto search. When search finishes, the system will automatically save the channels..
Click: To enter FM recording interface, the operation is the same as that of
Click ✗ To delete the current channel.
Click 📋To pause or play radio stations.
Setting: Click to enter setting memu.
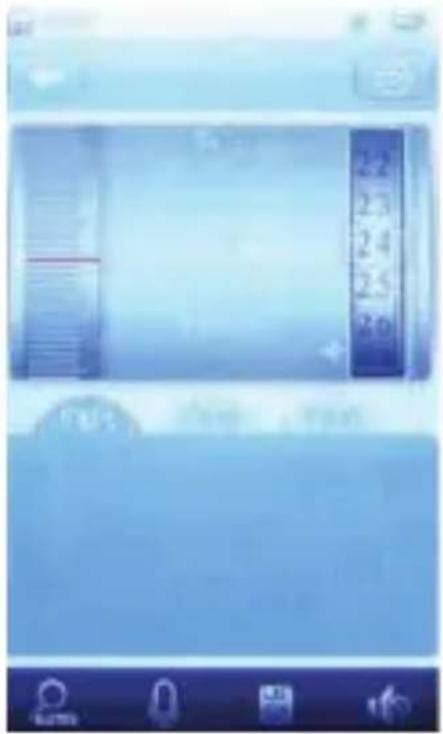
Tuner Region: To choose the tuner region including CHN/USA, JAPAN and EUROPE.
Record Format: To choose the Record format including WAV and MP3.
G) EBOOK MODE
Under main interface, Click to enter Ebook mode.
Click ← : To return to main menu.
Click 📄: To see now reading file
Click 📄 To see all TEXT files.

Click : 📁 To see all texts with tags .
Than press the file you desire to playing
Slide to start playing the page
Click to return the previous menu
Click to switch manual play and auto play mode. Auto play to press to choose playing time 3/6/9/12/15S.
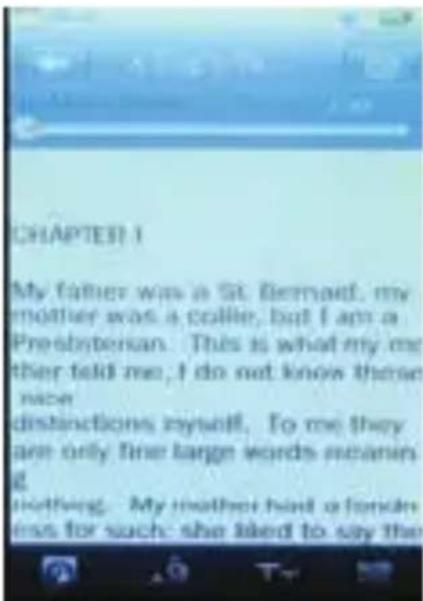
Click To Add tag .
Click TT: To change font size
Click : To change the color combination.
Setting: Click 📷 to enter setting memu
Select Coding: To select the language.
Effect Setting: To set to next page by auto, including Move Page/Turn Page/Water Wave.
Delete: To delete file you want.
H) Calendar
Under main interface, Click to enter calendar mode.
Click ▶ to select the year, month, day.

I) Video Record
Under main interface, Click 📋 to enter Video Record.
Click : To return to main menu.
Click : to choose Brightness:, Value range from -3\~+3. Default is 0
Click : To choose Exposure Mode.
Click To choose White Balance.
Click : to star/pause video record

Click :To stop and save video record.
Setting: Click 🔒 to enter setting memu
Special Effect: off, black & white, sepia, negative; the default is off.
Resolution: 640×480, 320×240,
Memory Free Space: To see memory free space.
Record Quality: To choose Record Quality including High/Medium/Low/Auto-adapted.
Save Path: To choose recording path between Internal memory / Card Memory.
J) Setting
Under main interface, Click 📄 to enter Setting Mode.

Display:
1. Bright Time
Slide process bar to choose LCD backlight time 0-60S. If the Bright Time is 0, then no black screen. If not 0, the screen will turn black if no operation during the set duration.
Bright off will be shield for some functions like lyric display, text reading, video playing etc.
- Brightness: Slide process bar to adjust LCD backlight brightness 1-5 levels.
Calibrate: Click twice in the center of “+” to proceed touch screen calibration and exit only calibrate ok.
Off Time : Click to enter Off Time setting,
1. Idle Time
Slide process bar to adjust the time 0-60Min. If the Idle Time is 0, the player will not shut down automatically, if not 0, the player will shut down in case no operation during the set duration.
2. Sleep Mode
Slide process bar to adjust power off time 0-120Min.. If the Idle Time is 0, the player will not shut down, if not 0, The player will shut
down when the set time reaches. The setting is deleted after the unit is turned off.
Date& Time:
1: Set Date
Press set date to date setting interface, slide the number to setting until the correct time, press ← to return.
2: Adjust Time:
Press Adjust Time to date setting interface, slide the number to setting until the correct time, press ← to return.
Language:
Support English, Simplified Chinese (default), Traditional Chinese, Japanese, Korean, French, German, Italian, Dutch, Portuguese, Spanish, Swedish, Czech, Danish, Polish, Russian, Turkish, ect
Advanced:
1: Player Info
Show the player's basic information: Firmware Version, Int. Capacity, Int Space, Card Capacity and Card Free Space. All Music, All Photos, All Videos, All Ebooks,
2: Reset:
Select it and the system will prompt: "Restore default settings?" Select Ok, then the
settings of all applications will restore to the factory setting.
K) Stopwatch
Under main interface, Click 🔒 to enter Stopwatch Mode.

Press start to time accounting. Press LAP to respective time accounting, which can save 100 time point. Click ←: To return to main menu.
L) Calculator
Under main interface, Click to enter Calculator Mode.

Click ← : To return to main menu.
M) Browser
Under main interface, Click 📄 to enter Browser.
-
by this mode it is possible to manage all the files supported by the player, by playing or deleting them.
-
browse the folders and select the supported files to start playback.
-
through the menu in the bottom side of the screen,
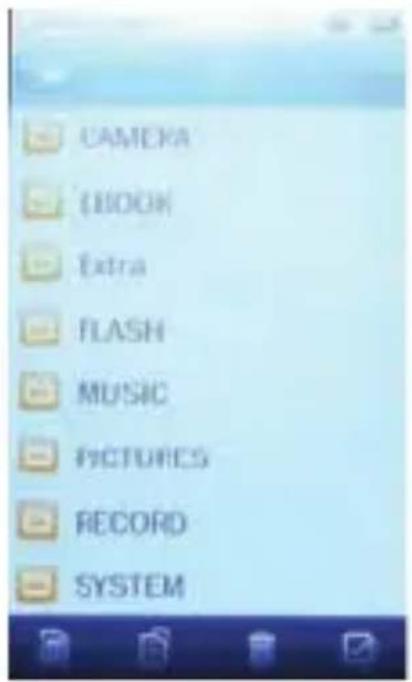
it is possible to select and delete the files inside the memory card.
- Click ← to return to main menu.
N) PC Camera
Under main interface, Click to enter PC Camera. The player will automatically detect whether USB cable is plugged in. The interface is shown as follows:

natural_image
Yellow webcam icon on dark background (no text or symbols)Select this option to use the player like a webcam; after selection connect the player to a PC through the USB cable, then start the previously installed program “Video Converter”.
O) FLASH
Under main interface, Click to enter play games. The FLASH option allows playing Games which are saved on memory.(SWF format)

Specification
| Size | 9,6*5,1*1 cm | |
| Screen | 2.8" TFT touch screen (resolution 400*240 pixels) | |
| Computer connection | USB 2.0 (full speed) | |
| MicroSD memory card | 4GB/8GB/16GB | |
| REC | Sample ratio | 8KHz/16KHz/24KHz/32KHz |
| Recording format | WAV(32/64/192/384Kbps)MP3(64/128/256 Kbps) | |
| MP3, WMA | Max output power | (L)9mW+(R)9mW(32Ohm) |
| MP3 bit rate | 8K bps – 320K bps | |
| WMA bit rate | 32K bps – 384K bps | |
| Frequency response | 20Hz-20KHz | |
| SNR | 85dB | |
| Lack fidelity | <+_0.05 | |
| FM radio | Frequency range | 87.5MHz-108MHz |
| Radio stations | 20 | |
| Max output power | (L)5mW+(R) | |
| of earphone | 5mW(320) | |
| SNR | 45dB | |
| Music format | MP3/WMA/WAV/AAC/APE/FLAC/OGG | |
| Temperature | -5 to 40 degree centigrade | |
| Language | English, Italian, French, German, Spanish, etc. | |
| Operating system | Windows XP/Vista/7 | |
Note: The specifications are subject to change for product improvement without further notice.
Warranty conditions
- The warranty of this product is for 2 years since the purchase date.
- The warranty will exclude breakdowns caused by bad use of the product, wrong installation or installation in not desirable places for a proper maintenance of the product, rips, updates of the products that are not the supplied by the brand, pieces wore away for its use or for not domestic or inappropriate use. Also are excluded breakdowns caused for manipulations of the products by people or companies alien to our company.
- For any request regarding the warranty terms, the purchase receipt must be attached.

- Utilização
- Description
- Use
- b) Recharge the Player
- Main Menu
- a) Music Mode
- B) Picture Mode
- C) Video Mode
- D) Camera Mode
- E) Record Mode
- F) FM Radio
- G) EBOOK MODE
- I) Video Record
- J) Setting
- Display:
- Bright Time
- Idle Time
- Sleep Mode
- K) Stopwatch
- L) Calculator
- M) Browser
- N) PC Camera
- O) FLASH
- Warranty conditions
Brand : Sunstech
Model : Mitra
Category : Mp3 player