
AIRMM01F - Alarm Clock Aluratek - Free user manual and instructions
Find the device manual for free AIRMM01F Aluratek in PDF.


| Product Type | Internet Radio Alarm Clock |
| Connectivity | WiFi 802.11b/g, Ethernet RJ-45, USB 2.0 (host) |
| Internet Radio | 11,000+ stations via built-in vTuner, no monthly cost |
| FM Radio | Built-in FM tuner with supplied antenna |
| Audio Output | 2x2W stereo amplifier, 3.5mm headphone jack, stereo RCA line out |
| Alarm Clock | Dual programmable alarms, wake to internet radio, FM, digital music, or tones |
| Media Playback via USB | USB flash drives, MP3 players, external hard drives |
| Media Server Support | UPnP compatible with WMP11, WMC2.0, Musicmatch Jukebox |
| Display | Backlit screen, adjustable timeout (1/3/10/30 min or always on) |
| Sleep Timer | 15/30/45/60 minutes |
| Equalizer Presets | Normal, Classic, Rock, Jazz, Pop |
| Clock Sync | Manual or automatic via NTP time server |
| Network Modes | Wireless client, wired client, wireless AP mode |
| Power | DC power adapter (included) |
| Remote Control | Included |
| Warranty | 1 year limited |
| Package Contents | WiFi Internet Radio, Remote Control, FM Antenna, Power Adaptor, Instructional Manual/CD, Quick Start Guide, Warranty/Registration Card |
| Dimensions | Approx. 7.1 x 5.1 x 3.1 inches (180 x 130 x 80 mm) |
| Weight | Approx. 1.1 lbs (0.5 kg) |
Frequently Asked Questions - AIRMM01F Aluratek
User questions about AIRMM01F Aluratek
0 question about this device. Answer the ones you know or ask your own.
Ask a new question about this device
Download the instructions for your Alarm Clock in PDF format for free! Find your manual AIRMM01F - Aluratek and take your electronic device back in hand. On this page are published all the documents necessary for the use of your device. AIRMM01F by Aluratek.
USER MANUAL AIRMM01F Aluratek
Internet Radio Alarm Clock
Instructional Manual | AIRMM01F

Chapter 1: Introduction 04
1.1 Overview 05
1.2 Features 05
1.3 Requirements 05
1.4 Package Contents 05
1.5 Product Application 06
1.6 Keypad Functions 07
Chapter 2: Getting Started 10
2.1 Hardware Installation.... 10
2.2 Software Installation 10
Chapter 3: Configuration 11
3.1 Configure as an Wireless Client 11
3.2 Configure as a Wired Client 15
3.3 Configure as a Wireless Access Point (AP Mode) 17
Chapter 4: Listen to Various Music 19
4.1 Listen to Internet Radio 19
4.2 Listen to FM Radio 23
4.3 Listen to Music in Your Computer 25
4.4 Listen to the Music in Your USB Drive 28
4.5 The Playback Screen 29
4.6 How to Add Stations Thru the Web Portal 30
Chapter 5: Advanced Tools.... 32
5.1 Network Setting 32
5.2 Configure Network.... 32
5.3 Reset to Default 32
5.4 Clear Favorites 33
5.5 Device MAC Address 33
5.6 Firmware Version 33
5.7 Firmware Upgrade 33
Chapter 6: Misc. 35
6.1 Clock Setting 35
6.1.1 Time Setup - Manually 36
6.1.2 Time Setup - Auto-Sync (NTP) 37
6.1.3 Time Display Format 37
6.2 Alarm Setting 38
6.3 Backlight Setting 40
6.4 Equalizer Setting 40
Appendix A: Listen to Music via WMP 11.... 41
Appendix B: Listen to Music via WMC 2.0 49
Technical Support 53
Radio and TV Interference Statement.... 54
Warranty 55
1.1 Overview
Thank you for choosing Aluratek's® Internet Radio Alarm Clock with Built-in WiFi. Once I'm connected to the internet you will have access to 11,000+ live streaming internet radio stations from around the globe at your fingertips.
This includes any music genre you can think of including talk, sports and local news from over 150 countries.
That's pretty much free music for life playing from any room in your home or office.
Just use your existing WiFi and internet connection. If you have internet you are all set!
In addition to making sure only quality materials are used for manufacturing, Aluratek® is also dedicated to provide the best customer satisfaction and support.
The goal of Aluratek is to embody “Simple Elegance” in every product it designs, manufactures and sells.
The product focus of Aluratek is to bring simple yet elegant connectivity solutions to the consumers to enhance their consumer electronics, communications and computing experience. Each product is carefully designed with the consumer in mind. Each product is solution-driven to address the need of the consumers and deliberately planned to provide the ultimate user experience.
Read this guide thoroughly and follow the installation and operation procedures carefully to prevent any damage to the unit and / or any of the devices it connects to.
1.2 Features
- Choose between more than 11,000+ radio stations worldwide via built-in vTuner with no monthly cost
- Search music by genre, i.e. classic, pop, talk, news, sports etc. and geographically over 150 countries
- Compatible with universal Plug-n-Play audio servers such as: Microsoft Media Player 11 (WMP11), Microsoft Media Connect and MusicMatch Jukebox
- Wireless access WIFI 802.11 b/g, Ethernet and USB 2.0 (host only) connectivity
• Built-in FM radio tuner for local FM broadcast service - Access music files stored on a USB 2.0 flash drive, MP3 player or Hard drive through the unit's USB port
- Alarm clock function with 2 programmable alarms wakes you up to internet radio, FM radio, digital music, or choice of several alarm tones
- Integrated amplifier: 2x2W stereo
• External plug for headsets (3.5mm) - 2 RCA plugs (Stereo Lineout) for external speakers
- No PC is required
• 1 Year limited warranty
1.3 Requirements
- Wired / wireless router
- Internet connection
1.4 Package Contents
Your order has been carefully packaged and inspected. The following should be included in your package. Please inspect the contents of the package to ensure that you have received all items and that nothing has been damaged. If you discover a problem, please contact us immediately for assistance.
- WiFi Internet Radio
- Remote Control
- FM Antenna
- Power Adaptor
• Instructional Manual / CD - Quick Start Guide
• Warranty / Registration Card
1.5 Product Application

PLACE IN ANY ROOM IN YOUR HOME
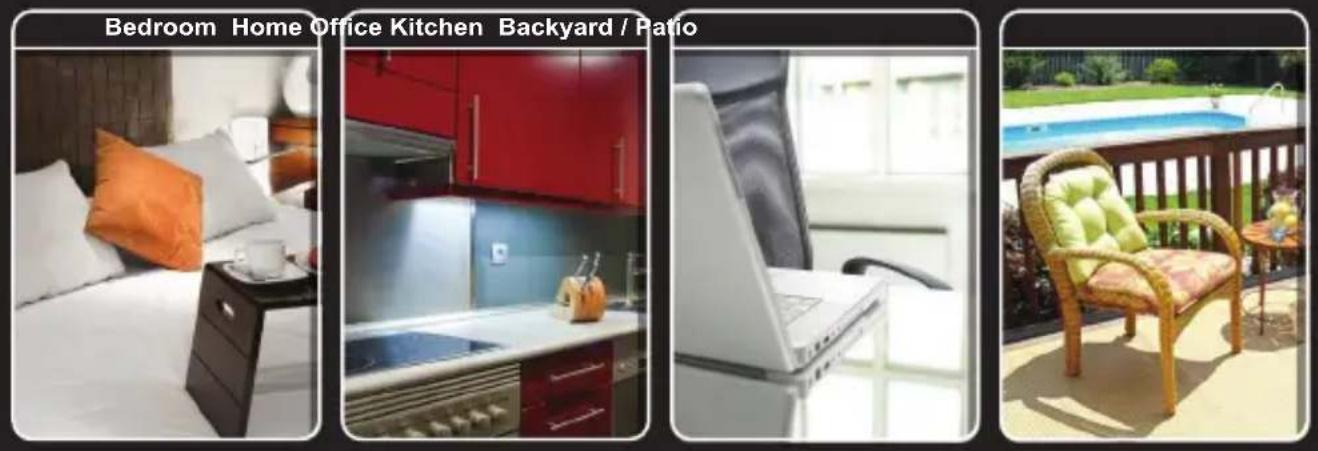
Built-in WiFiInteg
into your home theater system via the RCA jacks


LISTEN

natural_image
Pure black diagonal stripe pattern on white background (no text or symbols)
OR OR


Stream Internet Radio from your WiFi / wireless 802.11 B / G router.
Connect your local CAT5 Ethernet cable to stream Internet Radio.
Plug in any USB Drive and listen to your music files. (USB port at front)
1.6 Keypad Functions
The following tables shows the keypad function definition at various situations when you operate AIRMM01F.
(A) When you are browsing the menu list, or when the device is idle
| Screen with Menu List | Clock Screen(Standby Screen) | ||
| SNOOZE | No function No function | ||
| STOP | 1. Stop music2. Go back to main menu | Enter the alarm menu | |
 | Short press=Light ON/OFFLong press=standby mode | Short press=Light ON/OFFLong press=standby mode | |
| OK | Select the function | Enter main menu | |
| UP | Move to previous item | Enter main menu | |
| DOWN | Move to next item | Enter main menu | |
| LEFT | Int. Radio | Back to upper layer of lists | Enter main menu |
| FM Radio | |||
| Media Serv. | |||
| MP3 Player | |||
| RIGHT | Int. Radio | Enter next layer of lists | Enter main menu |
| FM Radio | |||
| Media Serv. | |||
| MP3 Player | |||
| (B) When you are playing music | ||||
| Screen with name of Station / Song | Clock screen & Music Playing | Clock Screen & Alarm Music | ||
| SNOOZE | Enable or disable sleep function.Start the timer for 15/30/45/60 min.(stop current music source after time is up) | Enable or disable sleep function.Start the timer for 15/30/45/60 min.(stop current music source after time is up) | STOP the music.Go back to clock screen & restart the alarm in 10 min. | |
| STOP | 1. Stop music2. Go back to main menu | 1. Stop music2. Go back to main menu | 1. STOP alarm2. Go back to clock screen | |
 | Short press = Light ON / OFFLong press = Standby mode | Short press = Light ON / OFFLong press = Standby mode | Short press = Light ON /OFFLong press = Standby mode | |
| OK | Go to option menu | Show the playback screen | Show the playback screen | |
| UP | Volume up | Volume up | Volume up | |
| DOWN | Volume down | Volume down | Volume down | |
| LEFT | Int. Radio | Go back to radio list | Show the playback screen | Show the playback screen |
| FM Radio | Go back to radio list | |||
| Media Serv. | Go back to song list | |||
| MP3 Player | Go back to song list | |||
| (B) When you are playing music (cont.) | ||||
| Screen with name of Station / Song | Clock screen & Music Playing | Clock Screen & Alarm Music | ||
| RIGHT | Int. Radio | Go back to radio list | Show the playback screen | Show the playback screen |
| FM Radio | Go back to radio list | |||
| Media Serv. | Go back to song list | |||
| MP3 Player | Go back to song list | |||
2.1 Hardware Installation
Please fasten the wireless antenna and the FM antenna to appropriate antenna connectors at the rear panel of the device. If you prefer to use Ethernet for wired network connection, please plug in your Ethernet cable to the LAN (RJ45) port.
Please plug in the DC power adapter to the outlet and the DC power jack carefully.
To operate the device, you can use both the supplied remote control and also the keypad buttons.
2.2 Software Installation
AIRMM01F can work as a stand-alone device or as a media streamer of a media server. As a stand-alone unit, you can use it to listen to Internet radio, FM radio, and external USB storage/MP3 players. No computer is needed.
For digital music files that are stored in your computer, you need to install streaming server software in the computer so that AIRMM01F can request the streaming service from that server.
AIRMM01F is compliant to UPnP protocol. It works with media server software such as Microsoft Windows Media Player 11 (WMP11), Microsoft Media Connect 2.0 (WMC2.0), and Musicmatch Jukebox. Once you have the software installed on the computer, you can stream your music collection to AIRMM01F.
Please find Appendix A and B for instructions on how to connect AIRMM01F to your computer via WMP11, and WMC2.0.
There are three modes of network configuration for AIRMM01F. It can be a wireless client, a wired client, or even a wireless access point (Wireless AP).
3.1 Configure as an Wireless Client
The factory default mode is the wireless client code. According to the availability of an Ethernet cable, the device will automatically select a suitable client mode to operate. User can also manually change the setting of network configuration through the Setup menu “Setup/Advanced Setup/Configure Network”.
AIRMM01F will connect wirelessly if it detects an 802.11b/g wireless network. With no Ethernet cable attached, you just need to power on the device and AIRMM01F will automatically enter the wireless client mode.
To connect AIRMM01F to the wireless network for the first time, you will need to set the encryption key for a secured network. Once the setting is finished, the device will remember the related settings and try to connect to the designated AP when it is power on next time. However, if there is something trouble in connecting to the designated AP, the device will show the AP list screen for you to configure again
First time using device without an Ethernet cable plugged in:
| ScreenshotInstructions | Go to next screen | Notes | ||
| 1. | POWER ON | |||
| 2. |  | Device is running as a Wireless Client. | ||
| 3. |  | Scanning for available APs. | ||
| First time using device without an Ethernet cable plugged in (cont.): | ||||
| ScreenshotInstructions | Go to next screen | Notes | ||
| 4. | “▼” button |  | “▶” button or “OK” button | Select the desired AP to connect |
| 5. | Numeric key pads |  | “OK” button | Type in the encryption key if the AP is encrypted. |
| 6. |  | “OK” button | Set a proxy server if any. | |
| 7. | 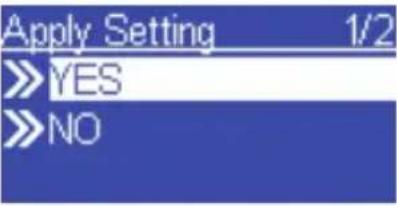 | “OK” button | Confirm to the settings. | |
 | Apply new settings. | |||
| Manually configured as the Wireless Client Mode: | ||||
| ScreenshotInstructions | Go to next screen | Notes | ||
| 1. | 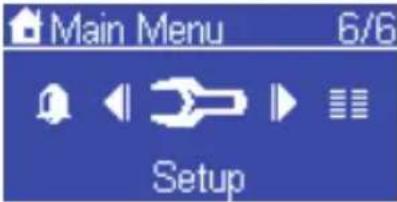 | “OK” button | Select “Setup” menu | |
| 2. | “▼” button (4 times) |  | “▶” button or “OK” button | Enter “Advanced Setup” menu |
| 3. | “▼” button (1 time) | 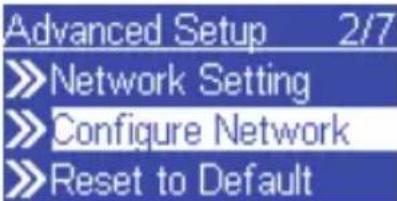 | “▶” button or “OK” button | |
| 4. |  | “▶” button or “OK” button | Manually select the wireless client mode. | |
| 5. |  | Scanning for available APs. | ||
| 6. | “▼buttonor | 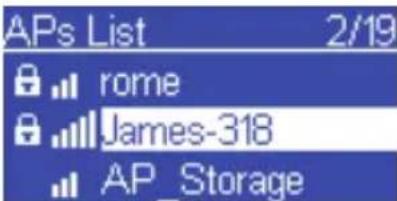 | “OK” button | Select the desired AP to connect |
| 7. | Numeric key pads |  | “OK” button | Type in the encryption key if the AP is encrypted. |
| Manually configured as the Wireless Client Mode (cont.): | ||||
| ScreenshotInstructions | Go to next screen | Notes | ||
| 8. |  | “OK” button | Set a proxy server if any. | |
| 9. |  | “OK” button | Confirm to the settings above. | |
| 10. |  | Apply new settings. | ||
3.2 Configure as a Wired Client
If there is no 802.11b/g wireless network, AIRMM01F can also connect to the wired network through an Ethernet cable.
For this case, prior to power on the device, you have to plug in the Ethernet cable into the LAN (RJ45) connector on the back of the unit. After you power on the device, it will automatically go into the wired client mode when it detects a link status through the Ethernet connection.
First time using device with an Ethernet cable plugged in:
| ScreenshotInstructions | Go to next screen | Notes | ||
| 1. | POWER ON | |||
| 2. |  | Device is running as a Wireless Client. | ||
| 3. |  | The device is in wired client mode now. It already connected to your network. | ||
| Manually configured as the Wired Client Mode: | ||||
| ScreenshotInstructions | Go to next screen | Notes | ||
| 1. | ‘OK” button | 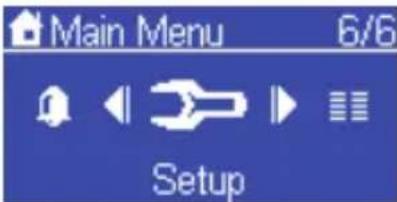 | Select “Setup” menu | |
| 2. | “▼” button (4 times) |  | “▶” button or “OK” button | Enter “Advanced Setup” menu |
| 3. | “▼buttonor (1 time) |  | ▶“OK” button | |
| 4. | “▼buttonor (1 time) |  | ▶“OK” button | Manually select the wired client mode. |
| 5. | “▼buttonor (1 time) | 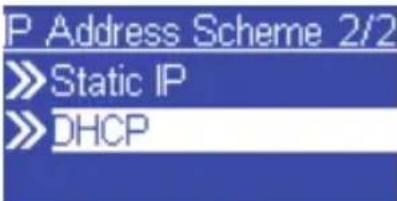 | ▶“OK” button | Select the DHCP for auto configured IP address. |
| 6. | ‘OK” button | 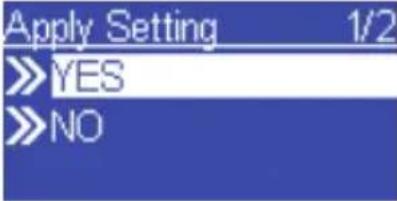 | Confirm to the settings above. | |
| 7. |  | Apply new settings. | ||
3.3 Configure as a Wireless Access Point (AP Mode)
AIRM01F can also be configured as a wireless AP. With such feature, you can easily extend the wireless coverage without purchasing another AP.
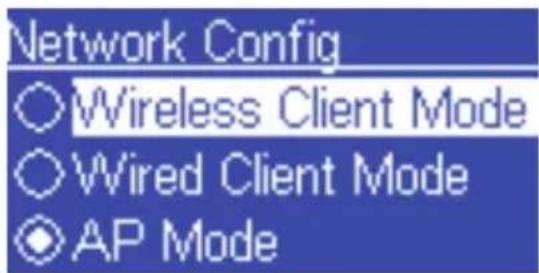
To configure the AIRMM01F as an wireless AP, you have to manually setup the device through selecting the setup menu “Setup / Advanced Setup / Configure Network/AP mode”. And then further setup the IP address scheme, SSID, channel number and the encryption key of the AP. Once the setting is finished, the device will reboot automatically and function as an AP.
Manually configured as a Wireless Access Point (AP Mode):
| ScreenshotInstructions | Go to next screen | Notes | ||
| 1. | ‘OK” button | 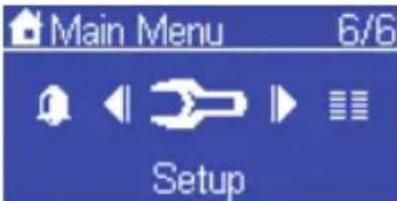 | Select “Setup” menu | |
| 2. | “▼” button (4 times) |  | “▶” button or “OK” button | Enter “Advanced Setup” menu |
| 3. | “▼buttonor (1 time) |  | ▶“OK” button | |
| 4. | “▼buttonor (2 times) |  | ▶“OK” button | Manually select the AP mode. |
| 5. | “▼buttonor (1 time) | 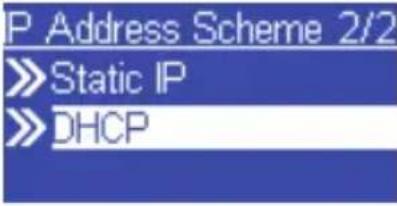 | ▶“OK” button | Select the DHCP for auto configured IP address. |
| Manually configured as a Wireless Access Point ((AP Mode) (cont.)): | ||||
| ScreenshotInstructions | Go to next screen | Notes | ||
| 6. | ‘OK’ 'burttokey pads |  | Type in the Identifier (name) of this AP. | |
| 7. | pads |  | “OK” buttonNumeric | Select the wireless channel to be allocated to this AP. |
| 8. | ‘OK’ “button (1 time) | 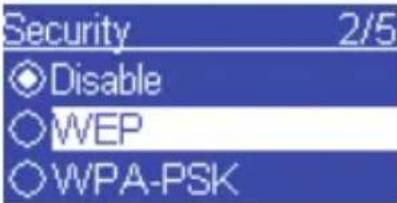 | Select one of the security schemes. | |
| 9. | ‘OK” buttonNum pads |  | Type in the encryption key if the AP is encrypted. | |
| 10. | “OK” button | 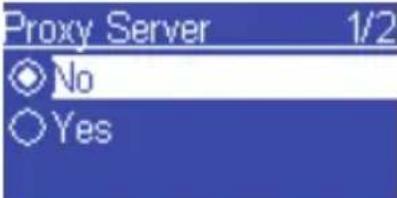 | Set a proxy server if any. | |
| 11. | ‘OK” button |  | Confirm to the settings above. | |
| 12. | 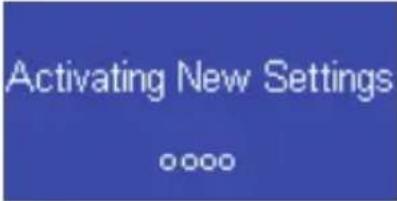 | Apply new settings. | ||
4.1 Listen to Internet Radio
To listen to music or broadcast programs from Internet radio stations, please select the “Internet Radio” function from the main menu and then press the OK button to enter the Internet Radio function.

The first screen of Internet Radio function shows 2 items for you to select:

"Station List": Retrieve the Internet radio station lists from the Internet portal server.
"Favorite Stations": Retrieve the favorite station lists that stored in the device.
Press “OK” button or “▶” button to retrieve the Station List. The device will try to connect to the Internet radio server to retrieve the Internet radio stations for further playback, you will see the following screen:

It takes few seconds to get the latest list from Internet. And you will see the next screen.

This means the AIRMM01F is connected to the Internet server and received the information from the server.
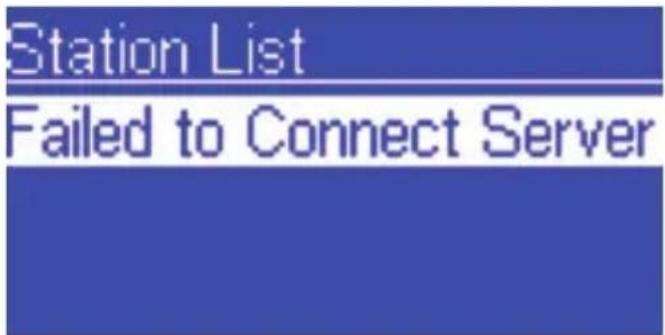
If you see the following screen instead, it means that the device has encountered problem in retrieving the list from the internet server, please try again.
Chapter 4: Listen to Various Music
| The following screen shots illustrate the sequence to browse to a specific ratio station such as “4U Classic Rock” in France and start to playback the music from it. | ||||
| Go to next screen | NotesScreenshot instr | |||
| 1. | 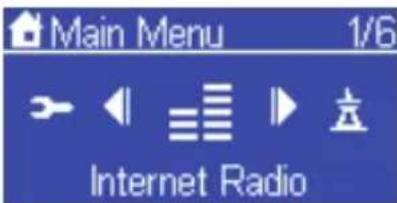 | Select “Internet Radio” function | ||
| 2. |  | “▶” button or “OK” button | ||
| 3. | “” button or |  | ▶ “OK” button | |
| 4. | “▼buttonor (4 times) | 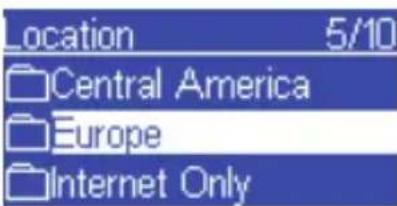 | ▶ “OK” button | |
| 5. | “▼buttonor (14 times) |  | ▶ “OK” button | |
| 6. | “” button or | 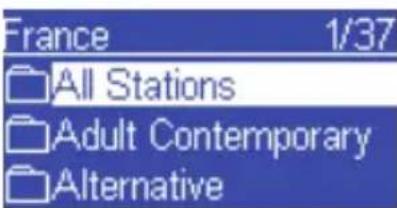 | ▶ “OK” button | |
Chapter 4: Listen to Various Music
| ScreenshotInstructions | Go to next screen | Notes | ||
| 7. | “▼buttonor (5 times) | 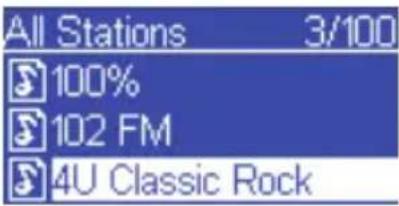 | ► “OK” button | Press the “♥” button to add current station to favorite list for quick access later. |
| 8. |  | Connecting to the radio station. | ||
| 9. |  | Start buffering the music from the radio station. | ||
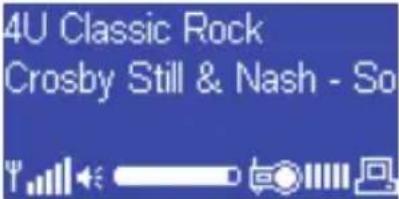 | Music started...10.. | |||
4.2 Listen to FM Radio
Before you can listen to the FM radio, please install the supplied FM antenna to the back of the device.
To listen to music or broadcast programs from local FM radio stations, please select the “FM Radio” function from the main menu and then press the OK button to enter the FM Radio function.

The first screen of FM Radio function shows 5 items for you to select:
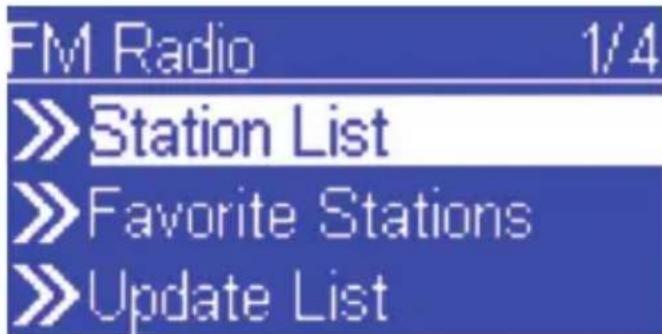
"Station List": Retrieve the tuned radio station lists from the device.
"Favorite Stations": Retrieve the favorite station lists that stored in the device.
"Update List": Activate the auto scan procedure to discover all the available FM stations, and keep the tuned stations in the device memory.
"Direct Access": Allow you to fine tune the frequency of the station or tune to previous / next FM station manually.
"FM Sensitivity": Allow you to change FM sensitivity to high or low.
Chapter 4: Listen to Various Music
| The following screen shots illustrate the sequence to pre-set the FM stations and tune to a specific ratio station 98.70 MHz and start the broadcast program. | ||||
| Go to next screen | NotesScreenshot | |||
| 1. | “” button or |  | ►“OK” button | Select “FM Radio” function |
| 2. |  | “►” button or “OK” button | ||
| 3. |  | Scanning for available FM stations. | ||
| 4. |  | Found 15 stations | ||
| 5. | “▼buttonoPres | 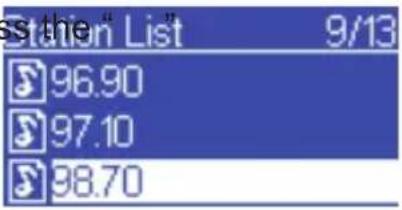 | ►“OK” button | ♥button to add current station to favorite list for quick access later. |
| 6. |  | Tuned to station and music started... | ||
4.3 Listen to Music in Your Computer
To listen to music from your own computers, you have to install and activate the media server utility. Please refer to Appendix A or B for example on how to install a media server software.
After you installed and activated the media server, you can enjoy listening to the streaming music from AIRMM01F. Please select the “Media Server” function from the main menu and then press the OK button to enter the Media Server function.

Then, the following message will be displayed during discovering all the available media servers in your network. It takes few seconds to finish.

Finally, the screen will list all available media servers for you to select.

If there is no server found, you will see the below message.

Please check if you had already started the media server on your computer. If the media server not found problem still exists, please refer to the trouble shooting chapter to identify the problem and resolve it step by step.
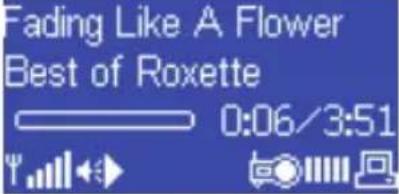
The following screen shots illustrate the sequence to connect to a media server "JAMES-NB: James:" and browsing to the Music album "Best of Roxette".
| ScreenshotInstructions | Go to next screen | Notes | ||
| 1. | “” button or |  | “OK” button | Select “Media Server” function |
| 2. |  | Searching for media server. | ||
| 3. | 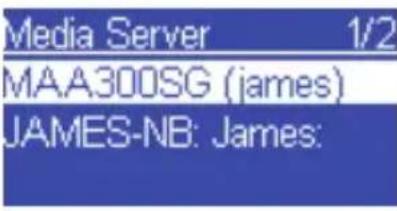 | “▶” button or “OK” button | Found two media servers | |
| 4. | ▼button | 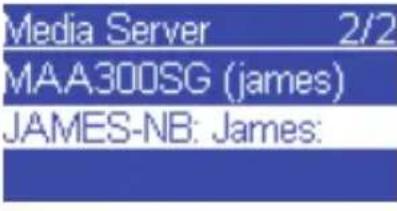 | “▶” button or “OK” button | Select media server |
Chapter 4: Listen to Various Music
| Go to next screen | NotesScreenshot | |||
| 5. | “” button or |  | “OK” button | |
| 6. | “▼” button |  | “▶” button or “OK” button | |
| 7. | “▼” button |  | “▶” button or “OK” button | |
| 8. | 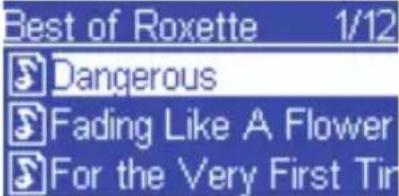 | “▶” button or “OK” button | Press the “♥” button to add current station to my song queue for quick access. | |
 | Wait till end of song, or press “▶” to next song. | Music started.9. | ||
 | Next song started.1 |
Once the music starts, you can freely control the song playback through the playback buttons, just like you are controlling a traditional stereo or CD player.
4.4 Listen to the Music in Your USB Drive
To listen to music on your USB drive or portable MP3 player, please plug in the USB drive into the USB connector of AIREC01F. Then select the "MP3 Player" function from the main menu and then press the OK button to enter the MP3 player function.

The first screen of MP3 Player function shows the root folder content of the attached USB drive.

If you see the screen "NO DEVICE", there was a problem accessing the USB device. Please remove the USB device and connect again.

For music playback from the USB drive, you just need to browse to the music file and click OK.
| The following screen shots are an example of how to play a music file. | ||||
| ScreenshotInstructions | Go to next screen | Notes | ||
| 1. | “” button or |  | ►“OK” button | Select “MP3 Player” function |
| 2. | “▼” button (2 times) | 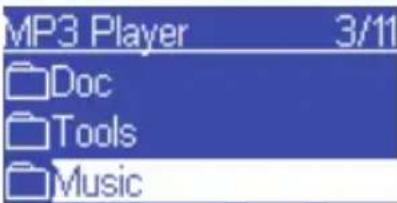 | “►” button or “OK” button | Select the folder where the music file is located |
| 3. | “▼buttonor (1 time) |  | ►“OK” button | |
| 4. | “” button or |  | ►“OK” button | |
 | Music started5. | |||
4.5 The Playback Screen
When the music starts, you can see the playback information saved with the file on the screen. It may include the title of the song / station, the album & artist information.
4.6 How to Add Stations Thru the Web Portal
- Please make sure you have the latest firmware. Please refer to section 5.6 and 5.7 for steps on how to determine the current firmware version on your device. Firmware can be found on http://www.aluratek.com/download_drivers_manuals.php
- Please go to http://aluratek.vtuner.com

- Use vTuner ID (you can find the id either from menu Setting > vTunerID or the MAC address on the label that is on the bottom of the unit)
- Please use your vTuner ID to login to the website
- Create account login by providing your email address and password
- Please login to your account after the above step
-
Click Add station
-
Please fill in info for the station that you wish to add

- Power Off/On the unit
- You should able to access the newly added station under Stations List>Added Stations Folder on your internet radio

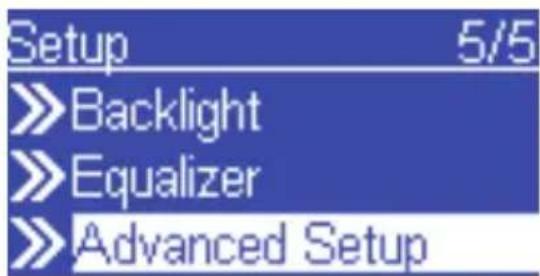
There are some useful setup functions that can help you to operate the device properly.


5.1 Network Setting
Check current network information.


5.2 Configure Network
Please refer to chapter 3 for network configuration.


5.3 Reset to Default
When you reset the device to its factory default, your "favorites" Internet radio and FM radio will not be erased.


5.4 Clear Favorites
Clear all "favorites" Internet radio station and FM radio station stored.

→

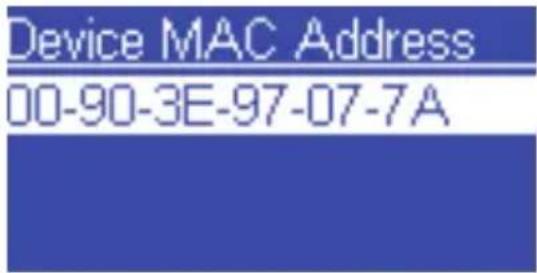
5.5 Device MAC Address
Check MAC address of the device.

→
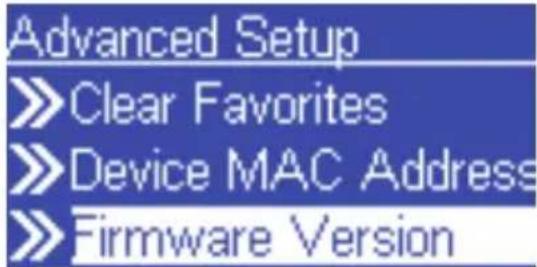
5.6 Firmware Version
Check current firmware version.

→
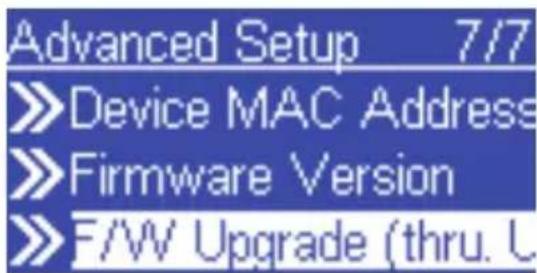
5.7 Firmware Upgrade
If there is any new firmware released, please download and follow the upgrade procedure below.

→
Steps to upgrade new firmware in the device via a USB drive
Step 1.
Copy the new firmware to the ROOT directory of a USB drive or a USB MP3 player. (Note. Please DON'T modify the file name, otherwise the AIREC01F can't find the new F/W)
Step 2.
Power on the AIRMM01F and then plug-in the USB drive into the front USB port of the AIRMM01F.
Step 3.
Operate the AIRMM01F to get into the F/W upgrade menu ("Setup\Advanced Setup\F/W Upgrade(thru. USB)"), then press the OK button to activate the
F/W Upgrade function. You should see the following messages "F/W Upgrading", and "Don't Power OFF!!". After a few seconds, the device will reboot automatically when the upgrade operation is completed.
Step 4.
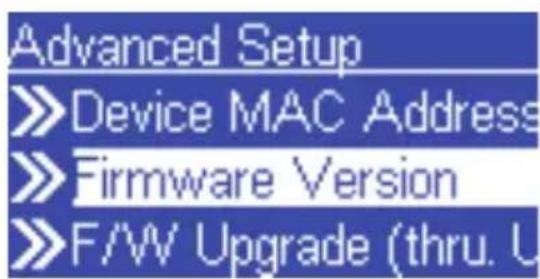
You can verify the firmware upgrade is successful by checking the firmware version from the menu "Setup\Advanced Setup\Firmware Version".
→

6.1 Clock Setting
Prior to setting the alarm, you need to set the clock of AIRMM01F. First, select the Setup function from the Main Menu.

The first item "Clock" is for the date and time setting. Press OK or "▶" button to set the clock value.

There are 3 items in the clock menu, the first one will display the current date and time; the second item is for you to set the date and time manually or via auto-Sync (automatically synchronize with network time server). If you select the “Auto-sync” function, the device will periodically synchronize with the server. The third option lets you change time display format between 12-Hours or 24-Hours. There is a built-in battery in the device, so if you power off the device, the clock will continue to run.
6.1.1 Time Setup - Manually

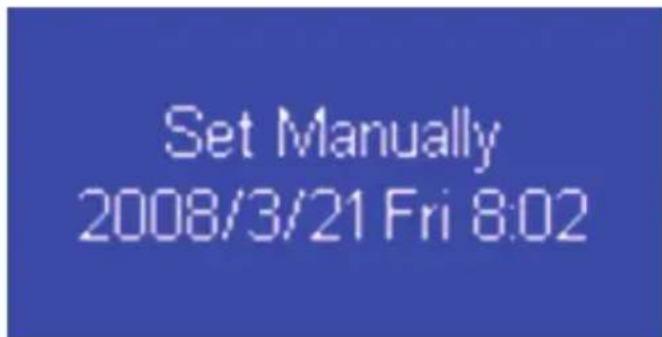
If you decide to set the clock manually, press the OK or “▶” button to go into the date and clock screen. You can use the four directional buttons and the OK button to set the current date/time.

Use “◀”, “▶” buttons to switch between the items to be adjusted. The selected item will be flashing.
Use “▲”, “▼” buttons to adjust (increase or decrease) the value of the specific item.
Press the OK button to confirm and finish the time setup.
6.1.2 Time Setup – Auto-Sync (NTP)

If you choose to set the clock automatically, please go into the "AutoSync (NTP)" menu, and select the correct time zone for your location. After that, the device will set the date and time automatically.
6.1.3 Time Display Format
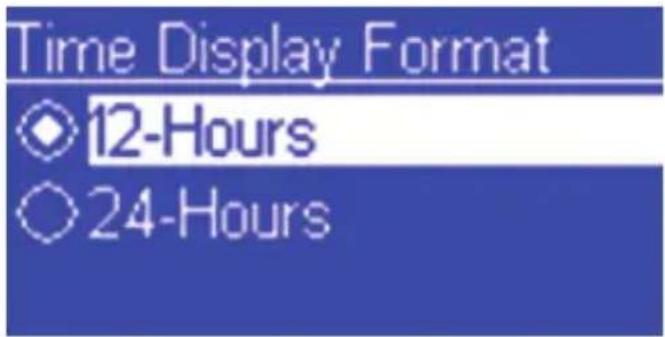
Choose time display format bewteen 12-Hour or 24-Hours.
6.2 Alarm Setting
To setup an alarm, you have to setup the time and alarm music properly. The following procedures illustrate a typical alarm setting operation. It sets Alarm 1 to generate alarm (play music) at 7:00 AM with Internet radio station “4U Classical Rock” as the source of the music.
| ScreenshotInstructions | Go to next screen | Notes | ||
 | Alarm Menu1. “OK” | |||
| 2. |  | “▶” button or “OK” button | Set Alarm 1 | |
| 3. | “▼” buttonor (1 time) |  | ▶ “OK” button | Enable Alarm 1 |
| 4. | ‘OK” button |  | Use the 4 directional buttons to set the time | |
| 5. |  | “▶” button or “OK” button | Set Internet radio as alarm source. | |
| 6. |  | “OK” button Select the specific station or Favorites.(section 4.1) | ||
| 7. | "OK" button | 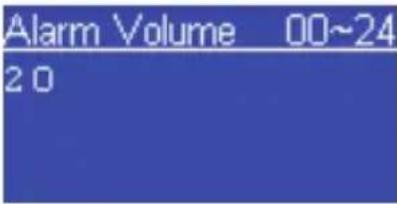 | Use the 4 directional buttons to set the volume | |
| 8. |  | Final alarm setting, lasting for 3~5 seconds | ||
| 9. | The setting is |  | finished. | |
After you set and enabled the alarm, you will see there is a bell icon on the clock screen.

When the alarm time is up, the device will activate the alarm operation and playback the specified music. Like traditional clock alarm, AIRMM01F also provides the SNOOZE function for you to temporarily stop the alarm, and after 10 minutes, the alarm will start again. You can press the STOP button to terminate the alarm.
6.3 Backlight Setting

You can adjust the backlight ON / OFF settings as you wish.


The default setting is Always ON. You can set the backlight to be turned OFF once the device is idle (no key press) after a specific time elapsed. The backlight can be switched off automatically in 1/3/10/30 minutes.
6.3 Equalizer Setting


In the Setup menu, you can change the setting of the equalizer. The options available are Normal, Classic, Rock, Jazz, and PoP.
Install & Connect to Windows Media Player 11
Please follow the steps below:
Step 0. Download WMP11.
- Please download Windows Media Player 11 (WMP11) installation file, e.g., wmp11-windowsxp-x86-enu.exe, from Microsoft's web site.
- Install wmp11-windowsxp-x86-enu.exe without any changes needed.
- Just click on 'next' to finish the installation.
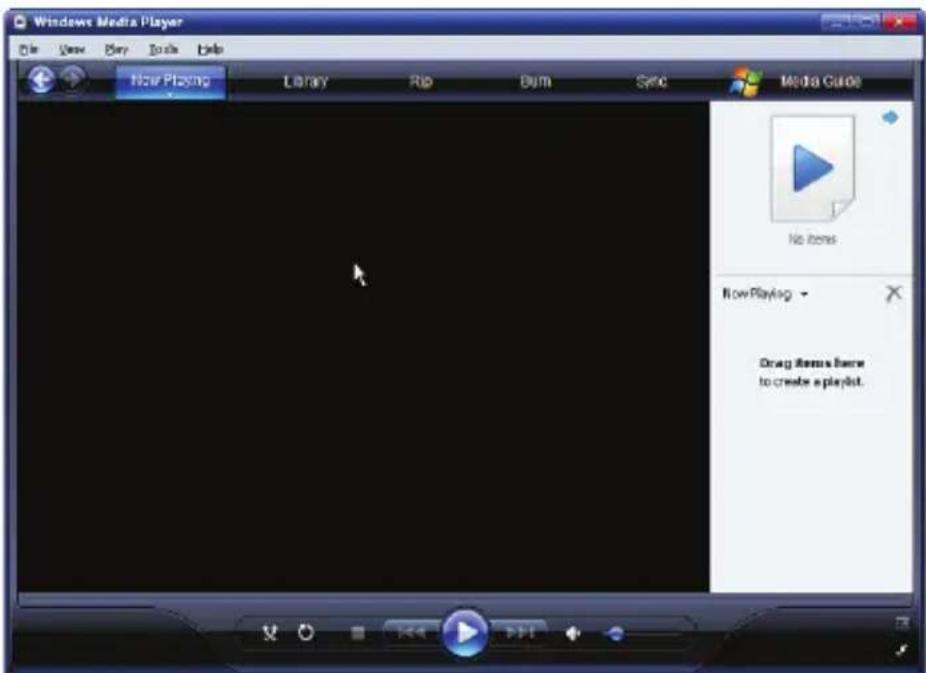
Step 1. Activate the Media Player.
- Find the "Windows Media Player" icon from the Program list,

and click on this program to activate it.
Step 2. Change the view
- Change the view from "Now Playing" to "Library" view by clicking on the Library Tab to manage the content and share your media. You will see the following view:

Step 3. Add your Media content to WMP11 media library.
- Click on the "Library" tab again, you can see a pull-down menu.
- To add your media files to the WMP11 media library, please click on the item "Add to Library..."
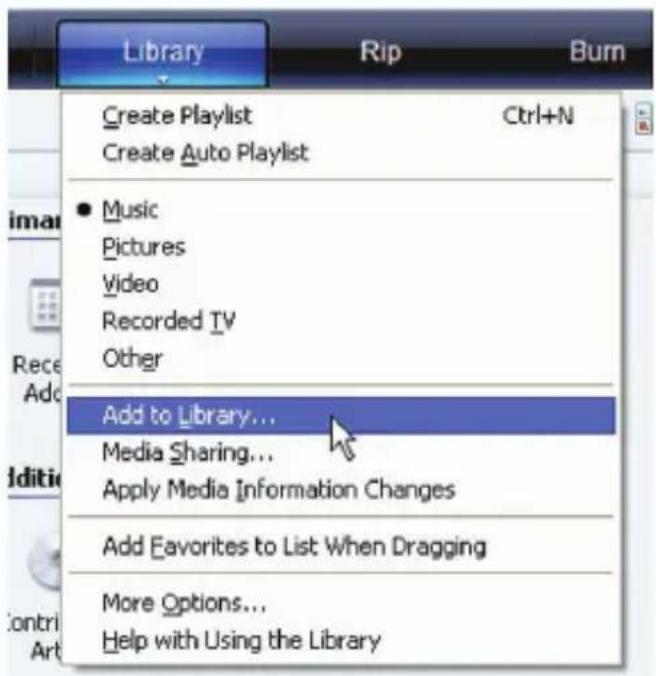
- You will see the following view:

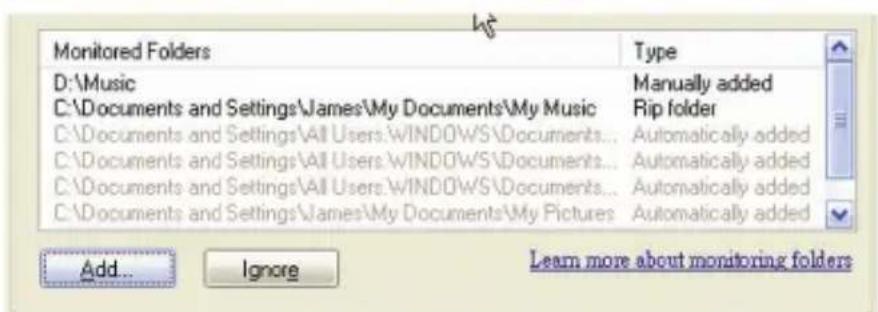
- Click on the add button and select the media folder in your computer, and then click the OK button. For example, you can put all the music files in the directory D:\Music, so you just need to add the folder to the share list.

Appendix A: Listen to Music via WMP 11
- You will see the specified folder included in the WMP11 monitor folder lists.
- Then press the OK button. A pop-up window will appear and show you the WMP11 is searching for the media files.
- When it finished, click on the "Close" button.

- Now, you can browse and manage your media content with the WMP11 Library manager.
![Windows Media Player File Users Play Tools Help Now Playing Library Rip Burn Sync Media Guide Music Library Album PlayBids Library Recently Added Artist Album Songs Genre Year Rating Album Album Artist Genre Release Year Count Length Rating A American Pie Don McLean BAD BOYS BEST Bad Boys's Blue The Bad Boys Best [Capitol] The Best of Joe Cocker [Robo] The Best of Lobo [Rhino] Best of Ravette](/content/2026/05/920123/images/3ec02d5b13f1acbd443db2664fb585f4c795cea1d4c48f8aaf325174eb5262f1.jpg)
Step 4. Share the WMP11 media library.
- Similar to Step 3, click on the “Media Sharing” item to activate the media sharing function.
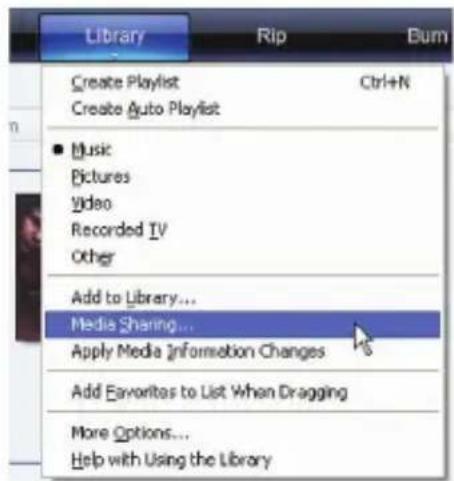
- The following dialog windows will appear.
- Check the "Share my media" checkbox and click on "OK" button.

- The WMP11 will try to discover the available network devices in your LAN.
- The following display showed that no device is found at this moment.

If AIRMM01F is already connected to your home network, you will see the following display that WMP11 found a network device named "Aluratek AIRMM01F".

Step 5. Manage the setting of sharing media.
- Click on the "Settings" button, and specify the name of the WMP11 server to be displayed on your AIRMM01F.

Then, press OK to exit.
Step 6. Authorize the access from your AIRMM01F.
The WMP11 provides simple access control setting. When WMP11 detects new network device (as the final screen in Step 4), you have to decide whether you want to allow or deny the requests from that device.
- Please select the device icon and then click on the “Allow” button to grant further streaming requests from that device. Then you will see that the device icon state changed consequently.

- Then, press the OK button to apply the setting.
There is another approach to manage the access for your network devices. There will be a small icon appeared on the Windows XP status bar to alert you WMP11 found network devices.

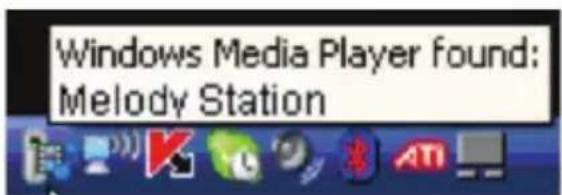
- Double click on it to manage the access for the devices.
- Then press "Allow".

Step 7. Establish the connection between AIRMM01F and WMP11 server.
- From AIRMM01F, select "Media Server" function from the main menu (or press the hot key "Media Player" on the remote control), and then AIRMM01F will start the server discovery process. After a few seconds, it will find server like "PC_Hostname: Server Name".
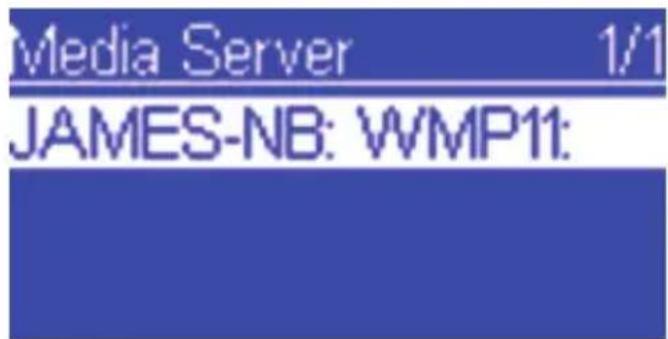
This is the WPM11 server that you installed.
- Press the 'OK' button to try to connect to the server.
You will see the AIRMM01F screen shows “Connecting....” and finally shows the following list:

You can now browse the "Music" list and playback the music you want.
Install & Connect to Windows Media Connect V2.0
Please follow the steps below:
Step 0. Download WMC server.
- Please download the Windows Media Connect (WMC) installation file, wmcsetup.exe, from Microsoft web site.
- Install the wmcsetup.exe without any changes needed.
- Just click on 'next' to finish the installation.
Step 1. Activate WMC.
You can find a new installed file icon "Windows Media Connect" from the Windows XP Program list.
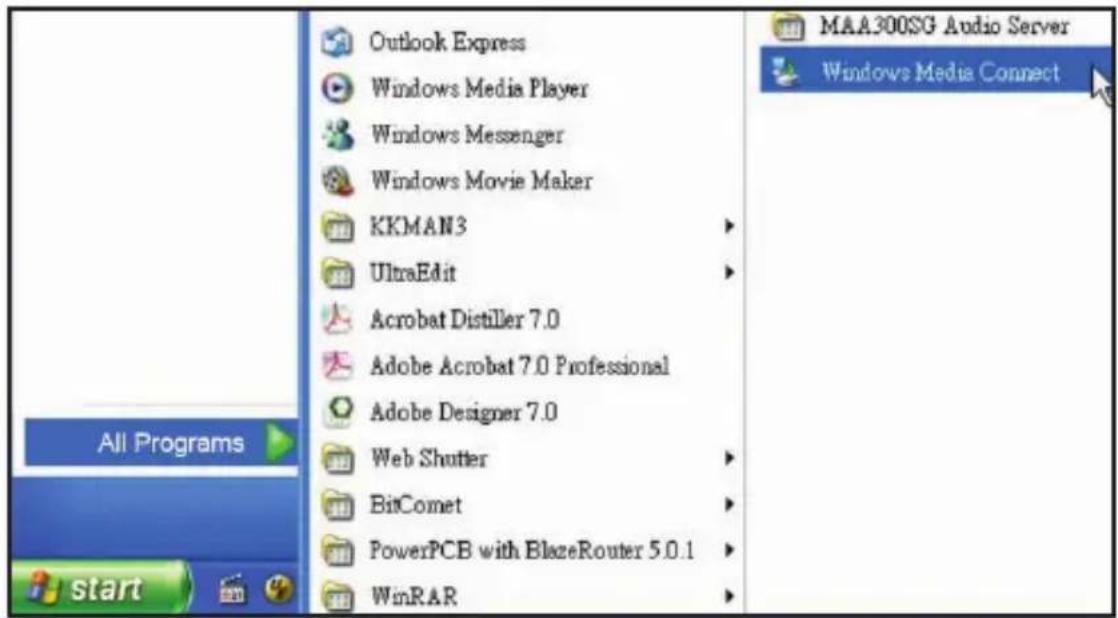
Click on this program to activate WMC.
Step 2.
You will see a pop-up window, asking for “select the device you want to allow access to your computer”. Just skip it by pressing the ‘next’ button.
Step 3.
Then, you will be asked to select the folders you want to share with your devices.

Step 4. Establish the connection between AIREC01F and WMC server.
\- From AIRMM01F, select "Media Server" function from the main menu (or press the hot key "Media Player" on the remote controller), and then AIRMM01F will start the server discovery process. After a few seconds, it will find server like "PC\_Hostname: 1: Windows Media Connect". - Then press the 'OK' button to try to connect to the server. You will see the AIRMM01F screen shows “Connecting...”. As the same time, you will see the following prompt in your PC:  It means that WMC detected an un-authorized device trying to access the content of the WMC server. You just double click on the WMC icon to allow the access from the device.  Select the device and then click on the 'Allow' button.  Then, press the ‘close’ button to finish the authorization process. At this moment, AIRMM01F can get the contents or service from the WMC server. You can browse the list and playback the music you want. If you need further assistance, please contact Aluratek support department prior to returning this device. E-mail: support@aluratek.com Web: www.aluratek.com/support Local (Irvine, CA): 949-419-6504 Toll free: 1-866-580-1978Radio and TV Interference Statement
WARNING!!! This equipment has been tested and found to comply with the limits of a Class B digital device, pursuant to part 15 of the FCC rules. These limits are designed to provide reasonable protection against harmful interference in a residential installation This equipment generates, uses and can radiate radio frequency energy and, if not installed and used in accordance with the instruction, may cause harmful interference to radio communications. However, there is no guarantee that interference will not occur in a particular installation. If this equipment does cause harmful interference to radio or television reception, which can be determined by turning the equipment off and on, the user is encouraged to try to correct the interference by whatever measures may be required to correct the interference. Aluratek warrants this product against defect in material or workmanship for 1 Year from the date of purchase. This warranty becomes invalid if the factory-supplied serial number or "warranty void" sticker has been removed or altered on the product. This warranty does not cover: A) Cosmetic damage or damage due to acts of God B) Accident, misuse, abuse, negligence or modification of any part of the produc C) Damage due to improper operation or maintenance, connection to improper equipment, or attempted repair by anyone other than Aluratek. D) Products sold AS IS or WITH FAULTS. IN NO EVENT SHALL ALURATEK'S LIABILITY EXCEED THE PRICE PAID FOR THE PRODUCT FROM DIRECT, INDIRECT, SPECIAL, INCIDENTAL, OR CONSEQUENTIAL DAMAGES RESULTING FROM THE USE OF THE PRODUCT, IT'S ACCOMPANYING SOFTWARE, OR IT'S DOCUMENTATION. Aluratek makes no warranty or representation, expressed, implied, or statutory, with respect to it's products, contents or use of this documentation and all accompanying software, and specifically disclaims it's quality, performance, merchantability, or fitness for any particular purpose. Aluratek reserves the right to revise or update it's product, software or documentation without obligation to notify any individual or entity.Aluratek
aluratek.com
- Chapter 1: Introduction 04
- Chapter 2: Getting Started 10
- Chapter 3: Configuration 11
- Chapter 4: Listen to Various Music 19
- Chapter 5: Advanced Tools.... 32
- Chapter 6: Misc. 35
- Appendix A: Listen to Music via WMP 11.... 41
- Appendix B: Listen to Music via WMC 2.0 49
- Technical Support 53
- Radio and TV Interference Statement.... 54
- Warranty 55
- Overview
- Features
- Requirements
- Package Contents
- Product Application
- PLACE IN ANY ROOM IN YOUR HOME
- LISTEN
- OR OR
- Keypad Functions
- Hardware Installation
- Software Installation
- Configure as an Wireless Client
- Configure as a Wired Client
- Configure as a Wireless Access Point (AP Mode)
- Listen to Internet Radio
- Chapter 4: Listen to Various Music
- Listen to FM Radio
- Listen to Music in Your Computer
- Listen to the Music in Your USB Drive
- The Playback Screen
- How to Add Stations Thru the Web Portal
- Network Setting
- Configure Network
- Reset to Default
- Clear Favorites
- Device MAC Address
- Firmware Version
- Firmware Upgrade
- Step 1.
- Step 2.
- Step 3.
- Step 4.
- Clock Setting
- Time Setup - Manually
- Time Setup – Auto-Sync (NTP)
- Time Display Format
- Alarm Setting
- Backlight Setting
- Equalizer Setting
- Install & Connect to Windows Media Player 11
- Step 0. Download WMP11.
- Step 1. Activate the Media Player.
- Step 2. Change the view
- Step 3. Add your Media content to WMP11 media library.
- Appendix A: Listen to Music via WMP 11
- Step 4. Share the WMP11 media library.
- Step 5. Manage the setting of sharing media.
- Step 6. Authorize the access from your AIRMM01F.
- Step 7. Establish the connection between AIRMM01F and WMP11 server.
- Install & Connect to Windows Media Connect V2.0
- Step 0. Download WMC server.
- Step 1. Activate WMC.
- Step 4. Establish the connection between AIREC01F and WMC server.
- Radio and TV Interference Statement
- Aluratek
- aluratek.com
Brand : Aluratek
Model : AIRMM01F
Category : Alarm Clock