
MIH742F558K2 - Cooker MIDEA - Free user manual and instructions
Find the device manual for free MIH742F558K2 MIDEA in PDF.


| Product Type | Induction Hob |
| Brand | Midea |
| Model | MIH742F558K2 |
| Number of Cooking Zones | 4 |
| Supply Voltage | 220-240V~ 50Hz/60Hz |
| Installed Electric Power | 7400W |
| Product Dimensions (DxWxH) | 590 x 520 x 53 mm |
| Building-in Dimensions (AxB) | 560 x 480 mm |
| Control Type | Touch slider controls |
| Boost Function | Yes, up to 10 minutes per zone |
| Flexible Cooking Zone | Yes, free induction zone (3300/3700W) |
| Timer Function | Yes, independent per zone, max 8 hours |
| Pause Function | Yes |
| Keylock (Child Lock) | Yes |
| Pan Transfer Function | Yes (default disabled, can be activated) |
| Auto Shut-off | Yes, default working times per power level |
| Hot Surface Indicator | Yes (H/h display) |
| Safety Features | Child lock, auto shut-off, overheat protection, pan detection |
| Suitable Cookware | Induction-compatible with magnetic base (minimum diameter 100mm) |
| Cleaning Instructions | Use mild cooktop cleaner and soft cloth; avoid abrasive pads |
| Installation Type | Built-in, requires minimum 5cm clearance and ventilation |
| Cooling Fan | Yes, runs after use to cool electronics |
Frequently Asked Questions - MIH742F558K2 MIDEA
User questions about MIH742F558K2 MIDEA
0 question about this device. Answer the ones you know or ask your own.
Ask a new question about this device
Download the instructions for your Cooker in PDF format for free! Find your manual MIH742F558K2 - MIDEA and take your electronic device back in hand. On this page are published all the documents necessary for the use of your device. MIH742F558K2 by MIDEA.
USER MANUAL MIH742F558K2 MIDEA
Thank you for choosing Midea! Before using your new Midea product, please read this manual thoroughly to ensure that you know how to operate the features and functions that your new appliance offers in a safe way.
CONTENTS
THANK YOU LETTER 01
SAFETY INSTRUCTIONS 02
SPECIFICATIONS 07
PRODUCT OVERVIEW 08
QUICK START GUIDE 10
PRODUCT INSTALLATION 12
OPERATION INSTRUCTIONS 16
CLEANING AND MAINTENANCE 23
TROUBLESHOOTING 24
TRADEMARKS, COPYRIGHTS AND LEGAL STATEMENT 27
DISPOSAL AND RECYCLING 28
DATA PROTECTION NOTICE 29
SAFETY INSTRUCTIONS
Intended Use
The following safety guidelines are intended to prevent unforeseen risks or damage from unsafe or incorrect operation of the appliance. Please check the packaging and appliance on arrival to make sure everything is intact to ensure safe operation. If you find any damage, please contact the retailer or dealer. Please note modifications or alterations to the appliance are not allowed for your safety concern. Unintended use may cause hazards and loss of warranty claims.
Explanation of Symbols
| DangerThis symbol indicates that there are dangers to the life and health of persons due to extremely flammable gas. | |
| Warning of electrical voltageThis symbol indicates that there is a danger to life and health of persons due to voltage. | |
| WarningThe signal word indicates a hazard with a medium level of risk which, if not avoided, may result in death or serious injury. | |
| CautionThe signal word indicates a hazard with a low degree of risk which, if not avoided, may result in minor or moderate injury. | |
| AttentionThe signal word indicates important information (e.g. damage to property), but not danger. | |
| Observe instructionsThis symbol indicates that a service technician should only operate and maintain this appliance in accordance with the operating instructions. |
Read these operating instructions carefully and attentively before using/commissioning the unit and keep them in the immediate vicinity of the installation site or unit for later use!
SAFETY WARNINGS
Your safety is important to us. Please read this information before using your cooktop.
INSTALLATION
Electrical Shock Hazard
- Disconnect the appliance from the mains electricity supply before carrying out any work or maintenance on it.
- Connection to a good earth wiring system is essential and mandatory.
- Alterations to the domestic wiring system must only be made by a qualified electrician.
- Failure to follow this advice may result in electrical shock or death.
Cut Hazard
• Take care - panel edges are sharp.
- Failure to use caution could result in injury or cuts.
Important Safety Instructions
- Read these instructions carefully before installing or using this appliance.
- No combustible material or products should be placed on this appliance at any time.
- Please make this information available to the person responsible for installing the appliance as it could reduce your installation costs.
- In order to avoid a hazard, this appliance must be installed according to these instructions for installation.
- This appliance is to be properly installed and earthed only by a suitably qualified person.
- This appliance should be connected to a circuit which incorporates an isolating switch providing full disconnection from the power supply.
- Failure to install the appliance correctly could invalidate any warranty or liability claims.
-
This appliance can be used by children aged from 8 years and above and persons with reduced physical, sensory or mental capabilities or lack of experience and knowledge if they have been given supervision or instruction concerning use of the appliance in a safe way and understand the hazards involved.
-
Children shall not play with the appliance. Cleaning and user maintenance shall not be made by children without supervision.
- If the supply cord is damaged, it must be replaced by the manufacturer, its service agent or similarly qualified persons in order to avoid a hazard.
- WARNING: If the surface is cracked, switch off the appliance to avoid the possibility of electric shock, for hob surfaces of glass-ceramic or similar material which protect live parts.
- Metallic objects such as knives, forks, spoons and lids should not be placed on the hob surface since they can get hot
- A steam cleaner is not to be used.
- Do not use a steam cleaner to clean your cooktop.
- The appliance is not intended to be operated by means of an external timer or separate remote-control system.
- WARNING: Danger of fire: do not store items on the cooking surfaces.
- The cooking process has to be supervised. A short term cooking process has to be supervised continuously.
- WARNING: Unattended cooking on a hob with fat or oil can be dangerous and may result in fire. NEVER try to extinguish a fire with water, but switch off the appliance and then cover flame e.g. with a lid or a fire blanket.
Electrical Shock Hazard
- Do not cook on a broken or cracked cooktop. If the cooktop surface should break or crack, switch the appliance off immediately at the mains power supply (wall switch) and contact a qualified technician.
- Switch the cooktop off at the wall before cleaning or maintenance.
- Failure to follow this advice may result in electrical shock or death.
Health Hazard
- This appliance complies with electromagnetic safety standards.
- However, persons with cardiac pacemakers or other electrical implants (such as insulin pumps) must consult with their doctor or implant manufacturer before using this appliance to make sure that their implants will not be affected by the electromagnetic field.
- Failure to follow this advice may result in death.
Hot Surface Hazard
- During use, accessible parts of this appliance will become hot enough to cause burns.
- Do not let your body, clothing or any item other than suitable cookware contact the Induction glass until the surface is cool.
- Keep children away.
- Handles of saucepans may be hot to touch. Check saucepan handles do not overhang other cooking zones that are on. Keep handles out of reach of children.
- Failure to follow this advice could result in burns and scalds.
Cut Hazard
- The razor-sharp blade of a cooktop scraper is exposed when the safety cover is retracted. Use with extreme care and always store safely and out of reach of children.
- Failure to use caution could result in injury or cuts.
EN
Important safety instructions
- Never leave the appliance unattended when in use. Boilover causes smoking and greasy spillovers that may ignite.
- Never use your appliance as a work or storage surface.
- Never leave any objects or utensils on the appliance.
- Do not place or leave any magnetisable objects (e.g. credit cards, memory cards) or electronic devices (e.g. computers, MP3 players) near the appliance, as they may be affected by its electromagnetic field.
- Never use your appliance for warming or heating the room.
- After use, always turn off the cooking zones and the cooktop as described in this manual (i.e. by using the touch controls). Do not rely on the pan detection feature to turn off the cooking zones when you remove the pans.
- Do not allow children to play with the appliance or sit, stand, or climb on it.
- Do not store items of interest to children in cabinets above the appliance. Children climbing on the cooktop could be seriously injured.
- Do not leave children alone or unattended in the area where the appliance is in use.
-
Children or persons with a disability which limits their ability to use the appliance should have a responsible and competent person to instruct them in its use. The instructor should be satisfied that they can use the appliance without danger to themselves or their surroundings.
-
Do not repair or replace any part of the appliance unless specifically recommended in the manual. All other servicing should be done by a qualified technician.
- Do not place or drop heavy objects on your cooktop.
- Do not stand on your cooktop.
- Do not use pans with jagged edges or drag pans across the Induction glass surface as this can scratch the glass.
- Do not use scourers or any other harsh abrasive cleaning agents to clean your cooktop, as these can scratch the Induction glass.
- This appliance is intended to be used in household and similar applications such as: -staff kitchen areas in shops, offices and other working environments; -farm houses; -by clients in hotels, motels and other residential type environments; -bed and breakfast type environments.
- WARNING: The appliance and its accessible parts become hot during use.
- Care should be taken to avoid touching heating elements.
- Children less than 8 years of age shall be kept away unless continuously supervised.
- After use, switch off the hob element by its control and do not rely on the pan detector.
- WARNING: Use only hob guards designed by the manufacturer of the cooking appliance or indicated by the manufacturer of the appliance in the instructions for use as suitable or hob guards incorporated in the appliance. The use of inappropriate guards can cause accidents.
Congratulations on the purchase of your new Induction Hob.
We recommend that you spend some time to read this Instruction / Installation Manual in order to fully understand how to install correctly and operate it.
For installation, please read the installation section.
Read all the safety instructions carefully before use and keep this Instruction / Installation Manual for future reference.
SPECIFICATIONS
| MIH742F558K2Cooking Hob | |
| Cooking Zones | 4 Zones |
| Supply Voltage | 220-240V~ 50Hz or 60Hz |
| Installed Electric Power | 7400W |
| Product Size DxWxH(mm) | 590X520X53 |
| Building-in Dimensions AxB (mm) | 560X480 |
Weight and Dimensions are approximate. Because we continually strive to improve our products we may change specifications and designs without prior notice.
PRODUCT OVERVIEW
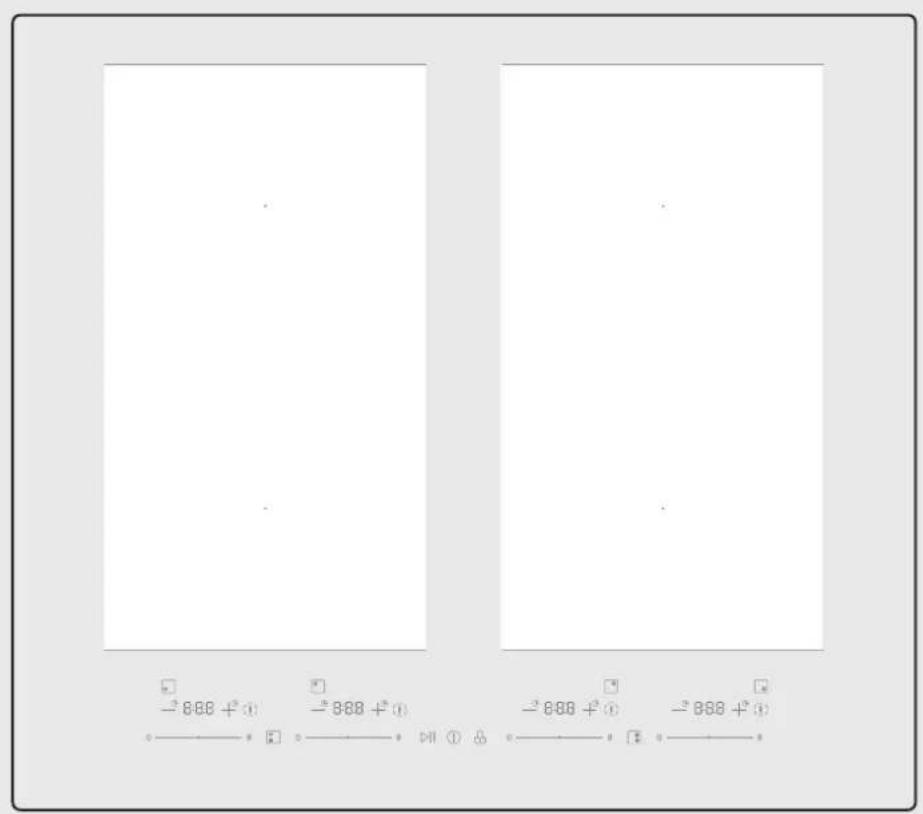
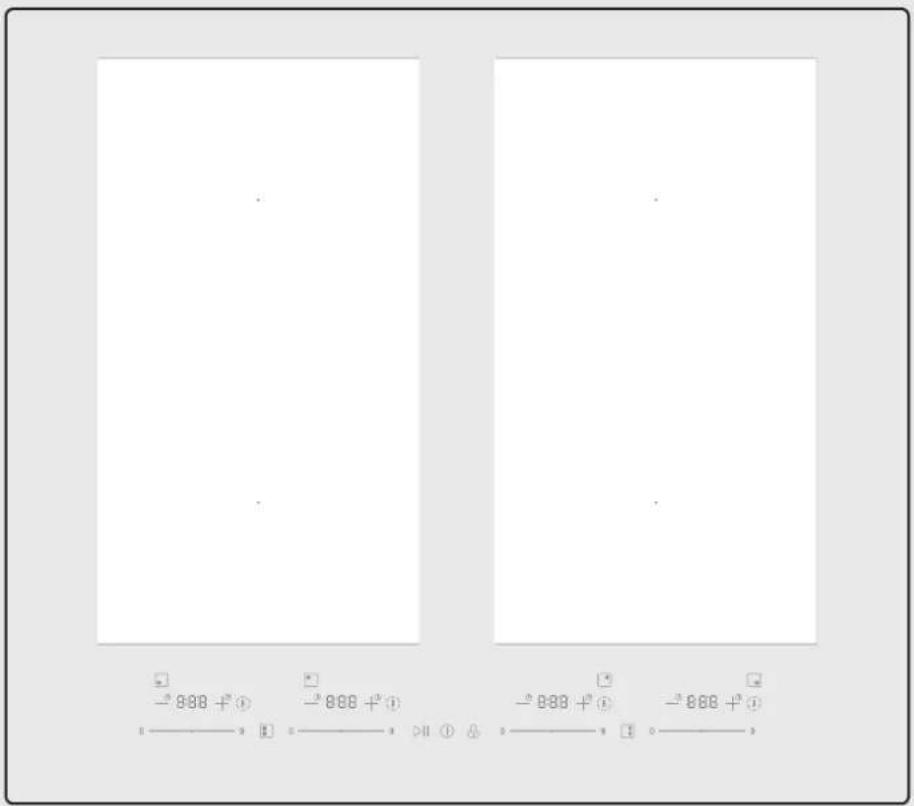
Top View
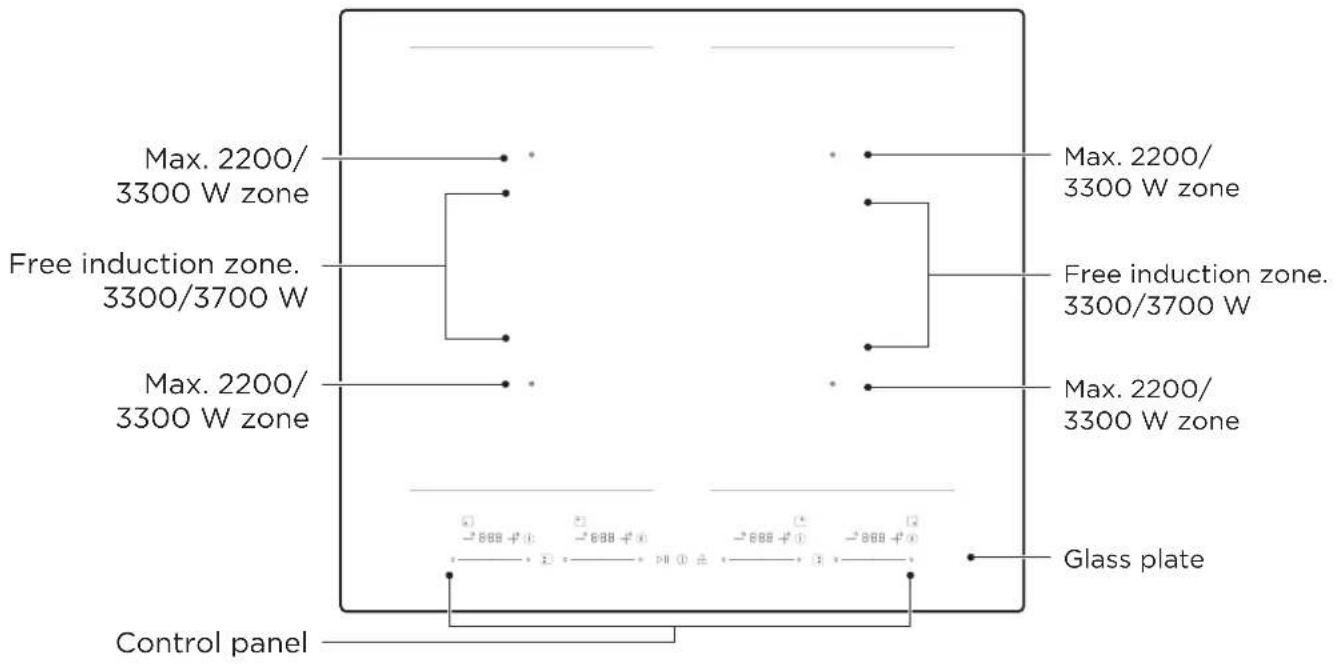
EN
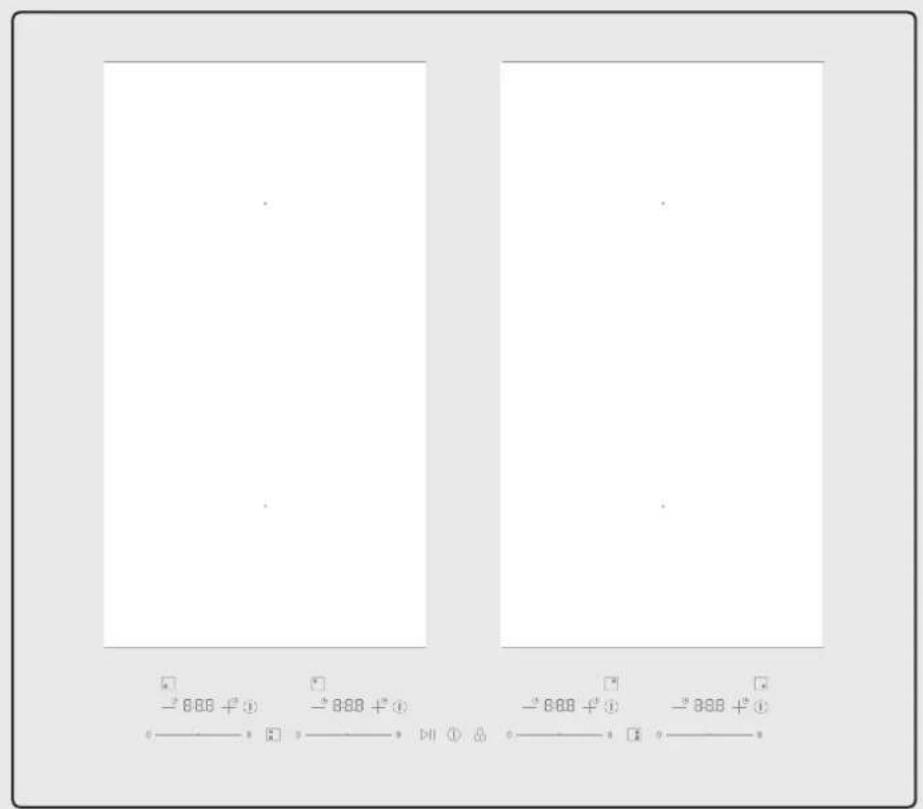
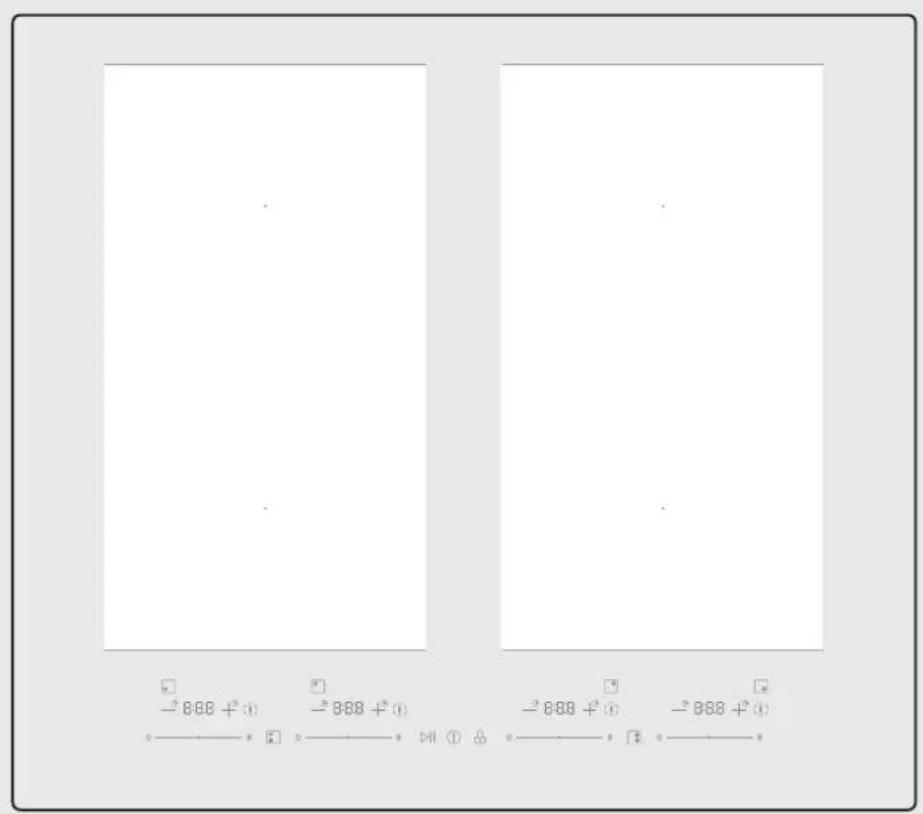
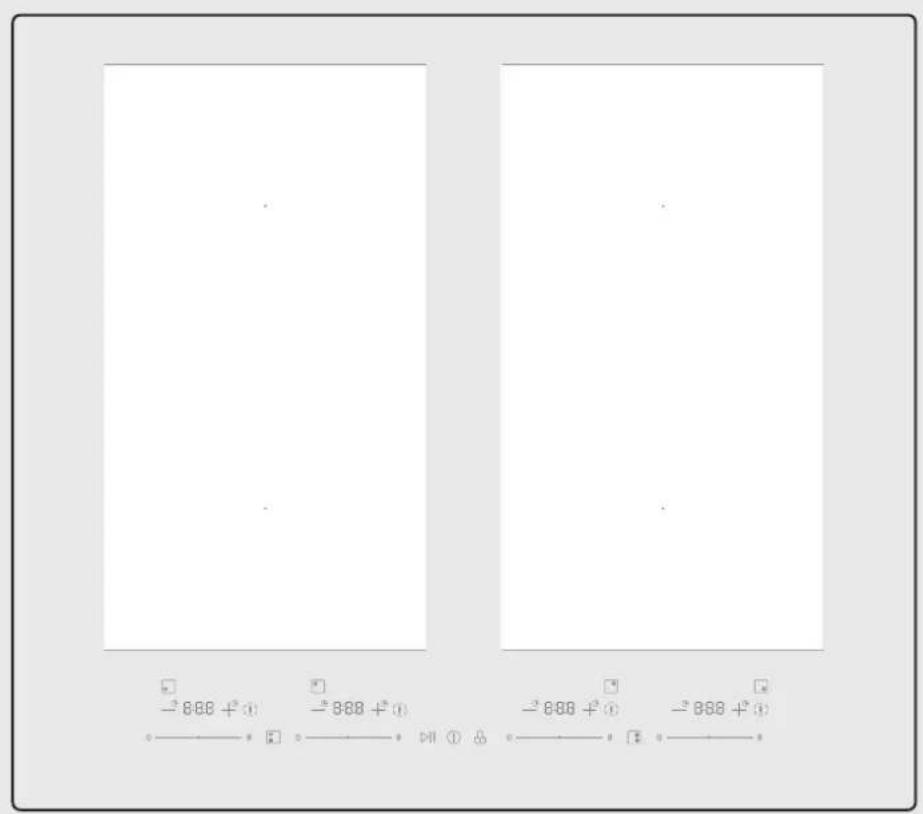
Control Panel
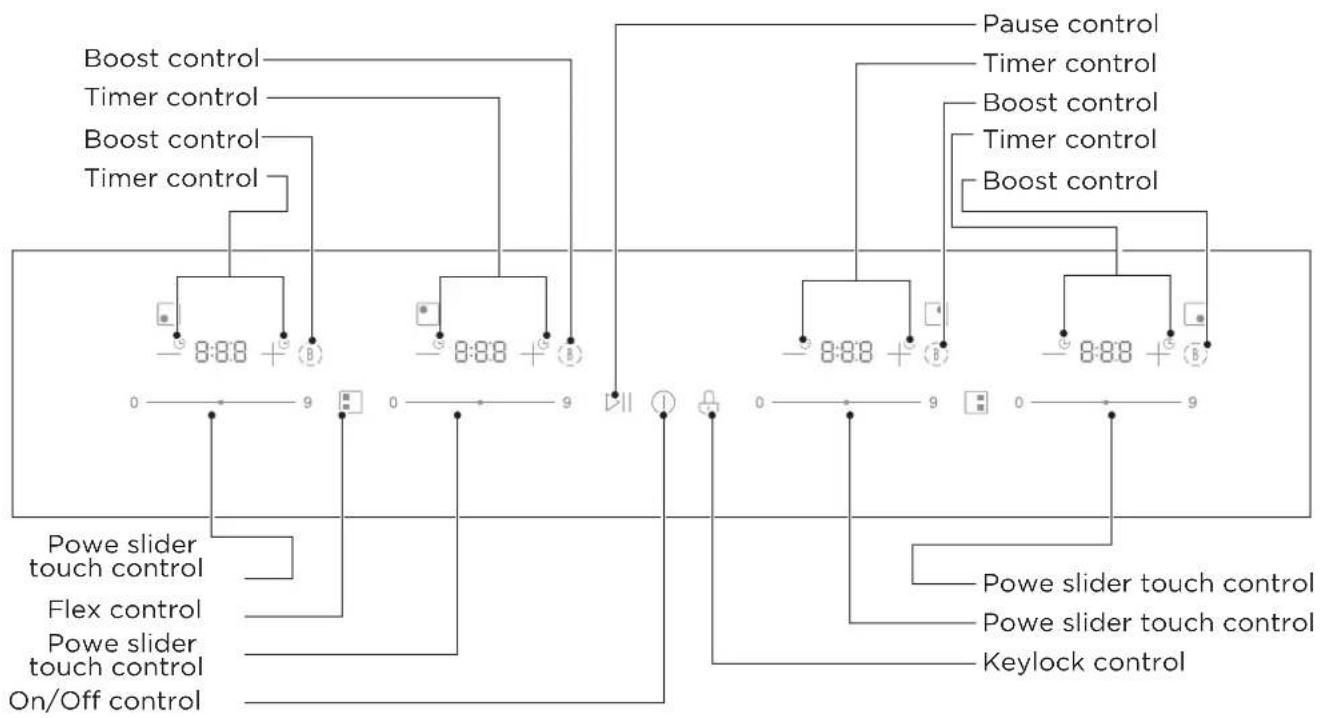
flowchart
graph TD
    A["8:88 + B"] --> B["Boost control"]
    A --> C["Timer control"]
    A --> D["Boost control"]
    A --> E["Timer control"]
    F["8:88 + B"] --> G["Pause control"]
    F --> H["Timer control"]
    F --> I["Boost control"]
    F --> J["Timer control"]
    F --> K["Boost control"]
    L["Powe slider touch control"] --> M["On/Off control"]
    N["Flex control"] --> M
    O["Powe slider touch control"] --> M
    P["Keylock control"] --> Q["Power slider touch control"]
    R["Power slider touch control"] --> S["Power slider touch control"]

NOTE
All the pictures in this manual are for explanation purpose only. Any discrepancy between the real object and the illustration in the drawing shall be subject to the real subject.
Working Theory
Induction cooking is a safe, advanced, efficient, and economical cooking technology. It works by electromagnetic vibrations generating heat directly in the pan, rather than indirectly through heating the glass surface. The glass becomes hot only because the pan eventually warms it up.
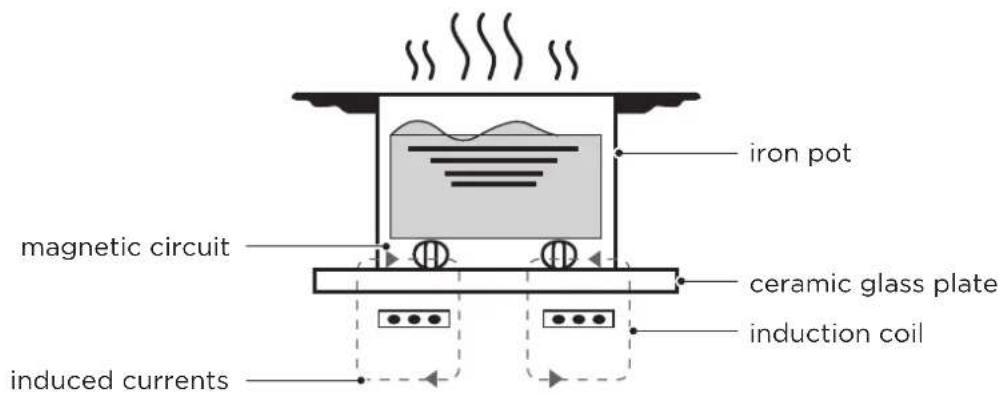
Before Using Your New Induction Hob
- Read this guide, taking special note of the 'Safety Warnings' section.
- Remove any protective film that may still be on your Induction hob.
QUICK START GUIDE
Take care when frying as the oil and fat heat up very quickly, particularly if you're using PowerBoost. At extremely high temperatures oil and fat will ignite spontaneously and this presents a serious fire risk.
Cooking Tips
- When food comes to the boil, reduce the temperature setting.
- Using a lid will reduce cooking times and save energy by retaining the heat.
- Minimize the amount of liquid or fat to reduce cooking times.
- Start cooking on a high setting and reduce the setting when the food has heated through.
Simmering, Cooking rice
- Simmering occurs below boiling point, at around 85^ , when bubbles are just rising occasionally to the surface of the cooking liquid. It is the key to delicious soups and tender stews because the flavours develop without overcooking the food. You should also cook egg-based and flour thickened sauces below boiling point.
- Some tasks, including cooking rice by the absorption method, may require a setting higher than the lowest setting to ensure the food is cooked properly in the time recommended.
Searing Steak
To cook juicy flavorsome steaks:
- Stand the meat at room temperature for about 20 minutes before cooking.
- Heat up a heavy-based frying pan.
- Brush both sides of the steak with oil. Drizzle a small amount of oil into the hot pan and then lower the meat onto the hot pan.
- Turn the steak only once during cooking. The exact cooking time will depend on the thickness of the steak and how cooked you want it. Times may vary from about 2 - 8 minutes per side. Press the steak to gauge how cooked it is - the firmer it feels the more 'well done' it will be.
- Leave the steak to rest on a warm plate for a few minutes to allow it to relax and become tender before serving.
For Stir-frying
- Choose an induction compatible flat-based wok or a large frying pan.
- Have all the ingredients and equipment ready. Stir-frying should be quick. If cooking large quantities, cook the food in several smaller batches.
- Preheat the pan briefly and add two tablespoons of oil.
- Cook any meat first, put it aside and keep warm.
- Stir-fry the vegetables. When they are hot but still crisp, turn the cooking zone to a lower setting, return the meat to the pan and add your sauce.
- Stir the ingredients gently to make sure they are heated through.
- Serve immediately.
Detection of Small Articles
When an unsuitable size or non-magnetic pan (e.g. aluminium), or some other small item (e.g. knife, fork, key) has been left on the hob, the hob automatically go on to standby in 1 minute. The fan will keep cooking down the induction hob for a further 1 minute.
Heat Settings
The settings below are guidelines only. The exact setting will depend on several factors, including your cookware and the amount you are cooking. Experiment with the induction hob to find the settings that best suit you.
| Heat setting Suitability | |
| 1 - 2 | ·delicate warming for small amounts of food·melting chocolate, butter, and foods that burn quickly·gentle simmering·slow warming |
| 3 - 4 | ·reheating·rapid simmering·cooking rice |
| 5 - 6 · pancakes | |
| 7 - 8 | ·sautéing·cooking pasta |
| 9/P | ·stir-frying·searing·bringing soup to the boil·boiling water |
PRODUCT INSTALLATION
Selection of Installation Equipment
Cut out the work surface according to the sizes shown in the drawing.
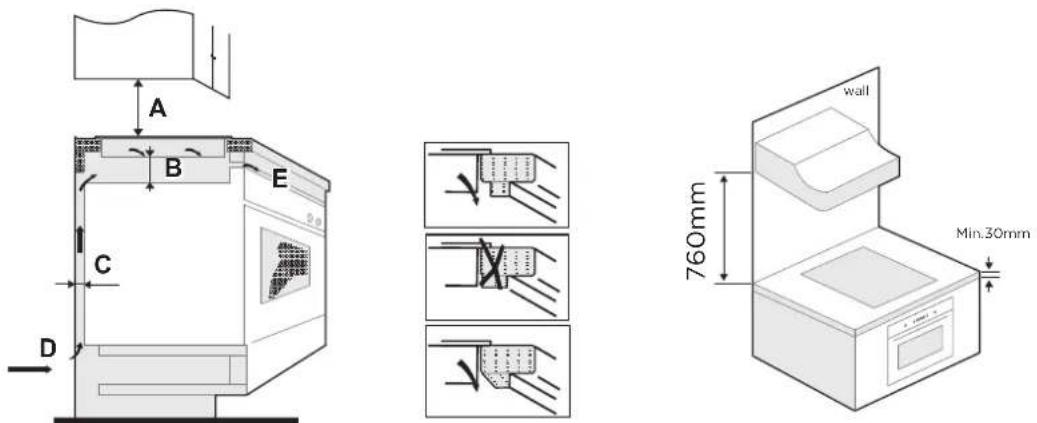
For the purpose of installation and use, a minimum of 5 cm space shall be preserved around the hole. Be sure the thickness of the work surface is at least 30mm. Please select heat-resistant and insulated work surface material (Wood and similar fibrous or hygroscopic material shall not be used as work surface material unless impregnated) to avoid the electrical shock and larger deformation caused by the heat radiation from the hotplate. As shown below:

Note: The safety distance between the sides of the hob and the inner surfaces of the worktop should be at least 3mm.
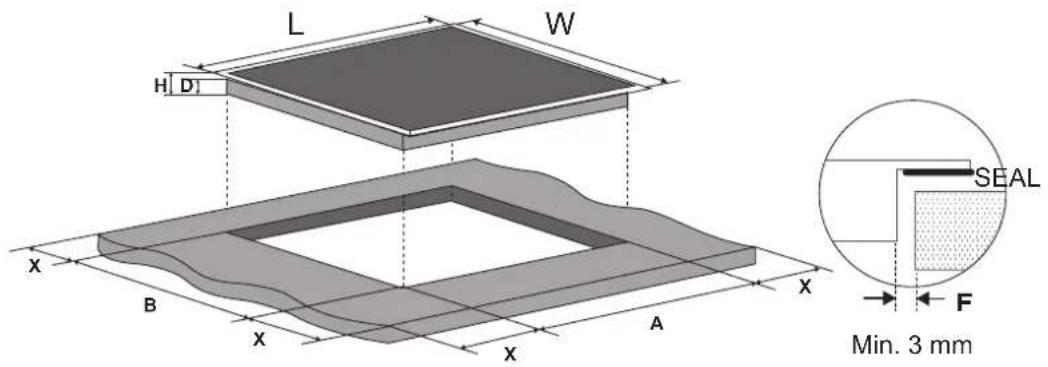
| L(mm) | W(mm) | H(mm) | D(mm) | A(mm) | B(mm) | X(mm) | F(mm) |
| 590 | 520 | 53 | 49 | 560 ± 1 | 480 ± 1 | 50 mini | 3 mini |
Under any circumstances, make sure the Induction cooker hob is well ventilated and the air inlet and outlet are not blocked. Ensure the induction cooker hob is in good work state. As shown below

Note: The safety distance between the hotplate and the cupboard above the hotplate should be at least 760 mm.
WARNING: Ensuring Adequate Ventilation
Make sure the induction cooker hob is well ventilated and that air inlet and outlet are not blocked. In order to avoid accidental touch with the overheating bottom of the hob, or getting unexpected electric shock during working, it is necessary to put a wooden insert, fixed by screws, at a minimum distance of 15mm from the bottom of the hob. Follow the requirements below.
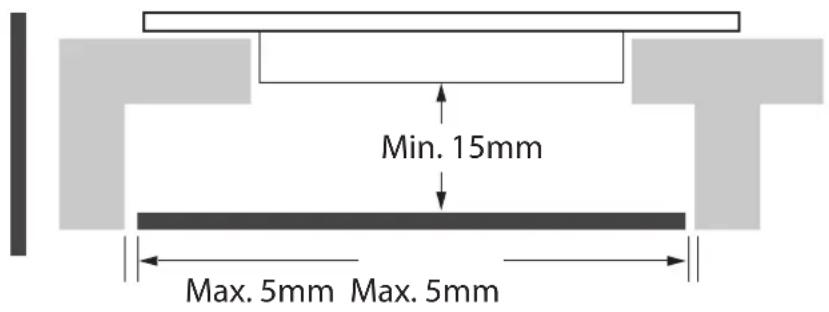
There are ventilation holes around outside of the hob. YOU MUST ensure these holes are not blocked by the worktop when you put the hob into position.
- Be aware that the glue that join the plastic or wooden material to the furniture, has to resist to temperature not below 150^ , to avoid the unstuck of the paneling.
- The rear wall, adjacent and surrounding surfaces must therefore be able to withstand an temperature of 90^ .
Before Installing the Hob, Make Sure That
- The work surface is square and level, and no structural members interfere with space requirements.
- The work surface is made of a heat-resistant and insulated material.
- If the hob is installed above an oven, the oven has a built-in cooling fan.
- The installation will comply with all clearance requirements and applicable standards and regulations.
- A suitable isolating switch providing full disconnection from the mains power supply is incorporated in the permanent wiring, mounted and positioned to comply with the local wiring rules and regulations.
- The isolating switch must be of an approved type and provide a 3 mm air gap contact separation in all poles (or in all active [phase] conductors if the local wiring rules allow for this variation of the requirements).
- The isolating switch will be easily accessible to the customer with the hob installed.
- You consult local building authorities and by-laws if in doubt regarding installation.
- You use heat-resistant and easy-to-clean finishes (such as ceramic tiles) for the wall surfaces surrounding the hob.
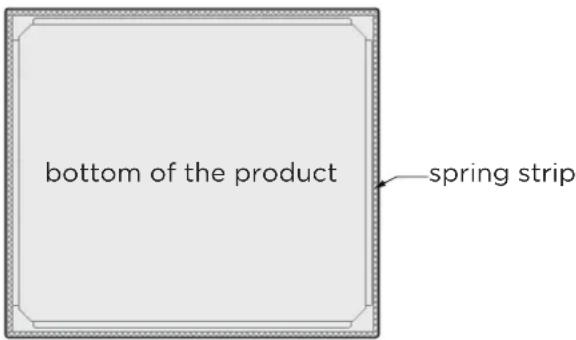
Before installing onto the workbench, it is necessary to stick the sealing strip onto the back of the glass plate:
- Flip the entire machine over to the back of the glass plate;
• Take out the sponge strip from the self-sealing bag and tear off the double-sided adhesive on the back of the sponge strip;
- Stick the sponge strip onto the back of the glass plate.
- The sponge strip should not exceed the edge of the glass plate.
After Installing the Hob, Make Sure That
- The power supply cable is not accessible through cupboard doors or drawers.
- There is adequate flow of fresh air from outside the cabinetry to the base of the hob.
- If the hob is installed above a drawer or cupboard space, a thermal protection barrier is installed below the base of the hob.
- The isolating switch is easily accessible by the customer.
Before Locating the Fixing Brackets
The unit should be placed on a stable, smooth surface (use the packaging). Do not apply force onto the controls protruding from the hob.
Adjusting the Bracket Position
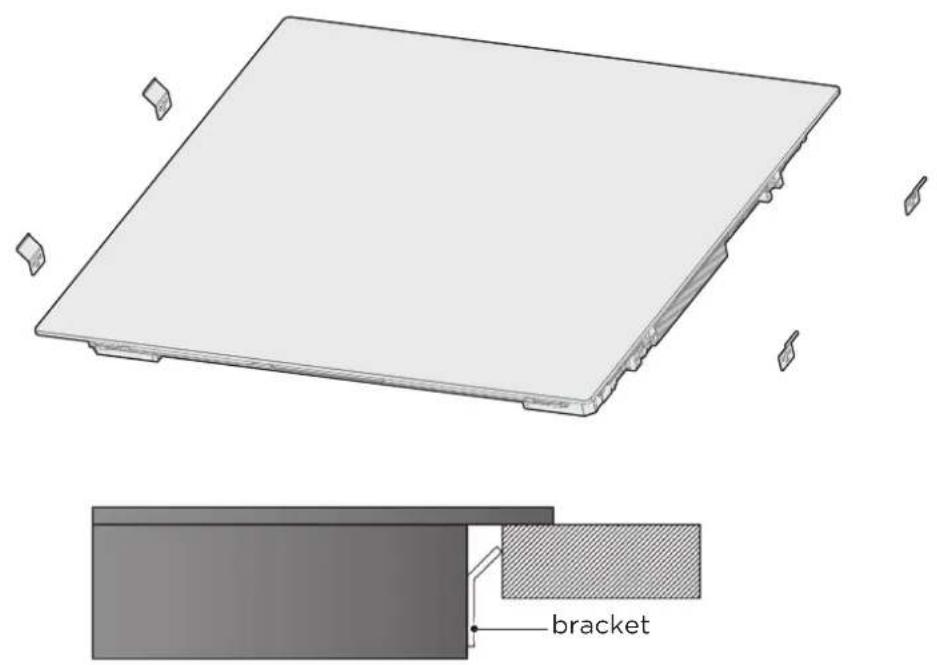
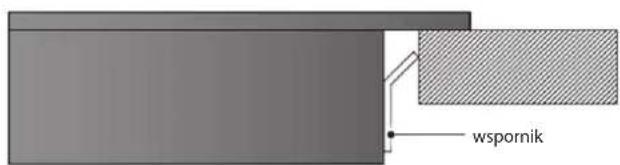
Fix the hob on the work surface by insert 4 brackets on the bottom of hob(see picture) before installation.
Adjust the bracket position to suit for different table top thickness.
natural_image
Technical illustration of a rectangular electronic component with a bracket detail (no text or symbols)
Under any circumstances, the brackets cannot touch with the inner surfaces of the worktop after installation (see picture).
CAUTIONS
- The induction hotplate must be installed by qualified personnel or technicians. We have professionals at your service. Please never conduct the operation by yourself.
- The hob will not be installed directly above a dishwasher, fridge, freezer, washing machine or clothes dryer, as the humidity may damage the hob electronics.
- The induction hotplate shall be installed such that better heat radiation can be ensured to enhance its reliability.
- The wall and induced heating zone above the table surface shall withstand heat.
- To avoid any damage, the sandwich layer and adhesive must be resistant to heat.
- A steam cleaner is not to be used.
Connecting the Hob to the Mains Power Supply

This hob must be connected to the mains power supply only by a suitably qualified person. Before connecting the hob to the mains power supply, check that:
- The domestic wiring system is suitable for the power drawn by the hob.
- The voltage corresponds to the value given in the rating plate.
- The power supply cable sections can withstand the load specified on the rating plate.
To connect the hob to the mains power supply, do not use adapters, reducers, or branching devices, as they can cause overheating and fire.
The power supply cable must not touch any hot parts and must be positioned so that its temperature will not exceed 75^ C at any point.

Check with an electrician whether the domestic wiring system is suitable without alterations. Any alterations must only be made by a qualified electrician.
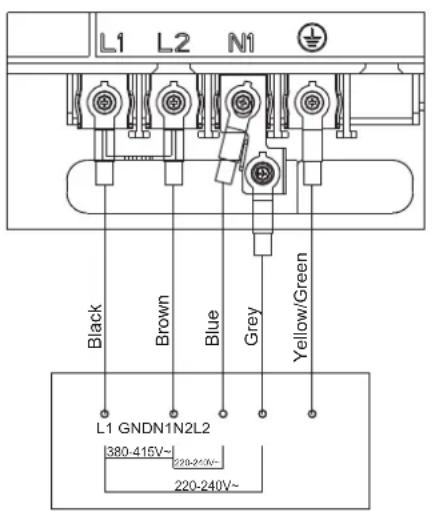
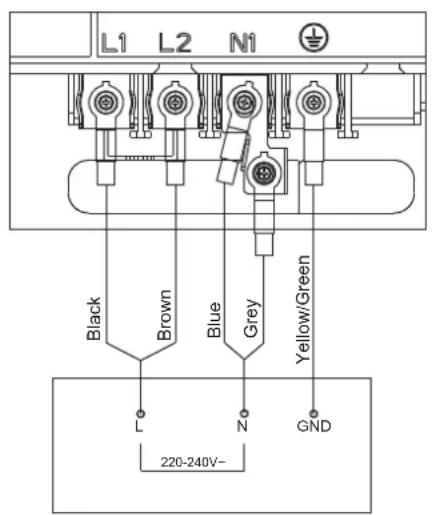
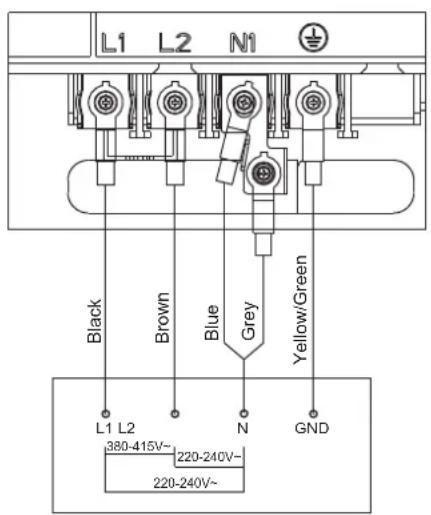
- If the cable is damaged or to be replaced, the operation must be carried out the by after-sale agent with dedicated tools to avoid any accidents.
- If the appliance is being connected directly to the mains an omnipolar circuit-breaker must be installed with a minimum opening of 3mm between contacts.
- The installer must ensure that the correct electrical connection has been made and that it is compliant with safety regulations.
- The cable must not be bent or compressed.
- The cable must be checked regularly and replaced by authorised technicians.

The bottom surface and the power cord of the hob are not accessible after installation.
OPERATION INSTRUCTIONS
Touch Controls
- The controls respond to touch, so you don't need to apply any pressure.
- Use the ball of your finger, not its tip.
- You will hear a beep each time a touch is registered.
- Make sure the controls are always clean, dry, and that there is no object (e.g. a utensil or a cloth) covering them. Even a thin film of water may make the controls difficult to operate.
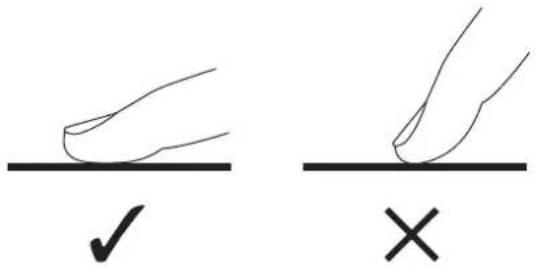
Choosing
EN

- Only use cookware with a base suitable for induction cooking.
Look for the induction symbol on the packaging or on the bottom of the pan.
- You can check whether your cookware is suitable by carrying out a magnet test.
Move a magnet towards the base of the pan. If it is attracted, the pan is suitable for induction.
• If you do not have a magnet:
-
Put some water in the pan you want to check.
-
If U does not flash in the display and the water is heating, the pan is suitable.
• Cookware made from the following materials is not suitable: pure stainless steel, aluminium or copper without a magnetic base, glass, wood, porcelain, ceramic, and earthenware.
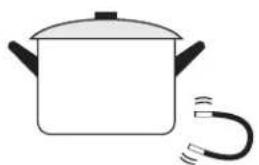
natural_image
Simple line drawing of a cooking pot with a coiled tube (no text or symbols)• Cookware bases with aluminium content.
• These reduce the ferromagnetic area, which means that less power is emitted to the Cookware. This cookware may not be sufficiently detected or may not be detected at all, And therefore does not heat sufficiently.
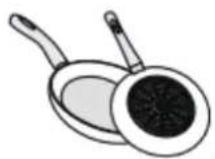
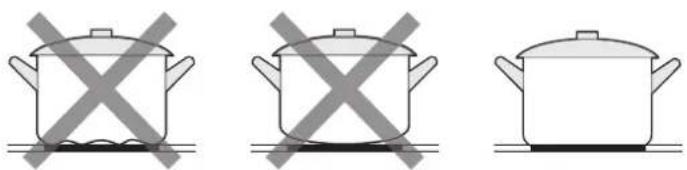
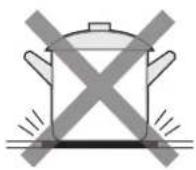
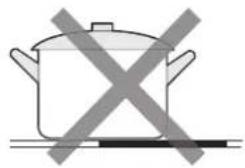
- Do not use cookware with jagged edges or a curved base.
natural_image
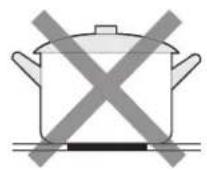
Three identical cooking pots with crossed-out X marks, shown in different orientations (no text or symbols)- Make sure that the base of your pan is smooth, sits flat against the glass, and is the same size as the cooking zone. Use pans whose diameter is as large as the graphic of the zone selected. Using a pot a slightly wider energy will be used at its maximum efficiency. If you use smaller pot efficiency could be less than expected. Pot less than 140 mm could be undetected by the hob. Always centre your pan on the cooking zone.
natural_image
Simple line drawing of a cooking pot with crossed-out triangular symbol (no text or labels)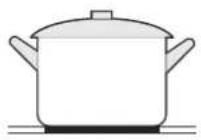
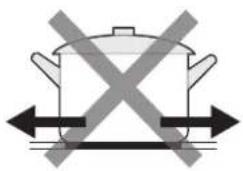
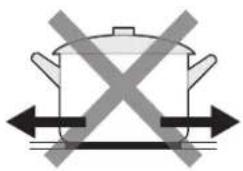
• Always lift pans off the Induction hob - do not slide, or they may scratch the glass.
natural_image
Simple line drawing of a cooking pot with crossed arrows indicating pressure or resistance (no text or symbols)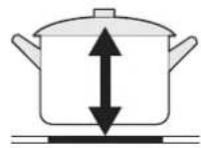
Pan Dimension
The cooking zones are, up to a limit, automatically adapted to the diameter of the pan. However the bottom of this pan must have a minimum of diameter according to the corresponding cooking zone. To obtain the best efficiency of your hob, please place the pan in the center of the cooking zone.
| Cooking zone | The base diameter of induction cookware | |
| Minimum (mm) Maximum (mm) | ||
| 1,2,3,4 100 220 | ||
| flex induction | 210 | 220x380 |
How to Use
1. Start Cooking
- Touch the ON/OFF control. After power on, the buzzer beeps once, heating zone selection controls show “-”, indicating that the induction hob has entered the state of standby mode.mode.
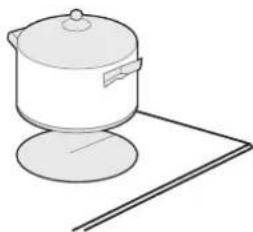
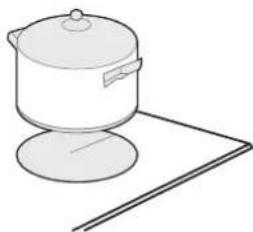
- Place a suitable pan on the cooking zone that you wish to use.
• Make sure the bottom of the pan and the surface of the cooking zone are clean and dry.
natural_image
Simple line drawing of a cooking pot on a stand (no text or symbols)-
Each hob has its own independent slider, boost, timing operation button, which can independently operate the power level/timing function.
-
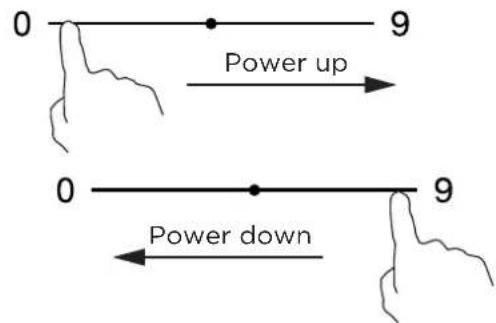
Adjust heat setting by touching the slider control.
- If you don't choose a heat setting within 20 seconds, the Induction hob will automatically switch off. You will need to start again at step 1.
- You can modify the heat setting at any time during cooking.
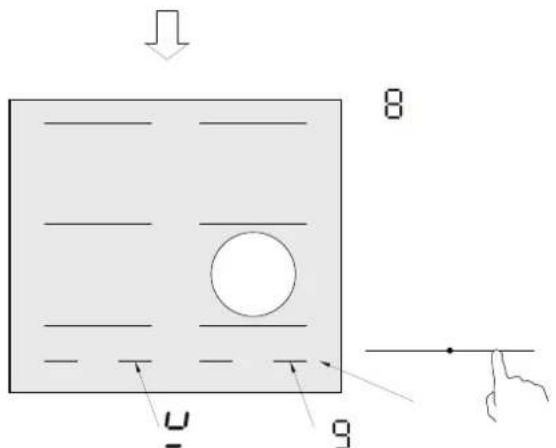
If the display flashes ≥slant U alternately with the heat setting
This means that:
- you have not placed a pan on the correct cooking zone or,
- the pan you're using is not suitable for induction cooking or,
- the pan is too small or not properly centered on the cooking zone.
No heating takes place unless there is a suitable pan on the cooking zone.
The display will automatically turn off after 1 minute if no suitable pan is placed on it.
2. Finish Cooking
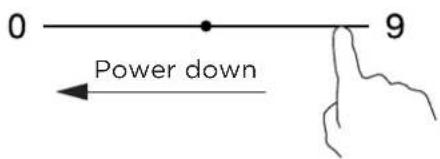
- Touch the slider of the corresponding burner to the far left, make sure the display shows "O", after 3s the cooking area is turned off, and the display shows "-".
- Turn the whole cooktop off by touching the ON/OFF control.
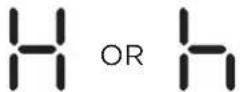
- Beware of hot surfaces
H/h will show which cooking zone is hot to touch. It will disappear when the surface has cooled down to a safe temperature. It can also be used as an energy saving function if you want to heat further pans, use the hotplate that is still hot.
3. Using the Boost Function
Activate the boost function
- Touch the ON/OFF control. After power on, the buzzer beeps once, heating zone selection controls show “-”, indicating that the induction hob has entered the state of standby mode.
- Touching the boost control "B", the zone indicator show "Marquee" and the power reach Max.
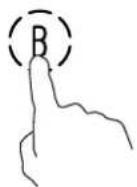
Cancel the Boost function
- In boost mode, the operation slider will exit the boost mode, and the gear will be displayed in the display area.
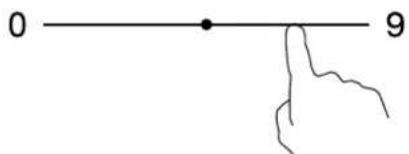
- After the boost operation time reaches, it will automatically exit the boost mode and return to the level before entering the boost mode. If the level before entering the boost mode is 0, it will become level 9 for operation.

Note
• The function can work in all cooking zones.
• The cooking zone returns to its original setting after 10 minutes.
- The flex cooking zone returns to its original setting after 5 minutes.
- As the boost function of 1st cooking zone is activated, start 2nd cooking area, and the 1st cooking area will automatically change to level 9. Vice versa.
- If the original heat setting equals 0, it will return to 9 when boost ends.
4. Flexible Area
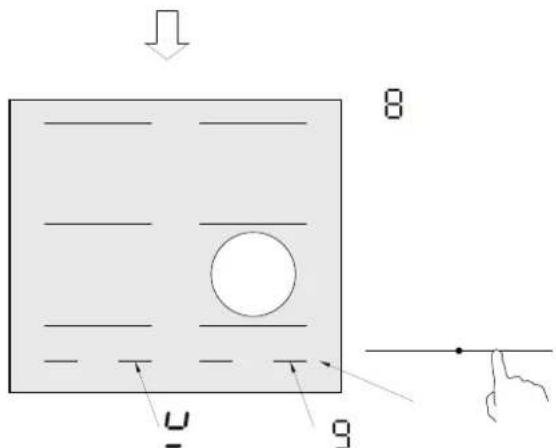
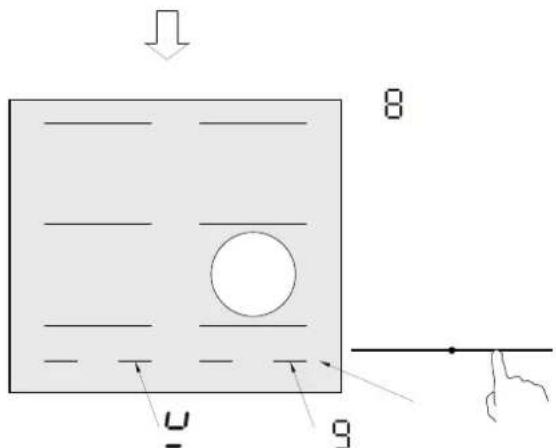
- This area can be used as a single zone or as two different zones, accordingly to the cooking needs anytime.
- Flexible area is made of two independent inductors that can be controlled separately. When working as a single zone, the part that is not covered by cookware is automatically switched off after 8 seconds.
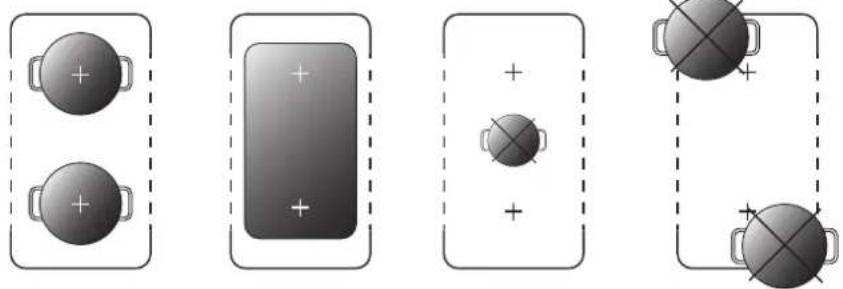
- To grant a correct pan detection and a even heat distribution, the cookware should be correctly placed:
- In the front or rear side of the flexible zone when the cookware is smaller than 21 cm.
- Anywhere with bigger cookware.
Examples of good pot placement and bad pot placement.
natural_image
Four diagrams showing battery charging setups with positive and negative charges, no text or symbols present5. Locking the Controls
- You can lock the controls to prevent unintended use (for example children accidentally turning the cooking zones on).
- When the controls are locked, all the controls except the ON/OFF control are disabled.
To lock the controls
Touch the lock control
The digital will show "Lo"
To unlock the controls
Touch and hold the lock control for a while.

When the hob is in the lock mode, all the controls are disable except the ON/OFF ①, you can always turn the induction hob off with the ON/OFF ① control in an emergency, but you shall unlock the hob first in the next operation.
6. Timer Control
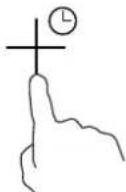
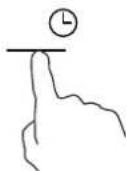
• Each heatzone has independent time increase and decrease buttons.
- Press the key for a short time to increase or decrease the key time by 1 min, and press the key for a long time to increase or increase by 10 min.
• In flex mode, the time operation keys of the flex included hobs can operate the time of the flex zone.
- In the flex zone mode, if the timing exists, turn off the flex zone function, and the time will remain until the front hob.
- Enter flex mode, and the timing setting is turned off by default.
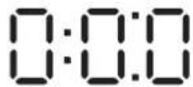
• The maximum settable timing time is 8:00.
- The maximum setting time of the current gear is the default timing time of the gear. For details, see the Default working times.
• After entering the timing, the display will only display the current timing time. click the slider bar to view the current level and slide the slider bar to adjust the level.
- When the time is set to 0, it will exit the level display mode at a fixed time without operation for 3s.
- Time decrease button, long press and short press are effective.
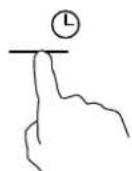
- Time increase button, long press and short press are effective.
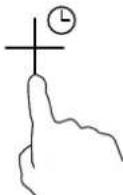
- At the same time, press the timing plus or minus button for 1s to cancel the timing.
7. Pause
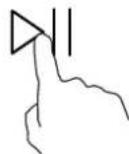
- When the cooking zones are running, touch the " ▷H control, all the displays will show" " and heating by level 2. At this moment only " ▷H and " Icontrol can be operated.
- Touch " ▷" again, the displays show the original setting, and the cooking zones keep on heating.
EN
8. Pan transfer
The pan tranfer function is disabled by default and can be activated or disabled by the following operations, In the off state, long press the open key to start the cooktop, in 10 seconds long press LF timing reduction function key 3s;
If LF digital tube display On, it means open pantransfer function.
If LF digital tube display OF, it means closepan transfer function.
- The pan transfer function is not enabled bydefault when bunner is in boost mode.
- After the transfer is confirmed, the timing time and level will be transferred.
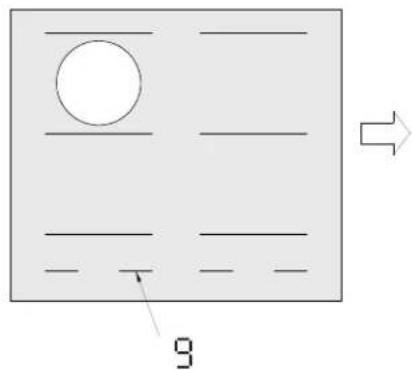
Start LR hob. LR burner running at 9 level
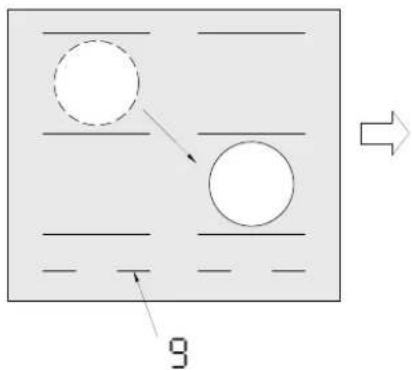
When the power is stable. transfer the LR cooker to RF
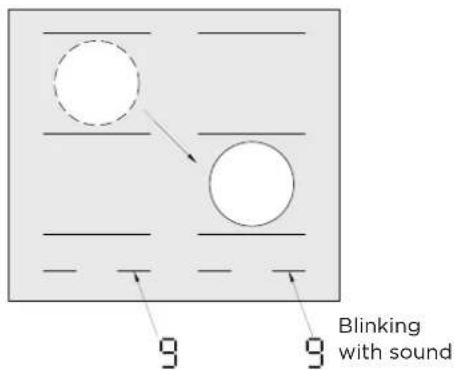
RF burner nib flashing LR bunner gear
Confirmation Disconfirmation
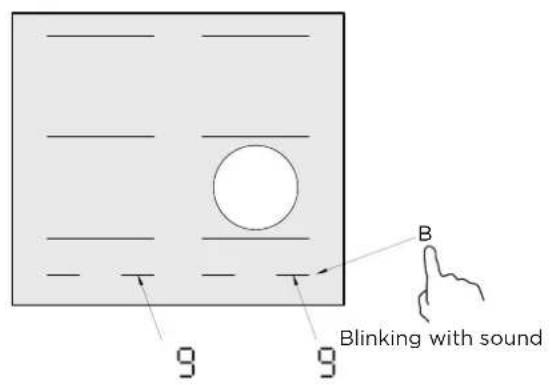
Press the flashing bunner's boost key to confirm the transfer
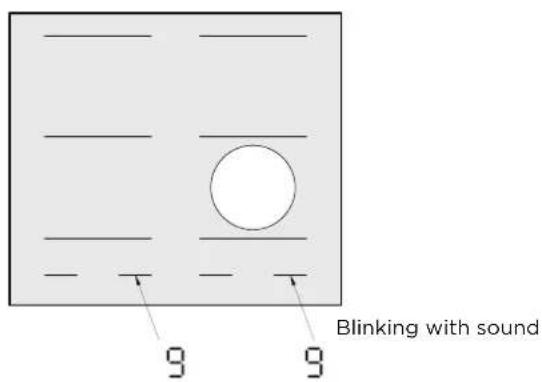
- No pot is displayed after 6 seconds
- 10 seconds later, turn off the blinking and prompt sound
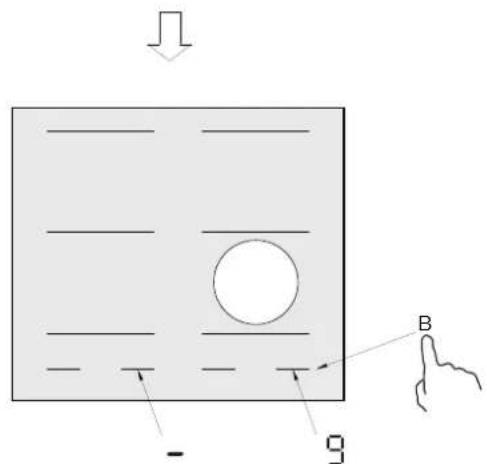
RF bunner is heated at LR bunner level
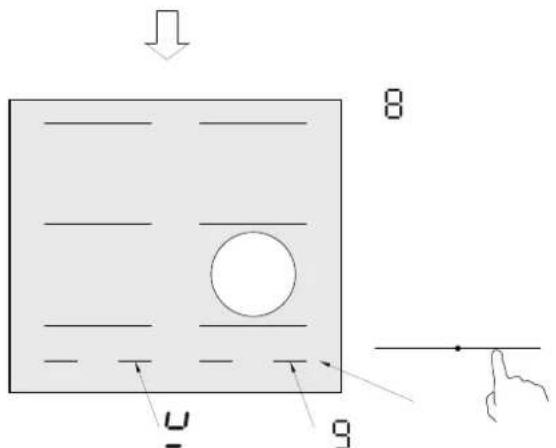
Operate the RF slide. cancel the transfer and heat in the set gear
EN
9. Default Working Times
Auto shut down is a safety protection function for your induction hob. It shut down automatically if ever you forget to turn off your cooking. The default working times for various power levels are shown in the below table:
| Power level pause | 1 | 2 | 3 | 4 | 5 | 6 | 7 | 8 | 9 | |
| Default working timer (hour) | 8 | 8 | 8 | 6 | 6 | 4 | 4 | 2 | 2 | 1.5 |
When the pot is removed, the induction hob can stop heating immediately and the hob automatically switch off after 1 minutes.

People with a heart pace maker should consult with their doctor before using this unit.
CLEANING AND MAINTENANCE
| What? How? Important! | ||
| Everyday soiling on glass (fingerprints, marks, stains left by food or non-sugary spillovers on the glass). | 1. Switch the power to the cooktop off.2. Apply a cooktop cleaner while the glass is still warm (but not hot!)3. Rinse and wipe dry with a clean cloth or paper towel.4. Switch the power to the cooktop back on. | ·When the power to the cooktop is switched off, there will be no 'hot surface' indication but the cooking zone may still be hot! Take extreme care.·Heavy-duty scourers, some nylon scourers and harsh/abrasive cleaning agents may scratch the glass. Always read the label to check if your cleaner or scourer is suitable.·Never leave cleaning residue on the cooktop: the glass may become stained. |
| Boilovers, melts, and hot sugary spills on the glass. | Remove these immediately with a fish slice, palette knife or razor blade scraper suitable for Ceramic glass cooktops, but beware of hot cooking zone surfaces:1. Switch the power to the cooktop off at the wall.2. Hold the blade or utensil at a 30° angle and scrape the soiling or spill to a cool area of the cooktop.3. Clean the soiling or spill up with a dish cloth or paper towel.4. Follow steps 2 to 4 for 'Everyday soiling on glass' above. | ·Remove stains left by melts and sugary food or spillovers as soon as possible. If left to cool on the glass, they may be difficult to remove or even permanently damage the glass surface.·Cut hazard: when the safety cover is retracted, the blade in a scraper is razor-sharp. Use with extreme care and always store safely and out of reach of children. |
| Spillovers on the touch controls. | 1. Switch the power to the cooktop off.2. Soak up the spill.3. Wipe the touch control area with a clean damp sponge or cloth.4. Wipe the area completely dry. with a paper towel.5. Switch the power to the cooktop back on. | ·The cooktop may beep and turn itself off, and the touch controls may not function while there is liquid on them. Make sure you wipe the touch control area dry before turning the cooktop back on. |
TROUBLESHOOTING
Operation of your appliance can lead to errors and malfunctions. The following tables contain possible causes and notes for resolving an error message or malfunction. It is recommended to read the tables carefully below in order to save your time and money that may cost for calling to the service center.
| Problem Possible causes What to do | ||
| The cooktop cannot be turned on. | No power. | Make sure the ceramic hob is connected to the power supply and that it is switched on.Check whether there is a power outage in your home or area. If you've checked everything and the problem persists, call a qualified technician. |
| The touch controls are unresponsive. | The controls are locked. | Unlock the controls. See section 'Using your ceramic cooktop' for instructions. |
| The touch controls are difficult to operate. | There may be a slight film of water over the controls or you may be using the tip of your finger when touching the controls. | Make sure the touch control area is dry and use the ball of your finger when touching the controls. |
| The glass is being scratched. | Rough-edged cookware.Unsuitable, abrasive scourer or cleaning products being used. | Use cookware with flat and smooth bases. See 'Choosing the right cookware'.See 'Care and cleaning'. |
| Some pans make crackling or clicking noises. | This may be caused by the construction of your cookware (layers of different metals vibrating differently). | This is normal for cookware and does not indicate a fault. |
| The induction hob makes a low humming noise when used on a high heat setting. | This is caused by the technology of induction cooking. | This is normal, but the noise should quieten down or disappear completely when you decrease the heat setting. |
| Fan noise coming from the induction hob. | A cooling fan built into your induction hob has come on to prevent the electronics from overheating. It may continue to run even after you've turned the induction hob off. | This is normal and needs no action. Do not switch the power to the induction hob off at the wall while the fan is running. |
| Pans do not become hot and appears in the display. | The induction hob cannot detect the pan because it is not suitable for induction cooking.The induction hob cannot detect the pan because it is too small for the cooking zone or not properly centred on it. | Use cookware suitable for induction cooking.See section 'Choosing the right cookware'.Centre the pan and make sure that its base matches the size of the cooking zone. |
| The induction hob or a cooking zone has turned itself off unexpectedly, a tone sounds and an error code is displayed (typically alternating with one or two digits in the cooking timer display). | Technical fault. | Please note down the error letters and numbers, switch the power to the induction hob off at the wall, and contact a qualified technician. |
Failure Display and Inspection
The induction hob is equipped with a self diagnostic function. With this test the technician is able to check the function of several components without disassembling or dismounting the hob from the working surface.
(1) Troubleshooting
| Problem Possible causes What to do! | ||
| E1、E2、E7 | • Please contact the supplier.Temperature sensor. | |
| E3、E4 | Temperature sensor of the IGBT failure. | • Please contact the supplier. |
| EU | The connection between the display board and the main board is fail or touch IC communication fail. | • Please contact the supplier. |
| EL/EH | Abnormal supply voltage. | • Please inspect whether power supply is normal.• Power on after the power supply is normal. |
| C1 | Temperature sensor of the ceramic glass plate Is high. | • Please restart after the induction hob cools down. |
| C2 | Temperature sensor of the IGBT Is high. | • Please restart after the induction hob cools down. |
| • Please contact the supplier.Fan abnormality.F5 | ||
| EF | Two or more keys are triggered for a long time. | • Cleaning the operation area |
(2) Specific Failure & Solution
| Failure Problem Solution A Solution B | |||
| The LED does not come on when unit is plugged in. | No power supplied. | Check to see if plug is secured tightly in outlet and that outlet is working. | |
| The accessorial power board and the display board connected failure. | Check the connection. | ||
| The accessorial power board is damaged. | Replace the accessorial power board. | ||
| The display board is damaged. | Replace the display board. | ||
| Some buttons can't work, or the LED display is not normal. | The display board is damaged. | Replace the display board. | |
| The Cooking Mode Indicator comes on, but heating does not start. | High temperature of the hob. | Ambient temperature may be too high. Air Intake or Air Vent may be blocked. | |
| There is something wrong with the fan. | Check whether the fan runs smoothly; if not , replace the fan. | ||
| The power board is damaged. | Replace the power board. | ||
| Heating stops suddenly during operation and the display flashes "u". | Pan Type is wrong. | Use the proper pot (refer to the instruction manual.) | Pan detection circuit is damaged, replace the power board. |
| Pot diameter is too small. | |||
| Cooker has overheated; | Unit is overheated. Wait for temperature to return to normal.Push "ON/OFF" button to restart unit. | ||
| Heating zones of the same side ( Such as the first and the second zone ) would display "u". | The power board and the display board connected failure; | Check the connection. | |
| The display board of communicate part is damaged. | Replace the display board. | ||
| The Main board is damaged. | Replace the power board. | ||
| Fan motor sounds abnormal. | The fan motor is damaged. | Replace the fan. | |
The above are the judgment and inspection of common failures.
Please do not disassemble the unit by yourself to avoid any dangers and damages to the induction hob.
TRADEMARKS, COPYRIGHTS AND LEGAL STATEMENT
Midea logo, word marks, trade name, trade dress and all versions there of are valuable assets of Midea Group and/or its affiliates (“Midea”), to which Midea owns trademarks, copyrights and other intellectual property rights, and all goodwill derived from using any part of an Midea trademark. Use of Midea trademark for commercial purposes without the prior written consent of Midea may constitute trademark infringement or unfair competition in violation of relevant laws.
This manual is created by Midea and Midea reserves all copyrights thereof. No entity or individual may use, duplicate, modify, distribute in whole or in part this manual, or bundle or sell with other products without the prior written consent of Midea.
All the described functions and instructions were up to date at the time of printing this manual. However, the actual product may vary due to improved functions and designs.
EN
DISPOSAL AND RECYCLING
Important instructions for environment
Compliance with the WEEE Directive and Disposing of the Waster Product:
This product complies with EU WEEE Directive (2012/19/EU). This product bears a classification symbol for waster electrical and electronic equipment (WEEE).
This symbol indicates that this product shall not be disposed with other household wastes at the end of its service life. Used device must be returned to official collection point for recycling of electrical electronic devices. To find these collection systems please contact to your local authorities or retailer where the product was purchased. Each household performs important role in recovering and recycling of old appliance. Appropriate disposal of used appliance helps prevent potential negative consequences for the environment and human health.
natural_image
Symbol of a trash bin crossed with no text or labels, accompanied by a solid black rectangle below (no text or symbols present)Compliance with RoHS Directive
The product you have purchased complies with EU RoHS Directive (2011/65/EU). It does not contain harmful and prohibited materials specified in the Directive.
Package information
Packaging materials of the product are manufactured from recyclable materials in accordance with our National Environment Regulations. Do not dispose of the packaging materials together with the domestic or other wastes. Take them to the packaging material collection points designated by the local authorities.

natural_image
Recycling symbol with three chasing arrows forming a triangle (no text or labels)DATA PROTECTION NOTICE
For the provision of the services agreed with the customer,
we agree to comply without restriction with all stipulations of applicable data protection law, in line with agreed countries within which services to the customer will be delivered, as well as, where applicable, the EU General Data Protection Regulation (GDPR).
Generally, our data processing is to fulfil our obligation under contract with you and for product safety reasons, to safeguard your rights in connection with warranty and product registration questions.
In some cases, but only if appropriate data protection is ensured, personal data might be transferred to recipients located outside of the European Economic Area.
Further information are provided on request. You can contact our Data Protection Officer via
MideaDPO@midea.com. To exercise your rights such as right to object your personal date being processed for direct marketing purposes, please contact us via MideaDPO@midea.com.
To find further information, please follow the QR Code.
Midea
make yourself at home
Induktionskochfeld
BEDIENUNGSANLEITUNG
MIH742F558K2
| L(mm) | W(mm) | H(mm) | D(mm) | A(mm) | B(mm) X(mm) F(mm) | |
| 590 | 520 | 53 | 49 | 560 ± 1 | 480 ± 1 | 50 mini. |
| A(mm) B(mm) C(mm) D E | |||
| 760 mini. 20 min. 15 mini. | Lufteintritt Luftaustritt 2mm | ||
natural_image
Simple line drawing of a cooking pot with a coiled tube (no text or symbols)natural_image
Three identical cooking pots with crossed-out X marks, placed on a surface (no text or symbols)natural_image
Simple line drawing of a cooking pot with crossed-out X marks (no text or symbols)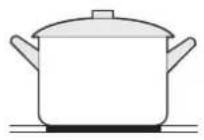
natural_image
Simple line drawing of a cooking pot with crossed arrows indicating crossed sides (no text or symbols)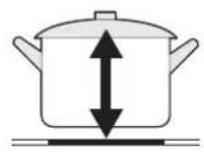
Pfannendimension
natural_image
Simple line drawing of a cooking pot on a stand (no text or symbols)natural_image
Four diagrams showing battery arrangement and charging setup with plus signs, no text or symbols present5. Tastensperre
natural_image
Two hand-drawn diagrams showing finger positions with a cross mark and a circle, no text or symbols present.7. Pause
natural_image
Symbol of a trash bin crossed out by two diagonal lines (no text or numbers present)
natural_image
Recycling symbol with three chasing arrows forming a triangle (no text or labels)DATENSCHUTZHINWEISE
HR
| L(mm) | W(mm) | H(mm) | D(mm) | A(mm) | B(mm) X(mm) F(mm) | |
| 590 | 520 | 53 | 49 | 560 ± 1 | 480 ± 1 | 50 mini |
natural_image
Technical illustration of a rectangular electronic component with a close-up view showing internal structure and part label 'nosač' (no text or symbols on the diagram itself)
Ni pod kojim okolnostima, nosači ne smiju dodirivati unutarnje površine radne ploče nakon postavljanja (vidi sliku).
Oprez
- Indukcijsku ploču za kuhanje mora postaviti kvalificirano osoblje ili tehničari. Imamo profesionalce na usluzi. Nikada ne provodite operaciju sami.
- Ploča za kuhanje neće se postavljati neposredno iznad perilice posuđa, hladnjaka, zamrzivača, perilice rublja ili sušilice rublja jer vlaga može oštetiti elektroniku ploče za kuhanje
- Indukcijska ploča za kuhanje mora biti instalirana tako da se može osigurati bolje zračenje topline kako bi se povećala njezina pouzdanost.
- Zid i zona induciranog grijanja iznad površine stola moraju izdržati toplinu.
- Kako bi se izbjegla bilo kakva oštećenja, sendvič sloj i ljepilo moraju biti otporni na toplinu.
- Ne smije se koristiti parni čistač.
Odabir pravog posuđa

- Koristite samo posuđe s dnom prikladnim za indukcijsko kuhanje.
Potražite simbol indukcije na pakiranju ili na dnu posude.
natural_image
Simple line drawing of a cooking pot with a coiled cable (no text or symbols)natural_image
Three identical cooking pots with crossed-out kitchen panes, shown in different orientations (no text or symbols)natural_image
Simple line drawing of a cooking pot with crossed-out triangular symbol (no text or labels)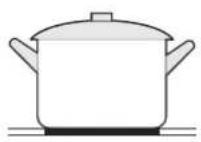
- Posude uvijek podižite s indukcijske ploče za kuhanje – nemojte kliziti jer bi mogle izgrebati staklo.
natural_image
Simple line drawing of a cooking pot with crossed-out arrows indicating pressure or resistance (no text or symbols)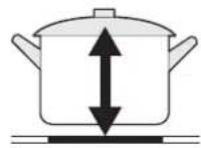
Dimenzija tiganja
Zone za kuhanje se do određene granice automatski prilagođavaju promjeru posude. Međutim, dno ove posude mora imati minimalni promjer u skladu s odgovarajućom zonom za kuhanje. Kako biste postigli najbolju učinkovitost vaše ploče za kuhanje, stavite posudu u sredinu zone za kuhanje.
| Zone za kuhanje | Osnovni promjer indukcijskog posuđa | |
| Minimalno (mm) Maksimalno (mm) | ||
| 1,2,3,4 100 220 | ||
| flex indukcija | 210 | 220x380 |
Kako koristiti
Početak kuhanja
-
Dodirnite kontrolu UKLJUČIVANJE/ISKLJUČIVANJE. Nakon uključivanja, zvučni signal se oglasi jednom, svi zasloni prikazuju “-”, što znači da je indukcijska ploča za kuhanje ušla u stanje mirovanja.
-
tavite odgovarajuću posudu na zonu za kuhanje koju želite koristiti.
- Provjerite jesu li dno posude i površina zone za kuhanje čisti i suhi.
natural_image
Simple line drawing of a cooking pot on a stand (no text or symbols)natural_image
Four diagrams showing different configurations of battery and circuit elements, with no visible text or symbols.5. Zaključavanje kontrola
RF plamenik se zagrijava na razini LR plamenika
natural_image
Symbol of a trash bin crossed with no visible text or labelsSukladnost s Direktivom RoHS
Proizvod kojeg ste kupili sukladan je s EU RoHS direktive (2011/65/EU). Ne sadrži štetne i zabranjene materijale navedene u Direktivi.
Informacije o pakiranju
Materijali za pakiranje proizvoda proizvedeni su od materijala koji se mogu reciklirati sukladno s našim Državnim uredbama za okoliš. Nemojte odlagati materijale za pakiranje zajedno s kućanskim ili drugim otpadom. Odnesite ih na mjesta za sakupljanje materijala za pakiranje koja određuju lokalne vlasti.

natural_image
Recycling symbol with three chasing arrows forming a triangle (no text or labels)OBAVIJEST O ZAŠTITI PODATAKA
make yourself at home

BEZBEDNOSNA UPUTSTVA
Namena
| L(mm) | W(mm) | H(mm) | D(mm) | A(mm) | B(mm) X(mm) F(mm) | |
| 590 | 520 | 53 | 49 | 560±1 | 480±1 | 50 mini |

natural_image
3D diagram of a rectangular electronic component with a close-up inset showing a labeled section 'nosač' (no text or symbols on the main diagram)
Ni u kom slučaju, nosači ne mogu da dodiruju unutrašnje površine radne ploče nakon ugradnje (pogledajte sliku).
Pažnja
Izbor pravog posuđa

natural_image
Simple line drawing of a cooking pot with a coiled cable (no text or symbols)natural_image
Three identical cooking pots with crossed X marks, no text or symbols presentnatural_image
Simple line drawing of a cooking pot with crossed-out arrows indicating pressure or resistance (no text or symbols)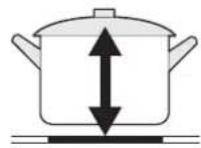
Dlmenzija tiganja
natural_image
Simple line drawing of a cooking pot on a stand (no text or symbols)natural_image
Four diagrams showing different configurations of battery cells and a device, with no visible text or symbols.5. Zaključavanje kontrola
natural_image
Two hand-drawn diagrams showing finger positions with a cross mark above, no text or symbols present.7. Pauza
RF gorionik se zagreva na nivou LR gorionika
Upravljajte RF klizačem. poništiti prenos i zagrejati u podešenoj brzini
natural_image
Symbol of a trash bin crossed with no text or labels, accompanied by a solid black rectangle below (no text or symbols present)Usklađenost sa RoHS direktivom
Proizvod koji ste kupili je u skladu sa direktivom EU RoHS (2011/65/EU). Ne sadrži štetne i zabranjene materijale navedene u Direktivi.
Informacije o paketu
Materijali za pakovanje proizvoda su proizvedeni od materijala koji se mogu reciklirati u skladu sa našim nacionalnim propisima o životnoj sredini. Nemojte odlagati materijal za pakovanje zajedno sa kućnim ili drugim otpadom. Odnesite ih na mesta za sakupljanje ambalažnog materijala koja su odredile lokalne vlasti.

natural_image
Recycling symbol with three chasing arrows forming a triangle (no text or labels)OBAVEŠTENJE O ZAŠTITI PODATAKA
Za pružanje usluga ugovorenih sa kupcem,
make yourself at home

Indukcijska plošča
NAVODILA ZA UPORABO
MIH742F558K2
| L(mm) | W(mm) | H(mm) | D(mm) | A(mm) | B(mm) X(mm) F(mm) | |
| 590 | 520 | 53 | 49 | 560±1 | 480±1 | 50 mini |

natural_image
Technical illustration of a rectangular electronic component with a sloped edge and a labeled 'nosilec' section (no text or symbols beyond label)Izbira prave posode

natural_image
Simple line drawing of a cooking pot with a coiled cable (no text or symbols)natural_image
Three identical cooking pots with crossed X marks, no text or symbols presentnatural_image
Simple line drawing of a cooking pot with crossed arrows indicating pressure or resistance (no text or symbols)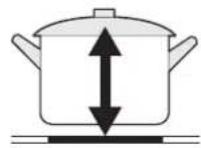
Dimenzija ponora
natural_image
Simple line drawing of a cooking pot on a stand (no text or symbols)natural_image
Four diagrams showing different configurations of battery and circuit elements, with no visible text or symbols.5. Zaklepanje kontrolnikov
RF gorilnik se segreje na ravni LR gorilnika
Upravljajte drsnik RF. prekliče prenos in segreje v nastavljeni prestavi
natural_image
Symbol of a trash bin crossed with two crossed lines, no text or labels presentSkladnost z direktivo RoHS
natural_image
Recycling symbol with three chasing arrows forming a triangle (no text or labels)OBVESTILO O VARSTVU PODATKOV
make yourself at home

Indukciós főzőlap
FELHASZNÁLÓI KÉZIKÖNYV
MIH742F558K2
| L(mm) | W(mm) | H(mm) | D(mm) | A(mm) | B(mm) X(mm) F(mm) | |
| 590 | 520 | 53 | 49 | 560±1 | 480±1 | 50 mini |
HU

natural_image
3D rendering of a flat rectangular electronic component with mounting holes and small protrusions (no text or symbols)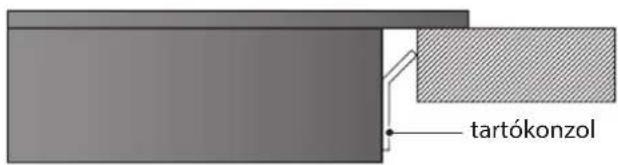
natural_image
Simple line drawing of a cooking pot with a coiled tube (no text or symbols)natural_image
Three identical cooking pots with crossed-out X marks, no text or symbols presentnatural_image
Simple line drawing of a cooking pot with crossed-out triangular symbol (no text or labels)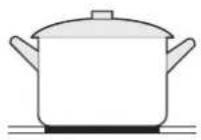
natural_image
Simple line drawing of a cooking pot with crossed-out arrows indicating pressure or resistance (no text or symbols)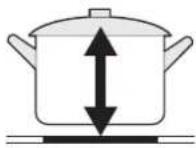
Serpenyő mérete
natural_image
Simple line drawing of a cooking pot on a stand (no text or symbols)natural_image
Symbol of a trash bin crossed out by two diagonal lines (no text or numbers present)
natural_image
Recycling symbol with three chasing arrows forming a triangle (no text or labels)ADATVÉDELMI NYILATKOZAT
make yourself at home
HU
natural_image
3D rendering of a flat rectangular electronic component with mounting holes and small protrusions (no text or symbols)PL

natural_image
Simple line drawing of a cooking pot with a coiled tube (no text or symbols)natural_image
Three identical cooking pots with crossed X marks, no text or symbols presentnatural_image
Simple line drawing of a cooking pot with crossed arrows indicating pressure or resistance (no text or symbols)
Wymiary patelni
natural_image
Simple line drawing of a cooking pot on a stand (no text or symbols)natural_image
Four diagrams showing battery charging setups with positive charges, no text or symbols presentnatural_image
Two hand-drawn diagrams showing finger positions with a cross and a circle on top, no text or symbols present.7. Pauza
UTYLIZACJA I RECYKLING
natural_image
Symbol of a trash bin crossed out by two diagonal lines (no text or numbers present)
natural_image
Recycling symbol with three chasing arrows forming a triangle (no text or labels)NOTA WS. OCHRONY DANYCH OSOBOWYCH
Welcome to MIDEA Service
Dear Customer,
Thank you for purchasing Midea products. Please attach your purchase certificate (invoice or sales slip) to this warranty and keep it properly. If service is required during the warranty period, proof of purchase must be provided. If can't provide, in/out of warranty will be defined by Manufacturer.
Midea product warranty applies to inherent defects in materials and workmanship from the date of initial purchase. For warranty period, please visit www.midea-group.com or your local call center. Warranty service must be obtained from Midea Consumer Services or an authorized Midea servicer.
Warranty terms and conditions
NORMAL RESPONSIBILITIES OF THE CONSUMER
This warranty applies only to products in ordinary household use, and the consumer is responsible for the items listed below:
- Proper use of the appliance in accordance with instructions provided with the product.
- Routine maintenance and cleaning necessary to keep in good working condition.
- Proper installation by an authorized service professional in accordance with instructions provided with the appliance and in accordance with all local plumbing, electrical and / or gas codes.
- Proper connection to a grounded power supply of sufficient voltage, replacement of blown fuses, repair of loosened connections or defects in house wiring.
- Expenses for making the appliance accessible for servicing.
- Damages to finish after installation.
EXCLUSIONS
- Damage due to mishandling or fire and becomes invalid if repair has been attempted by unauthorized persons.
- Any failure to follow the instructions as mentioned in the user manual.
- Fluctuation in voltage or any modifications/adjustments made to comply with local electrical, safety and technical standards.
- Damages caused by fire, accident or any natural disaster, damage due to mishandling, wear & tear, voltage fluctuations.

flowchart
graph TD
    A["Dealer Stamp"] --> B["Warranty Details Changes to Warranty card invalidates the warranty"]
    B --> C["Model No."]
    C --> D["Serial No."]
    D --> E["Customer Details To be filled in upon purchase"]
    E --> F["Customers Name&Address"]
    F --> G["Tel.No./Email"]
    G --> H["Service History To be filled in case of warranty repair"]

    subgraph Customer Details
        I["Customer Details To be filled in upon purchase"]
        J["Customers Name&Address"]
        K["Tel.No./Email"]
    end

    subgraph Service History
        L["Service History To be filled in case of warranty repair"]
    end

    style A fill:#f9f,stroke:#333
    style B fill:#ccf,stroke:#333
    style C fill:#cfc,stroke:#333
    style D fill:#fcc,stroke:#333
    style E fill:#cff,stroke:#333
    style F fill:#ffc,stroke:#333
    style G fill:#cfc,stroke:#333
    style H fill:#fcc,stroke:#333
    style I fill:#ffc,stroke:#333
    style J fill:#cfc,stroke:#333
    style K fill:#fcc,stroke:#333
    style L fill:#ffc,stroke:#333
SERVICE CONTACTS
| Albania | 355 |
| Bosnia and Herzegovina | +387 (033) 407 937 |
| Croatia | +385 1 619 5582 |
| Cyprus | +357 24 813890 |
| Czech Republic / Slovakia | +420 543 215 059 |
| Germany | 49 (0) 6196 9020 0 |
| Greece | 80111 22 622 |
| 210483347 | |
| Hungary | +36 23 769 245 |
| Italy | 199240626 |
| Kosovo | 38349779349 |
| 38349779100 | |
| Malta | +356 21237601 |
| Moldova | +373 (022) 54-54-74 |
| North Macedonia | 389230848 |
| Portugal | 35 1225025742 |
| Roumania | 0742726843(07GARANTEI)/*414 |
| Slovakia | 421 2 5710 1800 |
| Slovenia | +385 1 619 5582 |
| Spain | 34 934803322 |
| Srbija | +381 11 3188 033 |
| Latvia/Estonia | +37037329000 |
| Lithuania | +37037329000 |
| Poland | +48 800088680 |
| Hungary | +36 1 888 3250 |
| +36 96 512 527 | |
| +36 96 512 512 | |
| Romania | 021 9196 |
| 021 528 9196 | |
| UK 0333 900 11 01 |
Importer
Albania
CED Electric Distributors Ltd
P.O.Box 45071
7100 Aradippou-Larnaca Cyprus
+357 24 813890
Germany
Midea Europe GmbH
FG EUROPE SA Vouliagmenis 128
Ave, Glyfada,
P.O. 16674 - Athens, Greece
Italy
Midea Italia S.R.L.
Via Luigi Bodio 29/37 - Milano (MI)
20158 Italy
Kosovo
Elkos Shpk, address : Road Zona
Industriale P.N, 30 000 Peje, Kosove.
Malta
Kencar Co. Ltd.
168, Industrial Estate,
Luqa LQA 3000, Malta.
North Macedonia
Setec Se Od Tehnika Doo
Street 1523 no.1
Municipality of Kisela Voda 1000 Skopje
Republic of North Macedonia
Tel. 0038923080877
Portugal
MIDEA HOME APPLIANCES UK LTD
Conavon Court Ground Floor, 12 Blackfriars
Street, Salford, Manchester M3 5BQ UK
0333 900 1101
service_uk@midea.com
Latvia/Estonia
Importer: ACC Distribution, UAB
Raudondvario pl. 131 B, LT-47191
Kaunas, Lithuania
Service Data: Raudondvario pl.131B-4,
Kaunas, LT-47191, Tel: +37037329000
E-mail: info@servisaict.lt
https://servisaict.eu/en/
Lithuania
Importer: ACC Distribution, UAB
Raudondvario pl. 131 B, LT-47191 Kaunas, Lithuania
Service Data: Vilnius Geležinio
Vilko str. 6, LT-03150 Kaunas
https://servisaict.eu/en/
Poland
Importer: AB S.A. 55-040 Magnice, ul. Europejska 4
Service Data: Quadranet Sp. Z.o.o
Hotline: +48 800088680
Mail: midea@quadra-net.com
Hungary
Importer: Blizzard Hungary kft. 1162
Global City Business Park
Sos. Bucuresti Nord nr. 10
Corp O1, etaj 10
Voluntari, 077190 Ilfov
Service Data: Bucuresti-Nord road,
No. 10, Corps O1, Voluntari, Ilfov
County, Romania, Tel: 021 9196, 021
528 9196, infoclienti@altexservice.ro
Roumanla
ASBIS Romania SRL
J40/5587/1998 | RO10656216
Splaiul Independentei 319, Sector 6, Bucuresti
Phone : +40 21 337 1097
Fax : +40 21 337 1091
DATENSCHUTZHINWEISE
DARUVAR, TEHNOSERVIS
Gundulićeva 11
tel: 043/331003
IMOTSKI, ADIUMENTA j.d.o.o
Glavina Donja 337B
tel: 021/571239
e-mail: adiumenta@gmail.com
KARLOVAC, TEHNO-PAL
Dr. Vladka Mačeka 26
tel: 047/611733 GSM: 099/2191380
e-mail: info@tehnopal.hr
METKOVIĆ, DELTA TERM j.d.o.o.
Jeovci 40
GSM: 095/1115000
NAŠICE, ELKON PLUS d.o.o.
Ul. Vinogradska 9
tel: 031/615 090
e-mail: servis@elkon-servis.hr
OSIJEK, ELGRA
Š. Petöfija 42
tel: 031/302 100 GSM: 098/950 2171
OSIJEK, LL SERVIS j.d.o.o.
Ulica Vojlovica 17
GSM: 091/ 951 9518
e-mail: llservis.hr@gmail.com
OTOČAC, LEDENI d.o.o.
Trg popa Marka Mesića 5/12
GSM: 091/284 2040
PAKRAC, GEMA USLUGE - SERVIS ZANDON
Petra Preradovića 5
tel: 034/421884 GSM: 098/9534871
e-mail: info@servis-zandona.hr
PAZIN, ELER
Ivoli 112/D
tel/fax: 052/624723 GSM: 091/2529541
PITOMAČA, KOS SERVIS
Braće Radića 33
tel: 033/783 955 GSM: 098/792 989
e-mail: kos.servis@gmail.com
RIJEKA, BIOMATIC d.o.o.
Pehlin 66
tel: 051/269 898
SLAVONSKI BROD, DOMEL d.o.o.
Nikole Zrinskog 1
GSM: 098/340 467
SPLIT, ANDABAKA d.o.o.
Kopilica 21a
tel: 021/481403
fax: 021/453891
SPLIT, ADIUMENTA j.d.o.o.
Kopilica 22-23
tel: 021/645 866
e-mail: adiumenta@gmail.com
ŠIBENIK, TEHNO JELČIĆ
Sarajevska 9
tel: 022/217 264; 340 229 GSM: 091/225 0908
ŠIBENIK, El Bakota d.o.o.
Slobodana Macure 50
tel: 022/216 418 GSM: 095/221 6418
e-mail: markopetkovic@elbakota.com
ŠIBENIK, ELEKTROSERVIS FRANE j.d.o.o.
Ul. 8. udarne dalmat. brigade 20
GSM: 091/9412711
e-mail: frane@elektroservisfrane.com
TRILJ, PEŠO d.o.o.
Dubrovačka 1
tel: 021/832 353
VARAŽDIN, MARKOVIĆ
obrt za elektromehaničarske usluge
Krešimira Filića 9
tel./fax: 042/210588
e-mail: servis.markovicvz@gmail.com
web: www.markovic-servis.hr
VARAŽDIN, SMC
obrt za popravak i usluge
Zagrebačka ulica 244
GSM: 095/555691
VELA LUKA, TRGOVINA BAGE
Obrt - Elektro servis
Ulica 56 br. 14/2
GSM: 095/6813 016
e-mail: bage@inet.hr
VIROVITICA, FRUK d.o.o.
J.J. Strossmayera 23
tel: 033/553 068 GSM: 098/403 631
e-mail: prodaja.servis@fruk.hr
VUKOVAR, SERVIS JAGETIĆ
elektromehaničarski obrt
ul. Radnička 63
GSM: 095/220 2200
VAŽNE NAPOMENE:
Kupac je dužan prilikom preuzimanja uređaja ustanoviti kompletnost i fizičku neoštećenost uređaja koji preuzima, jer naknadne reklamacije po navedenim elementima neće biti prihvaćene.
Midea Electric Trading Co. Pte Ltd
158 Cecil Street #07-01/02, Singapore 069545, Singapore
Vásárlás időpontja:
TEHNIČKA SLUŽBA "GEMMA B&D" d.o.o.
Đorda Stanojevića 14, 11070 Novi Beograd Srbija
tel: +381 11 3188 033 e-mail: reklamacije@gemma.rs
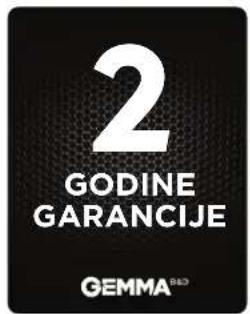
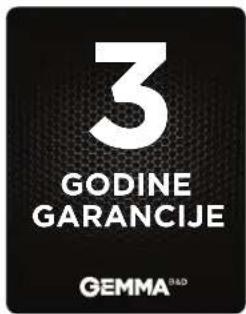
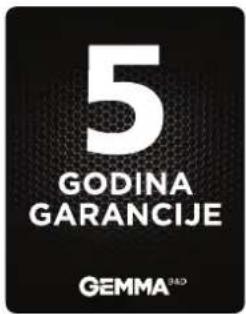
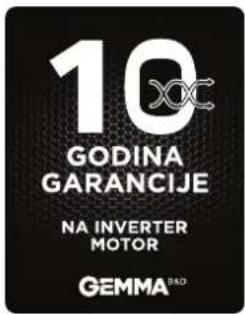
2 godine garancije vredi za mikrotalasne rerne i vinske vitrine
3 godine garancije vredi za mašine za pranje veša sa gornjim punjenjem
5 godina garancije vredi za električne uređaje
10 godina garancije vredi za inverter motor i kompresor
Naziv prodavca
Adresa prodavca
2 let garancije - velja za mikrovalovne pečice in hladilnike za vino
After sales service & your product warranty
We would like to thank you for choosing a Midea appliance.
We are confident that you will be happy with your purchase, and that your new appliance will provide a long & reliable service.
We are here to help!
If you have any questions about setting up your appliance, it's functions, or if you are
| Midea | 0333 900 1101 | service_uk@midea.com | www.midea.com/uk |
experiencing any problems then please contact our Midea Aftersales Team.
Appliance Fault
If you suspect that your appliance may have a fault, then please check the User Manual to ensure that the correct setup steps have been followed and your appliance is being used in line with our guidelines.
If you are still experiencing problems, then please contact our Aftersales Team.
To help the team support you, please make sure that you have the following information available when you contact them:
- Your proof of purchase
• The serial number of your appliance
• A description of the fault
Your Midea appliance has been manufactured and tested to the highest standards. It is supported with a 12-month manufacturer's warranty from the date it was purchased. The warranty covers any material or component defects that were present in the manufacturing process.
The appliance is not suitable for commercial use. The claim under warranty lapses in the event of intervention by the Buyer or by a third party. Damage caused as a result of improper handling or operation, incorrect installation or storage, improper connection or installation as well as an act [...] of God or other external factors shall not be covered by this warranty.
When claims are submitted, the manufacturer reserves the right to make improvements to defective parts or to replace or exchange the device. Only if it is not possible to achieve the intended use of the device by repairing or replacing the device, the buyer can demand a reduction of the purchase price or the cancellation of the purchase contract within 6 months from the date of purchase. Claims for damages, including consequential damages, are excluded unless they are based on intent or gross negligence. The guarantee claim exists only with submission of the product and the purchase receipt. This warranty is valid within the United Kingdom only.
GARANTIE / SERVICE
Midea Electrics Netherlands B.V.
Visiting address: Johan Cruijff Boulevard 65,
1101 DL Amsterdam
make yourself at home

- CONTENTS
- SAFETY INSTRUCTIONS
- Intended Use
- Explanation of Symbols
- SAFETY WARNINGS
- INSTALLATION
- Electrical Shock Hazard
- Cut Hazard
- Important Safety Instructions
- Health Hazard
- Hot Surface Hazard
- EN
- SPECIFICATIONS
- PRODUCT OVERVIEW
- NOTE
- Working Theory
- Before Using Your New Induction Hob
- QUICK START GUIDE
- Cooking Tips
- Simmering, Cooking rice
- Searing Steak
- For Stir-frying
- Detection of Small Articles
- Heat Settings
- PRODUCT INSTALLATION
- Selection of Installation Equipment
- WARNING: Ensuring Adequate Ventilation
- Before Installing the Hob, Make Sure That
- After Installing the Hob, Make Sure That
- Before Locating the Fixing Brackets
- Adjusting the Bracket Position
- CAUTIONS
- Connecting the Hob to the Mains Power Supply
- OPERATION INSTRUCTIONS
- Touch Controls
- Choosing
- Pan Dimension
- How to Use
- Start Cooking
- If the display flashes ≥slant U alternately with the heat setting
- Finish Cooking
- Using the Boost Function
- Activate the boost function
- Cancel the Boost function
- Flexible Area
- Locking the Controls
- To lock the controls
- To unlock the controls
- Timer Control
- Pause
- Pan transfer
- Confirmation Disconfirmation
- Default Working Times
- CLEANING AND MAINTENANCE
- TROUBLESHOOTING
- Failure Display and Inspection
- TRADEMARKS, COPYRIGHTS AND LEGAL STATEMENT
- DISPOSAL AND RECYCLING
- Important instructions for environment
- Compliance with RoHS Directive
- Package information
- DATA PROTECTION NOTICE
- Midea
- BEDIENUNGSANLEITUNG
- Pfannendimension
- Tastensperre
- DATENSCHUTZHINWEISE
- Oprez
- Odabir pravog posuđa
- Dimenzija tiganja
- Kako koristiti
- Početak kuhanja
- Zaključavanje kontrola
- Sukladnost s Direktivom RoHS
- Informacije o pakiranju
- OBAVIJEST O ZAŠTITI PODATAKA
- BEZBEDNOSNA UPUTSTVA
- Namena
- Pažnja
- Izbor pravog posuđa
- Dlmenzija tiganja
- Pauza
- Usklađenost sa RoHS direktivom
- Informacije o paketu
- OBAVEŠTENJE O ZAŠTITI PODATAKA
- NAVODILA ZA UPORABO
- Izbira prave posode
- Dimenzija ponora
- Zaklepanje kontrolnikov
- Skladnost z direktivo RoHS
- OBVESTILO O VARSTVU PODATKOV
- FELHASZNÁLÓI KÉZIKÖNYV
- Serpenyő mérete
- ADATVÉDELMI NYILATKOZAT
- Wymiary patelni
- UTYLIZACJA I RECYKLING
- NOTA WS. OCHRONY DANYCH OSOBOWYCH
- Welcome to MIDEA Service
- Dear Customer,
- Warranty terms and conditions
- NORMAL RESPONSIBILITIES OF THE CONSUMER
- EXCLUSIONS
- SERVICE CONTACTS
- Importer
- Albania
- Germany
- Italy
- Kosovo
- Malta
- North Macedonia
- Portugal
- Latvia/Estonia
- Lithuania
- Poland
- Hungary
- Roumanla
- VAŽNE NAPOMENE:
- TEHNIČKA SLUŽBA "GEMMA B&D" d.o.o.
- After sales service & your product warranty
- We are here to help!
- Appliance Fault
- GARANTIE / SERVICE
Brand : MIDEA
Model : MIH742F558K2
Category : Cooker