
I-DancerGyro - Uncategorized Grunkel - Free user manual and instructions
Find the device manual for free I-DancerGyro Grunkel in PDF.


| Product Type | Robotic Vacuum Cleaner with Mopping Function |
| Brand | Grunkel |
| Model | I-DancerGyro |
| Input Voltage | 14.4V |
| Battery Capacity | 2400mAh |
| Power Consumption | 40W |
| Charging Time (First Use) | Approx. 6 hours |
| Suction Levels | Mute, Normal, Strong, Max |
| Mopping Function | Yes (with water tank and mop holder) |
| Control Methods | Button on device, remote control, Smart Life app (third-party) |
| Navigation | Autonomous path planning with obstacle detection (bumpers and sensors) |
| Cleaning Modes | Automatic, Edge, Concentrated (spiral) |
| Filter Type | HEPA filter |
| Side Brushes | 2 (left and right, replaceable) |
| Safety Features | Drop detection, auto shut-off, anti-tangle |
| Charging Base | Yes, with automatic return |
| Remote Control | Included (directional buttons, start/stop, max, home, edge) |
| App Compatibility | Smart Life (third-party, not affiliated with Grunkel) |
| Included Accessories | Charging base, power adapter, remote control, side brushes (2), HEPA filter, mop cloth, mop holder, cleaning brush, instruction manual |
| Certifications | CE, RoHS |
Frequently Asked Questions - I-DancerGyro Grunkel
User questions about I-DancerGyro Grunkel
0 question about this device. Answer the ones you know or ask your own.
Ask a new question about this device
Download the instructions for your Uncategorized in PDF format for free! Find your manual I-DancerGyro - Grunkel and take your electronic device back in hand. On this page are published all the documents necessary for the use of your device. I-DancerGyro by Grunkel.
USER MANUAL I-DancerGyro Grunkel
natural_image
Black circular robotic vacuum cleaner with visible brand logo and control buttons (no text or symbols on body)
CONTROLA EL ROBOT
DESDE TU TELÉFONO MÓVIL

Search for and install the "Smart Life" application in the app shop on your mobile device, or scan the QR code corresponding to your operating system to access the application.
Open the application, select "Add Device" and follow the instructions on the screen.
NOTICE:
The Smart Life app has been developed by a third party. It is not owned by or affiliated with the GRUNKEL brand. GRUNKEL is not responsible for any modifications that may be made to the application by its developers, which may affect compatibility with this device or differ in use from what is described in this manual. This device is completely autonomous and can perform its functionality without the need to use third party applications through other devices not included in the product packaging.

natural_image
Symbol of a trash bin crossed with no text or labels, accompanied by a horizontal bar (no text or symbols present)natural_image
Simple circular diagram with two vertical lines and a central dot, no text or symbols present.Robot
natural_image
Technical line drawing of a mechanical component with no visible text or symbolsBase de Carga
natural_image
Diagram of a curved mechanical component with hatched fill and mounting holes (no text or symbols)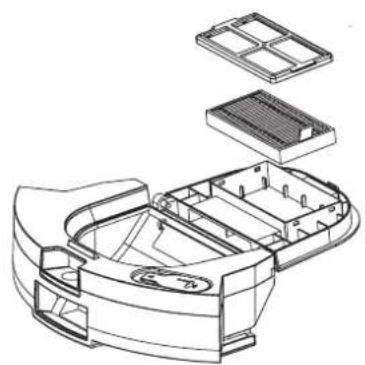
natural_image
Exploded view diagram of a mechanical housing with internal compartments and mounting points (no text or labels)natural_image
Hand holding a circular component with a pointer, no text or symbols visible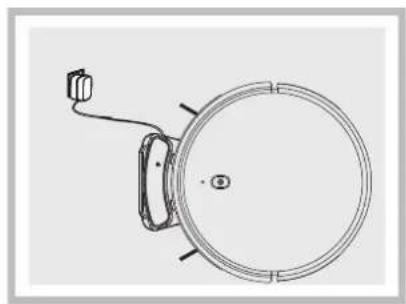
natural_image
Technical line drawing of a circular mechanical component with a cable and housing (no text or symbols)natural_image
Hand pointing at a circular component with a pointer, surrounded by curved lines (no text or symbols)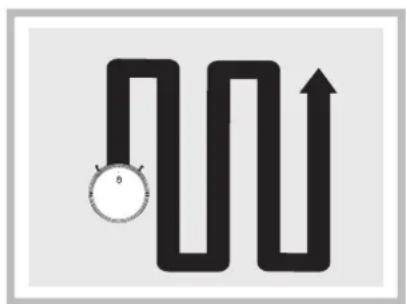
natural_image
Simple diagram showing a wavy path with an upward arrow and a stopwatch icon (no text or symbols)natural_image
Illustration of a hand holding a curved cable with a small electronic component, no text or symbols presentnatural_image
Hand holding a circular component with a pointer, no text or symbols visiblenatural_image
Simple line drawing of a room layout with a house icon and directional arrows (no text or symbols)natural_image
Pure electrical circuit lines without any symbolsflowchart
graph TD
    A["Circle Node"] --> B["Arrow Right"]
    B --> C["Circle Node"]
natural_image
Technical line drawing of a circular device with internal components and an inset view showing a separate component (no text or symbols)natural_image
Technical line drawing of a mechanical component with faucet and water tank (no text or symbols)natural_image
Technical line drawing of a mechanical device with internal components and mounting features (no text or symbols)natural_image
Technical line drawing of a circular device with internal components and an arrow indicating motion (no text or symbols)natural_image
Technical line drawing of a circular device with internal components and an arrow indicating assembly (no text or symbols)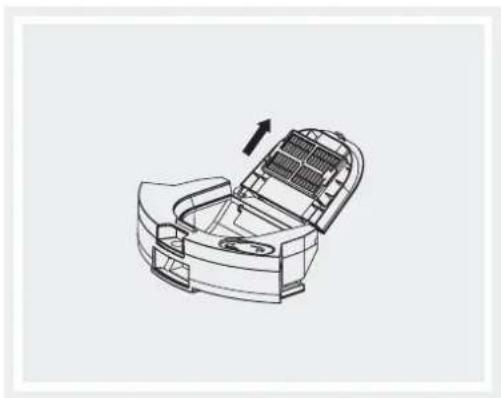
natural_image
Technical line drawing of a car interior with an open lid and ventilation duct (no text or symbols)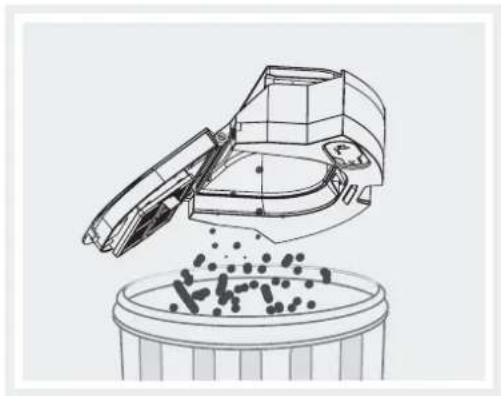
natural_image
Line drawing of a mechanical device pouring particles into a circular container (no text or symbols)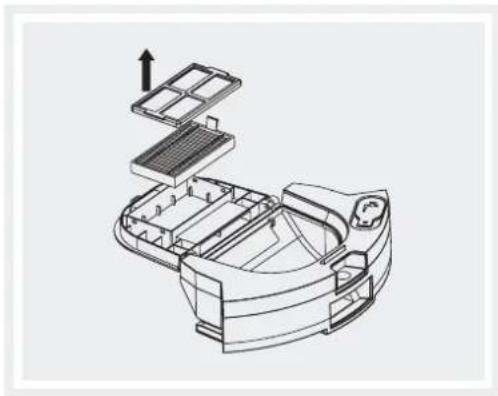
natural_image
Technical line drawing of a mechanical device with internal compartments and a directional arrow (no text or symbols)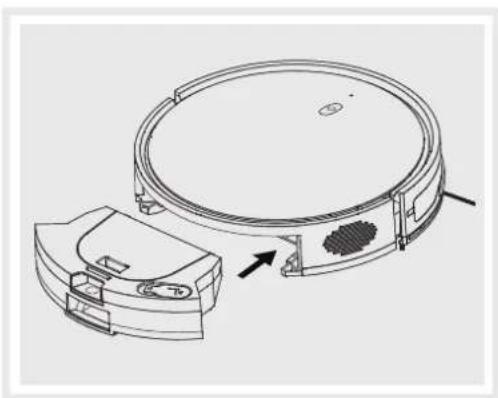
natural_image
Technical line drawing of a circular device with internal components and an arrow indicating direction (no text or symbols)natural_image
Technical line drawing of a device showing internal components and assembly (no text or symbols)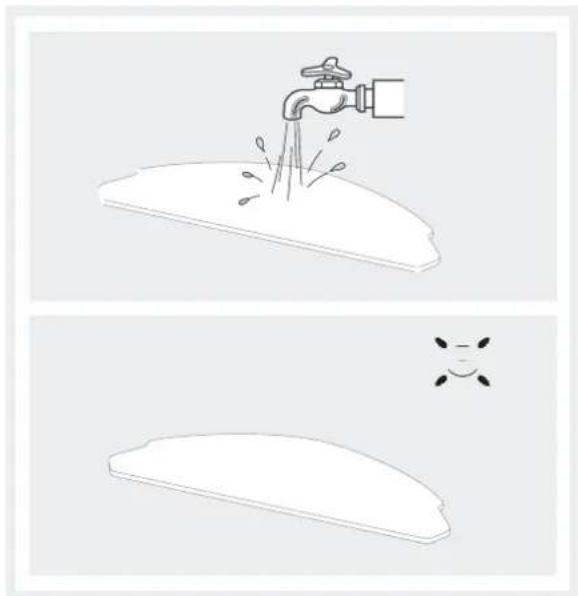
natural_image
Illustration showing a faucet spraying water onto a surface and a blank plate with a small cross symbol (no text or labels)natural_image
Technical line drawing of a mechanical device with a spotlight beam (no text or symbols)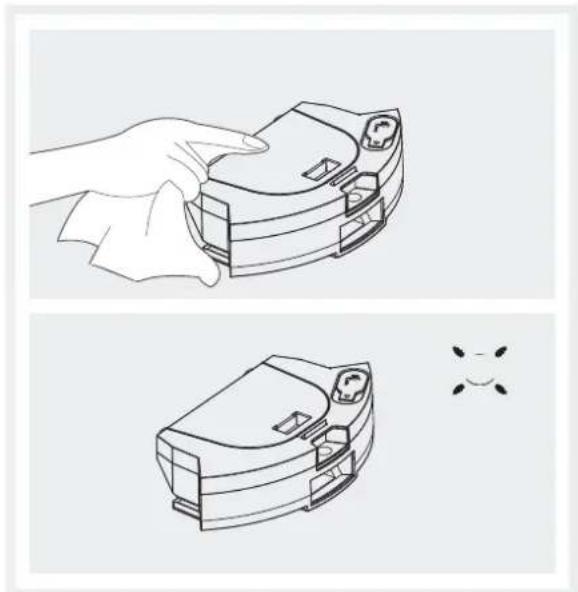
natural_image
Illustration of a hand holding a device with a close-up view of its internal components (no text or symbols)natural_image
Technical line drawing of a mechanical device with internal components and mounting holes (no text or symbols)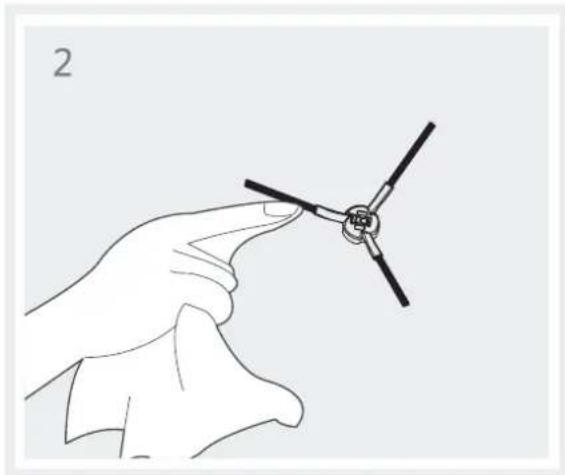
natural_image
Line drawing of a hand holding a small propeller airplane (no text or symbols)natural_image
Technical line drawing of a circular mechanical or electronic component with internal components and mounting holes (no text or symbols)natural_image
Three technical line drawings of a device interior with internal components, showing exploded and assembled views (no text or symbols)natural_image
Two line drawings of a room interior with furniture and a robotic vacuum cleaner, no text or symbols present.natural_image
Line drawing of a person standing in a hallway next to a robotic vacuum cleaner (no text or symbols)natural_image
Line drawing of a staircase with a circular tank and a person standing nearby (no text or symbols)THANK YOU FOR CHOOSING THIS GRUNKEL PRODUCT
GRUNKEL offers you innovative, durable and practical products. With responsible use and proper maintenance, they will provide you with a long service life and help to make everyday life much easier.
We thank you for your trust and hope you enjoy it.
Discover the rest of our range at www.grunkel.com


natural_image
Symbol of a trash bin crossed with no text or labels, accompanied by a horizontal line and a solid rectangle below (no text or symbols present)This manual is a faithful reproduction in features, operation and aesthetics of the product you have purchased, except for typographical, printing or translation errors. The specification, operation and features of this device are subject to change without notice.

BEFORE PUTTING THE APPLIANCE ON WORKING
- Please read carefully the instructions for use of this manual in its entirety before putting it into operation.
- Pay special attention to safety instructions.
- Keep this instruction manual. If you give the device to a third party, these instructions must also be given.
- Also keep the guarantee, the purchase receipt or invoice and, if possible, the box with the inner packaging for possible future requests.
Safety measures for its use
Before using the appliance, make sure that the voltage used corresponds to that shown on the appliance's label. Always connect the plug to a suitable power source.
To prevent electrical hazards, do not immerse cord, plug, or appliance in water or other liquid. Please read the cleaning instructions carefully.
Do not use unauthorized accessories. This will void the warranty and may cause accidents.
Do not let cord hang over edge of table or shelf. Keep it away from hot surfaces. Do not allow it to come into contact with sharp or blunt objects. Do not operate if the cord or plug is damaged or if you notice that the appliance is not working properly.
Do not leave the appliance running unattended. Always switch off the appliance or unplug it (by pulling the plug, not the cable). To disconnect, grasp plug and remove from outlet. Never disconnect by pulling on the cable.
In case of any repair, cable replacement or adjustment, please consult a qualified technician, or take the device to the Official Technical Service.

CAUTION: For the safety of your children, do not leave packing materials (plastic bags, cardboard, polyethylene, etc.) within their reach.
Always supervise the appliance when it is used in the vicinity of children. Never leave the appliance running unattended.
Use the appliance only for its intended use.
Never use a fork or any other sharp object to clean the appliance, as this could cause serious damage or result in an accident.
Do not immerse the appliance in water or any other liquid. Do not handle the appliance with wet hands.
Before cleaning the appliance, make sure that it is disconnected from the mains.
If you need a copy of the instruction manual, please contact an authorized service center.
Do not use the appliance incorrectly. Serious injury could result. In case of misuse by the If the customer misuses the appliance, it will be out of warranty.
Do not use it outdoors.
Do not leave the device unattended.
This appliance is not suitable for absorbing ashes, debris, building materials, liquids or metal particles. Do not use on animals.
Do not use the appliance on uneven or rough surfaces, such as asphalt or concrete.
Never use the appliance without the filter system installed.
Stop the appliance immediately if you notice a drastic reduction in suction power or if it emits a shrill sound during operation. Make sure that the ventilation ducts are not obstructed.
Avoid vacuuming large or sharp objects during cleaning, as they may damage the tank or the filtering system of the appliance.
Keep the appliance away from flammable, explosive or liquid materials.
Act quickly if you detect an error in the operation of the appliance. Before using remove power cords and small objects from the floor. Make sure that no tablecloths or curtains are in contact with the floor. Remove fragile objects.
Check that the robot detects unevenness or steps correctly before use. If not, place barriers to prevent accidental falls.
Use only the charging base and power adapter supplied by the manufacturer.
Do not use unauthorized accessories.
Install the filters and the waste container correctly on the appliance before use.
Do not use the appliance on surfaces with accumulated water.
Do not use the appliance in rooms where babies sleep.
Never immerse the appliance in water or any other liquid. Do not place it under running water. Do not put the appliance or any of its parts in the dishwasher.
Never attempt to open the appliance, disassemble it or tamper with its internal components. Failure to do so will invalidate the warranty.
Children should be supervised to ensure that they do not play with this appliance.
Keep the appliance and cord out of the reach of children under 8 years of age.
WARNING: This appliance is for DOMESTIC use only. It is not intended for industrial use.

CAUTION
THIS APPLIANCE SHOULD NOT BE USED OR CLEANED BY CHILDREN UNDER 8 YEARS OF AGE WITHOUT ADULT SUPERVISION. IT IS ALSO NOT INTENDED FOR USE OR CLEANING BY PERSONS WITH REDUCED PHYSICAL, SENSORY OR MENTAL CAPABILITIES, WITHOUT EXPERIENCE OR KNOWLEDGE OF ITS USE, OR WHO HAVE NOT RECEIVED ADEQUATE TRAINING UNDER THE DIRECT SUPERVISION OF A QUALIFIED PERSON.
Content
natural_image
Simple circular diagram with two curved lines and a central dot, no text or symbols present.Robot
natural_image
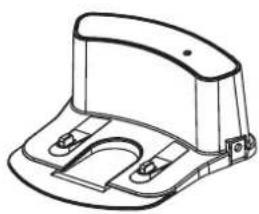
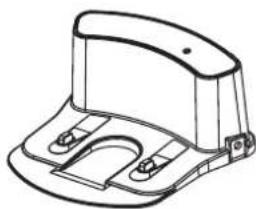
Technical line drawing of a mechanical bracket or housing component (no text or symbols)Base Load
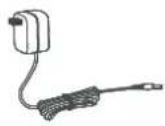
Adapter for current
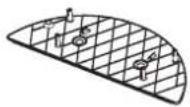
Support for
mop cloth
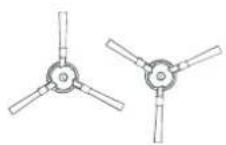
Side brushes
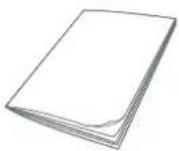
Manual of instructions
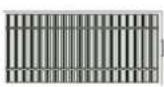
HEPA Filter
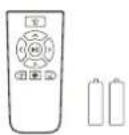
Remote control
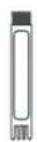
Cleaning brush
Description of parts
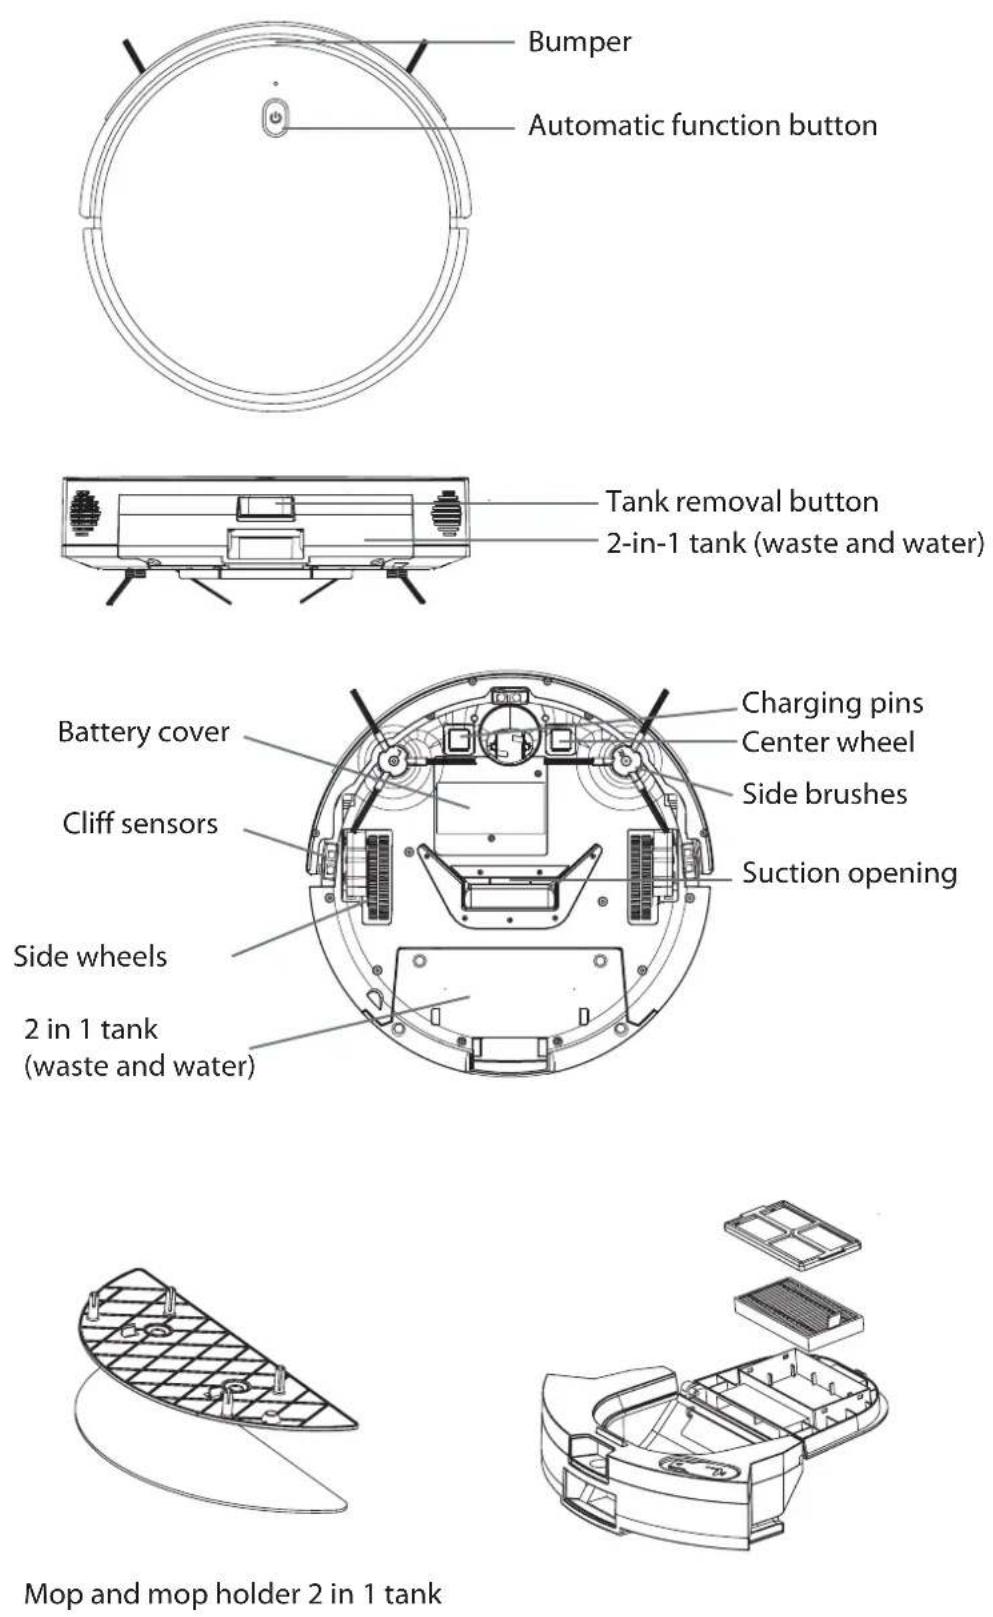
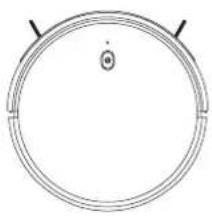
Mop and mop holder 2 in 1 tank
NOTE: The cleaning robot's ability to overcome obstacles may be affected when the water tank is completely full.
General functions
| Button | State Operation | Description |
| Automatic function | off | Press and hold for 2 seconds |
| Ignition | Press once Start or stop cleaning | |
| Press and hold for 3 seconds | ||
| Battery indicator | Green | Load above 15%. |
| Orange Load | below 15%. | |
| Red | Technical failure |
Use by remote control

Start / stop cleaning button
Press the button to switch to standby mode.
Press the button to start cleaning while the robot is in standby mode.
Press the button to stop the robot while it is cleaning.

MAX button
Press this button to toggle between suction mode and scrubbing mode while the robot is running.
Directional buttons
^ Press to move the button forward.
< Press to move to the left.
Press to move to the right.
Note: the function is only available in standby mode. It is not possible to use this function while the robot is cleaning.

Concentrated cleaning button
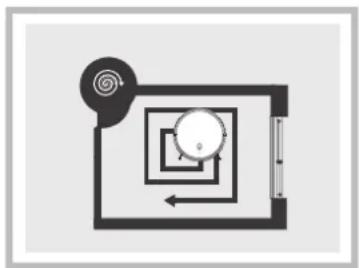
Press to concentrate the cleaning on a specific point.

Home button
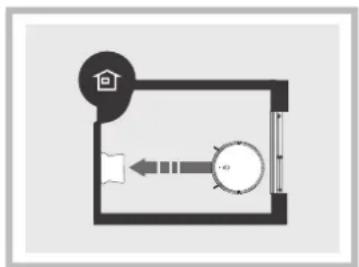
Press to return the robot to the charge base.

Max button
Pressing this button allows for four levels of suction adjustment: Mute Mode - Nornal Mode - Strong Mode - Max Mode.
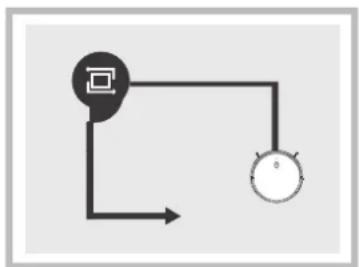
Press to direct the cleaning around the walls of the rooms.
Fast operation
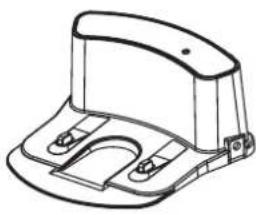
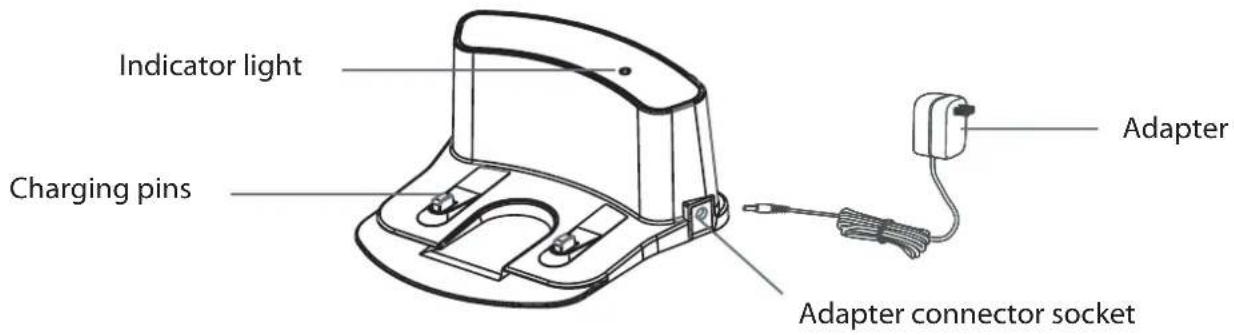
1. Installation of the charging base
Connect the power adapter to the charging base. Place the charging base against the wall. The space around the charging station must be kept clear to allow the robot to move around. Also, no reflective objects should be placed near the base. Connect the adapter to a suitable power outlet.
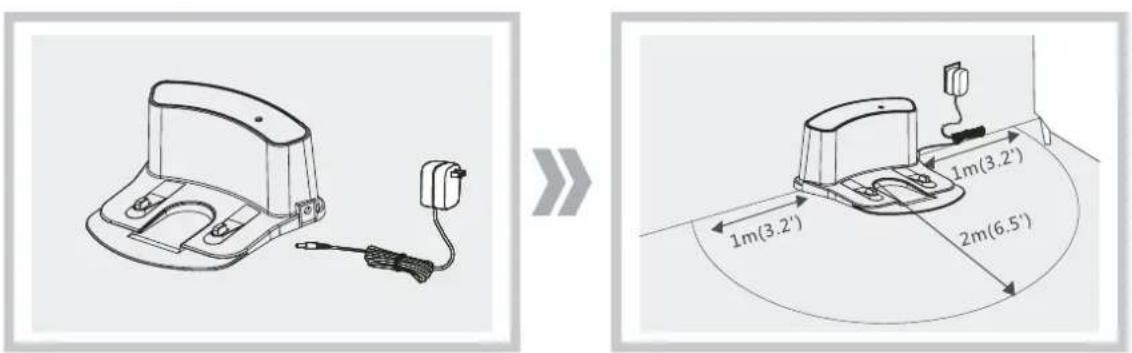
NOTE: When the charging base is connected to the adapter the indicator light stays on.
2. Switch on the robot
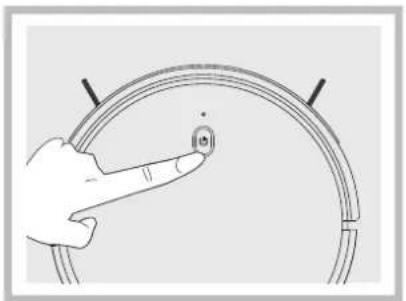
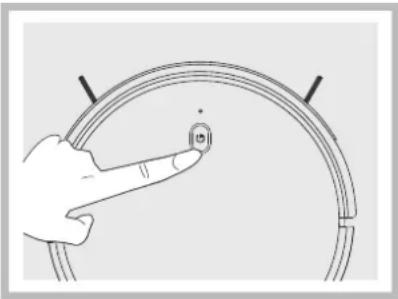
Press the automatic function button for two seconds to turn the robot on. To turn it off, press and hold the button for three seconds.
Do not turn off the robot when the cleaning is finished. Recharge the battery completely for the next cleaning. If the robot remains paused for more than ten minutes it will enter sleep mode. For the robot to exit sleep mode and enter standby mode it is necessary to press the automatic function button once..
natural_image
Hand holding a curved cable with a small circular component, no text or symbols visible3. Charge the robot
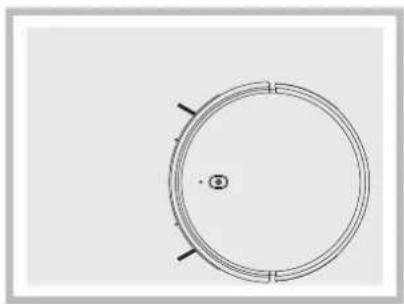
Place the robot on the charging base. While the robot is charging, the auto function button flashes orange. When charging is complete, the button will illuminate green, then the button will turn off and the robot will go into standby mode. The light will then turn off and the robot will go into standby mode. Charge the robot for 6 hours before first use.
natural_image
Simple circular diagram with two concentric rings and a central dot, no text or symbols present.Keep the charging pins clean to ensure proper connection.
Keep the robot on the base for daily use. Make sure the charge base is properly connected to the power supply.
If the robot is not going to be used for an extended period of time, fully charge it, disconnect the base from the power supply and store the device in a dry place with adequate ventilation.
4. Start cleaning
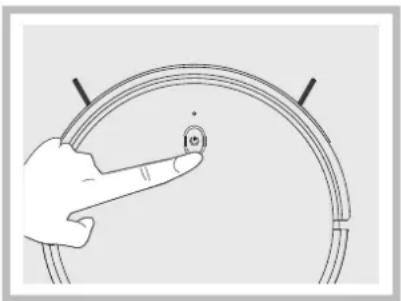
When the robot is in standby mode, you can press the automatic function button once to start the automatic cleaning process.
natural_image
Hand pointing at a circular component with a pointer, no text or symbols visible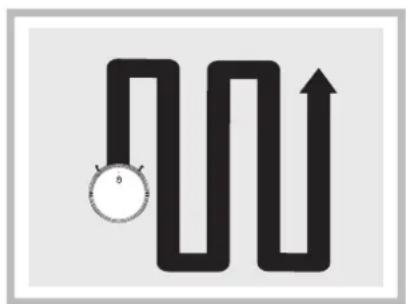
natural_image
Simple diagram showing a wavy path with an upward arrow and a stopwatch icon (no text or symbols)Before starting cleaning, make sure that the indicator light is flashing and that the robot is in standby mode. If the robot is in sleep mode, press the automatic function button once to activate the standby mode. If you wish to select other modes of use, please use the associated mobile application. The robot moves autonomously following a path. If it is moved manually or via the mobile app, the robot will re-plan the path, which may cause it to re-clean areas that have been previously cleaned. To ensure efficient cleaning, do not move the robot manually while it is running. If you manually lift the robot, cleaning will stop automatically. You must press the automatic function button to resume cleaning.
5. Pause
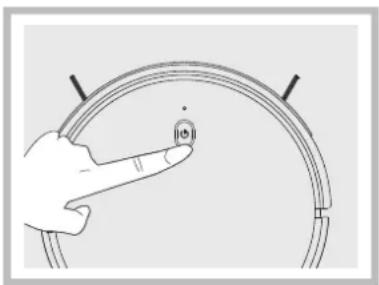
When the robot is in operation, you can pause the operation by pressing the automatic function button or the pause button on the associated mobile application..
natural_image
Illustration of a hand pointing at a small electronic component on a curved surface (no text or symbols)The robot will enter sleep mode if no operation is performed on the robot for 10 minutes. If you wish to activate the robot again, press the automatic function button once to activate the standby mode.
The robot will trace a new cleaning path, again including areas that have been previously cleaned.
6. Sleep mode
The robot will automatically switch to sleep mode if it does not perform any action for 10 minutes.
natural_image
Hand holding a circular gauge or dial with a pointer, no visible text or symbolsCleaning mode selection
This product can be operated in various modes to adapt to different floor surfaces for thorough cleaning of rooms.
Automatic loading
The robot can detect a low battery charge during the cleaning process and automatically activate the return to base to start charging.
natural_image
Simple line diagram of a room layout with a house icon and directional arrows (no text or symbols)Concentrated cleaning mode
Suitable for environments where more debris accumulates. The robot applies concentrated cleaning to an area in a spiral path.
natural_image
Pure diagram of a circular object with spiral pattern inside a rectangular frame, no text or symbols presentEdge cleaning mode
Suitable for cleaning inside corners. The robot performs the cleaning path around the edges of walls and objects fixed to the floor.
flowchart
graph TD
    A[" "] --> B[" "]
    B --> C[" "]
    style A fill:#000,stroke:#000
    style C fill:#fff,stroke:#000
Use of the water tank
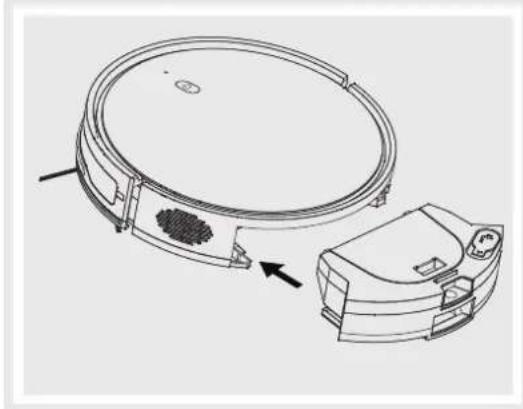
The water tank along with the mop is installed on the rear of the robot. You must add water to the tank before cleaning. It is recommended to vacuum the floor before mopping. For daily maintenance, please follow the instructions described in this manual.
Do not use the mopping mode when cleaning carpets and rugs. Pay attention during the mopping process. Occasionally it may be necessary to remove the tank and add water.
Be sure to remove the water tank when the appliance is charging in the base.
1. Remove the water tank. 2. Add water to the tank.
natural_image
Technical line drawing of a circular device with internal components and an arrow indicating assembly (no text or symbols)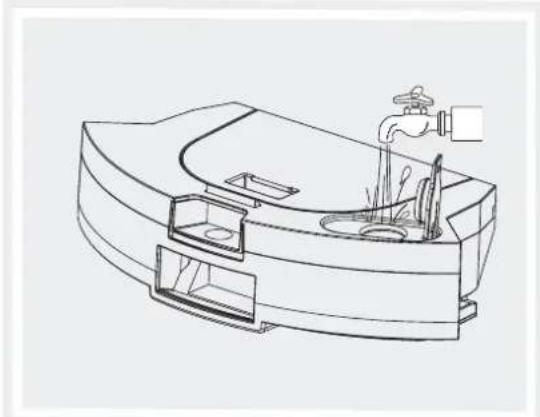
natural_image
Technical line drawing of a mechanical device with water tap and internal components (no text or symbols)Slide the tank backwards to remove it.. Open the cap on the tank opening and fill the tank with water. Close the cap tightly after filling the tank.
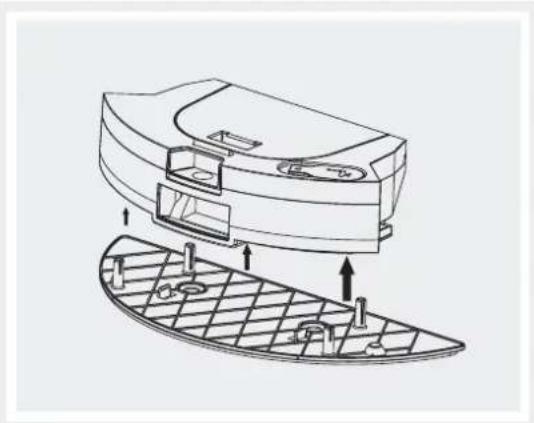
3. Attach the mop holder
natural_image
Technical line drawing of a mechanical device with internal components and mounting points (no text or symbols)Insert the mop holder together with the mop into the bottom side of the water tank.
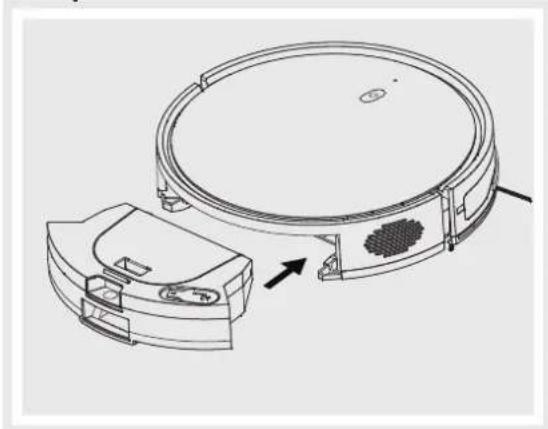
4. Insert the water tank.
natural_image
Technical line drawing of a circular device with internal components and an arrow indicating direction (no text or symbols)Slide the water tank with the mop holder installed on the back of the robot. You will hear a click when it is correctly positioned. The auto function button will activate the mopping function automatically.
Cleaning and maintenance
Cleaning the dirt tank and filters Switch off the robot and disconnect it from the mains before cleaning the removable components.
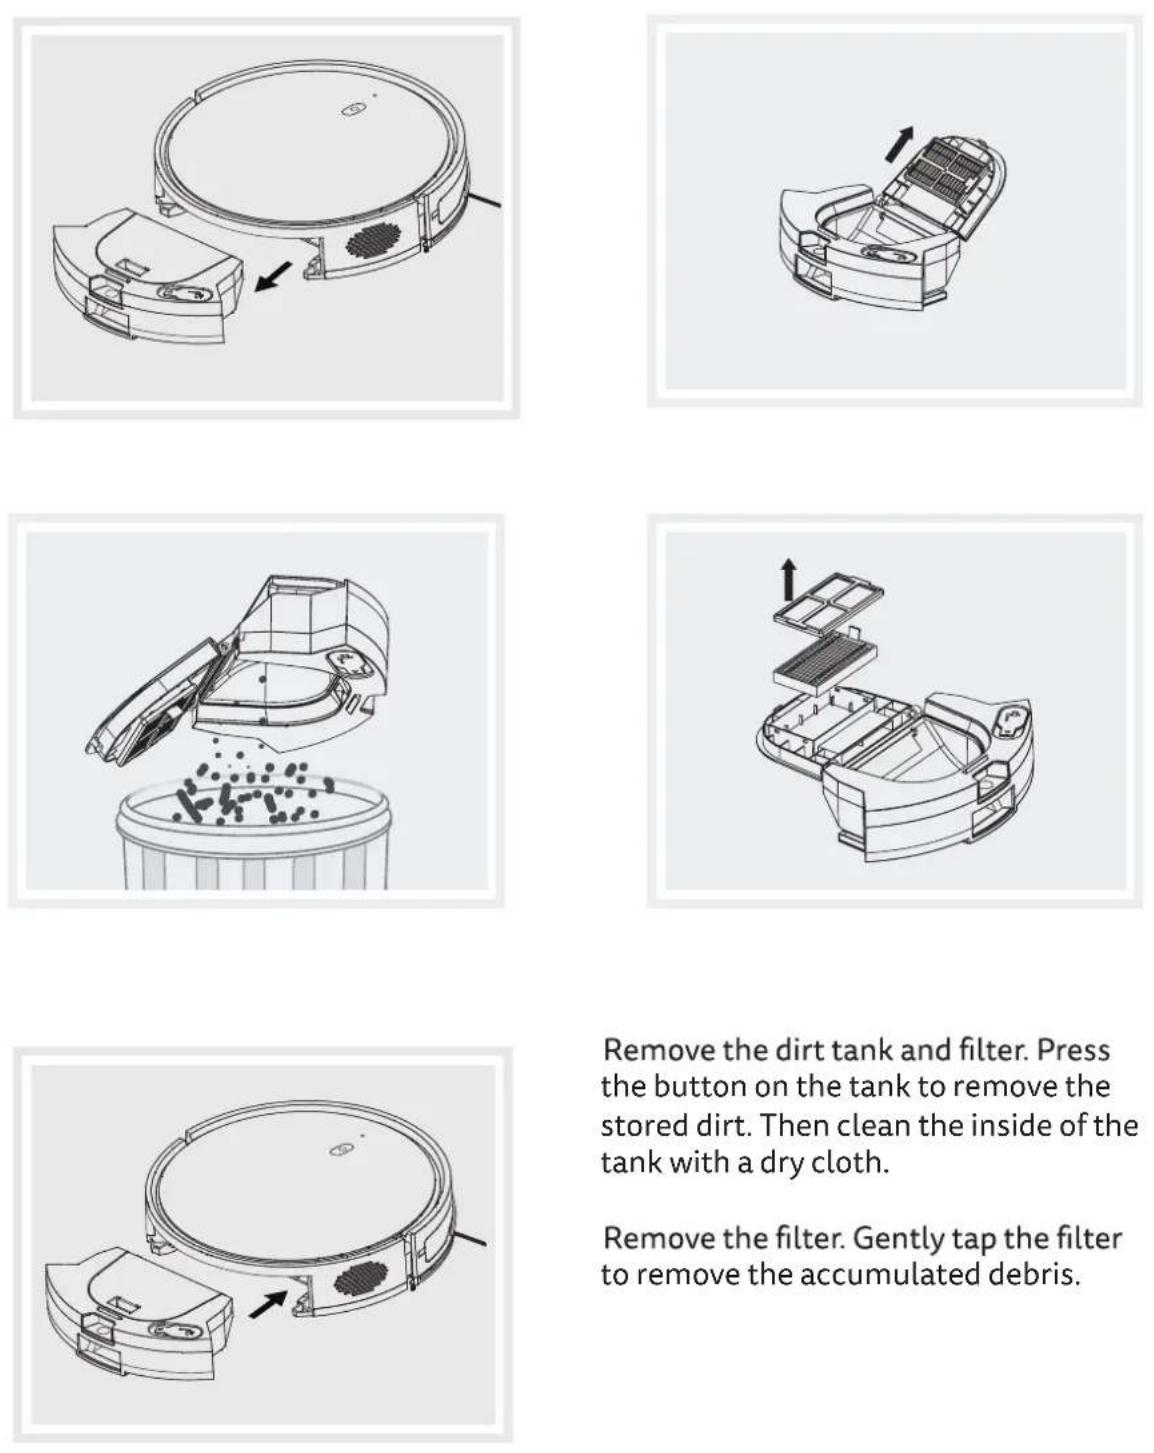
Remove the dirt tank and filter. Press the button on the tank to remove the stored dirt. Then clean the inside of the tank with a dry cloth.
Remove the filter. Gently tap the filter to remove the accumulated debris.
Cleaning of scrubbing components
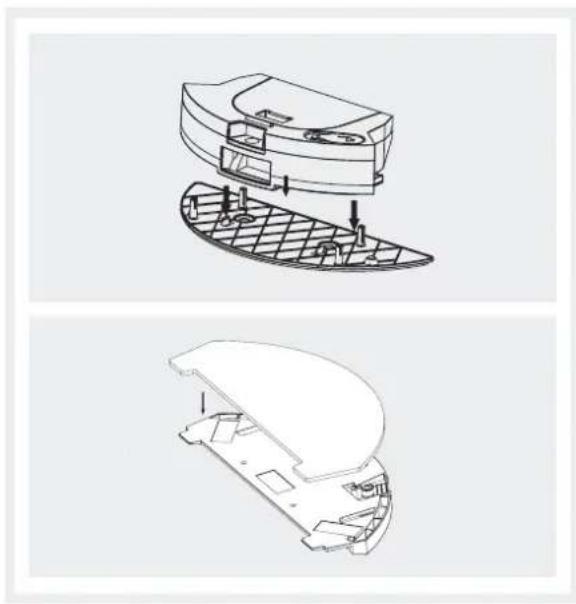
When mopping is complete, remove the mop holder and mop. Rinse the mop and allow it to dry completely.
natural_image
Technical line drawing of a device's internal structure, showing top and side views (no text or symbols)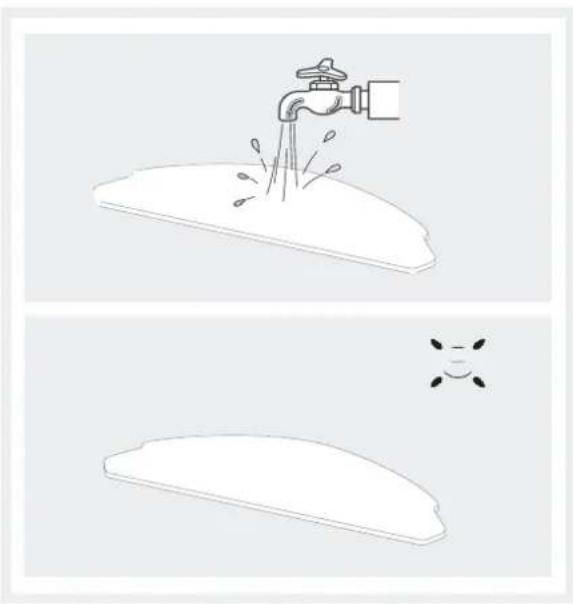
natural_image
Illustration showing a faucet spraying water onto a surface and a blank plate with a small mark (no text or symbols)Cleaning the water tank
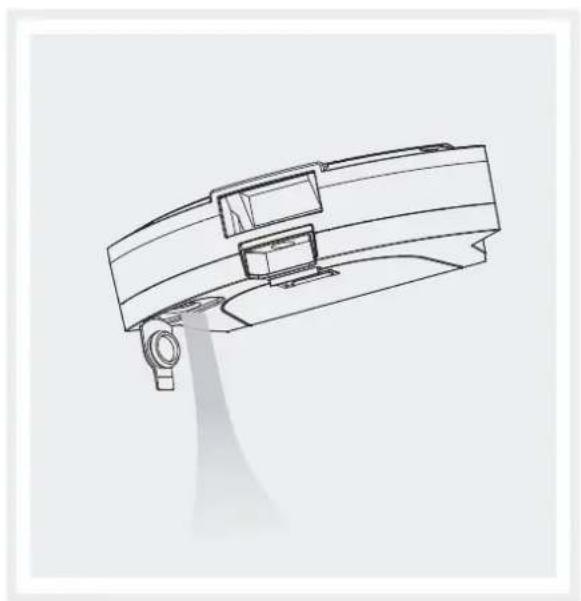
When cleaning is complete, remove the water tank from the robot and remove the mop holder. Empty the tank of excess cleaning water. Wipe the outside of the tank with a cloth and allow it to dry completely.
natural_image
Technical line drawing of a mechanical device with no visible text or symbols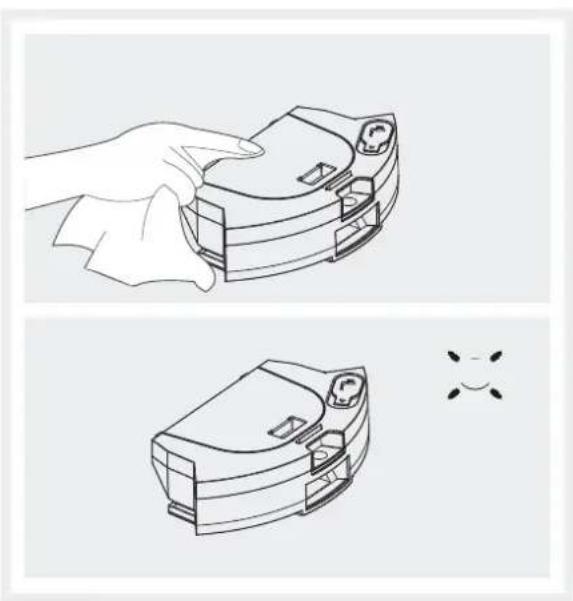
natural_image
Line drawing of a hand holding a device with a close-up view of its internal components (no text or symbols)Cleaning of side brushes
Turn off the robot. Remove the side brushes. Wipe with a clean dry cloth. When installing or replacing the side brushes, note the corresponding position of each brush: "L" (left) and "R" (right)".
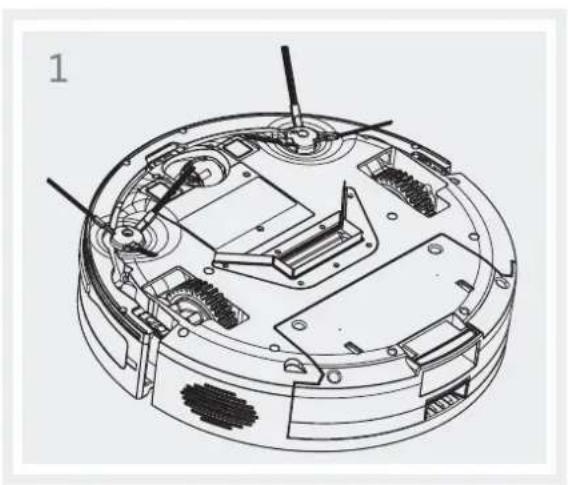
natural_image
Technical line drawing of a mechanical device with internal components and mounting holes (no text or symbols)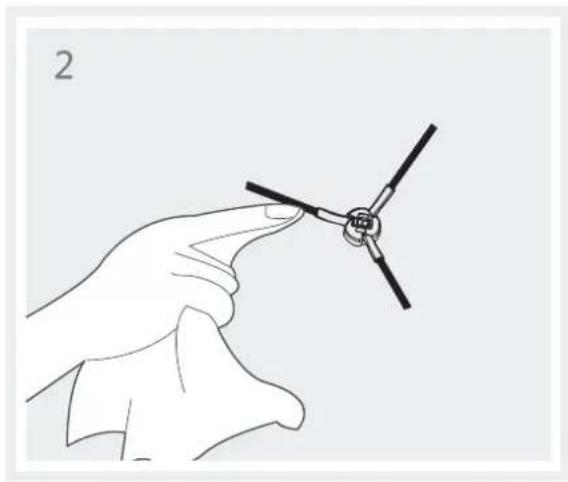
natural_image
Line drawing of a hand holding a small propeller airplane (no text or symbols)Check the side wheels
When the robot emits a buzzing sound, turn it off and remove any objects that are blocking the side wheels from turning.
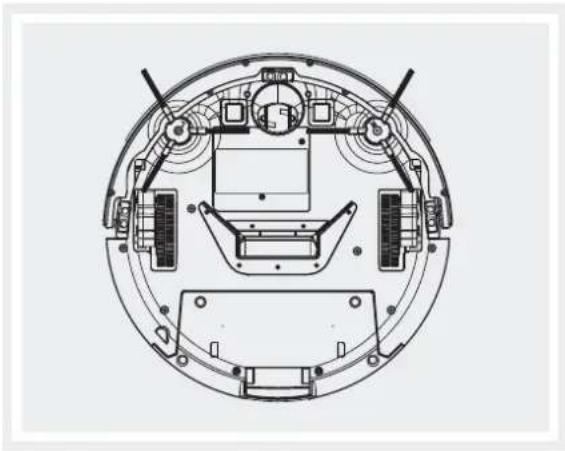
natural_image
Technical line drawing of a circular mechanical or electronic component with internal components and mounting brackets (no text or symbols)Cleaning of other robot parts
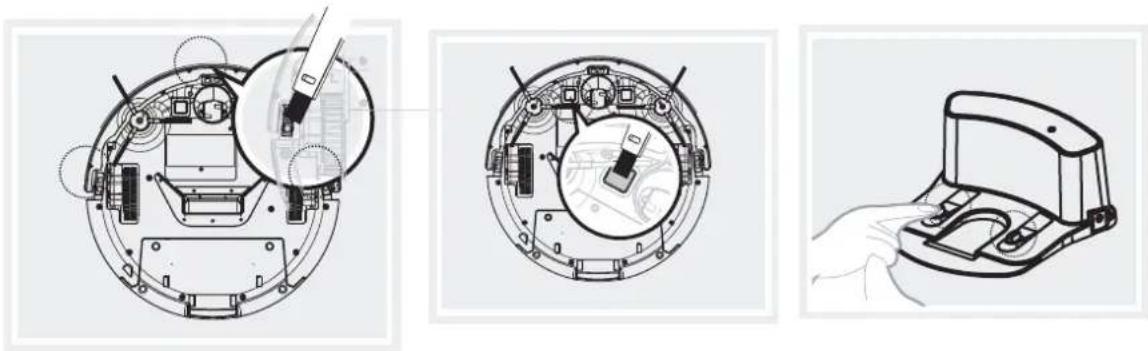
Turn off the robot and clean the obstacle sensors using the included brush.
natural_image
Three technical line drawings of a device interior with labeled components, showing internal wiring and assembly (no text or symbols present)Periodically clean the charging pins on the robot and charge base with a soft, dry cloth. When the battery has a very low charge or has not been used for a long period of time, its capacity will be reduced. In this case it is advisable to activate it again. Charge the robot on the base for three minutes; repeat this process 3 times, then fully charge the robot for 5 to 6 hours.
The robot uses long life batteries. It is not necessary to replace this component frequently.
Warnings
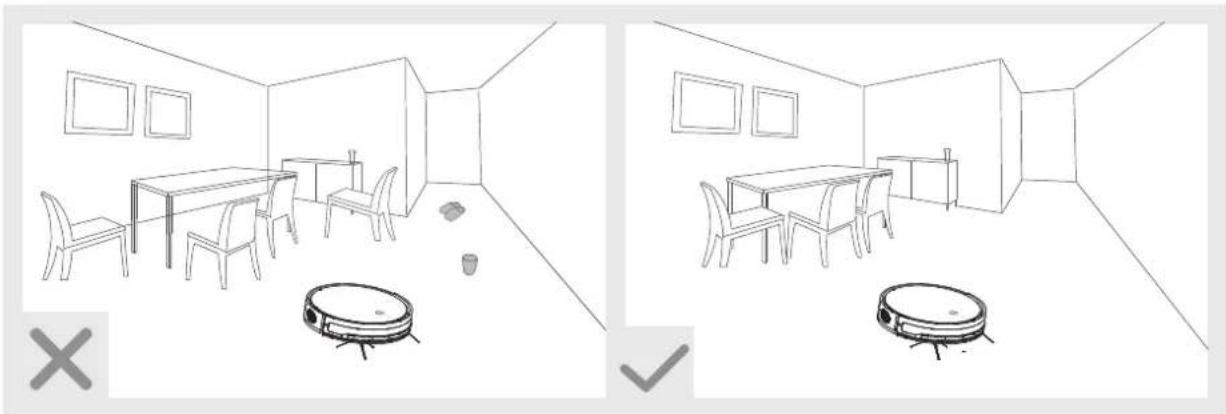
The robot may avoid certain areas due to the complexity of the environment. For best possible performance, remove all potential obstacles from the floor before performing routine cleanings.
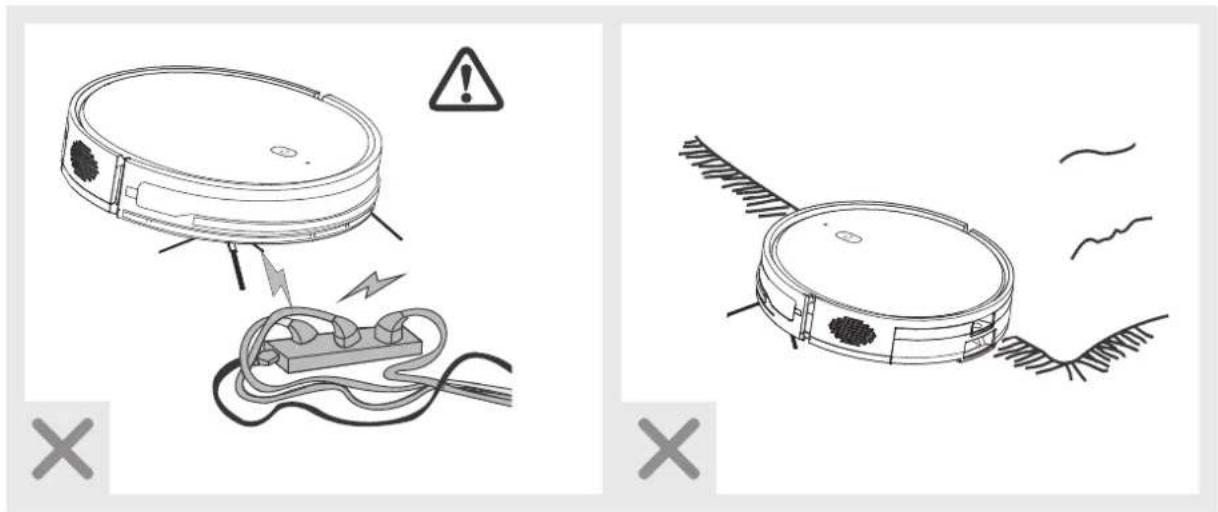
Keep power cords and other objects that can cause entanglement out of the robot's reach..
Hide the bangs in the carpets.
natural_image
Two line drawings of a room interior with furniture and a robotic vacuum cleaner (no text or symbols)The robot may avoid certain areas due to the complexity of the environment. For best possible performance, remove all potential obstacles from the floor before performing routine cleanings.
natural_image
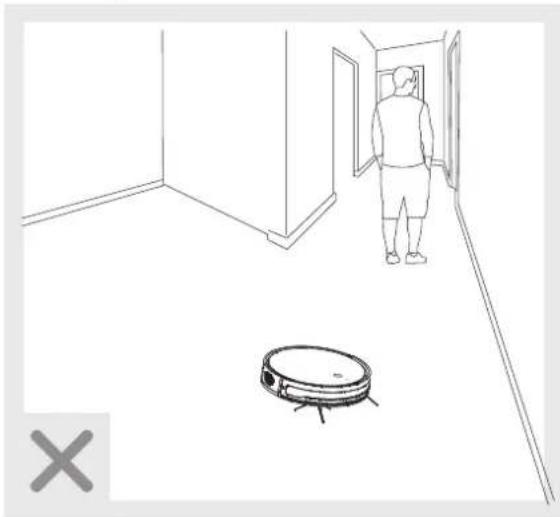
Line drawing of a person standing in a hallway next to a robotic vacuum cleaner (no text or symbols)Do not stand in narrow locations such as doorways or aisles to avoid blocking the robot's path.
natural_image
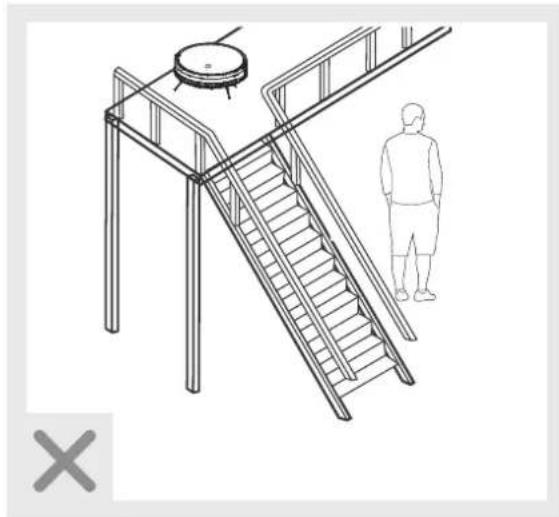
Line drawing of a staircase with a circular tank and a person standing nearby (no text or symbols)Do not stay near stairs or slopes while the appliance is cleaning in the upper zone, to avoid the risk of accidents caused by falling objects.
Troubleshooting
| No. Tone Possible cause Solution | |||
| 01 | ● | Problem on wheels, brushes or ventilation. | Check wheels, brushes side or the openings of the ventilation and aspiration. |
| 02 | ● ● | Failure in OBS sensors, bumper or bumper sensors | Check and clean the sensors OBS, bumpers and sensors for obstacles. |
| 03 The robot is stuck. Move the robot. | |||
| 04 | ● ● ● ● | Failure in the navigation. | Move the robot. |
If the above solutions do not solve the problem, please perform the following procedure:
- press the auto function button and hold it down for 3 seconds to turn off the robot. Then press the auto function button and hold it down for 2 seconds to turn the robot on.
- If, after restarting the robot in this way, the problem persists, please contact the Official Service Department.
NOTICE

This appliance is intended for household use. Do not use it for commercial use. Doing so will invalidate the warranty.
14,4V 2400mAh / 40W
Removal of the unit
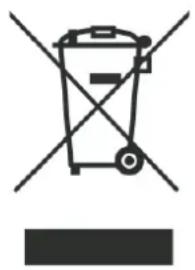
Waste Electrical and Electronic Equipment Regulations according to WEEE DIRECTIVE 2002/96/EC. This symbol means that this product must not be treated as normal household waste, but must be returned to the distributor, or handed over to the appropriate collection point for electrical or electronic equipment, or taken to a collection point set up for this purpose so that its components can be recycled and not mixed with household waste.
You can also notify the collection service of your municipality so that it can be collected and treated in the appropriate manner, following the instructions for environmental protection or for advice on how to do so. The disposal of a household appliance means avoiding possible negative consequences for the environment and health. Proper disposal will result in significant savings of energy and resources.
As a reminder of the need for separate disposal of household appliances, a crossed-out wheeled dustbin appears on the product.
To obtain technical assistance you can contact
954 185 320
natural_image
Symbol of a trash bin crossed with no text or labels, accompanied by a horizontal line and a rectangular block below (no text or symbols present)natural_image
Simple circular diagram with two curved lines and a central dot, no text or symbols present.Robô
natural_image
Technical line drawing of a mechanical bracket or housing component (no text or symbols)Base Load
natural_image
Hand pointing at a circular component with a pointer (no text or symbols visible)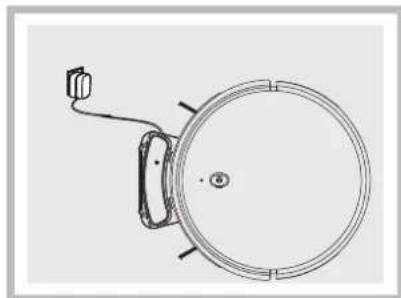
natural_image
Technical line drawing of a circular mechanical component with a cable and mounting bracket (no text or symbols)natural_image
Hand pointing at a circular component with a small mark, no text or symbols visible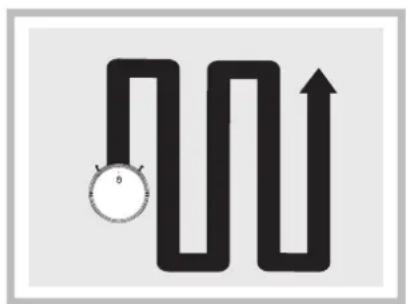
natural_image
Simple diagram showing a wavy path with an upward arrow and a stopwatch icon (no text or symbols)natural_image
Hand holding a curved cable with a small knob, no text or symbols visible5. Pausa
natural_image
Hand pointing at a circular component with measurement markings (no text or symbols)natural_image
Simple line diagram of a room layout with a house icon and directional arrows (no text or symbols)natural_image
Pure diagram of a circular object with spiral pattern inside a rectangular frame, no text or symbols presentflowchart
graph TD
    A[" "] --> B[" "]
    B --> C[" "]
natural_image
Technical line drawing of a circular device with internal components and an external housing, showing no text or symbols.natural_image
Technical line drawing of a water dispenser with faucet and sink (no text or symbols)natural_image
Technical line drawing of a mechanical device with internal components and mounting points (no text or symbols)natural_image
Technical line drawing of a circular device with internal components and an arrow indicating rotation (no text or symbols)natural_image
Technical line drawing of a circular device with internal components and an arrow indicating rotation (no text or symbols)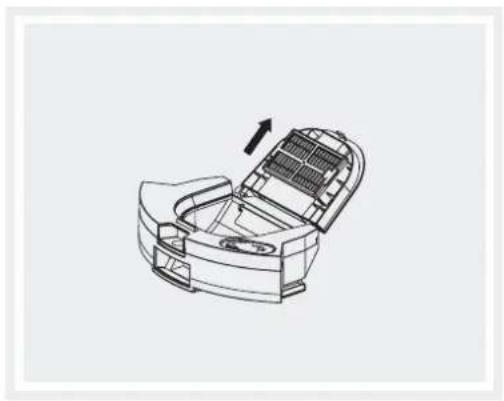
natural_image
Line drawing of a car interior with an open lid and ventilation slots, showing no text or symbols.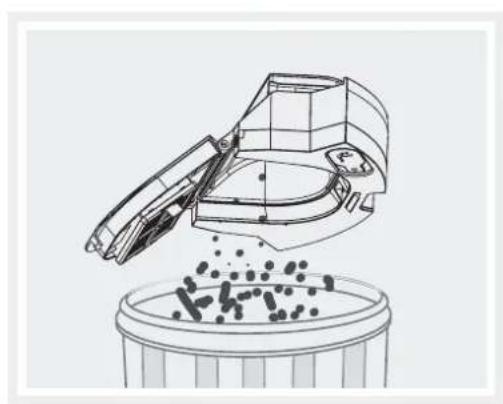
natural_image
Line drawing of a robotic arm pouring liquid into a circular container (no text or symbols)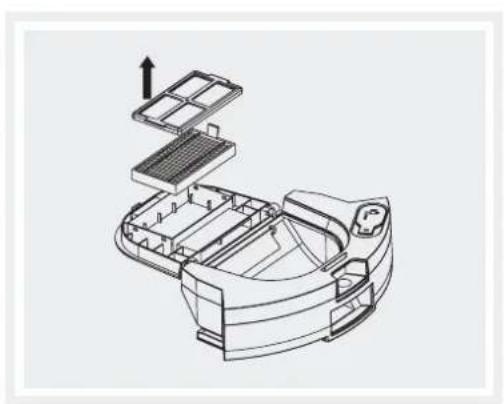
natural_image
Technical line drawing of a mechanical device with internal compartments and a highlighted component (no text or symbols)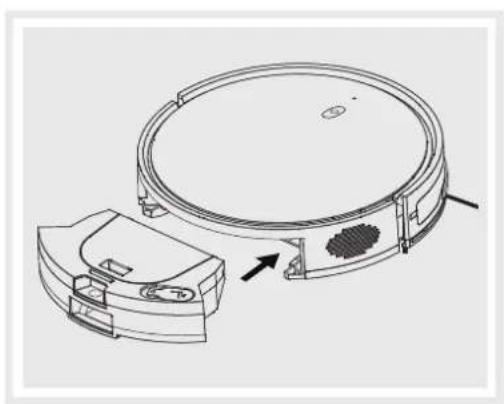
natural_image
Technical line drawing of a circular device with internal components and an arrow indicating direction (no text or symbols)natural_image
Technical line drawing of a device's internal components, showing top and side views (no text or symbols)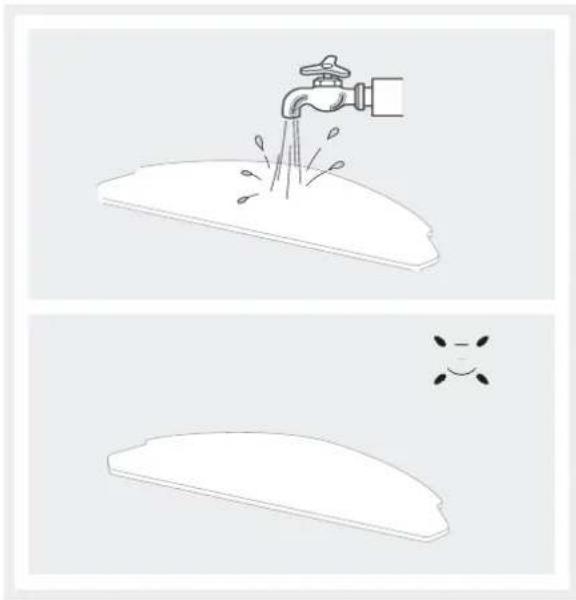
natural_image
Illustration showing a faucet spraying water onto a surface, with a small cross symbol below (no text or labels)natural_image
Technical line drawing of a mechanical device with a pointed tip and internal components (no text or symbols)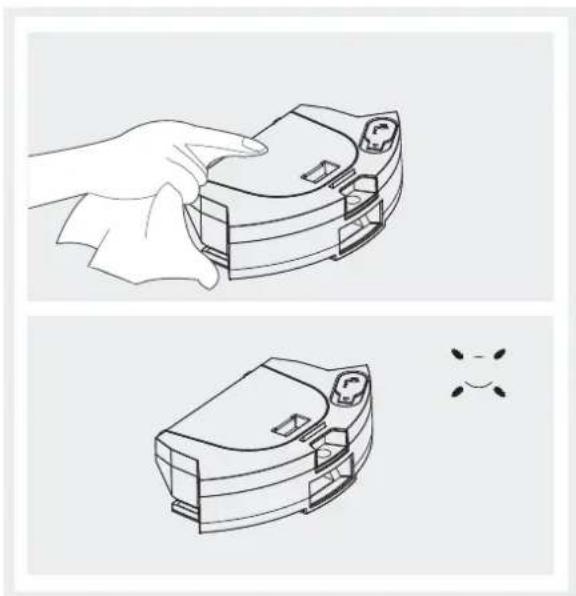
natural_image
Illustration of a hand holding a device with a close-up view of its internal components (no text or symbols)natural_image
Technical line drawing of a mechanical device with internal components and mounting holes (no text or symbols)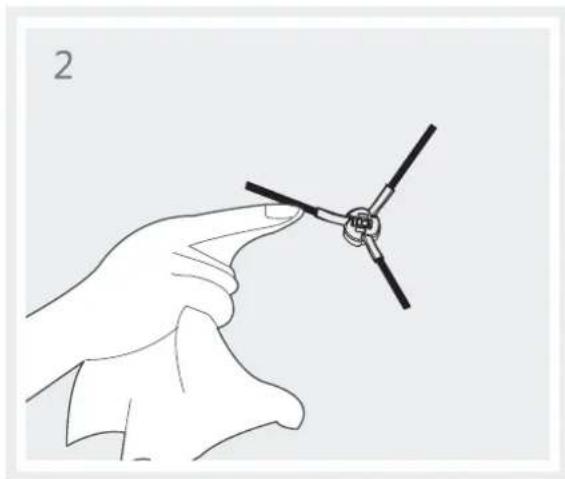
natural_image
Line drawing of a hand holding a small mechanical component (no text or symbols)Verificar as rodas laterais
natural_image
Technical line drawing of a circular mechanical or electronic component with internal components and mounting brackets (no text or symbols)Limpeza de outras partes do robot
natural_image
Three technical line drawings of a device interior with labeled components, showing internal components and a hand holding the base (no text or symbols present)natural_image
Two technical diagrams showing a clean vacuum cleaner with warning symbols and a close-up of its internal components (no text or labels present)natural_image
Two line drawings of a room interior with furniture and a robotic vacuum cleaner (no text or symbols)natural_image
Line drawing of a person standing in a hallway next to a robotic vacuum cleaner (no text or symbols)natural_image
Line drawing of a staircase with a circular component and a person standing nearby (no text or symbols)- NOTICE:
- THANK YOU FOR CHOOSING THIS GRUNKEL PRODUCT
- BEFORE PUTTING THE APPLIANCE ON WORKING
- Safety measures for its use
- CAUTION
- Content
- Start / stop cleaning button
- MAX button
- Concentrated cleaning button
- Home button
- Fast operation
- Installation of the charging base
- Switch on the robot
- Charge the robot
- Start cleaning
- Pause
- Sleep mode
- Cleaning mode selection
- Automatic loading
- Concentrated cleaning mode
- Edge cleaning mode
- Use of the water tank
- Remove the water tank. 2. Add water to the tank.
- Attach the mop holder
- Insert the water tank.
- Cleaning and maintenance
- Cleaning of scrubbing components
- Cleaning the water tank
- Cleaning of side brushes
- Check the side wheels
- Cleaning of other robot parts
- Warnings
- Troubleshooting
- NOTICE
- Removal of the unit
- 185 320
- Pausa
- Verificar as rodas laterais
- Limpeza de outras partes do robot
Brand : Grunkel
Model : I-DancerGyro
Category : Uncategorized