
Egeo - Toilet CORBERO - Free user manual and instructions
Find the device manual for free Egeo CORBERO in PDF.


| Product Type | Wall-hung or floor-standing toilet (S-trap) |
| Brand | Corbero |
| Model | Egeo (also compatible with Adriatico) |
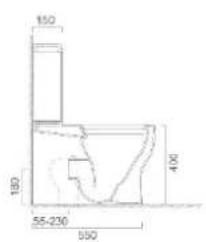
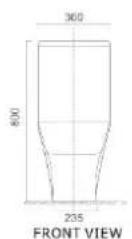
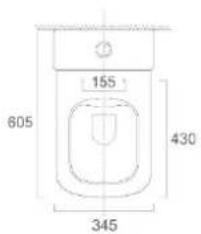
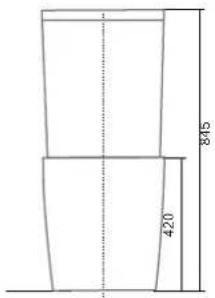
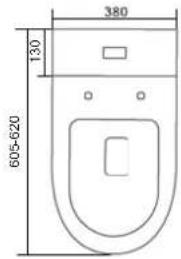
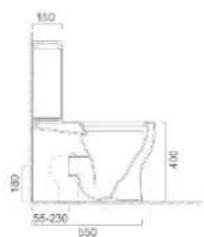
| Overall Dimensions (approx.) | Length: 615 mm, Width: 410 mm, Height: 810 mm (including cistern) |
| Bowl Height | Standard (approx. 400–430 mm from floor to seat) |
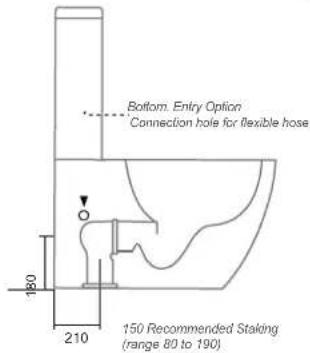
| Rough-in (center of outlet to wall) | 210 mm (recommended), adjustable 80–190 mm |
| Water Supply Connection | Bottom or rear inlet (1/2" BSP) |
| Flush Type | Dual flush (half and full) with push button |
| Flush Volume | Not specified; standard dual-flush (typically 3/6 L) |
| Outlet Orientation | S-trap (floor outlet) |
| Material | Ceramic (vitreous china) |
| Seat Included | Yes, with stainless steel hinges and covers |
| Cistern Capacity | Not specified; typical 6-9 L |
| Installation Type | Floor-mounted, concealed fixing brackets or cement bed |
| Installation Standards | AS/NZS 3500 |
| Weight | Not specified; approx. 25–35 kg (complete set) |
| Warranty | Not specified; standard Corbero warranty may apply |
| Maintenance | Clean with mild detergent and damp cloth; avoid abrasive cleaners |
| Spare Parts Available | Inlet valve, outlet valve, flush button, seat, fixing brackets, gaskets |
| Repairability | User-replaceable cistern internals and seat; professional installation recommended |
| Safety Notes | Do not overtighten bolts; use licensed installer; avoid chemical additives in cistern |
Frequently Asked Questions - Egeo CORBERO
User questions about Egeo CORBERO
0 question about this device. Answer the ones you know or ask your own.
Ask a new question about this device
Download the instructions for your Toilet in PDF format for free! Find your manual Egeo - CORBERO and take your electronic device back in hand. On this page are published all the documents necessary for the use of your device. Egeo by CORBERO.
USER MANUAL Egeo CORBERO
natural_image
Simple geometric shape: a rectangle with a horizontal line at the top edge (no text or symbols)natural_image
Line drawing of a flip phone with two doors and a seat, no text or symbols present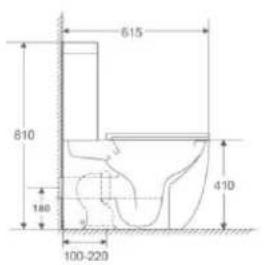
EGEO
ADRI
natural_image
Simple line drawing of a container with a horizontal line inside, resting on a flat surface (no text or symbols)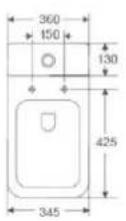
ÁTICO
TENGA EN CUENTA
MANUAL VALID FOR THE FOLLOWING MODELS
EGEO y ADRIATICO

IMPORTANT!
- Inspect components prior to installation to ensure there are no visible defects. If a defect is found, do not install the parts that make up the toilet and contact the supplier immediately. Claims for defects will not be accepted after the product has been installed.
- This set of toilets are suitable for a variety of configurations: Cistern: Holds any of the bottom inlet connections (left or right shut-off valve).
- The components provided must be installed by a licensed installer. Failure to do so may void the warranty.
- Installation must be carried out in accordance with AS/NZS3500.
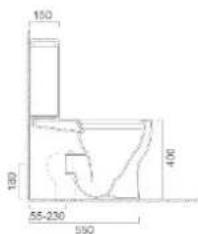
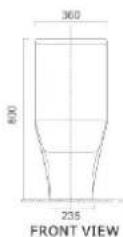
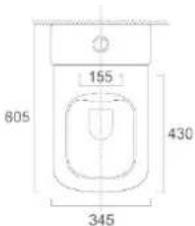
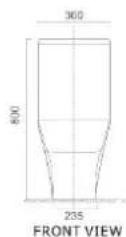
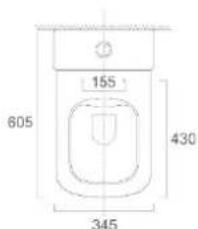
- All measurements are in millimeters. (Height measurements to toilet bowl are standard.)
- Leave enough space for cement bed.
- This WC set can be configured with either bottom entry or rear entrance.
INSTALLATION GUIDE
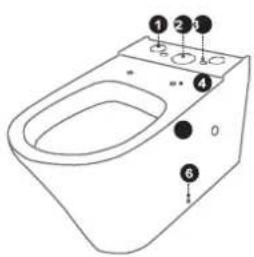
- Bottom Water Inlet / Control Holes
- Tank outlet pipe hole
- Cistern - tray / Fixing holes
- Connection holes with seat
- Bottom Inlet Hole / Flexible Tubing Hole (On both sides of the tray)
- Bracket fixing holes (On both sides of the mold)
TANK PACKAGE CONTENTS
natural_image
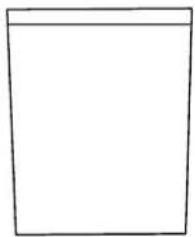
Simple geometric shape: a rectangle with a horizontal line at the top edge (no text or symbols)1x ceramic cistern lid 1x ceramic cistern base
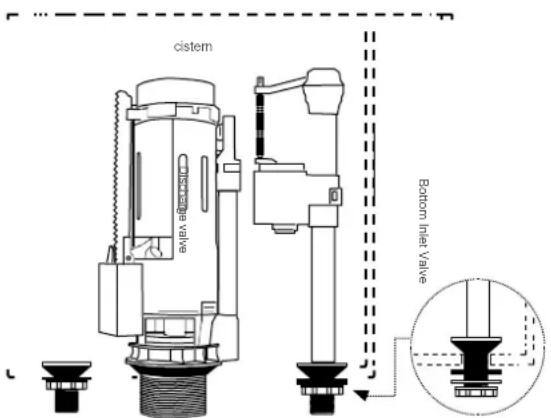
The cistem is supplied with the discharge valve and the dual-purpose inlet valve already installed
2x bolts with lock
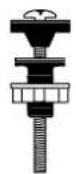
For fixing the cistern to the toilet bowl!
2x caps
Plugs can be used to cover the
holes on the sides of the toilet, if necessary
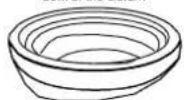
1x Rubber Gasket
For sealing the outlet in the toilet bowl of the cistern
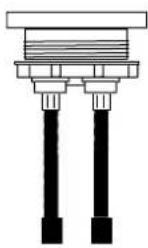
1x Download Button
Left half discharge, right half whole discharge
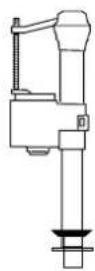
NOTE: The cistern can be adapted for the lower inlet pipe. The bottom inlet valve shown above is an optional extra
WC BOWL PACKAGE CONTENTS
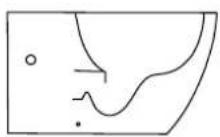
1x ceramic toilet bowl
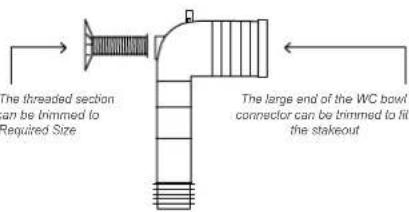
1x WC cup connector
For connecting the toilet bowl to the drain pipe on the ground / S-output
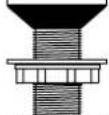
1x section (with flange plate)
Flange plate attaches to wall and threaded link section to WC bowl connector
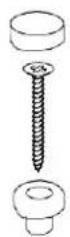
2x plugs (chrome) 2x screws
2x WC cup stoppers (white)
Optional Fixing: Used to secure the WC bowl to the concealed fixing bracket. The plastic plug is placed in the hole on the outer side, the screw in the hole in the vertical section of support. The chrome toilet bowl is used to cover the plastic stopper
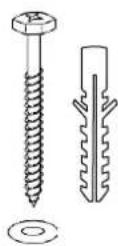
2x bolts (+ white pins) 2x washers
Optional fixing: Used with secure WC bowl fixing brackets to the WC bowl. The bolt is inserted through WC bowl hole holder
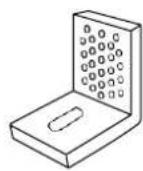
2x brackets
Concealed Fastening
Optional: Can be used to connect to low toilet how!
SEAT PACKAGE CONTENTS
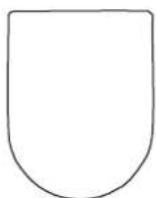
1x seat
The toilet bowl has receiver holes that slide over the stainless steel pins
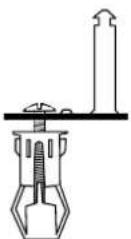
2x stainless steel plates
Located on the seat on the stainless steel pins
2x thumbscrews
Used to fix the stainless steel plate and pin to the toilet bowl
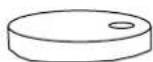
2x stainless steel caps
To cover the stainless steel plate
Corberō
1. S-EXIT, PROCEDURE. Fixing the TOILET BOWL connector in place
1.1 Determine the center of the toilet bowl and mark the center line on the floor and wall.
1.2 Calculate the necessary stakeout. The recommended stakeout is 210 mm.
1.3 You may need to trim the larger end of the plastic toilet bowl connector to fit it. To trim, first remove the plastic ring and rubber gasket, then cut the pipe to size. Replace the rubber gasket and plastic ring securely, ensuring a good fit.
1.4 Position of the toilet bowl connector on the drain pipe on the floor (S-Outlet). The height measurement from the floor to the center of the connector toilet bowl is 185 mm.
1.5 Attach the threaded section (with flange plate) to the tray connector, ensuring that the flange plate is in contact with the wall. You may need to trim the threaded section to fit properly.
1.6 Mark and drill holes in the flange plate and secure the plate to the wall with fixing screws. The toilet bowl connector is already installed.
2. POSITIONING THE TOILET BOWL
2.1 Use of the centreline marked on the wall and floor to place the toilet bowl (see step 1.1). Push the cup into the installed plastic connector. It is recommended that the wedges be used to accommodate the toilet bowl during positioning.
3. CISTERN - It is configured to make a rear exit connection. DIAGRAM A.
3.1 First remove two items: the rear inlet valve and the plug at the base of the cistern. Then install the bottom inlet valve with the connector in the hole in the cistern base.
3.2 Next, install the bottom inlet of the valve with plug in the hole in the toilet bowl of the cistern. Place the tapered rubber gasket inside the cistern.
3.3 On the outside, attach the cistern rubber gasket and to the white plastic disc with the plastic wing nuts following that sequence.
4. FIXING THE TOILET BOWL TO THE FLOOR
4.1 Cement fastening (optional fixing no. 1)
If using cement beds, adjust the level of the toilet bowl while the cement mixture is fresh. Fix the toilet bowl to the ground using a 3:1 cement and sand mixture at a depth of 60mm. Do not use quick-drying lime or cement.
Important: Allow at least 24 hours for the cement mixture before using the toilet.
4.2 Fixing bracket (optional fixing no. 2)
Attach the toilet bowl to the floor with silicone, ensuring that the toilet bowl is level. Make sure that the position of the hidden fixing brackets is in line with the bracket fixing holes. Place the bolts in the ground through the brackets. Then attach the toilet bowl to the brackets with the plastic plugs and screws.
Important: Do not over-tighten the bolts or screws as this can cause the ceramic to crack and break.
- FIXING THE CISTERN TO THE TOILET BOWL (Note: The cistern is fixed directly over the toilet bowl and does not require wall mounting)
5.1 First, check the alignment of the holes, making sure that the cistern and the bowl are aligned. The back of the cistern and toilet bowl should be aligned so that the toilet installation pieces will line up with the wall. Now remove the cistern.
5.2 Place the rubber gasket at the plastic pipe outlet in the toilet bowl of the cistern and make sure it is securely connected. Locate the outlet cistern (with rubber gasket) on the tray, ensuring a good fit.
5.3 If you have problems with the bottom inlet refer to step 5 and install the inlet return valve.
5.4 Now secure the cistern to the toilet bowl with the two bolts with seals on the cistern/tray fixing holes.
5.5 Clean everything, connect the water supply and check the operation of the cistern.
6. ADJUST THE TOILET BOWL TO THE CISTERN
6.1 Mount the flush button on the flush toilet bowl, with the half flush on the left and full flush on the right. Make sure everything is aligned.
6.2 Place the toilet bowl in the cistern and press the buttons to check the operation.
7.1 Press medium flush to save water and full flush only if needed.
7.2 Clean the toilet with liquid detergent and a damp cloth.
7.3 Do not place water additives inside the cistern as they can have chemicals that damage the valves and impair the functionality of the cistern.
8. SEAT INSTALLATION
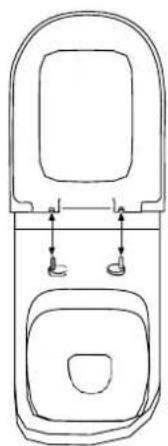
8.1 Secure the thumbscrews into the seat connection holes, ensuring that the stainless steel pins line up with the receiver holes in the seat. Once correctly placed, make sure the screws are tightened correctly.
8.2 Slide the stainless steel bushings onto the plates with hooks.
8.3 To fit the seat, it will slide over the stainless steel pins. If you need to make adjustments to position the seat correctly, go back to step 10.1.
8.4 To remove the seat, put the seat upright and pull up.
To adjust the seat, pull down on the stainless steel pins.
To remove the seat, place the seat upright as shown and pull it up.
natural_image
Line drawing of a two-door toilet with side-mounted sensors (no text or symbols)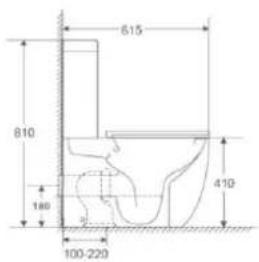
natural_image
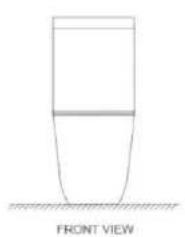
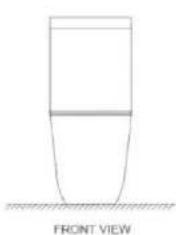
Simple line drawing of a conical object with a horizontal line and label 'FRONT VIEW' below (no other text or symbols)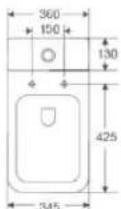
AEGEAN
ADRIATIC
PLEASE NOTE
- The installation will be carried out in accordance with AS/NZS3500.
- All measurements are in millimeters.
- Fix the floor toilet bowl using a 3:1 cement sand mixture at a depth of 60mm . Do not use quick-drying lime or cement.
- Wipe with a damp cloth. Do not use abrasive cleaners, liquids, or pastes.
- Fixing bracket: The toilet bowl must be fixed with a silicone sealant in addition to the supplied brackets.
- Dimensions are nominal and subject to possible variation in ceramic manufacturing.
- Specifications may change without notice as part of our continuous improvement.
Corberō
GUIA DE INSTALAÇÃO
PACOTE DE SANITA
MANUAL VÁLIDO PARA OS SEGUINTES MODELOS
EGEO y ADRIATICO

IMPORTANTE!
natural_image
Simple geometric shape: a rectangle with a horizontal line at the top edge (no text or symbols)natural_image
Line drawing of a flip phone with two speakers and a door (no text or symbols)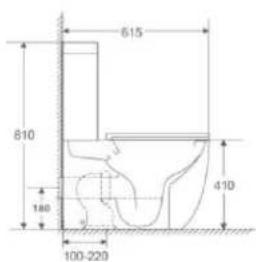
natural_image
Simple line drawing of a conical object with a flat top and base, labeled 'FRONT VIEW' at the bottom (no other text or symbols)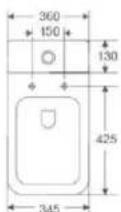
EGEU
ADRIATIC
ATENÇÃO:
- TENGA EN CUENTA
- IMPORTANT!
- Corberō
- S-EXIT, PROCEDURE. Fixing the TOILET BOWL connector in place
- POSITIONING THE TOILET BOWL
- CISTERN - It is configured to make a rear exit connection. DIAGRAM A.
- FIXING THE TOILET BOWL TO THE FLOOR
- ADJUST THE TOILET BOWL TO THE CISTERN
- SEAT INSTALLATION
- PLEASE NOTE
- GUIA DE INSTALAÇÃO
- PACOTE DE SANITA
- IMPORTANTE!
- ATENÇÃO:
Brand : CORBERO
Model : Egeo
Category : Toilet