
SEW 420 A1 - Electric hot water bottle SILVERCREST - Free user manual and instructions
Find the device manual for free SEW 420 A1 SILVERCREST in PDF.


| Product Type | Sewing Machine |
| Brand | SilverCrest |
| Model | SEW 420 A1 |
| Power Supply | 220-240 V, 50 Hz |
| Power Consumption | 90 W |
| Dimensions (approx.) | 40 x 20 x 30 cm |
| Weight (approx.) | 6 kg |
| Number of Stitches | 12 built-in stitches |
| Buttonhole Style | 4-step automatic buttonhole |
| Free Arm | Yes, for cuffs and sleeves |
| Stitch Length Adjustment | Adjustable |
| Stitch Width Adjustment | Adjustable (max 5 mm) |
| Bobbin Type | Top drop-in bobbin |
| Accessories Included | Needle set, presser feet, bobbins, seam ripper, spool caps |
| Maintenance | Clean feed dogs and bobbin area regularly; oil as per manual |
| Safety Features | Automatic safety switch when cover is opened |
| Repairability | Spare parts available from SilverCrest service centers |
| Manual Languages | English, German |
Frequently Asked Questions - SEW 420 A1 SILVERCREST
User questions about SEW 420 A1 SILVERCREST
0 question about this device. Answer the ones you know or ask your own.
Ask a new question about this device
Download the instructions for your Electric hot water bottle in PDF format for free! Find your manual SEW 420 A1 - SILVERCREST and take your electronic device back in hand. On this page are published all the documents necessary for the use of your device. SEW 420 A1 by SILVERCREST.
USER MANUAL SEW 420 A1 SILVERCREST
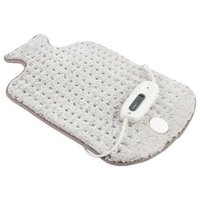
ELECTRIC HOT WATER BOTTLE SEW 420 A1
GB IE NI
ELECTRIC HOT WATER BOTTLE
Operating instructions
DE AT CH
Before reading, unfold the page containing the illustrations and familiarise yourself with all functions of the device.
DE AT CH
GB/IE/NI Operating instructions Page 1
Contents
Introduction 2
Information about these instructions for use....2
Proper use 2
Warnings and symbols used 2
Safety information 3
Operating elements / parts 6
Use 6
Check package contents 6
Charging and using the appliance 6
Cleaning....7
Storage 7
Troubleshooting 7
Disposal 8
Disposal of the appliance....8
Disposal of the packaging 8
Appendix 8
Technical specifications 8
Kompernass Handels GmbH warranty 8
Service 10
Importer 10
Introduction
Information about these instructions for use

Congratulations on the purchase of your new appliance. You have selected a high-quality appliance. The instructions for
use are part of this appliance. They contain important information about safety, usage and disposal. Before using the appliance, please familiarise yourself with all operating and safety instructions. Use this appliance only as described and for the areas of applications specified. Hand over all documents when passing the appliance on to third parties.
Proper use
This appliance is intended for applying soothing warmth to parts of the body, such as the stomach, back or neck.
Any other use or use beyond that specified is considered improper use. The appliance is not intended for use in medical/therapeutic or commercial settings and cannot replace medical treatment. Claims of any type due to damage from improper use are excluded. The risk is borne solely by the user.
Warnings and symbols used
The following warnings and symbols are used in these instructions for use, on the packaging and on the appliance:
| DANGER! A warning with this symbol and the signal word "DANGER" indicates an imminent hazardous situation which will result in death or serious injury if not avoided. | |
| WARNING! A warning with this symbol and the signal word "WARNING" indicates a potentially hazardous situation which could result in death or serious injury if not avoided. | |
| CAUTION! A warning with this symbol and the signal word "CAUTION" indicates a potentially hazardous situation which could result in a minor or moderate injury if not avoided. |
| ATTENTION! A warning with this symbol and the signal word "ATTENTION" indicates a potential situation which could result in property damage if not avoided. | |
| Note: A note provides additional information aimed at making it easier to use the appliance. | |
| Protection class II: Protection by double or reinforced insulation between live and touchable parts. | |
| AC current/voltage | |
| Do not wash | |
| Do not bleach | |
| Do not tumble dry | |
| Do not dry clean | |
| Do not iron | |
| Machine washable 30 °C | |
| Chemical cleaning | |
| Iron 120 °C | |
| Hang to dry |
Safety information
DANGER!
■The appliance should only be connected to correctly installed and earthed mains power outlets. Ensure that the specifications for your local power supply correspond to the details on the rating plate of the appliance.
■ For additional protection, we recommend that you install a residual current device with a rated tripping current of no more than 30 mA in the electrical circuit. Ask your electrician for advice.
■ Make sure that the power cable does not become wet or moist. Route the cable in such a way that it cannot be caught or damaged.
- Keep the appliance and the power cable away from hot surfaces.
■ To avoid potential risks, damaged power cables should be replaced by the manufacturer, their customer service department or a similarly qualified person.
■ Do not carry out any repair work on the appliance. All repairs must be performed by our customer service department or by a qualified specialist technician.
■ Never open the appliance housing. There are no parts inside the appliance which require user maintenance. In addition, this will invalidate the warranty.
■ Use and charge the appliance in dry interior rooms only; never use it outside.
■ Never immerse the appliance in water or other liquids!
■ Do not use the appliance while taking a bath or shower. Do not store or keep the appliance in places from where it can fall into the bath tub, sink or other containers filled with water or other liquids.
■ Never reach for the appliance if it has fallen into water.
■ Do not use the appliance if the power cable is damaged, if the appliance is not working properly, if it has fallen into water or is otherwise damaged.
■ Do not allow water or other liquids to flow over the plug connection of the appliance.
WARNING!
■ This appliance may be used by children aged 8 years or older and by persons with reduced physical, sensory or mental capabilities or lack of experience and knowledge, as long as they are being supervised or have been instructed on how to use the appliance safely and are aware of the potential risks.
■ Do not allow children to play with the appliance.
■ Cleaning and user maintenance tasks must not be carried out by children unless they are aged 8 years or more and are supervised.
■ Children younger than 8 years of age must be kept away from the appliance and the power cable.
■ Do not use the appliance in the area of the heart or face.
■ Do not use the appliance if you suffer from one or more of the following illnesses or complaints: circulatory disorders, varicose veins, open wounds, bruises, skin tears, phlebitis, thrombosis, diabetes or slipped discs.
■ Never use the appliance while under the influence of medications or alcohol or if sensitivity is impaired.
■ Never use the appliance on children, animals, during pregnancy, on your head, throat or other parts of the body that are exhibiting swelling, burns, eczema, wounds or other sensitive areas.
■ The appliance may not be covered during charging. Never use the appliance in the vicinity of petrol or other flammable materials.
■ Parts of the appliance may become very hot and cause burns.
■ Do not use an external timer switch or a separate remote control system to operate the appliance.
■ Check the appliance for visible external damage before use. Do not operate a damaged or dropped appliance.
■ If the contents leak from the appliance, the appliance must no longer be operated.
■ The contents of the device must not be drunk and cannot be refilled.
- Keep the appliance away from children and helpless persons during charging. The appliance may only be used under the supervision of an adult.
■ Route the power cable in such a way that no one can tread on it or trip over it.
■ Do not wrap the power cable around the appliance.
■ When disconnecting the appliance from the power outlet, always pull on the plug and never on the power cable.
■ The appliance may not be used during the charging process.
■ After charging, disconnect the mains plug from the mains socket.
CAUTION!
■ Ensure that the appliance is switched off before removing it from the stand.
■ Do not heat the appliance in a microwave or other appliances.
■ Stop using the appliance immediately if you find the treatment unpleasant or if you experience pain.
■ Use the appliance only for the intended purpose. Improper use of the appliance can result in injuries.
ATTENTION!
■ Use and charge the appliance only indoors.
■ Only use the appliance with the supplied charging station.
■ The charging port must never face down during the charging process.
■ When the appliance is charging, ensure that there are no easily flammable materials close to it.
- Keep sharp objects away from the appliance and never hit it to avoid damaging the appliance.
■ Do not use any aggressive cleaning liquids or solvents to clean the appliance. They could damage the surface.
(i) Note:
■ No action is required on the part of the user to set the appliance to 50 or 60 Hz. The appliance automatically sets itself to 50 or 60 Hz.
Operating elements / parts (See fold-out page for illustrations)
① Charging port
② Protective cap
③ Charging station
4 Charging LED
⑤ Charging contact
⑥ Removable fabric cover
Use
Check package contents
⚠️ DANGER! Risk of suffocation! Do not allow children to play with packaging materials.
◆ Remove all parts and the instructions for use from the box.
◆ Remove all packaging material.
The product includes the following components:
• Electric hot water bottle
- Charging station
● Removable fabric cover
• These instructions for use
① Note: Check the package for completeness and signs of visible damage. If the delivery is incomplete or damage has occurred as a result of defective packaging or during transport, contact the service hotline (see section Service).
Charging and using the appliance
WARNING! Risk of burns! The hot water bottle can become very hot. Never use the hot water bottle during the charging process, and never use it without the removable fabric cover 6.
ATTENTION! Damage to the appliance! Do not sit on the hot water bottle, and do not place or store objects on the hot water bottle. The hot water bottle must lie flat during the charging process.
(i) Note: The hot water bottle may make quiet noises during the charging process, and a slight odour may develop.
Place the charging station ③ on a level, dry surface.
◆ Flip up the lever of the charging station ③.
Remove the fabric cover ⑥ from the hot water bottle.
Turn the protective cap ② a half turn to the side until it snaps into place.
◆ Lay the hot water bottle flat on the charging station ③ as shown.

♦ Flip down the lever of the charging station ③ until the charging contact ⑤ snaps into the charging port ①.
Insert the power plug of the charging station ③ into a properly installed power outlet.
The charging LED ④ lights up red to indicate that charging is in progress. When the target temperature of about 60 °C is reached, the charging process stops automatically and the charging LED ④ goes out. When the hot water bottle is at room temperature, the charging time is about 10 minutes.
◆ Pull the power plug out of the power outlet.
With one hand, firmly hold the plastic area on the charging port ① and use the other hand to flip up the lever of the charging station ③.
Turn the protective cap ② a half turn over the charging port ① until it snaps into place.
◆ Pull the fabric cover ⑥ over the hot water bottle.
You can now use the hot water bottle.
If the temperature of the hot water bottle is uncomfortably warm, allow the hot water bottle to cool somewhat before use.
The hot water bottle can be used for a period from 2 hours (e.g. for warming your hands) up to 10 hours (e.g. when used under bedcover).
Cleaning
DANGER! Risk of fatal electrical shock! Before cleaning the hot water bottle, disconnect it from the charging station ③. Always remove the power plug of the charging station ③ from the power outlet before cleaning the appliance. Never immerse the hot water bottle or charging station ③ in water or other liquids. Ensure that no moisture enters into the hot water bottle or charging station ③ during cleaning.
WARNING! Risk of burns! Allow the hot water bottle to cool before cleaning it!
! ATTENTION! Damage to the appliance! Do not use caustic, abrasive or solvent-based cleaning agents. They can damage the surfaces of the appliance.
♦ Wash the removable fabric cover ⑥ in a washing machine at 30 °C. Observe the care and cleaning symbols on the label sewn onto the removable fabric cover ⑥.
◆ Wipe off the remaining parts of the appliance with a damp cloth. Do not use any solvents or cleansers which can damage plastic. If necessary, put a little mild detergent on the cloth and wipe this off afterwards with clear water.
Allow everything to dry thoroughly before storing the appliance or putting it back into operation.
Storage
◆ Unplug the power plug of the charging station ③ from the power outlet when not in use.
With one hand, firmly hold the hot water bottle near the charging port ① and use the other hand to flip up the lever of the charging station ③.
Insert the hot water bottle into the fabric cover 6.
♦ Flip down the lever of the charging station ③.
When not in use, store the appliance in a clean, dry place out of direct sunlight.
Troubleshooting
The charging LED ④ does not light up.
The appliance is not connected to the mains.
▶ Insert the power plug of the charging station ③ into a power outlet.
The charging station ③ is not correctly connected to the hot water bottle.
▶ Flip down the lever of the charging station ③ until the charging contact ⑤ snaps into the charging port ①.
The temperature of the hot water bottle is still too high to be reheated.
▶ Wait until the hot water bottle has cooled.
The hot water bottle expands and the flow of power is interrupted.
▶ Contact us (see section Service).
The charging LED ④ lights up, but the hot water bottle does not become warm.
The heating element is defective.
▶ Contact us (see section Service).
The hot water bottle leaks liquid or loses volume.
The shell of the hot water bottle is defective.
▶ Contact us (see section Service).
Disposal
Disposal of the appliance

The adjacent symbol of a crossed-out dustbin means that this appliance is subject to Directive 2012/19/EU. This directive states that this appliance may not be disposed of in the normal household waste at the end of its useful life, but must be taken to specially set-up collection locations, recycling depots or disposal companies.
The disposal is free of charge for the user. Protect the environment and dispose of this appliance properly.
If your old appliance has stored any personal data, you are responsible for deleting it yourself before returning it.

Your local community or municipal authorities can provide information on how to dispose of the worn-out product.
Disposal of the packaging

The packaging materials have been selected for their environmental friendliness and ease of disposal and are therefore recyclable. Dispose of packaging materials that are no longer needed in accordance with applicable local regulations.

Dispose of the packaging in an environmentally friendly manner. Note the labelling on the packaging and separate the packaging material components for disposal, if necessary.
The packaging material is labelled with abbreviations (a) and numbers (b) with the following meanings: 1-7: plastics, 20-22: paper and cardboard, 80-98: composites.
Appendix
Technical specifications
| Voltage | 220-240 V~, 50-60 Hz |
| Power consumption 410 W | |
| Protection class | II/☐ |
| Filling Water | |

This mark confirms that the product complies with the product safety requirements applicable in the UK.
KompernassHandelsGmbH warranty
Dear Customer,
This appliance has a 3-year warranty valid from the date of purchase. If this product has any faults, you, the buyer, have certain statutory rights. Your statutory rights are not restricted in any way by the warranty described below.
Warranty conditions
The warranty period starts on the date of purchase. Please keep your receipt in a safe place. This will be required as proof of purchase.
If any material or manufacturing fault occurs within three years of the date of purchase of the product, we will either repair or replace the product for you or refund the purchase price (at our discretion). This warranty service requires that you present the defective appliance and the proof of purchase (receipt) within the three-year warranty period, along with a brief written description of the fault and of when it occurred.
If the defect is covered by the warranty, your product will either be repaired or replaced by us. The repair or replacement of a product does not signify the beginning of a new warranty period.
Warranty period and statutory claims for defects
The warranty period is not prolonged by repairs effected under the warranty. This also applies to replaced and repaired components. Any damage and defects present at the time of purchase must be reported immediately after unpacking. Repairs carried out after expiry of the warranty period shall be subject to a fee.
Scope of the warranty
This appliance has been manufactured in accordance with strict quality guidelines and inspected meticulously prior to delivery.
The warranty covers material faults or production faults. The warranty does not extend to product parts subject to normal wear and tear or to fragile parts which could be considered as consumable parts such as switches or parts made of glass.
The warranty does not apply if the product has been damaged, improperly used or improperly maintained. The directions in the operating instructions for the product regarding proper use of the product are to be strictly followed. Uses and actions that are discouraged in the operating instructions or which are warned against must be avoided.
This product is intended solely for private use and not for commercial purposes. The warranty shall be deemed void in cases of misuse or improper handling, use of force and modifications / repairs which have not been carried out by one of our authorised Service centres.
Warranty claim procedure
To ensure quick processing of your case, please observe the following instructions:
■ Please have the till receipt and the item number (IAN) 460439_2401 available as proof of purchase.
■ You will find the item number on the type plate on the product, an engraving on the product, on the front page of the operating instructions (below left) or on the sticker on the rear or bottom of the product.
If functional or other defects occur, please contact the service department listed either by telephone or by e-mail.
■ You can return a defective product to us free of charge to the service address that will be provided to you. Ensure that you enclose the proof of purchase (till receipt) and information about what the defect is and when it occurred.

You can download these instructions along with many other manuals, product videos and installation software at www.lidl-service.com.
This QR code will take you directly to the Lidl service page (www.lidl-service.com) where you can open your operating instructions by entering the item number (IAN) 460439_2401.
Service

Service Great Britain
Tel.: 0800 404 7657
E-Mail: kompernass@lidl.co.uk

Servicelreland
Tel.: 1800 101010
E-Mail: kompernass@lidl.ie
IAN 460439_2401
Importer
Please note that the following address is not the service address. Please use the service address provided in the operating instructions.
For EU market

KOMPERNASS HANDELS GMBH
BURGSTRASSE 21
44867 BOCHUM
GERMANY
www.kompernass.com
For GB market
Lidl Great Britain Ltd
Lidl House 14 Kingston Road
Surbiton
KT5 9NU
Inhaltsverzeichnis
Einführung 12
KOMPERNASS HANDELS GMBH
BURGSTRASSE 21
44867 BOCHUM
DEUTSCHLAND
www.kompernass.com
Für den GB-Markt
Lidl Great Britain Ltd Lidl House 14 Kingston Road Surbiton KT5 9NU
KOMPERNASS HANDELS GMBH
BURGSTRASSE 21
44867 BOCHUM
GERMANY
www.kompernass.com
- ELECTRIC HOT WATER BOTTLE SEW 420 A1
- DE AT CH
- CONTENTS
- INTRODUCTION 2
- SAFETY INFORMATION 3
- OPERATING ELEMENTS / PARTS 6
- USE 6
- CLEANING....7
- STORAGE 7
- TROUBLESHOOTING 7
- DISPOSAL 8
- APPENDIX 8
- INTRODUCTION
- INFORMATION ABOUT THESE INSTRUCTIONS FOR USE
- PROPER USE
- WARNINGS AND SYMBOLS USED
- SAFETY INFORMATION
- DANGER
- WARNING
- CAUTION
- ATTENTION
- NOTE
- OPERATING ELEMENTS / PARTS (SEE FOLD-OUT PAGE FOR ILLUSTRATIONS)
- USE
- CHECK PACKAGE CONTENTS
- CHARGING AND USING THE APPLIANCE
- CLEANING
- STORAGE
- TROUBLESHOOTING
- DISPOSAL
- DISPOSAL OF THE APPLIANCE
- THE DISPOSAL IS FREE OF CHARGE FOR THE USER. PROTECT THE ENVIRONMENT AND DISPOSE OF THIS APPLIANCE PROPERLY
- DISPOSAL OF THE PACKAGING
- APPENDIX
- KOMPERNASSHANDELSGMBH WARRANTY
- WARRANTY CONDITIONS
- WARRANTY PERIOD AND STATUTORY CLAIMS FOR DEFECTS
- SCOPE OF THE WARRANTY
- WARRANTY CLAIM PROCEDURE
- SERVICE
- IMPORTER
- FOR EU MARKET
- FOR GB MARKET
- INHALTSVERZEICHNIS
- EINFÜHRUNG 12
- FÜR DEN GB-MARKT
Brand : SILVERCREST
Model : SEW 420 A1
Category : Electric hot water bottle