
Cube R1 - Enregistreur vidéo multi-canaux Kiloview - Free user manual and instructions
Find the device manual for free Cube R1 Kiloview in PDF.


| Product Type | Video Encoder |
| Model | Cube R1 |
| Dimensions | 10 cm × 6 cm × 2 cm |
| Weight | 150 g |
| Power Supply | USB-C, 5V/2A |
| Video Input | HDMI (up to 1080p60) |
| Video Encoding | H.264, H.265 |
| Streaming Protocols | RTMP, RTSP, SRT |
| Recording | MicroSD card (up to 512GB) |
| Network | Wi-Fi 5, Ethernet 100Mbps |
| Maximum Bitrate | 50 Mbps |
| Latency | Low (<100 ms) |
| Audio Input | HDMI embedded audio, 3.5mm line in |
| Audio Encoding | AAC, MP3 |
| Operating Temperature | 0°C to 40°C |
| Maintenance | Clean with a dry, soft cloth; avoid liquids and abrasive cleaners |
| Safety | Use only the supplied power adapter; do not cover ventilation holes; keep away from water |
| Spare Parts | Not user-replaceable; contact Kiloview support for repairs |
| Repairability | Professional repair only; no user-serviceable components |
| General Information | Portable video encoder for live streaming and recording; compatible with various platforms |
Frequently Asked Questions - Cube R1 Kiloview
User questions about Cube R1 Kiloview
0 question about this device. Answer the ones you know or ask your own.
Ask a new question about this device
Download the instructions for your Enregistreur vidéo multi-canaux in PDF format for free! Find your manual Cube R1 - Kiloview and take your electronic device back in hand. On this page are published all the documents necessary for the use of your device. Cube R1 by Kiloview.
USER MANUAL Cube R1 Kiloview
Multi-Channel Recording System
(V 3.3)
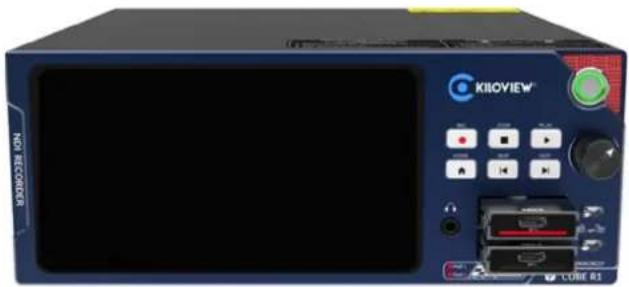
natural_image
Front view of a blue KiloView 2.08 ION device with control panel and buttons (no readable text or symbols beyond branding)Contents
Packing List
■ Device interfaces and functions
■ Device connection, login and use guide
■ Device upgrade and restore to factory settings
Before you start using this product, it is recommended that you carefully read the instruction manual. To ensure your safety and to prevent physical or electrical damage to the device, please follow the guidelines in the manual or use this product under the guidance of professionals. Faulty electrical connections or physical installation methods may cause permanent damage to the device or even pose a threat to personal safety.
Due to continuous product updates, the product you purchased may have undergone changes compared to the content in this manual. Please refer to the actual product inside the packaging for accurate information.
1 Packing List
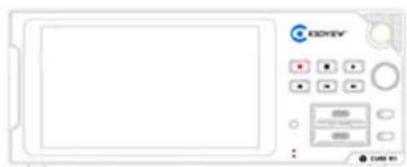
natural_image
Front view of a white electronic device with control panel and display (no visible text or symbols)(1) (CUBE R1) ×1

natural_image
Line drawing of a straight electrical outlet with a terminal plug (no text or symbols)(2) Power Adapter×2

natural_image
Generic document icon with horizontal lines, no text or symbols present(3) Certificate/Warranty Card×1

(4) "Quick Start" manual×1
2 Device interfaces

(1) Touchscreen
(2) P ower On/Off
(3) Con trol buttons
(4) Line OUT
(5) Power indicato
(6) 2*M.2 Disk in interfaces (NVMe)
(7) Disk lock
(8) 2* P ower supply
(9) Earthing interface
(10) Line IN
(11) Line OUT
(12) HDMI expansion interface
(13) 1000M Ethernet port
(14) 2* USB expansion interfaces
(15) 2* 10G SFP+

Interface Description
● The (4) and (11) Line OUT interfaces of CUBE R1 are designed for audio output during video playback, but only one of the two interfaces can be used at a time;
- After inserting the DISK driver into CUBE R1, the (7) interface must be used to lock the DISK drive, otherwise, recording cannot be started.
3 Device Indicators
| Device Indicators | ||||
| Power Indicators | Name Color Status Description | |||
| PWR1 | Reder off or | Always On | Power connected | |
| PWR2 Off Power | malfunction | |||
4 Button Descriptions
| Button When | Recording When Playing Back | |
| [26E8] REC: | Long press 3s: Start recording, single press: Invalid | / |
| [22.4C] STOP | Long press 2s: Stop recording, single press: Invalid | / |
| [VW22S] PLAY: | Press once: Enter secondary page Press | once: Pause/Play |
| [XH72] HOME: | / Return to the home page | |
| [75X1] SKIP: | Press once: Previous grid Press once: Jump to the beginning of the video file | |
 SKIP: SKIP: | Press once: Next grid Press once: Jump to the end of the video file | |
| [VW23H] Scroll wheel | Rotate to select the grid and settings, press to enter into secondary page | Press: Pause/PlayPause mode: next frame by rotating clockwise, last frame by rotating counterclockwise.Playback mode: Control playback speed by rotating the scroll wheel. |

Button Descriptions
- The buttons on the CUBE R1's front panel have different functions on different pages, please do make sure the status if it's when recording or playing back.
5 Application Scenarios

flowchart
graph TD
    A["Power Supply"] --> B["Switch"]
    B --> C["PC"]
    D["HDMI monitoring"] --> B
    B --> E["Network"]
    style A fill:#f9f,stroke:#333
    style B fill:#ccf,stroke:#333
    style C fill:#cfc,stroke:#333
    style D fill:#fcc,stroke:#333
    style E fill:#cff,stroke:#333

Port Description
- When recording more than 3 CH 1080P60 NDI High Bandwidth sources with CUBE R1, using the 10G SFP+ optical port is suggested.
● CUBE R1 offers 2*10G SFP+ optical ports for network redundancy design.
6 CUBE R1 Startup Guide
6.1 CUBE R1 Startup Guide
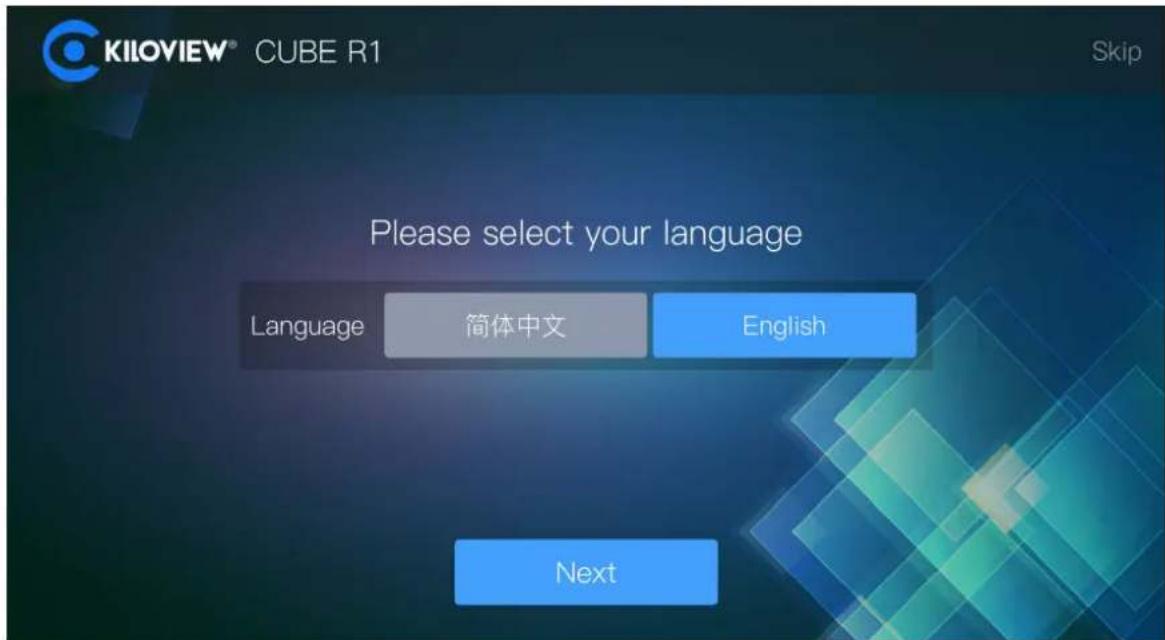
Press the power button on the right side of the CUBE R1 front panel, and the device enters the startup status while the screen displays KILOVIEW logo. Please wait patiently until the startup process completed.
After the device is powered on, follow the system guidance on the CUBE R1 screen to complete the initial system configuration.

Attention
- CUBE R1 is equipped with dual power supplies to enhance the availability and reliability of the power system, reduce equipment downtime, and decrease the impact of power grid accidents on system stability. If one power supply fails, the system can switch to another, ensuring backup is always available for the device or system.
An earthing interface is provided at the rear of the device. Customers are advised to use the grounding wire for grounding promptly when using the product to prevent short-circuit accidents.
6.2 Network Configuration
The CUBE R1 startup guide includes network configuration. The network configuration supports DHCP or Static IP, and you can configure accordingly. See the image below:

bar
| Category | Value | |---|---| | DHCP | DHCP | | IP | 192.168.28.163 | | Subnet Mask | 192.168.28.254 | | Gateway | 255.255.255.0 | | DNS | 8.8.8.8 | Previous Next Skip6.3 Time Zone Configuration
During the initial startup guide for CUBE R1, regional and time settings need to be configured.

Once all settings are done, you can use the CUBE R1.


Attention
- CUBE R1 has no default IP address, so during network configuration, you need to manually configure the IP address or use DHCP to obtain an IP address.
7 Device Login
Visit CUBE R1's web UI with your browser to log in to CUBE R1. The default username and password for logging in to the device is: "admin".


Attention
For security purpose, you are recommended to change your password immediately after the first login!
- When logging in the device for the first time, or logging in after firmware upgrade, you will need to accept the "End User License Agreement" again, please read carefully and accept it before using!
8 Device Usage
8.1 Information Display
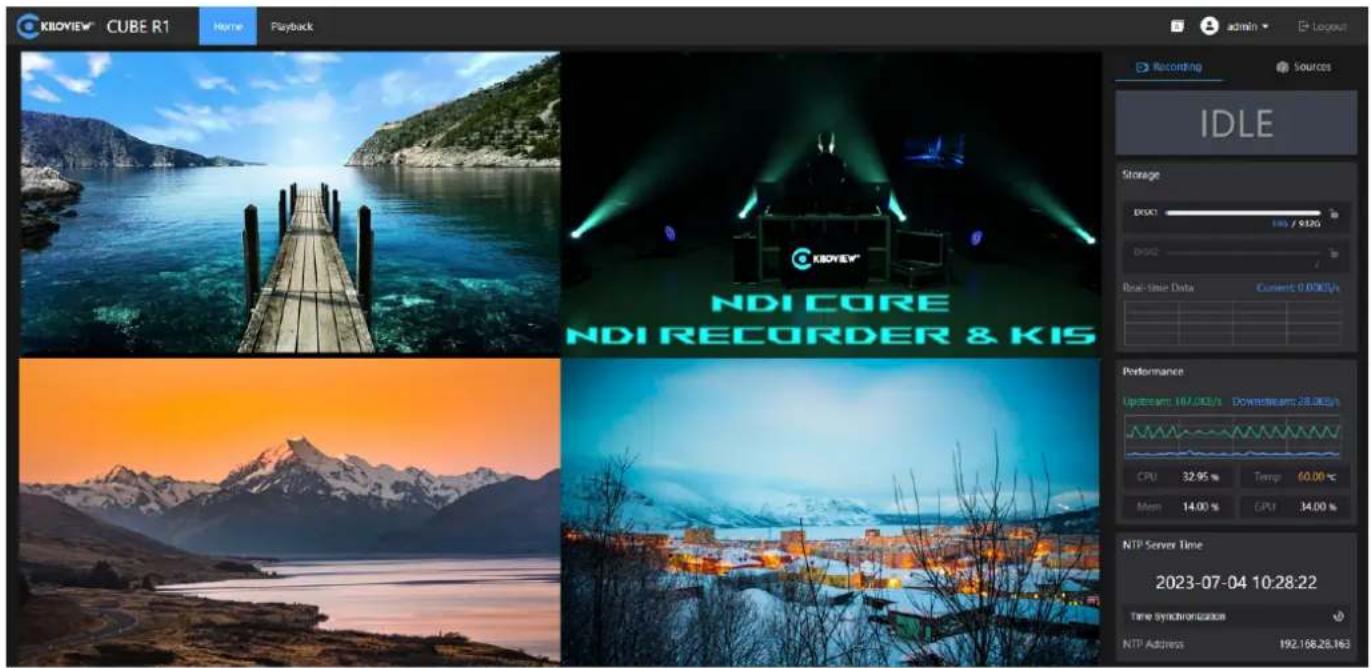
The CUBE R1 home page shows the device's storage status, CPU, memory usage, temperature, and network bandwidth usage etc. The CUBE R1 home page also supports video preview and displays recording VU meter/bitrate status.


Attention
- CUBE R1 only supports the ex-FAT file system format; please confirm that the format of the DISK is ex-FAT before recording started;
- The recording storage location of CUBE R1 is the hard DISK by default; if you need to modify the storage location, please refer to 9.2 Storage Strategy.
8.2 Start Recording
Step 1: Set multiview layout
Click on the right-hand navigation bar and choose the view list (1/4/9 grids) from the layout options.

Step 2: Find the NDI sources in source list, and drag it to the corresponding window.
The "Auto discovery" feature can automatically discover all NDI sources in the same LAN subnet and get the NDI sources to the public group (public). Choose the required NDI video sources.

To add NDI sources across different network segments, if the group name is not public, first add the specified group name, input the specific IP address in the "IP" field, and then click "OK" to save.


Attention
- The CUBE R1's preview function uses the sub stream only, so the preview quality might be slightly blurry. However, this does not affect quality of the recording file.
Step 3: Start Recording
Once the CUBE R1 is configured, click START to begin recording, or press and hold the "REC" button on the CUBE R1 front panel for 3 seconds to start recording.
8.3 Playback
To review the recorded video files, stop recording first. Once the recording has been stopped, click on "Playback" next to the Home to access the playback page.
In the playback page, select a DISK driver to view the recorded video files. The selected video file information will be displayed and you can play back the file.
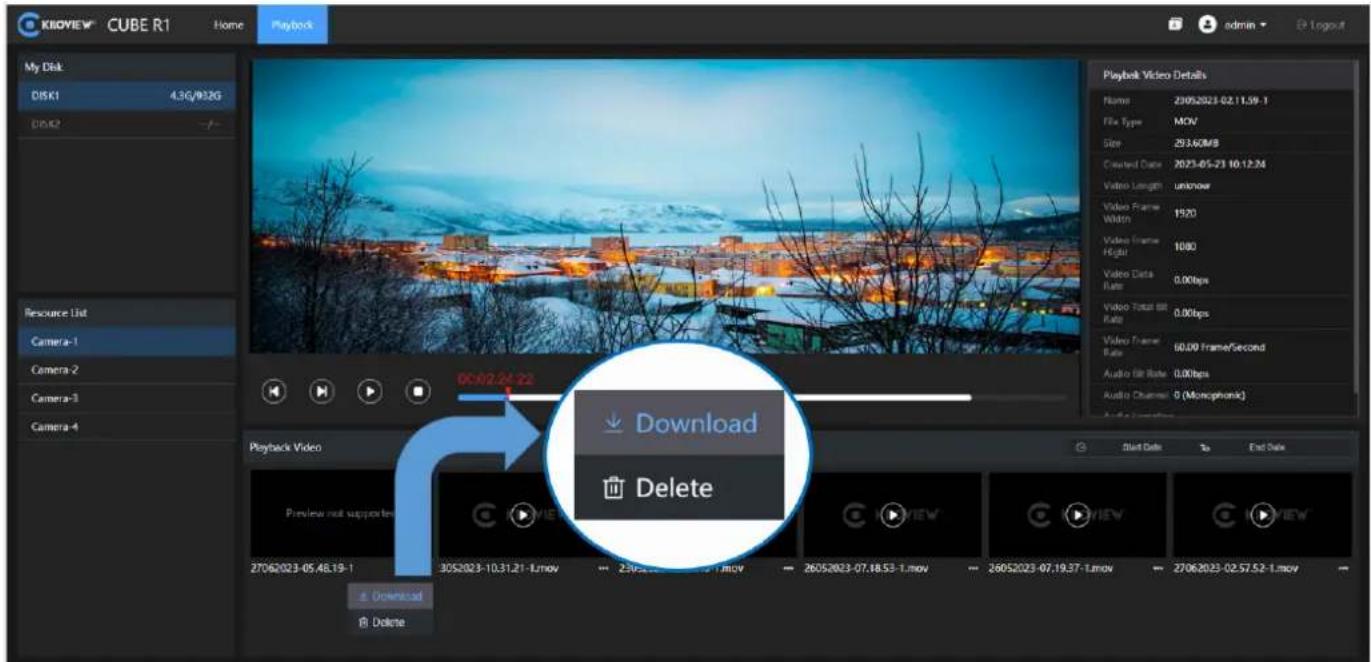
Additionally, CUBE R1 supports remote file downloading via a web interface. To do so, navigate to Playback >My Disk>Resource List, click the icon ⋯ at the lower right corner of the recorded file, choose "Download", and the recorded file will be downloaded to your local device. See the image below:
9 Touch Screen - Settings
9.1 Recording Settings
By tapping the settings icon 🔊 on the screen homepage, you can enter the settings for video recording parameter settings.
CUBE R1 supports the settings for transcoding options, configuring NTP server for synchronization, and recording time periods. As shown in the figure below, click "Apply" in the upper right corner to save and exit after setting.


Recorded files
● The recording file storage format is only .MOV currently.
9.2 Storage Strategies
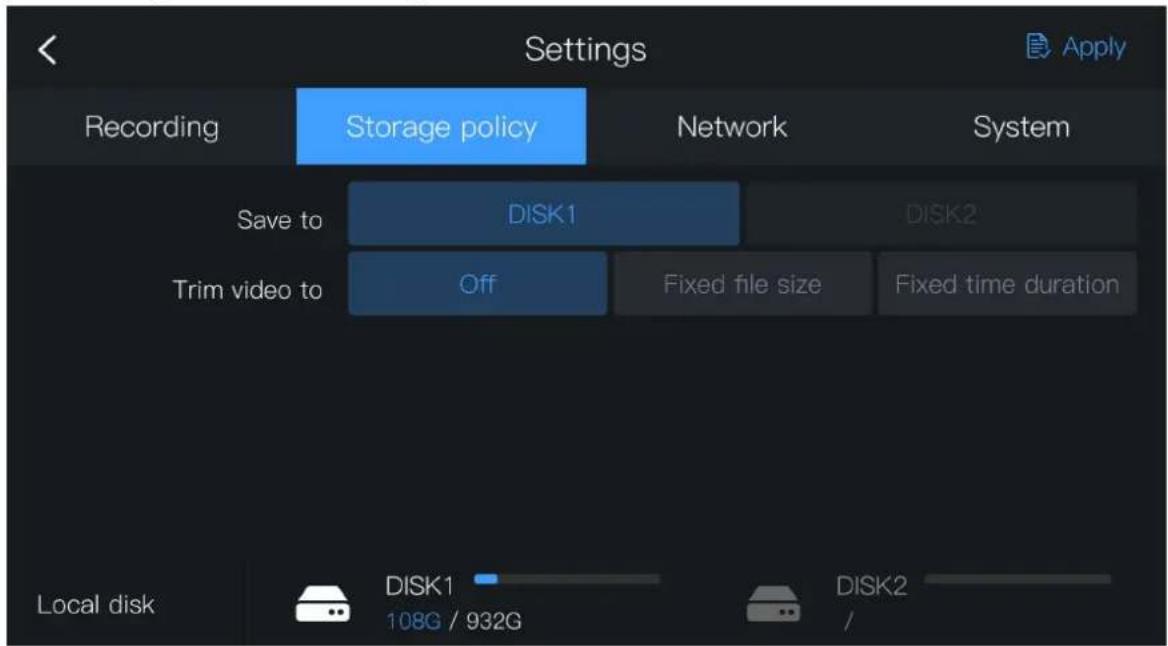
CUBE R1 has two NVMe SSD slots and allows the selection of local disk storage and NAS network storage. It also supports setting the file trim strategies: fixed size or fixed time.
9.3 Network Settings
CUBE R1 has three network connections, including two SFPs and one Ethernet with bandwidth of 1Gbps. Users can configure the network status, IP address, and other related information of multiple interfaces of the device through the Settings>Network menu. CUBE R1 also offers customized settings for each network interface. Users can choose any network interface, view the interface information, and manually set the IP address.

9.4 System Settings
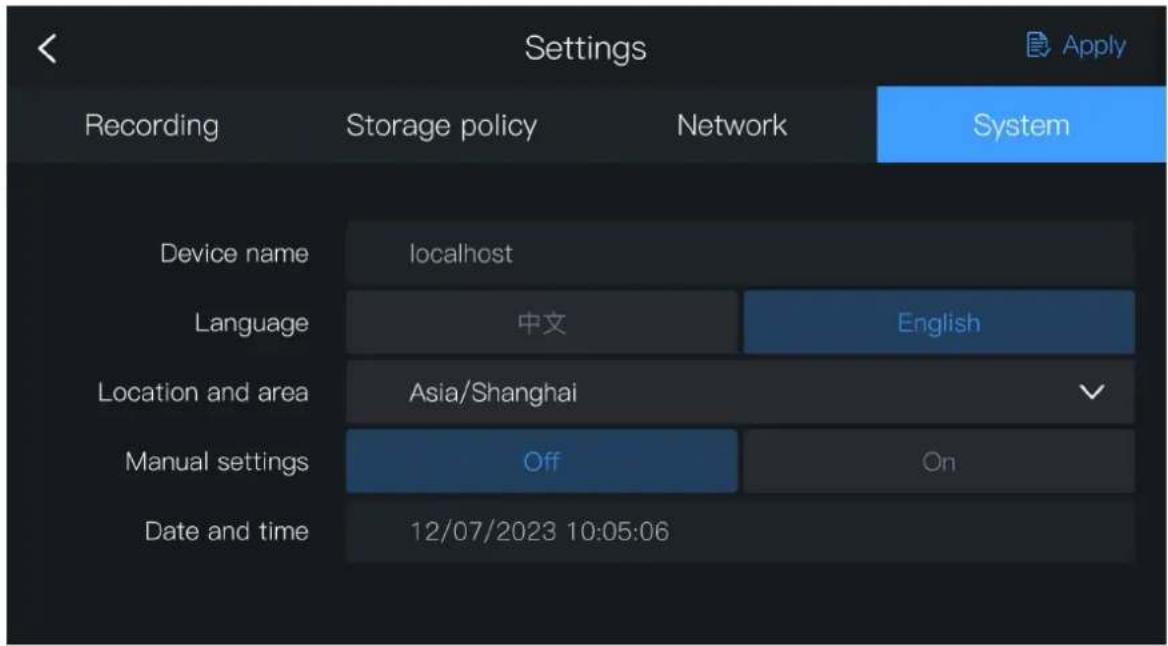
The CUBE R1 system settings page allows users to configure device name, language, location and area and other information.
10 Firmware Upgrade
10.1 Download the Upgrade Firmware

Kiloview will continuously provide firmware for the CUBE R1 with updates and bug fixes. Visit:
https://www.kiloview.com/en/support/download/
Select "NDI" > "CUBE R1" and find the latest firmware download under the "Firmware" tab.
10.2 Upgrade Device Firmware
Method 1: Upgrade firmware via USB flash drive
Step 1: Prepare a USB flash drive, download the firmware file from the official website, copy the file to the root directory of the USB flash drive, then insert the USB flash drive into the device.
Step 2: Tap the settings icon on the touch display to enter "System".
Step 3: Tap the "Upgrade" button, CUBE R1 will automatically search for the upgrade file and then pop up an upgrade window to proceed with the upgrade.

Method 2: Upgrade firmware via browser
Log in to the CUBE R1 Web UI, click System Settings> Firmware Upgrade to enter the firmware upgrade page.
Upload the firmware file downloaded from the official website and click "Firmware Upgrade".
Usually, the system will prompt you to restart after successfully uploading the firmware. If you need to confirm, please click confirm; if it restarts automatically, please wait patiently.


Attention
- When upgrading with a USB flash drive, the file should be saved in the root directory and the USB drive should include only one firmware upgrade file.
- It is recommended to use Google Chrome or Edge browsers on the Windows operating system for upgrading.
● During the upgrade process, do not power off the device, otherwise, it may cause the device to be unable to start. - The upgrade process typically takes about 3-5 minutes. If it takes more than 5 minutes and the upgrade is still not prompted as completed, try refreshing the webpage; if you still cannot access it normally, please contact Kiloview or Kiloview authorized dealer for technical support.
If improper device parameter settings caused the device not working properly, you can try to reset the device to factory settings. There are two ways for factory reset:
Method 1: When the device can be logged in to the Web management page normally, use the Web interface's System Settings> Basic Settings> Restore Factory Settings
If restore factory settings, all configuration parameters, login passwords, network address settings, etc. will be restored to default values, and the device will immediately restart to make the default parameters take effect!

Method 2: When the device cannot log in to the Web management page normally, perform a restore factory settings with the touch screen by Settings> System > Restore


Attention: After restoring factory settings, the following parameters will change to default settings:
● The login password for the admin user will be reset to 'admin'.
- Your device will revert to the default DHCP mode, dynamically obtaining IP addresses, so the IP address may change.
● All recording parameters, system settings, etc. will be restored to factory default parameters.
12 Others
If the device is not used for a long period of time, to extend its service life, please unplug the power supply and store the device properly.
Disclaimer: We kindly inform users that our company cannot guarantee that the disk will be completely fault-free during use, and we also do not provide any guarantees for the security and integrity of the data stored within this product. To ensure data safety, we strongly recommend that you regularly back up all important data stored on various storage devices to avoid irrecoverable losses caused by accidental data loss. Kiloview will not be responsible for any losses or damages caused by the use or operation of the solid-state drive used in this device.
- Contents
- Packing List
- Device interfaces
- Interface Description
- Device Indicators
- Button Descriptions
- Button Descriptions
- Application Scenarios
- Port Description
- CUBE R1 Startup Guide
- CUBE R1 Startup Guide
- Attention
- Network Configuration
- Time Zone Configuration
- Device Login
- Device Usage
- Information Display
- Start Recording
- Step 1: Set multiview layout
- Step 2: Find the NDI sources in source list, and drag it to the corresponding window.
- Step 3: Start Recording
- Playback
- Touch Screen - Settings
- Recording Settings
- Recorded files
- Storage Strategies
- Network Settings
- System Settings
- Firmware Upgrade
- Download the Upgrade Firmware
- Upgrade Device Firmware
- Method 1: Upgrade firmware via USB flash drive
- Method 2: Upgrade firmware via browser
- Others
Brand : Kiloview
Model : Cube R1
Category : Enregistreur vidéo multi-canaux