
S3BF - Uncategorized LG - Free user manual and instructions
Find the device manual for free S3BF LG in PDF.


| Product Type | Clothing Care System (Steamer & Dryer) |
| Model | LG S3BF |
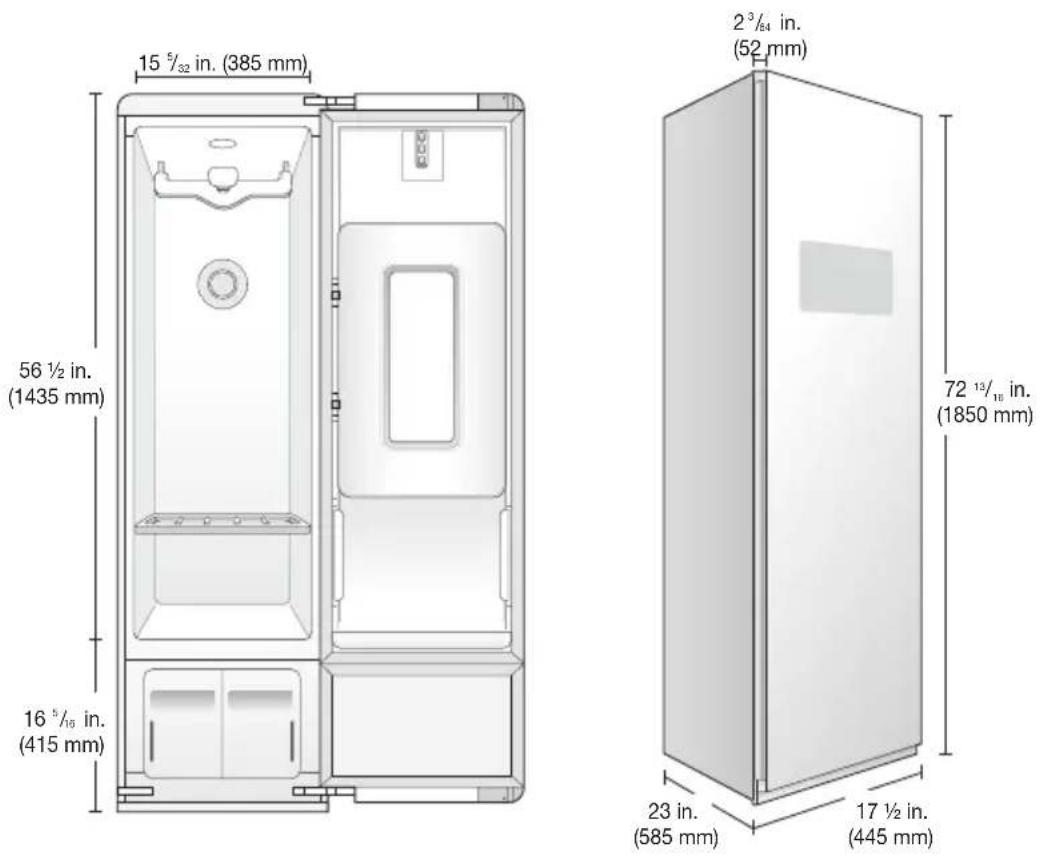
| Dimensions (W x D x H) | 17.5 in x 23 in x 72.8 in (445 mm x 585 mm x 1850 mm) |
| Depth with Door Open | 39.75 in (1010 mm) |
| Net Weight | 183 lb (83 kg) |
| Power Consumption | 1700–1900 W |
| Electrical Requirements | 220–240 V, 50 Hz, 15 A |
| Capacity | Up to 4 garments |
| Key Cycles | Refresh, Sanitary, Gentle Dry, Downloaded |
| Refresh Cycle | Removes odors & wrinkles using steam and moving hanger (180 vibrations/min) |
| Sanitary Cycle | Uses TrueSteam™ to sanitize and reduce allergens |
| Gentle Dry Cycle | Low-heat drying using heat pump technology (safe for delicate fabrics) |
| Special Features | Pants Crease Care, Moving Hanger, Shelf, Aroma Filter, Night Care, Remote Start, Smart Diagnosis™, SmartThinQ™, Cycle Download |
| Water Tanks | Supply tank (fill with tap water) and drain tank (empty after ~3 uses) |
| Filters | Lint filter (clean after each load), Aroma filter (wash periodically) |
| Safety Features | Anti-tip device, leveling feet, grounded plug, Control Lock, child safety warnings |
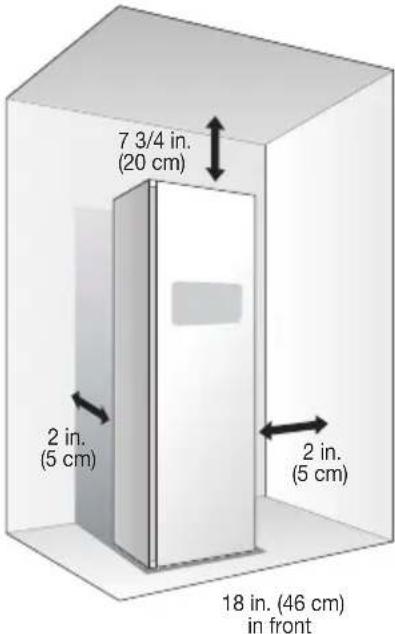
| Installation Clearances | Sides & rear: min 2 in (5 cm); top: min 7.75 in (20 cm); front: 18 in (46 cm) door opening |
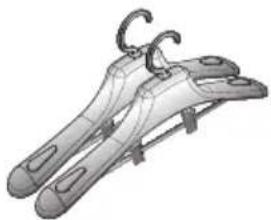
| Included Accessories | 2 hangers, 1 pants hanger, drip tray, non-skid pads, anti-tip kit, wrench, cap covers, hinge covers |
| Smart Connectivity | Wi-Fi (2.4 GHz), LG SmartThinQ app for remote control, download cycles, push alerts |
Frequently Asked Questions - S3BF LG
User questions about S3BF LG
0 question about this device. Answer the ones you know or ask your own.
Ask a new question about this device
Download the instructions for your Uncategorized in PDF format for free! Find your manual S3BF - LG and take your electronic device back in hand. On this page are published all the documents necessary for the use of your device. S3BF by LG.
USER MANUAL S3BF LG
Read this owner's manual thoroughly before operating the appliance and keep it handy for reference at all times.
S3*F*
TABLE OF CONTENTS
3 PRODUCT FEATURES
4 IMPORTANT SAFETY INSTRUCTIONS
5 Safety Instructions for Installation
6 Safety Instructions for Connecting Electricity
7 Basic Safety Precautions
8 Grounding Instructions
9 PRODUCT OVERVIEW
9 Parts
10Accessories
11 The Moving Hanger
11 The Pants Crease Care
12TheShelf
12 Choosing Styler Features
13INSTALLATION
13 InstallationOverview
13 Product Specifications
14 Unpacking the Styler
14 Choosing the Proper Location
15 Installation Location Requirements
15Clearances
17 Leveling the Styler
18 Reversing the Door
18 Installing the Anti-Tip Device
19 Assembling the Drip Tray
19 Installing Cap Covers
19 Installing Hinge Covers
20OPERATION
20BeforeUse
21 Using the Styler
22SortingLoads
Fabric Care Labels
Grouping Similar Items
Choosing Styler-Safe Clothing
23 Fabric Care Guide
25Checking the Filters Before
Every Load
Checking the Lint Filter
Changing the Aroma Sheet
26 Checking the Water Tanks
26 Loading the Styler
Hangers
Using the Moving Hanger
Pants Hanger or Pants Crease Care
Shelf
30ControlPanel
Control Panel Features
32CycleGuide
Cycle Processes
33 Choosing a Cycle
34Cycle Settings and Options
35EXTRA Functions
Locking the Controls
Setting a Delayed Start Time
Smart Diagnosis™
Night Care
36SMART FEATURES
36SmartThinQApplication
38 Smart Diagnosis™ Function
39MAINTENANCE
39RegularCleaning
Cleaning the Interior and Exterior
Cleaning the Lint Filter
Cleaning the Aroma Filter
Cleaning the Water Tanks
41 TROUBLESHOOTING
41FAQs
42 Before Calling for Service
44ErrorCodes
45SMART DIAGNOSIS ^TM
PRODUCT FEATURES

Refresh
REMOVE ODORS
Use the Styler's Refresh cycle to quickly and easily remove odors from clothes.
REFRESH CLOTHING OR ADD AN AROMA
Infuse items with the aroma from your favorite dryer fabric softener sheets to keep clothes and accessories looking, feeling, and smelling refreshed.
REMOVE WRINKLES
The Refresh cycle also uses steam and a moving hanger that vibrates approximately 180 times per minute to remove the wrinkles in clothing. Performance may vary depending on fabric type.
SHARPEN CREASES IN PANTS
Hang dress trousers flat in the Styler's Pants Crease Care feature. It will crease the pants legs and reduce wrinkles elsewhere.

Gentle Dry
"Remote Start
GENTLY AND EFFECTIVELY DRY
The heat pump drying technology of the Gentle Dry cycle provides low-heat drying which draws moisture from clothes without the shrinking or damage associated with hot-air drying. Gently and safely dry alpaca, camelhair and other non-washable fabrics that have become damp from rain or snow, and wool sweaters, hand-washable knits, and other dry-flat items after washing.

Special Care
SANITIZE AND REDUCE ALLERGENS
The Styler's Sanitary cycle uses TrueSteam™ to destroy bacteria and other microorganisms without damaging clothes. It maintains the optimal temperature necessary to sanitize each garment, destroying bacteria that persist even when clothes are dried in sunlight.

Smart Diagnosis™
SMART DIAGNOSISTM
Should you experience any technical difficulty with the Styler, it has the capability of transmitting data by phone to the Customer Information Center. The call center agent records the data transmitted from your machine and uses it to analyze the issue, providing a fast and effective diagnosis.

Special Care
Wi-Fi CYCLE DOWNLOAD
Download additional Styler cycles to meet individual needs. Download one new cycle at a time.
IMPORTANT SAFETY INSTRUCTIONS
READ ALL INSTRUCTIONS BEFORE USING THE APPLIANCE.
There are many important safety messages in this manual and on your appliance. Always read and obey all safety messages.

This is the safety alert symbol. This symbol alerts you to potential hazards that can result in product damage, property damage, or serious bodily harm or death.
The safety alert symbol will be followed by either the hazard signal word WARNING or CAUTION. These words mean:

WARNING
Indicates a hazardous situation which, if not avoided, could result in death or serious injury.

CAUTION
Indicates a hazardous situation which, if not avoided, may result in minor or moderate injury, or product damage.

WARNING
To reduce the risk of fire or explosion, electric shock, property damage, injury to persons or death when using this appliance, follow basic safety precautions, including the following:
Children in the household
This appliance is not intended for use by persons (including children) with reduced physical, sensory or mental capabilities, or lack of experience and knowledge, unless they have been given supervision or instruction concerning use of the appliance by a person responsible for their safety. Children should be supervised to ensure that they do not play with the appliance.
For use in Europe:
This appliance can be used by children aged
from 8 years and above and persons with reduced physical, sensory or mental capabilities or lack of experience and knowledge if they have been given supervision or instruction concerning use of the appliance in a safe way and understand the hazards involved. Children shall not play with the appliance.
Cleaning and user maintenance shall not be made by children without supervision.
Children of less than 3 years should be kept away unless continuously supervised.
SAFETY INSTRUCTIONS FOR INSTALLATION
- Contact an authorized service center before installing or relocating the Styler to avoid injury or product damage when moving the product.
- When moving the Styler away from the wall, be careful not to roll over or damage the power cord.
- The appliance is heavy. Two or more people are necessary to move and install the appliance to prevent damage or injury.
- Prior to use, ensure that you are connecting this product to a dedicated grounded electrical outlet rated for use with this product. It is the user's responsibility to replace a standard 2-prong wall outlet with a standard 3-prong wall outlet.
- Before use, the appliance must be properly installed as described in this manual. Electric shock can result if the appliance is not properly grounded.
- Do not install the Styler where there may be a danger of the unit falling. The product is not designed for use on ships or airplanes. Check with an authorized LG service center for use under other special circumstances.
- Do not tamper with controls.
- Install the product where the floor is firm and level. The product may vibrate excessively and eventually fall if installed on an unstable surface, causing damage or injury.
- Keep the front side protected when transporting the appliance. Do not truck from the front. The tempered glass panel on the front of the appliance may break, causing damage or injury.
- Properly ground the appliance to conform with all governing codes and ordinances. Follow the details in the installation instructions. Electric shock can result if the appliance is not properly grounded.
• Install and store the appliance where it will not be exposed to temperatures below freezing or exposed to the
weather. Allow the product to warm to room temperature before use if it was delivered in winter or at sub-sero temperature.
- Do not repair or replace any part of the appliance or attempt any servicing unless specifically recommended in the user-maintenance instructions or in published user-repair instructions that you understand and have the skills to carry out. Failure to follow this warning can cause serious injury, fire, electric shock, or death.
- To reduce the risk of electric shock, do not install the appliance in humid spaces such as a bathroom. Failure to follow this warning can cause death, serious injury, fire, electric shock, or product deformation or malfunction.
- Remove all packing items and dispose of all shipping materials properly. Failure to do so can result in burns, fire, explosion, or death.
- Connect to a properly rated, protected, and sized power circuit to avoid electrical overload. Improper power circuits can melt, creating electric shock and/or fire hazard.
-
If the supply cord is damaged, it must be replaced by the manufacturer or its service agents or similarly qualified person in order to avoid a hazard.
-
Keep all packaging from children. Packaging material can be dangerous for children. There is a risk of suffocation.
- Do not install near another heat source such as a stove, oven or heater. Failure to follow this warning can cause product deformation, smoke, or fire.
- Do not place candles, smoking materials, or other flammables on top of

WARNING
For your safety, the information in this manual must be followed to minimize the risk of fire, explosion, or electric shock, or to prevent property damage, injury to persons, or death.
SAFETY INSTRUCTIONS FOR INSTALLATION
the product. Dripping wax, smoke, or fire can result.
- Remove all protective vinyl film from the product. Failure to do so can cause product damage, smoke, or fire.
- The appliance shall be installed in accordance with national wiring regulations.
SAFETY INSTRUCTIONS FOR CONNECTING ELECTRICITY
- Do not, under any circumstances, cut or remove the ground prong from the power cord. To prevent personal injury or damage to the appliance, the electrical power cord must be plugged into a properly grounded outlet.
- This appliance must be plugged into a 220-240 VAC, 50-Hz grounded outlet protected by a 15-ampere fuse or circuit breaker. Failure to follow these instructions can result in fire, explosion, or death.
- This appliance must be plugged into a properly grounded outlet. Electrical shock can result if the appliance is not properly grounded. Have the wall outlet and circuit checked by a qualified electrician to make sure the outlet is properly grounded. Failure to follow these instructions can create an electric shock hazard and/or a fire hazard.
• Install the appliance where the plug is easily accessible. Unplug the appliance when not in use to avoid risk of fire or electric shock. - Unplug the appliance before disassembly or repair to avoid risk of electric shock.
- The appliance should always be plugged into its own individual electrical outlet which has a voltage rating that matches the rating plate.
This provides the best performance and also prevents overloading house wiring circuits which could cause a fire hazard
from overheated wires.
- Do not use an extension cord to connect to an outlet. Doing so could result in a fire or electric shock.
- Never unplug your appliance by pulling on the power cord. Always grip the plug firmly and pull straight out from the outlet. The power cord can be damaged, resulting in a risk of fire and electric shock.
- Contact LG or a qualified repair person immediately to repair or replace all power cords that have become frayed or otherwise damaged. Do not use a cord that shows cracks or abrasion damage along its length or at either end. The power cord can melt, creating electric shock and/or fire hazard.
- When installing or moving the appliance, be careful not to pinch, crush, or damage the power cord. This will prevent injury and damage to the appliance from fire and electric shock.
IMPORTANT SAFETY INSTRUCTIONS
READ ALL INSTRUCTIONS BEFORE USING THE APPLIANCE.

WARNING
To reduce the risk of fire or explosion, electric shock, property damage, injury to persons or death when using this appliance, follow basic safety precautions, including the following:
BASIC SAFETY PRECAUTIONS USE
- Do not allow children to play on or in the appliance. Close supervision of children is necessary when the appliance is used near children.
- Do not climb, stand, or hang on the Styler door or on the shelf or anywhere inside the appliance. The appliance could fall over or be damaged, or other damage or injury could occur.
- Do not step on the doors to the water tanks. The Styler could fall and cause damage and injury.
- Do not place heavy or dangerous objects on top of the Styler.
• Do not put live animals inside the Styler. - Do not allow children to climb into the product when it is in use.
- In the event of a gas leak (propane/LPG), ensure adequate ventilation and contact an authorized service center before resuming use. Do not touch or disassemble the electrical outlet of the Styler.
- Do not use or place flammable substances (chemicals, medicine, cosmetics, etc) near the Styler or store them inside the Styler. Do not place the Styler in the vicinity of flammable gas.
- Disconnect the power cord immediately if you hear a noise, smell a strange odor or detect smoke coming from the appliance.
- In the event of a flood: Do not go near the product when its base is submerged under water. Contact the service center. There is a risk of electric shock or fire.
-
Do not use fabric softeners or products to eliminate static unless recommended by the manufacturer of the fabric softener or product.
-
Do not place hands or body near steam nozzle during operation. The steam is hot and could cause an injury.
- Do not insert objects into the steam nozzle. Excessive noise and fire could result.
- Do not drink the water from the water supply or drain tanks.
• Do not disassemble or modify the Styler. - Do not put hands, feet, or metal objects below the Styler.
- Do not operate the Styler or touch the power cord with wet hands.
- Keep fingers out of pinch point areas; clearances between the door and cabinet are necessarily small. Be careful closing door when children are nearby.
- This appliance is not intended for use by persons (including children) with reduced physical, sensory or mental capabilities, or lack of experience and knowledge, unless they have been given supervision or instruction concerning the use of the appliance by a person responsible for their safety.
- Do not place items exposed to cooking oils in the Styler. Items contaminated with cooking oils may contribute to a chemical reaction that could cause a load to catch fire.
- Do not dry articles that have been previously cleaned in, washed in, soaked in, or spotted with gasoline, dry-cleaning solvents, or other flammable or explosive substances, as they give off vapors that could ignite or explode.
- Do not use heat to dry articles containing foam rubber or similarly textured rubber-like materials.

WARNING
To reduce the risk of fire or explosion, electric shock, property damage, injury to persons or death when using this appliance, follow basic safety precautions, including the following:
- Do not open door during operation. The performance of the product may be adversely affected. If the product is installed on or near carpet, condensation from escaping hot air or steam may stain or damage the carpet.
- Do not use the product for other than the intended purposes. Damage incurred by using the product for purposes other than those specified in this user manual are not covered by the warranty.
MAINTENANCE AND DISPOSAL
- Wipe foreign objects (such as dust and water) off the prongs of the power plug and contact areas regularly. Do not use a wet or damp cloth when cleaning the plug.
- Do not use an appliance to dry the interior. Do not light a candle to remove interior odors.
- Do not spray water onto the product directly when cleaning. A fire or electric shock may occur.
- Wipe the interior with a dry cloth after use.
-
Clean the lint screen before or after each load.
-
Do not use a bleaching agent such as oxygen or chlorine-based bleaches on the exterior of the product. Clorox or OxiClean may cause discoloration when applied to the surface of the product.
- Do not use sharp objects when cleaning or operating the controls. An electric shock may occur.
- Avoid hitting the front glass panel with heavy objects. Although it is made of tempered glass, the panel may break in the event of a strong impact and cause injury.
- Keep product free from rodents, insects, and other foreign objects. They may damage wires, causing fire or electric shock.
- Before the appliance is removed from service or discarded, remove the door to the drying compartment. Cut off the power plug and destroy the button section to prevent reuse.
GROUNDING INSTRUCTIONS
- This appliance must be grounded. In the event of malfunction or breakdown, grounding will reduce the risk of electric shock by providing a path of least resistance for electric current.
- This appliance must be equipped with a cord having an equipment-grounding conductor and a grounding plug. The plug must be plugged into an appropriate outlet that is properly installed and grounded in accordance with all local codes and ordinances.
- Do not modify the plug. If it will not fit the outlet, have a proper outlet installed by a qualified electrician.
- This appliance must be connected to a grounded metal, permanent wiring system or an equipment-grounding conductor must be run with the circuit conductors and connected to the equipment-grounding terminal or lead on the appliance. Electric shock can result if the appliance is not properly grounded.

WARNING
Improper connection of the equipment-grounding conductor can result in a risk of electric shock. Check with a qualified electrician or service person if you are in doubt that the appliance is properly grounded.
PRODUCT OVERVIEW PARTS
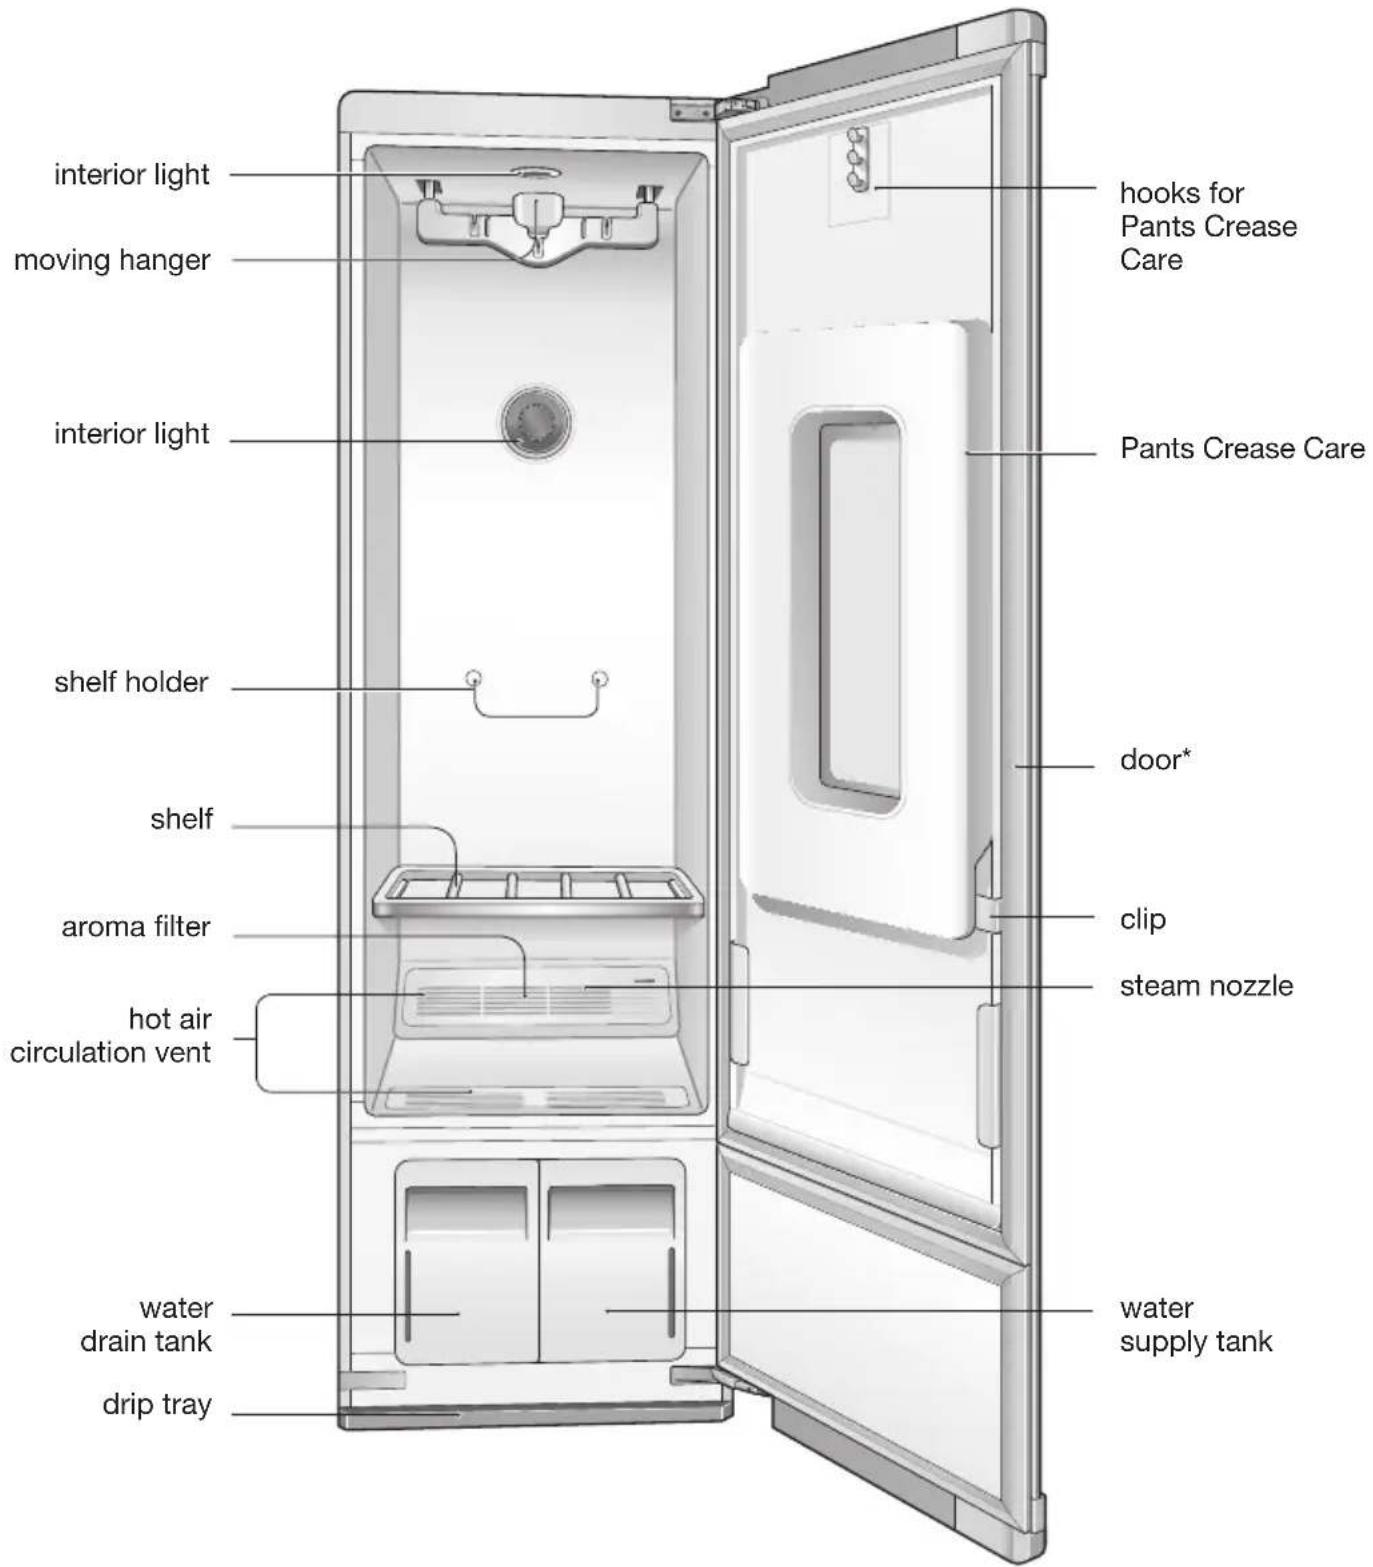
* The door swing can be reversed by the installer to fit the installation location.
ACCESSORIES
Included Accessories
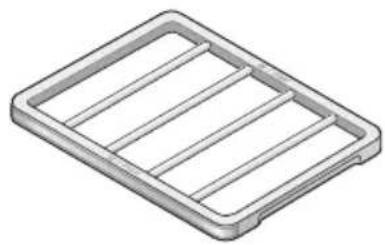
natural_image
Isometric view of a rectangular metal tray with horizontal slots (no text or symbols)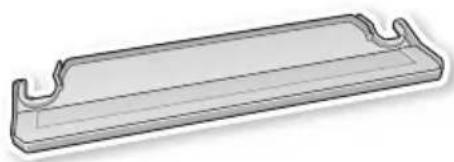
natural_image
3D rendering of a rectangular tray with rounded ends and a horizontal seam (no text or symbols)shelf drip tray
natural_image
3D rendered image of a pair of clothes hangers with hooks and straps (no text or symbols)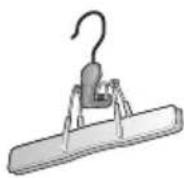
2 hangers* pants hanger*


2 non-skid pads
2 rear cap covers
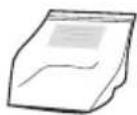
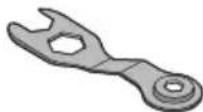
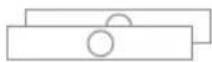
anti-tip kit wrench
2 hinge covers
* An ordinary metal/plastic hanger can be used if the hook is less than 5/32 in. (4 mm) thick. The hook must fit in the indentation in the moving hanger snugly. If the fit is too loose, it may result in vibration, noise, and damage to clothing.
NOTE
- Contact the store where the product was purchased or LG customer service if any accessories are damaged or missing.
- For your safety and for extended product life, use only authorized components. The manufacturer is not responsible for product malfunction or accidents caused by the use of separately purchased unauthorized components or parts.
- The images in this guide may be different from the actual components and accessories, which are subject to change by the manufacturer without prior notice for product improvement purposes.
THE MOVING HANGER
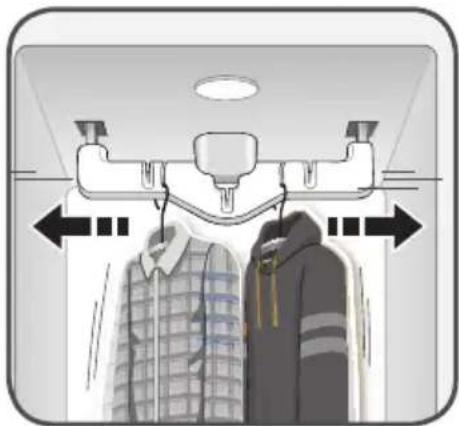
Hang clothes on the moving hanger using the hangers provided with the Styler, or use any plastic or metal hanger that hooks snugly into the indentations in the moving hanger.
natural_image
Illustration of two clothes hanging on a wardrobe, with arrows indicating direction (no text or symbols)- Use the moving hanger for suits, coats, jackets, blouses, dresses, skirts, and pants that don't require a crease. Use the Pants Crease Care to crease pants.
- Anything that can be securely placed on a hanger and steamed or dried without retaining hanger marks or other damage can be placed on the moving hanger.
- Dry sweaters or knits on the shelf to avoid hanger marks.
- Clothing should be securely fastened, with zippers and buttons closed, so that it does not fall off the moving hanger during the cycle.
- Arrange clothing so it does not touch the sides or rear of the cabinet, if possible. Condensation may form on the interior surface of the cabinet, and items in contact with the surface may remain damp at the end of the cycle. Hang larger items on the diagonal indentations on the moving hanger.

CAUTION
- Do not lean or pull on the moving hanger. Do not allow children play with or hang onto the moving hanger. The unit could tip, resulting in damage or injury.
THE PANTS CREASE CARE
Hang clothes in the Pants Crease Care using the pants hanger provided with the Styler or any pants hanger that fits into the hooks above the door to the Pants Crease Care.
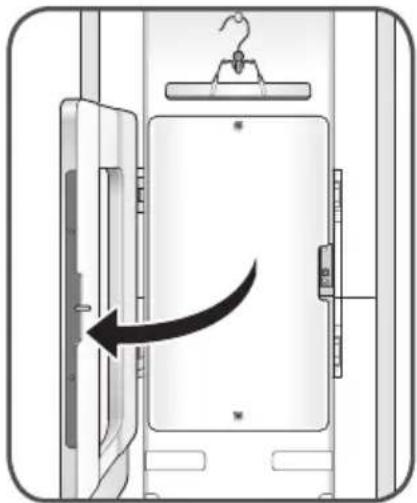
- Open the door to the Pants Crease Care by pressing the icon on the front.
natural_image
Diagram of a door lock mechanism with an arrow indicating clockwise motion (no text or symbols present)- The Pants Crease Care keeps pants legs creased while removing wrinkles elsewhere.
- Pants can be pressed while refreshing other items in the same cycle.
- For optimum results, use the Extra Pants Care cycle which is designed for use with the Pants Crease Care feature. This cycle can be downloaded using the LG Smart Styler app and used as the Downloaded cycle.

NOTE
To avoid double creases, run the strong course with the moving hanger to remove any existing knife pleats, and then use the pants press.

CAUTION
- Do not lean on or hang heavy items on the door of the Pants Crease Care. The unit may tip, resulting in damage or injury.
- Do not allow children to play with or hang onto the door of the Pants Crease Care. The unit may tip, resulting in damage or injury.
- Keep fingers out of pinch point areas when closing the door of the Pants Crease Care. Supervise nearby children to prevent injuries.
THE SHELF
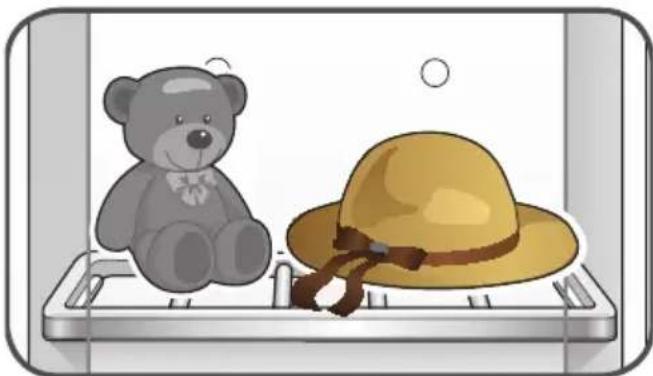
Use the shelf when styling clothes or other items that are difficult to hang or that may be damaged by hang drying.
natural_image
Illustration of two toy bearies, one sitting on a tray and the other holding a hat, inside a container (no text or symbols)- Use the shelf for stuffed toys, pillows, hats, and other accessories.
- Use the shelf for sweaters, knits, lingerie, or delicate blouses that can show hanger marks, stretching, or other damage if dried on a hanger.
- For best drying performance, do not stack items on the shelf. Dry single items or place items side by side with space between.
- When not in use, store the shelf on the shelf holder knobs in the back of the cabinet.
- Do not use the shelf for storing heavy items.
- Arrange items on the shelf so they do not touch the sides or rear of the cabinet, if possible. Condensation may form on the interior surface of the cabinet, and items in contact with the surface may remain damp at the end of the cycle.

CAUTION
- Do not use the shelf to store heavy items. The shelf may fall, resulting in damage or injury.
- Do not step or sit on the shelf. The shelf may fall or the unit may tip, resulting in damage or injury.
CHOOSING STYLER FEATURES
| item how to style it | |
| suit coat, blazer moving hanger | |
| coat, jacket (short) moving hanger | |
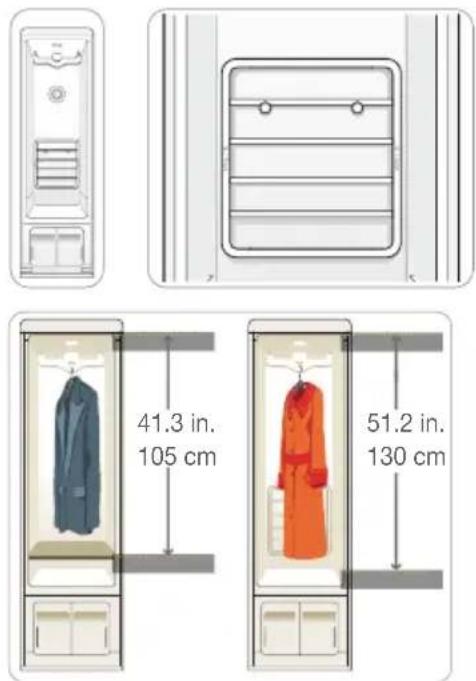
| coat (long) | moving hanger (remove shelf) |
| dress (short) moving hanger | |
| dress (long) | moving hanger (remove shelf) |
| skirt moving hanger | |
| lightweight blanket, throw moving hanger | |
| baby blanket moving hanger | |
| pants (not creased) moving hanger | |
| shorts moving hanger | |
| children's clothes moving hanger | |
| scarf | moving hanger or shelf |
| tie | moving hanger or shelf |
| shawl | moving hanger or shelf |
| lingerie | moving hanger or shelf (if delicate) |
| shirt, blouse | moving hanger or shelf (if delicate) |
| pants (creased) | Pants Crease Care |
| cap, hat shelf | |
| stuffed toys shelf | |
| pillow shelf | |
| sweater shelf | |
| knitwear shelf | |
| infant clothes | shelf |
INSTALLATION INSTALLATION OVERVIEW
Please read the following installation instructions first after purchasing this product or transporting it to another location.
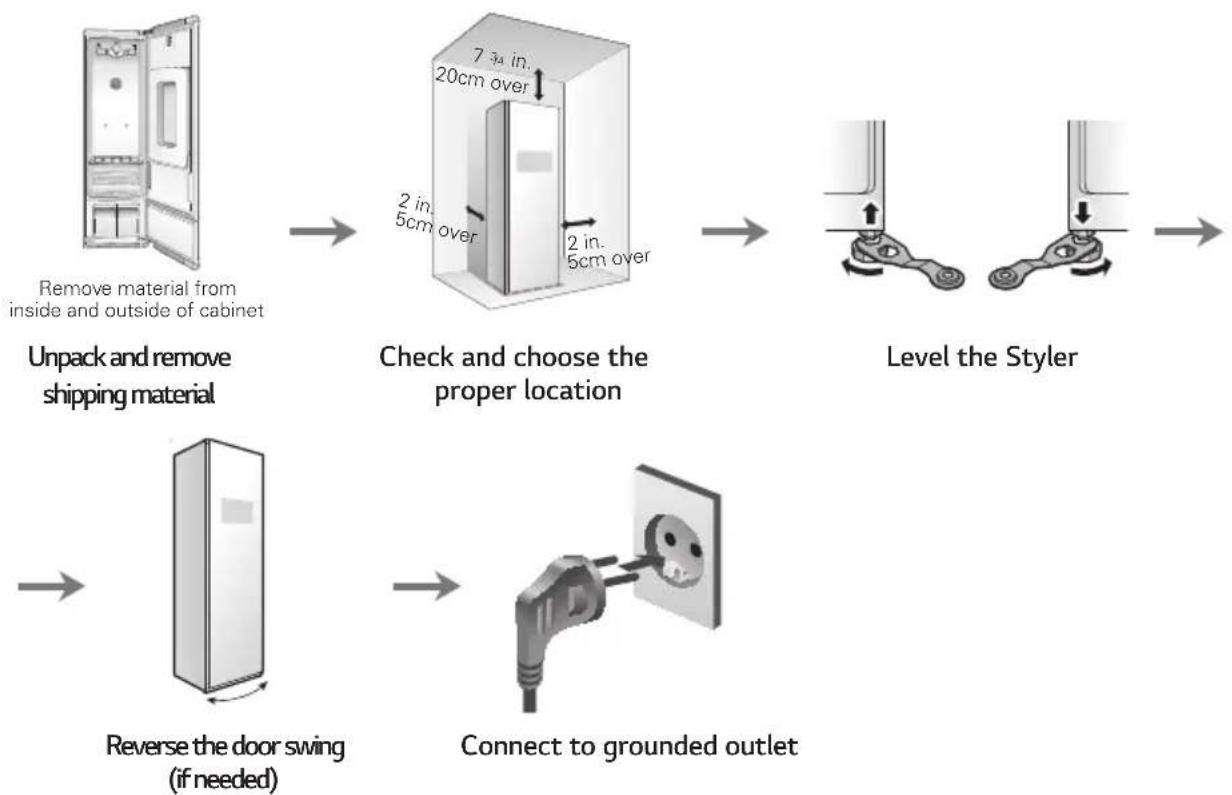
flowchart
graph TD
    A["Remove material from inside and outside of cabinet"] --> B["Unpack and remove shipping material"]
    B --> C["Check and choose the proper location"]
    C --> D["Level the Styler"]
    D --> E["Reverse the door swing (if needed)"]
    E --> F["Connect to grounded outlet"]
PRODUCT SPECIFICATIONS
The appearance and specifications listed in this manual may vary due to constant product improvements.
| steam clothing care S3*F* | |
| description | electric machine for maintaining clothing |
| electrical requirements | please refer to the rating label regarding detailed information |
| dimensions | 17 1⁄2 in. (W) X 23 in. (D) X 72 ^13_16 in. (H), 39 3⁄4 in. (D with door open)445 mm (W) X 585 mm (D) X 1850 mm (H), 1010 mm (D with door open) |
| net weight | 183 lb (83 kg) |
| maximum capacity | 4 items |
| power consumption | 1700-1900W |
| safety device | double overheating safety device, thermal fuse, programming |
| details of type and rating of fuses | 65TL Ceramic AC 250V 15A |
| maximum and minimum water or brine operating temperatures | 5~35°C(41~95°F) |
| maximum and minimum water or brine operating pressures | Atmospheric pressure |
UNPACKING THE STYLER

WARNING
- Use two or more people to move and install the Styler. Failure to do so can result in back injury or other injury.
- The Styler is heavy. Use the wheels at the bottom of the product to move it. Push the Styler slowly from about halfway down the front side.
- Keep the Styler upright when moving it. If you lay the Styler on its side, refrigerant may leak and cause the appliance to malfunction.
- Keep flammable materials and vapors, such as gasoline, away from the Styler.
Failure to do so can result in fire, explosion, or death.
- Remove tape and any temporary labels from the Styler before using.
Do not remove any warning labels, the model and serial number label, or the Tech Sheet that is located under the front of the Styler.
- To remove any remaining tape or glue, rub the area briskly with your thumb.
Tape or glue residue can also be easily removed by rubbing a small amount of liquid dish soap over the adhesive with your fingers. Wipe with warm water and dry.
- Do not use sharp instruments, rubbing alcohol, flammable fluids, or abrasive cleaners to remove tape or glue.
These products can damage the surface of the Styler.
| Electricity | Install where an outlet is easily accessible.Use an individual, grounded outlet: 220-240 Volts, 50 Hz, AC, 15 Amps minimum. WARNING: Do not plug in multiple appliances in the same outlet with the Styler. Overloading house wiring can cause a fire hazard.To reduce the risk of electric shock, do not install the Styler in a wet or damp area. WARNING: Do not plug in multiple appliances in the same outlet with the Styler. Overloading house wiring can cause a fire hazard.To reduce the risk of electric shock, do not install the Styler in a wet or damp area. |
| Floor | Floor must be level and solid enough to support 183 lb (83 kg).Adjust the leveling legs to compensate for any unevenness in the floor.Do not install on a platform or a weakly supported structure. |
| Ambient temperature | Temperature must be between 50°F (10°C) and 95°F (35°C).If the ambient temperature is too low or high, performance may be affected.Do not install in direct sunlight or where the temperature may fall below 32°F (0°C). |
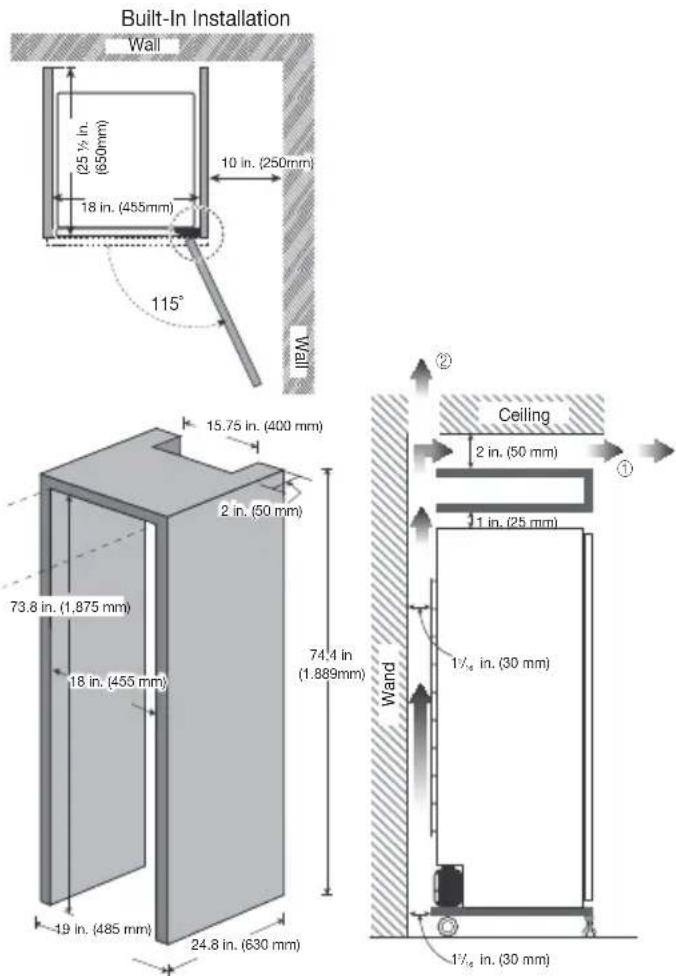
| Clearances | Allow at least 18 in. (46 cm) in front to open the door.Allow at least 2 in. (5 cm) on both sides and between the back of the Styler and the wall. Allow at least 7 3/4 in. (20 cm) between the top of the Styler and any overhanging shelves or cabinets.If the Styler is too close to adjacent items, performance may decrease and electricity consumption may increase. |
INSTALLATION LOCATION REQUIREMENTS

WARNING Read all installation instructions completely before installing and operating the Styler. It is important to review this entire manual before installing and using the Styler.
The installation requires:
- A grounded electrical outlet located within 2 ft. (61 cm) of either side of the appliance.
- A sturdy floor to support the total appliance weight of 183 lbs (83 kg). The combined weight of any other laundry appliances should also be considered.

WARNING
- Do not install or store the Styler in an area where it will be exposed to water and/or weather. Failure to follow this warning could result in risk of electric shock, injury, or product damage or malfunction.
Clearances

CAUTION
- The floor must be level, with a maximum slope of 1 inch (2.5 cm) under the Styler. If the slope is greater than 1 inch (2.5 cm), the appliance cannot be leveled properly.
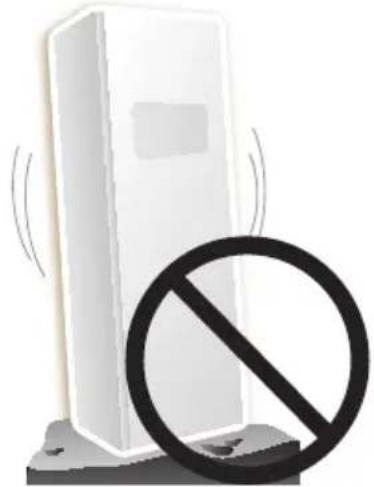
- Do not install the Styler on a hollow or flexible platform Doing so may cause excessive noise and vibration and result in damage or injury if the product tips over.
Recommended Installation Spacing
The following clearances are recommended for the Styler. Although the Styler has been tested for clearances of 1 36 inch (3 cm) on the sides and rear, recommended clearances should be considered for the following reasons:
• Additional space should be considered for ease of installation and servicing.
• Additional space might be required for wall, door and floor moldings.
• Additional space should be considered on all sides of the Styler to reduce noise transfer.
• Additional laundry appliance spacing should also be considered.
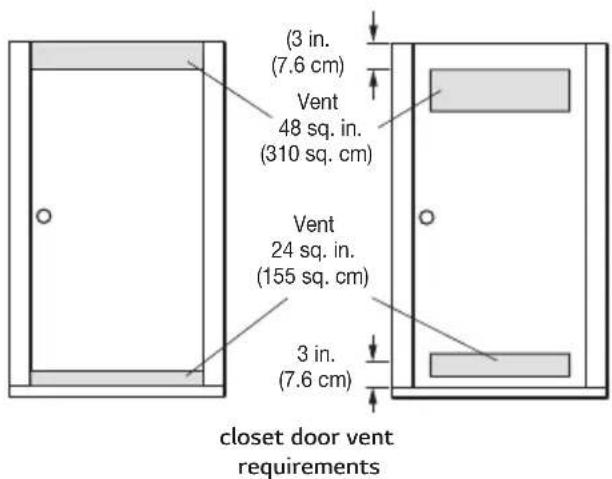
Installation Spacing for Recessed Area or Closet Installation
There should be at least a little space around the Styler (or any other appliance) to avoid contact with walls, furniture, or other appliances during operation. Allow a minimum of 1 316 inch (3 cm) on all sides of the Styler to avoid increased noise or damage.
- For closet installation, with a door, minimum ventilation openings in the top and bottom of the door are required. Louvered doors with equivalent ventilation openings are acceptable.
• Minimum vent opening for built-in installation is 31 12 sq. in. (200 cm ^2 ).
Closet Ventilation Requirements
Closets with doors must have both an upper and lower vent to prevent heat and moisture buildup in the closet. One upper vent opening with a minimum opening of 48 sq. in. (310 cm ^2 ) must be installed no lower than 6 feet above the floor. One lower vent opening with a minimum opening of 24 sq. in. (155 cm ^2 ) must be installed no more than one foot above the floor. One example shown uses vent grilles in the door.
LEVELING THE STYLER

WARNING
- To reduce the risk of injury to persons, adhere to all industry recommended safety procedures including the use of long-sleeved gloves and safety glasses. Failure to follow this warning can cause serious injury or death.
- The appliance is heavy. Two or more people are required when installing the Styler. Failure to follow this warning can cause serious injury or death. - To ensure that the Styler provides optimal performance, it must be level. To minimize vibration, noise, and unwanted movement, the floor must be a perfectly level, solid surface.
natural_image
Illustration of a white rectangular device with a large black prohibition symbol below it, indicating no restrictions or prohibition against the device (no text present)
NOTE
Adjust the leveling feet only as far as necessary to level the Styler. Extending the leveling feet more than necessary can cause the Styler to vibrate.
1 Position the Styler in the final location. Check to make sure it is level.
- All leveling feet must rest solidly on the floor. Gently push on the corners of the Styler to make sure that it does not rock from corner to corner. Make sure there are no gaps between the front leveling feet and the floor.

WARNING
- The Styler is heavy. Use two or more people if installing the rear leveling feet. Failure to do so can result in back injury or other injury. - Keep the Styler upright when moving and installing it. If you lay the Styler on its side, refrigerant may leak and cause the appliance to malfunction.
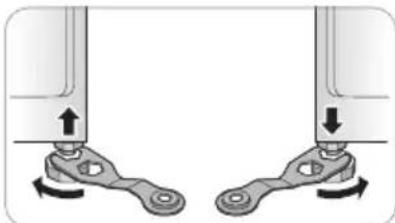
2 Use the wrench (packaged with the manual) to turn the leveling feet.
Unscrew the front feet to raise the Styler or screw in the feet to lower it. If unable to level the unit using only the front feet, install the two rear leveling feet by tipping the unit. Do not lay the unit down to install the leveling feet.
Raise or lower the unit using the leveling feet
natural_image
Mechanical linkage diagram showing two vertical arms with directional arrows indicating movement (no text or symbols)until the Styler is level from side to side and front to back.

CAUTION
Make sure that all leveling feet are in firm contact with the floor. If the Styler is used without leveling, it may fall, causing injury, damage, or product malfunction.
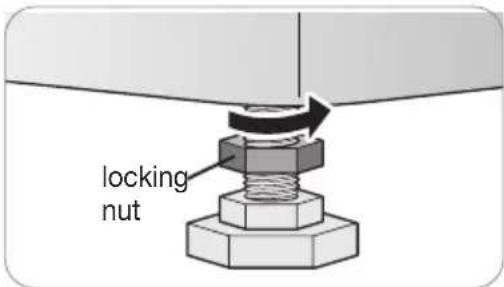
3 When the Styler is completely stable and all leveling feet are resting solidly on the floor, tighten the locking nuts.
REVERSING THE DOOR
It is possible to reverse the direction of the door swing. This should be done by the installer at the time of installation, if desired.

WARNING
Do not attempt to reverse the door swing yourself. If the direction of the door swing needs to be changed after installation, contact the LG Customer Information Center.
USING NON-SKID PADS (OPTIONAL)
Non-skid pads prevent the product from shaking or shifting when opening or closing the door.
1 Clean the floor to attach the non-skid pads. Use a dry rag to remove and clean foreign objects or moisture. If moisture remains, the non-skid pads may slip.
2 Adjust the level after placing the Styler in the installation area.
3 Place the adhesive side of the non-skid pad on the floor.
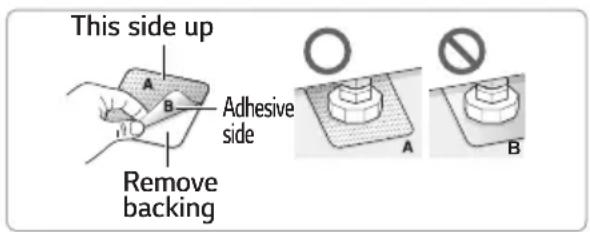
4 Recheck the Styler's levelness.
Push or rock the edges of the appliance gently to make sure that the Styler does not rock. If the Styler rocks, level the appliance again.
- The pads may leave a sticky residue when they are removed. The residue can be removed with alcohol.
INSTALLING THE ANTI-TIP DEVICE
- Appliances can tip, resulting in damage or injuries. Do not operate the unit without the anti-tip device in place and engaged.
If an anti-tip device is not properly installed, the appliance could be unexpectedly tipped by a child or adult standing, sitting, leaning, or placing excessive weight on an open door or the interior parts.
• Install the anti-tip device packed with the Styler to reduce the risk of tipping.
Refer to the instructions provided with the anti-tip kit for proper anti-tip device installation.
- Check that the anti-tip device is properly installed.
With the appliance in its final location, make sure that the slide adjuster on the cord is adjusted until there is about one inch of slack in the cord.
- The use of the anti-tip device does not preclude tipping of the appliance when it is not properly installed.
ASSEMBLING THE DRIP TRAY
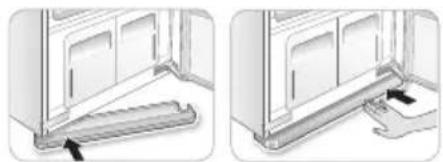
Before using the Styler, insert the drip tray onto the bottom of the cabinet.
1 Hold the tray so the arrow and letter on the front of the tray face up.
2 Insert one side of the tray first, then the other. Push the tray until it slides completely in.
3 To detach, pull one side out then the other. If the tray collects water, detach it and empty the water. After emptying it, re-assemble the tray.
natural_image
Two technical diagrams showing a door frame installation with a ladder and a foot, no text or symbols present.- Do not operate the Styler without installing the drip tray. Doing so could lead to water damage caused by leaking.
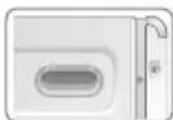
INSTALLING CAP COVERS
1 Line up the nubs on the cap cover with the holes in the top corner of the cabinet.
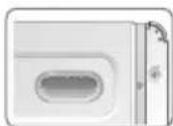
2 Snap the cap cover into place. Repeat with the remaining cap cover on the other corner.
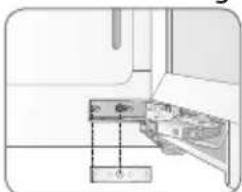
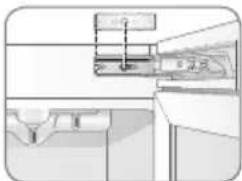
INSTALLING HINGE COVERS
1 Open the Styler door.
2 Snap the hinge cover onto the lower hinge assembly with the bent edge on the far side from the hinge.
natural_image
Simple line drawing of a refrigerator with a handle and drawer, no text or symbols present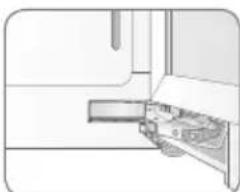
natural_image
Pure technical diagram showing a mechanical component with no visible text, numbers, or symbols3 Repeat with the remaining hinge cover on the upper hinge assembly.
natural_image
Pure technical diagram showing a mechanical assembly or assembly with no visible text, numbers, or symbols.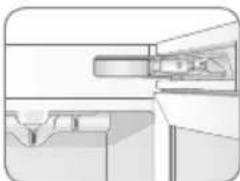
natural_image
Pure technical line drawing of a mechanical component without any text, numbers, or symbolsClean the Styler thoroughly and wipe off all dust that accumulated during shipping. Do not plug in or operate the appliance until the interior and exterior have thoroughly dried.

CAUTION
- Do not scratch the Styler with a sharp object or use a detergent that contains alcohol, bleach, a flammable liquid or an abrasive when removing any tape or adhesive from the Styler,.
- Do not peel off the model or serial number label or the technical information on the rear surface of the Styler.

NOTE
Remove adhesive residue by wiping it off with your thumb or dish detergent.
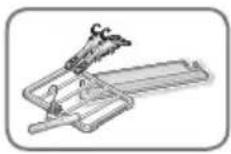
Unpack accessories.
Unpack the shelf and hangers. Accessories can be purchased separately from the LG Customer Information Center.
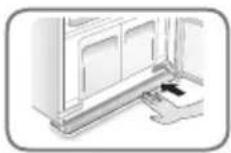
Assemble the drip tray.
Insert the drip tray at the bottom of the cabinet.
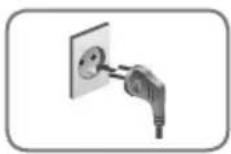
Connect the power supply.
Check if the power supply is connected before use.
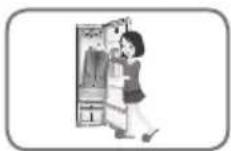
Wash dirty clothes if necessary before putting them in the Styler.
The Styler does not have a washing function. Stains and loose dirt from one item may transfer to others during a cycle. Wash or brush off dust and dirt, or spot-clean items, to avoid setting stains or transferring dirt or odors.
USING THE STYLER
natural_image
Illustration of a beige coat with double button design, displayed on a hanger (no text or symbols)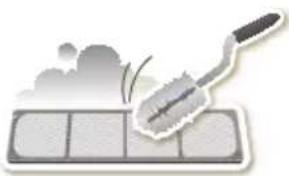
natural_image
Illustration of a tiled floor with a broom and cloud above it (no text or symbols)1 PREPARE ITEMS
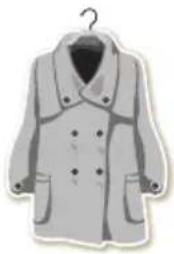
- Wash clothes first, if needed.
- No heat-sensitive items or items that can be damaged by exposure to water.
- Place items on hangers or the shelf.
- Fasten buttons and close zippers to keep items on moving hangers and prevent damage.
2 CLEAN LINT FILTER, CHANGE SHEET IN AROMA FILTER
Lift out filter and remove lint from last load for faster and more efficient performance. Reinstall filter, checking alignment when closing grill. Do not operate the Styler without the lint filter in place. If using a fabric softener sheet in the aroma filter, change it after every use.
natural_image
Illustration of two hands pouring liquid from a water bottle into a container (no text or symbols)3 CHECK WATER TANKS
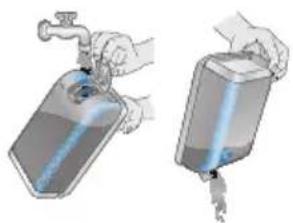
Fill water supply tank if needed. Empty water drain tank if needed. Use clean tap water in the supply tank for better product performance and lifespan. Do not use distilled water or reuse water from the drain tank.
natural_image
Illustration of a woman opening a refrigerator with clothes inside (no text or symbols)4 LOAD STYLER
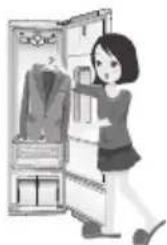
Pay attention to fabric care labels and cycle choice. If clothing is not appropriate for the cycle selected, it may shrink or be seriously damaged.
Remove all empty hangers to avoid noise, friction, and damage to clothing.
5 TURN ON STYLER
Touch Power to turn on the Styler.
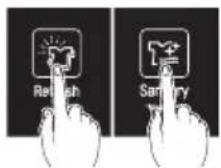
6 SELECT CYCLE
Touch icons to select desired cycle and settings.
7 BEGIN CYCLE
Touch and hold Start/Pause to begin cycle. Pause cycle at any time by touching Start/Pause again. Restart cycle within 14 minutes of pausing it, or the Styler shuts off and settings are lost. Do not open door during cycle. If steam or hot air escape from open door, condensation may collect on floor or walls, resulting in damage or mold.
8 END OF CYCLE
Remove items when cycle finishes. Leave door open to let hot air escape. Interior light shuts off after 1.5 minutes if door is left open.
SORTING LOADS
Fabric Care Labels
Most articles of clothing feature fabric care labels that include instructions for proper care. Below are some of the symbols that are relevant to choosing appropriate items for the Styler.
| fabric care labels that can be used with the | |||
| category label meaning Styler | |||
| [2208] washing labels | [06HX] | hand wash | [WTKX] |
 | machine wash, normal cycle | [8TY6] | |
 | perm press/wrinkle resistant | [40KZ] | |
| [30DD] | gentle/delicate | [6377] | |
 | do not wash | [ATBD] | |
| □ drying labels |  | normal | [HT7Y] |
 | permanent press/ wrinkle resistant | [0032] | |
| [7Z5G] | gentle/delicate | [0390] | |
| [048K] | do not tumble dry | [06WY] | |
 | do not dry |  | |
 | line/hang dry |  | |
| [WBXW] | drip dry | [8OWY] | |
 | dry flat |  | |
| □ dryer heat setting labels |  | high | [6801] |
 | medium |  | |
 | low | [13DH] | |
| [DBY8] | no heat/air dry | [X4V0] | |
* Some items such as fur and leather which are labeled as do not wash can be used with the Styler.
Grouping Similar Items
- For best fabric care results, always treat fabrics with similar care requirements together.
- Different fabrics have different care requirements, and some fabrics cannot be treated in certain Styler cycles or should be treated separately.
Choosing Styler-Safe Clothing
Some items are not appropriate for use with this product.
- Do not put the following items in the Styler.
| category non-Stylable items | |
| clothes starched clothes, vinyl | |
| bedding/blankets | electric blankets, heavy blankets (double layer or over 3.3 lb [1.5 kg]) |
| other shoes | items made with sponge rubber, items with adhesives |
• Follow fabric care labels.
- Don't put items that are sensitive to heat or are not suitable for washing with water in Styler cycles that use steam. Use the Gentle Dry cycle only.
- Fur, leather(only 100% natural leather) should only be treated with the Fur/Leather Care cycle. This cycle is a downloadable cycle.
- Using the wrong cycle for items can result in damage to fabrics.
- Wash heavily soiled or stained clothes before putting them in the Styler. The Styler does not have a washing function. Loose soil or stains can be transferred between garments during cycles.
- Treat items with an unpleasant odor in a separate load. Odors can be transferred between items during cycles.
• Some odors can be difficult to remove.
Odors from oily substances may be difficult for the steam to penetrate. Odors from extended storage may also be difficult to remove.
- Wrinkles may remain in some items.
Wrinkles caused by extended storage may be difficult to remove. Wrinkles in cotton or linen may not be removed completely.
FABRIC CARE GUIDE
| fabric clothes | Refresh cycle | Sanitarycycle | GentleDrycycle | comments | ||||
| removingwrinkles | removingodors | |||||||
| natural fibers | vegetable fibers | cotton | towels, socks,underwear,jeans,sportswear,t-shirts, blankets | ●●● | Wrinkles mayremain in 100%cotton fabrics.Iron after cycle, ifdesired. | |||
| linen,hemp,ramie | summer clothes,tablecloths | ●●● | Some wrinklesmay remain. Makesure fabrics arewashable/handwashable if usingRefresh/Sanitarycycles. Lay clotheson shelf if delicate.Do not stylestarched clothes. | |||||
| animal fibers | alpaca,camel hair,cashmere | coats, suits | § § § | ● | Lay knits on theshelf. Alpaca andcamel hair shrink inhot water. | |||
| scarves,knitwear | § | ● | ||||||
| fur,leather | coats, scarves | *Only usedownloaded Fur/Leather Care cycle(low temperaturedrying).But, leatheris only 100% Naturalleather(No artificialleather) | ||||||
| silk | silk neckties,ribbons, scarves,blouses, silkvelvet/plush | *Do not use silkclothes. | ||||||
| wool | sweaters,knitwear | § | ● | Lay knits on shelf.Some wool shrinkswhen washed inhot water. Makesure fabrics arewashable/handwashable if usingRefresh/Sanitarycycles. Gentle Drycycle is safe formost. | ||||
| wintercoats, suits,sportswear,uniforms | ●●●● | |||||||
FABRIC CARE GUIDE (CONTINUED)
| fabric clothes |  |  |  | ● = yes§ = check label | ||
| Refresh cycle | Sanitarycycle | GentleDrycycle | comments | |||
| removingwrinkles | removingodors | |||||
| man-made fibers | acetate | suit lining,blouses, neckties,pajamas | ||||
| acrylic | thermalunderwear,knitwear | Lay clothes on shelf | ||||
| nylon | stockings,lingerie | Lay clothes on shelf | ||||
| sportswear,curtains | ||||||
| polyure-thane | stretchableclothing(containing lessthan 5%) | If the item containsmore than 5%polyurethane(swimwear), checklabel for care | ||||
| rayon | suit lining | |||||
- Fabrics come in a wide variety of weights and finishes and can have different care requirements for each variety. It is difficult to cover them adequately in this manual. Before using the Styler with any item, check the care label before proceeding. Do not put items that are not colorfast, are heat-sensitive, or are not suitable for washing with water in the Refresh or Sanitary cycles. Do a water blot test on a small, inconspicuous spot (an inside seam) to determine if the fabric is colorfast. For further assistance, consult the clothing manufacturer, a dry cleaning professional, or a more detailed fabric care guide.
- Using the Styler with items that are very wet or are not colorfast may result in damage to the items and staining from fabric dyes on the interior of the cabinet. These stains will not affect the operation of the Styler. Use toothpaste to remove stains from interior of cabinet.
- The Styler does not have a washing function. Wash soiled items before use.
CHECKING THE FILTERS BEFORE EVERY LOAD
Checking the Lint Filter
Always make sure the lint filter is clean before starting a new load; a clogged lint filter will increase drying times.
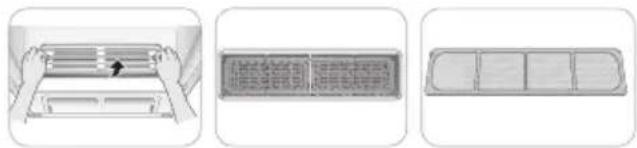
1 Open the front grill and take out the lint filter.
natural_image
Three-step diagram showing a hand pressing down on a rack, then applying a grid to a cover (no text or symbols)2 Brush the filter with a soft brush or clean it with a vacuum cleaner.
If the lint filter is torn or damaged, replace it with a new filter.
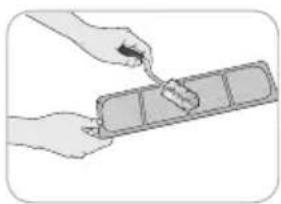
natural_image
Illustration of hands using a tool to adjust or install a rectangular object (no text or symbols visible)3 Reinstall the filter.

CAUTION
- Check that the sides are aligned correctly when inserting the grill.
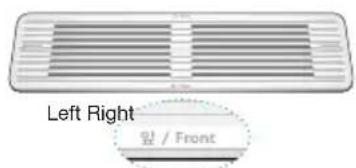
Changing the Aroma Sheet
Use a dryer fabric softener sheet to add a refreshing aroma to items. Replace the fabric softener sheet after every use.
1 Remove the aroma filter from the Styler.
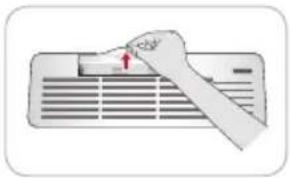
natural_image
Illustration of a hand pressing down on an air conditioner cover (no text or symbols visible)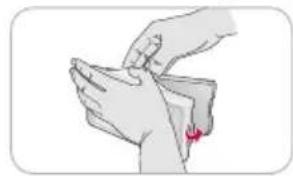
natural_image
Illustration of a hand performing a medical or therapeutic procedure on a wrist (no text or symbols visible)2 Open the aroma filter and insert a dryer fabric softener sheet into it.
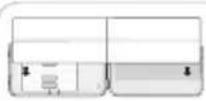
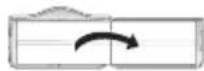
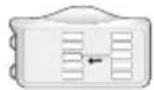
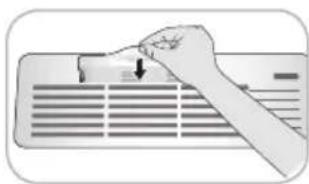
3 Close the aroma filter and insert it back in the Styler.
Insert the aroma filter in the direction of the arrow. You can adjust the opening of the perfume filter using the adjustment lever.
The more open the aroma filter is, the richer the aroma gets.
natural_image
Hand pressing down on a ventilation grille with a downward arrow (no text or symbols)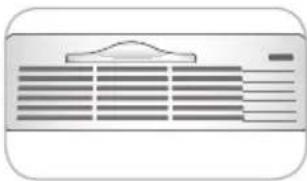
natural_image
Front view of a white rectangular air conditioner unit with ventilation grilles and a handle (no text or symbols visible)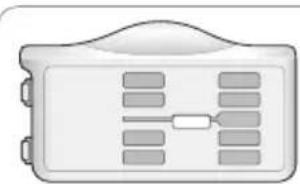
natural_image
Illustration of a rectangular electronic device with ventilation slots and a handle (no text or symbols)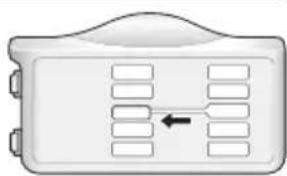
natural_image
Diagram of a device casing with vent slots and a black arrow indicating direction (no text or symbols)Closed Open
4 When the cycle is complete, remove the aroma filter and discard the fabric softener sheet.
Tip : Spray perfume 4-5 times on a cotton pad and then place it in the Aroma Holder to use. (However, the fragrance strength can vary depending on the scent.)
CHECKING THE WATER TANKS
Check the water in the water tanks before use. The water supply tank must be filled with water before using the Styler. The Styler does not work without water. The water drain tank should be emptied before each use.
1 Pull the handle of each tank forward to remove the tank and check the level of water.
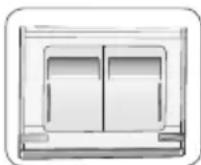
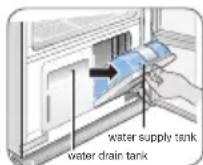
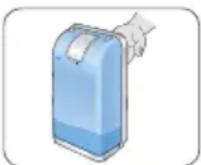
2 Make sure the water supply tank is filled with water.
The full water supply tank can be used approximately four times, depending on the cycles used. Use clean tap water or bottled water for best performance and longer product life. Do not use distilled water or reuse the water from the drain tank.
The first time the Styler is used, 2/3 of the water in the fully filled water supply tank is used. Less water is used in following cycles.

CAUTION
- Only use water when filling the water supply tank. Any other substance, such as detergent or fabric softener, may damage the Styler.
- Use only clean tap water or bottled water. Foreign materials in the water may shorten the lifespan of the Styler.
- Do not use distilled water. The water sensor may not work.
- Do not reuse the water in the drain tank to fill the water supply tank.
3 Make sure the water drain tank is empty.
The drain tank will be filled after about three uses. The tank fills more quickly during drying cycles. The Styler does not work if the drain tank is full.
- Some discoloration of the water drain tank may occur over time. This is normal and will not affect product performance.
LOADING THE STYLER

CAUTION
- Check all pockets to make sure that they are empty. Items such as clips, pens, coins, and keys can damage both the Styler and your clothes. Flammable objects such as lighters or matches could ignite, causing a fire. Failure to do so can result in fire, explosion, or death.
- Never dry clothes that have been exposed to oil, gasoline, or other flammable substances. Washing clothes will not completely remove oil residues. Failure to obey this warning can result in fire, explosion, or death.
- Remove empty hangers from the moving hanger and place them on the shelf before starting the cycle. Empty hangers may cause unnecessary noise, friction, and damage to fabrics.
- Hang hangers in the same direction on the moving hanger to prevent collisions.
| accessory items to use it with | |
| hangers | shirts, dresses, suits, coats, skirts, pants without creases or too large for pants press, or any item that can use a hanger |
| Pants Crease Care | pants when creases are desired |
| shelf | sweaters, wool, knitwear, lingerie, shoes, hats, toys, and other clothing or items that cannot use hangers |
Hangers
The hangers that come with the Styler are for use with the Styler only. Any plastic or metal hanger that has a hook less than 5/32 in. (4 mm) thick and hooks snugly into the indentations in the moving hanger can be used in the Styler.
- Do not use hangers with wool, knitwear, or delicate lingerie. The garments may stretch or be left with hanger marks.
- Wrinkles may appear at the back of the collar on some garments.
- Use the diagonal hanger grooves in the moving hanger for large or bulky items.
- Remove empty hangers or store them in the shelf during operation.
1 Select an appropriate hanger.
Choose the Styler hanger that fits the item you are hanging up.
2 Fasten the buttons and zippers on all garments and hang them on hangers.
Doing so helps keep the garments from falling or becoming more wrinkled during the cycle. If a garment has no buttons or zipper, fasten it with a cotton string around the collar area.
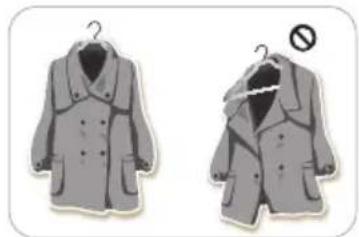
natural_image
Illustration of two gray men's coats with hangers, one holding a small circular symbol (no text or symbols present)3 Place the hangers into the slots of the moving hanger
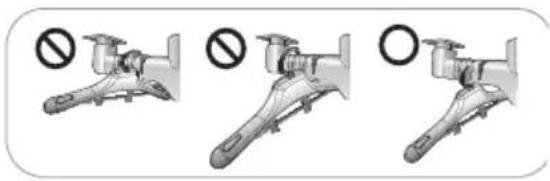
Using the Moving Hanger
1 Insert hangers into slots and pull down to secure the hook snugly.
Hooks should fit down in the slots snugly to prevent noise, vibration, or damage to items during operation.
2 Use the diagonal slots (2 and 4) for bulky items.
Do not use diagonal slots and standard slots during the same cycle. The hangers may knock into each other and damage clothing.
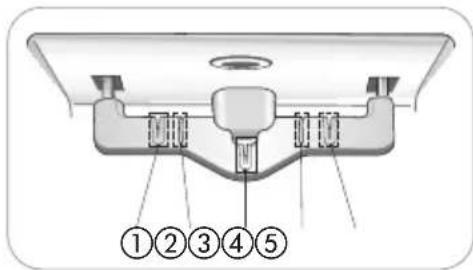
3 Do not overcrowd items.
The fewer items, the better the drying performance. Items that touch the sides of the cabinet may pick up condensation from the cabinet and fail to dry completely.
Pants Hanger or Pants Crease Care
Place pants either on the moving hanger or in the Pants Crease Care, depending on whether maintaining the creases on the pants legs is desired.
- Hanging pants on the moving hanger may remove the creases on pants legs.
- To maintain the creases on pants legs, use the Pants Crease Care.
- Pants should be no wider than 38 in. (96 cm) or longer than 43 5/16 in. (110 cm) to fit in the Pants Crease Care. Check the size of the pants before using the Pants Crease Care. If pants are too large, use the moving hanger.
- The fabric content of the garments affects how well wrinkles are removed.
- Use the default downloaded Extra Pants Care cycle for the most effective wrinkle removal for pants.
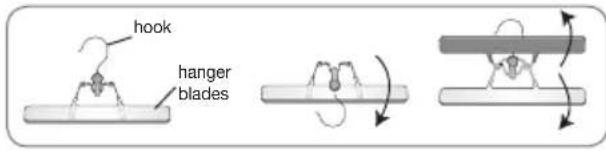
Opening and Closing the Pants Hanger
1 To open, fold the hook down toward the hanger blades to unlock and separate the blades.
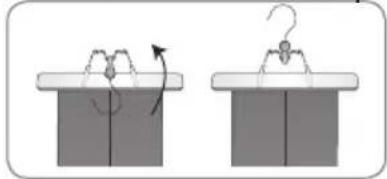
2 Once pants are inserted, bring the blades together and rotate the hook up and away from the blades to lock them in place.
natural_image
Two diagrams showing a fabric or mechanical setup with arrows indicating motion, no text or symbols present.Hanging Pants On the Pants Hanger
1 Remove all objects from pants pockets and button the back pockets.
2 Fold pants along crease lines (or where crease lines would be), and attach the pants hanger at the ends of the pants legs.
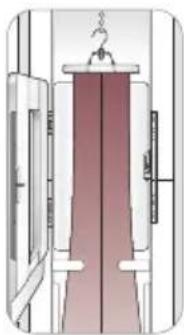
natural_image
Diagram of a vertical structure with a hanging hook and internal components, no visible text or symbols3 Tug gently on the sides of the pants legs. Make sure pants are stretched tight within the hanger, with no wrinkles, and will not fall out of the hanger during the cycle.
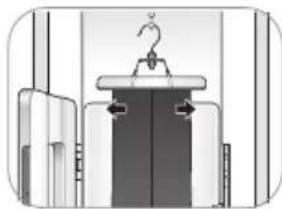
natural_image
Diagram of a mechanical lifting device with a hook attached to a frame (no text or symbols)4 Place the pants hanger on the moving hanger or in the Pants Crease Care.
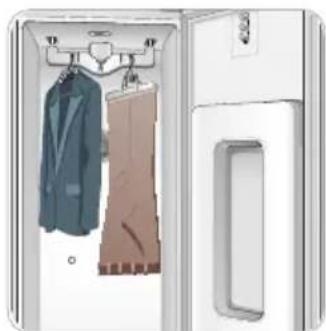
natural_image
Illustration of a white wardrobe with two hanging clothes (no text or symbols)Using the Pants Crease Care
1 Open the Pants Crease Care by pressing on the icon on the side.
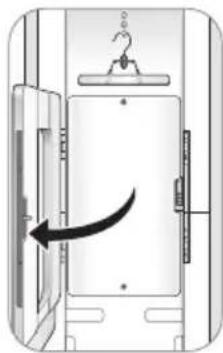
natural_image
Diagram of a door lock mechanism with an arrow indicating clockwise motion (no text or symbols)2 Hang the pants hanger on the hook above the Pants Crease Care that best fits the length of the pants being pressed.
If the pants are longer, use the higher hooks to keep the pants from hitting the floor of the cabinet.
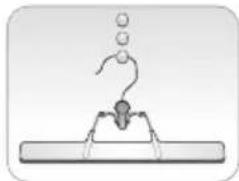
natural_image
Simple line drawing of a hook attached to a rectangular base (no text or symbols)Pants should be no wider than 38 in. (96 cm) or longer than 43.3 in. (110 cm). Check the size of the pants before using the Pants Crease Care. If pants are too large, use the moving hanger.
3 Make sure the pants are hanging straight.
Check the creases on the legs to make sure they are lined up. Fix the pants with 2 clips before closing the Pants Crease Care. If the pants legs are not aligned properly or the pants are not hanging straight, double lines may appear at the pants' edges, or the pants may be wrinkled.
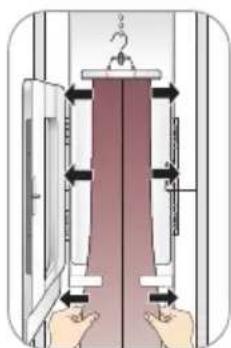
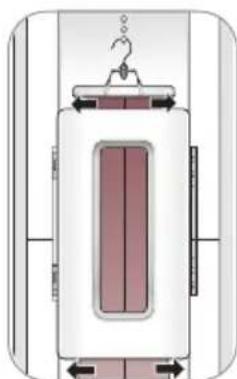
4 Close the Pants Crease Care, then straighten the pants once more.
Gently tug the edges of the pants to smooth out any wrinkles. Make sure the pants are hanging straight in the Pants Crease Care.
natural_image
Diagram of a vertical cylindrical device with internal components and directional arrows, no visible text or symbolsShelf
Use the shelf for clothes and items that cannot be placed on hangers. Do not stack items on the shelf. For best drying performance, use the shelf for a single item or smaller items with space between.
Assembling the Shelf
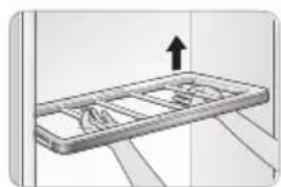
1 Hold the shelf so that the gray trim is toward the front.
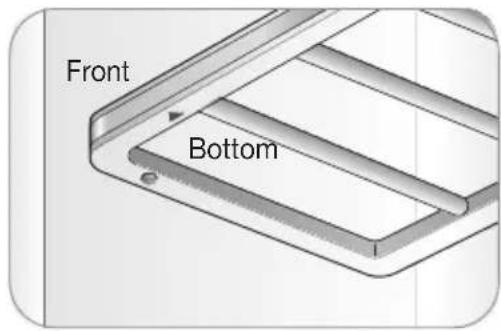
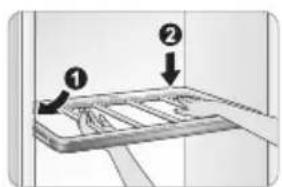
2 Insert the left shelf groove into the left shelf support, then lower the right shelf groove onto the right shelf support.
natural_image
3D diagram of a rectangular frame with internal grid structure and an upward arrow, no text or symbols present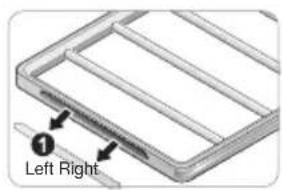
natural_image
3D diagram of a rectangular frame with internal grid lines and two elongated rods below, no text or symbols present3 To disassemble, lift up the right side of the shelf, then pull out the left side of the shelf from the shelf support.

CAUTION
- The shelf cannot be assembled by sliding it into the cabinet. It will fall if not assembled properly.
- Do not place heavy objects on the shelf or use it to store objects. Doing so can cause the product to malfunction.
- Do not allow children to climb on or hang on the shelf. They could be injured.
- Hang the shelf on the shelf holder when treating long clothes such as coats or dresses.
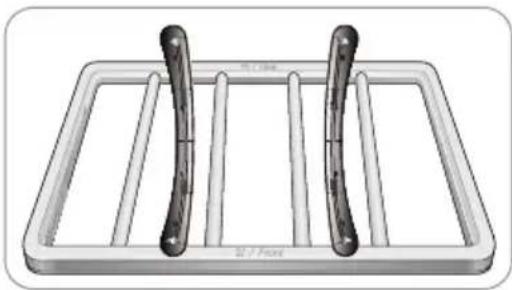
Storing Hangers
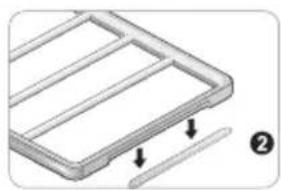
Remove unused hangers from the moving hanger and store them in the shelf during operation. This prevents noise and damage to clothing.
1 Insert the hangers between the rails of the shelf.
natural_image
3D rendering of a rectangular tray with two vertical metal rods inserted into the middle aisle (no text or symbols)2 When styling long clothes, if the shelf is stored on the shelf holder, store the hangers outside the unit during operation.
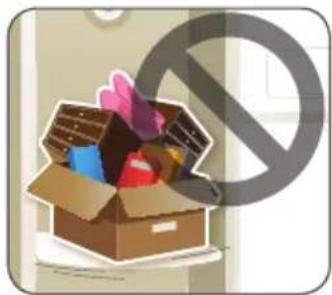
3 Do not use the shelf to store heavy items.
natural_image
Illustration of an open box filled with colorful toys and a large 'no' symbol in the background (no text or symbols on the main image)CONTROL PANEL
The control panel responds to touch using static electricity. A light touch is enough to operate it. Use a cloth when cleaning the controls to avoid contacting and activating the keys. Foreign substances on the control, wearing gloves, or touching the keys through cloth may prevent the keys from activating.
Control Panel Features
Depending on the model, some of the following functions may not be available.
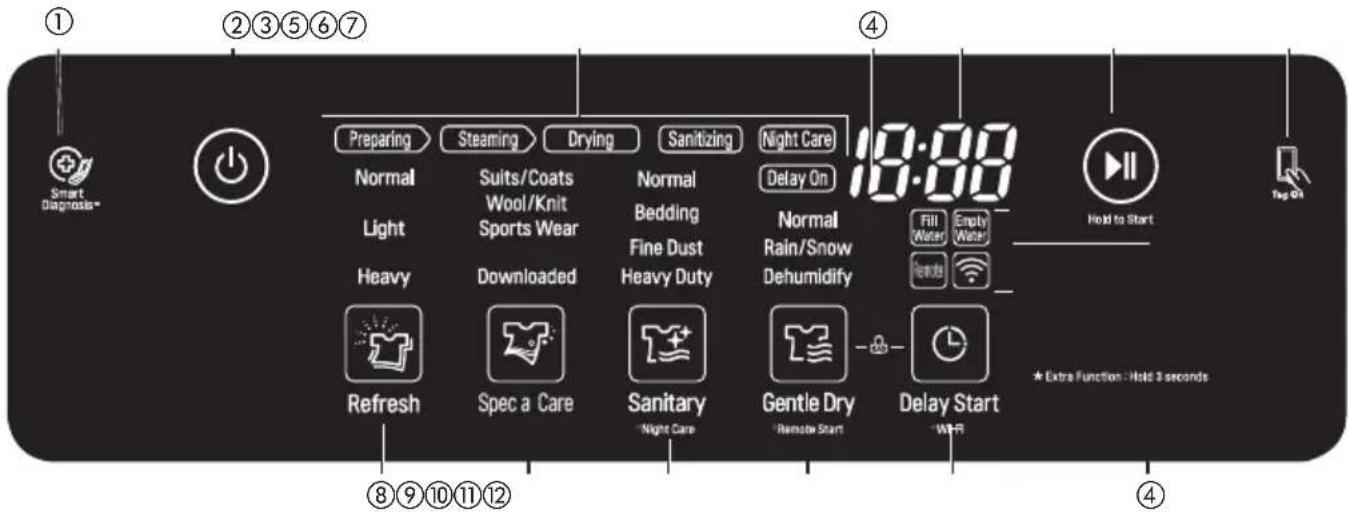
① SMART DIAGNOSISTM ICON
Place the phone over this icon when diagnosing problems with Smart Diagnosis.
② POWER ON/OFF
Touch Power to turn the Styler ON/OFF. Once the cycle is complete, the Styler automatically turns off after a few seconds if no keys are touched.
NOTE: Touching Power during a cycle will cancel that cycle and the cycle settings will be lost.
③ CYCLE COMPLETION INDICATOR
This portion of the display shows which stage of the styling cycle is currently underway.
④ OPTION AND ALERT INDICATORS
Delay On: lights when the Delay Start feature is set.
Fill Water: lights when the water supply tank is missing or empty.
Empty Water: lights when the water drain tank is missing or full.
Control Lock: lights when the Control Lock function is engaged.
Night Care: lights when the Night Care feature is set.
⑤ TIME DISPLAY
The display shows the estimated time remaining and error messages for the Styler.
The cycle time may vary by usage conditions.
⑥ START/PAUSE
Touch and hold to Start the selected cycle. If the Styler is running, touch to PAUSE the cycle without losing the current settings.
NOTE: If you do not touch Start/Pause to resume a cycle within an hour of pausing it, the Styler turns off automatically.
⑦ SmartThinQ™
Search for the LG SmartThinQ application from the Google Play Store or Apple App Store on a smart phone.
⑧ REFRESH CYCLE
Touch the icon to select a Refresh cycle, touch repeatedly to toggle through the settings.
⑨ SPECIAL CARE
Touch the icon to select a Special Care cycle. Touch repeatedly to toggle through the settings. Downloaded has 4 default cycles. Download a new cycle using the SmartThinQ application on a smart phone.
⑪ SANITARY / \*Night Care
Touch the icon to select a Sanitary cycle. Touch repeatedly to toggle through the settings. Touch and hold the icon for three seconds to activate/deactivate the Night Care function.
⑫ GENTLE DRY / \*Remote Start
Touch the icon to select a Gentle Dry cycle. Touch repeatedly to toggle through the settings. Press and hold three seconds to activate the Remote function.
⑬ DELAY START / \*Wi-Fi
Set a delayed start time for the cycle. Delay Start cannot be selected with the Night Care cycle. Press and hold for three seconds to activate the Wi-Fi function.
CYCLE GUIDE
| Cycle Processes | ||||||
| Cycle Setting Clothing / Fabric Type Prepare Steam Sanitize Dry | ||||||
| REFRESH CYCLE | Normal | suit, coat, school uniform, scarf, wool, knitwear, outdoor/performance clothing, towels, underwear, t-shirts, socks, jeans, jean jackets, lingerie, sportswear, tablecloths100% wool, polyester, rayon, urethane, gabardine, Gore-Tex, cotton, nylon, ramie, hemp | ||||
| Light | ||||||
| Heavy | ||||||
| SPECIAL CARE CYCLE | Suits/Coats | Specially designed to quickly remove odors from suits and coats. | ||||
| Wool/Knit | Specially designed to relieve wrinkles from wool and knit. | |||||
| Sports Wear | Use to protect fabric for sports wear. | |||||
| Downloaded | Downloaded has 4 default cycles. For other options, see Downloaded, page 32. | |||||
| SANITARY CYCLE | Normal | Same as Refresh cycle, excluding wool and knitwear. CheckFabric Care Guide, pages 22-23, and fabric care labels in garments before use. Natural fibers must be marked washable/hand-washable and tumble dry, to avoid shrinkage. Do not use with items containing rubber, foam, or adhesive. | ||||
| Bedding | ||||||
| Fine Dust | ||||||
| Heavy Duty | ||||||
| GENTLE DRY CYCLE | Normal | Same as Refresh Cycle. Gentle Dry is also safe for many non-washable garments such as silk ties, blouses, and other garments made from natural fibers such as 100% wool, cashmere, camelhair, and alpaca.SeeChoosing Styler-Safe Clothing, and always check garment labels before using. | ○ | |||
| Rain/Snow | ○ | |||||
| Dehumidify | - | - | ||||
Cycle Processes
• Preparingheats the water in the tank in preparation for supplying steam.
• Steaming sprays steam on the clothes.
• Sanitizingremoves germs from the clothes.
• Drying removes moisture in the clothes.
CHOOSING A CYCLE
Styler cycles are designed to fit a variety of situations. Select the cycle and setting that best match the load contents and desired results for maximum performance and fabric care. For best results, pay attention to garment care labels and choose a cycle that is appropriate for the fabric content of the items. See the Fabric Care Guide on pages 22-23. For a guide to the symbols used on fabric care labels, see the chart on page 21.
Touch the cycle selector icon to select the desired cycle. Press the icon repeatedly to select the desired setting. When you select a cycle, the light for the default setting will turn on. See Using the Styler, page 20, for more details on operating methods.
Refresh Cycle
Use the Refresh cycle to reduce odors and wrinkles and to dry items. This cycle uses steam and should only be used with washable items. The cycle is safe for washable wool and knitwear.
Sanitary Cycle
Use the Sanitary cycle to reduce germs and to dry items. Choose this cycle for clothing, bedding, and children's clothing and soft toys. Quilts or blankets should be a single layer and weigh 3.3 lb (1.5 kg) or less. Do not use this cycle for wool or knitwear, because the high temperatures and steam can cause shrinkage.
Gentle Dry Cycle
Use the Gentle Dry cycle to reduce odors and wrinkles and to dry items. Choose this cycle for non-washable fabrics like cashmere. There is also a downloadable dry cycle called Fur/Leather Care for use with fur and leather items. See Smart
Functions, page 36, and the list of available cycles in the SmartThinQ application.
Rain/Snow
Select this setting to refresh and gently dry damp clothing.
Dehumidify
Dehumidifies the room where the Styler is installed. Room dehumidifying time can be set to 2 or 4 hours by pressing the Gentle Dry button. Alarm beep and 'Empty Water' error will be displayed if drain tank is full. Empty drain tank and press Start/Pause button to continue dehumidification.
* Night Care feature cannot be used while using Dehumidify Course
* Use while door is open 45°. If door is closed, the course does not operate.
* Drain tank may be filled before end of Dehumidify cycle depending on the environment.
* It is possible for room temperature to increase due to outgoing airflow from Styler.
Special Care
Downloaded
Download additional cycle and use it to treat special fabrics like fur and leather, reduce noise or remove static.
Downloaded has 4 default cycles
- Press the Special Care button and select
"Downloaded": Select "Trouser Wrinkle Care" - Intensively straightens wrinkles and accentuates the creases in pants.
- Press Special Care Once : Select "Fur/Leather Care"
- Removes moisture and dust from fur/leather clothing without damaging fabrics and restores the volume of fur which gets flattened during storage and in everyday activities.
- Press Special Care Twice: Select "Static Removal"
- Removes static electricity in a short amount of time using the steam technology.
- Press Special Care 3 Times : Select "Jean Care"
- Keeps clean the jeans concerned of color migration or washout.
- The jeans may be washed out, so use the trouser hanger to pick it up and hang it on the moving hanger.
You can change courses or use additional courses through the App other than basic downloads. See
Smart Functions, page 36.
CYCLE SETTINGS AND OPTIONS
Cycle Selector Icons
To change the settings during the cycle, touch Start/Pause to pause the cycle, then touch the relevant cycle selector icon to change settings.
- Touch the Start/Pause button to activate the control panel.
The cycle selected and the Start/Pause button start blinking.
Selecting a Cycle
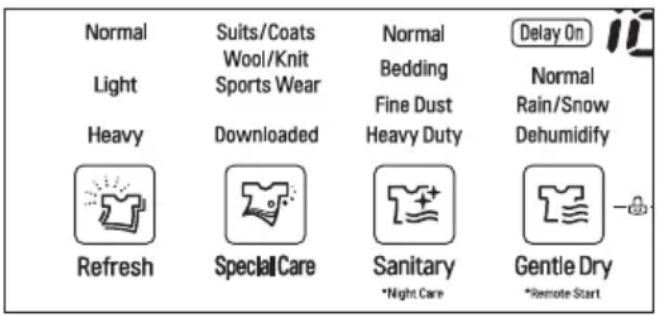
1 Touch Power
2 Touch the cycle selector icon repeatedly until the desired cycle and setting is illuminated.
3 Touch Start/Pause.
Changing Settings During a Cycle
1 Touch Start/Pause to pause the cycle.
2 Touch the relevant cycle selector icon to change settings.
- During the Refresh and Sanitary cycles, the machine will make a boiling and hissing sound as water is boiled to make steam and steam is sprayed on clothes. This is normal.
- The moving hanger will move even when only the shelf is being used.
- Cycle times may vary depending on the usage environment, including water temperature.
-
Cycle time for the Gentle Dry cycle may be longer for wet clothes that are not spin dried.
-
Very thick clothing may not be as uniformly dry at the end of the Gentle Dry cycle.
- If the Sanitary cycle is changed to a Refresh or Gentle Dry cycle during operation, the sanitize process is not performed.

CAUTION
- Do not open the door during operation. There is a risk of burns or injury from escaping hot air or steam.
- Do not allow steam or hot air to escape the cabinet during operation. Opening the door during operation also affects performance, lengthens drying time, and results in water condensing and collecting on the floor.
- Do not put very wet items in the Styler to dry. Shake off or wring out excess water before putting items in the cabinet to dry. If a large amount of water pools in the cabinet, drying performance may suffer or the product may be damaged.
- Remove or store the shelf when hanging longer items so items won't get wrinkled.
- Fasten buttons and zippers on hanging clothes to prevent them from falling off hangers during operation. Fasten the neck area with cotton string if there is no button or zipper.
Selecting the Downloaded Cycles
1 Touch Power
2 Touch the Special Care cycle selector icon to select the Downloaded cycle.
3 Touch Start/Pause.
- Download and use the LG Smart Styler app on a smart phone to confirm the current downloaded cycle or to download another cycle.
- Only one Downloaded Cycle can be saved and changed at a time.
EXTRA FUNCTIONS
Some buttons also activate special functions, including Night Care, Remote Start, Wi-Fi.
Locking the Controls
Use Control Lock to prevent unwanted use of the Styler or to keep cycle settings from being changed while the Styler is operating.
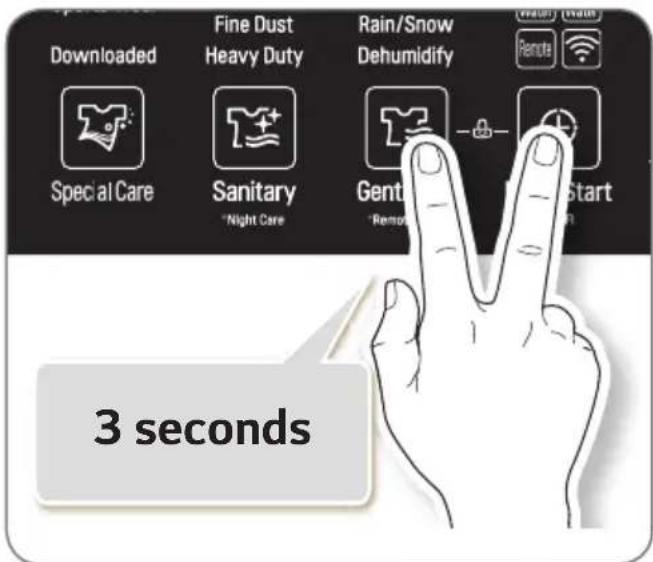
1 Touch and hold the Gentle Dry icon and the Delay Start icon for three seconds to activate or deactivate the Control Lock function.
2 "CL" appears in the display, and all controls are disabled except the Power button.
• Control Lock does not lock the door.
- The Control Lock setting is retained even if there is a power outage.
- Once set, Control Lock remains active until it is manually deactivated. Control Lock must be deactivated to run another cycle.
Setting a Delayed Start Time
Use the Delay Start function to delay the start time of the cycle.
1 Touch Power
2 Touch the cycle selector icon for the desired cycle.
3 Touch Delay Start to set the start time of the cycle.
The default delay time is three hours. Each time you touch the button, the time increases by an hour, up to 19 hours.
- Touch and hold the button to increase the delay time more quickly.

CAUTION
- Do not open the door during operation. There is a risk of burns or injury from escaping hot air or steam.
- Do not allow steam or hot air to escape the cabinet during operation. Opening the door during operation also affects performance, lengthens drying time, and results in water condensing and collecting on the floor.
\* Smart Diagnosis™
Use this function with the LG SmartThinQ application on a smart phone or when contacting the Goldiran Customer Information Center to help diagnose problems with the Styler.
Night Care
Use the Night Care function to store items overnight or anytime items can't be removed soon after a cycle ends. Night Care periodically produces warm air to prevent condensation, keeping items warm and dry until they are removed.
- Once set, the Night Care function starts after the selected cycle ends.
- The Night Care function can't be set to follow a Gentle Dry cycle.
- Night Care settings are lost if the Power button is pressed.
• Night Care runs for a maximum of 24 hours. - It is safe to open the door at any time during the Night Care function, even when the air is blowing.
- It is normal for the Night Care function to make noise periodically as it produces warm air.
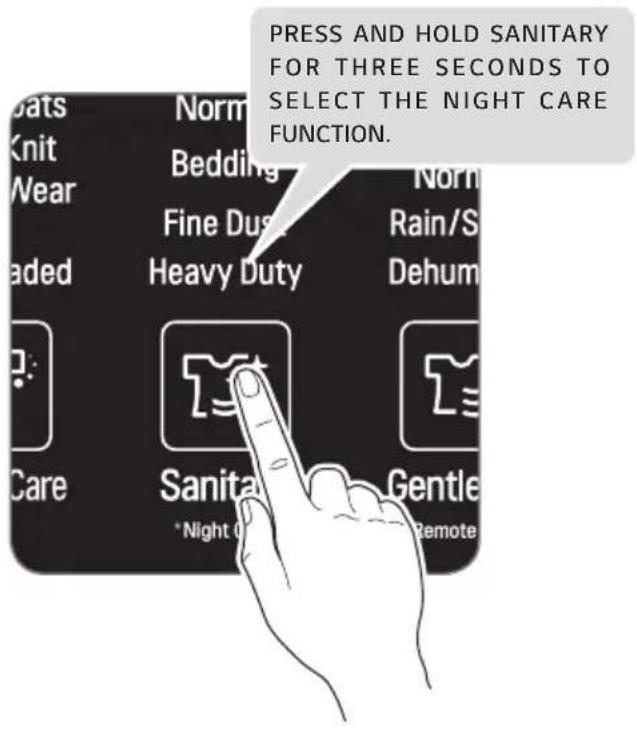
※ This image is for illustration purposes only. The location of the SANITARY button varies by model.
Setting the Night Care Function
1 Place clothes into the Styler.
2 Touch cycle selector icon repeatedly until desired cycle setting is selected.
3 Press and hold SANITARY for three seconds to illuminate the LED and activate Night Care.
4 Touch Start/Pause.
5 To cancel Night Care, touch another cycle selector icon.
SMART FUNCTIONS
SmartThinQ Application
The SmartThinQ application allows you to communicate with the appliance using a smart phone.
Installing SmartThinQ Application
Search for the LG SmartThinQ application from the Google Play Store or Apple App Store on a smart phone. Follow instructions to download and install the application.
NOTE
- If you choose the simple login to access the LG SmartThinQ application, you must go through the appliance registration process each time you change your smartphone or reinstall the application.
SmartThinQ Application Features
- For appliances with the


Download Cycle
Download new and specialized cycles that are not included in the standard cycles on the appliance.
Appliances that have been successfully registered can download a variety of specialty cycles specific to the appliance. Only one cycle can be stored on the appliance at a time. Once Download Cycle is completed in the appliance, the product keeps the downloaded cycle until a new cycle is downloaded.
NOTE
- You must first register the appliance and connect to a gateway in order to use the Download cycle function.
Push Alerts (Smart Messages)
When the cycle is complete or the appliance has problems, you have the option of receiving push notifications on a smart phone.
NOTE
- You must first register the appliance and connect to a gateway in order to use the Push Alerts function.
Smart Diagnosis™
This function provides useful information for diagnosing and solving issues with the appliance based on the pattern of use.
NOTE
- You must first register the appliance and connect to a gateway in order to use the Smart Diagnosis function.
Things to check before using LG SmartThinQ
1 Check the distance between the appliance and the wireless router (Wi-Fi network).
- If the distance between the appliance and the wireless router is too far, the signal strength becomes weak. It may take a long time to register or installation may fail.
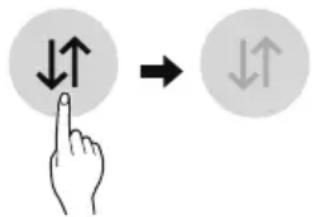
2 Turn off the Mobile data or Cellular Data on your smartphone.
- For iPhones, turn data off by going to Settings → Cellular → Cellular Data.
3 Connect your smartphone to the wireless router.
NOTE
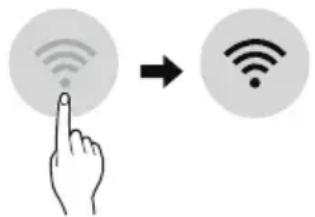
- To verify the Wi-Fi connection, check that Wi-Fi ( ) icon on the control panel is lit.
- The appliance supports 2.4 GHz Wi-Fi networks only. To check your network frequency, contact your Internet service provider or refer to your wireless router manual.
- LG SmartThinQ is not responsible for any network connection problems or any faults, malfunctions, or errors caused by network connection.
- If the appliance is having trouble connecting to the Wi-Fi network, it may be too far from the router. Purchase a Wi-Fi repeater (range extender) to improve the Wi-Fi signal strength.
- The Wi-Fi connection may not connect or may be interrupted because of the home network environment.
- The network connection may not work properly depending on the Internet service provider.
- The surrounding wireless environment can make the wireless network service run slowly.
- The appliance cannot be registered due to problems with the wireless signal transmission. Unplug the appliance and wait about a minute before trying again.
- If the firewall on your wireless router is enabled, disable the firewall or add an exception to it.
- The wireless network name (SSID) should be a combination of English letters and numbers. (Do not use special characters.)
- Smartphone user interface (UI) may vary depending on the mobile operating system (OS) and the manufacturer.
- If the security protocol of the router is set to WEP, you may fail to set up the network. Please change it to other security protocols (WPA2 is recommended) and register the product again.
- If you change your wireless router, your Internet service provider or your password after registering the appliance, please delete it from the LG SmartThinQ Settings → Edit Product and register again.
Open Source Software Notice Information
To obtain the source code under GPL, LGPL, MPL, and other open source licenses, that is contained in this product, please visit http://opensource.lge.com.
In addition to the source code, all referred license terms, warranty disclaimers and copyright notices are available for download.
LG Electronics will also provide open source code to you on CD-ROM for a charge covering the cost of performing such distribution (such as the cost of media, shipping, and handling) upon email request to opensource@lge.com. This offer is valid for three (3) years from the date on which you purchased the product.
MAINTENANCE REGULAR CLEANING

WARNING
To reduce the risk of fire, electric shock, or injury to persons when using this appliance, follow basic precautions, including the following:
- Unplug the Styler before cleaning to avoid the risk of electric shock. Failure to follow this warning can cause serious injury, fire, electrical shock, or death.
- Never use harsh chemicals, abrasive cleaners, or solvents to clean the Styler. They will damage the finish.
Cleaning the Interior and Exterior
Proper care of your Styler can extend its life.
1 Clean the inside and outside of the machine with a damp cloth. Glass cleaner can be used to clean the front glass panel, but spray it on a cloth and wipe rather than spraying it directly on the panel.
2 Buff the door dry with a clean, dry cloth to prevent any water stains.
3 Allow the interior and exterior to dry completely before plugging in and operating the product.

CAUTION
- Do not spray water directly on the product.
- Do not use detergent, methylated spirits, solvents, or any volatile liquids to clean the exterior of the product.
- Never use steel wool or abrasive cleansers; they can damage the surface.
- Keep sharp objects away from the exterior of the product. The touch panel may not work if damaged.
Cleaning the Lint Filter
Always remove the lint from the filter after every cycle.
If the lint filter has become very dirty or clogged, wash the lint filter in warm, soapy water and allow to dry thoroughly before reinstalling.
- Never operate the Styler without the lint filter.
• Never operate the Styler with a wet lint filter.
Cleaning the Aroma Filter
For best results, wash the aroma filter using hot water and dish soap. After cleaning, wipe the filter with a clean cloth and allow it to dry thoroughly before reinstalling it.
The aroma filter can also be cleaned in the top rack of the dishwasher.
- Never operate the Styler without the aroma filter.
- Never operate the Styler with a wet aroma filter.
Cleaning the Water Tanks
The water in the water supply tank contacts the clothing and items treated in the Styler directly. Clean both tanks periodically and keep them clean at all times. If the tanks are not properly cleaned, they may start to smell or need to be replaced.
- Some discoloration of the water drain tank may occur over time. This is normal and will not affect product performance.
- Use only clean tap water in the supply tank for best performance and to prolong the life of the product. Do not use distilled water.
- Do not reuse the water from the water drain tank in the water supply tank.
1 Clean the exterior of the tanks with a wet cloth.
2 Please clean the inside of the water tanks with water by using a brush cleaning the water tanks.
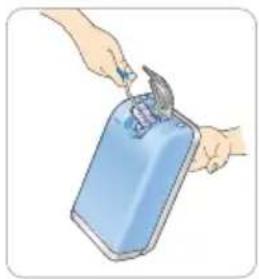
natural_image
Illustration of hands holding a blue container with a tool, no text or symbols present3 Make sure the drainage nozzle connected to the water drain tank and the water supply hole connected to the water supply tank are not clogged.
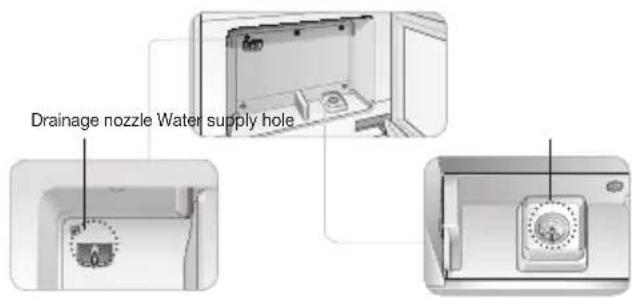
4 Allow the outsides of the tanks to dry completely before reinstalling the tanks.
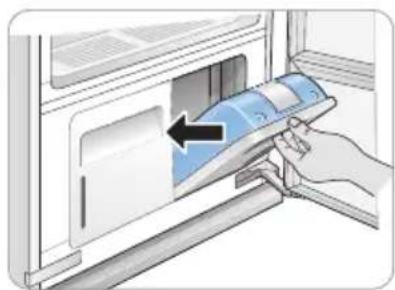
natural_image
Illustration of a hand inserting a blue card into a door panel (no text or symbols visible)Disposal of your old appliance
natural_image
Symbol of a trash bin crossed with two crossed lines, no text or labels present-
This crossed-out wheeled bin symbol indicates that waste electrical and electronic products (WEEE) should be disposed of separately from the municipal waste stream.
-
Old electrical products can contain hazardous substances so correct disposal of your old appliance will help prevent potential negative consequences for the environment and human health. Your old appliance may contain reusable parts that could be used to repair other products, and other valuable materials that can be recycled to conserve limited resources.
-
You can take your appliance either to the shop where you purchased the product, or contact your local government waste office for details of your nearest authorised WEEE collection point. For the most up to date information for your country please see www.lg.com/global/recycling
• Information of fluorinated greenhouse gases used as refrigerant of this dryer
Contains fluorinated greenhouse gases.
R134a (GWP: 1430): 0.155 kg / 0.222 t CO2-eq. Hermetically sealed.
TROUBLESHOOTING
FAQS: FREQUENTLY ASKED QUESTIONS
Q: What are aroma sheets and how do I use them?
A: You can use your favorite brand of dryer fabric softener sheets in the aroma filter to infuse items with a refreshing aroma. The sheets will not soften garments or reduce static. To use the aroma filter, add a softener sheet before running a cycle. Dispose of the softener sheet at the end of the cycle. For best performance, clean the aroma filter after every 5-7 uses.
Q: Can I put fur, leather, or silk items in the Styler?
A: Download the Fur/Leather Care cycle for use with fur and leather items in the Styler. And do not use silk clothes.
Q: Why is the cycle time longer than estimated for the Gentle Dry cycle?
A: The Styler uses a sensor to sense the dryness of fabrics. If clothing or other items are not dried properly, the cycle time is extended automatically (except for Time Dry cycles).
BEFORE CALLING FOR SERVICE
Your appliance is equipped with an automatic error-monitoring system to detect and diagnose problems at an early stage. If your appliance does not function properly or does not function at all, check the following before you call for service.
Operation
| Problem Possible Cause Solutions | ||
| Smoke comes out when the door is opened | Door is opened during operation | It is normal for steam or hot air to escape if the door is opened during operation. |
| Full water supply tank is empty after just one use | Appliance is being used for the first time | A larger amount of water is needed the first time the appliance is used to fill the empty reservoir. |
| Appliance makes a loud vibrating noise on startup | Moving hanger is balancing load before operation | This is normal at the beginning of the cycle. If the noise increases or continues for a long time, call for service. |
| [Drying times are taking longer than estimated?] | Clothes were extremely wet when loaded | Drying times may be longer for very wet or bulky clothing. Damp dry clothes before putting them in the Styler. The Styler stops automatically when clothes are dry. |
| Appliance is moving from left to right while operating | Floor under appliance is not level or is not sturdy enough to support the weight of the appliance without flexing | Install the appliance where the floor is level and sturdy. Compensate for any slight unevenness in the floor with the leveling legs. |
| Sound of motor whirring | Compressor is running during drying | This is normal. |
| Sound of water running, boiling, or hissing | Steam being generated and sprayed onto clothes | This is normal. |
| Steam or hot air leaks out when the door is closed | An item is caught in the door, keeping it slightly open | Make sure all items are completely inside the cabinet and nothing is caught in the door, blocking it from closing completely. |
| The appliance won't operate | Control panel has powered off due to inactivity | This is normal. Press the Power button to turn the appliance on. |
| Cord is unplugged | Make sure cord is plugged securely into a working outlet. | |
| Circuit breaker/fuse is tripped/blown | Check house circuit breakers/fuses. Replace fuses or reset breaker. The appliance should be on a dedicated branch circuit. | |
| Appliance not connected to 220-240 V socket | Make sure the cord is plugged into a grounded socket rated for this appliance. | |
Operation
| Problem Possible Cause Solutions | ||
| Control panel won’t respond | Control panel or button has dirt on it | Dirt or foreign objects on the control panel will interfere with the operation of the buttons. Clean the control panel. |
| Control panel is locked Disable the Control Lock function. | ||
| The cycle won’t start Start/Pause was not touched after the cycle was set. | Touch Start. | |
| Cycle is producing steam There may be a period of inactivity while steam is produced. | ||
| Control panel is locked Disable the Control Lock function and touch Start. | ||
Performance
| Problem Possible Cause Solutions | ||
| Clothes are wet at the end of the cycle | Filter is clogged or grill is upside down | Clean the lint filter. Insert the grill with the holes on the right side. |
| Door gasket is damaged If the rubber door gasket is damaged, it leaves a gap in the door seal, affecting performance of the appliance. Call for service. | ||
| Clothes caught in door Make sure all items are completely in the cabinet and not stuck in the door, blocking it from closing completely. Run the cycle again. | ||
| Odor is not removed at end of cycle | Clothes were stored for a long period of time or are stained with a strong-smelling substance | Odors can be particularly difficult to remove from clothes that have been stored for long periods or have strong-smelling, oily stains. Wash the clothes first, before using the Styler. |
| Wrinkles are not removed at end of cycle | Clothes were stored for a long period of time | Wrinkles may be very difficult to remove if set for a long time, especially in cotton and linen fabrics. Iron clothes that have been stored for a long period of time before treating them with the Styler, to remove wrinkles more effectively. |
| Clothes have an unpleasant odor at end of cycle | Appliance has not been used for a long time or water tanks and filters have not been cleaned | Check for dirt or foreign objects in the water supply and water drain tanks. Clean the filters and water tanks. |
| Functions are not operating properly | Detergent or fabric softener put in water supply tank | Do not use anything but clean water in the water supply tank. |
Performance
| Problem Possible Cause Solutions | ||
| Wrinkles at back of neck after cycle | Item too large for hanger or fabric too delicate | Use the right size hanger for the item so the fabric won't bunch up and cause wrinkles. Some fabrics are delicate and will bunch around the hanger no matter what you do. Use the shelf for lingerie and other delicate items. |
| Creases are gone from pants after cycle | Pants were hung on the moving hanger, not in the pants press | Hang pants in the pants press to maintain creases at edge of pants legs. |
| Clothing has water spots after cycle, color has faded or run | Fabric is not washable, or is not colorfast | Check fabric care labels before treating items. |
Error Codes
| Problem Possible Cause Solutions | ||
| Fill Water icon is blinking | Water supply tank is empty or tank is missing | Fill the water supply tank and reinstall it. |
| Empty Water icon is blinking | Water drain tank is full or tank is missing | Empty the water drain tank and reinstall it. |
| dE Error is blinking | Door is not completely closed | Check that items are completely inside the cabinet and that the door is tightly closed. |
| AE, LE, LE2, E1, E4, TE1, TE2, TE3, TE5 shows on the display. | System error Unplug the appliance | ce and call for service. |
SMART DIAGNOSIS SMART DIAGNOSIS™
Should you experience any problems with your appliance, it has the capability of transmitting data to your smart phone using the LG Smart Styler application or via your telephone to the LG Customer Information Center.
Smart Diagnosis™ cannot be activated unless your appliance is turned on by pressing the Power button. If your appliance is unable to turn on, then troubleshooting must be done without using Smart Diagnosis™.
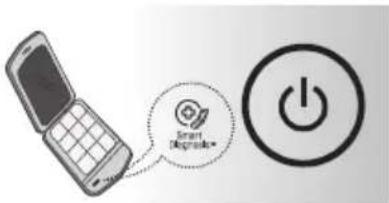
USING SMART DIAGNOSISTM
Smart Diagnosis™ Using a Smart Phone
1 Download the LG Smart Styler application on your smart phone.
2 Open the LG Smart Styler application on your smart phone. Press the right arrow button to advance to the next screen.
3 Press the Record button on the smart phone and then hold the mouth piece of the smart phone near the Smart Diagnosis™ logo on the appliance.
4 With the phone held in place, press and hold the Sanitary icon and the Gentle Dry icon for three seconds.
5 Keep the phone in place until the tone transmission has finished. The display will count down the time.
6 When the recording is complete, view the diagnosis by pressing the Next button on the phone.

NOTE
- Call quality differences by region may affect the function.
- Use the home telephone for better communication performance, resulting in better service.
- Bad call quality may result in poor data transmission from your phone to the machine, which could cause Smart Diagnosis™ to malfunction.
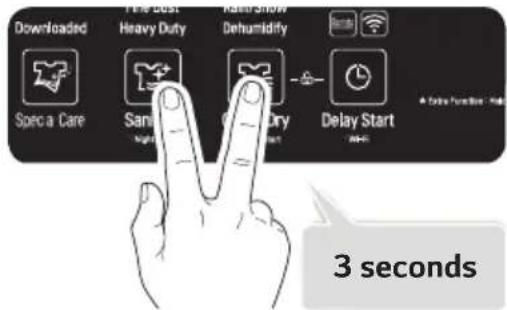
Smart Diagnosis™ through the Call Center
1 Call the LG Customer Information Center.
2 When instructed to do so by the call center agent, hold the mouthpiece of your phone over the Smart Diagnosis™ logo on the machine.

NOTE
Do not touch any other buttons or icons on the display screen.
Hold the phone no more than one inch from (but not touching) the machine.
3 Press and hold the Sanitary icon and the Gentle Dry icon for three seconds.
4 Keep the phone in place until the tone transmission has finished. The display will count down the time.
5 Once the countdown is over and the tones have stopped, resume your conversation with the call center agent, who will then be able to assist you in using the information transmitted for analysis.

NOTE
- For best results, do not move the phone while the tones are being transmitted.
- If the call center agent is not able to get an accurate recording of the data, you may be asked to try again.
GEBRUIKERSHANDLEIDING
STYLER

Broekhanger of broekpers Rek
31 Bedieningspaneel
42 PROBLEEMOPLOSSING
Sanitary
*Night Care
natural_image
Illustration of two clothes hanging from a wardrobe, showing front and back views with no text or symbolsnatural_image
Diagram of a door with an arrow indicating direction, showing internal components and a hook (no text or symbols)natural_image
Illustration of a teddy bear and a hat on a tray, no text or symbols presentnatural_image
Illustration of a white refrigerator with a large black prohibition symbol below (no text or symbols present)
OPMERKING
natural_image
Mechanical linkage diagram showing two vertical arms with directional arrows indicating movement (no text or symbols)natural_image
Diagram of a device with an open lid and internal components, no visible text or symbols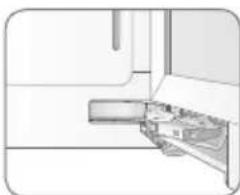
natural_image
Pure technical line drawing of a mechanical assembly without any text, numbers, or symbolsnatural_image
Interior view of a kitchen appliance with a mounted shelf and a showerhead (no visible text or symbols)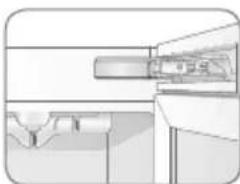
natural_image
Pure technical line drawing of a mechanical component without any text, numbers, or symbolsWERKING VOOR GEBRUIK
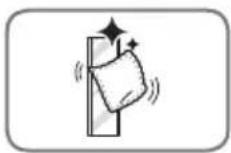
Styler reinigen.
natural_image
Illustration of a hand inserting a plug into an electrical outlet (no text or symbols)natural_image
Three-step diagram showing a hand pressing down on a rack, then to clean the air filter into a grid (no text or symbols)natural_image
Illustration of hands using a tool to adjust or install a rectangular object (no text or symbols visible)Aromablad vervangen
natural_image
Illustration of a hand pressing down on an air conditioner cover (no text or symbols visible)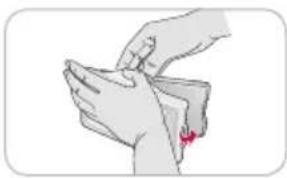
natural_image
Illustration of a hand performing a medical or therapeutic procedure on a patient's arm (no text or symbols present)natural_image
Illustration of a hand pressing down on a ventilation grille with a downward arrow (no text or symbols)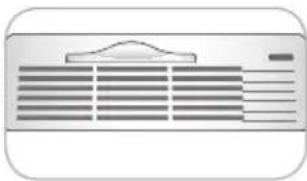
natural_image
Front view of a white rectangular air conditioner unit with ventilation grilles and a triangular top (no text or symbols visible)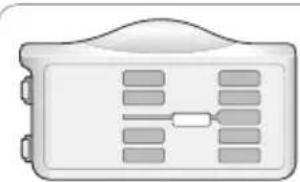
natural_image
Illustration of a white electronic device with ventilation slots and a handle (no text or symbols)Gesloten Open
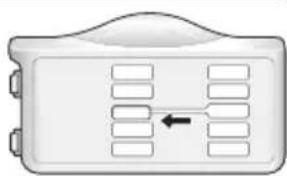
natural_image
Diagram of a device casing with vent slots and an arrow indicating direction (no text or symbols)natural_image
Illustration of two gray men's coats with hangers, one holding a small circular symbol (no text or labels)natural_image
Three identical illustrations of a faucet with no visible text or symbols, each marked with a prohibition symbol (no text or labels present)Broekhanger of broekpers
natural_image
Two diagrams showing a hanging hook and a hanging arm, with arrows indicating motion (no text or symbols)natural_image
Diagram of a vertical structure with a hanging hook, showing internal layers and no text or symbolsnatural_image
Diagram of a mechanical device with a hook and hanging component (no text or symbols)natural_image
Illustration of a pair of clothes hanging from an open wardrobe (no text or symbols visible)Broekpers gebruiken
natural_image
Diagram of a door lock mechanism with a black arrow indicating clockwise motion (no text or symbols)natural_image
Simple line drawing of a hook interacting with a base, no text or symbols presentnatural_image
Illustration of a double vertical structure with arrows indicating force or movement, no text or symbols presentnatural_image
Diagram of a cylindrical device with internal components and directional arrows, no visible text or symbolsRek
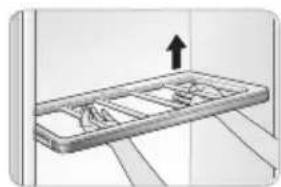
natural_image
Diagram of a rectangular device with internal components and an upward arrow, no visible text or symbols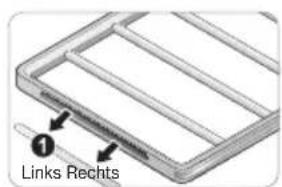
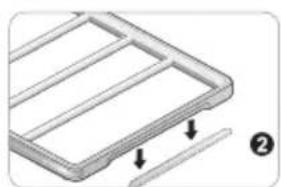
natural_image
Diagram of a rectangular frame with internal grid lines and two arrows indicating direction (no text or symbols)natural_image
Technical line drawing of a front panel and side panel (no text or symbols)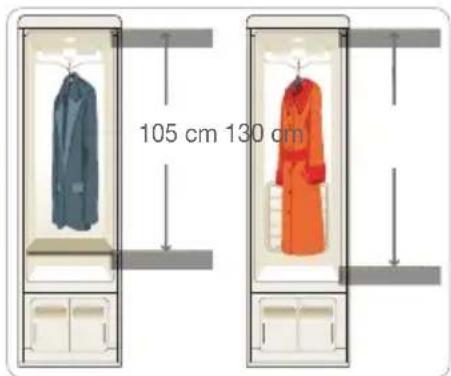
Hangers opbergen
natural_image
3D rendering of a rectangular tray with two vertical metal rods inserted into the middle aisle (no text or symbols)natural_image
Illustration of an open box filled with toys and a pink bag, with a large no-smoking symbol in the background (no text or symbols on the main image)BEDIENINGSPANEEEL
① SMART DIAGNOSISTM-PICTOGRAM
③ INDICATOR STATUS PROGRAMMA
④ OPTIES- EN WAARSCHUWINGSINDICATORS
Downloaded selecteren
Setting the Night Care Function
Download Cycle (Download prog.)
3 Connect your smartphone to the wireless router.
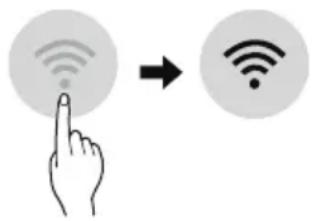
OPMERKING
LG Electronics European Shared Service Centre B.V.
Krijgsman 1
1186 DM Amstelveen
Nederland
natural_image
Illustration of hands pouring liquid into a blue plastic container (no text or symbols)natural_image
Illustration of a hand inserting a blue plastic component into a white panel, with an arrow indicating the process (no text or symbols present)natural_image
Symbol of a trash bin crossed with no text or numbers, representing waste sorting or disposal (no text present)SMART DIAGNOSISTM GEBRUIKEN
46 SMART DIAGNOSISTM
PRODUKTMERKMALE

Refresh
ENTFERNT GERÜCHE
Gentle Dry
*Remote Start
SCHONENDES UND EFFEKTIVES TROCKNEN
natural_image
3D rendering of a rectangular metal tray with horizontal slots (no text or symbols)Regal Auffangschale
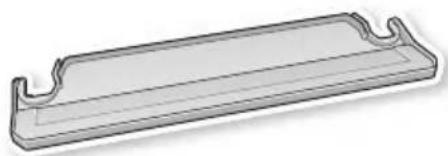
natural_image
3D rendering of a rectangular mechanical part with rounded ends and a horizontal centerline (no text or symbols)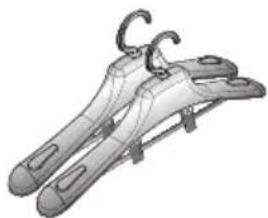
natural_image
Illustration of a pair of clothes hangers with metal racks and clips (no text or symbols)natural_image
Illustration of two clothes hanging on a wardrobe, with arrows indicating direction (no text or symbols)natural_image
Diagram of a door lock with a hanging hook, showing an open door and a curved arrow indicating direction (no text or symbols)natural_image
Illustration of a teddy bear and a yellow hat on a tray, with bubbles above (no text or symbols)natural_image
Illustration of a building with a large 'no' symbol and motion lines, no text or symbols present.
HINWEIS
natural_image
Mechanical linkage diagram showing two vertical arms with directional arrows indicating movement (no text or symbols)natural_image
Two technical diagrams showing door and seat assembly steps (no text or symbols)natural_image
Technical line drawing showing two views of a mechanical assembly with internal components (no text or symbols)natural_image
Two technical diagrams showing mechanical assembly or assembly steps, with no visible text or symbols.BETRIEB
VOR DEM BETRIEB
Den Styler reinigen.
natural_image
Illustration of a hand inserting a plug into an electrical outlet (no text or symbols)natural_image
Illustration of a beige coat with double button design, displayed on a hanger (no text or symbols)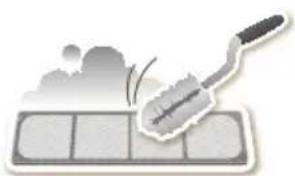
natural_image
Illustration of a griddle swab cleaning a tiled surface (no text or symbols)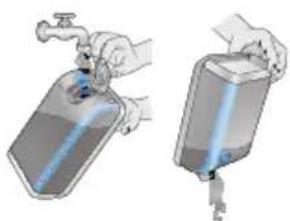
natural_image
Illustration of two hands holding a water dispenser, one open and one partially filled with liquid (no text or symbols)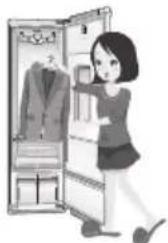
natural_image
Illustration of a woman opening an open refrigerator with a suit, no text or symbols present
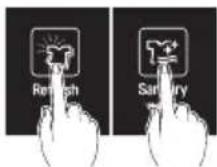
natural_image
Illustration of hands using a tool to adjust or install a rectangular component (no text or symbols visible)natural_image
Illustration of a hand pressing down on an air conditioner cover (no text or symbols visible)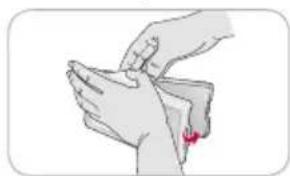
natural_image
Illustration of a hand performing a medical or therapeutic procedure on a wrist, with a red arrow indicating a point of interest (no text or symbols present)natural_image
Illustration of a hand pressing down on a component of an air conditioner grille (no text or symbols visible)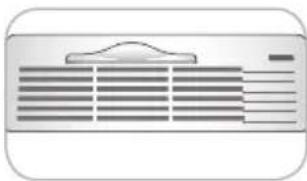
natural_image
Front view of a white air conditioner unit with ventilation grilles and a handle (no text or symbols visible)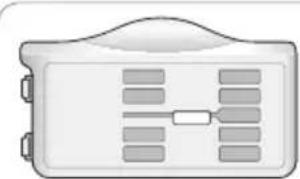
natural_image
Illustration of a white electronic device with ventilation slots and a curved top (no text or symbols)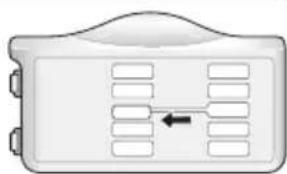
natural_image
Diagram of a device casing with internal compartments and a directional arrow (no text or symbols)GeöffnetGeschlossen
natural_image
Illustration of two gray men's coats hanging on hangers, one with a handle and the other with a number symbol (no text or labels)natural_image
Three identical illustrations of a showerhead with no visible text or symbols, each marked with a prohibition symbol (no text or labels present)natural_image
Two diagrams showing a hanging hook and a curved arrow on a surface, no text or symbols present.natural_image
Diagram of a vertical structure with a hanging hook and internal color gradient, no text or symbols presentnatural_image
Simple line drawing of a mechanical device with a hook and control panel (no text or symbols)natural_image
Illustration of a pair of clothes hanging from an open refrigerator (no text or symbols)natural_image
Diagram of a door with an arrow indicating direction, showing internal components and a hanging hook (no text or symbols)natural_image
Illustration of a hand holding a hanging hook attached to a vertical panel, with arrows indicating motion or force (no text or symbols present)natural_image
Diagram of a cylindrical device with internal components and directional arrows, no visible text or symbolsRegal
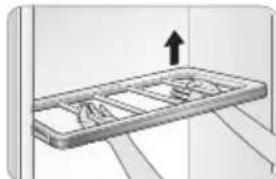
natural_image
Diagram of a rectangular frame with internal compartments and an upward arrow, no text or symbols present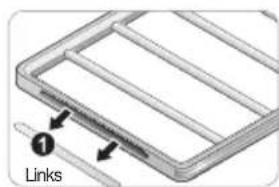
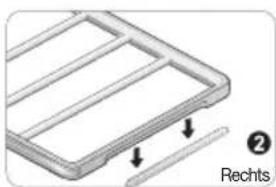
natural_image
Diagram of a 3D rectangular frame with a ruler and directional arrows indicating measurement (no text or symbols)natural_image
Technical line drawing of a front panel and side panel (no text or symbols)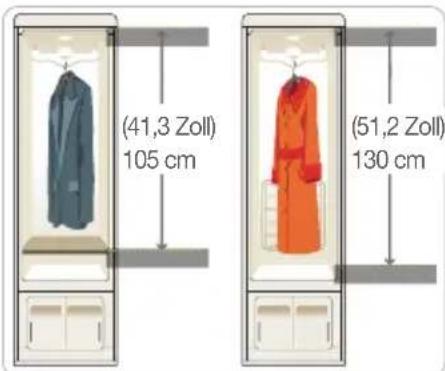
natural_image
3D rendering of two vertical metal rods placed on a rectangular tray (no text or symbols)natural_image
Illustration of a box filled with colorful items and a large 'no' symbol overlay (no text or symbols present)BEDIENFELD
① SMART DIAGNOSISTM
| Normal | Suits/Coats | Normal | Delay On |
| Light | Wool/Knit | Bedding | Normal |
| Sports Wear | Fine Dust | Rain/Snow | |
| Heavy | Downloaded | Heavy Duty | Dehumidify |
 |  |  |  |
| Refresh | Special Care | Sanitary*Night Care | Gentle Dry*Remote Start |
Setting the Night Care Function
1 Place clothes into the Styler.
2 Touch cycle selector icon repeatedly until desired cycle setting is selected.
3 Press and hold SANITARY for three seconds to illuminate the LED and activate Night Care.
4 Touch Start/Pause.
5 To cancel Night Care, touch another cycle selector icon.
SMART FUNCTIONS
SmartThinQ Application Features
3 Connect your smartphone to the wireless router.
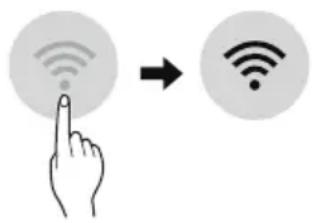
HINWEIS
- To verify the Wi-Fi connection, check that Wi-Fi ( ) icon on the control panel is lit.
- The appliance supports 2.4 GHz Wi-Fi networks only. To check your network frequency, contact your Internet service provider or refer to your wireless router manual.
- LG SmartThinQ is not responsible for any network connection problems or any faults, malfunctions, or errors caused by network connection.
- If the appliance is having trouble connecting to the Wi-Fi network, it may be too far from the router. Purchase a Wi-Fi repeater (range extender) to improve the Wi-Fi signal strength.
- The Wi-Fi connection may not connect or may be interrupted because of the home network environment.
- The network connection may not work properly depending on the Internet service provider.
- The surrounding wireless environment can make the wireless network service run slowly.
- The appliance cannot be registered due to problems with the wireless signal transmission. Unplug the appliance and wait about a minute before trying again.
- If the firewall on your wireless router is enabled, disable the firewall or add an exception to it.
- The wireless network name (SSID) should be a combination of English letters and numbers. (Do not use special characters.)
- Smartphone user interface (UI) may vary depending on the mobile operating system (OS) and the manufacturer.
- If the security protocol of the router is set to WEP, you may fail to set up the network. Please change it to other security protocols (WPA2 is recommended) and register the product again.
- If you change your wireless router, your Internet service provider or your password after registering the appliance, please delete it from the LG SmartThinQ Settings → Edit Product and register again.
LG Electronics European Shared Service Center B.V.
Krijgsman
11186 DM Amstelveen
Niederlande
natural_image
Illustration of hands holding a blue plastic container with a tool, no text or symbols presentnatural_image
Illustration of a hand inserting a blue plastic component into a white panel inside a computer (no text or symbols visible)natural_image
Symbol of a trash bin crossed with no text or numbers, representing waste sorting or disposal (no text present)SMART DIAGNOSISTM BENUTZEN
46 SMART DIAGNOSISTM
CARATTERISTICHE DEL PRODOTTO

Refresh
Gentle Dry
*Remote Start

Sanitary
*Night Care
SANITIZZARE E RIDURRE GLI ALLERGENI
natural_image
Isometric view of a rectangular metal tray with horizontal slots (no text or symbols)natural_image
3D rendering of a rectangular tray with rounded ends and horizontal lines (no text or symbols)acqua
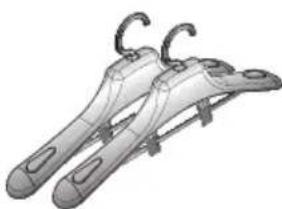
natural_image
Illustration of two hangers with clips and straps (no text or symbols)2 appendiabiti* appendipantaloni*
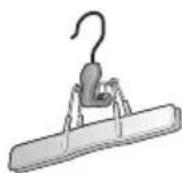
natural_image
Illustration of a clothes rack with hanging racks and two hanging clothes (no text or symbols)natural_image
Diagram of a door lock with a hanging hook, showing an open door and internal structure (no text or symbols)natural_image
Illustration of a teddy bear and a hat on a tray, no text or symbols presentMETTERE IN PIANO LO STYLER

AVVERTENZA
natural_image
Illustration of a building with a large 'no' symbol and motion lines, indicating no restriction or prohibition (no text present)
NOTA
natural_image
Mechanical linkage diagram showing two vertical arms with directional arrows indicating movement (no text or symbols)natural_image
Simple line drawing of a kitchen sink with a handle and outlet (no text or symbols)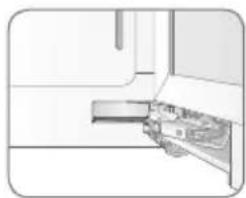
natural_image
Pure diagram of a mechanical or electrical component with no visible text, numbers, or symbolsnatural_image
Interior view of a kitchen appliance with a door handle and shelf (no visible text or symbols)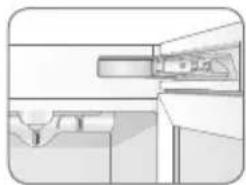
natural_image
Pure technical diagram of a mechanical assembly without any text, numbers, or symbolsFUNZIONAMENTO
PRIMA DALL'USO
Pulire lo Styler
natural_image
Electrical plug connecting a wall socket to a power outlet (no text or symbols visible)natural_image
Illustration of a gray coat with double button design, displayed on a hanger (no text or symbols)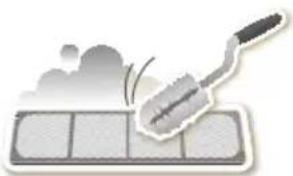
natural_image
Illustration of a griddle being brushed over a grid, with smoke rising (no text or symbols)natural_image
Illustration of two hands holding a water dispenser, one with a faucet and the other with a bag (no text or symbols)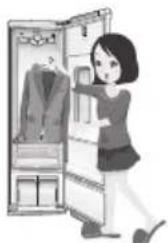
natural_image
Illustration of a woman standing beside an open refrigerator with clothes hanging (no text or symbols)
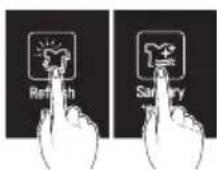
3 CONTROLLARE I SERBATOI D'ACQUA
natural_image
Illustration of hands using a tool to adjust or install a rectangular object (no text or symbols visible)natural_image
Illustration of a hand pressing down on an air conditioner cover (no text or symbols visible)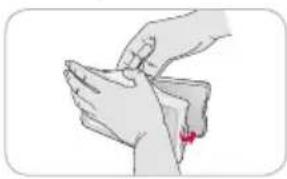
natural_image
Illustration of a hand performing a massage or physical therapy technique on a wrist (no text or symbols present)natural_image
Illustration of a hand pressing down on a ventilation grille (no text or symbols)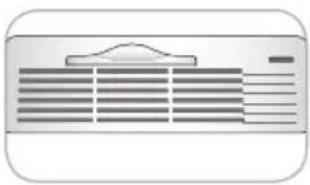
natural_image
Front view of a stylized air conditioner unit with horizontal stripes and a central grille (no text or symbols visible)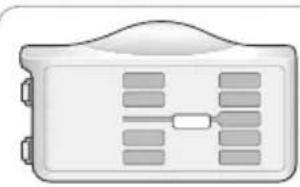
natural_image
Illustration of a rectangular device with ventilation slots and a handle (no text or symbols)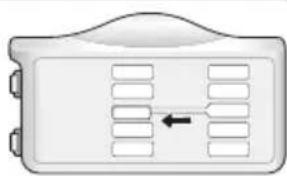
natural_image
Diagram of a device casing with vent slots and an arrow indicating direction (no text or symbols)ApertoChiuso
natural_image
Illustration of two gray men's coats hanging on hangers, one with a circular symbol and the other with a crossed-out collar (no text or symbols)natural_image
Three identical mechanical components with circular and open symbols, no text or labels presentnatural_image
Two diagrams showing a mechanical setup with rotating components and a hanging hook, no text or symbols present.natural_image
Diagram of a vertical structure with a hook and internal color gradient, no text or symbols presentnatural_image
Illustration of a hanging hook attached to a wall-mounted device (no text or symbols visible)natural_image
Illustration of a two-door refrigerator with clothes hanging from the side (no text or symbols visible)natural_image
Diagram of a door with an arrow indicating direction, no text or symbols presentnatural_image
Diagram of a vertical object being held by hands, with arrows indicating motion or force direction (no text or symbols)natural_image
Diagram of a cylindrical device with internal components and directional arrows, no visible text or symbolsRipiano
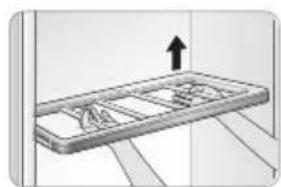
natural_image
3D diagram of a rectangular frame with internal grid structure and an upward arrow, no text or symbols present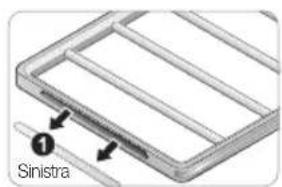
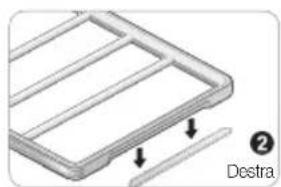
natural_image
Diagram of a 3D panel structure with arrows indicating direction, labeled 'Destra' (no text or symbols on the diagram itself)natural_image
3D rendering of a rectangular tray with two vertical metal rods inserted into the center (no text or symbols)natural_image
Illustration of an open box filled with gift boxes and a pink flower, with a large no-smoking symbol in the background (no text or symbols on the main image)PANNELLO DI CONTROLLO
① ICONA SMART DIAGNOSISTM
3 Collegare lo smartphone al router wireless.
NOTA
LG Electronics European Shared Service Centre B.V.
Krijgsman 1
1186 DM Amstelveen
The Netherlands
natural_image
Illustration of hands holding a blue plastic container with a tool, no text or symbols presentnatural_image
Illustration of a hand inserting a blue plastic bag into a white air conditioner unit (no text or symbols visible)natural_image
Symbol of a trash bin with crossed lines indicating no waste or discharge (no text or labels)- TABLE OF CONTENTS
- PRODUCT FEATURES
- IMPORTANT SAFETY INSTRUCTIONS
- PRODUCT OVERVIEW
- 13INSTALLATION
- 20OPERATION
- 36SMART FEATURES
- 39MAINTENANCE
- TROUBLESHOOTING
- 45SMART DIAGNOSIS TM
- PRODUCT FEATURES
- REMOVE ODORS
- REFRESH CLOTHING OR ADD AN AROMA
- REMOVE WRINKLES
- SHARPEN CREASES IN PANTS
- GENTLY AND EFFECTIVELY DRY
- SANITIZE AND REDUCE ALLERGENS
- SMART DIAGNOSISTM
- Wi-Fi CYCLE DOWNLOAD
- IMPORTANT SAFETY INSTRUCTIONS
- WARNING
- CAUTION
- Children in the household
- For use in Europe:
- SAFETY INSTRUCTIONS FOR INSTALLATION
- SAFETY INSTRUCTIONS FOR CONNECTING ELECTRICITY
- BASIC SAFETY PRECAUTIONS USE
- MAINTENANCE AND DISPOSAL
- GROUNDING INSTRUCTIONS
- PRODUCT OVERVIEW PARTS
- ACCESSORIES
- Included Accessories
- NOTE
- THE MOVING HANGER
- THE PANTS CREASE CARE
- THE SHELF
- CHOOSING STYLER FEATURES
- INSTALLATION INSTALLATION OVERVIEW
- PRODUCT SPECIFICATIONS
- UNPACKING THE STYLER
- INSTALLATION LOCATION REQUIREMENTS
- Clearances
- Recommended Installation Spacing
- Installation Spacing for Recessed Area or Closet Installation
- Closet Ventilation Requirements
- LEVELING THE STYLER
- REVERSING THE DOOR
- USING NON-SKID PADS (OPTIONAL)
- INSTALLING THE ANTI-TIP DEVICE
- ASSEMBLING THE DRIP TRAY
- INSTALLING CAP COVERS
- INSTALLING HINGE COVERS
- Unpack accessories.
- Assemble the drip tray.
- Connect the power supply.
- Wash dirty clothes if necessary before putting them in the Styler.
- USING THE STYLER
- PREPARE ITEMS
- CLEAN LINT FILTER, CHANGE SHEET IN AROMA FILTER
- CHECK WATER TANKS
- LOAD STYLER
- TURN ON STYLER
- SELECT CYCLE
- BEGIN CYCLE
- END OF CYCLE
- SORTING LOADS
- Fabric Care Labels
- Grouping Similar Items
- Choosing Styler-Safe Clothing
- FABRIC CARE GUIDE (CONTINUED)
- CHECKING THE FILTERS BEFORE EVERY LOAD
- Checking the Lint Filter
- Changing the Aroma Sheet
- CHECKING THE WATER TANKS
- LOADING THE STYLER
- Hangers
- Select an appropriate hanger.
- Fasten the buttons and zippers on all garments and hang them on hangers.
- Place the hangers into the slots of the moving hanger
- Using the Moving Hanger
- Insert hangers into slots and pull down to secure the hook snugly.
- Use the diagonal slots (2 and 4) for bulky items.
- Do not overcrowd items.
- Pants Hanger or Pants Crease Care
- Opening and Closing the Pants Hanger
- Hanging Pants On the Pants Hanger
- Using the Pants Crease Care
- Shelf
- Assembling the Shelf
- Storing Hangers
- CONTROL PANEL
- Control Panel Features
- ① SMART DIAGNOSISTM ICON
- ② POWER ON/OFF
- ③ CYCLE COMPLETION INDICATOR
- ④ OPTION AND ALERT INDICATORS
- ⑤ TIME DISPLAY
- ⑥ START/PAUSE
- ⑦ SmartThinQ™
- ⑧ REFRESH CYCLE
- ⑨ SPECIAL CARE
- ⑪ SANITARY / \*Night Care
- ⑫ GENTLE DRY / \*Remote Start
- ⑬ DELAY START / \*Wi-Fi
- Cycle Processes
- CHOOSING A CYCLE
- Refresh Cycle
- Sanitary Cycle
- Gentle Dry Cycle
- Rain/Snow
- Dehumidify
- Special Care
- Downloaded
- CYCLE SETTINGS AND OPTIONS
- Cycle Selector Icons
- Selecting a Cycle
- Changing Settings During a Cycle
- Selecting the Downloaded Cycles
- EXTRA FUNCTIONS
- Locking the Controls
- Setting a Delayed Start Time
- \* Smart Diagnosis™
- Night Care
- Setting the Night Care Function
- SMART FUNCTIONS
- SmartThinQ Application
- Installing SmartThinQ Application
- SmartThinQ Application Features
- Download Cycle
- Push Alerts (Smart Messages)
- Smart Diagnosis™
- Things to check before using LG SmartThinQ
- Open Source Software Notice Information
- MAINTENANCE REGULAR CLEANING
- Cleaning the Interior and Exterior
- Cleaning the Lint Filter
- Cleaning the Aroma Filter
- Cleaning the Water Tanks
- Disposal of your old appliance
- TROUBLESHOOTING
- FAQS: FREQUENTLY ASKED QUESTIONS
- Q: What are aroma sheets and how do I use them?
- Q: Can I put fur, leather, or silk items in the Styler?
- Q: Why is the cycle time longer than estimated for the Gentle Dry cycle?
- BEFORE CALLING FOR SERVICE
- SMART DIAGNOSIS SMART DIAGNOSIS™
- USING SMART DIAGNOSISTM
- Smart Diagnosis™ Using a Smart Phone
- Smart Diagnosis™ through the Call Center
- GEBRUIKERSHANDLEIDING
- STYLER
- PROBLEEMOPLOSSING
- OPMERKING
- WERKING VOOR GEBRUIK
- Styler reinigen.
- Aromablad vervangen
- Broekhanger of broekpers
- Broekpers gebruiken
- Rek
- Hangers opbergen
- BEDIENINGSPANEEEL
- ① SMART DIAGNOSISTM-PICTOGRAM
- ③ INDICATOR STATUS PROGRAMMA
- ④ OPTIES- EN WAARSCHUWINGSINDICATORS
- Downloaded selecteren
- Download Cycle (Download prog.)
- SMART DIAGNOSISTM GEBRUIKEN
- SMART DIAGNOSISTM
- PRODUKTMERKMALE
- ENTFERNT GERÜCHE
- SCHONENDES UND EFFEKTIVES TROCKNEN
- HINWEIS
- BETRIEB
- VOR DEM BETRIEB
- Den Styler reinigen.
- Regal
- BEDIENFELD
- ① SMART DIAGNOSISTM
- SMART DIAGNOSISTM BENUTZEN
- CARATTERISTICHE DEL PRODOTTO
- SANITIZZARE E RIDURRE GLI ALLERGENI
- METTERE IN PIANO LO STYLER
- AVVERTENZA
- NOTA
- FUNZIONAMENTO
- PRIMA DALL'USO
- Pulire lo Styler
- CONTROLLARE I SERBATOI D'ACQUA
- Ripiano
- PANNELLO DI CONTROLLO
- ① ICONA SMART DIAGNOSISTM
- Collegare lo smartphone al router wireless.
Brand : LG
Model : S3BF
Category : Uncategorized