
TLD - Uncategorized Mercury - Free user manual and instructions
Find the device manual for free TLD Mercury in PDF.


| Product Type | Bolt-action rifle |
| Brand | Mercury (manufactured by Sabatti) |
| Model | TLD |
| Caliber | Various (e.g., 30-06 Springfield) |
| Action Type | Manually operated rotating bolt |
| Safety Mechanism | Two-position safety catch on tang (red dot = fire, white dot = safe) |
| Trigger Type | 3-lever adjustable trigger group |
| Magazine | Removable single-column magazine |
| Barrel Thread | 5/8")-24 UNF for muzzle brake |
| Scope Mount Base | Picatinny base (one-piece) compatible with Remington 700 bases |
| Bolt Release | Button on frame for bolt removal |
| Magazine Release | Button on trigger guard |
| Primary Use | Target shooting, competition, hunting |
| Maintenance | Regular cleaning of barrel and chamber; oil metal parts; periodic removal of copper/lead deposits |
| Safety Precautions | Always treat as loaded; store unloaded; use correct ammunition; wear ear and eye protection |
| Parts & Repairability | Trigger adjustment only by gunsmith; disassembly limited to bolt; other repairs by expert |
| Accessories | Scope mounts, muzzle brake (optional) |
| Manual Languages | English, Italian (original), plus translation available on request |
Frequently Asked Questions - TLD Mercury
User questions about TLD Mercury
0 question about this device. Answer the ones you know or ask your own.
Ask a new question about this device
Download the instructions for your Uncategorized in PDF format for free! Find your manual TLD - Mercury and take your electronic device back in hand. On this page are published all the documents necessary for the use of your device. TLD by Mercury.
USER MANUAL TLD Mercury
natural_image
Side profile of a modern sniper rifle with textured grip and scope (no visible text or markings)
CARATTERISTICHE PRINCIPALI, USO E MANUTENZIONE DELLE CARABINE AD OTTURATORE GIREVOLE SCORREVOLE.
Your new rifle is at the top of the range for the high performance. The shooting precision, quality of materials employed in manufacturing and accuracy of its finishing are advantages that will
be of benefit only through a safe use of the gun.
The presence of effective safety devices must not lead to less careful use; the gun must be handled by strictly following all the security rules involved with firearms, ammunition and their maintenance, as prescribed in this booklet.
Sabatti S.p.A. and your gun dealer are at your complete disposal to give all the assistance in understanding this manual as well as to supply any further information you may need.
IMPORTANT!
Please read the whole instruction manual carefully before using the gun.
Failure to read and understand it, or failure to follow the instructions and rules on how to handle firearms, could cause serious injury and general damage to people and property.
SAFETY BEFORE ALL
- Do not leave your personal safety, or that of others, to the sole safety devices. Always handle your gun as if it was loaded and ready to fire.
- Store firearms and ammunition separately, in a locked place, outside of children's reach.
- Make sure your firearm is not used by people who do not hold a shooting license.
- Get familiar with your firearm, its handling and the functioning of its mechanism before you start to use it. Practice when the firearm is unloaded and in a safe environment.
- Do not load the firearm until you are ready to use it and do not carry a loaded firearm.
- Always check that there are no obstructions (snow, water, mud, leaves, etc.) inside the barrel before loading it. Look down the barrel from the side of the cartridge chamber.
- Only use industrially made cartridges that are in perfect condition, that correspond to the caliber impressed on the lugs of your firearm and comply with the standards requested by C.I.P. (Europe) or an equal body. Cartridges that are not certified or have been improperly reloaded can damage the firearm and injure you or other people around you.
- Always pay attention to the direction where your firearm is pointing at so as not to endanger the safety of those around you. This is especially important when you are
loading or unloading your firearm.
- Do not cross ditches or impassable areas, do not climb or jump obstacles with a loaded gun. Always unload the gun before getting on or off a hiding terrace, crossing a road, entering a building or an inhabited centre and getting in a vehicle.
- Do not fire unless you are undoubtedly sure that you have recognized your target, as well as what is in place before and after it.
- Be aware of your gun range. As a matter of fact, a shot from a hunting cartridge (for example a 30-06 caliber) can travel 6 km before stopping.
- Bring the safety catch button to its firing position only before shooting, paying attention that the gun is pointing at a safe direction. If you decide not to fire, bring the safety catch button back to the safety position.
- Place your finger on the trigger only when you are ready to fire.
- Never shoot into water, against rocks or hard surfaces as ricocheting shots are extremely dangerous even at long distances.
- In case a cartridge fails to shoot, wait at least 60 seconds before opening the gun, aiming it at a safe direction to avoid the danger of a delayed lighting of the gunpowder.
- If, after shooting, the recoil is felt less than usual, check that the barrel is free from any obstruction before shooting again. Shooting with the barrel obstructed by a bullet can destroy the gun and put your safety, and that of others around you, in danger.
- Shooting in closed or badly aired premises can cause lead exposure. Always make sure that there is good ventilation when you shoot.
- Always wear ear protections and safety glasses before you start shooting. Repeated exposure to noise can cause permanent damage to the hearing system. If a primer capsule or a cartridge breaks, or there is a malfunctioning mechanical part, this can lead to the projection of metal parts or powder.
- Do not modify parts of your gun, particularly the trigger's pull and its travel, as well as other parts of the trigger mechanism, safety devices and any other mechanism. To keep your gun always in best conditions, have it checked regularly by an expert gun dealer. Failing to comply with these rules can lead to serious damage to yourself and others.
- Before storing the gun away in its case, or package, or place where it is kept, always verify that the cartridge chamber is empty.
- Do not drink or take drugs if you expect to use any firearm.
BOLT-ACTION RIFLE
A bolt-action rifle usually refers to a rifled firearm where the loading and locking procedures are carried out by a manually-operated rotating bolt.
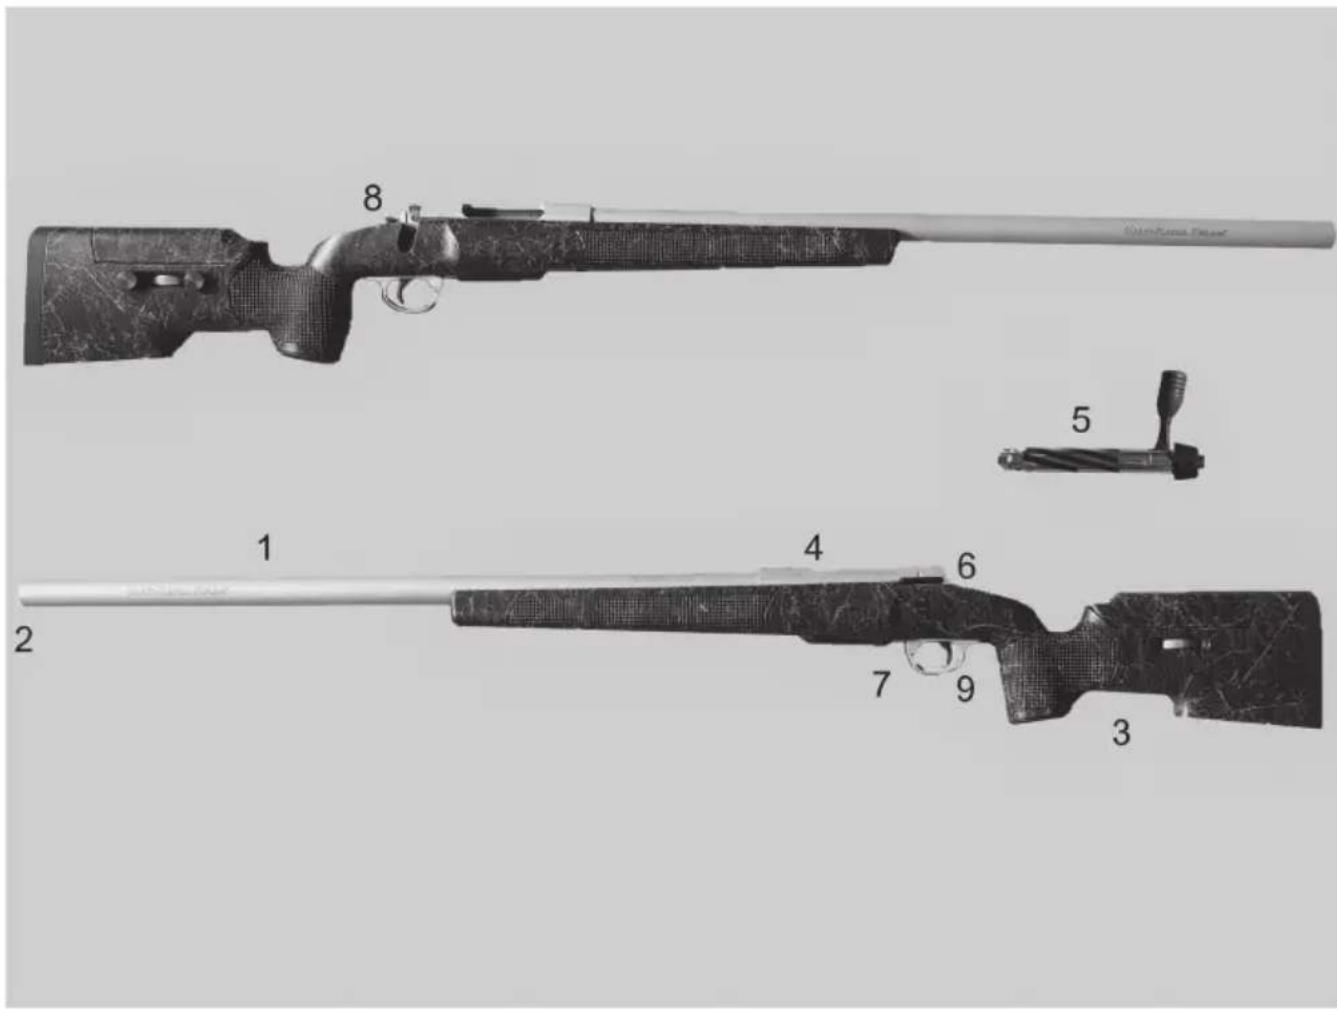
LIST OF THE MAIN GUN PARTS (PIC. 11)
1 - Barrel
2 - Muzzle
3 -Chassis
4 - Frame
5 - Bolt
6 - Bolt-release button
7- Magazine release button (magazine opening button)
8 - Safety catch
9 - Trigger
THE SAFETY DEVICE
On Sabattirifles, the safety catch button (or just safety) is found on the frame tang, behind the bolt handle. Pushing the safety catch button all the way forward with the thumb sets the gun in Firing mode. A red dot will appear on the tang (Pic. 2). The trigger and trigger mechanism are activated and the gun is ready to shoot.
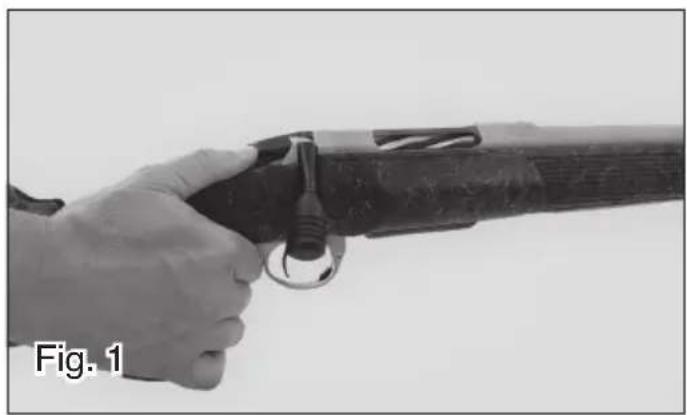
Pushing the safety button all the way back with the thumb sets the gun in Safety mode. A white dot will appear on the tang (Pic. 1). The trigger mechanism and the trigger are deactivated and the rifle cannot shoot.
THE BOLT
The bolt, located inside the frame, works as a support and a guide for the firing pin, loads and unloads the gun and opens and closes the breech face.
To open the bolt, rotate its handle 60^ anti-clockwise so as to free the tenons, and pull it all the way back until it reaches the limit.
To close the bolt, push its handle forward and rotate it 60^ clockwise so as to bring the tenons to the closing position.
THE TRIGGER GROUP
The trigger fitted on this rifle is part of the trigger mechanism located under the frame. The trigger activates the mechanism that frees the firing pin. The trigger mechanism is regulated at the factory. The setting can be modified only by the gun maker or by ar
authorized gun dealer.
Altering the trigger pull or travel can compromise the safety of the gun.
3-lever trigger group
Sabatti target and competition rifles (such as the models TLD, TACTICAL EVO, etc.) come standard with 3-lever trigger groups which guarantee lighter trigger pulls and shorter travels PLEASE NOTE: the3-lever trigger mechanism is quite delicate and complex, so much so that any intervention must be carried out only by the gun maker.
THE REMOVABLE MAGAZINE
These rifle models come with removable and interchangeable single-column magazines
USING AND HANDLING THE RIFLE
Assembling the bolt
Take the rifle and bolt from the packaging and slip the protective plastic bag off. Look down the barrel from the frame to make sure that no cartridge or obstruction is present.
Hold the bolt handle and while keeping the groove on the bolt aligned with the bolt release button, rest the bolt head on the frame between the rear trigger bow and the safety catch button, aligning the tenons with the guiding slots on the frame. (Pic. 8)
Push the bolt forward in the frame until it passes over the bolt release button; bring it to closed and locked position.
PLEASE NOTE: before storing the gun for a long period, release the firing pin spring tension by keeping the trigger pressed while pushing and rotating the bolt forward. (Pic. 5)
Disassembling the bolt
Aim the rifle towards a safe direction, rotate the bolt handle 60^ anti-clockwise.
With your thumb holding the rifle, press the bolt release button, while pulling the bolt backwards with the other hand, until it comes out of the frame completely. (Pic. 7)
If necessary, put the rifle and bolt away in the packaging.
PLEASE NOTE: do not proceed any further in taking your gun apart as disassembling its components is not required to clean it or for the usual maintenance and could damage its mechanism.
If necessary, contact your gun dealer or the gun maker.
Loading and unloading the gun
Make sure you have followed all the instructions found in the section entitled “Safety before all”.
Clean out any protective oil from the barrel and the cartridge chamber.
Make sure that the caliber on the cartridges that you intend to use corresponds to that marked on the barrel of the rifle.
Aim the gun in a safe direction.
You own a rifle with a removable magazine. Insert the cartridges in the single-column magazine, (Pic. 9) and make sure the bolt is shut. Insert the loaded magazine in its slot, located before the trigger guard, and push it in until it clicks in place.
To chamber a cartridge, open the bolt and then shut it: this will draw a cartridge from the magazine and push it in the chamber.
To unload the rifle, open the bolt and expel the cartridge found in the chamber, (Pic. 6).
Remove the magazine by pressing the release button located on the trigger guard in front of the trigger (Pic. 10) and then shut the bolt.
WARNING! If there is a cartridge in the chamber, by pressing the trigger the rifle will shoot.
PLEASE NOTE: if for any reason a loaded cartridge should get stuck in the chamber, lay down the rifle making sure it points towards a safe direction, insert the safety catch, if possible, and ask an expert gunsmith to intervene.
Preparing the gun for shooting
Having loaded the gun according the instruction in the previous paragraphs, push the safety catch completely forward: a red dot will appear on the action tang. (Pic. 2)
ATTENTION! Avoid carrying a loaded gun with the safety catch in Fire position.
Placing the safety catch on Push the safety button all the way back: a white dot will appear on the action tang (Pic. 1)
PLEASE NOTE: having placed the safety catch button in the Safety position does not justify any improper or careless handling of the gun.
Safety mechanisms, as sophisticated as they can be, are purely mechanical devices that cannot be held solely responsible for our safety and that of others.
Shooting
Once the rifle is loaded, after having identified the target and adjusted it to the metal sights or another aiming device, with your thumb, push the safety forward until the rifle is in firing position (Pic. 2).
Now the rifle is loaded, cocked and ready to fire. When you think the time is right, press lightly on the trigger, increasing the pressure gradually until the shot has been fired.
Expelling the empty cartridge after firing
To expel the empty cartridge after firing, simply open the bolt: the extractor or ejector will throw the case out of the frame (Pic. 6).
PLEASE NOTE: if an empty cartridge should remain stuck inside the cartridge chamber, preventing the bolt from opening, take the rifle to an expert gunsmith. Any other intervention could damage the gun.
PLEASE ALSO NOTE: if the primer (cap) has been perforated, take the gun to an expert gunsmith to clean the firing pin area from any combustion residues and metal parts.
PLEASE ALSO NOTE: keep the environment clean and always collect the expelled empty cartridges.
Fitting the aiming device
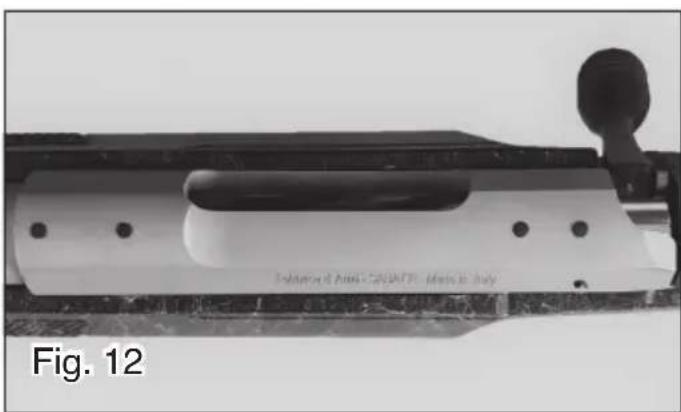
A one-piece Picatinny base for scope mounts available from the gun manufacturer can be fitted on the two bows of the frame. Alternatively, 2-piece bases compatible with Remington 700 are easily available from specialized gun shops (Pic 12). Ask your gun dealer for more information about the range of mounts that is available or contact the manufacturer. Fitting a scope is a delicate operation that should be preferably carried out by an expert, as any mistake would make it impossible to aim the gun properly or could alter the point of impact in time. Not all mounts can be assembled and disassembled while maintaining the correct adjustment of the scope. Some mounts require that a new adjustment is carried out whenever the scope is fitted. When fitting the scope, make sure it is at the right distance from the eye. In fact, due to the effect of the recoil, a scope that is positioned too close to the eye could hurt the shooter.
Fitting a scope is a delicate operation that should be preferably carried out by an expert, as any mistake would make it impossible to aim the gun properly or could alter the point of impact in time.
Not all mounts can be assembled and disassembled while maintaining the correct adjustment of the scope. Some mounts require that a new adjustment is carried out whenever the scope is fitted.
When fitting the scope, make sure it is at the right distance from the eye. In fact, due to the effect of the recoil, a scope that is positioned too close to the eye could hurt the shooter.
Fitting the muzzle brake
The muzzle brake available from the gun manufacturer or any other accessory with a 5/8"-24 UNF thread can be fitted to the end of the barrel after unscrewing the thread cover (Pic 13)
Care and maintenance
After drying up every trace of humidity with a dry cloth, keep the mechanical parts in contact with one another and the external surface of the barrel always lightly oiled.
After the gun has been exposed to rain or humidity, or just before storing the gun for a long period, dry up all the metal parts, cartridge chamber and bore and protect them from
rusting by applying a specific oil for guns.
Before using the gun again, eliminate the oil left in the barrel and the cartridge chamber completely.
To maintain the gun accuracy in time, it is advisable to periodically eliminate all the deposits due to combustion, and the copper or lead residues left inside the barrel by the cartridge, using good quality cleaning products.
If you employ an ammonia-based product to dissolve the copper residues left inside the barrel, leave the product to work only for a short time to avoid damages to the rifling and carefully remove even the smallest residue of the solvent.
It is good practice to follow the instructions supplied with the cleaning and maintenance products.
natural_image
Close-up of a hand holding a rifle with a clamp, labeled 'Fig. 1' (no other text or symbols visible)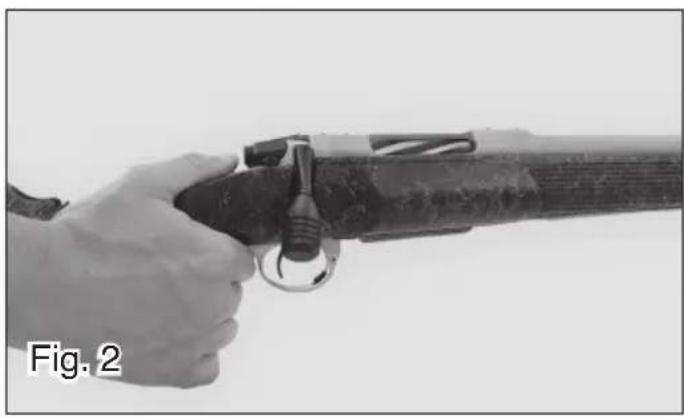
natural_image
Close-up of a hand holding a rifle with a tool, labeled 'Fig. 2' (no other text or symbols visible)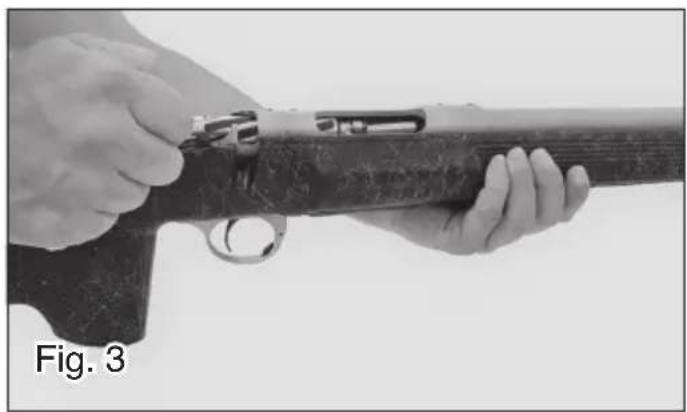
natural_image
Close-up of hands holding a firearm with a grip, labeled 'Fig. 3' (no other text or symbols visible)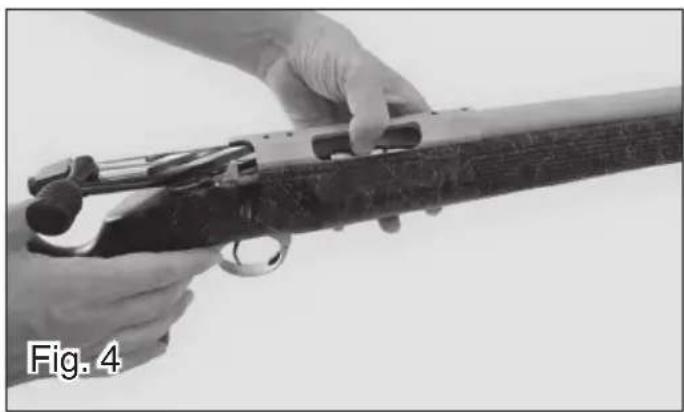
natural_image
Close-up of hands holding a rifle with a ring, labeled 'Fig. 4' (no other text or symbols visible)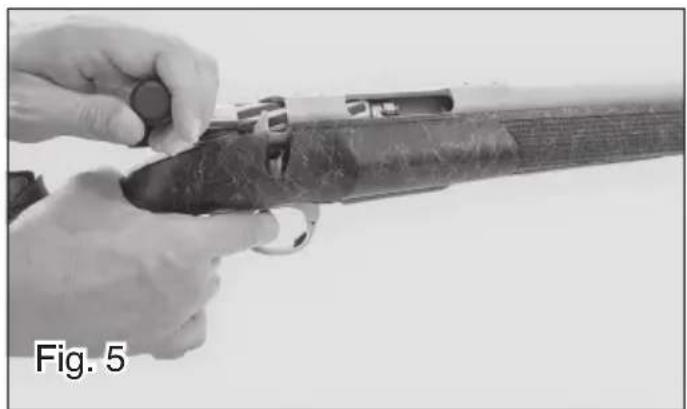
natural_image
Close-up of hands holding a firearm with a grip, labeled 'Fig. 5' (no other text or symbols visible)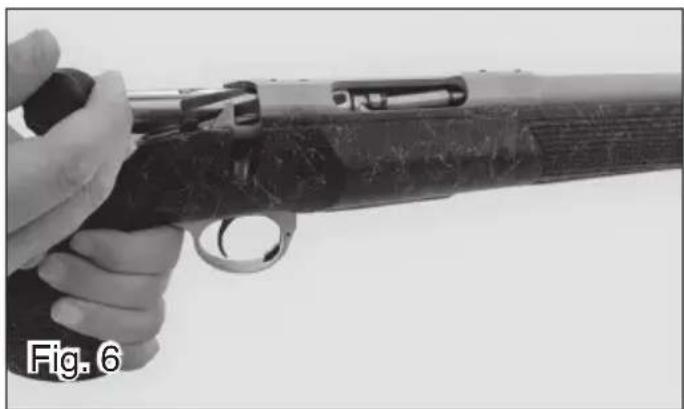
natural_image
Close-up of a hand holding a firearm with a circular grip, labeled 'Fig. 6' (no other text or symbols visible)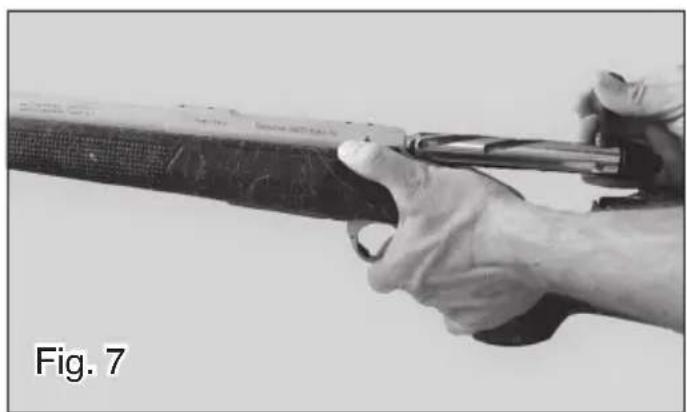
natural_image
Close-up of a person holding a rifle with a pointed tip, labeled 'Fig. 7' (no other text or symbols visible)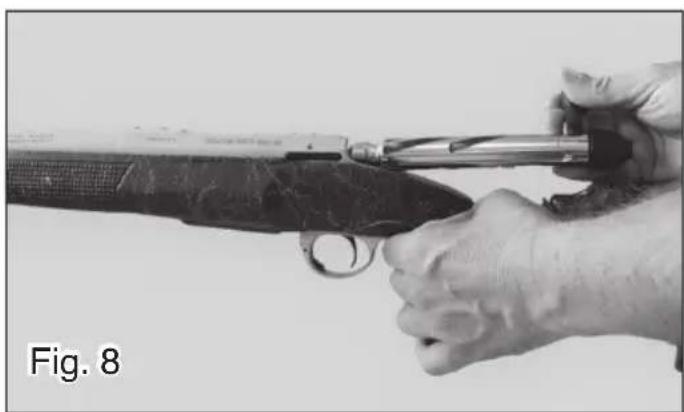
natural_image
Close-up of a hand holding a firearm with a tool, labeled 'Fig. 8' (no other text or symbols visible)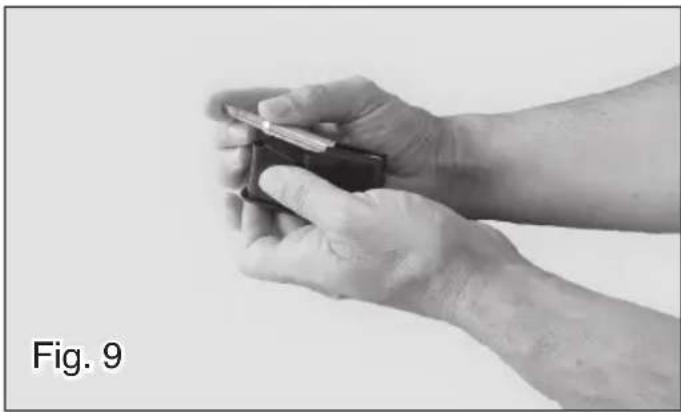
natural_image
Close-up of a person holding a small object, labeled 'Fig. 9' at bottom left (no other text or symbols)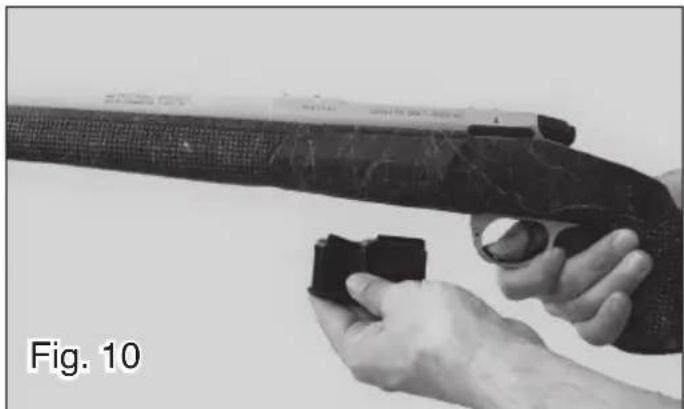
natural_image
Close-up of a hand holding a handgun with a small black object nearby, labeled 'Fig. 10' (no other text or symbols visible)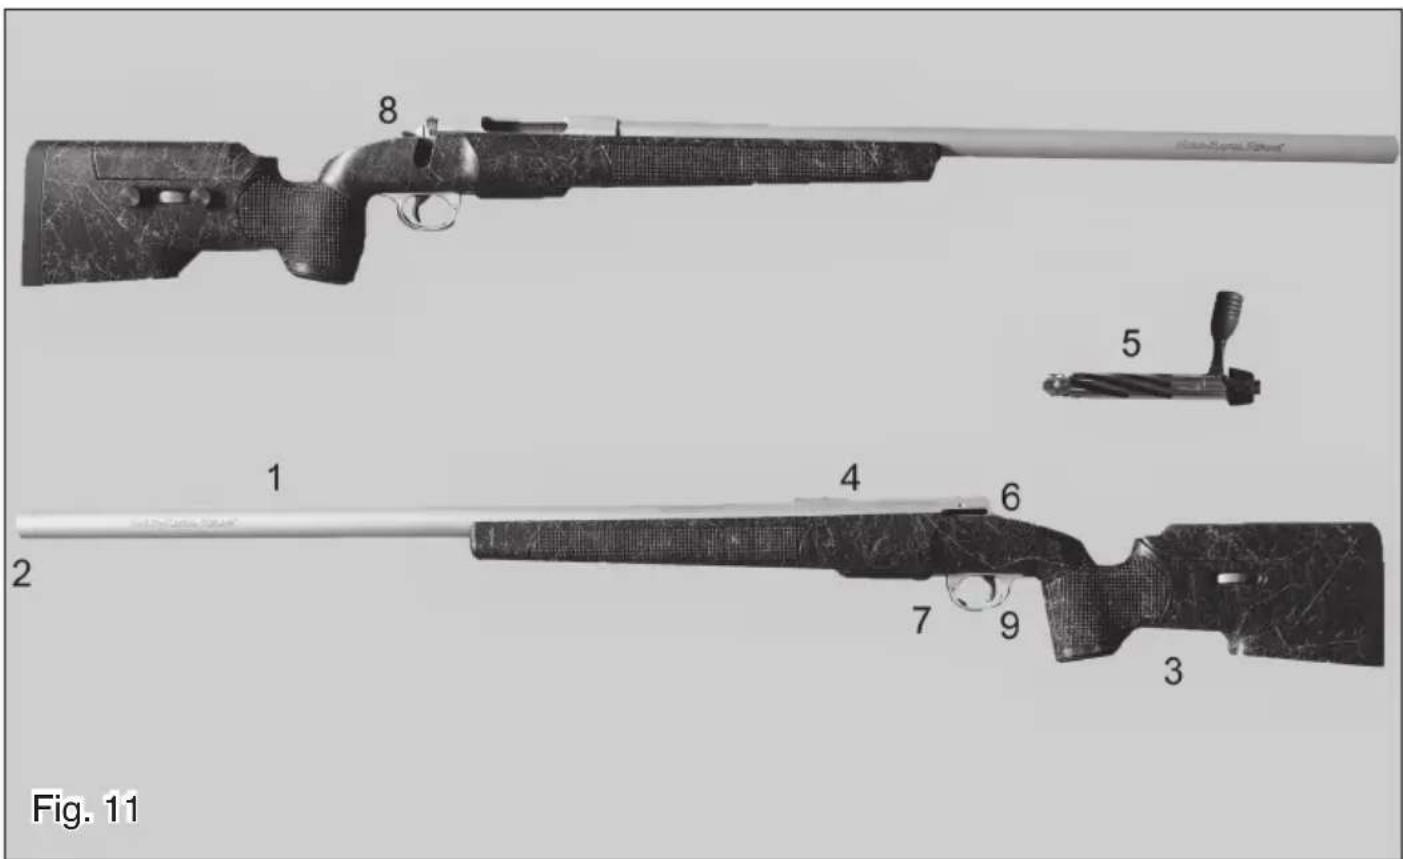
natural_image
Close-up of a mechanical component with a metallic handle and mounting holes, labeled Fig. 12 (no readable text or symbols on the object itself)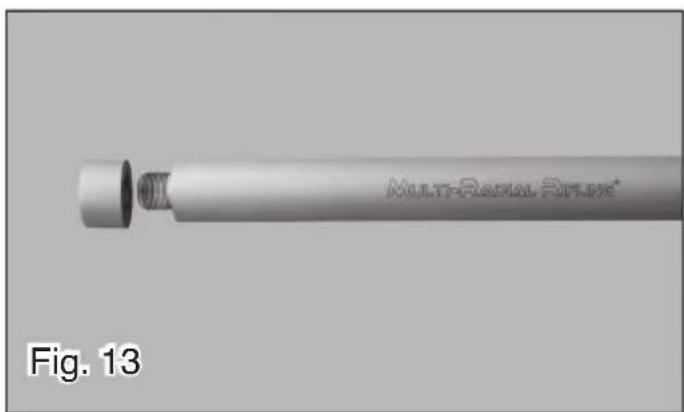
natural_image
3D rendered image of a cylindrical mechanical component with a flanged end, labeled Fig. 13 (no text or symbols on the object itself)
Sabatti
s.p.a.
Via Alessandro Volta, 90
25063 GARDONE VALTROMPIA (Brescia) ITALY
TEL. 030·8912207 - 030.831312 - FAX 030·8912059
e-mail: info@sabatti.it
- CARATTERISTICHE PRINCIPALI, USO E MANUTENZIONE DELLE CARABINE AD OTTURATORE GIREVOLE SCORREVOLE.
- IMPORTANT!
- SAFETY BEFORE ALL
- BOLT-ACTION RIFLE
- LIST OF THE MAIN GUN PARTS (PIC. 11)
- THE SAFETY DEVICE
- THE BOLT
- THE TRIGGER GROUP
- 3-lever trigger group
- THE REMOVABLE MAGAZINE
- USING AND HANDLING THE RIFLE
- Assembling the bolt
- Disassembling the bolt
- Loading and unloading the gun
- Preparing the gun for shooting
- Shooting
- Expelling the empty cartridge after firing
- Fitting the aiming device
- Fitting the muzzle brake
- Care and maintenance
- Sabatti
Brand : Mercury
Model : TLD
Category : Uncategorized