
IMWH-GD203 B - Oven VOX - Free user manual and instructions
Find the device manual for free IMWH-GD203 B VOX in PDF.


| Product Type | Microwave Oven with Grill and Convection |
| Brand | VOX |
| Model | IMWH-GD203 B |
| Product Dimensions (W x H x D) | 595 x 385 x 377 mm (23.4 x 15.2 x 14.8 in) |
| Opening Dimensions (W x H x D) | 560±2 x 360±2 x 550±2 mm |
| Cabinet Board Thickness | 18-20 mm |
| Microwave Power | Approximately 800 W (5 power levels) |
| Grill Power | Approximately 1000 W (3 modes: Grill, Combi 1, Combi 2) |
| Turntable | Glass turntable, diameter approx. 270 mm, removable |
| Control Type | Electronic with knob and buttons, LED display |
| Functions | Microwave, Grill, Combination, Defrost by weight/time, Auto cook (8 menus), Express cooking, Clock, Child lock |
| Defrost Modes | dEF1 (by weight, 100-1500 g), dEF2 (by time, 0:10-60:00) |
| Auto Menus | Potato, Pasta, Pizza, Popcorn, Vegetable, Beverage, Meat, Fish |
| Child Lock | Yes, press STOP for 3+ seconds |
| Interior Light | LED, <60 lm |
| Safety Features | Door interlock, overheating protection, child lock |
| Cleaning | Wipe with damp cloth; do not use abrasive cleaners or steam cleaners |
| Voltage / Frequency | 230 V / 50 Hz (typical) |
| Net Weight | Approximately 25 kg (estimated) |
| Color | Black (stainless steel front, black cavity) |
Frequently Asked Questions - IMWH-GD203 B VOX
User questions about IMWH-GD203 B VOX
0 question about this device. Answer the ones you know or ask your own.
Ask a new question about this device
Download the instructions for your Oven in PDF format for free! Find your manual IMWH-GD203 B - VOX and take your electronic device back in hand. On this page are published all the documents necessary for the use of your device. IMWH-GD203 B by VOX.
USER MANUAL IMWH-GD203 B VOX
natural_image
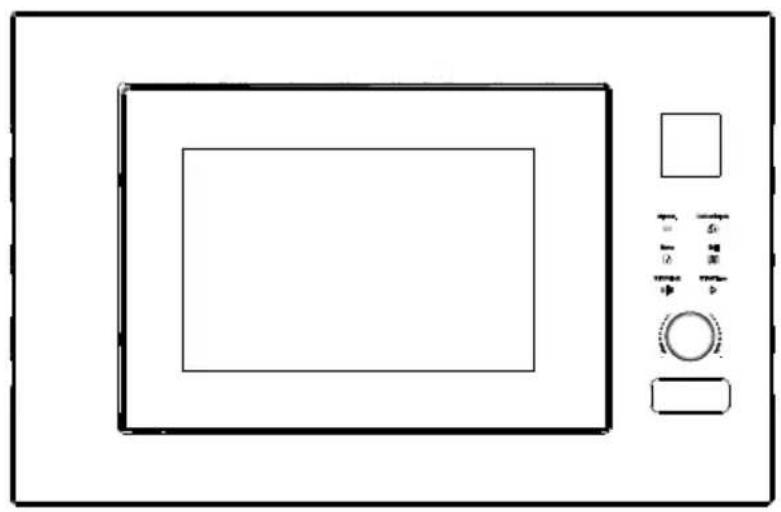
Line drawing of a microwave oven with control panel and buttons (no text or symbols)IMWH- GD203B
IMPORTANT SAFETY INSTRUCTIONS READ CAREFULLY AND KEEP FOR FUTURE REFERENCE
IMPORTANT SAFEGUARDS
WARNING: If the door or door seals are damaged, the oven must not be operated until it has been repaired by a trained person.
WARNING: It is hazardous for anyone other than a trained person to carry out any service or repair operation, which involves the removal of any cover, which gives protection against exposure to microwave energy. WARNING: Liquids or other food must not be heated in sealed containers since they are liable to explode.
- Only use utensils that are suitable for use in microwave ovens.
- Metallic containers for food and beverages are not allowed during microwave cooking.
- When heating food in plastic or paper containers, keep an eye on the oven due to the possibility of ignition.
- The microwave oven is intended for heating food and beverages. Drying of food or clothing and heating of warming pads, slippers, sponges, damp cloth and similar may lead to risk of injury, ignition or fire.
- If smoke is observed, switch off or unplug the appliance and keep the door closed in order to stifle any flames microwave heating of beverages can result in delayed eruptive boiling, therefore care has to be taken when handling the container.
- The contents of feeding bottles and baby food jars are to be
stirred or shaken and the temperature is to be checked before consumption, in order to avoid burns.
- Eggs in their shell and whole hard-boiled eggs shall not be heated in microwave ovens since they may explode, even after microwave heating has ended.
- Failure to maintain the oven in a clean condition could lead to deterioration of the surface that could adversely affect the life of the appliance and possibly result in a hazardous situation. The microwave oven is intended to be used freestanding or built-in or in a cabinet.
- Care should be taken not to displace the turntable when removing containers from the appliance.
- The appliance shall not be cleaned with a steam cleaner.
- The appliance must not be installed equal or higher than 900 mm above the floor. Minimum height of free space necessary above the top surface of the oven: 100mm.
Warning: When the appliance is operated in the combination mode, children should only use the oven under adult supervision due to the temperatures generated.
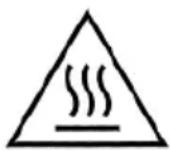
CAUTION: HOT SURFACE
- If the supply cord is damaged, it must be replaced by the manufacturer or its service agent or a similarly qualified
person in order to avoid a hazard.
-
This appliance can be used by children aged from 8 years and above and persons with reduced physical, sensory or mental capabilities or lack of experience and knowledge if they have been given supervision or instruction concerning use of the appliance in a safe way and understand the hazards involved.
-
Children shall not play with the appliance.
-
Cleaning and user maintenance shall not be made by children without supervision.
-
Group 2 Class B appliance
Group 2 ISM equipment: group 2 contains all ISM equipment in which radio-frequency energy is intentionally generated and/or used in the form of electromagnetic radiation for the treatment of material, and EDM and arc welding equipment.
Class B equipment is equipment suitable for use in domestic establishments and in establishments directly connected to a low voltage power supply network which supplies buildings used for domestic purposes
-
The plug must be remained easily accessible after installation of the appliance.
-
The appliance must not be placed in a cabinet.
-
This product internal light source LED light on <60lm.
-
During use the appliances becomes hot. Care should be taken to avoid touching heating elements inside the oven.
WARNING: Accessible parts may become hot during use. Young children should be kept away.
WARNING: The appliance and its accessible parts become hot during use.
-
Care should be taken to avoid touching heating elements.
-
Children less than 8 years of age shall be kept away unless continuously supervised.
-
Do not use harsh abrasive cleaners or sharp metal scrapers to clean the oven door glass since they can scratch the surface, which may result in shattering of the glass.
-
The appliance must not be installed behind a decorative door in order to avoid overheating. This appliance can be used by children aged from 8 years and above and persons with reduced physical, sensory or mental capabilities or lack of experience and knowledge if they have been given supervision or instruction concerning use of the appliance in a safe way and understand the hazards involved. Children shall not play with the appliance. Cleaning and user maintenance shall not be made by children without details indicating the correct installation of the shelves.
INSTALLATION
- Take out all the packing. If there is a safe film over the oven, tear it off before use. Check carefully for damage. If any, immediately notify dealer or send to the manufacturer's service center.
- Microwave ovens must be placed under dry and non-corrosiveness environments, kept away from heat and humidity, such as gas burner or water tank.
- The position of the oven shall be such that it is far from the TV, Radio or antenna as picture disturbance, or noise may occur.
- The appliance must be positioned so that the plug is accessible, and must ensure a good grounding in case leakage, ground loop can be formed to avoid electric shock.
- The microwave oven must be operated with the door closed.
- This product internal light source LED light on <60lm.
- As there is manufacturing residue or oil remained on the oven cavity or heat element, it usually would smell the odor, even a slight smoke, It is normal case and would not occur after several times use, keep the door or window open to ensure good ventilation. So it is strongly recommended to place a cup of water in the cavity, setting at high power and operate for several times.
- Group 2 Class B appliance
Group 2 ISM equipment: group 2 contains all ISM equipment in which radio-frequency energy is intentionally generated and/or used in the form of electromagnetic radiation for the treatment of material, and EDM and arc welding equipment.
Class B equipment is equipment suitable for use in domestic establishments and in establishments directly connected to a low voltage power supply network which supplies buildings used for domestic purposes. - This is a cabinet microwave oven, which is subject to PRECAUTIONS and INSTALLATION below.
① PRECAUTIONS:
Given the limited room of the cabinet, the microwave oven must be installed under the following instructions so as to avoid danger.
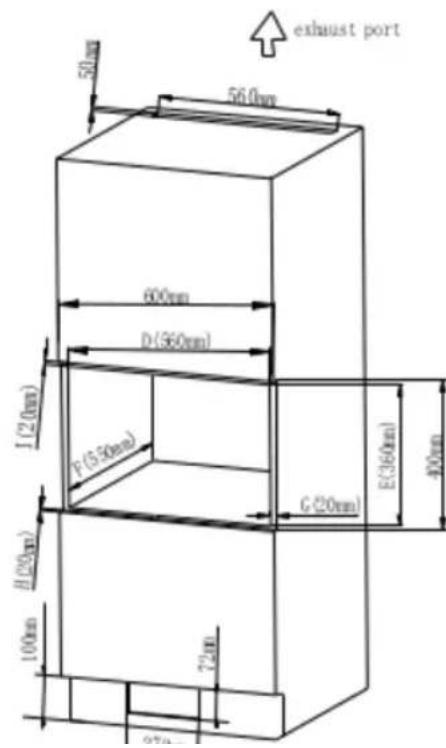
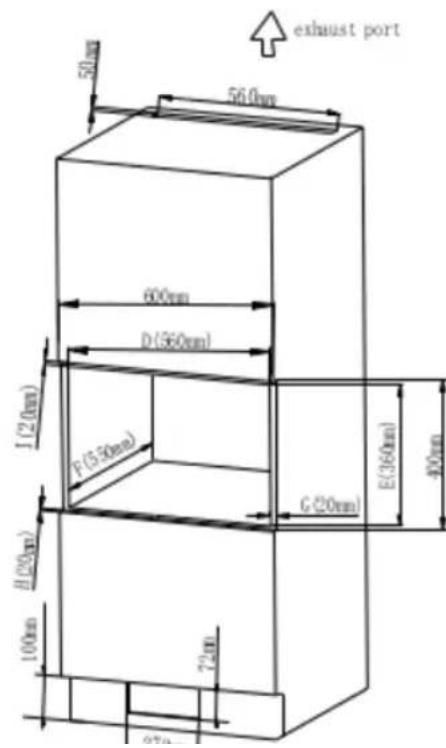
a) Intake and exhaust port position, as shown in Fig.5.
b) Net depth≥550mm, as shown in Fig.4.
c) Reference plate thickness between 18 and 20mm.
②INSTALLATION:
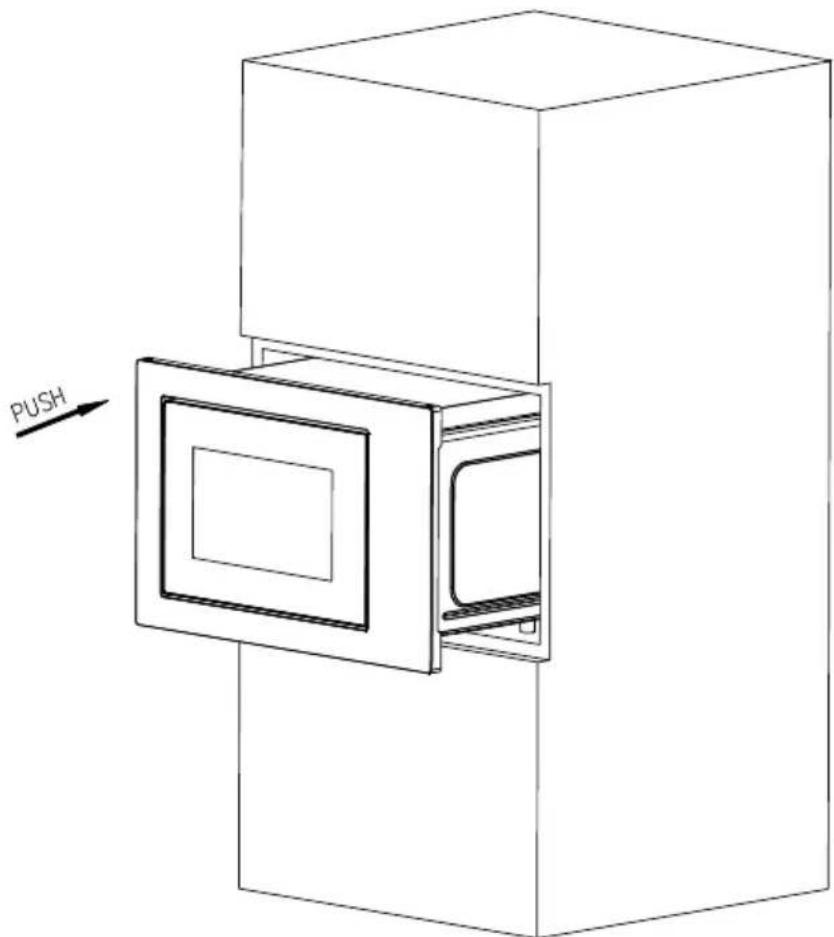
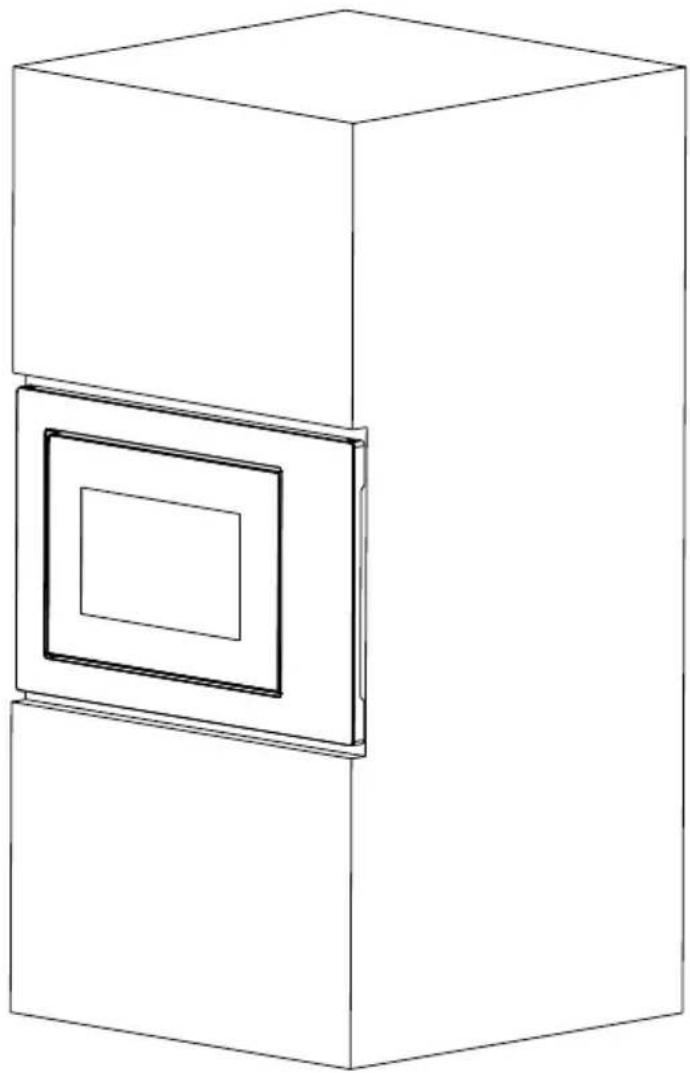
a) Put the microwave oven into built-in cabinet and push it forward to the end. (Fig.1)
natural_image
Technical line drawing of a mechanical device with a labeled push force arrow (no text or symbols on the diagram itself)Fig.1
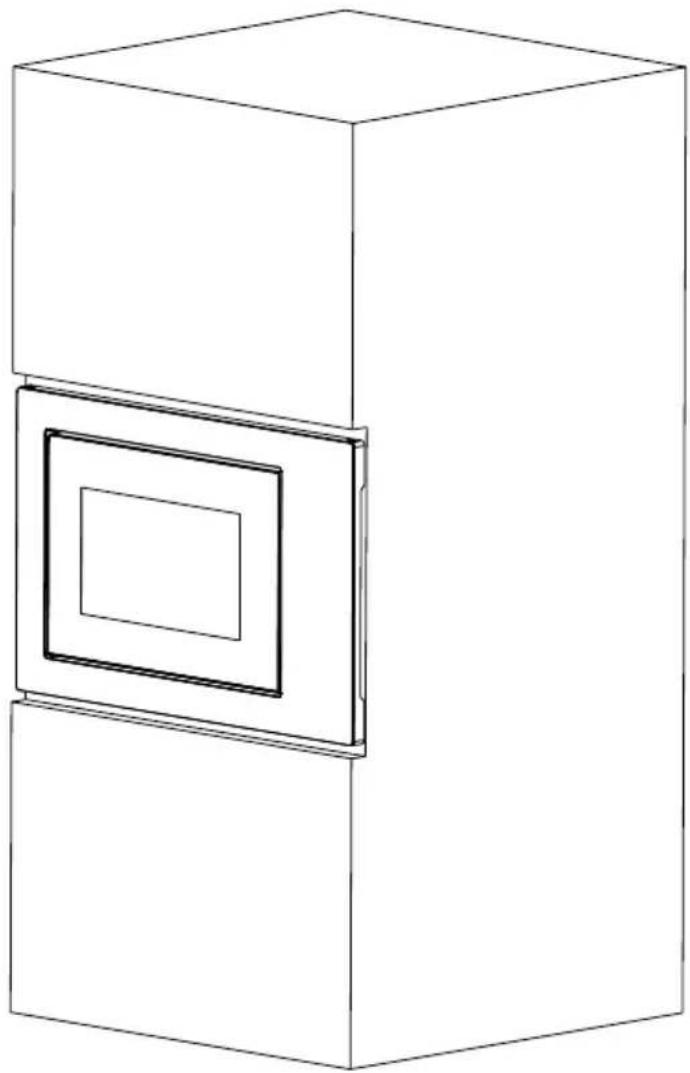
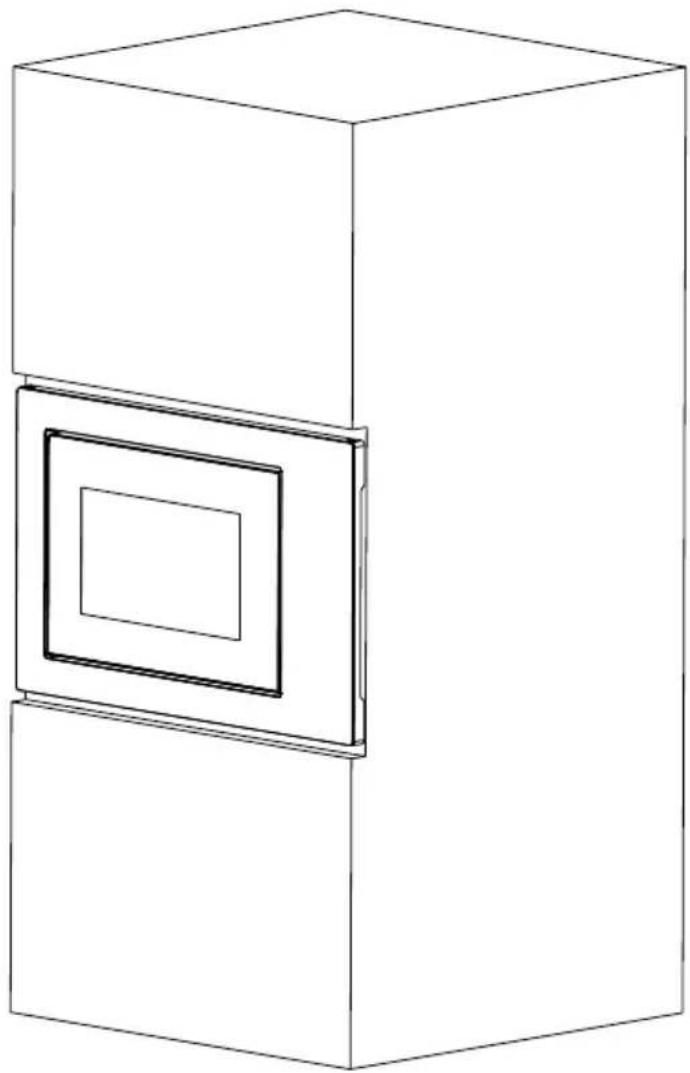
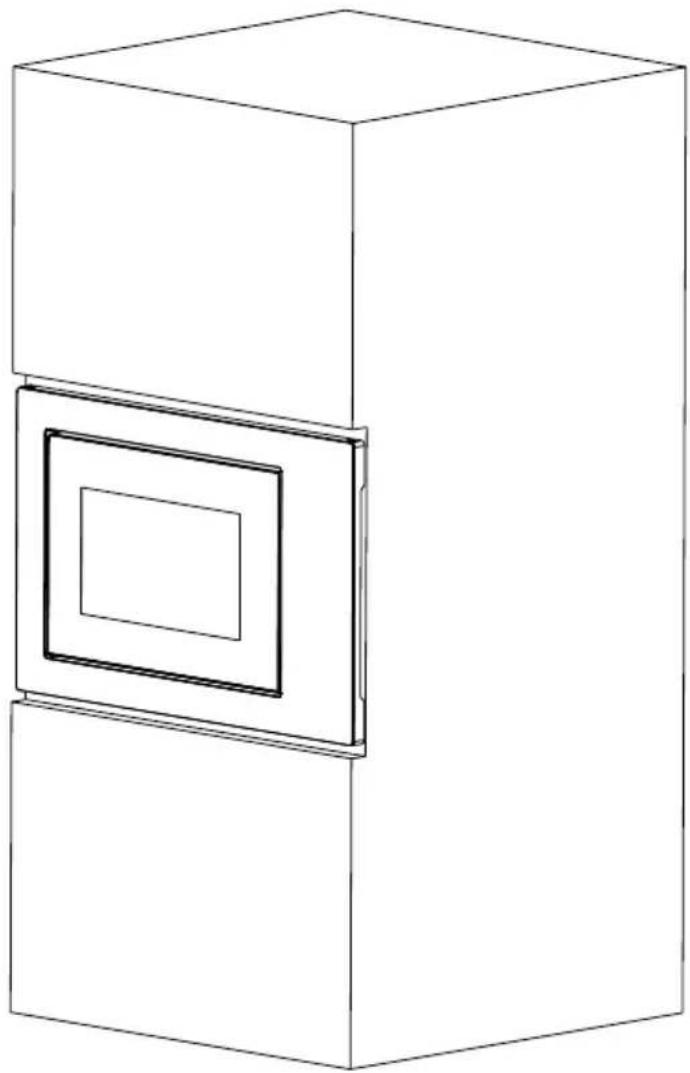
b) Push the microwave oven till to the end. (Fig.2)
natural_image
Line drawing of a 3D rectangular box with a square recessed on top, no text or symbols presentFig.2
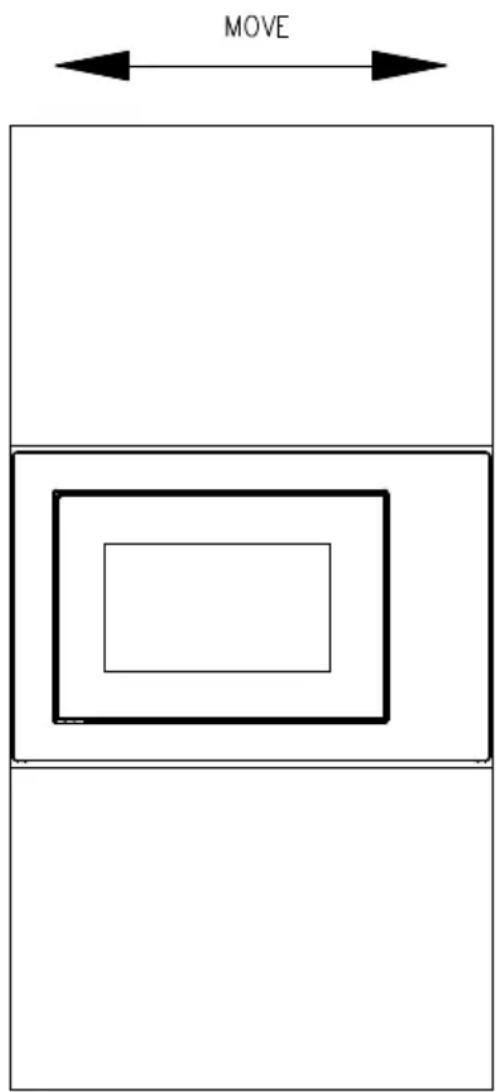
c) Move the product in parallel in the kitchen cabinet according to the direction of the arrow in the figure, and keep it centered. (Fig.3)
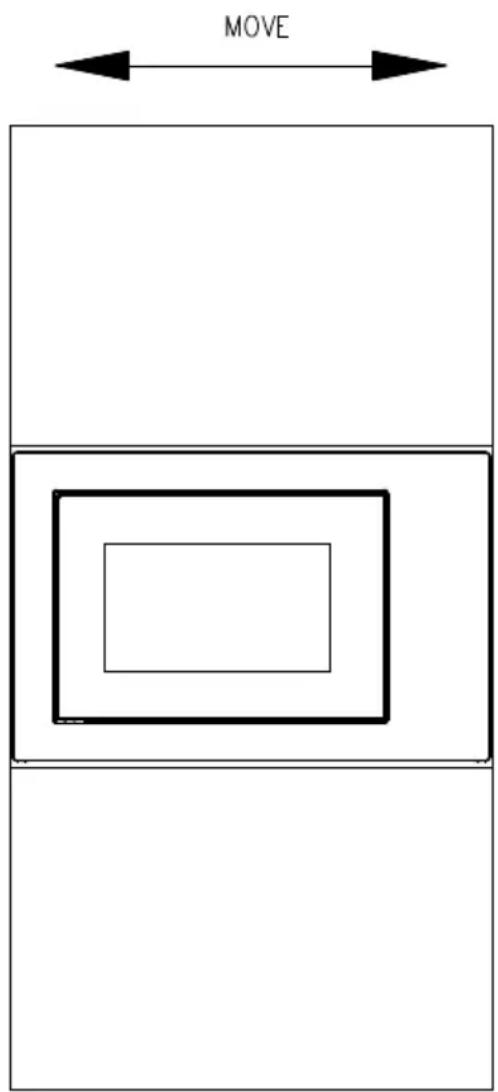
Fig.3
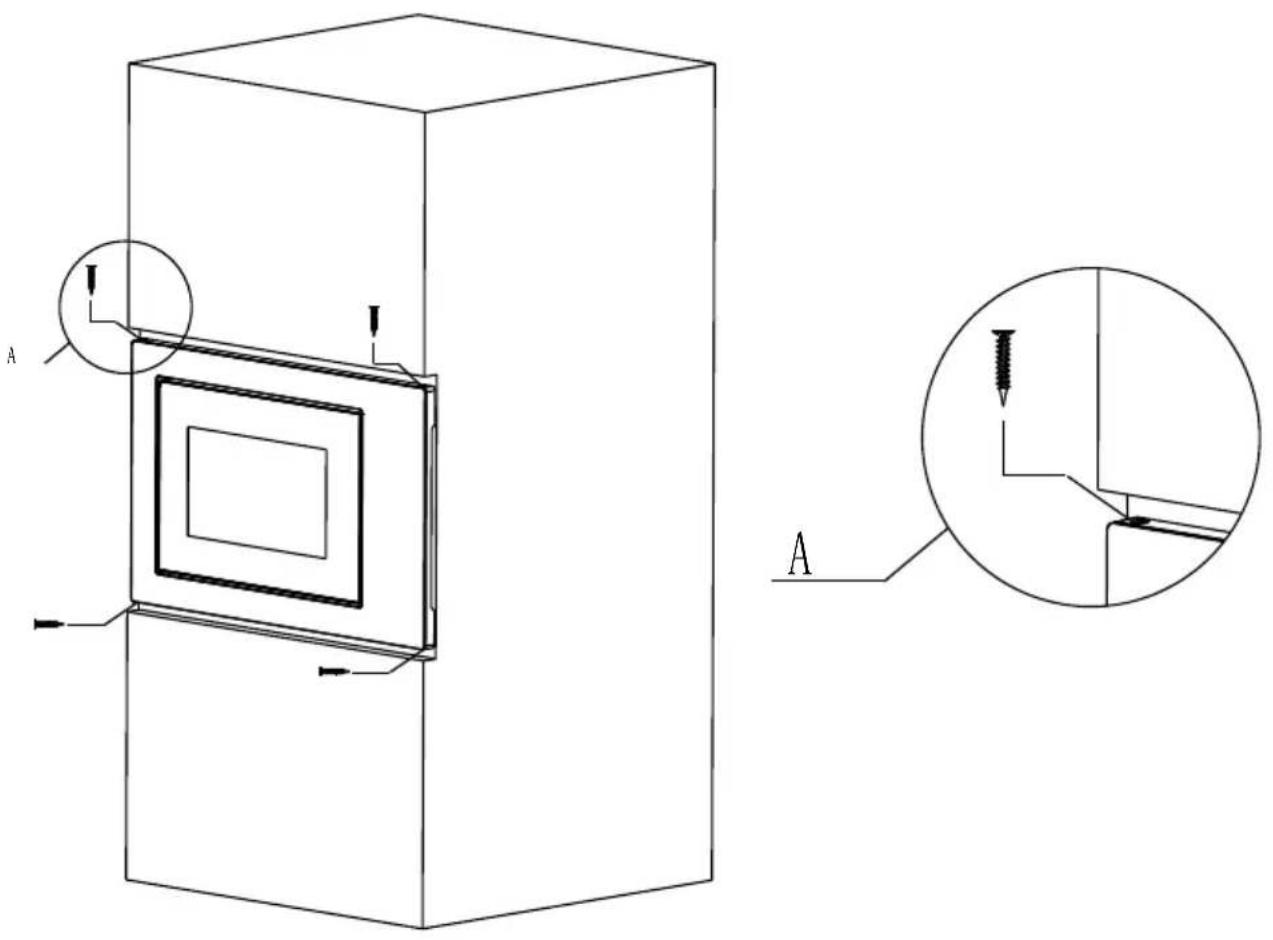
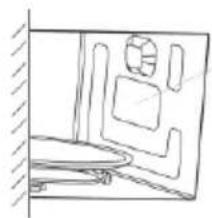
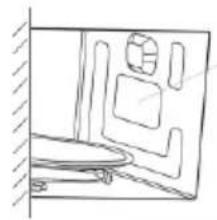
d) Use the screws of parts packing to secure the microwave oven in the cabinet. (Fig.4).
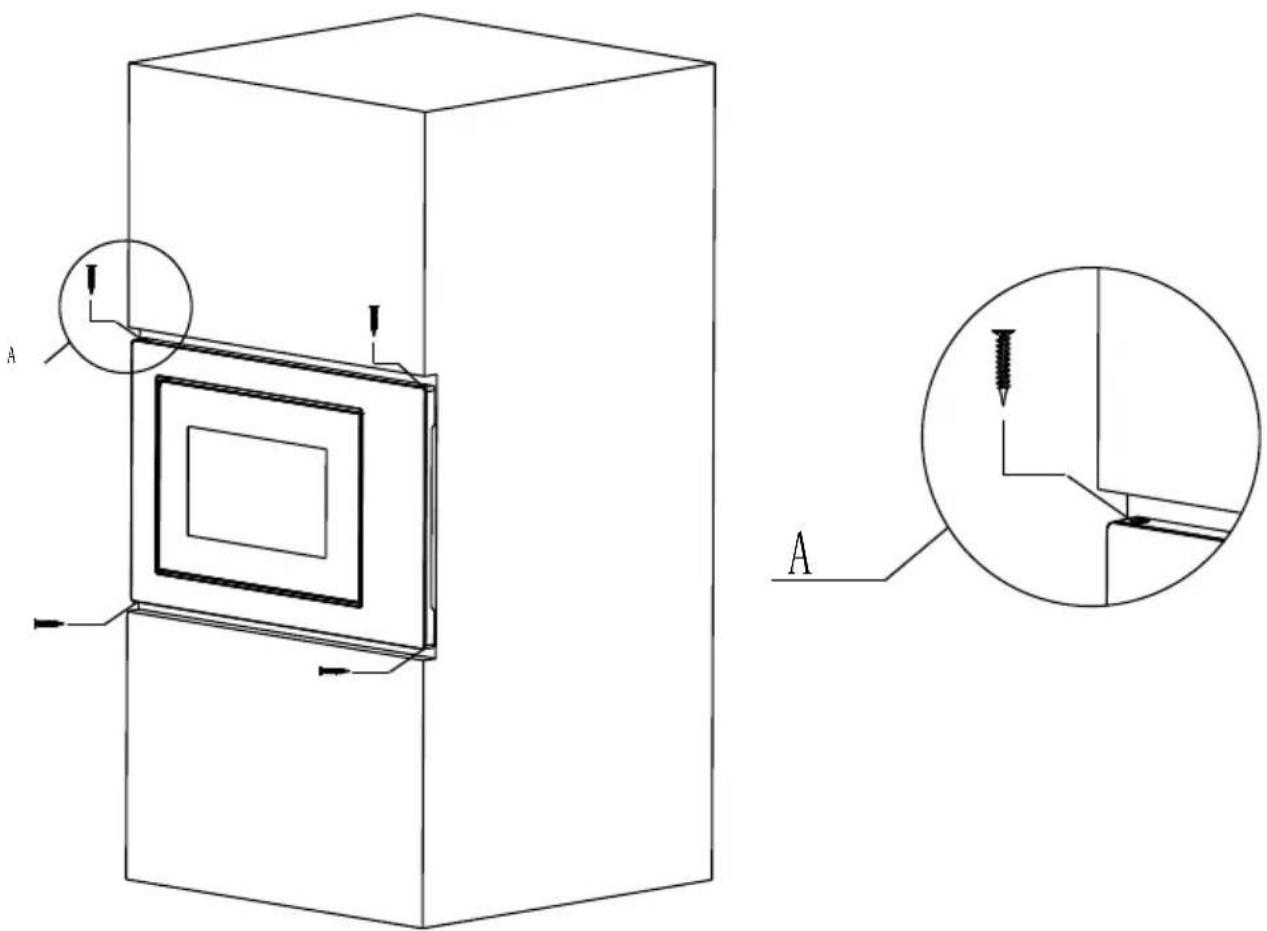
Fig.4
Cabinet details:
Product size: (W) 595 x (H) 385 x (D) 377 (mm)
Opening size: (D) 560±2 x (E) 360±2 x (F) 550±2 (mm) as shown in Fig.5 “D”, “E”, “F”.
G (The thickness of board): 20mm
I (The thickness of board): 20mm
H (The deepness of wrong layer): 20mm
CLEANING
MICROWAVE OVEN CARE
The oven should be cleaned regularly and any food deposits removed.

WARNING
a. Remove the power cord from the wall outlet before cleaning. After cooling products. Don't immerse the appliance in water or other fluids when cleaning.
b. Failure to maintain the oven in a clean condition could lead to deterioration of the surface that could adversely affect the life of the appliance and possibly result in a hazardous situation.
c. Never use hard detergent, gasoline, abrasive powder or metal brush to clean any part of the appliance.
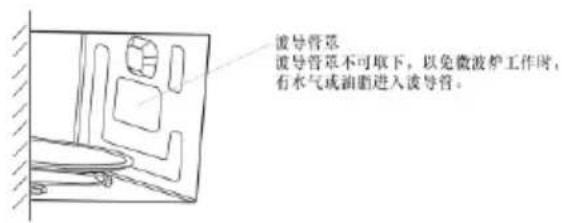
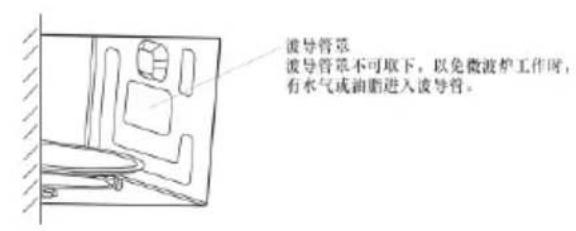
d. Do not remove the waveguide cover.
e. When the microwave oven has been used for a long time, there may be some strange odors exist in oven, following 3 methods can get rid of them:
1) Place several lemon slices in a cup, then heat with high micro power for 2-3 min.
2) Place a cup of red tea in oven, then heat with high micro power.
3) Put some orange peel into oven, and then heat them with high micro power for 1 minute.
f. When the product is not used, it should be placed in dry and ventilated areas as well as possible.

WARNING
Details how to clean surfaces in contact with food:
After use wipe the waveguide cover with a damp cloth, followed by dry cloth to remove any food splashes and grease. Built -up grease may overheat and begin to cause smoke or catch fire.
TIPS FOR CLEANING
Details for cleaning door seals, cavity and adjacent parts:
Exterior:
Wipe the enclosure with a dampened soft cloth
Door:
Using a dampened soft cloth, wipe clean the door and window
Wipe the door seals and adjacent parts to remove any spill or spatter
Wipe the control panel with a slightly dampened soft cloth
Interior walls:
Wipe clean the interior surfaces with a dampened soft cloth
Wipe clean the waveguide cover to remove any food splashed
Turntable/Rotation ring/Rotation axis:
Wash with mild soap water
Rinse with clean water and allow drying thoroughly
PRODUCT INSTRUCTION
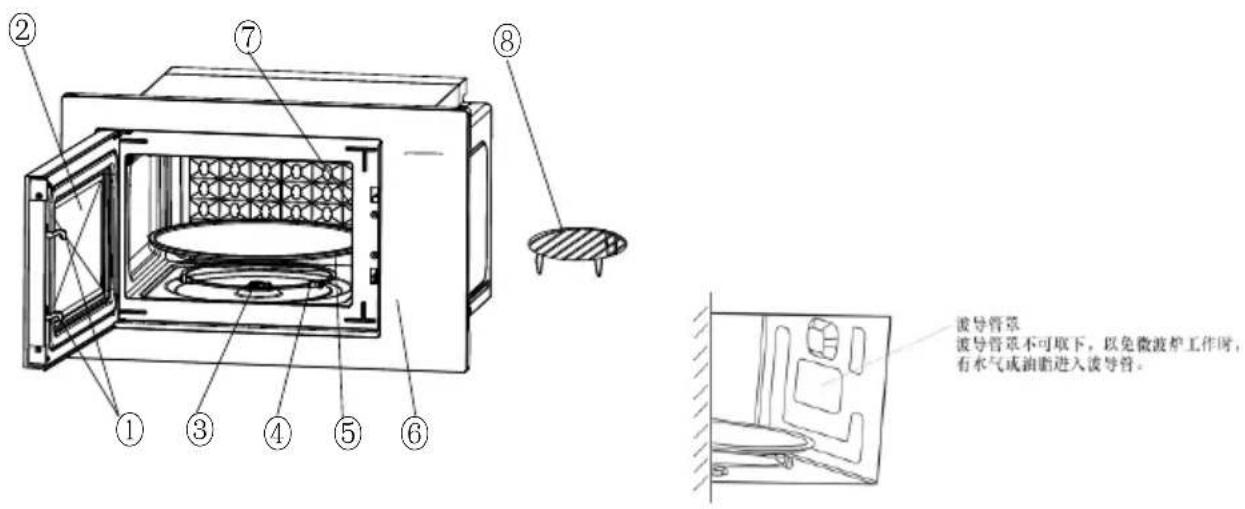
Microwave oven door must be properly closed in order for it to operate.
2) Viewing window
Allow user to see the cooking status
3) Rotating ring
The glass turntable sits on its wheels; it supports the turntable and helps it to balance when rotating
4) Rotating axis
The glass turntable sits on the axis; the motor underneath it drives the turntable to rotate
5) Turntable
The food sits on the turntable, its rotation during operation helps to cook food evenly
- Place the rotating ring first
- Fit the turntable onto the rotating axis and make sure that it is geared in properly
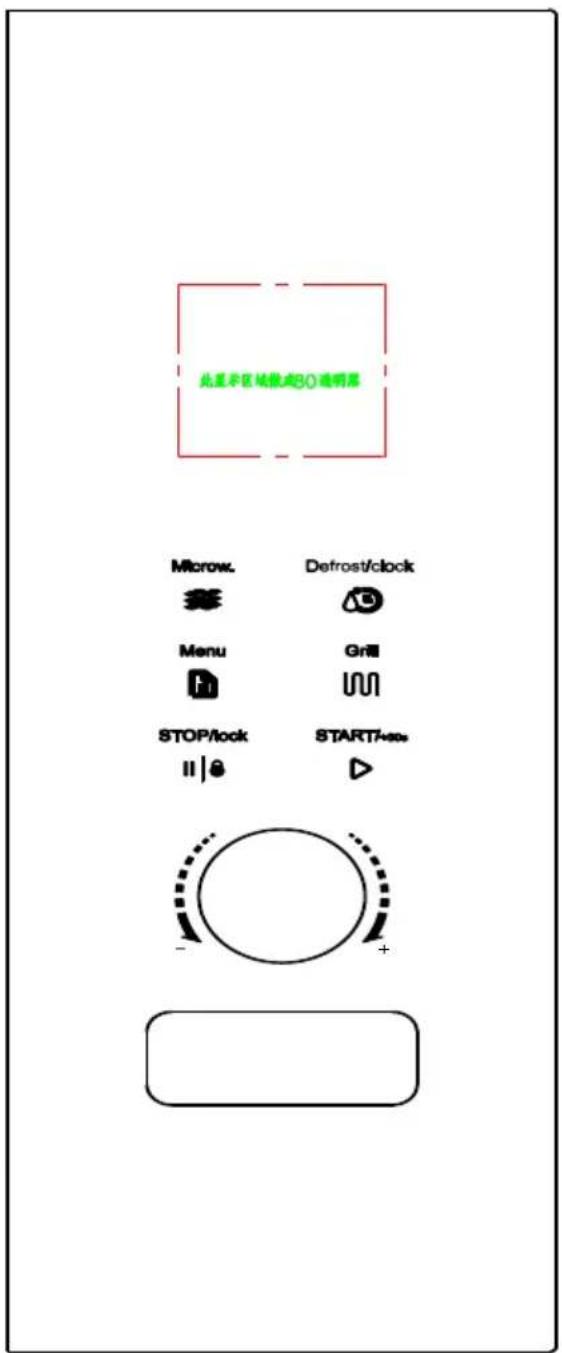
6) Control panel
See below in details (the control panel is subject to change without prior notice)
7) Waveguide cover
It is inside the air fryer oven, next to the wall of control panel.

WARNING
Never remove the waveguide cover.
8) Grill rack
Use to place the roasting food.
1. BEFORE COOKING
The display lights up when plugged in power supply, then enter the standby state and display shows 1:00.
2. MICROWAVE FUNCTION
There are five firepower levels, 100P, 80P, 50P, 30P and 10P, respectively. Press the “Microw.” button continuously to select the desired microwave power. Turn the knob to select cooking time, and the time range that can be regulated is from 0:10 to 60:00. After selecting the cooking time, press “START/+30s” button to start work. An buzzing sound to notify completion of the operation.
| HIGH | 100% power output | (Applicable for quick and thorough cooking) |
| M.High | 80% power output | (Applicable for medium express cooking) |
| Med | 50% power output | (Applicable for steaming food) |
| M.Low | 30% power output | (Applicable for defrosting food) |
| LOW | 10% power output | (Applicable for keeping warm) |
a. The max time which can be set is 60 minutes.
b. Never operate the oven empty.
c. At the maximum microwave power, the oven will automatically lower the power after a certain time of cooking to lengthen the service life.
d. If you turn the food during operation, press the Start/+30s button once and the preset cooking procedure will continue.
e. If you intend to remove the food before the preset time, you must press Stop/Lock button once to clear the preset
procedure to avoid unintended operation of next time use.
3. DEFROST/CLOCK
3.1 DEFROST
There are two defrost mode, dEF1 and dEF2, respectively. dEF1 for defrost by weight and dEF2 for defrost by time. Press this button to select defrost by weight or by time, and the display screen will display "dEF1" or "dEF2". Turn the knob to select food weight or defrost time. The weight range of dEF1 is from 100 to 1500g, and the optional time range of dEF2 is from 0:10 to 60:00. After selecting the defrost weight or time, press the "START/+30s" button start to work. An buzzing sound to notify completion of the operation. The dEF1 defrost mode by weight will have a beeping sound to prompt the food to be turned over during defrosting.
Below is some food defrosting time advice:
| dEF1 | For defrosting, the weight range from 100 to 1500g. |
| dEF2 | For defrosting, the time range from 0:10 to 60:00. |
a. It is necessary to turn over the food during operation to obtain uniform effect.
b. Usually defrosting will need longer time than that of cooking the food.
c. If the food can be cut by knife, the defrosting process can be considered completed.
d. Microwave penetrates around 4cm into most food
e. Defrosted food should be consumed as soon as possible, it is not advised to put back to fridge and freeze again.
3.2 CLOCK (24-hour clock)
In standby mode, press and hold down the "DEFROST/CLOCK" button for more than 3 seconds to enter the clock setting interface. At the same time, the display screen blinks in hours. The hour time can be set by turning the knob. After setting the hour, press the "START/+30s" button for a short time to switch to the setting minute mode. The minutes can be set by turning the knob. After setting minutes, press the "START/+30s" button again to exit the setting mode.
4. AUTO COOKING
There are eight automatic menus A.1\~A.8, potato, pasta, pizza, popcorn, vegetable, beverage, meat and fish respectively. Press the “Menu” button continuously to select the desired menu, the display screen corresponds to A.1 \~ A.8, then turn the knob to select the weight of the menu. After selecting the cooking weight, press “START/+30s” button to start work. An buzzing sound to notify completion of the operation.
| Display | Kind | Method |
| A.1 | Potato | The optional weights are 250g, 500g and 750g |
| A.2 | Pasta | The optional weights are 50g, 100g and 150g |
| A.3 | Pizza | The optional weights are 200g and 400g |
| A.4 | Popcorn | The optional weight is100g |
| A.5 | Vegetable | The optional weights are 200g, 400g and 600g |
| A.6 | Beverage | The optional weights are 1 cup, 2 cups or 3 cups, each one about 250ml. |
| A.7 | Meat | The optional weights are 200g, 400g and 600g |
| A.8 | Fish | The optional weights are 200g, 400g and 600g |
a. The temperature of food before cooking would be 20-25°C. Higher or lower temperature of the food before cooking would require increase or decrease of cooking time.
b. The temperature, weight and shape of food will largely influence the cooking effect. If any deviation has been found to the factor noted on above menu, you can adjust the cooking time for best result.
5. GRILL FUNCTION
There are three modes of Grill: G, C-1 and C-2. They are grill, combination 1 of grill and microwave cooking and combination 2 of grill and microwave cooking. Press the "Grill" button continuously, select the desired mode and then turn the knob to select the cooking time, the time range that can be regulated is from 0:10 to 60:00. After entering the cooking time, press the "START/+30s" button to start the work, it will have beeping sound to prompt the food to be turned over during defrosting. An buzzing sound to notify completion of the operation.
| G | Grill, the heat element will be energized during operation time. Which is applicable for rolling thin meats or pork sausage, chicken wing as good brown color can be obtained |
| C1 | Combination of grill and microwave cooking. 30% microwave and 70% grill. |
| C2 | Combination of grill and microwave cooking. 55% microwave and 45% grill. |
In the mode of grill, all of the oven parts, as well as the rack and cooking containers, may become very hot. Use caution when removing any item from the oven. Use heavy potholders or oven mitts to PREVENT BURNS.
6. STOP
In the process of cooking settings, can press the “STOP” button to cancel the settings and return to standby state. In the process of working, can press the “STOP” button to pause. In the standby state, can press the “STOP” button again to cancel the function and return to standby state.
7. START/+30s
After setting the cooking time or food weight, press the “START/+30s” button to start microwave oven immediately. In working state, can press the “START/+30s” button to increase time, press one time to increase 30 seconds, but the menu mode and weight defrosting mode cannot adjust time. In pause state, can press the “START/+30s” button to continue the microwave oven before cooking mode.
8. EXPRESS
In standby mode, after the food is put in and the door is closed, press the "START/+30s" button to quickly start the microwave oven. The default working time is 30 seconds. In the process of working, each time you press the "START/+30s" button, the increased time will change according to the current working time range (in the range of 10 seconds to 5 minutes, in the increment of +10s, in the range of 5 minutes to 10 minutes, in the increment of +30s, and in the increment of +1 minute for more than 10 minutes). An buzzing sound to notify completion of the operation.
9. CHILD LOCK FUNCTION
Use this feature to lock the control panel when you are cleaning or so that children cannot use the oven unsupervised. All the buttons are rendered inoperable in this mode.
1) Set lock: In standby mode, press the "STOP" button for more than 3 seconds, the child lock function is locked, and all buttons of the microwave oven cannot be operated.
2) Cancel lock: In the child lock state, press the "STOP" button for more than 3 seconds to cancel the child lock function.
UTENSILS GUIDELINE
It is strongly recommended to use the containers which are suitable and safe for microwave cooking. Generally speaking, the containers which are made of heat-resistant ceramic, glass or plastic are suitable for microwave cooking. Never use the metal containers for microwave cooking and combination cooking as spark is likely to occur. You can take the reference of below table.
| Material of container | Microwave Grill Combi Notes | |||
| Heat-resistant ceramic | Yes Yes Yes | Never use the ceramics which are decorated with metal rim or glazed | ||
| Heat-resistant plastic | Yes | No | No | Can not be used for long time microwave cooking |
| Heat-resistant glass | Yes Yes Yes | |||
| Plastic film | Yes | No | No | It should not be used when cooking meat or chops as the over-temperature may do damage to the film |
| Grill rack | No | Yes Yes | The grill rack can only be used in Grill mode. It should not be used in microwave oven. | |
| Metal container | No | No | No | Microwave can not penetrate through metal. |
| lacquer | No | No | No | Poor heat-resistant. Can not be used for High-temperature cooking |
| Bamboo wood and paper | No | No | No | Poor heat-resistant. Can not be used for High-temperature cooking |
COOKING TIPS
The following factors may affect the cooking result:
Food arrangement
Place thicker areas towards outside of dish, the thinner part towards the centre and spread it evenly. Do not overlap if possible.
Cooking time length
Start cooking with a short time setting, evaluate it after it times out and extend it according to the actual need. Over cooking may result in smoke and burns.
Cooking food evenly
Food such as chicken, hamburger or steak should be turned once during cooking.
Depending on the type of food, if applicable, stir it from outside to centre of dish once or twice during cooking
Allow standing time
After cooking times out, leave the food in the oven for an adequate length of time, this allows it to complete its cooking cycle and cooling it down in a gradual manner
Whether the food is done
Color and hardness of food help to determine if it is done, these include:
- Steam coming out from all parts of food, not just the edge
- Joints of poultry can be moved easily
- Pork or poultry shows no signs of blood
- Fish is opaque and can be sliced easily with a fork
Browning dish
When using a browning dish or self-heating container, always place a heat-resistant insulator such as a porcelain plate under it to prevent damage to the turntable and rotating ring.
Microwave safe plastic wrap
When cooking food with high fat content, do not allow the plastic
wrap come into contact with food as it may melt
Microwave safe plastic cookware
Some microwave safe plastic cookware might not be suitable for cooking foods with high fat and sugar content. Also, the preheating time specified in the dish instruction manual must not be exceeded.
MAINTENANCE
SERVICING
Please check the following before calling for services.
-
Place one cup of water (approx. 150ml) in a glass measure in the oven and close the door securely. Oven lamp should go off if the door is closed properly. Let the oven work for 1 min.
-
Does the oven lamp light?
-
Does the cooling fan work? (Put your hand over the rear ventilation openings.)
-
Does the turntable rotate? (The turntable can rotate clockwise or counter clockwise. This is quite normal.)
-
Magnetron
• High voltage transformer
• High voltage capacitor
• High voltage diode -
High voltage fuse
-
The following conditions may cause undue microwave exposure during servicing.
-
Improper fitting of magnetron;
- Improper matching of door interlock, door hinge and door;
- Improper fitting of switch support;
- Door, door seal or enclosure has been damaged.
| Correct disposal of this product | |
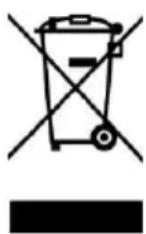 | This marking indicates that this product should not be disposed with other household wastes throughout the EU. To prevent possible harm to the environment or human health from uncontrolled waste disposal, recycle it responsibly to promote the sustainable reuse of material resources. To return your used device, please use the return and collection systems or contact the retailer where the product was purchased. They can take this product for environmental safe recycling. |
natural_image
Line drawing of a microwave oven with control panel and buttons (no text or symbols)IMWH- GD203B
МИКРОВОЛНОВАЯ ПЕЧЬ
natural_image
Technical line drawing of a mechanical assembly with a labeled push force arrow (no text or symbols beyond the label)Рис.1
natural_image
Line drawing of a 3D rectangular box with a square recessed on top, no text or symbols presentРис.2
Рис.4
ЧИСТКА
7. START/+30s CTAPT/+30 c
natural_image
Line drawing of a microwave oven with control panel and buttons (no text or symbols)IMWH- GD203B
MIKROTALASNA RERNA UPUTSTVO ZA UPOTREBU
VAŽNA BEZBEDNOSNA UPUTSTVA PAŽLJIVO PROČITAJTE I SAČUVAJTE ZA BUDUĆU UPOTREBU
VAŽNA BEZBEDNOSNA UPUTSTVA
UPOZORENJE: Ako su vrata ili zaptivke na vratima oštećene, nemojte koristiti rernu dok je ne popravi stručno lice.
UPOZORENJE: Opasno je da bilo ko, osim stručnog lica, servisira ili popravlja rernu, kao i da podiže poklopac koji štiti od izlaganja mikrotalasnoj energiji.
UPOZORENJE: Tečnosti ili druge namirnice se ne smeju zagrevati u zatvorenim posudama jer mogu eksplodirati.
natural_image
Technical line drawing of a mechanical device with a labeled push force arrow (no text or symbols on the diagram itself)Sl.1
b) Gurnite mikrotalasnu rernu do kraja. (Sl.2)
natural_image
Line drawing of a 3D rectangular box with a square recessed on top, no text or symbols presentSl.2
c) Pomerite proizvod paralelno u kuhinjskom ormariću u skladu sa smerom strelice na slici i držite ga u centru. (Sl.3)
Sl.3
d) Koristite zavrtnje na pakovanju delova da pričvrstite mikrotalasnu rernu u kućište. (Sl.4).
Sl.4
Detalji kabineta:
Veličina proizvoda: (Š) 595 x (V) 385 x (D) 377 (mm)
Veličina otvora: (D) 560±2 x (E) 360±2 x (F) 550±2 (mm)
ČIŠĆENJE
NEGA MIKROTALASNE RERNE

OPREZ
natural_image
Line drawing of a microwave oven with control panel and buttons (no text or symbols)IMWH- GD203B
FORNO DE MICROONDAS MANUAL DE INSTRUÇÕES
INSTRUÇÕES IMPORTANTES DE SEGURANÇA LEIA ATENTAMENTE ESTE MANUAL E GUARDE-O PARA REFERÊNCIAS FUTURAS
PRECAUÇÕES IMPORTANTES
The microwave oven is intended to be used freestanding or built-in or in a cabinet.
natural_image
Technical line drawing of a mechanical assembly with a labeled push arrow (no text or symbols beyond the label)Fig.1
natural_image
Line drawing of a 3D rectangular box with a square recessed on top, no text or symbols presentFig.2
Fig.4
LIMPEZA
CUIDADOS COM FORNO MICROONDAS
CUIDADO
1. ANTES DE COZINHAR
natural_image
Line drawing of a microwave oven with control panel and indicator lights (no text or symbols)IMWH- GD203B
natural_image
Technical line drawing of a mechanical housing with a pull arrow indicator (no text or symbols present)Eik.1
natural_image
Line drawing of a 3D rectangular box with a square recessed on top, no text or symbols presentEik.2
Eik.4
natural_image
Line drawing of a microwave oven with control panel and buttons (no text or symbols)IMWH- GD203B
MIKROVALOVNA PEČICA
NAVODILA ZA UPORABO
POMEMBNA VARNOSTNA NAVODILA POZORNO PREBERITE IN SHRANITE ZA PRIHODNJE UPORABE
POMEMBNA VARNOSTNA NAVODILA
natural_image
Technical line drawing of a mechanical housing with a labeled push force arrow (no text or symbols beyond the label)Sl.1
b) Potisnite mikrovalovno pečico do konca. (slika 2)
natural_image
Line drawing of a 3D rectangular box with a square recessed on top, no text or symbols presentSl.2
Sl.4
Podrobnosti kabineta:
NEGA MIKROVALOVNE PEČICE
POZOR
natural_image
Line drawing of a microwave oven with control panel and indicator lights (no text or symbols)IMWH- GD203B
MIKROVALNA PEĆNICA
UPUTE ZA UPORABU
VAŽNE SIGURNOSNE UPUTE PAŽLJIVO PROČITAJTE I SAČUVAJTE ZA BUDUĆU UPORABU
VAŽNE SIGURNOSNE UPUTE
natural_image
Technical line drawing of a mechanical assembly with a labeled push force arrow (no text or symbols beyond the label)Sl.1
b) Gurnite mikrovalnu pećnicu do kraja. (Sl.2)
natural_image
Line drawing of a 3D rectangular box with a square recessed on top, no text or symbols presentSl.2
Sl.4
Detalji kabineta:
Veličina proizvoda: (Š) 595 x (V) 385 x (D) 377 (mm) Veličina otvora: (D) 560±2 x (E) 360±2 x (F) 550±2 (mm) kao što je prikazano na sl. 5 "D", "E", "F". G (debljina ploče): 20 mm I (Debljina ploče): 20 mm H (dubina pogrešnog sloja): 20 mm
ČIŠĆENJE
ODRŽAVANJE MIKROVALNE PEĆNICE
OPREZ
natural_image
Simple line drawing of a door with handle and seat, no text or symbols presentnatural_image
Line drawing of a microwave oven with control panel and buttons (no text or symbols)IMWH- GD203B
natural_image
Technical line drawing of a cabinet with an open door and a pull arrow indicator (no text or symbols)Сл.1
natural_image
Line drawing of a 3D rectangular box with a square recessed on top, no text or symbols presentСл.2
Сл.4
ЧИСТЕЊЕ
natural_image
Simple line drawing of a door with a handle and seat, no text or symbols present1. ПРЕД ГОТВЕЊЕ
natural_image
Line drawing of a microwave oven with control panel and buttons (no text or symbols)IMWH- GD203B
FURRA MIKROVALORE
MANUAL UDHËZIMI
UDHËZIME TË RËNDËSISHME SIGURIE LEXONI ME KUJDES DHE MBANI PËR PËRDORIM NË TË ARDHMEN
MASA MBROJTËSE TË RËNDËSISHME
KUJDES: SIPËRFAQE E NXEHTË
natural_image
Technical line drawing of a mechanical assembly with a labeled push force arrow (no text or symbols beyond the label)Fig.1
natural_image
Line drawing of a 3D box with a square frame on top and a smaller square frame on the side (no text or symbols)Fig.2
Fig.4
Detajet e kabinetit:
Madhësia e produktit: (W) 595 x (H) 385 x (D) 377 (mm)
Madhësia e hapjes: (D) 560±2 x (E) 360±2 x (F) 550±2
KUJDESI PËR FURRËN MIKROVALORE
KUJDES
- IMPORTANT SAFEGUARDS
- CAUTION: HOT SURFACE
- INSTALLATION
- ① PRECAUTIONS:
- ②INSTALLATION:
- Cabinet details:
- CLEANING
- MICROWAVE OVEN CARE
- WARNING
- TIPS FOR CLEANING
- Exterior:
- Door:
- Interior walls:
- Turntable/Rotation ring/Rotation axis:
- PRODUCT INSTRUCTION
- 2) Viewing window
- 3) Rotating ring
- 4) Rotating axis
- 5) Turntable
- 6) Control panel
- 7) Waveguide cover
- 8) Grill rack
- BEFORE COOKING
- MICROWAVE FUNCTION
- DEFROST/CLOCK
- DEFROST
- CLOCK (24-hour clock)
- AUTO COOKING
- GRILL FUNCTION
- STOP
- START/+30s
- EXPRESS
- CHILD LOCK FUNCTION
- UTENSILS GUIDELINE
- COOKING TIPS
- Food arrangement
- Cooking time length
- Cooking food evenly
- Allow standing time
- Whether the food is done
- Browning dish
- Microwave safe plastic wrap
- Microwave safe plastic cookware
- MAINTENANCE
- SERVICING
- МИКРОВОЛНОВАЯ ПЕЧЬ
- ЧИСТКА
- START/+30s CTAPT/+30 c
- MIKROTALASNA RERNA UPUTSTVO ZA UPOTREBU
- VAŽNA BEZBEDNOSNA UPUTSTVA
- Detalji kabineta:
- ČIŠĆENJE
- NEGA MIKROTALASNE RERNE
- OPREZ
- FORNO DE MICROONDAS MANUAL DE INSTRUÇÕES
- PRECAUÇÕES IMPORTANTES
- LIMPEZA
- CUIDADOS COM FORNO MICROONDAS
- CUIDADO
- ANTES DE COZINHAR
- MIKROVALOVNA PEČICA
- NAVODILA ZA UPORABO
- POMEMBNA VARNOSTNA NAVODILA
- Podrobnosti kabineta:
- NEGA MIKROVALOVNE PEČICE
- POZOR
- MIKROVALNA PEĆNICA
- UPUTE ZA UPORABU
- VAŽNE SIGURNOSNE UPUTE
- ODRŽAVANJE MIKROVALNE PEĆNICE
- ЧИСТЕЊЕ
- ПРЕД ГОТВЕЊЕ
- FURRA MIKROVALORE
- MANUAL UDHËZIMI
- MASA MBROJTËSE TË RËNDËSISHME
- KUJDES: SIPËRFAQE E NXEHTË
- Detajet e kabinetit:
- KUJDESI PËR FURRËN MIKROVALORE
- KUJDES
Brand : VOX
Model : IMWH-GD203 B
Category : Oven