MixDream XP Mk2 - Uncategorized SPL - Free user manual and instructions
Find the device manual for free MixDream XP Mk2 SPL in PDF.


| Product Type | Analog Mixing Console |
| Model | MixDream XP Mk2 |
| Brand | SPL |
| Number of Channels | 16 mono + 4 stereo |
| Frequency Response | 20 Hz - 20 kHz ±0.5 dB |
| Input Impedance | 10 kΩ (balanced) |
| Output Impedance | 100 Ω (balanced) |
| Maximum Input Level | +24 dBu |
| Maximum Output Level | +24 dBu |
| Signal-to-Noise Ratio | > 90 dB (unweighted) |
| THD+N | < 0.005% @ 1 kHz, +20 dBu |
| Power Supply | 100-240 V AC, 50/60 Hz, 50 W max |
| Dimensions (W x D x H) | 19 x 12 x 4.5 inches (483 x 305 x 115 mm) |
| Weight | 12.5 kg (27.6 lbs) |
| Construction Material | Steel chassis, aluminum faceplate |
| Cooling | Passive ventilation |
| Operating Temperature | 5°C to 40°C (41°F to 104°F) |
| Maintenance | Clean with a soft, dry cloth; avoid solvents |
| Safety | Class I equipment - must be earthed. Keep away from liquids. |
| Spare Parts & Repairability | Available from SPL authorized service centers |
| General Information | Warranty: 3 years parts and labor. Manufactured in Germany. |
Frequently Asked Questions - MixDream XP Mk2 SPL
User questions about MixDream XP Mk2 SPL
0 question about this device. Answer the ones you know or ask your own.
Ask a new question about this device
Download the instructions for your Uncategorized in PDF format for free! Find your manual MixDream XP Mk2 - SPL and take your electronic device back in hand. On this page are published all the documents necessary for the use of your device. MixDream XP Mk2 by SPL.
USER MANUAL MixDream XP Mk2 SPL
Analog 16 to 2 Summing Mixer with Class A Technology

Manual
More information: spl.audio

Getting started
Read the safety instructions starting on page 8.
Make sure that the mains voltage of the MixDream XP Mk2 corresponds to the voltage of your region and that the fuse has the correct value for the selected voltage (see specifications on page 7).
The power switch on the back of the MixDream XP Mk2 must be in the off position. (Off = O / On = 1).
Connect the supplied power cord to the power connector of the MixDream XP Mk2 and to a power outlet.
If the supplied power cord does not match your mains socket outlet, please contact your dealer.
The devices that are to be connected to the MixDream XP Mk2 must be be switched off.
Connect your devices with appropriate audio cables [XLR and DB25 (Tascam pinout)] to the inputs and outputs of the MixDream XP Mk2.
Audio cables not included in the scope of delivery.
Power on
Switch on the power switch on the rear panel of the MixDream XP Mk2 (On = 1). The PWR LED and all activated switches light up.
Power off
Switch off the power switch on the rear panel of theMixDream XP Mk2 (Off = 0).
The PWR LED and all activated switches no longer light up.
Ground
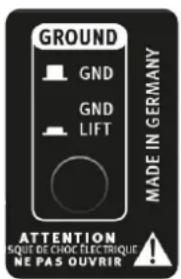
The Ground switch on the back of the MixDream Mk2 can be used to eliminate ground loops by disconnecting the internal ground from the housing ground when the switch is pressed.
MixDream XP Mk2 in the studio – How to set up
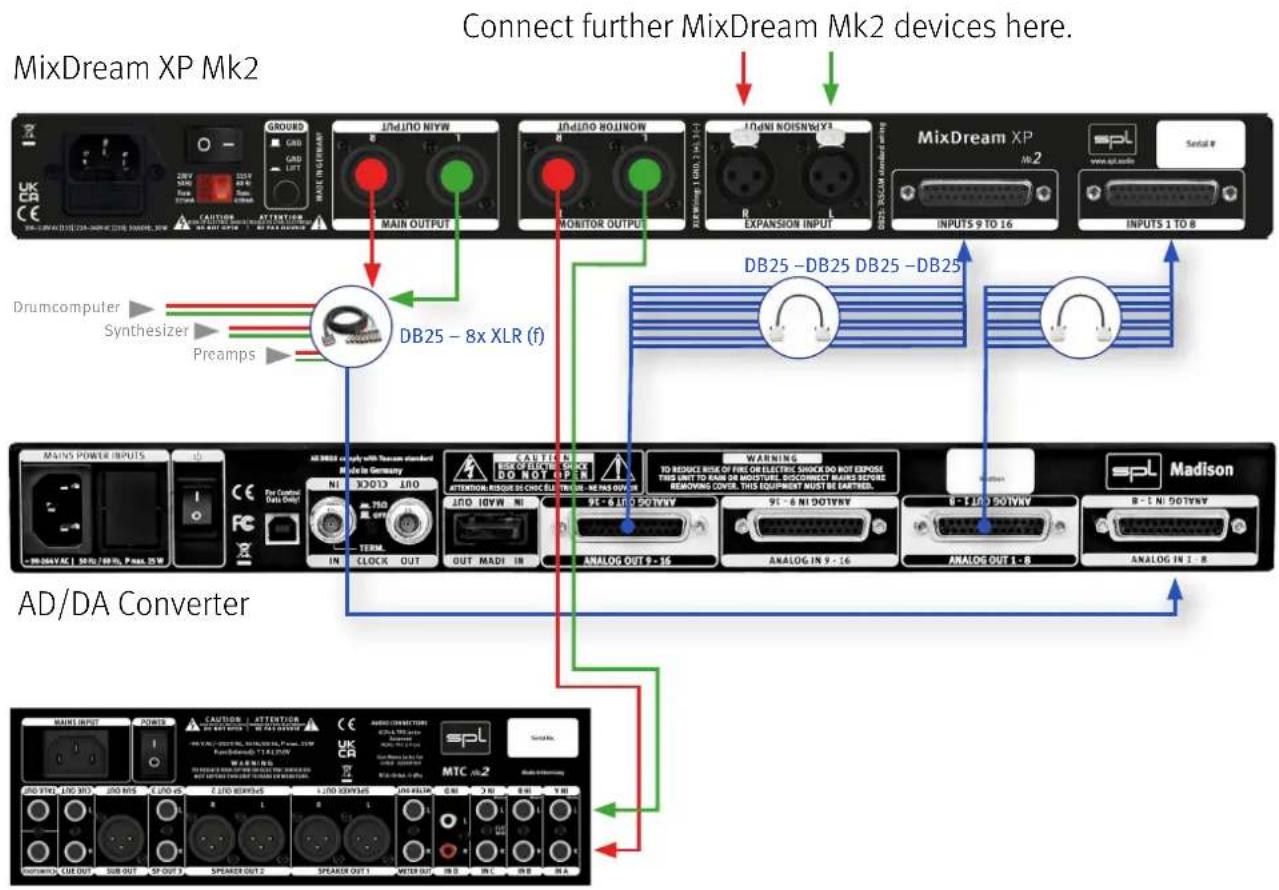
flowchart
graph TD
    A["Connect further MixDream Mk2 devices here."] --> B["Main OUTPUT"]
    B --> C["MONITOR OUTPUT"]
    C --> D["EXPANSION INPUT"]
    D --> E["DB25 - DB25 DB25 - DB25"]
    E --> F["DB25 - 8x XLR (f)"]
    F --> G["AD/DA Converter"]
    G --> H["Main Power Inputs"]
    H --> I["AD/DA Converter"]
    I --> J["Main Input"]
    I --> K["Power"]
    style A fill:#f9f,stroke:#333
    style B fill:#ccf,stroke:#333
    style C fill:#cfc,stroke:#333
    style D fill:#fcc,stroke:#333
    style E fill:#cff,stroke:#333
    style F fill:#ffc,stroke:#333
    style G fill:#cfc,stroke:#333
    style H fill:#fcc,stroke:#333
    style I fill:#ffc,stroke:#333
    style J fill:#cfc,stroke:#333
    style K fill:#fcc,stroke:#333
Monitoring Controller
AD/DA converter and monitor controller are not included in the scope of delivery.
Within the illustration, the products SPL Madison (AD/DA converter) and SPL MTC Mk2 (monitoring controller) are shown.
Audio cables are not included in the scope of delivery.

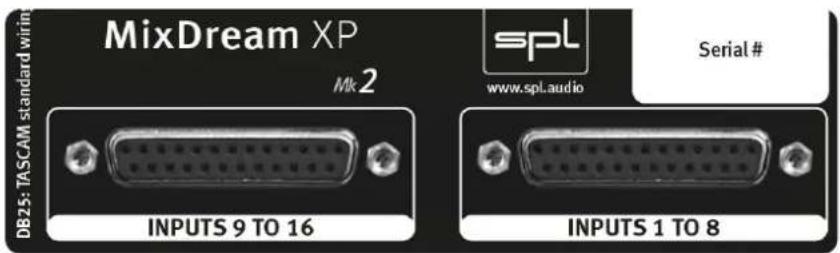
Inputs
MixDream XP MK2 has 16 inputs with DB25 connectors. Here e.g. the analog outputs of a D/A converter, which plays the tracks to be summed out of the DAW are connected.
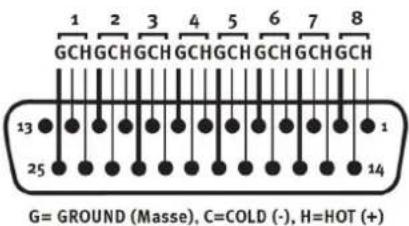
The DB25 sockets are assigned according to the Tascam standard.
Pin layout as pictured below:
Main Output
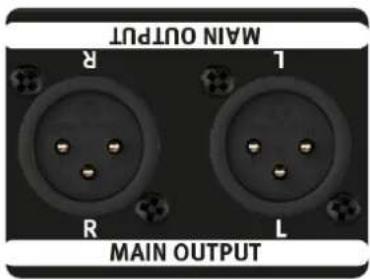
The Main Output outputs the summed stereo mix, which is e.g. fed back to the DAW via an A/D converter and recorded there.
Monitor Output
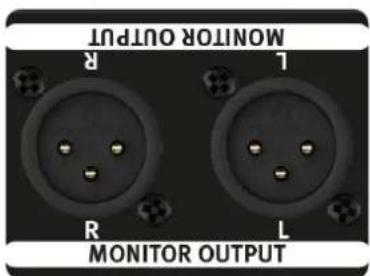
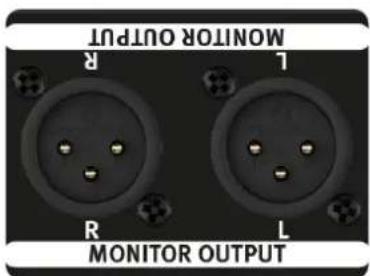
The Monitor output is electronically balanced and implemented via XLR connectors. The Monitor Output is connected in parallel to the Master Output and provides the stereo mix for a monitor controller or a pair of studio monitoring speakers.
Important: Since Main and Monitor Outs are connected in parallel, using a non-balanced connection in one results in both outputs being unbalanced.
Output
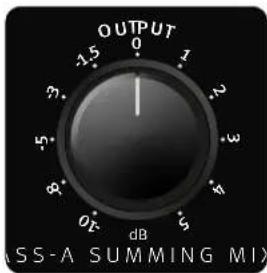
The Output control adjusts the output level of the MixDream XP Mk2. The control range can be set from -10 dB to +5 dB.
With the output control a perfect control for following AD-converters can be performed.
Since the main and monitor outputs are configured in parallel, the output control always affects both output pairs.
Variable Output
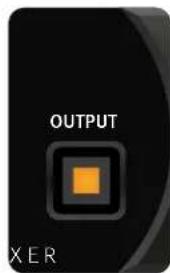
The output control is switched on or off with the Variable Output switch.
When the Variable Output switch is deactivated, the input level is maintained at 1:1 (Unity Gain).
Expansion Input
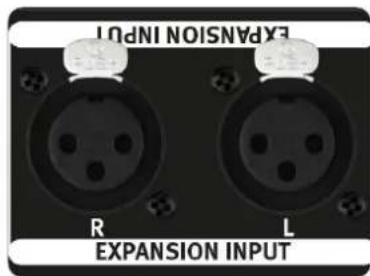
The expansion input is another electronically balanced stereo input via XLR connectors. It can be activated with the Expansion Input switch at the right set of switches on the front. Usually the Main Outputs of another MixDream XP Mk2 are connected here, but of course any (stereo) summed signal can be connected here.
Important: The expansion input of the summing device must be connected to the Main Output of the previous connected device - never connect both expansion inputs!
Expansion Input Switch
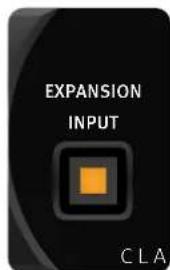
The Expansion Input switch on the front of the MixDream XP Mk2 is used to switch the Expansion Input on or off.
Tip: The Expansion Input can also be used as another stereo input.
Mono switch
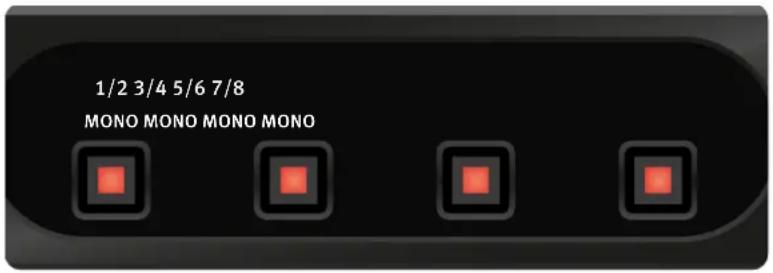
The first four channel pairs of the MixDream XP Mk2 (1/2 to 7/8) can be switched from stereo to mono via the Mono switch (red status LED lights up). This is important for mono signals that should be positioned exactly in the center of the mix (kick, snare, lead vocal, bass, ...).
In stereo mode, the two channels are generally panned hard left/right. This basic setting is useful for all stereo signals. Panorama settings and automation of the DAW remain perfectly unchanged.
-18 dB
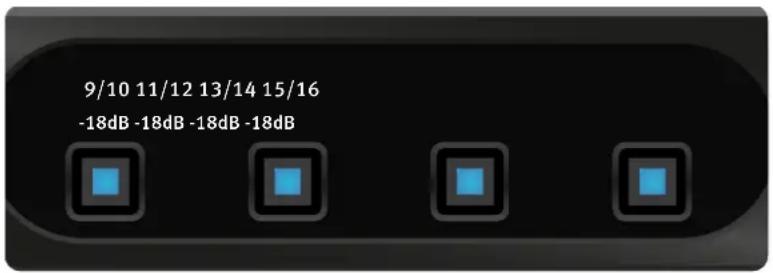
The level of the last four channel pairs of the MixDream XP Mk2 (9/10 to 15/16) can be attenuated by 18 dB via the -18 dB switch (blue status LED lights up). Low level signals in the mix can thus be played back and get converted with a higher level, therefore with a higher digital resolution, from the DAW. This preserves more details and sonic characteristics.
Tip: This can work wonders for digital reverbs (also plug-ins)!
Specifications
Analog inputs & output; XLR & DB25 (balanced)
| Maximum input & output gain 28 dBu | |
| Input impedance 10 kΩ | |
| Output impedance 82 Ω | |
| Common mode rejection (1 kHz) <70 dB | |
| Frequency range | 10 Hz – 200 kHz |
| THD + N (A-weighted, +10 dBu, all channels active) | -95 dBu |
| Noise (A-weighted, all channels active) | -97 dBu |
| Crosstalk (1 kHz, +10dBu) | -90 dB |
| Dynamic range | 125 dB |
Internal Linear Power Supply with Shielded Toroidal Transformer
| Operating voltage for analog audio +/- 30 V |
| Operating voltage for relays and LEDs 12 V |
Mains Power Supply
| Mains voltage 230 V (selectable) 230 V AC / 50; 115 V AC / 60 Hz |
| Fuse for 230 V T 312 mA |
| Fuse for 115 V T 630 mA |
| Power consumption max. 30 VA |
Dimensions & Weight
| W x H x D (width x height x depth) 482 x 44 x 237 mm | |
| 19 x 1.73 x 9.33 inch | |
| Unit weight 3.55 kg | |
| 7.83 lbs | |
| Shipping weight (incl. packaging) 4.9 kg | |
| 10.8 lbs | |
Security Advices
Before starting up the device:
- Read thoroughly and follow the security advices.
- Read thoroughly and follow the Quickstart.
- Observe all warning instructions on the device.
- Please keep the user manual as well as the security advices in a safe place for future reference.

Warning
Always follow the security advices listed below to avoid serious injuries or even deadly accidents due to electric shocks, short circuit, fire or other dangers. The following are examples of such risks and do not represent an exhaustive list:
Power supply/Power cord
Do not place the power cord near heat sources such as heaters or radiators and do not excessively bend or otherwise damage the cord, do not place heavy objects on it, or place it in a position where anyone could walk on, trip over, or roll anything over it.
Only use the voltage indicated on the device.
Only use the supplied power cord/plug.
If you intend to use the device in an area other than in the one you purchased it, the included power cord may not be compatible. In this case please contact your dealer.
Be sure to connect the device to an appropriate mains socket outlet with a protective grounding connection. Improper grounding can cause electrical shock.
Do not open
This device contains no user-serviceable parts. Do not open the device or attempt to disassemble the internal parts or modify them in any way. If it should appear to be malfunctioning, turn off the power immediately, unplug the power cord from the mains socket outlet and have it inspected by a qualified professional.
Water warning
Do not expose the device to rain, or use it near water or in damp or wet conditions, or place anything on it (such as vases, bottles or glasses) containing liquids which might spill into any openings. If any liquid such as water seeps into the device, turn off the power immediately and unplug the power cord from the mains socket outlet. Then have the device inspected by a qualified professional.
Never insert or remove an electric plug with wet hands.
Fire warning
Do not put burning items, such as candles, on the unit. A burning item may fall over and cause a fire.
Lightning
Before thunderstorms or other severe weather, disconnect the device from the mains socket outlet; do not do this during a storm in order to avoid life threatening lightning strikes. Similarly, disconnect all the power connections of other devices, antenna and phone/network cables which may be interconnected so that no damage results from such secondary connections.
If you notice any abnormality
When one of the following problems occur, immediately turn off the power switch and disconnect the electric plug from the mains socket outlet. Then have the device inspected by a qualified professional.
- The power cord or plug gets frayed or damaged.
• The device emits unusual smells or smoke. - An object has fallen into the unit.
- There is a sudden loss of sound during the use of the device.

Caution
Always follow the basic precautions listed below to avoid the possibility of physical injury to you or others, or damage to the device or other property. These precautions include, but are not limited to, the following:
Power supply/Power cord
When removing the electric plug from the device or an mains socket outlet, always pull on the plug itself and not the cord. Pulling the cord may damage it. Unplug the device from the mains socket outlet when the device is not used for a while.
Location
Do not place the device in an unstable position where it might accidentally fall over.
Do not block the vents. This device has ventilation holes to prevent the internal temperature from rising too high. In particular, do not place the device on its side or upside down. Inadequate ventilation can result in overheating, possibly causing damage to the device or even fire.
Do not place the device in a location where it may come into contact with corrosive gases or salty air. This may result in malfunction.
Before moving the device, remove all connected cables. When setting up the device, make sure that the mains socket outlet you are using is easily accessible. If some trouble or malfunction occurs, immediately turn off the power switch and disconnect the plug from the mains socket outlet. Even when the power switch is turned off, electricity is still flowing to the product at a minimum rate. When you are not using the device for a long time, make sure to unplug the power cord from the wall mains socket outlet.
Connections
Before connecting the device to other devices, power down all devices. Before power on or off the devices, set all volume levels to minimum.
Only use appropriate cables to connect the device with other devices. Make sure that the cables you use are intact and comply with the electrical specifications of the connection. Other connections can lead to health risks and damage the equipment.
Handling
Operate the controls and switches only as described in the manual. Incorrect adjustments outside safe parameters can lead to damage. Never use excessive force on the switches or controls.
Do not insert your fingers or hands in any gaps or openings of the device.
Avoid inserting or dropping foreign objects (paper, plastic, metal, etc.) into any gaps or openings of the device. If this happens, power down immediately and unplug the power cord from the mains socket outlet.
Then have the device inspected by a qualified professional.
Do not expose the device to excessive dust or vibrations or extreme cold or heat (such as direct sunlight, near a heater or in a car during the day) to prevent the possibility of causing damage to the housing, the internal components or unstable operation.
If the ambient temperature of the device suddenly changes, condensation can occur (if for example the device is relocated or is affected by a heater or air conditioning).
Using the device while condensation is present may result in malfunction. Do not power on the device for a few hours until the condensation is gone. Only then it is safe to power on.
Cleaning
Disconnect the device from your mains socket outlet before cleaning.
Do not use any solvents, as these can damage the chassis finish. Use a dry cloth, if necessary, with an acid-free cleaning oil.
Disclaimer
Windows ^® is a registered trademark of Microsoft ^®
Corporation in the United States and other countries.
Apple, Mac and Macintosh are trademarks of Apple Inc., registered in the U.S. and other countries.
The company names and product names in this manual are the trademarks or registered trademarks of their respective companies.
SPL and the SPL Logo are registered trademarks of SPL electronics GmbH.
SPL cannot be held responsible for damage caused by improper use or modification of the device or data that is lost or destroyed.
Notes on Environmental Protection

At the end of its operating life, this product must not be disposed with regular household waste but must be returned to a collection point for the recycling of electrical and electronic equipment.
The wheelie bin symbol on the product, user manual and packaging indicates that.
For proper treatment, recovery and recycling of old products, please take them to applicable collection points in accordance with your national legislation and the Directives 2012/19/EU.
The materials can be reused in accordance with their markings. Through reuse, recycling of raw materials, or other forms of recycling of old products, you are making an important contribution to the protection of our environment.
Your local administrative office can advise you of the responsible waste disposal point.
This directive only applies to countries inside the EU. If you wish to discard devices outside the EU, please contact your local authorities or dealer and ask for the correct method of disposal.
WEEE-Reg-No.: 973 349 88

MixDream XP Mk2 - Manual
MixDream XP Mk2
Monitor Output
- Getting started
- Power on
- Power off
- Ground
- MixDream XP Mk2 in the studio – How to set up
- Inputs
- Main Output
- Monitor Output
- Output
- Variable Output
- Expansion Input
- Expansion Input Switch
- Mono switch
- -18 dB
- Specifications
- Security Advices
- Before starting up the device:
- Warning
- Power supply/Power cord
- Do not open
- Water warning
- Fire warning
- Lightning
- If you notice any abnormality
- Caution
- Location
- Connections
- Handling
- Cleaning
- Disclaimer
- Notes on Environmental Protection
- MixDream XP Mk2
Brand : SPL
Model : MixDream XP Mk2
Category : Uncategorized