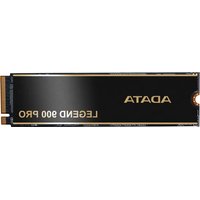
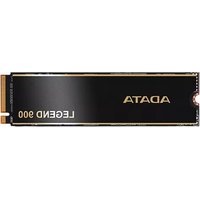
GAMMIX S50 CORE - SSD ADATA - Free user manual and instructions
Find the device manual for free GAMMIX S50 CORE ADATA in PDF.


| Product Type | Internal Solid State Drive (SSD) |
| Interface | PCIe Gen4 x4, NVMe 1.3 |
| Form Factor | M.2 2280 |
| Capacity | 1 TB (also available in 500 GB, 2 TB) |
| Sequential Read Speed | Up to 5,000 MB/s |
| Sequential Write Speed | Up to 4,500 MB/s |
| Random Read (IOPS) | Up to 750K |
| Random Write (IOPS) | Up to 700K |
| Controller | InnoGrit IG5220 |
| NAND Flash Type | 3D TLC NAND |
| Dimensions (L x W x H) | 80 mm x 22 mm x 2.4 mm |
| Weight | 8 g |
| Operating Temperature | 0°C to 70°C |
| Storage Temperature | -40°C to 85°C |
| Power Consumption (Active) | 6.5 W (typical) |
| Power Consumption (Idle) | 0.3 W |
| Warranty | 5 years or 1 TB TBW (Terabytes Written) |
| Endurance (TBW) | 1 TB model: 600 TBW |
| Special Features | SLC caching, Thermal Throttling, TRIM support, SmartRefresh |
| Operating System Support | Windows 10/11, Linux, macOS |
| Cleaning & Maintenance | Keep firmware updated; avoid extreme temperatures; use SSD utility software for monitoring |
| Safety & Certifications | RoHS, CE, FCC, VCCI |
Frequently Asked Questions - GAMMIX S50 CORE ADATA
User questions about GAMMIX S50 CORE ADATA
0 question about this device. Answer the ones you know or ask your own.
Ask a new question about this device
Download the instructions for your SSD in PDF format for free! Find your manual GAMMIX S50 CORE - ADATA and take your electronic device back in hand. On this page are published all the documents necessary for the use of your device. GAMMIX S50 CORE by ADATA.
USER MANUAL GAMMIX S50 CORE ADATA
Chinese traditional 03 Portuguese 27
Chinese simple 07 Russian 31
English 11 Romanian 35
German 15 Spanish 39
Japanese 19 Turkish 43
Korean 23
INSTALLING AN M.2 SSD ON A LAPTOP PC
Chinese traditional 47 Portuguese 71
Chinese simple 51 Russian 75
English 55 Romanian 79
German 59 Spanish 83
Japanese 63 Turkish 87
Korean 67
HOW TO INSTALL AN M.2 SSD ON PLAYSTATION 5
Chinese traditional 91 Portuguese 127
Chinese simple 97 Russian 133
English 103 Romanian 139
German 109 Spanish 145
Japanese 115 Turkish 151
Korean 121
如何在桌機安裝
M.2 固態硬碟

natural_image
Exterior view of a computer monitor displaying a colorful circular light pattern, next to a black GPU RAM module labeled XPG on a red background (no text or symbols on the hardware itself)更換前準備步驟
natural_image
Interior view of a computer case with exposed circuitry and internal components (no visible text or symbols)1. 準備工具
2. 備份資料
natural_image
Hand inserting a black rack into a server rack unit (no visible text or labels)natural_image
Hand placing a device into a black server tower case with visible internal components and tools (no text or symbols)1. 將主機機殼卸下
natural_image
Interior view of a computer motherboard with CPU socket, RAM slots, and monitor (no visible text or symbols)natural_image
Close-up of a hand holding a black tool, partially installed in a computer motherboard (no visible text or symbols)3. 對準 M.2 插槽、插上固態硬碟
natural_image
Close-up of a hand using a tool to adjust or install electronic components on a computer motherboard (no visible text or symbols)4. 拴上螺絲固態硬碟
再以螺絲起子固定M.2固態硬碟。
natural_image
Close-up of a hand inserting a device into a black server rack (no visible text or symbols)5.重新裝上機殼
natural_image
Hand inserting a rack into a server rack unit (no visible text or labels)natural_image
Exterior view of a computer RAM module with a colorful circular light source on its screen, next to a black GPU RAM card labeled 'XPG' (no text or symbols on the hardware itself)更换前准备步骤

natural_image
Interior view of a computer tower case showing internal components and wiring (no visible text or labels)1. 准备工具
natural_image
Hand inserting a rack into a server rack unit (no visible text or labels)natural_image
Hand placing a device into a black server rack with visible internal components and tools (no text or symbols)1. 将机箱侧板卸下
natural_image
Interior view of a computer motherboard with CPU socket, RAM slots, and monitor (no visible text or symbols)natural_image
Close-up of a hand holding a black tool, partially installed in a computer motherboard (no visible text or symbols)3.对准M.2插槽、插上固态硬盘
natural_image
Close-up of a hand using a tool to adjust or install electronic components on a computer motherboard (no visible text or symbols)4.拧上螺丝以固定固态硬盘
再以螺丝起子固定M.2固态硬盘。
natural_image
Close-up of a hand inserting a device into a black server tower case, with visible internal components and no text or symbols.5.重新装上机箱侧板
natural_image
Hand inserting a rack into a server rack unit (no visible text or labels)natural_image
Exterior view of a computer RAM module with a colorful circular light source on its screen, placed beside a black GPU RAM card (no text or symbols visible on the hardware itself)BEFORE INSTALLATION

natural_image
Interior view of a computer case with exposed circuitry and internal components (no visible text or symbols)1. GATHER THE THINGS YOU'LL NEED
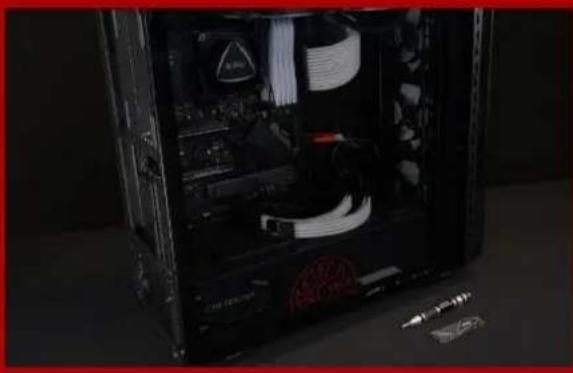
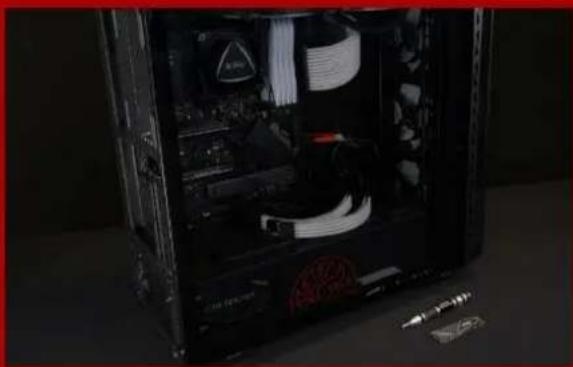
PC, Phillips screwdrivers, and XPG M.2 SSD
*Please use a standard Phillips screwdriver (3.5mm) for disassembling the case; and a smaller Phillips screwdriver for installing the M.2 solid state drive as it uses screws with a diameter of 1.85-1.98mm

Make sure to backup the important data on your PC to an external device, such as an external HDD, before starting installation.
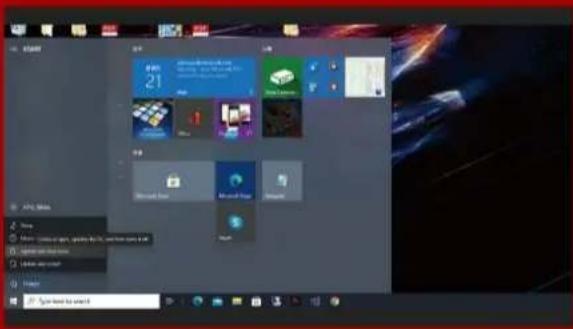
After backing up your data, power off your PC to avoid data loss or damage to other components during installation.

natural_image
Hand inserting a rack into a server rack unit (no visible text or labels)4. SWITCH OFF THE POWER SWITCH AND UNPLUG POWER CORD
This action is necessary to discharge residual power that can damage your PC and its components.
*The location of the power switch may vary by PC, please check your user manual.
INSTALLATION

natural_image
Hand placing a hard disk into a black computer tower case with visible internal components and tools (no text or symbols)1. REMOVE THE PC CASE
Use the standard Philips screwdriver to remove the screws and then remove the PC case
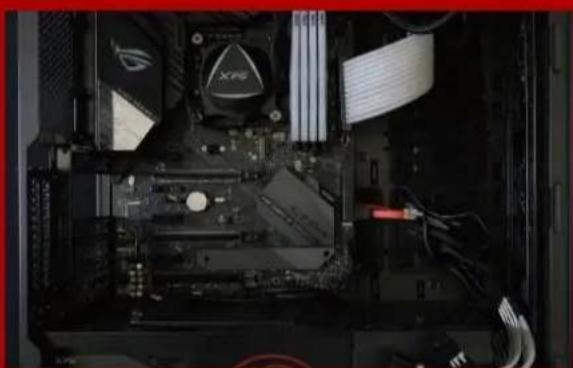
natural_image
Interior view of a computer motherboard showing CPU socket, RAM slots, and drive bays (no visible text or symbols)2. LOCATE THE M.2 PCIE SLOT AND CONFIRM THERE ARE SCREWS
Locate the M.2 PCIe slot, ensure the SSD will fit, and confirm there are screws present.
*The location of slots may vary by PC. Please check your PC's user manual for more information.
**Generally speaking, the screws that secure the SSD in place will be installed on the motherboard when the PC is shipped from the factory.
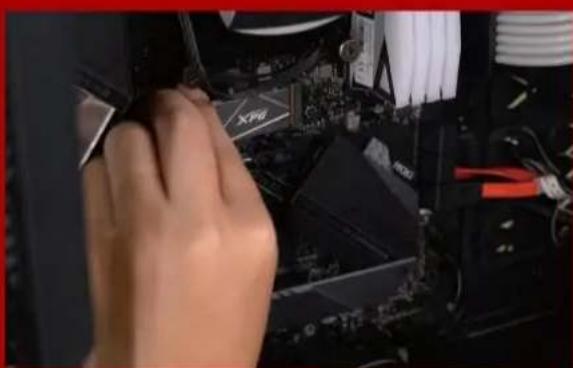
natural_image
Close-up of a hand inserting a CPU into a motherboard with visible components and wiring (no text or symbols)3. ALIGN THE M.2 SLOT AND INSERT THE SOLID STATE DRIVE
Use your small Phillips screwdriver to remove the screws on the motherboard. Align the notches in the SSD with the ridges in the PCIe slot, then insert at a an angle. Give it a final push to ensure it is securely in place.
* The slot has a foolproof design. Please insert the SSD in the direction corresponding to the pins on the solid state drive and the slot. Do not insert it forcibly to avoid damage to the product.
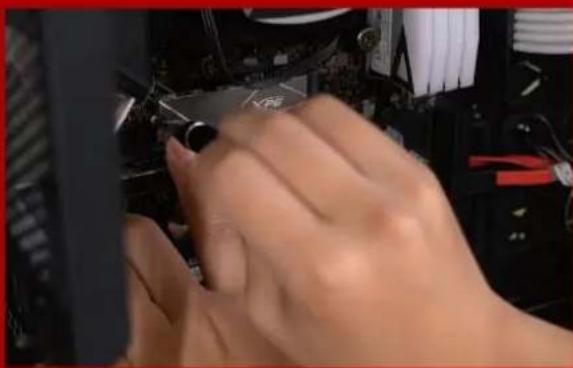
natural_image
Close-up of hands assembling or adjusting a computer motherboard with visible circuitry and hardware (no text or symbols)4. FASTEN THE SCREWS TO SECURE THE SSD
Use your small Phillips screwdriver to secure the SSD into place.

natural_image
Close-up of a hand inserting a device into a black server rack (no visible text or symbols)5. RESEMBLE THE CASE
*Do not overtighten the screws as it may damage the screws ad back plate

natural_image
Hand inserting a rack into a server rack unit (no visible text or labels)6. PLUG IN THE POWER CORD AND POWER ON THE PC TO COMPLETE INSTALLATION
EINE M.2-SSD AN EINEM
DESKTOP-PC INSTALLIEREN

natural_image
Exterior view of a computer RAM module with a colorful circular light source on its screen, next to a black XPG chip (no text or symbols visible on the main components)VOR DER INSTALLATION
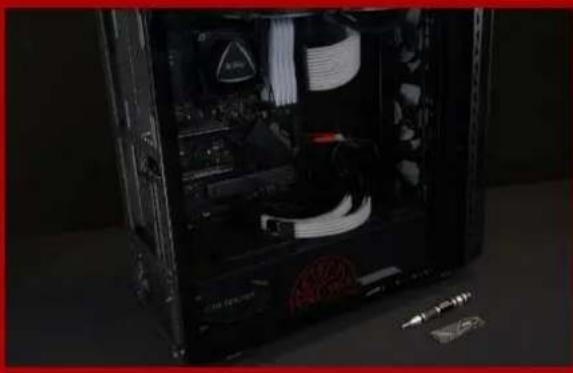
natural_image
Interior view of a computer case with exposed circuitry and internal components (no visible text or symbols)1. ALLES NÖ TIGE ZUSAMMENTRAGEN
2. IHRE DATEN SICHERN
natural_image
Hand inserting a rack into a server rack unit (no visible text or labels)natural_image
Hand placing a hard disk into a black computer tower case with visible internal components and tools (no text or symbols)1. PC-GEHÄ USE ENTFERNEN
natural_image
Interior view of a computer motherboard with CPU socket, RAM slots, and ventilation duct (no visible text or symbols)2. M.2-PCIE-STECKPLATZ AUSFINDIG MACHEN UND SICHERSTELLEN, DASS SCHRAUBENVORHANDENSIND
natural_image
Close-up of a hand inserting a component into a computer motherboard with CPU socket and hardware (no visible text or symbols)natural_image
Close-up of hands using a tool to adjust or install electronic components (no visible text or symbols)natural_image
Close-up of a hand inserting a device into a black server tower case, with visible internal components and no text or symbols.5. GEHÄ USE WIEDER ZUSAMMENBAUEN
natural_image
Hand inserting a rack into a server rack unit (no visible text or labels)natural_image
Exterior view of a computer RAM module with a colorful circular light source on its screen, next to a black GPU RAM card labeled 'XPG' (no text or symbols on the hardware itself)交換前の準備

natural_image
Interior view of a computer tower case showing internal components and wiring (no visible text or labels)1. 準備するもの
natural_image
Hand inserting a rack into a server rack unit (no visible text or labels)natural_image
Hand placing a hard disk into a black computer tower case with visible internal components and tools (no text or symbols)1. パソコン本体のケースを取り外す
natural_image
Interior view of a computer motherboard with CPU socket, RAM slots, and ventilation duct (no visible text or symbols)natural_image
Close-up of a hand inserting a component into a computer motherboard with CPU socket and hardware (no visible text or symbols)3. M.2スロットにSSDを差し込む
natural_image
Close-up of hands using a tool to adjust or install electronic components (no visible text or symbols)4. SSDをねじで 固 定する
natural_image
Close-up of a hand inserting a device into a black server tower case, with visible internal components and no text or symbols.5. ケースを元の位置に取り付ける
natural_image
Hand inserting a rack into a server rack unit (no visible text or labels)natural_image
Interior view of a computer tower case showing internal components and wiring (no visible text or labels)1.필요한 도구 준비
natural_image
Hand inserting a rack into a server rack unit (no visible text or labels)natural_image
Hand placing a device into a black server rack with visible internal components and tools (no text or symbols)1.PC케이스 제거
natural_image
Interior view of a computer motherboard with CPU socket, RAM slots, and monitor (no visible text or symbols)natural_image
Close-up of a hand holding a black tool, partially installed in a computer motherboard (no visible text or symbols)natural_image
Close-up of a hand using a tool to adjust or install electronic components on a computer motherboard (no visible text or symbols)4. 나사를 조여서 SSD 고정
natural_image
Close-up of a hand inserting a device into a black server tower case, with visible internal components and no text or symbols.5.케이스 재조립
natural_image
Hand inserting a rack into a server rack unit (no visible text or labels)natural_image
Exterior view of a computer RAM module with a colorful circular light source on its screen, next to a black XPG chip (no text or symbols visible on the main components)natural_image
Interior view of a computer tower case showing internal components and wiring (no visible text or labels)1. REÚ NA AS COISAS QUE VOCÊ PRECISA
PC, chaves de fenda Phillips e SSD XPG M.2
natural_image
Hand inserting a socket into a server rack (no visible text or labels)natural_image
Hand placing a hard disk into a black computer tower case with visible internal components and tools (no text or symbols)1. REMOVA O GABINETE DO PC
natural_image
Interior view of a computer motherboard with CPU socket, RAM slots, and ventilation duct (no visible text or symbols)2. LOCALIZE O SLOT M.2 PCIE E CONFIRME SE HÁ PARAFUSOS
natural_image
Close-up of a hand inserting a component into a computer motherboard with CPU socket and hardware (no visible text or symbols)3. ALINHE O SLOT M.2 E INSIRA A UNIDADE DE ESTADO SÓ LIDO
natural_image
Close-up of hands using a tool to adjust or install electronic components (no visible text or symbols)4. APERTE OS PARAFUSOS PARA PRENDER O SSD
natural_image
Close-up of a hand inserting a device into a black server rack (no visible text or symbols)natural_image
Hand inserting a rack into a server rack unit (no visible text or labels)natural_image
Interior view of a computer tower case showing internal components and wiring (no visible text or labels)natural_image
Hand inserting a socket into a server rack (no visible text or labels)4.ОТКЛЮЧИТЕ ШНУР ПИТАНИЯ БАТАРЕЮ
natural_image
Hand placing a hard disk into a black computer tower case with visible internal components and tools (no text or symbols)1. СНИМИТЕ ЗАДНЮЮ ПЛАСТИНУ ПК
natural_image
Interior view of a computer motherboard with CPU socket, RAM slots, and ventilation duct (no visible text or symbols)natural_image
Close-up of a hand inserting a component into a computer motherboard with CPU socket and hardware (no visible text or symbols)natural_image
Close-up of hands using a tool to adjust or install electronic components (no visible text or symbols)natural_image
Close-up of a hand inserting a device into a black server rack (no visible text or symbols)5.ЗАКРЕПИТЕ ЗАДНЮЮ ПЛАСТИН НА МЕСТЕ
natural_image
Hand inserting a rack into a server rack unit (no visible text or labels)natural_image
Exterior view of a computer RAM module with a colorful circular light source on its screen, next to a black XPG chip (no text or symbols visible on the device itself)Î NAINTE DE INSTALARE

natural_image
Interior view of a computer case with exposed internal components and a small metallic tool on the right (no visible text or symbols)1. ADUNATI LUCRURILE DE CARE VEȚI AVEA NEVOIE
2. FACETI O COPIE DE REZERVĂ A DATELOR
natural_image
Hand inserting a rack into a server rack unit (no visible text or labels)4. DECONECTATI ALIMENTAREA CU ENERGIE ŞI CABLUL DE ALIMENTARE
natural_image
Hand placing a component into a black server rack with visible internal components (no text or symbols)1. SCOATEȚI CARCASA PC-ULUI
natural_image
Interior view of a computer motherboard with CPU socket, RAM slots, and ventilation ducts (no visible text or symbols)2. LOCALIZATI FANTA M.2 PCIE ŞI CONFIRMAȚI CĂ EXISTĂ ŞURUBURI
natural_image
Close-up of a hand using a tool to adjust or install electronic components in a computer room (no visible text or symbols)3.ALINIATI FANTA M.2 ŞI INTRODUCETI UNITATEA SOLID STATE
natural_image
Close-up of hands operating a computer motherboard with a tool (no visible text or symbols)4. STRÂ NGETI ŞURUBURILE PENTRU À FIXA SSD
natural_image
Close-up of a hand inserting a device into a black server tower case, with visible internal components and no text or symbols.5.REASAMBLATICARCASA
natural_image
Hand inserting a port into a server rack with multiple Ethernet connectors (no visible text or labels)6.CONECTATICABLULDE ALIMENTARE ŞI PORNITI PC-UL PENTRUAFINALIZA INSTALAREA
INSTALARUNAUNIDAD
DEESTADOSÓLIDOM.2
ENUNEQUIPODE
SOBREMESA
natural_image
Interior view of a computer case with exposed circuitry and internal components (no visible text or symbols)1. REUNIR LOS ELEMENTOS QUE NECESITARÁ
natural_image
Hand inserting a rack into a server rack unit (no visible text or labels)natural_image
Hand placing a hard disk into a black computer tower case with visible internal components and tools (no text or symbols)1. QUITAR LA CARCASA DELEQUIPO
natural_image
Interior view of a computer motherboard with CPU socket, RAM slots, and ventilation duct (no visible text or symbols)natural_image
Close-up of a hand inserting a component into a computer motherboard with CPU socket and hardware (no visible text or symbols)3. ALINEARLARANURAM.2EINSERTA LA UNIDAD DE ESTADO SÓLIDO
natural_image
Close-up of hands using a tool to adjust or install electronic components (no visible text or symbols)natural_image
Close-up of a hand inserting a device into a black server rack (no visible text or symbols)5. VOLVER A MONTAR LA CARCASA
natural_image
Hand inserting a rack into a server rack unit (no visible text or labels)natural_image
Exterior view of a computer RAM module with a colorful circular light source on its screen, next to a black XPG chip (no text or symbols visible on the hardware itself)KURULUM
natural_image
Interior view of a computer tower case showing internal components and wiring (no visible text or labels)1. İHTIYACINIZ OLACAK ŞEYLERI TOPLAYIN
PC, Phillips tornavidalar ve XPG M.2 SSD
natural_image
Hand inserting a rack into a server rack unit (no visible text or labels)4. GÜ Ç ANAHTARINI KAPATIN VE GÜ Ç KABLOSUNU Ç IKARIN
natural_image
Hand placing a hard disk into a black computer tower case with visible internal components and tools (no text or symbols)1. PC KASASINI Ç IKARIN
natural_image
Interior view of a computer motherboard with CPU socket, RAM slots, and ventilation duct (no visible text or symbols)2. M.2 PCIE YUVASINI BULUN VE VIDALARIN BULUNDUĞUNU DOĞRULAYIN
natural_image
Close-up of a hand inserting a component into a computer motherboard with CPU socket and hardware (no visible text or symbols)3. M.2 YUVASINI HIZALAYIN VE KATI HAL SÜ RÜ CÜ SÜ NÜ TAKIN
natural_image
Close-up of hands using a tool to adjust or install electronic components (no visible text or symbols)4. SSD'YI SABITLEMEK IÇ IN VIDALARI SIKIN
natural_image
Close-up of a hand inserting a device into a black server tower case, with visible internal components and no text or symbols.5. DAVAYA BENZEYEN
natural_image
Hand inserting a rack into a server rack unit (no visible text or labels)6. KURULUMU TAMAMLAMAK IÇ IN GÜ Ç KABLOSUNU TAKIN VE BILGISAYARI AÇ IN
如何在筆電安裝
M.2固態硬碟
更換前準備步驟

1. 準備工具
3.請確實關機
natural_image
Close-up of human hands resting on a dark surface, with a small triangular object labeled 'XFG' visible in the background (no other text or symbols)4.將電源線及電池拔除
1. 將主機背板卸下
natural_image
Top-down view of a laptop showing internal circuit board and drive components (no visible text or symbols)natural_image
Close-up of a hand inserting a 3D drive into a black CPU socket (no visible text or symbols)3.對準M.2插槽、插上固態硬碟
natural_image
Close-up of hands using a screwdriver to adjust a XPG chip on a computer motherboard (no visible text or symbols)4.拴上螺絲以固定固態硬碟
再以螺絲起子固定M.2固態硬碟。
5.重新蓋上背板
natural_image
Close-up of human hands resting on a dark surface, no visible text or symbols3.请确认关机
natural_image
Close-up of human hands resting on a dark surface, with a small triangular object labeled 'XFG' visible in the background (no other text or symbols)4. 将电源线及电池拔除
1. 将电脑背板卸下
natural_image
Top-down view of a laptop showing internal circuit board and drive components (no visible text or symbols)natural_image
Close-up of a hand inserting a 3D drive into a black CPU socket (no visible text or symbols)3. 对准M.2插槽、插上固态硬盘
natural_image
Close-up of hands using a screwdriver to adjust a 3D electronic device with XPG chip (no visible text or symbols)4.拴上螺丝以固定固态硬盘
再以螺丝起子固定M.2固态硬盘。
5.重新盖上背板
natural_image
Close-up of human hands resting on a dark surface, no visible text or symbols1. GATHER THE THINGS YOU'LL NEED
PC, Phillips screwdrivers, and XPG M.2 SSD
*Please use a standard Phillips screwdriver (3.5mm) for disassembling the case; and a smaller Phillips screwdriver for installing the M.2 solid state drive as it uses screws with a diameter of 1.85-1.98mm.

Make sure to backup the important data on your PC to an external device, such as an external HDD, before starting installation.

After backing up your data, power off your PC to avoid data loss or damage to other components during installation.

natural_image
Close-up of human hands resting on a dark surface, with a small triangular object labeled 'XFB' visible in the background (no other text or symbols)4. UNPLUG POWER CORD AND BATTERY
This action is necessary to discharge residual power that can damage your PC and its components.
*The battery removal step applies only to laptops when it's possible to remove the battery. To see how to remove the battery, refer to your user manual.
INSTALLATION
natural_image
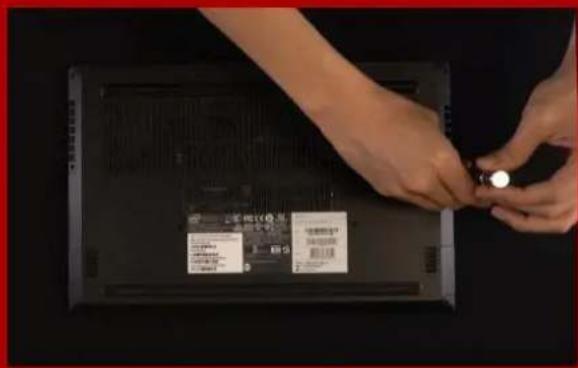
Close-up of hands installing a small electronic component on a laptop back (no visible text or symbols)1. REMOVE YOUR PC'S BACK PLATE
Use your standard Phillips screwdriver to remove the screws from the back plate.
*If you are unsure how to do this, refer to your user manual
natural_image
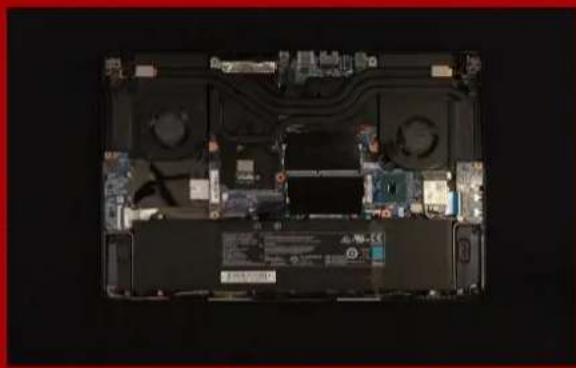
Top-down view of a laptop's front open showing internal circuit board and drive components (no text or symbols visible)2. LOCATE THE M.2 PCIe SLOT AND CONFIRM THERE ARE SCREWS
Locate the M.2 PCIe slot, ensure the SSD will fit and confirm there are screws present.
*The location of slots may vary by PC. Please check your PC's user manual for more information.
**Generally speaking, the screws that secure the SSD in place will be installed on the motherboard when the laptop is shipped from the factory.

natural_image
Close-up of a hand inserting a 3D drive into a black CPU socket (no visible text or symbols)3. ALIGN THE M.2 SLOT AND INSERT THE SOLID STATE DRIVE
Use your small Phillips screwdriver to remove the screws on the motherboard. Align the notches in the SSD with the ridges in the PCIe slot, then insert at a an angle. Give it a final push to ensure it is securely in place.
*The slot has a foolproof design. Please insert the SSD in the direction corresponding to the pins on the solid state drive and the slot. Do not insert it forcibly to avoid damage to the product.

natural_image
Close-up of hands using a screwdriver to adjust a XPG chip on a computer motherboard (no visible text or symbols)4. FASTEN THE SCREWS TO SECURE THE SSD
Use your small Phillips screwdriver to secure the SSD into place.
*Do not overtighten the screws

5. SECURE THE BACK PLATE INTO PLACE
*Do not overtighten the screws as it may cause damage
natural_image
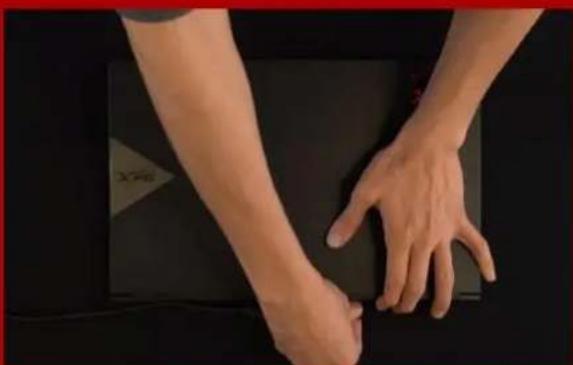
Close-up of human hands resting on a dark surface, no visible text or symbols6. PLUG IN THE POWER CORD AND POWER ON THE PC TO COMPLETE INSTALLATION
EINE M.2-SSD AN EINEM LAPTOP-PC INSTALLIEREN
VOR DER INSTALLATION

1. ALLES NÖ TIGE ZUSAMMENTRAGEN
2.IHRE DATEN SICHERN
3.IHREN PC ABSCHALTEN
natural_image
Close-up of human hands resting on a dark surface, no visible text or symbols4.NETZKABEL UND AKKU TRENNEN
1. RÜ CKPLATTE IHRES PCS ENTFERNEN
natural_image
Top-down view of a laptop showing internal circuit board and drive bays (no text or symbols visible)2.M.2-PCIE-STECKPLATZ AUSFINDIG MACHENUND SICHERSTELLEN, DASS SCHRAUBEN VORHANDEN SIND
natural_image
Close-up of a hand inserting a 3D drive into a black CPU socket (no visible text or symbols)natural_image
Close-up of hands using a screwdriver to adjust a XPG chip on a computer motherboard (no visible text or symbols)5.RÜCKPLATTE WIEDER EINSETZEN
natural_image
Close-up of human hands resting on a dark surface, no visible text or symbols2. データのバックアップ
3. パソコンのシャットダウン
natural_image
Close-up of human hands resting on a dark surface, no visible text or symbols4. 電源ーブルとバッテリーを取り外す
natural_image
Close-up of hands installing a small electronic component on a laptop back (no visible text or symbols)1. パソコンのバックパネルを取り外す
natural_image
Top-down view of a laptop's front open showing internal circuit board and drive components (no text or symbols visible)natural_image
Close-up of a hand inserting a XPG into a computer motherboard (no visible text or symbols)3. M.2スロットにSSDを差し込む
natural_image
Close-up of hands using a screwdriver to adjust a laptop chip into a motherboard (no visible text or symbols)4. SSDをねじで固定する
natural_image
Close-up of human hands resting on a dark surface, no visible text or symbolsnatural_image
Close-up of human hands resting on a dark surface, with a small triangular object labeled 'XFG' visible in the background (no other text or symbols)4.전원 코드와 배터리 분리
natural_image
Close-up of hands holding a small electronic device on a black laptop case (no visible text or symbols)1.PC뒤판 제거
natural_image
Top-down view of a laptop chassis showing internal components and circuitry (no visible text or symbols)natural_image
Close-up of a hand inserting a XPG into a computer motherboard with visible CPU socket and circuit board (no text or symbols on main subject)natural_image
Close-up of hands using a screwdriver to adjust a device on a circuit board (no visible text or symbols)4.나사를 조여서SSD고정
5.뒤판 제자리에 고정
natural_image
Close-up of human hands resting on a dark surface, no visible text or symbols1. REÚ NA AS COISAS QUE VOCÊ PRECISA
PC, chaves de fenda Phillips e SSD XPG M.2
natural_image
Close-up of human hands resting on a dark surface, with a small triangular object labeled 'XFG' visible in the background (no other text or symbols)natural_image
Close-up of hands installing a small electronic component on a laptop back (no visible text or symbols)1. REMOVA A PLACA TRASEIRA DO SEU PC
natural_image
Top-down view of a laptop showing internal circuit board and drive bays (no text or symbols visible)2. LOCALIZE O SLOT M.2 PCIE E CONFIRME SE HÁ PARAFUSOS
natural_image
Close-up of a hand inserting a 3D drive into a black CPU socket (no visible text or symbols)3. ALINHE O SLOT M.2 E INSIRA A UNIDADE DE ESTADO SÓ LIDO
natural_image
Close-up of hands using a screwdriver to adjust a 3D electronic device with XPG chip (no visible text or symbols)4.APERTE OS PARAFUSOS PARA PRENDER O SSD
5. PRENDA A PLACA TRASEIRA NO LUGAR
natural_image
Close-up of human hands resting on a dark surface, no visible text or symbolsnatural_image
Close-up of human hands resting on a dark surface, with a small triangular object labeled 'XFG' visible in the background (no other text or symbols)natural_image
Top-down view of a laptop showing internal circuit board and drive components (no visible text or symbols)natural_image
Close-up of a hand inserting a 3D drive into a black CPU socket (no visible text or symbols)natural_image
Close-up of hands using a screwdriver to adjust a device on a circuit board (no visible text or symbols)5.ЗАКРЕПИТЕ ЗАДНЮЮ ПЛАСТИН НА МЕСТЕ
natural_image
Close-up of human hands resting on a dark surface, no visible text or symbols2. FACETI O COPIE DE REZERVĂ A DATELOR
natural_image
Close-up of human hands resting on a dark surface, no visible text or symbols4. DECONECTATI CABLUL DE ALIMENTARE ŞI BATERIA
natural_image
Close-up of hands installing a device on a black electronic device (no visible text or symbols)1. SCOATEȚI PLACA DIN SPATE A PC-ULUI
natural_image
Top-down view of a laptop showing internal circuitry and components (no visible text or symbols)natural_image
Close-up of a hand inserting a 3D drive into a computer motherboard with visible CPU socket and circuit board (no text or symbols)3. ALINIATI FANTA M.2 Ş INTRODUCETI UNITATEA SOLID STATE
natural_image
Close-up of hands using a tool to adjust or repair a device on a circuit board (no visible text or symbols)4. STRÂ NGETI ŞURUBURILE PENTRU À FIXA SSD
5. FIXAREA PLĂCII DIN SPATE ÎN POZIȚIE
natural_image
Close-up of human hands resting on a dark surface, no visible text or symbols6.CONECTATI CABLUL DE ALIMENTARE ŞI PORNITI PC-UL PENTRU A FINALIZA INSTALAREA
INSTALAR UNA UNIDAD DE ESTADO SÓ LIDO M.2 EN UN EQUIPO PORTÁTIL
natural_image
Close-up of human hands resting on a dark surface, with a small triangular object labeled 'XFG' visible in the background (no other text or symbols)natural_image
Close-up of hands installing a small electronic component on a laptop back (no visible text or symbols)1. RETIRAR LA PLACA POSTERIOR DE SU PC
natural_image
Top-down view of a laptop showing internal circuit board and drive bays (no text or symbols visible)2. LOCALIZAR LA RANURA PCIE M.2 Y CONFIRMAR QUE TIENE TORNILLOS
natural_image
Close-up of a hand inserting a 3D drive into a black CPU socket (no visible text or symbols)3.ALINEAR LA RANURA M.2 E INSERTAR LA UNIDAD DE ESTADO SÓ LIDO
natural_image
Close-up of hands using a screwdriver to adjust a XPG chip on a computer motherboard (no visible text or symbols)5. ASEGURAR LA PLACA POSTERIOR EN SU LUGAR
natural_image
Close-up of human hands resting on a dark surface, no visible text or symbols6. ENCHUFAR EL CABLE DE ALIMENTACIÓ N Y ENCENDER EL EQUIPO PARA COMPLETAR LA INSTALACIÓ N
natural_image
Close-up of human hands resting on a dark surface, with a small triangular object labeled 'XFG' visible in the background (no other text or symbols)4. GÜ Ç KABLOSUNU VE PILI Ç IKARIN
natural_image
Top-down view of a laptop showing internal circuit board and drive bays (no text or symbols visible)2. M.2 PCIE YUVASINI BULUN VE VIDALARIN BULUNDUĞUNU DOĞRULAYIN
natural_image
Close-up of a hand inserting a 3D drive into a black CPU socket (no visible text or symbols)3. M.2 YUVASINI HIZALAYIN VE KATI HAL SÜ RÜ CÜ SÜ NÜ TAKIN
natural_image
Close-up of hands using a screwdriver to adjust a device on a circuit board (no visible text or symbols)4. SSD'YI SABITLEMEK IÇ IN VIDALARI SIKIN
5. ARKA PLAKAYI YERINE SABITLEYIN
natural_image
Close-up of human hands resting on a dark surface, no visible text or symbols4. KURULUMU TAMAMLAMAK IÇ IN GÜ Ç KABLOSUNU TAKIN VE BILGISAYARI AÇ IN
如何在PS5主機安裝
M.2固態硬碟

natural_image
Blue-tinted image of a PlayStation 3 console with Sony logo, next to a game controller (no visible text or symbols on device)安裝前準備步驟

natural_image
Product display featuring a game controller, multiple video and audio formats including a 512x3 video card, with no visible text or symbols on the main objects.需要的工具有:
2.將PS5主機關機。

natural_image
Close-up of a white gaming controller next to a black Sony PC, with a cable inserted (no visible text or symbols)3.移除所有主機上的線材跟裝置。
安裝固態硬碟步驟

natural_image
Hands holding a white rectangular object on a dark surface, no visible text or symbolsnatural_image
Close-up of a white plastic panel edge with a small slot, resting on a gray surface (no text or symbols visible)2.用左手緊握PS5主機的左上角。

natural_image
Hand holding a white sheet of paper against a dark textured background (no text or symbols visible)natural_image
Close-up of a mechanical component with a screwdriver inserted, showing internal structure (no visible text or symbols)natural_image
Close-up of a mechanical component with green and gray surfaces, no visible text or symbols- 接著會看到綠色底的固態硬碟擴充插槽。
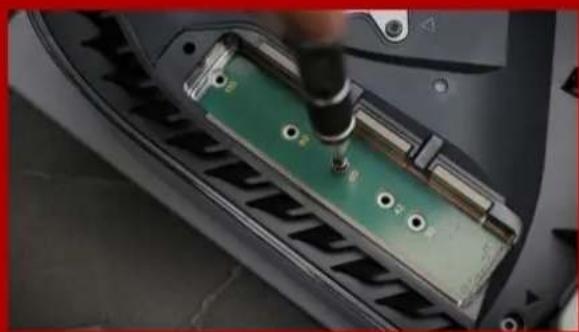
natural_image
Close-up of a green electronic component being inserted into a car's door panel, with a hand using a screwdriver (no visible text or symbols)natural_image
Close-up of a car's front panel showing internal components and battery pack (no text or symbols visible)natural_image
Close-up of a 3D printer's internal structure with XPG logo and warning symbol (no readable text or symbols beyond branding)natural_image
Close-up of a hand using a tool to insert components on a device casing (no visible text or symbols)- 再將螺絲旋緊,固定固態硬碟。

natural_image
Close-up of a mechanical component with a screwdriver inserted, showing internal structure (no visible text or symbols)- 重新蓋上擴充插上蓋。

natural_image
Close-up of a black electronic device with a circular fan and paper lid, placed on a surface (no visible text or symbols)natural_image
Close-up of a gaming device with a white game controller and black ventilation slots, placed on a textured floor (no visible text or symbols)- 重新連接電線並啟動您的PS5主機。
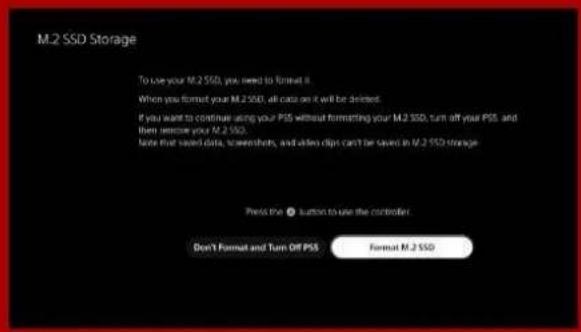
13. 按照重新格式化說明操作。

14. 您已完成!
natural_image
Blue-tinted image of a PlayStation 3 console with Sony logo, next to a game controller (no visible text or symbols on device)安装前准备步骤

natural_image
Product display set including a game controller, video games, and a 512-inch DVD on a table (no visible text or symbols)需要的工具有:
-XPG M.2固态硬盘
-十字型螺丝刀
-PS5主机

- 将PS5主机关机。

natural_image
Close-up of a white gaming controller and a black Sony PC connected by a cable (no visible text or symbols)- 移除所有主机上的线材跟装置。
安装固态硬盘步骤

natural_image
Hands holding a white rectangular object on a dark surface, no visible text or symbolsnatural_image
Close-up of a white plastic panel edge with a small slot, resting on a textured surface (no text or symbols visible)- 用左手紧握PS5主机的左上角。

natural_image
Hand holding a white sheet of paper against a dark textured background (no text or symbols visible)- 用右手拉动,然后向左滑动背板以拆除机壳上盖。
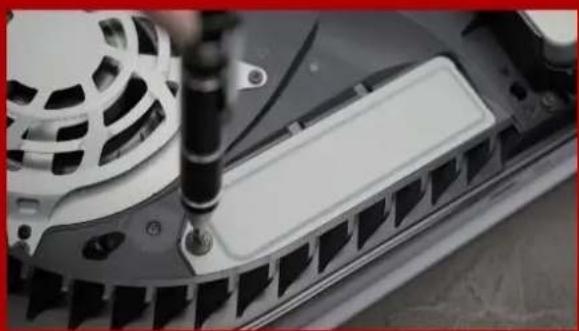
natural_image
Close-up of a mechanical component with a screwdriver inserted, showing internal structure (no visible text or symbols)- 松开螺丝以拆除固态硬盘扩充槽的盖子。

natural_image
Close-up of a green electronic component with mounting holes and a metallic bracket, mounted on a metal panel (no visible text or symbols)- 接着会看到绿色底的固态硬盘扩充插槽。
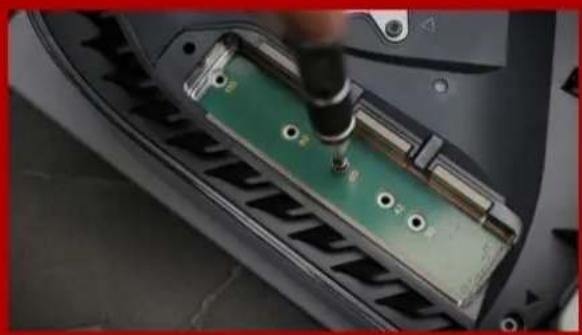
natural_image
Close-up of a car's internal battery pack with a screwdriver inserted, showing green circuit board and mounting holes (no text or symbols visible)natural_image
Close-up of a car's front panel showing internal components and battery pack (no text or symbols visible)natural_image
Close-up of a 3D printer's internal structure with XPG logo and metallic components (no readable text beyond branding)natural_image
Close-up of a hand using a tool to insert components on a device casing (no visible text or symbols)- 再将螺丝旋紧,固定固态硬盘。

natural_image
Close-up of a mechanical component with a screwdriver inserted, showing internal structure (no visible text or symbols)- 重新盖上扩充插上盖。

natural_image
Close-up of a black electronic device with a circular fan and paper lid, placed on a surface (no visible text or symbols)natural_image
Close-up of a gaming device with a white game controller and black ventilation slots, placed on a textured floor (no visible text or symbols)- 重新连接电线并启动您的PS5主机。

13. 按照重新格式化说明操作。

natural_image
Blue-tinted image of a PlayStation 3 console with Sony logo, next to a game controller (no visible text or symbols on device)BEFORE INSTALLATION

natural_image
Product display of gaming consoles including a game controller, video games, and a 512-inch SSD with a pen on a table (no visible text or symbols)WHAT YOU'LL NEED :
- XPG M.2 SSD
- Phillips head screwdriver
- PS5
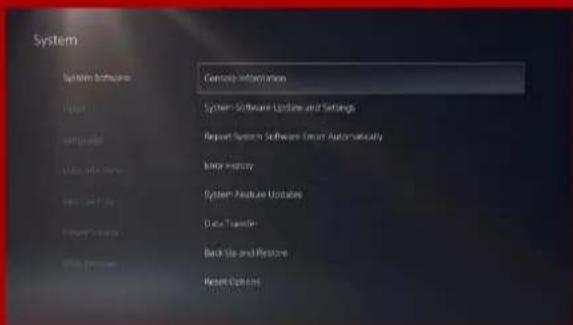
- ENSURE YOU HAVE THE LATESTPS5 SOFTWARE UPDATES.
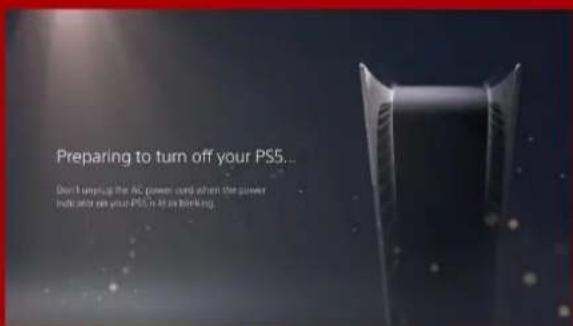
- TURN OFF YOUR PS5.
natural_image
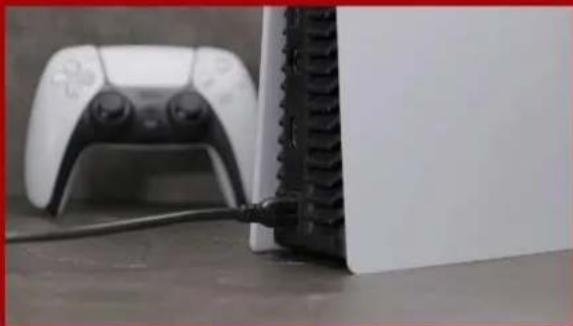
Close-up of a white PlayStation controller connected to a black Sony PC, with cable visible (no text or symbols)- DISCONNECT ALL CABLES AND DEVICES.
INSTALLATION

natural_image
Hands holding a white rectangular object on a dark surface, no visible text or symbols- LAY THE PS5 FLAT WITH THE LOGO SIDE FACING DOWNWARDS.

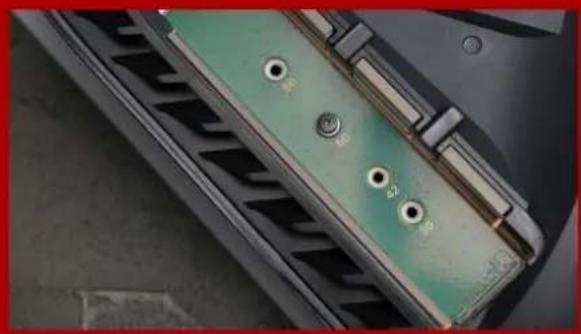
natural_image
Close-up of a white plastic panel edge with a small slot, resting on a textured surface (no text or symbols visible)- FIRMLY GRAB THE UPPER LEFT HAND CORNER OF THE PS5 WITH YOUR LEFT HAND.

natural_image
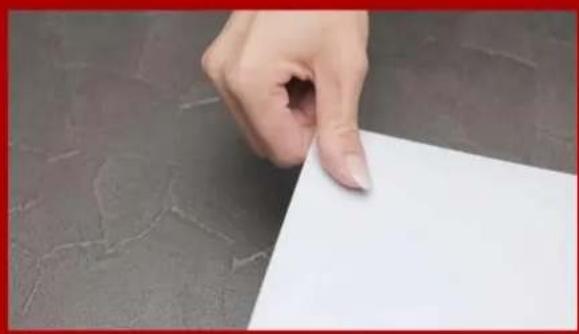
Hand holding a white sheet of paper against a dark textured background (no text or symbols visible)3.WITH YOUR RIGHT HAND, PULL AND THEN SLIDE THE BACKING PLATE TO THE LEFT TO REMOVE.

natural_image
Close-up of a mechanical component with a screwdriver inserted, showing internal structure (no visible text or symbols)- LOOSEN THE SCREW TO REMOVE THE EXPANSION SLOT COVER.

natural_image
Close-up of a mechanical component with green and gray surfaces, no visible text or symbolsnatural_image
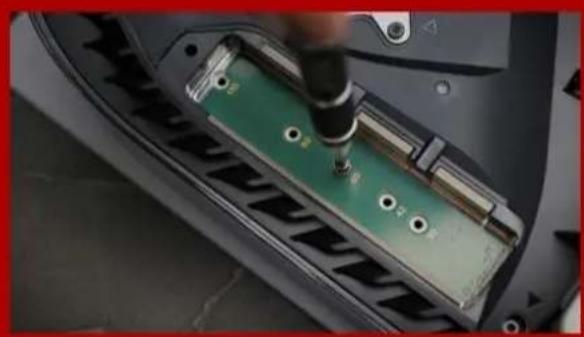
Close-up of a green electronic component being inserted into a car's door panel, with a hand using a screwdriver (no visible text or symbols)- REMOVE THE SINGLE SCREW AND THE WASHER-LIKE STANDOFF UNDERNEATH.

natural_image
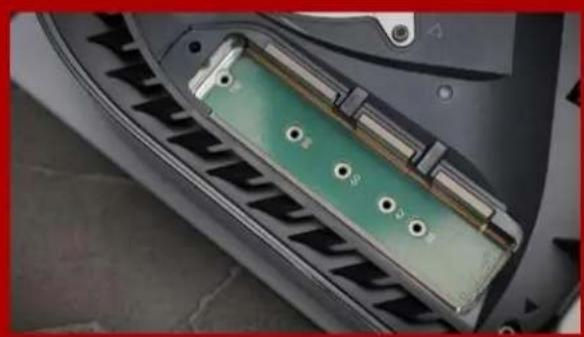
Close-up of a car's front panel showing internal components and battery pack (no text or symbols visible)- PLACE THE STANDOFF IN THE HOLE THAT CORRESPONDS TO THE M.2 FORM FACTOR.
natural_image
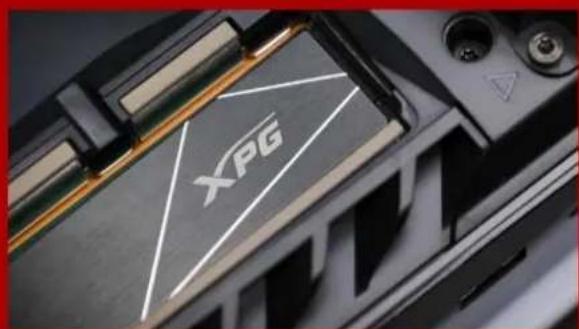
Close-up of a 3D printer's internal structure with XPG logo and warning symbol (no readable text or symbols beyond branding)- CLICK THE GOLD CONNECTOR OF THE SSD INTO THE MATCHING INPUT NOTCH.

natural_image
Close-up of a hand using a tool to adjust or install electronic components on a device casing (no visible text or symbols)- FASTEN THE SSD WITH THE SCREW.
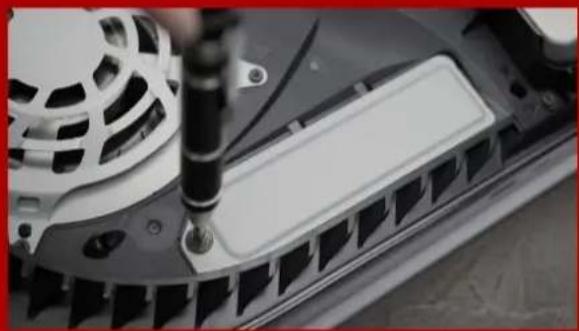
natural_image
Close-up of a mechanical component with a screwdriver inserted, showing internal structure (no visible text or symbols)10.REINSTALL THE EXPANSION SLOT COVER.

natural_image
Close-up of a black electronic device with a circular fan and paper lid, placed on a surface (no visible text or symbols)- REINSTALL THE BACKING PLATE BY SLIDING IT BACK AND PUSHING DOWNWARDS.
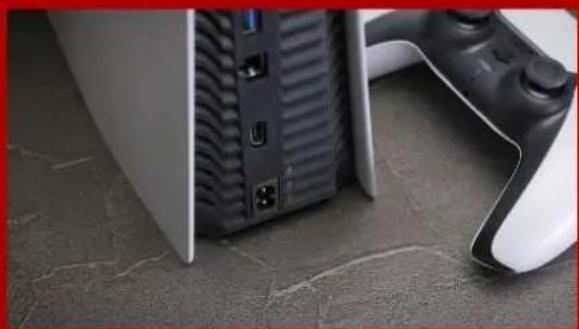
natural_image
Close-up of a gaming controller next to a white game controller with black buttons, placed on a textured floor (no visible text or symbols)- RE-ATTACH CABLES AND TURN ON YOUR PS5.

13. FOLLOW THE REFORMATTING INSTRUCTIONS.

14. YOU'RE DONE! YOU CAN NOW STORE GAMES AND APPS ONTO THE ADATA LEGEND 840.
INSTALLATION EINER M.2 SSD AUF PLAYSTATION®5

natural_image
Blue-tinted image of a PlayStation 3 console with Sony logo, next to a game controller (no visible text or symbols on device)VOR DER INSTALLATION

natural_image
Product display featuring a game controller, multiple video and audio formats including a 512x3 video card, with no visible text or symbols on the main objects.WAS SIE BENÖ TIGEN:
- STELLEN SIE SICHER, DASS SIE DIE NEUESTEN PS5-SOFTWARE-UPDATES INSTALLLIERT HABEN.

- SCHALTEN SIE IHRE PS5 AUS.

natural_image
Close-up of a white gaming controller next to a black Sony PC, with a cable inserted (no visible text or symbols)- TRENNEN SIE ALLE KABEL UND GERÄ TE AB.
INSTALLATION

natural_image
Hands holding a white rectangular object on a dark surface, no visible text or symbols- LEGEN SIE DIE PS5 FLACH HIN, SO DASS DAS LOGO NACH UNTEN ZEIGT.

natural_image
Close-up of a white plastic panel edge with a small slot, resting on a gray surface (no text or symbols visible)- GREIFEN SIE MIT IHRER LINKEN HAND FEST IN DIE LINKE OBERE ECKE DER PS5.
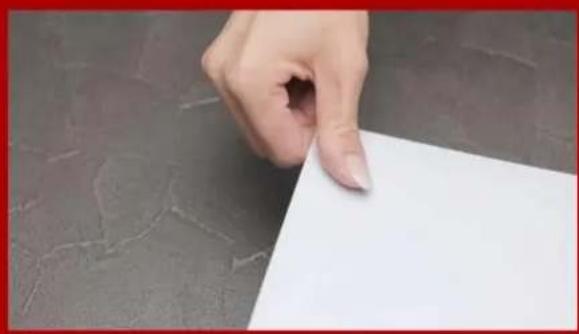
natural_image
Hand holding a white sheet of paper against a dark textured background (no text or symbols visible)- ZIEHEN SIE MIT DER RECHTEN HAND AN DER TRÄ GERPLATTE UND SCHIEBEN SIE DIESE NACH LINKS, UM SIE ZU ENTFERNEN.
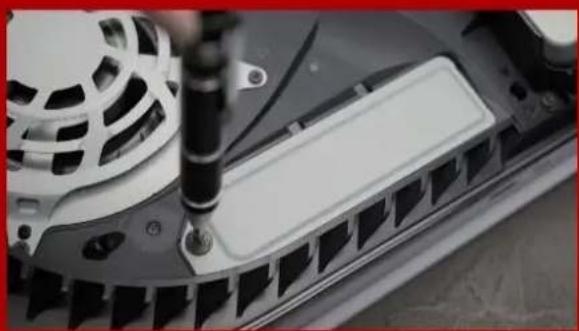
natural_image
Close-up of a mechanical component with a screwdriver inserted, showing internal structure (no visible text or symbols)natural_image
Close-up of a green electronic component with mounting holes and a metallic bracket, mounted on a metal panel (no visible text or symbols)natural_image
Close-up of a green electronic component being inserted into a car's door panel, with no visible text or symbols.natural_image
Close-up of a car's front panel showing internal components and battery pack (no text or symbols visible)- SETZEN SIE DEN ABSTANDHALTER IN DAS LOCH IM M.2-FORMFAKTOR.

- SETZEN SIE DEN GOLDENEN STECKER DER SSD IN DIE ENTSPRECHENDE AUSSPARUNG AM EINGANG EIN

natural_image
Close-up of a hand using a tool to adjust or install electronic components on a device casing (no visible text or symbols)- BEFESTIGEN SIE DIE SSD MITHILFE DER SCHRAUBE.

natural_image
Close-up of a mechanical component with a screwdriver inserted, showing internal structure (no visible text or symbols)natural_image
Close-up of a black electronic device with a circular fan and paper towel, placed on a surface (no visible text or symbols)natural_image
Close-up of a game controller next to a computer monitor and keyboard, placed on a textured floor (no visible text or symbols)natural_image
Blue-tinted image of a PlayStation 3 console with Sony logo, next to a game controller (no visible text or symbols on device)設置前の準備

natural_image
Product display set including a game controller, video games, and a 512-inch DVD on a table (no visible text or symbols)必要なもの:
- XPG M.2 SSD
- プラスドライバー
- PS5
- PS5の電源を切ります。

natural_image
Close-up of a white gaming controller and a black Sony PC connected by a cable (no visible text or symbols)natural_image
Hands holding a white rectangular object on a dark surface, no visible text or symbolsnatural_image
Close-up of a white plastic panel edge with a small slot, resting on a gray surface (no text or symbols visible)natural_image
Hand holding a white sheet of paper against a dark textured background (no text or symbols visible)natural_image
Close-up of a mechanical component with a screwdriver inserted, showing internal structure (no visible text or symbols)natural_image
Close-up of a green electronic component with mounting holes and a metallic bracket, mounted on a metal panel (no visible text or symbols)natural_image
Close-up of a car's internal battery pack with a screwdriver inserted, showing green circuit board and mounting holes (no text or symbols visible)natural_image
Close-up of a car's front panel showing internal components and battery pack (no text or symbols visible)natural_image
Close-up of a 3D printer's internal structure with XPG logo and metallic components (no readable text beyond branding)natural_image
Close-up of a hand using a tool to insert a component into a device casing (no visible text or symbols)- SSDをネジで固定します。
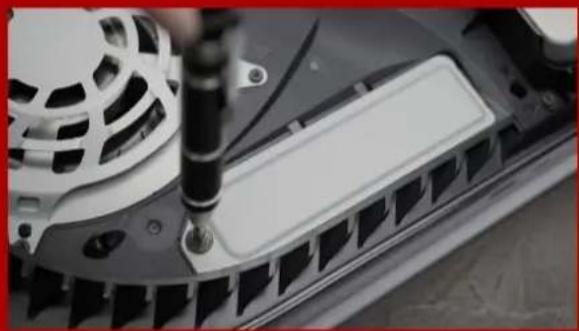
natural_image
Close-up of a mechanical component with a screwdriver inserted, showing internal structure (no visible text or symbols)- 拡張スロットカバーを元に戻します。
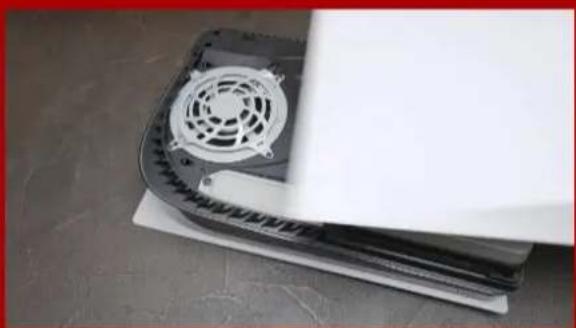
natural_image
Close-up of a black electronic device with a circular fan and paper towel, placed on a surface (no visible text or symbols)natural_image
Close-up of a gaming device with a white game controller and black ventilation slots, placed on a textured floor (no visible text or symbols)- 再フォーマットの指示に従ってください。

natural_image
Blue-tinted image of a PlayStation 3 console with Sony logo, next to a game controller (no visible text or symbols on device)설치하기 전에

natural_image
Product display of gaming consoles including a game controller, video games, and a 512x30X credit card on a table (no visible text or symbols)준비물:
- PS5를 꿈니다.

natural_image
Close-up of a white gaming controller next to a black Sony PC, with cable inserted (no visible text or symbols)natural_image
Hands holding a white rectangular object on a dark surface, no visible text or symbolsnatural_image
Close-up of a white plastic panel edge with a small slot, resting on a gray surface (no text or symbols visible)natural_image
Hand holding a white sheet of paper against a dark textured background (no text or symbols visible)natural_image
Close-up of a mechanical component with a screwdriver inserted, showing internal structure (no text or symbols visible)natural_image
Close-up of a green electronic component with mounting holes and a metallic bracket, mounted on a metal panel (no visible text or symbols)5.이제 녹색 확장 슬롯이 보입니다

natural_image
Close-up of a car's internal battery pack with a screwdriver inserted, showing green circuit board (no text or symbols visible)natural_image
Close-up of a car's front panel showing internal components and battery pack (no text or symbols visible)natural_image
Close-up of a 3D printer's internal structure with XPG logo and metallic components (no readable text beyond branding)natural_image
Close-up of a hand using a tool to insert a component labeled 'XPG' into a device casing (no readable text beyond label)- 나사를 조여서 SSD를 고정합니다

natural_image
Close-up of a mechanical component with a screwdriver inserted, showing internal structure (no visible text or symbols)natural_image
Close-up of a device's front panel with a circular vent, placed on a surface (no visible text or symbols)natural_image
Close-up of a game controller next to a computer monitor and keyboard, placed on a textured floor (no visible text or symbols)natural_image
Blue-tinted image of a PlayStation 3 console with Sony logo, next to a game controller (no visible text or symbols on device)
natural_image
Product display of gaming consoles including a game controller, video games, and a 512x30X credit card on a table (no visible text or symbols)- CERTIFIQUE-SE DE TER AS ATUALIZAÇÃO ES DE SOFTWARE DO PS5 MAIS RECENTES.

- DESLIGUE SEU PS5.

natural_image
Close-up of a white gaming controller and a black Sony PC connected to a cable (no visible text or symbols)- DESCONECTE TODOS OS CABOS E DISPOSITIVOS.

natural_image
Hands holding a white rectangular object on a dark surface, no visible text or symbols- COLOQUE O PS5 NA HORIZONTAL COM O LADO DO LOGOTIPO VOLTADO PARA BAIXO.

natural_image
Close-up of a white plastic panel with a slot, resting on a textured surface (no text or symbols visible)- SEGURE FIRMEMENTE O CANTO SUPERIOR ESQUERDO DO PS5 COM A MÃ O ESQUERDA.
natural_image
Hand holding a white sheet of paper against a dark textured background (no text or symbols visible)- COM A MÃ O DIREITA, PUXE E DESLIZE A PLACA TRASEIRA PARA A ESQUERDA PARA RETIRA-LA.

natural_image
Close-up of a mechanical component with a screwdriver inserted, showing internal structure (no visible text or symbols)- AFROUXE O PARAFUSO PARA RETIRAR A TAMPA DO SLOT DE EXPANSÃ O.
natural_image
Close-up of a green electronic component with mounting holes and a metallic bracket, mounted on a metal panel (no visible text or symbols)- VOCÊ DEVERÁ VER AGORA O SLOT DE EXPANSÃ O VERDE.
natural_image
Close-up of a green electronic component being inserted into a car's door panel, with no visible text or symbols.- REMOVA O Ú NICO PARAFUSO E O ESPAÇ ADOR EM FORMA DE ARRUELA EMBAIXO.
natural_image
Close-up of a car's front panel showing internal components and battery pack (no text or symbols visible)- COLOQUE O ESPAÇ ADOR NO ORIFÍ CIO QUE CORRESPONDE AO FATOR DE FORMA M.2.

natural_image
Close-up of a 3D printer's internal structure with XPG logo and warning symbol (no readable text or symbols beyond branding)- CLIQUE NO CONECTOR DOURADO DO SSD NO ENTALHE DE ENTRADA CORRESPONDENTE.

natural_image
Close-up of a hand using a tool to adjust or install electronic components on a device casing (no visible text or symbols)- FIXE O SSD COM O PARAFUSO.

natural_image
Close-up of a mechanical component with a screwdriver inserted, showing internal structure (no visible text or symbols)- RECOLOQUE A TAMPA DO SLOT DE EXPANSÃ O.
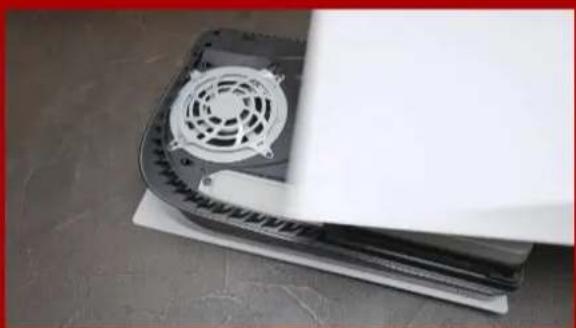
natural_image
Close-up of a black electronic device with a circular fan and paper base, placed on a surface (no visible text or symbols)- RECOLOQUE A PLACA TRASEIRA DESLIZANDO-A PARA TRÁ S E EMPURRANDO PARA BAIXO.
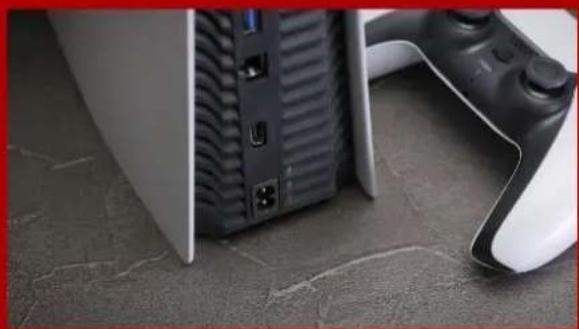
natural_image
Close-up of a gaming device with a white game controller and black ventilation slots, placed on a textured floor (no visible text or symbols)- RECONECTE OS CABOS E LIGUE SEU PS5.
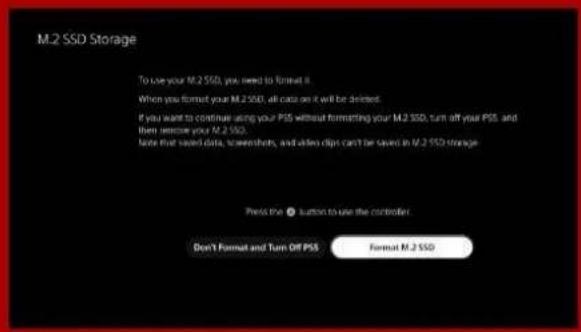
- SIGA AS INSTRUÇ Ô ES DE REFORMATAÇ Â O.

- PRONTO! AGORA VOCÊ PODE ARMAZENAR JOGOS E APLICATIVOS NO SSD.
natural_image
Blue-tinted image of a PlayStation 3 console with Sony logo, next to a game controller (no visible text or symbols on device)natural_image
Product display featuring a game controller, multiple video and audio formats including a 512x3 video card, with no visible text or symbols on the main objects.- ВЫКЛЮЧИТЕ PS5.

natural_image
Close-up of a white gaming controller next to a black Sony PC, with a cable inserted (no visible text or symbols)- ОТСОЕДИНИТЕ ВСЕ КАБЕЛИ И УСТРОЙСТВА.
УСТАНОВКА
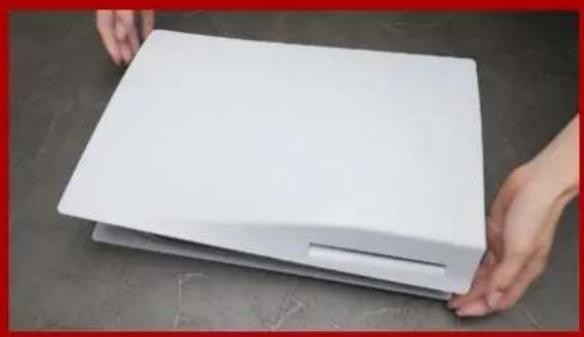
natural_image
Hands holding a white rectangular object on a dark surface, no visible text or symbolsnatural_image
Close-up of a white plastic panel edge with a small slot, resting on a gray surface (no text or symbols visible)- ВОЗЬМИТЕСЬ ЗА ВЕРХНИЙ ЛЕВЫЙ УГОЛ PS5 ЛЕВОЙ РУКОЙ.

natural_image
Hand holding a white sheet of paper against a dark textured background (no text or symbols visible)natural_image
Close-up of a mechanical component with a screwdriver inserted, showing internal structure (no visible text or symbols)natural_image
Close-up of a car's front wheel and battery panel with mounting holes (no visible text or symbols)natural_image
Close-up of a green electronic component being inserted into a car's door, with no visible text or symbols.natural_image
Close-up of a car's front panel showing internal components and a green plastic component (no text or symbols visible)natural_image
Close-up of a 3D printer's internal structure with XPG logo and warning symbols (no readable text beyond logo)natural_image
Close-up of a hand using a tool to insert a component labeled 'XPG' into a device casing (no readable text beyond label)natural_image
Close-up of a mechanical component with a screwdriver inserted, showing internal structure (no visible text or symbols)natural_image
Close-up of a black electronic device with a circular fan and paper towel, placed on a surface (no visible text or symbols)natural_image
Close-up of a gaming device with a white game controller and black ventilation slots, placed on a textured floor (no visible text or symbols)- ПОДКЛЮЧИТЕ КАБЕЛИ И ВКЛЮЧИТЕ PS5.

natural_image
Blue-tinted image of a PlayStation 3 console and a Sony PC, both on a dark blue background (no visible text or symbols)Î NAINTE DE INSTALARE

natural_image
Product display of a gaming console, video games, and a 512-inch SSD on a table (no visible text or symbols)DE CE AVETI NEVOIE:
- ASIGURATI-VĂ CĂ AVETI CELE MAI RECENTE ACTUALIZĂRI DE SOFTWARE PS5.

- OPRITI PS5.

natural_image
Close-up of a white gaming controller next to a black Sony PC, with a cable inserted (no visible text or symbols)- DECONECTAȚI TOATE CABLURILE ȘI DISPOZITIVELE.
INSTALARE

natural_image
Hands holding a white rectangular object on a dark surface, no visible text or symbols- AŞEZATI PS5 LA ORIZONTALĂ, CU PARTEA CU SIGLA ORIENTATĂ ÎN JOS.

natural_image
Close-up of a white plastic panel with a slot, resting on a textured surface (no text or symbols visible)- PRINDEȚI FERM COLȚUL DIN STĂ NGA SUS AL PS5 CĂ MĂ NA STĂNGĂ.

natural_image
Hand holding a white sheet of paper against a dark textured background (no text or symbols visible)- CU MÂNA DREAPTĂ, TRAGEȚI ȘI APOI GLISAȚI PLACA DE SUPPORT SPRE STĂ NGA PENTRU A O SCOATE.

natural_image
Close-up of a mechanical component with a screwdriver inserted, showing internal structure and mounting holes (no text or symbols visible)- SLĂBIȚI ȘURUBUL PENTRU A SCOATE CAPACUL FANTEI DE EXPANSIUNE.

natural_image
Close-up of a car's front panel showing battery, screw holes, and ventilation grilles (no text or symbols visible)- ACUM AR TREBUI SĂ VEDEȚI SLOTUL DE EXPANSIUNE VERDE.

natural_image
Close-up of a green electronic component being inserted into a car's door, with no visible text or symbols.natural_image
Close-up of a car's front panel showing internal components and a green plastic component (no text or symbols visible)- AŞEZATI DISTANTIERUL ÎN ORIFICIUL CARE CORESPUNDE FORMEI M.2.

natural_image
Close-up of a 3D printer's internal structure with XPG logo and warning symbols (no readable text beyond branding)- FACETI CLIC PE CONECTORUL AURIU AL SSD- ULUI ÎN CRESTĂTURA DE INTRARE CORESPUNZĂTOARE.

natural_image
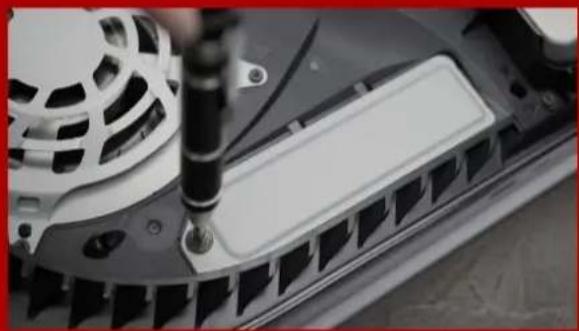
Close-up of a hand using a tool to insert a component labeled 'XPG' into a device casing (no readable text beyond label)- FIXATI SSD-UL CU AJUTORUL ŞURUBULUI.
natural_image
Close-up of a mechanical component with a screwdriver inserted, showing internal structure (no visible text or symbols)- REINSTALATI CAPACUL FANTEI DE EXPANSIUNE.

natural_image
Close-up of a black electronic device with a circular fan and paper towel, placed on a surface (no visible text or symbols)- REINSTALATI PLACA DE SUSTINERE GLISÂND-O ÎNAPOI ŞI İMPINGÂND-O ÎN JOS.

natural_image
Close-up of a gaming device with a white game controller and black ventilation slots, placed on a textured floor (no visible text or symbols)- RECONECTAȚI CABLURILE ȘI PÓRNITI PS5.
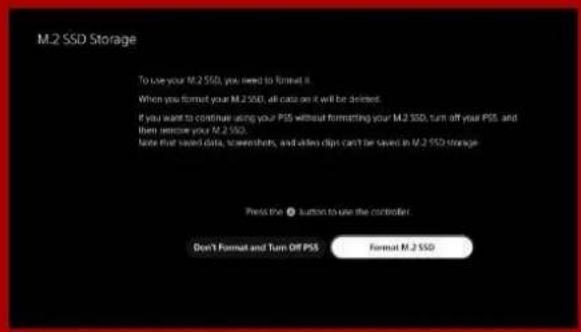
- URMAȚI INSTRUCTIUNILE DE REFORMATARE.

- AȚI TERMINAT! ACUM PUTETI STOCA JOCURI ȘI APLICATII PE SSD.
natural_image
Blue-tinted image of a PlayStation 3 console with Sony logo, next to a game controller (no visible text or symbols on device)natural_image
Product display set including a game controller, video games, and a 512-inch DVD on a table (no visible text or symbols)LO QUE VAS A NECESITAR:
- SSD M.2 DE XPG
- Destornillador Phillips
- PS5

- APAGA TU PS5.

natural_image
Close-up of a white gaming controller and a black Sony PC connected by cable (no visible text or symbols)- DESCONECTE TODOS LOS CABLES Y DISPOSITIVOS.
INSTALACIÓ N

natural_image
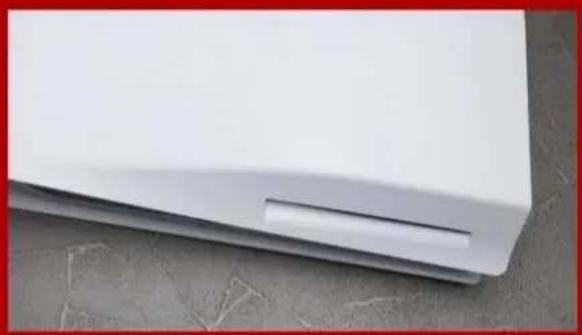
Hands holding a white rectangular object on a dark surface, no visible text or symbols- APOYA EL PS5 EN POSICIÓ N HORIZONTAL CON EL LOGOTIPO HACIA ABAJO.
natural_image
Close-up of a white plastic panel edge with a small slot, resting on a gray surface (no text or symbols visible)- AGARRE FIRMEMENTE LA ESQUINA SUPERIOR IZQUIERDA DEL PS5 CON LA MANO IZQUIERDA.

natural_image
Hand holding a white sheet of paper against a dark textured background (no text or symbols visible)- TIRE DE LA PLACA DE APOYO CON LA MANO DERECHA Y DESLÍ CELA HACIA LA IZQUIERDA PARA EXTRAERLA.
natural_image
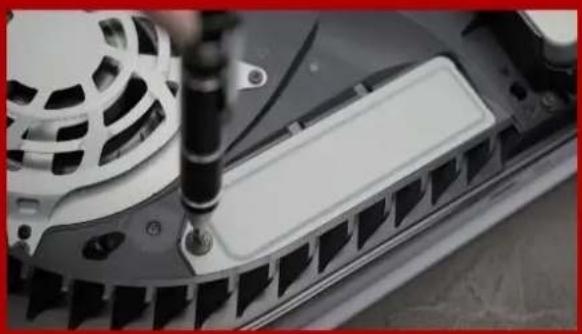
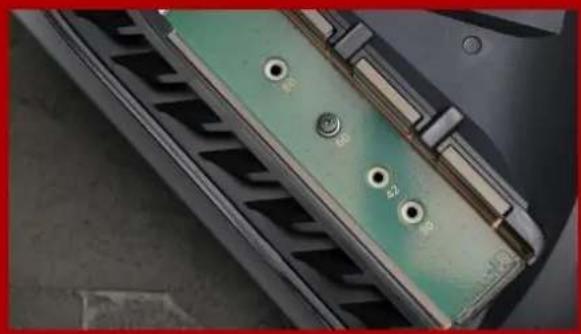
Close-up of a mechanical component with a screwdriver inserted, showing internal structure (no text or symbols visible)- AFLOJE EL TORNILLO PARA RETIRAR LA TAPA DE LA RANURA DE EXPANSIÓ N.
natural_image
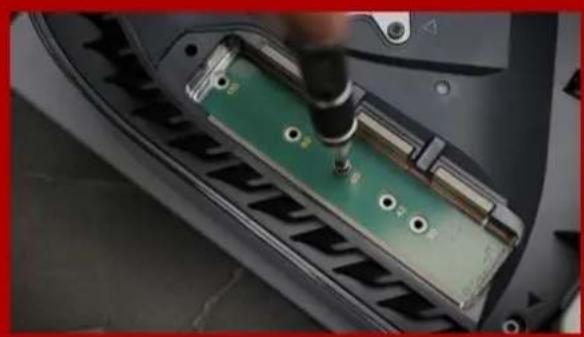
Close-up of a green electronic component with mounting holes and a metallic bracket, mounted on a metal panel (no visible text or symbols)- AHORA VERÁ S LA RANURA DE EXPANSIÓ N DE COLOR VERDE.
natural_image
Close-up of a green electronic component being inserted into a car's door panel, with no visible text or symbols.natural_image
Close-up of a car's front panel showing internal components and battery pack (no text or symbols visible)natural_image
Close-up of a 3D printer's internal structure with XPG logo and triangular design (no readable text or symbols beyond branding)natural_image
Close-up of a hand using a tool to adjust or install electronic components on a device casing (no visible text or symbols)- SUJETE EL SSD CON EL TORNILLO.

natural_image
Close-up of a mechanical component with a screwdriver inserted, showing internal structure (no visible text or symbols)- REINSTALE LA TAPA DE LA RANURA DE EXPANSIÓ N.

natural_image
Close-up of a black electronic device with a circular fan and paper base, placed on a surface (no visible text or symbols)- REINSTALE LA PLACA DE APOYO DESLIZÁ NDOLA HACIA ATRÁ S Y EMPUJÁ NDOLA HACIA ABAJO.

natural_image
Close-up of a gaming device with a white game controller and black ventilation slots, placed on a textured floor (no visible text or symbols)- VUELVE A CONECTAR LOS CABLES Y ENCIENDE TU PS5.

- SIGA LAS INSTRUCCIONES DE REFORMATEO.

natural_image
Blue-tinted image of a PlayStation 3 console with Sony logo, next to a game controller (no visible text or symbols on device)KURULUMDAN Ö NCE

natural_image
Product display of gaming consoles including a game controller, video games, and a 512x30X credit card on a table (no visible text or symbols)GEREKENLER:
- EN SON PS5 YAZILIM GÜ NCELLEMELERINE SAHIP OLDUĞUNUZDAN EMIN OLUN.
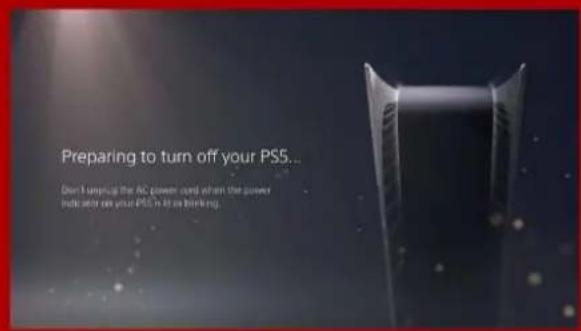
- PS5'INIZI KAPATIN.

natural_image
Close-up of a white gaming controller and a black Sony PC connected to a cable (no visible text or symbols)- TÜ M KABLOLARI VE CIHAZLARI Ç IKARIN.
KURULUM
natural_image
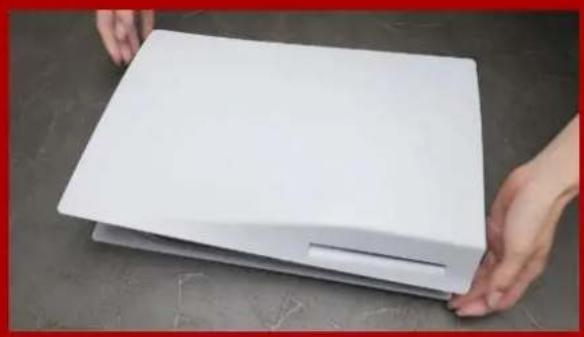
Hands holding a white rectangular object on a dark surface, no visible text or symbols- PS5'I LOGOLU TARAFI AŞAĞI BAKACAK ŞEKILDE DÜZ BIR ŞEKİLDE YATIRIN.

natural_image
Close-up of a white plastic panel with a slot, resting on a textured surface (no text or symbols visible)- SOL ELINIZLE PS5'IN SOL ÜST KÖŞESINI SIKICA TUTUN.

natural_image
Hand holding a white sheet of paper against a dark textured background (no text or symbols visible)- SAĞ ELINIZLE DESTEK PLAKASINI Ç EKIP Ç IKARMAK İÇ IN SOLA KAYDIRIN.

natural_image
Close-up of a mechanical component with a screwdriver inserted, showing internal structure and mounting holes (no text or symbols visible)- GENİŞLETME YUVASI KAPAĞINI ÇIKARMAK IÇIN VIDAYI GEVŞETIN.

natural_image
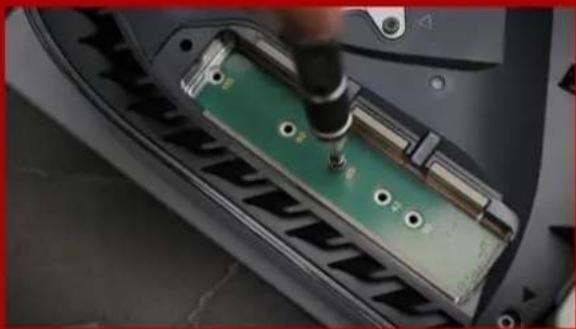
Close-up of a car's front panel showing battery, screw holes, and ventilation grilles (no text or symbols visible)- ARTIK YEŞIL GENİŞLETME YUVASINI GÖ RMELISINIZ.
natural_image
Close-up of a green electronic component being inserted into a car's door, with no visible text or symbols.- TEK VIDAYI VE ALTINDAKI RONDELA BENZERI AYIRICIYI Ç IKARIN.

natural_image
Close-up of a car's front panel showing internal components and a green plastic component (no text or symbols visible)- AYIRICIYI M.2 FORM FAKTÖRÜNE KARŞILIK GELEN DELIĞE YERLEŞTIRIN.

natural_image
Close-up of a 3D printer's internal structure with XPG logo and warning symbols (no readable text beyond branding)- SSD'NIN ALTIN KONEKTÖRÜNÜ EŞLEŞEN GIRİŞ ÇENTIĞINE TIKLAYIN.

natural_image
Close-up of a hand using a tool to adjust or install electronic components on a device casing (no visible text or symbols)- SSD'YI VIDAYLA SABITLEYIN.

natural_image
Close-up of a mechanical component with a screwdriver inserted, showing internal structure (no visible text or symbols)- GENİŞLETME YUVASI KAPAĞINI YENIDEN TAKIN.

natural_image
Close-up of a black electronic device with a circular fan and paper towel, placed on a surface (no visible text or symbols)- DESTEK PLAKASINI GERIYE DOĞRU KAYDIRIP AŞAĞI DOĞRU ITEREK YENIDEN TAKIN.
natural_image
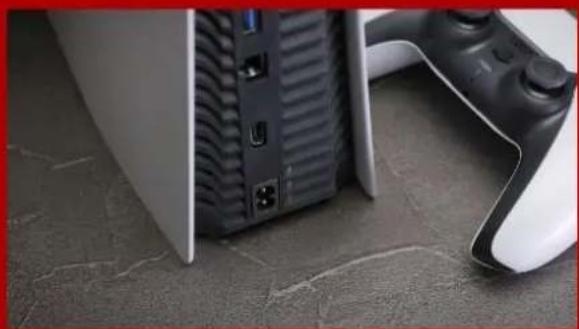
Close-up of a gaming device with a white game controller and black ventilation slots, placed on a textured floor (no visible text or symbols)- KABLOLARI YENIDEN TAKIN VE PS5'INIZI AÇ IN.

- YENIDEN BIÇ IMLENDIRME TALIMATLARINI IZLEYIN.

- TAMAMLADINIZ! ARTIK OYUNLARI VE UYGULAMALARI SSD'DE DEPOLAYABILIRSINIZ.