
CM15BK - Coffee maker GORENJE - Free user manual and instructions
Find the device manual for free CM15BK GORENJE in PDF.


| Product Type | Coffee Maker |
| Brand | Gorenje |
| Model | CM15BK |
| Dimensions (approx.) | 30 x 20 x 35 cm |
| Weight (approx.) | 2.5 kg |
| Power Supply | 220-240 V ~ 50/60 Hz |
| Power Consumption | 1000 W |
| Water Tank Capacity | 1.25 L |
| Display | LCD with clock and program indicator |
| Filter Type | Permanent filter (included) |
| Brewing Capacity | Up to 12 cups |
| Keep Warm Function | Yes, automatic shut-off after 40 minutes |
| Delay Start | Programmable up to 24 hours in advance |
| Auto Shut-Off | Yes, 40 minutes after brewing |
| Pause & Serve | Yes, allows serving mid-brew (max 30 seconds) |
| Safety Features | Automatic shut-off, hot surface warning, child safety (keep out of reach) |
| Cleaning | Detachable parts dishwasher-safe (hand wash recommended); descaling with citric acid or descaler |
| Construction Materials | Plastic body, glass carafe, stainless steel warming plate |
| Cord Length (approx.) | 0.8 m |
| Warranty | Standard manufacturer warranty (see warranty leaflet) |
| User Manual Languages | EN, RO, SL (also translated upon request) |
Frequently Asked Questions - CM15BK GORENJE
User questions about CM15BK GORENJE
0 question about this device. Answer the ones you know or ask your own.
Ask a new question about this device
Download the instructions for your Coffee maker in PDF format for free! Find your manual CM15BK - GORENJE and take your electronic device back in hand. On this page are published all the documents necessary for the use of your device. CM15BK by GORENJE.
USER MANUAL CM15BK GORENJE
CM15BK
- Top lid
- Shower head
- Water tank
- Water level window
- Body
- Power cord
- Carafe assembly
- LCD display
- Decorative panel
- Funnel/brew basket assembly
Important
Before connecting the appliance to power mains, make sure the voltage indicated on the appliance matches the voltage in your home.
Do not place the appliance on a hot surface.
Immediately disconnect the appliance from the power mains if:
- there are any problems during the coffee brewing process;
- before cleaning the appliance. Make sure the power cord is not in contact with any hot surface at any time.
Keep the appliance out of reach of children. Prevent children from pulling on the power cord.
Never use the appliance if the power cord or the appliance are damaged.
If the power cord is damaged, have it replaced by a service technician authorized by the manufacturer.
Only use the appliance for its intended use in household.
Do not add water to the appliance after it has been switched on.
Only add fresh water to the water tank.
Do not let the cord hang over the edge of the table or worktop.
Never connect this appliance to an external timer switch or remote control system in order to avoid a hazardous situation.
WARNING! The appliance and its accessible parts become hot during use.
Care should be taken to avoid touching heating elements. Children less than 8 years of age shall be kept away unless continuously supervised.
Children should be supervised to ensure that they do not play with the appliance. This appliance can be used by children aged from 8 years and above and persons with reduced physical, sensory or mental capabilities or lack of experience and knowledge if they have been given supervision or instruction concerning use of the appliance in a safe way and understand the hazards involved.
Children shall not play with the appliance.
Cleaning and maintenance shall not be made by children unless they are older than 8 and supervised.
Keep the appliance and its cord out of reach of children less than 8 years. Never leave an empty carafe on the warming plate, as the carafe may crack.
This equipment is labelled in compliance with the European Directive 2012/19/EC on waste electric and electronic equipment — WEEE. The Directive specifies the requirements for collection and management of waste electric and electronic equipment effective in the entire European Union.
Before using the appliance for the first time
For the perfect flavour, run the coffee brewing cycle with water only (without coffee) two or three times. Each time the water runs through the appliance, unplug it and let it cool down for five minutes. Then repeat the cycle with fresh water.
Brewing coffee
- Open the water tank cover and fill the water tank with drinking water. The water level should not exceed the MAX level as indicated on the water level gauge.
- Place the funnel into the funnel support. Make sure it is assembled correctly, otherwise the water tank cover cannot be closed. Place the permanent filter in the funnel.
- Add ground coffee into permanent filter. Usually a cup of coffee needs a level spoon of ground coffee, but you may adjust the amount according to personal taste. Close the water tank cover completely.
- Place the carafe onto the warming plate horizontally.
- Plug the power cord into the outlet. The LCD display indicates "12:00".
- Press the ON/OFF button. The ON/OFF indicator lights up in red and the appliance begins to operate. Note: The brewing process may be interrupted at any time by pressing the ON/OFF button. The ON/OFF indicator will switch off, indicating your coffee maker is shut off.
Note: During the brewing process, the "PROG", "HOUR" and "MINUTE" buttons do not have any effect.
- The brewing process can be interrupted at any time by pressing the ON/OFF button, The ON/OFF indicator will switch off. The appliance will continue brewing once the ON/OFF button is pressed again. Note: You can take out the carafe and serve the coffee at any time. The appliance will stop dripping automatically. This pause, however, may not exceed 30 seconds.
- When the brewing process is complete (about one minute after the coffee stops dripping), you may remove the carafe to serve the coffee.
Note: The amount of coffee will be less than the amount of water you have added, since some water is absorbed by the coffee grounds and some may adhere to the plastic parts.
- If you do not wish to serve the coffee immediately after the brewing process is finished, keep the coffee maker plugged in and switched on. Coffee can be kept warm on the warming plate. Forty minutes after the appliance was switched on with the ON/OFF button, the appliance will be switched off automatically, if it has not been manually disconnected after the end of the brewing process. For optimum coffee taste, serve it immediately after brewing.
- Always turn off the coffee maker and unplug the power cord when not in use. Note: Be careful when pouring the coffee. The coffee that has just been brewed is very hot and you could scald yourself.
Delay function
If you do not want the coffee maker to start operating immediately – for example, if it is 8:00 a.m. right now, but you want your coffee maker to start operating automatically at 1:00 p.m., first follow steps 1 to 5 from the section “USING YOUR COFFEE MAKER”, and then set the automatic start function as follows:
- Set the current time, e.g. 8:00 a.m., by pressing the "HOUR" and "MINUTE" buttons.
Note: The time cycle is 24 hours.
- Press the PROG button once. The PROG indicator flashes in green, and "12:00" will flash on the LCD display unit. Set the automatic start time at 1 p.m. by pressing the "HOUR" and "MINUTE" buttons.
- Press the PROG button again. The PROG indicator will be permanently lit in green. After a while, the LCD display unit indicates the current time.
Note: You may cancel the automatic start function by pressing the PROG button. If you want to change the automatic start time, repeat steps 2–3 as described above.
- When the programmed time is reached, the ON/OFF indicator will light up in red and the appliance will start brewing. If you do not wish to serve the coffee immediately after the brewing process is finished, keep the coffee maker plugged in and switched on. Coffee can be kept warm on the warming plate. Forty minutes after the appliance was switched on with the ON/OFF button, the appliance will be switched off automatically, if it has not been manually disconnected after the end of the brewing process. For optimum coffee taste, serve it immediately after brewing.
Note: During the brewing process, the "PROG", "HOUR" and "MINUTE" buttons do not have any effect.
Cleaning
CAUTION: Be sure to unplug this appliance before cleaning. To protect against electrical shock, do not immerse the cord, plug or the unit in water or liquid. After each use, always make sure plug is removed from wall outlet first.
- Clean all detachable parts after each use in hot sudsy water.
- Wipe the exterior surface of the unit with a soft, damp cloth to remove any stains.
- Water droplets may build up at the top of the funnel and drip onto the product
base during brewing. To control the dripping, wipe off the area with a clean dry cloth after each use.
- Use a damp cloth to gently wipe the warming plate. Never use an abrasive cleaner to clean it.
- Replace all parts and store until next use.
Removing mineral deposits
To keep your coffee maker operating efficiently, you should periodically clean the mineral deposits, the build-up of which depends on water quality in your area and on how frequently you use the appliance. We recommend removing the mineral deposits as follows:
- Fill the water tank with water and descaler (descaling agent) to the max level as indicated on the water level gauge (mix the water and descaler in a 4:1 ratio; for details, refer to the descaler instructions). Please use a "household descaler". You may also use citric acid instead of descaler (one hundred parts of water to three parts of citric acid).
- Place the glass carafe onto the warming plate.
- Make sure the filter (without any ground coffee) and the funnel are assembled and in place.
- Turn on the appliance and allow it to "brew" the descaling solution as described above.
- After one cup of solution has been brewed, switch off the appliance.
- Leave the solution in the appliance for 15 minutes, then repeat steps 3–5.
- Switch on the appliance and run off the rest of the solution until the water tank is completely empty.
- Rinse by operating the appliance with only water at least 3 times.
Environment
Do not throw away the appliance with the normal household waste at the end of its life, but hand it in at an official collection point for recycling. By doing this, you help to preserve the environment.
Guarantee & service
If you need information or if you have a problem, please contact the Gorenje Customer Care Centre in your country (you find its phone number in the worldwide guarantee leaflet). If there is no Customer Care Centre in your country, go to your local Gorenje dealer or contact the Service department of Gorenje domestic appliances.
GORENJE WISHES YOU TO FIND A LOT OF PLEASURE IN USING YOUR APPLIANCE.
We reserve the right to any modifications.

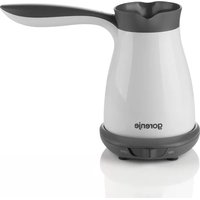
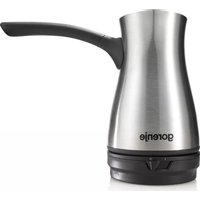

Brand : GORENJE
Model : CM15BK
Category : Coffee maker