HIF79DAB - Hi-Fi System Reflexion - Free user manual and instructions
Find the device manual for free HIF79DAB Reflexion in PDF.


| Type | Hi-Fi System |
| Brand | Reflexion |
| Model | HIF79DAB |
| Product Dimensions (Approx.) | 300 x 200 x 250 mm (W x H x D) |
| Weight (Approx.) | 5 kg |
| Power Supply | AC 230V ~ 50Hz |
| Power Consumption | 30 W |
| Radio Tuner | DAB / DAB+ and FM with RDS |
| Disc Player | CD, CD-R, CD-RW compatible |
| Connectivity | Bluetooth, USB, Aux-In, Headphone Jack |
| Speakers | 2-way stereo speakers (included) |
| Display | LCD with backlight |
| Clock / Alarm | Yes, with dual alarm and sleep timer |
| Remote Control | Included (battery not supplied) |
| Audio Output Power | 2 x 10 W RMS |
| Frequency Range (FM) | 87.5 - 108 MHz |
| Frequency Range (DAB) | Band III (174–240 MHz) |
| Preset Stations | 20 (DAB) + 20 (FM) |
| Cleaning and Maintenance | Use a soft dry cloth. Do not use liquids or sprays. |
| Safety Precautions | Keep away from moisture. Do not open the device. Unplug during storms. |
| Spare Parts and Reparability | Contact authorized service center. No user-serviceable parts inside. |
| Manual | 63 pages, available in PDF format |
Frequently Asked Questions - HIF79DAB Reflexion
User questions about HIF79DAB Reflexion
0 question about this device. Answer the ones you know or ask your own.
Ask a new question about this device
Download the instructions for your Hi-Fi System in PDF format for free! Find your manual HIF79DAB - Reflexion and take your electronic device back in hand. On this page are published all the documents necessary for the use of your device. HIF79DAB by Reflexion.
USER MANUAL HIF79DAB Reflexion
natural_image
Simple line drawing of concentric circles with a vertical border (no text or symbols)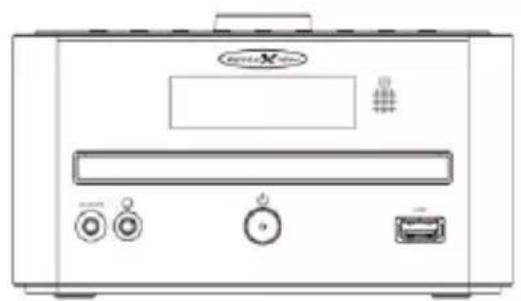
natural_image
Front view of a portable electronic device with control buttons and a display screen (no visible text or symbols)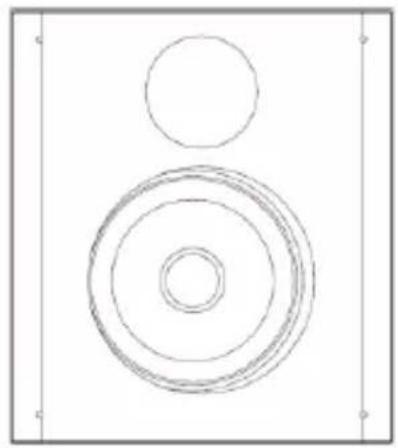
natural_image
Simple line drawing of concentric circles inside a square frame (no text or symbols)Stereo micro hifi system with DAB, FM, USB, MP3/CD and Bluetooth
Model No.: HIF79DAB

natural_image
Simple line drawing of concentric circles with a vertical border (no text or symbols)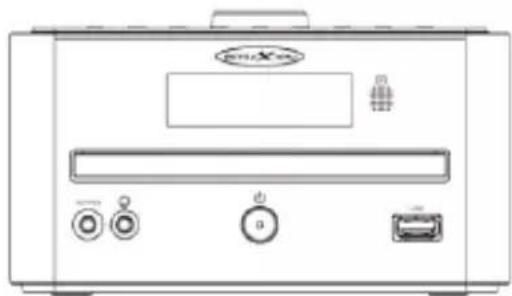
natural_image
Front view of a portable electronic device with control buttons and indicator lights (no visible text or symbols)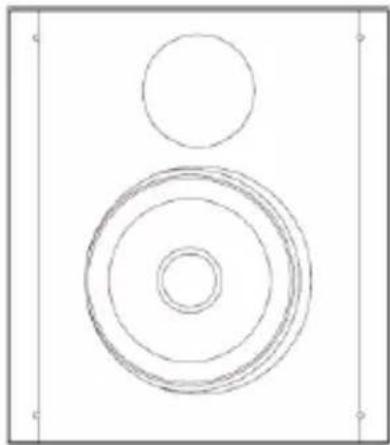
natural_image
Simple line drawing of concentric circles with a top circle, no text or symbols presentRead the entire manual of the device carefully before using the product.
Keep them in a safe place for future use.
SAFETY INSTRUCTIONS
 | The operating and maintenance instructions (service) in this manual must be followed. Any other use may result in damage to health. |
 | The CD player is classified as a class 1 LASER PRODUCT. |
  | To avoid the risk of electric shock, do not open the housing under any circumstances. There are no parts inside that can be repaired by the user. Repairs may only be carried out by an authorised specialist workshop. |
 | This appliance is a Class II or double insulated electrical appliance. It has been designed so that it does not require a safety connection to electrical earth. |
 | This unit is designed for DC 9V mains voltage. If the unit is not to be used for a long period of time, unplug it from the mains. |
 | Do not expose the unit to moisture or rain. |
 | Do not switch on the system until you have carefully checked all connections. |
 | Position the unit so that an undisturbed supply of fresh air is always ensured. Do not place the unit on carpets or near curtains and do not install it in bookshelves. |
UK

Do not expose the unit to direct sunlight or heat sources.
SAFETY INSTRUCTIONS:
1) Read these operating instructions before using the appliance for the first time.
2) Keep these operating instructions in a safe place for future reference.
3) Do not expose the appliance to dripping or splashing and do not place objects filled with liquids, such as vases, on the appliance. Use only in dry areas.
4) Do not place naked flames such as candles on the appliance and keep the appliance away from naked flames.
5) Children should be supervised to ensure that they do not play with the appliance.
6) Do not obstruct ventilation by covering the vents.
7) Ensure that the unit is connected to a DC 9V 2A power supply. Using higher voltage may cause the unit to malfunction. Switch off the unit before disconnecting it from the mains to turn it off completely.
8) If your hands are wet or damp, do not touch the mains plug.
9) Do not use force to insert the mains plug into the socket.
10) Only use accessories and spare parts approved by the manufacturer.
11) Install the appliance according to the manufacturer's instructions.
12) Install the unit only in adequately ventilated environments. Place the unit on a flat and stable surface.
13) Do not expose to temperatures above 40 °C.
14) When placing the unit, make sure that there is 30 cm to the rear and the top of the unit and 5 cm from each side.
15) Do not operate the unit's buttons with excessive force as this may cause damage.
16) Dispose of batteries in an environmentally friendly way. When disposing of batteries, pay attention to environmental aspects. Batteries shall not be exposed to excessive heat such as sunshine, fire or the like.
17) Always make sure that the unit is disconnected from the power supply before transport or cleaning. Clean the unit only with a dry cloth.
18) In the event of a thunderstorm or if the unit is not to be used for a long period of time, disconnect the unit from the mains.
UK
19) This unit has no user-serviceable parts. Do not attempt to repair this unit yourself. Only qualified service personnel should perform maintenance. In the event of a defect, complain about the unit to your dealer.
20) Do not allow anyone, especially children, to push anything into holes, slots or any other openings in the unit's casing as this could result in a fatal electric shock.
21) Do not attach this unit to a wall or ceiling.
22) Do not place the unit near televisions, speakers and other objects that generate strong magnetic fields.
23) Do not leave the unit unattended when it is switched on.
24) If the unit does not respond to the inputs, disconnect the unit from the power supply for a few seconds and then switch it on again.
25) After receiving the unit, please check that the delivery is complete. If the delivery is not complete, please contact your dealer or our customer support.
Headphone warnings:
Set the volume of the device to minimum before using headphones. A volume that is set too high can lead to hearing impairment / damage over a long period of time. Therefore, to protect your hearing, use a comfortable room volume.
ACCESSORIES
- Main unit 1x
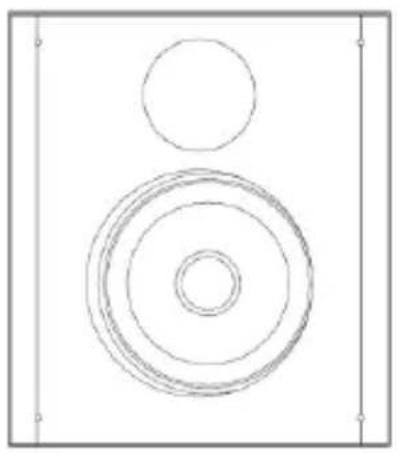
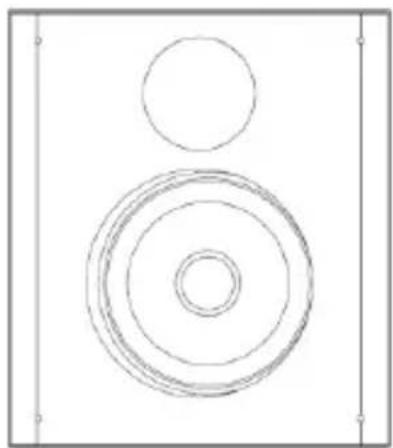
- Loudspeaker 2x
- Power supply unit 1x
- Remote control (incl. battery) 1x
- User manual 1x
POWER SUPPLY
This device can be operated as follows:
DC operation:
Connect the included power supply (DC9V 2A) to the device and your home power outlet.
OPERATING KEYS
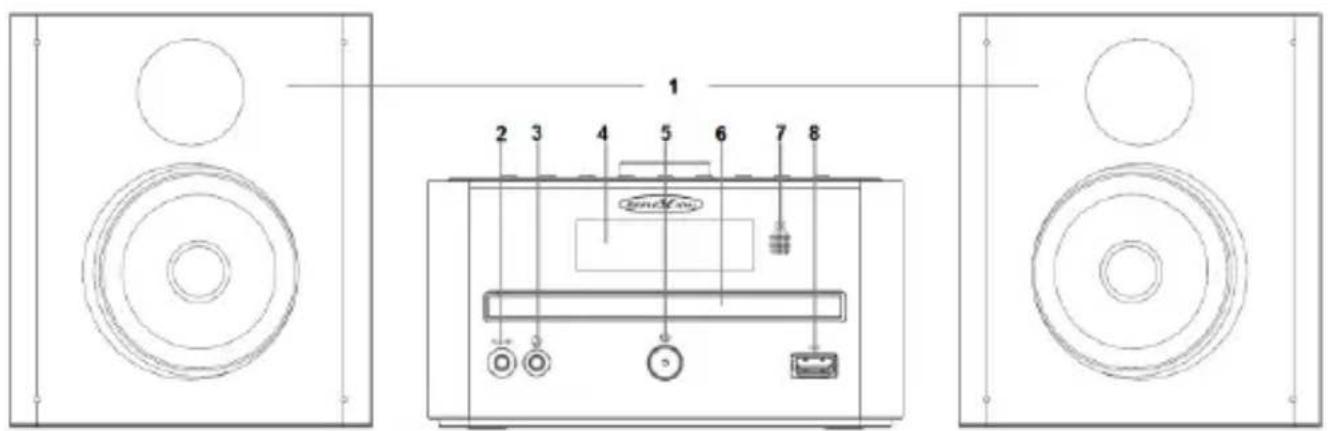
Front view:
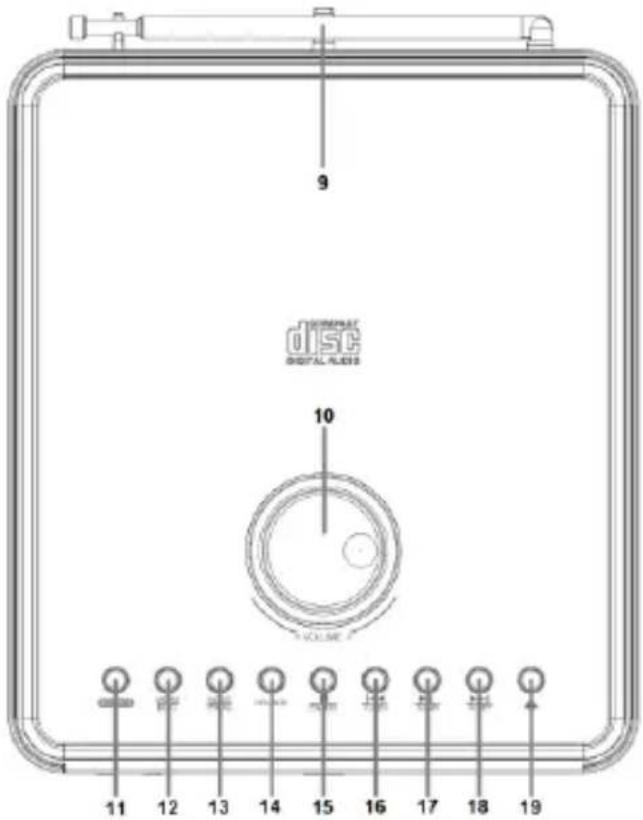
Top view:
UK
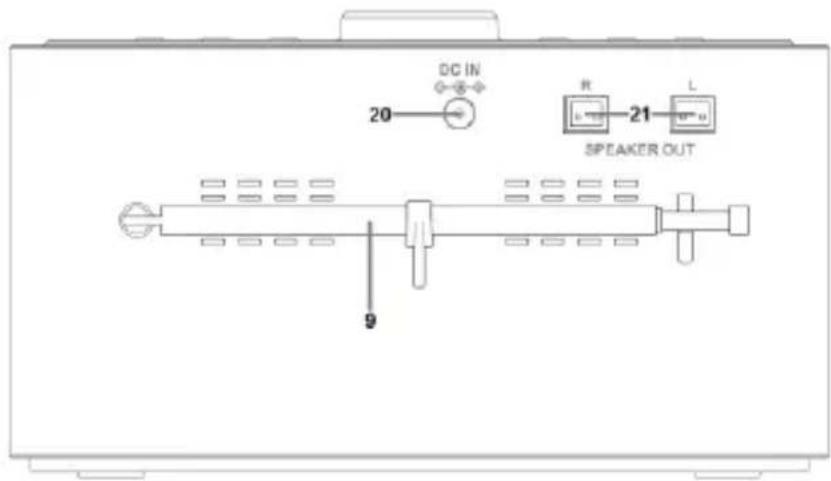
Back view:
Description of buttons and connectors:
| 1. |  | Speaker:- Left / Right |
| 2. |  | AUX IN:- 3.5mm AUX-IN connector |
| 3. |  | Headphone input:- 3.5mm headphone output (when used, the sound on the speakers is muted) |
| 4. |  | Display:- Displays frequency, title and time |
| 5. |  | Power:- Switch on / switch off (standby) |
| 6. |  | CD drive:- CD compartment for CD playback |
UK
| 7. |  | IR input:- Remote control receiverNote:Please do not place any objects in front of the receiver, otherwise the remote control may not work. |
| 8. |  | USB:- USB jack for USB-MP3 playbackNotice:The USB jack is not suitable for charging external devices. |
| 9. |  | Antenna:- Antenna for FM/DAB reception |
| 10. |  | VOLUME:- + : LOUDER- -: QUIETER |
| 11. |  | Select function mode:- DAB / FM / Bluetooth / CD / USB / AUX In |
| 12. |  | Menu:- Press and hold in DAB / FM mode to enter the settings menu.Info:- Press in DAB / FM mode to switch the information display. |
| 13. |  | CD / USB:- Set playback modeDAB / FM:- Press and hold: Store radio station.- Press briefly: Select stored station |
| 14. |  | CD / USB:- Next folder |
| 15. |  | CD / USB:- Stop playback |
UK
| 16. |  | CD / USB:- Previous trackDAB / FM:- Previous DAB station / Previous frequency |
| 17. |  | CD / USB:- Play / PauseDAB / FM:- Start search |
| 18. |  | CD / USB:- Next trackDAB / FM:- Next DAB station / Next frequency |
| 19. |  | Drive:- Open / Close |
| 20. | 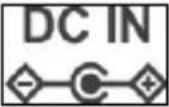 | DC power jack:- For connecting the external power supply (DC: 9V / 2A) |
| 21. | 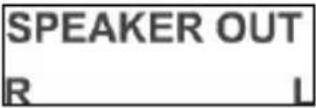 | Loudspeaker connection:- For the loudspeakers included in the scope of delivery |
REMOTE CONTROL
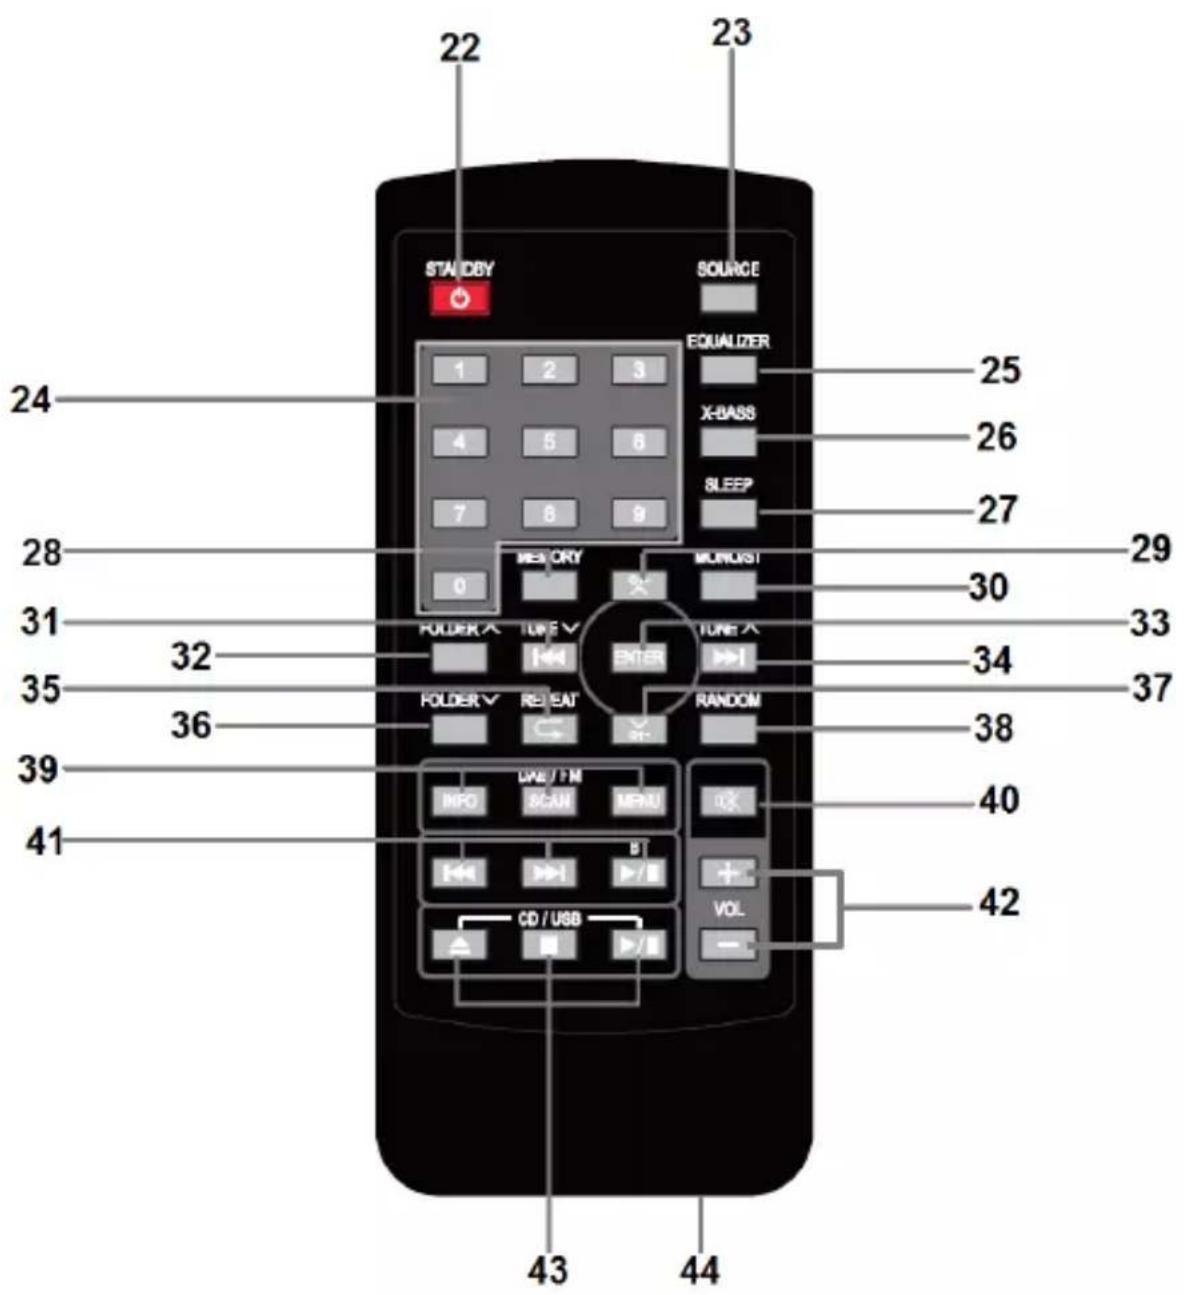
UK
| 22. |  | Power:- Switch on / Switch off (standby) |
| 23. |  | Select function mode:- DAB / FM (FM) / Bluetooth / CD / USB / AUX IN |
| 24. |  TO TO  | Numeric keys 0-9:- For CD/USB track selection |
| 25. |  | Equalizer selection:- FLAT / ROCK / POP / JAZZ / CLASSIC |
| 26. |  | X-Bass:- X-Bass On: X-Bass is switched on.- Normal: X-Bass is switched off. |
| 27. |  | Set sleep timer:- Device automatically switches to standby mode after set time. |
| 28. |  | CD / USB:- Press in stop mode to program the playback orderDAB / FM:- Press and hold: Save radio station- Press briefly: Select saved station |
| 29. |  | FM:- Next saved radio station.Menu:- Navigation key: High |
| 30. |  | FM:- Choose between mono or stereo sound output. |
UK
| 31. |  | MP3 CD / USB:- Next folder. | |
| 32. |  | DAB:- Previous DAB station.FM:- Short keystroke: Decrease frequency.- Long key press: Start search for the previously available station. | |
 | CD / USB:- Short key press: Previous title.- Long key press: Rewind title.- Navigation key: Left | ||
| 33. |  | Enter:- Menu Confirm selection. | |
| 34. |  | DAB:- Next DAB station.FM:- Short keystroke: Increase frequency.- Long key press: Start search for the next available station. | |
 | CD / USB:- Short keystroke: Next title.- Long key press: Fast forward title.- Navigation key: Right | ||
| 35. |  | MP3 CD / USB:- Previous folder. | |
| 36. |  | MP3 CD / USB:- REP-1: Repeat current title.- REP-ALL: Repeat all titles.- INTRO: Title is only played.- REP-DIR: Repeat only the current folder. |
UK
| 37. |  | FM:- Previous saved radio station.Menu:- Navigation key: Down | |
| 38. |  | CD / USB:- Shuffle: Random playback. | |
| 39. | DAB / FM |  | Only for DAB / FM mode:- Select the different modes for the information display. |
 | Only for DAB / FM mode:- Starts the automatic search. | ||
 | Only for DAB / FM mode:- Open the settings menu. | ||
| 40. |  | Mute:- Mute sound. | |
| 41. | BT(Bluetooth) |  | Only for Bluetooth mode:- Previous title. |
 | Only for Bluetooth mode:- Next title | ||
 | Only for Bluetooth mode:- Play / Pause | ||
| 42. | VOL. |  | Lautstärke einstellen:- VOL +: Loud |
UK
| 42. | VOL. |  | Adjust volume:- VOL -: Quieter |
| 43. | CD / USB |  | Only for CD/USB mode:- Open: Open drive.- Close: Close drive. |
| 43. |  | Only for CD/USB mode:- Stop playback. | |
| [CXY] | Only for CD/USB mode:- Play / Pause | ||
| 44. |  | Battery compartment:- The battery compartment is located on the bottom of the remote control. | |
Changing the battery (remote control)
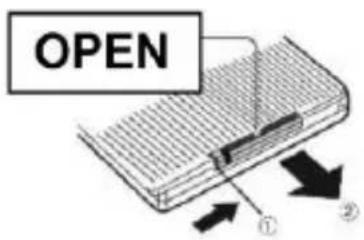
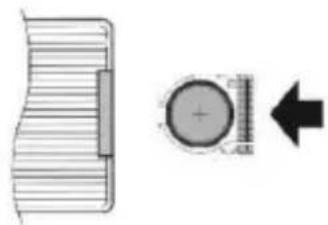
- Press the lower left corner to the right. Now you can pull out the battery compartment.
- Remove the old battery and insert the new CR2025 battery.
- Make sure that the polarity is correct (+ points to the back of the remote control).
- Then push the battery compartment back into the remote control.
natural_image
Technical diagram showing a mechanical component with a circular feature and an arrow indicating direction (no text or symbols)UK
Note:
- Before first use, remove the plastic film so that the battery has contact with the remote control.
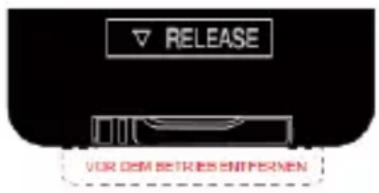
- Remove the battery from the remote control during storage or prolonged non-use of the device.
BASIC OPERATION
Switching on the device
Switch on:
- Press the
[5/22] key to switch on the device.
Switch off:
- Press the
[5/22] key to switch off the device.
Comment:
- Before you switch on the device, please make sure that the device is correctly connected to the power supply.
- After the first power on, the device will start in DAB mode and a scan will be started. The scan can be repeated at a later time. See the item "DAB Mode" in this manual.
Note:
- The unit will automatically switch to standby mode if no audio signal is active in CD, AUX, Bluetooth or USB mode within 15 minutes. Please note that a low volume setting on the device may be detected as "no audio signal" and the device will automatically switch to standby mode. To switch the device back on, press the [5/22] key.
UK
Notes on electrostatic discharge
The device may possibly reset due to electrostatic discharge. If the device can no longer be operated, disconnect the device from the power supply for a few seconds and then restart the device.
Set volume
Press the Volume buttons or [42] on the remote control to adjust the volume. Alternatively, you can also press the volume control [9] to adjust the volume.
SET TIME
The time is automatically set by the DAB / FM station information. To set the time manually, please proceed as follows.
- Press the MENU [39] key to open the device menu.
- Use the following keys to navigate in the menu.
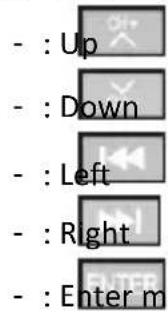
- Select the System menu item and press the ENTER [33] key.
- Now navigate to the Time menu item and press the ENTER [33] key again.
- Select the Set time/date menu item with the ENTER [33] key.
Set time:
- The display shows the time.
- Press the [←] / [→] [32/34] keys to set the hours. Press ENTER [33] key to confirm and go to minutes selection.
- Press the [1] / [32/34] buttons to set the minutes. Press the ENTER [33] key to
UK
confirm and enter the date setting.
Set date:
- Press the [1] / [32/34] keys to set the day. Press the ENTER [33] key to confirm and enter the month selection.
- Press the [←] / [→] [32/34] keys to set the month. Press the ENTER [33] key to confirm and enter the year selection.
- Press the [1] / [2] [32/34] keys to set the year. Press ENTER [33] key to confirm and finish the setting.
SET ALARM CLOCK
- Press the MENU [39] key and navigate to the System menu item.
- Confirm with the ENTER [33] key and select the menu item Alarm clock with the / [32/34] keys.
- Press the [B3] key to confirm.
Select alarm clock 1 or alarm clock 2:
- Use the [1] / [32/34] keys to select between Alarm 1 and Alarm 2.
- Then press the [B3] key.
Set hours:
- Now the hours are shown flashing in the display. Press the keys / [32/34] keys to set the hours.
- Now press the ENTER [33] key to switch to the minutes.
Set minutes:
- Now the minutes are shown flashing in the display. Press the / [32/34] keys to set the minutes.
- Now press the ENTER [33] key to enter the alarm time.
UK
Alarm clock duration:
-
Set the value of the alarm time with the [32/34] keys.
-
Press ENTER [33] key to enter the source selection.
Source selection:
-
Select the source for the alarm clock with the [32/34] keys. The available sources are: Buzzer, DAB, FM, CD and USB.
-
Press the ENTER [33] button to enter the day selection.
Daily selection:
- Select the day for the alarm clock with the / [32/34] keys. Available are: Daily, Once, Weekend and Working days
Note:
- If you have selected Once, set a "Date" for the alarm clock.
- Press the ENTER [33] key to enter the volume selection.
Alarm clock volume:
-
Select the volume for the alarm clock with the / [32/34] keys.
-
Press the ENTER [33] key to complete the alarm clock setting.
-
Then select whether the alarm clock should be set to „On“ or „Off“. Press the ENTER [33] key and the display will show "Alarm clock saved".
Note:
- If you want to cancel the setting of the alarm clock, press the MENU [39] key. The display shows "Alarm not saved".
- Depending on whether you have set "One" or "Two" active alarms, the display will show one bell or two bells.
Turn off alarm sound:
- When the alarm sounds, press the [5/22] key to turn off the alarm.
UK
Alarm clock switch on / switch off
- Go to the alarm clock setting and scroll through the settings until you reach the "Alarm On" / "Alarm Off" setting and go to "Alarm Off" to turn the alarm off. Press the ENTER [33] key to confirm the setting.
SYSTEM MENU
- Press the MENU [39] key and navigate to the "System" menu item using the [32/34] keys.
- Press the ENTER [33] key to enter the system menu.
- The following menu items and setting options are available.
| Sleep | Set the sleep timer after which the device goes into standby mode.Off / 15 / 30 / 45 / 60 / 90 minutes |
| Alarm | Set up to two alarm times for the device. For more information on the alarm clock function, see the item Setting „Set Alarm clock“ in this user manual. |
| Time | In this menu you can set the time and date. For more information on setting the time and date, see the Setting „Set time“ item in this user manual. |
UK
| Backlight | In this menu, you can set the brightness of the display for the switched-on and standby mode. The following setting options are available.Timeout:Set after how many seconds the display should dim. If the setting is set to Off, the display will not dim. The following setting options are available.Off / 10 / 20 / 30 / 45 / 60 / 90 / 120 / 180 secondsOn level:Set how bright you want the display to be when it is on. The following setting options are available:High / Medium / LowDim level:Set how bright the display should be in standby mode. The following setting options are available:High / Medium / LowNote:If the timeout is set to Off, the display is not dimmed in standby mode. |
| Language | Set the language for the device menu. German is set as the default. |
| Factory Reset | Reset the device to the factory settings. The device then restarts and is then in standby mode.Note:- With the factory setting, all settings are deleted and the device is reset to the delivery state. |
DAB MODE
- Press the

- Press the

[11/23] key repeatedly until "DAB" appears in the display.
[39] key to start the search.
Note:
- When the device is put into operation for the first time, it is in DAB mode and starts a search.
- After the search is completed, you can operate the DAB mode with the following buttons.
UK
 | Next DAB station. |
 | Previous DAB station. |
 | Press to confirm. |
 | Short keystroke: - Select a stored station. Long key press: - Save a station. |
 | Press the key repeatedly to cycle through the various DAB information displays. |
 | Starts the DAB search. |
 | Press the key to open the DAB menu. |
DAB MENU
- Press the MENU [39] key in DAB mode to open the DAB menu.
- The following menu items are available for DAB mode.
| Full scan | Starts the DAB search. |
| Manual tune | Start a manual search with a transponder frequency. |
| DRC | Set the setting for the DRC value. |
| Prune | Delete inactive stations without reception. |
UK
| System | Gives access to various settings such as time, alarm clock or language settings. See "SYSTEM MENU" in this manual. |
FM MODE
- Press the

[11/23] key repeatedly until "FM" appears in the display.
- Press the

[39] key to start the search.
- After the search is completed, you can operate the FM mode with the following keys.
 | Short keystroke:- Adjust frequency upwards.Long key press:- Search for the next FM station. |
 | Short keystroke:- Adjust frequency downwards.Long key press:- Search for the next FM station. |
 | Press to confirm. |
 | Short keystroke:- Select a stored station.Long key press:- Save a station. |
 | Press the key repeatedly to cycle through the various FM information displays. |
 | Starts the FM search. |
 | Press the key to open the FM menu. |
UK
FM MENÜ
-
Press the [39] key in FM mode to open the FM menu.
-
The following menu items are available for FM mode.
| Scan setting | In this menu you can set whether only FM stations with strong reception or all FM stations should be stored during the search.- All stations- Strong stations only |
| Audio setting | In this menu you can set whether mono or stereo output should be preferred for the audio output.- Stereo allowed- Forced mono |
| System | In this menu you have access to various settings such as time, alarm clock or language settings. See "System menu" in this operating manual. |
SAVE DAB / FM AS FAVORITES
-
Select a DAB station to be saved as a favorite. Up to 30 DAB and 30 FM stations can be stored as favorites.
-
Press and hold the MEMORY [28] button for approx. 3 seconds until the display shows "Save program".
-
Use the [1] / [2] [32/34] keys to select the memory location. Press the ENTER [33] key to save the station to the selected location.
-
Repeat points 1-3 until all desired DAB stations are added to the favorites list.
SELECT DAB / FM FAVORITES
![1. Press the MEMORY [28] key and the display will show "Progr. select?". 2. Press the / [32/34] keys to select the desired favorite station. Press the ENTER](/content/2026/05/896292/images/186b226d17ad073f80435da3ee5dc69cc8250542c7930ee51f09360c46a78a52.jpg)
[33] key to confirm the selection.
UK
- Alternatively, you can also select the favorites directly with the keys

[29] /

[37].
BLUETOOTH MODE
- Press the SOURCE [11/23] key repeatedly until "Bluetooth" appears in the display.
-
The Bluetooth status is shown on the display.
-
Not connected: There is no connection to an external source device.
- Connected: The device is connected to an external source device.
Note:
- Only signals can be received.
- If the device is not connected to any source device, start the Bluetooth search on your source device (e.g. smartphone).
- Select "HIF79DAB" from the devices found.
- The display will show "Connected" and a "Beep" will sound.
- Start playback on your source device.
- You can control the playback with your external source device or directly via the HIF79DAB.
Note:
- When setting the volume, make sure that the volume of the source device and the HIF79DAB must be adjusted. If the volume is set too low, no sound will be heard from the speakers or the sound will be very low.
- To disconnect the Bluetooth connection, press and hold the [41] key until the display shows "Not connected".
- Use the following buttons to control Bluetooth playback.

Press the key to select the previous track.
UK
 | Press the key to select the next track. |
 | Short key press:- Press the button, for play/pause function.Long button press:- Press and hold the button for about 3 seconds to disconnect the Bluetooth connection. |
CD MODE
- Press the SOURCE [11/23] key repeatedly until "CD" appears in the display.
- Open the CD drive with the key [43] and insert an audio CD into the CD compartment.
Note:
- Audio CDs and MP3 CDs are supported.
-
Press the [43] key again to close the drive.
-
The CD is now read in and "CD-READING" is shown in the display.
-
The unit will then start to play the first track from the CD.
-
You can control CD playback with the following keys.
 | Press the key to select the previous track. |
 | Press the key to select the next track. |
 | Press the button, for the play/pause function. |
UK
 | Press the key to stop playback. |
 | Press the button to open or close the drive. |
 | Press the key repeatedly to select the playback modes. The different modes are available for selection.- REP1: Only the current title will be repeated.- REP-ALL: All titles are repeated.- INTRO: Only the first seconds of the title are played.- REP-DIR: Only the current folder is repeated. Only active during MP3 playback. |
 | Press the key to activate Shuffle playback. When active, the display shows "Shuffle". |
 | Press the button when CD playback is stopped to program the CD playback order. |
CD Playback Programming:
- Stop the CD playback with key [43].
- Now press key MEMORY [28] and "MEM" is shown in the display.
MEM
P01: Displays the program number you are currently setting.
T—001: Displays the title you want to set to the current program number.
- Press the / [32/34] keys to select the title.
- Press the MEMORY [28] button to confirm the selection.
- Repeat points 3 and 4 until you have set all the desired titles for playback.
- Press the ▶/□ [43] key to start playback.
- Press the [43] button to stop the playback. Press the key again to delete the
UK
programmed playback. "MEM" is now no longer shown in the display.
Note:
- Audio CD: A maximum of 20 tracks can be programmed ("P01 - P20").
- MP3 CD: A maximum of 99 tracks can be programmed ("P01 - P99").
- MP3 Stick: A maximum of 99 titles can be programmed ("P01 - P99").
- CD types: CD, CD-R/RW, MP3/CD.
CD maintenance
- Do not touch the playback side of the CD.
- Do not stick paper, tape, or other material on the CD.
- Fingerprints and dust on the disc will cause deterioration of playback. Wipe the disc from the center outward with a soft cloth. Always keep the disc clean.
- If dust or stains cannot be removed with a soft cloth, wipe the disc with a slightly damp soft cloth, then wipe with a soft, dry cloth.
- DO NOT use solvents, commercial cleaners, or anti-static sprays for vinyl, as they may damage the disc.
- Do not store CDs in places exposed to direct sunlight or near a heat source.
- Do not store CDs in places exposed to moisture or dust, such as in a bathroom or near a humidifier.
- Always store CDs vertically in a case.
USB MODE
- Press the SOURCE [11/23] key repeatedly until "USB" appears in the display.
- Insert a USB stick (max. 32GB) into the USB socket.
- The USB stick is now read and "USB-READING" is shown in the display.
- The device will start to play the first track from the USB stick.
- You can control the USB playback with the following buttons.

Press the key to select the previous track.
UK
 | Press the key to select the next track. |
 | Press the button for the play/pause function. |
 | Press the key to stop playback. |
 | Press the key repeatedly to select the playback modes. The different modes are available for selection.- REP1: Only the current title will be repeated.- REP-ALL: All titles are repeated.- INTRO: Only the first seconds of the title are played.- REP-DIR: Only the current folder is repeated. Only active during MP3 playback. |
 | Press the key to activate Shuffle playback. When active, the display shows "Shuffle". |
 | Press the button when USB playback is stopped to program the USB playback order. For more information see item Program CD Playback. |
AUX IN MODE
- You can connect and play music from any external audio device that has a 3.5mm stereo jack to this unit.
- To do this, connect the HIF79DAB to your external audio device using a 3.5mm audio cable (not included).
- Connect the audio cable to the AUX-IN jack [2] of the HIF79DAB. Connect the other end to the audio output of your external audio device (e.g. smartphone, MP3 player).
UK
- Press the key SOURCE [11/23] until "AUX" is shown in the display.
- You control the playback on your external audio device.
- You can control the volume on the HIF79DAB device and on your externally connected device.
Note:
- When setting the volume, make sure that the volume of the external device and the HIF79DAB must be set. If the volume is set too low, no sound will be heard from the speakers or the sound will be very low.
TECHNICAL DATA
General
Power supply unit Input AC: 100-240V\~50/60Hz
Power supply unit output DC: 9V / 2A
Unit Input DC: 9V / 2A
Max. Power consumption 18W
Main unit dimensions (W x D x H) 170 x 210 x 95mm
Loudspeaker dimensions (W x D x H) 130 x 142 x 180mm
Weight 2,2Kg
Operating temperature + 5°C - + 35°C
Radio
Receiver band FM / DAB
Frequency range FM 87.5 - 108 MHz
DAB 147.928 - 239.200 MHz
Memory locations FM 30 memory locations
DAB 30 memory locations
Audio
Max. Music power 2x 40 Watt
AUX-IN socket 3.5mm
Headphone socket Φ3.5mm
USB socket MP3 playback / max. 32GB
CD type Audio CD / MP3 CD
Bluetooth
Version V5.0 (A2DP)
Frequency 2.4GHz
All information without guarantee.
Design and specifications are subject to change without notice.
UK
SIMPLIFIED EU DECLARATION OF CONFORMITY
Hereby, UltraMedia GmbH & Co. Handels KG that the radio equipment type HIF79DAB is in conformity with Directive 2014/53/EU.
The full text of the EU Declaration of Conformity can be requested at the following e-mail address.
We wish you much pleasure with the device.
Your UltraMedia Team
CE
DISPOSAL INSTRUCTIONS
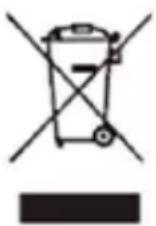
This symbol on the product or in the instructions means that the appliance, electrical and electronic equipment and batteries must be disposed of separately from your household waste at the end of their working life. There are separate collection systems for recycling in the EU. For more information, please contact the local authority or your dealer where you purchased the product.
BATTERY DISPOSAL NOTICE:
BATTERIES AND ACCUMULATORS MUST NOT BE DISPOSED OF WITH HOUSEHOLD WASTE!
EVERY CONSUMER IS LEGALLY OBLIGED TO HAND IN ALL BATTERIES ANDACCUMULATORS, REGARDLESS OF WHETHER THEY CONTAIN HARMFULSUBSTANCES* OR NOT, AT A COLLECTION POINT IN HIS OR HER
MUNICIPALITY/BOROUGH OR AT A RETAILER, SO THAT THEY CAN BE DISPOSED OF IN AN ENVIRONMENTALLY FRIENDLY MANNER.
PLEASE ONLY RETURN BATTERIES AND ACCUMULATORS DISCHARGED CONDITION!
) MARKED WITH:
CD = CADMIUM,
HG = MERCURY,
PB = LEAD
WARRANTY

Dear Customer,
Thank you for choosing one of our products. Our products undergo precise quality control in the course of production. If one of our devices gives you cause for complaint, or you have questions about one of our devices, please call our customer support.
We give a 36 month warranty on TV and SAT devices, and a 24 month warranty on portable DVD and audio devices from the date of purchase. Outside of the warranty, we offer you a paid repair based on a cost estimate. Please contact our customer support before submitting.
The warranty relates to material and production defects. Your device will be repaired or replaced during the warranty period. Unfortunately, UltraMedia cannot reimburse the purchase price. Damage caused by improper use, the use of third-party accessories, falls, dust, water damage and signs of wear (e.g. scratches, optical wear and tear) caused by the customer or external influences are excluded from the guarantee.
In order to assert the warranty claims, send the device with all accessories, a copy of the invoice and the description of the fault to the address given below. Devices that do not have a proof of purchase cannot be guaranteed. Please do not forget to include your full address and a telephone number / email address for any queries.
Shipping to us takes place at your own expense. Unpaid parcels cannot be accepted and are returned to the sender.
Please pack the device securely for transport. UltraMedia assumes no liability for damage in transit that occurs on the way to us. After receiving your submission, we will process your device as soon as possible and send it back to you.
Before sending your device in, please contact our customer support or your specialist dealer, as many problems can also be solved over the phone.
- SAFETY INSTRUCTIONS
- UK
- SAFETY INSTRUCTIONS:
- Headphone warnings:
- ACCESSORIES
- POWER SUPPLY
- DC operation:
- OPERATING KEYS
- REMOTE CONTROL
- Changing the battery (remote control)
- Note:
- BASIC OPERATION
- Switching on the device
- Switch on:
- Switch off:
- Comment:
- Notes on electrostatic discharge
- Set volume
- SET TIME
- Set time:
- Set date:
- SET ALARM CLOCK
- Select alarm clock 1 or alarm clock 2:
- Set hours:
- Set minutes:
- Alarm clock duration:
- Source selection:
- Daily selection:
- Alarm clock volume:
- Turn off alarm sound:
- Alarm clock switch on / switch off
- SYSTEM MENU
- DAB MODE
- DAB MENU
- FM MODE
- FM MENÜ
- SAVE DAB / FM AS FAVORITES
- SELECT DAB / FM FAVORITES
- BLUETOOTH MODE
- CD MODE
- CD Playback Programming:
- CD maintenance
- USB MODE
- AUX IN MODE
- TECHNICAL DATA
- General
- Radio
- Audio
- Bluetooth
- SIMPLIFIED EU DECLARATION OF CONFORMITY
- CE
- DISPOSAL INSTRUCTIONS
- BATTERY DISPOSAL NOTICE:
- PLEASE ONLY RETURN BATTERIES AND ACCUMULATORS DISCHARGED CONDITION!
- WARRANTY
Brand : Reflexion
Model : HIF79DAB
Category : Hi-Fi System