
MK-CM300 - Food processor PANASONIC - Free user manual and instructions
Find the device manual for free MK-CM300 PANASONIC in PDF.


| Product Type | Food processor (Chef Machine) |
| Model | MK-CM300 |
| Brand | Panasonic |
| Dimensions (W x D x H) | 180 mm × 358 mm × 305 mm (approx.) |
| Weight | 4.3 kg (approx.) |
| Power Supply | 220-240 V ~50-60 Hz |
| Power Consumption | 600 W |
| Rotational Cycle (Max) | 220 cycles/min |
| Power Cord Length | 0.9 m |
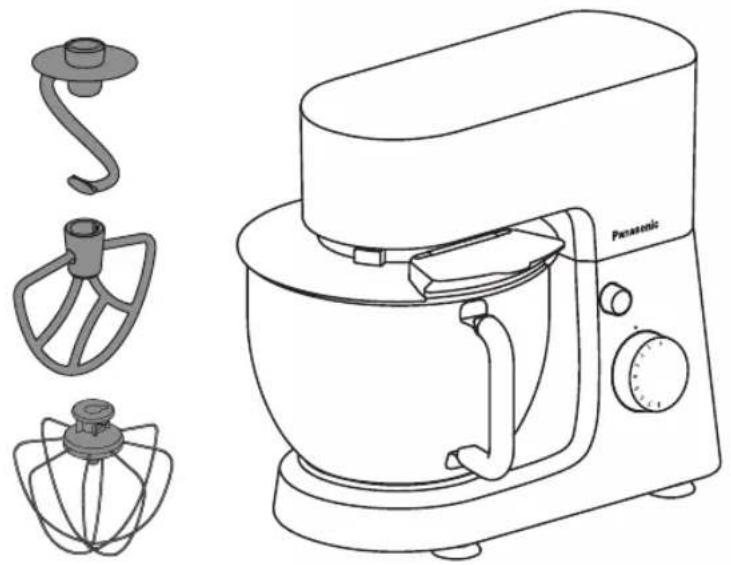
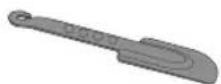
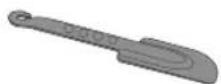
| Accessories Included | Kneading hook, stirring blade, whisk, spatula |
| Functions | Kneading, stirring, whipping, mixing |
| Capacity (Kneading Hook) | Max: 786 g flour + 566 g water; Min: 300 g flour + 190 g water |
| Capacity (Stirring Blade - flour) | Max: 1000 g flour + 650 g water; Min: not specified |
| Capacity (Whisk - egg whites) | Max: 400 g; Min: 150 g |
| Speed Settings | 8 levels (1-8) plus off (0) |
| Maximum Continuous Operation | 10 minutes, then 30 minutes rest required |
| Overload Protection | Yes, motor shuts off if overheated or overloaded |
| Safety Features | Safety lock when upper part not closed; release button to lift head |
| Cleaning | Wash accessories in warm water; wipe base and upper part with dry cloth; not dishwasher safe |
| Repairability | Contact Panasonic service center; do not disassemble |
| Intended Use | Household use only |
| Warranty | Warranty card included; keep for future reference |
Frequently Asked Questions - MK-CM300 PANASONIC
User questions about MK-CM300 PANASONIC
0 question about this device. Answer the ones you know or ask your own.
Ask a new question about this device
Download the instructions for your Food processor in PDF format for free! Find your manual MK-CM300 - PANASONIC and take your electronic device back in hand. On this page are published all the documents necessary for the use of your device. MK-CM300 by PANASONIC.
USER MANUAL MK-CM300 PANASONIC
Operating Instructions
Chef Machine
(Household Use)
Model No. MK-CM300
natural_image
Line drawing of a Panasonic kitchen mixer with three separate views: a hook, a fan blade, and a spool (no text or symbols)Thank you for purchasing the Panasonic product.
- Please read these instructions carefully to use the appliance correctly and safely.
- Before using this product, please give your special attention to "Safety Precautions" and "Important Information" (see Page EN3–EN5).
- Please keep the warranty card and the Operating instructions for future use.
- Panasonic will not accept any liability if the appliance is subjected to improper use, or in the event of failure to comply with these instructions.
Contents Page
| Safety Precautions EN3 | |
| Important Information EN5 | |
| Parts Names and Instructions EN6 | |
| Preparations | EN7 |
| Precautions for Use EN9 | |
| How to Use EN10 | |
| How to Clean EN11 | |
| Troubleshooting | EN12 |
| Specifications | EN13 |

This symbol on the appliance indicates
"Be careful when pressing the upper part of the container to avoid injury."
EN2
Safety Precautions
Please be sure to follow these instructions.
To avoid personal injury and damage to the property of others, please observe the following.
■ The following symbols indicate the degree of injury and damage due to incorrect operation.

WARNING:
Indicates a potential hazard that could result in serious injury or death.

CAUTION:
Indicates a potential hazard that could result in minor injury or property damage.
■ The symbols indicating points to be observed are classified and explained as follows.

This symbol indicates prohibition.

This symbol indicates requirement that must be followed.

WARNING
To avoid the risk of electric shock, fire caused by short circuit, burns, scalds, or injuries.

●Do not disassemble, repair or modify the appliance.
→ Contact Panasonic Service Centre for inspection or repair.
●Do not damage the power cord or power plug.
The following actions are strictly prohibited: Damaging, modifying or placing near heating elements, bending forcibly, twisting, pulling, pulling over sharp edges, putting heavy objects on top, bundling the power cord or carrying the appliance by the power cord.
●Do not use the appliance if the power cord or power plug is damaged or the power plug is loosely connected to the outlet.
→ If the power cord is damaged, it must be replaced by the manufacturer, its service centre or similarly qualified person in order to avoid a hazard.
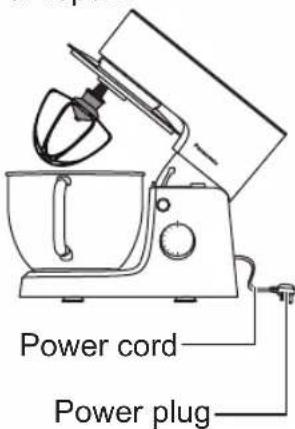
●Do not plug or unplug the power plug with wet hands.
●Do not immerse the appliance, power cord or power plug in water or splash it with water and / or any liquid.
●Do not leave the power plug hanging over the edge of a table or desk or touching a hot surface.
●Do not allow infants and children to play with packaging material. (It may cause suffocation)
●Do not start the product without the stirring container installed.
●The stirring lid must be closed while in use.
●Be careful when pressing the upper part of the container to avoid injury.
EN3
Safety Precautions
Please be sure to follow these instructions.

WARNING
To avoid the risk of electric shock, fire caused by short circuit, burns, scalds, or injuries.

This appliance is not intended for use by persons (including children) with reduced physical, sensory or mental capabilities, or lack of experience and knowledge unless they have been given supervision or instruction concerning the use of the appliance by a person responsible for their safety. Children should be supervised to ensure that they do not play with the appliance.
Keep the appliance and its power cord out of reach of infants and children.
●Discontinue using the appliance immediately and unplug in the unlikely event that this appliance stops working properly.
e.g. for abnormal or breaking down
• The power plug and the power cord become abnormally hot.
- The power cord is damaged or the appliance power fails.
• The appliance is deformed or abnormally hot.
• There is an unpleasant smell.
• There is an abnormal noise while in use.
- Other abnormality or breaking down.
→ Please unplug the power plug immediately and contact the customer service center for inspection or repair.
● Make sure that the voltage indicated on the label of the appliance is the same as your local supply.
Also avoid plugging other devices into the same power outlet to prevent electrical overheating. However, if you are connecting a number of power plugs, make sure the total wattage does not exceed the rated wattage of the power outlet.
●Insert the power plug firmly.
●Dust off the power plug regularly.
→ Unplug the power plug, and wipe with a dry cloth.

CAUTION
To avoid the risk of electric shock, fire, smoke, burns, scalds, injuries, or property damage.

●Do not leave the appliances unattended while in use.
●Do not use this appliance in the following places.
- Uneven surfaces, carpets, non-waterproof surfaces or places with tablecloths, etc.
- Place where it may be splashed with water or near a heat source.
• Near any open water source such as a sink.
• Near walls or furniture.
→ Place the appliance on a firm, dry, clean, flat and heat-resistant worktop. - Do not put any object on this appliance or insert any object under this appliance /in gaps.
EN4

CAUTION
To avoid the risk of electric shock, fire, smoke, burns, scalds, injuries, or property damage.

●Hands, cloth or other tools must not be in contact with operating accessories such as the kneading hook, the stirring blade, the whisk and the spatula.
- Do not stir hot ingredients until they are cooled to the temperature of the human body (below 35 °C).
●Do not pour hot liquids (above 60 °C) into the stirring container.
- Do not wash the appliance with hot water (above 60 °C) or dry it at a high temperature.
Do not turn on the appliance before accessories are assembled in place.

●Make sure to switch off the appliance and disconnect the power plug from the power outlet before assembly, disassembly, movement and cleaning while not in use, and wipe the appliance before next use.
●Before using the appliance, make sure that accessories are wiped and assembled correctly.
● Beware not to trip over or get caught in the power cord while in use.
●Make sure to hold the power plug when unplugging it. Never pull on the power cord.
●Switch off the appliance and disconnect from supply before changing accessories or approaching parts that move in use.
●Ensure to operate and rest the appliance as stated on the table of "The maximum and minimum capacity of ingredients to be held in the stirring container". (P. EN9)
●Ensure to clean the appliance especially surfaces in contact with food after use. (P. EN11 "How to Clean")
●This product is intended for household use only.
Important Information
●Do not place the stirring container on any heat sources or in a microwave oven.
●Do not use the appliance outdoors.
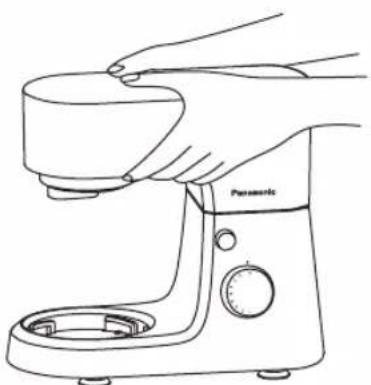
- When moving, make sure that the appliance is not in use, firmly press the upper part, grasp the upper part (see figure) and sway it from left to right or vice-versa.
●Do not drop the appliance or accessories to avoid damaging them.
●Do not wrap the power cord around the housing.
●When the appliance is fixed on the holder, do not move it.
●Do not operate the appliance without ingredients to avoid damaging it.
natural_image
Line drawing of a hand using a Panasonic blender to press or feed into a cup (no text or symbols present)EN5
Parts Names and Instructions
Accessories
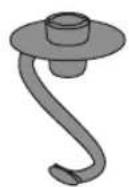
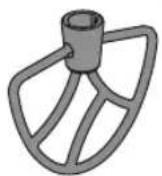
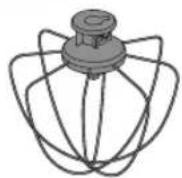
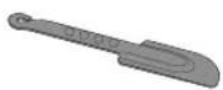
Kneading hook Stirring blade Whisk Spatula
● Knead doughs
● Stir stuffing, cake batters, etc.
●Whip up egg whites and fresh cream
●Shape ingredients
Before use
When using the appliance for the first time or when it has not been used for a period of time, remove the packaging material first and then clean the appliance according to the following steps.
1 Clean all the removable accessories. (See P. EN11)
2 Before assembling accessories, make sure the appliance is unplugged and the Switch knob is in the "0" position.
3 Attach the appropriate accessory to the adapter as necessary.
EN6
Preparations
Assembling and Desassembling
Assembling
1 Make sure that the appliance is disconnected from the power outlet and the switch knob is in the "0" position.
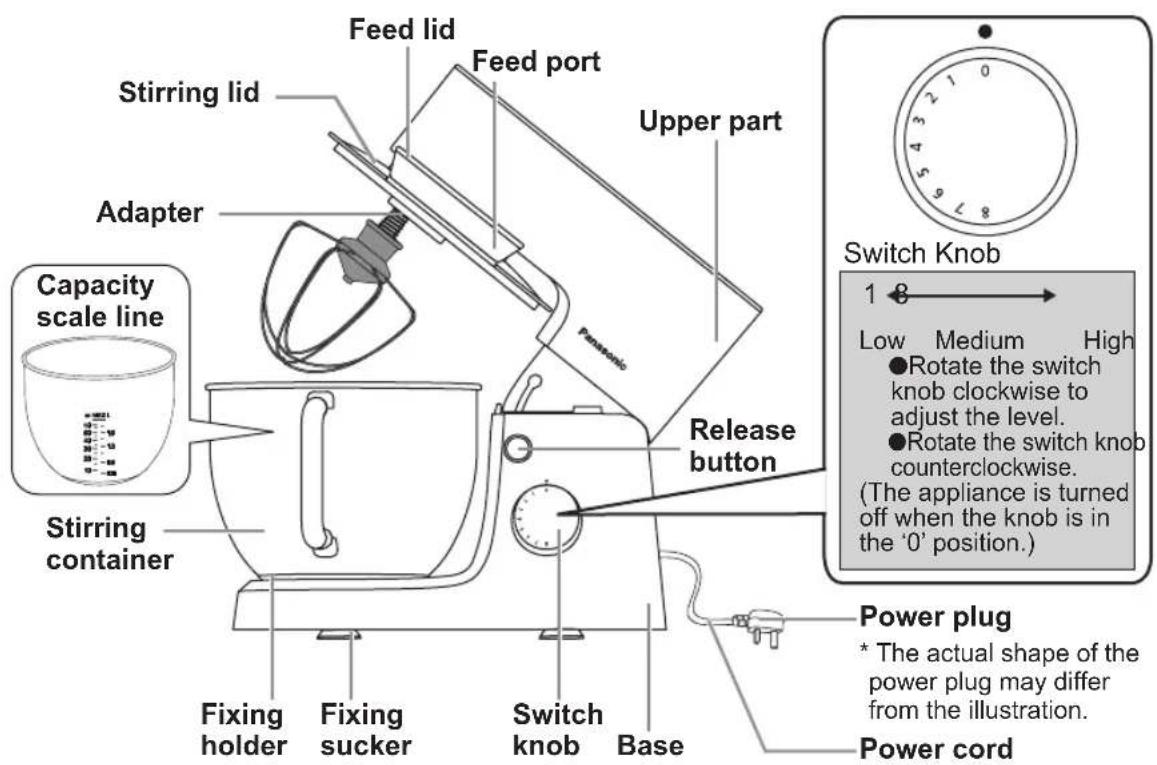
2 Press the release button to automatically release the upper part, gently lift it backward and fix it in the head-up position.
- Remove the stirring container and clean it.
●Put the ingredients to be blended into the stirring container.
3 Set the stirring lid to the upper part.
- Set the stirring lid to the upper part in the direction of the arrow and make the feed port is placed in the same direction as the switch knob to ensure that it can be installed firmly.
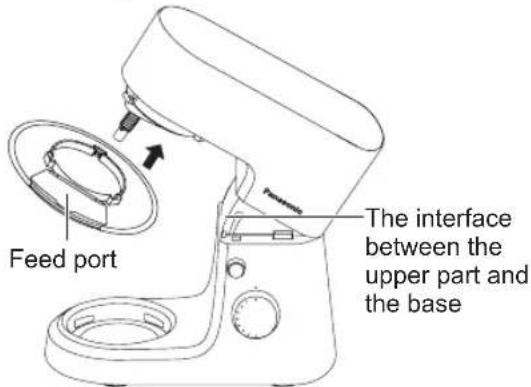
4 Attach the stirring container with ingredients to the fixing holder.
- Hold the stirring container handle with both hands and rotate it in the direction of the arrow, and rotate it to the left until it stops completely and is installed in place.
5 Attach the kneading hook, stirring blade or whisk to the adapter as necessary, aligning the recessed part of the kneading hook, stirring blade or whisk with the protruding part of the shaft pin.
① Push up as far as possible in the direction of the arrow.
② Rotate counterclockwise in the direction of the arrow to install it in place.
●After installation, gently pull down to make sure the accessories are in place, otherwise, it may fall off during operation.
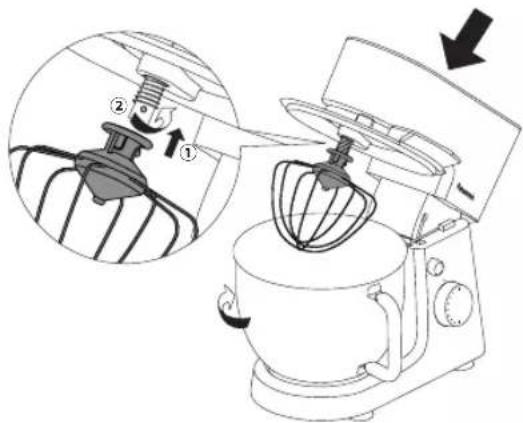
6 Press the release button and press the upper part directly by hand (in the direction) until a "click" sound is heard, and the installation is complete.
EN7
Preparations
Assembling and Desassembling
Disassembling
1 Make sure that the appliance is disconnected from the power outlet and the switch knob is in the "0" position.
2 Press the release button to automatically release the upper part, gently lift it backward and fix it in the head-up position.
3 Remove the accessories after use.
① Push up as far as possible in the direction of the arrow.
② Turn it clockwise in the direction of the arrow and remove it when the recessed part of the accessory coincides with the protruding part of the shaft pin.
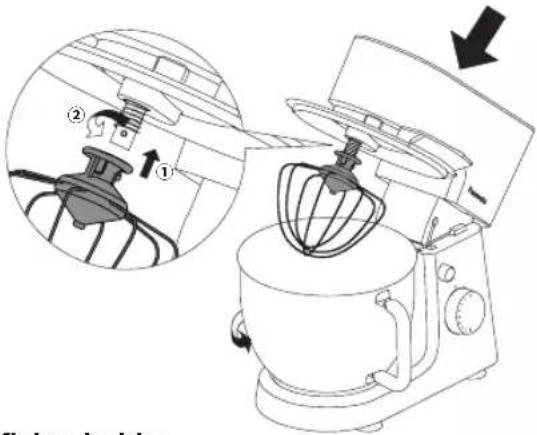
4 Remove the stirring container from the fixing holder.
- Hold the stirring container handle with both hands and rotate it in the direction of the arrow to remove it.
5 Remove the stirring lid from the upper part.
● Hold the stirring lid with both hands and remove it.
6 Press the release button and press the upper part directly by hand (in the → direction) until it clicks. Disassembly completed.
Note: Please follow the disassembly sequence to prevent stirring accessories or other foreign objects from dropping into the stirring container during disassembly.
EN8
Precautions for Use
Precautions
Prepare the ingredients and the stirring container.
● Use the stirring container provided.
- When filling ingredients, the level of ingredients cannot be higher than the MAX scale mark and the stirring wing of the accessory.
● Refrigerated ingredients such as butter and eggs should be taken out and left at room temperature for a period of time before stirring.
- Beat the eggs in another container first before pouring them into the stirring container to avoid shells or broken eggs affecting your cooking.
- Do not stir for a long time and operate as described in recipes. For dry mixtures, stir at low level.
● Climate conditions, seasonal temperatures, temperature of mixtures and ingredients can change at any time, which will affect stirring time and stirring effects.
● To avoid ingredients from splashing during stirring, use lower levels at the beginning and adjust to higher levels slowly.
Prohibited Ingredients
To avoid damaging accessories, do not use hard ingredients.
• Ingredients other than food
- Ingredients that are too viscous or lumpy
*Sugars that are too viscous, such as maltose, should be diluted and dissolved in water before use.
* Before filling, please remove bones and chop massive pieces, meat with tendons and oversized ingredients.
The maximum and minimum capacity of ingredients to be held in the stirring container:
| Accessories | Ingredients | Maximum Minimum | |||||
| Weight | Operation time | Speed | Weight | Operation time | Speed | ||
| Kneading hook | High gluten flour + Water | 786 g flour + 566 g water | 10 minutes | 8 | 300 g flour + 190 g water | 11 minutes | 1~3 |
| Stirring blade | High gluten flour + Water | 1000 g flour + 650 g water | 2.5 minutes | 8 -- - | |||
| Minced meat filling | 600 g meat + 450 g cabbage | 4minutes4 | 400 g meat + 300 g cabbage | 4minutes4 | |||
| Whisk Egg whites | 400 g | 4minutes8 | 150 g | 2.5 minutes | 8 | ||
Note
- During continuous operation, 30 minutes of off is required.
- Remarks: For making best effect dough, we recommend choosing the middle and low speed to operate the appliance.
- The values above are standard loads of the appliance. If the amount of ingredients in the stirring container exceeds the maximum acceptable capacity or the amount of water is below the proportion in recipes, the overload protection device of the motor may be activated causing a shutdown.
How to Use
1 Prepare for stirring
- Place the prepared ingredients in the stirring container (please see page EN7 for assembling instructions) and start stirring after assembly.
2 Plug in
3 Choose a level
- Attach an accessory suitable for the ingredients to the adapter.
● There are 8 levels on the switch knob. Please select a level as necessary to stir. - Do not put metal objects such as knives, forks, or metal spoons into the stirring container during the mixing.
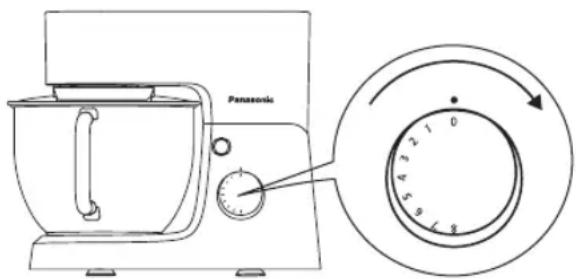
- During stirring, feed ingredients from the feed port on the stirring lid as necessary.
- The maximum operation time should not exceed 10 minutes with at least 30 minutes rest between two consecutive cycles.
- When stirring flour, some flour may stick to the stirring container. To alleviate, stop operation, remove the stirring lid and use the spatula to scrape flour off the inner wall of the stirring container.
* Please reduce the amount of ingredients if there are too many. (Continuation in using the product without reducing the ingredients may cause the motor to malfunction.)
4 Stirring completed
- Before disassembling accessory, make sure that the switch knob is turned to "0" and unplug the power plug.
● After stirring, turn the switch knob to "0" and unplug the power plug. - Press the release button, lift the upper part slightly and backwards to lock it.
- Use the spatula to scrape ingredients stuck on the whisk or other accessories during stirring.
●Push the accessory upward while turning clockwise to remove it.
EN10
How to Clean
■Always clean the appliance after use.
■ Before cleaning, make sure that the power plug is unplugged from the power outlet and the appliance is cooled thoroughly.
Note
- Do not clean the appliance with gasoline, thinner, abrasive powder, bleaching agent, metal brushes or nylon brushes to avoid wearing the surface.
- Do not clean this appliance in a dishwasher.
- Do not clean this appliance with sharp objects such as toothpicks or pins.
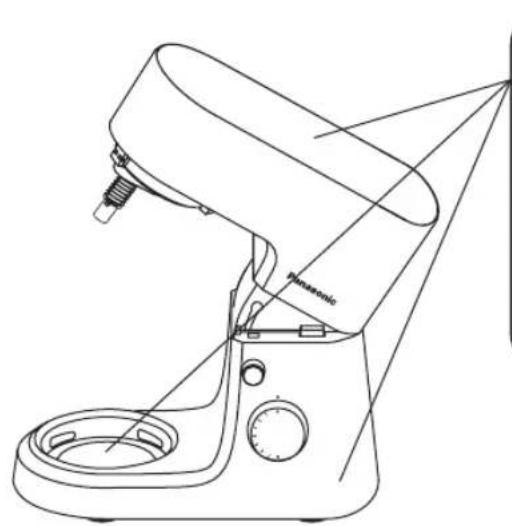
natural_image
Line drawing of a kitchen mixer with control panel and stand (no text or symbols)Upper Part / Base / Fixing Holder
Wipe with a dry cloth.
- Do not rinse it under running water or immerse it in water.
- Do not hit the appliance with hard objects or wipe it with a wire brush to avoid damage to the upper part, base and mount surface.
Kneading Hook / Stirring Blade / Whisk / Stirring Container / Stirring Lid / Spatula
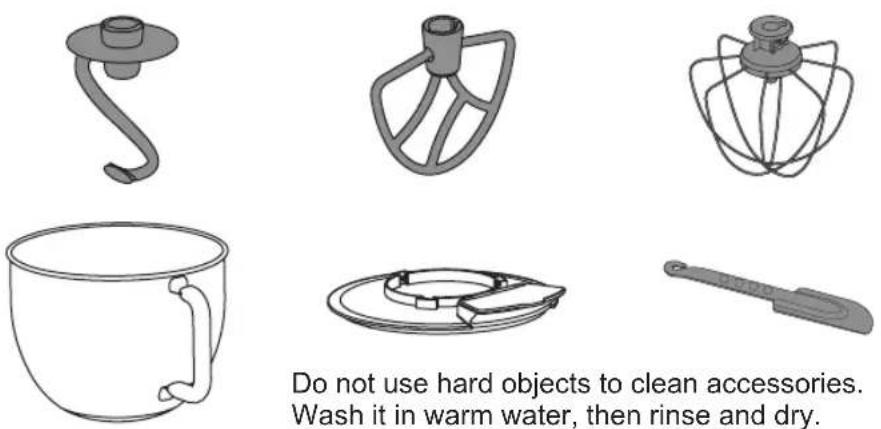
Do not use hard objects to clean accessories.
Wash it in warm water, then rinse and dry.
Troubleshooting
Please check the following points before calling or arranging for repair.
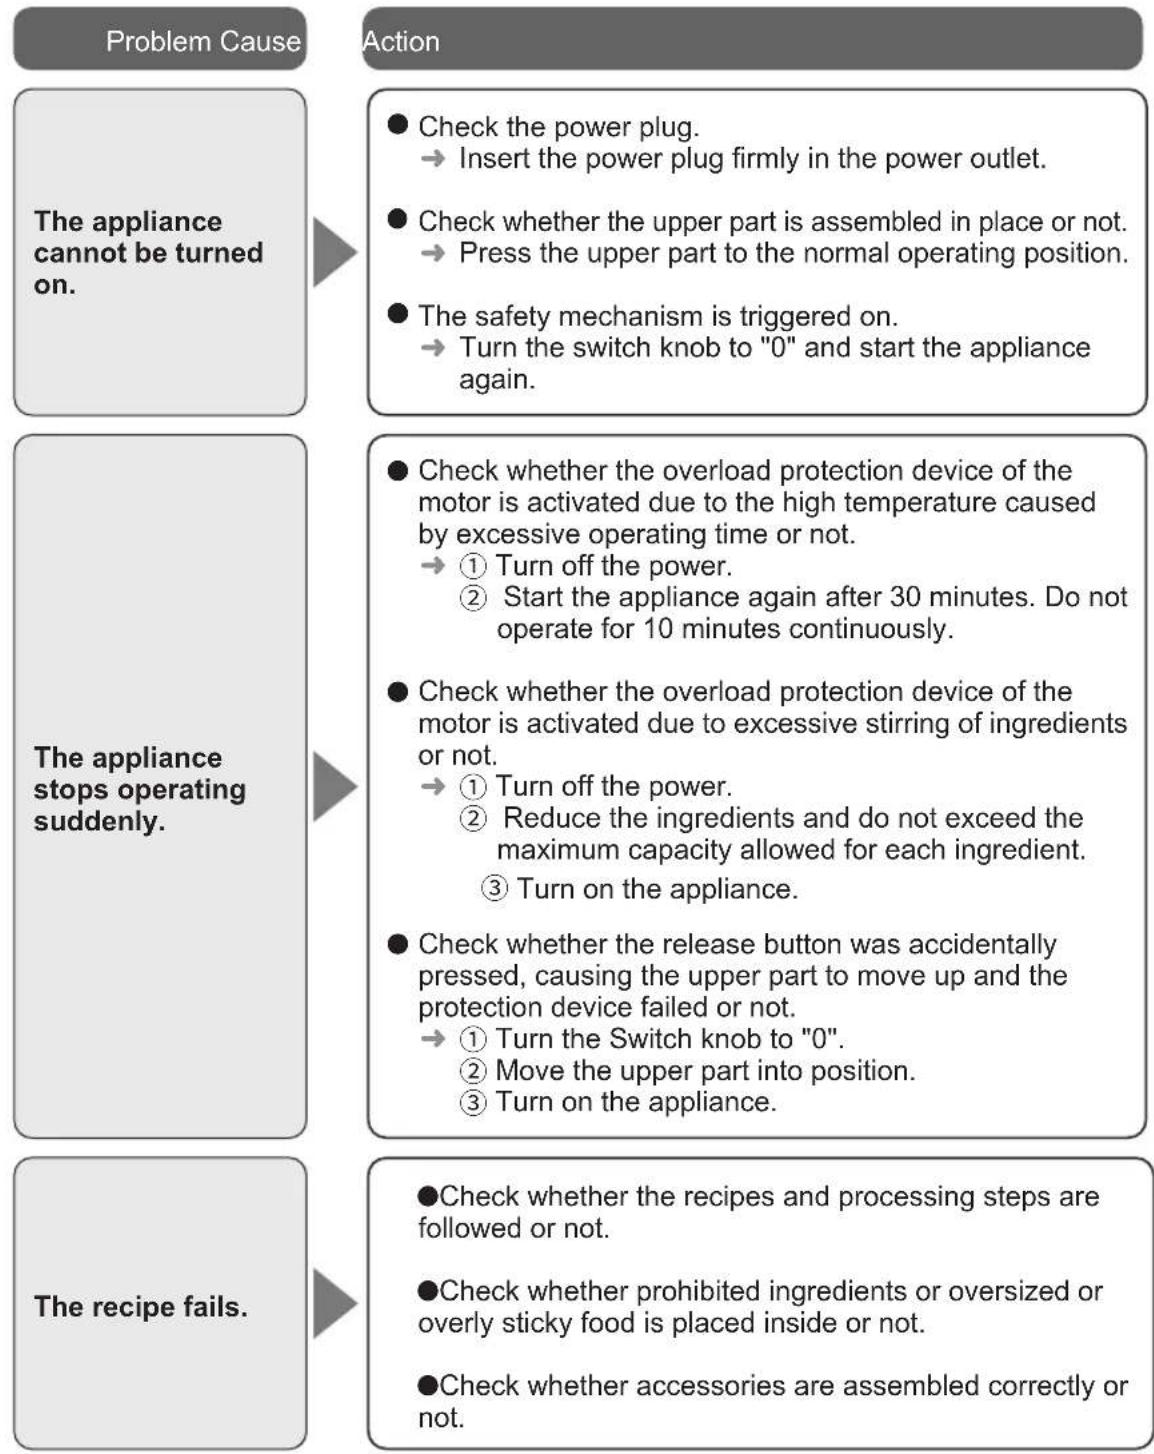
flowchart
graph TD
    A["Problem Cause"] --> B["The appliance cannot be turned on."]
    B --> C["Action"]
    C --> D1["Check the power plug. → Insert the power plug firmly in the power outlet."]
    C --> D2["Check whether the upper part is assembled in place or not. → Press the upper part to the normal operating position."]
    C --> D3["The safety mechanism is triggered on. → Turn the switch knob to "0" and start the appliance again."]
    A --> E["The appliance stops operating suddenly."]
    E --> F1["Action"]
    F1 --> G1["Check whether the overload protection device of the motor is activated due to the high temperature caused by excessive operating time or not. → ① Turn off the power. ② Start the appliance again after 30 minutes. Do not operate for 10 minutes continuously."]
    F1 --> G2["Check whether the overload protection device of the motor is activated due to excessive stirring of ingredients or not. → ① Turn off the power. ② Reduce the ingredients and do not exceed the maximum capacity allowed for each ingredient. ③ Turn on the appliance."]
    F1 --> G3["Check whether the release button was accidentally pressed, causing the upper part to move up and the protection device failed or not. → ① Turn the Switch knob to "0". ② Move the upper part into position. ③ Turn on the appliance."]
    A --> H["The recipe fails."]
    H --> I1["Action"]
    I1 --> J1["Check whether the recipes and processing steps are followed or not."]
    I1 --> J2["Check whether prohibited ingredients or oversized or overly sticky food is placed inside or not."]
    I1 --> J3["Check whether accessories are assembled correctly or not."]
EN12
Specifications
| Power supply | 220-240 V ~50-60 Hz |
| Power consumption 600 W | |
| Rotational cycle (Approx.) Maximum speed: 220 cycles / minutes | |
| Demension (Width× Depth× Height) (Approx.) | 180 mm × 358 mm × 305 mm |
| Weight (Approx.) | 4.3 kg |
| Power cord length (Approx.) 0.9 m | |
English
EN13
Memo
يادداشت
مشخصات
natural_image
Line drawing of a kitchen mixer with control panel and spool (no text or symbols)natural_image
Line drawing of a simple cup with handle and spout (no text or symbols)
4
5
natural_image
Line drawing of a hand using a Panasonic blender to press or adjust the cup (no text or symbols present)اطلاعات مهم
• Nepal++, Nepal, Nepal, Nepal, Nepal, Nepal, Nepal, Nepal, Nepal, Nepal, Nepal, Nepal, Nepal, Nepal, Nepal, Nepal, Nepal, Nepal, Nepal, Nepal, Nepal, Nepal, Nepal, Nepal, Nepal, Nepal, Nepal, Nepal, Nepal, Nepal, Nepal, Nepal, Nepal, Nepal, Nepal, Nepal, Nepal, Nepal, Nepal, Nepal, Nepal, Nepal, Nepal, Nepal, Nepal, Nepal, Nepal, Nepal, Nepal, Nepal, Nepal, Nepal
natural_image
Line drawing of a kitchen mixer with handle and control panel (no text or symbols)natural_image
Line drawing of a simple cup with handle and spout (no text or symbols)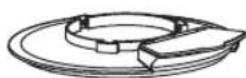
4
5
natural_image
Line drawing of a hand using a Panasonic blender mixer (no text or symbols present)معلومات مهمة
natural_image
Three technical illustrations of a mixing bowl with a hook, one with a mesh head, another with a curved handle (no text or symbols)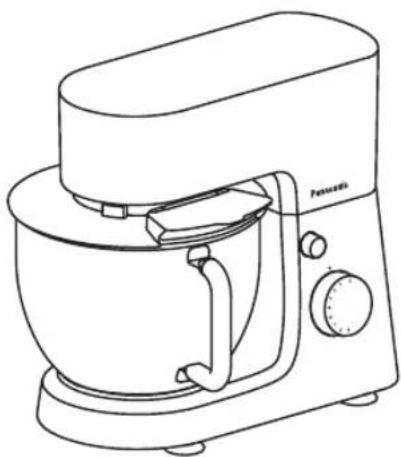
natural_image
Line drawing of a kitchen mixer with a side-mounted stand and control panel (no text or symbols)تعليمات التشفيل
Manufacturer: Panasonic Taiwan Co., Ltd. 579, Yuan Shan Road, Chung-Ho District, New Taipei City, Taiwan
* Importer: Panasonic Marketing Middle East & Africa FZE Jebel Ali Dubai United Arab Emirates * For GSO Member Countries
- EN2
- Safety Precautions
- WARNING
- CAUTION
- EN4
- Important Information
- Parts Names and Instructions
- Kneading hook Stirring blade Whisk Spatula
- Before use
- EN6
- Preparations
- Assembling
- Disassembling
- EN8
- Precautions for Use
- Precautions
- Prepare the ingredients and the stirring container.
- Prohibited Ingredients
- To avoid damaging accessories, do not use hard ingredients.
- Note
- How to Use
- Prepare for stirring
- Plug in
- Choose a level
- Stirring completed
- EN10
- How to Clean
- Upper Part / Base / Fixing Holder
- Troubleshooting
- Memo
- مشخصات
- اطلاعات مهم
Brand : PANASONIC
Model : MK-CM300
Category : Food processor