
P6 Ultimate - Projector AAXA Technologies - Free user manual and instructions
Find the device manual for free P6 Ultimate AAXA Technologies in PDF.


| Product Type | Video Projector |
| Model | P6 Ultimate |
| Brand | AAXA Technologies |
| Operating System | Android 9.0 |
| Display Technology | DLP |
| Light Source | LED |
| Battery | 74Wh (20000mAh) Lithium Ion |
| Power Adapter | 65W USB-C PD |
| Connectivity | HDMI, AV, USB-C, USB-A, TF Card Slot, Bluetooth, WiFi (2.4/5GHz) |
| Throw Ratio | 1.2:1 |
| Projection Offset | 100% |
| Minimum Throw Distance | 14 inches |
| Screen Size | 20 to 90 inches diagonal |
| Brightness Modes | Eco, Standard, Boost |
| Keystone Correction | 4-Way Adjustable |
| Audio Output | 3.5mm Headphone Jack, Bluetooth Audio Out |
| Features | Screen Mirroring (Android/iOS), 3D DLP Mode, File Viewer (Office), Web Browser, App Store, Bluetooth Speaker Mode with LED Visualization |
| Charging Time | 3+ hours |
| Storage Support | TF Card and USB up to 64GB |
| Accessories Included | 65W USB-C Charger, Remote Control, Carrying Case |
Frequently Asked Questions - P6 Ultimate AAXA Technologies
User questions about P6 Ultimate AAXA Technologies
0 question about this device. Answer the ones you know or ask your own.
Ask a new question about this device
Download the instructions for your Projector in PDF format for free! Find your manual P6 Ultimate - AAXA Technologies and take your electronic device back in hand. On this page are published all the documents necessary for the use of your device. P6 Ultimate by AAXA Technologies.
USER MANUAL P6 Ultimate AAXA Technologies
natural_image
Hand holding a black portable projector with a camera lens (no visible text or symbols)User Guide
Caution!
WARNING: Please use this product as instructed. Misuse may cause injury or death.
• DO NOT use while driving.
- DO NOT expose to water or wet surfaces. Electric shock may occur.
- DO NOT expose the projected LED image to your eyes or the eyes of others.
- DO NOT block or restrict airflow from ventilation holes as this may cause the projector to overheat.
- Keep the projector, battery, or charger away from any heat sources.
Battery warning
This product includes a large array of lithium ion batteries. AAXA Technologies employs only premium lithium ion batteries, the same type used in high-end Electric Vehicles. Additionally we pay careful attention to battery design safety. That said Lithium Ion batteries contain a tremendous amount of energy and must be handled with care!
WARNING: Large battery products contain a tremendous amount of energy.
WARNING: Users must handle this product with care. Battery systems are susceptible to shock damage, vibration damage, punctures, and overheating.
WARNING: Please respect the internal large lithium ion battery. Please remember it contains a tremendous amount of energy.
Battery warning
SUGGESTIONS
- Do not carelessly throw or drop the product.
- Do not keep the product in direct sunlight or near heat sources.
- Do not keep the product inside hot environments such as automobiles during the summer.
- Do not attempt to charge in freezing environments, this will damage batteries.
- If damage is suspected DO NOT CHARGE, DO NOT USE.
● Always Charge on safe, no-flammable surfaces, away from flammable objects.

Solar Charging Warning
● Warning: Do not expose the projector to direct sunlight!
- Caution: When using a solar panel to charge the projector makes sure the projector is covered and / or not under direct sunlight. Monitor the projector temperature to ensure it does not overheat.

natural_image
Simple line drawing of a tent under a sun, with a box nearby (no text or symbols)Table of Contents
Chapter 1: P6U at a Glance
P6U Introduction 1
Remote & Keypad3
Accessories 4
Chapter 2: Getting Started
Powering On / Off 5
Charging the P6U 6
Focus Adjustment / Throw Distance 7
Bluetooth Mode / Lantern Mode • • 8
Connecting to Speakers/Headphone 11
Loading External Content 12
Chapter 3: Menu Screens
Main Menu 16
Streaming Services Menu .....17
Files Menu 19
Wifi Menu 20
Input Selection 21
Office Menu 22
Mirroring Menu 24
3D Function 27
Browser Menu 28
Apps Menu 29
Chapter 4: Settings Menu 30
Brightness Menu 31
Advanced Settings 32
Language Settings 33
Display Settings 34
Keystone & Projection Direction 35
Bluetooth Menu 39
Upgrade/Reset 40
About Menu 41
Notes 42
P6U at a Glance
Chapter 1
Main Unit

P6U at a Glance
Main Unit

Remote & Keypad
Remote Control

Direction Pad

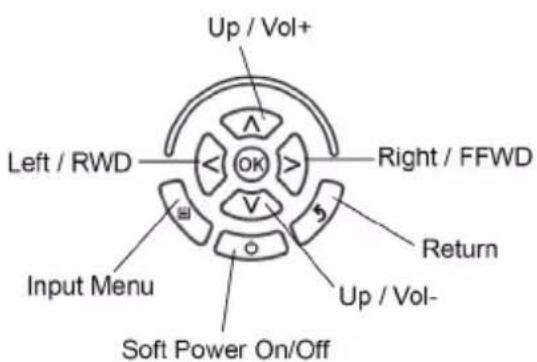
Both the keypad and remote can be used to navigate through the menus. The remote control has additional functionality including "mouse" feature that the onboard keypad does not.
Accessories

natural_image
Black plastic electrical plug with a metallic tip, shown against a white background (no text or symbols visible)65W Fast Charger Carrying


Remote Control
*Under various circumstances, the actual accessories may be different from those shown in the pictures above.
Additional accessories are available for purchase at www.aaxatech.com
Getting Started
Chapter 2
Powering ON the projector
- The P6U should be fully charged before startup.
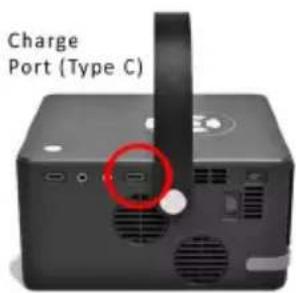
- The P6U charges through the Type C power port found under "Power Input" next to the carry handle.
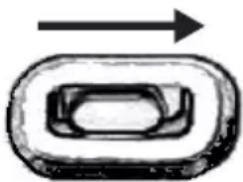
- Toggle the On / Off switch to "On" and the projector should automatically turn on.
natural_image
Simple diagram of a rectangular object with an arrow pointing upward, no text or symbols present.Bluetooth OFF Projector
Standby Mode
- To transition to "STANDBY" mode, press the power button on the remote control.
- The optical engine should power off and the fan should stop spinning. The projector is now in "STANDBY" mode and can be turned on using the remote control.
*Note: Standby mode will still consume a small amount of power.
Powering OFF the projector
- To turn off the projector, toggle the "Power Switch" to the "OFF" position. This will fully turn off the projector. The unit can only charge when it is off.
Charging the P6U
-
Charge Mode – The P6U charges through a USBC Type C (Compatible) charge port. This makes the P6U compatible with most USB chargers and eliminates the need for a clunky power adapter. A powerful 65W USBC compatible adapter is included with the device. This charger is able to support the P6U at maximum power consumption levels for extended operation.
-
Operating Power Load Balance In low power charging conditions (when the power adapter is not high power) the
P6U will load balance first from the power adapter then any power deficit from the onboard batteries. When the onboard batteries are depleted the P6U will shut down. The included power adapter is sufficient to operate the P6U for extended operation.
NOTE: Most USB power adapters are not powerful to operate the P6U for extended operation.
- Battery Pack – The P6U incorporates a large 74w (20000mah) battery pack. Please see battery warnings for cautions. The battery system charges at 0.3C (3+ hours for a full charge). The P6U incorporates a large battery. PLEASE SEE BATTERY WARNINGS
Focus Adjustment / Throw Distance
Focus Adjustment
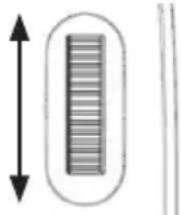
- Spin the focus wheel up or down until the image becomes clear.
Throw Distance Chart
| Throw Distance | Screen Diagonal |
| Units: Inches | Units: Inches |
| 20 | 19 |
| 30 | 29 |
| 40 | 38 |
| 50 | 48 |
| 60 | 57 |
| 70 | 67 |
| 80 | 76 |
| 90 | 86 |
natural_image
Simple diagram showing a vertical bar inside an oval and a vertical line on the right (no text or symbols)
- Throw Ratio: 1.2:1
• Projection Angle: 100% Offset
• Minimum Throw Distance: 14 inches
Bluetooth Mode / Lantern Mode
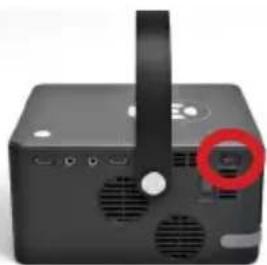
- Bluetooth Mode – The P6U can operate as a Bluetooth Compatible Speaker and Music Visualizer (LED effects). This mode is activated by hard-switching the power button to “Bluetooth” mode. The projector will say “Bluetooth Mode”.
natural_image
Black electronic device with ventilation slots and a red circular button highlighting a screen (no visible text or symbols)Connecting a Bluetooth compatible music source:
- Switch the Projector into "Bluetooth Mode"

natural_image
Simple diagram of a rectangular object with an arrow pointing upward (no text or symbols)Bluetooth
OFF
Projector
- Select "AAXA Tech" in your Bluetooth connection screen on your device. The devices should pair automatically.
Bluetooth Mode / Lantern Mode
- Selecting Music Visualization (LED Special Effects) – The P6U's onboard LED lights will light up matching the volume, tempo, and type of music.
Controls for Music Visualization:
• Light Button - Toggle Music Visualization (while in Bluetooth mode)
LED Mode
Mode 1, Mode 2, Mode 3, Lantern, Off
a. Light Mode 1
b. Light Mode 2
c. Light Mode 3
d. Lantern Mode
e. Off

natural_image
Black rectangular electronic device with ventilation slots and a handle, no visible text or symbolsLight Button
Bluetooth Mode / Lantern Mode
-
Lantern Mode: Lantern mode can be activated in Bluetooth mode and by toggling the "LED" button until the LED lights stay on constantly. LED light color can be selected by pressing the selection button.
-
Bluetooth Mode Controls:
-
Toggle Music Mode, Toggle Lantern On/Off, LEDs Off
- LED Color
• Volume Up / Down - Next / Previous Song

Connecting Speakers / Headphones

natural_image
Close-up of a black electronic device with ventilation slots and a red circular mark on the front panel (no visible text or symbols)Step 1: Connect your speakers/headphones to the projector's audio port.
Step 2: Ensure that the projector and/or the headphones are powered on.
Step 3: Place the headphones on and enjoy!
Connecting Bluetooth Speakers:
To connect a Bluetooth Speaker go to the Bluetooth submenu found under the settings menu. Please see page (37) for more information.

natural_image
Three electronic devices: two speakers, a microphone, and a headboard with Bluetooth symbol (no text or labels visible)*CAUTION:Prolonged use of headphones at a high volume may impair hearing.
Loading External Content

natural_image
Black rectangular device with attached handle and ventilation slots, showing a red circle highlighting a component (no text or symbols visible)The P6U can read files directly from both a TF Card and USB Drive.
Supported file types include: MP3 / WMA / OGG / WAV AVI / JPG / GIF/ BMP

(up to 64 GB)

natural_image
Black USB flash drive with metallic port (no text or symbols visible)(up to 64 GB)

natural_image
Black industrial computer case with ventilation slots and a handle, showing a small electronic component with a red circle highlighting it (no text or symbols visible)Loading External Content Cont.
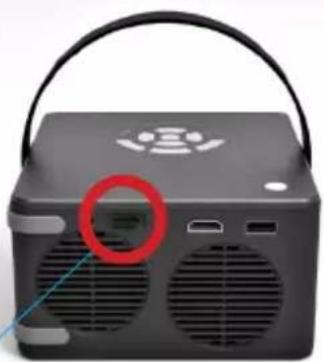
How to insert your TF Card
- Slide in your TF card into the TF card slot on the side of the P6U (as shown in picture).
• Gently slide the TF card until it clicks into place.

(up to 64 GB)
natural_image
Close-up of a black electronic device with ventilation slots and a handle, showing a red circle highlighting a component (no text or symbols visible)Loading External Content Cont.
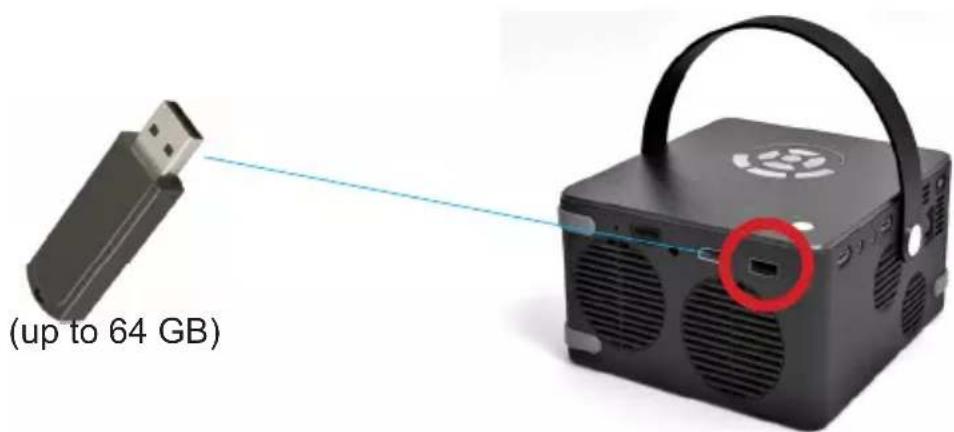
How to insert your USB Drive
- Slide your USB Drive into the USB port.
• Gently slide the drive until it cannot go in any further.
Loading External Content Cont.
Once your TF Card or USB Drive is inserted into the projector, the TF Card or USB Drive Storage will be loaded automatically and the content can be found through the Files icon on the Main Menu (See Page 18 for File Viewer Submenu). To load Text documents, select the Office icon. (See Page 21 to learn more)

Menu Screens
Chapter 3
Main Menu
The P6U features an Android 9.0 Operating System. This powerful operating system allows users to (1) Connect to WIFI (2) Stream Content (3) Play Videos/Pictures/Media (4) Mirror Smartdevices (5) View and Edit MS Office and PDF files (6) Browse internet (7) Load Apps.

- Press the left and right directional buttons to choose an icon from the main menu.
- To select a menu option, press the "OK" button in the middle of the navigation pad.
- To go back to the previous screen, press the "Back" button.
- To Jump back to the submenu, press the "Menu" button once.
- To return to the main menu, press the "Return" button twice.
Streaming Services Menu
- The use of Streaming Apps requires a working WIFI internet connection.
• Some apps will require a mouse. - To Access the App Store, please see "Apps Menu" Page (28).
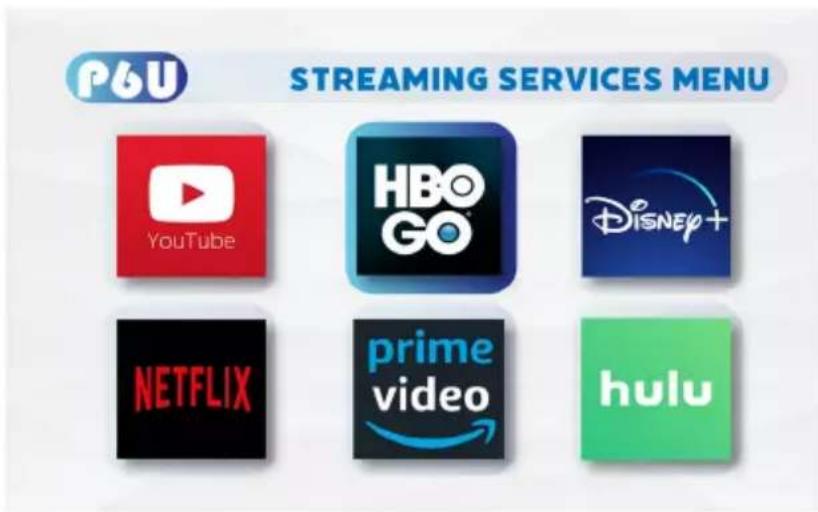
- Streaming Services require subscription including paid subscription.Users are responsible for their own subscriptions. Not all streaming apps are compatible in all regions.
Streaming Services Menu
- Primary Streaming Services can be accessed through the Streaming Submenu.
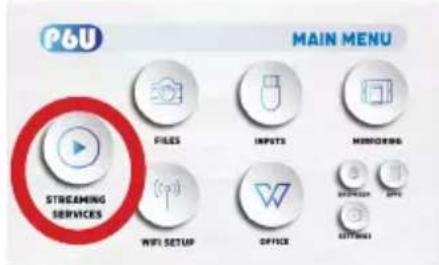
Note: Different regions will feature different streaming apps.
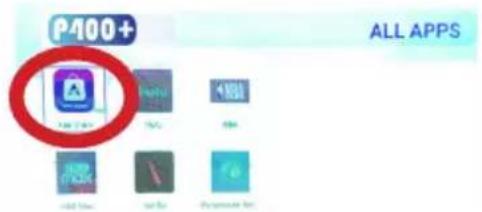
• Additional Streaming Apps can be downloaded via the App Store. The App store can be found under Apps and App Store.
Note: Not all regions support the App Store or the downloadable apps. Some regions may not include App Store on the device.

Files Menu
Opening A File:
- Select the "Files" icon in the Main Menu (Fig 3.8)
- In the Files Menu, select the external content device (USB/ Micro SD - TF Card) that contains the file you wish to open (Fig 3.9)
Fig. 3.8

Fig. 3.9

The P6U will show all folders and files you have on your USB or TF Card drive. Use the navigation buttons to select folders or files.
Wifi Menu (How to connect to Wifi)
How to Connect to Wifi:
- In the Main Menu, choose the "Wifi Setup" icon (Fig 3.4)
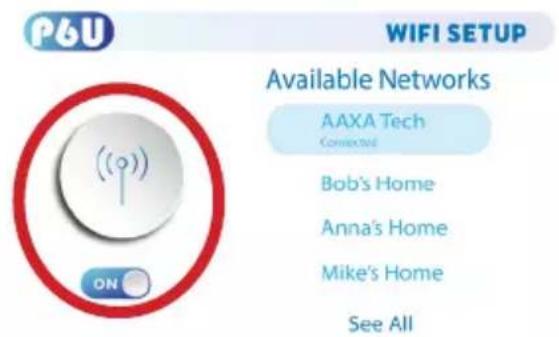
- In the Wifi Menu, toggle the Wifi icon to "On" and select the Wifi network you desire. Enter password and connect. (Fig 3.5)
- If you enter the password incorrectly, select "forget" the available network to start over.
Fig. 3.4 Fig. 3.5

Input Selection
The P6 Ultimate has 3 hard wired Inputs;
i. Digital Video (HDMI Compatible)
ii. AV (Audio Visual)
iii. USB Type C (Compatible)

natural_image
Black electronic device with ventilation slots and a handle, showing a red circular connector (no text or symbols visible)P6U
DIGITAL
VIDEO

natural_image
Close-up of a black electronic device with ventilation slots and a red circular annotation highlighting a component (no text or symbols visible)INPUTS MENU

AV

TYPE C
Office Menu
In the Main Menu, select the "Office" icon to access the N Docs app.
P6U
MAIN MENU

STREAMING SERVICES

FILES
INPUTS

MIRRORING
WIFI SETUP


BROWSER

APPS

SETTINGS
Office Menu
- In the Main Office Menu select "Removable Disk" Then select the file you want to display. File formats can include PDF, DOC, PPT, XLS
- Use the arrow keys on the keypad or remote control to scroll through the file.


Mirroring Menu
How To Screen Mirror Smartphone:
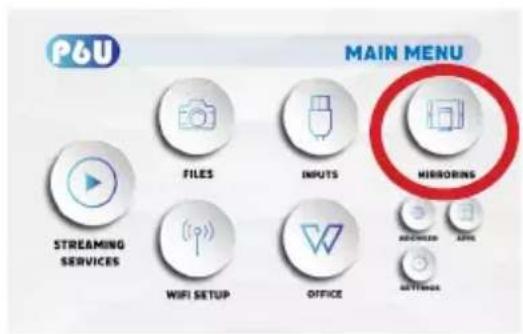
- The P6U allows screen mirroring of Android and Apple IOS smart devices. Android mirroring is done through a direct P2P connection whereas Apple IOS devices requires a router/network host for mirroring.
• After connecting the P6U to wifi, in the Main Menu, choose "Mirroring" icon (Fig 3.6)
• In the Mirroring Menu, choose Android, Iphone or Type C. (Fig 3.7) - Use built-in AirPlay, AirPinCast, AirPinPCSender to screen mirror from your iOS devices. Android devices can use Smart Mirror or similar onboard casting functions.
Fig. 3.6 Fig. 3.7

Mirroring Menu

To screen mirror IOS devices, your devices and the P6U have to be connected to the same Wifi network. Note: DMCA (copyright) content cannot be wirelessly mirrored. This includes content from streaming services such as Netflix, Hulu, Disney+, etc.
Mirroring Menu

To screen mirror Android devices, select the "Smart View" or similar direct P2P function in your smart phone. Select "P6U" as the display source.
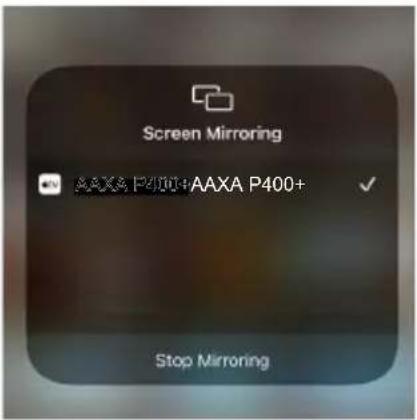
To screen mirror iOS device, after connecting the P6U and your device to the same WiFi network, please select "AAXA Tech" in the Screen Mirroring menu.
3D Function
- The P6U supports DLP 3D Projection Mode.
- Supported File Formats include Vertical and Horizontal 3D Mix. Youtube and other streaming 3D content is not supported at this time.
- To Activate 3D mode first begin playing a 3D file in the Video Player. Most 3D video files will begin playing either horizontally or vertically (fig 1).
- After the file begins playing press the "+" button on the remote control (fig 2).
- A submenu will pop out (fig 3) and the user can select the type of file 3D format (vertical, horizontal, or other)
Fig. 1 Fig. 3

natural_image
Two red cartoon birds standing on a dirt ground with a play button overlay (no text or symbols)Fig. 2


natural_image
Two red cartoon birds singing with a play button, set against a sandy background (no text or symbols)*Note: DLP 3D Projection Mode requires DLP 3D Glasses.
Browser Menu
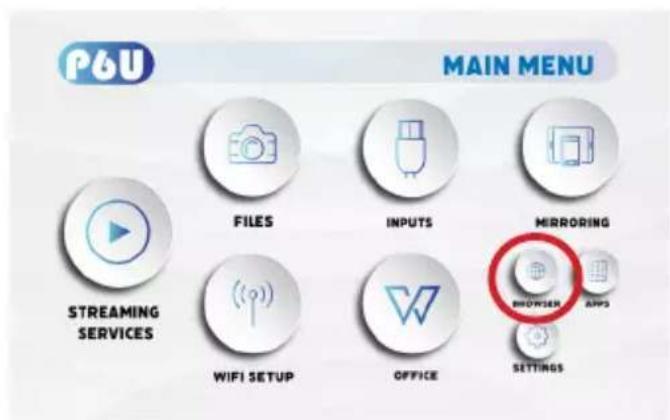
How to open an internet browser in the P6U:
In the Main Menu, select the "Browser" icon. Once the Chrome browser opens, press the 🔑 button on the navigation pad or the remote control to search or type web address.
Apps Menu
Some versions of the P6U (depending on region) will feature an “app store”. This app store can be accessed to download different apps. Many apps are region dependent - not all apps are compatible – some may not work.

Fig. 3.10 Fig. 3.11
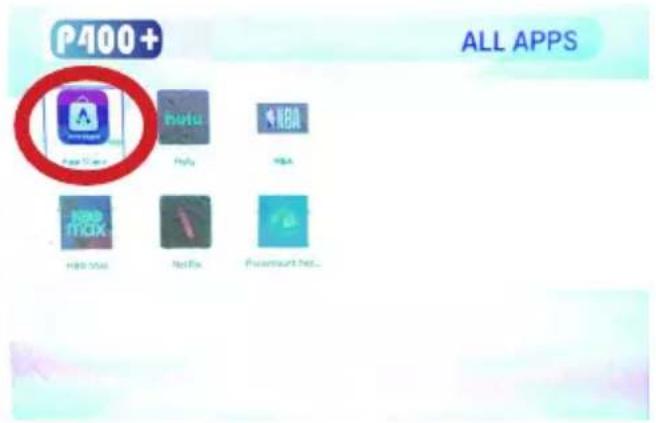
Note: It is not recommended that users load their own apps onto the P6U.
Settings Menu
Chapter 4
The Settings Menu can be accessed by selecting "Settings" on the Main Menu.

Within the settings menu, there are eight more submenus that allow you to customize your P6U to the settings you want.
Brightness
- Eco
- Standard
- Boost
• Network & Internet - Bluetooth
• Accounts & Sign In
• Device Preference
Wireless (Wifi Menu)
Advanced
Language
Display
- Keystone
- Projection Direction
- Mode image
• Color Temperature
Bluetooth
Upgrade/Reset
- Reset
- Update Android
About
Brightness Menu
To change the brightness on your P6U:
- Select the "Settings" icon (Fig. 3.1) in the Main Menu then choose "Brightness" (Fig. 3.2)
- Select the brightness you wish (Fig. 3.3)
Eco Mode/ Standard Mode/ Boost Mode

"Boost mode" should only be used in low temperature, low altitude environments with adequate clearance of exhaust/intake vents. A tripod is highly recommended. DO NOT block vents while operating in Boost mode.
*For Wifi Menu please see Page (20).
Advanced Settings
p6U

BRIGHTNESS

WIRELESS

SETTINGS MENU

LANGUAGE

DISPLAY
BLUETOOTH

UPGRADE/RESET

ABOUT
In the Advanced setting menu, you can set up:
• Network & Internet
- Bluetooth
- Accounts Sign in
- Apps
• Device Preferences: About, Date & Time, Language, Keyboard & Autofill, Mouse Mode, Display, Inputs, Sound, Storage, Screen Saver, Developer Options, Location, Security & Restrictions, Accessibility and Reset.
Language Settings

In the Language Settings menu, you can select your preferred language.
Display Settings
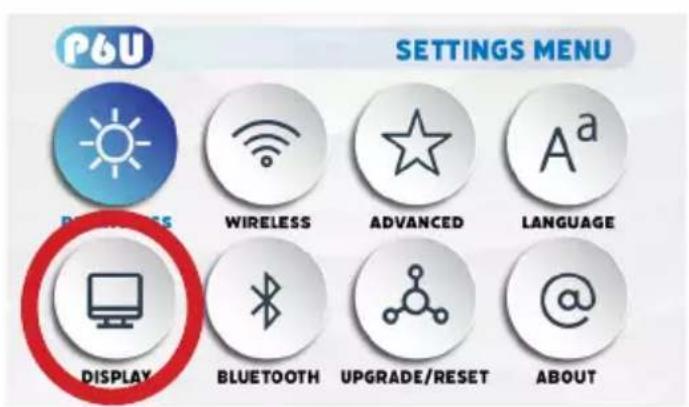

In the Display setting menu, you can
set up:
- Projection Direction
- Mode Image
- Color Temperature
Keystone
- Change Image Keystone
Projection Direction
- Front Vertical, Rear Vertical, Rear Inverted, Front Inverted
Mode Image
• Auto Mode, 4:3, 16:9
Color Temperature
• Medium, Cool, Warm
Adjusting Keystone
- The P6U features 4-way adjustable keystone.
- Enter the Keystone submenu (fig 1).
- Keystone is adjusted by selection each corner of the screen and adjusting either the X or Y coordinate. The adjustments will push or pull the screen at each corner along the X or Y axis. The amount of correction can be selected with the keypad or remote control.
- User can "restore" to original.
Fig. 1

Projection Direction

- Front Vertical
- Rear Vertical
- Rear Inverted
- Front Inverted
Mode Image Menu
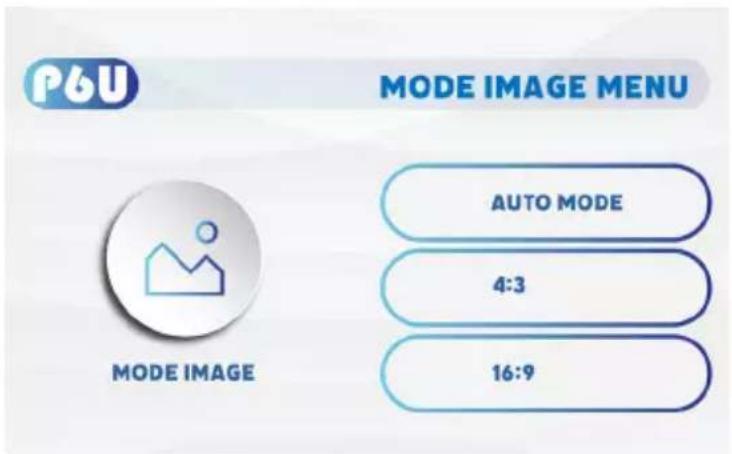
- Set the image mode to Auto Mode
- Set the image mode to 4:3
• Set the image mode to 16:9
Color Temperature

Color Temperature Color Temperature
• Set the color temperature to Cool
• Set the color temperature to Medium
• Set the color temperature to Warm
Bluetooth Menu

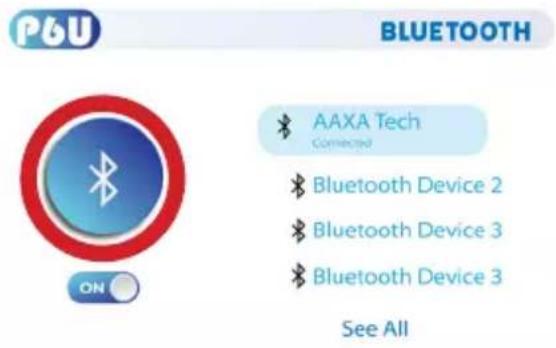
How to connect the P6U to bluetooth for audio out
- In the Settings Menu, go to the Bluetooth menu by selecting the bluetooth icon
- In the Bluetooth submenu, toggle the "On/Off" switch beneath the bluetooth icon to "On"
- Select the desired bluetooth device. Make sure that your device is not connected to any other devices and it is placed near the P6U.
- Note: Bluetooth is for audio output only – does not accept audio input or video streaming.
Backup/Reset Menu


How to reset the P6U
- In the Settings Menu, go to the Backup/Reset menu by selecting the Upgrade/Reset icon.
- In the Backup Reset menu, you can choose to Reset the P6U, or Update Android.
About Menu

How to view P6U "About" information
- In the Settings Menu, go to the About Menu by selecting the about icon
- In the About menu, you can Update System, check Device Name, Restart, Check Status & Legal Information, check Model Name & Android Version, check Android Security Patch Level, Kernel version and Build.
Notes
Please direct all customer service inquiries to:
AAXA Technologies, Inc. 17781 Sky Park Circle, Suite #F Irvine, CA 92614 (714) 957-1999
info@aaxatech.com


- Caution!
- Battery warning
- SUGGESTIONS
- Solar Charging Warning
- Table of Contents
- Chapter 1: P6U at a Glance
- Chapter 2: Getting Started
- Chapter 3: Menu Screens
- Chapter 4: Settings Menu 30
- P6U at a Glance
- Chapter 1
- Main Unit
- Remote & Keypad
- Accessories
- Getting Started
- Chapter 2
- Powering ON the projector
- Standby Mode
- Powering OFF the projector
- Charging the P6U
- Focus Adjustment / Throw Distance
- Focus Adjustment
- Bluetooth Mode / Lantern Mode
- Controls for Music Visualization:
- LED Mode
- Connecting Speakers / Headphones
- Connecting Bluetooth Speakers:
- Loading External Content
- Loading External Content Cont.
- How to insert your TF Card
- How to insert your USB Drive
- Menu Screens
- Chapter 3
- Main Menu
- Streaming Services Menu
- Files Menu
- Opening A File:
- Wifi Menu (How to connect to Wifi)
- How to Connect to Wifi:
- Input Selection
- The P6 Ultimate has 3 hard wired Inputs;
- Office Menu
- P6U
- Mirroring Menu
- How To Screen Mirror Smartphone:
- 3D Function
- Browser Menu
- How to open an internet browser in the P6U:
- Apps Menu
- Settings Menu
- Chapter 4
- Brightness
- Wireless (Wifi Menu)
- Advanced
- Language
- Display
- Bluetooth
- Upgrade/Reset
- About
- Brightness Menu
- To change the brightness on your P6U:
- Advanced Settings
- In the Advanced setting menu, you can set up:
- Language Settings
- Display Settings
- Adjusting Keystone
- Projection Direction
- Mode Image Menu
- Color Temperature
- Color Temperature Color Temperature
- Bluetooth Menu
- How to connect the P6U to bluetooth for audio out
- Backup/Reset Menu
- How to reset the P6U
- About Menu
- How to view P6U "About" information
- Notes
Brand : AAXA Technologies
Model : P6 Ultimate
Category : Projector