
AquaTouch AT758 - Beard trimmer PHILIPS - Free user manual and instructions
Find the device manual for free AquaTouch AT758 PHILIPS in PDF.

| Product type | Beard trimmer |
| Model | AquaTouch AT758 |
| Brand | Philips |
| Dimensions | Approx. 15 x 4 x 5 cm |
| Weight | Approx. 200 g |
| Power supply | Rechargeable battery |
| Battery type | Lithium-ion |
| Battery life | 60 minutes |
| Charging time | 8 hours |
| Waterproof | Yes, fully washable |
| Wet and dry use | Yes |
| Blade type | Self-sharpening stainless steel |
| Cutting length settings | 20 lockable settings (0.5–10 mm) |
| Usage | Facial hair trimming |
| Maintenance | Oil blades regularly |
| Cleaning | Rinse under running water |
| Safety | Not for children under 8 |
| Spare parts | Replacement blades available |
| Included accessories | Comb attachment, charger, cleaning brush |
Frequently Asked Questions - AquaTouch AT758 PHILIPS
User questions about AquaTouch AT758 PHILIPS
0 question about this device. Answer the ones you know or ask your own.
Ask a new question about this device
Download the instructions for your Beard trimmer in PDF format for free! Find your manual AquaTouch AT758 - PHILIPS and take your electronic device back in hand. On this page are published all the documents necessary for the use of your device. AquaTouch AT758 by PHILIPS.
USER MANUAL AquaTouch AT758 PHILIPS
natural_image
Close-up of a Philips electric shaver with three circular dials and water droplets (no text or symbols visible)フィリップス電動シェーバー
品番
AT758
AT757
取 扱 說 明 書
保証書付
natural_image
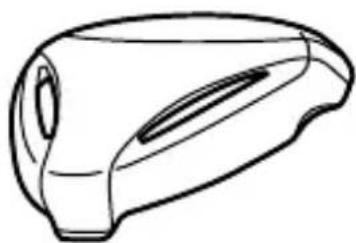
Line drawing of a pair of electric shaver with power button and control knob (no text or symbols)本体
natural_image
Line drawing of a stylized object resembling a device or container (no text or symbols)保護キャップ
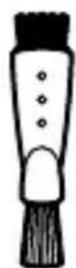
クリーニングブラシ
natural_image
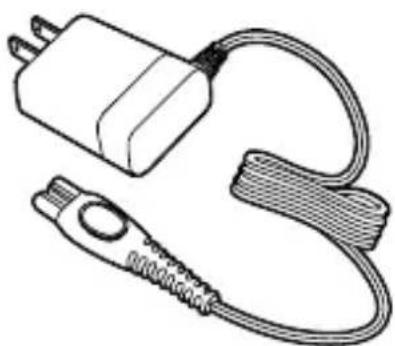
Line drawing of a connected electrical plug and cable (no text or symbols)充電アダプタ HQ850)
natural_image
Line drawing of a three-ring mechanical component with a top bracket (no text or symbols)ユニットフレーム
内刃
natural_image
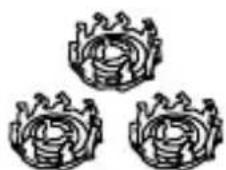
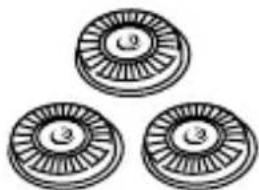
Three circular mechanical components with radial grooves, no text or symbols visible外刃

natural_image
Symmetrical mechanical component diagram with four circular ports and a central triangular hub (no text or symbols)保持板
natural_image
Line drawing of a mechanical component or housing (no text or symbols)
natural_image
Line drawing of a hand-painted electric shaver with no text or symbolsnatural_image
Diagram showing a medical device with a catheter inserted, and an arrow pointing to the catheter tip (no text or symbols present)natural_image
Diagram of a mechanical or electrical component with no visible text, numbers, or symbols充電中
充電表示ランプが 緑色に点滅
充電完了
充電表示ランプが 緑色に点灯
natural_image
Line drawing of a three-bladed electric shaver with an arrow pointing to it (no text or symbols)natural_image
Illustration of two people using flashlights, one pointing at the mouth and the other looking down (no text or symbols)natural_image
Line drawing of a person applying eye examination to their ear (no text or symbols present)ほお
natural_image
Illustration of a hand holding a cylindrical object with an arrow indicating motion (no text or symbols)あごの裏側
natural_image
Illustration of a person performing a neck massage or acupressure technique (no text or symbols present)ほおの奥から首筋
natural_image
Line drawing of a person receiving a finger massage or pressure technique, with no text or symbols present.鼻の下
natural_image
Illustration showing a person using a handheld device to clean a plant root (no text or symbols present)natural_image
Diagram of a mechanical component with arrows indicating direction (no text or symbols)natural_image
Medical illustration showing two views of a surgical procedure in the lower view, with no visible text or symbols.natural_image
Illustration of a hand holding a device with concentric circular patterns (no text or symbols)natural_image
Diagram of a mechanical component with an arrow indicating direction, no visible text or symbols分解掃除の仕方
text_image
Medical illustration showing two steps of a surgical procedure on a device's head, labeled with arrows and numbered annotations.natural_image
Technical line drawing of a mechanical component with top and side views (no text or symbols)text_image
Diagram illustrating three mechanical components with numbered arrows indicating motion or assembly stepsnatural_image
Illustration of two hands using a tool to adjust a gear and a mechanical component (no text or symbols present)刃の取り付け方
natural_image
Medical illustration of a cross-sectional view of the brain with an arrow indicating direction (no text or labels present)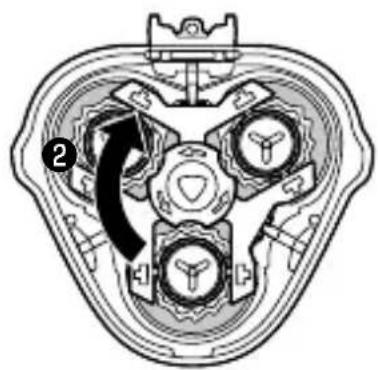
natural_image
Cross-sectional diagram of a mechanical component with internal gears and a central hub (no text or symbols)text_image
Diagram illustrating two steps of a mechanical or electrical component assembly, labeled ① and ②, with directional arrows indicating process flow.刃の交換
natural_image
Illustration of a medical device with an arrow pointing to a component (no text or symbols present)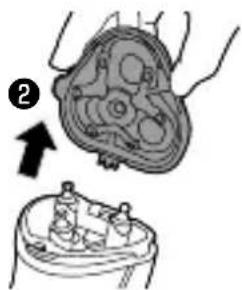
natural_image
Medical illustration showing a hand holding a circular anatomical structure with an arrow pointing to it, and a separate view of a device (no text or symbols present)text_image
Diagram of a biological or anatomical structure with numbered annotations and directional arrows indicating flow or movement.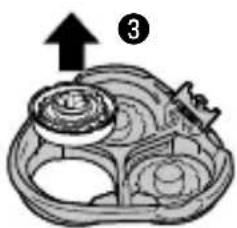
natural_image
Illustration of a tray with three plates and a fork, no text or symbols presentnatural_image
Illustration showing a food item being processed into a bowl, with a magnified view of the lid (no text or symbols)text_image
Diagram of a decorative object with numbered annotations indicating parts of the base and interior features.text_image
Medical illustration showing two steps of a surgical procedure on a patient's abdomen, labeled with arrows and numbered indicators.natural_image
Technical diagram of a mechanical component with two views: top shows internal gear-like structure, bottom shows close-up with circular features (no text or symbols)natural_image
Technical line drawing of a mechanical assembly with scissors and parts (no text or symbols)natural_image
Technical diagram of a mechanical component with directional arrows indicating force or movement (no text or symbols present)text_image
Diagram of a hairdryer with labeled parts including disposable, power cord, and cableIntroduction
Congratulations on your purchase and welcome to Philips! To fully benefit from the support that Philips offers, register your product at www.philips.com/welcome.
Please read this user manual, as it contains information about the wonderful features of this shaver as well as some tips to make shaving easier and more enjoyable.
General description (Fig. 1)
1 Protection cap
2 Shaving unit
3 Shaving unit release button
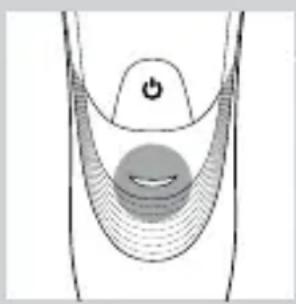
4 Shaver on/off button
5 Shaving head symbol
6 Charging light
7 Cleaning brush
8 Adapter
Important
Read this user manual carefully before you use the appliance and save it for future reference.
Danger
Keep the adapter dry. -
- This symbol means: Forbidden to clean under a running tap.
Warning
The adapter contains a transformer. Do not cut - off the adapter to replace it with another plug, as this causes a hazardous situation.
This appliance is not intended for use by persons - (including children) with reduced physical, sensory or mental capabilities, or lack of experience
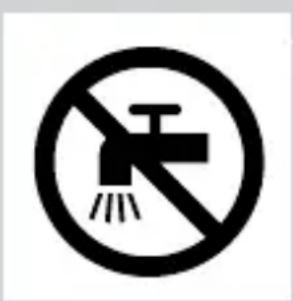
text_image
Prohibition sign with a faucet symbol and diagonal line, indicating no fire or water discharge.and knowledge, unless they have been given supervision or instruction concerning use of the appliance by a person responsible for their safety. Children should be supervised to ensure that they - do not play with the appliance.
Always unplug the shaver before you clean it - under the tap.
Caution
Never use water hotter than 80^ C to rinse the - shaver.
Be careful with hot water. Always check if the - water is not too hot, to prevent your hands from getting burnt.
The shaver and the other accessories are not -dishwasher-proof.
Warning: Remove the detachable cord from the - handheld part before cleaning this part in water.
Water may leak from the socket at the bottom - of the shaver when you rinse it. This is normal and not dangerous because all electronics are enclosed in a sealed power unit inside the shaver.
Do not use the shaver, adapter or any other part - if it is damaged, as this may cause injury. Always replace a damaged adapter or part with one of the original type.
Use, charge and store the appliance at a - temperature between 10°C and 35°C.
Always place and use the shaver on a surface that - is fluid-resistant.
-Only use the adapter and accessories supplied.
Always put the protection cap on the shaver - to protect the shaving heads when you are travelling.
-If the shaver is subjected to a major change in temperature, pressure or humidity, let it acclimatise for 30 minutes before you use it.
natural_image
Simple line drawing of a showerhead spraying over water (no text or symbols)Electromagnetic fields (EMF)
This Philips appliance complies with all applicable - standards and regulations regarding exposure to electromagnetic fields (EMF).
General
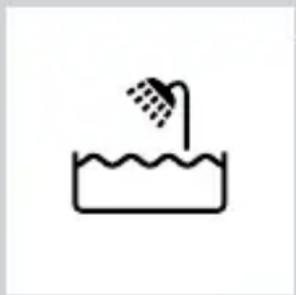
- This symbol means: Suitable to be used in the shower.
It is allowed to use this appliance close to a - bathtub, shower or other containers filled with water.
The adapter is equipped with an automatic - voltage selector and is suitable for mains voltages ranging from 100 to 240 volts.
The adapter transforms 100-240 volts to a safe - low voltage of less than 24 volts.
Charging
Note: The shaver cannot be used directly from the mains.
It takes approx. 8 hours to fully charge the shaver.
When you charge the shaver for the first time or after a long period of disuse, let it charge until the charging light lights up continuously.
A fully charged shaver provides up to 40 minutes of shaving time.
The shaving time may be less than 40 minutes as a result of your shaving behaviour, your cleaning habits or your beard type.
Charge indications
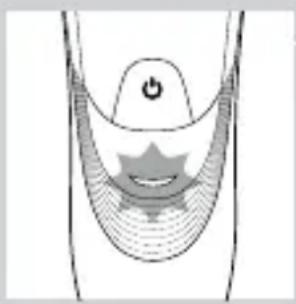
Battery low
natural_image
Diagram of a medical or anatomical structure with a central star-like shape and a power button, no text or symbols present.- When the battery is almost empty (when there are only 5 or fewer shaving minutes left), the charging light starts to flash orange.
When you switch off the shaver, the charging light - continues to flash orange for a few seconds.
natural_image
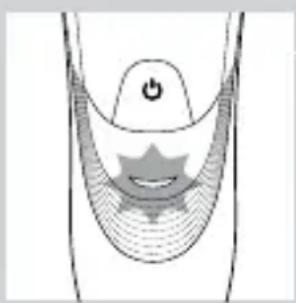
Diagram of a stylized human head with a star-shaped symbol inside, no text or labels presentCharging
- When the shaver is charging, the charging light flashes green.
natural_image
Diagram of a curved mechanical or electrical component with a central circular feature and a power button (no text or symbols)Battery fully charged
- When the battery is fully charged, the charging light lights up green continuously.
Note: After approx. 30 minutes, the charging light goes out to save energy.
Charging
1 Put the small plug in the shaver.
2 Put the adapter in the wall socket.
The charging light shows the charging status of the shaver (see section ‘Charge indications’ in this chapter).
Using the shaver
Note: This shaver can be used in the bath or shower. For safety reasons, It can therefore not be used directly from the mains.
Shaving tips and tricks
This shaver is suitable for both wet and dry use. - Use the shaver with shaving gel or foam for extra skin comfort, or use the shaver dry for extra convenience.
Note: We advise you to use the shaver with shaving gel or foam when you use it for a wet shave. Do not use thick shaving cream or shaving oil with this shaver.
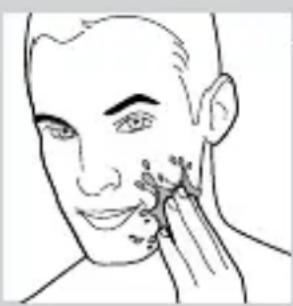
For optimal shaving results, make circular - movements during use.
The shaver is waterproof and can be used in the - bath or shower.
Your skin may need 2 or 3 weeks to get - accustomed to the Philips shaving system.
Wet shaving
natural_image
Line drawing of a person's face with a finger pointing to the nose area (no text or symbols)
natural_image
Line drawing of a person applying face-to-face care to the ear (no text or symbols)1 Apply some water to your skin.
2 Apply shaving foam or shaving gel to your skin.
3 Rinse the shaving unit under the tap to ensure that the shaving unit glides smoothly over your skin.
4 Press the on/off button once to switch on the shaver.
5 Move the shaving heads in circular movements over your skin.
natural_image
Illustration of a person using a handheld device to clean water from a bottle (no text or symbols visible)Note: Rinse the shaver under the tap regularly to ensure that it continues to glide smoothly over your skin.
6 After shaving, press the on/off button once to switch off the shaver and dry your face.
7 Clean the shaver (see chapter ‘Cleaning and maintenance’).
Note: Make sure you rinse all foam or shaving gel off the shaver.
Dry shaving

natural_image
Illustration of a person using a handheld device to interact with another person (no text or symbols present)1 Press the on/off button once to switch on the shaver.
2 Move the shaving heads in circular movements over your skin.
3 After shaving, press the on/off button once to switch off the shaver.
4 Clean the shaver (see chapter ‘Cleaning and maintenance’).
Cleaning and maintenance
Remove the detachable cord from the handheld part before cleaning this part in water.
Never use compressed air, scouring pads, abrasive cleaning agents or aggressive liquids such as petrol or acetone to clean the appliance.
Clean the shaver after every shave for optimal - shaving performance. Regular cleaning guarantees better shaving - performance.
ENGLISH
Be careful with hot water. Always check if the - water is not too hot, to prevent your hands from getting burnt.
Note: Water may leak from the socket at the bottom of the shaver when you rinse it. This is normal and not dangerous because all electronics are enclosed in a sealed power unit inside the shaver.
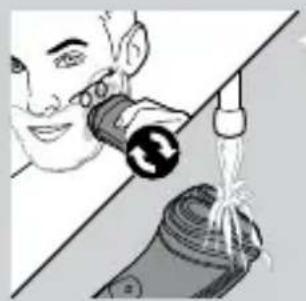
Cleaning the shaving unit under the tap
natural_image
Three-step medical procedure illustration showing a surgical procedure on a patient's abdomen, including insertion and root manipulation steps (no text or labels)1 Switch off the shaver and disconnect it from the mains.
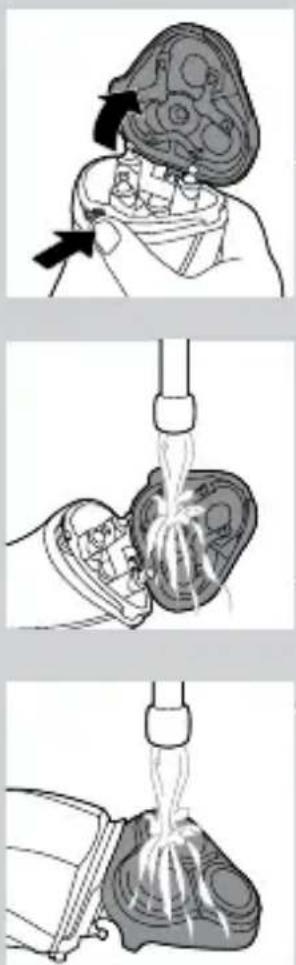
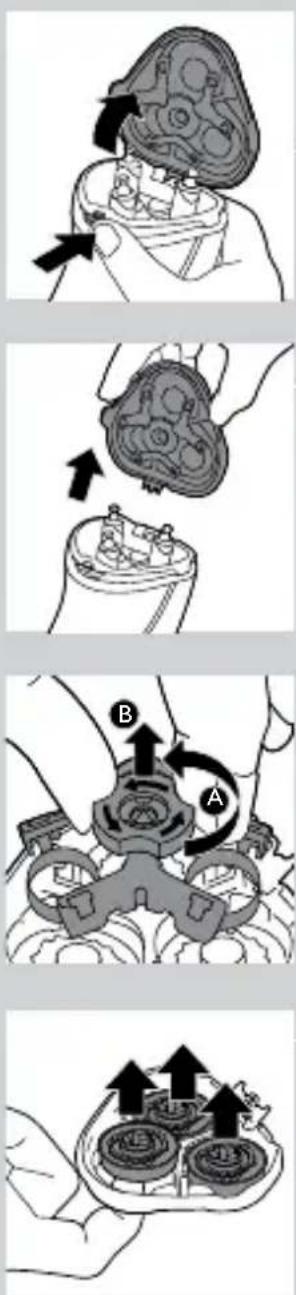
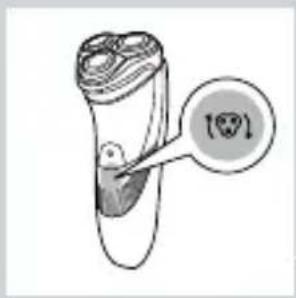
2 Press the release button to open the shaving unit.
3 Rinse the shaving unit and hair chamber under a hot tap for 30 seconds.
Be careful with hot water. Always check if the water is not too hot, to prevent your hands from getting burnt.
- Rinse the hair chamber and the inside of the shaving unit.
- Rinse the outside of the shaving unit.
4 Close the shaving unit and shake off excess water.
Be careful not to hit the shaving unit against anything while shaking off excess water.
Never dry the shaving unit and the hair chamber with a towel or tissue, as this may damage the shaving unit.
5 Open the shaving unit again and leave it open to let the shaver dry completely.
Cleaning the shaving unit with the cleaning brush
1 Switch off the shaver and disconnect it from the mains.
2 Press the release button to open the shaving unit.
3 Pull the shaving unit off the shaver.
4 Turn the lock anticlockwise (A) and remove the retaining frame (B).
5 Remove and clean one shaving head at a time. Each shaving head consists of a cutter and a guard.
Note: Do not clean more than one cutter and guard at a time, since they are all matching sets. If you accidentally mix up the cutters and guards, it may take several weeks before optimal shaving performance is restored.
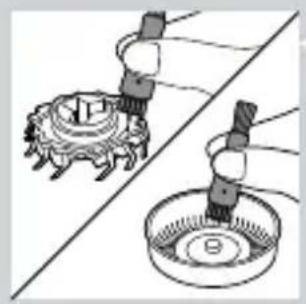
Remove the cutter from the shaving guard and - clean it with the brush.
ENGLISH
natural_image
Illustration of two hands operating a mechanical device with a circular base and a gear-like component (no text or symbols)- Clean the inside and outside of the shaving guard with the brush.

natural_image
Illustration of a hand holding two circular objects with a downward arrow, no text or symbols present6 Put the shaving heads back into the shaving unit.
text_image
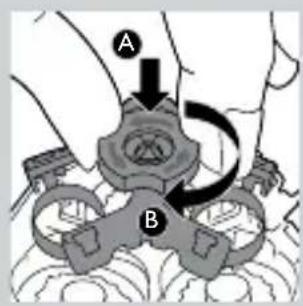
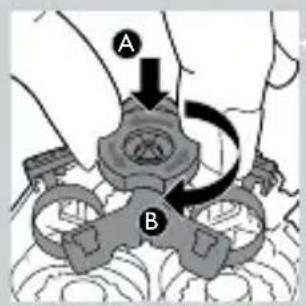
A B7 Put the retaining frame back into the shaving unit (A) and turn the lock clockwise (B).
natural_image
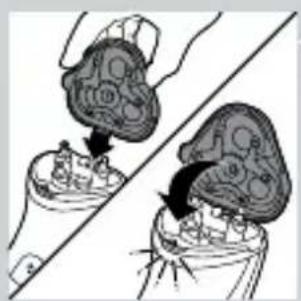
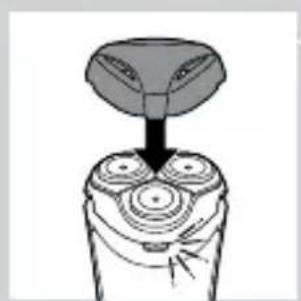
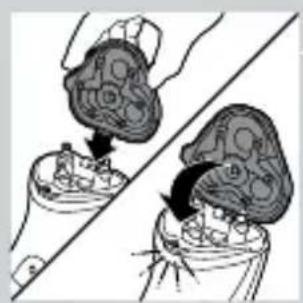
Illustration of two hands performing a manual task on a device, showing internal components and motion arrows (no text or symbols)8 Insert the lug of the shaving unit into the slot in the top of the shaver. Then close the shaving unit.
Note: If the shaving unit does not close smoothly, check if you have inserted the shaving heads properly and if the retaining frame is locked.
Storage
natural_image
Diagram of a hand holding a three-circular object with a top hat, showing mechanical components (no text or symbols)- Put the protection cap on the shaver to prevent damage.
Replacement
For maximum shaving performance, we advise you to replace the shaving heads every two years.
Replacement reminder
The shaving head symbol will light up to indicate that the shaving heads need to be replaced. Replace damaged shaving heads right away.
Only replace the shaving heads with HQ8 Philips Shaving Heads.
text_image
Diagram showing a test tube with a magnified view of the test tube labeled '100' and a circular annotation pointing to it.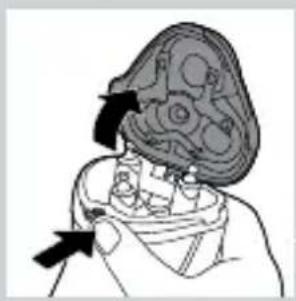
natural_image
Medical illustration showing a surgical procedure on a patient's head (no text or labels)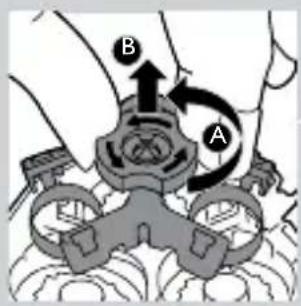
text_image
Diagram showing mechanical assembly with labeled parts A and B, likely illustrating a gear or valve mechanism.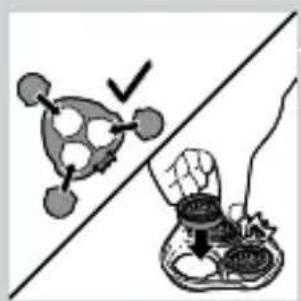
natural_image
Illustration of a food safety scenario: a hand holding a bowl with a checkmark, separated by a diagonal line (no text or symbols)1 The shaving head symbol lights up orange continuously.
2 Switch off the shaver. Disconnect the shaver from the mains, remove it from the Jet Clean System or remove it from the charging stand.
3 Press the release button to open the shaving unit.
4 Pull the shaving unit off the shaver.
5 Turn the lock anticlockwise (A) and remove the retaining frame (B).
6 Remove the shaving heads and place new ones in the shaving unit.
Note: Make sure that the projections of the shaving heads fit exactly into the recesses.
ENGLISH
text_image
A B7 Put the retaining frame back into the shaving unit (A) and turn the lock clockwise (B).
natural_image
Illustration of two hands performing a manual task with a tool, showing a hand pressing down on a device (no text or symbols present)8 Insert the lug of the new shaving unit into the slot in the top of the shaver. Then close the shaving unit.
text_image
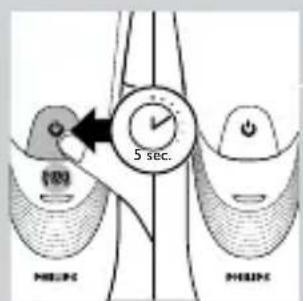
0 5 sec. PHILIPS PHILIPSNote: If the shaving unit does not close smoothly, check if you have inserted the shaving heads properly and if the retaining frame is locked.
9 Press and hold the on/off button for 5 seconds to reset the replacement reminder on the shaver. The orange light goes out.
Ordering accessories
To buy accessories or spare parts, visit www.
shop.philips.com/service or go to your Philips dealer. You can also contact the Philips Consumer Care Centre in your country (see the worldwide guarantee leaflet for contact details).
To retain the top performance of your shaver, make sure you clean it regularly and replace its shaving heads at the recommended time.
Shaving heads

text_image
2yrs- We advise you to replace your shaving heads every two years. Always replace them with HQ8 Philips Shaving Heads.
Environment
text_image
Symbol of a trash bin with crossed-out lanes and a blank rectangular block below- Do not throw away the appliance with the normal household waste at the end of its life, but hand it in at an official collection point for recycling. By doing this, you help to preserve the environment.
- The built-in rechargeable shaver battery contains substances that may pollute the environment. Always remove the battery before you discard or hand in the shaver at an official collection point. Dispose of the battery at an official collection point for batteries. If you have trouble removing the battery, you can also take the appliance to a Philips service centre. The staff of this centre will remove the battery for you and will dispose of it in an environmentally safe way.
Removing the rechargeable shaver battery
Only remove the rechargeable battery when you discard the shaver. Make sure the rechargeable battery is completely empty when you remove it.
1 Disconnect the shaver from the mains.
2 Let the shaver operate until it stops.
ENGLISH
3 Undo the screws in the back of the shaver and in the hair chamber.
4 Remove the front panel and the back panel.
5 Bend the 6 hooks aside and take out the power unit.
Be careful, the hooks are sharp.
6 Remove the rechargeable battery.
Be careful, the battery strips are sharp.
Do not connect the shaver to the mains again after you have removed the rechargeable battery.
Guarantee and support
If you need information or support, please visit www.philips.com/support or read the separate worldwide guarantee leaflet.
Guarantee restrictions
The shaving heads (cutters and guards) are not covered by the terms of the international guarantee because they are subject to wear.
Troubleshooting
This chapter summarises the most common problems you could encounter with the appliance. If you are unable to solve the problem with the information below, visit www.philips.com/support for a list of frequently asked questions or contact the Consumer Care Centre in your country.
| Problem Possible cause Solution | ||
| The shaver does not shave as well as it used to. | The shaving heads are damaged or worn. | Replace the shaving heads (see chapter ‘Replacement’). |
| Foam or gel residues clog up the shaving heads. | Rinse the shaving unit under a hot tap (see chapter ‘Cleaning and maintenance’). | |
| Long hairs obstruct the shaving heads. | Clean the shaving heads one by one (see chapter ‘Cleaning and maintenance’). | |
| You have not inserted the shaving heads properly. | Make sure that the projections of the shaving heads fit exactly into the recesses (see chapter ‘Cleaning and maintenance’). | |
| The shaver does not work when I press the on/off button. | The rechargeable battery is empty. | Recharge the battery (see chapter ‘Charging’). |
| The temperature of the shaver is too high. In this case, the shaver does not work. | As soon as the temperature of the shaver has dropped sufficiently, you can switch on the shaver again. | |
| The shaver does not work, although it is connected to the mains. | If the shaver does not work when you press the on/off button, the battery is empty. | This shaver is not designed to be used directly from the mains, so you should recharge the battery (see chapter ‘Charging’). |