
DSP-1280 - Processor Crestron - Free user manual and instructions
Find the device manual for free DSP-1280 Crestron in PDF.


| Product Type | Digital Signal Processor |
| Audio Inputs | 12 (8 mic/line, 4 line) |
| Audio Outputs | 8 balanced line |
| Digital Audio Protocol | Dante (up to 32x32) |
| Control | Ethernet (TCP/IP), Crestron control system |
| Dimensions (H x W x D) | 1.7 in x 17.2 in x 8.5 in (43 mm x 437 mm x 216 mm) |
| Weight | 5.5 lb (2.5 kg) |
| Power Supply | 100-240 V AC, 50/60 Hz, 30 W max |
| Operating Temperature | 32°F to 104°F (0°C to 40°C) |
| Mounting | 1U rack-mount, includes rack ears |
| Main Functions | Audio mixing, routing, filtering, AEC, automatic gain control, Dante integration |
| Cleaning & Care | Wipe with a soft, dry cloth. Do not use liquids or aerosols. |
| Safety | Class I equipment; disconnect power before servicing. |
| Repairability | Contact Crestron True Blue Support for service; no user-serviceable parts. |
| Included Accessories | Power cord, rack ears, rubber feet |
| Compliance | FCC Part 15, CE, RoHS |
| Warranty | Limited 3-year warranty |
| Software Compatibility | XiO Cloud, Crestron Toolbox, Crestron Composer |
Frequently Asked Questions - DSP-1280 Crestron
User questions about DSP-1280 Crestron
0 question about this device. Answer the ones you know or ask your own.
Ask a new question about this device
Download the instructions for your Processor in PDF format for free! Find your manual DSP-1280 - Crestron and take your electronic device back in hand. On this page are published all the documents necessary for the use of your device. DSP-1280 by Crestron.
USER MANUAL DSP-1280 Crestron
Provisioning and Management Service
The original language version of this document is U.S. English. All other languages are a translation of the original document.
Crestron product development software is licensed to Crestron dealers and Crestron Service Providers (CSPs) under a limited nonexclusive, nontransferable Software Development Tools License Agreement. Crestron product operating system software is licensed to Crestron dealers, CSPs, and end-users under a separate End-User License Agreement. Both of these Agreements can be found on the Crestron website at www.crestron.com/legal/software_license_agreement.
The product warranty can be found at www.crestron.com/warranty.
The specific patents that cover Crestron products are listed online at www.crestron.com/legal/patents.
Certain Crestron products contain open source software. For specific information, please visit www.crestron.com/opensource.
Crestron, the Crestron logo, 3-Series, 4-Series, AirMedia, Avia, Crestron Connected, Crestron Fusion, Crestron Mercury, Crestron Toolbox, DigitalMedia, DM, DM 8G+, DM NAX, DM NVX, DMPS Lite, FlipTop, infiNET EX, XiO Cloud, and Zūm are either trademarks or registered trademarks of Crestron Electronics, Inc. in the United States and/or other countries. Acer is either a trademark or registered trademark of Acer, Inc. in the United States and/or other countries. Dante is either a trademark or registered trademark of Audinate Pty Ltd. in the United States and/or other countries. Barco is either a trademark or a registered trademark of Barco, Inc. in the United States and/or other countries. BenQ is either a trademark or a registered trademark of BenQ America Corp. in the United States and/or other countries. Bluetooth is either a trademark or registered trademark of Bluetooth SIG, Inc. in the United States and/or other countries. Blu-ray is either a trademark or a registered trademark of Blu-ray Disc Association (BDA) in the United States and/or other countries. Christie is either a trademark or registered trademark of Christie Digital Systems USA, Inc. in the United States and/or other countries. Elo is either a trademark or a registered trademark of Elo Touch Solutions, Inc. in the United States and/or other countries. Epson is either a trademark or a registered trademark of Epson America, Inc. in the United States and/or other countries. Jabra and PanaCast are trademarks of GN Audio A/S in the United States and/or other countries. GUDE is either a trademark or a registered trademark of GUDE Systems GmbH United States and/or other countries. HDMI is either a trademark or a registered trademarks of HDMI Licensing LLC in the United States and/or other countries. InFocus is either a trademark or a registered trademark of InFocus Corporation in the United States and/or other countries. Legrand is either a trademark or a registered trademark of Legrand North America, LLC in the United States and/or other countries. Lenovo and ThinkSmart are either trademarks or registered trademarks of Lenovo in the United States and/or other countries. LG is either a trademark or a registered trademark of LG Electronics in the United States and/or other countries. Active Directory, Azure, Excel, Microsoft, Microsoft Teams, and Skype are either trademarks or registered trademarks of Microsoft Corporation in the United States and/or other countries. Okta is either a trademark or a registered trademark of Okta, Inc. in the United States and/or other countries. Optoma is either a trademark or a registered trademark of Optoma Technology, Inc. in the United States and/or other countries. JavaScript is either a trademark or a registered trademark of Oracle Corporation in the United States and/or other countries. Philips is either a trademark or a registered trademark of Philips North America LLC in the United States and/or other countries. Polycom is either a trademark or a registered trademark of Plantronics, Inc. in the United States and/or other countries. Raritan is either a trademark or a registered trademark of Raritan, Inc. in the United States and/or other countries. Samsung is either a trademark or a registered trademark of Samsung Electronics Co., Ltd in the United States and/or other countries. ServiceNow is either a trademark or a registered trademark of ServiceNow, Inc. in the United States and/or other countries. NEC and Sharp are either trademarks or registered trademarks of Sharp NEC Display Solutions of America, Inc. in the United States and/or other countries. SMART Board is either a trademark or a registered trademark of Smart Technologies ULC in the United States and/or other countries. Sony is either a trademark or a registered trademark of Sony Group Corporation in the United States and/or other countries. USB-C and USB Type-C are either trademarks or registered trademarks of USB Implementers Forum, Inc. in the United States and/or other countries. DisplayPort is either a trademark or registered trademark of Video Electronics Standards Association in the United States and/or other countries. ViewSonic is either a trademark or a registered trademark of ViewSonic Corporation in the United States and/or other countries. Vivitek is either a trademark or a registered trademark of Vivitek Corporation in the United States and/or other countries. Wi-Fi is either a trademark or a registered trademark of Wi-Fi Alliance in the United States and/or other countries. Zoom Rooms is either a trademark or a registered trademark of Zoom Video Communications, Inc. in the United States and/or other countries. Other trademarks, registered trademarks, and trade names may be used in this document to refer to either the entities claiming the marks and names or their products. Crestron disclaims any proprietary interest in the marks and names of others. Crestron is not responsible for errors in typography or photography.
Contents
Introduction ...1
How to Order...2
Select Room Licenses...2
Purchasing Instructions...3
New XiO Cloud Accounts...3
Existing XiO Cloud Accounts...4
Log in to the Service 6
Navigate the Service 9
Build the Environment....11
Create the Building Address Book 11
Manage Buildings...12
Manage Space Properties...16
Create the Group Tree...16
Manage Groups...17
Manage Rooms...21
Manage Desks 30
Claim Devices 42
Add Devices to Rooms or Desks 47
Cut and Paste 50
Download Inventory 51
Licensed Features
Apply Multiple Licenses
Update Multiple Licenses
Filter and Manage Licenses 55
Manage Devices
Rename a Device 57
View Device Status 58
View Status for a Single Device 59
View Status for a Group of Devices 60
Configure Device Settings 61
Configure Settings for a Single Device 61
Configure Settings for a Group of Devices 64
Prevent Unnecessary Restarts 67
Manage Licenses 68
Manage Licenses for a Single Device 68
Manage Licenses for a Group or Room 71
Scheduled Actions 72
Create a Scheduled Action...74.
Delete a Scheduled Action...76
Dashboard ..77
Activity Log...79
Device Metadata...81.
Update Firmware...81
Restart Devices...84
Refresh Devices...84
Manage Users...85
Add a New User...85
Edit User Information...87.
Manage User Access...88
Delete a User...89
Download User Activity Audit Log 90
Single Sign-On 91
Account Dashboard 92
Device Status 94
Occupied Rooms 96
Active Alerts - last 48 hours 98
Firmware Releases 99
Room Utilization 100
Room Usage Over Time 101
Uptime By Device 102
Device Offline Incidents 103
Room Services Expiration 104
Historical Reports 105
What's New Message 109
Progress Tracker 110
Alerts 111
Configure Contact Information 111
Configure Alert Levels 112
Manage Alerts 114
Add a New Alert 116
Delete an Alert 116
View Alerts 117
File Library 118
Manage Files 119
Add a Program or Project 120
Edit a Program or Project 122
EDIDs 124
Add a Custom EDID.File...125.
Delete a Custom EDID File...126
Manage Images...128
Add an Image File 129
Delete an Image .File...130
Load a Program to a Control System 131
Upload a New Program...131
Manage Programs...133
Edit a Program 134.
Delete a Program...136
Load a Program to Device 136
Manage a Loaded Program...138
Edit a Loaded Program...138
Start/Stop a Loaded Program...139
Unregister a Loaded Program 139
Remote Control 140
Enable Remote Control 140
Request Remote Control Access 141
Initiate a Request 141
Accept or Decline the Request 142
End a Remote Control Session 143
View a User Interface 143
Control a User Interface 144
Privacy Considerations...145
Enable API Access 146
Manage Support Providers 148
Add a Support Provider 149
Manage Support Providers 150
FAQs 152
Troubleshooting 157
Works with XiO Cloud 159
Audio 160
Amplifiers 160
Digital Signal Processors 160
Multiroom Audio Accessories 160
Conferencing 161
AirMedia Wireless Presentation and Conferencing 161
Crestron Flex Solutions 161
Crestron Flex Hubs and Pods 166
Connectivity 168
FlipTop Cable Compartments...168
USB Switchers ..168
Control ...169
3-Series Control Systems 169
4-Series Control Systems...169.
Crestron Virtual Control Server-Based Control Systems...169.
Media Presentation Controllers 169
Smart Display Controllers...170
Lighting and Environmental...171
Lighting Control Systems...171
Power 172
Power Conditioners...172
Scheduling ..173.
Room Scheduling Touch Screens...173
Desk Scheduling Touch Screens...173
Sensors 174
Occupancy Sensors 174
Third-Party Devices 175
Crestron Connected Devices 175
Crestron Driver Devices 176
Third-Party Device Monitoring Gateway Software 176
Touch Screens 177
Tabletop Touch Screens 177
Touch Screen Control Systems 177
Wall Mount Touch Screens 177
Wireless Touch Screens 178
Video 179
AirMedia Wireless Presentation and Conferencing 179
Digital Graphics Engines 179
DigitalMedia Solutions 179
HDMI Solutions 181
Smart Display Controllers 181
Appendix A: Configure ServiceNow for XiO Cloud Alerts 182
Client Prerequisites 182
Turn on ServiceNow Within XiO Cloud 183
Create XiO Incident Script 184
When to Run Tab 184
Actions Tab 184
Close Incident XiO Script 187
When to Run Tab 187
Actions Tab 187
Close ServiceNow Incidents in XiO Cloud 188
Add a Subscription Key to ServiceNow 189
Inbound Actions Setup 191
REST Message Setup 192
Business Rule Setup...195.
Test the Connection...196
Processing Script...196
Business Rule Script 197
Additional Resources...198
Appendix B: User Access Matrix 199
Introduction
The XiO Cloud ^® provisioning and management service allows all supported Crestron ^® devices and supported third-party devices across an enterprise to be managed and configured from one cen secure location in the cloud. The XiO Cloud service may be used to view the status of a d configure various device and network settings, to manage licenses, and to update device firmwc
The XiO Cloud service is an IoT (Internet of Things) based platform that provides the followir for an enterprise:
Quick Deployment
- Configure new or replacement devices before installation
- Retrieve device settings automatically
- Drag-and-drop naming, configuration, and organization
Remote Management
- Change settings for multiple devices across the enterprise simultaneously
- Update firmware for all devices across the enterprise simultaneously
• View cloud audit logs to identify and resolve issues quickly
Instant Monitoring
• View live status of all connected devices from anywhere at any time
• Monitor device changes in real time
- No extra configuration tools are required for monitoring
Confident Evolution
- Interactive dashboards provide real-world usage data
- No programming is required for data gathering
- Optimize workplace technology experiences
For more details and additional resources, refer to https://www.crestron.com/xiocloud.
NOTE: This document is current as of the XiO Cloud version 1.58 release.
How to Order
The following sections describe how to order the XiO Cloud service from Crestron.
Select Room Licenses
The XiO Cloud service environment consists of groups, rooms, and devices. Rooms provide an organizational hierarchy for devices according to geographic location, department, or any other structure that is appropriate for the organization. Devices must be associated with licensed roof before device status can be viewed or device settings can be configured.
Room-based licenses provide various features that are billed monthly or invoiced in full. Each r XiO Cloud requires purchase of one Endpoint Management (SW-XIOC-EM) license. Additional licenses can then be purchased for the room or account depending on the desired functionality. Different can have different license combinations.
The following features are provided in each room-based license:
NOTE: As of XiO Cloud release 1.36, managing device licenses (such as VC-4 server licenses) within XiO Cloud no longer requires purchase of any XiO Cloud room-based licenses. For more information refer to Manage Licenses on page 68.
- Endpoint Management (SW-XIOC-EM): Provides the functionality required to deploy and manage devices, including configuring device settings and viewing device status, firmware upgrades, custom code deployment, and actions such as firmware updates. Required for all rooms in XiO Cloud installation.
- Support (SW-XIOC-S): Provides tools for managing support for rooms, including remote view and control for touch screens, email and SMS alerts, and certain dashboards.
- REST API (SW-XIOC-API): Provides access to a REST API used to pull device status into other services. The API license must be purchased for all rooms in an account to use this fund
- Workplace Analytics (SW-XIOC-WA): Provides access to dashboards that show how a room space is used within an organization. This feature is currently provided as a complimentary beta with each Endpoint Management license.
Refer to the XiO Cloud feature comparison table for a comparison matrix showing the features provided by each license type. This table can also be accessed via the XiO Cloud product page www.crestron.com.
The following table provides an overview of the room license types and features. For more in on each license type, including pricing, visit its product page by selecting the appropriate link
License/Service Model/SKU # Key Features
SW-XIOC-EM (Endpoint Management)
3001922 Provision devices off site, manage devices remotely
| License/Service | Model/SKU # | Key Features | |
| SW-XIOC-S | (Support) | 3001923 Support device remotely, receive alerts, view incident dashboards | |
| SW-XIOC-API | (REST API Access) | 3001925 Integrate with preferred Business Intelligence (BI) or management tools | |
| SW-XIOC-WA (Workplace Analytics) | N/A Receive actionable usage data | ||
Purchasing Instructions
Authorized Resellers (dealers) can purchase new XiO Cloud accounts or renew existing accounts for users or partners (customers) directly through Crestron. Purchasing instructions differ depending on whether the XiO Cloud accounts are new or existing.
NOTE: Crestron does not automatically activate renewals for XiO Cloud accounts. The customer must submit an updated XiO Cloud registration form to activate and renew their licenses. For more information, refer to Existing XiO Cloud Accounts on page 4.
New XiO Cloud Accounts
To purchase new XiO Cloud accounts for a customer:
-
The dealer submits a purchase order (PO) for XiO Cloud to orders@crestron.com (US), ceurorders@crestron.com (EU), or anzorders@crestron.com (ANZ). Include the following information in the PO to avoid ordering delays:
-
Specify that the order is for a new account
-
Customer and project name (for reference)
• Quantity of rooms
• Term of service (monthly or yearly)
• Desired billing structure (monthly or single payment) -
The dealer receives an order confirmation along with a link to the XiO Cloud registration form.
- The dealer forwards the order confirmation to the customer, including the request to con the XiO Cloud registration form.
- The customer submits the XiO Cloud registration form directly to Crestron.
- The customer receives the new account information via email, including account credentials temporary password. Invoicing is sent the same day.
Refer to the following process diagram for an overview on how to order new XiO Cloud accou
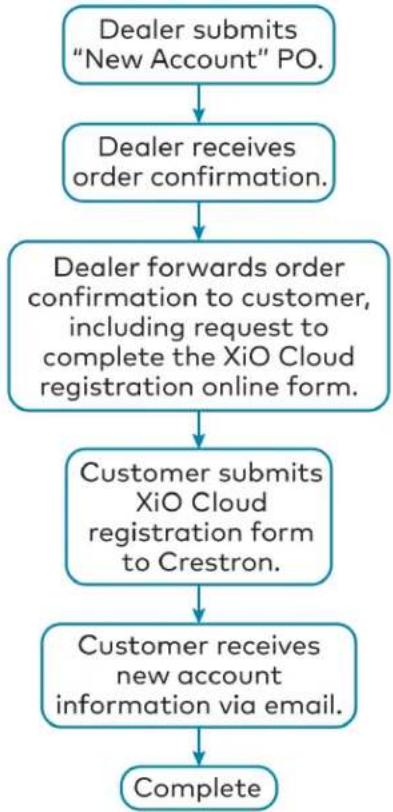
flowchart
graph TD
    A["Dealer submits "New Account" PO."] --> B["Dealer receives order confirmation."]
    B --> C["Dealer forwards order confirmation to customer, including request to complete the XiO Cloud registration online form."]
    C --> D["Customer submits XiO Cloud registration form to Crestron."]
    D --> E["Customer receives new account information via email."]
    E --> F["Complete"]
Existing XiO Cloud Accounts
To renew existing XiO Cloud accounts or to add additional licenses for a customer:
-
The dealer submits a purchase order (PO) for XiO Cloud to orders@crestron.com (US), ceurorders@crestron.com (EU), or anzorders@crestron.com (ANZ). Include the following information in the PO to avoid ordering delays:
-
Specify whether the order is to renew an account or add licenses
- Customer and project name (for reference)
-
XiO Cloud account name and identification number
• Quantity of rooms
• Term of service (monthly or yearly)
• Desired billing structure (monthly or single payment) -
When the customer is ready to activate the additional licenses, they must request the right and activation using the XiO Cloud registration form.
-
The customer submits the XiO Cloud registration form directly to Crestron, which initiates renewal process.
-
The customer receives their updated account information via email, including the updated room accounts and expiration dates. Invoicing is sent the same day.
Refer to the following process diagram for an overview on how to renew existing XiO Cloud add new licenses.
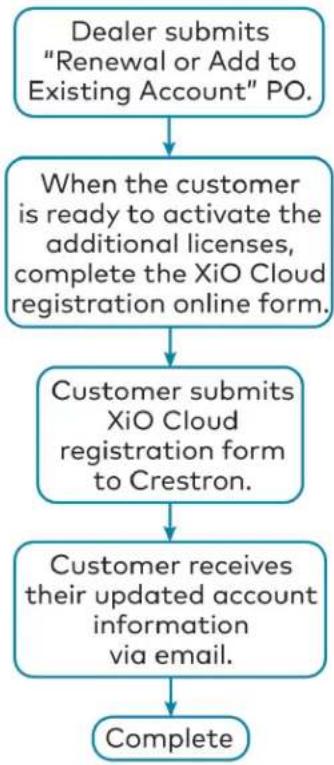
flowchart
graph TD
    A["Dealer submits "Renewal or Add to Existing Account" PO."] --> B["When the customer is ready to activate the additional licenses, complete the XiO Cloud registration online form."]
    B --> C["Customer submits XiO Cloud registration form to Crestron."]
    C --> D["Customer receives their updated account information via email."]
    D --> E["Complete"]
Log in to the Service
A registered XiO Cloud account is required to use the XiO Cloud service. To register for an www.crestron.com/Support/Tools/Licensing-Registration/XiO-Account-Registration.
The first individual at an organization to register for the service will receive an email from C provides a username and a temporary password. These credentials are used for the initial login
Additional users are added from within the XiO Cloud service. For information about managing, and deleting users, refer to Manage Users on page 85.
To log in to the XiO Cloud service:
- Navigate to https://portal.crestron.io. The XiO Cloud landing page is displayed.
XiO Cloud Landing Page
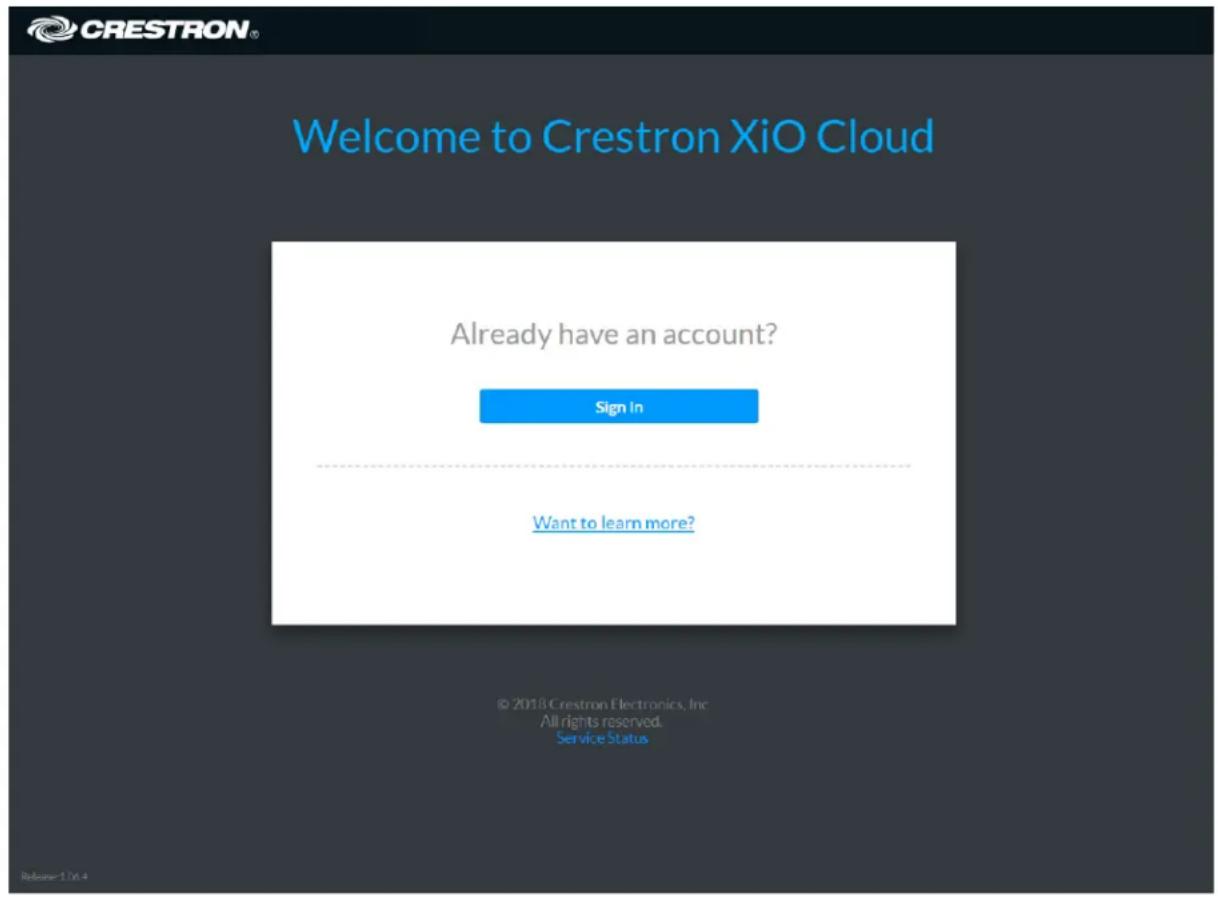
- Select Sign In. A Microsoft® Azure® service page for entering login credentials is displayed.
Crestron uses Microsoft Azure services to manage login credentials for the highest level of enterprise security.
Sign In Page
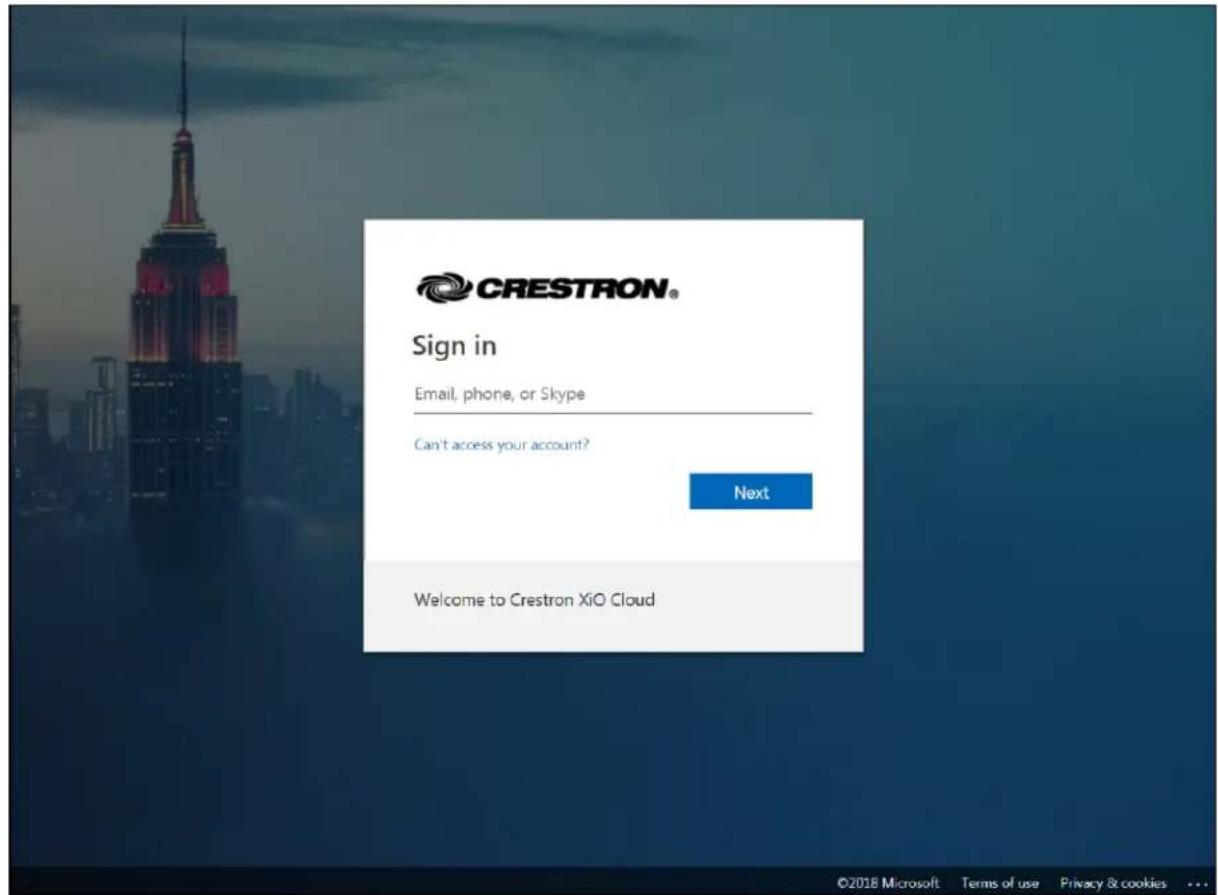
- Enter the username (provided in the email) in the text field, and then select Next.
- Enter the temporary password (provided in the email) in the text field, and then select Next.
If this is the first login, the user is asked to change their password and to provide an email mobile number. The email address and phone number are used for account recovery if the us password is forgotten.
Upon successful login, the user is redirected to the XiO Cloud service with the Dashboard page open by default.
XiO Cloud Service Dashboard Page
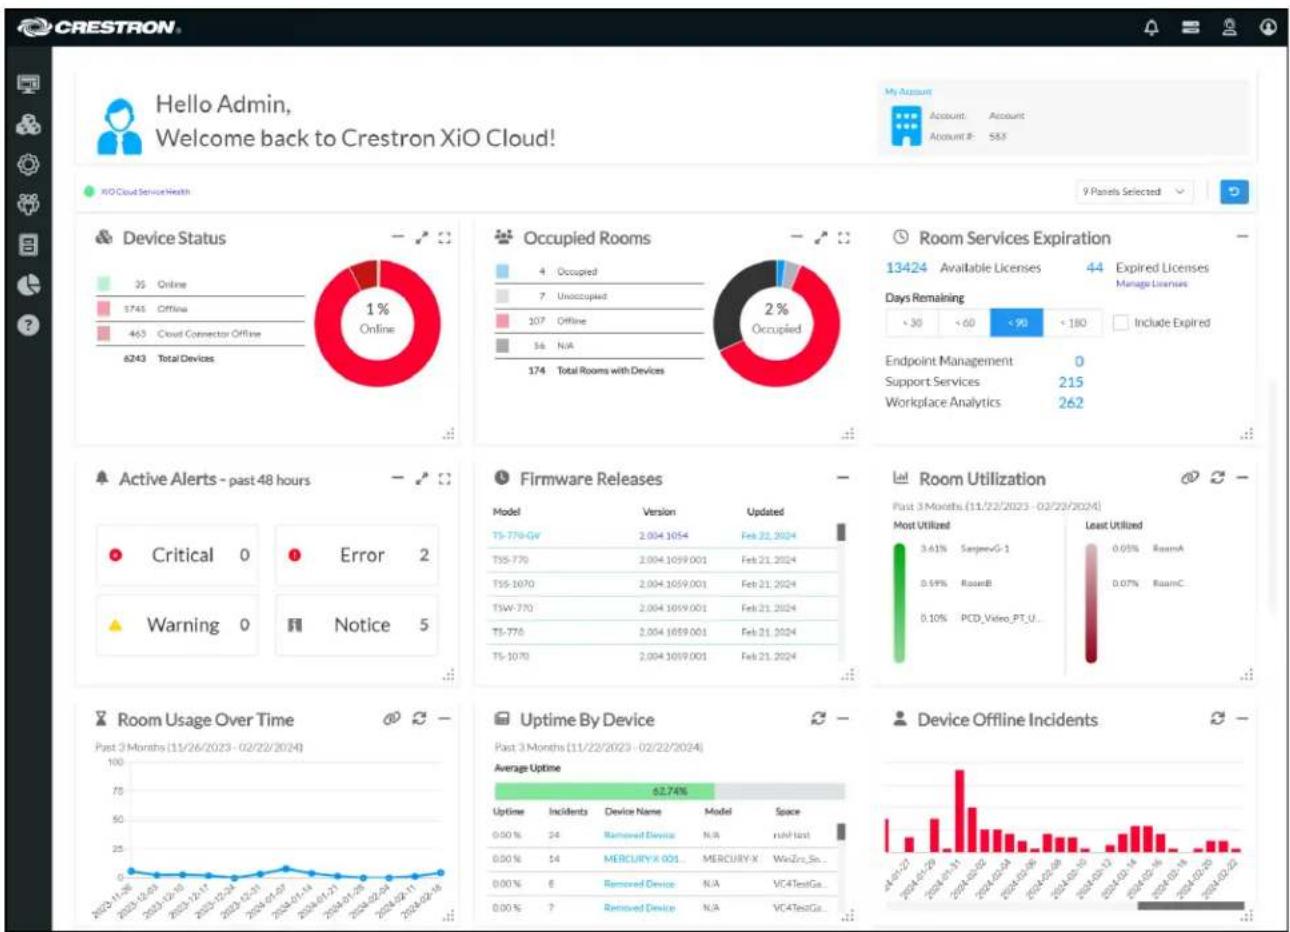
bar
| Category | Value | | :--- | :--- | | Online | 1% | | Unoccupied | 2% | | N/A | 174 Total Rooms with Devices | | Occupied | 4 Occupied | | Unoccupied | 7 Unoccupied | | Offline | 107 Offline | | N/A | 36 N/A | | Total Devices | 6243 Total Devices | | Metric | Value | | :--- | :--- | | **Hardware Releases** | **Firmware Releases** | | **Room Usage Over Time** | **Room Usage Over Time** | | **Uptime By Device** | **Uptime By Device** | | **Device Offline Incidents** | **Device Offline Incidents** |Navigate the Service
The XiO Cloud service provides the following informational controls on the top right of the page Informational Controls
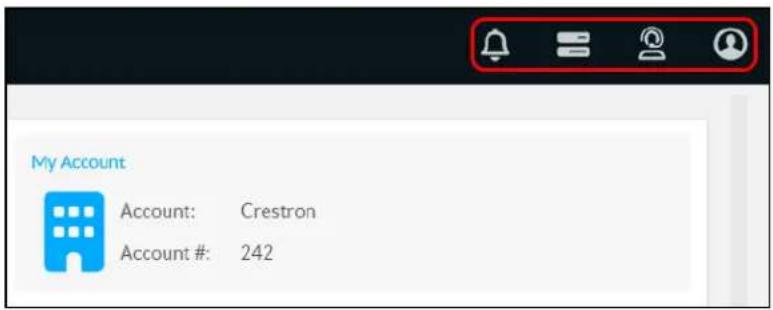
- Select the alerts button to display recent What's New messages for the XiO Cloud account. For more information, refer to What's New Message on page 109.
- Select the progress tracker button to display progress status for tasks initiated within the XiO Cloud service. For more information, refer to Progress Tracker on page 110.
- Select the support button to display options for contacting Crestron True Blue support via email, chat, or phone.
- Select the profile button to display general information for the active XiO Cloud account. A Sign out button is also provided that is used to sign out of the service.
The XiO Cloud service also provides a navigation menu on the left of the page. The navigation used to access the primary functions of the service.
Navigation Menu
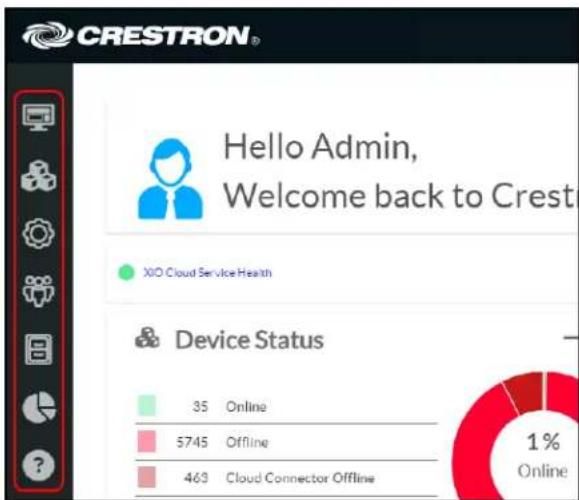
The following navigation controls are provided:
- Select the Home button to access the account dashboard page. The home page is displo default after logging into the service.
- Select the Groups button to access the group tree, which contains all groups, rooms, and devices in the account.
- Select the Settings button to access account settings and to manage alerts.
- Select the Users button to view and manage account users.
- Select the File Upload button to view and manage uploaded files.
- Select the Historical Reports button to generate reports for various data sets within the account.
- Select the Help button to view documentation for getting started with the XiO Cloud serv
Certain navigation controls show an expanded menu when selected. For example, selecting the Groups button 📋 shows the group tree in the expanded menu.
- Expanded menus can be collapsed by selecting the collapse button in the header bar.
- When the menu is collapsed, select the expand button to display the menu again.
Build the Environment
The XiO Cloud service provides an environment that represents the organizational structure of a enterprise.
The XiO Cloud service environment consists of groups, rooms, desks, and devices. XiO Cloud administrators are able to create virtual buildings with multiple floors that represent their organization's workspaces. Once a building has been created, rooms or desks that contain device be added using the group tree. Devices may be associated with rooms or desks once they are the service. Once devices are associated with rooms or desks, actions may be performed simultaneously for all grouped devices.
Use the following procedures to build the XiO Cloud service environment.
Create the Building Address Book
The building address book represents all workspaces with rooms or desks across an organization
The SETTINGS menu for managing the building address book is located in the settings panel, which may be accessed by clicking the Settings button in the navigation menu.
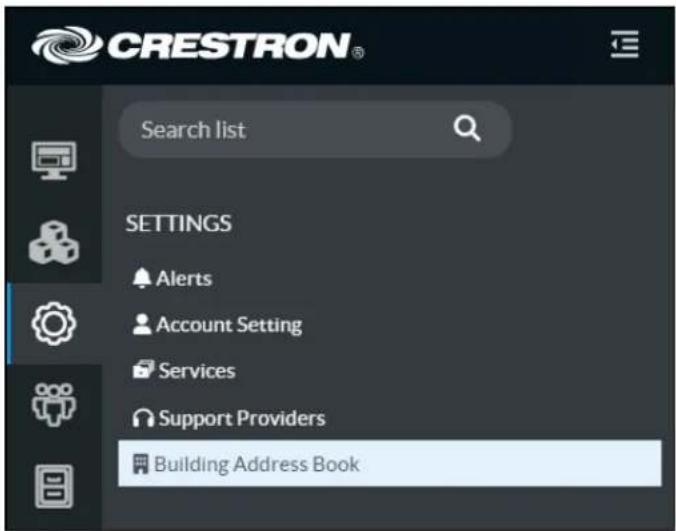
Select Building Address Book in the SETTINGS menu. A Building Address Book page is displayed to the right of the SETTINGS menu.
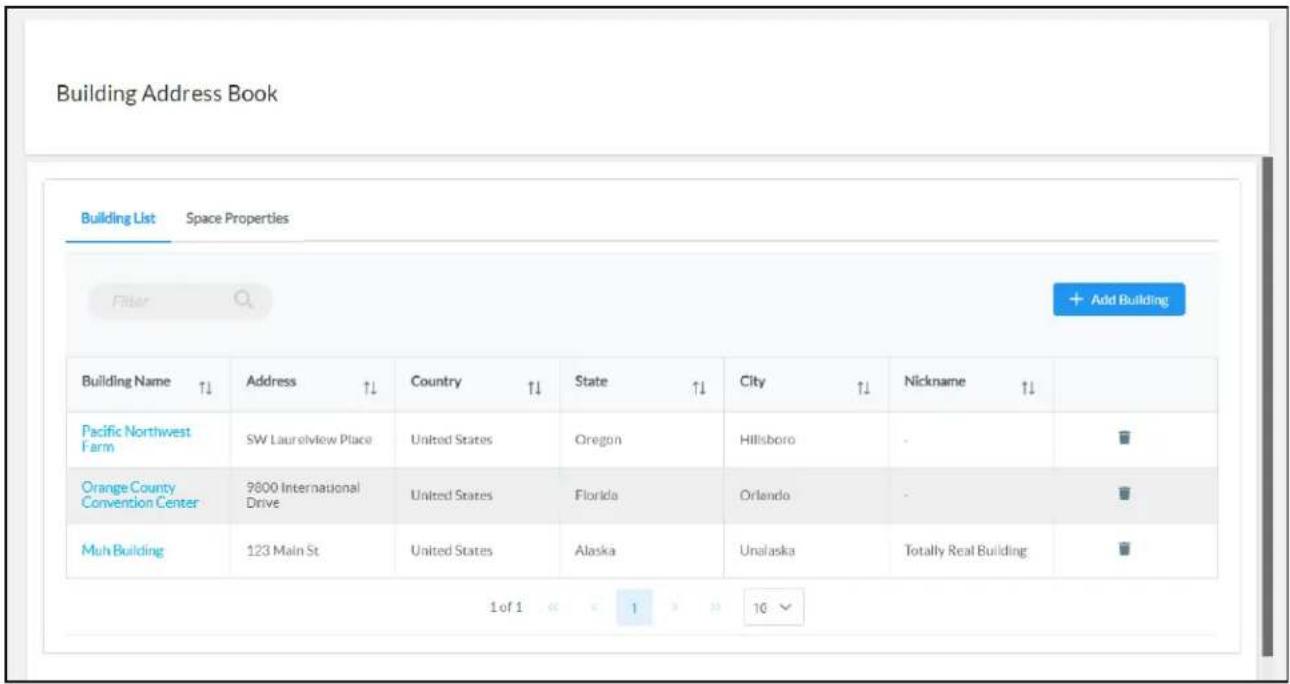
The building address book allows for new buildings to be created and existing buildings to be deleted. In addition, the desk types that are available for reservation within the organization c selected or customized.
Manage Buildings
Select the Building List tab in the Building Address Book page to show all buildings that have been created for the XiO Cloud account.
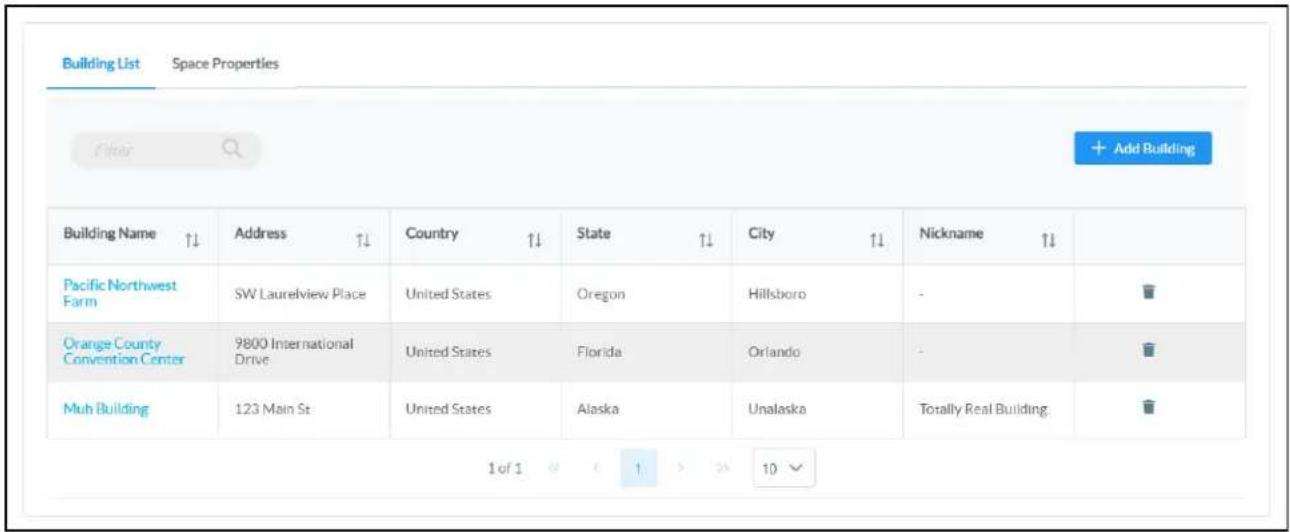
Buildings are listed in a table that provides the following information:
- Building Name: The user-defined building name. Selecting this name allows the building to be edited.
- Address: The physical address of the building.
• Country: The country where the building is located.
• State: The state or province where the building is located.
• City: The city where the building is located. - Nickname: An alternate or shorthand name for the building.
By default, buildings are sorted in alphabetical order. Use the controls provided in each column to sort buildings in ascending or descending order based on the column data. Use the search locate a specific building that matches the search criterion. The table also provides navigational that can be used to move between pages and set the number of table rows per page.
Create a New Building
To create a new building in the building address book:
- Select the Building List tab in the Building Address Book page.
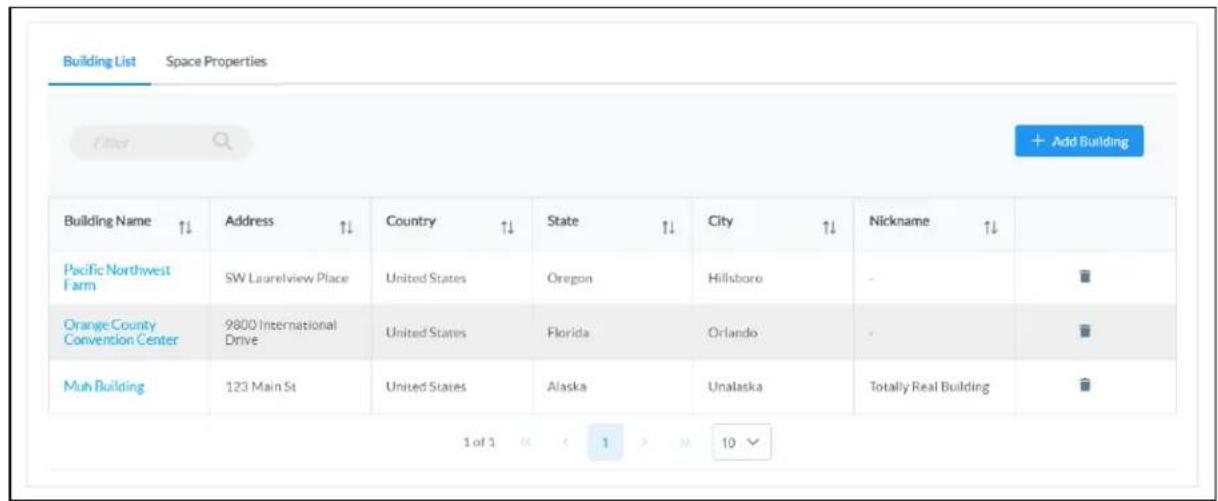
- Select + Add Building. The Add Building dialog box is displayed.
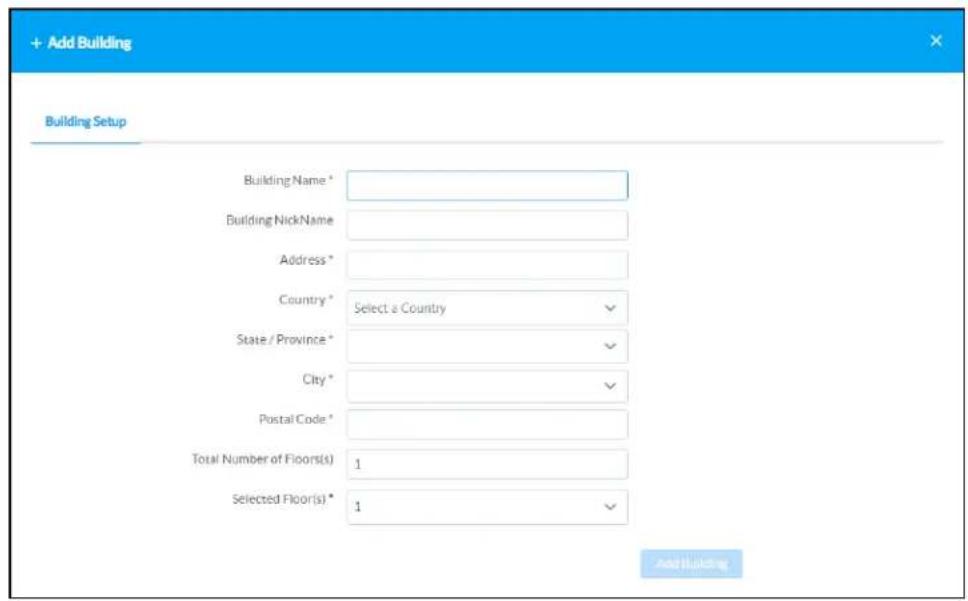
-
Enter the following information for the building:
-
Building Name Required. Enter the building name. This name will be displayed for the building throughout the XiO Cloud service.
• Building NickName: Enter an alternate or shorthand name for the building. - Address: Required. Enter the physical street address for the building.
- Country: Required. Use the drop-down menu to select the country where the building is located.
• State / Province Required. If applicable, select the state or province where the building located. The available selections are populated based on the value selected for Count
• City: Required. Enter the city where the building is located. - Postal Code Required. Enter the postal code associated with the building address.
- Total Number of Floor(s): Enter the total number of floors of the building that cont organization, including floors that do not belong to the organization.
- Selected Floor(s)Required. Use the drop-down menu to select the specific floors of the building that belong to the organization. A filled check box next to the floor number indicates that is has been selected. The available selections are populated based on number entered for Total Number of Floor(s).
For example, if your organization is located on the eighth, ninth, and tenth floors of building with 20 floors, select 8, 9, and 10 from the drop-down menu.
NOTE: Six floor levels with negative values are also provided in the Selected Floor (s) drop-down menu to support underground or basement floors.
- Once all required fields have been populated, select Add Building. The building is added to the table in the Building Address Book page.
Edit a Building
To edit an existing building, select the building name within its table row in the Building Address Book page. The Edit Building dialog box is displayed.
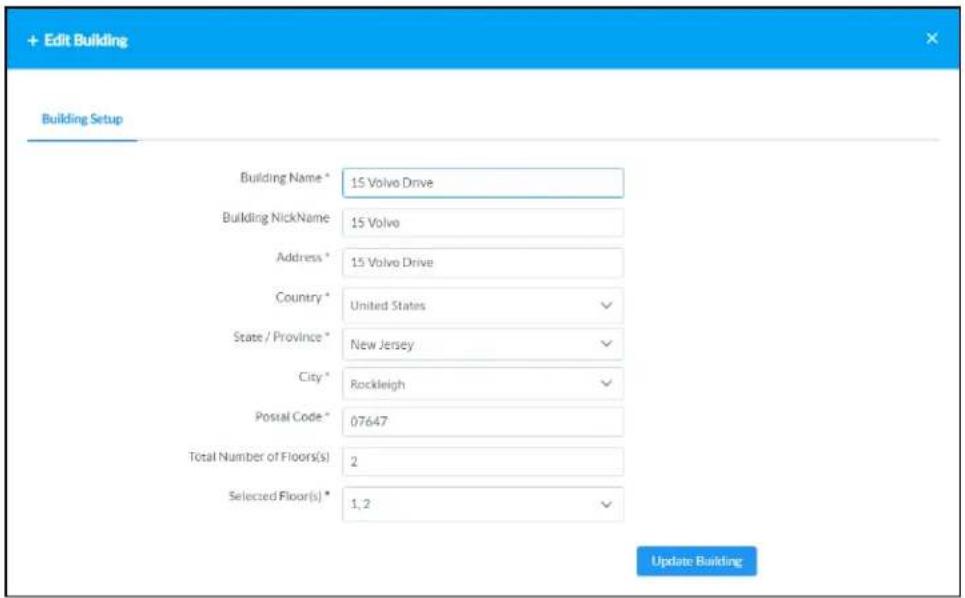
Once all changes have been made, select Update Building to return to the Building Address Book page.
Delete a Building
To delete an existing building, select the trash can icon within the building's table row in the Building Address Book page. A confirmation prompt is displayed asking whether the building should be deleted.
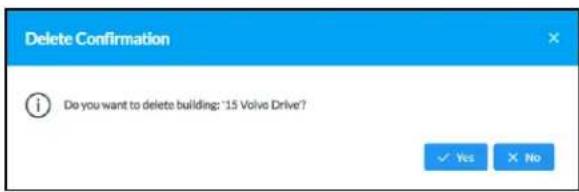
Select Yes to delete the building or No to cancel the deletion.
NOTE: A building cannot be deleted if any rooms or desks are associated with it. If you attempt to delete a building with associated rooms or desks, a message window is displayed stating that rooms and desks must be deleted or moved from the building before it can be deleted. For information, refer to Delete a Desk on page 39.
Manage Space Properties
Select the Space Properties tab in the Building Address Book page to configure the desk types that can be reserved within the organization.
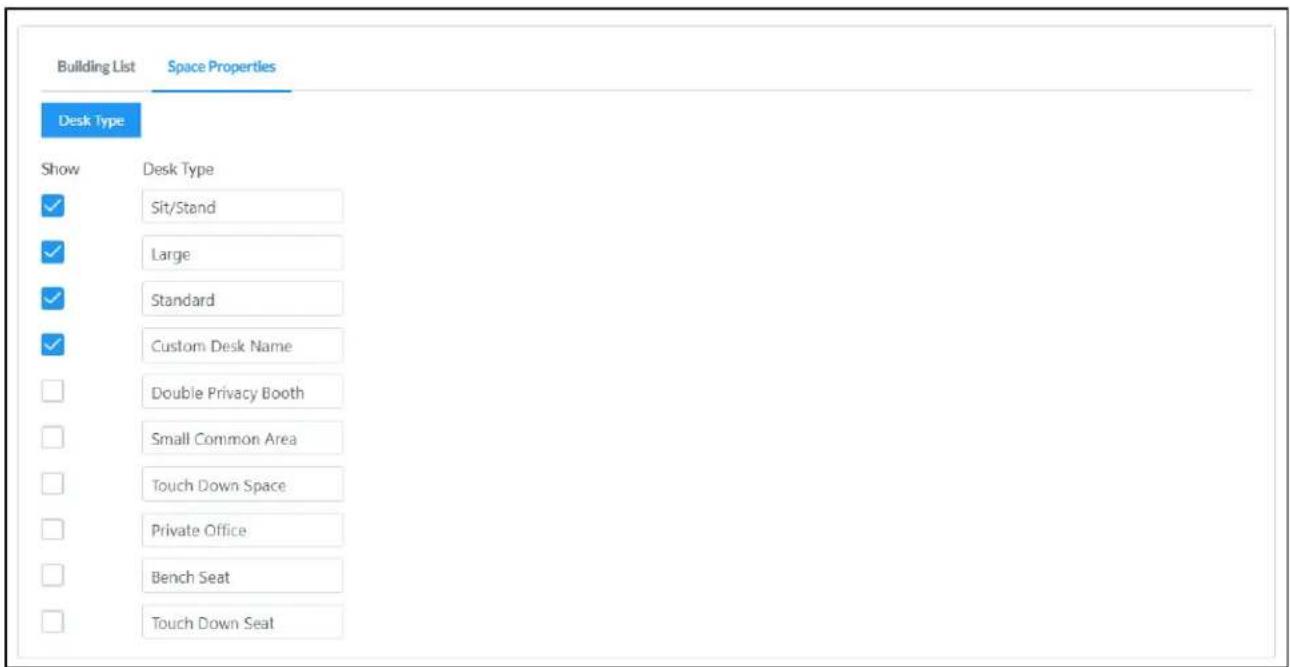
Ten default desk types are provided. Fill the Show check box next to a desk type to make it available for selection when adding or editing a desk.
Additionally, all default desk types can be customized using the Desk Type text field.
Create the Group Tree
The group tree is in the environment panel, which may be accessed by selecting the Groups button 🌐 in the navigation menu.
The group tree is the primary organizational structure of the XiO Cloud environment. Top-level rooms, and desks appear in the group tree once they are added to the environment. One or subgroups, rooms, and desks may also be added under each group.
The group tree is located under the ENVIRONMENT menu on the left side of the configuration pages.
Groups, subgroups, rooms, and desks are ordered alphabetically. A search field is provided at the ENVIRONMENT menu that can be used to find items within the environment group tree. Hover the
cursor over the right edge of the group tree to display a vertical blue bar that can be use tree width.
Environment Menu
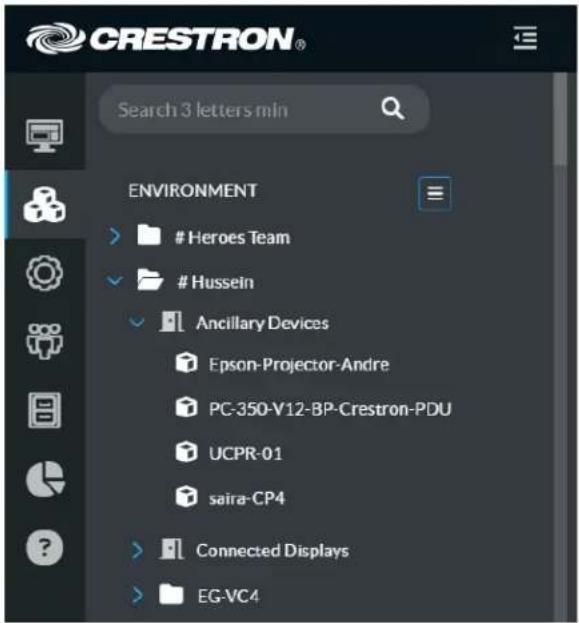
Manage Groups
Groups are added within the group tree. Groups provide a means for organizing rooms, desks, subgroups into logical categories (typically representing the structure of an enterprise or building Actions can be performed for multiple devices at once at the group level.
Add a Top-Level Group
To add a top-level group:
- Select the ENVIRONMENT menu button to display a drop-down menu. Environment - Drop-Down Menu
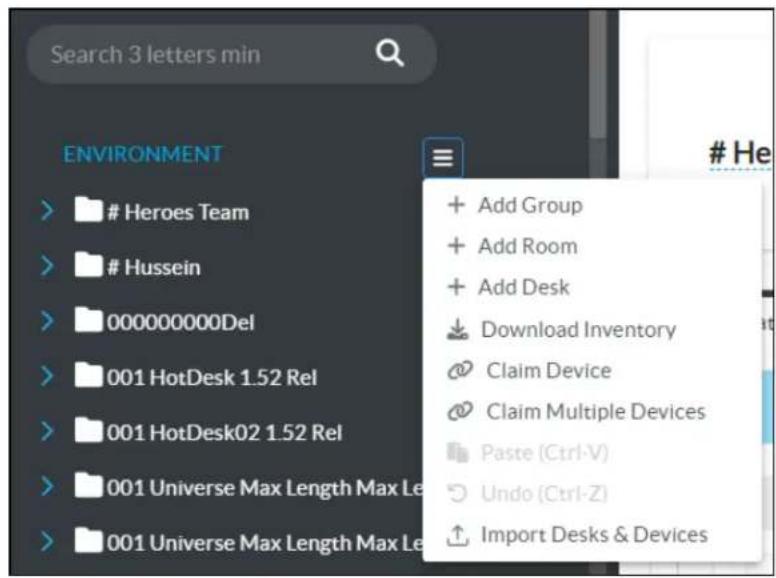
- Select Add Group. A new group is added to the group tree. Environment - New Group
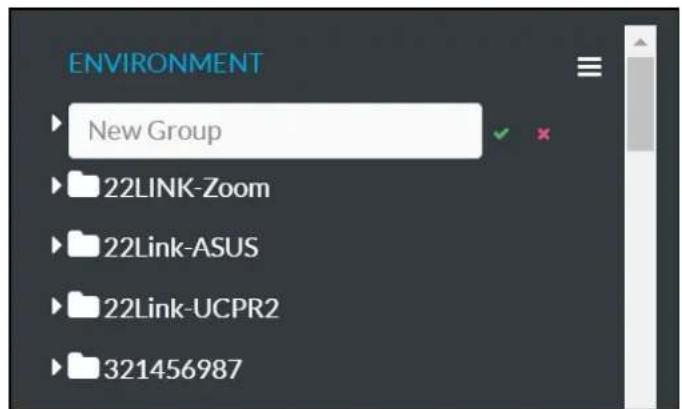
- Enter a descriptive group name in the New Group text field. A group name must be at least three characters long.
NOTE: Each group name must be unique. If a duplicate group name is entered, a not is displayed stating that the group name already exists.
- Select the green check icon √ or select Enter to save the group. Select the red x icon ✗ to discard the group.
The group is reordered alphabetically in the top level of the group tree after it is added.
Select the group from the group tree to view and configure group settings. For more information to Configure Settings for a Group of Devices on page 64.
Add a Subgroup
One or more subgroups may be added under the top-level group. A group hierarchy may contain eight levels.
To add a subgroup:
- Position the cursor over the group name in the ENVIRONMENT menu to reveal its content.
- Select the context menu button for the group to display a drop-down menu.
Group - Drop-Down Menu
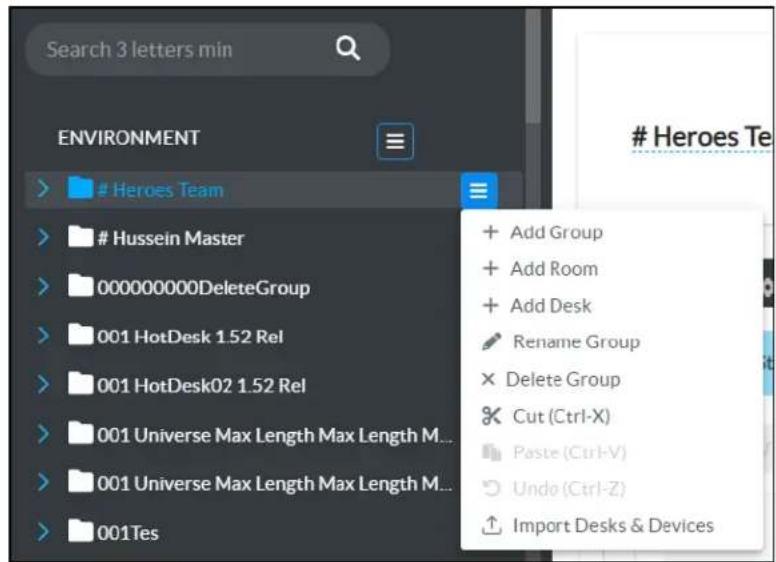
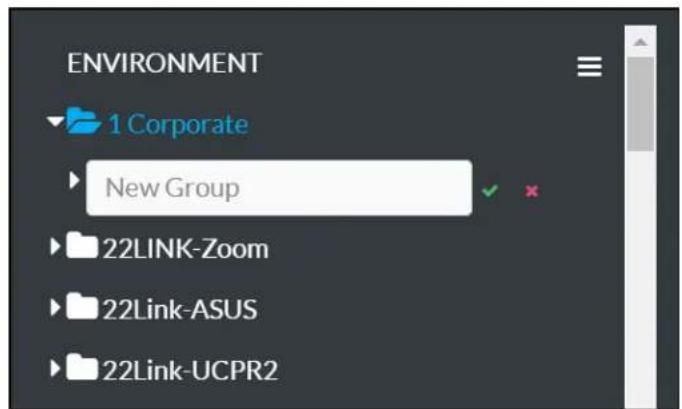
- Select Add Group. A new subgroup is added under the selected group.
Group - New Group
-
Enter a descriptive subgroup name in the New Group text field. A subgroup name must be at least three characters long.
-
Select the green check icon √ or select Enter to save the subgroup. Select the red x icon ✗ to discard the subgroup.
The subgroup is reordered alphabetically within its parent group after it is added.
Select the subgroup from the group tree to view and configure subgroup settings. For more information, refer to Configure Settings for a Group of Devices on page 64.
Rename a Group
Each group in the XiO Cloud service has a unique name, which allows the group to be iden organized within the service. A group may be renamed as needed.
To change the group name in the group tree:
-
Position the cursor over the group name in the ENVIRONMENT menu to reveal its conte
-
Select the context menu button for the group to display a drop-down menu.
Group - Drop-Down Menu
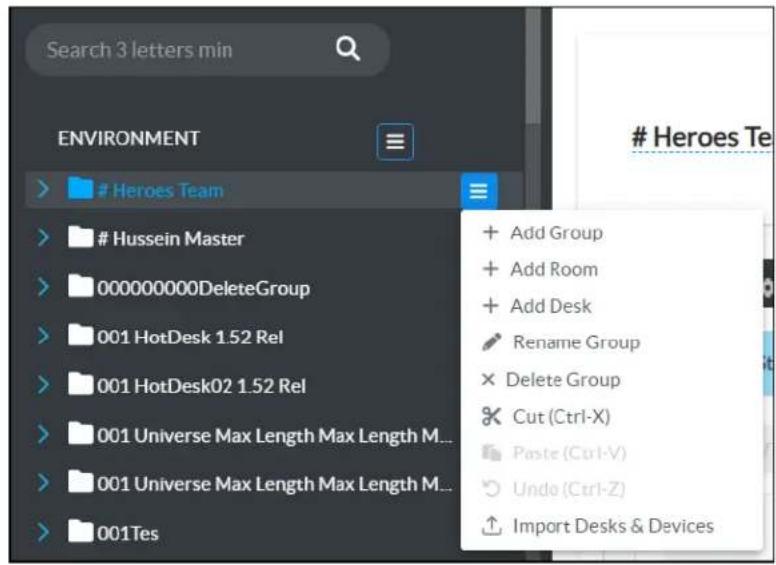
- Select Rename Group. The group name becomes an editable text box.
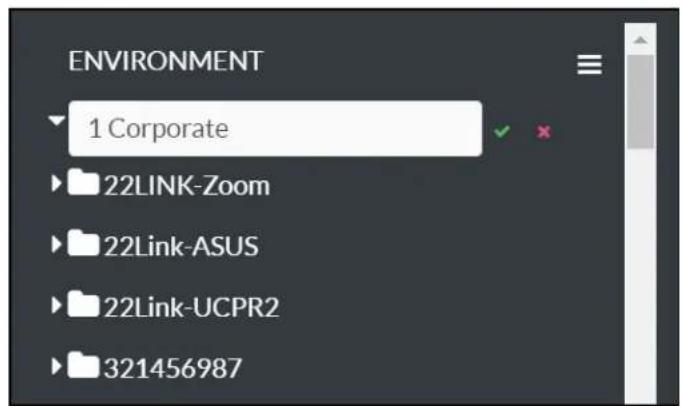
Group - Edit Group Name
-
Enter a new group name in the text box. A group name must be at least three char
-
Select the green check icon √ or select Enter to save the group name. Select the red x icon ✗ to discard the changes.
Delete a Group
Groups may be deleted from the XiO Cloud service environment as needed. A group that con subgroup may not be deleted until all subgroups are removed.
To delete a group from the group tree:
-
Position the cursor over the group name in the ENVIRONMENT menu to reveal its conte
-
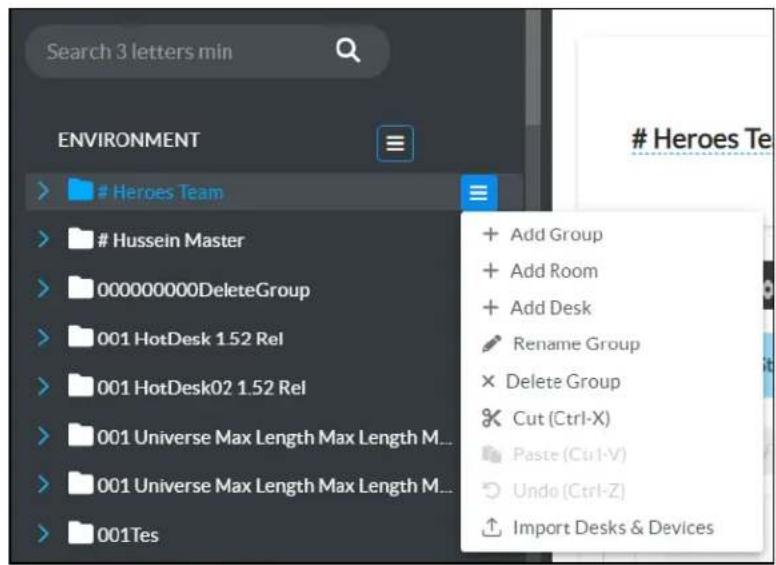
Select the context menu button for the group to display a drop-down menu.
Group - Drop-Down Menu
-
Select Delete Group. A confirmation dialog box is displayed.
-
Select Yes to delete the group or select No to cancel the deletion.
Manage Rooms
Rooms can be added within groups or at the top level of the group tree. Rooms are designed to represent physical rooms within an enterprise that contain all cloud-enabled devices. Devices can be added to rooms after they claimed into the XiO Cloud service.
NOTE: As of XiO Cloud version 1.55, new rooms are added using the building address book function.
An import tool is provided for existing deployments that associates all existing rooms with a address book. For more information, refer to Associate Rooms with a Building on page 27.
Add a New Room
To add a new room:
- Select the ENVIRONMENT menu button to display a drop-down menu. Environment - Drop-Down Menu
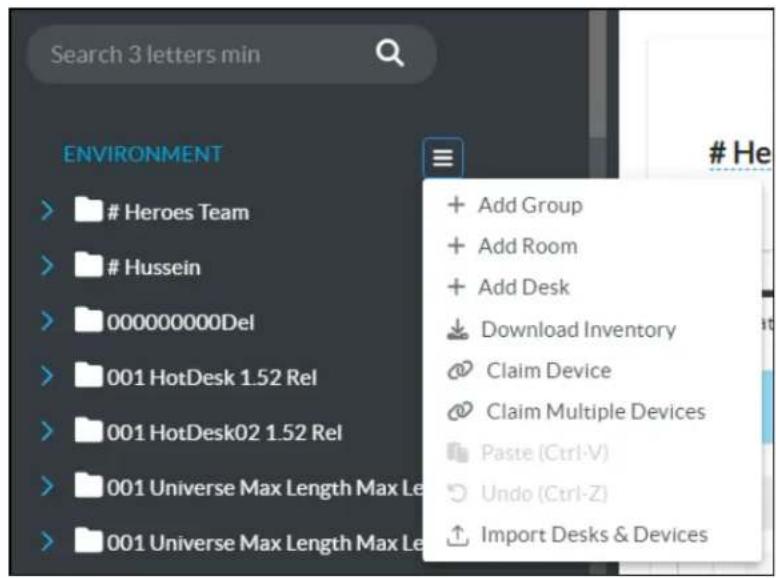
- Select Add Room. The Add Room dialog box is displayed.
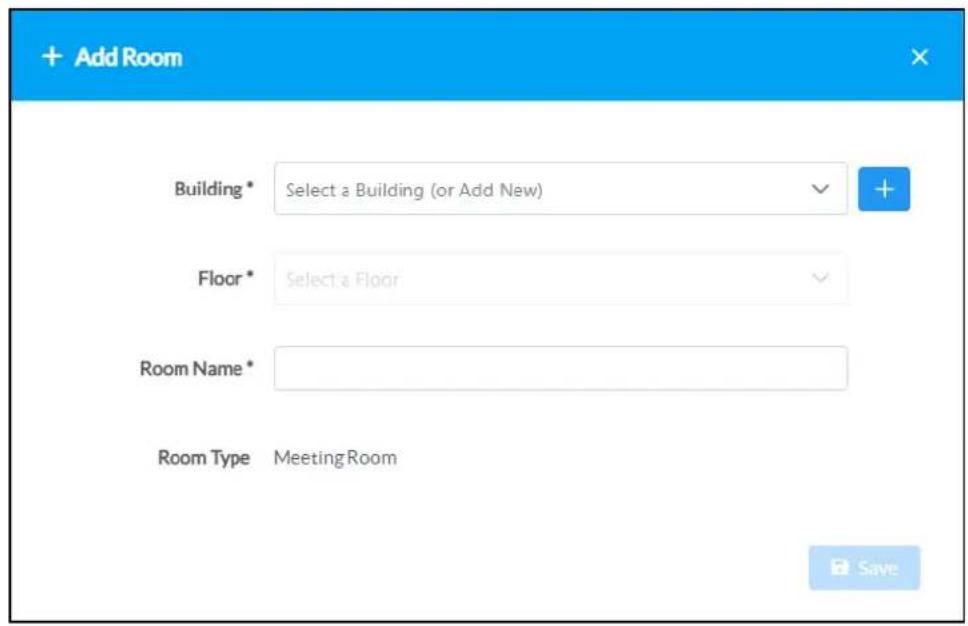
-
Enter the following information for the desk:
-
Building: Required. Use the drop-down menu to select a building that will be associated with the room from the building address book.
If the desired building is not shown, select + Add Building to display the Add Building dialog
box. For more information on adding a building, refer to Create a New Building on - Floor: Required. Select the building floor where the room is located. The available select are populated based on the floors configured for the building.
-
Room NameRequired. Enter the room name. This name will be displayed for the room throughout the XiO Cloud service.
-
Select Save. The room is added to the group tree and is reordered alphabetically within its parent group after it is added.
Select the room from the group tree to view and configure group settings. For more information to Configure Settings for a Group of Devices on page 64.
Edit a Room
Once a room has been added to the group tree, select it in the tree to open the room d
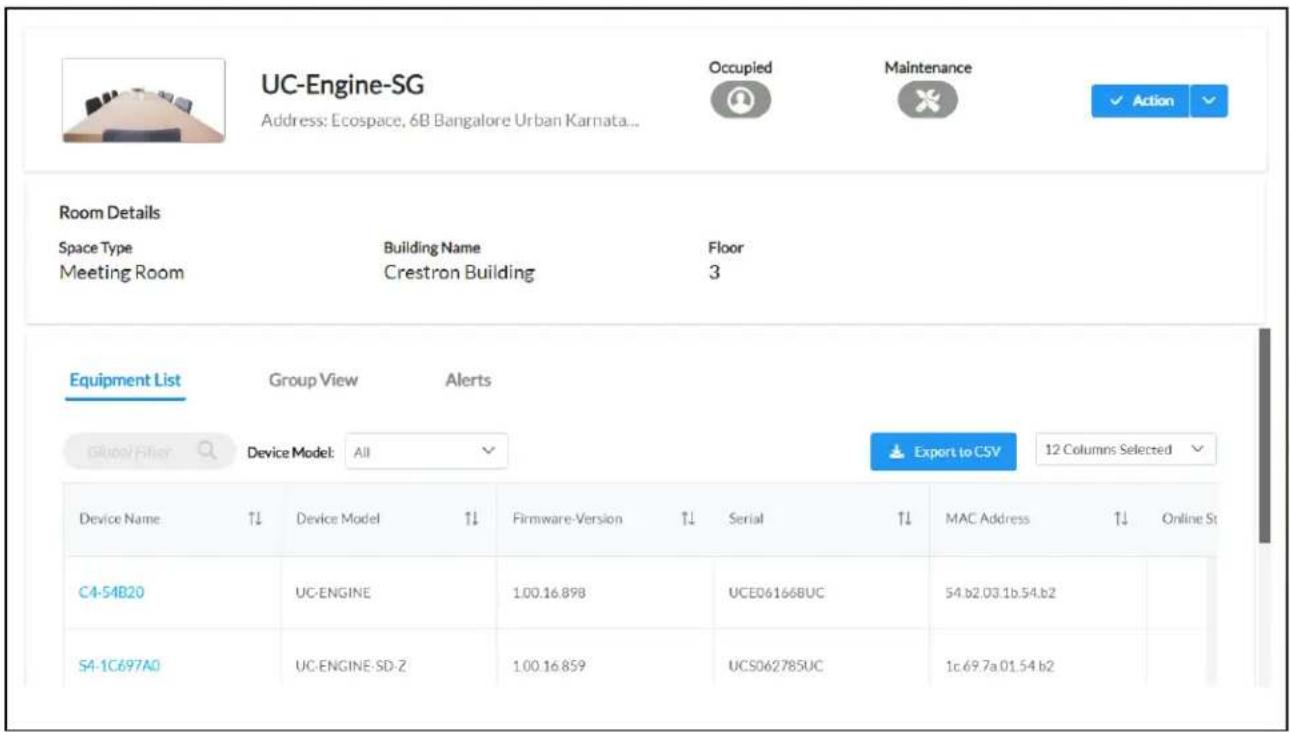
The following information is displayed for the room:
- The user-defined room name and the building address.
- Indicators that the room is occupied (if it contains occupancy-sensing equipment) or that requires maintenance due to a device issue.
• A Room Details section that displays the space type, building name, and floor. -
An Equipment List tab that displays the status of associated devices.
-
A Group View tab that displays options for managing all devices in the room. For more information, refer to Configure Settings for a Group of Devices on page 64.
- An Alerts tab that displays any recent alerts that have been raised for the room. For information, refer to Alerts on page 111.
An Action menu is also provided in the top right of the page that provides a Edit Details selection for editing the room details.
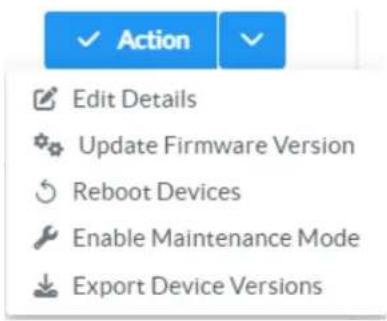
Select Edit Details to display editable fields for room settings.
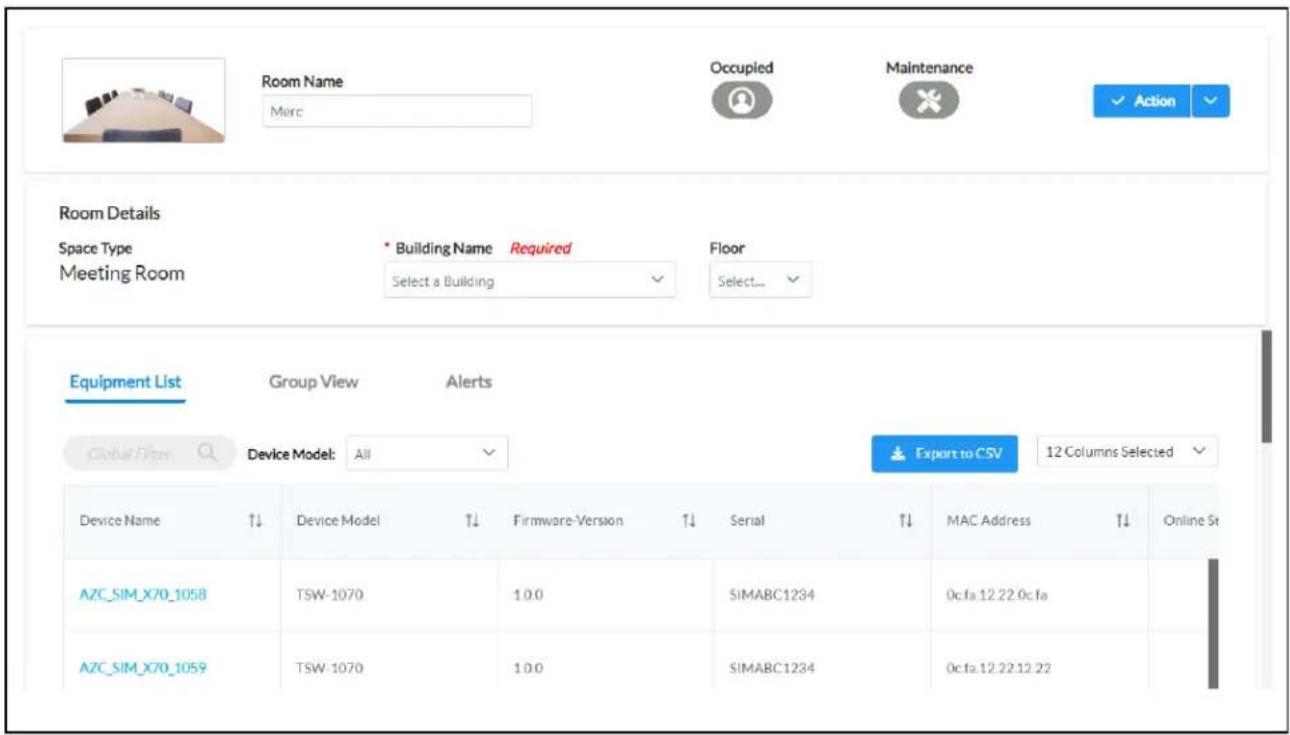
The following settings can be edited:
- Room Name: Enter the room name. This name will be displayed for the desk throughout XiO Cloud service.
- Building Name: Use the drop-down menu to select a building that will be associated with the room from the building address book.
- Floor: Select the building floor where the room is located. The available selections are populated based on the floors configured for the building.
Select Save Changes to save any changes. A toast notification is shown indicating that the changes have been saved.
Rename a Room
Each room in room-based XiO Cloud accounts has a unique name, which allows the room to identified and organized within the service. A room may be renamed as needed.
To change the room name in the group tree:
- Position the cursor over the group name in the ENVIRONMENT menu to reveal its conte
- Select the context menu button for the group to display a drop-down menu.
- Select Rename Room. The room name becomes an editable text box.
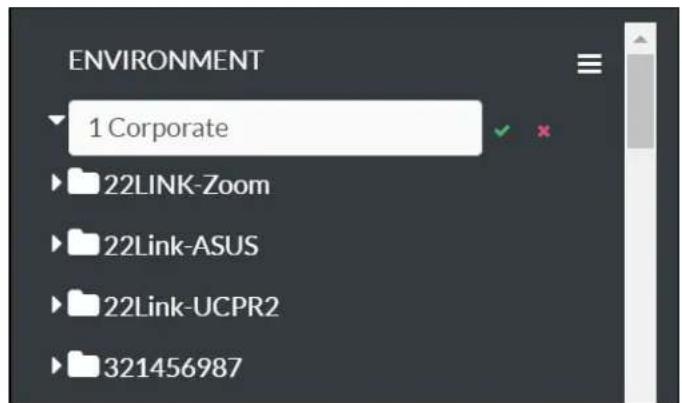
Room - Edit Room Name
-
Enter a new room name in the text box. A room name must be at least three chara
-
Select the green check icon √ or select Enter to save the room name. Select the red x icon ✗ to discard the changes.
Delete a Room
Rooms may be deleted from an XiO Cloud account environment as needed. A room that cont device may not be deleted until all child devices removed.
To delete a room from the group tree:
- Position the cursor over the group name in the ENVIRONMENT menu to reveal its conte
- Select the context menu button for the group to display a drop-down menu.
- Select Delete Room. A confirmation dialog box is displayed.
- Select Yes to delete the group or select No to cancel the deletion.
View Device Settings
Once devices have been associated with the room, navigate to the Equipment List section of the room status page to view the following device settings.
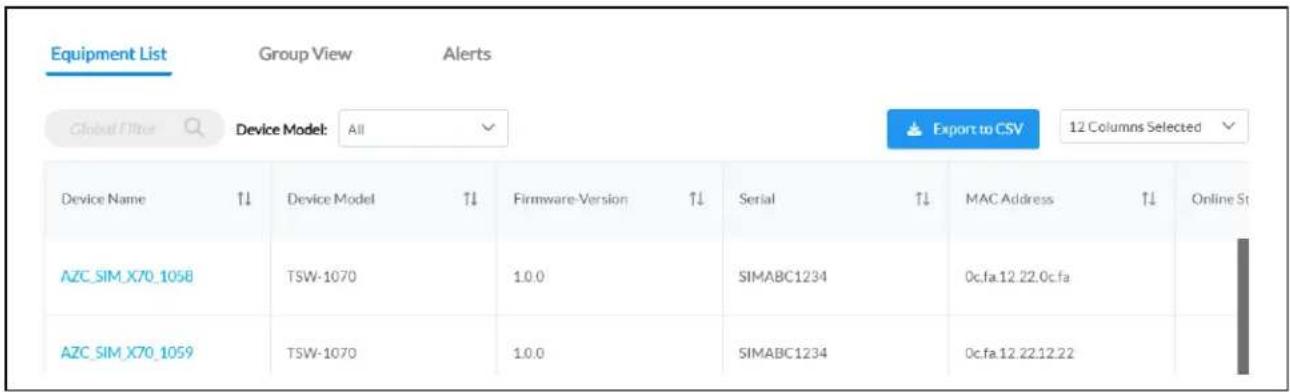
• Device Name: The device name in XiO Cloud.
• Device Model: The device model.
- Firmware Version: The firmware version running on the device.
- Serial: The device serial number.
- MAC Address: The MAC address of the device network adapter used to connect to the XiO service.
- Online Status: Indicates whether the device is reporting online or offline within XiO Cloud. Crestron XiO Cloud Gateway connected devices that are reporting offline show a cloud cor offline icon.
- Pending Settings Delivery: Indicates whether device settings changed in XiO Cloud are pending delivery to the device.
• IP Address: The current device IP address.
- Hostname: The device host name.
- Application Mode: If applicable, indicates the application mode that is running on the device
- DHCP Enabled: Indicates whether DHCP is turned on or off for the device.
- Room Status: If applicable, indicates status of the room for devices with room scheduling capabilities.
- Calendar Connection: If applicable, indicates status of the calendar connection for devices with room scheduling capabilities.
An Actions column is also provided that allows the device to be configured or deleted. For n information on configuring a device, refer to Manage Devices on page 56.
The data that is displayed in the device table can be customized by filtering the table column default, 12 columns are displayed that contain the data described in the list above.
To select or deselect table columns for the device status table, expand the drop-down menu right of the table. Then, select or deselect an item in the menu to display or hide that col table, respectively. Use the check box at the top of the menu to select or deselect all colun
NOTE: The device status table will reset to its default settings after logging out of the XiO Cloud service.
The device status table can be downloaded as a CSV file by selecting the Export to CSV button at the top right of the table. The CSV file will include all table columns that have been selected as above.
Associate Rooms with a Building
As of XiO Cloud version 1.55, new rooms are added using the building address book function. tool is provided for existing deployments that associates all existing rooms with a building add To associate rooms with a building using the import tool:
- Select the Settings button in the navigation menu.
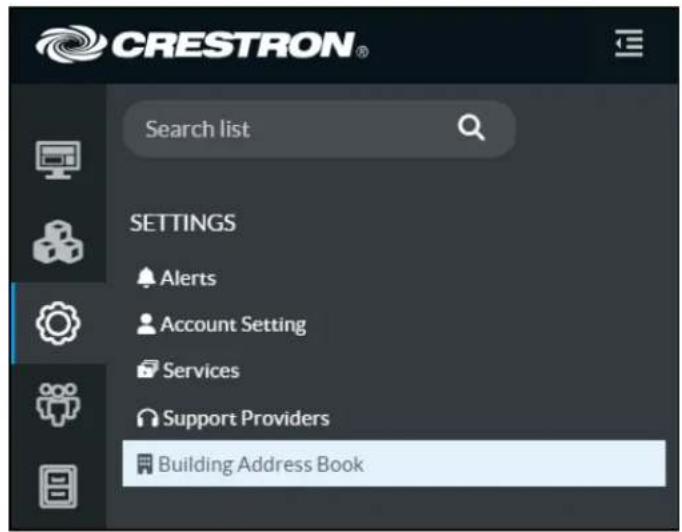
- Select Building Address Book. A Building Address Book page is displayed to the right of the SETTINGS menu.
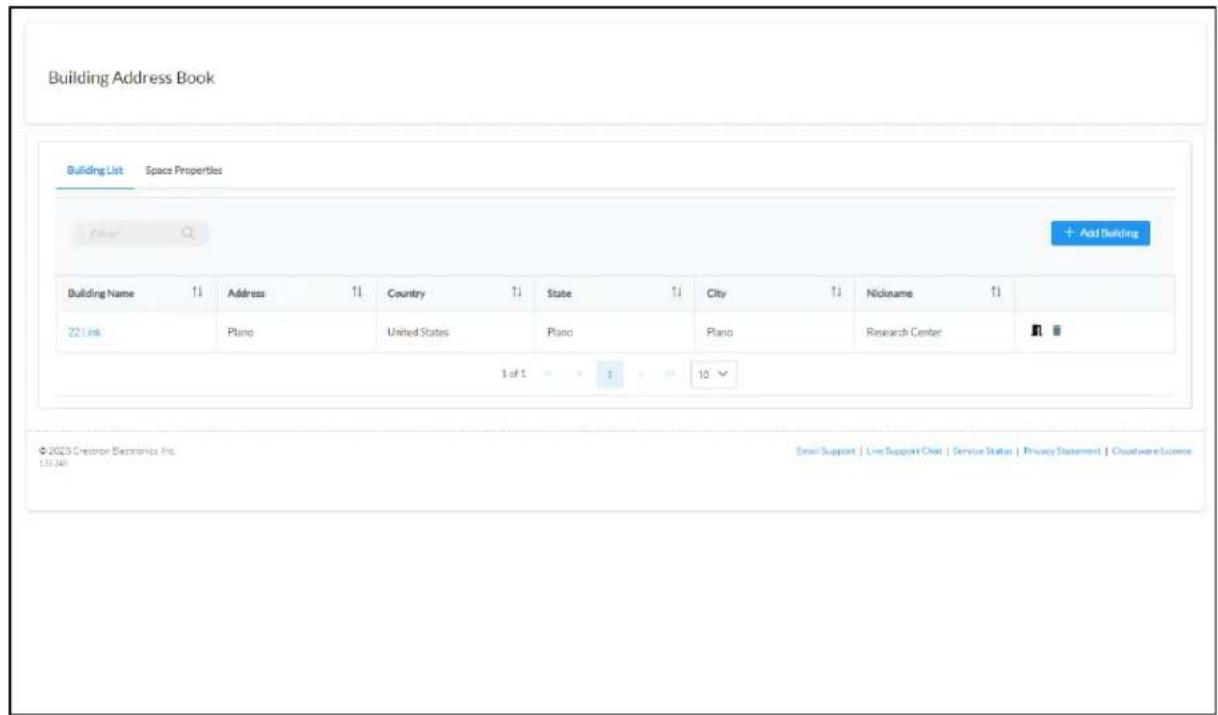
- Select the door icon in the table row of the desired building address book. An Associate Rooms dialog box is displayed.
NOTE: The door icon appears only if there are rooms in a deployment that are not as with in address book. Once all rooms have been associated, this selection is no longer available.
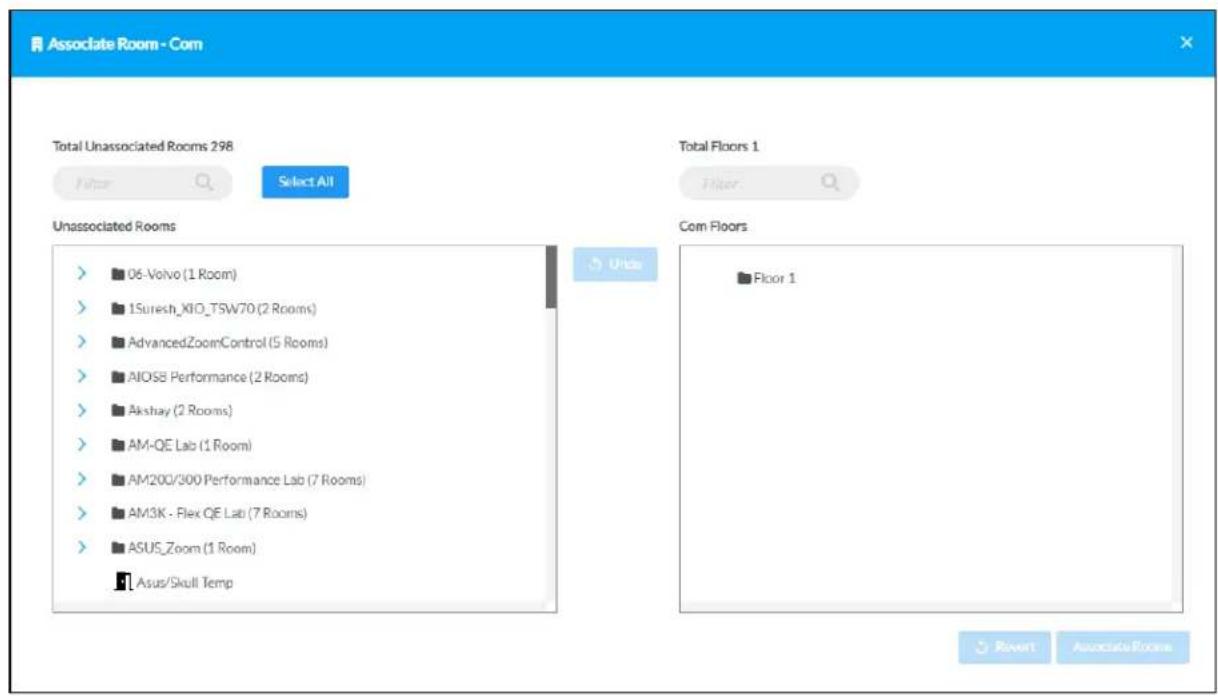
-
Drag rooms from the Unassociated Rooms column into the appropriate floor of the build within the [Building] Floors column. The Unassociated Rooms column matches the structure of the XiO Cloud group tree for the account.
-
Enter text into the filter text boxes to filter room, group, and floor data based on entered text.
- Select Select All to select all rooms within the Unassociated Rooms column.
- Select Undo to undo the last performed action.
- Select Revert to revert all rooms back to the Unassociated Rooms column.
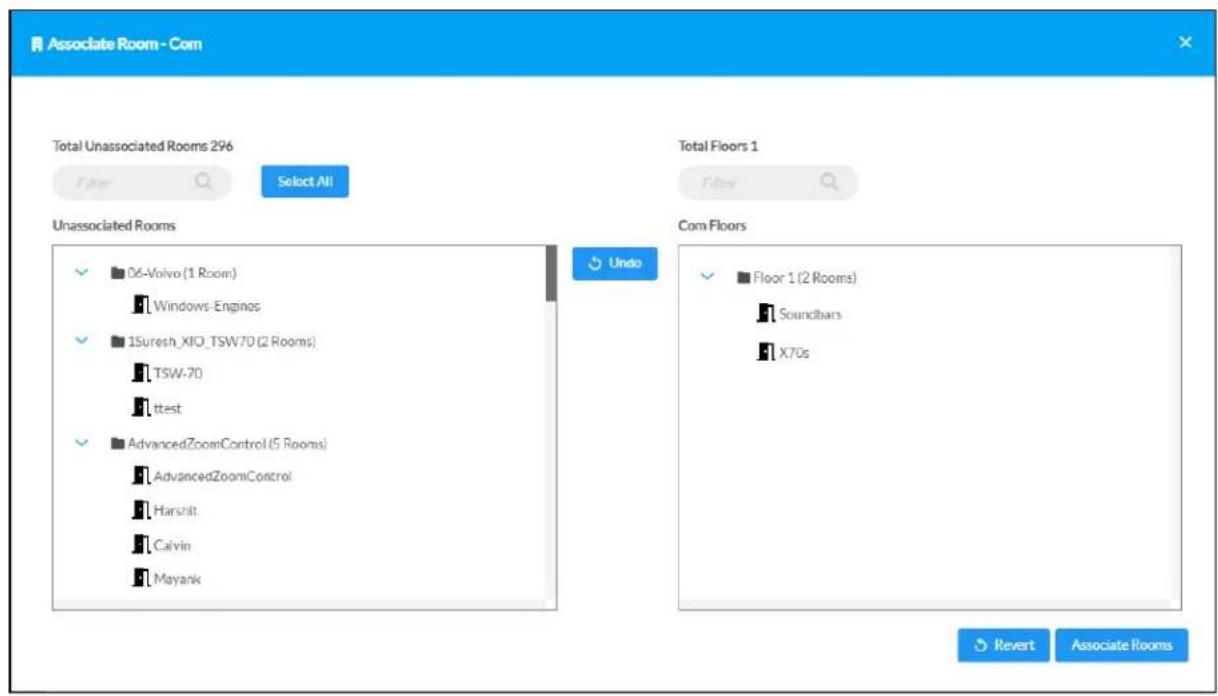
- Once all rooms have been associated, select Associate Rooms. All rooms are associated with the selected floors of the building address book.
Manage Desks
For accounts that use desk scheduling, desks can be added to groups and subgroups within tree. After a desk has been added, it can be associated with a building from the building a and then assigned a unique desk scheduling device and scheduling calendar address.
Import Desks and Devices
Desks and their associated desk scheduling devices can be mass provisioned into the XiO Cloud via a CSV file. Once the CSV file is imported successfully, all new desks and devices will be appropriate buildings and floors within the XiO Cloud environment tree.
To import desks and devices into the XiO Cloud service:
- Create a new CSV file with the following header columns in the first row. The name of header column must match the following items exactly.
NOTE: A sample CSV file with prepopulated header columns can also be downloaded from the Import Desks & Devices dialog box that is described later in this procedure.
- Building Name
- Floor
- Desk Name
- Desk Type
-
Calendar Email
-
Serial
-
MAC Address
-
For each desk and associated device, enter the following data in the appropriate columns: new table row. Each desk must have its own table row.
-
Building Name: The building that will be associated with the desk. The building must already been created in the building address book prior to importing the CSV file.
- Floor: The building floor where the desk is located. The floor must match one of the configured for the building.
- Desk Name: The desk name that will be displayed for the desk throughout the XiO service and in the Desk Scheduling UI on the touch screen.
- Desk Type: The desk type. The desk type must match one of the desk types config the building address book. For more information, refer to Manage Space Properties o 16.
- Calendar Email: The unique scheduling calendar address that will be paired with the control reservations.
- Serial: The serial number of the associated touch screen.
• MAC Address: The MAC address of the associated touch screen.
NOTE: The Serial and MAC Address fields are not required to create a desk from the
CSV file. Desk scheduling devices can be associated manually with a desk at a lat time.
Refer to the following mock CSV file as an example.
| Building Name | Floor | Desk Name | Desk Type | Calendar Email | Serial | MAC Address |
| Corporate HQ | 9 | D901 | Standard | 901@company.onmicrosoft.com | 1234567890 | 00.11.22.33.44 |
| Corporate HQ | 9 | D902 | Standard | 902@company.onmicrosoft.com | 2345678901 | 11.22.33.44.55 |
| Corporate HQ | 10 | D1001 | Large | 1001@company.onmicrosoft.com | 3456789012 | 22.33.44.55.66 |
| Corporate HQ | 10 | D1002 | Large | 1002@company.onmicrosoft.com | 4567890123 | 33.44.55.66.77 |
-
Save the CSV file to an accessible location on the local computer.
-
Select the context menu button for the ENVIRONMENT menu to display a drop-down me
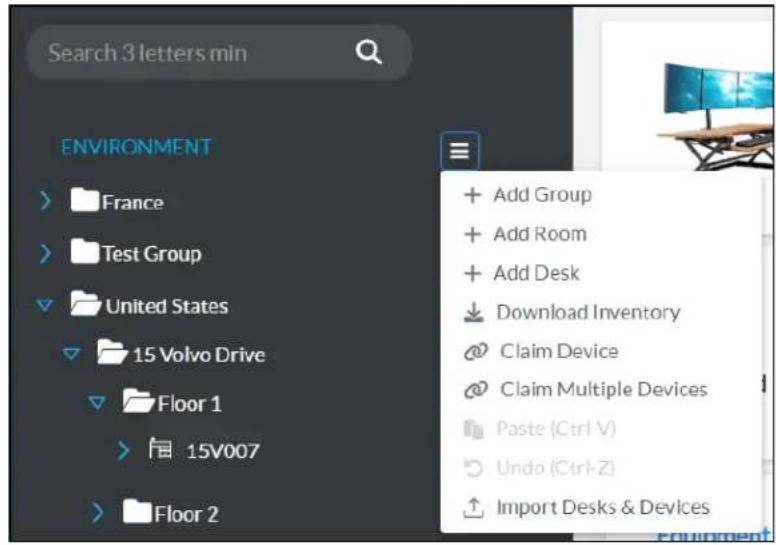
- Select Import Desks & Devices. The Import Desks & Devices dialog box is displayed.
NOTE: The Import Desks & Devices selection is also available in the context menu for groups and subgroups. Making this selection at the group level will limit the import to that g
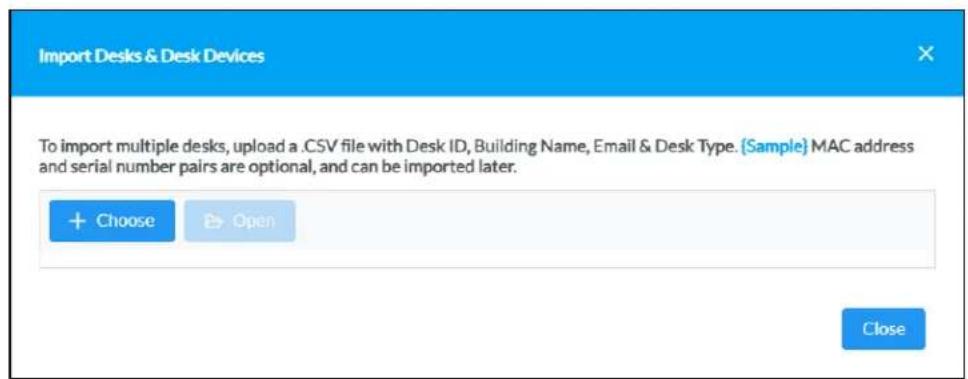
- Select Choose, and then select the CSV file created earlier in this procedure. The CSV file is shown in the dialog box if it is valid.
![Import Desks & Desk Devices To import multiple desks, upload a .CSV file with Desk ID, Building Name, Email & Desk Type. [Sample] MAC address and serial number pairs are optional, and can be imported later. + Choose Open Sample.csv 132 B Close](/content/2026/05/883356/images/dec194974f58fe070b81469018b3dcb8485ae02755ffdeb08f9cb0f030f4c8da.jpg)
- Select Open. The Import Validation dialog box is displayed.
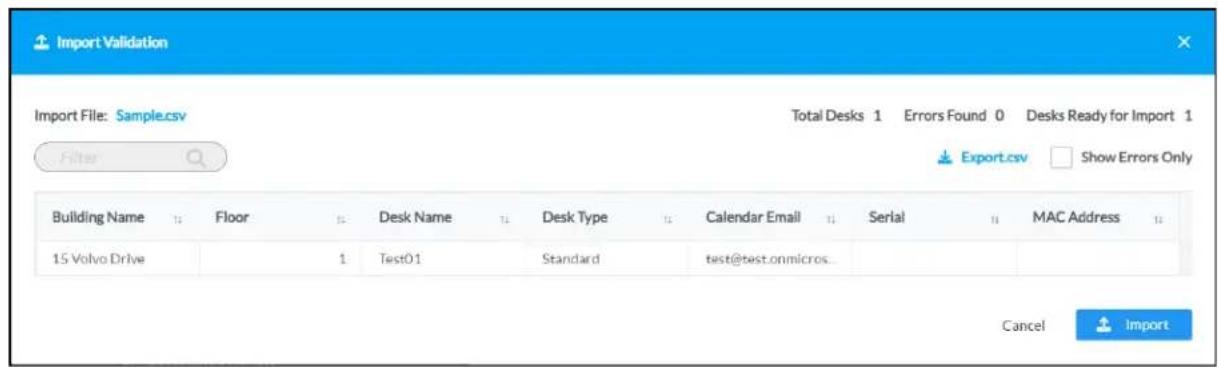
The Import Validation dialog box shows the total number of desks that will be imported reports any errors that are found within the CSV file data. Each row of the CSV file is can be modified within the dialog box. The following controls are provided:
- Use the Filter function to filter the CSV file table based on the entered information
- Use the sorting controls in the table headers to sort the data in that column.
- Select Export.csv to export the provided CSV file to the local computer.
- Fill the Show Errors Only check box to show only the table rows that contain err data with errors is shown with red text. Hover over an error to view a pop-up d explaining the error.
-
Select within any table cell to edit the data within that cell.
-
Select Import once all errors have been corrected. The CSV file upload progress begins.
To check the status of the CSV file upload, select the progress tracker button at the top rig page. A Progress Tracker dialog box is shown that shows the progress of the import task.
NOTE: Large CSV files may take a considerable amount of time to upload. The status of the upload is always available within the Progress Tracker dialog box. For more information, refer to Progress Tracker on page 110.

Once the CSV file has been uploaded successfully, a toast notification is shown indicating this. group tree is updated to show the new desks and child devices.
Add a New Desk
To add a new desk to a group manually:
- Position the cursor over the group name in the ENVIRONMENT menu to reveal its conte
- Select the context menu button for the group to display a drop-down menu.
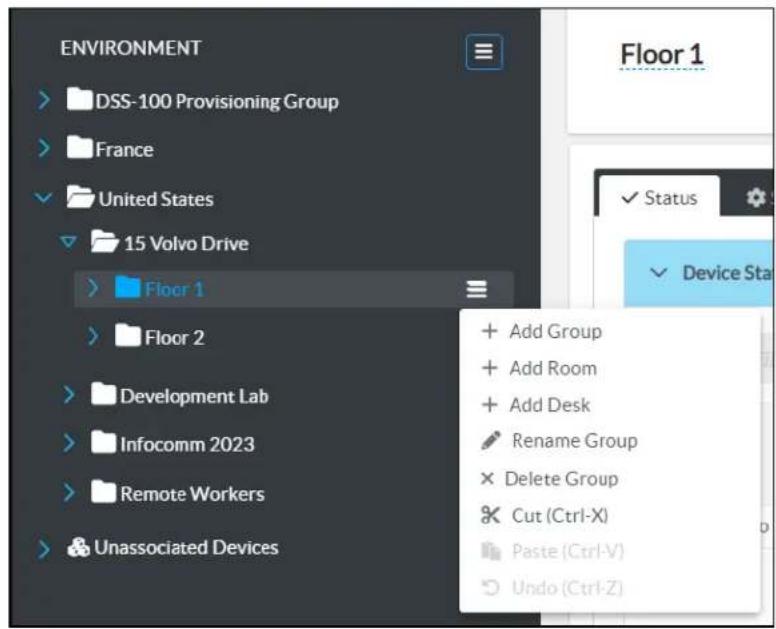
- Select Add Desk. The Add Desk dialog box is displayed.
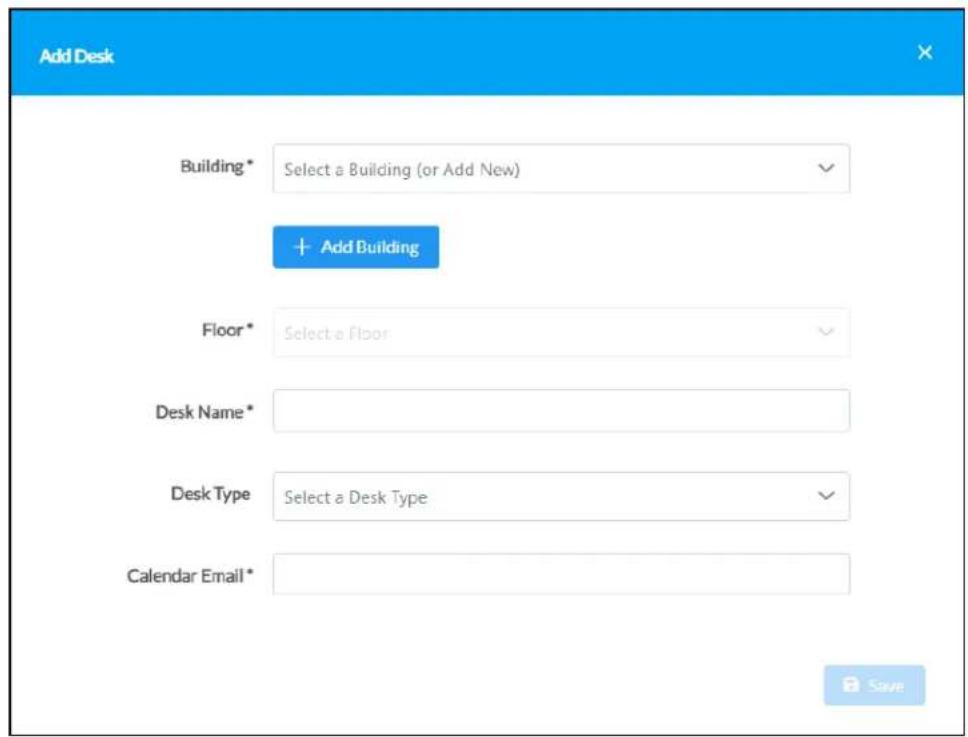
- Enter the following information for the desk:
• Building: Required. Use the drop-down menu to select a building that will be associated with the desk from the building address book.
If the desired building is not shown, select + Add Building to display the Add Building dialog box. For more information on adding a building, refer to Create a New Building on
- Floor: Required. Select the building floor where the desk is located. The available select are populated based on the floors configured for the building.
- Desk Name Required. Enter the desk name. This name will be displayed for the desk throughout the XiO Cloud service and in the Desk Scheduling UI on the touch screen.
- Desk Type: Use the drop-down menu to select the desk type. The available selections populated based on the desk types configured for the building address book. For my information, refer to Manage Space Properties on page 16.
- Calendar Email Required. Enter a unique scheduling calendar address that will be paired with the desk to control reservations.
- Select Save. The desk is added to the group and is reordered alphabetically within its parent group after it is added.
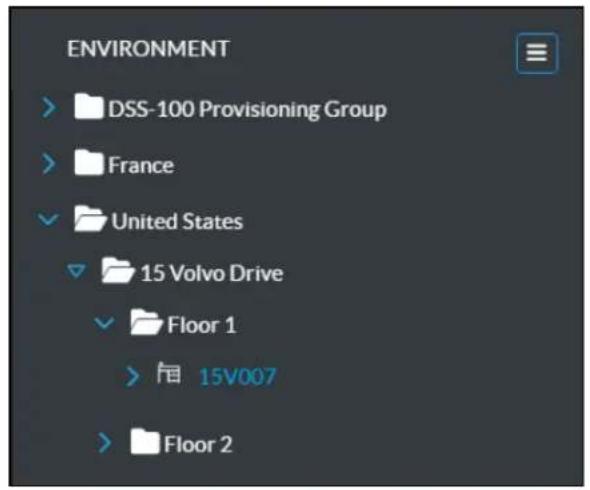
Edit a Desk
Once a desk has been added to the XiO Cloud environment tree, select it in the tree to open details page.
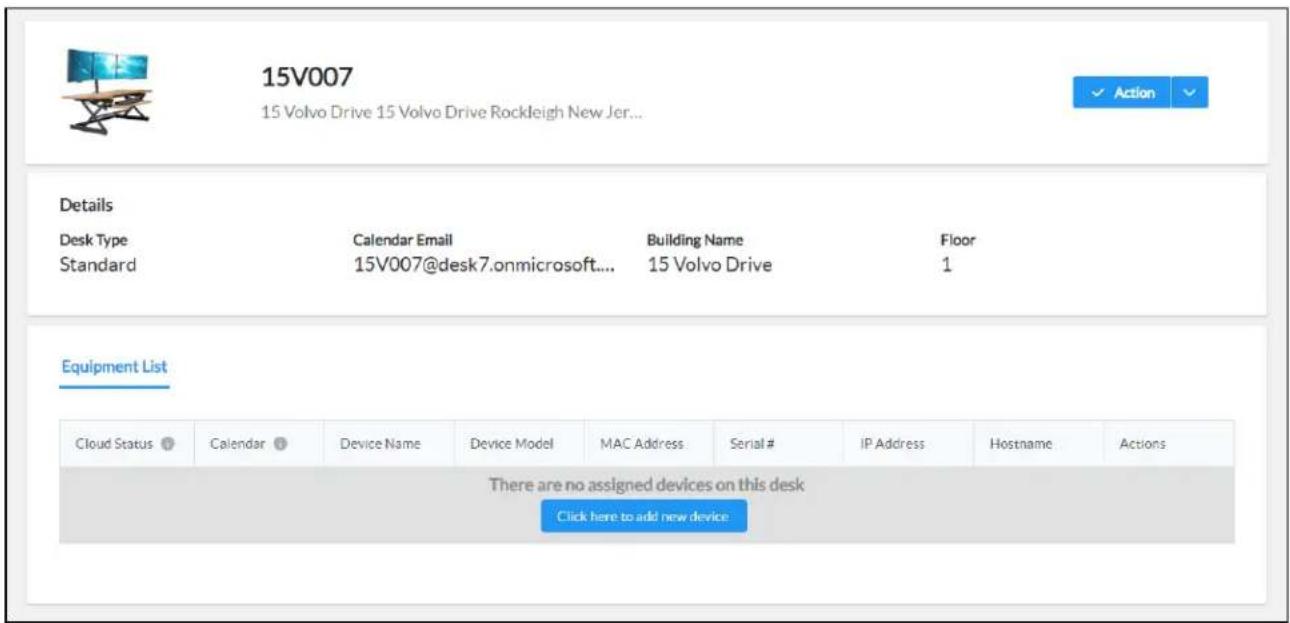
The following information is displayed for the desk:
- The user-defined desk name and the building address.
- A Details section that displays the desk type, scheduling calendar email address, building name, and floor.
- An Equipment List section that displays the status of the associated desk scheduling device (once added) and provides controls for adding a device.
An Action menu is also provided in the top right of the page that provides a Edit Desk Details selection for editing the desk.
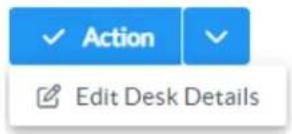
Select Edit Desk Details to display editable fields for desk settings.
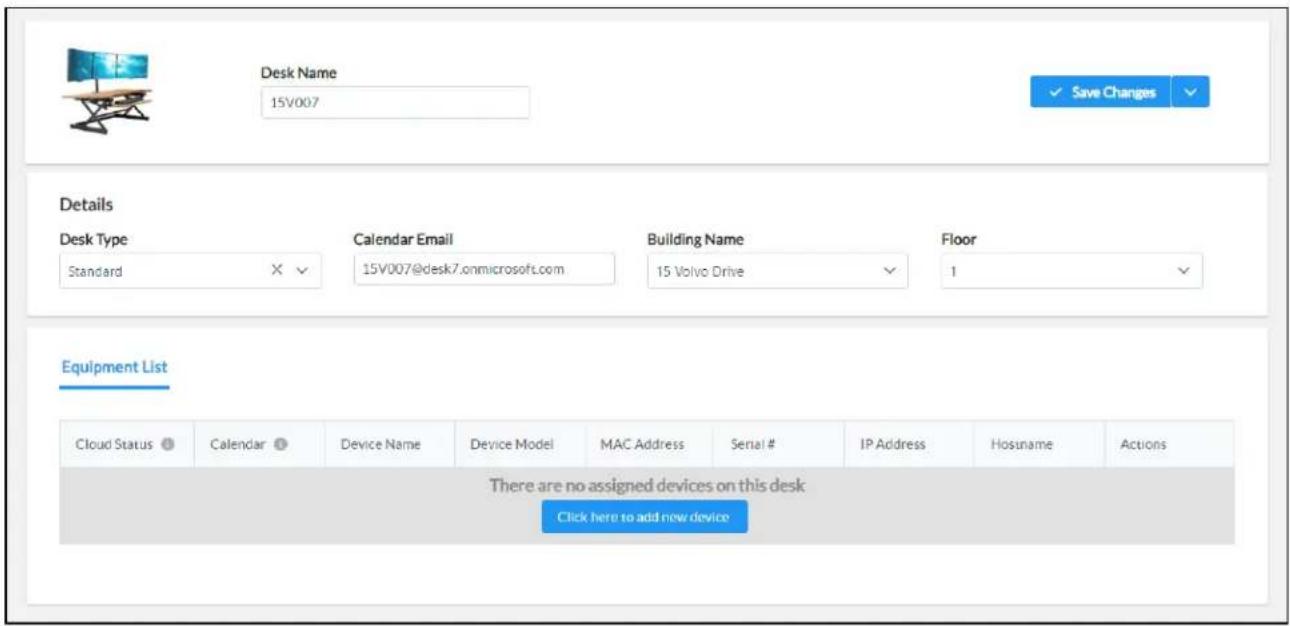
The following settings can be edited:
- Desk Name: Enter the desk name. This name will be displayed for the desk throughout tl XiO Cloud service and in the Desk Scheduling UI on a TSS-470E touch screen.
- Desk Type: Use the drop-down menu to select the desk type. The available selections are populated based on the desk types configured for the building address book. For more information, refer to Manage Space Properties on page 16.
- Calendar Email: Enter the unique scheduling calendar address that will be paired with the desk to control reservations.
• Building Name: Use the drop-down menu to select a building that will be associated with the desk from the building address book. - Floor: Select the building floor where the desk is located. The available selections are populated based on the floors configured for the building.
Select Save Changes to save any changes. A toast notification is shown indicating that the changes have been saved.
Rename a Desk
To rename an existing desk from the XiO Cloud environment tree:
- Position the cursor over the desk name in the ENVIRONMENT menu to reveal its context
- Select the context menu button for the desk to display a drop-down menu.
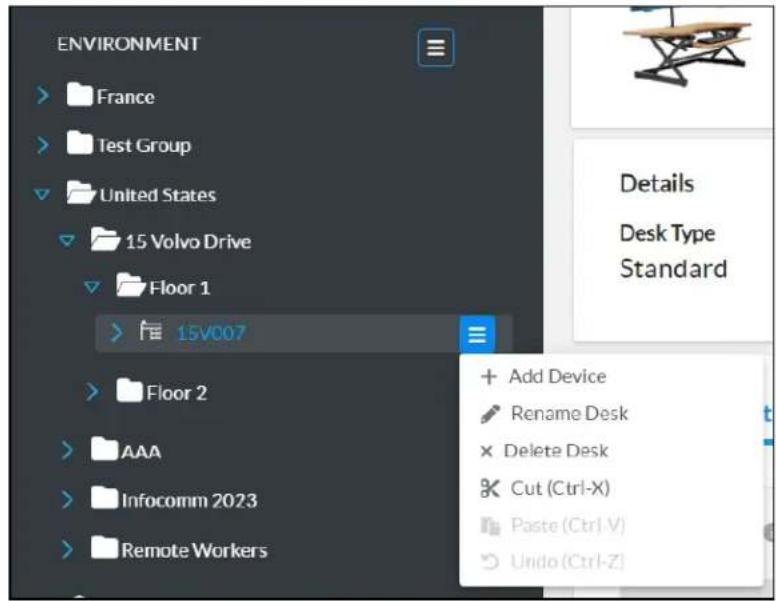
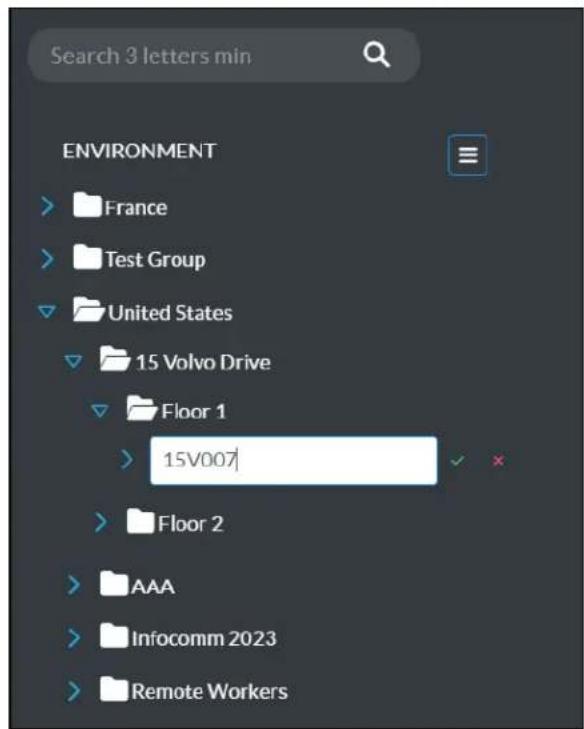
- Select Rename Desk. The room name becomes an editable text box.
-
Enter a new desk name in the text box. A room name must be at least three charac
-
Select the green check icon √ or press Enter to save the room name. Select the red x icon ✗ to discard the changes.
Delete a Desk
To delete an existing desk:
-
Position the cursor over the desk name in the ENVIRONMENT menu to reveal its context
-
Select the context menu button for the desk to display a drop-down menu.
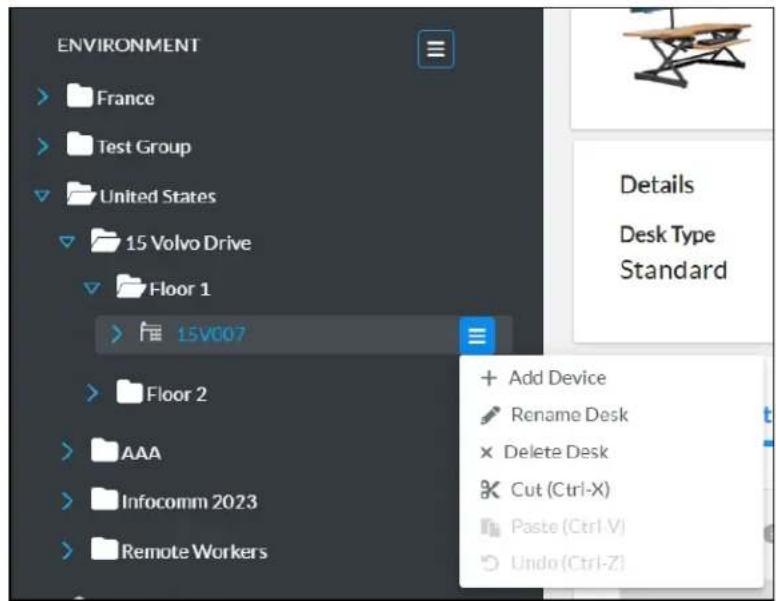
- Select Delete Desk. A confirmation prompt is displayed asking whether the desk should be deleted.
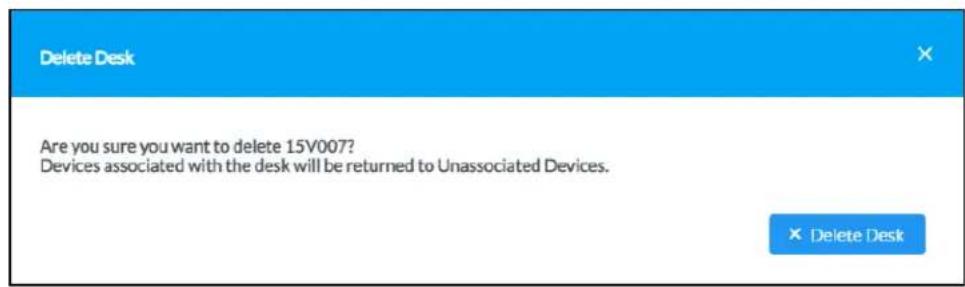
- Select Delete Desk to delete the desk or close the message window to cancel the delet
NOTE: If a desk scheduling device is associated with the desk, the device will become unassociated with the desk and return to the Unassociated Devices node within the XiC environment tree.
Associate a Desk Scheduling Device with a Desk
Each desk within the XiO Cloud environment tree must be associated with a unique desk sched device. Once a device is associated with the desk, status and settings for the device and so calendar connection can be viewed.
NOTE: The following procedure assumes that the desk scheduling device has been claimed to XiO Cloud service and is not associated with another desk. For more information on how to device, refer to Claim Devices on page 42.
To associated a desk scheduling device with a desk:
- Select the desk within the XiO Cloud environment tree to display its status page.
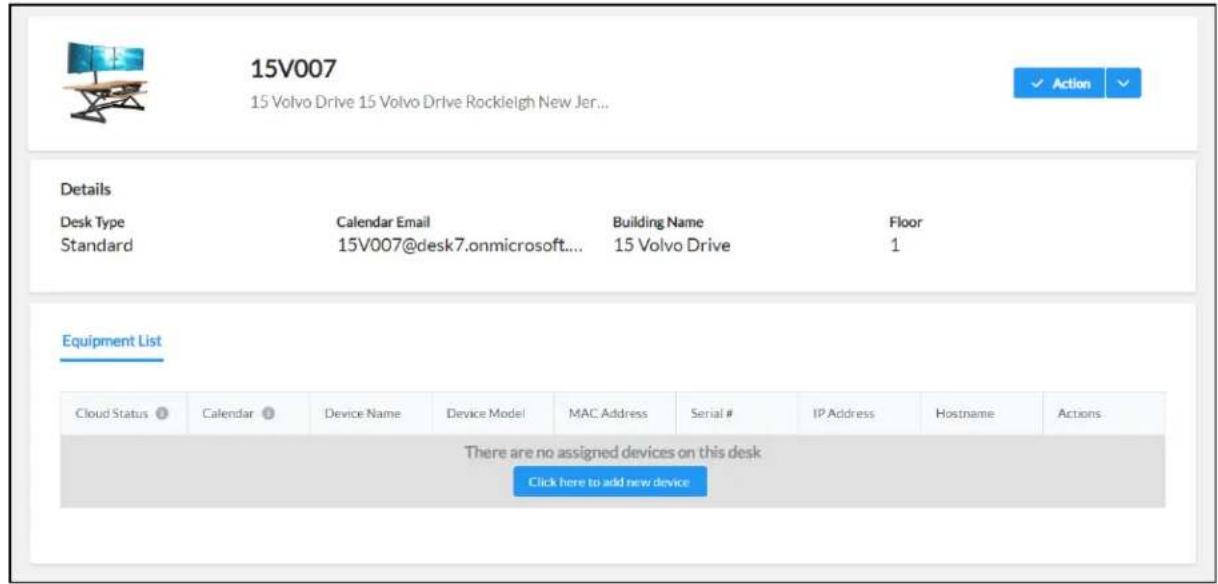
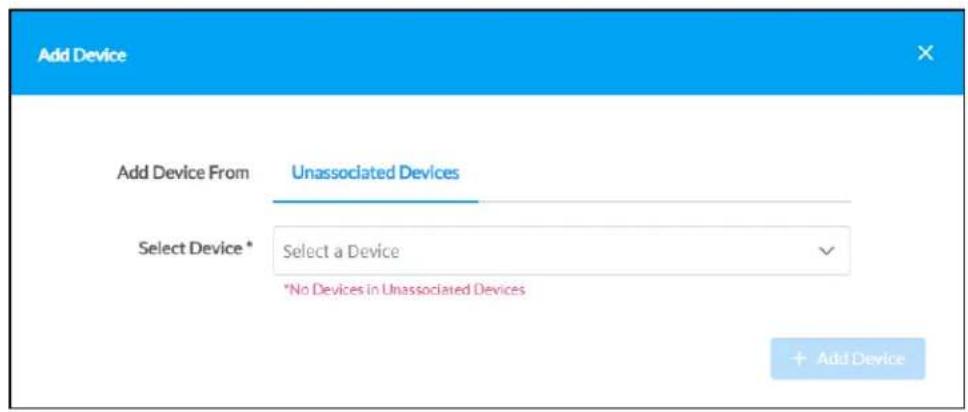
- Select Click here to add new devices in the Equipment List section. The Add Device dialog box is displayed.
NOTE: Alternately, the Add Device selection in the desk's environment tree context menu can be used to open the Add Device dialog box.
-
From the Unassociated Devices tab, use the Select Device drop-down menu to select an unassociated desk scheduling device within the XiO Cloud account.
-
Select Add Device once the unassociated desk scheduling device has been selected. The device is added to the Equipment List section of the desk status page.
NOTE: It may take up to 15 minutes for the device to establish a connection with the XiO Cloud service.
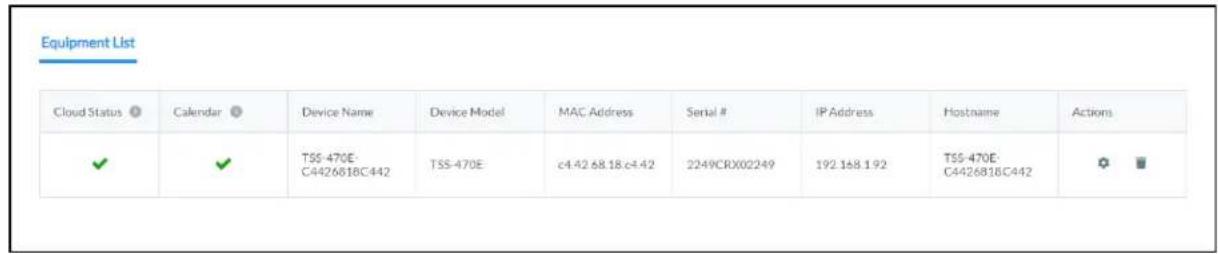
View Device Settings
Once the desk scheduling device has been associated with the desk, navigate to the Equipment List section of the desk status page to view the following device settings.
| Cloud Status ① | Calendar ② | Device Name | Device Model | MAC Address | Serial # | IP Address | Hostname | Actions |
| ✓ | ✓ | TSS-470E- C4426818C442 | TSS-470E | c4.42.68.18.c4.42 | 2249CRX02249 | 192.168.1.92 | TSS-470E- C4426818C442 |
- Cloud Status: Indicates whether the device is reporting online or offline within XiO Cloud. A device is reported as offline after the XiO Cloud service has missed three consecutive heartbeats from the device.
- Calendar: Reports the current status of the scheduling calendar connection:
° Shows a green check icon if the scheduling calendar connection is active.
- Shows a red x icon if the scheduling calendar connection is inactive.
° Shows a question mark icon if the scheduling calendar connection status is unknown (reported only if the device is showing as offline).
• Device Name: The device name in XiO Cloud.
• Device Model: The device model.
- MAC Address: The MAC address of the device network adapter used to connect to the XiO service.
- Serial #: The device serial number.
• IP Address: The current device IP address.
- Hostname: The device host name.
An Actions column is also provided that allows the device to be configured or deleted. For n information on configuring a device, refer to Manage Devices on page 56.
Claim Devices
Devices must be claimed by the XiO Cloud service before they may be managed by the serv may be claimed individually or as a group.
NOTE: Supported third-party devices that do not use the Crestron Connected® connection proto must be claimed using a Crestron control system or the Crestron XiO Cloud™ Gateway softw For more information, refer to the XiO Cloud® Service Third-Party Device Monitoring Configuration Guide.
Claim a Single Device
To claim a single device:
- Record the MAC address and serial number of the device. The MAC address and serial labeled on the shipping box or on a sticker attached to the device.
NOTES:
- If the device has multiple MAC addresses, use the MAC address that is providing primary connection back to the network. For most devices, the Ethernet MAC address should be used. However, if your device is connecting to the network over a different protocol (such as Wi-Fi® communications), use the MAC address for that protocol instead.
-
If claiming a Crestron software product (such as Crestron Virtual Control server software), the serial number and MAC address are generated by the software and be located using its web configuration interface. For Crestron software products that are preinstalled on a computer or other device (such as the VC-4-PC-3), do not serial number and MAC address labeled on the device.
-
In the XiO Cloud service, select the ENVIRONMENT menu button to display a drop-down menu.
Environment - Drop-Down Menu
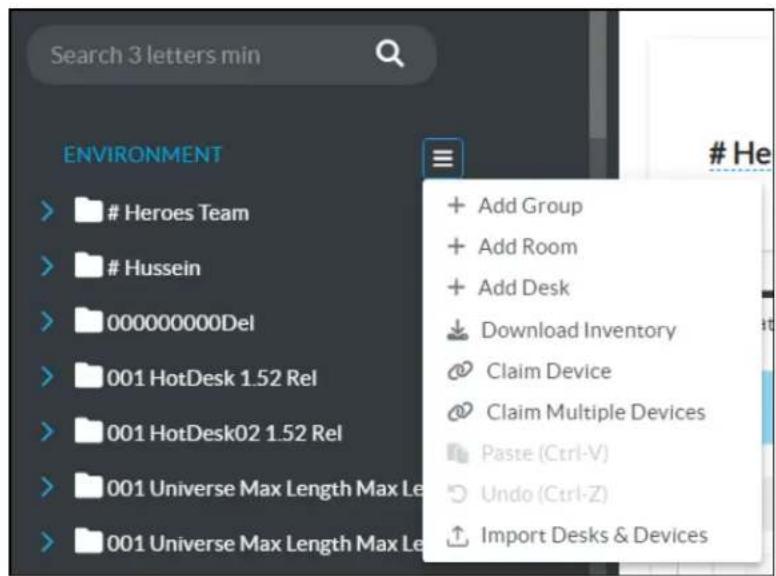
- Select Claim Device. The Claim Device dialog box is displayed.
Claim Device Dialog Box
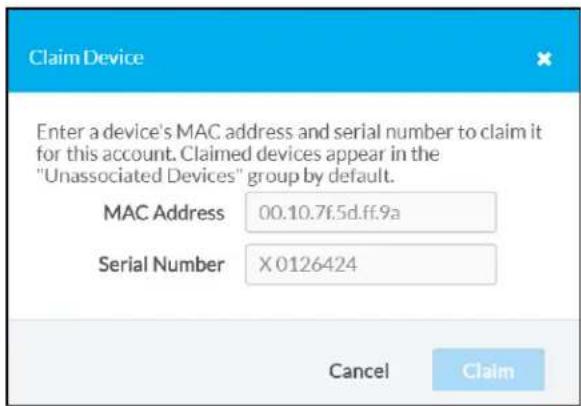
- Enter the MAC address and serial number recorded in step 1 in the MAC Address and Serial Number fields, respectively.
- Select Claim. A success message is displayed if the claim is successful.
NOTE: If an error message is displayed stating that the device does not exist, connect device to a network that has access to the internet, wait 15 minutes, and then try c
- Select X to close the dialog box. The host name of the claimed device is displayed in the device tree under the group Unassociated Devices.
Unassociated Devices
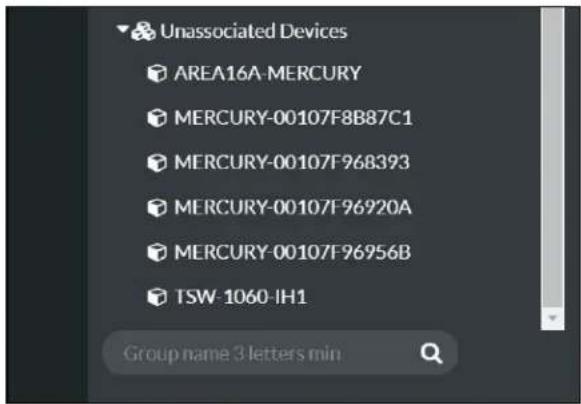
The device may now be managed and assigned to a group or room.
Claim Multiple Devices
To claim multiple devices:
- Record the MAC address and serial number of each device as a comma delimited CSV MAC address and serial number are labeled on the shipping box or on a sticker attached device.
NOTES:
- If the device has multiple MAC addresses, use the MAC address that is providing primary connection back to the network. For most devices, the Ethernet MAC address should be used. However, if your device is connecting to the network over a different protocol (such as Wi-Fi® communications), use the MAC address for that protocol instead.
- If claiming a Crestron software product (such as Crestron Virtual Control server software), the serial number and MAC address are generated by the software and be located using its web configuration interface. For Crestron software products that are preinstalled on a computer or other device (such as the VC-4-PC-3), do not serial number and MAC address labeled on the device.
The CSV file should be formatted as shown below:
CSV File Format
MAC Address, Serial Number
00.10.7e.8b.81.b6,17284712
00.10.7e.8b.8c.87,17284570
00.10.7e.96.83.93,1716JBG01207
00.10.7e.96.92.0a,1716JBG01550
00.10.7e.8b.87.c1,17284670
NOTE: An optional third column may be added to the CSV file with custom device no. After being claimed, the device will take the custom name from the CSV file instead default name. For example, if adding a custom device name to the first example abov formatting would be 00.10.73.8b.81.b6,17284712,[custom device name]
-
Save the CSV file to a location that may be accessed by the computer used to access: Cloud service.
-
In the XiO Cloud service, select the ENVIRONMENT menu button to display a drop-down menu.
Environment - Drop-Down Menu
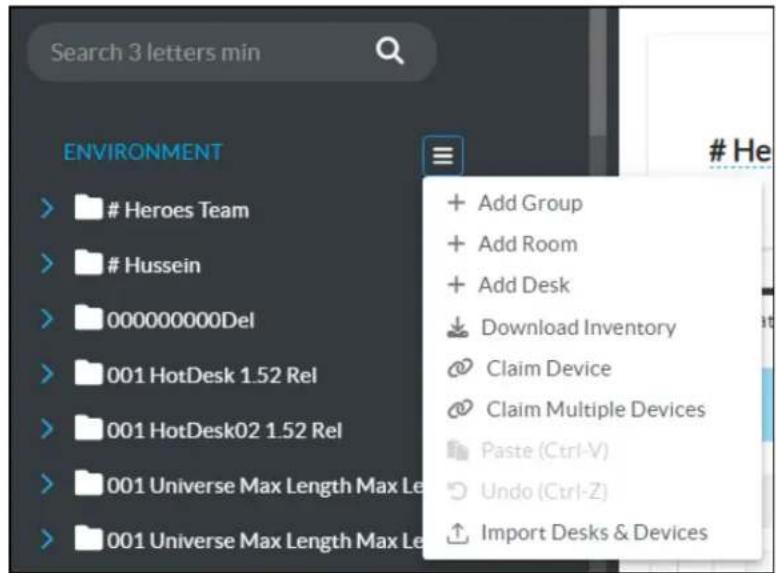
- Select Claim Multiple Devices. The Claim Multiple Devices dialog box is displayed.
Claim Multiple Devices Dialog Box
![Claim Multiple Devices To claim multiple devices, upload a CSV file of MAC addresses and serial number pairs. [sample] Claimed devices appear in the "Unassociated Devices" group by default. + Choose Claim Cancel Close](/content/2026/05/883356/images/555f5398d79c7eef59ffca1a3922270abe85347bca254f827263fa4bd08f1244.jpg)
-
Select Choose, and then select the CSV file created in step 1.
-
Select Claim to claim all of the devices listed in the file. A message indicating the claim status of each device is displayed.
NOTE: If an error message is displayed stating that a device does not exist, connect device to a network that has access to the internet, wait 15 minutes, and then try c
- Select X to close the dialog box. The host names of the claimed devices appear in the device tree under the group Unassociated Devices.
Unassociated Devices
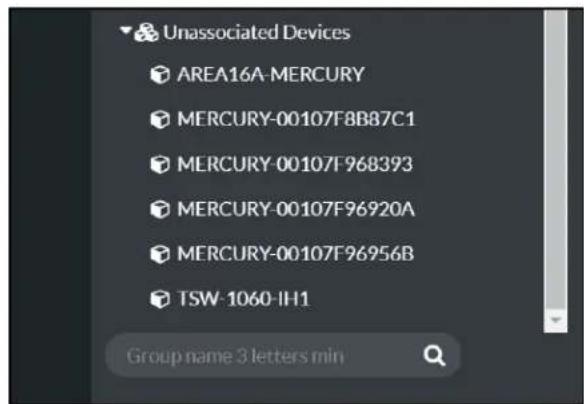
The devices may now be managed and assigned to a group or room.
Unclaim Devices
Devices may be unclaimed to remove them from a user's account. Once a device is unclaimed
- The device is no longer counted against the allotted number of devices for the account
• The device may be claimed by another account.
• The XiO Cloud service no longer enforces any settings on the device.
To unclaim a device:
- Position the cursor over the device in the ENVIRONMENT menu to reveal its context me
- Select the context menu button of the device to display a drop-down menu.
Device - Drop-Down Menu
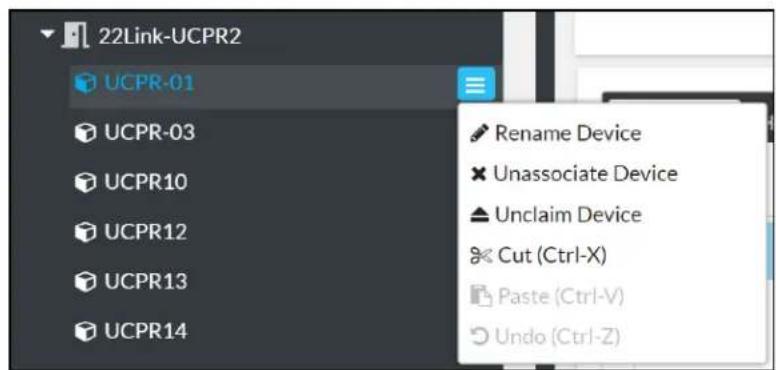
-
Select Unclaim Device. A confirmation dialog box is displayed.
-
Select Yes to unclaim the device, or select No to cancel.
NOTE: If a device that has any licenses on it is unclaimed, the licenses remain with the account and not the device. The licenses are removed from the device once it is unclaimed, or licensed functionality is no longer available on the device.
Add Devices to Rooms or Desks
Devices may be added to rooms after they are claimed by the XiO Cloud service. Once device to rooms or desks, all devices within a group or desk may be monitored and controlled at
Two methods may be used to add devices to a room or desk: Devices may be added via t menu for the room or desk, or devices may be dragged from the Unassociated Devices group room or desk.
To add devices to a room or desk via its context menu:
-
Position the cursor over the room or desk name in the ENVIRONMENT menu to reveal menu.
-
Select the context menu button for the group or room to display a drop-down menu. Group - Drop-Down Menu
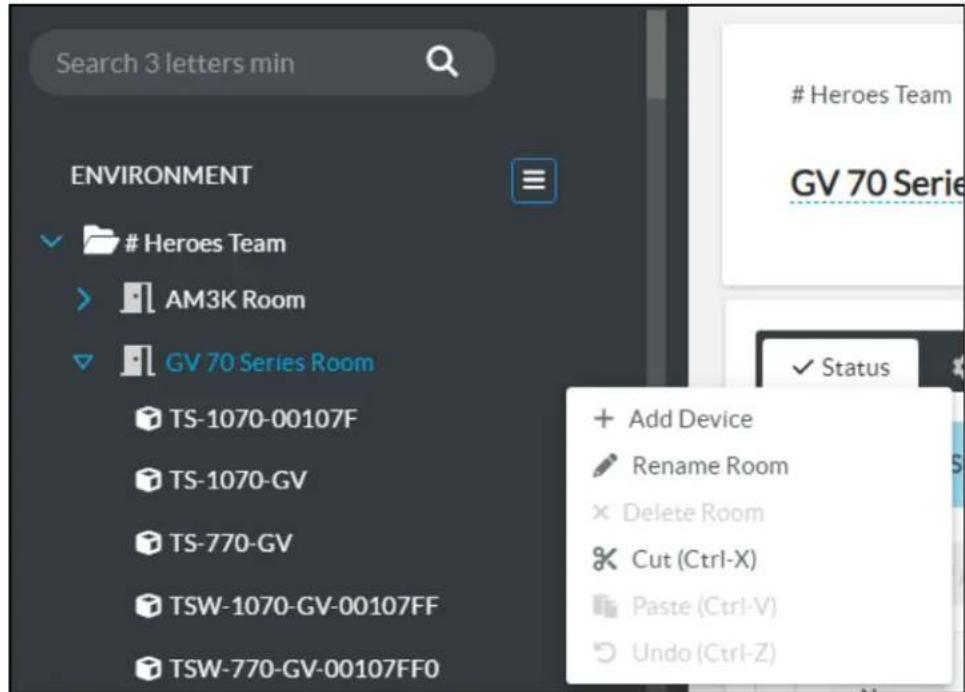
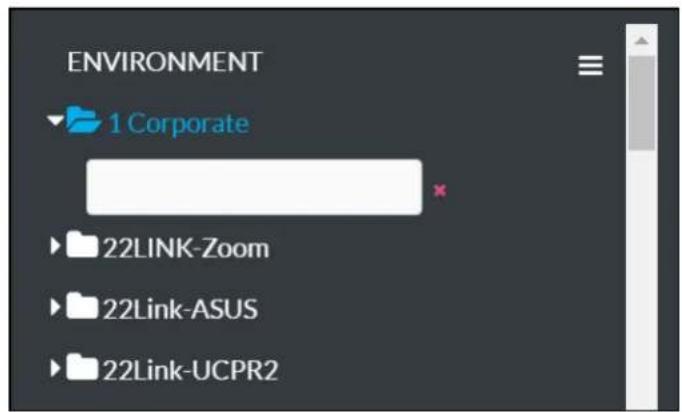
- Select Add Device. A text box is added under the selected room or desk. Group - Add Device Text Box
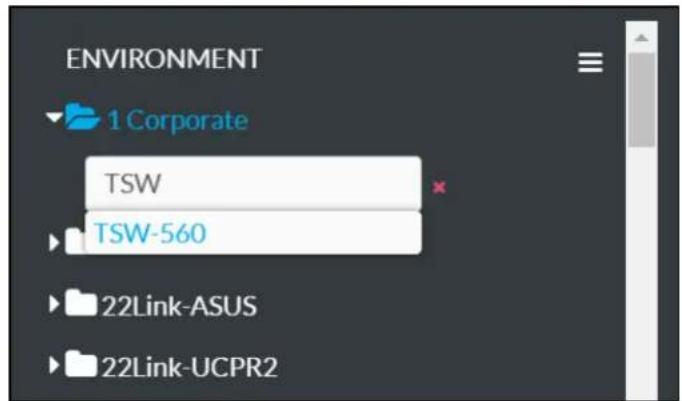
- Start typing the name of the desired device. A list of claimed devices that match the is displayed below the text box.
Group - Add Device Text Box (with Text)
- Select the desired device by clicking on it or by navigating to the device using the arre pressing Enter.
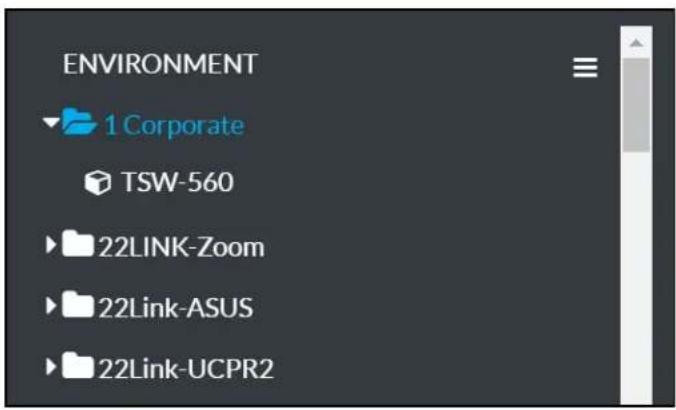
The device is reordered alphabetically within its parent room or desk after it is added. It is shown in the Unassociated Devices group.
Group - Device Added
To drag a device from the Unassociated Devices group into another room or desk:
- Select and hold the pointer over the device.
- Drag the device from the Unassociated Devices group and drop it into the desired room or desk.
The device is added to the room or desk and is no longer shown in the Unassociated group.
To return a device to the Unassociated Devices group:
- Position the cursor over the device in the ENVIRONMENT menu to reveal its context me
- Select the context menu button for the device to display a drop-down menu.
Device - Drop-Down Menu (Cut Action)
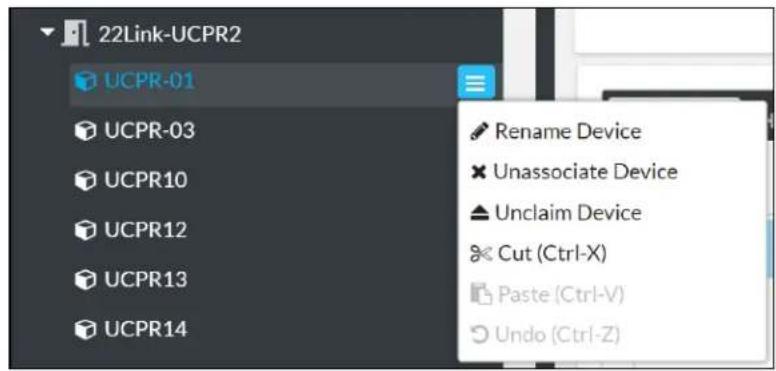
- Select Unassociate Device. The device is added back to the Unassociated Devices group and is no longer shown in its previous room or desk.
Devices may also be dragged to the Unassociated Devices group or to any other room or de supports added devices.
Select the device from the group tree to view and configure device settings. For more inform to Configure Device Settings on page 61.
Cut and Paste
The cut and paste functionality allows items in the group tree to be moved more easily than traditional drag and drop method, which is helpful when associating devices to rooms or groups. Cutting and pasting can be performed using the UI controls or keyboard shortcuts.
NOTE: Any item in the group tree can be cut and pasted. However, pasted items must abid organizational hierarchy of the group tree. For example, devices can only be pasted to room desks, top-level groups cannot be pasted under subgroups, and so forth.
To cut items (add them to the clipboard):
-
Select one or more items from the group tree. Press Ctrl + Shift on your keyboard to select multiple items.
-
Select the context menu button for one of the selected items to display a drop-down device - Drop-Down Menu
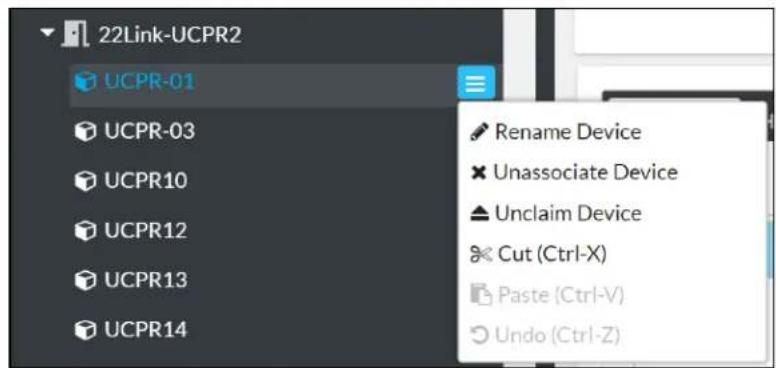
- Select Cut. The selected item(s) are added to the clipboard. Alternately, press Ctrl + x on your keyboard to perform this action.
To paste items that have been cut (added to the clipboard):
-
Select the parent node in the group tree where the cut items should be pasted.
-
Select the context menu button for the selected group tree node.
Group - Drop-Down Menu (Paste Action)
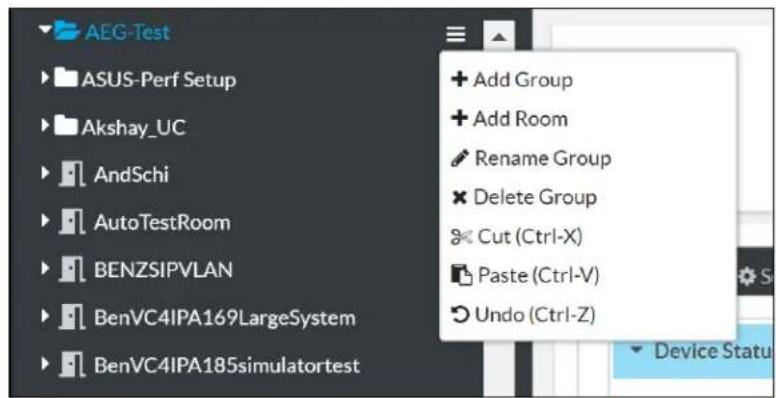
- Select Paste. The selected item(s) are pasted into the selected group tree node as long as it abides by the group tree hierarchy. Alternately, press Ctrl + v on your keyboard to perform this action.
To undo the previous cut or paste action, select Undo from the appropriate context menu or press Ctrl + z on your keyboard.
Download Inventory
An inventory report for the XiO Cloud account can be downloaded as a CSV file. The inventory includes basic information about claimed devices and their location within the group tree.
To download the inventory report:
- Select the ENVIRONMENT menu button to display a drop-down menu. Environment - Drop-Down Menu
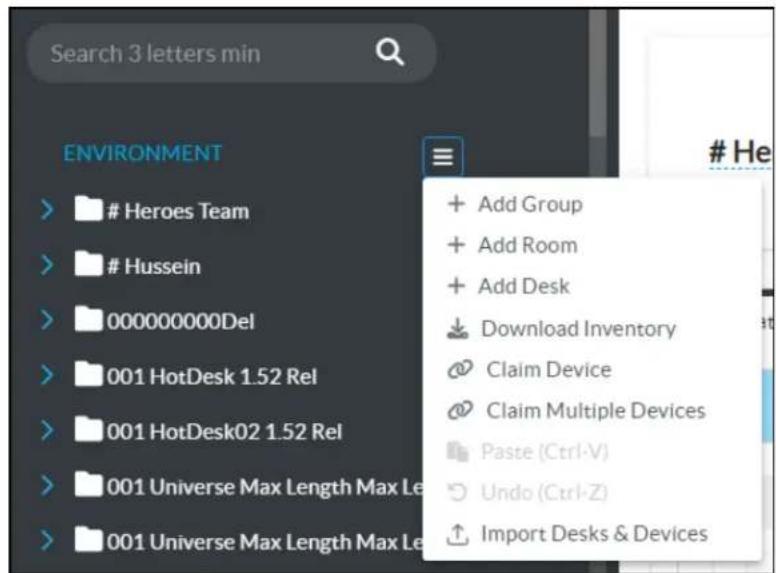
- Select Download Inventory. The inventory report is downloaded to your PC as a CSV file.
Licensed Features
For room-based accounts, licenses can be purchased to enable specific functionality within the XiO Cloud service. Licensed features may be added to rooms, removed from rooms, or transferr different rooms.
NOTE: Licensed features can be configured only by users with Global Administrator permissions.
The SETTINGS menu for licensed features is located in the user management panel, which ma accessed by selecting the Settings button in the navigation menu.
Settings - Services Option
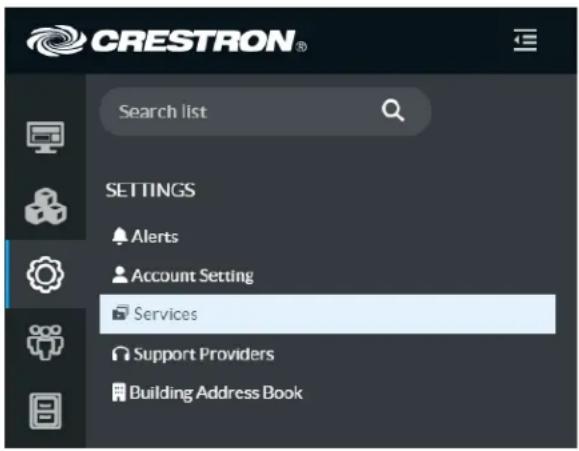
Select Services in the SETTINGS menu. A Room Services page is displayed to the right of the SETTINGS menu.
Room Services Page
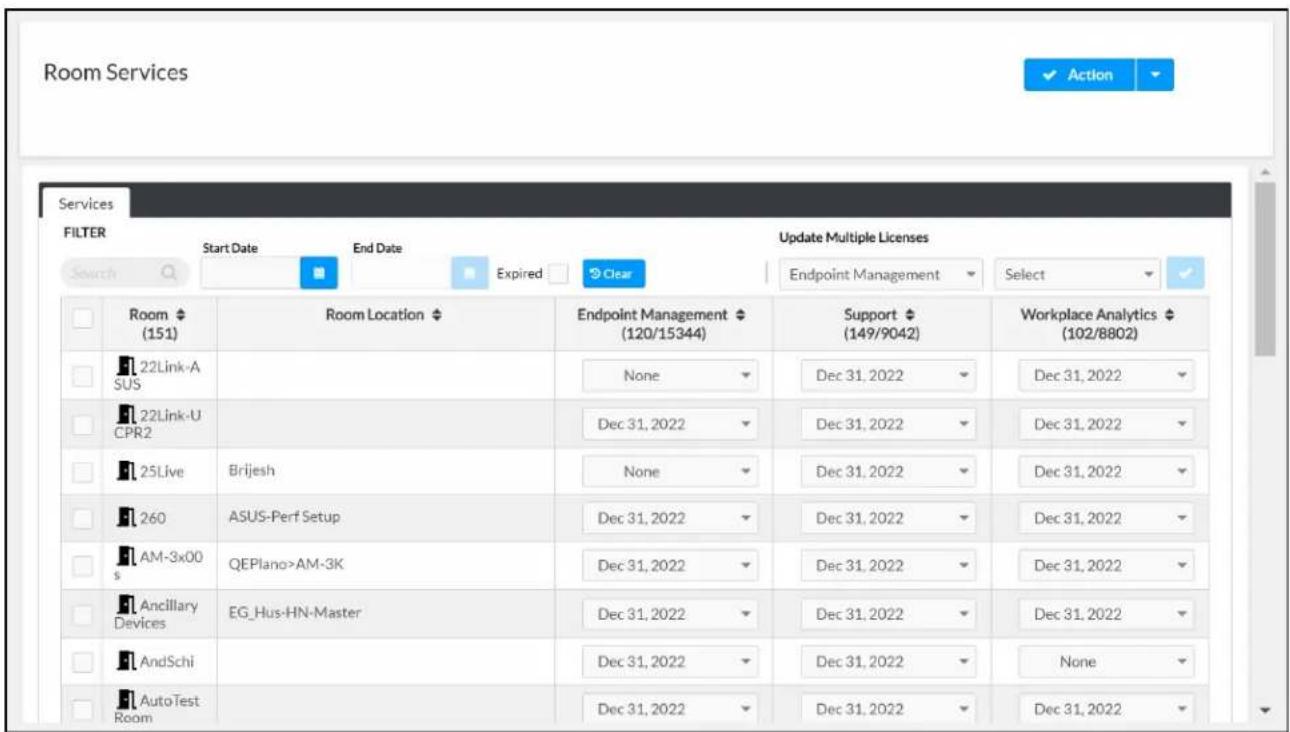
Licensed features are organized by room name and displayed within a table. The total number available licenses versus purchased licenses for each feature is displayed next to the license type table headings.
Drop-down menus for each license type are also displayed within each room row:
- If a license has not been applied to the room, the drop-down menu shows the None si
- If a license has been applied to the room, the drop-down menu shows the license expiry. If multiple licenses are available, use the drop-down menu to select a different license.
- Select Remove License from the drop-down menu to remove a license from a room and back to your license pool.
- Enter text into the provided search field to display licenses that match the search term(
Apply Multiple Licenses
Licenses can be applied to multiple rooms at once using the Apply Available Licenses feature, which can be selected from the Action drop-down menu at the top right of the page.
Room Services Page - Apply Available Licenses
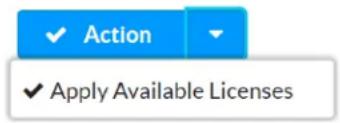
Selecting Apply Available Licenses will display a warning message showing the number of unlicensed rooms for each license type. Select Apply to apply the available licenses from your license pool to the unlicensed rooms.
NOTE: If the number of available licenses is less than the number of unlicensed rooms for a particular license type, this information is indicated in the warning message. Licenses will be to only a number of rooms that match the license count.
Update Multiple Licenses
Licenses can be updated for multiple rooms at once using the Update Multiple Licenses feature, which is located at the top right of the license table.
Room Services Page - Update Multiple Licenses

- Select the license type to be updated from the first drop-down menu under Update Mul Licenses.
- Select the license expiration date from the second drop-down menu under Update Multiple Licenses.
- Check the check box next to any room that should be updated with the license type s step 1. Check the check box in the table header row to select or deselect all rooms tl on the page.
NOTE: If no check boxes are checked, the selected license type will be applied to all re the account.
- Select the check button under Update Multiple Licenses. A dialog box is displayed asking whether the licenses should be applied to the chosen room(s).
NOTE: If the number of available licenses is less than the number of selected rooms, a message with this information will be shown in the dialog box.
- Select Apply. The license type selected in step 1 will be applied to all rooms selected in step 3.
NOTE: If a room already has a license of the selected type applied, this process will replace the existing license with the newly selected license.
Filter and Manage Licenses
Enter text into the global search field at the top left of the screen to search for and disp locations that match the search term(s). Additionally, use the Start Date and End Date text boxes to filter licenses by the provided date range, and use the Clear button to clear the current filters. Check the Expired check box to display only licenses that have expired.
Room Services Page - Filter

If the room list spans multiple pages, use the navigation arrows on the bottom of the page forward or backward through the pages, or select a page number to navigate to that page. type also provides arrow controls in its heading row that sorts the available rooms by license date.
The following information and controls are provided for each listed room:
• Room: The room name
- Room Location: The location of the room within the group tree hierarchy
- Endpoint Management: Indicates whether an Endpoint Management license has been assigned to the room
NOTE: An Endpoint Management license is required for the room before any other license functionality can be added.
- Support: Indicates whether a Support license has been assigned to the room. Removing a license adds it back to the customer's license pool.
- Workplace Analytics: Indicates whether a Workplace Analytics license has been assigned to room. A Workplace Analytics license can be added only if one or more unused Workplace licenses are available in a customer's license pool. Removing a Workplace Analytics license back to the customer's license pool.
Manage Devices
Devices may be managed via the XiO Cloud service after they have been claimed by the ser added into a licensed group or room. Devices may be managed individually or as a group.
Select a device from the group tree to view and configure the device status, settings, and line configuration page for the device also provide options for viewing status dashboards and activities and automated actions may be scheduled for the device.
NOTE: Not all device management options are available for some devices.
Device Configuration Page
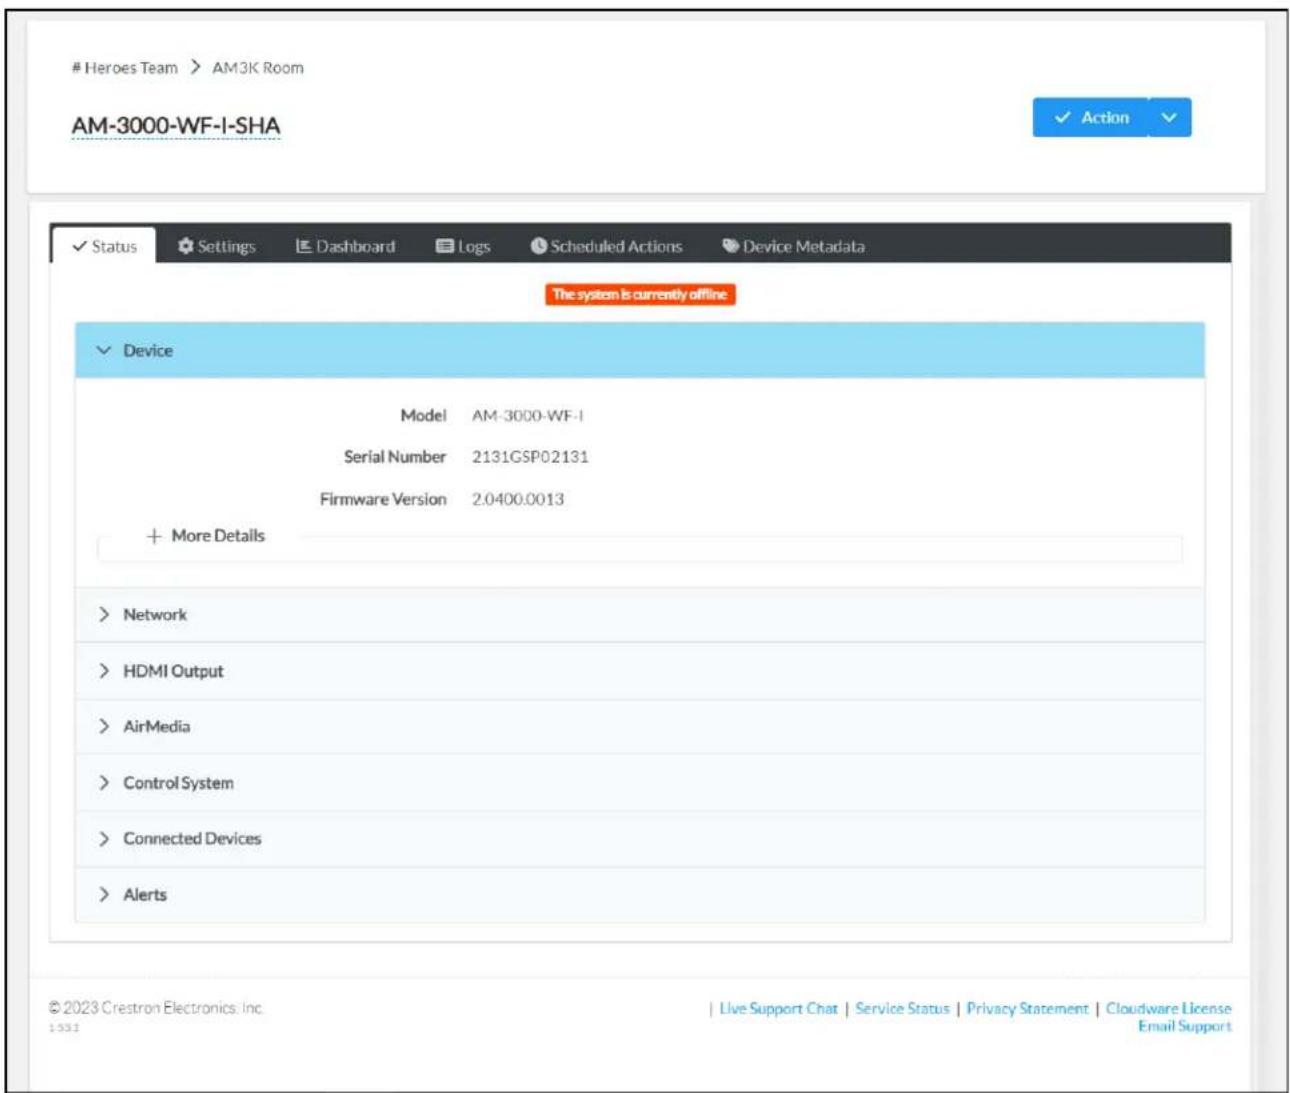
Use the following procedures to manage devices via the XiO Cloud service.
Rename a Device
Each device in the XiO Cloud service has a unique device name, which allows the device to and organized within the service. The device name is used only by the XiO Cloud service.
By default, the device name is set as the host name of the device. However, the device mc as needed.
NOTE: Changing the device name has no impact on the host name or other identifying fea the hardware.
Two methods may be used to rename a device: The device name may be changed in the gi from its configuration page.
To change the device name in the group tree:
-
Position the cursor over the device in the ENVIRONMENT menu to reveal its context me
-
Select the context menu button of the device to display a drop-down menu.
Device - Drop-Down Menu
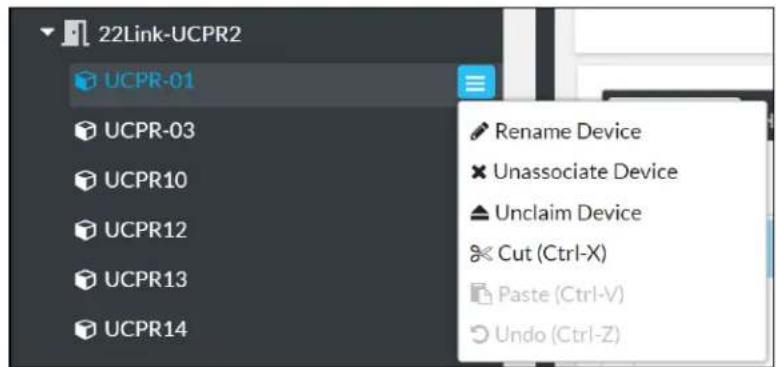
- Select Rename Device. The device name becomes an editable text box.
Device - Edit Device Name
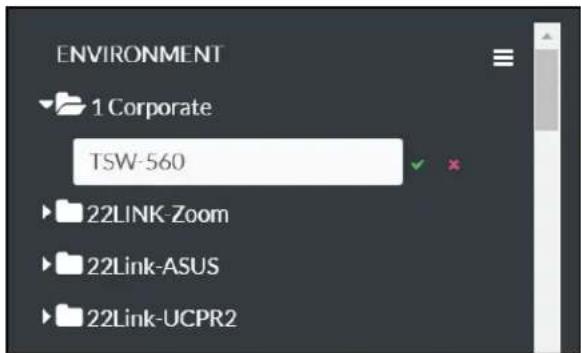
-
Enter a new device name in the text box. A device name must be at least three cha
-
Select the green check icon √ or select Enter to save the device name. Select the red x icon ✗ to discard the changes.
To change the device name from the configuration page:
- Select the device from the group tree to display its configuration page.
Device Configuration Page
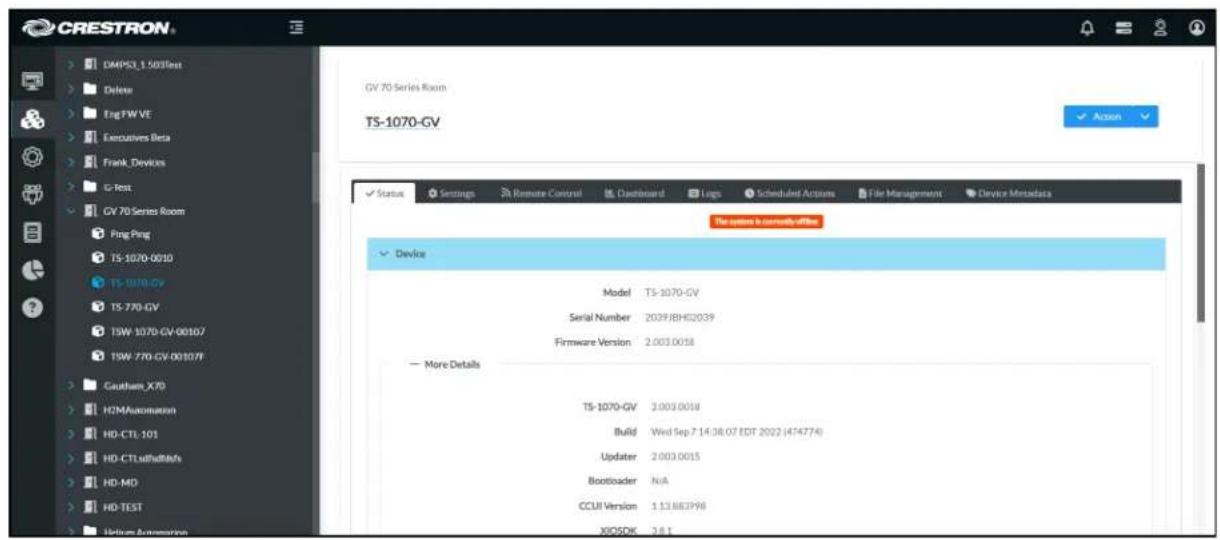
- Select the device name on the top left of the configuration page. The device name be editable text box.
Device Configuration Page - Edit Device Name
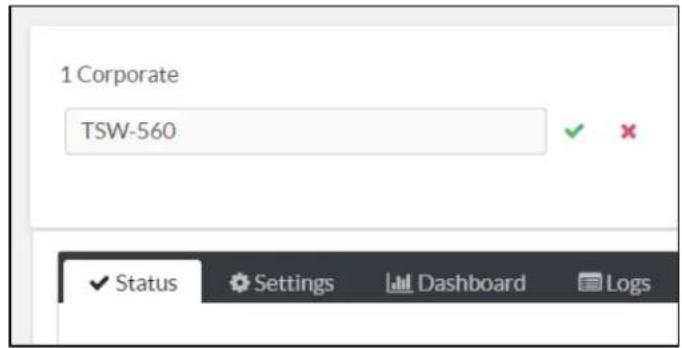
-
Enter a new device name in the text box. A device name must be at least three cha
-
Select the green check icon √ or select Enter to save the device name. Select the red x icon ✗ to discard the changes.
View Device Status
The device status may be viewed for individual devices or for multiple devices within the same room.
View Status for a Single Device
To view the status for a single device, select a device from the group tree to display its c page. The Status tab is open by default.
NOTE: A device must be added into a licensed room or group before its configuration page c viewed.
Device Configuration Page - Status Tab (Devices)
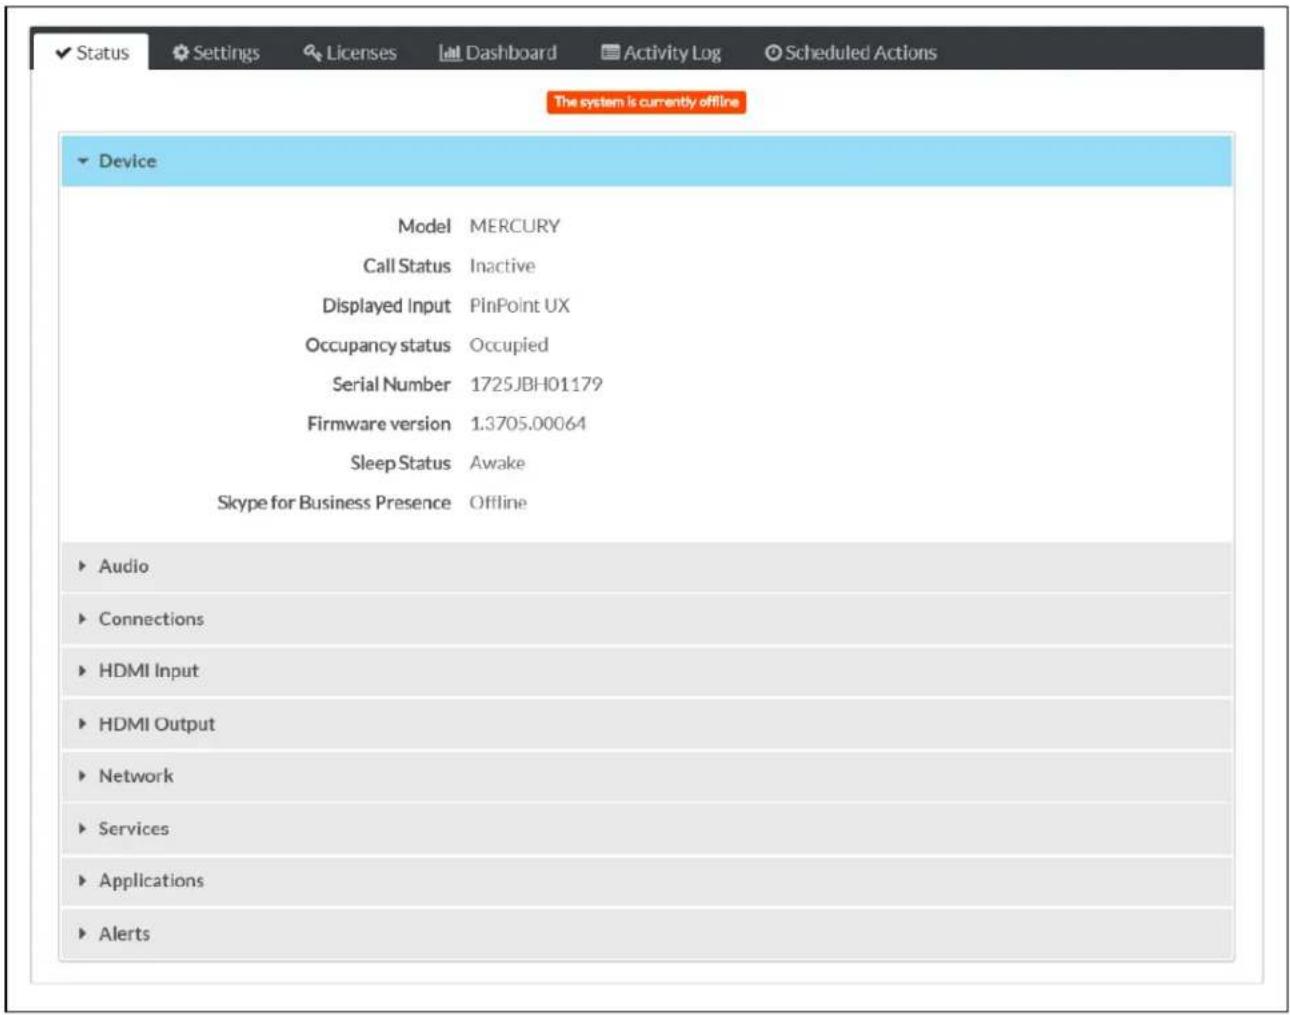
The Status tab provides expandable "accordions" that display static and changing device attributes.
Dynamic attributes, such as volume, change in the appropriate status accordion within seconds changed on the device.
Select an accordion name to expand it. If the accordion is expanded, select the accordion nar collapse it. The accordions provided vary depending on the device.
View Status for a Group of Devices
To view the status for multiple devices within the same group or room, select a group or group tree to display its configuration page. The Status tab is selected by default.
Group Configuration Page - Status Tab (Device Status)
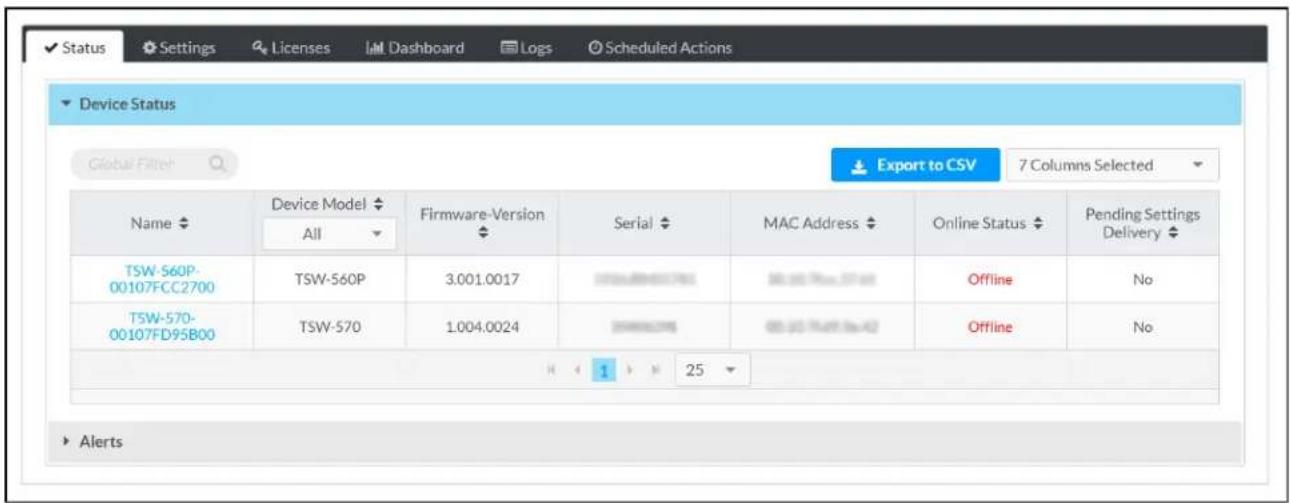
The Status section lists all of the devices within the group or room and any subgroups in table format. The Device Status table provides a subset of important status information for the devices within the group and its subgroups.
NOTE: Selecting the Unassociated Devices group displays the device status for all unassociated devices in the account. Only the Name, Device Model, Serial, and MAC Address status fields are provided for unassociated devices. An unassociated device must be moved to a licensed room group before its individual status can be viewed.
The following information is displayed for each device by default:
• The name and model
• The loaded firmware version, including whether any firmware updates are pending
• The serial number and MAC address
• The online status, which indicates whether the device is connected to the XiO Cloud service
- The pending settings delivery status, which indicates whether any device settings changes or pending
NOTE: If the Pending Settings Delivery status is Yes, device settings have been saved in the portal but have not yet been applied to the device (such as in instances where the unplugged).
The data that is displayed for each device in a group or room can be customized by filterir columns for that group or room. By default, 7 columns are displayed that contain the data the list above. Up to 15 columns can be displayed by selecting or deselecting a column in the drop-down menu.
To select or deselect table columns for a group or room, expand the drop-down menu at the status table. Then, select or deselect an item in the menu to display or hide that column status table, respectively. Use the check box at the top of the menu to select or deselect c
Column Selection Drop-Down Menu
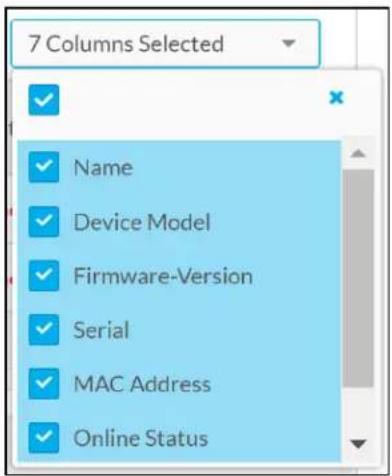
NOTE: Changes made to the status table are made only on a per-group or room basis. The table will reset to its default settings after logging out of the XiO Cloud service.
The device status table for a group or room can be downloaded as a CSV file by selecting the Export to CSV button at the top right of the status table. The CSV file will include all table columns that have been selected as described above.
Enter text into the Global Filter text box to search for and display devices that match the search terms.
If the device lists spans multiple pages, use the navigation arrows on the bottom of the page forward or backward through the pages, or select a page number to navigate to that page. the number of devices displayed on each page may be set to 5, 10, 20, or 25 devices.
Configure Device Settings
Device settings may be configured for individual devices or for multiple devices within the same room.
Configure Settings for a Single Device
To configure the settings for a single device, select a device from the group tree to display configuration page, and then select the Settings tab.
NOTE: A device must be added into a licensed room or group before its configuration page c viewed.
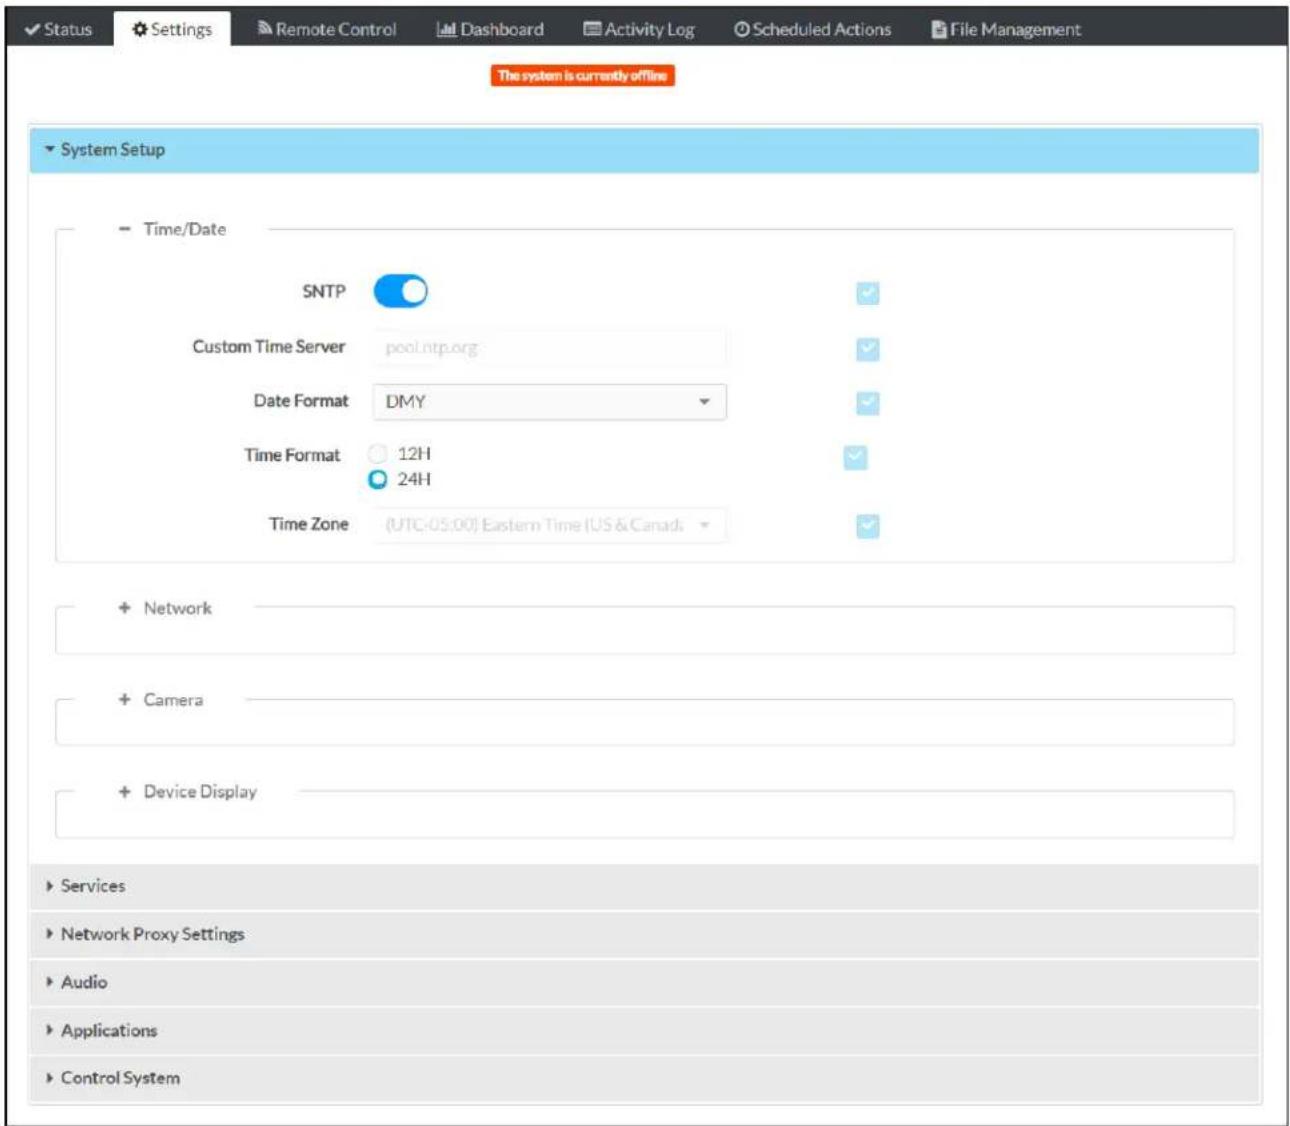
The Settings tab provides selections for configuring various device settings. When a device is first claimed and added to a group, the current device settings are prepopulated in the XiO Cloud To change a device setting:
- Locate the device setting in the appropriate Settings accordion.
The accordions provided vary depending on the device. Some accordions include subsections may be expanded by selecting the plus (+) button next to the subsection name. If the subsection is expanded, select the minus (-) button to collapse the subsection.
- Fill the check box next to a setting to enable it in XiO Cloud.
If a setting is not enabled in XiO Cloud, it will not be sent to the device and can b processes outside of XiO Cloud (such as joins).
NOTE: If a setting is enabled in XiO Cloud, it will show what is currently saved in the portal. If a setting is not enabled in XiO Cloud, it will show what is currently set on the devi
For more information on configuring specific settings for a device, refer to its documentation of www.crestron.com/manuals.
Once a device setting has been changed, the Actions button on the top right of the configuration page changes to a Save Changes button. Select Save Changes to push the updated setting(s) to the device.
Save Changes Button
304 Link
TSW-1060-IH1

After the settings have been pushed from the cloud to the device successfully, a toast notification displayed confirming the success.
Device Settings Saved Successfully Message

Device Settings have been saved successfully TSW-1060-IH1

If the device has not yet received the settings, orange "Delivery to Device Pending" text is s the changed settings until the device receives the settings.
NOTES:
- Depending on the settings that are changed, the device may restart a few minutes of Changes is selected.
- Each setting checks for valid input. If an invalid input is entered, red text explaining t displayed next to the setting, and a red underline is shown under the setting. Changes be saved until the error is resolved.
- A setting entered at the group level cannot be edited on the individual device page. E device in a group inherits any group-level settings.
To undo changes before saving the settings to the device, select the drop-down arrow next to the Action (or Save Changes) button, and then select Revert. The device settings are returned to their last saved state.
Configure Settings for a Group of Devices
To configure the settings for multiple devices within the same group or room, select a group from the group tree to display its configuration page, and then select the Settings tab.
Group Configuration Page - Settings Tab (System Setup)
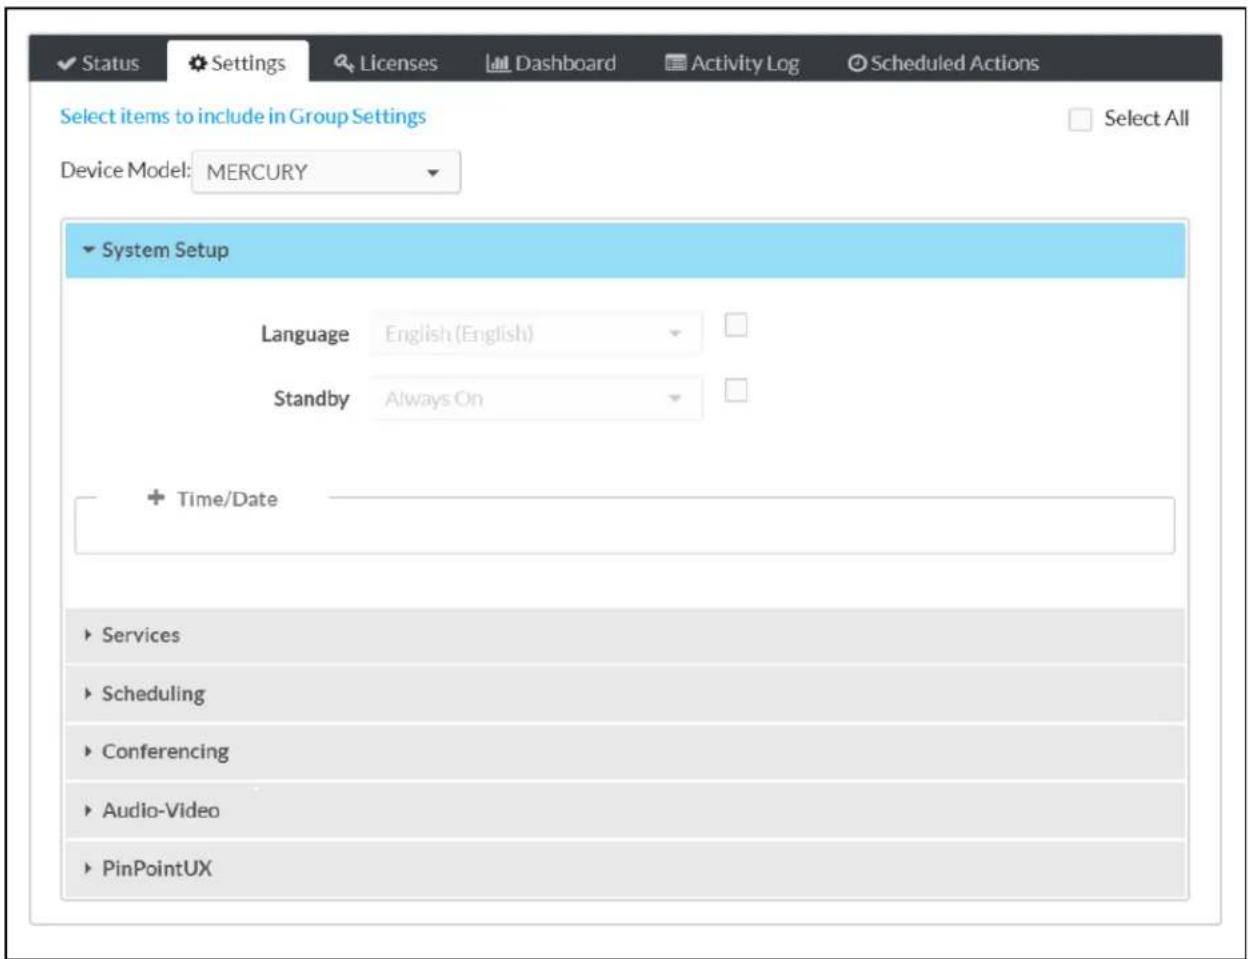
Configuring device settings (such as language or date and time) at the group level pushes that to every device in that group or room or its subgroups. Device settings configured at the group overwrite the same settings on the individual device pages.
NOTE: No device settings can be configured for devices within the Unassociated Devices group. An unassociated device must be moved to a licensed room or group before its settings can be configured.
Each group-level setting in the Settings section provides a check box next to the setting:
- Select an empty check box to activate the associated setting at the group level. Green displayed next to the setting to indicate that the setting is now included in the group
- Select a filled check box to disable the associated setting at the group level.
By default, all group-level settings are disabled.
System Setup Accordion (Language Setting Enabled)
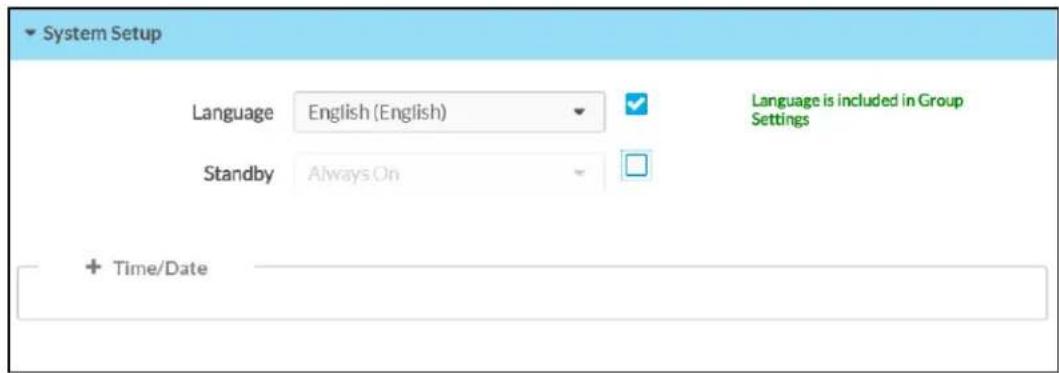
Group-level settings in the Settings section are organized by device type. To configure the group-level settings for a device type:
- Select the desired device type from the Device Model drop-down menu on the top left Settings section.
- Navigate through the accordions provided for each device to locate the desired group-level settings.
- Select the applicable check box(es) next to the group-level settings to activate the associated setting at the group level.
Once a group setting has been changed, the Actions button on the top right of the configuration page changes to a Save Changes button. Select Save Changes to save the group-level settings.
Save Changes Button

Additional settings may be configured for subgroups after changes are made at the parent gr
Only settings that have not been configured for the parent group may be activated. Parent g settings are disabled because they are inherited by the subgroup. A "Setting is Inherited from text is displayed next to any subgroup settings that may not be activated, where [Group] is group name.
System Setup Accordion (Subgroup)
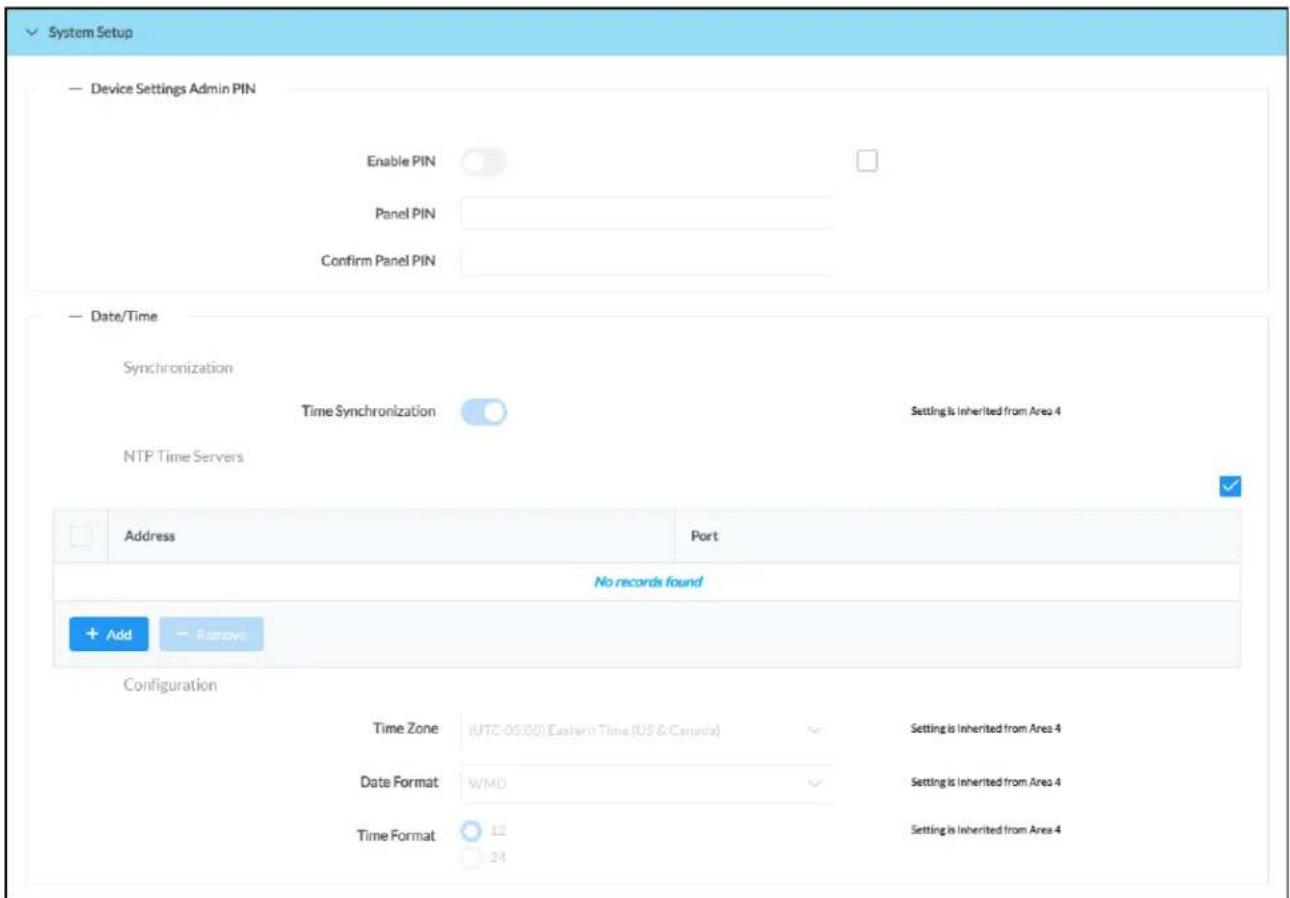
Subgroup-level settings in the Settings section are organized by device type. To configure the subgroup-level settings for a device type:
- Select the desired device type from the Device Model drop-down menu on the top left Settings section.
- Navigate through the accordions provided for each device to locate the desired subgroup-I settings.
- Select the applicable check box(es) next to the subgroup-level settings to activate the as: setting at the subgroup level.
Once a subgroup setting has been changed, the Actions button on the top right of the configuration page changes to a Save Changes button. Select Save Changes to save the subgroup-level settings.
Save Changes Button
304 Link

Any remaining settings may be configured for individual devices after changes are made at the group and subgroup level.
Only settings that have not been configured for the parent group or subgroup may be config Parent group and subgroup settings are disabled because they are inherited by the device. An from Group Settings" text is displayed next to any device settings that may not be activated
NOTE: Unchecking the check box for a group setting does not change the setting for an individual device, but makes it possible to change the setting on the individual device configuration page.
Device Status Page Showing "Inherited from Group Settings" Text
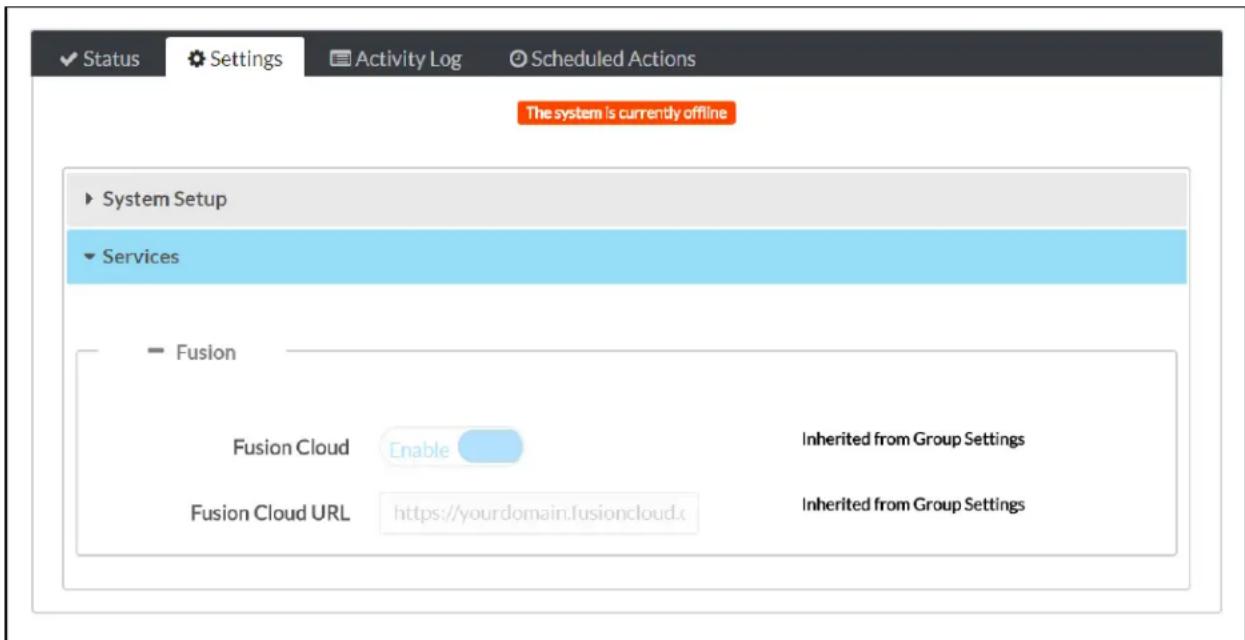
NOTE: Adding a device to a group or room automatically pushes down any of the settings group to the device.
Prevent Unnecessary Restarts
Under rare circumstances, applying certain settings to a device may cause unexpected device be such as repeated restarting, to occur.
If the XiO Cloud service detects a device in this state:
- The XiO Cloud service stops sending the setting that is causing the issue to the device, prevents restarts from occurring.
- A message is displayed on the device settings page stating that undesired behavior was and that settings are no longer being sent to the device.
• An alert message is placed next to the setting that is causing the issue.
To resume sending settings to the device, update the setting that is causing the issue, and the Save Changes from the Action menu. The XiO Cloud service resumes sending settings to the device once it verifies that the problem setting is fixed.
Manage Licenses
Certain Crestron devices use licenses to enable extra functionality. These licenses may be mana through the XiO Cloud service. Licenses may be added to devices, removed from devices, or t to different devices.
The XiO Cloud service maintains a record of all of the licenses that have been purchased for customer's account, including licenses that were included with purchased devices.
NOTE: As of XiO Cloud release 1.36, managing device licenses (such as VC-4 server licenses) within XiO Cloud no longer requires purchase of any XiO Cloud room-based licenses.
Manage Licenses for a Single Device
To manage the licenses for a single device, select a device from the group tree to display i configuration page, and then select the Licenses tab.
Device Configuration Page - Licenses Tab
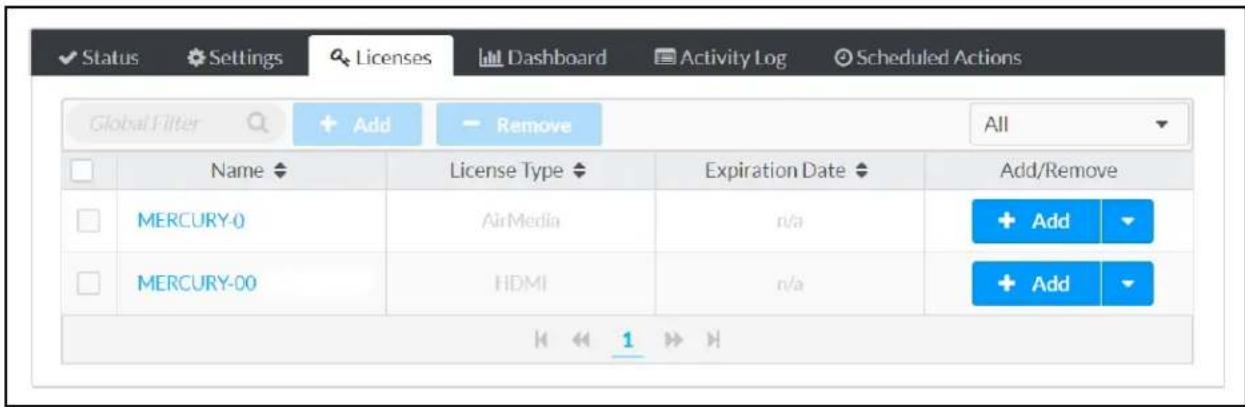
The Licenses section lists all of the licenses that are available for the device in table format. The Licenses table provides the following information for each license:
• The device name
• The license type
• The expiration date
- Controls to add or remove the license
Enter text in to the Global Filter text box to search for and display licenses that match the search terms.
If the license list spans multiple pages, use the navigation arrows on the bottom of the page forward or backward through the pages, or select a page number to navigate to that page.
To add a license for a feature that has not yet been licensed for a device, select Add in the Add/Remove column for the device.
NOTE: If multiple licenses are available for the same feature, the license that expires first is added first automatically. For example, if a 1-year AirMedia® presentation system license and a 2-year AirMedia license are available, the 1-year license is added first.
If a license other than the license with the earliest expiration date is desired, select the arro Add button to choose from the available expiration dates in the account.
Device Configuration Page - Licenses Tab (Expiration Date Selection)
![Status Settings Licenses Dashboard Activity Log Scheduled Actions Global Filter Add Remove All Name License Type Expiration Date Add/Remove MERCURY-0 AirMedia n/a MERCURY-00 HDMI n/a Dec 31 2018 [ 1 Available ]](/content/2026/05/883356/images/18d9cae1f65503d12c714e69760c4f9b87c913a7544b34a69c6d0c220e060f8d.jpg)
To add licenses for multiple features at the same time, check the boxes next to the license then select Add at the top of the screen. As with adding licenses individually, if multiple licenses are available for the same feature, the license that expires first is added first automatically.
Select the check box in the table heading row to select or deselect all available licenses.
Device Configuration Page - Licenses Tab (Add Multiple Licenses)
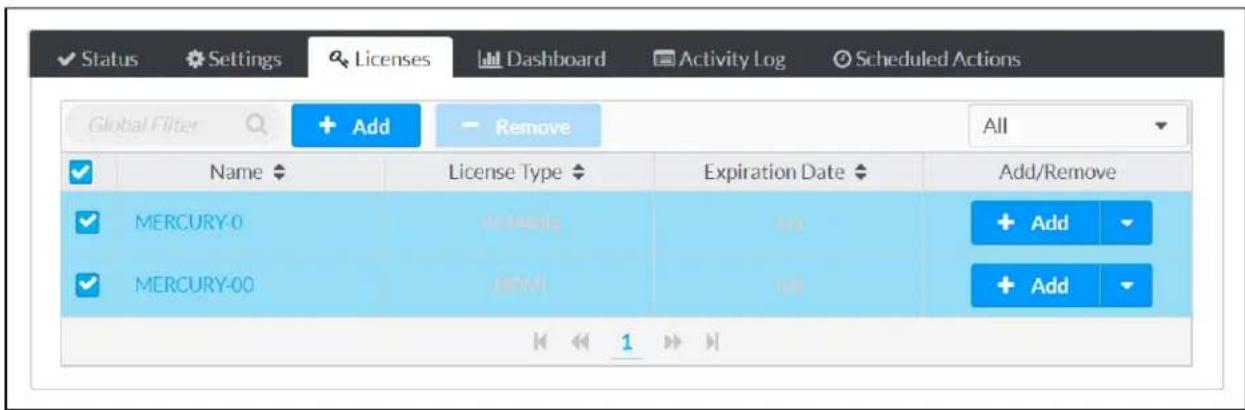
After adding a license using either of these methods, a confirmation dialog box is displayed. Select YES to apply the license.
Add Licenses Confirmation Dialog Box
![Add Licenses Are you sure you wish to add the following licenses? Name License Type Expiration Date MERCURY-0 AirMedia [ 1 Available] Dec 31 2018 MERCURY-00 HDMI [ 1 Available] Dec 31 2018 Cancel YES](/content/2026/05/883356/images/d0b8ad4a44cc6d76d2a037520ba3f192c2913207c9ef5e658494cdfe178a348f.jpg)
To remove a license for a feature that has not yet been licensed for a device, select Remove in the Add/Remove column for the device.
Removing a license returns it to the customer's license pool, allowing the same license to be different device.
Device Configuration Page - Licenses Tab (Remove Button)
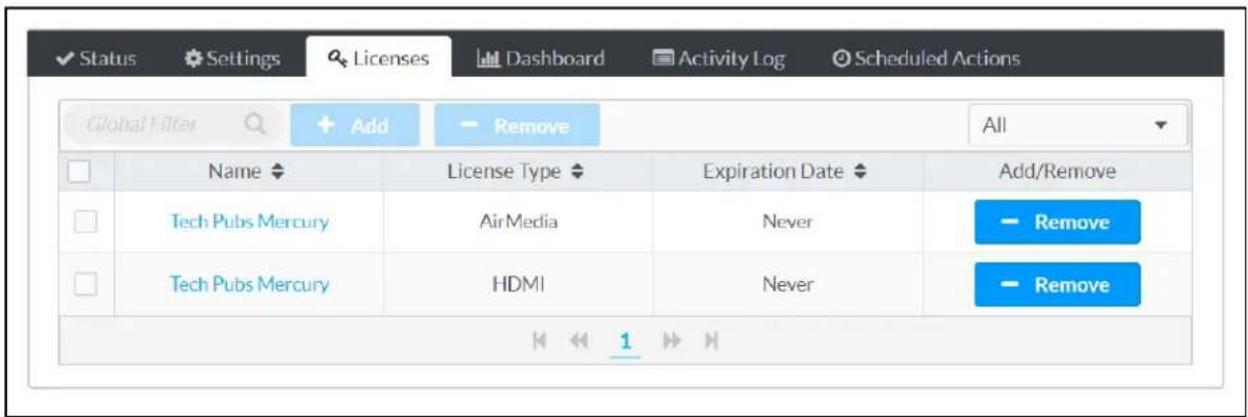
To remove licenses for multiple features at the same time, check the boxes next to the licen and then select Remove at the top of the screen.
Select the check box in the table heading row to select or deselect all available licenses.
Device Configuration Page - Licenses Tab (Remove Multiple Licenses)
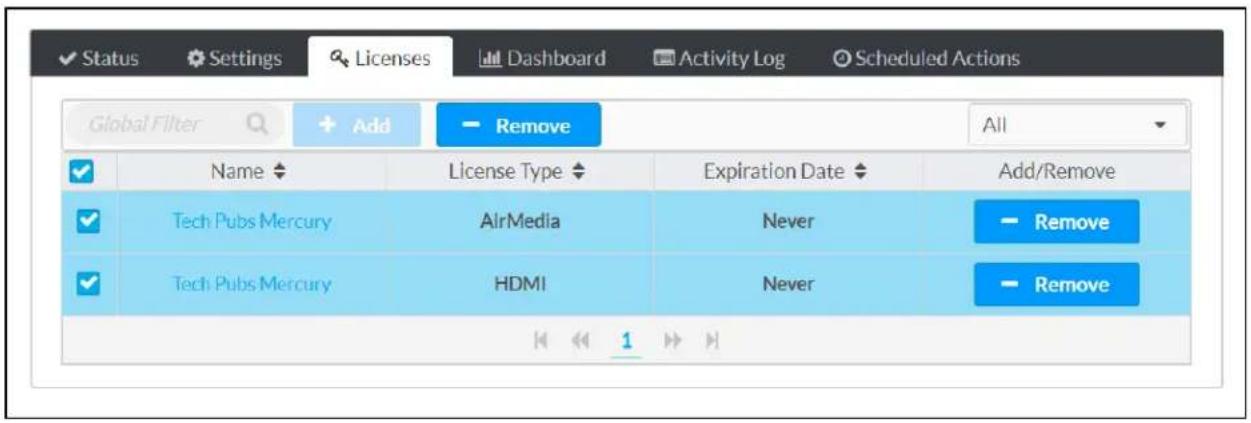
NOTE: Adding or removing licenses may cause a device to restart. Behavior may differ between device models due to firmware differences.
Manage Licenses for a Group or Room
To manage the licenses for multiple devices within the same group or room, select a group to the group tree to display its configuration page, and then select the Licenses tab.
Group Configuration Page - Licenses Tab
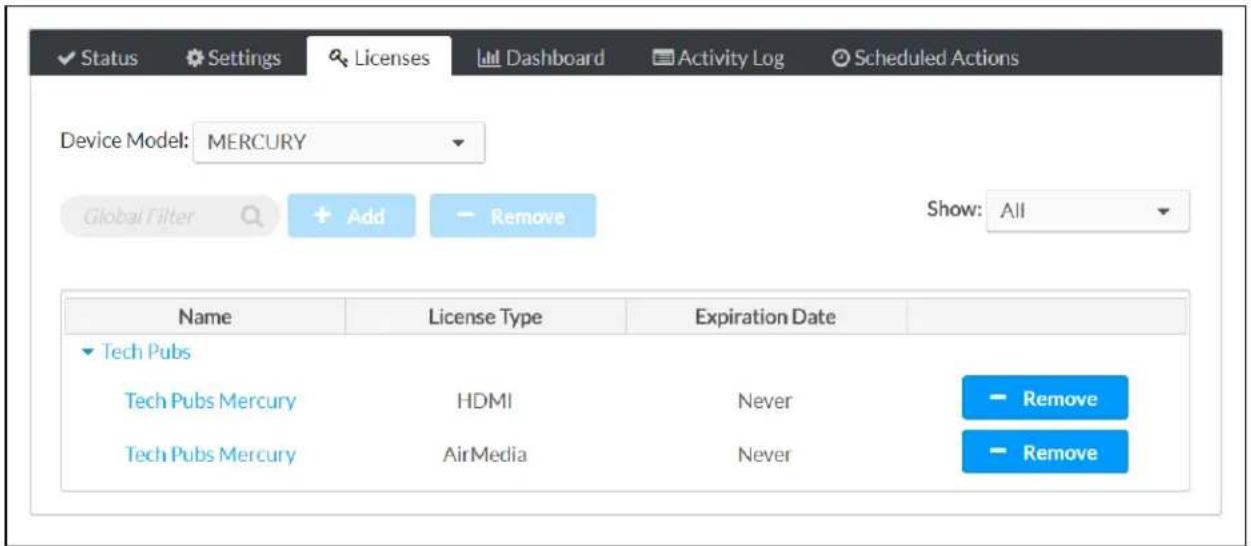
The Licenses section of the group or room configuration page provides the same information of controls as the Licenses section of the device configuration page; however, the licenses for all the devices in the group or room and its subgroups are displayed.
To add or remove the licenses for multiple features or devices at once, press Ctrl and select the appropriate features, and then use the bulk Add and Remove buttons at the top of the page to add or remove the licenses, respectively.
Group Configuration Page - Licenses Tab (Select Multiple Licenses)
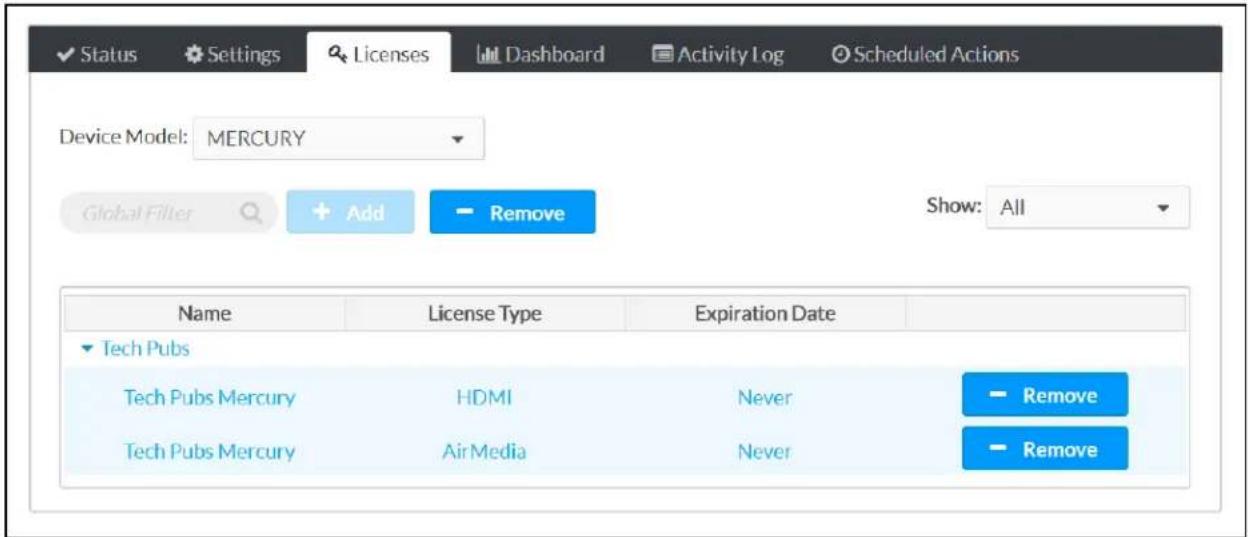
Scheduled Actions
Scheduled actions allow device functions to be automated from the cloud.
The available actions for each device vary, although all devices support a scheduled restart. Ac be scheduled to occur once or in a recurring pattern.
Scheduled actions are accessible from the Scheduled Actions tab for an individual device or for a group.
Device Configuration Page - Scheduled Actions
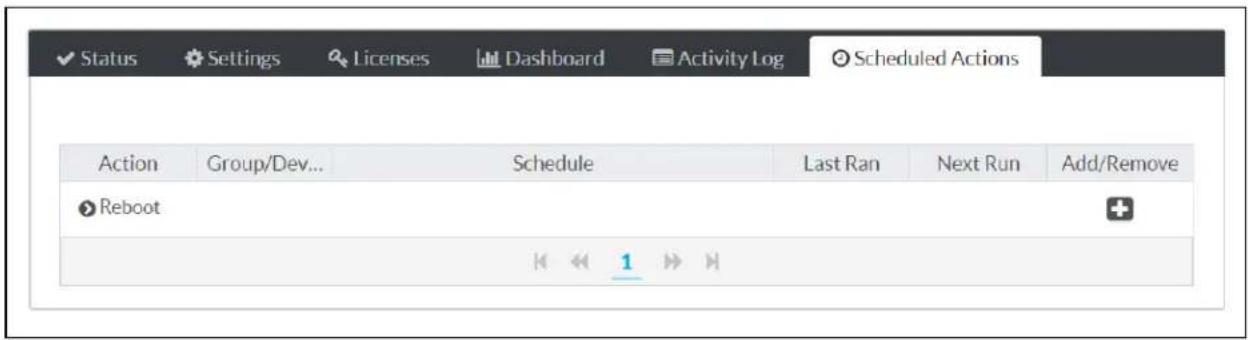
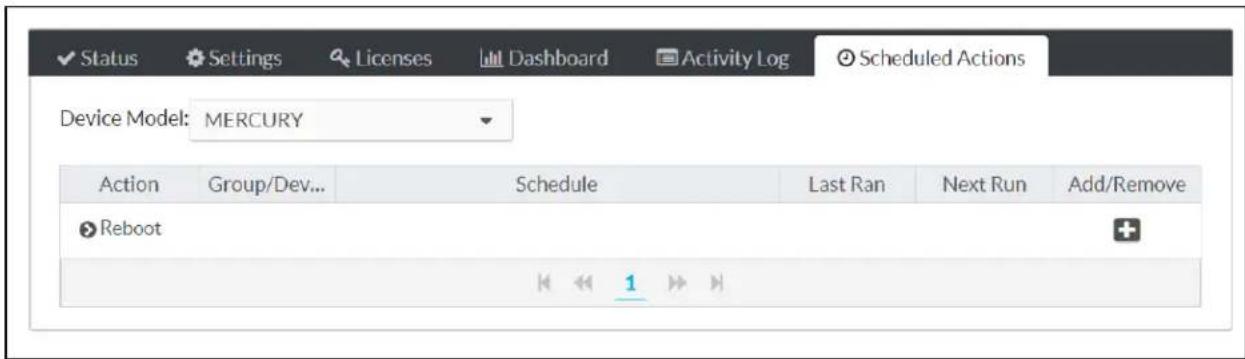
The Scheduled Actions table lists the actions that may be scheduled for the selected device or device model.
When scheduling actions for a group or room, select the desired device type from the Device Model drop-down menu on the top left of the Settings section. An action created in the group or configuration page will be applied to all devices that share the selected model.
Select the arrow button next to an action to view more details about the action.
Schedule Actions Table
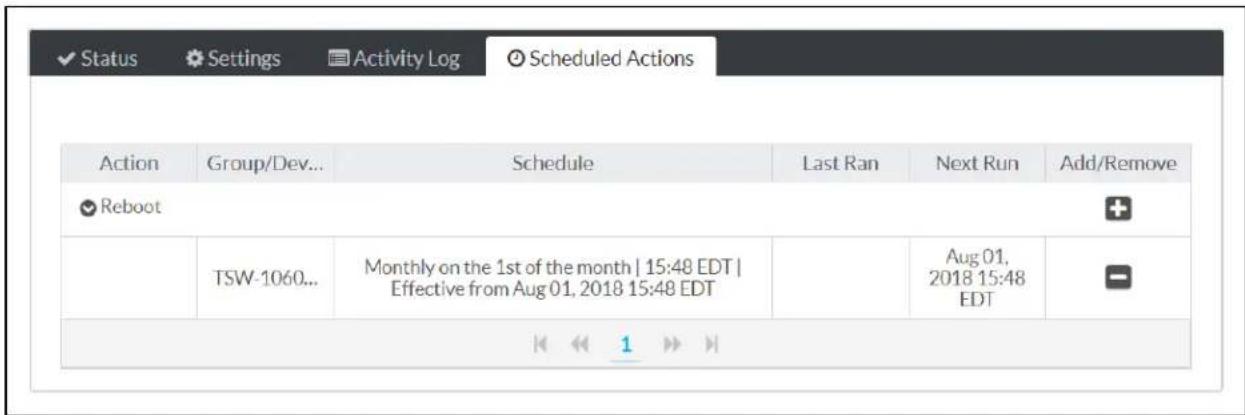
The following information is displayed for each device:
• The name of the action
• The device model or device model group
• The schedule that has been set for the action
• The date and time when the action was last ran
NOTE: If the action was triggered but the device was unable to complete it for any such as being offline at the scheduled date and time, an error icon is shown next to Ran date and time to indicate this error.
• The date and time when the action is scheduled to run again
- Controls for adding and removing an action
Create a Scheduled Action
To schedule an action:
- Select the plus (+) button under Add/Remove. An Add Scheduled Action dialog box is displayed.
Add Scheduled Action Dialog Box
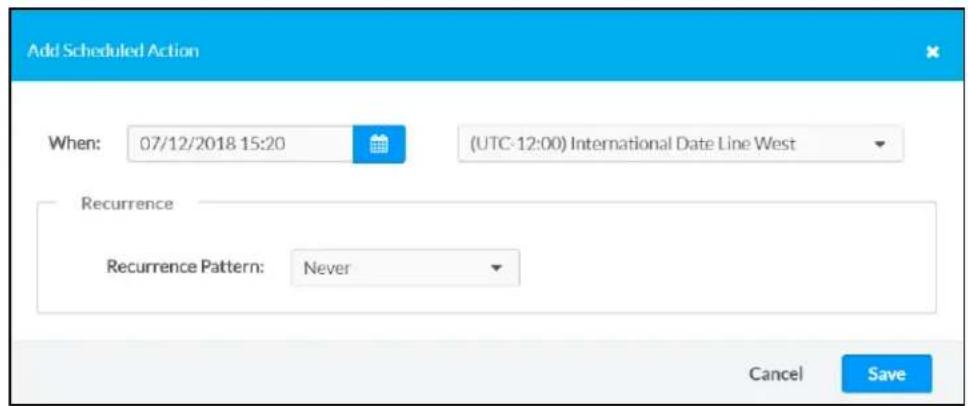
- Click inside the When field to open the calendar and time settings.
- Select the date and time for the action to occur. If the Recurrence Pattern is set to Never, the action will occur only once at the selected date and time.
Add Scheduled Action Dialog Box (Calendar and Time Settings)
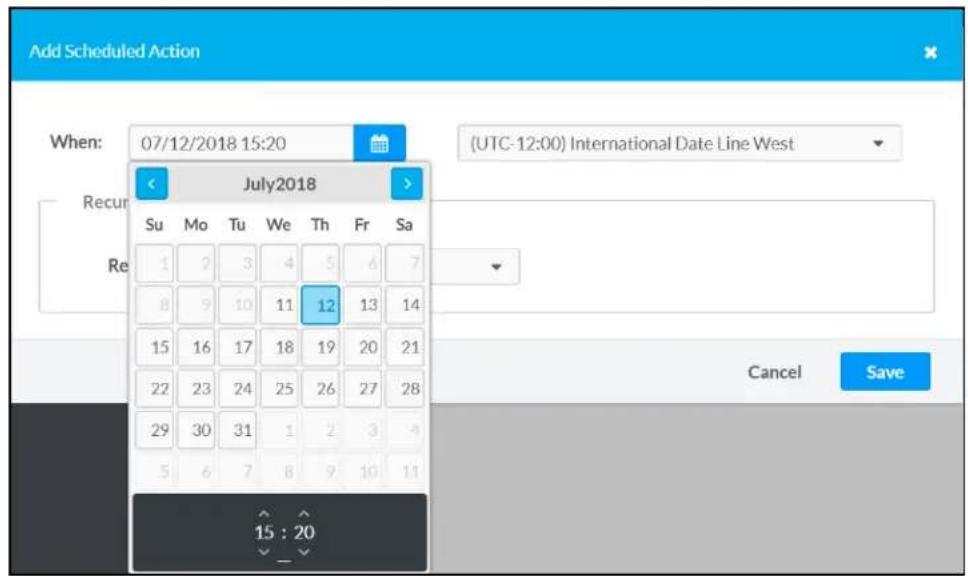
- Select a time zone from the drop-down menu to the right of the When field.
NOTE: All devices in the same time zone that share a scheduled action perform that the same time if the action is set at a group level. If there are devices in different their actions may be scheduled individually.
-
If applicable, use the Recurrence Pattern drop-down menu to select if and when the action should repeat. The following options are provided:
-
Never: The action will occur only once on the date and time that is set for the When field.
- Daily: The action will occur every day starting on the date and time that is set 1 field.
- Weekly: The action will occur every week on the days selected, starting on the date that is set for the When field. Select the empty check box next to a day to select Add Scheduled Action Dialog Box (Weekly Recurrence Pattern)
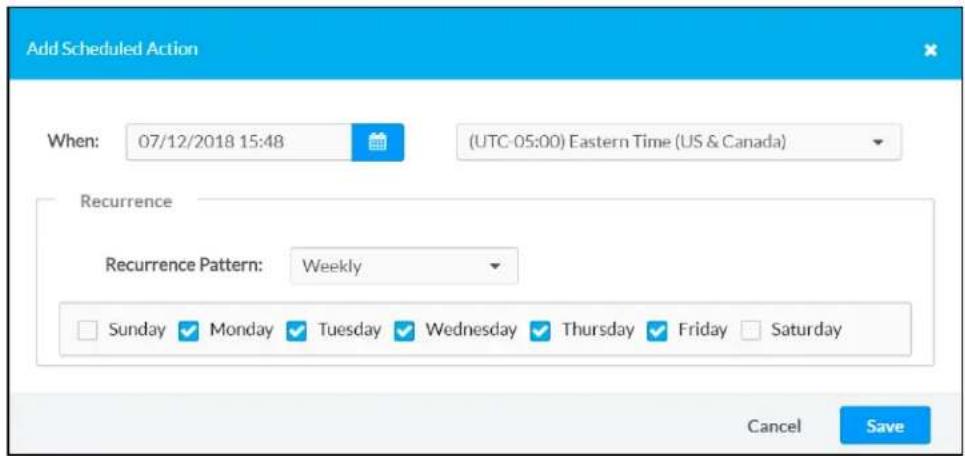
• Monthly: The action will occur on the selected date of every month. Options are 1 through 31 and last.
Add Scheduled Action Dialog Box (Monthly Recurrence Pattern)
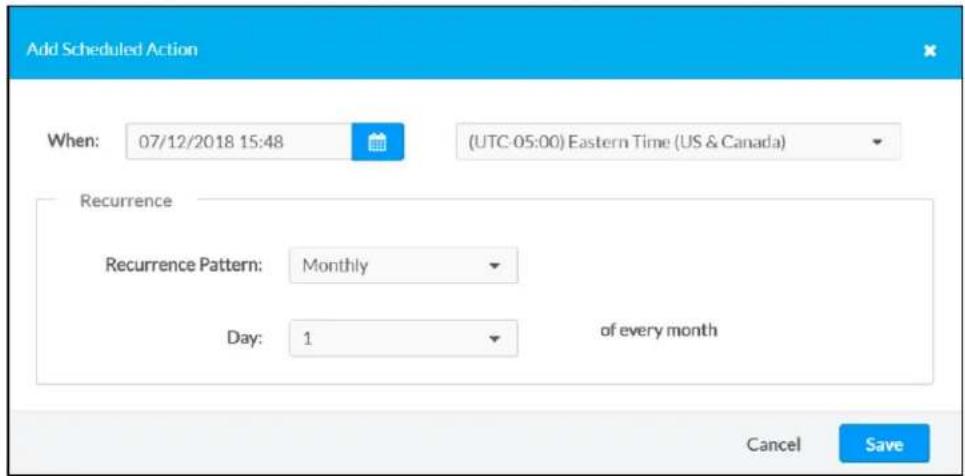
NOTE: The selection in the When box determines the first time the scheduled action occurs and does not need to be set for the recurrence pattern. In the example the first time the action occurs will be on July 12. Thereafter, it will occur on t of each month, so the next occurrence will be on August 1.
- If applicable, use the provided controls to configure additional settings for the scheduled Each category of scheduled actions has its own unique controls.
- Select Save. The new scheduled action is added under its parent category.
Delete a Scheduled Action
To delete a scheduled action:
- Use the arrow button next to the action name to expand the selection.
- Select the plus (-) button under Add/Remove for the desired action. A Confirmed Scheduled Action Delete dialog box is displayed.
Confirm Scheduled Action Delete Dialog Box
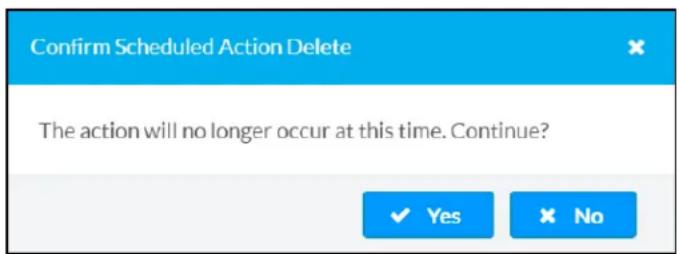
- Select Yes to delete the action, or select No to cancel the deletion.
Dashboard
The Dashboard section provides interactive data that shows when and how a device is used by organization.
The Dashboard section is accessible from the Dashboard tab for an individual device or for a group or room (license-dependent).
Device Configuration Page - Dashboard
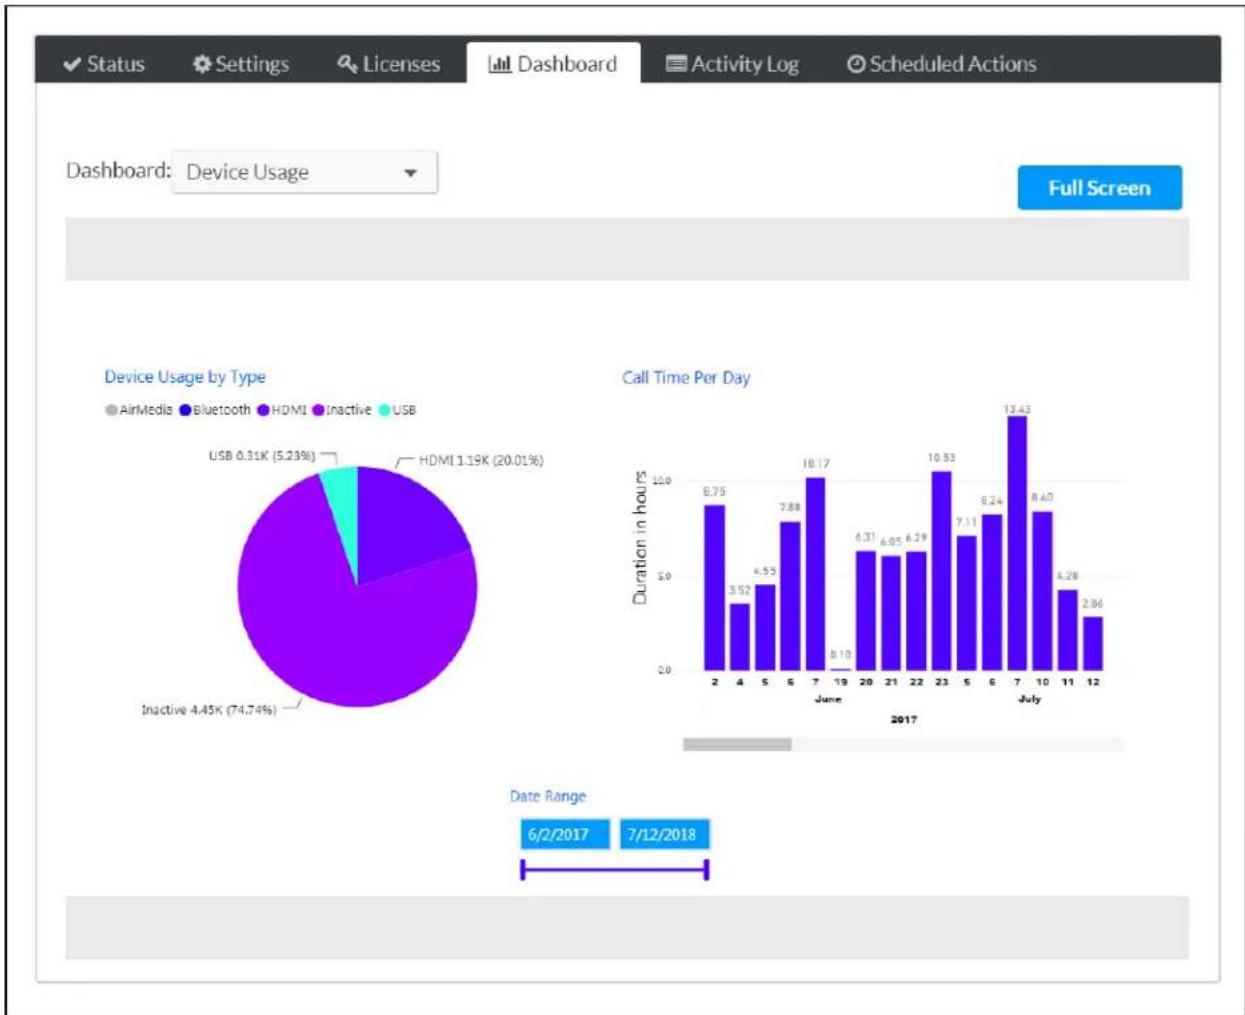
other
| Device Usage | Duration in hours | | ------------ | ----------------- | | AirMedia | 8.75 | | Bluetooth | 3.52 | | HDMI | 4.55 | | Inactive | 7.88 | | USB | 0.31K | | Inactive | 4.45K (74.74%) | | Inactive | 20.01% | | Inactive | 5.23% | | Inactive | 8.10 | | Inactive | 6.31 | | Inactive | 6.05 | | Inactive | 6.29 | | Inactive | 10.53 | | Inactive | 7.11 | | Inactive | 8.24 | | Inactive | 13.43 | | Inactive | 8.40 | | Inactive | 4.28 | | Inactive | 2.86 | | AirMedia | 6/2/2017 | | Bluetooth | 7/12/2018 | | HDMI | - | | Inactive | - | | Inactive | - | | Inactive | - | | Inactive | - | | Inactive | - | | Inactive | - | | Inactive | - | | Inactive | - | | Inactive | - | | Inactive | - | | Inactive | - | | Inactive | - | | Inactive | - |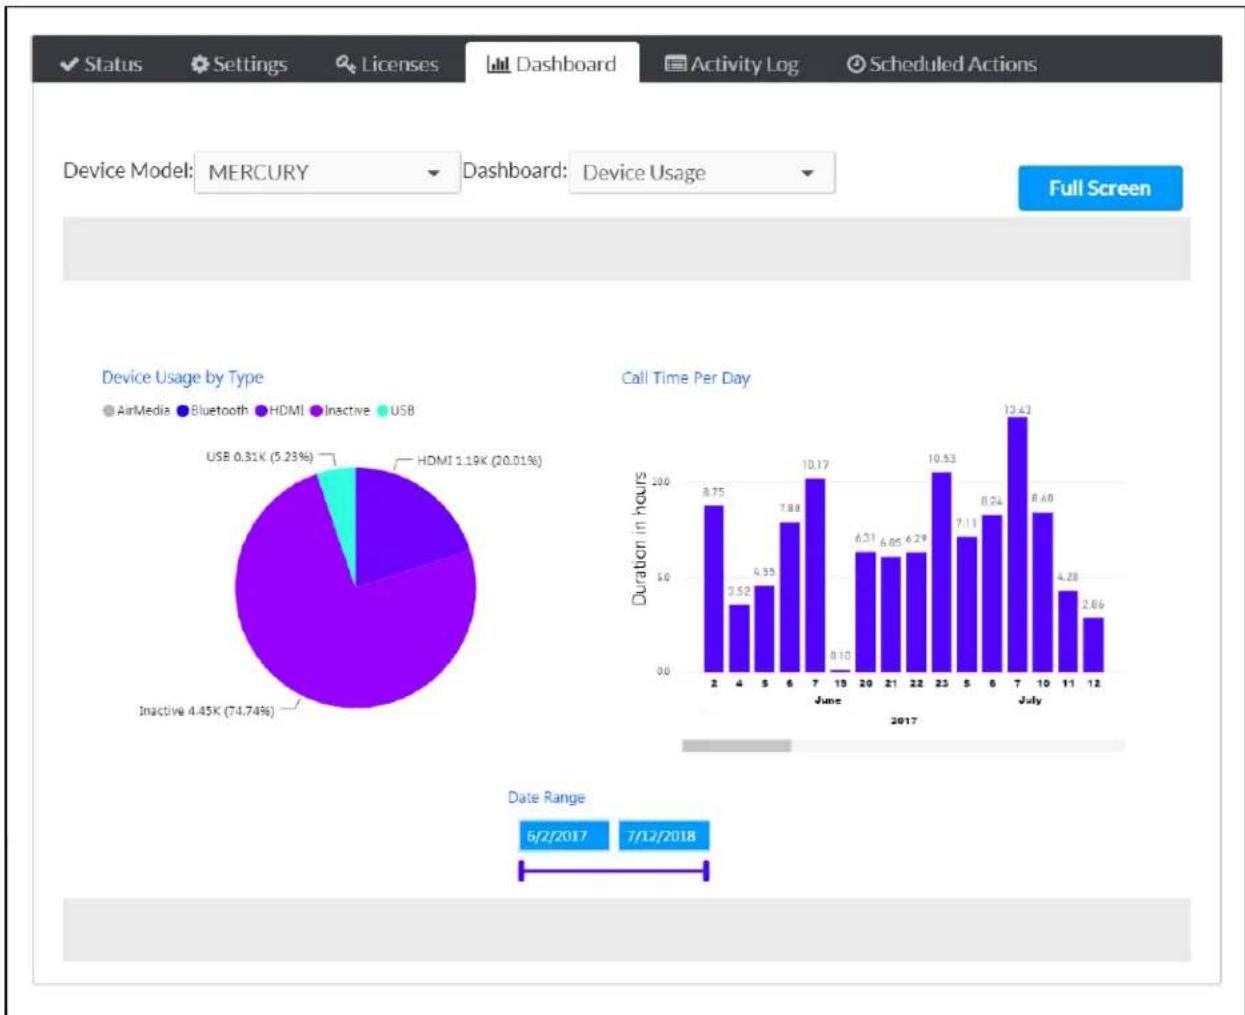
pie
| Device Usage | Duration in hours | | :--- | :--- | | AirMedia | 8.75 | | Bluetooth | 3.52 | | HDMI | 4.95 | | Inactive | 10.17 | | USB | 8.10 | | Inactive (Total) | 10.53 | | Inactive (Total) | 12.43 | | Inactive (Total) | 8.40 | | Inactive (Total) | 4.28 | | Inactive (Total) | 2.66 | | Inactive (Total) | 74.74% (74.74%) | | Inactive (Total) | 0.31K (5.23%) | | HDMI (Total) | 1.19K (20.01%) | | AirMedia (June) | 2 | | Bluetooth (June) | 4 | | HDMI (June) | 5 | | Inactive (June) | 6 | | Inactive (June) | 7 | | Inactive (June) | 8 | | Inactive (June) | 10 | | Inactive (June) | 11 | | Inactive (June) | 12 | | Inactive (June) | 19 | | Inactive (June) | 20 | | Inactive (June) | 21 | | Inactive (June) | 22 | | Inactive (June) | 23 | | Inactive (June) | 5 | | Inactive (June) | 6 | | Inactive (June) | 8 | | Inactive (June) | 7 | | Inactive (June) | 10 | | Inactive (June) | 11 | | Inactive (June) | 12 | | Inactive (June) | 19 | | Inactive (July) | 8.75 | | Bluetooth (July) | 3.52 | | HDMI (July) | 4.95 | | Inactive (July) | 7.88 | | Inactive (July) | 10.17 | | Inactive (July) | 8.10 | | Inactive (July) | 6.31 | | Inactive (July) | 6.85 | | Inactive (July) | 6.29 | | Inactive (July) | 10.53 | | Inactive (July) | 7.11 | | Inactive (July) | 8.24 | | Inactive (July) | 12.43 | | Inactive (July) | 8.40 | | Inactive (July) | 4.28 | | Inactive (July) | 2.66 | Date Range: 6/2/2017 to 7/12/2018Use the Dashboard drop-down menu to select the type of data shown for the device (such as device usage). The available data varies by device.
When viewing the Dashboard section for a group or room, select the desired device type from the Device Model drop-down menu on the top left of the Settings section. The dashboard presents data for all devices within the group or room that share the same model.
Dashboards are interactive and contain different charts that may be cross-filtered by selecting chart and filters:
- Hover the mouse cursor over a chart to expose additional selections for viewing and sort chart, changing the level of data shown, and exporting data as a CSV file or a Micros software file.
- Use the Date Range filter to show data from a specific date range. Enter a start and end date in the appropriate fields, or drag the two points on the slider bar up and down to adjust and end dates.
Select Full Screen to display the Dashboard section in full screen mode. To return to the normal size, press the Esc key on the keyboard.
Activity Log
The Activity Log section provides a list of events that have occurred for each device.
The Activity Log section is accessible from the Activity Log tab for an individual device or for a group or room (license-dependent).
Device Configuration Page - Activity Log
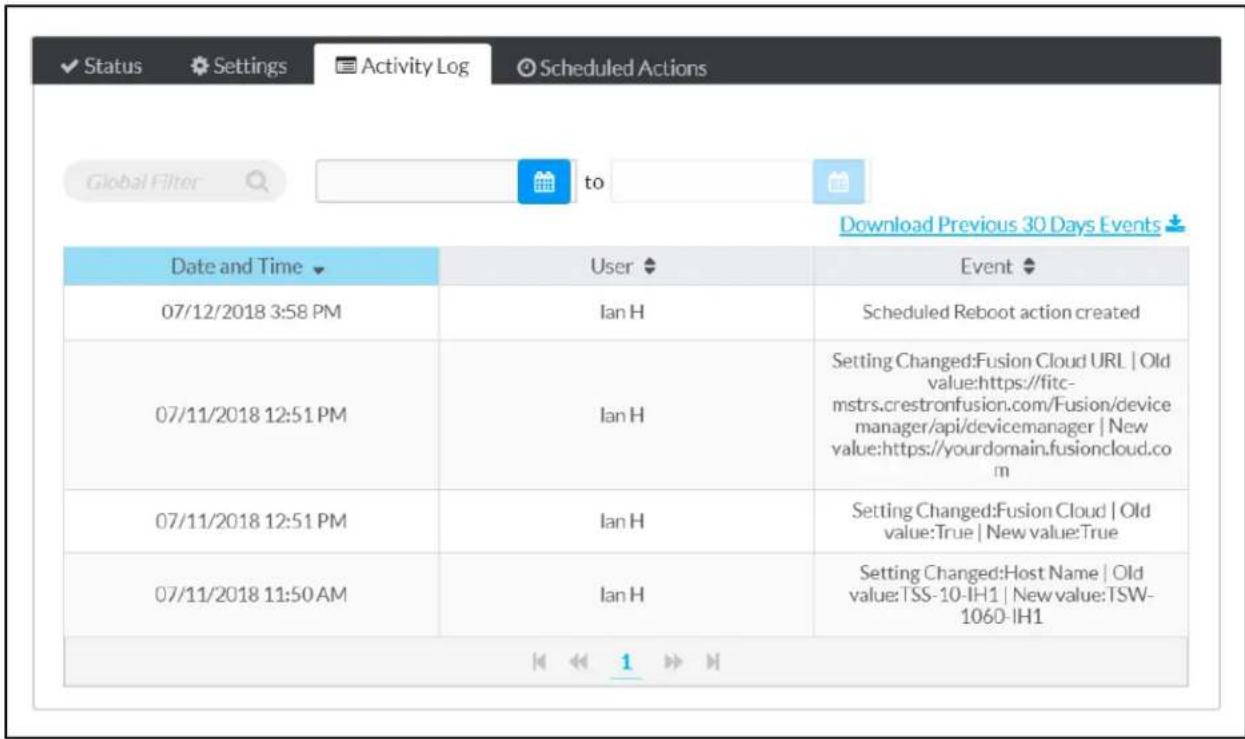
The Activity Log presents the following information for each device in table format:
- Scheduled actions
- Changed device settings, including the original and new values
- Licenses that were added to or removed from the device
- Movement from one group to another
- Movement between online and offline states
Each entry in the Activity Log table includes the date and time of the event, the logged-in user who performed the event (if applicable), and a summary of the event.
The Activity Log table at the group level presents additional data, including the device model and the device, group, or subgroup that was affected. Use the drop-down menu at the top of the Device Model column to filter the table by device type.
Group Configuration Page - Activity Log
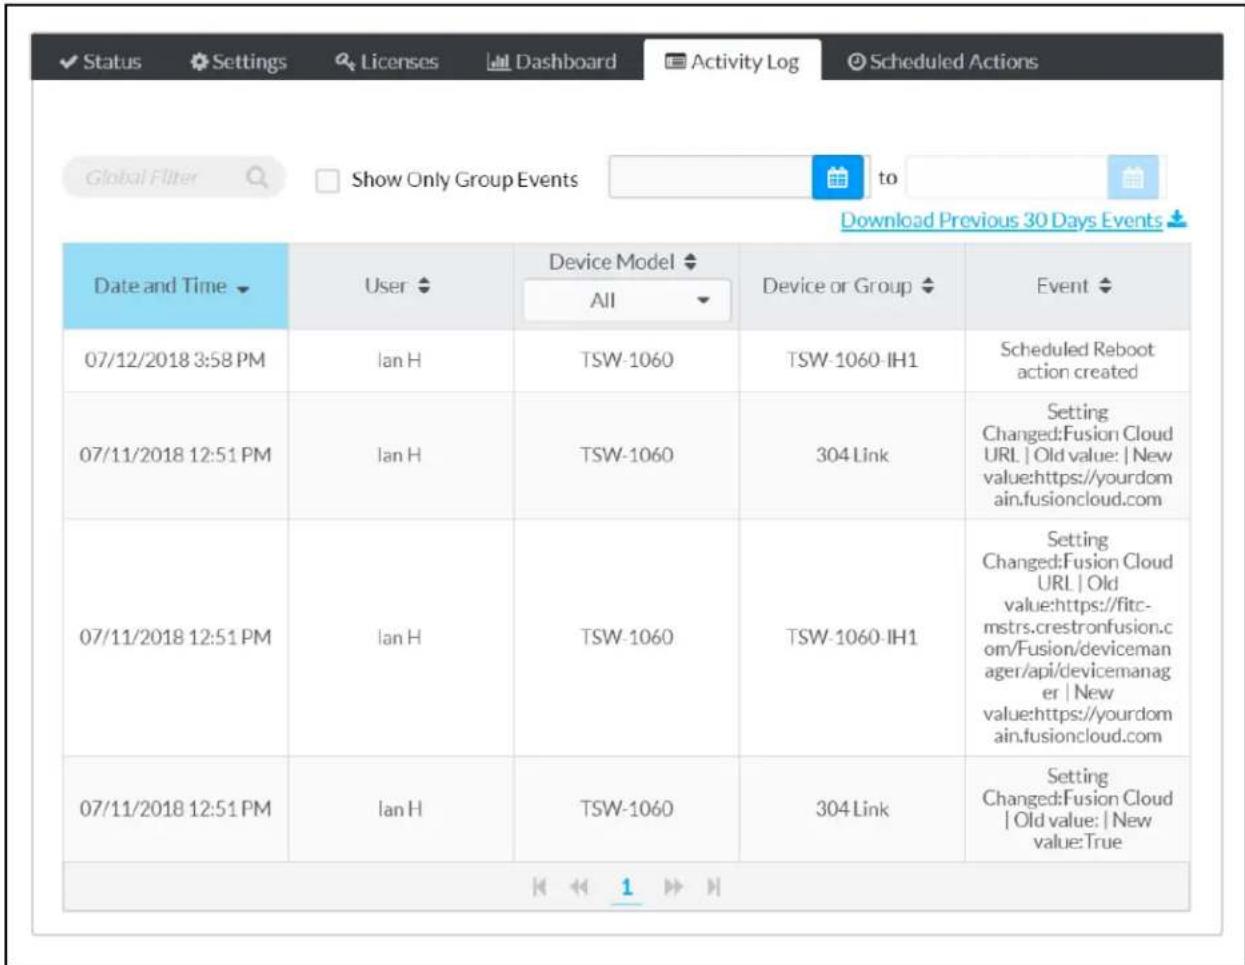
The table may be filtered using a global filter or date filter:
- Enter text in to the Global Filter text box to search for and display activity log entries that match the search term(s). (For example, typing "Mercury" in the global filter box will show all containing the word "Mercury" in any column.)
- Click inside the first date filter text box to select a start date for the activity log, an inside the second date box to select an end date for the activity log. The activity log show entries within the specified date range.
If the activity log list spans multiple pages, use the navigation arrows on the bottom of the move forward or backward through the pages, or select a page number to navigate to that
Select Download Previous 30 Days Events to download the previous 30 days of the activity log as a CSV file. Any filter applied to the table are not applied to the CSV file.
When viewing the Activity Log at the group level, select the empty check box next to Show Only Group Events to update the table to show events that were performed at the group level only.
Device Metadata
The Device Metadata section allows various metadata information to be added to devices within the XiO Cloud service.
The Device Metadata section is accessible from the Device Metadata tab for an individual device.
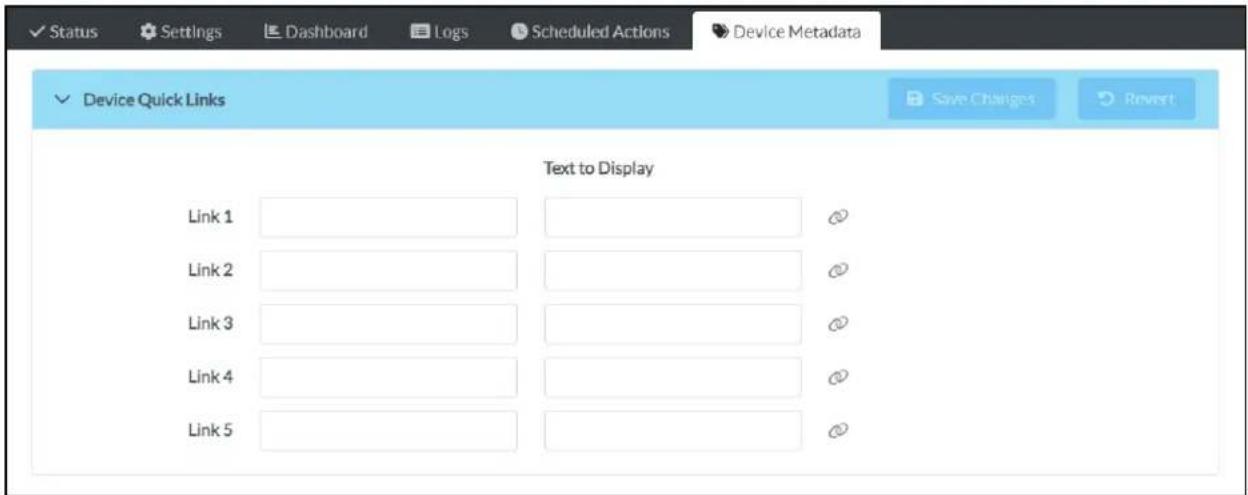
Expand the Device Quick Links accordion to associate related URLs to a device for quick access within the XiO Cloud service, such as URLs for XPanels, device documentation, and other management. Up to five URLs can be added per device.
NOTE: The following URL protocols are supported: "http://", "https://", "ssh://", "sftp://", "rtsp://", "vnc://". For protocols that are not supported by the web browser, a compatible application must be registered in the OS of the local computer; otherwise, selecting the link a blank page in the web browser. The registered application is OS dependent and must be handle the associated resource URI.
For each link, enter the desired URL within the first text field, and then enter the text to the second field. The link is provided to the right of these text fields once it has been entered in link once it has been generated to open the URL in a new tab.
Update Firmware
Firmware for one or all devices may be updated from the XiO Cloud service. When new firm released for a device, it is posted to the cloud and made available for update.
NOTE: Firmware updates are scheduled actions and may be managed like any other schedule action. For more information, refer to Scheduled Actions on page 72.
To update device firmware:
NOTE: As of XiO Cloud version 1.58, firmware cannot be downgraded from the XiO Cloud service any devices.
- Select the individual device or the group where the firmware update is desired.
- Select Update Firmware Version from the Action drop-down menu.
Action Drop-Down Menu
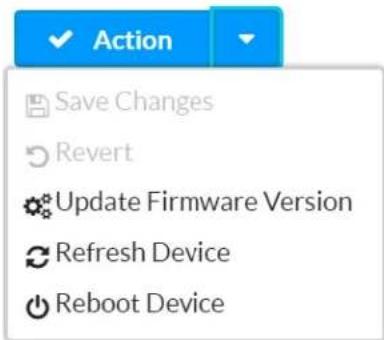
The Update Firmware dialog box is displayed.
Update Firmware Dialog Box
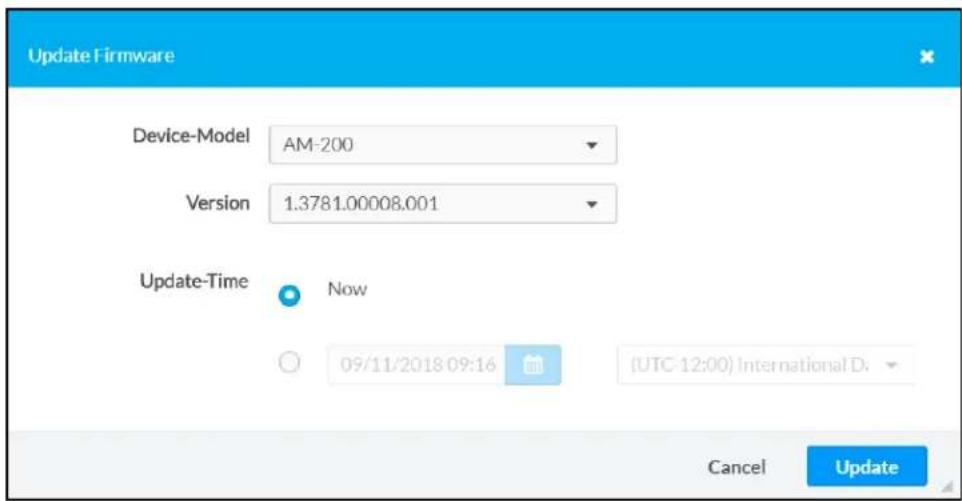
NOTE: When updating firmware from the group or room level, select the device model the Device-Model drop-down menu to update the firmware of all devices that share the model type.
- Use the Version drop-down menu to select the firmware version that will be installed or device or devices.
NOTE: Release notes may be downloaded from the link below the Version menu if available.
- Select when the firmware update will be performed:
a. Select the Now radio button to perform the firmware update immediately, or select radio button next to the date/time and time zone fields to perform the firmware update at a set date and time. The firmware update will occur on the selected date and time. b. Select inside the date/time field to display a pop-up dialog box for selecting a date time. c. Use the drop-down menu to the right of the date/time field to select a time zone firmware update.
Update Firmware Dialog Box (Day and Time Selection)
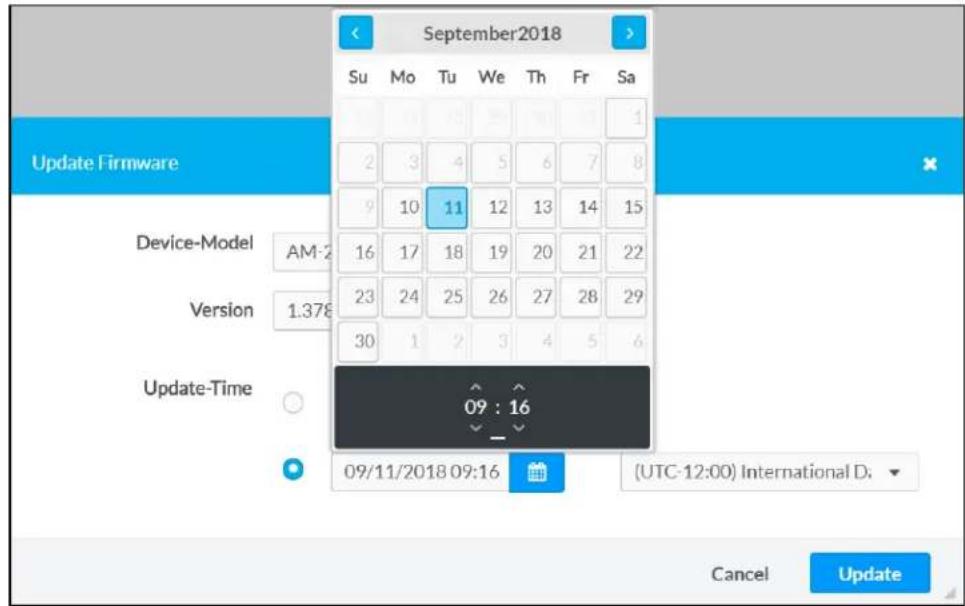
- Select Update to perform the firmware update at the selected date and time, or select Cancel to cancel the firmware update.
At the specified update time, the device connects to a secure Crestron file server to download the firmware. If the device cannot complete the download and installation on the first attempt up to three more times. If these attempts fail, the device tries one more time at 2:00 AM this final attempt fails, a failure message is displayed in the Firmware-Version column on the group Status page.
NOTE: Automatic firmware updates through the XiO Cloud service cannot be turned off.
Restart Devices
An individual device or groups of devices may be rebooted remotely from the XiO Cloud servi
To restart one or more devices, select Reboot Device from the Action drop-down menu on the desired device or group page. The device or devices restart immediately.
Action Drop-Down Menu
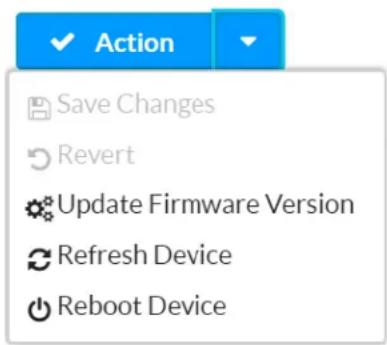
Refresh Devices
Occasionally, the settings or status of a device shown in the XiO Cloud service may become with the settings or status on the actual device.
To obtain the latest settings and status from the device, select Refresh Device from the Action drop-down menu. The latest device settings and status are synced with the XiO Cloud service.
Manage Users
Individuals in an organization may have their own login credentials to access the XiO Cloud system administrator can limit a user's access to only the devices that they need to manage. example, an administrator in Hong Kong may be granted read/write access to devices in their office but granted read-only access to devices in the London office.
This section explains how to manage users locally.
Add a New User
The USERS menu is located in the user management panel, which may be accessed by select Users butto in the navigation menu.
Users Menu
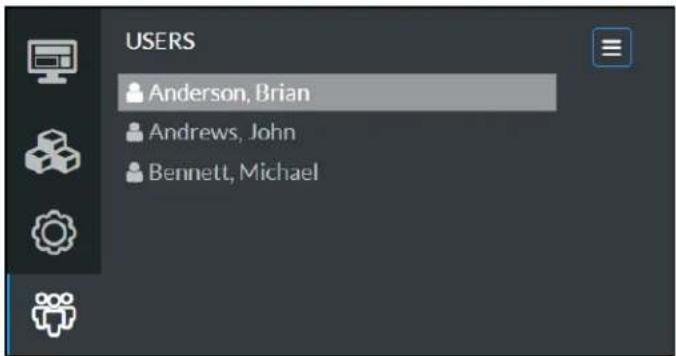
The USERS menu provides a list of the users with access to the XiO Cloud service for the organization.
To add a new user:
- Select the USERS menu button to display a drop-down menu.
Users Menu - Add New User
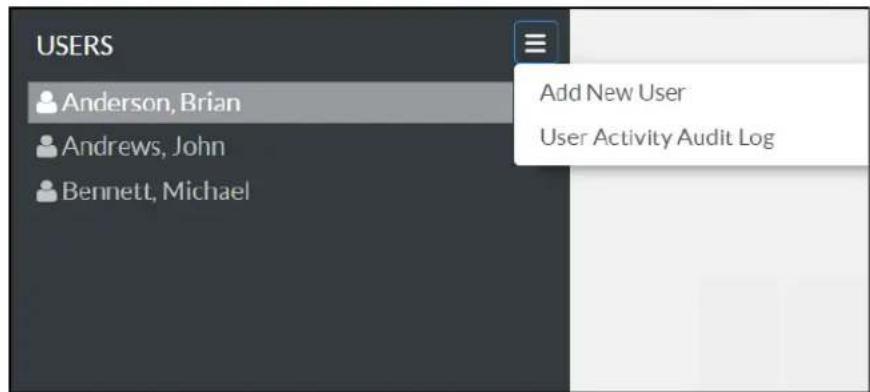
- Select Add New User. A Users page is displayed to the right of the USERS menu.
Users Page
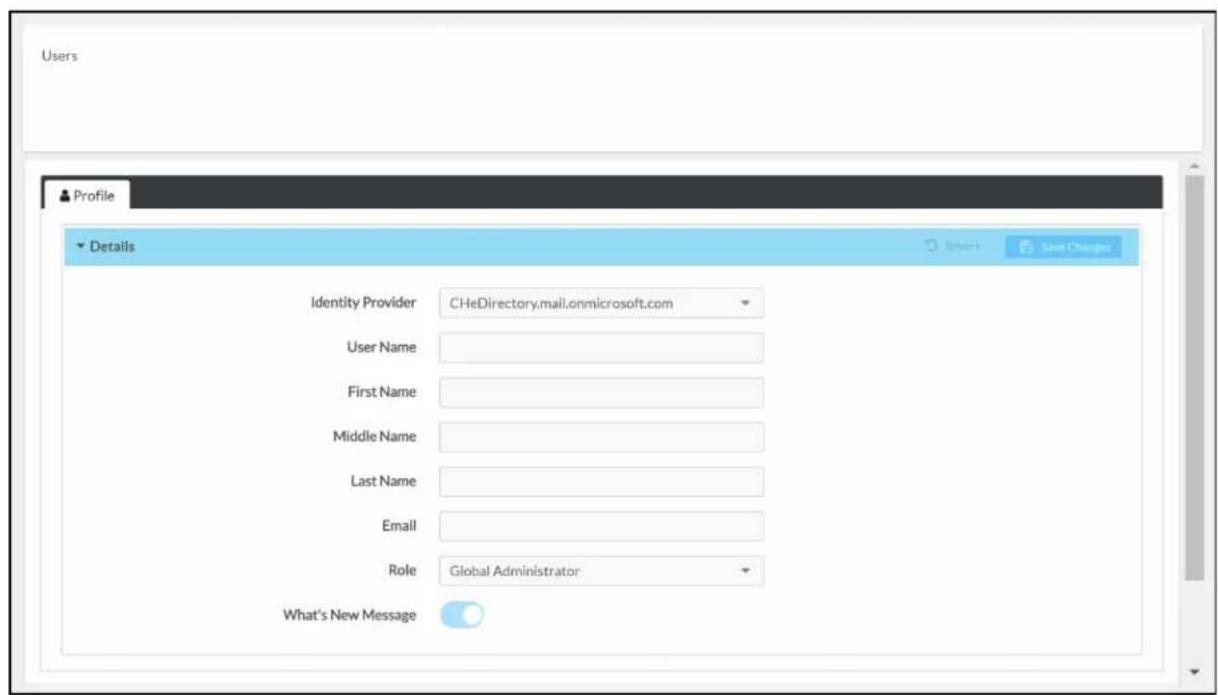
-
Use the provided fields to enter information about the new user, including identity provid username, name, email address, and role. Two roles are available in the XiO Cloud servic
-
Select Global Administrator from the Role drop-down menu to grant the user complete access to every part of the system. The user may add other global administrators. must always must be at least one global administrator in the system.
-
Select Standard User from the Role drop-down menu to grant the user limited levels of access based on assigned groups. This user may not add other global administrators.
-
Once all information is entered, select Save Changes at the top right of the screen. Select Revert to clear any information that was entered.
The user receives an email asking for account confirmation, along with a temporary password. of password is requested on the first login.
Edit User Information
Any of the information entered for a user during the account creation process may be edited time.
To edit the information for an existing user:
- Select the user's name in the USERS menu. A Users page with the Profile tab open by default is displayed to the right of the USERS menu.
Uses Page - Profile
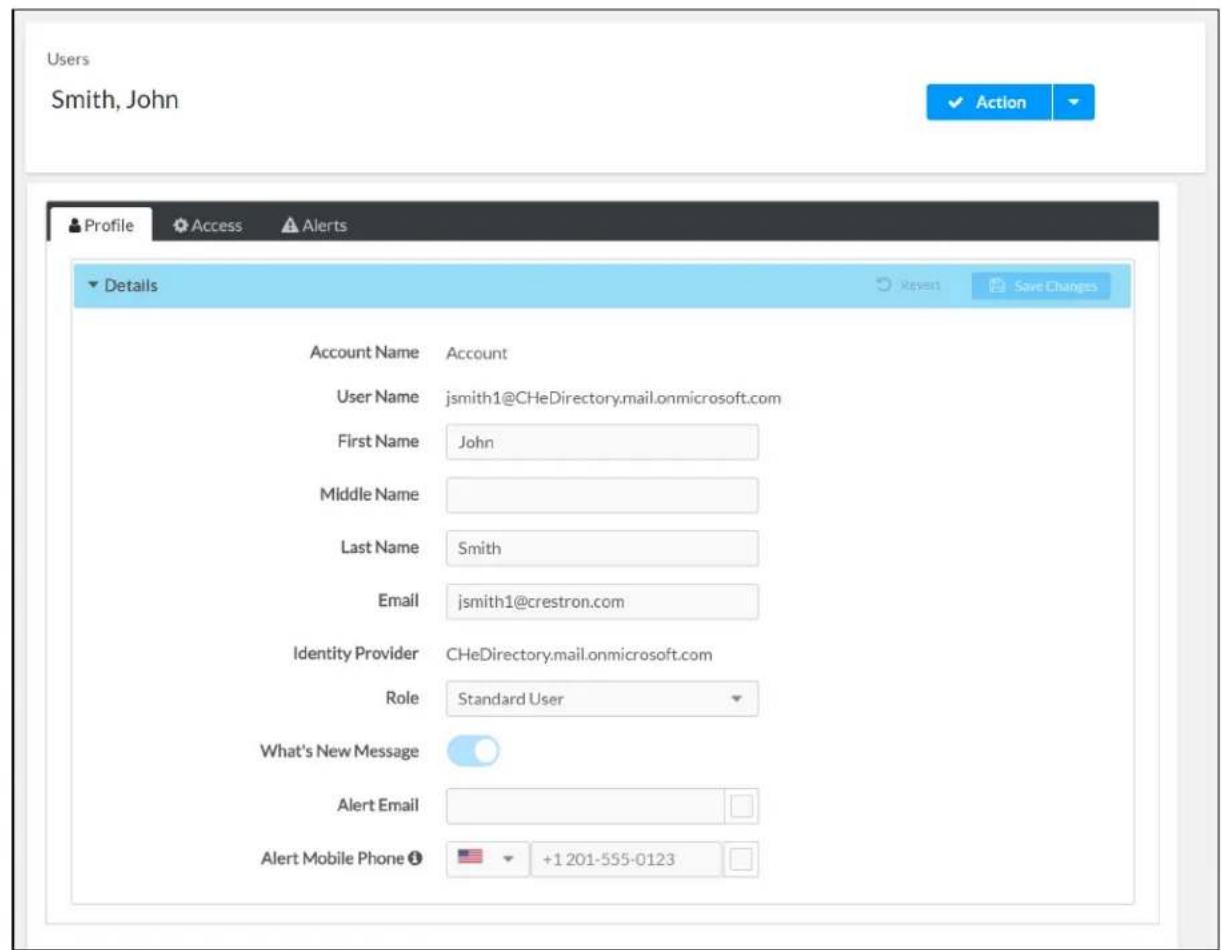
- Use the provided fields to edit information about the user, including name, email address and alert notifications.
NOTE: For more information on managing alerts, refer to Alerts on page 111. For more information on the What's New Message, refer to What's New Message on page 109.
- Select Save Changes at the top right of the screen to save any changes made. Select Revert to clear any information that was entered.
Manage User Access
Users may be granted different access levels to groups or rooms within the XiO Cloud service environment.
NOTE: For more information on the tasks that can be performed by each user access level, refer to Appendix B: User Access Matrix on page 199.
To manage access levels for a user:
- Select the user's name in the USERS menu. A Users page with the Profile tab open by default is displayed to the right of the USERS menu.
- Select the Access tab.
Users Page - Access Tab
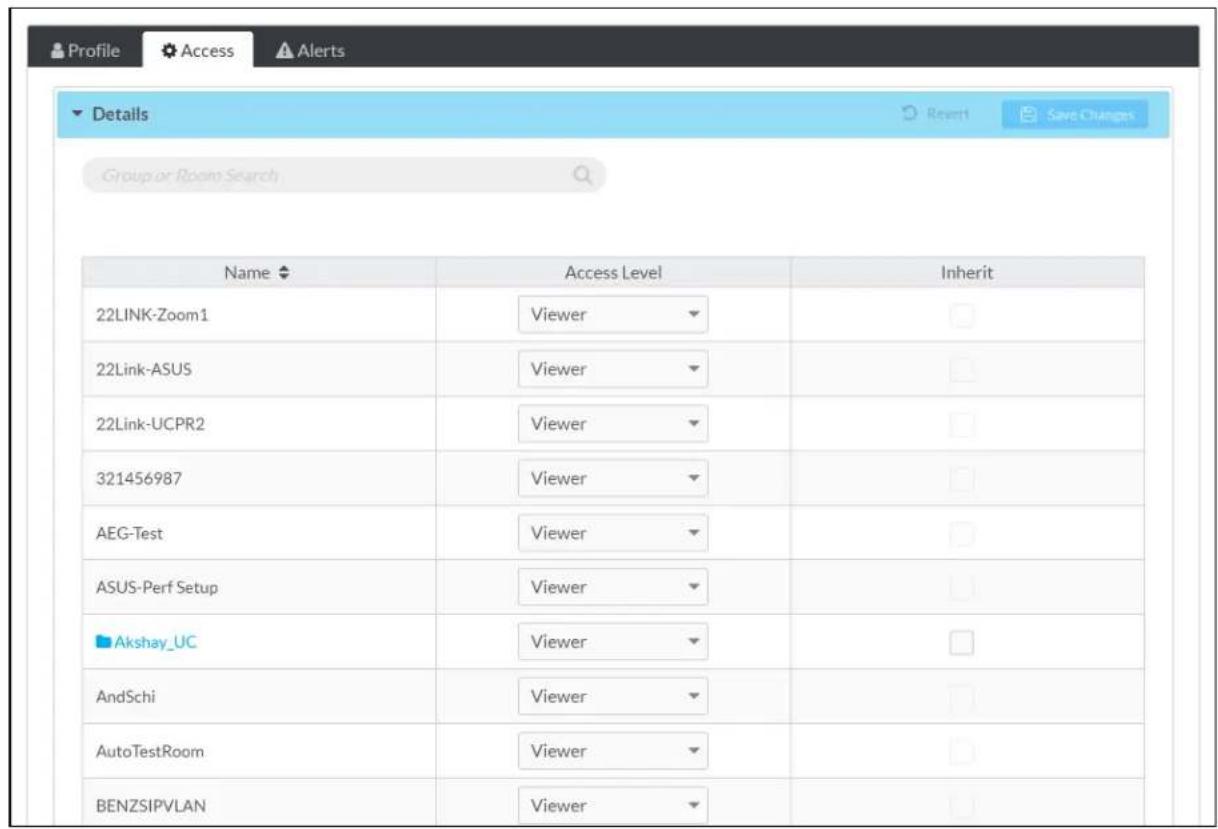
- Use the Access Level drop-down menu to select the user's access level for each group and subgroup or room.
NOTE: Enter text in to the Group or Room Search text box to search for and display groups or rooms that match the search term(s).
- Select Viewer to grant the user read-only access to the group or room. The user devices within the group or room but cannot modify them.
- Select Tech to grant the user read and write access to the group or room. The view the status of devices and change device settings within the group or room.
- Select Administrator to grant the user read and write access to the group or room allow the user to change the access level of other users to the group or room.
- Select Hidden to hide the room or group from the user within the group tree.
- (Subgroups or room only) Select Inherit to have the subgroup or room inherit the level settings of its parent group. Inherit is the default setting for subgroups.
NOTE: The access level for a subgroup or room that is set to Inherit from its parent group can be overridden. For example, if a standard user has Viewer permissions parent group, that user can be assigned Tech permissions for a subgroup or room the parent group.
Delete a User
Users may be deleted from the XiO Cloud service to remove their access and to prevent the viewing or changing any settings in the service.
To delete a user:
- Select the user's name in the USERS menu.
Users Menu
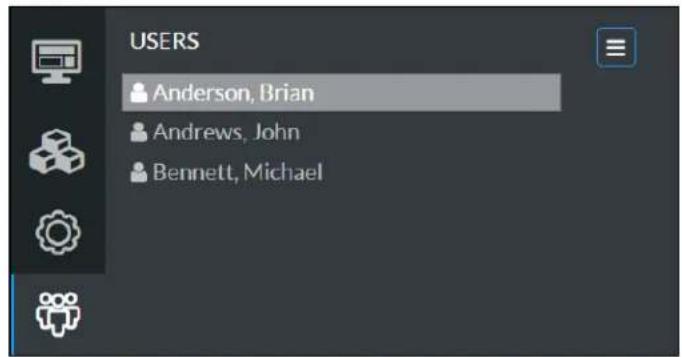
- Select Delete User from the Action menu.
Action Drop-Down Menu - Delete User
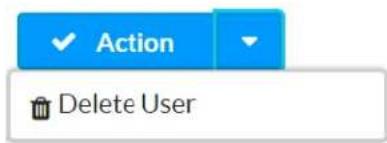
The Confirm User Delete dialog box is displayed.
Confirm User Delete Dialog Box
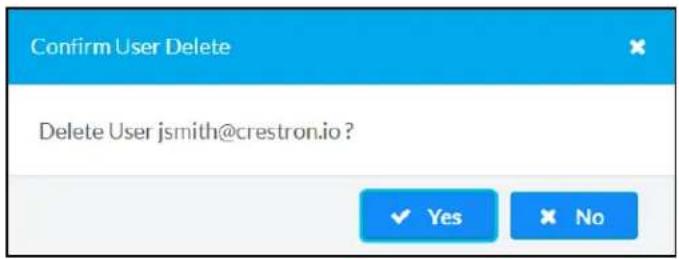
- Select Yes to delete the user or select No to cancel the deletion.
Download User Activity Audit Log
A user activity audit log for the XiO Cloud account can be downloaded as a CSV file. The au provides a list of recent user-initiated events (such as login and logoff) with corresponding use time stamps.
To download the user activity audit log:
- Select the USERS menu button to display a drop-down menu.
Users Menu - User Activity Audit Log
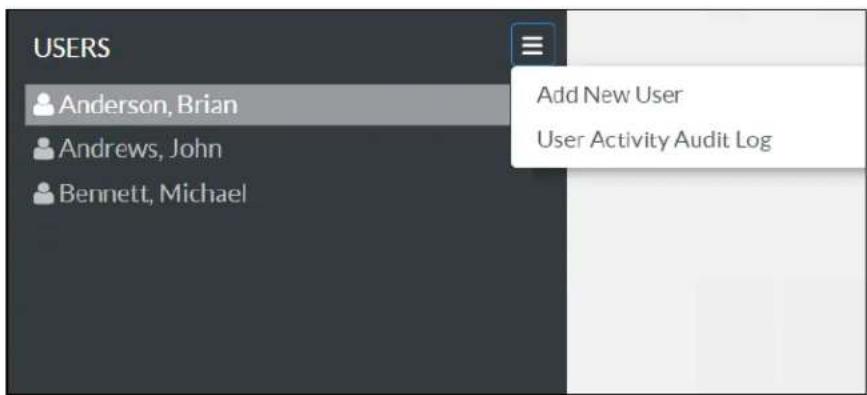
- Select User Activity Audit Log. The audit log is downloaded to your PC as a CSV file.
Single Sign-On
XiO Cloud accounts can be configured for enterprise single sign-on (SSO) with the Okta® manage platform, the Active Directory® service, and other identity providers. Account administrators may contact Crestron support to configure their accounts for single sign-on.
To configure SSO for the XiO Cloud service using an identity provider:
- Create a SAML or OpenID application registration in the identity provider. Refer to Crest Online Help article 1000838 for instructions on how to create SAML applications for commo identity providers.
- Submit a completed XiO Cloud SSO Request Form to Crestron. Crestron will respond to the account administrator via email once the integration is confirmed.
-
Add one or more external users to the XiO Cloud account as described in Manage Users 85.
-
Select External Domain for Identity Provider when creating the external user.
- The email address specified for the external user must match their email address us access the identity provider.
-
Ensure that the appropriate user role and access level are delegated to the externa
-
Test that the external user(s) can log into the service once Crestron has confirmed the integration.
XiO Cloud also supports multifactor authentication (MFA) for single sign-on solutions. MFA is configured within your identity provider.
Account Dashboard
The XiO Cloud service provides an account dashboard that shows various account statuses in the account dashboard can be accessed by selecting the Home button in the navigation menu and is displayed by default after logging into the service. The account dashboard can also be viewed individual groups or rooms using the left navigation menu.
Account Dashboard
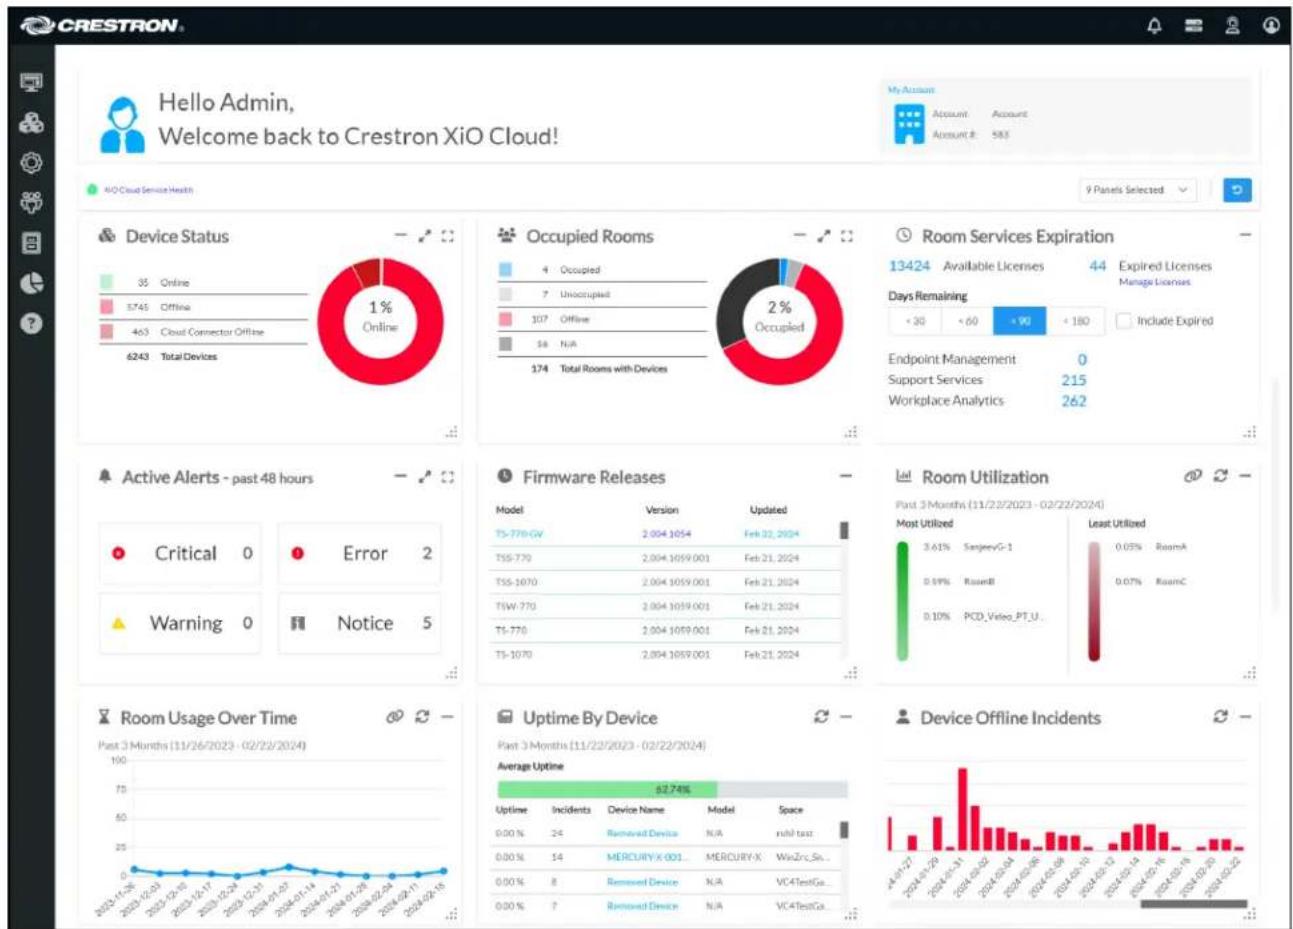
bar
| Category | Value | | :--- | :--- | | Room Usage Over Time (Past 3 Months) | 100 | | Uptime By Device (Past 3 Months) | 62.74% | | Average Uptime | 52.74% | | Room Usage Over Time (Past 3 Months) | 100 | | Uptime By Device (Past 3 Months) | 62.74% | | Room Usage Over Time (Past 3 Months) | 100 | | Uptime By Device (Past 3 Months) | 62.74% | | Room Usage Over Time (Past 3 Months) | 100 | | Uptime By Device (Past 3 Months) | 62.74% | | Room Usage Over Time (Past 3 Months) | 100 | | Utime By Device (Past 3 Months) | 62.74% | | Room Usage Over Time (Past 3 Months) | 100 | | Utime By Device (Past 3 Months) | 62.74% | | Room Usage Over Time (Past 3 Months) | 100 | | Utime By Device (Past 3 Months) | 62.74% | | Room Usage Over Time (Past 11/26/2023 - 02/22/2024) | 100 | | Utime By Device (Past 11/26/2023 - 02/22/2024) | 100 | | Utime By Device (Past 11/26/2023 - 02/22/2024) | 100 | | Utime By Device (Past 11/26/2023 - 02/22/2024)| 100 | | Utime By Device (Past 11/26/2023 - 02/22/2024)| 100 | | Utime By Device (Past 11/26/2023 - 02/22/2024)| 100 | | Utime By Device (Past 11/26/2023 - 02 / 2024) | 100 | | Utime By Device (Past 11/26/2023 - 02 / 2024) | 100 | | Utime By Device (Past 11/26/2023 - 02 / 2024) | 100 | | Utime By Device (Past 11/26/2023 - 02 / 19 / 2024) | 100 | | Utime By Device (Past 11/26/2023 - 02 / 19 / 2024) | 100 | | Utime By Device (Past 11/26/2023 - 02 / 19 / 2024) | 100 | | Utime By Device (Past 8/19 / 2024) | 100 | | Utime By Device (Past 8/19 / 2024) | 100 | | Utime By Device (Past 8/19 / 2024) | 100 | | Utime By Device (Past 8/19 / 2024) | 100 | | Utime By Device (Past 8 / 2024) | 100 | | Utime By Device (Past 8 / 2024) | 100 | | Utime By Device (Past 8 / 2024) | 100 | | Utime By Device (Past 8 / 2024) | 100 | | Utime By Device (Last Month) | 100 | | Utime By Device (Last Month) | 100 | | Utime By Device (Last Month) | 100 | | Utime By Device (Last Month) | 100 | | Utime By Device (Last Month) | 100 | | Utime By Device (Last Month) | 100 | | Utime By Device (Last Month) | 100 | | UTime By Device (Last Month) | 100 | | Utime By Device (Last Month) | 100 | | Utime By Device (Last Month) | 100 | | Utime By Device (Last Month) | 100 | | Utime By Device (Last Month) | 100 | | Utime By Device (Last Month) | 100 | | Utime By Device (Last Month) | 15 | | Utime By Device (Last Month) | 15 | | Utime By Device (Last Month) | 15 | | Utime By Device (Last Month) | 15 | | Utime By Device (Last Month) | 15 | | Utime By Device (Last Month) | 15 | | Utime By Device (Last Month) | 15 | | Utime By Device (Last Month) | 15 | | | Utime By Device (Last Month) | nan | | Utime By Device (Last Month) | nan | | Utime By Device (Last Month) | nan | | Utime By Device (Last Month) | nan | | Utime By Device (Last Month) | nan | | Utime By Device (Last Month) | nan | | Utime By Device (Last Month) | nan | | Utime By Device (Last Month) | nan | | Utime By Device (Last Month) | nan | | Utime by device status: Online Device Status: Online Occupied Rooms: Occupied Occupied Rooms: Unoccupied Occupied Rooms: Unoccupied Occupied Rooms: Unoccupied Occupied Rooms: Unoccupied Occupied Rooms: Unoccupied Occupied Rooms: Unoccupied Occupied Rooms: Unoccupied Occupied Rooms: Unoccupied Occupied Rooms: Unoccupied Occupied Rooms: Unoccupied Occupied Rooms: Unoccupied Occupied Rooms: Unoccupied Occupied Rooms: Unoccupied Occupied Rooms: Unoccupied Occupied Rooms: Unoccupied Occupied Rooms: Unoccupied Occupied Rooms: Unoccupied Occupied Rooms: Unoccupied Occupied Rooms: Unoccupied Occupied Rooms: Unoccupied Occupied Rooms: Unoccupied Occupied Rooms: Unoccupied Occupied Rooms: Unoccupied Occupied Rooms: Unoccupied Occupied Rooms: Unoccupied Occupied Rooms: Unoccupied Occupied Rooms: Unoccupied Occupied Rooms: Unoccupied Occupied Rooms: Unoccupied Occupied Mills Remaining <35 > <65 > <95 > <185 > Include Expired Endpoint Management Support Services Workplace AnalyticsThe account dashboard page provides a message near the top of the page that indicates the health status of the XiO Cloud service.

XiO Cloud Service Health
A green icon is shown if the service is healthy, and a red icon is shown if the service is up (experiencing issues or outages). A link to Crestron Online Help answer ID 5894 is also provided that gives detailed information on the current health status of the XiO Cloud service and updates r service restoration.
The account dashboard page also contains tiles that each show different account statuses. The can be expanded, hidden, or reordered as needed.
NOTE: Certain account status tiles may not provide all of the controls listed below.
- Select the maximize button at the top right of a tile to expand the tile to the full v browser window and to show more information for the associated account status.
NOTE: The maximize button cannot be selected if the browser window is not maximized full screen.
- If a tile is expanded to full width, select the maximize button again to shrink the tile original size, or select the half-width button to shrink the tile to half the width of the window.
- Select the half-width button at the top right of a tile to expand the tile half the wide browser window and to show more information for the associated account status.
- If a tile is expanded to half width, select the half-width button again to shrink the tile original size.
- Select the minimize button to hide the tile from the account dashboard page. Hidden til be returned to the account dashboard page using the View Panels drop-down menu.
- Select the refresh button to refresh the data shown in the tile (if supported).
- Select the link button to navigate to the Historical Reports page for generating a custom report based on the data shown in the tile (if supported). For more information, refer to Historical Reports on page 105.
- Use the View Panels drop-down menu on the top right of the page to show or hide tiles. If a tile is selected, it will be shown on the account dashboard page. If a tile is unselected, it will from the page.
- Select the clear button to clear any filters that have been created to sort data in the status tiles. Each tile that allows filters will also provide a clear button for the individual status.
- Press and hold a tile's header bar or the grip icon in the bottom-right corner to float reordering. Once it is floating, drag the tile across the account dashboard page to the location, and then release the tile to move it to that location. If the floating tile is pl existing tile, the latter tile is moved automatically.
The following account statuses are displayed in the dashboard.
Device Status
Expand the Device Status tile to display information about devices that are reporting online or offline within the service. The devices that are shown can be filtered based on their status and typ
Account Dashboard Page - Device Status
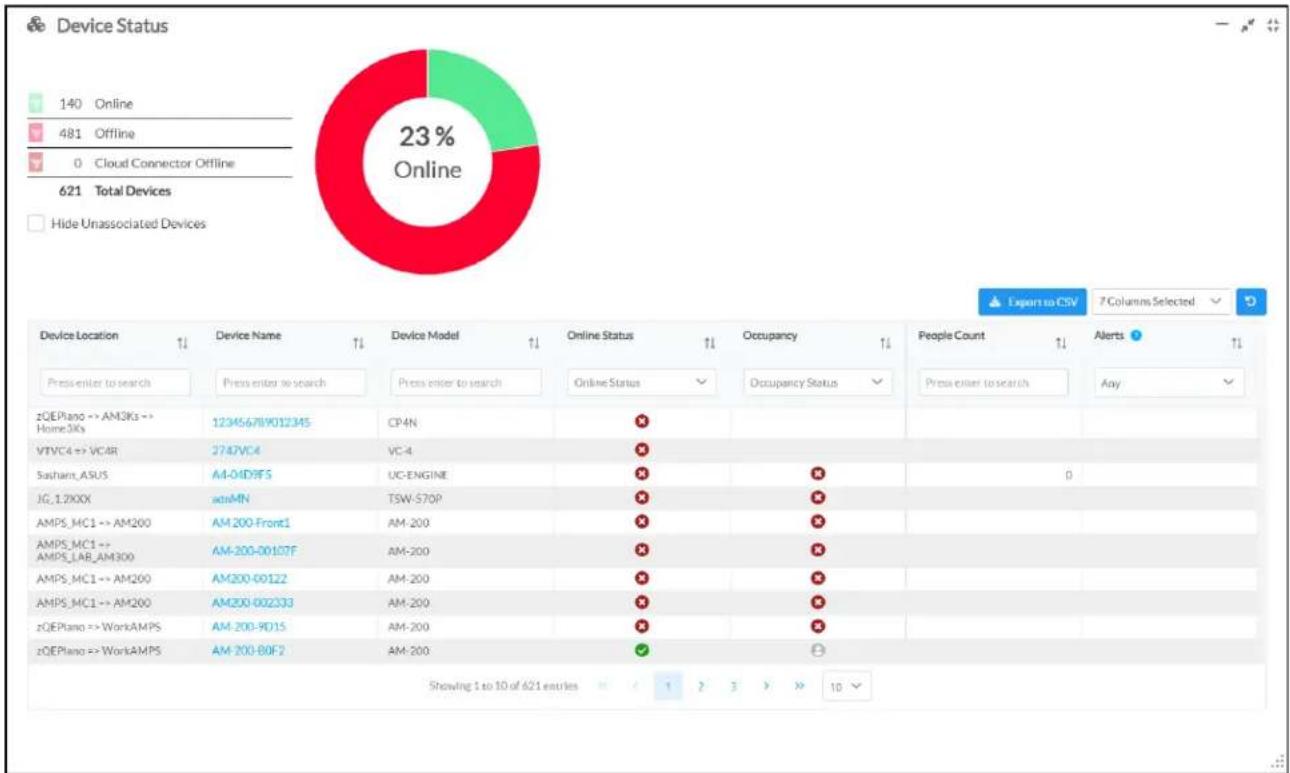
pie
Device Status | Device Location | Device Name | Device Model | Online Status | Occupancy | People Count | Alerts | |---|---|---|---|---|---|---| | Press-enter to search | Press enter to search | Press enter to search | Online Status | Occupancy Status | Press enter to search | Any | | zQEPiano => AM3Ks => Home3Ks | 123456789012345 | CP-4N | ✗ | 0 | 0 | 0 | | VTVC4 => VC4R | 2747VC4 | VC-4 | ✗ | 0 | 0 | 0 | | Sathart_ASUS | A4-04D9F5 | UC-ENGINE | ✗ | 0 | 0 | 0 | | JG_1.2XXX | aktMN | TSW-S70P | ✗ | 0 | 0 | 0 | | AMPS_MC1 => AM200 | AM-200-Front1 | AM-200 | ✗ | 0 | 0 | 0 | | AMPS_MC1 => AMPS_LAB_AM300 | AM-200-00107F | AM-200 | ✗ | 0 | 0 | 0 | | AMPS_MC1 => AM200 | AM200-00122 | AM-200 | ✗ | 0 | 0 | 0 | | AMPS_MC1 => AM200 | AM200-002333 | AM-200 | ✗ | 0 | 0 | 0 | | zQEPiano => WorkAMPS | AM-200-9D15 | AM-200 | ✗ | 0 | 0 | 0 | | zQEPiano => WorkAMPS | AM-200-BOF2 | AM-200 | ✗ | 0 | 0 | 0 | Showing 1 to 10 of 621 entries: < 1 > 3 > >> 10A pie chart is provided that gives an overview of the devices that are reporting online or off the service. The pie chart corresponds with the device status categories that are listed to the chart. The following device status categories are provided:
NOTE: Devices that have not been associated with a room or group are included in the device status reports by default. Select the Hide Unassociated Devices check box below the device status categories to hide all unassociated devices from the device status reports.
• Online: Indicates the number of devices that are reporting online within the service.
- Offline: Indicates the number of devices that are reporting offline within the service. A device is considered offline after three consecutive heartbeat messages from the device to the service missed.
- Cloud Connector Offline: Indicates the number of connected Crestron XiO Cloud Gateway dev that are reporting offline.
Certain device status categories have filter buttons that can be used to show or hide the cc from the pie chart. The color of the filter buttons matches the color of the device status c pie chart. Once a device status category is hidden, select the button again to show the stat chart. The percentage of online devices shown within the pie chart changes automatically deper the selected filters.
NOTE: The filter buttons also filter data in the device status table within the tile automatically.
The Device Status tile also lists all devices in the account in table form. Each table column provides a search field or drop-down menu in its header row that allows the device table to be filtered based on the selected criterion. The table also provides navigation controls at the bottom of can be used to move between pages and set the number of table rows per page.
The following information is provided for each device:
- Device Location: The room or group where the device is located within XiO Cloud.
- Device Name: The device name in XiO Cloud. Select the device name to navigate to the c within the group tree.
• Device Model: The device model. - Online Status: Indicates whether the device is reporting online or offline within XiO Cloud. Crestron XiO Cloud Gateway connected devices that are reporting offline show a cloud cor offline icon.
- Occupancy: Shows one of the following icons if the device supports occupancy detection. N is shown if the device does not support occupancy detection.
° Shows a blue icon if occupancy is detected.
- Shows a gray icon if no occupancy is detected.
° Shows an x iron if occupancy detection is reporting offline.
- People Count: If occupancy detection is supported by the device, displays the occupancy nu for the associated room.
- Alerts: If alerts are reported for the room, a description of the issue and the corresponding alert level (Notice, Warning, Error, and Critical) are shown for each alert.
The data that is displayed in the device table can be customized by filtering the table column default, 7 columns are displayed that contain the data described in the list above. Select the button to clear any filters for the Device Status tile.
To select or deselect table columns for the device status table, expand the drop-down menu right of the table. Then, select or deselect an item in the menu to display or hide that col table, respectively. Use the check box at the top of the menu to select or deselect all colun
NOTE: The device status table will reset to its default settings after logging out of the XiO Cloud service.
The device status table can be downloaded as a CSV file by selecting the Export to CSV button at the top right of the table. The CSV file will include all table columns that have been selected as above.
Occupied Rooms
Expand the Occupied Rooms tile to display information about room occupancy status within the service. The rooms that are shown can be filtered based on their status and type.
Account Dashboard Page - Occupied Rooms
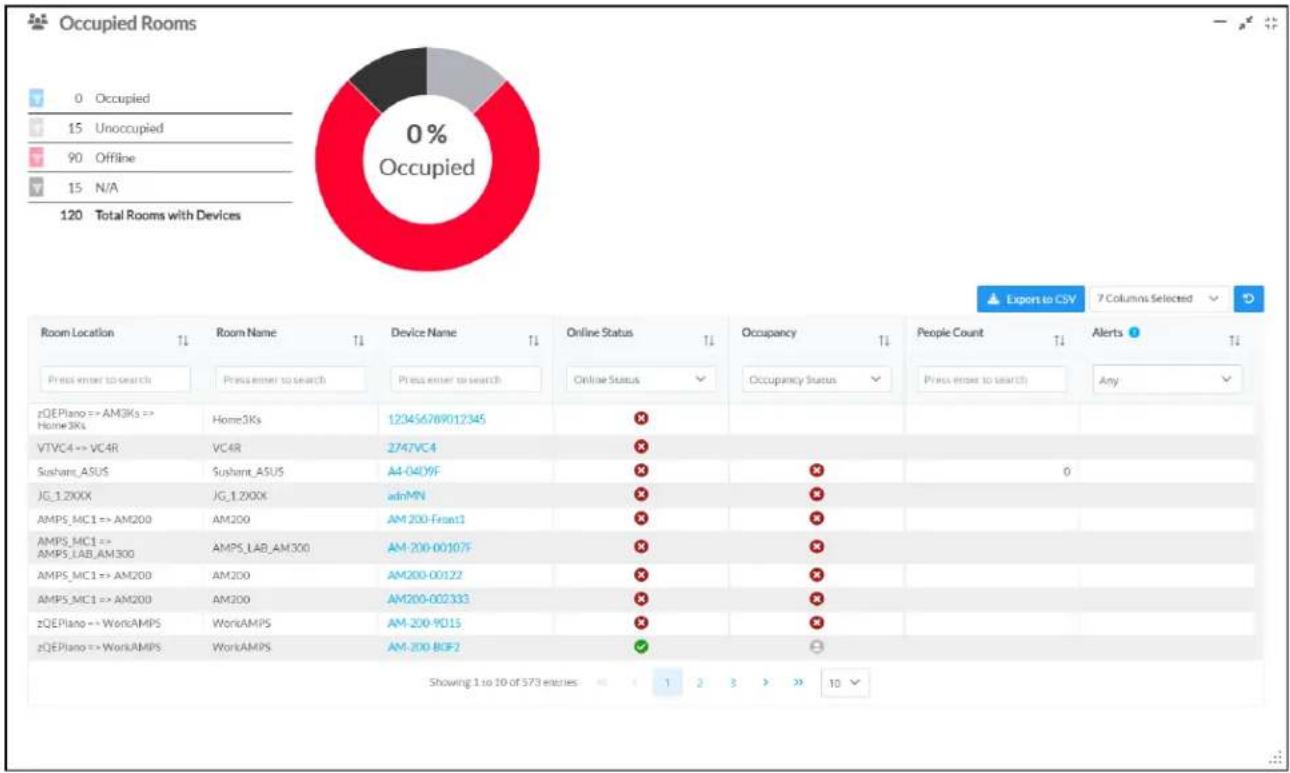
pie
Occupied Rooms | Room Location | Room Name | Device Name | Online Status | Occupancy | People Count | Alerts | |---|---|---|---|---|---|---| | Press enter to search | Press enter to search | Press enter to search | Online Status | Occupancy Status | Press enter to search | Any | | zQEPlano => AM3Ks => Home3Ks | Home3Ks | 123456789012345 | ✗ | | | | | VTVC4 => VC4R | VC4R | 2747VC4 | ✗ | | | | | Sushent_ASUS | Sushent_ASUS | A4-0409F | ✗ | ✗ | 0 | | | JG_1200XX | JG_1200X | adnMN | ✗ | ✗ | | | | AMPS_MC1 => AM200 | AM200 | AM 200-Front1 | ✗ | ✗ | | | | AMPS_MC1 => AMPS_LAB_AM300 | AMPS_LAB_AM300 | AM-200-00107F | ✗ | ✗ | | | | AMPS_MC1 => AM200 | AM200 | AM200-00122 | ✗ | ✗ | | | | AMPS_MC1 => AM200 | AM200 | AM200-002333 | ✗ | ✗ | | | | zQEPlano => WorkAMPS | WorkAMPS | AM-200-9D15 | ✗ | ✗ | | | | zQEPlano => WorkAMPS | WorkAMPS | AM-200-BGF2 | ✓ | ✓ | | | Showing 1 to 10 of 573 entries: 1 2 3 >> 10A pie chart is provided that gives an overview of the room occupancy within the service. The corresponds with the room occupancy categories that are listed to the left of the chart. The room occupancy categories are provided:
- Occupied: Indicates the number of rooms that are reporting as occupied within the service. multiple devices in a room report occupancy, the room will show as occupied if any of devices report active occupancy.
- Unoccupied: Indicates the number of rooms that are reporting as unoccupied within the ser
- Offline: Indicates the number of rooms that have occupancy detection reporting as offline within the service.
• N/A: Indicates the number of rooms that do not contain devices that report occupancy.
Certain room occupancy categories have filter buttons that can be used to show or hide the from the pie chart. The color of the filter buttons matches the color of the room occupancy the pie chart. Once a room occupancy category is hidden, select the button again to show the pie chart. The percentage of occupied rooms shown within the pie chart changes automatically depending on the selected filters.
NOTE: The filter buttons also filter data in the room occupancy table automatically.
The Occupied Rooms tile also lists all rooms in the account in table form. Each table column provides a search field or drop-down menu in its header row that allows the room occupancy table to sorted based on the selected criterion. The table also provides navigation controls at the bottom tile that can be used to move between pages and set the number of table rows per page.
The following information is provided for each room:
- Room Location: The location of the room within the group tree.
• Room Name: The room name in XiO Cloud - Device Name: The device name that reports occupancy within the room (if applicable). Select device name to navigate to the device within the group tree.
- Online Status: Indicates whether the device is reporting online or offline within XiO Cloud. Crestron XiO Cloud Gateway connected devices that are reporting offline show a cloud con offline icon.
- Occupancy: Shows one of the following icons if the device supports occupancy detection. N is shown if the device does not support occupancy detection.
° Shows a blue icon if occupancy is detected.
° Shows a gray icon if no occupancy is detected.
- Shows an x icon if occupancy detection is reporting offline.
- People Count: If occupancy detection is supported by the device, displays the occupancy nu for the associated room.
- Alerts: If alerts are reported for the room, a description of the issue and the corresponding alert level (Notice, Warning, Error, and Critical) are shown for each alert.
The data that is displayed in the room occupancy table can be customized by filtering the t. By default, 7 columns are displayed that contain the data described in the list above. Select button to clear any filters for the Occupied Rooms tile.
To select or deselect table columns for the room occupancy table, expand the drop-down men top right of the table. Then, select or deselect an item in the menu to display or hide that the status table, respectively. Use the check box at the top of the menu to select or deselect
NOTE: The room occupancy table will reset to its default settings after logging out of the XiO Cloud service.
The room occupancy table can be downloaded as a CSV file by selecting the Export to CSV button at the top right of the table. The CSV file will include all table columns that have been selected above.
Active Alerts - last 48 hours
Expand the Active Alerts - last 48 hours tile to display information about alert messages that have been raised within the service over the last 48 hours.
Account Dashboard Page - Active Alerts - last 48 hours
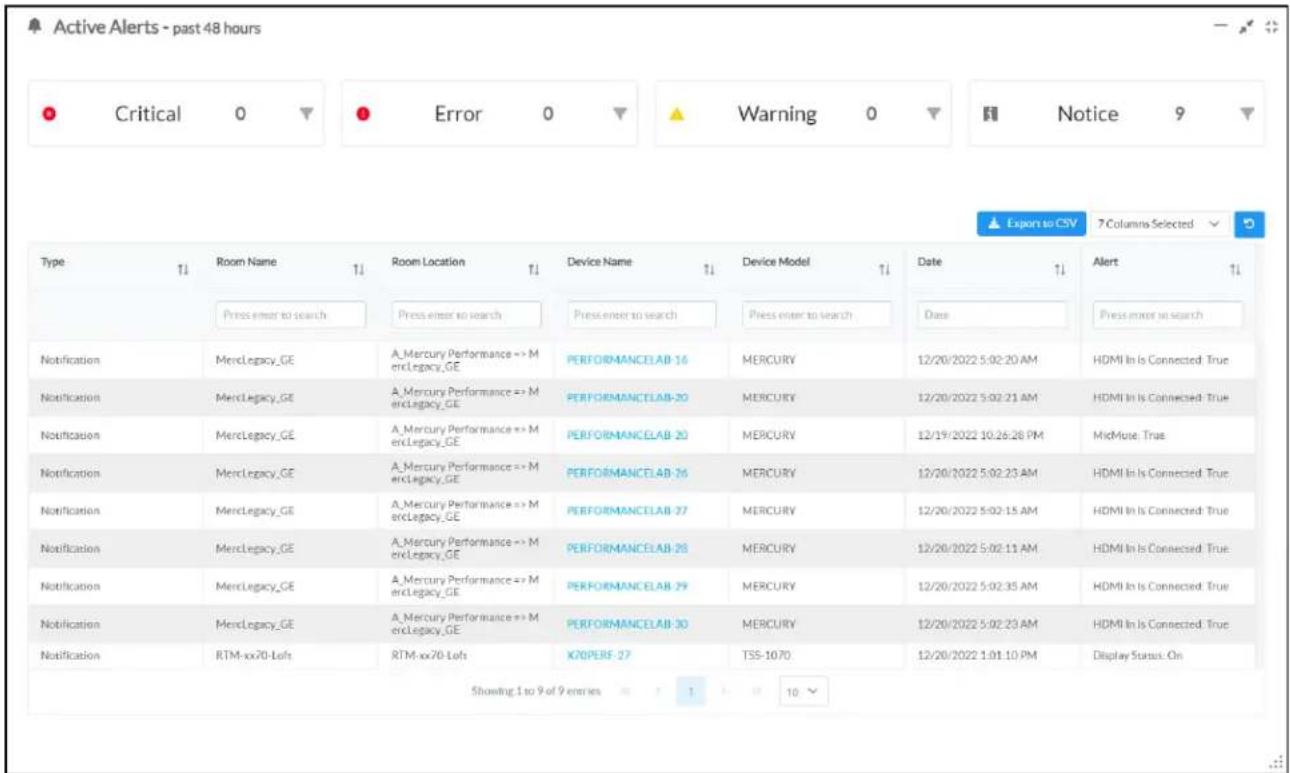
The Active Alerts - last 48 hours tile shows the total number of alert messages that are active. Each alert level (Notice, Warning, Error, and Critical) shows a number that indicates how many alerts are active for that level.
NOTE: For more information on alert messages, refer to Alerts on page 111.
The Active Alerts - last 48 hours tile also lists all active alerts in the account in table form. Each table column provides a search field or drop-down menu in its header row that allows the alerts to filtered or sorted based on the selected criterion. The table also provides navigation controls a bottom of the tile that can be used to move between pages and set the number of table
The following information is provided for each alert:
• Type: The alert level (Notice, Warning, Error, and Critical)
• Room Name: The room name in XiO Cloud where the alert was raised.
• Room Location: The location of the room within the group tree.
• Device Name: The device name in XiO Cloud that raised the alert.
• Device Model: The device model.
- Date: The date and time when the alert was raised.
- Alert: A description of the issue that triggered the alert.
The data that is displayed in the alerts table can be customized by filtering the table column default, 7 columns are displayed that contain the data described in the list above. Select the button to clear any filters for the Active Alerts - last 48 hours tile.
To select or deselect table columns for the alerts table, expand the drop-down menu at the table. Then, select or deselect an item in the menu to display or hide that column from respectively. Use the check box at the top of the menu to select or deselect all columns.
NOTE: The alerts table will reset to its default settings after logging out of the XiO Cloud service.
The alerts table can be downloaded as a CSV file by selecting the Export to CSV button at the top right of the table. The CSV file will include all table columns that have been selected as described
Firmware Releases
The Firmware Releases tile displays information about recent firmware releases for devices that have been claimed to the XiO Cloud account. For more information about updating device firmware in XiO Cloud, refer to Manage Devices on page 56.
NOTE: The Firmware Releases tile cannot be expanded to full or half-width size.
Account Dashboard Page - Firmware Releases
| Firmware Releases | ||
| Model | Version | Updated |
| TSW-1070 | 2.004.1004.001 | Apr 28, 2023 |
| TSW-1060 | 3.002.1012.001 | Apr 27, 2023 |
| UC-ENGINE-SD-Z | 1.13.00.010-Zoom | Apr 26, 2023 |
| CP3 | 1.8001.0214.01 | Apr 25, 2023 |
| CP3N | 1.8001.0214.01 | Apr 25, 2023 |
| RMC3 | 1.8001.0214 | Apr 25, 2023 |
The following information is provided for each firmware release:
• Model: The device model.
- Version: The device firmware version.
NOTE: If release notes are available for the device firmware version within XiO Cloud, the listed firmware version is displayed as a hyperlink that opens the release notes in a browser window or downloads them to the local computer.
- Updated: The date the firmware version was last updated or released.
Room Utilization
The Room Utilization tile displays information about the most and least used rooms within the XiO Cloud account (or for an individual group or room) based on reported occupancy. The data to a three month period leading up to the current date.
NOTE: The Room Utilization tile cannot be expanded to full or half-width size.
Account Dashboard Page - Room Utilization

Room Utilization
Past 3 Months (11/22/2023 - 02/22/2024)
Most Utilized
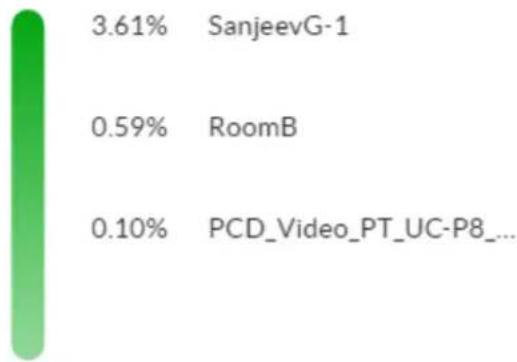
bar
| Category | Value (%) | |---|---| | SanjeevG-1 | 3.61 | | RoomB | 0.59 | | PCD_Video_PT_UC-P8_... | 0.10 |


Least Utilized
heatmap
| Value | RoomA (%) | |---|---| | 0.05 | | | 0.07 | | RoomA RoomC
The following information is provided:
NOTE: Only rooms that support occupancy detection are included.
- Most Utilized: Lists up to four rooms that have been most utilized based on their report occupancy in descending order. A percentage is shown next to each room indicating its occupancy over a 24-hour period.
- Least Utilized: Lists up to four rooms that have been least utilized based on their report occupancy in ascending order. A percentage is shown next to each room indicating its to occupancy over a 24-hour period.
Room Usage Over Time
The Room Usage Over Time tile displays information about how often rooms are used over time within the XiO Cloud account (or for an individual group or room) based on reported occupancy. The fixed to a three month period leading up to the current date.
NOTE: The Room Usage Over Time tile cannot be expanded to full or half-width size.
Account Dashboard Page - Room Usage Over Time
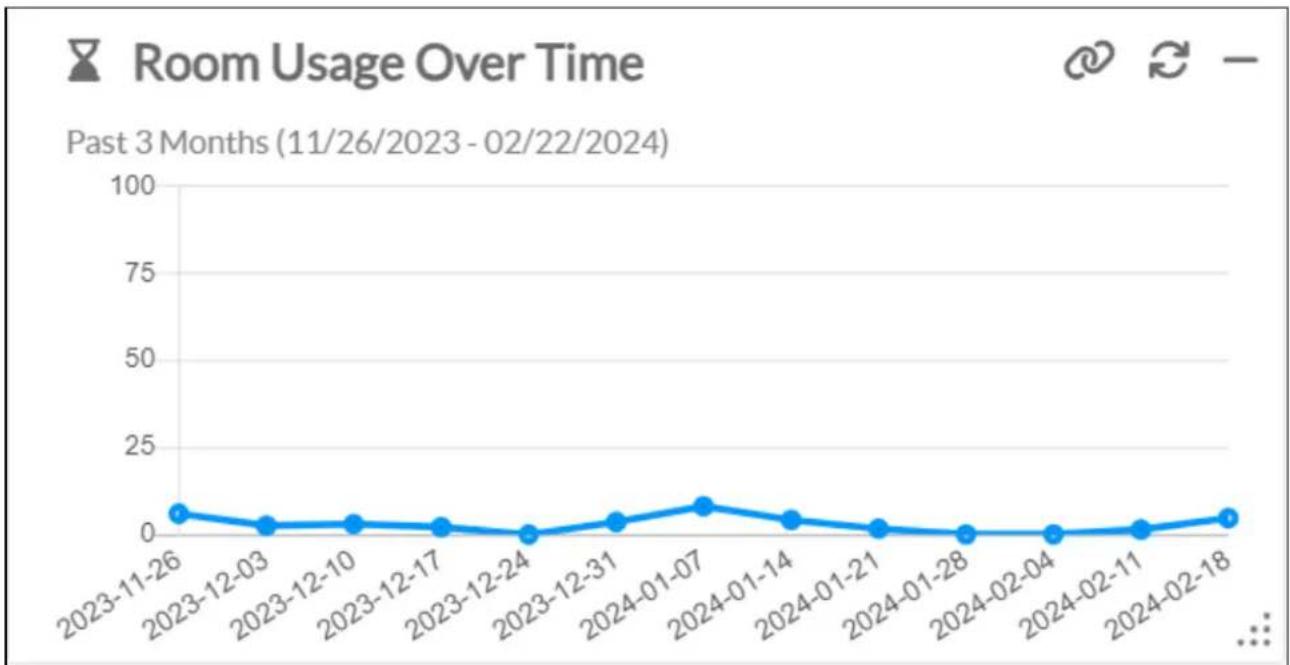
line
| Date | Room Usage | | ---------- | ---------- | | 2023-11-26 | 5 | | 2023-12-03 | 2 | | 2023-12-10 | 3 | | 2023-12-17 | 2 | | 2023-12-24 | 1 | | 2023-12-31 | 3 | | 2024-01-07 | 8 | | 2024-01-14 | 4 | | 2024-01-21 | 2 | | 2024-01-28 | 1 | | 2024-02-04 | 1 | | 2024-02-11 | 2 | | 2024-02-18 | 5 |The Room Usage Over Time data is presented as a line graph where room usage is represented by data points for each week in the three-month period. Each data point is a percentage indicating the room group's total occupancy over a 24-hour period for the given week. Hover over a data point the exact usage percentage for that week.
NOTE: Only rooms that support occupancy detection are included.
Uptime By Device
The Uptime By Device tile displays information about the uptime for every device within the XiO Cloud account (or for an individual group or room). The data is fixed to a three month period lea current date.
NOTE: The Uptime By Device tile cannot be expanded to full or half-width size.
Account Dashboard Page - Uptime By Device

Uptime By Device

Past 3 Months (11/22/2023 - 02/22/2024)
Average Uptime
| 62.75% | ||||
| Uptime | Incidents | Device Name | Model | Space |
| 0.00 % | 1 | Removed Device | N/A | Ancillary Devices |
| 0.00 % | 1 | Removed Device | N/A | Ancillary Devices |
| 0.00 % | 1 | saira-CP4 | CP4 | Ancillary Devices |
| 0.00 % | 1 | MERCURY-X-00107FCF2... | MERCURY-X | VenkatOffice |
The Average Uptime filled bar chart reports the average uptime (as a percentage) for all devices over a 24-hour period.
A table is also provided that lists all devices in ascending order by average uptime. The table following information:
- Uptime: The average uptime for the device over a 24-hour period (as a percentage).
- Incidents: The number of incidents reported by the device.
• Device Name: The device name.
• Model: The device model.
• Space: The room or group where the device is located.
Device Offline Incidents
The Device Offline Incidents tile displays information about the number of reported offline incidents for all devices within the XiO Cloud account (or for an individual group or room). The data is fix month period leading up to the current date.
NOTE: The Device Offline Incidents tile cannot be expanded to full or half-width size.
Account Dashboard Page - Device Offline Incidents
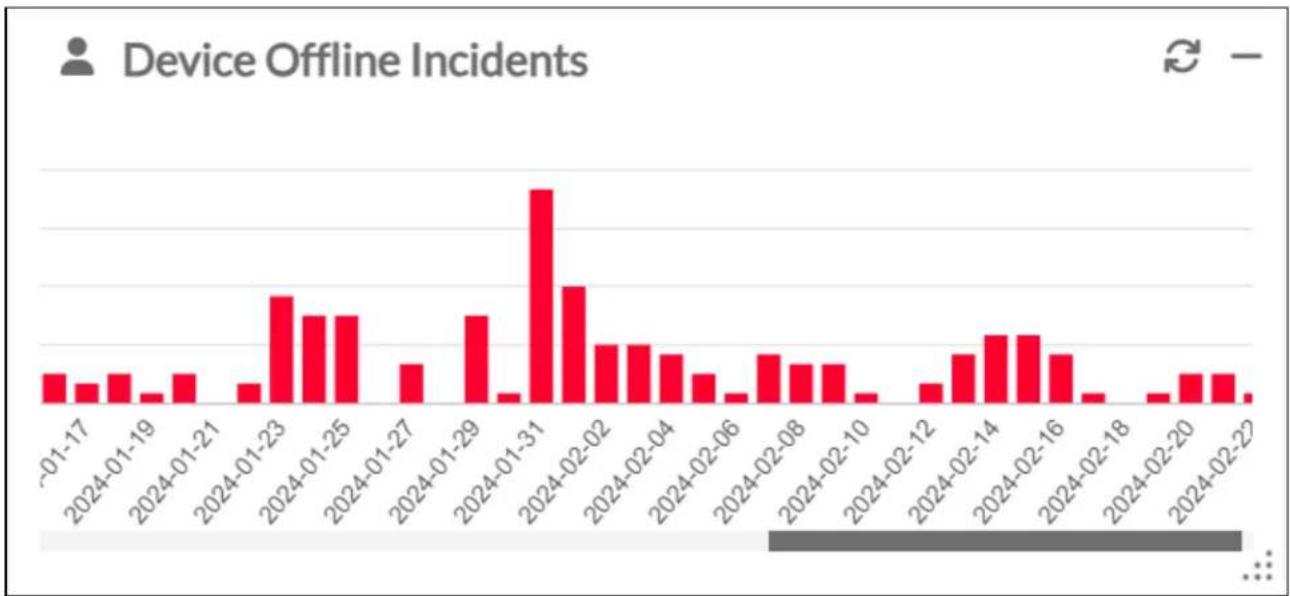
bar
| Date | Device Offline Incidents | | ---------- | ------------------------ | | -01-17 | 1 | | 2024-01-19 | 1 | | 2024-01-21 | 1 | | 2024-01-23 | 1 | | 2024-01-25 | 3 | | 2024-01-27 | 1 | | 2024-01-29 | 3 | | 2024-01-31 | 1 | | 2024-02-02 | 5 | | 2024-02-04 | 3 | | 2024-02-06 | 2 | | 2024-02-08 | 1 | | 2024-02-10 | 1 | | 2024-02-12 | 1 | | 2024-02-14 | 3 | | 2024-02-16 | 3 | | 2024-02-18 | 1 | | 2024-02-20 | 1 | | 2024-02-22 | 1 |The Device Offline Incidents data is presented as a bar graph where offline incidents are represented by bars for each day in the three-month period. Each bar indicates the total number of offline day. Hover over a bar to view the exact number of offline incidents for that day. Use the scroll through the provided date range.
Room Services Expiration
The Room Services Expiration tile displays information about available and expired licenses for the XiO Cloud account (or for an individual group or room).
NOTE: The Room Services Expiration tile cannot be expanded to full or half-width size.
Account Dashboard Page - Room Services Expiration
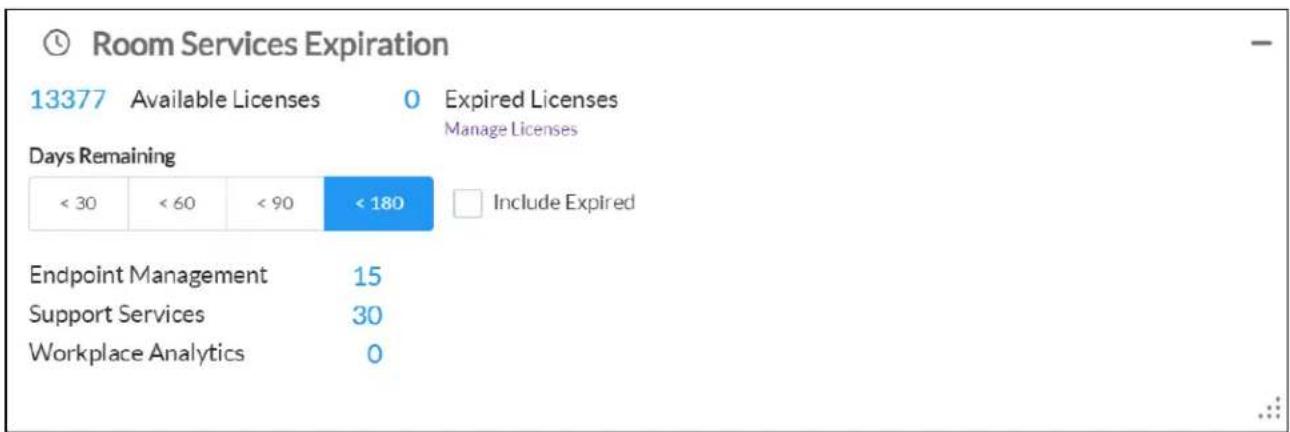
bar
Room Services Expiration | Category | Days Remaining | |---|---| | < 30 | < 180 | | < 60 | < 180 | | < 90 | < 180 | | Endpoint Management | 15 | | Support Services | 30 | | Workplace Analytics | 0 |The total number of Available Licenses and Expired Licenses are displayed at the top of the tile. Select Manage Licenses under the Expired Licenses count to navigate to the Room Services page for managing expired licenses. For more information, refer to Licensed Features on page 52.
The bottom portion of the tile shows the total number of available licenses per license type (Endpoint Management, Support Services, and Workplace Analytics) within a set period.
- Use the Days Remaining selections to show only licenses that are set to expire within the selected number of days (30, 60, 90, or 180).
- Fill the Include Expired check box to also show licenses that have already expired.
Historical Reports
The XiO Cloud service provides a feature that allows custom historical reports to be generated various data sets within the XiO Cloud account. Historical reports can be customized based on type, date range, and location within the environment group tree.
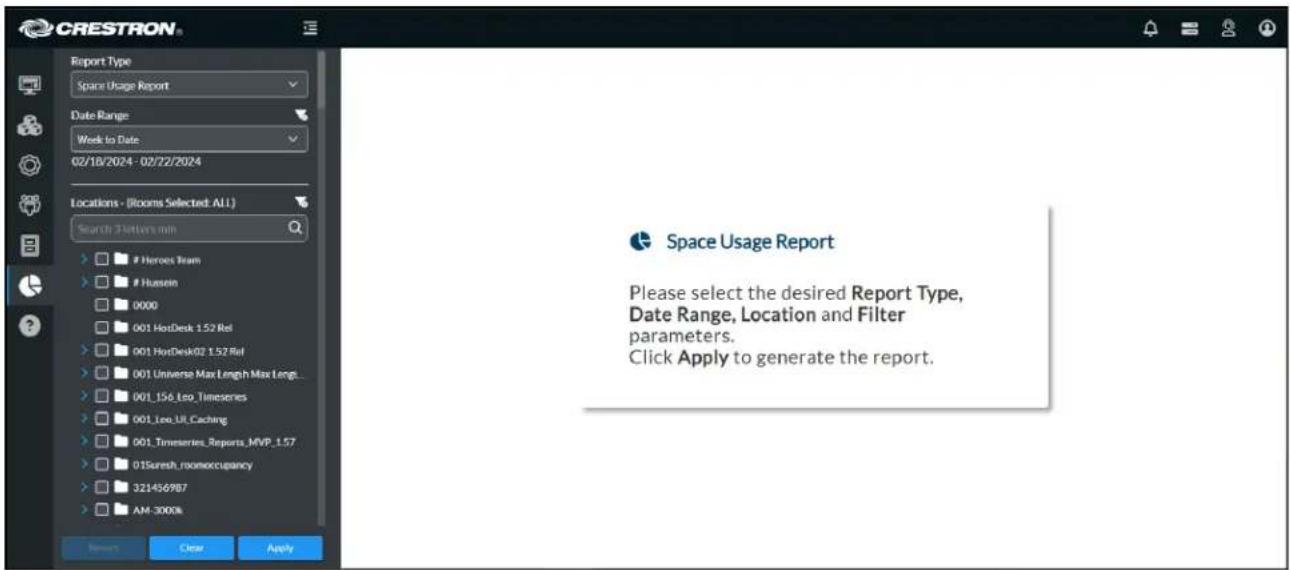
This feature is accessed by selecting the Historical Reports button in the navigation menu.
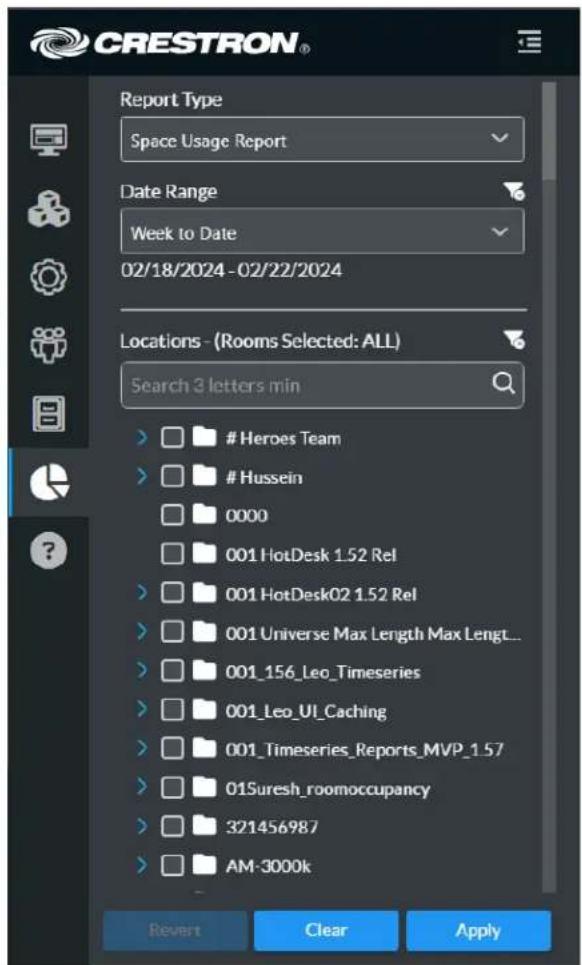
Use the following filters to customize the historical report.
- Report Type: Select one of the provided report types from the drop-down menu. Each rep includes different data sets from a specific category (such as space usage metrics) that c shown when the report is generated.
- Date Range: Select one of the provided date ranges from the drop-down menu. The general report will show data only from within the specified range.
Select Custom Timeframe to create a custom date range for the report. A pop-up of is displayed that is used to select the start and end dates to be used.
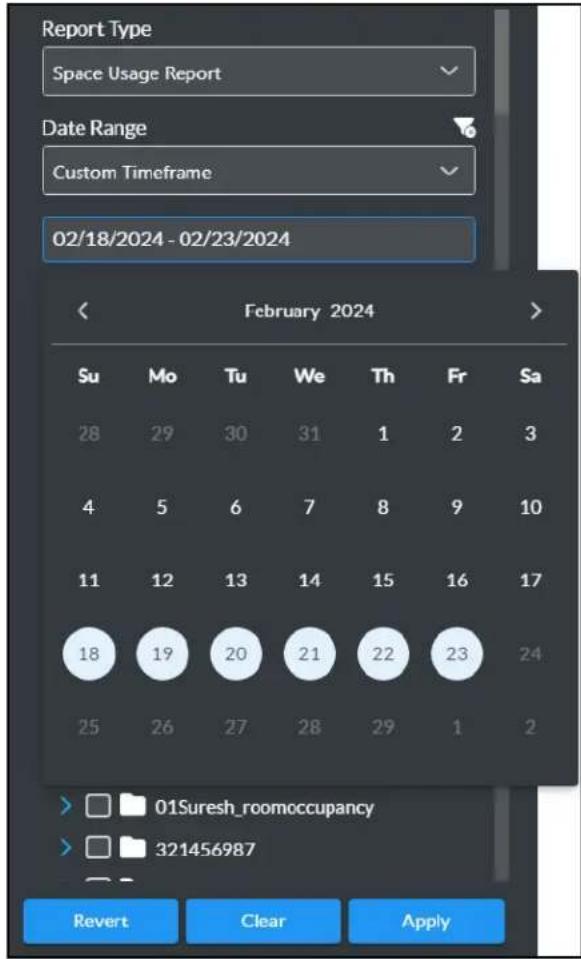
Select the filter clear button to clear any custom filters created for this selection.
- Locations: Select the groups, rooms, or desks that will be included in the report using the environment group tree. The number of selected nodes are shown above the search field.
- Fill the check box next to the group, room, or desk in the group tree to add the report.
NOTE: If no nodes are selected, the report will include data for the entire group
- Use the search function to search for a specific node within the group tree. The g will only show nodes that match the entered search terms.
Select the filter clear button to clear any custom filters created for this selection.
Once all filters have been selected, select Apply to generate the report within the right pane of the screen. If any changes are made to the report filters, select Apply again to generate a new report.
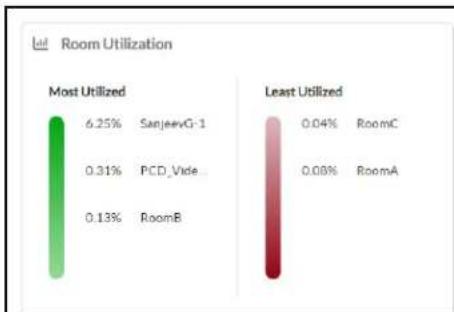
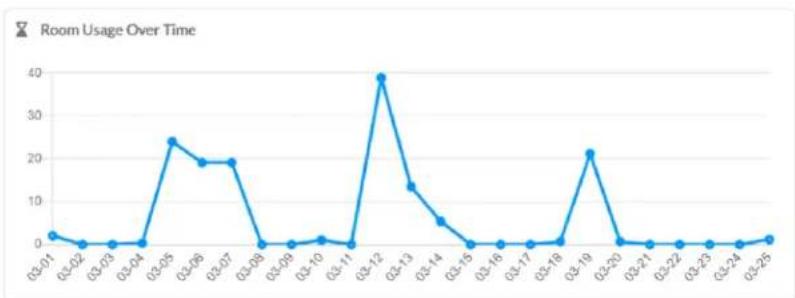
line
| Date | Room Usage | |--------|------------| | 03-01 | 2 | | 03-02 | 1 | | 03-03 | 1 | | 03-04 | 1 | | 03-05 | 24 | | 03-06 | 19 | | 03-07 | 19 | | 03-08 | 1 | | 03-09 | 1 | | 03-10 | 1 | | 03-11 | 1 | | 03-12 | 39 | | 03-13 | 13 | | 03-14 | 5 | | 03-15 | 1 | | 03-16 | 1 | | 03-17 | 1 | | 03-18 | 1 | | 03-19 | 21 | | 03-20 | 1 | | 03-21 | 1 | | 03-22 | 1 | | 03-23 | 1 | | 03-24 | 1 | | 03-25 | 1 |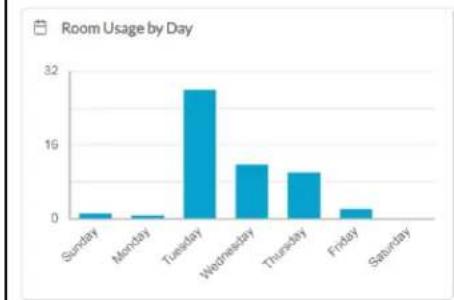
bar
Room Usage by Day | Day | Room Usage | |---|---| | Sunday | 2 | | Monday | 1 | | Tuesday | 28 | | Wednesday | 14 | | Thursday | 13 | | Friday | 3 | | Saturday | 0 |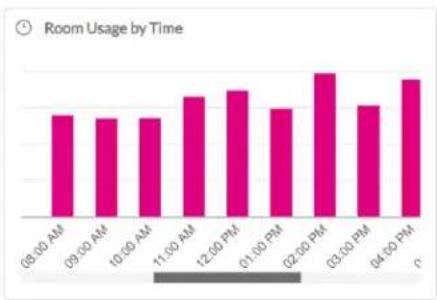
bar
Room Usage by Time | Time | Room Usage | |---|---| | 08:00 AM | 1.2 | | 09:00 AM | 1.15 | | 10:00 AM | 1.15 | | 11:00 AM | 1.6 | | 12:00 PM | 1.75 | | 01:00 PM | 1.35 | | 02:00 PM | 2.1 | | 03:00 PM | 1.4 | | 04:00 PM | 1.8 |The following additional controls are provided:
- Select Revert to revert the report filters to their previous settings.
- Select Clear to restore the report filters to their default values.
What's New Message
The XiO Cloud service shows messages occasionally that announce new features or news about service. Recent What's New messages can be viewed by selecting the alerts button on the to of the page.
To disable these messages, set the What's New Message toggle on the user profile page to Disable. For more information on editing user information, refer to Edit User Information on page 87.
User Profile Page
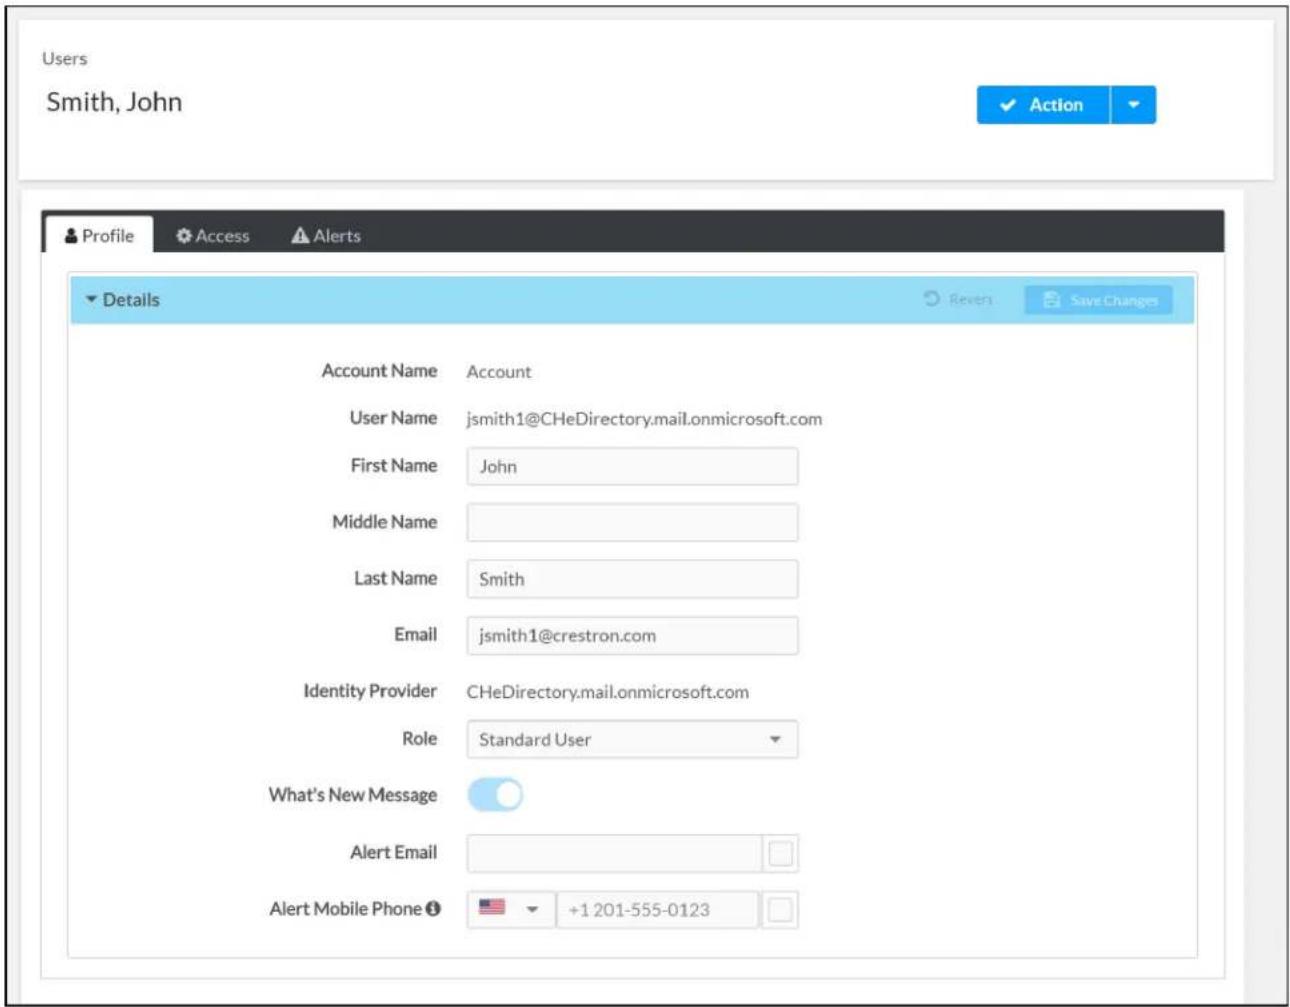
Progress Tracker
Certain tasks initiated within the XiO Cloud service that involve large data sets (such as important and devices for the Crestron Desk Scheduling functionality) can take a considerable amount of complete. The progress tracker function allows users to check on the status of these tasks run background at any time.
Select the progress tracker button on the top right of the page to display the Progress Track dialog box.

The Progress Tracker dialog box lists all in-progress tasks for the account in table form. A Filter function is provided to filter the table based on the entered information. Each table column also provides controls to sort the data in that column.
The following information is provided for each task:
- Task Name: The name of the task.
- Started At: The date and time when the task was started.
- Status: The current task status. Completed tasks show a green check icon with the date time that the task was completed.
• Description: Information about the task, such as the name of an imported file. - Initiated By: The XiO Cloud user who initiated the task.
- Actions: Provides actions for the task, such as clearing the task or downloading an imported file.
Alerts
The XiO Cloud service sends alerts when it detects an issue with a device. Alerts are sent v text messages to any user that is configured to receive alerts. For room-based accounts, enabling requires purchase of one SW-XIOC-S license per room.
NOTE: XiO Cloud alerts can be integrated with ServiceNow® software instances. For more information, refer to Appendix A: Configure ServiceNow for XiO Cloud Alerts on page 182.
Configure Contact Information
To receive alerts, a user must enable alerts for email and/or text messages in his or her pr To configure alerts for a user:
- Select the user's name in the USERS menu. A Users page with the Profile tab open by default is displayed to the right of the USERS menu.
-
Choose one or both of the following alert methods:
-
Select the check box next to the Alert Email text field to enable email alerts. Ent email address in the Alert Email text field to receive messages at that address.
- Select the check box next to the Alert Mobile Phone text field to enable text mes Enter a valid mobile phone number (including country code and area code) in the A Mobile Phone text field to receive text messages at that phone number.
NOTE: SMS services are not supported in all countries. For a list of countries that currently support the service, refer to FAQs on page 152.
User Profile Page
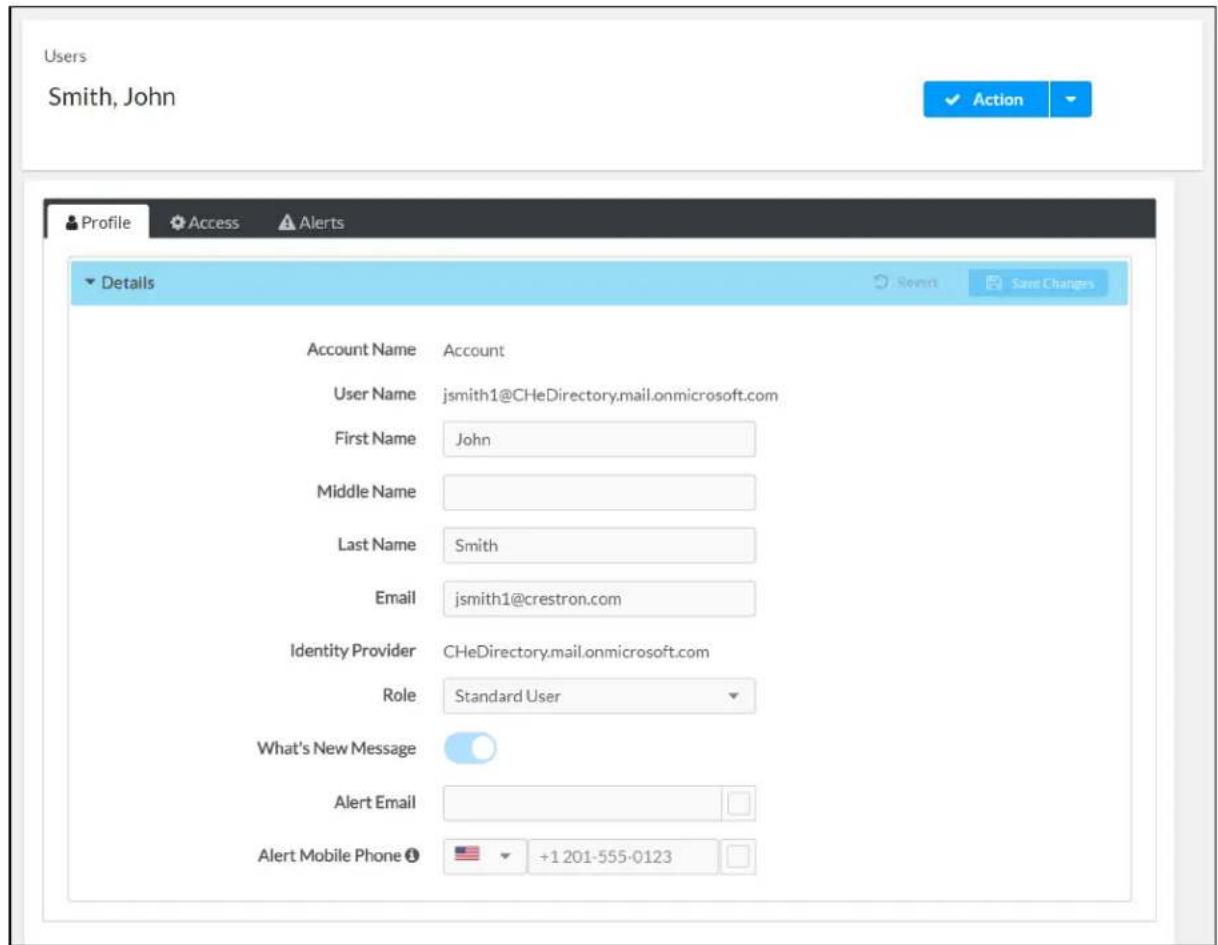
- Select Save Changes at the top right of the screen to save any changes made. Select Revert to clear any information that was entered.
Configure Alert Levels
Alerts may be configured so that they are issued at different severity levels for different group configuration is set at the user level, so each user may customize the alerts that he or she. To configure access levels for alerts:
NOTE: A user must be configured to receive alerts via email or mobile phone before alert levels can be configured for that user. Refer to Configure Contact Information on page 111 for more information.
-
Select the user's name in the USERS menu. A Users page with the Profile tab open by default is displayed to the right of the USERS menu.
-
Select the Alerts tab.
Users Page - Alerts Tab
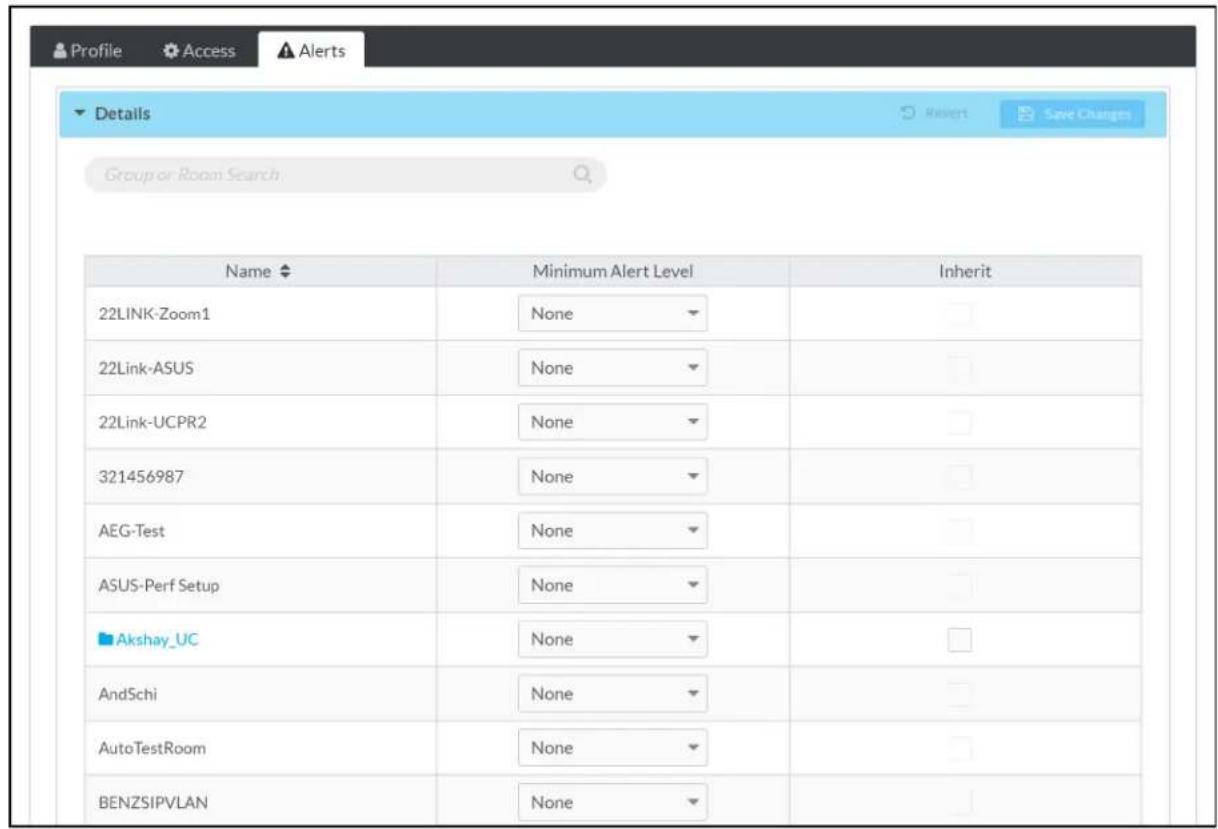
- Use the Minimum Alert Level drop-down menu to select the alert severity level (None, Notice, Warning, Error, or Critical) for each group and subgroup or room. Only alerts of the chosen severity level or higher will be sent.
- (Subgroups only) Select Inherit to have the subgroup or room inherit the alert severity level settings of its parent group. Inherit is the default setting for subgroups and rooms.
NOTE: Enter text in to the Group or Room Search text box to search for and display groups or rooms that match the search term(s).
- Select Save Changes at the top right of the screen to save any changes made. Select Revert to clear any information that was entered.
Manage Alerts
The changes made to a device that trigger an alert may be customized. The XiO Cloud serv common alerts automatically. However, these alerts may be deleted and new alerts may be ac The SETTINGS menu for alerts is located in the user management panel, which may be access selecting the Settings button in the navigation menu.
Settings - Alerts Option
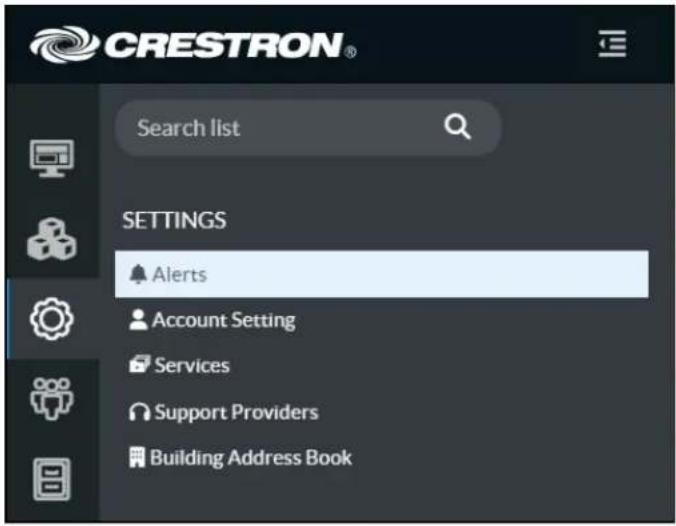
Select Alerts in the SETTINGS menu. An Alerts page with the Status Fields tab open by default is displayed to the right of the SETTINGS menu.
Alerts - Status Fields Tab
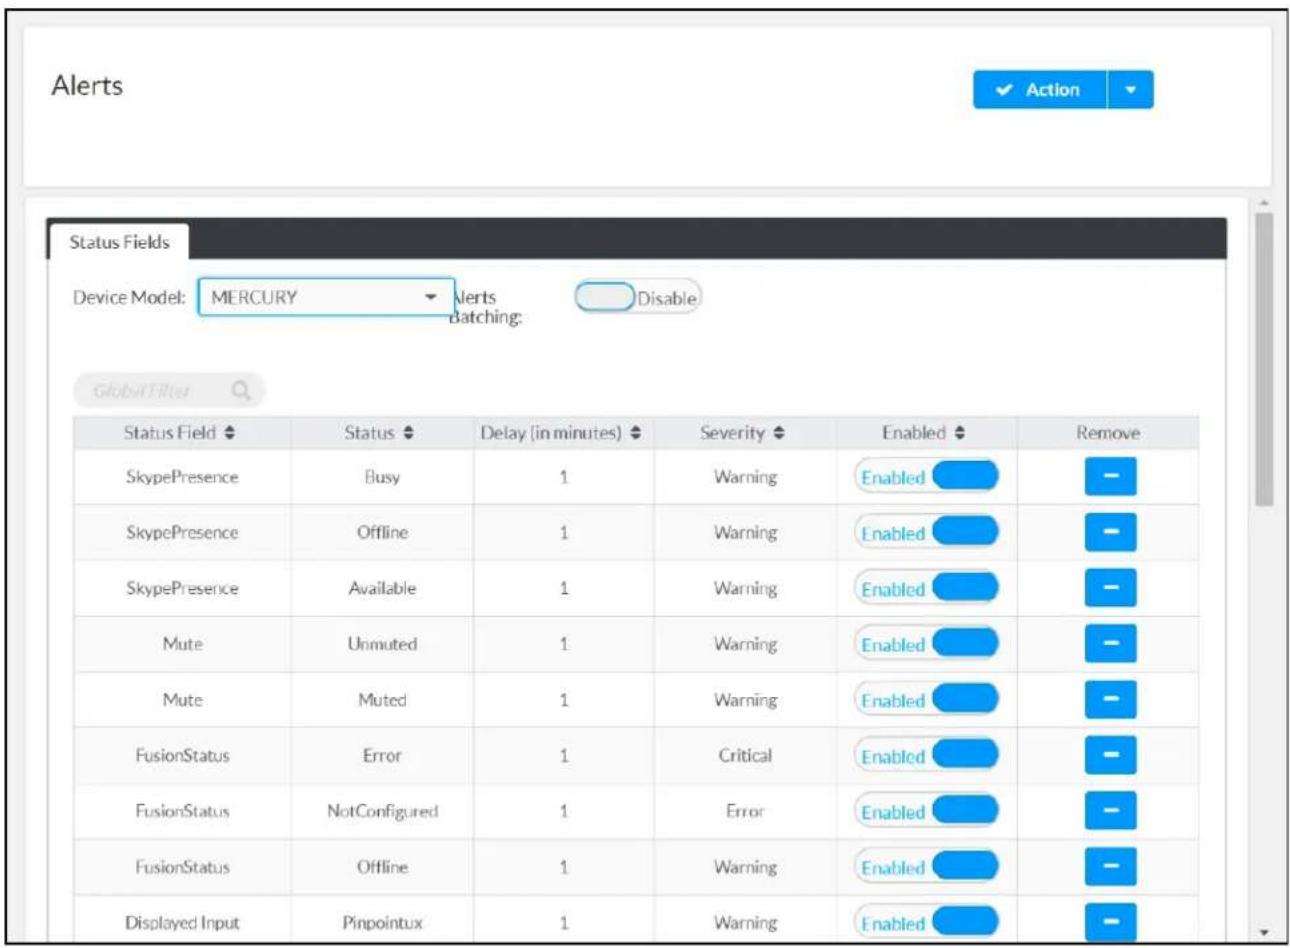
Alerts in the Status Fields section are organized by device type. To configure alerts for a device type, select the desired device type from the Device Model drop-down menu on the top left of the Status Fields section.
Alerts may be also be batched by setting the Alerts Batching toggle to Enabled. When Alerts Batching is enabled, all alerts for a device are batched together and may be enabled/disabled or removed
The Status Fields table presents all of the alerts configured for the selected device type. The following information is provided:
- Status Field: The device status type (An alert is triggered if changes to this status are detected.)
• Status: The state that the device status must reach in order to trigger an alert - Delay: The duration in minutes that the device must remain in the selected status before an alert is triggered
- Severity: The severity level of the alert, which determines the users who are notified bas their configured alert levels
- Enabled/Disabled: Provides controls for enabling or disabling the alert
- Remove: Provides controls for removing the alert
Add a New Alert
To add a new alert:
- Select Add Alert from the Action drop-down menu. Drop-Down Menu with Add Alert Option
An Add Alert dialog box is displayed. Add Alert Dialog Box
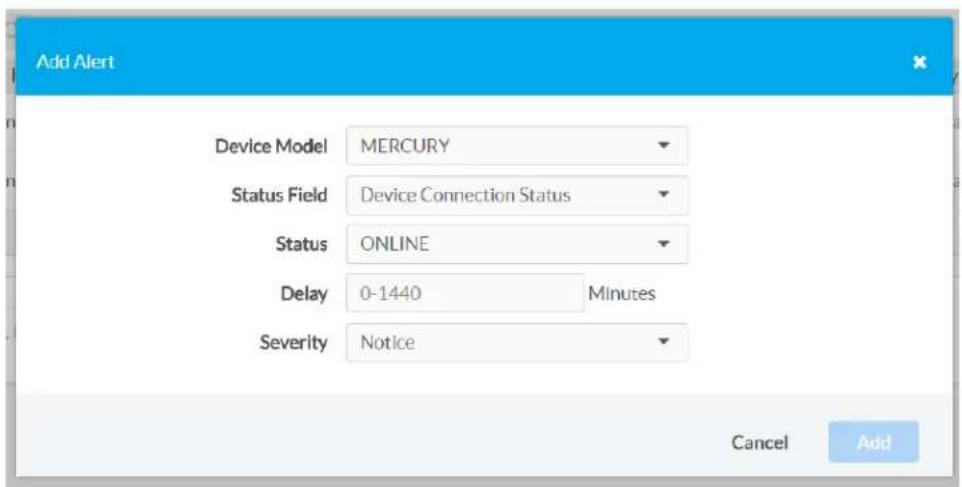
- Use the provided text fields and drop-down menus to enter the required information for
- Once all information has been entered, select Add to add the alert or Cancel to cancel adding the alert.
The new alert is displayed in the Status Fields section of the Alerts page for the selected device type.
Delete an Alert
To delete an alert, select the minus button (-) in the Remove column for that alert.
View Alerts
In addition to receiving alerts via email or text messages, alerts may also be viewed for indi and for groups of devices.
Alerts are accessible from the Alerts accordion of the Status tab for an individual device or for a group.
Settings Tab - Alerts Accordion
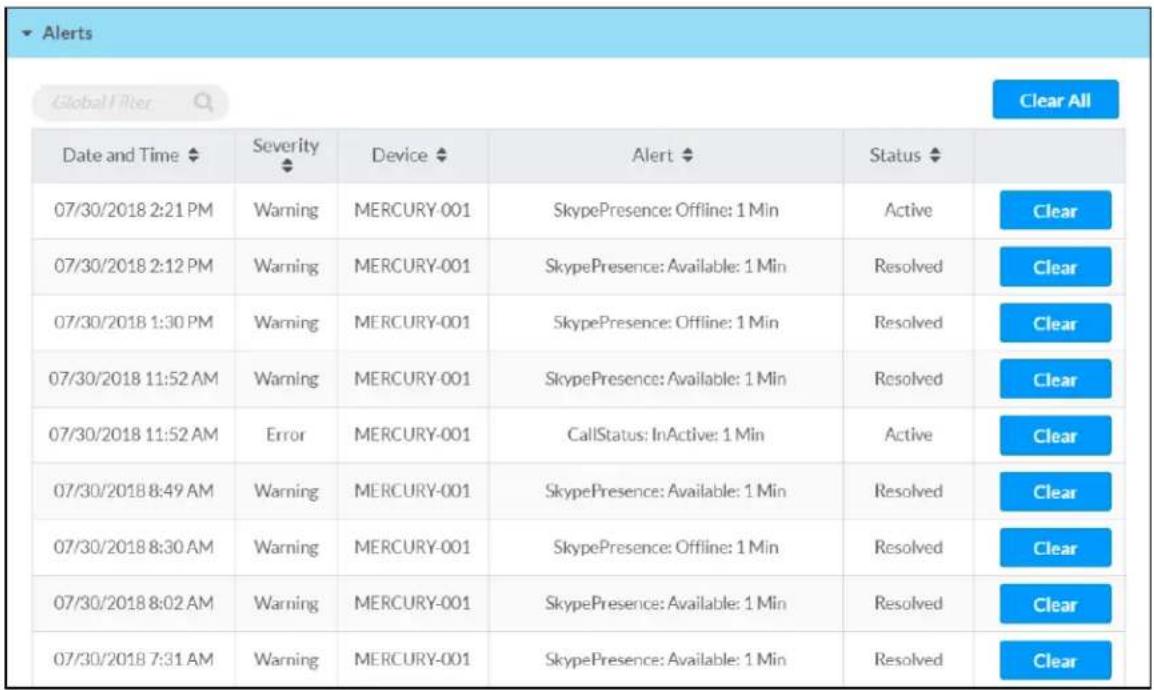
The Alerts section provides the following information in table format:
• The date and time the alert was issued
• The severity of the alert
• The device that caused the alert to be issued
• The status field, status, and duration values that triggered the alert
- The status of the alert (An alert changes from Active to Resolved automatically when the status field value changes to a status other than the one that triggered the alert.)
• A Clear button that removes the alert from the log
Select Clear All at the top right of the table to clear all listed alerts.
File Library
Various files can be loaded to the XiO Cloud service for use by claimed devices via the File selections. Select the File Upload button in the navigation menu to display the FILE LIBRARY menu.
FILE LIBRARY Menu
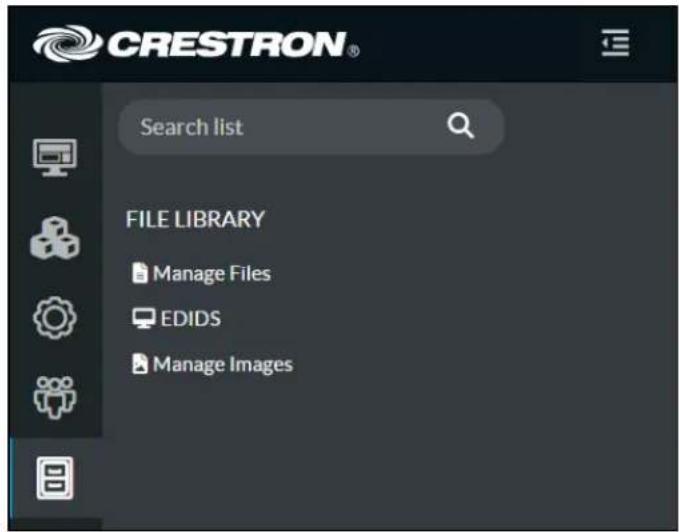
The following selections are provided:
- Manage Files: Contains a library of programs and projects for control systems, touch screens, and other devices
• EDIDs: Contains a library of Extended Display Identification (EDID) data files for use with display devices - Manage Images: Contains a library of image files for use by various devices
Each menu selection is described in the following sections.
Manage Files
Select Manage Files from the FILE LIBRARY menu to display the Manage Files page.
Manage Files Page
Manage Files
Manage Files

Manage Files
| Name ▲ | Version ↙ | File Type ↙ | Notes ↙ | Edit | Delete |
| 253HybridMC3IR_Pgm1Master | 3 | Program | 253HybridMC3IR_Pgm1Master | ☑ Edit | ☑ Delete |
| 308HTTPS | 1 | Program | 308HTTPS | ☑ Edit | ☑ Delete |
| 4Series_2200JSON_TEST_PROGRAM | 1 | Program | 2200JSON_TEST_PROGRAM | ☑ Edit | ☑ Delete |
| 4Series_with_IP_ID_4_8 | 1 | Program | with_IP_ID_4_8_v4_Ipz | ☑ Edit | ☑ Delete |
| 4Series_with_no_ipid_prog_2 | 1 | Program | with_no_ipid_prog_2 | ☑ Edit | ☑ Delete |
| 570PUserProjectJasmine | 1 | User Project | fileuploadtest | ☑ Edit | ☑ Delete |
| 828TcpTraffic | 1 | Program | 828TcpTraffic | ☑ Edit | ☑ Delete |
| AM200 | 1 | User Project | AM200 | ☑ Edit | ☑ Delete |
| AM2001 | 1 | User Project | AM2001 | ☑ Edit | ☑ Delete |
| asd | 3 | Program | xml | ☑ Edit | ☑ Delete |
Each loaded program or project file is represented in a table that provides the following info controls. An Action drop-down menu is also provided in the top-right of the page that is used to add program or project files to XiO Cloud.
• Name: The program or project name
- Version: The version of the program or project
- File Type: The program or project file type
• Notes: User-provided notes that describe the program or project
- Edit: Contains an Edit button that is used to edit program or project information (Refer to Edit a Program or Project on page 122 for more information.)
- Delete: Contains a Delete button that is used to delete the program or project file from XiO Cloud
Enter text in to the Global Filter text box to search for and display programs or project files that match the search term(s).
If the table spans multiple pages, use the navigation arrows on the bottom of the page to or backward through the pages, or select a page number to navigate to that page.
Add a Program or Project
To add a program or project file to XiO Cloud:
NOTE: Only valid program or project files (.cpz, .lpz, .xml, or .zip) can be uploaded. Other file types will be rejected.
- Select Add File from the Action drop-down menu.
Drop-Down Menu with Add File Option
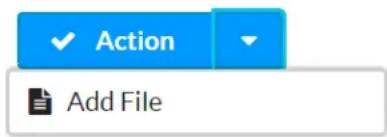
The Add Files dialog box is displayed.
Add Files Dialog Box
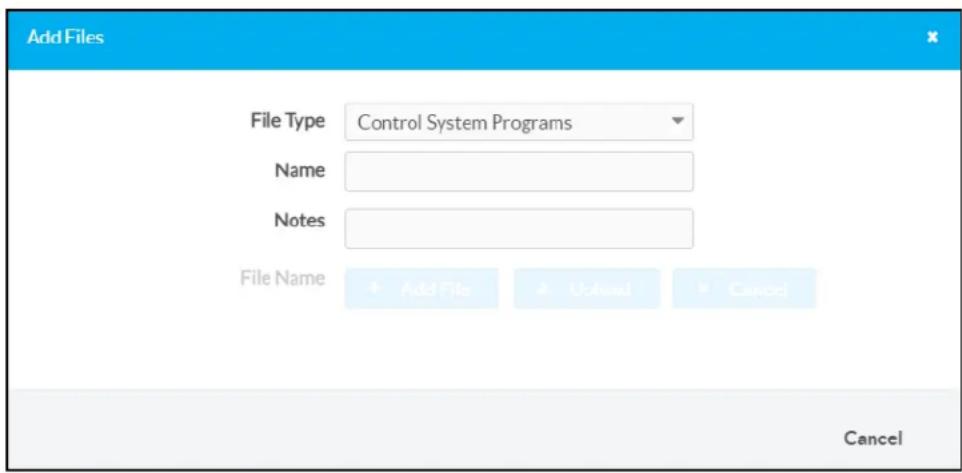
- Enter the following information about the program or project file:
- File Type: Select one of the supported program or project file types from the drop menu:
- Control System Programs
- User Project
- Mobility Project
-
Web Browser Project
-
Name: Enter a program or project name into the text field.
- Notes: Enter any notes about the program or project into the text field.
Once the information above is entered, the + Add File button can be selected.
- Select + Add File, and then navigate to the program or project file on the computer.
- Select the program or project file, and then select Open. The filename and file size is shown after the program or project file is selected.
NOTE: Select the x button to discard the program.
Add Files Dialog Box - File Preview
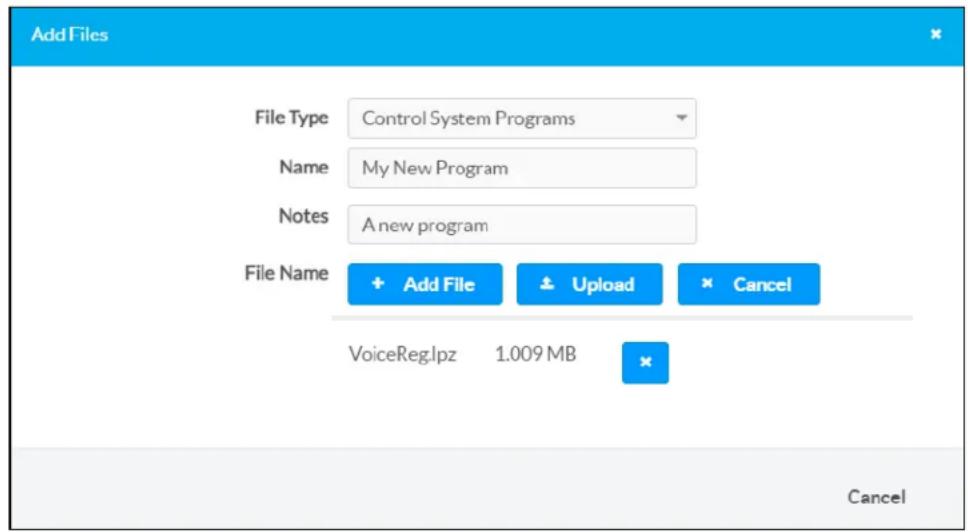
NOTE: Only compiled program files may be uploaded. The program code must be comp with a minimum version of the include4.dat file to ensure full compatibility with XiO C more information, refer to the respective programming tool help file.
- Select Upload. Growl notifications are displayed when the upload starts and completes. Upon successful upload, the program or project file is added to the Manage Files table.
Edit a Program or Project
To edit an existing program or project file within XiO Cloud, navigate to the program or project within the Manage Files table. Then, select Edit within the table row for the file. A Manage Programs dialog box is displayed.
Manage Programs Dialog Box
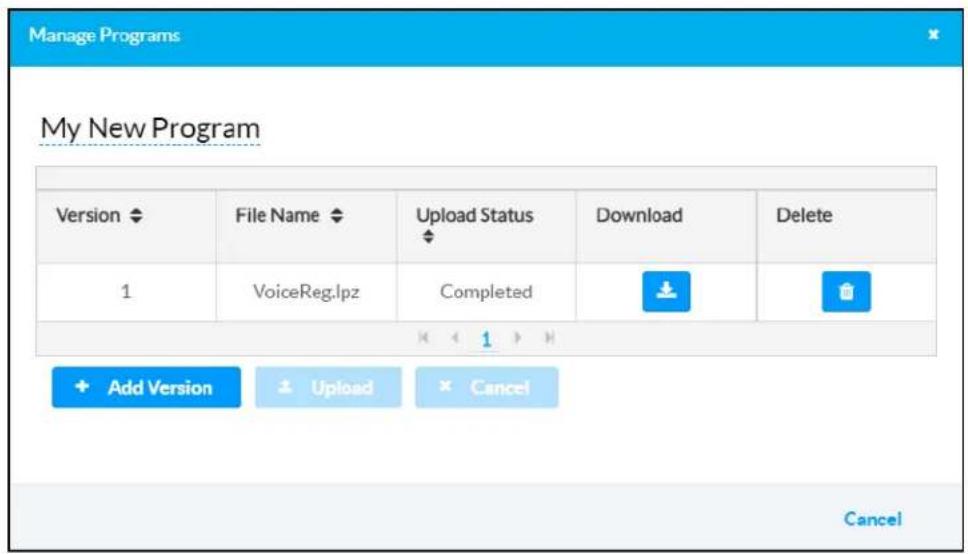
The program or project files are represented in a table that provides the following information controls. Controls are also provided for adding new versions of the program or project file.
- Version: The version of the program or project
NOTE: If there are multiple versions of a program or project file available, each version populates a table row.
- File Name: The program or project file name
- Upload Status: The upload status of the program or project file
- Download: Contains a download button that is used to download the program or project to a computer.
- Delete: Contains a delete button that is used to delete the program or project file from XiO Cloud
If the table spans multiple pages, use the navigation arrows on the bottom of the page to or backward through the pages, or select a page number to navigate to that page.
To edit the program or project name, select the program or project name on the top-left of box. A text field is displayed where the name can be edited. Select the green check button any changes.
To add a new version of the program or project file:
- Select + Add Version, and then navigate to the program or project file on the computer.
- Select the program or project file, and then select Open. The file name and file size are shown after the program or project file is selected.
NOTE: Select the x button to discard the program.
Manage Programs Dialog Box - File Preview
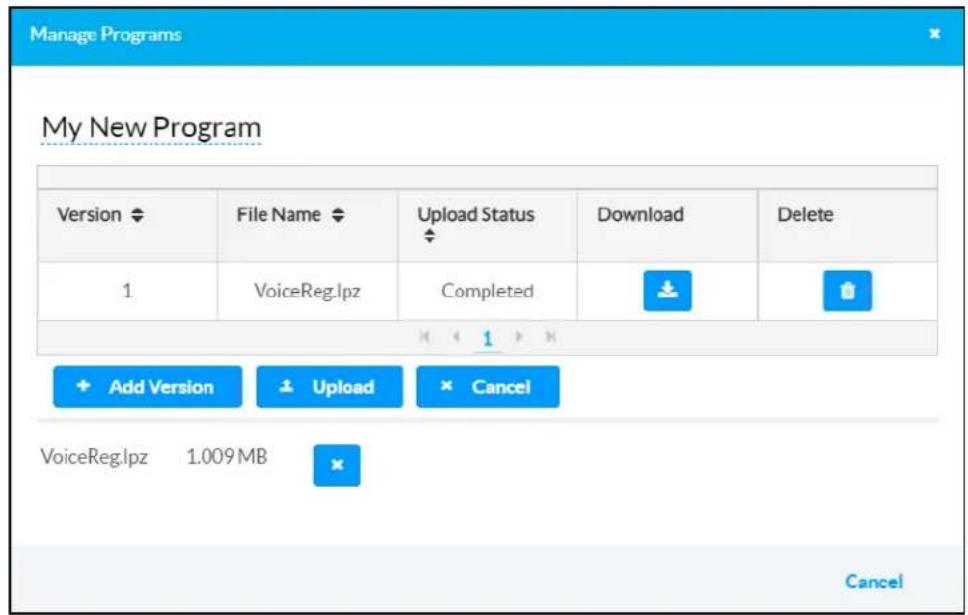
NOTE: Only compiled program files may be uploaded. The program code must be comp with a minimum version of the include4.dat file to ensure full compatibility with XiO C more information, refer to the respective programming tool help file.
- Select Upload. A Download File to Device dialog box is displayed asking whether the new program or project version should be pushed to devices, rooms, or groups running the older file v
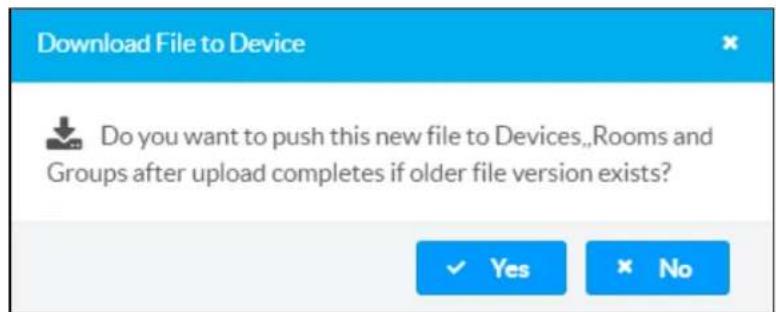
- Make a selection to start the upload. The new file version is added to the Manage Programs table. The Upload Status changes from "In Progress" to "Completed" once the new file version is uploaded successfully.
EDIDs
Select EDIDs from the FILE LIBRARY menu to display the EDIDs page.
EDIDs Page
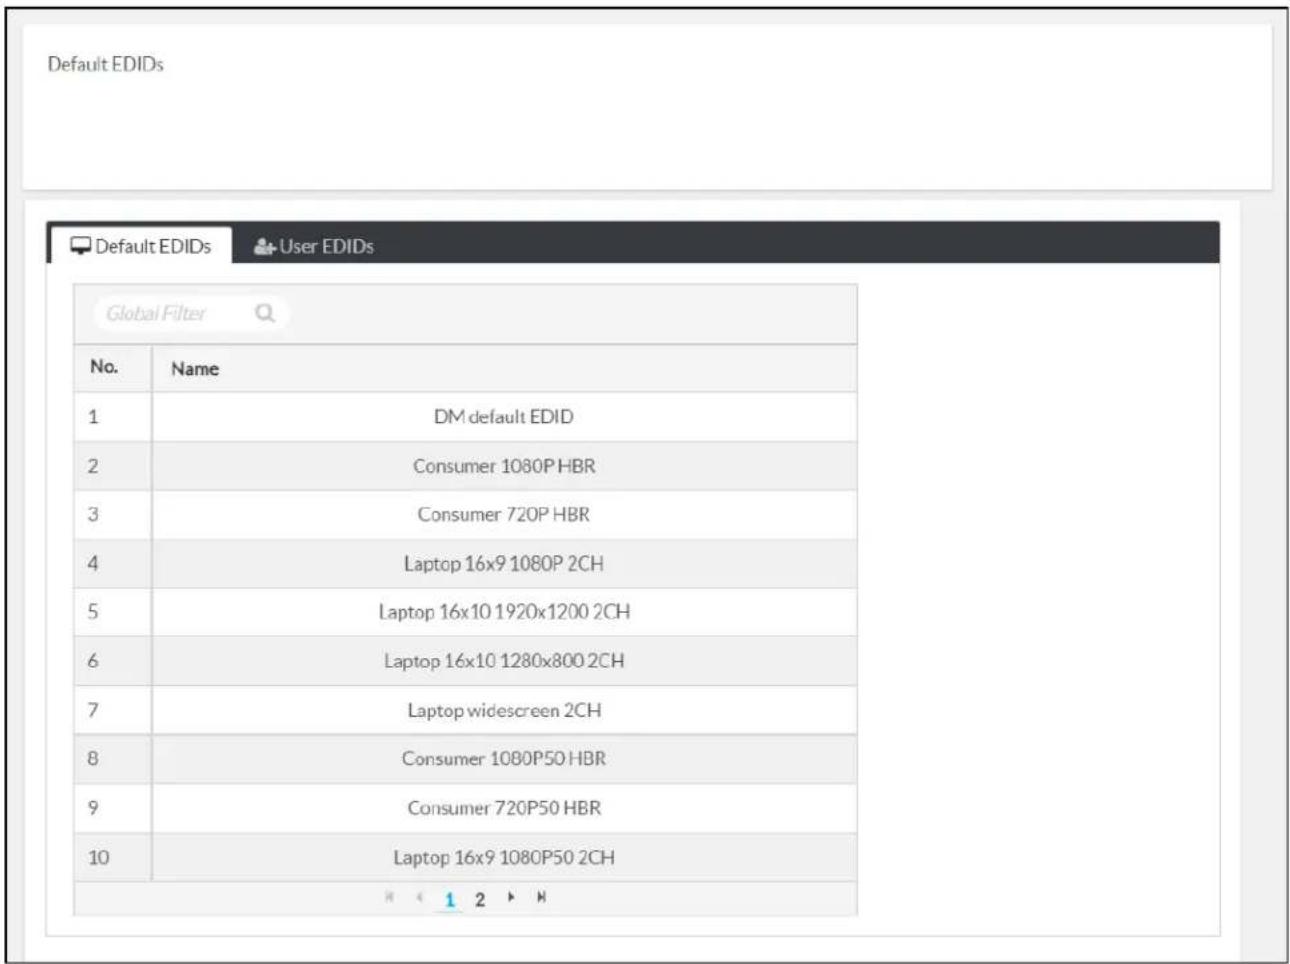
The EDIDs page is divided into two sections that can be accessed by selecting the respective top of the page:
- Default EDIDs: Provides a collection of default EDID data files (in CEDID format) for commo display device configurations
- User EDIDs: Provides a collection of custom EDID data files (in CEDID format) and supports uploading new EDID data files
Enter text in to the Global Filter text box to search for and display EDID data files that match the search term(s).
If the table spans multiple pages, use the navigation arrows on the bottom of the page to or backward through the pages, or select a page number to navigate to that page.
Add a Custom EDID File
To upload a custom EDID data file (in CEDID format) to XiO Cloud:
NOTE: Only valid CEDID files can be uploaded. Other file types will be rejected.
- Select the User EDIDs tab to display the User EDIDs page.
EDIDs Page - User EDIDs
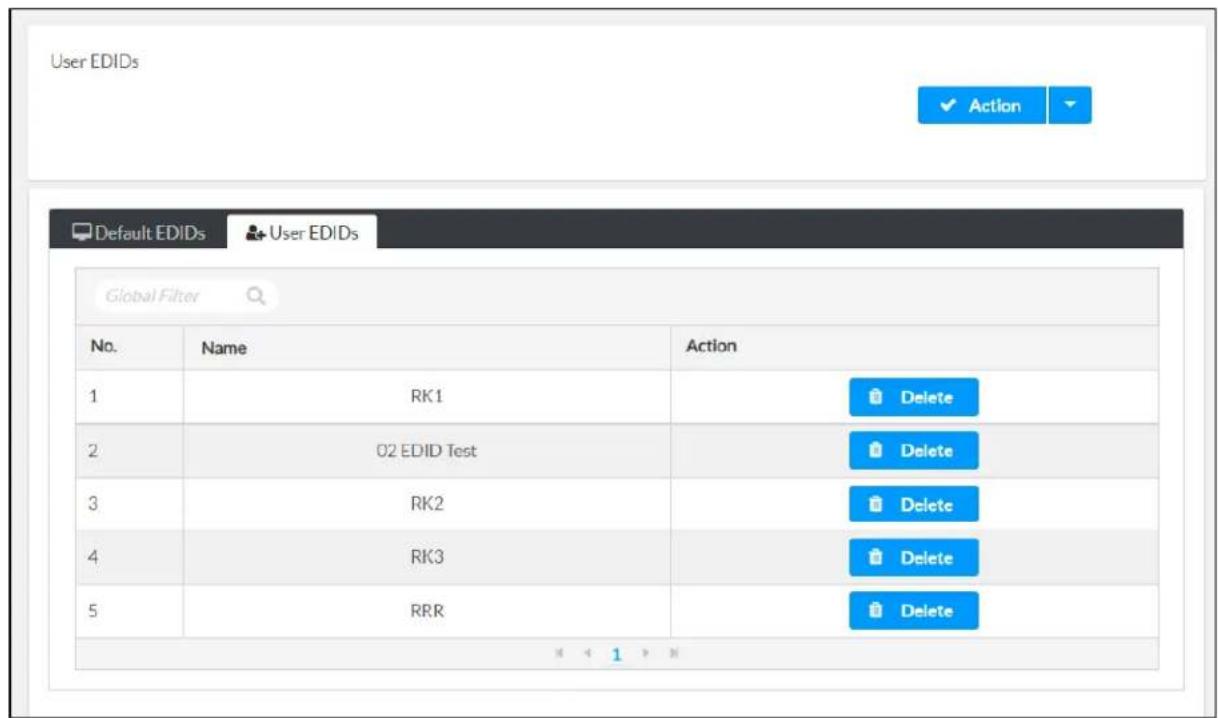
- Select Add EDID from the Action drop-down menu.
Drop-Down Menu with Add EDID Option
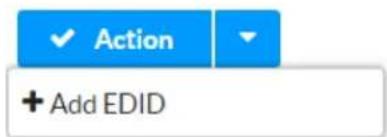
The EDID File Upload dialog box is displayed.
EDID File Upload Dialog Box
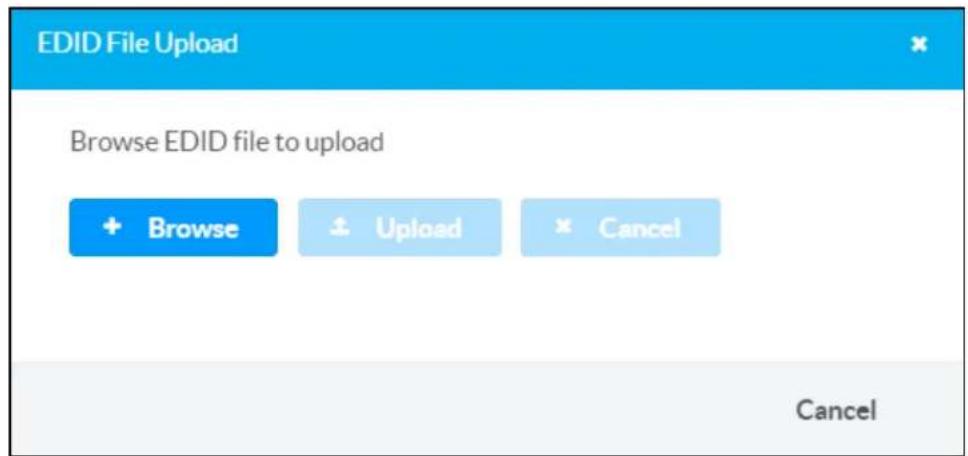
- Select + Browse, and then navigate to the CEDID file on the computer.
- Select the CEDID file, and then select Open. The filename and file size are shown after the CEDID file is selected.
NOTE: Select the x button to discard the CEDID file.
- Select Upload. Growl notifications are displayed when the upload starts and completes. Upon successful upload, the EDID data file is added to the User EDIDs table.
Delete a Custom EDID File
To delete a custom EDID file from XiO Cloud:
NOTE: The default EDID files provided by XiO Cloud cannot be deleted.
- Select the User EDIDs tab to display the User EDIDs page.
EDIDs Page - User EDIDs
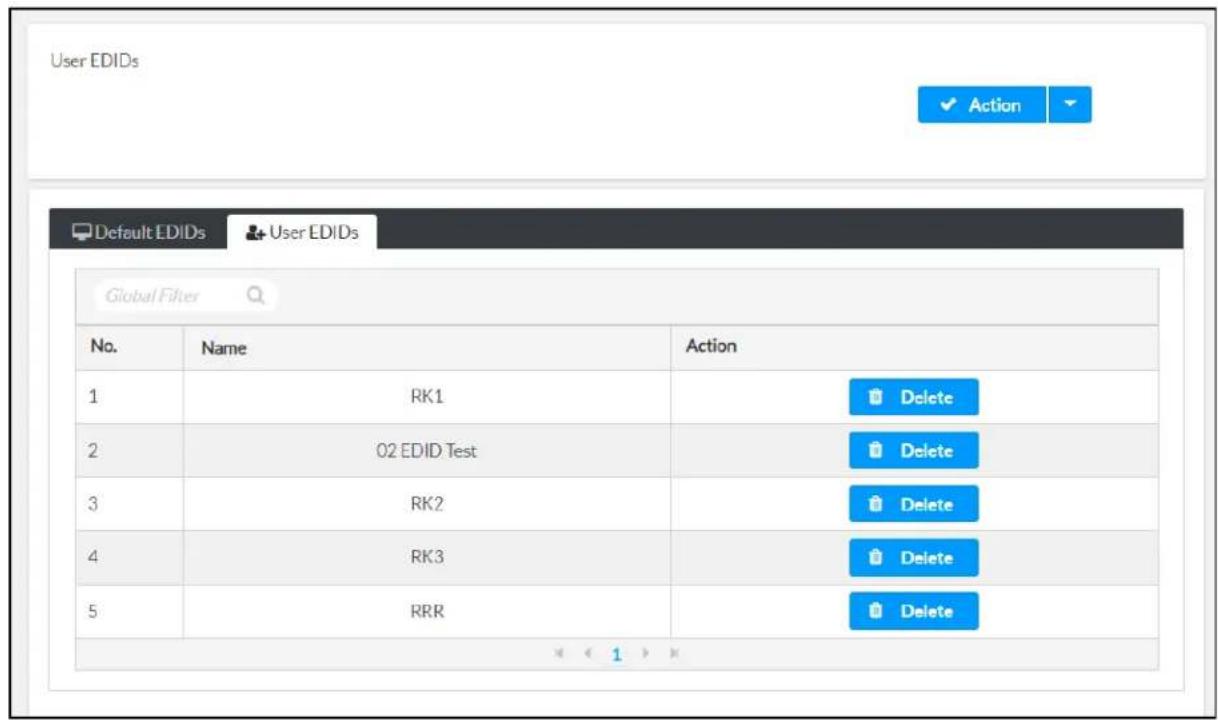
- Navigate to the file within the User EDIDs table.
- Select Delete from the corresponding table row. A dialog box is displayed confirming the deletion.
- Select Yes to delete the file.
Manage Images
Select Manage Images from the FILE LIBRARY menu to display the Images page.
Images Page
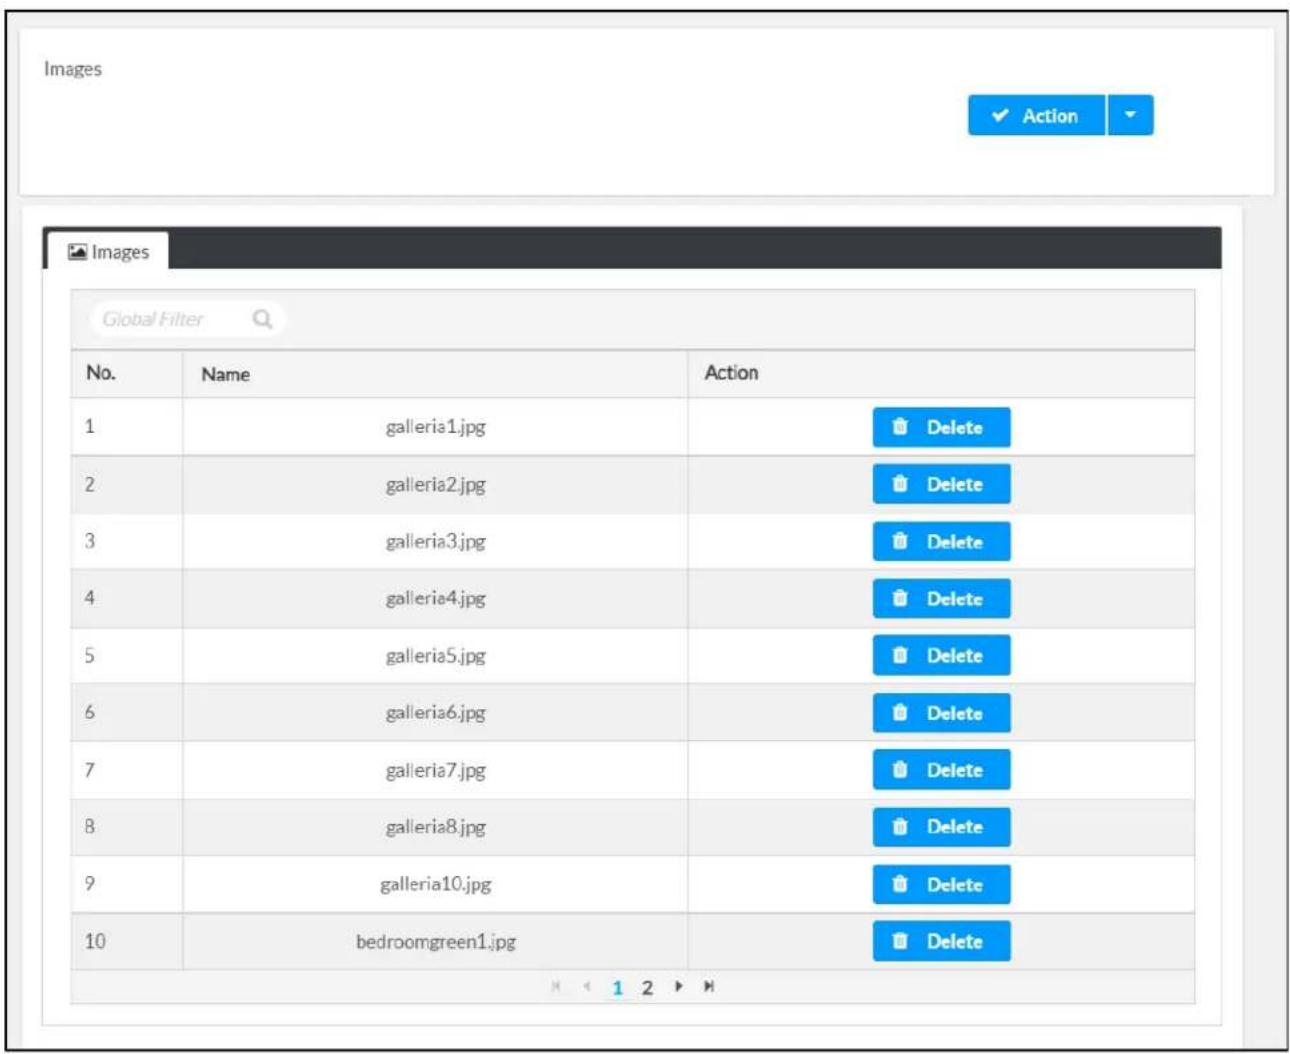
Each loaded image file is represented in a table that provides the following information and Action drop-down menu is also provided in the top-right of the page that is used to add image files to XiO Cloud.
- No.: The image file number within XiO Cloud (determined by the upload order)
• Name: The image filename
• Action: Contains a Delete button that is used to delete the image file from XiO Cloud
Enter text in to the Global Filter text box to search for and display image files that match the search term(s).
If the table spans multiple pages, use the navigation arrows on the bottom of the page to or backward through the pages, or select a page number to navigate to that page.
Add an Image File
To upload a custom image file to XiO Cloud:
NOTE: Only valid image files can be uploaded. Other file types will be rejected.
- Select Add Image from the Action drop-down menu.
Drop-Down Menu with Add Image Option
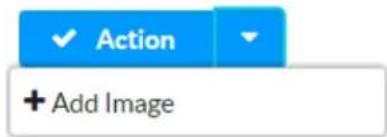
The Image File Upload dialog box is displayed.
Image File Upload Dialog Box
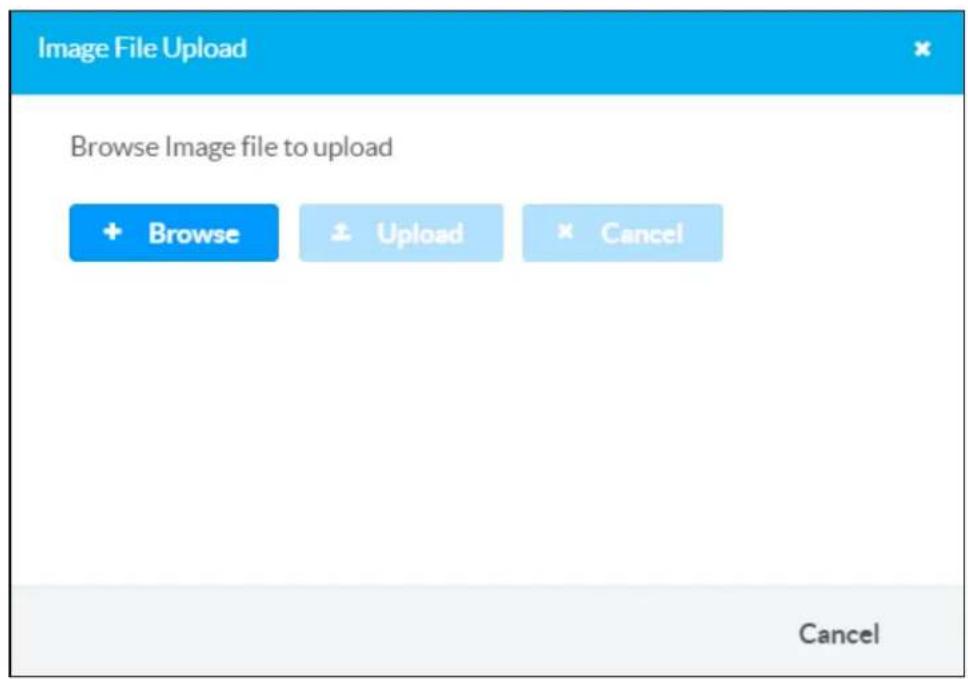
-
Select + Browse, and then navigate to the image file on the computer.
-
Select the image file, and then select Open. The filename, file size, and a thumbnail preview of the image are shown after the image file is selected.
NOTE: Select the x button to discard the image file.
- Select Upload. Growl notifications are displayed when the upload starts and completes. Upon successful upload, the image file is added to the Images table.
Delete an Image File
To delete an image file from XiO Cloud:
- Navigate to the file within the Images table.
- Select Delete from the corresponding table row. A dialog box is displayed confirming the deletion.
- Select Yes to delete the file.
Load a Program to a Contro System
The XiO Cloud service provides controls for uploading a program file to a 3-Series® or 4-Serie system. Once a program has been uploaded to the XiO Cloud environment, it may be pushed number of control systems that have been claimed by the service.
Upload a New Program
To upload a new program to the XiO Cloud environment:
- Select the File Upload button ☐ in the navigation menu to display the FILE LIBRARY menu. FILE LIBRARY Menu
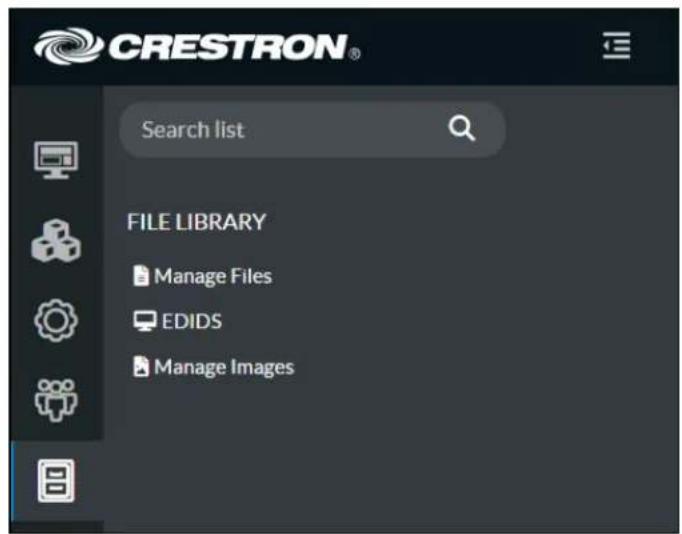
- Select Add File from the Action drop-down menu. Drop-Down Menu with Add File Option
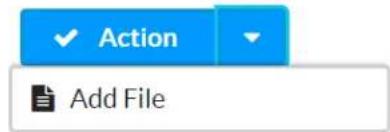
The Add Files dialog box is displayed.
Add Files Dialog Box
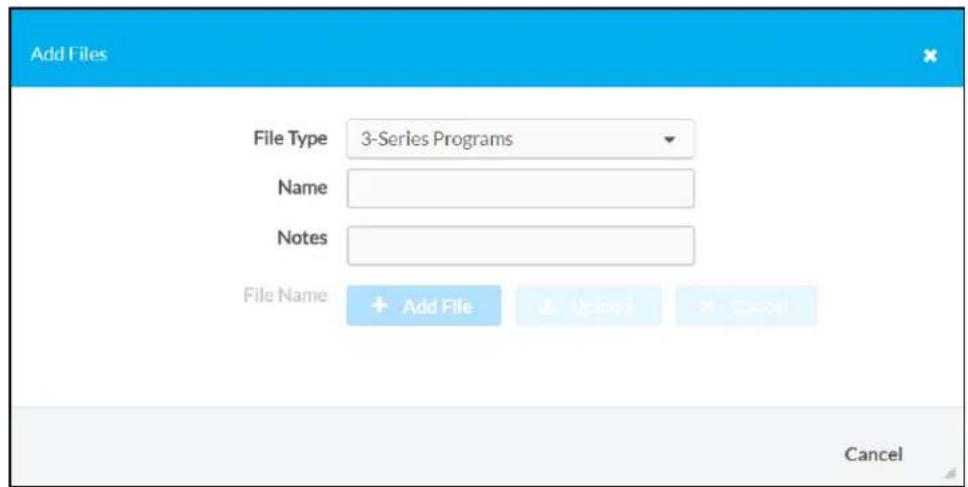
-
Enter the following information about the program:
-
File Type: Select Control System Programs from the drop-down menu
- Name: Enter a name for the program.
• Notes: Enter any notes about the program.
Once the information above is entered, the + Add File button can be selected.
- Select + Add File, and then navigate to the program file on a connected computer.
- Select the program file, and then select Open. The filename and file size of the program is shown after the program is selected.
NOTE: Select the x button to discard the program.
Add Files Dialog Box - Program Preview
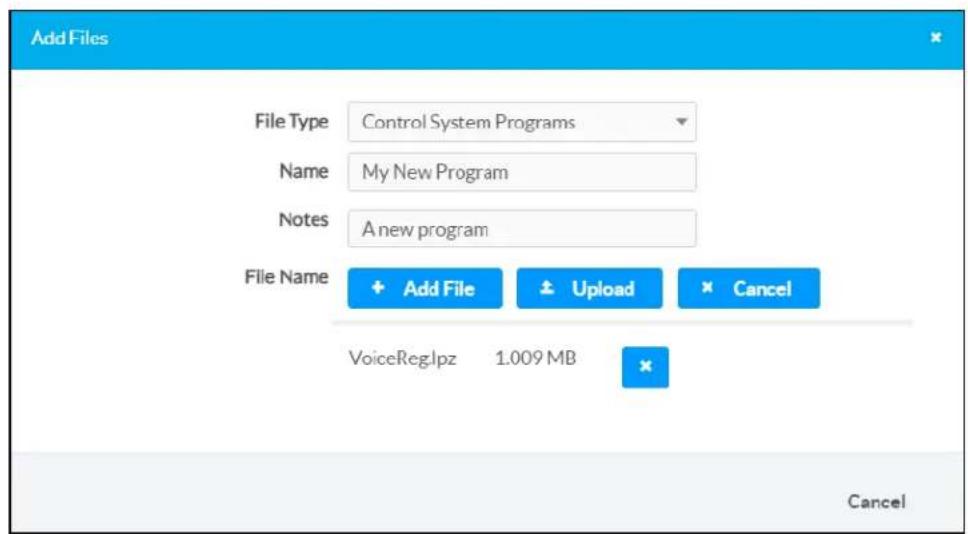
NOTE: Only compiled programs may be uploaded. The program code must be compiled minimum version of the include4.dat file to ensure full compatibility with XiO Cloud. For information, refer to the respective programming tool help file.
- Select Upload. A window showing the status of the upload is displayed.
Upon successful upload, the program file is added to the Manage Files table on the right side of the screen.
Manage Files Table
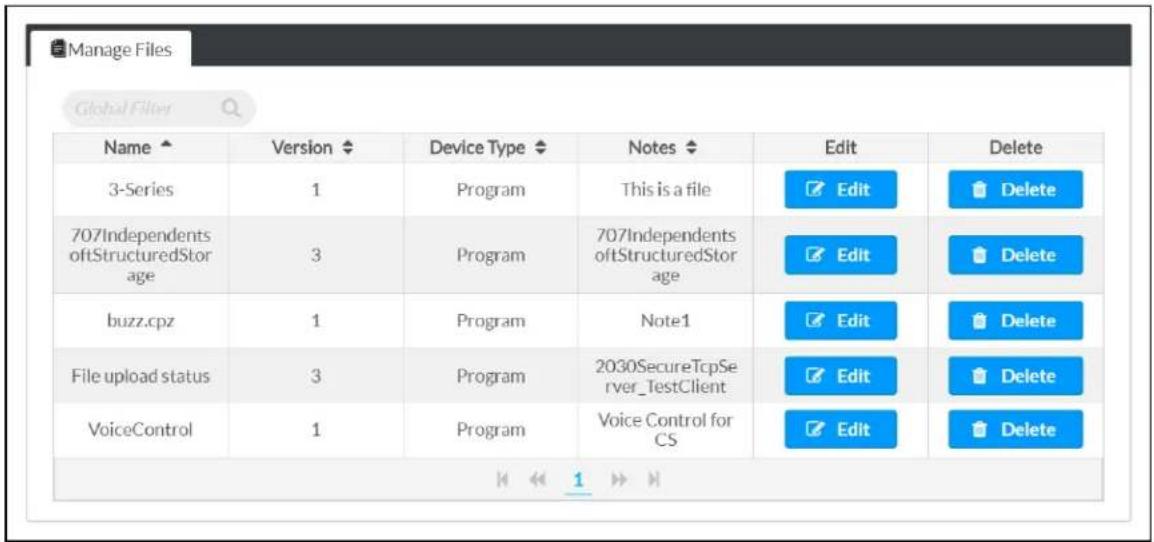
Manage Programs
Use the Manage Files table to manage program files after they have been uploaded to the XiO Cloud environment.
Edit a Program
Select Edit next to a program file to edit that program file. A Manage Programs dialog box is displayed.
Manage Programs Dialog Box
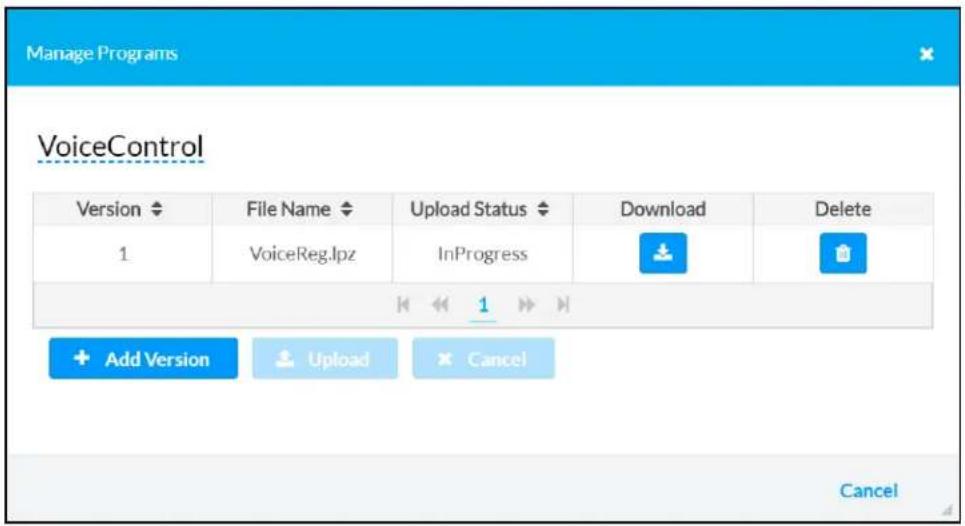
The Manage Programs dialog box provides the following information about the program in table format:
• The program version
• The program file name
• The status of the program upload
- Controls to download or delete the program file
To edit the program name, select the program name in the top left corner of the dialog box, program name becomes an editable text box. Select the green check icon or press Enter to save the new program name. Select the red x icon to discard the changes.
To add a new version of the program file:
- Select + Add Version, and then select an updated version of the program from the host computer.
The file name and file size of the program is shown after the program is selected. Sel button to discard the program.
Manage Programs Dialog Box - Program Preview
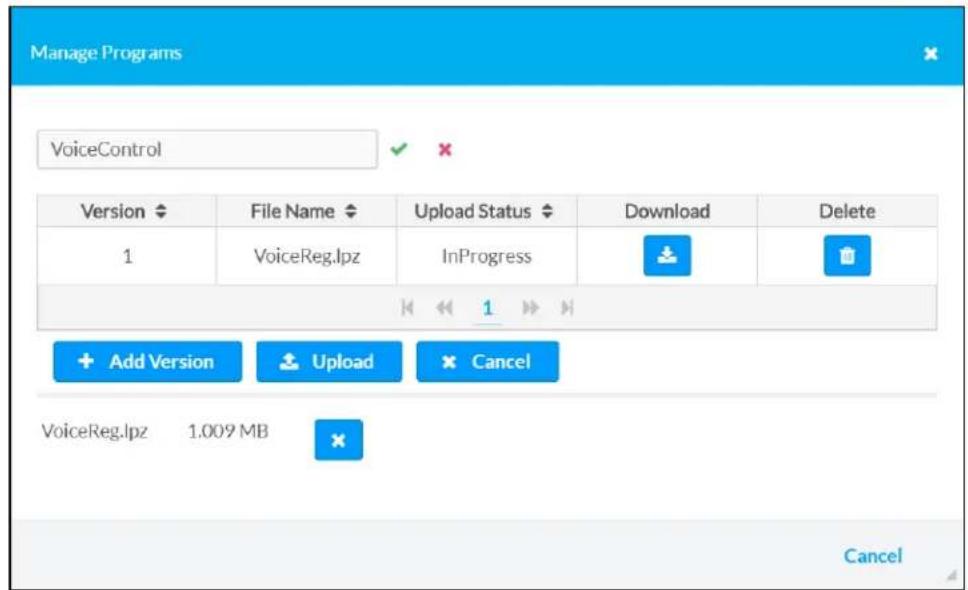
2. Select Upload.
A message window is displayed asking whether the updated program file should be pushed devices running the older program file.
Download File to Device Window
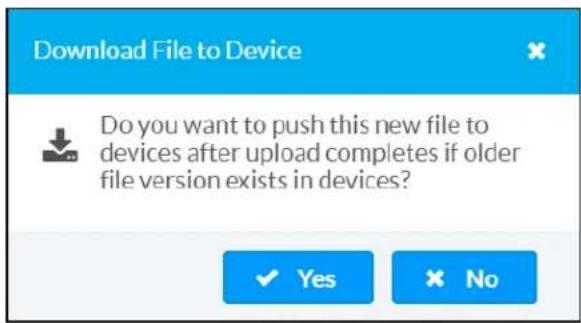
- Select Yes to push the program file to all applicable devices, or select No to upload the file without pushing the program to the devices.
Upon successful upload, the new program file is added to the Manage Programs table with the latest iteration of the version number. All previous versions of the program file are retained in this they are deleted manually.
Manage Programs Dialog Box - New Program Version Uploaded
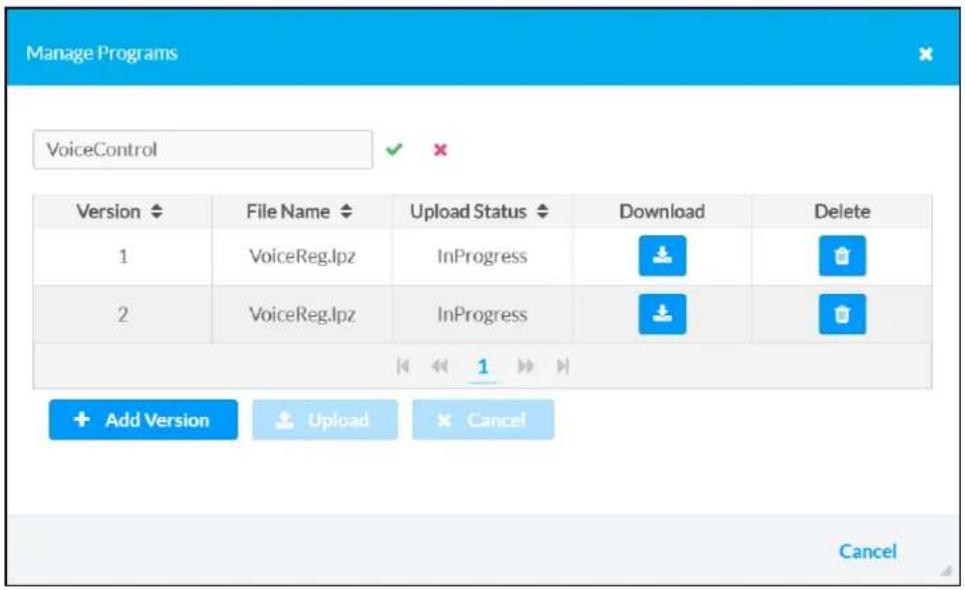
Select the x button or Cancel to exit the Manage Programs dialog box.
Delete a Program
Select Delete next to a program file to delete that program file. A message window is displayed asking whether the program file should be deleted.
Select Yes to delete the program file or No to cancel the deletion.
NOTE: If multiple versions of a program file have been uploaded, all program file versions will be deleted.
Load a Program to Device
Once a program is uploaded to the XiO Cloud environment, it may be loaded to any number 3-Series or 4-Series control systems within the environment.
To load a program to a control system:
-
Select the Groups button on the left side of the screen.
-
Select the desired control system from the group tree to display its configuration page.
-
Select the File Management tab. A table showing all of the device's program slots is displayed.
File Management Tab
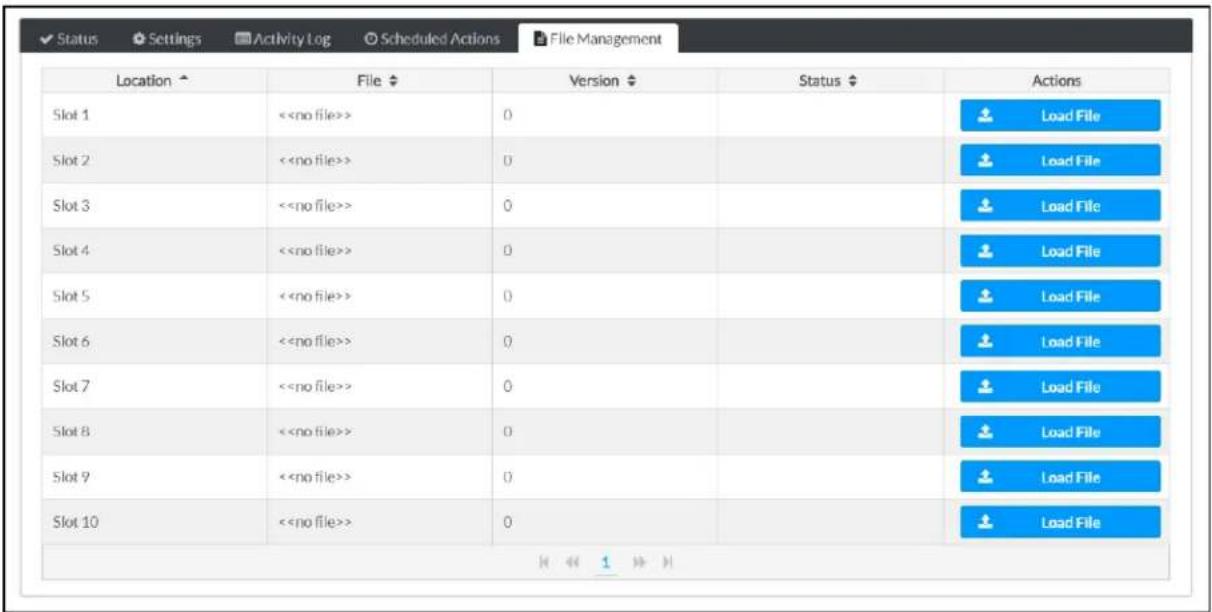
- Select Load File next to the desired program slot. The Download File dialog box is displayed.
Download File Dialog Box
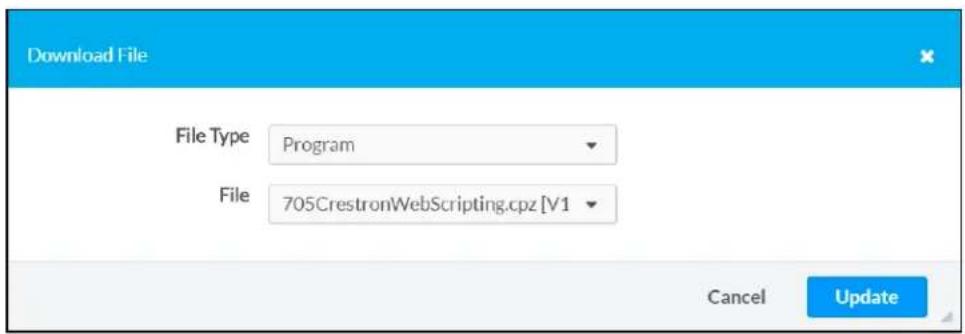
-
Enter the following information about the program file:
-
File Type: Select Program from the drop-down menu.
-
File: Select the uploaded program file from the drop-down menu. The program version displayed to the left of the program file name.
-
Select Update. The program file is pushed to the chosen program slot of the control s)
Manage a Loaded Program
Use the File Management table to manage program files after they have been loaded to a 3-Series or 4-Series control system.
File Management Tab
![✓ Status ✓ Settings ☒ Activity Log Ⓧ Scheduled Actions □ File Management Location ↑ File ↕ Version ↕ Status ↕ Actions Slot 1 708IndependentsoftMsg.cpz 1 Registered [ ][ ][ ][ ][ ][ ][ ][ ][ ][ ][ ][ ][ ][ ][ ][ ][ ][ ][ ][ ][ ][ ][ ][ ][ ][ ][ ][ ][ ][ ][ ][ ][ ][ ][ ][ ][ ][ ][ ][ ][ ][ ][ ][ ][ ][ ][ ][ ][ ][ ][ ][ ][ ][ ][ ][ ][ ][ ][ ][ ][ ][ ][ ][ ][ ][ ][ ][ ][ ][ ][ ][ ][ ][ ][ ][ ][ ][ ][ ][ ][ ][ ][ ][ ][ ][ ][ ][ ][ ][ ][ ][ ][ ][ ][ ][ ][ ][ ][ ][ ][ ] Slot 2 2004SecureTcpClient.cpz 1 Registered [ ][ ][ ][ ][ ][ ][ ][ ][ ][ ][ ][ ][ ][ ][ ][ ][ ][ ][ ][ ][ ][ ][ ][ ][ ][ ][ ][ ][ ][ ][ ][ ][ ][ ][ ][ ][ ][ ][ ][ ][ ][ ][ ][ ][ ][ ][ ][ ][ ][ ][ ][ ][ ][ ][ ][ ][ ][ ][ ][ ][ ][ ][ ][ ][ ][ ][ ][ ][ ][ ] Slot 3 2000SQLiteDBTests.cpz 2 Registered [ [ ] [ ] [ ] [ ] [ ] [ ] [ ] [ ] [ ] [ ] [ ] [ ] [ ] [ ] [ ] [ ] [ ] [ ] [ ] [ ] [ ] Slot 4 707IndependentsoftStructuredStorage.cpz 1 Registered [ [ ] [ ] [ ] [ ] [ ] [ ] [ ] [ ] [ ] [ ] [ ] [ ] [ ] [ ] [ ] [ ] Slot 5 706CrestronSNMPTest.cpz 1 Registered [ [ ] [ ] [ ] [ ] [ ] [ ] [ ] [ ] [ ] [ ] [ ] [ ] Slot 6 <> 0 Load File Slot 7 <> 0 Load File Slot 8 <> 0 Load File Slot 9 <> 0 Load File Slot 10 708IndependentsoftMsg.cpz 1 Registered [ [ ] [ ] [ ] [ ] [ ] [ ] << 1 >>>](/content/2026/05/883356/images/1e30b4f154ee4bf7c0449e735c32c53d682a8dded0e41017a8c6375a7b55dccc.jpg)
The File Management table displays the following information for each program slot:
- Location: The program slot of the control system
- File: The name of the program file loaded to the control system
- Version: The program file version
NOTE: The Version column for a loaded program will also note if a newer version of the program was loaded to XiO Cloud but has not yet been loaded to the device.
• Status: The registration status of the program file
- Actions: Controls to load a program file to the program slot or to manipulate a loaded
Edit a Loaded Program
Select the edit button next to a loaded program file in the Actions column to edit the program file.
The Download File dialog box is displayed.
Download File Dialog Box
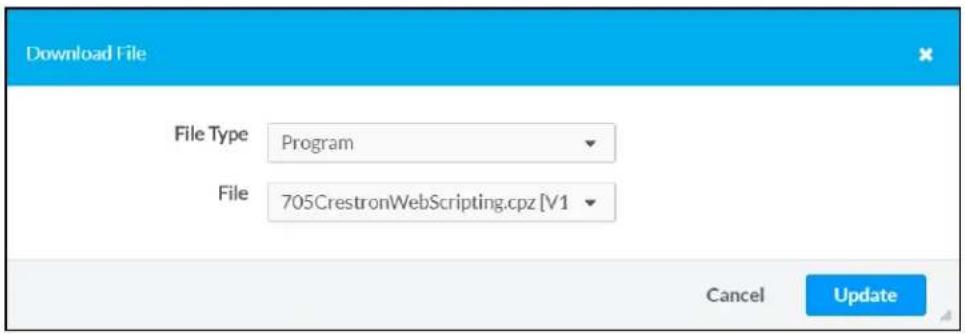
The following program file information may be edited:
- File Type: Use the drop-down menu to select the file type (Program)
- File: Use the drop-down menu to select a program file to load to the program slot.
Once all changes have been made, select Update. The updated program file is pushed to the chosen program slot of the control system. Select Cancel to cancel any changes.
Start/Stop a Loaded Program
Select the play button ▶ next to a loaded program file in the Actions column to start the program file.
A growl notification is displayed stating that the program start command has been sent to the system, and that there may be a small delay before the program starts.
If a program is running, select the stop button in the Actions column to stop the program. A growl
notification is displayed stating that the program stop command has been sent to the control and that there may be a small delay before the program stops.
Unregister a Loaded Program
Select the circular arrow button next to a loaded program in the Actions column to unregistered program from the control system. A growl notification is displayed stating that the program u command has been sent to the control system, and that there may be a small delay before is unregistered.
Remote Control
Remote control functionality allows the display of a supported user control device (such as TS series touch screens, TSW-70 series touch screens, Crestron Mercury® video conference systems & Crestron Mercury X series, and Crestron Mercury Mini series) to be viewed and controlled with Cloud. Users can control the user interface directly by clicking on the virtual display, which may touch controls on the physical device.
Remote control functionality supports any programs that can run on the user control device, in custom user projects, Crestron scheduling, and partner applications. Users also have full control capacitive hard buttons on the user interface (if present).
NOTE: Remote control for room-based accounts requires purchase of one SW-XIOC-S license per room.
Enable Remote Control
A global administrator must enable remote control for the XiO Cloud account before users can the functionality.
To enable remote control for an account:
- Select the gear icon on the left side of the screen.
- Select Account Setting.
SETTINGS Menu
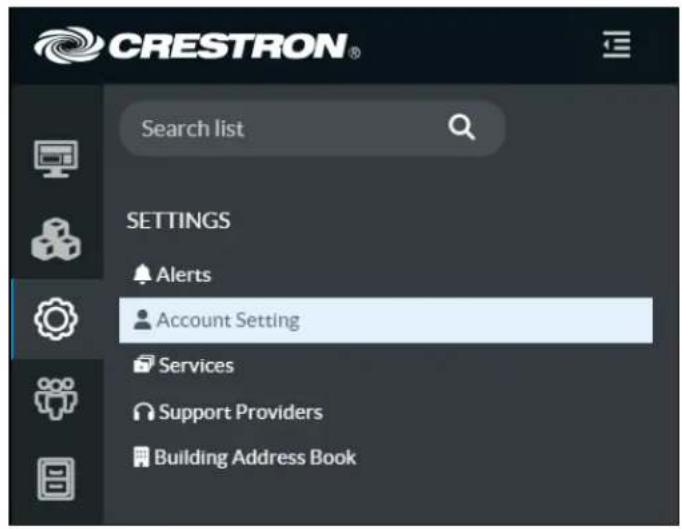
- Within the Profile tab on the right side of the screen, turn on the Enable Remote Tab toggle.
Profile Tab
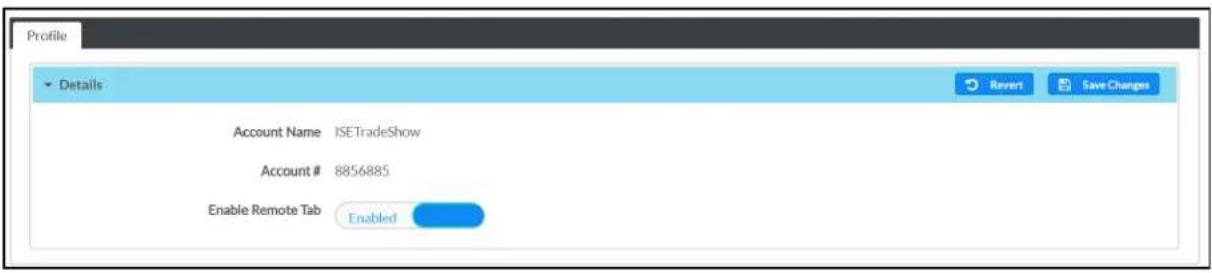
- Tap Save Changes on the top right of the screen.
Request Remote Control Access
Certain device families (such as Crestron Flex phones) require a local user to approve the remote request before access is granted. The following sections describe the procedures and work flows associated with requesting remote control access.
Initiate a Request
To initiate a remote control request from XiO Cloud:
- Navigate to the user control device that supports remote control functionality.
- Select the Remote Control tab on the right side of the screen. A Remote Control Permission dialog box is displayed.
Remote Control Permission Dialog Box
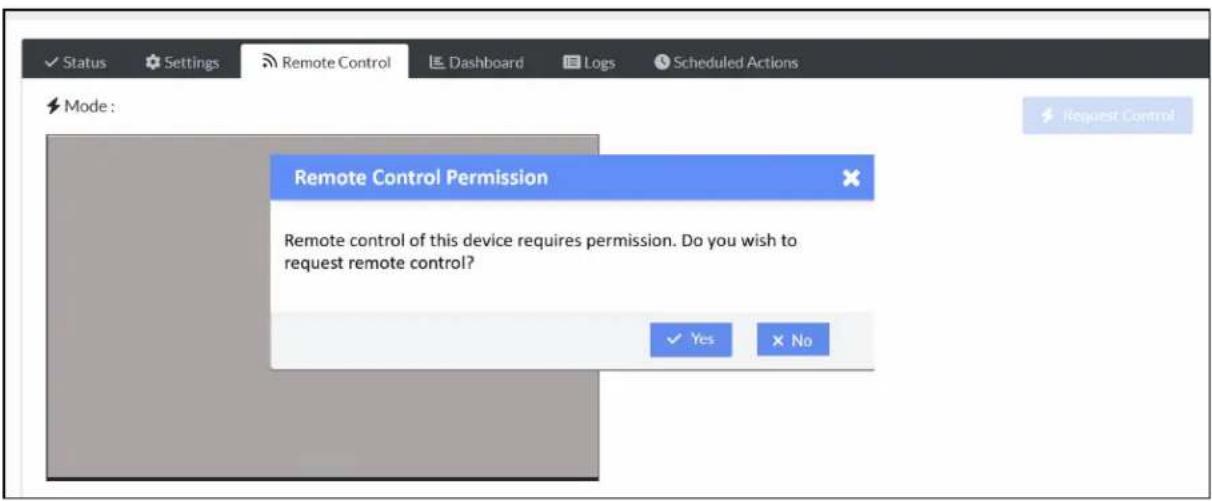
- Select Yes to initiate the remote control request. Selecting No closes the dialog box without sending the request, and the user must navigate back to the Remote Control tab to dis dialog box again.
After initiating the request, the Mode status changes to Remote control request has been sent. The remote user must wait until a local user accepts or denies the request as described in Accept or Decline the Request on page 142.
Remote control request has been sent Mode
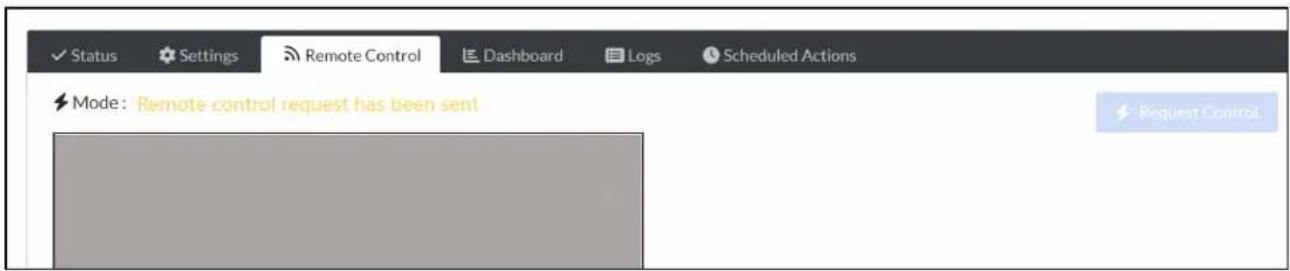
If a local user does not respond to the remote request within 30 seconds, the Mode status changes to The request for control has Timed Out, and a Retry button is displayed next to the Mode. Select Retry to resend the remote control request. There is no limit to the number of retries that can be s
The request for control has Timed Out Mode
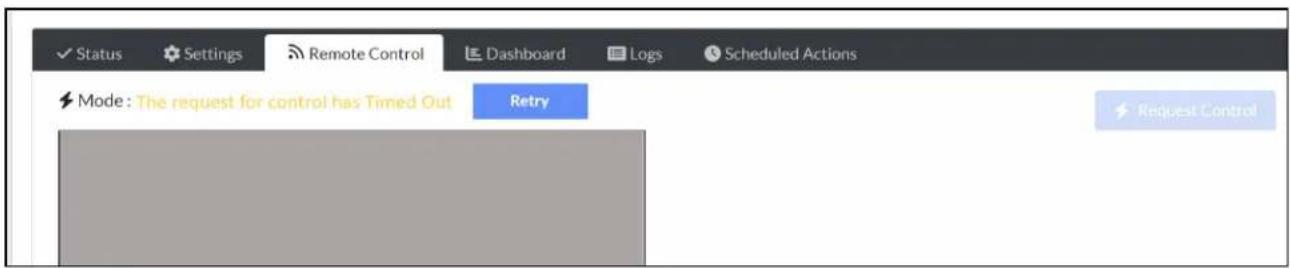
Accept or Decline the Request
After a remote control request is initiated, the user control device prompts a local user to a decline the request via a pop-up window.
- If the local user accepts the request, the Mode status changes to View, and the Request Control button can be selected. Refer to View a User Interface on page 143 and Control a User Interface on page 144 for more information.
- If the local user declines the request, the Mode status changes to Remote control request has declined, and no remote control functionality is provided. The remote user can retry the control request as described in Initiate a Request on page 141.
Remote control request has declined Mode

End a Remote Control Session
The local user can end an active remote control session at any time by selecting End Remote Support
Session on the user control device. The Mode status within XiO Cloud changes to Remote control
Session has ended, and remote control functionality is no longer provided.
A remote control session times out after one hour. At that time, the local user is prompted or end the session via a pop-up window on the user control device.
- If the local user selects Continue, the remote session continues without any interruption.
- If the local user selects End, the Mode status within XiO Cloud changes to Remote control Session has ended, and remote control functionality is no longer provided.
- If the local user does not respond to the prompt, the remote session times out and re functionality is no longer provided.
View a User Interface
Users can view a connected user interface once remote control is enabled for the XiO Cloud
NOTE: To access user control devices within a group, users must have Tech access or above.
To view a connected user interface:
- Navigate to the user control device that supports remote control functionality.
- Select the Remote Control tab on the right side of the screen.
- If prompted, initiate a remote control request as described in Request Remote Control Access on page 141.
Remote Control Tab
√ Status
Settings
Remote Control
Activity Log
Scheduled Actions
File Management
NOTES:
- Remote control is available only on the device level.
- The Remote Control tab is shown only if the user control device has been upgraded to firmware version that supports this functionality. The device firmware can be updated directly through XiO Cloud if necessary.
The content that is currently displayed on the user interface is shown as an image in the Remote Control tab.
Remote Control Tab - User Interface (View Mode)
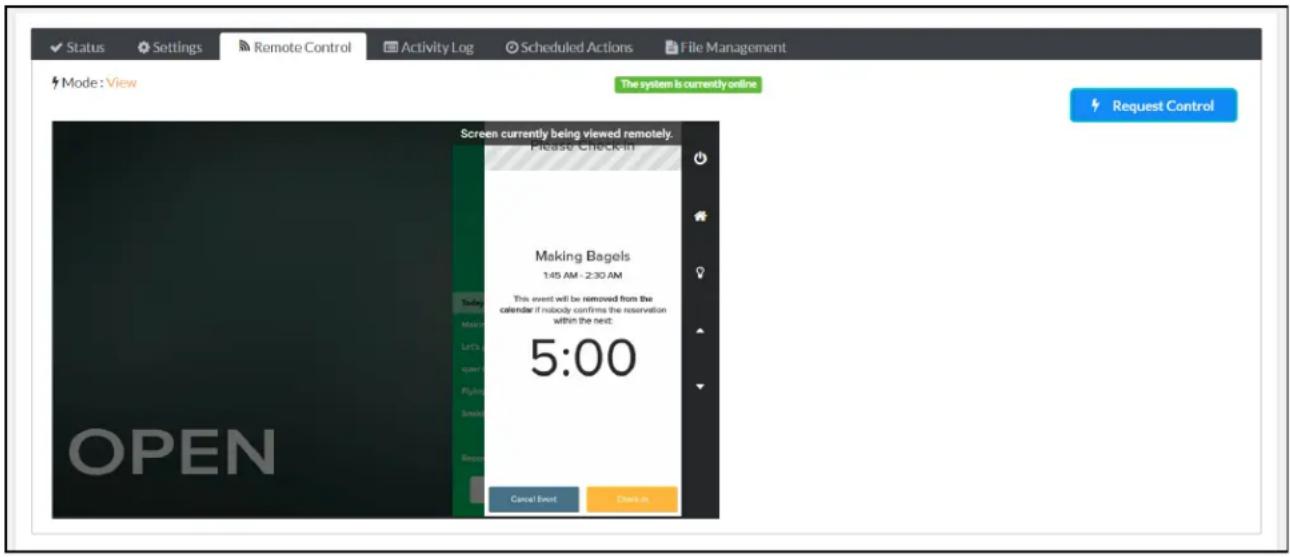
By default, the user interface is placed in View mode, which is indicated in the top left of the screen.
- The image of the remote user interface is updated approximately every five seconds.
- If the remote user interface is viewed for 15 minutes without any other activity occurring page, the image stops updating automatically. Refresh the page in the browser to resume the user interface in real time.
Control a User Interface
To take control of a user interface:
- Navigate to the user control device that supports remote control functionality.
- Select the Remote Control tab on the right side of the screen.
- If prompted, initiate a remote control request as described in Request Remote Control Access on page 141.
- Select Request Control on the top right of the screen.
NOTE: Only one user can control a remote user interface at any time. If another user req control, the current user controlling the display is placed back in View mode. Users controlling the physical user interface are not affected by remote usage.
Within a few seconds, the mode switches from View to Control, and the Request Control button changes to a Release Control button.
While in Control mode, select anywhere on the virtual user interface, including capacitive hard buttons (if present), to send a virtual touch command to the device.
NOTE: If the user control device is in standby mode, a black screen is displayed. Click the remote screen once to wake the user control device. Normal control can resume once the image up show the remote user interface.
To stop controlling the user control device, select Release Control. The user control device, returns to View mode.
Privacy Considerations
Remote control functionality was designed with privacy considerations in mind.
- The remote control functionality must be enabled by a Global Administrator before it can
- To access user interfaces within a group, users must have Tech access or above.
- Whenever a user is viewing or controlling the user interface remotely, a "Screen currently viewed remotely" message is displayed on the physical device.
- The activity log is updated to record whenever a user starts and stops viewing or contr interface.
- Remote control access can be disabled entirely on a user interface by issuing the REMOTE DISABLE console command in Crestron Toolbox™ software.
- No images from the user interface are stored on Crestron servers longer than is necessary to display them, and no images are accessible by Crestron staff.
Enable API Access
Users with Global Administrator permissions can enable the XiO Cloud REST API functionality d from the XiO Cloud portal. For room-based accounts, enabling API access requires purchase of XIOC-API license for the account.
The XiO Cloud REST API binds to the XiO Cloud server as a new transport interface (much transport interface or a serial join interface). The REST API layer provides a translation from Cloud server. Web server requests are stateless, and all stateful information is maintained between XiO Cloud REST API layer and account, group, and device data. For more information, refer to Cloud Service API microsite at https://developer.crestron.com.
To enable API access from the portal:
- Select the gear icon on the left side of the screen.
- Select Account Setting.
SETTINGS Menu
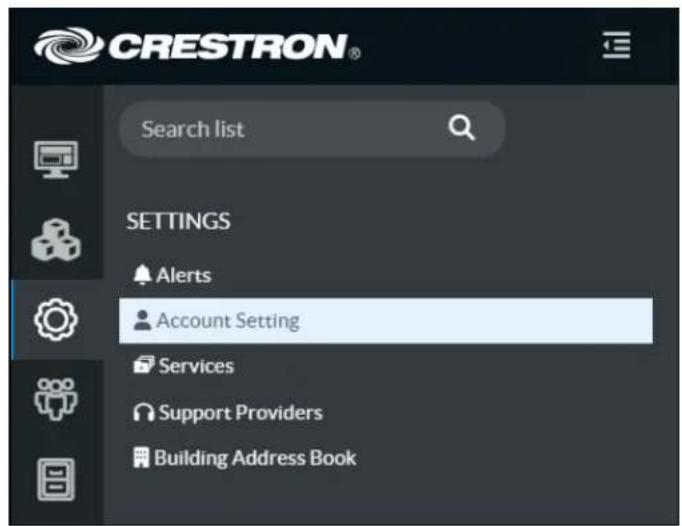
- Within the Profile tab on the right side of the screen, expand the Details accordion, then turn on the Enable API Access toggle.
Profile Tab - Details Accordion
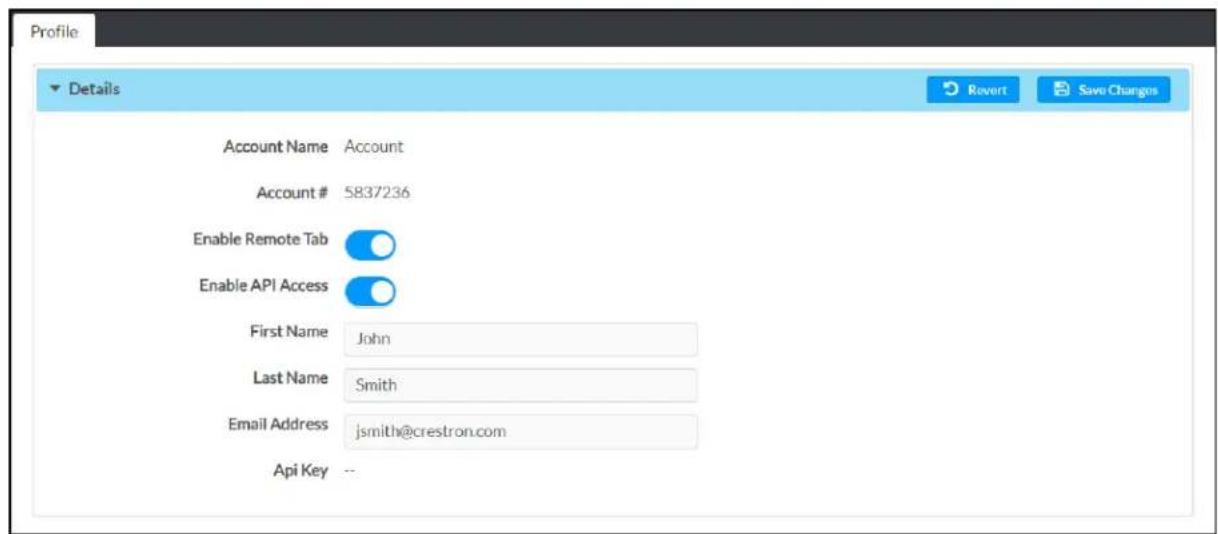
- Enter the administrator's name and email address in the appropriate text fields.
- Tap Save Changes on the top right of the accordion. An API authentication key is displayed next to Api Key.
Manage Support Providers
The Support Providers feature allows customers to grant account access to Authorized Resellers and Crestron Service Providers (together, Authorized Support Providers). Once a support provider is g access, the provider can view and manage the account as specified by the Global Administrat customer account. Customers can revoke a support provider's access to their account at any t
NOTE: Support providers must create an XiO Cloud Management Portal account to access customer accounts as described in the XiO Cloud Management Portal User Guide. Once the customer grants a support provider access to their account, portal account users that have authorized to access the account will be added automatically as Standard Users with Viewer permissions. These permissions can be elevated by the customer Global Administrator as describ in Manage User Access on page 88.
The SETTINGS menu for managing support providers is located in the user management panel, may be accessed by clicking the Setting button in the navigation menu.
Settings - Support Providers Option
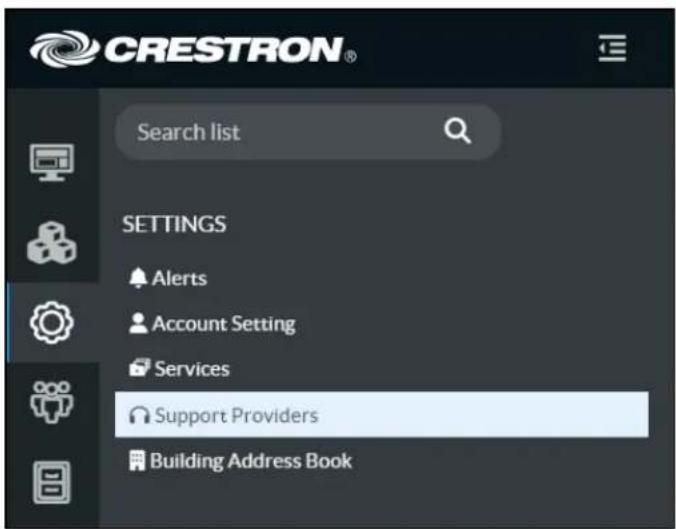
Select Support Providers in the SETTINGS menu. A Support Providers page is displayed to the right of the SETTINGS menu.
Support Providers Page
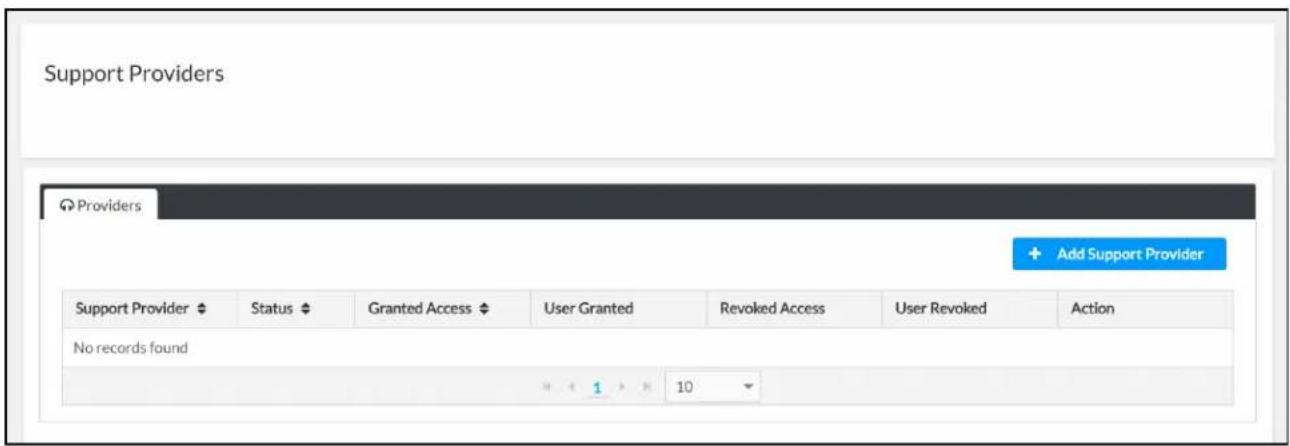
Support providers are organized by name and displayed within a table. Support provider access granted or revoked using the functions in this page.
Add a Support Provider
To add a new support provider to the customer account:
- Select + Add Support Provider at the top right of the page. The Add Support Provider dialog box is displayed.
Add Support Provider Dialog Box
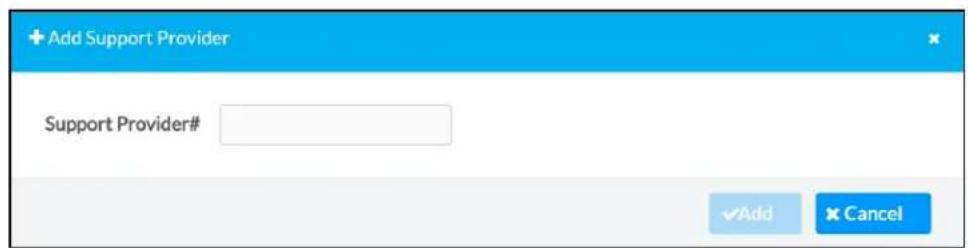
-
Enter a valid seven-digit support provider ID into the Support Provider# text field. This number will be provided by your Authorized Support Provider.
-
Select Add. A Support Provider Confirmation dialog box is displayed to confirm whether the support provider should be added.
Support Provider Confirmation Dialog Box
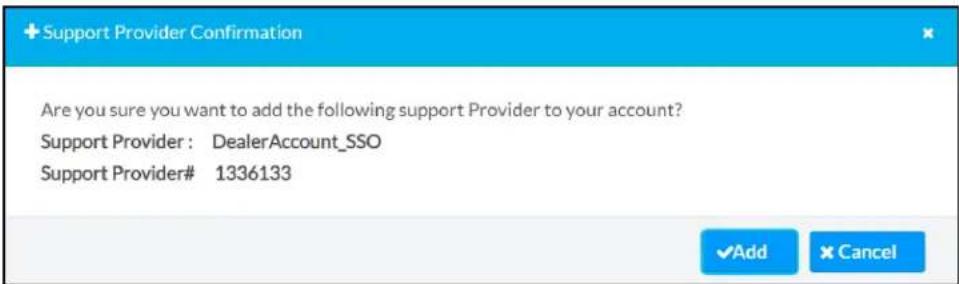
- Select Add. The support provider is added to the table within the Support Providers page.
Manage Support Providers
Once support providers have been added as described in Add a Support Provider on page 149, they can be managed using the provided table.
Support Providers Table
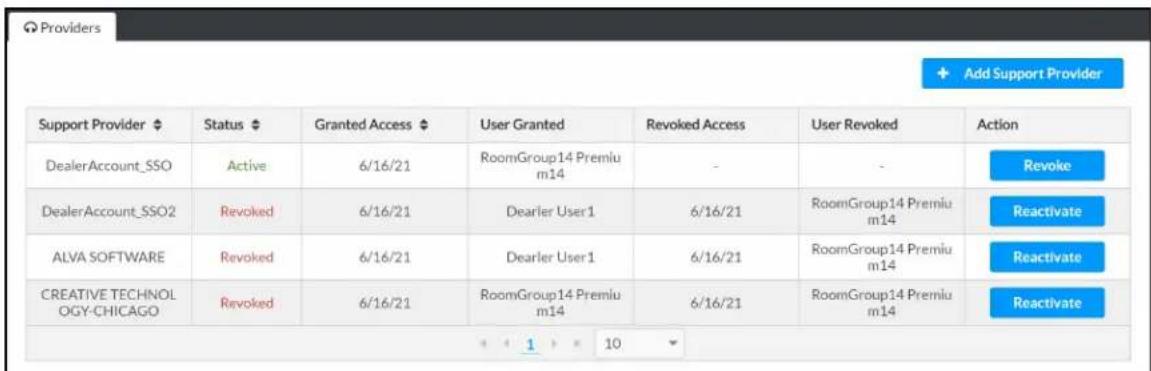
If the support provider table spans multiple pages, use the navigation arrows on the bottom to move forward or backward through the pages, or select a page number to navigate to the Certain columns also provide arrow controls in the heading row that sorts the table by the columns.
The following information and controls are provided for each listed room:
• Support Provider: The name of the Authorized Support Provider account.
• Status: The status of the Authorized Support Provider account within the customer accoun
Active: Indicates that the Authorized Support Provider is currently authorized to access customer account.
- Revoked: Indicates that access to the customer account for the Authorized Support Provider has been revoked.
- Granted Access: The date when the Authorized Support Provider was granted access to the customer account.
- User Granted: The customer account user that granted account access to the Authorized S Provider.
- Revoked Access: The date when the Authorized Support Provider's access to the customer account was revoked (if applicable).
- User Revoked: The customer account user that revoked account access from the Authorized Support Provider.
• Action: Provides an action button based on the Authorized Support Provider account status: - Revoke: If the Authorized Support Provider has been granted access to the customer account, select Revoke to revoke their access to the customer account.
- Reactivate: If the Authorized Support Provider's customer account access has been revoked, select Reactivate to reactive their access to the customer account.
FAQs
This topic provides answers to frequently asked questions regarding the XiO Cloud service.
What is the XiO Cloud service?
The XiO Cloud service is a device management software as a service (SaaS). The XiO Cloud se allows all supported Crestron devices and certain supported third-party devices across an enterp be managed and configured from one central, secure location in the cloud. The XiO Cloud ser used to view the status of a device, to configure various device and network settings, to mc licenses, and to update device firmware. After enrolling in the service, the XiO Cloud portal car accessed at portal.crestron.io.
For more details and additional resources, refer to https://www.crestron.com/xiocloud.
What devices are supported by the XiO Cloud service?
For a list of supported Crestron devices, refer to the Specifications tab on any of the XiO Cloud product pages at www.crestron.com.
What minimum device firmware versions are required to connect to the XiO Cloud service?
The following table provides minimum firmware versions that must be running on a supported order for the device to connect to the XiO Cloud service.
NOTE: If a supported device is not listed in the table below, then it does not have a mini firmware version that is required to connect to the XiO Cloud service.
Model(s) Firmware Versions
| AV3, CP3, CP3N, DIN-AP3, DIN-AP3MEX, FT-TS600, FT-TSC600, MC3, MPC8001,0176MPC3-102, MPC3-201, MPC3-302, PRO3, RMC3, TSCW-730 | |
| DM-MD8X8-CPU3, DM-MD8X8-CPU3-RPS, DM-MD16X16-CPU3, 1.603.0112DM-MD16X16-CPU3-RPS, DM-MD32X32-CPU3, DM-MD32X32-CPU3-RPS,DMPS3-200-C, DMPS3-300-C, DMPS3-300-C-AEC, DMPS3-4K-50,DMPS3-4K-100-C, DMPS3-4K-150-C, DMPS3-4K-200-C, DMPS3-4K-250-C,DMPS3-4K-300-C, DMPS3-4K-350-C | |
| TSS-7, TSS-10, TSW-560, TSW-560P, TSW-760, TSW-1060 2.009.0121 | |
| DGE-100, DM-DGE-200-C, TS-1542, TS-1542-C 1.4662.00000.000 | |
| CCS-UC-1 W/PS, CCS-UC-1-AV W/PS, CCS-UC-1-X, UC-M50-U, UC-M50-UA, 1.4395.00025.001UC-M70-U, UC-M70-UA, UC-MX50-U, UC-MX70-U | |
| Model(s) Firmware Versions | |
| AM-200, AM-300 1.4493.00039.003 | |
| DM-NVX-350, DM-NVX-350C, DM-NVX-351, DM-NVX-351C, DM-NVX-352, DM-NVX-352C, DM-NVX-D30, DM-NVX-D30C, DM-NVX-E30, DM-NVX-E30C | 5.1.4651.00031 |
| AMP-2000, AMP-4000, AMP-4600, AMP-8000, AMP-8075, AMPI-8075, AMP-8150, AMPI-8150, DSP-860, DSP-1280, DSP-1281, DSP-1282, DSP-1283 | 1.00.380.002 |
| CEN-ODT-C-POE 1.001.0063 | |
| AV4, CP4, CP4N, DIN-AP4, MC4, MC4-I, PRO4, RMC4 2.7000.00083 | |
| UC-ENGINE, UC-ENGINE-SD, UC-ENGINE-SD-Z 1.00.16.885 or 1.00.17.185 | |
| The minimum firmware version is dependent on the UC-ENGINE hardware. XiO Cloud and the device will select the correct version automatically. | |
| HD-RX-4K-410-C-E, HD-RX-4K-410-C-E-SW4, HD-RX-4K-510-C-E, HD-RX-4K-510-C-E-SW4 | 1.0.4365.16200 |
What XiO Cloud features are supported by Crestron devices?
All Crestron devices that can be claimed into the XiO Cloud service support the following feature minimum:
- Online status
• Network settings - Firmware updates
- Remote restart
- Crestron Fusion® service provisioning (enable/disable and cloudl)
- Log file retrieval
Certain Crestron devices support additional XiO Cloud features. These additional features are implemented either when the device support is initially released or during a future update to XiO Cloud service.
Which takes precedence: local settings made on the device, or settings made within the XiO Clo service?
Settings enforced in the XiO Cloud service always take precedence to local settings. If a local changed, it will report its new value to the XiO Cloud service, and the device will indicate that its settings are pending. Refresh the device within XiO Cloud to see its updated settings.
How do I determine if the XiO Cloud service is down?
Refer to Crestron Online Help article 5894 for the current status of the XiO Cloud service. Subscribe to this article to get updates on any status changes.
Does the XiO Cloud service support single sign-on (SSO) solutions?
The XiO Cloud service supports both SAML and OpenID Connect for SSO, which are supported by major identity providers including the Azure ^® Active Directory ^® service.
For more information on integrating SSO with XiO Cloud via Azure Active Directory, refer to www.crestron.com/News/Blog/April-2020/SSO-for-XiO-Cloud-using-Azure-AD.
What device ports are required to connect to the XiO Cloud service?
Devices communicate to the XiO Cloud service over TCP using port 443 (AMQP over WebSockets)
What IP addresses are used for the XiO Cloud service?
The XiO Cloud service is located within Azure's US East and West datacenters. The current list datacenter IP addresses is available at www.microsoft.com/en-us/download/confirmation.aspx?id=56519.
For more information on the URLs and IP addresses used by the XiO Cloud service, refer to XiO Cloud Service Security Reference Guide.
How do I check that a device is registered with the XiO Cloud service?
To check that a device is registered with the XiO Cloud service, issue the hydrogenstatus command to the device using the Text Console tool in Crestron Toolbox™ software.
A sample response is shown below indicating that the device is registered to the XiO Cloud ser not claimed.
MERCURY>HYDROGENSTATUS
HydrogenUrl: https://fc.crestron.io/api/device/create
This unit is online with Hydrogen
IoT Hub Url: prd-use-iothub.azure-devices.net
Last IOT connect Time: 02/08/2018 15:43:02
Hydrogen device state: REGISTRATION_SUCCESSFUL
HttpsRegistrationRetryInterval (sec): 300
IoTHeartbeatInterval (sec): 300
Empty Callback from CPH count: 0
CresNextReceiveThread: waiting on queue...
How to I disable a Crestron Fusion in the Cloud (FITC) connection?
The Crestron Fusion Cloud URL must be changed to the myCrestron URL
(https://api.my.crestron.com/api/Registration) prior to disabling the FITC connection. This is required
when moving a device from a Crestron Fusion Cloud server to an on-premesis Crestron Fusion
What countries currently support SMS alerts for the XiO Cloud service?
SMS (short message service) for XiO Cloud alerts is not currently supported in all countries. The following countries are supported at this time:
• American Samoa
- Anguilla
- Antigua
- Australia
- Barbuda
- Bahamas
- Barbados
- Belgium
- Bermuda
- Canada
- Cayman Islands
- Dominica
• Dominican Republic
- Ireland
- Grenada
- Grenadines
- Guam
- India
- Israel
- Jamaica
- Montserrat
- Myanmar
• North Mariana Islands
- Puerto Rico
- Sweden
- Trinidad
- Turks
- United Kingdom
• United States of America
- Virgin Islands
To inquire about SMS support for a country that is not currently listed, contact Crestron.
Can I turn off automatic firmware updates in XiO Cloud?
The automatic update feature cannot be turned off by the XiO Cloud service. Unlike the auto mechanism that is configured out of the box for individual devices, XiO Cloud firmware updates different manifest location that includes only the firmware version that has been applied to a device managed through XiO Cloud uses the auto update feature to ensure it is running the f applied from XiO Cloud.
Troubleshooting
This topic provides troubleshooting procedures for various issues that may occur when using the XiO Cloud service.
Issue Solution(s)
| A device reports that it is registered with the Xio Cloud service but is reporting as offline within the line to be correct. Uncorrect date and time settings can cause the device to report as offline. | |
| The device goes offline after roughly 12 hours. | Ensure that the date and time settings on the device are correct. Incorrect date and time settings can cause the device to report as offline.Additionally, if the device is connected to a control processor, check that the time and timezone settings on the control processor are correct. |
| Conflicts occur when attempting to schedule act for a device. | Stroger the times for scheduled actions to ensure there are no conflicts with delivery. |
| A change to device settings from Xio Cloud is by the device. | Ersted there are no IP ID conflicts within your system. IP IDs must be unique across systems.For example, if you are adding a Crestron Connected® Display at IP ID 03 to a system that is configured to use Crestron Fusion at IP ID 03, the settings will be rejected by the device due to the IP ID conflict. |
| Errors are received when attempting to claim to the Xio Cloud service. | Endvice that the device is connected to the network and has internet access. After connecting the device, wait a few minutes until the device has been registered.Issue the hydrogenstatus command to the device using the Text Console tool in Crestron Toolbox software to ensure the device is able to connect to the Xio Cloud service, |
| The device reports as connected but the settings Select Refresh Device from the Action drop-down Xio Cloud are different than the local settings mentheto refresh the device connection.device. | |
| The device is showing pending settings even thofelectit Refresh Device from the Action drop-down is reporting as connected. | Select Refresh Device from the Action drop-down menu to refresh the device connection. |
Issue Solution(s)
Settings changed from XiO Cloud are not applied. Pushing settings while a firmware update is in the device. progress on a device (not scheduled, but actively in progress on a device) may result in the settings not being applied to the device.
To resolve, select Refresh Device from the Action drop-down menu to refresh the device connection.
A firmware upgrade fails to start. Applying settings may cause a firmware upgrade to not start if the settings are saved around the same time that the upgrade begins.
To resolve, restart the firmware upgrade.
Works with XiO Cloud
The XiO Cloud ^® service is designed to work with many Crestron ^® and third-party products.
The following device types work with XiO Cloud:
• Audio on page 160
• Conferencing on page 161
• Connectivity on page 168
• Control on page 169
• Lighting and Environmental on page 171
• Power on page 172
• Scheduling on page 173
- Sensors on page 174
• Third-Party Devices on page 175
- Touch Screens on page 177
• Video on page 179
Audio
The following audio solutions are supported by the XiO Cloud® service.
Amplifiers
- AMP-2800: 2-Channel Power Amplifier, 800 W/Ch, Discontinued
- AMP-4600: 4-Channel Power Amplifier, 600 W/Ch
- AMP-8075: 8-Channel Power Amplifier, 75 W/Ch, 4/8 Ω or 70V, North America and Japan, 120V
- AMPI-8075: 8-Channel Power Amplifier, 75 W/Ch, 4/8 Ω or 70V, International, 220–240V
- AMP-8150: 8-Channel Power Amplifier, 150 W/Ch, 4/8 Ω or 70V, North America and Japan, 120V
- AMPI-8150: 8-Channel Power Amplifier, 150 W/Ch, 4/8 Ω or 70V, International, 220–240V
Digital Signal Processors
- DSP-860: Crestron Avia® 8x6 Digital Signal Processor
- DSP-1280: Crestron Avia® 12x8 Digital Signal Processor
- DSP-1281: Crestron Avia® 12x8 Digital Signal Processor with Dante® Audio Networking
- DSP-1282: Crestron Avia® 12x8 Digital Signal Processor with USB Audio, AEC, and Audio Conferencing Interface, Discontinued
- DSP-1283: Crestron Avia® 12x8 Digital Signal Processor with Dante® Audio Networking, USB Audio, AEC, and Audio Conferencing Interface, Discontinued
Multiroom Audio Accessories
- DM-NAX-2XLRI-1G: DM NAX® Audio-over-IP Wall Plate with XLR, Black, 1-Gang
- DM-NAX-AUD-IO: DM NAX® Audio-over-IP Converter with Balanced/Unbalanced Line-Level Audio Input and Output
• DM-NAX-AUD-USB: DM NAX® Audio-over-IP Converter with USB-C® Audio Input and Output - DM-NAX-BTIO-1G: DM NAX® Audio-over-IP Wall Plate with Bluetooth® Audio Support, Analog Audio Input and Output, 1-Gang
- DM-NAX-XSP: DM NAX® 8K Smart Display Controller and Network Audio Encoder/Decoder w eARC Support
Conferencing
The following conferencing solutions are supported by the XiO Cloud® service.
AirMedia Wireless Presentation and Conferencing
• AM-200: AirMedia® Presentation System 200, Discontinued
- AM-300: AirMedia® Presentation System 300, Discontinued
- AM-3000-WF: AirMedia® Receiver 3000 with Wi-Fi® Network Connectivity
- AM-3000-WF-I: AirMedia® Receiver 3100 with Wi-Fi® Network Connectivity, International
- AM-3100-WF: AirMedia® Series 3 Receiver 100 with Wi-Fi® Connectivity
- AM-3100-WF-I: AirMedia® Series 3 Receiver 100 with Wi-Fi® Connectivity, International
• AM-3200: AirMedia® Series 3 Receiver 200
- AM-3200-WF: AirMedia® Series 3 Receiver 200 with Wi-Fi® Connectivity
- AM-3200-WF-I: AirMedia® Series 3 Receiver 200 with Wi-Fi® Connectivity, International
Crestron Flex Solutions
The following Crestron Flex solutions are supported by the XiO Cloud® service.
All-In-One Bars
- UC-B70-A-Z: Crestron Flex Large Room Conference Solution with All-In-One Videobar 70 for Zoom Rooms® Software
- UC-B70-A-Z-I: Crestron Flex Large Room Conference Solution with All-In-One Videobar 70 for Zoom Rooms® Software, International
Crestron Flex Kits
NOTE: The individual devices that can be connected to the XiO Cloud service vary by Crestron Flex kit. Refer to the documentation for your Crestron Flex kit for more information about which can be connected to the XiO Cloud service.
- UC-B30-T: Crestron Flex Small Room Conference System with Video Soundbar for Microsoft Teams® Rooms
- UC-B30-T-L: Crestron Flex Small Room Conference System with Video Soundbar and Lenovo® M920Q ThinkSmart™ Edition Tiny for Microsoft Teams® Rooms, Discontinued
- UC-B30-T-L-WM: Crestron Flex Small Room Conference System with Video Soundbar, Wall Mounted Control Interface, and Lenovo® M920Q ThinkSmart™ Edition Tiny for Microsoft Tea Rooms, Discontinued
-
UC-B30-T-WM: Crestron Flex Small Room Conference System with Video Soundbar and Wall Mounted Control Interface for Microsoft Teams® Rooms
-
UC-B30-Z: Crestron Flex Small Room Conference System with Video Soundbar for Zoom Ro Software
- UC-B30-Z-L: Crestron Flex Small Room Conference System with Video Soundbar and Lenovo M920Q ThinkSmart™ Edition Tiny for Zoom Rooms® Software, Discontinued
- UC-B30-Z-L-WM: Crestron Flex Small Room Conference System with Video Soundbar, Wall Mounted Control Interface, and Lenovo® M920Q ThinkSmart™ Edition Tiny for Zoom Rooms® Software, Discontinued
- UC-B30-Z-WM: Crestron Flex Small Room Conference System with Video Soundbar and Wall Mounted Control Interface for Zoom Rooms® Software
- UC-B31-T: Crestron Flex Small Room Conference System with Jabra® PanaCast® 50 Video B Microsoft Teams® Rooms
- UC-B31-T-INDIA: Crestron Flex Small Room Conference System with Jabra® PanaCast® 50 Vid Bar for Microsoft Teams® Rooms, India
- UC-B31-T-WM: Crestron Flex Small Room Conference System with Jabra® PanaCast® 50 Video Bar and Wall Mounted Control Interface for Microsoft Teams® Rooms
- UC-B31-T-WM-INDIA: Crestron Flex Small Room Conference System with Jabra® PanaCast® 50 Video Bar and Wall Mounted Control Interface for Microsoft Teams® Rooms, India
- UC-B31-Z: Crestron Flex Small Room Conference System with Jabra® PanaCast® 50 Video B Zoom Rooms® Software
- UC-B31-Z-INDIA: Crestron Flex Small Room Conference System with Jabra® PanaCast® 50 Vid Bar for Zoom Rooms® Software, India
- UC-B31-Z-WM: Crestron Flex Small Room Conference System with Jabra® PanaCast® 50 Video Bar and Wall Mounted Control Interface for Zoom Rooms® Software
- UC-B31-Z-WM-INDIA: Crestron Flex Small Room Conference System with Jabra® PanaCast® 50 Video Bar and Wall Mounted Control Interface for Zoom Rooms® Software, India
- UC-BX30-T: Crestron Flex Advanced Small Room Conference System with Video Soundbar fo Microsoft Teams® Rooms
- UC-BX30-T-WM: Crestron Flex Advanced Small Room Conference System with Video Soundba and Wall Mounted Control Interface for Microsoft Teams® Rooms
- UC-BX30-Z: Crestron Flex Advanced Small Room Conference System with Video Soundbar fo Zoom Rooms® Software
- UC-BX30-Z-WM: Crestron Flex Advanced Small Room Conference System with Video Soundba and Wall Mounted Control Interface for Zoom Rooms® Software
- UC-BX31-T: Crestron Flex Advanced Small Room Conference System with Jabra® PanaCast® 5 Video Bar for Microsoft Teams® Rooms
- UC-BX31-T-INDIA: Crestron Flex Advanced Small Room Conference System with Jabra® PanaCast® 50 Video Bar for Microsoft Teams® Rooms, India
- UC-BX31-T-WM: Crestron Flex Advanced Small Room Conference System with Jabra® PanaCas 50 Video Bar and Wall Mounted Control Interface for Microsoft Teams® Rooms
-
UC-BX31-T-WM-INDIA: Crestron Flex Advanced Small Room Conference System with Jabra® PanaCast® 50 Video Bar and Wall Mounted Control Interface for Microsoft Teams® Rooms
-
UC-BX31-Z: Crestron Flex Advanced Small Room Conference System with Jabra® PanaCast® ! Video Bar for Zoom Rooms® Software
- UC-BX31-Z-INDIA: Crestron Flex Advanced Small Room Conference System with Jabra® PanaCast® 50 Video Bar for Zoom Rooms® Software, India
- UC-BX31-Z-WM: Crestron Flex Advanced Small Room Conference System with Jabra® PanaCas 50 Video Bar and Wall Mounted Control Interface for Zoom Rooms® Software
- UC-BX31-Z-WM-INDIA: Crestron Flex Advanced Small Room Conference System with Jabra® PanaCast® 50 Video Bar and Wall Mounted Control Interface for Zoom Rooms® Software,
- UC-C100-T: Crestron Flex Video Conference System Integrator Kit for Microsoft Teams® Roor
- UC-C100-T-L: Crestron Flex Video Conference System Integrator Kit with Lenovo® M920Q ThinkSmart™ Edition Tiny for Microsoft Teams® Rooms, Discontinued
- UC-C100-T-L-WM: Crestron Flex Video Conference System Integrator Kit with a Wall Mount Control Interface and Lenovo® M920Q ThinkSmart™ Edition Tiny for Microsoft Teams® Room Discontinued
- UC-C100-T-WM: Crestron Flex Video Conference System Integrator Kit with a Wall Mounted Control Interface for Microsoft Teams® Rooms
- UC-C100-Z: Crestron Flex Video Conference System Integrator Kit for Zoom Rooms® Softwar
- UC-C100-Z-L: Crestron Flex Video Conference System Integrator Kit with Lenovo® M920Q ThinkSmart™ Edition Tiny for Zoom Rooms® Software, Discontinued
- UC-C100-Z-L-WM: Crestron Flex Video Conference System Integrator Kit with a Wall Mount Control Interface and Lenovo® M920Q ThinkSmart™ Edition Tiny for Zoom Rooms® Software Discontinued
- UC-C100-Z-WM: Crestron Flex Video Conference System Integrator Kit with a Wall Mounted Control Interface for Zoom Rooms® Software
- UC-CX100-T: Crestron Flex Advanced Video Conference System Integrator Kit for Microsoft Teams® Rooms
- UC-CX100-T-L: Crestron Flex Advanced Video Conference System Integrator Kit with Lenovo® M920Q ThinkSmart™ Edition Tiny for Microsoft Teams® Rooms, Discontinued
- UC-CX100-T-L-WM: Crestron Flex Advanced Video Conference System Integrator Kit with a \ Mounted Control Interface and Lenovo® M920Q ThinkSmart™ Edition Tiny for Microsoft Team Rooms, Discontinued
- UC-CX100-T-WM: Crestron Flex Advanced Video Conference System Integrator Kit with a Work Mounted Control Interface for Microsoft Teams® Rooms
• UC-CX100-Z: Crestron Flex Advanced Video Conference System Integrator Kit for Zoom Roor Software - UC-CX100-Z-L: Crestron Flex Advanced Video Conference System Integrator Kit with Lenovo® M920Q ThinkSmart™ Edition Tiny for Zoom Rooms® Software, Discontinued
- UC-CX100-Z-L-WM: Crestron Flex Advanced Video Conference System Integrator Kit with a Mounted Control Interface and Lenovo® M920Q ThinkSmart™ Edition Tiny for Zoom Rooms® Software, Discontinued
-
UC-CX100-Z-WM: Crestron Flex Advanced Video Conference System Integrator Kit with a Wa Mounted Control Interface for Zoom Rooms® Software
-
UC-M50-T: Crestron Flex Tabletop Medium Room Video Conference System for Microsoft Tec Rooms
- UC-M50-T-L: Crestron Flex Tabletop Medium Room Video Conference System with Lenovo® M920Q ThinkSmart™ Edition Tiny for Microsoft Teams® Rooms, Discontinued
- UC-M50-T-UPGRD: Crestron Flex Medium Room Upgrade Solution with Microsoft Teams® Roof
• UC-M50-U: Crestron Flex Tabletop Medium Room Video Conference System
• UC-M50-UA: Crestron Flex Tabletop Medium Room Audio Conference System - UC-M50-Z: Crestron Flex Tabletop Medium Room Video Conference System for Zoom Rooms' Software
- UC-M50-Z-L: Crestron Flex Tabletop Medium Room Video Conference System with Lenovo® M920Q ThinkSmart™ Edition Tiny for Zoom Rooms® Software, Discontinued
- UC-M50-Z-UPGRD: Crestron Flex Medium Room Upgrade Solution with Zoom Rooms® Softwar
- UC-M70-T: Crestron Flex Tabletop Large Room Video Conference System for Microsoft Team Rooms
- UC-M70-T-L: Crestron Flex Tabletop Large Room Video Conference System with Lenovo® M9? ThinkSmart™ Edition Tiny for Microsoft Teams® Rooms, Discontinued
• UC-M70-U: Crestron Flex Tabletop Large Room Video Conference System
• UC-M70-UA: Crestron Flex Tabletop Large Room Audio Conference System - UC-M70-Z: Crestron Flex Tabletop Large Room Video Conference System for Zoom Rooms® Software
- UC-M70-Z-L: Crestron Flex Tabletop Large Room Video Conference System with Lenovo® M9: ThinkSmart™ Edition Tiny for Zoom Rooms® Software, Discontinued
• UC-MM30-T: Crestron Flex Tabletop Small Room Video Conference System for Microsoft Tea Rooms - UC-MM30-T-I: Crestron Flex Tabletop Small Room Video Conference System for Microsoft Teams® Rooms, International
- UC-MM30-T-L: Crestron Flex Tabletop Small Room Video Conference System with Lenovo® M920Q ThinkSmart™ Edition Tiny for Microsoft Teams® Rooms, Discontinued
- UC-MM30-T-L-I: Crestron Flex Tabletop Small Room Video Conference System with Lenovo® M920Q ThinkSmart™ Edition Tiny for Microsoft Teams® Rooms, International, Discontinued
- UC-MM30-TA: Crestron Flex Tabletop Small Room Audio Conference System for Microsoft Teams® Rooms
- UC-MM30-TA-I: Crestron Flex Tabletop Small Room Audio Conference System for Microsoft Teams® Rooms, International
- UC-MM30-Z: Crestron Flex Tabletop Small Room Video Conference System for Zoom Rooms® Software
- UC-MM30-Z-I: Crestron Flex Tabletop Small Room Video Conference System for Zoom Room: Software, International
-
UC-MM30-Z-L: Crestron Flex Tabletop Small Room Video Conference System with Lenovo® M920Q ThinkSmart™ Edition Tiny for Zoom Rooms® Software, Discontinued
-
UC-MM30-Z-L-I: Crestron Flex Tabletop Small Room Video Conference System with Lenovo® M920Q ThinkSmart™ Edition Tiny for Zoom Rooms® Software, International, Discontinued
- UC-MMX30-T: Crestron Flex Advanced Tabletop Small Room Video Conference System for Microsoft Teams® Room
- UC-MMX30-T-I: Crestron Flex Advanced Tabletop Small Room Video Conference System for Microsoft Teams® Rooms, International
- UC-MMX30-T-L: Crestron Flex Advanced Tabletop Small Room Video Conference System with Lenovo® M920Q ThinkSmart™ Edition Tiny for Microsoft Teams® Rooms, Discontinued
- UC-MMX30-T-L-I: Crestron Flex Advanced Tabletop Small Room Video Conference System with Lenovo® M920Q ThinkSmart™ Edition Tiny for Microsoft Teams® Rooms, International, Discontinued
- UC-MMX30-Z: Crestron Flex Advanced Tabletop Small Room Video Conference System for Zo Rooms® Software
- UC-MMX30-Z-I: Crestron Flex Advanced Tabletop Small Room Video Conference System for Zoom Rooms® Software, International
- UC-MMX30-Z-L: Crestron Flex Advanced Tabletop Small Room Video Conference System with Lenovo® M920Q ThinkSmart™ Edition Tiny for Zoom Rooms® Software, Discontinued
- UC-MMX30-Z-L-I: Crestron Flex Advanced Tabletop Small Room Video Conference System with Lenovo® M920Q ThinkSmart™ Edition Tiny for Zoom Rooms® Software, International, Discontinued
- UC-MX50-T: Crestron Flex Advanced Tabletop Medium Room Video Conference System for Microsoft Teams® Rooms
- UC-MX50-T-L: Crestron Flex Advanced Tabletop Medium Room Video Conference System with Lenovo® M920Q ThinkSmart™ Edition Tiny for Microsoft Teams® Rooms, Discontinued
- UC-MX50-T-UPGRD: Crestron Flex Advanced Medium Room Upgrade Solution with Microsoft Teams® Rooms
• UC-MX50-U: Crestron Flex Advanced Tabletop Medium Room Video Conference System - UC-MX50-Z: Crestron Flex Advanced Tabletop Medium Room Video Conference System for Z1 Rooms® Software
- UC-MX50-Z-L: Crestron Flex Advanced Tabletop Medium Room Video Conference System with Lenovo® M920Q ThinkSmart™ Edition Tiny for Zoom Rooms® Software, Discontinued
- UC-MX50-Z-UPGRD: Crestron Flex Advanced Medium Room Upgrade Solution with Zoom Rooms® Software
- UC-MX70-T: Crestron Flex Advanced Tabletop Large Room Video Conference System for Microsoft Teams® Rooms
- UC-MX70-T-L: Crestron Flex Advanced Tabletop Large Room Video Conference System with Lenovo® M920Q ThinkSmart™ Edition Tiny for Microsoft Teams® Rooms, Discontinued
• UC-MX70-U: Crestron Flex Advanced Tabletop Large Room Video Conference System - UC-MX70-Z: Crestron Flex Advanced Tabletop Large Room Video Conference System for Zoo Rooms® Software
- UC-MX70-Z-L: Crestron Flex Advanced Tabletop Large Room Video Conference System with Lenovo® M920Q ThinkSmart™ Edition Tiny for Zoom Rooms® Software, Discontinued
Crestron Flex Phones
- UC-P8-T: Crestron Flex 8 in. Audio Desk Phone for Microsoft Teams® Software, Discontinued
- UC-P8-T-I: Crestron Flex 8 in. Audio Desk Phone for Microsoft Teams® Software, International Discontinued
- UC-P8-T-C: Crestron Flex 8 in. Video Desk Phone for Microsoft Teams® Software, Discontinue
- UC-P8-T-C-I: Crestron Flex 8 in. Video Desk Phone for Microsoft Teams® Software, International Discontinued
- UC-P8-T-HS: Crestron Flex 8 in. Audio Desk Phone with Handset for Microsoft Teams® Softv
- UC-P8-T-HS-I: Crestron Flex 8 in. Audio Desk Phone with Handset for Microsoft Teams® Software, International
- UC-P8-T-C-HS: Crestron Flex 8 in. Video Desk Phone with Handset for Microsoft Teams® Software
- UC-P8-T-C-HS-I: Crestron Flex 8 in. Video Desk Phone with Handset for Microsoft Teams® Software, International
- UC-P8-TD: Crestron Flex 8 in. Display for Microsoft Teams® Software
- UC-P8-TD-I: Crestron Flex 8 in. Display for Microsoft Teams® Software, International
- UC-P10-T: Crestron Flex 10 in. Audio Desk Phone for Microsoft Teams® Software, Discontinue
- UC-P10-T-1: Crestron Flex 10 in. Audio Desk Phone for Microsoft Teams® Software, Internation Discontinued
- UC-P10-T-C: Crestron Flex 10 in. Video Desk Phone for Microsoft Teams® Software, Discontinu
- UC-P10-T-C-I: Crestron Flex 10 in. Video Desk Phone for Microsoft Teams® Software, International, Discontinued
- UC-P10-T-HS: Crestron Flex 10 in. Audio Desk Phone with Handset for Microsoft Teams® Software
- UC-P10-T-HS-I: Crestron Flex 10 in. Audio Desk Phone with Handset for Microsoft Teams® Software, International
- UC-P10-T-C-HS: Crestron Flex 10 in. Video Desk Phone with Handset for Microsoft Teams® Software
- UC-P10-T-C-HS-I: Crestron Flex 10 in. Video Desk Phone with Handset for Microsoft Teams® Software, International
- UC-P10-TD: Crestron Flex 10 in. Display for Microsoft Teams® Software
- UC-P10-TD-I: Crestron Flex 10 in. Display for Microsoft Teams® Software, International
- UC-P100-T: Crestron Flex VoIP Desk Phone for Microsoft Teams® Software, Discontinued
- UC-P110-T: Crestron Flex VoIP Desk Phone with Tilt Screen for Microsoft Teams® Software, Discontinued
Crestron Flex Hubs and Pods
• UC-AUDIO-HUB-DR1: Crestron Flex Hub Wireless Transceiver, DECT Region 1
• UC-AUDIO-HUB-DR2: Crestron Flex Hub Wireless Transceiver, DECT Region 2
- UC-AUDIO-POD-B-DR1: Crestron Flex Pod Wireless Speaker and Microphone, Black, DECT Region 1
- UC-AUDIO-POD-B-DR2: Crestron Flex Pod Wireless Speaker and Microphone, Black, DECT Region 2
Connectivity
The following connectivity solutions are supported by the XiO Cloud® service.
FlipTop Cable Compartments
- FT-TS600-B: FlipTop™ Touch Screen, Black Anodized, Discontinued
- FT-TS600-BALUM: FlipTop™ Touch Screen, Brushed Aluminum, Discontinued
- FT-TSC600-B: FlipTop™ Touch Screen Control System, Black Anodized, Discontinued
- FT-TSC600-BALUM: FlipTop™ Touch Screen Control System, Brushed Aluminum, Discontinued
USB Switchers
• USB-SW-200: 2-input USB 3.2 Data Matrix Switcher
• USB-SW-400: 4-input USB 3.2 Data Matrix Switcher
Control
The following control solutions are supported by the XiO Cloud® service.
3-Series Control Systems
• AV3: 3-Series® Control System, Discontinued
- CP3: 3-Series® Control System, Discontinued
- CP3N: 3-Series® Control System, Discontinued
• DIN-AP3: 3-Series® DIN Rail Control System, Discontinued
- DIN-AP3MEX: 3-Series® DIN Rail Control System with infiNET EX® and ER Wireless Gateway, Discontinued
• PRO3: 3-Series® Control System, Discontinued
- RMC3: 3-Series® Control System, Discontinued
4-Series Control Systems
• AV4: 4-Series® Control System, Discontinued
• CP4: 4-Series® Control System
• CP4N: 4-Series® Control System
• DIN-AP4: 4-Series® DIN Rail Control System
• MC4: 4-Series® Control System
• MC4-1: 4-Series® Control System, International
• PRO4: 4-Series® Control System, Discontinued
• RMC4: 4-Series® Control System
Crestron Virtual Control Server-Based Control Systems
• VC-4-PC-3: Computer with Crestron Virtual Control Server Software
• VC-4-ROOM: Crestron Virtual Control Server Software - Single-Room License
Media Presentation Controllers
- MPC3-101-B: 3-Series® Media Presentation Controller 101, Black, Discontinued
- MPC3-102-B: 3-Series® Media Presentation Controller 102, Black
- MPC3-201-B: 3-Series® Media Presentation Controller 201, Black
- MPC3-302-B: 3-Series® Media Presentation Controller 302, Black
- MPC3-302-W: 3-Series® Media Presentation Controller 302, White
Smart Display Controllers
- HD-CTL-101: 8K Smart Display Controller with HDMI® connectivity
Lighting and Environmental
The following lighting and environmental solutions are supported by the XiO Cloud® service.
Lighting Control Systems
• ZUM-HUB4: Zūm® Lighting Control System, Hub4
Power
The following power solutions are supported by the XiO Cloud ^® service.
Power Conditioners
- PC-350V-12: 12-Outlet Vertical Networked Power Controller and Conditioner with Surge Protection and Metering
• PC-350V-18: 18-Outlet Vertical Networked Power Controller and Conditioner with Surge Protection and Metering
Scheduling
The following scheduling solutions are supported by the XiO Cloud® service.
Room Scheduling Touch Screens
• TSS-7-B-S: 7 in. Room Scheduling Screen, Black Smooth, Discontinued
• TSS-7-W-S: 7 in. Room Scheduling Screen, White Smooth, Discontinued
• TSS-10-B-S: 10.1 in. Room Scheduling Screen, Black Smooth, Discontinued
• TSS-10-W-S: 10.1 in. Room Scheduling Screen, White Smooth, Discontinued
• TSS-770-B-S: 7 in. Room Scheduling Screen, Black Smooth
• TSS-770-W-S: 7 in. Room Scheduling Screen, White Smooth
• TSS-1070-B-S: 10.1 in. Room Scheduling Screen, Black Smooth
• TSS-1070-W-S: 10.1 in. Room Scheduling Screen, White Smooth
Desk Scheduling Touch Screens
• TSS-470E-B-T: 3.5 in. Desk Scheduling Touch Screen, Black Textured
Sensors
The following sensors are supported by the XiO Cloud® service.
Occupancy Sensors
• CEN-ODT-C-POE: Dual-Technology Occupancy Sensor, PoE, 2,000 Sq Ft
Third-Party Devices
The following third-party devices are supported by the XiO Cloud ^® service via the Crestron Conr protocol or the Crestron XiO Cloud ^™ Third-Party Device Monitoring Gateway.
NOTE: For more information on using third-party devices to the XiO Cloud service, refer to the XiO Cloud® Service Third-Party Device Monitoring Configuration Guide.
Crestron Connected Devices
Supported third-party devices that use the Crestron Connected® communications protocol can be claimed to the XiO Cloud service directly without requiring a Crestron control processor, includir following:
- Acer® displays
- Barco® displays
- BenQ® displays
- Christie® displays
- Elo® Touch displays
- Epson® displays
- GUDE® PDUs
- InFocus® projectors
- Legrand® PDUs
- LG® displays
- NEC® displays
- Optoma® displays
- Phillips® displays
- Raritan® PDUs
- Samsung® displays
- Sharp® displays
- SMART Board® displays
- Sony® displays
- ViewSonic® displays
- Vivitek® projectors
For a list of third-party device models that have been certified to connect to XiO Cloud, refer Crestron Online Help answer ID 1001716.
Crestron Driver Devices
The XiO Cloud ^® service provides monitoring capabilities for supported third-party devices within a Crestron ^® system using the Crestron Drivers framework. The devices will appear in the XiO Cloud and need only to be claimed to start monitoring.
Crestron Driver support in XiO Cloud is available for the following device types:
- A/V Receivers
- A/V Switchers
- Audio Mixers
- Blu-ray® Disc Players
- Cable Boxes
- Displays
• Polycom® Video Codec - Projectors
- Video Servers
To view the available Crestron Drivers for these device types, visit the Crestron Driver Portal drivers.crestron.io.
Third-Party Device Monitoring Gateway Software
Crestron XiO Cloud™ Gateway Software provides expanded configuration and monitoring capabilities
for supported third-party devices not connected directly to a Crestron® control processor. This configuration allows for monitoring via Ping, TCP, SNMP, and the Crestron Drivers framework of Ethernet.
Touch Screens
The following touch screens are supported by the XiO Cloud® service.
Tabletop Touch Screens
• TS-770-B-S: 7 in. Tabletop Touch Screen, Black Smooth
• TS-770-W-S: 7 in. Tabletop Touch Screen, White Smooth
• TS-770-GV-B-S: 7 in. Tabletop Touch Screen, Government Version, Black Smooth
• TS-770-GV-W-S: 7 in. Tabletop Touch Screen, Government Version, White Smooth
• TS-1070-B-S: 10.1 in. Tabletop Touch Screen, Black Smooth
• TS-1070-W-S: 10.1 in. Tabletop Touch Screen, White Smooth
• TS-1070-GV-B-S: 10.1 in. Tabletop Touch Screen, Government Version, Black Smooth
• TS-1070-GV-W-S: 10.1 in. Tabletop Touch Screen, Government Version, White Smooth
• TS-1542-TILT-B-S: 15.6 in. HD Touch Screen, Tabletop Tilt, Black Smooth, Discontinued
• TS-1542-TILT-W-S: 15.6 in. HD Touch Screen, Tabletop Tilt, White Smooth, Discontinued
• TS-1542-TILT-SSB: 15.6 in. HD Touch Screen, Tabletop Tilt, Signature Series Black, Discontinued
• TS-1542-TILT-SSW: 15.6 in. HD Touch Screen, Tabletop Tilt, Signature Series White, Discontinue
- TS-1542-TILT-C-B-S: 15.6 in. HD Touch Screen with DM 8G+® Input, Tabletop Tilt, Black Smoc Discontinued
- TS-1542-TILT-C-W-S: 15.6 in. HD Touch Screen with DM 8G+® Input, Tabletop Tilt, White Sm Discontinued
- TS-1542-TILT-C-SSB: 15.6 in. HD Touch Screen with DM 8G+® Input, Tabletop Tilt, Signature Series Black, Discontinued
- TS-1542-TILT-C-SSW: 15.6 in. HD Touch Screen with DM 8G+® Input, Tabletop Tilt, Signature Series White, Discontinued
Touch Screen Control Systems
• TSCW-730-B-S: 7 in. Touch Screen Control System, Black Smooth, Discontinued
• TSCW-730-W-S: 7 in. Touch Screen Control System, White Smooth, Discontinued
Wall Mount Touch Screens
• TS-1542-B-S: 15.6 in. HD Touch Screen, Wall Mount or VESA, Black Smooth, Discontinued
• TS-1542-W-S: 15.6 in. HD Touch Screen, Wall Mount or VESA, White Smooth, Discontinued
- TS-1542-C-B-S: 15.6 in. HD Touch Screen with DM 8G+® Input, Wall Mount or VESA, Black Discontinued
- TS-1542-C-W-S: 15.6 in. HD Touch Screen with DM 8G+® Input, Wall Mount or VESA, White Smooth, Discontinued
• TSW-560-B-S: 5 in. Touch Screen, Black Smooth, Discontinued
- TSW-560-W-S: 5 in. Touch Screen, White Smooth, Discontinued
- TSW-560-NC-B-S: 5 in. Touch Screen without Camera or Microphone, Black Smooth, Discontinued
- TSW-560-NC-W-S: 5 in. Touch Screen without Camera or Microphone, White Smooth, Discontinued
• TSW-560P-B-S: 5 in. Touch Screen, Portrait, Black Smooth, Discontinued
• TSW-560P-W-S: 5 in. Touch Screen, Portrait, White Smooth, Discontinued
• TSW-570-B-S: 5 in. Touch Screen, Black Smooth
• TSW-570-W-S: 5 in. Touch Screen, White Smooth
• TSW-570P-B-S: 5 in. Touch Screen, Portrait, Black Smooth
• TSW-570P-W-S: 5 in. Touch Screen, Portrait, White Smooth
• TSW-760-B-S: 7 in. Touch Screen, Black Smooth, Discontinued
- TSW-760-W-S: 7 in. Touch Screen, White Smooth, Discontinued
- TSW-760-NC-B-S: 7 in. Touch Screen without Camera or Microphone, Black Smooth, Discontinued
- TSW-760-NC-W-S: 7 in. Touch Screen without Camera or Microphone, White Smooth, Discontinued
• TSW-770-B-S: 7 in. Wall Mount Touch Screen, Black Smooth
- TSW-770-W-S: 7 in. Wall Mount Touch Screen, White Smooth
• TSW-770-GV-B-S: 7 in. Wall Mount Touch Screen, Government Version, Black Smooth
• TSW-770-GV-W-S: 7 in. Wall Mount Touch Screen, Government Version, White Smooth
• TSW-1060-B-S: 10.1 in. Touch Screen, Black Smooth, Discontinued
• TSW-1060-W-S: 10.1 in. Touch Screen, White Smooth, Discontinued
- TSW-1060-NC-B-S: 10.1 in. Touch Screen without Camera or Microphone, Black Smooth, Discontinued
- TSW-1060-NC-W-S: 10.1 in. Touch Screen without Camera or Microphone, White Smooth, Discontinued
• TSW-1070-B-S: 10.1 in. Wall Mount Touch Screen, Black Smooth
• TSW-1070-W-S: 10.1 in. Wall Mount Touch Screen, White Smooth
• TSW-1070-GV-B-S: 10.1 in. Wall Mount Touch Screen, Government Version, Black Smooth
• TSW-1070-GV-W-S: 10.1 in. Wall Mount Touch Screen, Government Version, White Smooth
Wireless Touch Screens
• TST-1080: 10.1 in. Wireless Touch Screen
Video
The following video solutions are supported by the XiO Cloud® service.
AirMedia Wireless Presentation and Conferencing
• AM-200: AirMedia® Presentation System 200, Discontinued
- AM-300: AirMedia® Presentation System 300, Discontinued
- AM-3000-WF: AirMedia® Receiver 3000 with Wi-Fi® Network Connectivity
- AM-3000-WF-I: AirMedia® Receiver 3100 with Wi-Fi® Network Connectivity, International
- AM-3100-WF: AirMedia® Series 3 Receiver 100 with Wi-Fi® Connectivity
- AM-3100-WF-I: AirMedia® Series 3 Receiver 100 with Wi-Fi® Connectivity, International
• AM-3200: AirMedia® Series 3 Receiver 200
- AM-3200-WF: AirMedia® Series 3 Receiver 200 with Wi-Fi® Connectivity
- AM-3200-WF-I: AirMedia® Series 3 Receiver 200 with Wi-Fi® Connectivity, International
Digital Graphics Engines
• DGE-100: Digital Graphics Engine 100
- DM-DGE-200-C: Digital Graphics Engine 200 with 4K DM 8G+® Input
DigitalMedia Solutions
The following DigitalMedia™ solutions supported by the XiO Cloud® service.
DigitalMedia Presentation Systems
• DMPS3-4K-50: 3-Series® 4K DigitalMedia™ Presentation System 50, Discontinued
- DMPS3-4K-100-C: 3-Series® 4K DigitalMedia™ Presentation System 100, Discontinued
- DMPS3-4K-150-C: 3-Series® 4K DigitalMedia™ Presentation System 150, Discontinued
• DMPS3-4K-200-C: 3-Series® 4K DigitalMedia™ Presentation System 200, Discontinued
• DMPS3-4K-250-C: 3-Series® 4K DigitalMedia™ Presentation System 250
- DMPS3-4K-250-C-AIRMEDIA: 3-Series® 4K DigitalMedia™ Presentation System 250 with AirMedia®, Discontinued
- DMPS3-4K-300-C: 3-Series® 4K DigitalMedia™ Presentation System 300, Discontinued
• DMPS3-4K-350-C: 3-Series® 4K DigitalMedia™ Presentation System 350
- DMPS3-4K-350-C-AIRMEDIA: 3-Series® 4K DigitalMedia™ Presentation System 350 with AirMedia®, Discontinued
- DMPS3-200-C: 3-Series® DigitalMedia™ Presentation System 200, Discontinued
- DMPS3-300-C: 3-Series® DigitalMedia™ Presentation System 300, Discontinued
- DMPS3-300-C-AEC: 3-Series® DigitalMedia™ Presentation System 300 with Audio Conferencing Interface, Discontinued
DigitalMedia Switchers
• DM-MD8X8-CPU3: 8x8 DigitalMedia™ Switcher
- DM-MD8X8-CPU3-RPS: 8x8 DigitalMedia™ Switcher with Redundant Power Supplies
- DM-MD16X16-CPU3: 16x16 DigitalMedia™ Switcher
- DM-MD16X16-CPU3-RPS: 16x16 DigitalMedia™ Switcher with Redundant Power Supplies
• DM-MD32X32-CPU3: 32x32 DigitalMedia™ Switcher
- DM-MD32X32-CPU3-RPS: 32x2 DigitalMedia™ Switcher with Redundant Power Supplies
DM NVX AV-over-IP Solutions
- DM-NVX-350: DM NVX® 4K60 4:4:4 HDR Network AV Encoder/Decoder, Discontinued
• DM-NVX-350C: DM NVX® 4K60 4:4:4 HDR Network AV Encoder/Decoder Card, Discontinued - DM-NVX-351: DM NVX® 4K60 4:4:4 HDR Network AV Encoder/Decoder with Downmixing
- DM-NVX-351C: DM NVX® 4K60 4:4:4 HDR Network AV Encoder/Decoder Card with Downmixin
- DM-NVX-352: DM NVX® 4K60 4:4:4 HDR Network AV Encoder/Decoder with Dante® Audio, Discontinued
- DM-NVX-352C: DM NVX® 4K60 4:4:4 HDR Network AV Encoder/Decoder Card with Dante® A Discontinued
- DM-NVX-360: DM NVX® 4K60 4:4:4 HDR Network AV Encoder/Decoder
- DM-NVX-360C: DM NVX® 4K60 4:4:4 HDR Network AV Encoder/Decoder Card
- DM-NVX-363: DM NVX® 4K60 4:4:4 HDR Network AV Encoder/Decoder with Downmixing and Dante® Audio
- DM-NVX-363C: DM NVX® 4K60 4:4:4 HDR Network AV Encoder/Decoder Card with Downmixi and Dante® Audio
- DM-NVX-D10: DM NVX® 1080p60 4:4:4 Network AV Decoder
- DM-NVX-D20: DM NVX® 4K60 4:2:0 Network AV Decoder
- DM-NVX-D30: DM NVX® 4K60 4:4:4 HDR Network AV Decoder
- DM-NVX-D30C: DM NVX® 4K60 4:4:4 HDR Network AV Decoder Card
- DM-NVX-D200: DM NVX® 4K60 4:2:0 Network AV Decoder with Scaler
- DM-NVX-D80-IOAV: DM NVX® 4K60 4:4:4 HDR Network AV OPS Decoder
- DM-NVX-E10: DM NVX® 1080p60 4:4:4 Network AV Encoder
- DM-NVX-E20: DM NVX® 4K60 4:2:0 Network AV Encoder
- DM-NVX-E30: DM NVX® 4K60 4:4:4 HDR Network AV Encoder
- DM-NVX-E30C: DM NVX® 4K60 4:4:4 HDR Network AV Encoder Card
- DM-NVX-E760: DM NVX® 4K60 4:4:4 HDR Network AV Encoder with DM® Input
• DM-NVX-E760C: DM NVX® 4K60 4:4:4 HDR Network AV Encoder Card with DM® Input
HDMI Solutions
The following HDMI® solutions supported by the XiO Cloud® service.
HDMI Extenders
• HD-RX-4K-210-C-E: DMPS Lite™ 4K Multiformat 2x1 AV Switch and Receiver
• HD-RX-4K-210-C-E-POE: DMPS Lite™ 4K Multiformat 2x1 AV Switch and Receiver with PoE+
• HD-RX-4K-410-C-E: DMPS Lite™ 4K Multiformat 4x1 AV Switch and Receiver, Discontinued
- HD-RX-4K-410-C-E-SW4: DMPS Lite™ 4K Multiformat 4x1 AV Switch and Receiver with 4-Port Ethernet Switch
• HD-RX-4K-510-C-E: DMPS Lite™ 4K Multiformat 5x1 AV Switch and Receiver
- HD-RX-4K-510-C-E-SW4: DMPS Lite™ 4K Multiformat 5x1 AV Switch and Receiver with 4-Port Ethernet Switch
- HD-RXU-4KZ-202: DM Lite® 4K60 4:4:4 Receiver and 2x2 Auto-Switcher for HDMI® and USB Signal Extension over CATx Cable
- HD-TXU-4KZ-211: DM Lite® 4K60 4:4:4 Transmitter and 2x1 Auto-Switcher for HDMI®, USB-C® DisplayPort™, and USB 2.0 Signal Extension over CATx Cable
- HD-TXU-4KZ-211-CHGR: DM Lite® 4K60 4:4:4 Transmitter and 2x1 Auto-Switcher for HDMI®, L C® DisplayPort™, and USB 2.0 Signal Extension over CATx Cable with Device Charging
HDMI Switchers
• HD-MD4X1-4KZ-E: 4x1 4K60 4:4:4 HDR AV Switcher
• HD-MD4X2-4KZ-E: 4x2 4K60 4:4:4 HDR AV Switcher
• HD-MD4X4-4KZ-E: 4x2 4K60 4:4:4 HDR AV Switcher
• HD-MD8X4-4KZ-E: 8x4 4K60 4:4:4 HDR AV Switcher
• HD-MD8X8-4KZ-E: 8x8 4K60 4:4:4 HDR AV Switcher
• HD-PS401: 4x1 4K60 4:4:4 HDR Presentation System
• HD-PS402: 4x2 4K60 4:4:4 HDR Presentation System
• HD-PS621: 8x1 4K60 4:4:4 HDR Presentation System
• HD-PS622: 8x2 4K60 4:4:4 HDR Presentation System
Smart Display Controllers
- HD-CTL-101: 8K Smart Display Controller with HDMI® connectivity
Appendix A: Configure ServiceNow for XiO Cloud Alerts
As of XiO Cloud version 1.23, XiO Cloud alerts can be integrated with ServiceNow® software inst Once alerts have been configured for your XiO Cloud account (as described in Alerts on page 111), the
ServiceNow administrator for your system must make configuration changes to allow XiO Cloud communicate with your ServiceNow instance. The administrator must implement two new inbound actions and modify the scripts/incident form in accordance with your system and requirements. configuration tasks are described in the following sections.
Client Prerequisites
Ensure the following client-side prerequisites have been met prior to configuring your ServiceNow instance for XiO Cloud alerts:
- A working ServiceNow instance that is permitted to receive emails
• A ServiceNow system administrator that has been granted the Admin role - ServiceNow has been enabled in the XiO Cloud account settings.
- Basic knowledge of ServiceNow incident form development
- Basic knowledge of ServiceNow scripting and JavaScript® coding
Turn on ServiceNow Within XiO Cloud
Users with Global Administrator permissions can turn on a connection to a ServiceNow instance from the XiO Cloud portal.
To turn on ServiceNow within XiO Cloud from the portal:
-
Select the gear icon on the left side of the screen.
-
Select Account Setting.
SETTINGS Menu
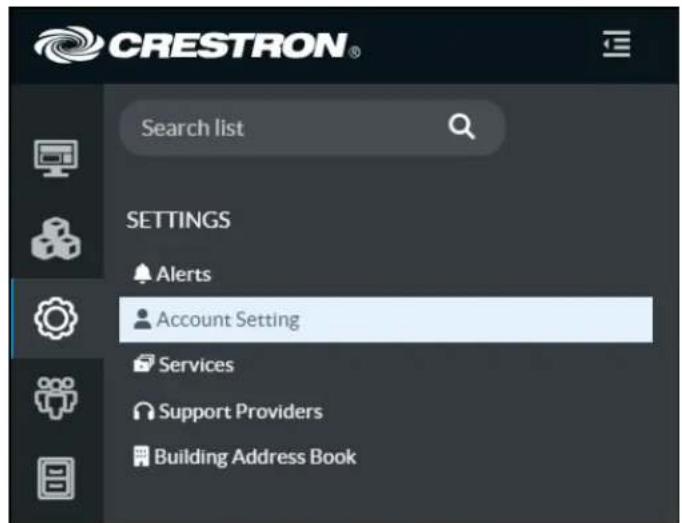
- Within the Profile tab on the right side of the screen, expand the ServiceNow accordion, then turn on the Enable ServiceNow toggle.
Profile Tab - ServiceNow Accordion
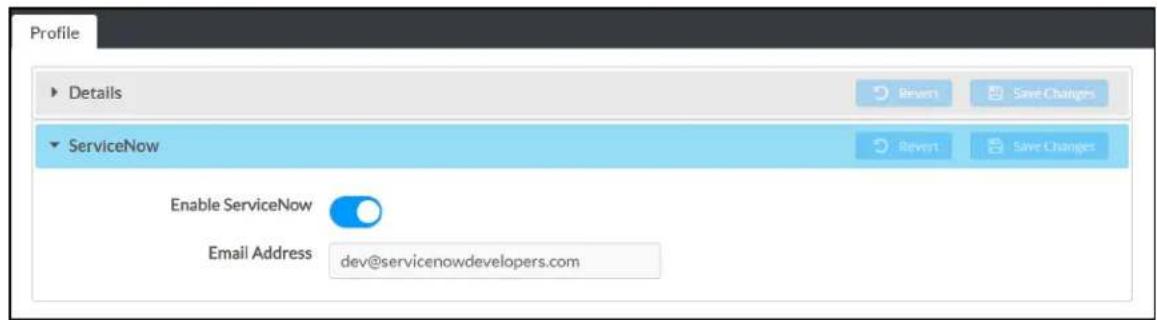
-
Enter the email address for the ServiceNow instance in the Email Address text field.
-
Tap Save Changes on the top right of the accordion.
Create XiO Incident Script
To allow XiO Cloud to create an alert email within your system, you must implement the Create XiO
Incident inbound action within your ServiceNow instance. This rule takes emails received from XiO Cloud
and converts them into incidents within your system automatically, allowing specified data points map to fields within your instance. Selecting the inbound action rule shows the details associated it, including the condition that triggers the inbound action and the script that maps it to your table.

Create XiO Incident
true
email.read
(function runAction( /*GlideRecord*/cur...
Incident [incident]
When to Run Tab
Select the When to Run tab to view and configure conditions that will trigger the Create XiO Incident
inbound action to run. Sending an email to the ServiceNow instance with a subject that cont
"Crestron-XIO: NEW Incident" triggers the inbound action to run.
NOTE: Do not change the subject condition, as it may cause your system to incorrectly triage your XiO Cloud incidents and, therefore, to not trigger the rule.

Actions Tab
Select the Actions tab to view and configure action scripts for the Create XiO Incident inbound action.
The provided script parses through the email and correctly allocates data to certain fields based content of the XiO Cloud alert.
Each section of the script is described below.
//Parse Table Content to Description
var parseBody = email.body_text.split(',').join('\n');
current.description = parseBody;
The code under the "Parse Table Content to Description" comment is used to parse the information within the comma-delimited email sent from XiO Cloud and adds it to the description field of created incident.
//Populate Email content to Fields
current.short_description = email.subject;
current.caller_id = gs.getUserID();
current.contact_type = "Email";
current.comments = "received from: " + email.origemail + "\n\n" + email.body_text;
current.category = "xio";
current.subcategory = "Email";
current.cmbd_ci.setDisplayValue('XiO');
The code under the "Populate Email content to Fields" section shows the logic used to populate key fields on the incident form, including Caller ID, Contact Type, Comments, Category, Subcategory, and Configuration Item.
NOTES:
- You must add the Category, Subcategory, and Configuration Item values to your system if they do not already exist. Custom categories, subcategories, or configuration items can be used. In this case, the code must be modified to match the values that will be current system. Additional information on how to add these values is provided in the ServiceNow documentation.
- The Caller ID field will populate as "Guest" unless you create an account associated with XiO Cloud email. For more information, refer to the ServiceNow documentation.
//Parse Correlation ID from Email

var rsubject = email.subject;
var keyword = "CorrelationID";
var key = rsubject.indexOf(keyword); // Assuming this text would never change
gs.log(key, 'Did it work');

if (key > 0) {
    var number = rsubject.substring(47);
    gs.log(number, "TEST"); // Try logging number
    current.correlation_id = number;
    gs.log(number, "TEST AGAIN");
    current.insert();
}
The code under the "Parse Correlation ID from Email" section shows the logic used to populate with the Correlation ID needed to link the XiO Cloud alert emails with your ServiceNow instance. This
field must be added to your Incident form through the Form Designer tool if has not been added.
NOTE: Modifying the provided logic is not recommended, as the code will likely break and wi prevent the field from being populated.
Additional information on how to add certain fields to your incident form, such as Correlation provided in the ServiceNow documentation.
//Logic to Define Priority
if (email.body_text.toLowerCase().indexOf("critical") >= 0) {
    current.impact = 1;
    current.urgency = 1;
}
if (email.body_text.toLowerCase().indexOf("warning") >= 0) {
    current.impact = 2;
    current.urgency = 2;
}
The code under the "Logic to Define Priority" section is showing the logic that will populate the Impact and Urgency fields on the incident form, which will result in populating the Priority field based on the impact/urgency matrix that your incident is configured with.
Currently, there are only two variables within the script that will modify the Priority field:
- If an XiO Cloud alert email is of type "Critical" or of type "Warning", the priorities will 3, respectively.
- If an XiO Cloud alert email is of a type other than "Warning" or "Critical", the default is assigned.
If you would like to modify this logic to better adhere to your instance processes, change the current.impact or current.urgency in accordance with the matrix below to get the desired priority incoming incidents.
| Impact/Urgency | 1 – Critical | 2 – High | 3 – Medium | 4 – Low |
| 1 – Extensive | Priority 1 | Priority 2 | Priority 2 | Priority 3 |
| 2 – Significant | Priority 2 | Priority 2 | Priority 3 | Priority 4 |
| 3 – Moderate | Priority 2 | Priority 3 | Priority 4 | Priority 4 |
| 4 – Minor | Priority 3 | Priority 4 | Priority 4 | Priority 4 |
Close Incident XiO Script
After the XiO Cloud alert is resolved, the system will send a follow-up email to your Servicel instance. After this email is sent, the Close Incident XiO script will trigger and close the associated incident automatically. The primary function of the script is to locate the correct incident that Cloud email is referencing, and it does so by searching the system for the corresponding corr that links the ServiceNow Incident to the XiO Cloud email.

Close Incident XiO
true
email.read
(function runAction( /*GlideRecord*/cur...
Incident [incident]
When to Run Tab
Select the When to Run tab to view and configure conditions that will trigger the Close Incident XiO inbound action to run. Sending any email to the ServiceNow instance with a subject that con "Closed incident with CorrelationID#" triggers the inbound action to run.
NOTE: Do not change the subject condition, as it may cause your system to incorrectly triage your XiO Cloud incidents and therefore not trigger the rule.

Actions Tab
Select the Actions tab to view and configure action scripts for the Close Incident XiO inbound action. The provided script parses through an XiO Cloud alert email and associates its correlation ID (the email subject) with the correlated incident and its matching ID.
Each section of the script is described on the following page.
//Logic to parse Correlation ID
var rsubject = email.subject;
var keyword = "CorrelationID";
var key = rsubject.indexOf(keyword); //Assuming this text would never change if (key > 0) {
    var myID = rsubject.substring(50);
    gs.log(myID);
}
The first snippet of code under the "Logic to parse Correlation ID" section is used to parse correlation ID from the email subject and save it as a variable called "Keyword's then run to check if the Keyword "Correlation ID#" exists. If this keyword exists, the index of the parsed from the email subject and saved as the variable "MyID." A log function, gs.log(myID), is also provided.
var myTask = new GlideRecord('incident');
myTask.addQuery("correlation_id", myID.toString());
myTask.query();
if (myTask.next()) {
    myTask.incident_state = IncidentState.CLOSED;
    gs.log('Task Completed');
    myTask.update();
} else {
    // No match found so log an error
    gs.info('No Match found');
}
The second snippet of code under the "Logic to parse Correlation ID" section takes the saved ID (MyID) and uses it in a new GlideRecord to find any existing incidents with a matching 1. Once it is queried using MyTask.query(); the system searches your instance for any incidents that have a Correlation ID matching the variable saved from the Close Incident XiO email. Once a match is found, the system will set the Incident State to Closed. If no updated occurs, it will log "No Match your system logs.
NOTE: Do not modify the close incident script, as any modifications to it may jeopardize the functionality of this script.
Close ServiceNow Incidents in XiO Cloud
When a ServiceNow incident is closed, the corresponding alert is not automatically resolved in XiO Cloud. In order for a closed incident to resolve the corresponding alert in XiO Cloud, a second connection must be established between ServiceNow and XiO Cloud via REST API calls to the following endpoint:
https://api.crestron.io/api/v2/servicenowcallback/ServicenowCallBack
The REST API call is configured in ServiceNow as described in the following sections.
Add a Subscription Key to ServiceNow
A subscription key must be added to your ServiceNow instance to establish a connection between ServiceNow and XiO Cloud.
To add the required subscription key:
- Log in to your ServiceNow instance.
- Select My Profile from the right-hand navigation menu.
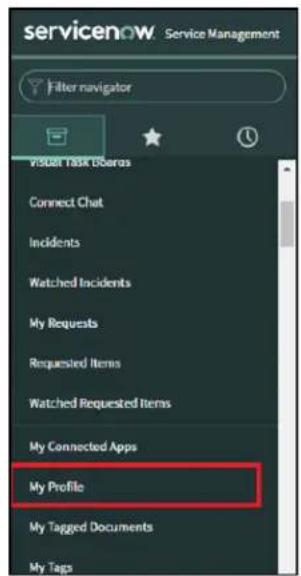
- Using the hamburger menu in the top-left corner, navigate to Configure > Form Layout.
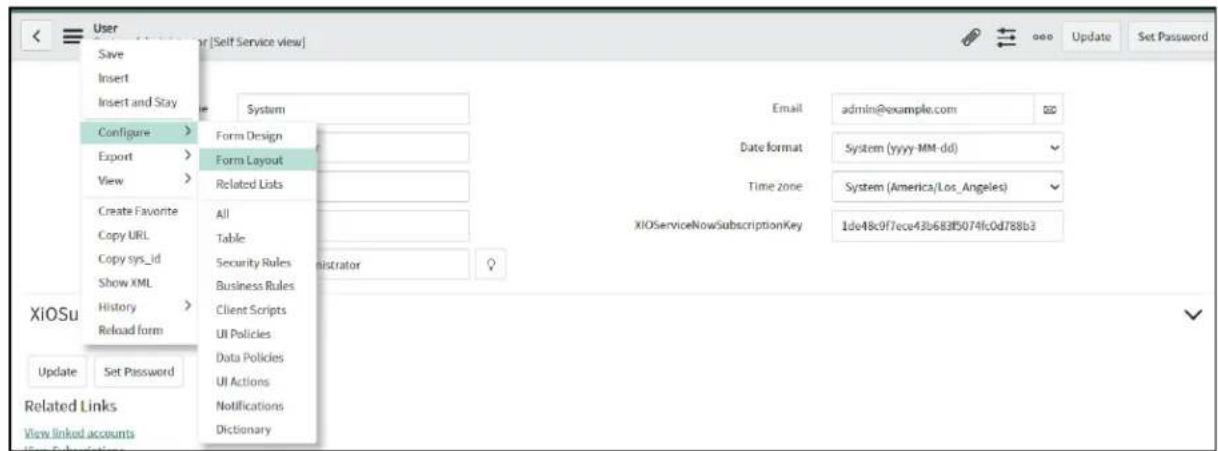
The Configuring User form page is displayed.
![Configuring User form Available Active Avatar Building [*] Calendar integration City Class Company [*] Cost center [*] Country code Created Created by Default perspective [*] Department [*] Domain [*] Domain Path Employee number Enable Multifactor Authentication Selected First name Last name Business phone Mobile phone Title: {- split -} Email Notification Date format Time zone XIOServiceNowSubscriptionKey Cancel Save Form view and section View name Self Service Section User XIOSubscriptionkey New... Create new field Name XIOServiceNowSubscriptionKey Type String Field length Medium (100) Add](/content/2026/05/883356/images/af31874366966f5bfffad8ced049b6b59d3fd14dc39abf33ffe87b82080926b7.jpg)
-
Enter the following information into the Create new field section.
-
Name: Enter "XIOServiceNowSubscriptionKey" into the text field.
- Type: Select String from the drop-down menu.
-
Field Length: Select Medium (100) from the drop-down menu.
-
Select Add. The XiOServiceNowSubscriptionKey field is added to the Available fields list.
- Select XiOServiceNowSubscriptionKey in the Available fields list, and then select the right arrow (>) button to move it into the Selected fields list.
- Select Save. The XiOServiceNowSubscriptionKey field is now shown in the User profile page, and the subscription key is populated automatically as long as ServiceNow is turned on in the XiO Cloud tenant.
NOTE: If ServiceNow is already turned on in the XiO Cloud tenant and the subscription not populating after completing the steps above, turn off the Enable ServiceNow toggle XiO Cloud and then turn it back on. For more information, refer to Turn on ServiceNow XiO Cloud on page 183.
![User System Administrator [Self Service view] First name: System Last name: Administrator Business phone: Mobile phone: Title: System Administrator Email: admin@example.com Date format: System (yyyy-MM-dd) Time zone: System (America/Los_Angeles) XIOServiceNowSubscriptionKey: 1dw48c9f7ecw43b683f5074fc0d788b3](/content/2026/05/883356/images/5da27784f80eac6d4b5ef0c508e1884909d6f24d41a24b3d89fa0fa2546c4ed1.jpg)
Inbound Actions Setup
An new inbound action must be created and configured that includes a script for updating the subscription key within the ServiceNow user profile page.
To create and configure the required inbound action:
- Select Inbound Actions from the System Policy section of the right-hand navigation menu to display all inbound actions for the ServiceNow instance.
![servicenow Service Management Inbound Email Actions Now Search Name Search System Policy Email Inbound Actions All Name Active Event name Script Target table Updated Execution Order Search Search Search Search Search Search Search ① Names Domain Monitoring true email.read (function runAction) / "GlideRecord" / C/C... Domain Monitoring [applet&_human_result_set] 2020-08-26 15:00:14 100 ② Close Incident XO true email.read (function runAction) / "Udaherant" / C/C... Incident [incident] 2022-08-16 08:06:56 100 ③ Create incident false email.read // Note: current opened_by is already se... Incident [incident] 2022-08-16 07:07:03 100 ④ Create incident (Forwarded) true email.read // Note: current opened_by is already se... Incident [incident] 2023-07-15 02:55:06 100 ⑤ Create Live Feed Like Reply true email.read var (Rust = new LiveFeed(Rust); var it... Message Liked by [live_message_like] 2014-11-21 09:36:00 100 ⑥ Create Live Feed Ready true email.read var (Rust = new LiveFeed(Rust); var rep... Live Feed Message [live_message] 2014-11-21 09:38:59 100 ⑦ Create RIO Incident true email.read (function runAction) / "GlideRecord" / Incident Incident 2022-08-16 08:06:14 100](/content/2026/05/883356/images/fed6e863389b4aa653f4da1938e12350f03294f0e7b86e5c7f8309fa211ab245.jpg)
- Select New from the top of the inbound actions list. A page for configuring a new inbound action is displayed.
![Inbound Email Actions UpdateXIOSubscriptionKey Name UpdateXIOSubscriptionKey Application Global Target table User [sys_user] Active Action type Record Action Stop processing When to run Actions Description Only emails of the selected Type will trigger this inbound action. Only emails from senders with the Required roles will trigger this inbound action. Type New Required roles Order determines when to run relative to other inbound actions. The Inbound action with the lowest order runs first. Only emails from this sender will trigger this inbound action. Execution Order 100 From All of the following conditions must be true, to trigger this inbound action. Conditions Add Filter Condition Add "OR" Clause Subject contains XIO SubscriptionKey# AND OR ✗ Condition Update Delete](/content/2026/05/883356/images/aa9f747a3e976603b10d9af848534a7d3e9bbc451e73ee16653abf068fde5aa3.jpg)
-
Configure the following information for the inbound action:
-
Name: Enter "UpdateXiOSubscriptionKey" into the text field.
-
Target table: Select User [sys_user] from the drop-down menu.
• Action type: Select Record Action from the drop-down menu. -
Select the When to run tab (if is not already selected).
- Create the following new condition: Subject / contains / XIO SubscriptionKey# / AND / OR.
- Select the Actions tab.
- Enter the script located within the Processing Script on page 196 topic into the Script text box.
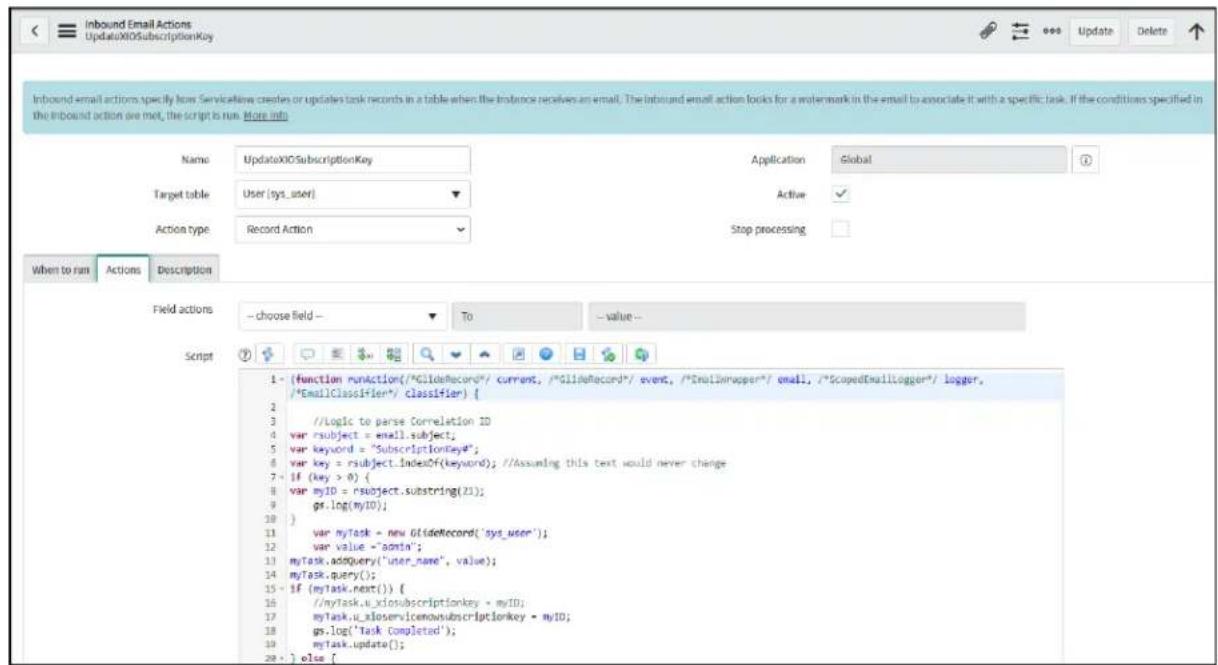
- Select Submit to save the new inbound action. The UpdateXiOSubscriptionKey inbound action is added to the ServiceNow instance.
REST Message Setup
A REST message must be created and configured that invokes the XiO Cloud service when a changes an incident status to Closed from the ServiceNow portal.
To create and configure the required REST message:
- Select Outbound > REST Message from the System Web Services section of the right-hand navigation menu to display all REST messages for the ServiceNow instance.
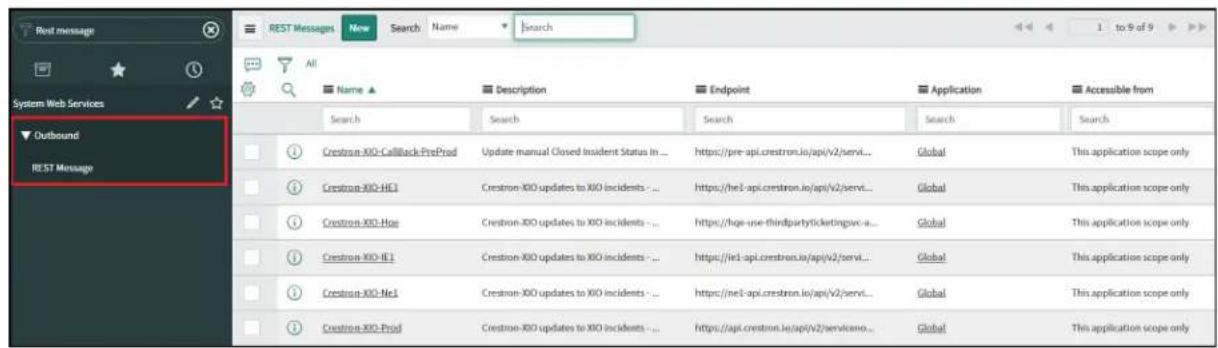
- Select New from the top of the REST messages list. A page for configuring a new REST is displayed.
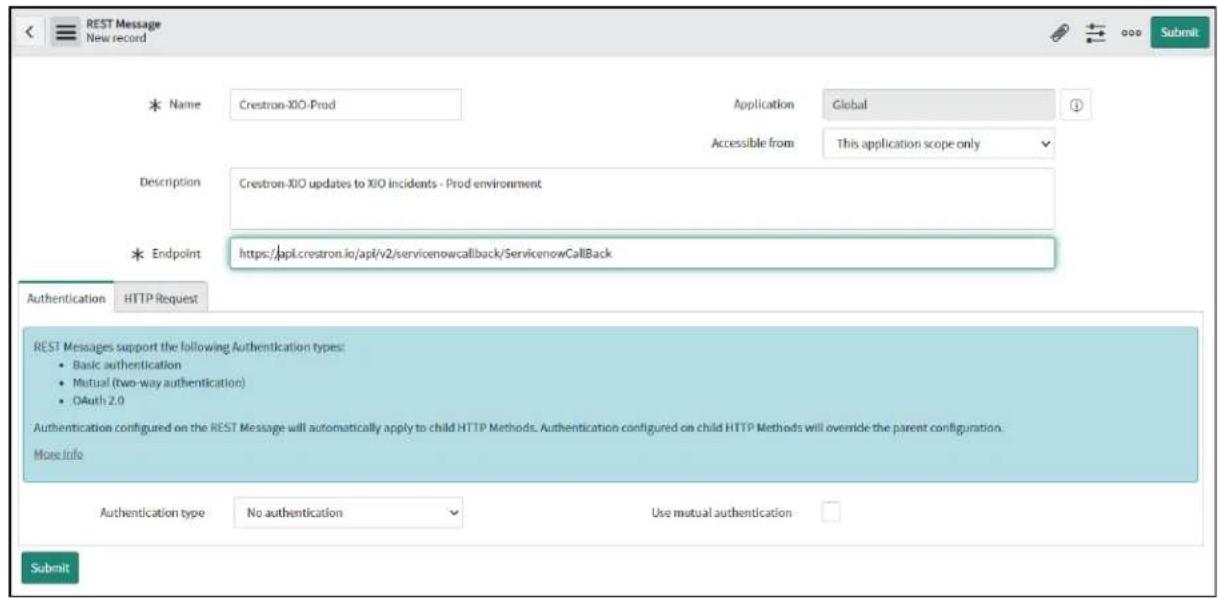
- Create the new REST message by entering the following information in the provided fields as shown:
• Name: Crestron-XIO-Prod
• Description: Crestron-XIO updates to XIO incidents - prod environment
- Endpoint: https://api.crestron.io/api/v2/servicenowcallback/ServicenowCallBack
-
Select Submit to save the new REST message. The Crestron-XIO-Prod REST message is added to the ServiceNow instance.
-
Reopen the Crestron-XIO-Prod REST message.
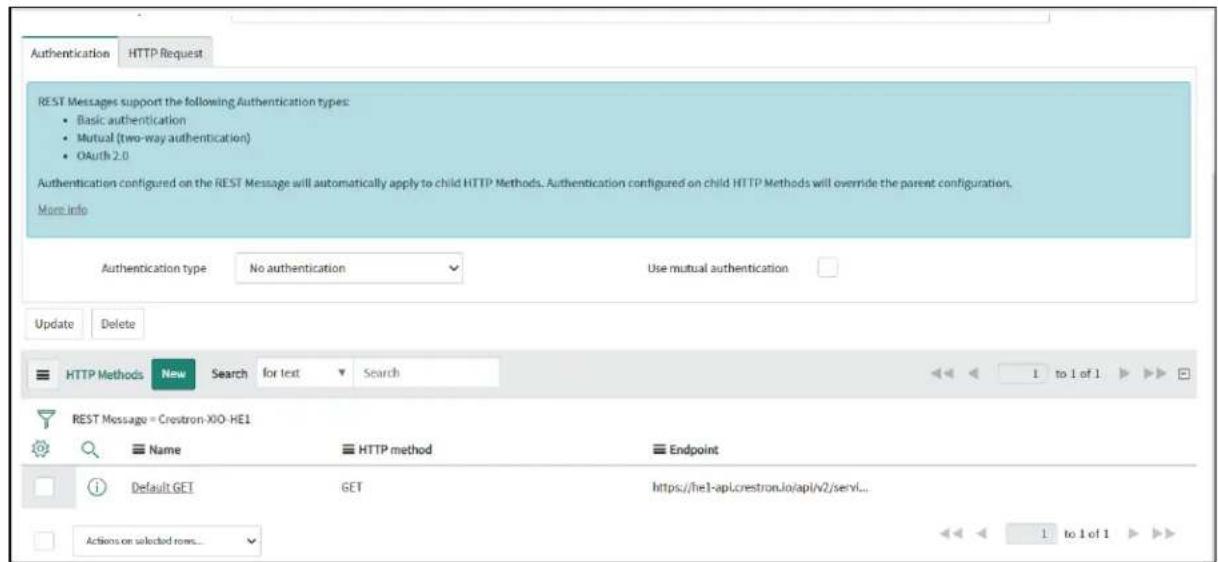
- Under the HTTP Methods section, select the Default Get method. A page for editing the REST message method is displayed.
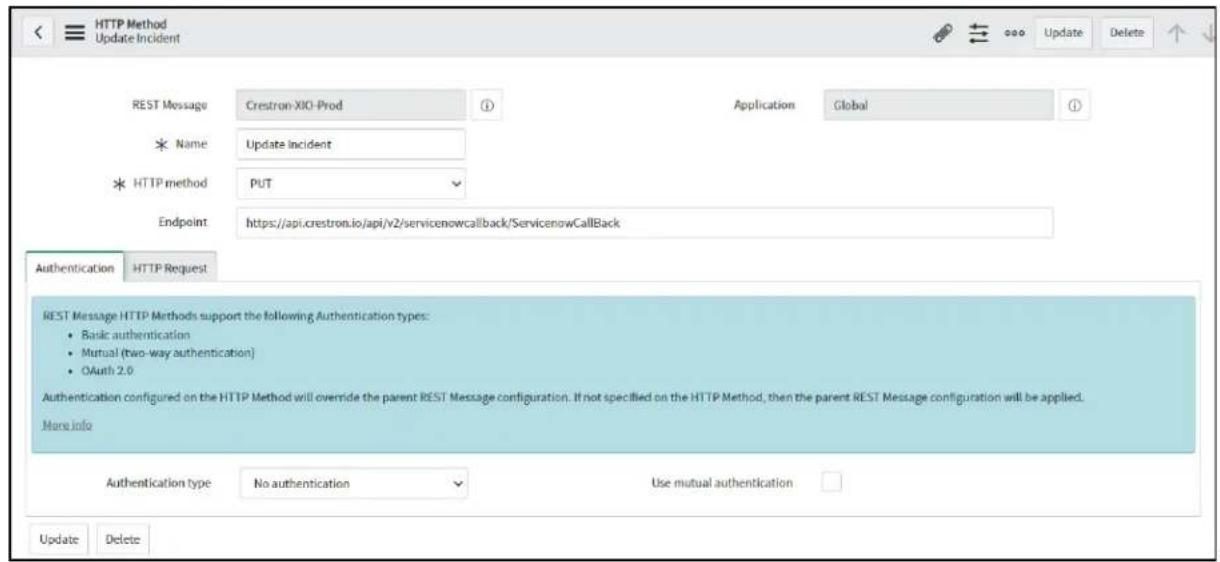
- Enter the following information for the HTTP method in the provided fields:
• Name: Update Incident
- HTTP Method: PUT
- Endpoint: https://api.crestron.io/api/v2/servicenowcallback/ServicenowCallBack
- Authentication type: No authentication
- Select the HTTP Request tab.
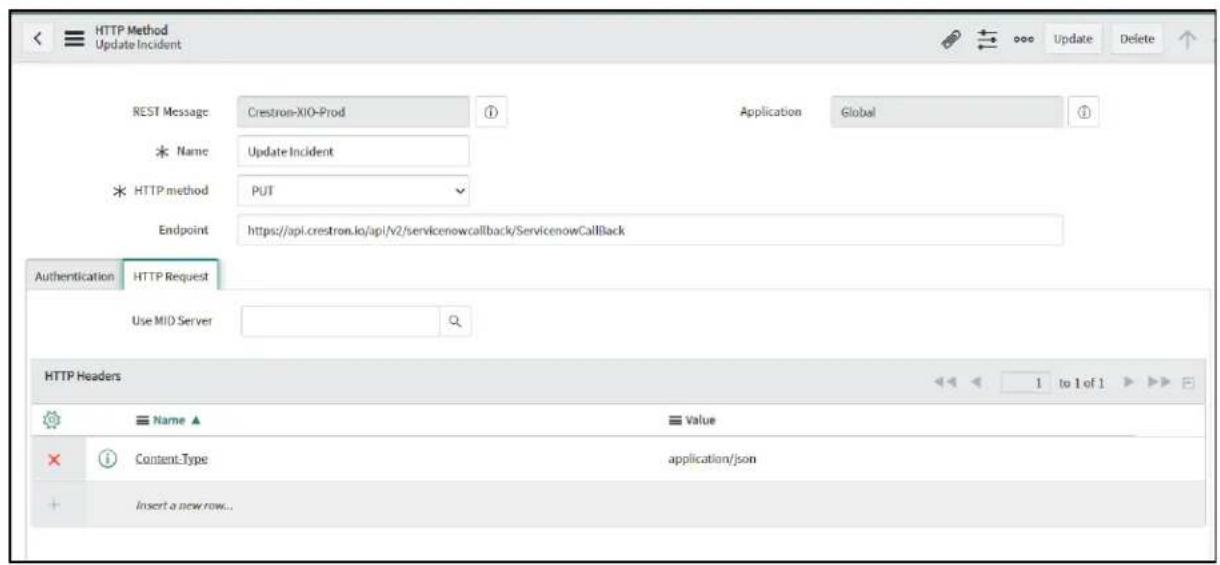
- Add the following new HTTP header:
• Name: Content-Type
• Value: application/json
- Select Update to save the REST message.
Business Rule Setup
A business rule must be created and configured that includes a script for calling the RESTmes when an incident status is changed to Closed within the Incident Table in ServiceNow.
- Select Business Rules from the System Definition section of the right-hand navigation menu to display all system definition business rules for the ServiceNow instance.
![Business Rule Search Name Search All Name Active Table Application Order Updated Search Search Search Search Display: Fulfiller UI and Queues true Chat Setup [sys_cs_live_agent_setup] Global 100 2020-03-23 00:00:32 GTD Tour Name and Page Name Validation true Guided Tour [sys_embedded_tour_guide] Global 100 2020-07-27 22:40:67 80-20 split for the usage field true ML Labeled Data [ml_labelled_data] Global 100 2021-10-13 09:48:24 Able to disable parameterized testing true Test [sys_af_test] Global 100 2018-06-29 10:33:57 Abort CMDB Policy Type deletion true CMDB Policy Type [cmdb_policy_type] Global 100 2021-10-28 18:24:30 Abort actions if no license type true Software Model [cmdb_software_product_model] Global 100 2012-04-03 19:35:58 Abort Activation/Deactivation of tools true Topic [topic] Global 100 2020-05-26 16:58:14 Abort adding more than one taxonomy true Portal Taxonomy [m2m_spt_portal_taxonomy] Global 100 2021-03-29 01:40:35](/content/2026/05/883356/images/fc37a53831f7499de088e995fa4b40e6f2bd9939ae137fdd8b8f2a355a13137d.jpg)
- Select New from the top of the business rules list. A page for configuring a new business rule is displayed.
![Business Rule Update XIO Prod upon Incident Closure A business rule is a server side script that runs when a record is displayed, inserted, deleted, or when a table is opened. Use business rules to automatically change values in form fields when the specified conditions are met. More info Name: Update XIO Prod upon Incident Closure Table: Incident [incident] Application: Global Active Advanced When to run: Actions Advanced Specify whether the business rule should run on Insert or Update. Use Filter Conditions to specify under which conditions the business rule should run. When: after Insert: Order: 100 Update Delete Query Filter Conditions: Add Filter Condition Add "OR" Clause State changes to Closed AND OR ✗ Role conditions / Update Delete](/content/2026/05/883356/images/f2ba7d349270aee3fb5b225e38987554f9cabcfa44431d4dab929db9e5939af6.jpg)
-
Enter the following information for the business rule in the provided fields:
-
Name: Update XIO Prod upon Incident Closure
• Table: Incident [Incident]
• Application: Global
• Active: Fill the check box -
Advanced: Fill the check box
-
Populate the business rule data by selecting the Advanced tab and then adding the XML located within the Business Rule Script on page 197 topic.
-
Select Submit to save the new business rule.
Test the Connection
To test that the incident closing behavior works as expected, create a new incident in Service then toggle the state from New to a different state and then back to New. A request for a new correlation ID will be generated. Then, update the incident with the new correlation ID and ma incident as Closed. The incident should also be closed in XiO Cloud following this test.
Processing Script
The following script is used when configuring an inbound action to update the XiO Cloud subscale key within the ServiceNow user profile page. Refer to Inbound Actions Setup on page 191 for more information.
(function_runAction(/*GlideRecord*/ current, /*GlideRecord*/ event, /*EmailWrapper*/ email, /*ScopedEmailLogger*/ logger, /*EmailClassifier*/ classifier) {
    //Logic to parse Correlation ID
var rsubject = email.subject;
var keyword = "SubscriptionKey";
var key = rsubject.indexOf(keyword); //Assuming this text would never change
if (key > 0) {
var myID = rsubject.substring(21);
gs.log(myID);
}
var myTask = new GlideRecord('sys_user');
var value = "admin";
myTask.addQuery("user_name", value);
myTask.query();
if (myTask.next()) {
//myTask.u_xiosubscriptionkey = myID;
myTask.u_xioservicenowsubscriptionkey = myID;
gs.log('Task Completed');
myTask.update();
} else {
// No match found so log an error
gs.info('No Match found');
}
})(current, event, email, logger, classifier);
Business Rule Script
The following script is used when creating a new business rule to set the incident closing be to Business Rule Setup on page 195 for more information.
(function executeRule(current, previous /*null when async*) {

    var myTask = new GlideRecord('sys_user');
    var value = "admin";

myTask.addQuery("user_name", value);
myTask.query();
if (myTask.next()) {
    var XiOSubscriptionKey = myTask.getValue('u_xioservicenowsubscriptionkey');
    gs.log('Task Completed');
} else {
    // No match found so log an error
    gs.info('No Match found');
}

try {
    if (XiOSubscriptionKey) {
    var incObj = {
    sys_id: current.getUniqueValue(),
    state: current.getDisplayValue('state'),
    short_description: current.getValue('short_description'),
    number: current.getDisplayValue('number'),
    assignment_group: current.getDisplayValue('assignment_group'),
    assigned_to: current.getDisplayValue('assigned_to'),
    correlation_id: current.getValue('correlation_id'),
    XiO Subscription_key: XiO SubscriptionKey,
    };

    try {
    var xioRequest = new sn_ws.RESTMessageV2('Crestron-XIO-Prod', 'Update Incident');
//Specific name of the Rest Endpoint
    xioRequest.setRequestBody(JSON.stringify(incObj));
    xioRequest.setRequestHeader("XiO-subscription-key", XiOSubscriptionKey);
    var response = xioRequest.execute();
    var responseBody = response BrasBody();
    var httpStatus = response whaleCode();
    gs.addInfoMessage(responseBody); //Remove upon conclusion of testing
    } catch (ex) {
    var message = ex.message;
    gs.error("Unexpected error encountered during XIO Update Incident. " + message);
    }
    }
    } catch (e) {
    gs.error("Unexpected error encountered during XIO Token Request. " + e.message);
    }
}) (current, previous);
Additional Resources
The following resources are provided to assist users with implementing this functionality.
• ServiceNow Paris Platform Documentation
• ServiceNow Development Documentation
• ServiceNow Inbound Action Documentation
• ServiceNow Community Form
- JavaScript Documentation
Appendix B: User Access Matr
The following table shows the tasks that can be performed for different user access levels.
| Task | Global Admin | Standard User | Standard User (Admin) | Standard User (Tech) | Standard User (Viewer) | Standard User (Hidden) | |
| View tree | devices in device | √ | Use groups | √ | √ | √ | ✕ |
| View | Status tab Use groups | √ | √ | √ | ✕ | ||
| View | Settings tab Use groups | √ | √ | √ | ✕ | ||
| View | Licenses tab Use groups | √ | √ | √ | ✕ | ||
| View | Activity Log tab Use groups | √ | √ | √ | ✕ | ||
| View | Dashboard tab Use groups | √ | √ | √ | ✕ | ||
| View Actions tab | Scheduled | √ | Use groups | √ | √ | √ | ✕ |
| View | File Management tab | √ | Use groups | √ | √ | √ | ✕ |
| View | Remote Control tab | √ | Use groups | √ | √ | ✕ | ✕ |
| Change device or group settings | √ | Use groups | √ | √ | ✕ | ✕ | |
| Add or remove licenses on devices | √ | Use groups | √ | √ | ✕ | ✕ | |
| Create scheduled actions | √ | Use groups | √ | √ | ✕ | ✕ | |
| Control devices remotely | √ | Use groups | √ | √ | ✕ | ✕ | |
| Load a file to a device slot | √ | Use groups | √ | √ | ✕ | ✕ | |
| Start/stop or register/unregister a device program | √ | Use groups | √ | √ | ✕ | ✕ | |
| Update firmware Use groups | √ | √ | ✕ | ✕ | |||
| Reboot devices Use groups | √ | √ | ✕ | ✕ | |||
| Clear alerts Use groups | √ | √ | ✕ | ✕ | |||
| Task | Global Admin | Standard User | Standard User (Admin) | Standard User (Tech) | Standard User (Viewer) | Standard User (Hidden) | |
| Add devices to a group | √ | Use groups | √ | √ | ✕ | ✕ | |
| Rename a group Use groups | √ | √ | ✕ | ✕ | |||
| Delete a group Use groups | √ | √ | ✕ | ✕ | |||
| Add or modify program and project files | √ | Use groups | √ | √ | ✕ | ✕ | |
| Change user access to a group | √ | ✕ | N/A N/A N/A N/A | ||||
| Add subgroups Use groups | √ | ✕ | ✕ | ✕ | |||
| Add top-level groups N/A N/A N/A N/A | |||||||
| Claim devices N/A N/A N/A N/A | |||||||
| Download inventory N/A N/A N/A N/A | |||||||
| Add alerts N/A N/A N/A N/A | |||||||
| Enable remote control functionality | √ | ✕ | N/A N/A N/A N/A | ||||
| Invite new users N/A N/A N/A N/A | |||||||
| Delete users N/A N/A N/A N/A | |||||||
| Change user roles N/A N/A N/A N/A | |||||||
| Change user profile information | √(any user) | √(for self) | N/A N/A N/A N/A | ||||
| Change alerts received by a user | √(any user) | √(for self) | N/A N/A N/A N/A | ||||
| View cloud activity logs | √ | Use groups | √ | √ | √ | ✕ | |
| Request device logs Use groups | √ | √ | ✕ | ✕ | |||
| View downloaded device logs | √ | Use groups | √ | √ | √ | ✕ | |
| Modify alerts | √ | ✕ | N/A N/A N/A N/A | ||||
| Modify account settings | √ | ✕ | N/A N/A N/A N/A | ||||
| Modify services (room licensing) | √ | ✕ | N/A N/A N/A N/A | ||||
| Modify support providers | √ | ✕ | N/A N/A N/A N/A | ||||
| Task | Global Admin | Standard User | Standard User (Admin) | Standard User (Tech) | Standard User (Viewer) | Standard User (Hidden) | |||
| Manage files (read | ✓ | ✗ only) | N/A | N/A | N/A | N/A | |||
| Manage EDIDs (read | ✓ | ✗ only) | N/A | N/A | N/A | N/A | |||
| Manage images (read | ✓ | ✗ only) | N/A | N/A | N/A | N/A | |||
| Add users N/A N/A N/A√N/A | ✗ | ||||||||
| Delete users N/A N/A N/A N/A | ✗ | ||||||||
| Reset user account password | √(any user) | √(for self) | N/A | N/A | N/A | N/A | |||
| Power on/off (displays) | ✓ | Use groups | ✓ | ✓ | ✓ | ✗ | |||
| Power on/off (PDUs) Use groups | ✓ | ✓ | ✓ | ✗ | |||||
| Source routing Use groups | ✓ | ✓ | ✓ | ✗ | |||||

- Contents
- Introduction ...1
- How to Order...2
- Log in to the Service 6
- Navigate the Service 9
- Build the Environment....11
- Licensed Features
- Manage Devices
- Manage Users...85
- Account Dashboard 92
- Historical Reports 105
- What's New Message 109
- Progress Tracker 110
- Alerts 111
- File Library 118
- Load a Program to a Control System 131
- Remote Control 140
- Enable API Access 146
- Manage Support Providers 148
- FAQs 152
- Troubleshooting 157
- Works with XiO Cloud 159
- Control ...169
- Lighting and Environmental...171
- Power 172
- Scheduling ..173.
- Sensors 174
- Third-Party Devices 175
- Touch Screens 177
- Video 179
- Appendix A: Configure ServiceNow for XiO Cloud Alerts 182
- Client Prerequisites 182
- Create XiO Incident Script 184
- Close Incident XiO Script 187
- Close ServiceNow Incidents in XiO Cloud 188
- Introduction
- Quick Deployment
- Remote Management
- Instant Monitoring
- Confident Evolution
- How to Order
- Select Room Licenses
- Purchasing Instructions
- New XiO Cloud Accounts
- Existing XiO Cloud Accounts
- Log in to the Service
- Navigate the Service
- Build the Environment
- Create the Building Address Book
- Manage Buildings
- Create a New Building
- Edit a Building
- Delete a Building
- Manage Space Properties
- Create the Group Tree
- Heroes Team
- Hussein
- Manage Groups
- Add a Top-Level Group
- Add a Subgroup
- Hussein Master
- Rename a Group
- Delete a Group
- Manage Rooms
- Add a New Room
- Edit a Room
- Rename a Room
- Delete a Room
- View Device Settings
- Associate Rooms with a Building
- Manage Desks
- Import Desks and Devices
- Add a New Desk
- Edit a Desk
- Rename a Desk
- Delete a Desk
- Associate a Desk Scheduling Device with a Desk
- Claim Devices
- Claim a Single Device
- NOTES:
- Claim Multiple Devices
- Unclaim Devices
- Add Devices to Rooms or Desks
- Cut and Paste
- Download Inventory
- Apply Multiple Licenses
- Update Multiple Licenses
- Filter and Manage Licenses
- Heroes Team > AM3K Room
- Rename a Device
- View Device Status
- View Status for a Single Device
- View Status for a Group of Devices
- Configure Device Settings
- Configure Settings for a Single Device
- Configure Settings for a Group of Devices
- Prevent Unnecessary Restarts
- Manage Licenses
- Manage Licenses for a Single Device
- Manage Licenses for a Group or Room
- Scheduled Actions
- Create a Scheduled Action
- Delete a Scheduled Action
- Dashboard
- Activity Log
- Device Metadata
- Update Firmware
- Restart Devices
- Refresh Devices
- Manage Users
- Add a New User
- Edit User Information
- Manage User Access
- Delete a User
- Download User Activity Audit Log
- Single Sign-On
- Account Dashboard
- Device Status
- Occupied Rooms
- Active Alerts - last 48 hours
- Firmware Releases
- Room Utilization
- Room Usage Over Time
- Uptime By Device
- Device Offline Incidents
- Room Services Expiration
- Historical Reports
- Hussain
- What's New Message
- Progress Tracker
- Alerts
- Configure Contact Information
- Configure Alert Levels
- Manage Alerts
- Add a New Alert
- Delete an Alert
- View Alerts
- File Library
- Manage Files
- Add a Program or Project
- Edit a Program or Project
- EDIDs
- Add a Custom EDID File
- Delete a Custom EDID File
- Manage Images
- Add an Image File
- Delete an Image File
- Load a Program to a Contro System
- Upload a New Program
- Manage Programs
- Edit a Program
- Select Upload.
- Delete a Program
- Load a Program to Device
- Manage a Loaded Program
- Edit a Loaded Program
- Start/Stop a Loaded Program
- Unregister a Loaded Program
- Remote Control
- Enable Remote Control
- Request Remote Control Access
- Initiate a Request
- Accept or Decline the Request
- End a Remote Control Session
- View a User Interface
- Control a User Interface
- Privacy Considerations
- Enable API Access
- Manage Support Providers
- Add a Support Provider
- FAQs
- What is the XiO Cloud service?
- What devices are supported by the XiO Cloud service?
- What minimum device firmware versions are required to connect to the XiO Cloud service?
- What XiO Cloud features are supported by Crestron devices?
- Which takes precedence: local settings made on the device, or settings made within the XiO Clo service?
- What countries currently support SMS alerts for the XiO Cloud service?
- Can I turn off automatic firmware updates in XiO Cloud?
- Troubleshooting
- Issue Solution(s)
- Works with XiO Cloud
- Audio
- Amplifiers
- Digital Signal Processors
- Multiroom Audio Accessories
- Conferencing
- AirMedia Wireless Presentation and Conferencing
- Crestron Flex Solutions
- All-In-One Bars
- Crestron Flex Kits
- Crestron Flex Phones
- Crestron Flex Hubs and Pods
- Connectivity
- FlipTop Cable Compartments
- USB Switchers
- Control
- 3-Series Control Systems
- 4-Series Control Systems
- Crestron Virtual Control Server-Based Control Systems
- Media Presentation Controllers
- Smart Display Controllers
- Lighting and Environmental
- Lighting Control Systems
- Power
- Power Conditioners
- Scheduling
- Room Scheduling Touch Screens
- Desk Scheduling Touch Screens
- Sensors
- Occupancy Sensors
- Third-Party Devices
- Crestron Connected Devices
- Crestron Driver Devices
- Third-Party Device Monitoring Gateway Software
- Touch Screens
- Tabletop Touch Screens
- Touch Screen Control Systems
- Wall Mount Touch Screens
- Wireless Touch Screens
- Video
- Digital Graphics Engines
- DigitalMedia Solutions
- DigitalMedia Presentation Systems
- DigitalMedia Switchers
- DM NVX AV-over-IP Solutions
- HDMI Solutions
- HDMI Extenders
- HDMI Switchers
- Appendix A: Configure ServiceNow for XiO Cloud Alerts
- Client Prerequisites
- Turn on ServiceNow Within XiO Cloud
- Create XiO Incident Script
- When to Run Tab
- Actions Tab
- Close Incident XiO Script
- Close ServiceNow Incidents in XiO Cloud
- Add a Subscription Key to ServiceNow
- Inbound Actions Setup
- REST Message Setup
- Business Rule Setup
- Display: Fulfiller UI and Queues true Chat Setup [sys_cs_live_agent_setup] Global 100 2020-03-23 00:00:32
- GTD Tour Name and Page Name Validation true Guided Tour [sys_embedded_tour_guide] Global 100 2020-07-27 22:40:67
- 80-20 split for the usage field true ML Labeled Data [ml_labelled_data] Global 100 2021-10-13 09:48:24
- Able to disable parameterized testing true Test [sys_af_test] Global 100 2018-06-29 10:33:57
- Abort CMDB Policy Type deletion true CMDB Policy Type [cmdb_policy_type] Global 100 2021-10-28 18:24:30
- Abort actions if no license type true Software Model [cmdb_software_product_model] Global 100 2012-04-03 19:35:58
- Abort Activation/Deactivation of tools true Topic [topic] Global 100 2020-05-26 16:58:14
- Abort adding more than one taxonomy true Portal Taxonomy [m2m_spt_portal_taxonomy] Global 100 2021-03-29 01:40:35
- Test the Connection
- Processing Script
- Business Rule Script
- Additional Resources
- Appendix B: User Access Matr
Brand : Crestron
Model : DSP-1280
Category : Processor