K-715 - Toy Steren - Free user manual and instructions
Find the device manual for free K-715 Steren in PDF.


| Brand | Steren |
| Model | K-715 |
| Product Type | Electronic Toy |
| Dimensions (approx.) | 20 × 15 × 5 cm |
| Weight (approx.) | 200 g |
| Power Source | 2 × AA batteries (not included) |
| Functions | Sound effects, lights, interactive buttons |
| Material | Plastic, electronic components |
| Safety Warnings | Contains small parts; not for children under 3 years |
| Cleaning | Wipe with a dry or slightly damp cloth; do not immerse |
| Repairability | Not user-serviceable; contact Steren support |
| Age Recommendation | 3 years and up |
| Certification | CE, RoHS compliant |
Frequently Asked Questions - K-715 Steren
User questions about K-715 Steren
0 question about this device. Answer the ones you know or ask your own.
Ask a new question about this device
Download the instructions for your Toy in PDF format for free! Find your manual K-715 - Steren and take your electronic device back in hand. On this page are published all the documents necessary for the use of your device. K-715 by Steren.
USER MANUAL K-715 Steren
natural_image
Technical diagram of a mechanical assembly with two views: top shows a vertical component, bottom shows a complex internal frame (no text or symbols)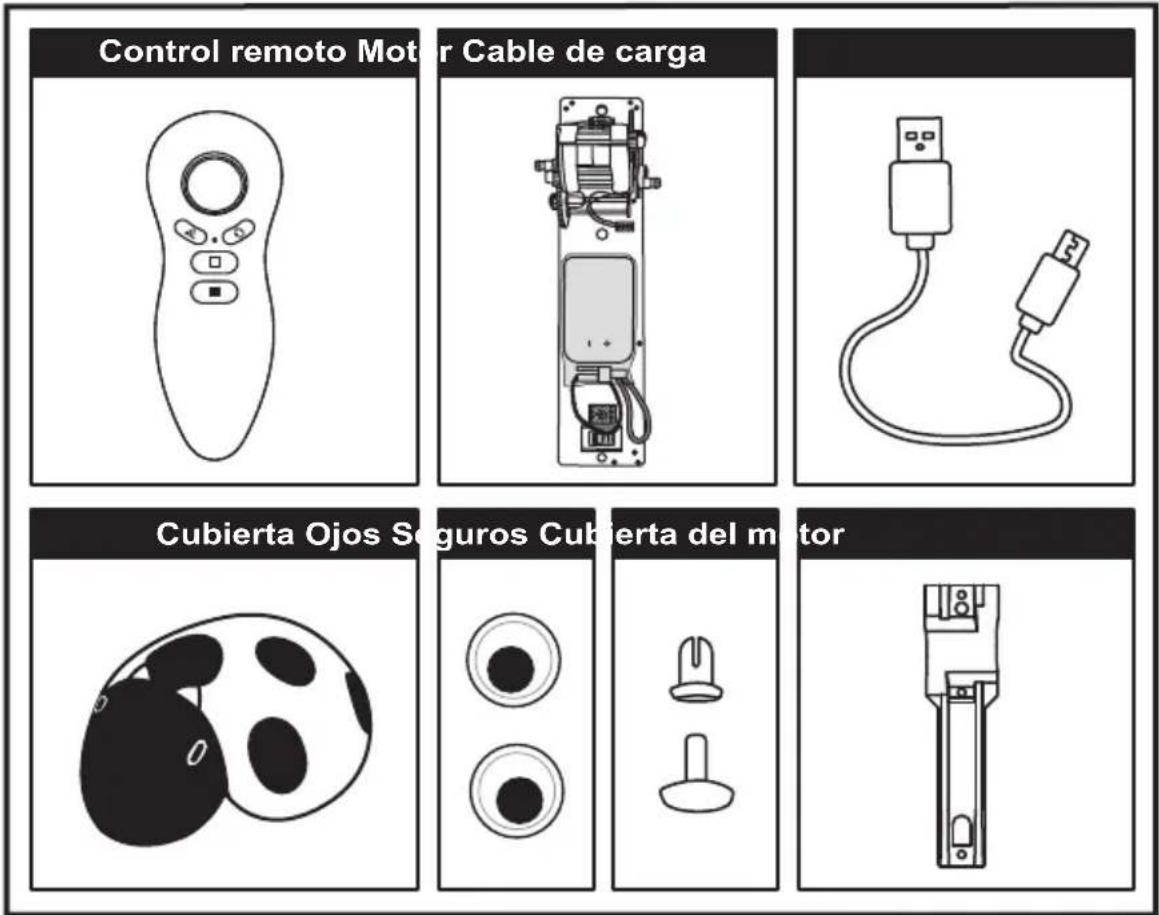
natural_image
Illustration of a kidney with an arrow indicating a specific anatomical feature (no text or labels)natural_image
Illustration of a cartoon ladybug with black and white spots, showing eye anatomy (no text or symbols)natural_image
Illustration of a cartoon robot with a large black-and-white spherical object and a downward arrow, next to a mechanical device (no text or symbols)COLOCAR LAS BATERÍAS DEL CONTROL REMOTO
natural_image
Diagram of a light bulb with internal components and directional arrows indicating rotation (no text or symbols)natural_image
Diagram of a light bulb with internal components and directional arrows indicating motion (no text or symbols)CARGAR LA BATERÍA DEL MOTOR
natural_image
Diagram showing a USB plug connected to a cable with an upward arrow indicating connection (no text or symbols)
natural_image
Line drawing of a hand pointing to a circular object with a square button (no text or symbols)
natural_image
Line drawing of a hand pointing at a button on a device (no text or symbols)
Read these manual to avoid any damage.
The instructions only are for reference about the product.
There may be differences due to update.
Please check our web site www.steren.com to obtain the latest version of the instruction manual.

CAUTIONS
- This product is NOT suitable for children under 3 years of age. Small parts can cause suffocation. It is recommended to use for children over 11 years.
- This device is not intended for use by people (including children), whose physical, sensory or mental abilities are different or reduced, or who lack experience or knowledge.
- Children should be supervised to ensure they do not use the device as a toy.
- Before using the product for the first time, charge the battery 100% .
- Do not use or store this product in places where there are leaks or splashes.
CONTENT

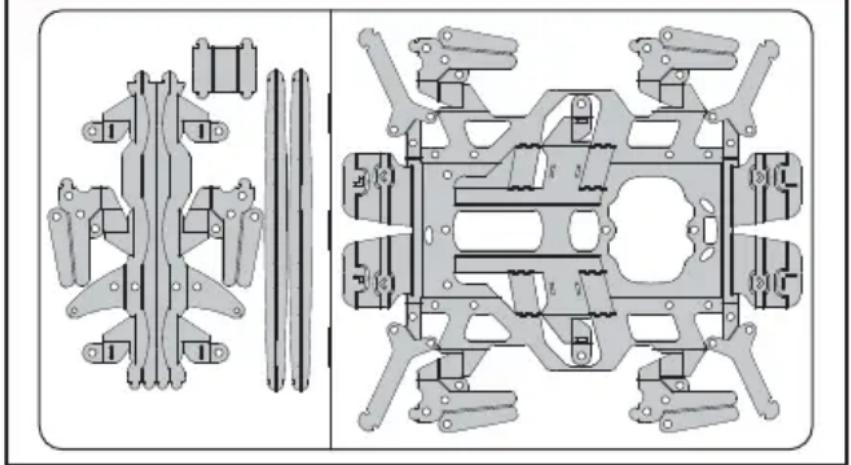
CAUTION: Detach the pieces carefully so as not to break them.
Chassis
natural_image
Technical diagram of a mechanical assembly with two views: top shows a vertical component, bottom shows a complex internal frame (no text or labels)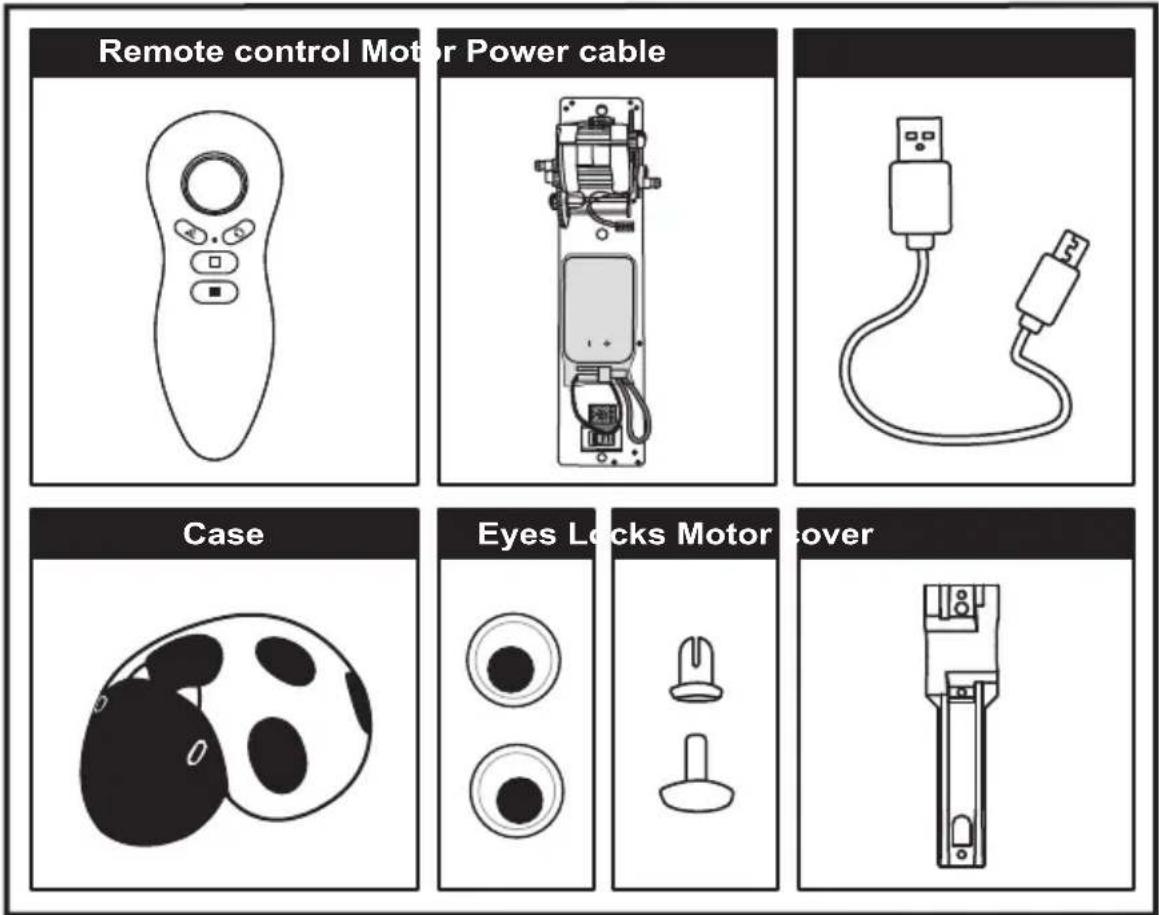
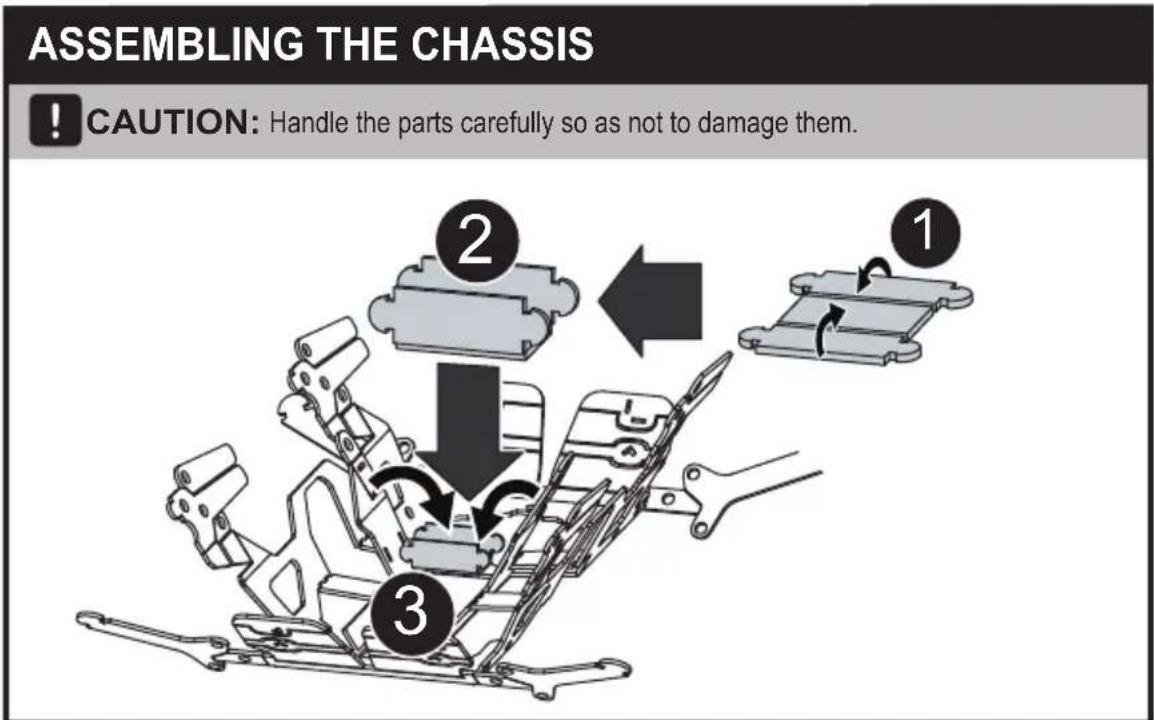
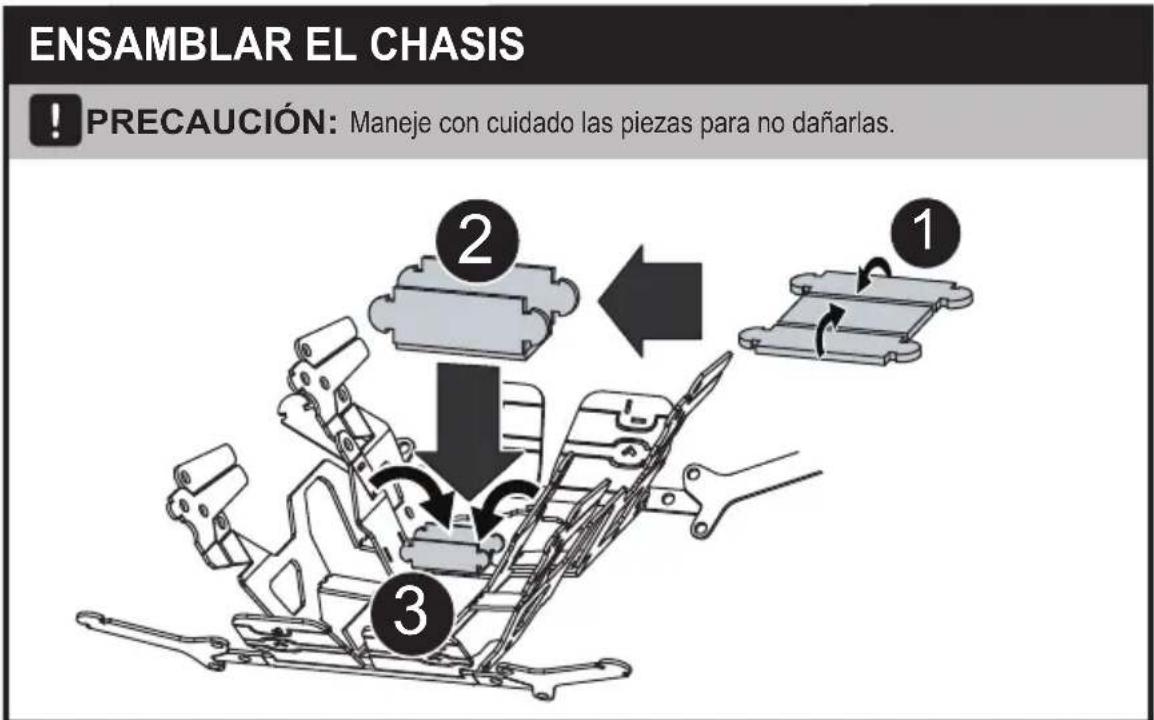
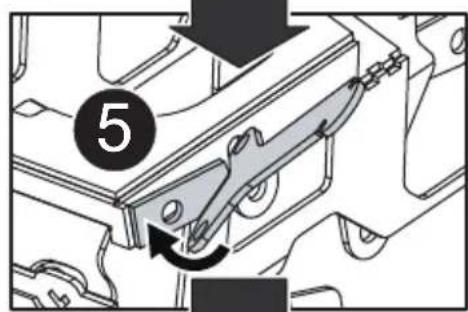
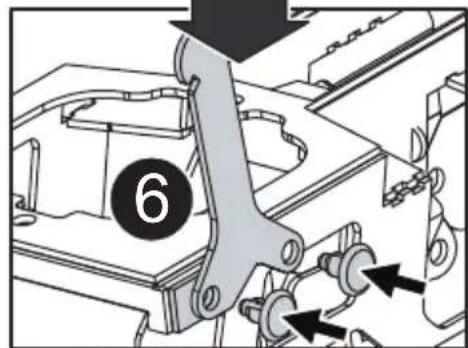
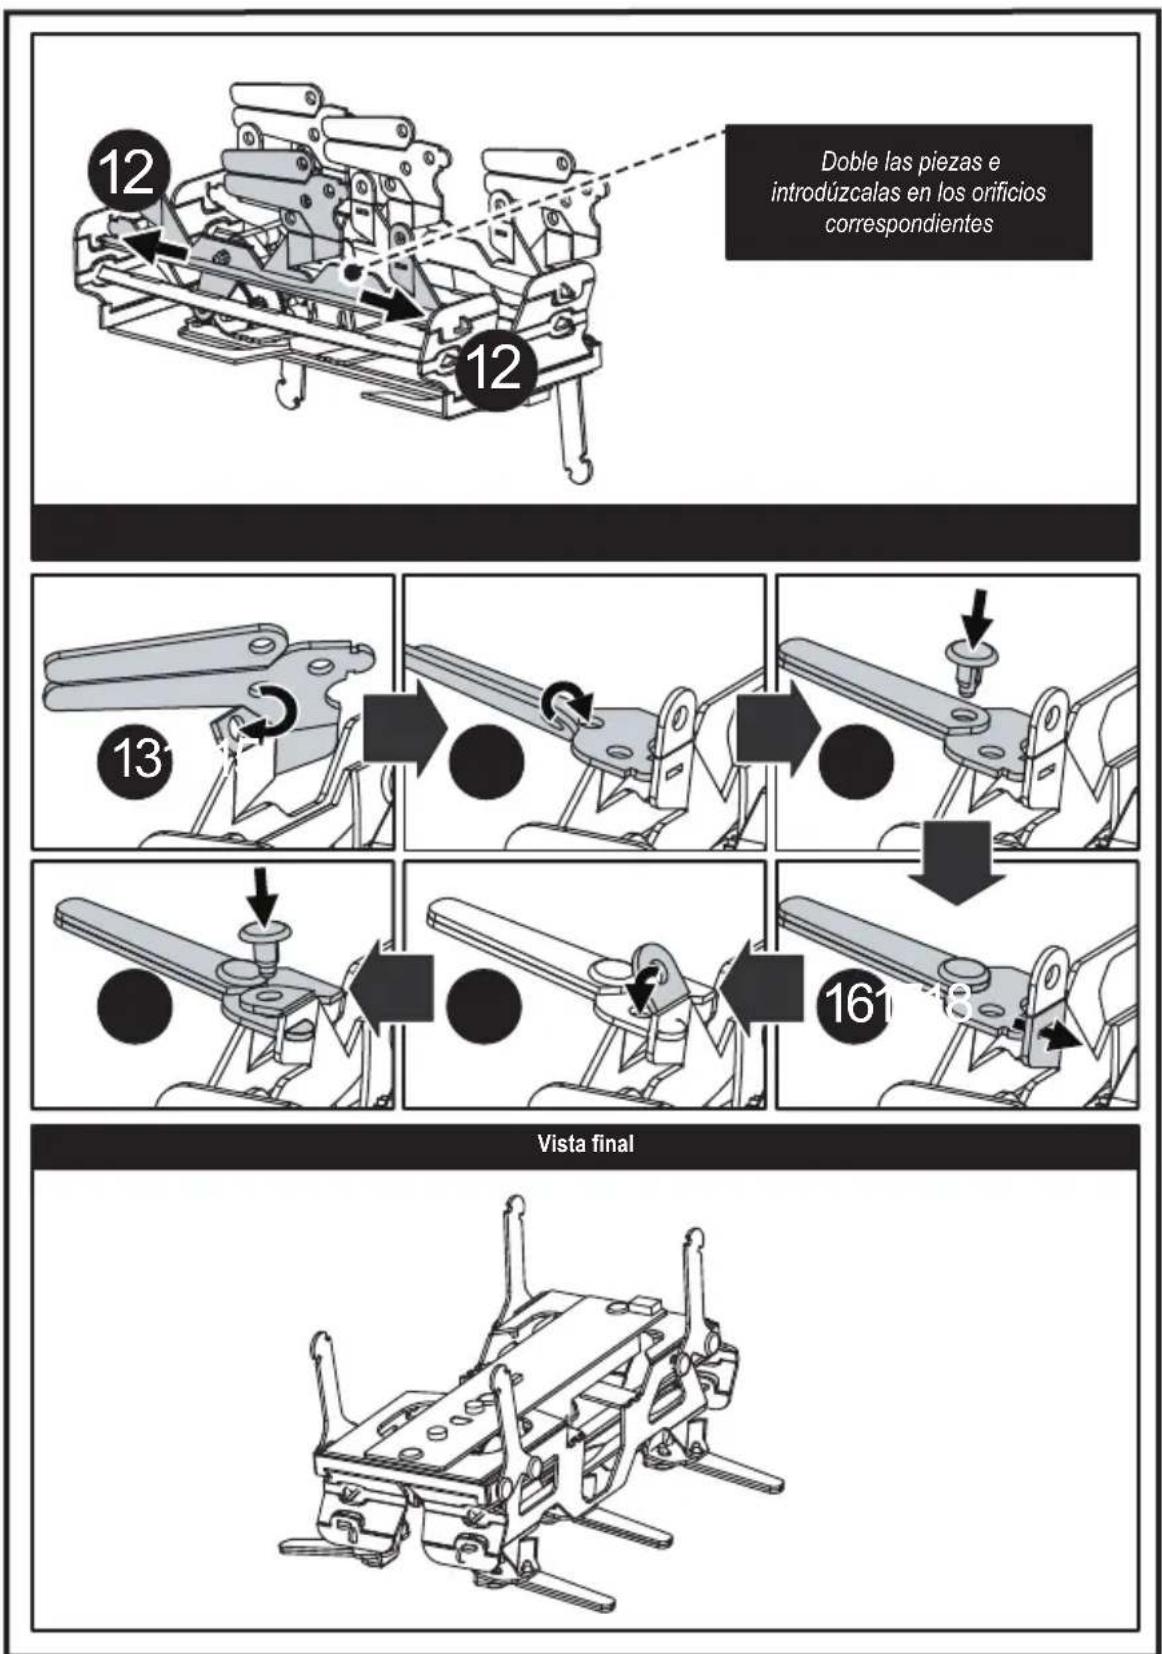
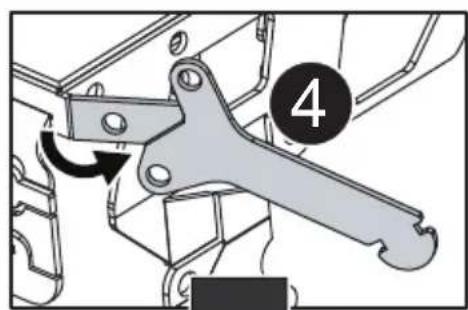
ASSEMBLING THE CHASSIS
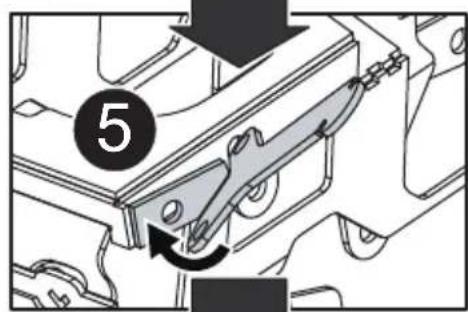
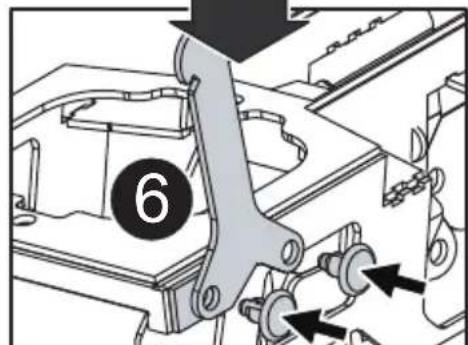
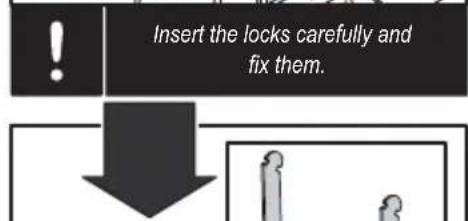
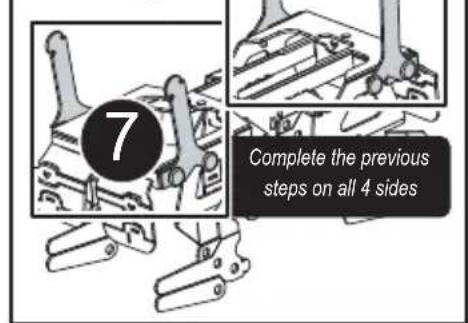
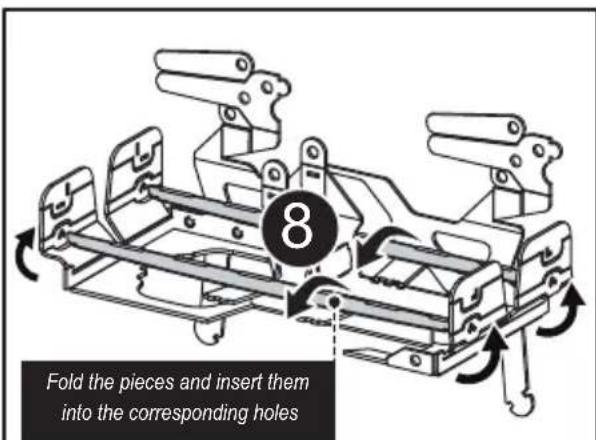
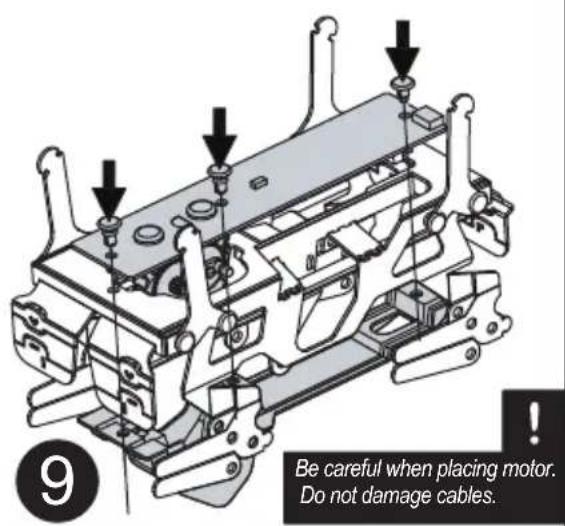
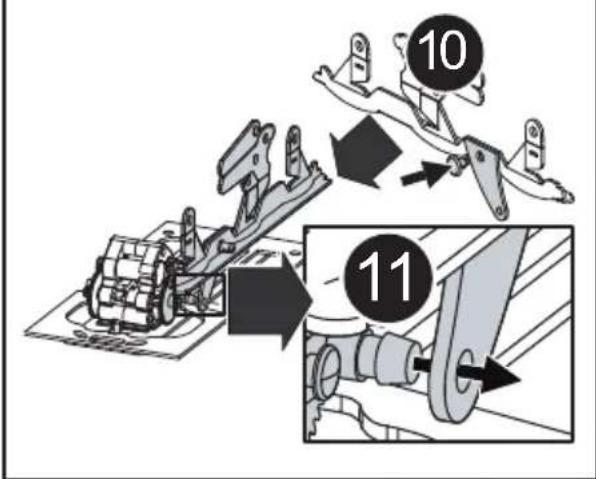
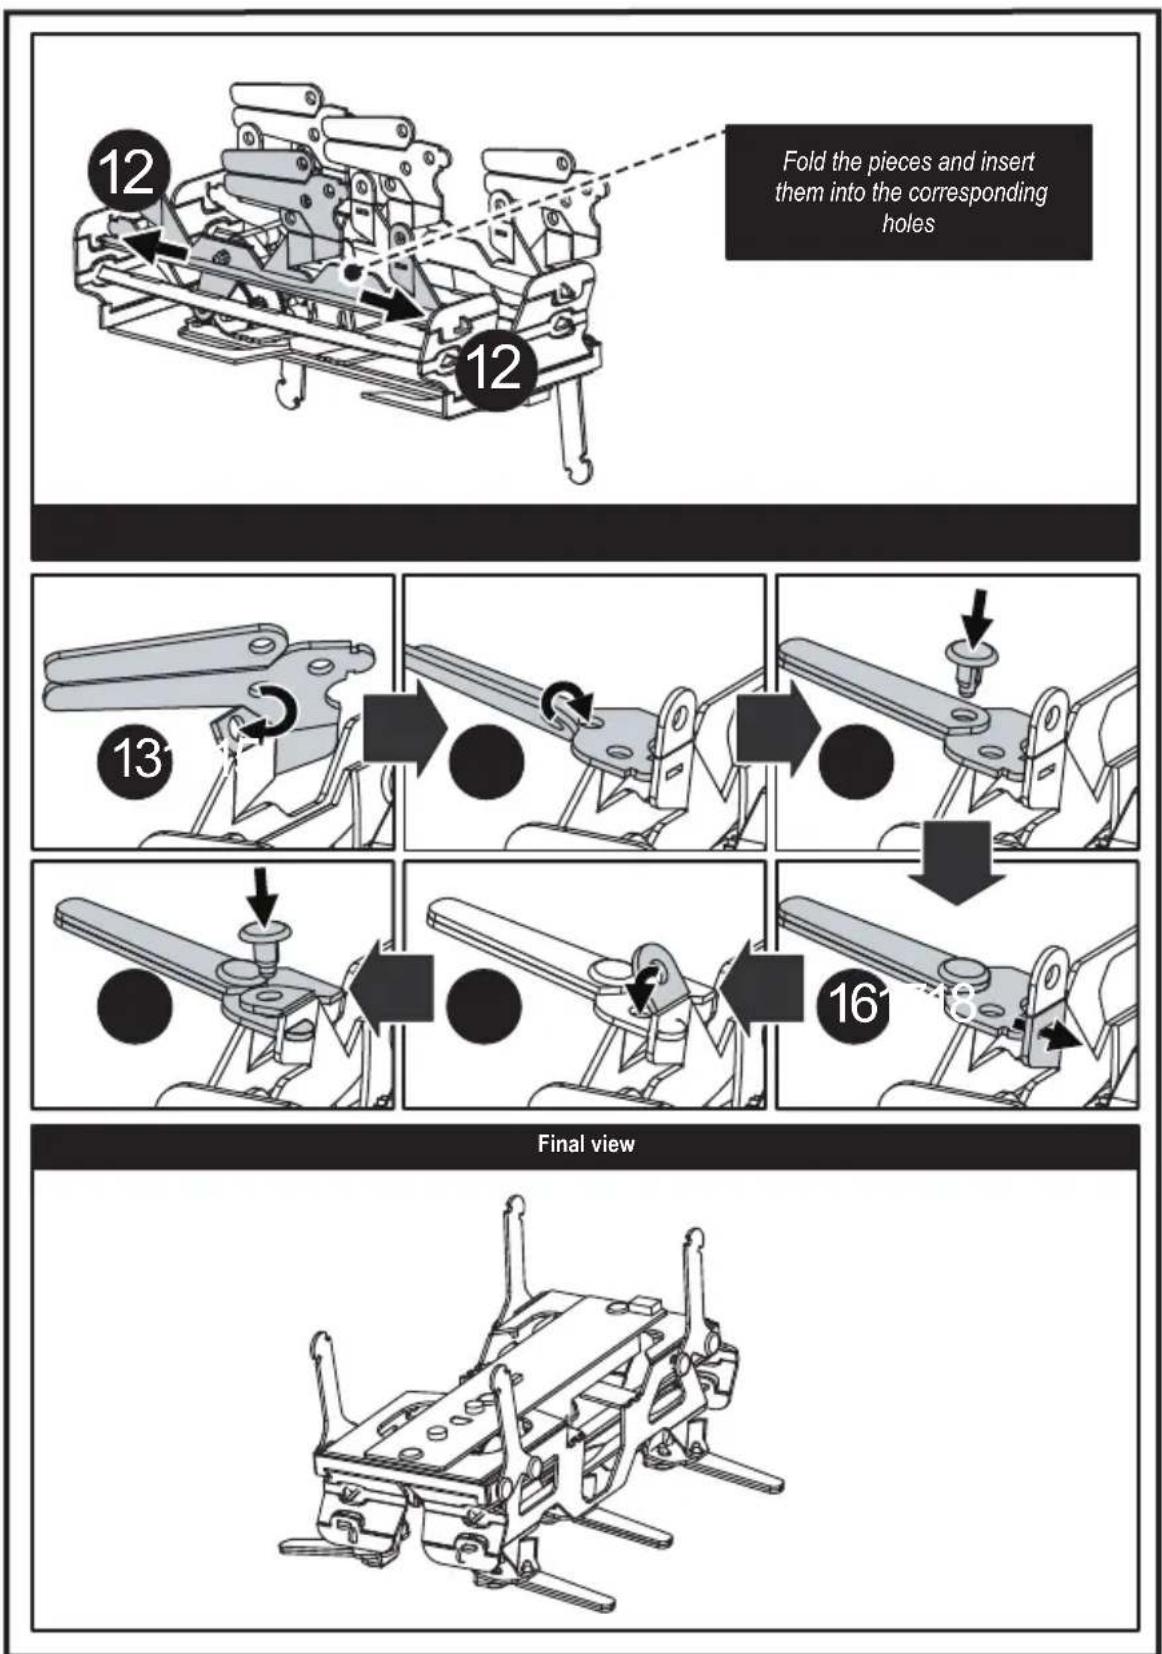
PLACING EYES AND COVER
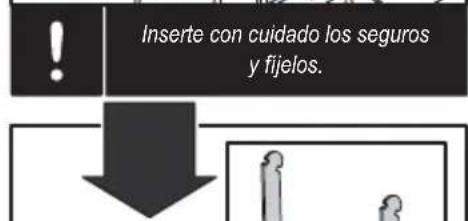
! CAUTION: Handle the pieces carefully so as not to damage them.
1 Detach the protective plastic from the cover.

natural_image
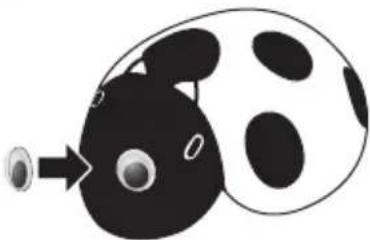
Illustration of a kidney with an arrow indicating a specific anatomical feature (no text or symbols present)2 Detach the protective paper that is on back of the eyes.

3 Place the eyes on the cover.
natural_image
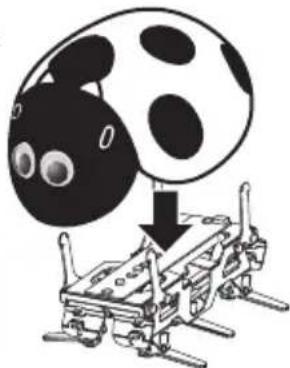
Illustration of a cartoon ladybug with black and white spots, showing eye anatomy (no text or symbols)4 Insert the cover into the chassis.
Make sure that the chassis fits into the holes correctly.
natural_image
Illustration of a robotic arm with a large black-and-white spherical object and a downward arrow, no text or symbols present.PLACING REMOTE CONTROL BATTERIES
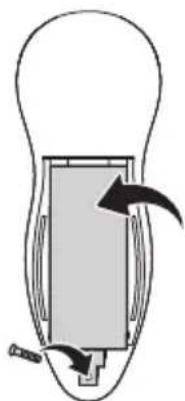
! CAUTION: Place the batteries polarity correctly.
1 Remove the screw and the remote control cover.
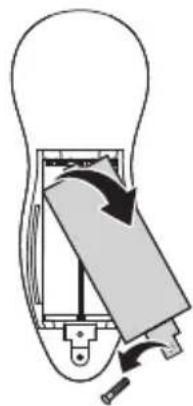
natural_image
Diagram of a light bulb internal mechanism with rotating components and directional arrows (no text or symbols)2 Insert 2 AAA batteries.
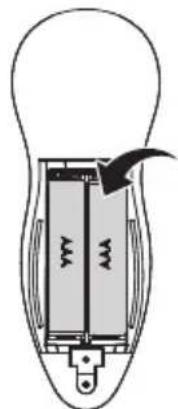
3 Place again the cover and screw.
natural_image
Diagram of a light bulb with internal components and directional arrows indicating rotation (no text or symbols)CHARGING MOTOR BATTERY
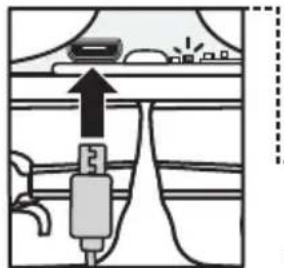
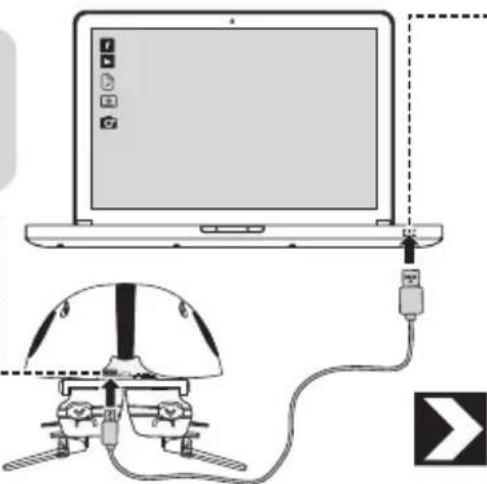
! CAUTION: Before to use the product, charge the battery fully.
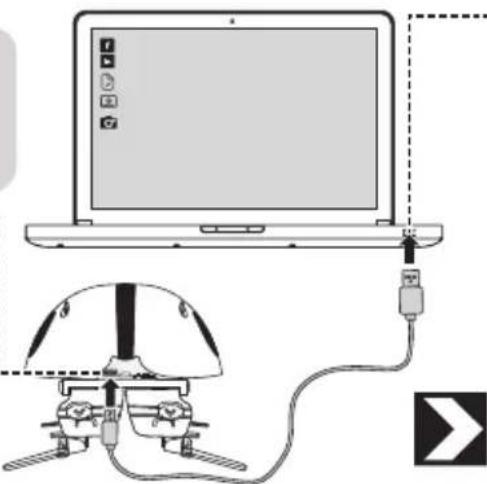
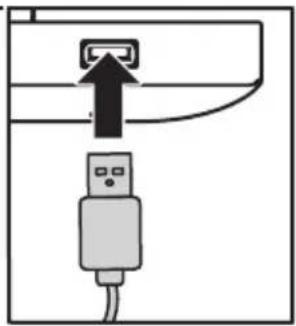
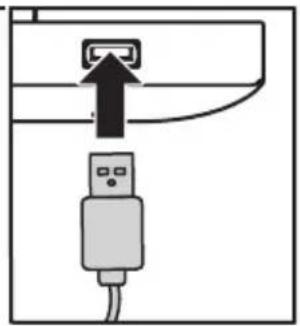
The charge LED indicator will light red. Disconnect the cable when the LED turns off, this will indicate that the battery is fully charged.
natural_image
Simple line drawing of a USB plug connected to a cable, with an upward arrow indicating the connection (no text or symbols)You can also use a power adapter (not included)
! CAUTION: Before to use the product, charge the battery fully.
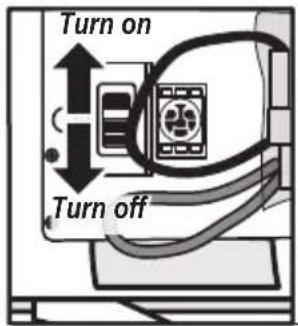
Slide the switch to turn on or off.
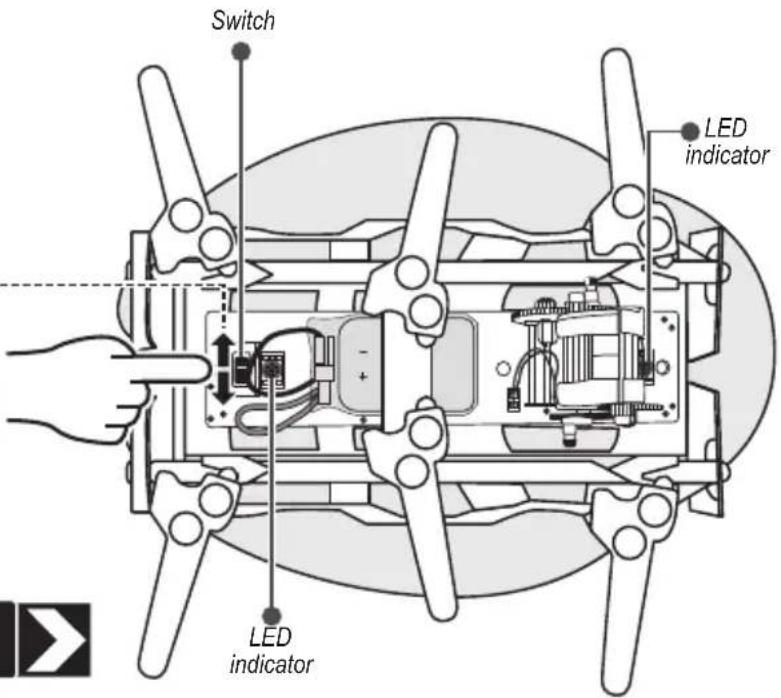
The LED indicators will light when the device is turned on.

TURN ON AND OFF THE REMOTE CONTROL
! CAUTION: Make sure that the batteries are placed correctly.
Press anyone button on remote control to turn it on. The LED indicator will turn on red. This will indicate that the control is on.
To turn it off, do not touch the remote control, the LED indicator will turn off. This will indicate that the control is off
PAIRING THE REMOTE CONTROL WITH THE LADYBUG
! CAUTIONS: It is necessary to perform pairing to use the device.
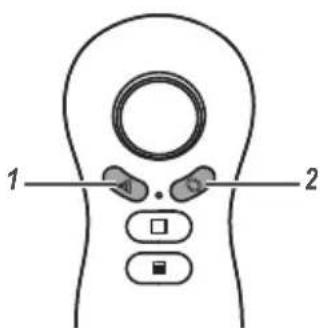
1 Turn on the remote control. Press once the 1 and 2 buttons at the same time to start pairing, then turn on the ladybug.
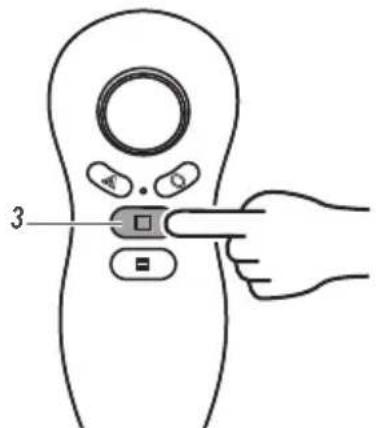
2 Press button 3 to finish the process.
MOVEMENT MODES
The ladybug has 3 movement modes:
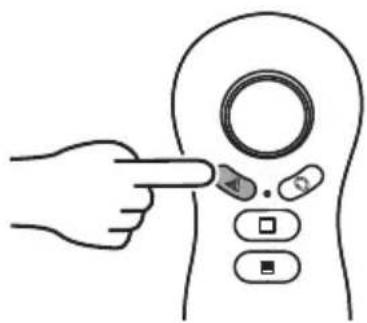
1) Escape
Press once the 🔒 button to select this mode.
The ladybug will stay static until you try to move or touch it.
natural_image
Line drawing of a hand pointing to a device with control buttons (no text or symbols)
In this mode the ladybug LED indicators will turn on green color.
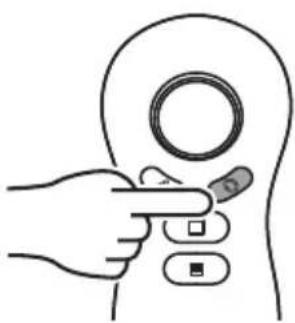
2 Automatic
Press once the Ⓞ button to select this mode.
The ladybug will keep on moving all the time.
natural_image
Line drawing of a hand pointing to a circular object with a square button (no text or symbols)
In this mode the ladybug LED indicators will turn on blue color.
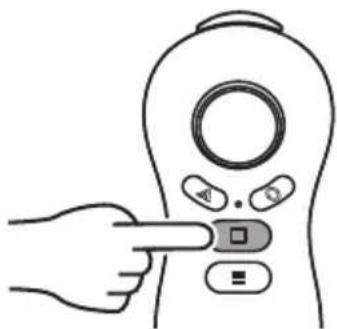
3) Manual
Press once the ☐ button to select this mode.
Use the remote control to move the ladybug in the desired direction.
natural_image
Line drawing of a hand pointing at a control panel with buttons (no text or symbols)
In this mode the ladybug LED indicators will turn on red color.
BASIC MOVEMENTS OF THE MANUAL MODE
Move the remote control lever as shown below to move the ladybug on the desired direction.
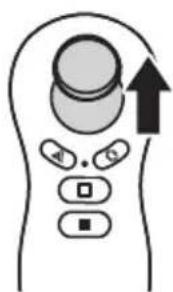
Move the lever up to advance.
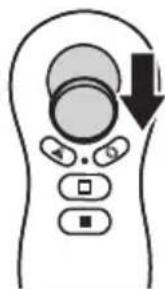
Move the lever down to go back.
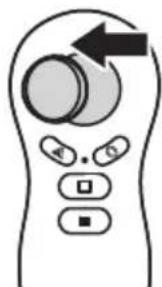
Move the lever to the left to turn to the left.
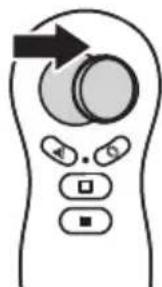
Move the lever to the right to turn to the right.
SPECIFICATIONS
Battery: 3.7 V --- 380 mAh
Frequency: 2.4 GHz
Remote control
Input: 3 V --- (2 x AAA)



- COLOCAR LAS BATERÍAS DEL CONTROL REMOTO
- CARGAR LA BATERÍA DEL MOTOR
- CAUTIONS
- CONTENT
- ASSEMBLING THE CHASSIS
- PLACING EYES AND COVER
- PLACING REMOTE CONTROL BATTERIES
- CHARGING MOTOR BATTERY
- TURN ON AND OFF THE REMOTE CONTROL
- PAIRING THE REMOTE CONTROL WITH THE LADYBUG
- MOVEMENT MODES
- 1) Escape
- Automatic
- 3) Manual
- BASIC MOVEMENTS OF THE MANUAL MODE
- SPECIFICATIONS
Brand : Steren
Model : K-715
Category : Toy