
A400 - Coffee maker FRANKE - Free user manual and instructions
Find the device manual for free A400 FRANKE in PDF.
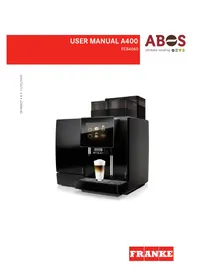


| Type of product | Super-automatic espresso machine |
| Dimensions (W x D x H) | 305 x 375 x 475 mm |
| Weight | 12 kg |
| Power supply | 120V / 60 Hz or 230V / 50-60 Hz, 1400 W |
| Water tank capacity | 2.5 L |
| Bean hopper capacity | 250 g |
| Pump pressure | 15 bar |
| Grounds container capacity | 15 servings |
| Integrated grinder | Ceramic burr grinder |
| Adjustable coffee strength | 5 levels |
| Adjustable cup size | Programmable |
| Milk system | Integrated steam wand with automatic frother |
| Hot water function | Yes |
| User interface | Touchscreen display |
| Programs | Espresso, lungo, cappuccino, latte macchiato, hot water |
| Cleaning | Automatic rinse, descaling program, removable brew group |
| Safety features | Auto shut-off, child lock, overheating protection |
| Spare parts | Brew group, water filter, milk nozzle |
| Repairability | Modular design, user-replaceable parts |
| Warranty | 2 years (depending on region) |
Frequently Asked Questions - A400 FRANKE
User questions about A400 FRANKE
0 question about this device. Answer the ones you know or ask your own.
Ask a new question about this device
Download the instructions for your Coffee maker in PDF format for free! Find your manual A400 - FRANKE and take your electronic device back in hand. On this page are published all the documents necessary for the use of your device. A400 by FRANKE.
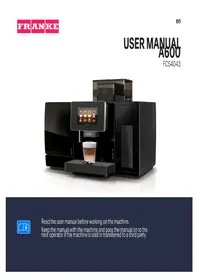
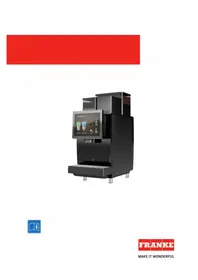
USER MANUAL A400 FRANKE
1 For your safety....6
1.1 Intended use....6
1.2 Prerequisites for using the coffee machine 6
1.3 Explanation of safety instructions according to ANSI 7
1.4 General safety concerns when using the coffee machine and add-on units 7
2 Explanation of symbols 11
2.1 Symbols used in the manual.... 11
2.2 Symbols used in the software.... 11
3 Scope of delivery 15
4 Identification 17
4.1 Position of type plates 17
4.2 Type key 18
5 Description of machine.... 19
5.1 Coffee machine 19
5.2 Add-on units 21
5.3 Overview of operating modes.... 23
6 Installation.... 25
6.1 Preparations 25
6.2 Dimensions of the A400 with cooling unit SU05 25
6.3 Requirements of the water supply 27
7 Filling and emptying.... 29
7.1 Filling beans 29
7.2 Filling powder 30
7.3 Filling the water tank.... 30
7.4 Filling milk 31
7.5 Setting the grind coarseness.... 33
7.6 Emptying the bean hopper 34
7.7 Emptying the powder hopper 35
7.8 Emptying the grounds container 36
7.9 Emptying the drip tray 37
7.10 Emptying the cooling unit.... 38
8 Preparing drinks.... 40
8.1 Preparing drinks with Quick Select 41 8.2 Preparing drinks with Cash Register 42 8.3 Preparing a drink with ground coffee 43 8.4 Preparing hot water 45 8.5 Steam output.... 46 9 Cleaning 48 9.1 Introduction.... 48 9.2 5-step method....48 9.3 Required cleaning accessory.... 49 9.4 Starting the cleaning process.... 50 9.5 Cleaning the internal water tank / Replacing the filter cartridge 51 9.6 Cleaning the monitor screen 52 9.7 Cleaning and maintenance plan 54 10 Configuration.... 55 10.1 Switching to the maintenance level 55 10.2 PIN codes.... 55 10.3 My settings menu tree 56 10.4 Input methods 56 10.5 1 Set machine .... 56 10.6 2 Set drinks....62 10.7 3 Date and time....63 10.8 4 Nutritional value information 64 10.9 6 Access rights.... 66 11 Individualization and data transfer 68 11.1 Overview 68 11.2 Individualization and data transfer menu tree 69 11.3 Switching to the maintenance level 70 11.4 Requirements for your own media 70 11.5 Required folder structure on the USB stick....70 11.6 Loading or deleting your own media....71 11.7 Using your own advertising media 72 11.8 Displaying languages and configuring nutritional values 72 11.9 Loading/backing up data....73 11.10 Restoring default values....73 12 Troubleshooting....74
12.1 Error messages....74 12.2 Color code for error messages 75 12.3 Tips for good coffee drinks.... 75 12.4 Help with problems concerning product quality 76 13 Decommissioning 77 13.1 Preparing for decommissioning 77 13.2 Short-term decommissioning (up to 3 weeks)....77 13.3 Long-term decommissioning 77 13.4 Transport and storage.... 78 13.5 Recommissioning after prolonged periods of storage or non-use 78 14 Disposal 79 15 Technical data 80 15.1 Technical data for the coffee machine.... 80 15.2 Electrical connections....80 15.3 Power cord 81 15.4 Cooling unit SU05....81 15.5 Cup warmer CW.... 82 15.6 KE200 cooling unit....82 15.7 Chill&Cup 82 15.8 Accounting system AC.... 82 83
1 FOR YOUR SAFETY
1.1 Intended use
1.1.1 Coffee machine
- The A400 is a commercial machine for preparing drinks and is intended for use in food services, offices, and other similar environments.
- The A400 is designed to process whole coffee beans, ground coffee, powder that is suitable for automatic devices, and fresh milk.
- The A400 is intended for the preparation of drinks in accordance with these instructions and the technical data.
- The A400 is intended for operation indoors.
Please note
- The A400 is not suitable for use outdoors.
1.1.2 Add-on units
Cooling unit
- The cooling unit is used exclusively to keep milk cool while preparing coffee drinks with a coffee machine. Only use pre-cooled milk (2–5 °C).
- Only use Franke milk system cleaning agent.
Please note
- Other cleaning agents may leave residue in the milk system.
Cup warmer
- The cup warmer is intended only for preheating coffee cups and glasses used when preparing drinks.
Please note
- The cup warmer is not designed to dry dish towels or other cloths. It is not necessary to cover the cups to warm them.
Accounting system
- The accounting system can be used for various methods of payment. Examples: Payment with coins, cards, or mobile payment systems.
1.2 Prerequisites for using the coffee machine
- The A400 is intended for use by trained personnel. – Each operator of the A400 must have read and understood the instructions. This does not apply to its use in the self-service sector.
- Self-service machines must always be monitored to protect the users.
- Do not operate the A400 or add-on units until you have completely read and understood these instructions.
- Do not use the A400 or add-on units if you are not familiar with the various functions.
- Do not use the A400 if the connection lines of the A400 or the add-on units are damaged.
- Do not use the A400 unless the A400 or the add-on units have been cleaned or filled as intended.
- Children under the age of 8 are not permitted to use the A400 or the add-on units.
- Children or persons with reduced physical, sensory, or mental capabilities must not use the A400 or the add-on units except under supervision, nor should they be permitted to play with the A400 or the add-on units.
- Children are not permitted to clean the A400 or the add-on units.
1.3 Explanation of safety instructions according to ANSI
Observation of these safety instructions is imperative to ensure personal safety and the protection of material goods.
The safety instructions are structured as follows:
SYMBOL AND SIGNAL WORD for severity of the danger.

WARNING
WARNING indicates a potential danger which, if not avoided, could result in death or moderate injury.

CAUTION
CAUTION indicates a hazardous situation which, if not avoided, could result in minor or moderate injury.

NOTICE directs your attention to the risk of damage to the machine.
1.4 General safety concerns when using the coffee machine and add-on units

WARNING
Risk of fatal injury from electrocution
Damaged power cords, lines or plug connections can lead to electrocution.
a) Do not connect any damaged power cords, lines or plug connections to the power supply. b) Replace damaged power cables, lines or plug connections. If the power cord is permanently attached, contact the service technician. If the power cord is not permanently attached, order and use a new, original power cord. c) Ensure that the machine and the power cord are not near any hot surfaces such as gas or electric stoves or ovens. d) Ensure that the power cord is not pinched and does not rub against sharp edges.

WARNING
Danger of suffocation
Plastic packaging materials could cause children to suffocate.
a) Ensure that children have no access to plastic packaging materials.

WARNING
Risk of fatal injury from electrocution
Liquid/moisture entering the machine or leaks can lead to electrocution.
a) Never point a liquid or steam jet at the machine. b) Do not pour any liquids on the machine. c) Do not immerse the machine in liquid. d) Disconnect the machine from the power supply in the event of a leak or if liquid/moisture enters the machine.

⚠ WARNING
Risk of fatal injury from electrocution
Work, repairs or servicing improperly performed on electrical systems can lead to electrocution.
a) Have repairs on electrical parts carried out by service technicians using original spare parts. b) Have servicing carried out by authorized persons with corresponding qualification only.

⚠ WARNING
Risk of burns
The heating surfaces of the cup warmer can cause burns.
a) Do not touch the hot heating surfaces of the cup warmer. b) IN CASE OF BURNS: Immediately cool the affected area and consult a doctor depending on the severity of the injury.

⚠ WARNING
Risk of scalding
Hot water is released during rinsing.
a) Keep hands away from the spouts and nozzles during this process. b) Do not place anything on the drip grid. c) IN CASE OF SCALDING: Immediately cool the affected area and, depending on the severity of the injury, consult a doctor.

⚠ WARNING
Risk of scalding
Hot drinks can lead to scalding.
a) Always be careful with hot drinks. b) Use only suitable drinking vessels.

WARNING
Risk of scalding
Hot liquids and steam escape during cleaning and can lead to scalding.
a) Keep hands away from the spouts and nozzles during this process.

WARNING
Risk of injury
If objects find their way into the bean hopper or grinder, splinters may be ejected, leading to injury.
a) Never put any objects in the coffee bean hopper or grinder.

CAUTION
Irritation from cleaners
Cleaning tablets, milk system cleaning agent, and descaler can lead to irritations.
a) Observe the hazard warnings on the label of the respective cleaner.
b) Avoid contact with your eyes and skin.
c) Wash your hands after coming into contact with cleaner.
d) Cleaners must not find their way into drinks.

CAUTION
Health hazard due to germ formation
Inadequate cleaning can result in food residues accumulating in the machine and at the spouts, thereby contaminating products.
a) Do not use the machine unless it has been cleaned according to the instructions.
b) Clean the machine daily in accordance with the instructions.
c) Inform operating personnel of the necessary cleaning measures.

CAUTION
Health hazard due to germ formation
If the machine is not used for extended periods, residue may accumulate.
a) Clean the machine if it is not used for extended periods (more than 2 days).

CAUTION
Health hazard due to algae formation
Using a water filter for too long can lead to the build-up of algae.
a) Replace the water filter when prompted to do so by the machine.

CAUTION
Formation of mold
Mold can form on the coffee grounds.
a) Empty and clean the grounds container at least once a day.

CAUTION
Cutting injuries
Sharp edges can cause cutting injuries.
a) Remove any sharp edges, including those at openings.
b) Use suitable tools and protective equipment to produce cutouts and openings.
2 EXPLANATION OF SYMBOLS
2.1 Symbols used in the manual
2.1.1 Orientation

Clean components by using the 5-step method.

This symbol indicates tips and tricks, as well as other additional information.

Prerequisites for additional steps

Result or intermediate result for additional steps
2.2 Symbols used in the software
2.2.1 Symbols used for navigation
Symbol Name Description

Cancel button Cancel preparation

Select next/previous page Scroll through menus with multiple pages

Start button Start preparation
2.2.2 Symbols on the dashboard

When a symbol is illuminated on the dashboard, additional information and instructions can be displayed by tapping the symbol. Refer to the "Troubleshooting" chapter for help if an error occurs. Troubleshooting [▶ 74]
Symbol Designation Description
Franke logo Call up the maintenance level

Servicing/cleaning Machine must be cleaned and/or serviced

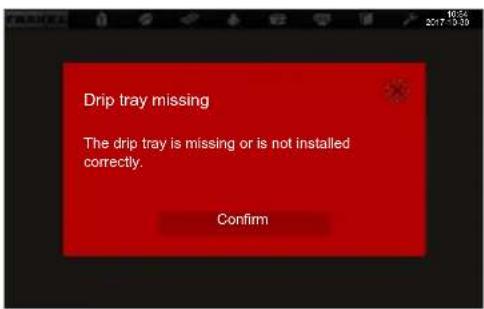
Drip tray Drip tray is full or not installed correctly
Symbol Designation Description
 | Water tank Water tank is empty or missing |
 | Milk Milk container is empty or not installed correctly |
 | Coffee bean Bean hopper is empty or not installed correctly |
 | Hot chocolate |
 | Grounds container Grounds container must be emptied |
 | Rinsing Machine must be rinsed or machine is being rinsed |
 | Product |
 | Payment Payment active |
 | Advertising images |
 | Screen saver |
 | Brightness Set brightness |
 | Data transfer Data being transferred |
 | Individual products counter |
 | Individualization |
 | Info |
 | Inactive |
 | Standby Switch the machine to standby |
 | Cup heater |
Symbol Designation Description
 | Filter Replace the filter cartridge in the water tank (optional for internal water tank) | |
 | Milk system cleaning agent | Milk system cleaning agent in FoamMaster is empty |
 | Door | |
 | Favorites Favorites button, can be assigned to a function that is used frequently | |
 | Service/Configuration/Administration | |
 | Bean left/right | |
 | Double product Prepare double drink quantity (double dispensing) | |
 | Cold milk | |
 | Ground coffee Selection button for ground coffee | |
2.2.3 Depiction of error messages
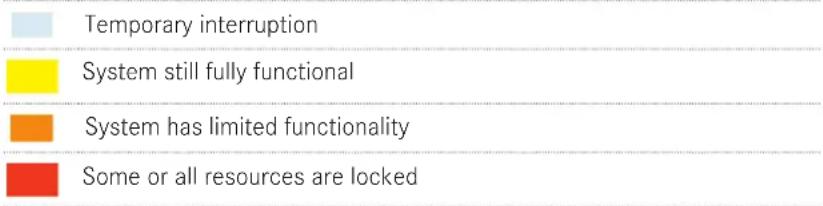
Highlighted products cannot be prepared. The illuminated symbol on the dashboard takes you to the error message.

If the entire system is affected by an error, the error message will appear automatically.
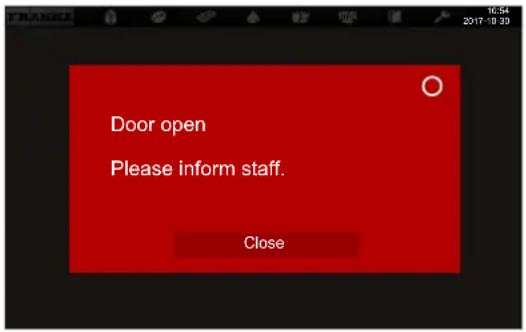
See also
Troubleshooting [▶ 74]
2.2.4 Color code for error messages
| Temporary interruption | |
| System still fully functional | |
| System has limited functionality | |
| Some or all resources are locked |
3 SCOPE OF DELIVERY

A400 with cooling unit SU05
The scope of delivery may vary, depending on the device configuration. Additional accessories may be obtained directly from your retailer or from Franke Kaffeemaschinen AG in Aarburg, Switzerland.
| Item description Item number | ||
 | Cleaning tablets (100 pcs.) BK328400 | |
 | Milk system cleaning agent (dosing bottle) 1L301219 | |
 | Milk system cleaning agent (cartridge) (SU05 FM CM) | 1Z365033 |
| [CDK8] | Cleaning brushes 1L301376 | |
 | Cleaning brush 1L301160 | |
| [24T6] | Microfiber cloth 1H325974 | |
 | Grinder adjustment wrench 1N330253 | |
 | Neoperl aerator wrench 1H327863 | |
 | USB stick (4 GB) 1H329064 | |
 | Set of manuals 560.0523.128 | |
 | Filter holder(optional for internal water tank) | 1N330385 |
 | Filter cartridge(optional for internal water tank) | 1P315694 |
4 IDENTIFICATION
4.1 Position of type plates
Coffee machine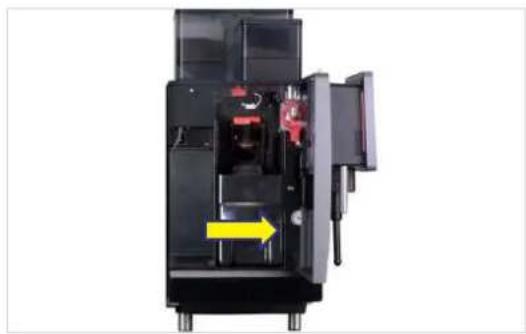
The type plate for the coffee machine is located on the right interior wall next to the grounds container.
Cup warmer (CW)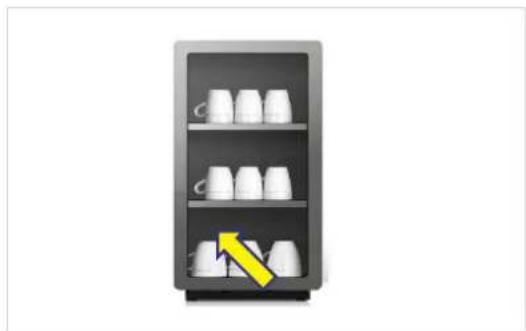
The type plate for the cup warmer is located on the inner side of the rear panel at the bottom left.
FoamMaster SU05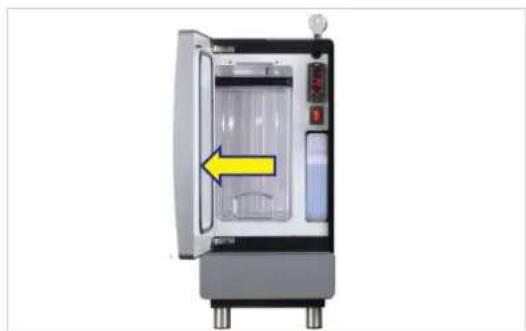
The type plate for the FoamMaster SU05 is located on the inner side of the door.
4.2 Type key
4.2.1 Coffee machine
Code Description
| A400 Coffee machine (fully automatic device) |
| Series: A |
| Overall size: 400 |
1G 1 grinder (max. 2)
1P 1 powder hopper (max. 2)
FM FoamMaster (cold and hot milk, cold and hot milk foam)
H1 Hot water dispenser
MS Milk system (with pump)
S1 Steam wand
W2 Water connection/internal water tank
W3 Internal water tank
4.2.2 Add-on units
Code Description
| 1C1M 1 coffee machine, 1 milk type | |
| AC Payment device | |
| CM CleanMaster | |
| CW Cup warmer | |
| EC EasyClean | |
| FM FoamMaster (cold and hot milk, cold and hot milk foam) | |
| MS Milk system without pump | |
| NM Machine without milk system (NoMilk) | |
| SU Cooling unit | |
| SU05 Cooling unit (< 10 l) | |
| SU05 FM | Cooling unit (< 10 l) with FoamMaster (cold and warm milk, cold and warm milk foam) |
| SU05 MS | Cooling unit (< 10 l) with milk system |
| SU12 Cooling unit (≥ 10 l) | |
5 DESCRIPTION OF MACHINE
5.1 Coffee machine
Introduction
The A400 coffee machine is available with numerous options. To provide you with an overview of your machine, a sample configuration is illustrated here. Please note that your coffee machine may look different from the configuration shown here.
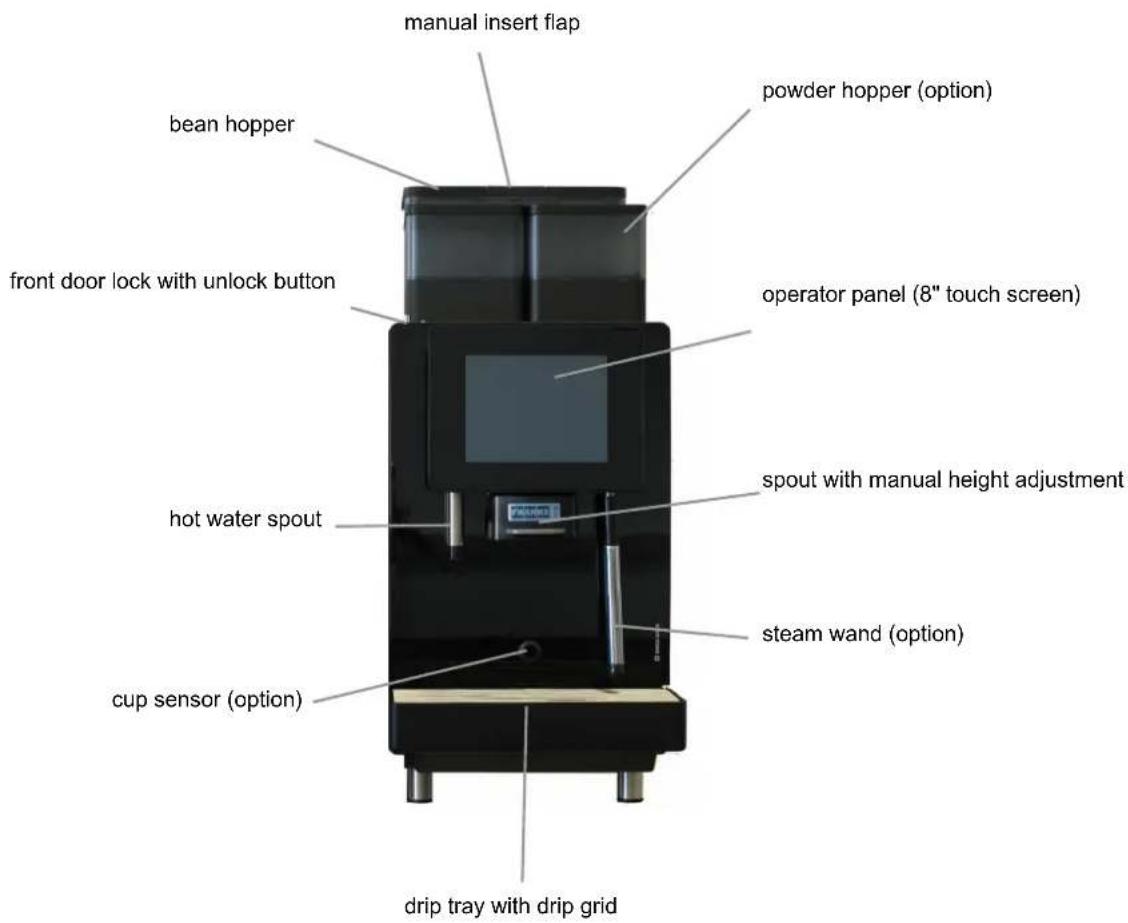
Options
- Lockable bean hopper
- One or two lockable powder hoppers
- Steam wand
- Cup sensor
- Height-adjustable feet
- M2M/telemetry preparation
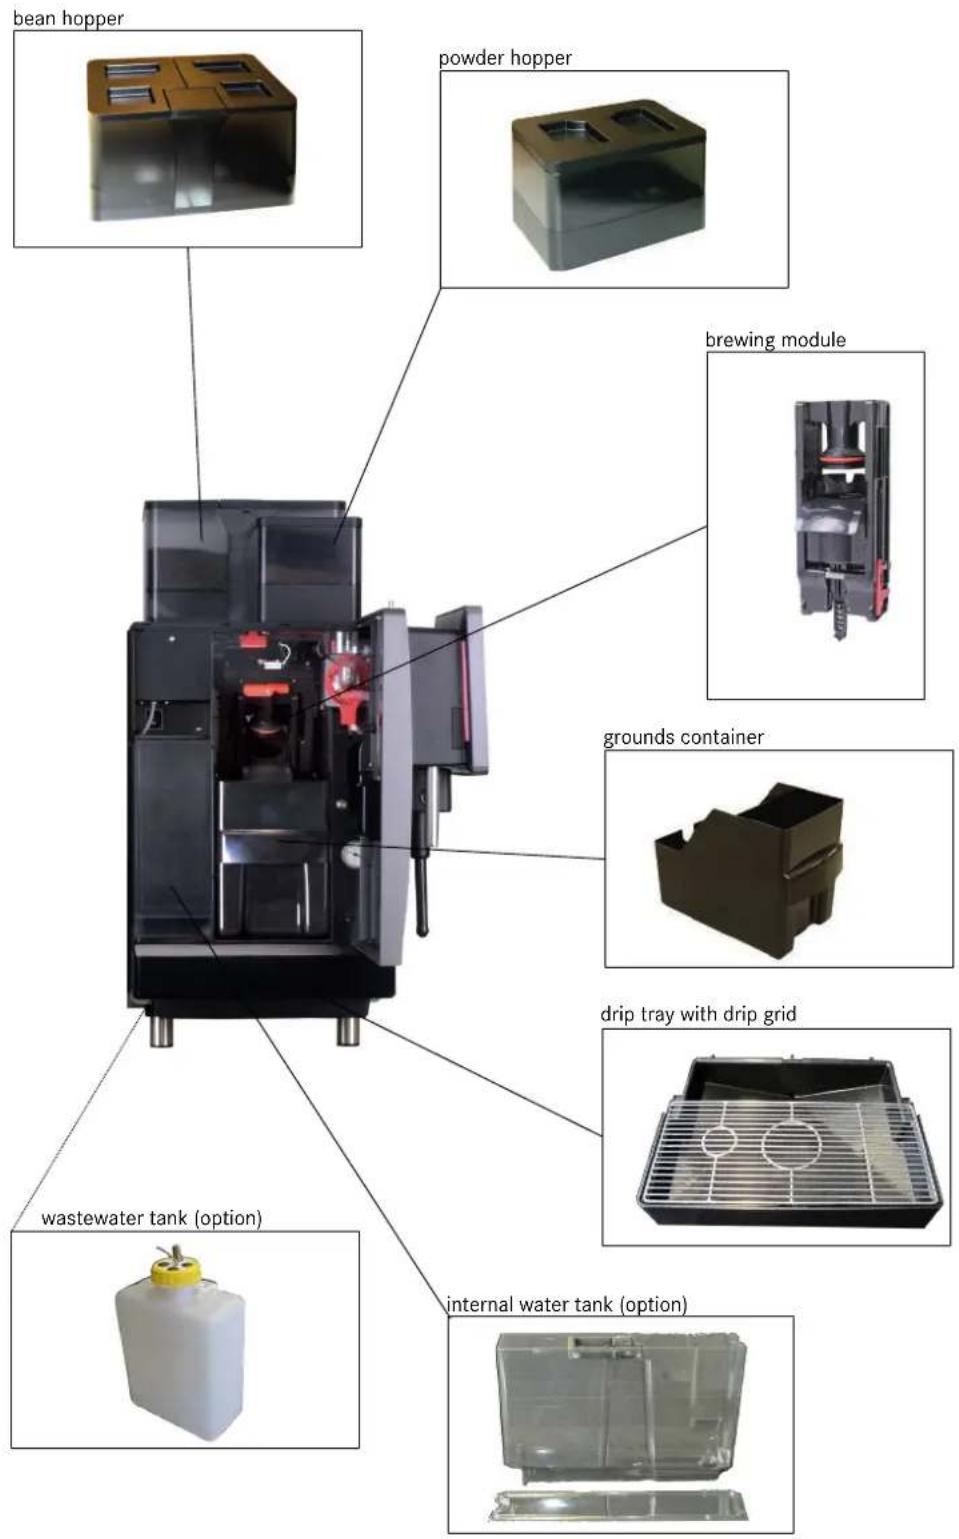
5.1.1 Coffee machine components
5.2 Add-on units
5.2.1 Components of the cooling unit with FoamMaster
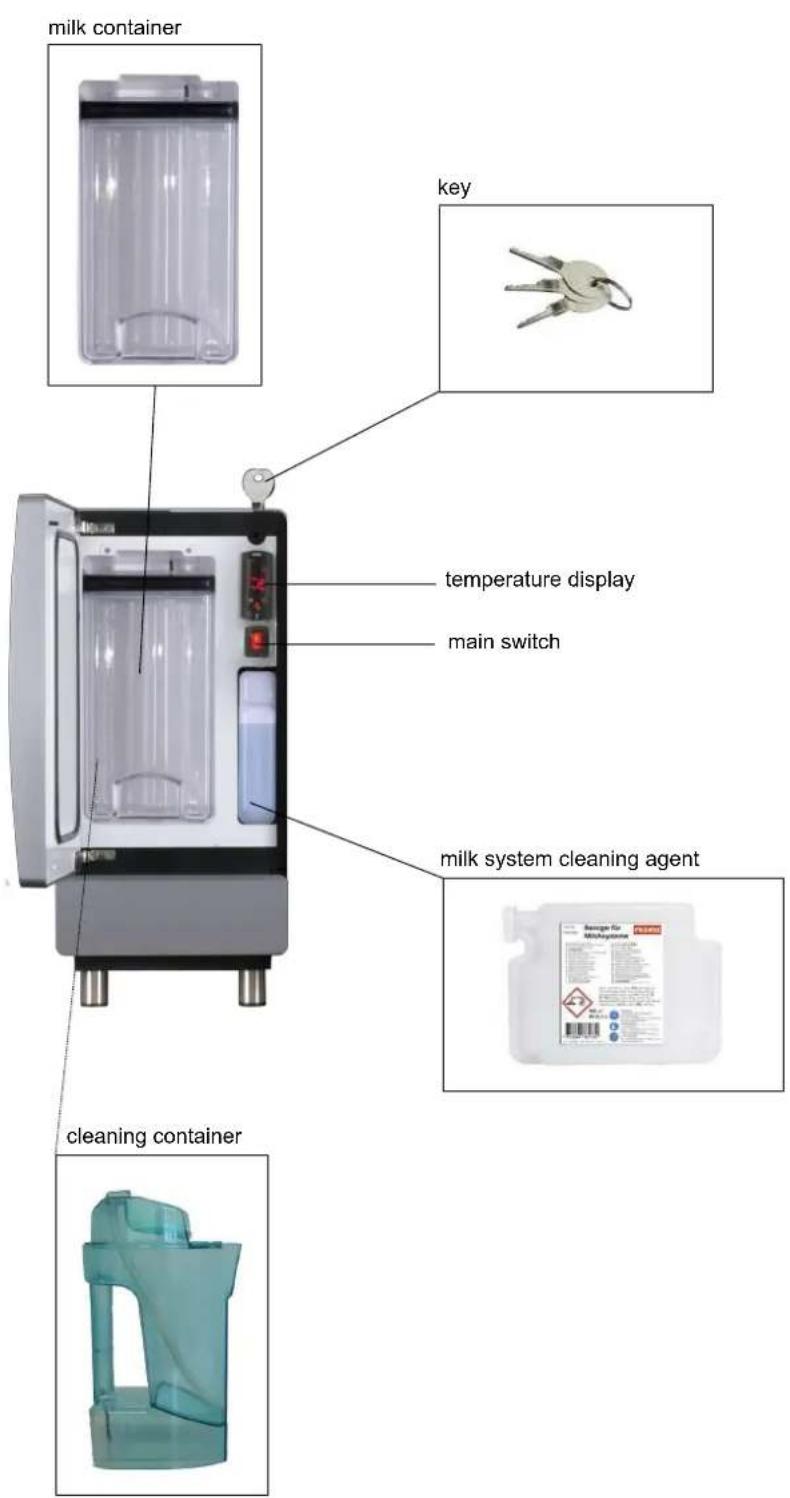
5.2.2 Cup warmer (optional)

To enjoy coffee at its best, you need pre-heated cups. The cup warmer with four heatable shelves fits perfectly to your coffee machine.
5.2.3 Accounting system (optional)
The accounting system processes all payment transactions and records all accounting data.
Interfaces:
- VIP
Payment systems:
- Coin validator
- Coin changer
- Card readers
5.3 Overview of operating modes
5.3.1 User interface
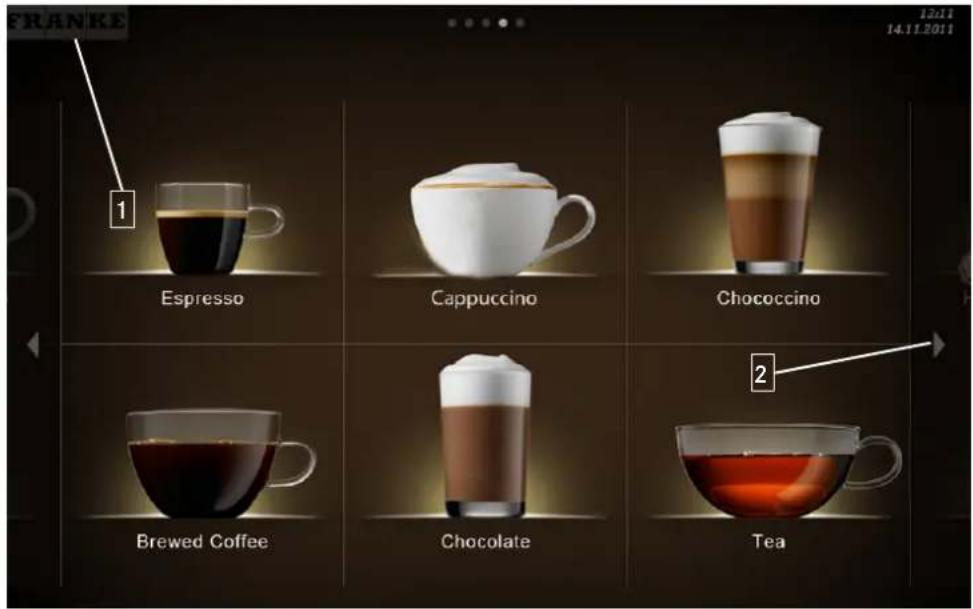
1 The Franke button is used to switch between the maintenance level and product selection.
2 Scroll forwards or backwards.
5.3.2 Cash Register operating mode
Cash Register

Cash Register is the operating mode for non-self-service utilization. You can add additional orders while your coffee machine is preparing a product.
Structure of the user interface
- Level 1: Product selection, up to 5 pages. Column with the possible options, the production status, and the waiting list
- Level 2: Display of 4, 9, or 16 product buttons per page
Individual adaptations:
- Display: 2x2, 3x3, or 4x4 products per page
- Depiction: photo-realistic, drawn
5.3.3 Quick Select operating mode
Quick Select
The Quick Select operating mode is the standard setting for self-service. Once your customer has selected a drink, he/she can adapt it in the second step if product options are activated.
Structure of the user interface:
- Level 1: Product selection, up to 5 pages
- Level 2: Drink Selection status; display of 6, 12, or 20 product buttons per page, select product options, start preparation (if activated)
Individual adaptations:
- Display: 2x3, 3x4, or 4x5 products per page
- Activate Credit Mode
- Individual arrangement of drinks
5.3.4 Operating mode Quick Select with Credit Mode

Display
- Product prices
- Credit
- Missing credit

In the Drink Selection status, you cannot add any drink options with the Credit Mode configuration.
You can activate the Credit Mode in the My settings menu under 1 Set machine > 1.12 Payment. Select Activate payment.
6 INSTALLATION
6.1 Preparations
- The power connection for the coffee machine must be protected by a residual current circuit-breaker (RCCB).
- Each terminal of the power supply must be able to be interrupted by a switch.
- The water connection must have a shut-off valve with a check valve that can be inspected and a filter, and it must fulfill the requirements of the technical data.
- The supplied hose set must be used for the water connection to your coffee machine. Do not use any other water hoses that happen to be present.

You must have completed these preparations before one of our service technicians can install the coffee machine for you. Your service technician will install your coffee machine and carry out the initial commissioning process. The technician will walk you through the basic functions.
See also
- Requirements of the water supply [1-27]
6.2 Dimensions of the A400 with cooling unit SU05
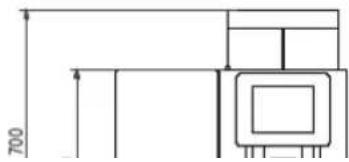
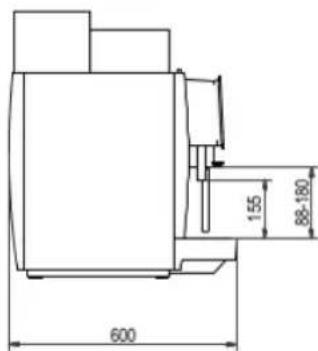
A400, side view

Hose feedthrough in the counter

The dimensions are specified in millimeters. Prepare a stable, ergonomic surface (min. load capacity 150 kg). The operator panel should be at eye level.
Minimum clearances:
- To the rear panel: 50 mm
- Above: 200 mm (for filling and removal of the bean hopper)
Adjustable feet (optional) can be used to compensate for unevenness or differences in height.
6.3 Requirements of the water supply
6.3.1 Water connection
Chloride content < 30 mg/l
TDS (total dissolved solids) 30–150 ppm (mg/l)
Electrical conductivity 50–200 μS/cm (microsiemens)
Iron content < 0.3 mg/l
- Color: Clear
- Taste: Fresh and pure taste
- Aroma: No perceptible aroma
6.3.3 Water drainage
- Drain hose: D = 16 mm, L = 2 m
- Connection to a lower-lying siphon
7 FILLING AND EMPTYING
7.1 Filling beans

⚠ WARNING
Risk of injury
If objects find their way into the bean hopper or grinder, splinters may be ejected, leading to injury. a) Never put any objects in the coffee bean hopper or grinder.

Fill the bean hoppers with coffee beans.
Fill the powder hopper with powder that is suitable for automatic coffee makers.
- Lift the bean hopper lid.

- Add coffee beans.

- Replace the lid.
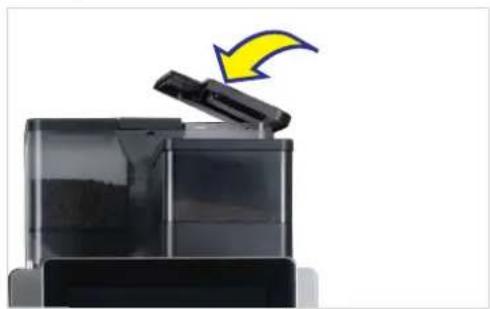
7.2 Filling powder
- Lift the powder hopper lid.
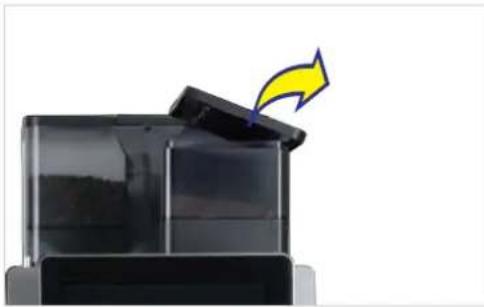
- Fill with powder that is suitable for automatic coffee makers.
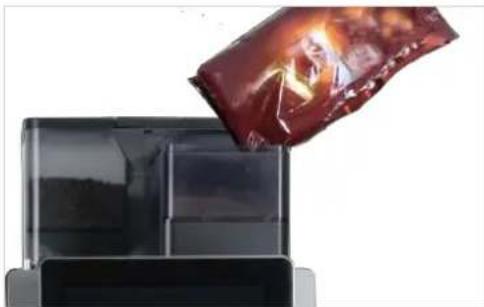
- Replace the lid.
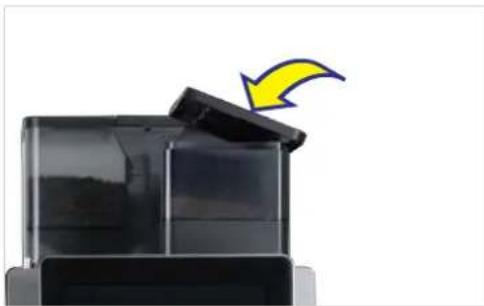
7.3 Filling the water tank

NOTICE
Machine damage
Filling the water tank with milk will result in damage to the machine.
a) Fill the water tank with water only.
b) Disconnect the machine from the power supply and contact the service department if the water tank has been inadvertently filled with milk.
- Pull out the water tank.

- Remove the lid.
- Fill the water tank up to the marking with fresh water.
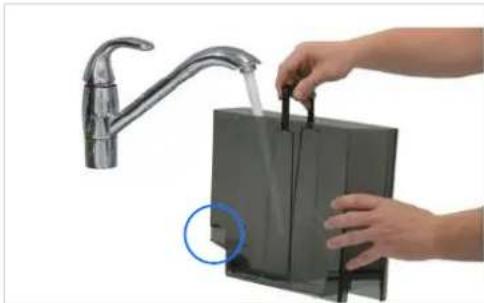
The surface of the sensor must be dry.
- Push the water tank with lid all the way into the coffee machine.
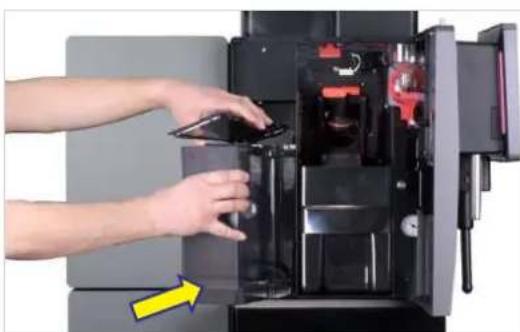

NOTICE
Malfunction
If the water tank is not pushed in all the way, the pump may draw air into the system.
a) Ensure that pressure is applied to the lower area of the water tank when pushing it into the coffee machine.
7.4 Filling milk

NOTICE
Impaired drink quality
Incorrect handling of milk can lead to quality problems.
a) Only clean containers should be filled with milk. b) Only use pre-cooled milk (2-5 °C). c) Only touch the inside of the milk container, the milk hoses, and the milk lid after sanitizing your hands, or wear disposable gloves.

NOTICE
Machine damage
Using incorrect liquids can damage the machine.
a) Only fill the milk container with milk. b) Use water and a mild cleaner to clean the machine.
7.4.1 Filling milk for the SU05
- Open the door.
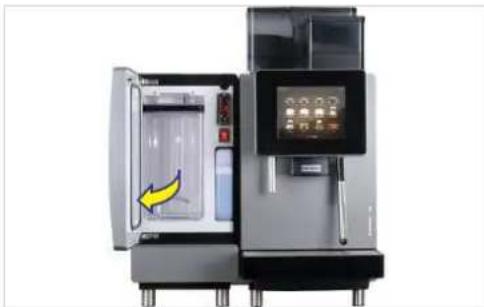
- Switch the cooling unit on.

⇒ The current cooling chamber temperature is displayed.
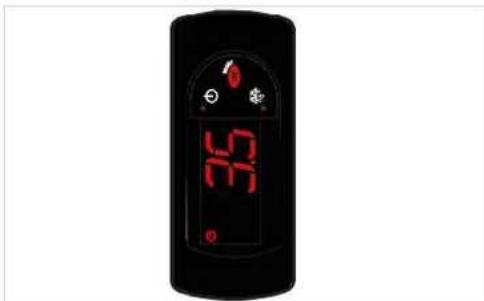
- Remove the milk container lid with the suction hose and place it on a clean surface.
- Fill the container with a maximum 5 l of cooled milk.
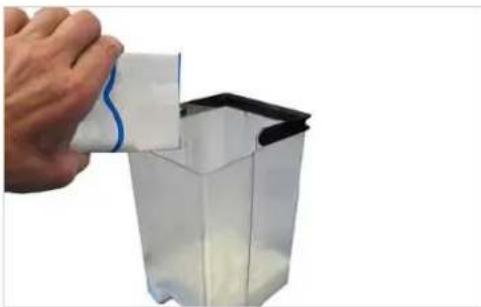
- Replace the milk container lid.
- Slide the milk container all the way into the cooling chamber.

- Close the door.

7.5 Setting the grind coarseness
If required, the coarseness of the grind can be set in stages for each grinder.
- Pull the locking slide forwards as far as possible.
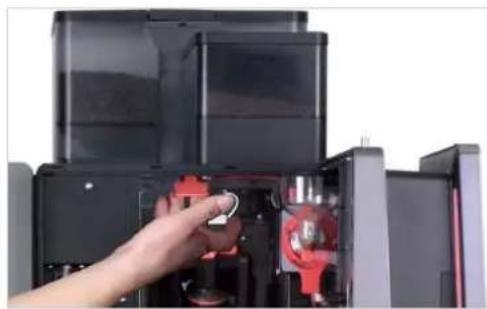
- Lift and remove the bean hopper.
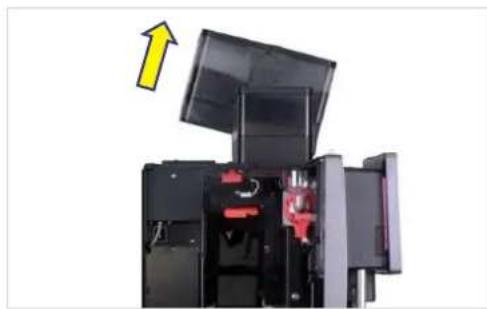
√ Grinder adjustment wrench (no. 1N330253) is available.
- Adjust the coarseness of the grind with the wrench.
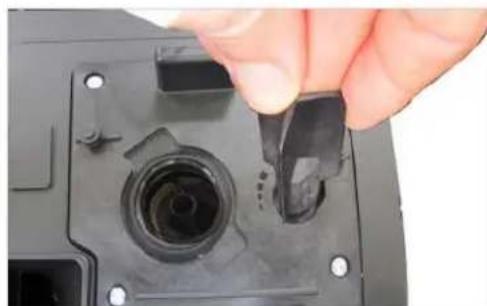
→ Turn counterclockwise for a finer grind. → Turn clockwise for a coarser grind.

- Replace the bean hopper.
- Check the grind produced and adjust if necessary.
→ +2: very coarse
⇒ 0: normal
→ -2: very fine
- Replace the bean hopper.
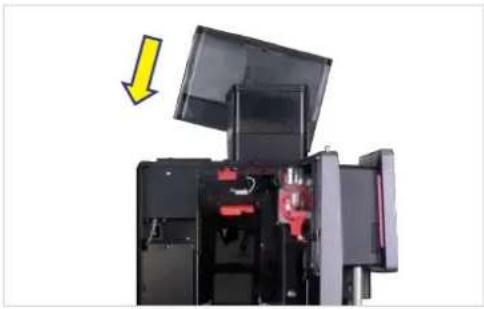
- Push the locking slide all the way in.
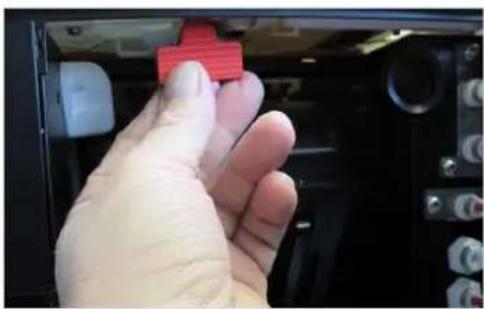

NOTICE
Impairment of function
If the bean hopper and powder hopper are not locked correctly, the function of the coffee machine and the product quality may be impaired.
a) Push the locking slide all the way in.
7.6 Emptying the bean hopper
- Pull the locking slide forwards as far as possible.

- Lift and remove the bean hopper.
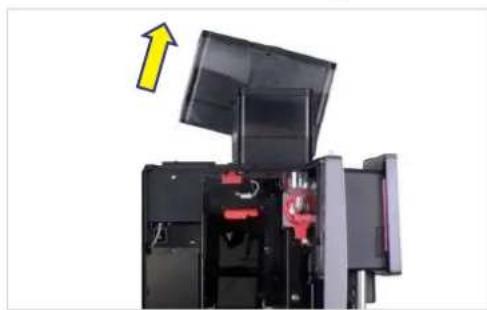
- Empty, clean, and dry the bean hopper.
- Replace the bean hopper.

- Push the locking slide all the way in.


NOTICE
Impairment of function
If the bean hopper and powder hopper are not locked correctly, the function of the coffee machine and the product quality may be impaired.
a) Push the locking slide all the way in.
7.7 Emptying the powder hopper

NOTICE
Contamination from powder
Powder can fall from the powder hopper.
a) Always transport the powder hopper in an upright position and ensure it is closed.
- Pull the locking slide forwards as far as possible.
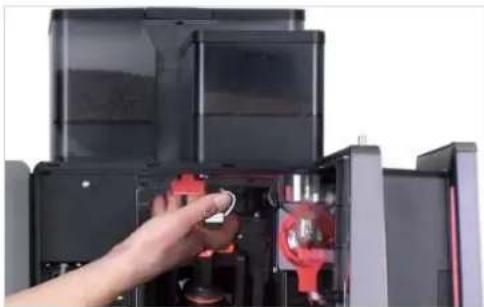
- Lift and remove the powder hopper.
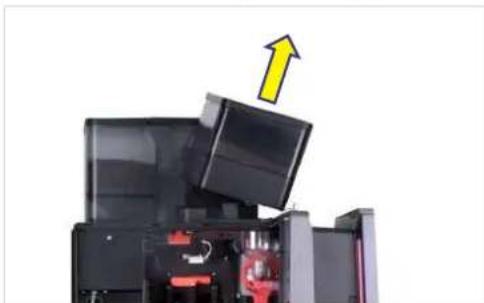
- Empty, clean and dry the powder container.
- Replace the powder hopper.
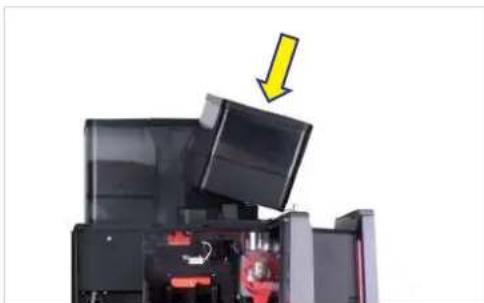
- Push the locking slide all the way in.
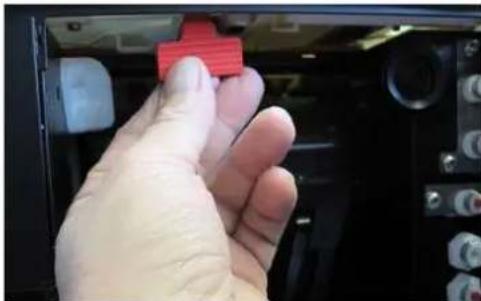

CAUTION
Cutting injuries/crushing
The powder hopper's feeding mechanism can cause cuts or crushing injuries.
a) Exercise care when cleaning the powder hopper.

NOTICE
Impairment of function
If the bean hopper and powder hopper are not locked correctly, the function of the coffee machine and the product quality may be impaired.
a) Push the locking slide all the way in.
7.8 Emptying the grounds container

NOTICE
Formation of mold
Coffee residue can lead to the formation of mold.
a) Empty and clean the grounds container at least once a day.
- Open the door.
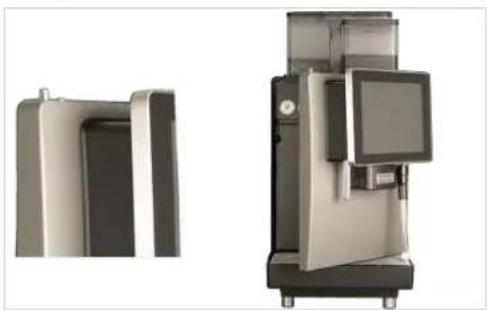
→ The message Door open appears on the operating interface.
- Remove the grounds container.
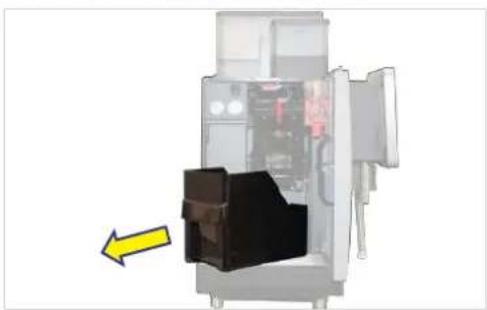
- Empty, clean, and dry the grounds container.
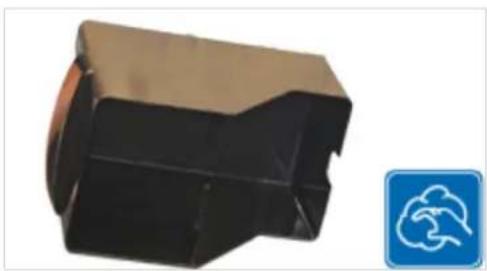
- Replace the grounds container and close the door.

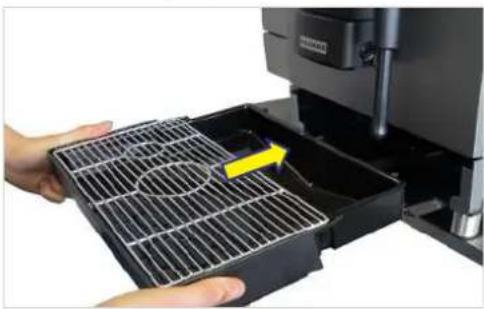
7.9 Emptying the drip tray

Clean the drip tray if a corresponding message is displayed on the operator panel.

NOTICE
Improper handling
Liquid can escape from the drip tray.
a) Transport and empty the drip tray carefully.
√ The message Drip tray full is displayed on the operator panel.

- Pull out the drip tray.

- Remove the drip grid.
- Empty the drip tray.
- Clean and dry the drip tray and drip grid.

- Place the drip grid on the drip tray.
- Slide the drip tray into the machine.
- Tap Confirm.
7.10 Emptying the cooling unit

NOTICE
Spoiled milk
Insufficient cooling or hygiene can cause milk to spoil.
a) Only use pre-cooled milk (2–5 °C). b) Only store milk in the cooling unit during operation. When the machine is not in use, e.g., overnight, store the milk in a refrigerator. c) Clean the machine and cooling unit once a day. d) Only touch the suction hose, the inside of the milk container, and the milk lid after sanitizing your hands, or wear disposable gloves. e) Place the container lid with the suction hose only on a clean surface.

CAUTION
Health hazard due to germ formation
Inadequate cleaning can result in food residues accumulating in the machine and at the spouts, thereby contaminating products.
a) Do not use the machine unless it has been cleaned according to the instructions. b) Clean the machine daily in accordance with the instructions. c) Inform operating personnel of the necessary cleaning measures.
- Open the door.
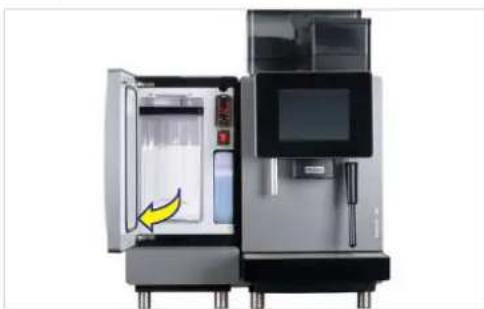
- Remove the milk container.
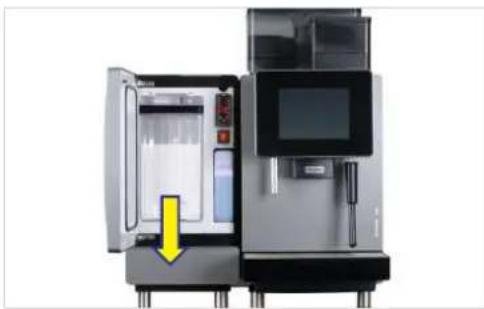
- Store the milk in a refrigerator or dispose of it if necessary.
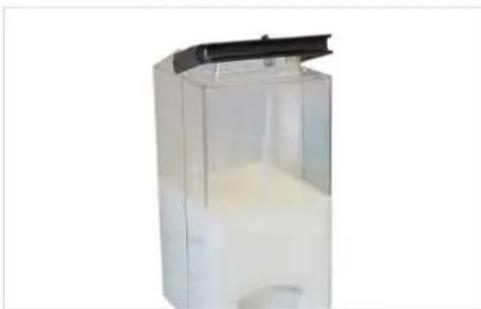
- Clean the milk container, the parts that come into contact with milk, and the cooling chamber.
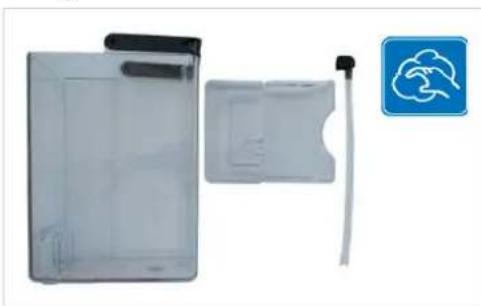
- Insert the clean milk container.

- Switch off the cooling unit if it is no longer required. After switching off, do not close the cooling unit door all the way, but leave it slightly open in order to prevent the formation of odors.
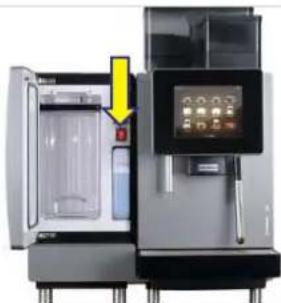
8 PREPARING DRINKS

WARNING
Risk of scalding
Hot drinks can lead to scalding.
a) Always be careful with hot drinks. b) Use only suitable drinking vessels.
8.1 Preparing drinks with Quick Select
- Place an appropriate drinking vessel under the spout.

- Adjust the height of the spout using the spout handle.
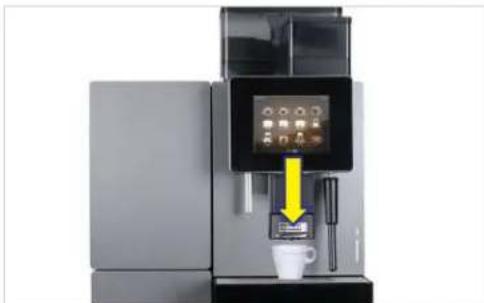
- Select a product.
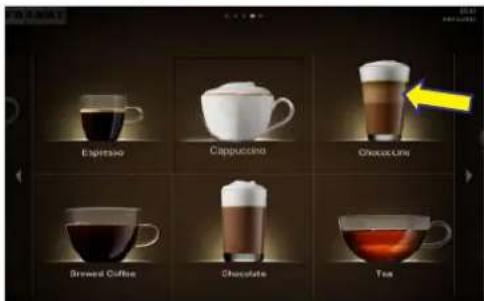
⇒ The Drink Selection product preview appears.
- Select product options.

- Start preparation with the green button.
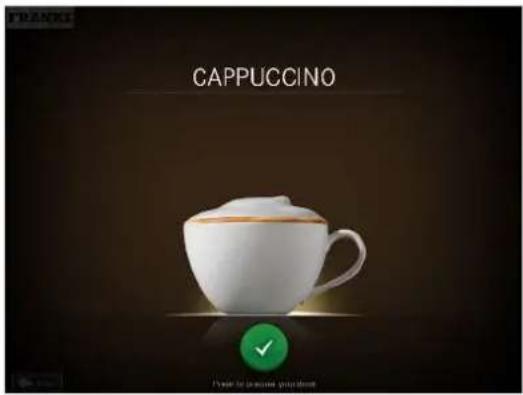
⇒ Preparation begins.
→ The product selection screen appears when the drink is ready.
8.2 Preparing drinks with Cash Register

When preparing several products one after the other, please observe the following:
a) Have sufficient drinking vessels ready to use. b) You can continuously add new products to the waiting list during the preparation. c) You can select and clear products from the waiting list.
- Place an appropriate drinking vessel under the spout.

- Adjust the height of the spout using the spout handle.

- Select product options.
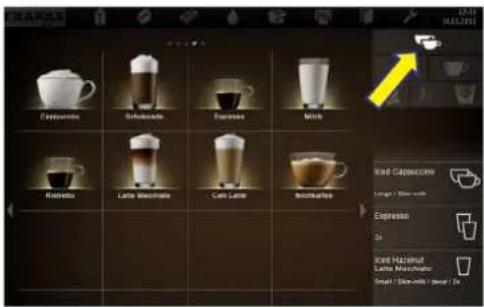
- Select a product.
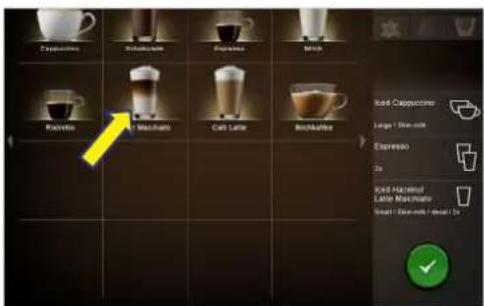
⇒ Preparation begins.
- Add more products to the waiting list as needed.
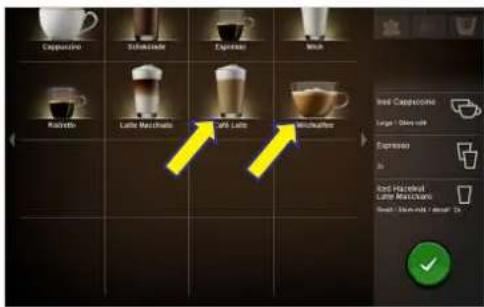
- Start preparation of each of the products in the waiting list by pressing the green button.

→ The next preparation begins.
→ The product selection appears.
→ The drinks are ready.
8.3 Preparing a drink with ground coffee
Example: Quick Select

Only ground coffee may be used. Instant coffee made from dried coffee extract cannot be used.
- Place an appropriate drinking vessel under the spout.

- Adjust the height of the spout using the spout handle.

- Press the Decaffeinated coffee selection button.
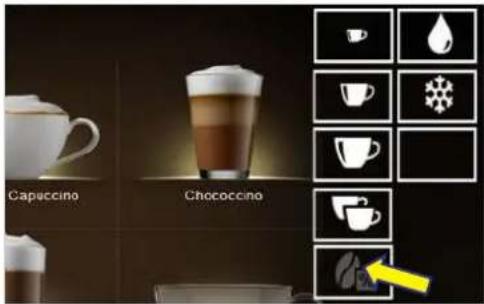
⇒ The Decaffeinated coffee selection button illuminates.
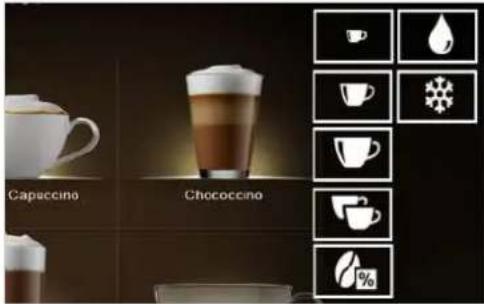
→ The following message appears:
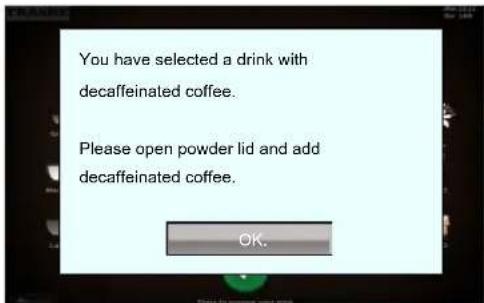
- Open the manual insertion flap.
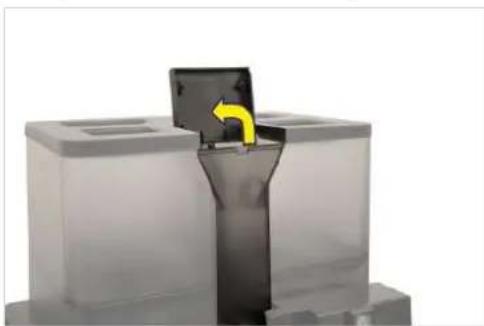
- Fill powder.
- Close the manual insertion flap.

- Confirm the message by pressing OK.
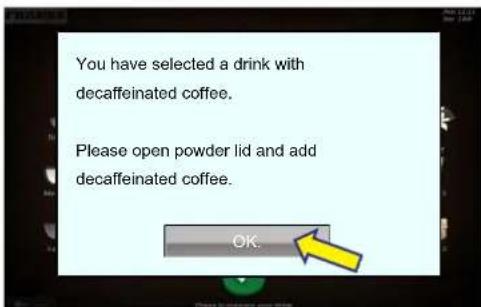
⇒ Preparation begins.
⇒ The product selection appears.
The product is ready.
8.4 Preparing hot water
Example: Quick Select
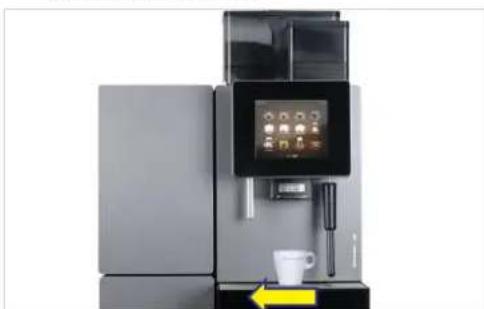
- Place an appropriate drinking vessel under the hot water spout.
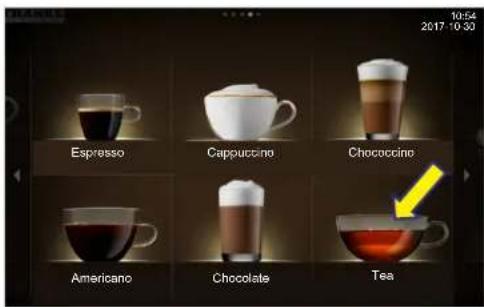
- Select water for tea.
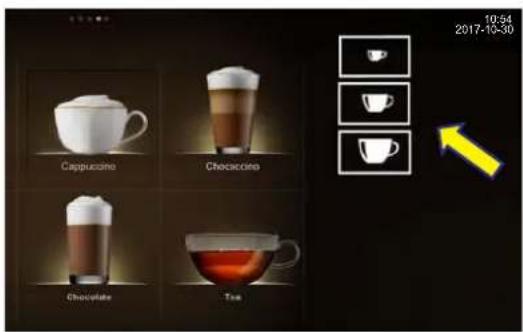
- Select cup size.
Hot water is dispensed until the cycle is complete.

You can stop the hot water dispenser at any time by pressing the cancel button.
8.5 Steam output

The steam wand is suitable for manually heating and foaming milk, as well as for heating other drinks.
- Hold a suitable container under the steam outlet.
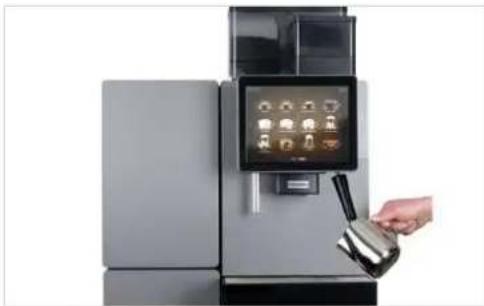
- Select Steam output.
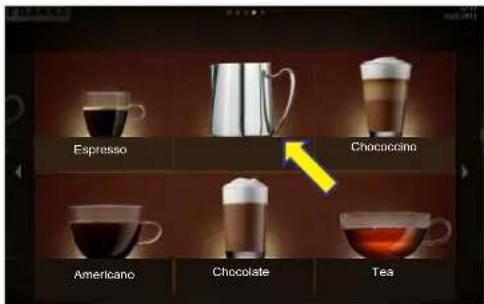
The steam output starts.
- Press the cancel button to stop the steam output.
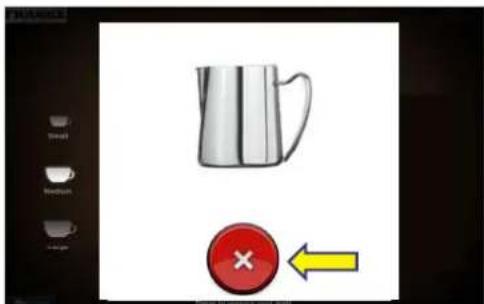
The steam output stops.
→ The drinks overview screen appears.
8.5.1 Cleaning the steam wand after use
- Wipe the steam wand with a damp cloth.
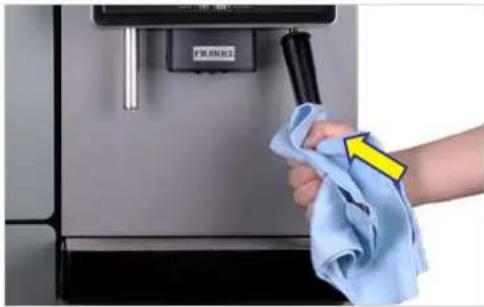
- Start the steam output briefly to clean the nozzle.
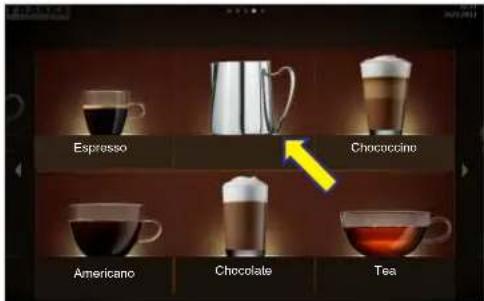
- Press the cancel button to stop the steam output.

→ The steam output stops.
→ The drinks overview screen appears.
9 CLEANING
9.1 Introduction
The perfect coffee experience depends on a perfectly cleaned coffee machine. Clean your coffee machine at least once a day and more frequently if necessary.

NOTICE
Soiled accessories
Soiled accessories can have a negative affect on the functionality of the machine and the quality of the drinks produced.
a) Clean the accessories by using the 5-step method. b) Follow the applicable instructions for accessories.
The automatic cleaning process involves cleaning the coffee machine and cleaning the cooling unit.
Other areas to be cleaned:
- Inner surfaces of the cooling chamber
- Inner side of the door and lip seal
- Milk container and milk container lid
- Milk suction hose, suction fitting, flow / no flow adapter (SU12 only)
- Bean hopper and powder container
Cleaning and maintenance plan [▶ 54]
See also
5-step method [▶ 48]
9.2 5-step method

Clean the removable components of your coffee machine using the 5-step method.
- Remove coarse dirt with a brush or paint brush.

- Soak the parts in hot water with a mild cleaner. Clean the inside of the milk hose with a brush.
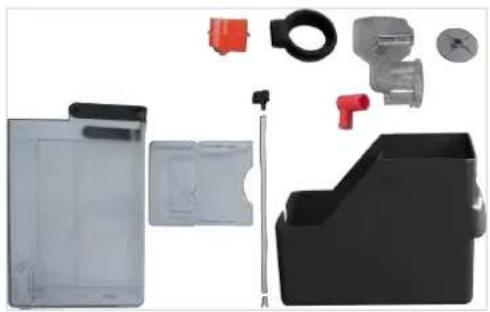
- Wash the parts.

- Rinse the parts thoroughly.
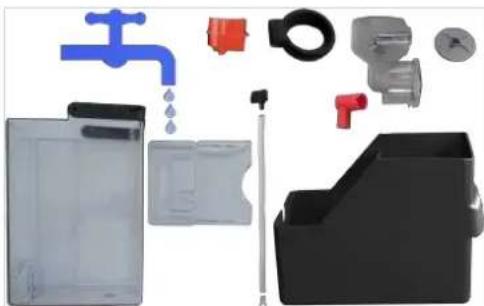
- Dry the parts.

See also
Cleaning [▶ 48]
9.3 Required cleaning accessory
9.3.1 Cleaning accessories for MS EC
- Cleaning tablets
- Microfiber cloth
- Brush set
- Milk system cleaning agent (dosing bottle)
- Cleaning container
9.3.2 Cleaning accessories for FM CM
- Cleaning tablets
- Microfiber cloth
- Brush set
9.4 Starting the cleaning process
9.4.1 Starting cleaning via the Cleaning and Maintenance menu
Switch to the maintenance level
- Tap the Franke logo.
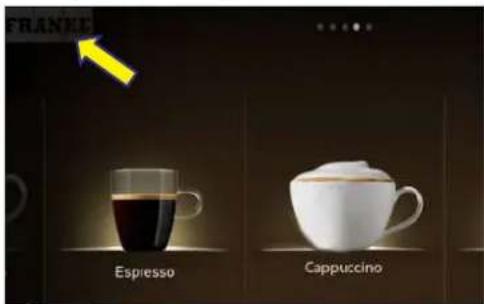
- Enter the PIN. PIN codes [▶ 55]
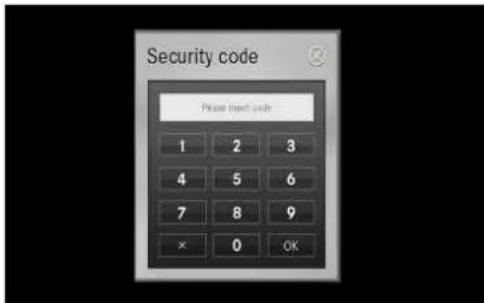
- Press Ok.
- Select the menu.
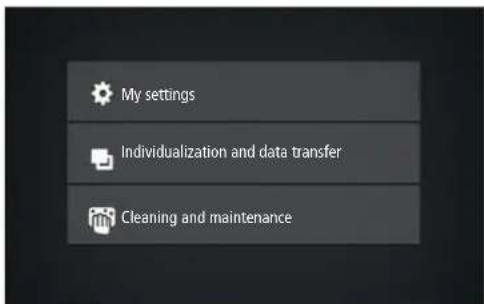
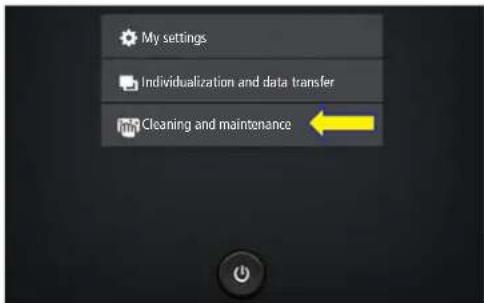
- Select Cleaning and Maintenance.
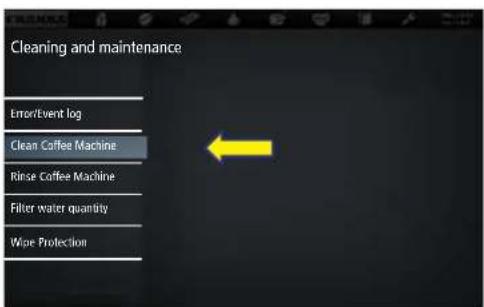
- Select Clean coffee machine.
- Press Yes to start the cleaning process.

- Follow the instructions on the user interface and confirm the individual steps by selecting Next.
→ The machine shows the next step.

WARNING
Risk of scalding
Hot liquids and steam escape during cleaning and can lead to scalding.
a) Keep hands away from the spouts and nozzles during this process.

When the cleaning cycle is complete, the machine either switches back to the maintenance level or the energy saving mode. Your service technician can set the desired option for you.
9.5 Cleaning the internal water tank / Replacing the filter cartridge
- Remove and empty the water tank.
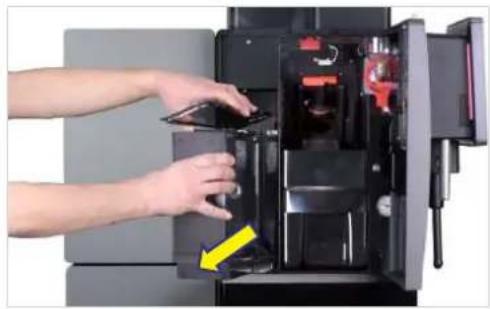
- Unscrew the filter cartridge counterclockwise and remove it from the filter holder.
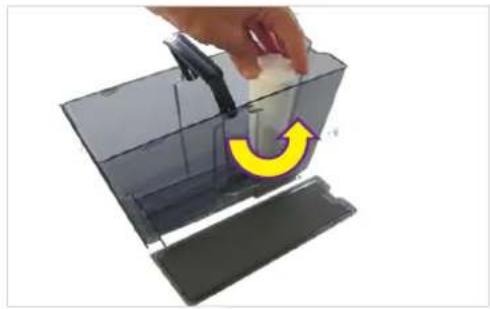
- Dispose of the water filter.
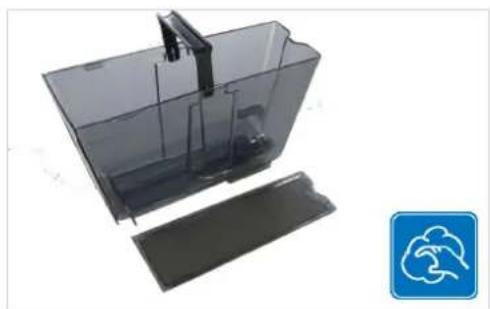
- Clean the water tank using the 5-step method.
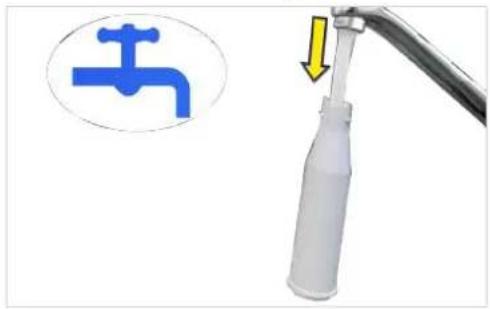
- Fill the new filter cartridge with water.
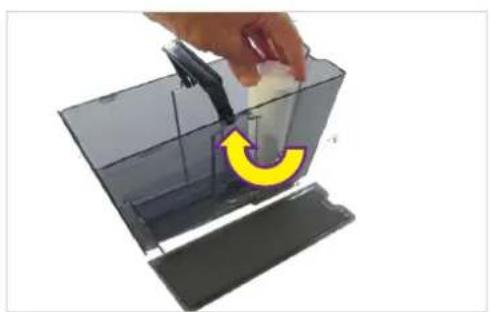
- Insert the new filter cartridge into the filter holder and secure it in place by screwing clockwise.
- Fill the water tank up to the marking with fresh water.
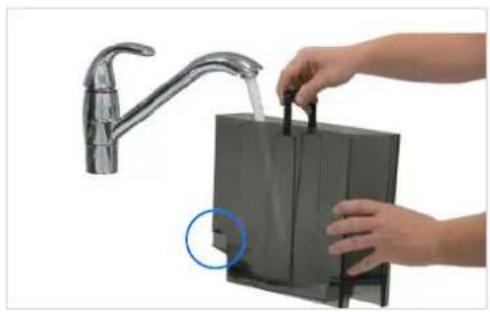
⇒ The surface of the sensor must be dry.
- Push the water tank with lid all the way into the coffee machine.

→ The filter rinsing process is active.
→ The system is filled.
→ Filter replacement is completed.

NOTICE
Malfunction
If the water tank is not pushed in all the way, the pump may draw air into the system.
a) Ensure that pressure is applied to the lower area of the water tank when pushing it into the coffee machine.
9.6 Cleaning the monitor screen
- Switch to the maintenance level.
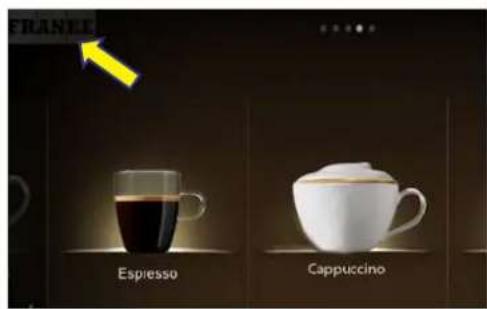
- Select Cleaning and maintenance.
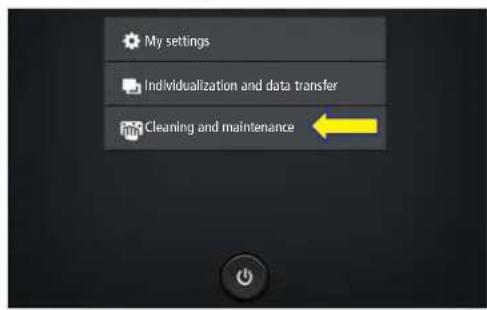

You cannot cancel the locking function of the user interface. The locking function lasts 20 seconds.
3. Select Wipe Protection.
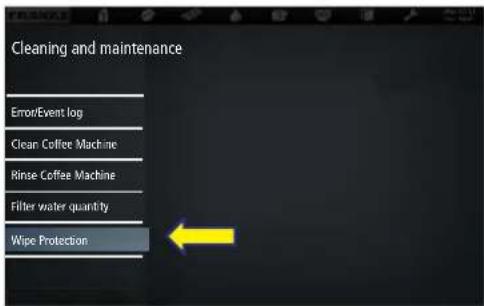
⇒ The user interface is locked for 20 seconds.
4. Clean the monitor screen.
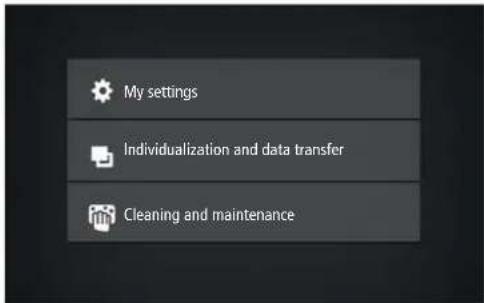
→ The maintenance level appears.
9.7 Cleaning and maintenance plan
Frequency Task Information
| Daily | |
| Daily cleaning in accordance with the See Cleaning [▶ 48] instructions on the coffee machine | |
| Weekly | |
| Clean the bean hopper | |
| Clean the powder hopper | |
| Clean the brewing module See supplied cleaning instructions | |
| Annually/every 30 000 products (whichever occurs first) | Maintenance by service technician Contact a service technician |
See also
Emptying the bean hopper [▶ 34] Emptying the powder hopper [▶ 35]
10 CONFIGURATION
10.1 Switching to the maintenance level
- Tap the Franke logo.

- Enter the PIN. PIN codes [▶ 55]
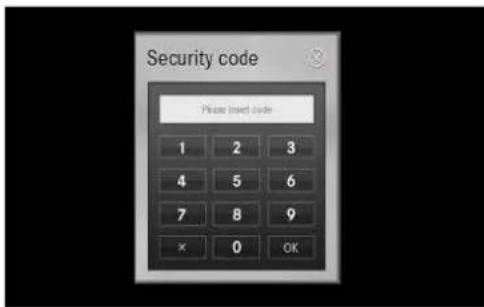
- Press Ok.
- Select the menu.

10.2 PIN codes
Default PIN codes are assigned from the factory:
Owner Specialist Operator
Default PIN 1111 2222 7777
My PIN
The PIN codes for key (secured) products and On/Off machine can be viewed and changed with the owner role in the My settings/Access rights menu.
10.3 My settings menu tree
![graph TD A["My settings"] --> B["0 Startup"] B --> C["1 Set Machine"] C --> D["2 Set Drinks"] D --> E["3 Date and time"] E --> F["6 Access rights"] F --> G["6.2 Owner"] G --> H["6.3 Specialist"] H --> I["6.4 Operator"] I --> J["6.6 Key (secured) Products"] J --> K["6.7 On/Off Machine"] B --> L["0.10…](/content/2026/05/878649/images/b5efaa161b5c7ac59b26c682700079302f09a18710c6afb5f646558a35d360e9.jpg)

Depending on the configuration of your machine, individual menu items may or may not be displayed.
10.4 Input methods

10.5 1 Set machine
You can customize your machine to suit your requirements via the menu 1 Set Machine. The following options are available.
- Set language
- Configure operating mode
- Assign selection buttons
- Set cleaning function
- Change temperature settings
10.5.1 1.1 Language
![graph TD A["My settings"] --> B["1 Set Machine"] B --> C["1.1 Language"]](/content/2026/05/878649/images/658d9f650184f3bd4f78dd5b49bc6412c3f345bd783eb41439b96a7be99f5ef3.jpg)
Parameter Value range Remarks
| Select language de, en, fr, nl, da, fi,no, sv, pl, cs, uk,ru ... | - The language is switched immediately on the user interface- Default: de (German) |
10.5.2 1.2 Operating mode
![graph TD A["My settings"] --> B["1 Set Machine"] B --> C["1.2 Operation Mode"]](/content/2026/05/878649/images/bd02e0bbf25912e4dfdb3a17fd76355fb57b8cc83a9b7c052e71ee4590d291e8.jpg)
Parameters Value range Remarks
| Usage scenario - Non-self-service | ||
| - Self-service | ||
| Operation Mode - Quick Select | - Cash Register | - The only operating mode available in the Non-self-service usage scenario is Cash Register. |
| Products per page - Cash Register: | 4, 9, 16- Quick Select: 6, 12, 20 | - Number of products displayed simultaneously- Default: 16 or 12 |
| Depiction - Photo-realistic | - Iconized | |
| Automatic mode - Yes | - No | |
| Pause between products 1-10 seconds Increment: 1 | ||
| Adapt drinks | - Yes- No | - Possibility for self-service customers to modify the selected drink in accordance with the allocation of the selection buttons- Default: No |
| Custom images | - Yes- No | - Activate customer-specific images- For the self-service usage scenario, Quick Select operating mode- Default: No |
Options
| Parameters Value range Remarks | ||
| Hide cancel button | - Yes | - Display the button for canceling the product |
Parameters Value range Remarks
| - No - Default: No | ||
| Acoustic signal for drink preparation | - Yes | Beeps when the product is ready |
| - No | ||
| Acoustic signal for error messages | - Yes | Beeps in a 3-second cycle if a resource is missing |
| - No | ||
1.2 Operating mode
| Parameters Value range Remarks | ||
| Usage scenario - Non-self-service | - Self-service | |
| Operation Mode - Quick Select | - Cash Register | - The only operating mode available in the Non-self-service usage scenario is Cash Register. |
| Products per page - Cash Register: | 4, 9, 16 | - Number of products displayed simultaneously |
| - Quick Select: 6, 12, 20 | - Default: 16 or 12 | |
| Depiction - Photo-realistic | - Iconized | |
| Automatic mode - Yes | - No | |
| Pause between products 1-10 seconds Increment: 1 | ||
| Adapt drinks - Yes | - No | - Possibility for self-service customers to modify the selected drink in accordance with the allocation of the selection buttons |
| - Default: No | ||
| Custom images - Yes | - No | - Activate customer-specific images |
| - For the self-service usage scenario, Quick Select operating mode | ||
| - Default: No | ||
Options
| Parameters Value range Remarks | ||
| Hide cancel button - Yes | - Display the button for canceling the product | |
| - No | - Default: No | |
| Acoustic signal for drink prepara-tion | - Yes | Beeps when the product is ready |
| - No | ||
| Acoustic signal for error mes-sages | - Yes | Beeps in a 3-second cycle if a resource is missing |
| - No | ||
1.2 Operating mode
| Parameters Value range Remarks |
| Usage scenario - Non-self-service- Self-service |
| Parameters Value range Remarks | ||
| Operation Mode - Quick Select | - Cash Register | - The only operating mode available in the Non-self-service usage scenario is Cash Register. |
| Products per page - Cash Register: | 4, 9, 16 | - Number of products displayed simultaneously- Default: 16 or 12 |
| - Quick Select: 6, 12, 20 | ||
| Depiction - Photo-realistic | - Iconized | |
| Automatic mode - Yes | - No | |
| Pause between products 1-10 seconds Increment: 1 | ||
| Adapt drinks - Yes | - No | - Possibility for self-service customers to modify the selected drink in accordance with the allocation of the selection buttons- Default: No |
| Custom images - Yes | - No | - Activate customer-specific images- For the self-service usage scenario, Quick Select operating mode- Default: No |
Options
| Parameters Value range Remarks | ||
| Hide cancel button - Yes | - Display the button for canceling the product | |
| - No | - Default: No | |
| Acoustic signal for drink prepara-tion | - Yes | Beeps when the product is ready |
| - No | ||
| Acoustic signal for error mes-sages | - Yes | Beeps in a 3-second cycle if a resource is missing |
| - No | ||
1.2 Operating mode
| Parameters Value range Remarks | ||
| Usage scenario - Non-self-service | - Self-service | |
| Operation Mode - Quick Select | - Cash Register | - The only operating mode available in the Non-self-service usage scenario is Cash Register. |
| Products per page - Cash Register: | 4, 9, 16 | - Number of products displayed simultaneously |
| - Quick Select: 6, 12, 20 | - Default: 16 or 12 | |
| Depiction - Photo-realistic | - Iconized | |
| Automatic mode - Yes | - No | |
Parameters Value range Remarks
| Pause between products 1-10 seconds Increment: 1 | ||
| Adapt drinks - Yes | - No | - Possibility for self-service customers to modify the selected drink in accordance with the allocation of the selection buttons- Default: No |
| Custom images - Yes | - No | - Activate customer-specific images- For the self-service usage scenario, Quick Select operating mode- Default: No |
Options
| Parameters Value range Remarks | ||
| Hide cancel button - Yes | - Display the button for canceling the product | |
| - No | - Default: No | |
| Acoustic signal for drink prepara-tion | - Yes | Beeps when the product is ready |
| - No | ||
| Acoustic signal for error mes-sages | - Yes | Beeps in a 3-second cycle if a resource is missing |
| - No | ||
| Hide cancel button - Yes | - Display the button for canceling the product | |
| - No | - Default: No | |
10.5.3 1.3 Selection buttons
![graph TD A["My settings"] --> B["1 Set Machine"] B --> C["1.3 Selection buttons"]](/content/2026/05/878649/images/60c16898295581654e92603c9e68bc6646d03d70cdd6d6d5906b97f8fa8f0c70.jpg)
Parameters Value range Remarks
| Product options - Small | - The maximum twelve selection buttons can be as-signed with various product options in the servicemenu. The product options appear in the Drink Selection status | |
| - Medium | ||
| - Large | ||
| - 2x | ||
| - Decaf | - With up to eight configured selection buttons, but-tons 1-4 are displayed on the left-hand side, withthe rest on the right-hand side | |
| - Extra Shot | ||
| - Iced | - If more than eight selection buttons are configured,buttons 1-6 are displayed on the left-hand side,with the rest on the right-hand side | |
| - Espresso Shot | - Nine or more buttons are displayed at a reducedsize | |
| Recommendation: | ||
| - Selection buttons on left-hand side: Select drinksize. |
Parameters Value range Remarks
| - Selection buttons on the right-hand side: Select additional settings. | ||
| Text display - Function | - Free text | - Default: Function: Labeling corresponds to the name of the selected product option. |
| - No text | - Free text: your own labeling of the selection buttons. | |
| - No text: Switch off labeling. | ||
| Price Amount - Store surcharge for the option. | - The total price is calculated by the machine | |
| - Default: 0.00 | ||
| PLU PLU No. - Store PLU number of price calculation (if PLU numbers are used). | ||
| - Default: 0 | ||
10.5.4 1.4 Cleaning
![graph TD A["My settings"] --> B["1 Set Machine"] B --> C["1.4 Cleaning"]](/content/2026/05/878649/images/fa862e368f2e1c8a82ed7becc21dcb32320cf71052c83dab3acffe01d994a703.jpg)
Process behavior
Parameters Value range Remarks
| Buzzer - Yes | - Acoustic prompts for actions during cleaning | |
| - No | - Default: No | |
10.5.5 1.7 Temperatures
![graph TD A["My settings"] --> B["1 Set Machine"] B --> C["1.7 Temperatures"]](/content/2026/05/878649/images/52e2dab472874c39b9f1dd9e5bf3135fd7d3b153b60442663b364f3dc466af01.jpg)
Parameters Value range Remarks
| Coffee -20 to +20 – The temperature in the coffee boiler is preset bythe service technician- The set temperature can be adjusted by percent-ages using the sliding controller |
| Steam -20 to +20 – The temperature in the steam boiler is preset by theservice technician- The set temperature can be adjusted by percent-ages using the sliding controller |
10.6 2 Set drinks

You can save each product in three user-specific variations. The original cannot be changed.
Only parameters that are relevant for the product are displayed.
The percentage specifications are always based on the preset value.
Tips for configuring the parameters can be found in the chapter Help with problems concerning product quality [▶ 76].

1 Select variation 2 Select area 3 Save settings 4 Select product 5 Confirm variation 6 Prepare a test product 7 Adjust parameters
Setting drinks
Desired action Menu item Information / instruction Number
| Select a product Use the selection arrows to select the product to be defined, then select the variation to be edited | 4, 1 | |
| Change the product description and product text | General Enter the product description and select the product text | 2, 7 |
| Determine the price (only available when payment is activated) | General Determine PLU, prices, and tokens; select the Free option | 7 |
| Adjust water quantity, grinders, brewing quantity, and pressure | Coffee Adjust parameters 2, 7 | |
| Adjust milk quantity Milk | Adjust the milk quantity in percent | 2, 7 |
| Desired action Menu item Information / instruction Number | ||
| Adjust the foam quantity Foam Adjust the foam quantity in percent 2, 7 | ||
| Prepare a test product Test Press Test to prepare the selected product using the modified settings | 6 | |
| Assign a drink variation that is to be prepared with this product selection | Select the variation, then confirm with the checkmark | 1, 5 |
| Save drink settings Save Press Save to save the drink settings 3 | ||
10.7 3 Date and time
10.7.1 3.2 Date and time
![graph TD A["My settings"] --> B["3 Date and time"] B --> C["3.2 Date and Time"]](/content/2026/05/878649/images/75bcc857b5d9c283c2a47d1294dd06f1b509a7b64335725585a6fddf4845082d.jpg)
| Parameter Value range | Remarks | |
| Display | 12 h/24 h | |
| Day | 0-31 | Set the day |
| Month | 0-12 | Set the month |
| Year | 0-63 | Set the year |
| Hour | 0-23/0-11 | Configure hours |
| Minute | 0-59 | Configure minutes |
| Time zone | Set time zone | |
10.7.2 3.2 Date and time
![graph TD A["My settings"] --> B["3 Date and time"] B --> C["3.2 Date and Time"]](/content/2026/05/878649/images/b9713402d09892b412bf5f2cf9cdeddd626f19f9d2c58f9524cc9767630a7fbe.jpg)
| Parameter Value range | Remarks | |
| Display | 12 h/24 h | |
| Day | 0-31 | Set the day |
| Month | 0-12 | Set the month |
| Year | 0-63 | Set the year |
| Hour | 0-23/0-11 | Configure hours |
| Minute | 0-59 | Configure minutes |
| Time zone | Set time zone |
10.7.3 3.3-3.6 Timer 1-4
![graph TD A["My settings"] --> B["3 Date and time"] B --> C["3.3 Timer 1"] D["My settings"] --> E["3 Date and time"] E --> F["..."]](/content/2026/05/878649/images/07dce10d1e7ea6fe2067c4611471471993be80df41751b5553dcb7f13d857a33.jpg)
Parameter Value range Remarks
| Active Mo, Tu, We, Th, Fr, Sa, Su | Activate or deactivate days by tapping |
| On/Off hours 0–23/0–11 Switch-on time (hour) | |
| On/Off minutes 0–59 Switch-on time (minute) | |
| Monday – Sunday Yes/No Days on which the machine will switch on automatically | |
10.8 4 Nutritional value information
10.8.1 Menu item 4.1 Milk
![graph TD A["My settings"] --> B["4 Nutritional value information"] B --> C["4.1 Milk"]](/content/2026/05/878649/images/32a18bd392d893fe9bec6fae7f25aa7d560be51968da927344aa86e3aecda93e.jpg)
Parameter Value range Remarks
| Sugar (g) Number Enter value per 100 ml | ||
| Fat (%) Number Enter value per 100 ml | ||
| Protein (g) | Number Enter value per 100 ml | |
| Calories (kcal) | Number Enter value per 100 ml | |
| Ingredients | Yes/No | Default list of ingredients. Specify whether the ingredient is contained in the selected resource |
| Special allergens Characters | Enter ingredients or allergens that are not included in the list | |
10.8.2 Menu item 4.3 Powder
![graph TD A["My settings"] --> B["4 Nutritional value information"] B --> C["4.3 Powder"]](/content/2026/05/878649/images/a62c93ab4ff22ac671c1dede0871f6b6878d0a748c87238707389379954c4fba.jpg)
Parameters Value range Remarks
Sugar (g) Number Enter value per 100 ml
Fat (%) Number Enter value per 100 ml
Protein (g) Number Enter value per 100 ml
Calories (kcal) Number Enter value per 100 ml
Ingredients Yes / No Default list of ingredients. Specify whether the ingredient is contained in the selected resource
Special allergens Characters Enter ingredients or allergens that are not included in the list
10.8.3 Menu item 4.3 Powder
![graph TD A["My settings"] --> B["4 Nutritional value information"] B --> C["4.3 Powder"]](/content/2026/05/878649/images/7f1080e66f6c3e8fbba84f06fe974ae179394856d561e71f3a05fe0b3c3acfbe.jpg)
Parameters Value range Remarks
Sugar (g) Number Enter value per 100 ml
Fat (%) Number Enter value per 100 ml
Protein (g) Number Enter value per 100 ml
Calories (kcal) Number Enter value per 100 ml
Ingredients Yes / No Default list of ingredients. Specify whether the ingredient is contained in the selected resource
Special allergens Characters Enter ingredients or allergens that are not included in the list
10.9 6 Access rights
10.9.1 Menu item 6.2 Owner
![graph TD A["My settings"] --> B["6 Access rights"] B --> C["6.2 Owner"]](/content/2026/05/878649/images/7b898fbae8428943bb633926960c597afc9f732eae2cc01016b41a3d1b098d88.jpg)
Parameters Value range Remarks
Set PIN 0-9 - Authorizations: Access to My settings; call up
counter values
- Default PIN: 1111
10.9.2 Menu item 6.3 Specialist
![graph TD A["My settings"] --> B["6 Access rights"] B --> C["6.3 Specialist"]](/content/2026/05/878649/images/78446acdc7ef044baf045065f3efae94e52939b2832d752420f89cbfe7eec2cd.jpg)
Parameters Value range Remarks
Set PIN 0-9 - Authorizations: Limited access to My settings; call
up the counter values of all products
- Default PIN: 2222
10.9.3 Menu item 6.4 Operator
![graph TD A["My settings"] --> B["6 Access rights"] B --> C["6.4 Operator"]](/content/2026/05/878649/images/493f6bd00cf7584efbc046856522ab918179dec744987a183dec6443173e4a40.jpg)
Parameters Value range Remarks
Set PIN 0-9 - Authorization: Call up the counter value of all products
- Default PIN: 7777
10.9.4 Menu item 6.6 Key (secured) products
Parameters Value range Remarks
![graph TD A["My settings"] --> B["6 Access rights"] B --> C["6.6 Key (secured) Products"]](/content/2026/05/878649/images/3652c279212328fb7690a157be59ce9a92349400ed75ee5aa63755d7f8f3ebc8.jpg)
Set PIN 0-9 - Authorization: Lock and unlock key (secured) products - Default PIN: 8888
Set PIN 0-9 - Authorization: Lock and unlock key (secured) products - Default PIN: 8888
Parameters Value range Remarks
![graph TD A["My settings"] --> B["6 Access rights"] B --> C["6.7 On/Off Machine"]](/content/2026/05/878649/images/42dd29a0b32e0b3f013656be077e7bab4e491edb964d50e3c8e4ee12535054bb.jpg)
Set PIN 0-9 - Authorization: Switch the coffee machine On/Off - Default PIN: 9999
Set PIN 0-9 - Authorization: Switch the coffee machine On/Off - Default PIN: 9999
11.1 Overview
11.1 Overview
This menu provides you with the following options:
- Use existing Franke media for drinks, screen savers, or as advertising media.
- Upload and view your own media objects on the machine.
- Use your own media for drinks, screen savers, or as advertising media.
- Configure the behavior of the various operating modes and screen savers.
- Save settings.
- Create regular backups of your A400 to a USB stick.
11.2 Individualization and data transfer menu tree
![graph TD A["Individualization and data transfer"] --> B["1 Manage my media"] B --> C["1.1 Load media"] C --> D["1.2 Back up media"] D --> E["1.3 Advertising media"] E --> F["1.4 Product images"] F --> G["1.5 Screen saver"] G --> H["1.6 Audio files"] H --> I["1.7 Eject USB stick"] I --> J["1.8 Create…](/content/2026/05/878649/images/2a94ef7174b4b181df476eae734345d217126a5aab0f413c08df88d866795bbb.jpg)

By using 4 Set default values, selected parameters can be reset to the preset values.
5 Import FPC becomes usable when a USB stick with a valid Franke product catalog is connected.
8 Eject USB stick logs off connected USB sticks. If a USB stick is being used, the menu item will appear in green, otherwise it appears in orange.
The multimedia functions are only available in the Inspire Me (if available) and Quick Select operating modes.
11.3 Switching to the maintenance level
- Tap the Franke logo.
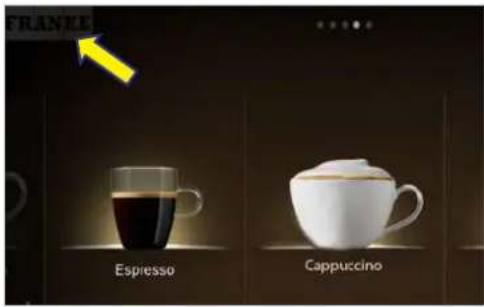
- Enter the PIN. PIN codes [▶ 55]

- Press Ok.
- Select the menu.

11.4 Requirements for your own media
| Media Advertising images (ad-vertising media) | Product images Screen saver | ||
| Size | 800 x 600 px 430 x 274 px 800 x 600 px | ||
| Data formats | 24 bit PNG 24 bit PNG and 8-bit alpha channel (if necessary) | 24 bit PNG | |
| Storage location on a USB stick | QML-Files\rc\custom\images | QML-Files\rc\custom\drinks | QML-Files\rc\custom\screensavers |
11.5 Required folder structure on the USB stick
You must maintain a specific directory structure so that the A400 can recognize your media without any difficulty.
Folder structure
[Drive]
QML-Files\
rc\
custom\
drinks
images
screensavers
- Create the folder structure once, save it, and then you will be able to access it again quickly.
- You can also generate this directory structure automatically. To do this, use menu item 1.8 Create directory structure.
11.6 Loading or deleting your own media

The upload process is the same for all media.
Free space: 400 MB
The images on the USB stick must be present in the required folder structure, have the correct data format, and be of the correct size. See Requirements for your own media [▶ 70].
Desired action Menu item Information / instruction
| Load media onto the machine | 1.1 Load media - Insert a USB stick with the required folder structure- Select the media type from the drop-down menu: Advertising media/Product images/Screen savers/Audio files- Select the media using drag&drop- Press Save | |
| Back up media from the machine | 1.2 Back up media - Insert a USB stick- Select the media type- Save individual media files or all of the media onto the USB stick | |
| Delete media 1.3 Advertising media | - Open the desired menu- Select the media that is no longer required- Delete the media that is no longer required by pressing the Clear button- Drag a medium from the selection below to an existing medium aboveThe existing medium is replaced | |
| 1.4 Product images | ||
| 1.5 Screen saver |
11.7 Using your own advertising media
11.7.1 Configuring your own advertising media
Menu item 2.7 My advertising media

The activated advertising media can be switched on for each drink by selecting My settings > Set drinks.
Desired action Menu item Information / instruction
| Use media 2.7 My advertising media – Tap the medium that you wish to use in the lower section– Drag the medium to the top | ||
| Remove used media 2.7 My advertising media – Tap a medium that you no longer wish to use in the upper section– Drag the medium to the bottom | ||
| View a selection | 2.7 My advertising media | – SelectPreviewto check the selection |
| Activate advertising media | 2.7 My advertising media | – Select Changeto activate the advertising media |
11.7.2 Assigning my product images

An image must be assigned to each available product.
The images can be activated by selecting My settings > Set machine > Operating mode.
Products to which no image has been assigned will be displayed without an image.
You can either use the Franke images or your own, but you cannot mix the two types with one another.
Desired action Menu item Information / instruction
| Select an image 2.12 My product images - Tap the image | - Press Select image |
| Remove an image 2.12 My product images - Tap the image | - Press Remove image |
11.8 Displaying languages and configuring nutritional values
Desired action Menu item Information / instruction
| Switching languages | 2.13 Configure application | - Activate language switching- Select languages to be displayed |
| Set the waiting time for switching language | 2.13 Configure application | - Set theTimeoutuntil the system switches back to the default language |
| Display nutritional value information | 2.13 Configure application | - Activate the display of nutritional value information |
11.9 Loading/backing up data
11.9.1 Backing up data
Desired action Menu item Information / instruction
| Export a configuration and media | 3.1 Back up data - Export configuration |
| - Back up Franke media | |
| - Back up your own media | |
| - Eject USB stick |
11.9.2 Back up XML data
Desired action Menu item Information / instruction
| Back up XML data 3.3 Back up XML data Export operating data such as maintenance data, error logs, or product and machine counters |
11.10 Restoring default values
Desired action Menu item Information / instruction
| Set default values 4 Set default values Restore the default values in the selected areas |
12 TROUBLESHOOTING
12.1 Error messages
When an error occurs, the machine displays an error message that provides notices regarding the elimination of the error.
Non-self-service mode
When the non-self-service mode is selected, an error is indicated via a highlighted symbol. Tap the symbol for further information.


A message with instructions
Self-service mode
When the self-service mode is selected, an error is indicated via a colored triangle in the upper right-hand corner of the operator panel. Tap the symbol for further information.

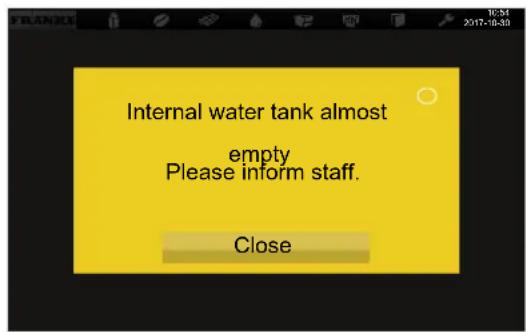
A message with instructions for your customer

If the entire system is affected by an error, error messages will appear automatically. The machine must be restarted in the event of serious errors.
a) To restart the machine, switch it off via the main switch

b) Wait a minute and then switch it back on again. c) Check the power supply if the machine fails to start. d) Contact your service technician if the machine cannot be started or if you are unable to rectify the error.
12.2 Color code for error messages
12.3 Tips for good coffee drinks

NOTICE
Poor drink quality
The oil from the coffee beans is deposited on the inside of the bean hopper as a thin film of oil. This deposited oil ages quickly and impairs the taste of the drinks produced.
a) Remove the oil film from the inside of the bean hopper on a daily basis. b) To do this, use a dry cloth or a cloth moistened only with water. c) Do not use any cleaners, as these alter the taste of the coffee.

The aromas of the coffee beans evaporate in the bean hopper as a result of heat and air exchange. The quality will have already deteriorated after 3 hours.
a) Coffee beans should not be moist. b) Seal any open coffee bean packs in an airtight manner. c) Do not store coffee beans in a refrigerator or freezer. d) Only fill the coffee beans into the bean hopper that you will need for the next 3 hours.
12.4 Help with problems concerning product quality
| Problem Possible causes Possible solutions | ||
| Coffee tastes stale Grind too coarse | Select a finer grind (see Setting the grind coarseness [33]) | |
| Too little coffee Increase the amount of coffee | ||
| Temperature too low Increase the temperature | ||
| Coffee is old Use fresh coffee | ||
| Bean hopper not locked correctly Check the bean hopper locking mecha-nism (see Emptying the bean hopper [34], Setting the grind coarseness [33]) | ||
| Coffee tastes strange Poor grind Contact customer service | ||
| Minimal coffee usage Pour a small amount of coffee beans into the bean hopper | ||
| Spoiled coffee beans Replace coffee beans | ||
| Residual cleaner Rinse the machine | ||
| Dirty cup Check dishwasher | ||
| Poor water quality (chlorine, hardness, etc.) Have the water quality checked | ||
| Coffee tastes bitter | Temperature too high | Lower coffee temperature |
| Grind too fine | Select a coarser grind (see Emptying the bean hopper [34], Setting the grind coarseness [33]) | |
| Coffee quantity too low | Increase the amount of coffee | |
| Roast too dark | Use lighter coffee roast | |
| Coffee tastes sour | Temperature too low Increase coffee temperature | |
| Roast too light | Use darker coffee roast | |
| Grind too coarse | Select a finer grind (see Emptying the bean hopper [34], Setting the grind coarseness [33]) | |
| Consistency of powder products | Viscous | Use less powder, use more water |
| Watery | Use more powder, use less water | |
| Powder clumping or moist | Clean and dry powder system | |
| Taste of powder products Too sweet Use less powder, use more water | ||
13 DECOMMISSIONING
13.1 Preparing for decommissioning
- Clean the machine using the automatic cleaning function. Cleaning [▶ 48]
- Empty the bean hopper and powder hopper.
- Clean the bean hopper and powder hopper.
- Empty the milk container.
- Clean the milk container and container lid.
- Clean the inside of the milk hose with a brush.
- Clean the suction filter with a twisted-in-wire brush.
- Clean the flow / no flow adapter.
13.2 Short-term decommissioning (up to 3 weeks)
√ The machine remains in place. 1. Enable the energy saving mode. 2. Disconnect the machine from the power supply. 3. Close the water supply for the water connection. 4. Clean any add-on units. 5. Switch off the add-on units and disconnect them from the power supply.
13.3 Long-term decommissioning

NOTICE
Functionality of the machine is impaired in the event of long-term decommissioning and storage
If you plan to start using your machine again at a later date, it is essential service measures are implemented. The coffee machine must be maintained, installed, and cleaned before preparing any drinks.
a) Contact the Franke Service team for information regarding proper decommissioning and storage. b) Have your coffee machine drained by your service technician. c) Remedial maintenance may be required when commissioning the machine if it has been stored in excess of 6 months.
13.4 Transport and storage

Protect the machine from mechanical damage and adverse environmental conditions during transport and storage. Protect the machine from the following:
- Vibrations
- Dust
- Sunlight
- Falling or tipping over
- Slipping during transport
The following conditions must be fulfilled:
- Permissible temperatures: -10 to +50 °C
- If the machine has not been drained and emptied completely, it must not be stored at sub-zero temperatures
- Relative humidity: max. 80%
- Sufficient structural integrity and fastening
- Set the machine up in a standing position
- Machine empty and system emptied
- Machine and loose parts packaged, preferably in their original packaging

CAUTION
Bodily injury
Lifting heavy objects can cause injury.
a) Do not lift heavy objects on your own. b) Use suitable tools and aids to reduce the load.
13.5 Recommissioning after prolonged periods of storage or non-use

NOTICE
Deterioration in storage
Components may no longer function as they should if they have been stored or unused for periods in excess of 6 months.
a) Contact your Service team for information regarding restoring and recommissioning your machine.
14 DISPOSAL
Disposal of consumables
- Beans, powder, and coffee grounds can be composted.
- Observe the information on the label when disposing of any unused cleaning agent.
- Dispose of any liquids in the cleaning container or drip tray via the waste water system.
Disposing of the machine and other devices

The machine complies with European Directive 2012/19/EU regarding Waste Electrical and Electronic Equipment (WEEE) and must not be disposed of with household waste.

Dispose of electronic components separately.

Dispose of plastic parts in accordance with their marking.

Two people are required to transport the coffee machine.
15 TECHNICAL DATA
15.1 Technical data for the coffee machine
| Bean hopper capacity 0,6 kg | |
| 1,2 kg | |
| Powder hopper capacity 0,6 kg | |
| 1,2 kg | |
| Coffee boiler Volume: 0,9 l | |
| Operating pressure: 800 kPa (8 bar) | |
| Voltage: 230 V | |
| Power: 2,5 kW | |
| Steam boiler Volume: 0,9 l | |
| Operating pressure: 100 kPa (1 bar) | |
| Voltage: 230 V | |
| Power: 2,5 kW | |
| Water tank (internal) 4 l | |
| Drip tray 3 l | |
| Wastewater tank (external) 16 l | |
| Noise emission < 70 dB | |
| Weight 38 kg | |
| Ambient conditions Humidity: max. 80 % | |
| Ambient temperature: 10-32 °C |
15.2 Electrical connections
| Type Country | |||
| A400 | CH Voltage | 200-240 V | |
| FCS4060 | Frequency | 50-60 Hz | |
| Power | 2100-2300 W | ||
| Current consumption | 9.6 A | ||
| Fuse | 10 A | ||
| Connection | 1L N PE | ||
| A400 | EU | Voltage | 220-240 V |
| FCS4060 | GB | Frequency | 50-60 Hz |
| CH | Power | 2400-2800 W | |
| Current consumption | 11.64-12.71 A | ||
| Fuse | 13/16 A | ||
| Connection | 1L N PE | ||
| A400 | JP | Voltage | 200 V |
| FCS4060 | Frequency | 50-60 Hz | |
| Power | 2300 W | ||
| Current consumption 11.2 A | |||
| Fuse 16 A | |||
| Connection 2L PE | |||
| CW | EU | Voltage 220-240 V | |
| FCS4054 | GB | Frequency 50-60 Hz | |
| CH | Power 110-130 W | ||
| Current consumption | |||
| Fuse 10 A | |||
| Connection 1L N PE | |||
| CW | JP Voltage 100 V | ||
| FCS4054 | Frequency 50-60 Hz | ||
| Power 80 W | |||
| Current consumption 11.2 A | |||
| Fuse 10 A | |||
| Connection 1L N PE | |||
| Power cord 1T310466 | |||
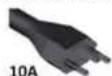
15.3 Power cord
Fuse 10 A
Country Item number Plug
CH 1T310036
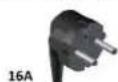
Fuse 16 A
Country Item number Plug
EU 1N330002
GB 1N330001
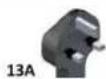
CH 1N330000

15.4 Cooling unit SU05
| Device type | FCS4048 |
| Milk container | 5 l |
| Ambient conditions | Humidity: max. 80 %Ambient temperature: 10–32 °C |
| Refrigerant R134a/40 g |
| Climate class T (tropical, suitable for temperatures between 16-43 °C) |
| Noise emission < 70 dB |
| Weight SU05 MS: 16.1 kg |
| SU05 FM: 23.0 kg |
| Cooling temperature 2.0-5.0 °C |
| Dimensions (width/depth/height) 270 mm/474 mm/540 mm |
15.5 Cup warmer CW
Device type FCS4054
Capacity Up to 120 cups (depending on cup size)
Weight approx. 20 kg
Dimensions (width/depth/height) 270 mm/475 mm/540 mm
15.6 KE200 cooling unit
Weight approx. 13 kg
Dimensions (width/depth/height) 225 mm/453 mm/330 mm
15.7 Chill&Cup
Weight approx. 29 kg
Dimensions (width/depth/height) 334 mm/471 mm/502 mm
15.8 Accounting system AC
Device type FCS4056
Weight approx. 18 kg
Dimensions (width/depth/height) 200 mm/451 mm/542 mm
Numerical
5-step method 11,48
A
Advertising media 71
Ambient conditions 80, 81
Annually 54
B
Bean hopper 80
Beans
Disposal 79
C
Cancel button 11
Clean coffee machine 50
Cleaning
Drip grid 37
Drip tray 37
Cleaning agent
Disposal 79
Cleaning container
Disposing of liquid 79
Cleaning the monitor screen 53
Coffee boiler 80
Coffee grounds
Disposal 79
Credit Mode 24
D
Daily 54
Dashboard 11, 13
Decommissioning 77
Directory structure 71
Disposal 79
Drip grid 37
Drip tray 37
Disposing of liquid 79
E
Electronic components
Disposal 79
Error messages 74
Installation dimensions 26
Intended use 6
Media
Back up 73
Load 73
Requirements 000
Noise emission 80, 82
Operating mode
Cash Register 23
Non-self-service mode 74
Quick Select 24
Self-service 74
Operator panel 37
P
Plastic parts
Disposal 79
Powder
Disposal 79
Prerequisites 11
Product images 71
S
Screen saver 71
Spout 42
Height adjustment 42
Start button 11
Steam boiler 80
Steam output 47
Steam wand 47
T
Tips and tricks 11
Transport 79
Troubleshooting
Machine error 74
U
USB stick 70
W
Wastewater tank (external) 80
Weekly 54
Wipe Protection 53

- FOR YOUR SAFETY
- INTENDED USE
- COFFEE MACHINE
- PLEASE NOTE
- ADD-ON UNITS
- COOLING UNIT
- CUP WARMER
- ACCOUNTING SYSTEM
- PREREQUISITES FOR USING THE COFFEE MACHINE
- EXPLANATION OF SAFETY INSTRUCTIONS ACCORDING TO ANSI
- WARNING
- CAUTION
- GENERAL SAFETY CONCERNS WHEN USING THE COFFEE MACHINE AND ADD-ON UNITS
- RISK OF FATAL INJURY FROM ELECTROCUTION
- DANGER OF SUFFOCATION
- ⚠ WARNING
- RISK OF BURNS
- RISK OF SCALDING
- RISK OF INJURY
- IRRITATION FROM CLEANERS
- HEALTH HAZARD DUE TO GERM FORMATION
- HEALTH HAZARD DUE TO ALGAE FORMATION
- FORMATION OF MOLD
- CUTTING INJURIES
- EXPLANATION OF SYMBOLS
- SYMBOLS USED IN THE MANUAL
- ORIENTATION
- SYMBOLS USED IN THE SOFTWARE
- SYMBOLS USED FOR NAVIGATION
- SYMBOL NAME DESCRIPTION
- SYMBOLS ON THE DASHBOARD
- SYMBOL DESIGNATION DESCRIPTION
- DEPICTION OF ERROR MESSAGES
- COLOR CODE FOR ERROR MESSAGES
- SCOPE OF DELIVERY
- IDENTIFICATION
- POSITION OF TYPE PLATES
- TYPE KEY
- DESCRIPTION OF MACHINE
- INTRODUCTION
- OPTIONS
- COFFEE MACHINE COMPONENTS
- COMPONENTS OF THE COOLING UNIT WITH FOAMMASTER
- CUP WARMER (OPTIONAL)
- ACCOUNTING SYSTEM (OPTIONAL)
- OVERVIEW OF OPERATING MODES
- USER INTERFACE
- CASH REGISTER OPERATING MODE
- CASH REGISTER
- QUICK SELECT OPERATING MODE
- OPERATING MODE QUICK SELECT WITH CREDIT MODE
- DISPLAY
- INSTALLATION
- PREPARATIONS
- DIMENSIONS OF THE A400 WITH COOLING UNIT SU
- REQUIREMENTS OF THE WATER SUPPLY
- WATER CONNECTION
- WATER DRAINAGE
- FILLING AND EMPTYING
- FILLING BEANS
- FILLING POWDER
- FILLING THE WATER TANK
- NOTICE
- MACHINE DAMAGE
- MALFUNCTION
- FILLING MILK
- IMPAIRED DRINK QUALITY
- FILLING MILK FOR THE SU
- SETTING THE GRIND COARSENESS
- IMPAIRMENT OF FUNCTION
- EMPTYING THE BEAN HOPPER
- EMPTYING THE POWDER HOPPER
- CONTAMINATION FROM POWDER
- CUTTING INJURIES/CRUSHING
- EMPTYING THE GROUNDS CONTAINER
- EMPTYING THE DRIP TRAY
- IMPROPER HANDLING
- EMPTYING THE COOLING UNIT
- SPOILED MILK
- PREPARING DRINKS
- PREPARING DRINKS WITH QUICK SELECT
- PREPARING DRINKS WITH CASH REGISTER
- PREPARING A DRINK WITH GROUND COFFEE
- EXAMPLE: QUICK SELECT
- PREPARING HOT WATER
- STEAM OUTPUT
- CLEANING THE STEAM WAND AFTER USE
- CLEANING
- SOILED ACCESSORIES
- OTHER AREAS TO BE CLEANED
- STEP METHOD
- REQUIRED CLEANING ACCESSORY
- CLEANING ACCESSORIES FOR MS EC
- CLEANING ACCESSORIES FOR FM CM
- STARTING THE CLEANING PROCESS
- STARTING CLEANING VIA THE CLEANING AND MAINTENANCE MENU
- SWITCH TO THE MAINTENANCE LEVEL
- CLEANING THE INTERNAL WATER TANK / REPLACING THE FILTER CARTRIDGE
- CLEANING THE MONITOR SCREEN
- SELECT WIPE PROTECTION
- CLEAN THE MONITOR SCREEN
- CLEANING AND MAINTENANCE PLAN
- SEE ALSO
- CONFIGURATION
- SWITCHING TO THE MAINTENANCE LEVEL
- PIN CODES
- OWNER SPECIALIST OPERATOR
- MY SETTINGS MENU TREE
- INPUT METHODS
- SET MACHINE
- LANGUAGE
- OPERATING MODE
- SELECTION BUTTONS
- PROCESS BEHAVIOR
- TEMPERATURES
- PARAMETERS VALUE RANGE REMARKS
- SET DRINKS
- SETTING DRINKS
- DATE AND TIME
- TIMER
- NUTRITIONAL VALUE INFORMATION
- MENU ITEM 4.1 MILK
- MENU ITEM 4.3 POWDER
- ACCESS RIGHTS
- MENU ITEM 6.2 OWNER
- MENU ITEM 6.3 SPECIALIST
- MENU ITEM 6.4 OPERATOR
- SET PIN 0-9 - AUTHORIZATION: LOCK AND UNLOCK KEY (SECURED) PRODUCTS - DEFAULT PIN
- SET PIN 0-9 - AUTHORIZATION: SWITCH THE COFFEE MACHINE ON/OFF - DEFAULT PIN
- OVERVIEW
- INDIVIDUALIZATION AND DATA TRANSFER MENU TREE
- REQUIREMENTS FOR YOUR OWN MEDIA
- REQUIRED FOLDER STRUCTURE ON THE USB STICK
- LOADING OR DELETING YOUR OWN MEDIA
- USING YOUR OWN ADVERTISING MEDIA
- CONFIGURING YOUR OWN ADVERTISING MEDIA
- ASSIGNING MY PRODUCT IMAGES
- DISPLAYING LANGUAGES AND CONFIGURING NUTRITIONAL VALUES
- LOADING/BACKING UP DATA
- BACKING UP DATA
- BACK UP XML DATA
- RESTORING DEFAULT VALUES
- TROUBLESHOOTING
- ERROR MESSAGES
- NON-SELF-SERVICE MODE
- SELF-SERVICE MODE
- TIPS FOR GOOD COFFEE DRINKS
- POOR DRINK QUALITY
- DECOMMISSIONING
- PREPARING FOR DECOMMISSIONING
- SHORT-TERM DECOMMISSIONING (UP TO 3 WEEKS)
- LONG-TERM DECOMMISSIONING
- TRANSPORT AND STORAGE
- BODILY INJURY
- RECOMMISSIONING AFTER PROLONGED PERIODS OF STORAGE OR NON-USE
- DETERIORATION IN STORAGE
- DISPOSAL
- DISPOSAL OF CONSUMABLES
- DISPOSING OF THE MACHINE AND OTHER DEVICES
- TECHNICAL DATA
- POWER CORD
- COOLING UNIT SU
- CUP WARMER CW
- KE200 COOLING UNIT
- CHILL&CUP
- ACCOUNTING SYSTEM AC
- NUMERICAL
- A
- B
- C
- D
- E
- P
- S
- T
- U
- W
Brand : FRANKE
Model : A400
Category : Coffee maker