
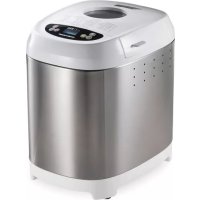
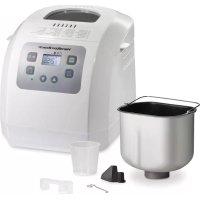
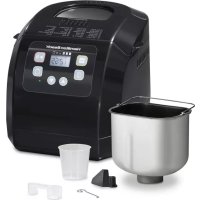
29883-CN - Bread maker HAMILTON BEACH - Free user manual and instructions
Find the device manual for free 29883-CN HAMILTON BEACH in PDF.


| Product Type | Bread Maker |
| Model | 29883-CN |
| Brand | Hamilton Beach |
| Power Rating | 650 W (estimated) |
| Dimensions (Approx.) | 12 x 10 x 11 inches |
| Weight (Approx.) | 10 lbs |
| Loaf Sizes | 500g, 750g, 1000g (1, 1.5, 2 lb) |
| Number of Programs | 13 (Basic, Basic Turbo, Wheat, Wheat Turbo, French, French Turbo, Sweet, Yeast-Free/Gluten-Free Mix, Rye, Gluten-Free Recipe, Dough, Artisan-Style Dough, Jam) |
| Additional Settings | Bake Only, Crust Color (Light, Medium, Dark), Delay Timer (up to 15 hours), Keep Warm (up to 1 hour) |
| Special Features | Automatic Fruit & Nut Dispenser, Power Interruption Protection (7 min), Turbo cycles for quick breads |
| Kneading Paddle | Removable nonstick |
| Bread Pan | Nonstick, removable |
| Viewing Window | Tempered glass |
| Housing Material | Plastic |
| Safety Features | Thermal cut-out, auto shut-off |
| Cleaning & Care | Wipe exterior with damp cloth; hand wash bread pan and paddle; do not immerse or dishwasher |
| Repair & Service | Contact manufacturer (China: 400-852-2655) |
| Warranty | Not specified in manual, but typical 1-2 years |
Frequently Asked Questions - 29883-CN HAMILTON BEACH
User questions about 29883-CN HAMILTON BEACH
0 question about this device. Answer the ones you know or ask your own.
Ask a new question about this device
Download the instructions for your Bread maker in PDF format for free! Find your manual 29883-CN - HAMILTON BEACH and take your electronic device back in hand. On this page are published all the documents necessary for the use of your device. 29883-CN by HAMILTON BEACH.
USER MANUAL 29883-CN HAMILTON BEACH
Visit www.hamiltonbeach.cn for our complete line of products and Use and Care Guides – as well as delicious recipes, tips, and to register your product online!
Please call us – our friendly associates are ready to help. China: 400-852-2655
如有疑问?
natural_image
Line drawing of a microwave oven with control panel and ventilation slots (no text or symbols)This product is intended for household use only.
When using electrical appliances, basic safety precautions should always be followed to reduce the risk of fire, electric shock, and/or injury to persons, including the following:
- Read all instructions.
- This appliance is not intended for use by persons (including children) with reduced physical, sensory, or mental capabilities, or lack of experience and knowledge, unless they are closely supervised and instructed concerning use of the appliance by a person responsible for their safety.
- Close supervision is necessary when any appliance is used by or near children. Children should be supervised to ensure that they do not play with the appliance.
- Do not touch hot surfaces. Use handles or knobs. Always use oven mitts to handle hot bread pan or hot bread.
- Do not put hand inside oven chamber after bread pan is removed. Heating unit will still be hot.
- To protect against electrical shock, do not immerse cord, plug, or breadmaker in water or other liquid.
- Unplug from outlet when not in use and before cleaning. Allow to cool before putting on or taking off parts, or before cleaning the appliance.
-
Do not operate any appliance with a damaged supply cord, or after the appliance malfunctions or is dropped or damaged in any manner. All repairs must be conducted by the manufacturer, its service agent, or similarly qualified persons in order to avoid a hazard. Call the customer service number provided for further information on examination, repair, or electrical or mechanical adjustments.
-
The use of accessory attachments not recommended by the appliance manufacturer may cause injuries.
- Do not use outdoors.
- Do not let cord hang over edge of table or counter or touch hot surfaces.
- Do not place on or near a hot gas or electric burner or in a heated oven.
- Extreme caution must be used when moving an appliance containing hot oil or other hot liquids.
- To disconnect, turn all controls off (O/STOP); then remove plug from wall outlet.
- Use extreme caution when removing bread pan.
- To turn breadmaker OFF, press and hold the START/STOP button for 2 seconds. See "Control Panel" section for more information.
- Do not place eyes or face in close proximity with tempered glass viewing window, in the event that the safety glass breaks.
- Do not use appliance for other than intended use.
- Clean oven interior carefully. Do not scratch or damage heating element tube.
- CAUTION: Risk of Electric Shock. Cook only in removable Bread Pan.
- CAUTION: In order to avoid a hazard due to inadvertent resetting of the thermal cut-out, this appliance must not be supplied through an external switching device, such as a timer, or connected to a circuit that is regularly switched on and off by the utility.
SAVE THESE INSTRUCTIONS!
Other Consumer Safety Information
The length of the cord used on this appliance was selected to reduce the hazards of becoming tangled in or tripping over a longer cord. If a longer cord is necessary, an approved extension cord may be used. The electrical rating of the extension cord must be equal to or greater than the rating of the appliance. Care must be taken to arrange the extension cord so that it will not drape over the countertop or tabletop where it can be pulled on by children or accidentally tripped over.
To avoid an electrical circuit overload, do not use another high-wattage appliance on the same circuit with this appliance.
Quick-Start Guide
See "Detailed Instructions" on page 10 for additional information.
1 Add Ingredients
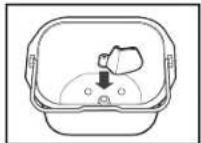
Place kneading paddle on shaft, pushing down as far as it will go, making sure flat surfaces are lined up.

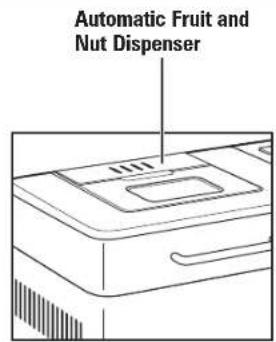
Carefully measure and add ingredients to the bread pan in the EXACT order given in the recipe. Add any fruit or nuts to the fruit and nut dispenser. TIP: Premesure all ingredients, including add-ins (nuts, raisins), prior to beginning.
BEFORE FIRST USE: Wash and dry bread pan and kneading paddle.
NOTE: Do not use metal utensils in bread pan since they may damage the nonstick surface.
CAUTION Falling Object Hazard. Breadmaker can wobble and walk during kneading cycle. Always position it in the center of the counter away from the edge.

Place bread pan in the breadmaker, and press down on the rim until the bread pan clicks firmly in place. Close cover. NOTE: Bread pan must lock into place for proper mixing and kneading.
2 Select Menu
▶ Press MENU button until desired program number appears on the digital display.
To program a Time Delay, use the + or - buttons to add up to 15 hours before Cycle will start. NOTE: Using perishable ingredients such as milk, eggs, or cheese is not recommended when using Time Delay.
Press CRUST and SIZE buttons to ADJUST to desired setting (not adjustable in some menus).
3 Start Making Bread
▶ Press START/STOP. The digital display will show the time remaining in the cycle.
Once complete, breadmaker will beep and begin Keep Warm cycle for up to 1 hour. Press START/STOP button for 2 seconds to cancel the Keep Warm cycle.
Open the lid using oven mitts. Rotate handle towards the front of machine and pull/rock pan towards front of machine and then rotate handle towards rear of machine and pull/rock pan towards rear of machine. Repeat as necessary until pan feels loose, then rotate handle vertically and pull pan out vertically. Still using oven mitts, shake loaf from pan and let cool for 10 minutes. If kneading paddle remains in the bread, gently pry it out using a spatula or small utensil. When not in use or when operation is complete, unplug the power cord.
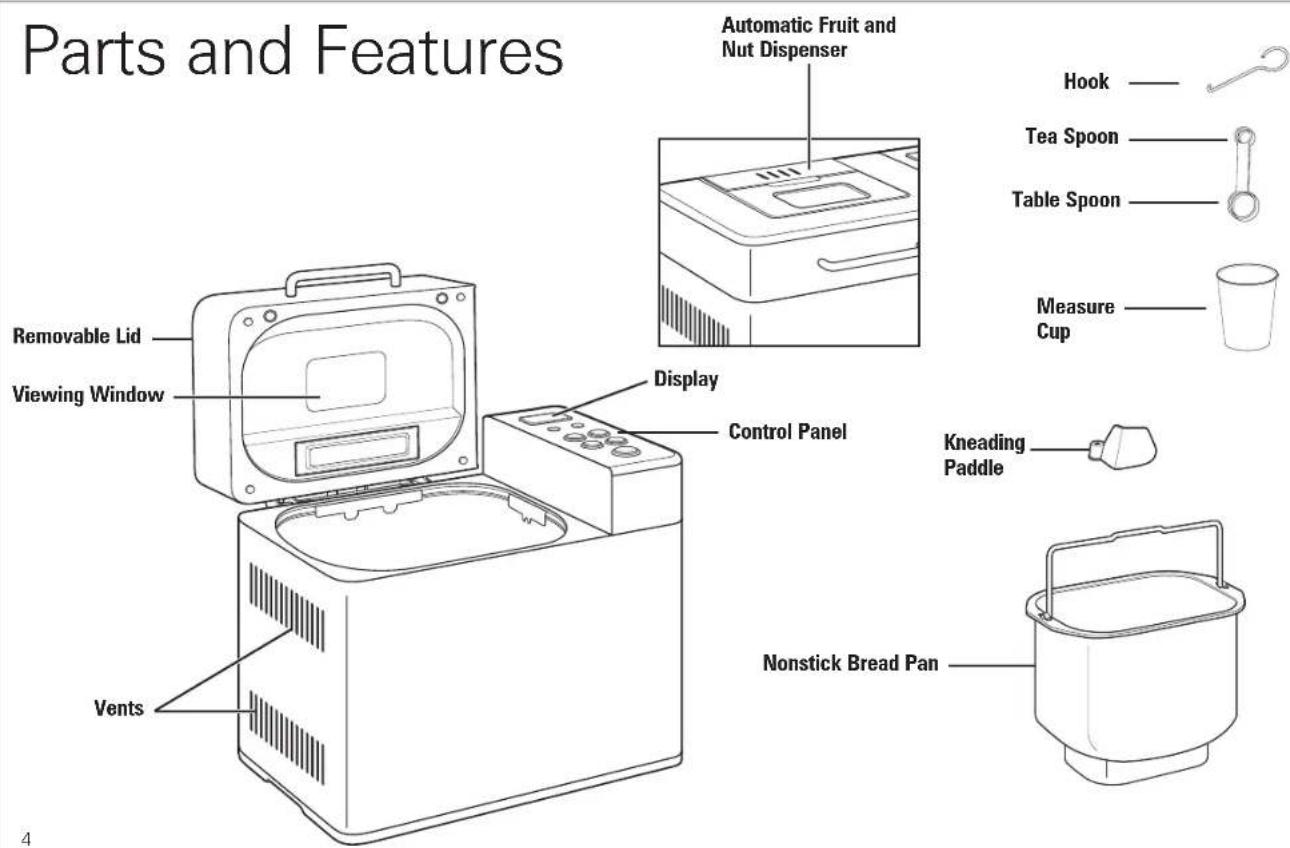

Control Panel

- Display
The display scrolls through the menu setting, crust color, and loaf size. The window will indicate the hours and minutes of the cycle.
- Timer Buttons
Press the UP or DOWN arrows to increase/decrease the time in 10-minute intervals.
- Size Button
Press the "∧" or "∨" to increase/decrease the time in 10-minute intervals.
- Menu Button
Default menu is 1. Use the menu button to scroll through the menu selections 1–13. See "Program Cycles" on page 6 for more information about each menu choice.
- Bake Button
This is used for the Bake Only menu setting. Use the timer buttons to adjust baking time.
- Crust Button
Press the CRUST button to move the indicator line to desired setting: Light, Medium, or Dark crust.
- Start/Stop Button
Press the START/STOP button once to start a cycle. A short beep will be heard, the colon in the time display will begin to flash, and the cycle will start. To remove bread, press the START/STOP button to end the baking cycle.
To cancel a cycle, press and hold the START/STOP button for 2–3 seconds.
Program Cycles
1. Basic
For white bread and mixed breads consisting mainly of basic bread flour.
2. Basic Turbo
For quick-bread recipes that do not use yeast for rising and instead may use baking powder or soda. Kneading, rising, and baking loaf in less time than for basic bread. This cycle takes about 1 hour and is for 1000g loaves only.
3. Wheat
For breads with heavy varieties of flour that require a longer phase of kneading and rising (whole wheat flour, rye flour). Bread will be more compact and heavy. Cycle starts with preheat. Does not start mixing immediately.
4. Wheat Turbo
Same as Basic Turbo cycle. For whole grain quick-bread recipes that do not use yeast for rising and instead may use baking powder or soda. Kneading, rising, and baking loaf in less time than for wheat cycle. Bread will be more compact and heavy. This cycle takes about 1 hour and is for 1000g loaves only.
5. French
For light breads made from fine flour. Normally, the bread is fluffy and has a crispy crust. This is not a suitable setting for recipes requiring butter, margarine, or milk.
6. French Turbo
Same as Basic Turbo cycle. For French-style quick bread recipes that do not use yeast for rising and instead may use baking powder or soda. Kneading, rising, and baking loaf in less time than for French cycle. Bread will be more compact and heavy. This cycle takes about 1 hour and is for 1000g loaves only.
7. Sweet
For breads with ingredients such as fruit juices, grated coconut, raisins, dry fruits, chocolate, or added sugar. Due to a longer rising phase, the bread will be light and airy. We recommend the Light crust setting.
8. Yeast-Free, Gluten-Free Bread Mix
For yeast-free or gluten-free store-bought bread mixes, plus yeast-free recipes.
9. Rye
For breads with rye flour that require a longer phase of kneading and rising. Bread will be more compact and heavy, but more moist than a whole grain bread. Cycle starts with preheat. Does not start mixing immediately.
10. Gluten-Free Recipe
For gluten-free bread recipes. Cycle starts with 8-minute preheat and will start mixing after that.
11. Dough
This cycle prepares the yeast dough for buns, pizza crust, etc., to be baked in a conventional oven. There is no baking in this cycle.
12. Artisan-Style Dough
For artisan-style bread recipes made with fresh herbs and organic flours. This cycle has a long rising time for fluffier loaves and a cool temperature setting to create artisan-style flavors. This is not a suitable setting for recipes using sugars or fats. Full cycle is about 5 hours.
13. Jam
For making jams with fresh fruit. The jam cycle can also be used to make marmalades, preserves, chutneys, and ketchup.
Bake Only - Additional Setting
Ideal for when additional baking of breads is needed because a loaf is too light or not baked through. There is no kneading or resting.
Program Timetable and Settings
Menus vary according to the various rising times, the number of kneads, and the temperature setting.
Menu Type Crust Size
PREH KND1 KND2 RISE1 KND3 RISE2 KND4 RISE3 Bake Total Extras Warm Delay
| 1 Basic | Light | 500g750g 0:40 3:11 0:201000g 0:43 3:14 0:20 | 1:00 15:001:00 15:00 | 0:37 3:08 0:20 1:00 15:00 | |||||||||||||
| Medium | 500g 0:45 3:16 0:20750g 0:50M 3:2M 0:201000g 0:55 3:26 0:20 | 1:00 15:00260M 3:30S 3:5M1:00 15:00 | |||||||||||||||
| Dark | 500g 1:00 3:31 0:20750g 1:05 3:36 0:201000g 1:10 3:41 0:20 | 1:00 15:001:00 15:00 | |||||||||||||||
| 2 | Basic Turbo | Medium | 1000g | 0M | 3M | 9M | 0M | 0M | 0M | 0M | 8M | 0:48 | 1:08 | NA | 1:00 | NA | |
| 3 | Wheat | Light | 500g750g 0:44 4:30 0:441000g 0:48 4:34 0:44 | 1:00 15:001:00 15:00 | 0:40 4:26 0:44 1:00 15:00 | ||||||||||||
| Medium | 500g 0:45 4:31 0:44750g 0:50M 3:36/024M1000g 0:55 4:41 0:44 | 1:00 15:001800/1306041M1:00 15:00 | 30S 46M | ||||||||||||||
| Dark | 500g 0:54 4:40 0:44750g 1:00 4:46 0:441000g 1:04 4:50 0:44 | 1:00 15:001:00 15:00 | |||||||||||||||
| 4 | Wheat Turbo | Medium | 1000g | 0M | 3M | 9M | 0M | 0M | 0M | 0M | 8M | 0:48 | 1:08 | NA | 1:00 | NA | |
Program Timetable and Settings (cont.)
| Menu Type Crust Size | PREH | KND1 | KND2 | RISE1 | KND3 | RISE2 | KND4 | RISE3 | Bake Total Extras Warm Delay | ||||||
| 5 French | Light | 500g | 0:42 3 | :23 0:19 | 1:00 15:00 | ||||||||||
| 750g 0 | :53 3:3 | 4 0:19 | 1:00 15:00 | ||||||||||||
| 1000g | 1:04 3:45 0:19 | 1:00 15:00 | |||||||||||||
| Medium | 500g 1 | :02 3:43 0:19 | 1:00 15:00 | ||||||||||||
| 750g 1 | :08 3:47 0:19 | 1:20 16:00M | 30S 55M | ||||||||||||
| 1000g | 1:10 3:51 0:19 | 1:00 15:00 | |||||||||||||
| Dark | 500g 1 | :05 3:46 0:19 | 1:00 15:00 | ||||||||||||
| 750g 1 | :12 3:53 0:19 | 1:00 15:00 | |||||||||||||
| 1000g | 1:14 3:55 0:19 | 1:00 15:00 | |||||||||||||
| 6 | French Turbo | Medium | 1000g | 0M | 3M | 9M | 0M | 0M | 0M | 8M | 0:48 | 1:08 | NA | 1:00 | NA |
| 7 | Sweet | Light | 500g | 0:52 3 | :28 0:20 | 1:00 15:00 | |||||||||
| 750g 0 | :54 3:30 0:20 | 1:00 15:00 | |||||||||||||
| 1000g | 0:56 3:32 0:20 | 1:00 15:00 | |||||||||||||
| Medium | 500g 0 | :54 3:30 0:20 | 1:00 15:00 | ||||||||||||
| 750g 0 | :57 3:39 0:20 | 1:00 16:00M | 30S 50M | ||||||||||||
| 1000g | 1:00 3:36 0:20 | 1:00 15:00 | |||||||||||||
| Dark | 500g 0 | :58 3:34 0:20 | 1:00 15:00 | ||||||||||||
| 750g 1 | :01 3:37 0:20 | 1:00 15:00 | |||||||||||||
| 1000g | 1:04 3:40 0:20 | 1:00 15:00 | |||||||||||||
| 8 | Yeast-Free, Gluten-Free Bread Mix | Medium | 1000g | 0M 3M | 20M 0M | 0S | 0M | 0S | 0M | 1:45 | 2:08 | 0:18 | 0:22 15:00 | ||
Program Timetable and Settings (cont.)
Menu Type Crust Size
PREH KND1 KND2 RISE1 KND3 RISE2 KND4 RISE3 Bake Total Extras Warm Delay
| 9 Rye | Medium | 1000g | 30M 3M | 25M | 80M 30S | 31M | 30S 46M | 0:55 | 4:31 NA | 1:00 | 15:00 | |||||
| 10 | Gluten-Free Recipe | Medium | 750g | 8M 4M | 19M | 48M 0S | 0M | 0S | 0M | 1:35 2 | :54 0:17 | 1:00 | 15:00 | |||
| 1000g | 1:40 | 2:59 0:17 | 1:00 | 15:00 | ||||||||||||
| 11 | Dough | NA | NA | 0M | 3M | 27M | 60M | 0M | 0M | 0S | 0M | 0:00 | 1:30 | 0:16 | NA | 15:00 |
| 12 | Artisan Dough | NA | NA 0M | 5M 45M | 110M | 30S 85M | 30S 70M | 0:00 5:16 | 0:36 NA | 15:00 | ||||||
| 13 | Jam | NA | NA | 0M | 0M | 15M | 0M | 0M | 0M | 0S | 0M | 1:10 | 1:25 | NA | 0:20 | 15:00 |
| Bake | NA | NA | 0M | 0M | 0M | 0M | 0M | 0M | 0S | 0M | 0:10~1:30 | 0:10 NA | 1:00 | NA |
Detailed Instructions

natural_image
Simple line drawing of a container with an upward arrow indicating process (no text or symbols)Insert kneading paddle and make sure it is in the upright position.
natural_image
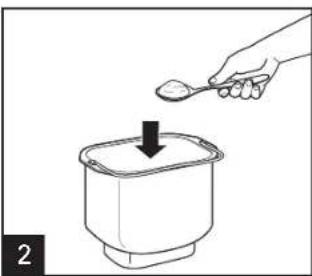
Illustration of a hand pouring powder into a container with an arrow indicating downward motion (no text or symbols)Add the ingredients to the bread pan in the order listed in the recipe. First, add the liquids; then sugar, salt, shortening, and flour; and last the yeast. NOTE: Make sure that yeast does not come into contact with salt or liquids.

Close the lid. Plug in the appliance.

natural_image
Line drawing of a hand inserting a coin into a machine (no text or symbols)If required, add fruit and nuts to the automatic fruit and nut dispenser.
The appliance may emit a little smoke and/or odor when you turn it on for the first time. This is normal and will subside after the first or second use. Make sure the appliance has sufficient ventilation.
- Dry all parts thoroughly. The appliance is ready for use.
natural_image
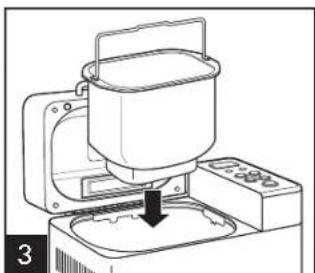
Line drawing of a milk feeding machine with a downward arrow indicating process (no text or symbols)Place the bread pan into the appliance and press down on the rim until the bread pan clicks firmly in place.
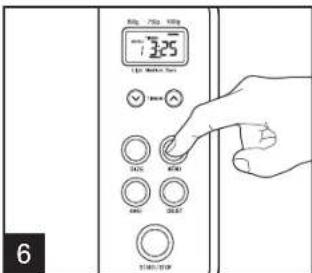
Press MENU button to select your program cycle. Continue to press the MENU button to scroll through the menu choices.
Detailed Instructions (cont.)
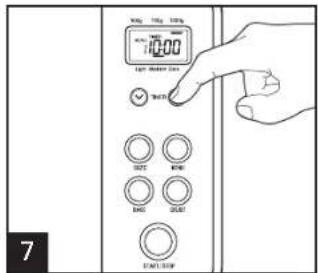
To set time delay, press the UP or DOWN buttons to set the number of hours and minutes. Press the CRUST button to move the indicator line to desired setting: Light, Medium, or Dark crust. NOTE: Turbo, Dough, Artisan Dough, Jam, and Bake Only menus do not have the option to choose a crust color.

VN buttons to set the number of hours to move the indicator line to desired

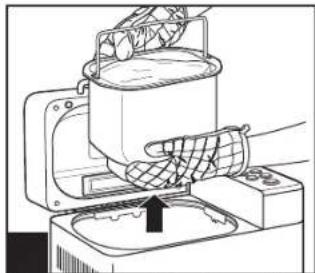
When the bread is done, the breadmaker will beep 10 times and shift to the Keep Warm cycle for 1 hour. Press START/STOP for 2 seconds to stop the machine. Rotate handle towards the front of machine and pull/rock pan towards front of machine and then rotate handle towards rear of machine and pull/rock pan towards rear of machine. Repeat as necessary until pan feels loose, then rotate handle vertically and pull pan out vertically.

natural_image
Illustration of two open electronic devices with internal components, placed on a table (no text or symbols visible)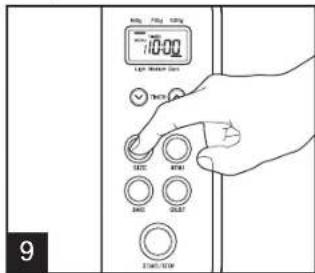
Press the SIZE button to choose 500g, 750g, or 1000g loaf size. NOTE: Turbo, Rye, Gluten-Free, Dough, Artisan Dough, and Jam menus do not have the option to choose loaf size. Press the START/STOP button to begin the cycle. To change the menu selection, hold down the START/STOP button for 2-3 seconds. Once the timer has cleared, the program can be set again.
natural_image
Line drawing of a hand pouring liquid into a container with an arrow indicating flow (no text or symbols)
natural_image
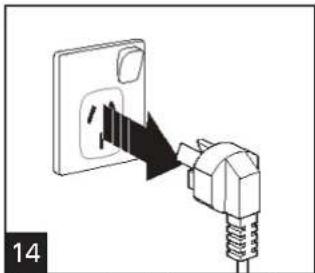
Diagram of a plug inserted into a socket, showing internal wiring (no text or symbols)Unplug unit and allow to cool completely.
Detailed Instructions (cont.)
NOTES:
• There is no Keep Warm cycle for the Dough, Artisan Dough, Jam, and Bake Only cycles.
• After 10 minutes, use oven mitts to turn the bread pan upside down (with the bread pan handle folded down) onto a wire cooling rack or clean cooking surface and gently shake until bread falls out. Use a nonstick spatula to gently loosen the sides of the bread from the bread pan.
- If kneading paddle remains in the bread, gently pry it out using a spatula or small utensil. When not in use or when operation is complete, unplug the power cord.
- Store remaining bread in a sealed plastic bag for up to three days at room temperature. To store for a longer time, place sealed plastic bag in refrigerator for up to 10 days.
Bake Only Menu
This setting is used for immediate baking and can be flexible in the time set up to 1 hour and 30 minutes. If your bread is not done or you would like a darker crust, this setting is beneficial. Press the START/STOP button to control the function at any time; you may want to check every few minutes.
- Press the BAKE button. Press the TIMER buttons (up or down arrows) to adjust the desired time.
- Press the START/STOP button.
Delay Time
Request Delay time function, press timer button "∧" or "∨" to request working time. Delay working time=Cycle time+delay time.
Power Interruption Program Protection
There is a 7-minute power interruption protection to protect the program memory in case of a power outage. During the power outage, the breadmaker will keep the memory intact for 7 minutes. When power returns, the breadmaker will continue baking.
Throw away ingredients if the power outage is more than 7 minutes and start again. If the power outage happens during baking or baking is almost done, the Bake Only cycle can be used to finish baking.
Fruit and Nut Dispenser
During the second kneading cycle, the breadmaker will automatically dispense dry ingredients into the dough. The ingredients that are placed into the fruit and nut dispenser need to be whole and not crushed. The fruit and nut dispenser will automatically dispense fruits and nuts into the dough. The fruit and nut dispenser is not an option on Turbo, Rye, Jam, and Bake Only menu cycles.
Tips: Bread Basics
Ingredients
Two things can ensure a perfect loaf of bread: using fresh, quality ingredients and measuring them accurately.
Flour
All-Purpose Flour
Flour that contains no baking powder, suitable for "quick" breads or bread made with the Quick settings. Bread flour is better suited for yeast breads.
Bread Flour
Bread flour is the most important ingredient of making bread and is recommended in most yeast-bread recipes. It has a high gluten content and can keep the size of the bread from collapsing after rising. Flour varies by region. For example, American flour is milled from hard spring wheat; Canadian flour is milled from hard winter wheat.
Self-Rising Flour
Flour that contains baking powder, used especially for making cakes. Do not use self-rising flour in combination with yeast.
Whole-Wheat Flour
Whole-wheat flour is ground from the entire wheat kernel. Bread made with all or part whole-wheat flour will have higher fiber and nutritional content. Whole-wheat flour is heavier and, as a result, loaves may be smaller in size and have a heavier texture.
Tip
To check whether the yeast is fresh and active:
- Pour 1 cup (237 ml) hot tap water into the measuring cup.
- Add 1 teaspoon (5 ml) white sugar and 1 tablespoon (15 ml) yeast.
- Place the measuring cup in a warm place for about 5 minutes.
- Fresh, active yeast will begin to bubble or "grow." If it does not, the yeast is dead or inactive.
Other Ingredients
Egg
Eggs can improve bread texture and make the bread larger in size. The egg must be whisked in with the other liquid ingredients.
Salt
Salt is necessary to improve the bread flavor and crust color. It is also used to restrain yeast activity.
Shortening, Butter, and Vegetable Oil
Shortening and butter should be cut into small pieces before adding to liquid.
Sugar
Sugar is "food" for the yeast and also increases the sweet taste and color of bread. It is a very important element of making the bread rise. White sugar is normally used; however, brown sugar, powdered sugar, or cotton sugar may also be called for in some recipes.
Water and Other Liquids (always added first)
Water is an essential ingredient for making bread. Generally speaking, water should be at room temperature. Some recipes may call for milk or other liquids. Never use dairy with the Time Delay option.
Yeast
Yeast is a living organism and should be kept in the refrigerator to remain fresh. It needs carbohydrates found in sugar and flour as nourishment. Yeast used in breadmaker recipes will be sold under several different names: Bread machine yeast (preferred), active-dry yeast, and instant yeast.
Before using, check the expiration date of the yeast. Return to refrigerator immediately after each use.
Tips: Use Exact Measurements
One of the most important steps of making good bread is the proper measurement of ingredients. Measure each ingredient carefully and add to your bread pan in the order given in the recipe.
Adding Sequence
Always add ingredients in the order given in the recipe.
FIRST: Liquid ingredients
SECOND: Dry ingredients
LAST: Yeast
The yeast should only be placed on the dry flour and never come in contact with the liquid or salt.
When you use the Time Delay function for a long time, never add perishable ingredients such as eggs, milk, or cheese.
Liquid Ingredients
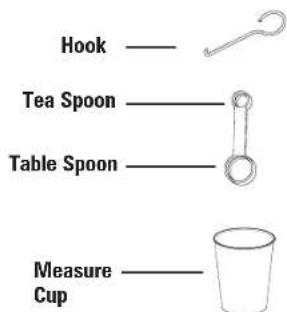
Water, fresh milk, or other liquids should be measured with a glass measuring cup with clear markings and a spout. Set the cup on the counter and lower yourself to check the liquid level. When measuring cooking oil or other ingredients, clean the measuring cup thoroughly in between.
Liquid Measurement Conversion Chart
| Fluid Ounce(s) Cup Tablespoon(s) Teaspoons | |||
| 8 1 16 48 | |||
| 7 7/8 14 42 | |||
| 6 3/4 12 36 | |||
| 5 5/8 10 30 | |||
| 4 1/2 8 24 | |||
| 3 3/8 6 18 | |||
| 2 1/4 4 12 | |||
| 1 1/8 2 6 | |||
| 1/2 1/16 | 1 | 3 | |
| 1/4 1/32 | 1/2 1 1/2 | ||
14
Dry Measurements
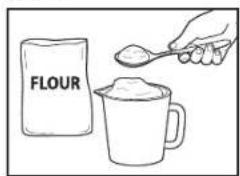
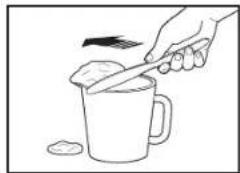
Measure dry ingredients by gently spooning flour, etc., into the measuring cup and then, once filled, leveling off with a knife. Never use the measuring cup to scoop your dry ingredients directly from a container as this could add up to one tablespoon of extra ingredients. Do not tap the bottom of the measuring cup or pack down.
HINT: Before measuring, stir the flour to aerate it.
When measuring small amounts of dry ingredients, such as salt or sugar, use a measuring spoon, making sure it is leveled off. Weighing dry ingredients with a digital scale will provide better baking results.
natural_image
Line drawing of a hand pouring liquid into a mug with a spoon (no text or symbols)Dry Measurement Weight Equivalents
| 1 cup of: Ounces | Grams | |
| All-purpose flour | 4.4 | 125 |
| Bread flour | 4.5 | 128 |
| Whole-wheat flour | 4.2 | 119 |
| Rye flour | 3.6 | 102 |
Frequently Asked Questions
May I use a sugar substitute in place of sugar?
Sugar is necessary for the yeast to produce a light loaf with a good height. Results may vary with the type and amount of sugar substitute used. If you are going to use an artificial sweetener, choose one that is aspartame-based rather than saccharin-based.
May I omit the salt or sugar from the recipe?
No, both the sugar and salt play an important role in the breadmaking process. Salt prevents the yeast from overreacting and the bread from overrising. The combination of sugar, salt, and yeast is a key part of the breadmaking process. Remember that the total sugar and salt amounts are divided among all the slices, so the amount of sugar and salt per serving is small.
When do I add raisins, nuts, etc., to the bread?
This breadmaker has an automatic fruit and nut dispenser. Add your raisins or other add-ins to the dispenser when you add all your other ingredients into the breadmaker, and the machine will add in these items at the correct time for the cycle you have chosen.
Can I open the lid while the breadmaker is operating?
This breadmaker is designed with a window in the lid to let you watch your bread's progress. Quick checks are OK in the early stages of kneading and to add ingredients when the beeper sounds. However, the temperature in the baking chamber adjusts for the Rising and Baking stages. Opening the lid during these steps could cause the loaf to fall or not bake properly. Sometimes condensation forms on the window after initial mixing and kneading. It usually disappears once the baking cycle starts so you should be able to get a clear view of your loaf.
Can I use my favorite bread recipes in my breadmaker?
Yes, but you will need to experiment to get the right proportion of ingredients. Become familiar with the unit and make several loaves of bread with recipes provided before you begin experimenting. Never exceed a total amount of 4 1/4 cups (1 L) of dry ingredients (that includes flours, oats, cornmeal, etc.). Use the recipes in this book to help determine the ratio of dry ingredients to liquid and amounts of yeast, sugar, salt, and butter/margarine to use.
What will happen if I leave the bread in the bread pan after baking?
This unit has a 60-minute Keep Warm cycle that lets you leave the bread in the pan for up to an hour after baking is complete. Once the warming cycle is over, it is best to remove the bread immediately or the bottom of your loaf will absorb moisture and become soggy.
Can the recipe be cut in half?
No, it is not recommended. The ingredient proportions work better in the full amounts.
How can bread mixes be used in the machine and at what setting?
The package instructions will list the amount of water and amount of yeast to use. Be sure to add liquid, then dry ingredients, followed by yeast. Do not allow the yeast to sit in the liquid. The bread type setting is dependent upon the type of bread mix being used (i.e., White bread uses the Basic bread setting; Sweet Bread setting is for use with dried fruit, cheese, or nuts; whole-wheat or multigrain should use the Whole Grain setting; Crust setting, either Light or Dark, is a personal preference). Do not use bread mixes that exceed 2-lb. (907-g) loaf size.
Bread Settings
The following are instructions for settings 1 (basic), 3 (wheat), 5 (French), 7 (sweet), 8 (yeast-free), 9 (rye), and 10 (gluten-free recipe).
natural_image
Simple line drawing of a container with a lid and arrow indicating downward motion (no text or symbols)
natural_image
Line drawing of a hand pouring food into a container with an arrow indicating downward motion (no text or symbols)
natural_image
Illustration of a hand washing a cup and pouring liquid into a machine (no text or symbols)
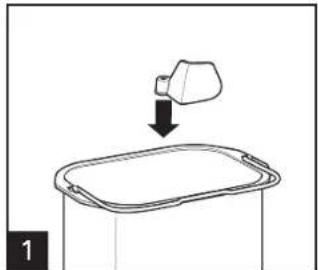
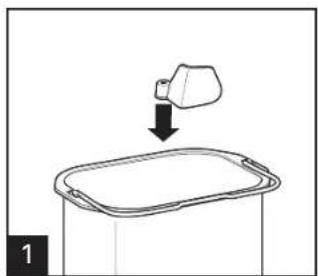
Insert kneading paddle and make sure it is in the upright position. Add the ingredients to the bread pan in the order listed in the recipe. If required, add fruit and nuts to the automatic fruit and nut dispenser. If there are any spills on the outside of the bread pan, wipe them up. Place the bread pan into the appliance and press down firmly on the rim. Close lid. Plug in the appliance.

natural_image
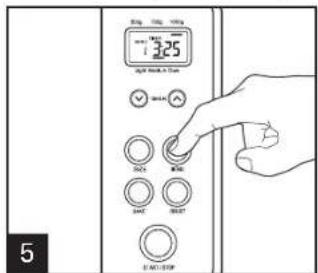
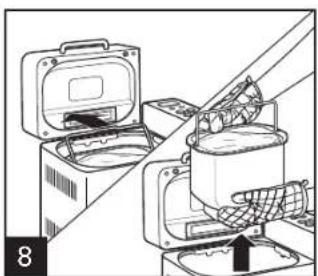
Illustration of a hand inserting a container into a device, showing internal components and a handle (no text or symbols)Select program cycle by pressing the MENU button. To use the Time Delay function, press the UP or DOWN buttons to set the number of hours and minutes. Press CRUST button to select the crust color and press SIZE button to select the loaf size. Press START. When bread is done baking, open the lid using oven mitts. Rotate handle towards the front of machine and pull/rock pan towards front of machine and then rotate handle towards rear of machine and pull/rock pan towards rear of machine. Repeat as necessary until pan feels loose, then rotate handle vertically and pull pan out vertically. Let cool for 10 minutes; then place on a wire rack. If kneading paddle remains in the bread, gently pry it out using a spatula or small utensil. Unplug the appliance.
Basic/Basic Turbo (Turbo Water Temp 45°C–50°C):
Ingredients: Large (1000g) (Turbo) Regular (750g) Small (500g)
| Water 370 ML 270 ML 190 ML | |||
| Oil 2 Tbsp (30g) 2 Tbsp (30g) 1 Tbsp (15g) | |||
| Salt 1 Tsp (4.5g) 1 Tsp (4.5g) 1/2 Tsp (2.5g) | |||
| Sugar 3 Tbsp (45g) 2 Tbsp (30g) 1 Tbsp (15g) | |||
| Milk Powder | 2 Tbsp (30g) 1 Tbsp (15g) 1 Tbsp (15g) | ||
| Flour Powder | 4 cups (560g) | 3 cups (420g) | 2 cups (280g) |
| Yeast Powder | 1 Tsp (4.5g) (*4 Tsp/18g) | 1 Tsp (4.5g) | 1 Tsp (4.5g) |
*For Basic Turbo only
Wheat/Wheat Turbo (Turbo Water Temp 45°C–50°C):
Ingredients: Large (1000g) (Turbo) Regular (750g) Small (500g)
| Water 380 ML 280 ML 220 ML | |||
| Oil 3 Tbsp (45g) 2 Tbsp (30g) 1.5 Tbsp (23g) | |||
| Salt 1.5 Tsp (6–7g) 1 Tsp (4.5g) 1 Tsp (4.5g) | |||
| Brown Sugar 3 Tbsp (45g) 3 Tbsp (45g) 3 Tbsp (45g) | |||
| Milk Powder | 3 Tbsp (45g) 2 Tbsp (30g) 2 Tbsp (30g) | ||
| Flour Powder | 3 Cups (420g) 3 Cups (420g) 2 Cups (280g) | ||
| Whole Wheat Flour | 1 Cup (140g) | 3/4 Cup (90–100g) | 1/4 Cup (35g) |
| Yeast Powder | 1 Tsp (4.5g) (*4Tsp/18g) | 1 Tsp (4.5g) | 1 Tsp (4.5g) |
*For Wheat Turbo only
French/French Turbo (Turbo Water Temp 45°C–50°C):
Ingredients: Large (1000g) (Turbo) Regular (750g) Small (500g)
Lemon Juice 1 Tsp (4.5g) 1 Tsp (4.5g) 1 Tsp (4.5g)
Water 370 ML 270 ML 190 ML
Oil 2 Tbsp (30g) 2 Tbsp (30g) 1 Tbsp (15g)
Salt 2 Tsp (9g) 1+1/4 Tsp (5.5g) 1 Tsp (4.5g)
Sugar 2 Tbsp (30g) 2 Tbsp (30g) 1 Tbsp (15g)
Flour Powder 4 Cups (560g) 3 Cups (420g) 2 Cups (280g)
Yeast Powder 1 Tsp (4.5g) (*4Tsp/18g) 1 Tsp (4.5g) 1 Tsp (4.5g)
*For French Turbo only
Sweet:
Ingredients: Large (1000g) Regular (750g) Small (500g)
Water 320 ML 210 ML 140 ML
Egg 1 unit 1 unit 1 unit
Oil 2 Tbsp (30g) 1 Tbsp (15g) 1 Tbsp (15g)
Salt 1.5 Tsp (6.5g) 1 Tsp (4.5g) 1/2 Tsp (2.5g)
Sugar 1/2 Cup (70g) 1/3 Cup (45g) 1/4 Cup (35g)
Milk Powder 2 Tbsp (30g) 2 Tbsp (30g) 1 Tbsp (15g)
Flour Powder 4 Cups (560g) 3 Cups (420g) 2 Cups (280g)
Yeast Powder
1 Tsp (4.5g)
1 Tsp (4.5g)
1 Tsp (4.5g)
Yeast-Free/Gluten-Free Mix (Water Temp 40°C–45°C): (1000g)
Ingredients: Regular (1000g)
Water 350 ML
Oil 2 Tbsp (30g)
Salt 1 Tsp (4.5g)
Sugar 2 Tbsp (30g)
Milk Powder 2 Tbsp (30g)
Flour Powder 4 Cups (560g)
Yeast Powder 3 Tsp (13.5g)
Rye: (1000g)
Ingredients: Regular (1000g)
Water 380 ML
Oil 2 Tbsp (30g)
Salt 1.5 Tsp (6.5g)
Brown Sugar 3 Tbsp (45g)
Milk Powder 3 Tbsp (45g)
Flour Powder 2 Cups (280g)
Rye Flour 2 Cups (280g)
Yeast Powder 1 Tsp (4.5g)
Gluten-Free:
Ingredients: Large (1000g) Regular (750g)
Water (40°C-45°C) 310 ML 250 ML
Oil 3 Tbsp (45g) 3 Tbsp (45g)
Salt 1.5 Tsp (6.5g) 1.5 Tsp (6.5g)
Sugar 3 Tbsp (45g) 3 Tbsp (45g)
Egg 3 pcs 3 pcs
Vinegar 1 Tsp (4.5g) 1 Tsp (4.5g)
Mix Flour 450g 390g
Xanthan Gum 1 Tbsp (15g) 1 Tbsp (15g)
Dried Yeast 1.5 Tsp (6.5g) 1.5 Tsp (6.5g)
Bread Settings (cont.)
The following are instructions for settings 2 (basic turbo), 4 (wheat turbo), and 6 (French turbo). This setting is only used for 1000g recipes, medium crust color, and cannot use the fruit and nut dispenser. If recipes call for fruit and/or nuts, ingredients will have to be added by hand to the pan (add before the flour).

natural_image
Simple line drawing of a container with a lid and arrow indicating downward motion (no text or symbols)
natural_image
Illustration of a hand pouring food into a container with an arrow indicating downward motion (no text or symbols)
natural_image
Illustration of a hand washing a small bowl into a machine, with a downward arrow indicating a drop (no text or symbols present)
Insert kneading paddle and make sure it is in the upright position. Add the ingredients to the bread pan in the order listed in the recipe. If required, add fruit and nuts by hand before the flour is added. If there are any spills on the outside of the bread pan, wipe them up. Place the bread pan into the appliance and press down firmly on the rim. Close lid. Plug in the appliance.

natural_image
Illustration of two open storage units with a hand inserting a component, no text or symbols present
natural_image
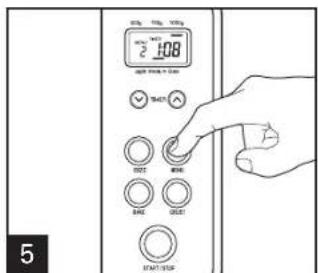
Illustration of a hand placing a container into a machine (no text or symbols visible)Select program cycle by pressing the MENU button. To use the Time Delay function, press the UP or DOWN buttons to set the number of hours and minutes. Press START. When bread is done baking, open the lid using oven mitts. Rotate handle towards the front of machine and pull/rock pan towards front of machine and then rotate handle towards rear of machine and pull/rock pan towards rear of machine. Repeat as necessary until pan feels loose, then rotate handle vertically and pull pan out vertically. Let cool for 10 minutes; then place on a wire rack. If kneading paddle remains in the bread, gently pry it out using a spatula or small utensil. Unplug the appliance.
Bread Setting – Dough
natural_image
Simple line drawing of a container with a lid and arrow indicating downward motion (no text or symbols)Insert kneading paddle and make sure it is in the upright position.

natural_image
Illustration of a hand pouring food into a container with an arrow indicating downward motion (no text or symbols)Add the ingredients to the bread pan in the order listed in the recipe.

natural_image
Illustration of a hand washing a small container while another container is being inserted into a machine (no text or symbols)If there are any spills on the outside of the bread pan, wipe them up. Place the bread pan into the appliance and press down firmly on the rim.

Close lid. Plug in the appliance.

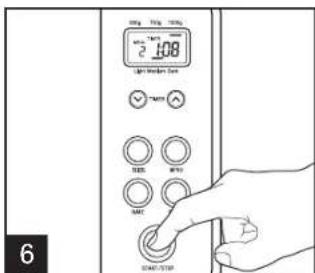
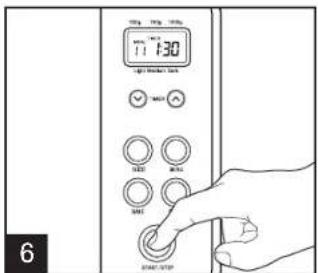
Select menu 11 (Dough) by pressing the MENU button. To use the Time Delay function, press the UP or DOWN buttons to set the number of hours and minutes. Press START.
Follow instructions given after each recipe.
Bread Setting – Artisan-Style Dough

natural_image
Simple line drawing of a container with an upward arrow indicating process (no text or symbols)Insert kneading paddle and make sure it is in the upright position.

natural_image
Illustration of a hand pouring powder into a container with an arrow indicating downward motion (no text or symbols)Add the ingredients to the bread pan in the order listed in the recipe.

natural_image
Illustration of two hands washing a bowl on a machine, one being compressed and the other uncompressed (no text or symbols)If there are any spills on the outside of the bread pan, wipe them up. Place the bread pan into the appliance and press down firmly on the rim.

natural_image
Diagram showing a device connected to an electrical outlet with a plug, no text or symbols presentClose lid. Plug in the appliance.

Select menu 12 (Artisan-Style Dough) by pressing the MENU button. To use the Time Delay function, press the UP or DOWN buttons to set the number of hours and minutes. Press START.

natural_image
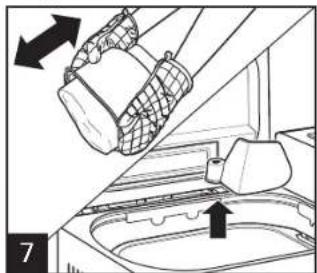
Diagram showing a mechanical device interacting with a car interior, with arrows indicating direction of movement (no text or symbols present)When dough is done, remove the dough from the breadmaker. If kneading paddle remains in the bread, gently pry it out using a spatula or small utensil. Place dough on a lightly floured surface. Shape dough as desired.

natural_image
Line drawing of a hand holding a round object, possibly a ball or container, with no visible text or symbols.Bread Setting – Artisan-Style Dough (cont.)

natural_image
Illustration showing two steps of a food preparation or baking process: one with a plate and the other with a dough ball being placed on a tray (no text or symbols)Place the dough on greased oven trays. Cover. Allow the dough to rise for about 30 minutes.
natural_image
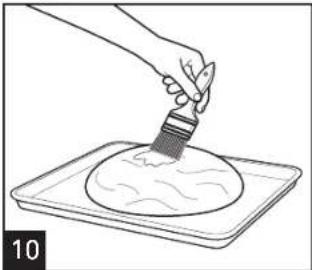
Line drawing of a hand applying paint to a round cake on a tray (no text or symbols)Glaze. Bake until the bread is golden

natural_image
Line drawing of a kitchen oven with an oven containing a dough ball, no text or symbols presentbrown.
Dough/Artisan Dough:
Ingredients:
Water 390 ml
Oil 2 Tbsp (30g)
Salt 1.5 Tsp (6.5g)
Sugar 2 Tbsp (30g)
Milk Powder 2 Tbsp (30g)
Flour Powder 3 1/2 Cups (790g)
Yeast Powder 1.5 Tsp (6.5g)
Bread Setting – Jam

natural_image
Simple line drawing of a container with a lid and arrow indicating downward motion (no text or symbols)Insert kneading paddle and make sure it is in the upright position.
natural_image
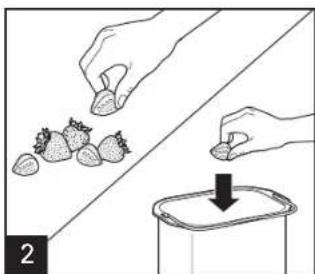
Illustration showing hands picking strawberries and pouring into a container with a downward arrow (no text or symbols)Prepare the fruit as instructed. Add the ingredients to the bread pan in the order listed in the recipe.

natural_image
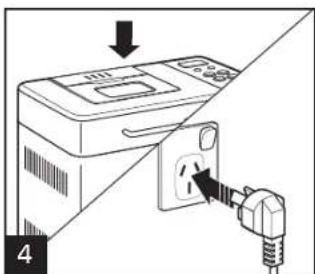
Illustration of a hand washing a cup and pouring liquid into a container (no text or symbols)If there are any spills on the outside of the bread pan, wipe them up. Place the bread pan into the appliance and press down firmly on the rim. Close lid. Plug in the appliance.
of the bread pan, wipe them up. ce and press down firmly on the

Turn the power ON. Select menu 13 (Jam) by pressing the MENU button. To use the Time Delay function, press the UP or DOWN buttons to set the number of hours and minutes. Press START. When jam is done, open the lid using oven mitts. Rotate handle towards the front of machine and pull/rock pan towards front of machine and then rotate handle towards rear of machine and pull/rock pan towards rear of machine. Repeat as necessary until pan feels loose, then rotate handle vertically and pull pan out vertically. Jam should be stored in sterilized jars and sealed immediately. Before refrigerating, make sure the jam is cooled to room temperature.

) by pressing the MENU button. To use the Time Delay function, press the UP or DOWN buttons to set the number of hours done, open the lid using oven mitts. Rotate handle towards the front of machine and pull/rock pan towards front of machine machine and pull/rock pan towards rear of machine. Repeat as necessary until pan feels loose, then rotate handle vertically stored in sterilized jars and sealed immediately. Before refrigerating, make sure the jam is cooled to room temperature.
Jam:
Ingredients:
Lemon Juice 2 Tbsp (30g)
Sugar 8 Tbsp (120g)
Jam (pectin/corn flour) 2 Tbsp (30g)
Orange 500g
Cleaning

natural_image
Diagram of a plug inserted into a wall socket, showing internal wiring (no text or symbols)Unplug. Allow to cool completely.

natural_image
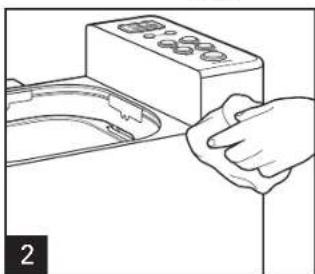
Line drawing of a hand cleaning a kitchen sink with a cloth (no text or symbols)Vipe exterior and cord with a damp cloth or sponge. To remove stubborn spots, use a mild, nonabrasive cleanser.

natural_image
Line drawing of a kitchen sink with faucet and sink (no text or symbols)Wash in warm, soapy water.

natural_image
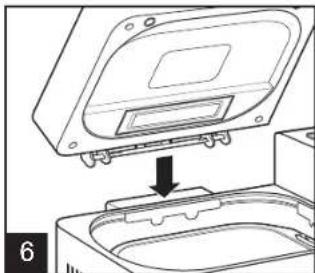
Diagram showing a device with a lid and a base component, no text or symbols presentTilt the lid approximately 70^ and, while holding the base, lift the lid out of the hinge.
natural_image
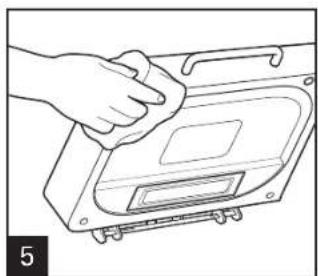
Line drawing of a hand cleaning a device with a cloth (no text or symbols)Wipe interior and exterior of lid with a damp cloth or sponge.

natural_image
Diagram showing a device being processed into a housing component, with no visible text or symbols.Replace lid.
NOTES:
- DO NOT wash any part of your breadmaker in a dishwasher.
• DO NOT immerse the breadmaker in water. - Make sure the breadmaker is completely cooled and dry before storing. Store the breadmaker with the lid closed. Do not place heavy objects on top of the lid.
Troubleshooting
PROBLEM
Why are the ingredients not mixed well?
What causes the height and shape of each loaf to differ?
Why does the kneading paddle come out with the bread?
Why does the bread have floured corners?
Can the ingredients be split in half or doubled?
Is it okay to use fresh milk instead of powered milk?
PROBABLE CAUSE/SOLUTION
• After ingredients are added, make sure the kneading paddle is in the upright position.
- The height and shape of each loaf depends on the ingredients, the measurements of those ingredients, and the room temperature.
- The kneading paddle removes easily for cleaning purposes. A nonmetal utensil is recommended to remove the paddle from the loaf. CAUTION: The kneading paddle might be hot. Let cool for 10 minutes; then place on a wire rack before removing.
- Flour may not have been mixed completely into the dough. The bread should be checked about 10 minutes into the kneading cycle to check if this happening. To incorporate the flour into the dough, use a silicon spatula to remove the flour from the sides of the bread pan.
- Pan might not be inserted properly. Place the bread pan into the appliance and press down on the rim until the bread pan clicks firmly in place. Insert kneading paddle and make sure it is in the upright position.
- No. The kneading will not be done well if there is too little of the ingredients in the bread pan. The bread may rise above the bread pan if there is too much of the ingredients added.
- Yes. The water amount will have to be decreased to equal the liquid substitution. When using the time delay, do not use fresh milk because it may spoil.
重要安全说明
本产品建议于家庭使用。
natural_image
Simple line drawing of a container with an upward arrow indicating process (no text or symbols)插入揉面棒,并确保它位于垂直位置。

natural_image
Illustration of a hand pouring food into a container with an arrow indicating downward motion (no text or symbols)关闭上盖。插上本机电源插头。

natural_image
Line drawing of a hand inserting a coin into a machine (no text or symbols)The Ground Truth image displays a single, solid horizontal line. According to Rule 2 (UNDERSCORE & LINE RULES), this is a stylistic or background line, not a placeholder underscore. Therefore, the OCR result must ignore it and output nothing or only meaningful text. The provided OCR content is "____", which consists of four underscores. This is an incorrect interpretation of the line as a placeholder, violating the rule that stylistic lines must be ignored. The OCR has hallucinated placeholder underscores where none should exist in the GT. Hence, the OCR result is inconsistent with the Ground Truth.
natural_image
Line drawing of a coffee maker using a machine, showing a drop in the cup (no text or symbols)natural_image
Illustration of two open storage cabinets placed on a table, no text or symbols presentnatural_image
Line drawing of a hand pouring liquid into a container with a handle (no text or symbols)natural_image
Diagram of a plug inserted into a wall socket, showing internal wiring (no text or symbols)拔掉电源插头让本机完全冷却。
详细操作说明 (续)
注意:
natural_image
Line drawing of a hand pouring liquid into a mug with a spoon, no text or symbols present干食材量取重量换算表
natural_image
Simple line drawing of a container with a lid and arrow indicating downward motion (no text or symbols)natural_image
Line drawing of a hand pouring food into a container with an arrow indicating downward motion (no text or symbols)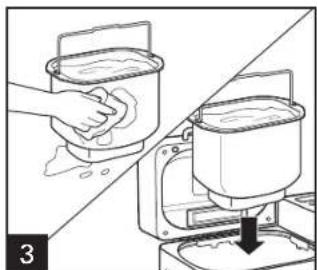
natural_image
Illustration of a hand washing a small container while pouring liquid into a machine (no text or symbols)
natural_image
Illustration of a hand using a tool to lift a box onto a surface, with no visible text or symbols.natural_image
Simple line drawing of a container with a lid and arrow indicating downward motion (no text or symbols)
natural_image
Illustration of a hand pouring food into a container with a downward arrow (no text or symbols)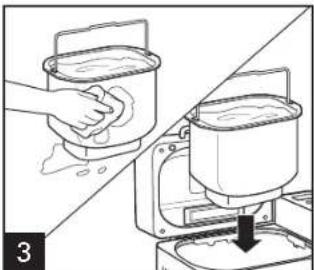
natural_image
Illustration of a hand washing a cup and pouring liquid into a machine (no text or symbols)
natural_image
Diagram showing a device connected to an electrical outlet with a plug, no text or symbols presentnatural_image
Illustration of two open storage bins with a hand inserting a component, no text or symbols present
natural_image
Illustration of a hand inserting a device into a container with an arrow indicating insertion (no text or symbols present)natural_image
Simple line drawing of a container with a lid and arrow indicating downward motion (no text or symbols)插入揉面棒,并确保它位于垂直位置。

natural_image
Illustration of a hand pouring food into a container with an arrow indicating downward motion (no text or symbols)natural_image
Illustration of a hand washing a cup and pouring liquid into a machine (no text or symbols)盖上上盖。插上本机电源插头。

natural_image
Simple line drawing of a container with a lid and arrow indicating downward motion (no text or symbols)插入揉面棒,并确保它位于垂直位置。

natural_image
Illustration of a hand pouring powder into a container with an arrow indicating downward motion (no text or symbols)natural_image
Illustration of a hand washing a cup and pouring liquid from a machine (no text or symbols)natural_image
Diagram showing a device connected to an electrical outlet with a plug, no text or symbols present盖上上盖。插上本机电源插头。

natural_image
Diagram showing a mechanical assembly with arrows indicating direction, no text or symbols presentnatural_image
Line drawing of a hand holding a round object, possibly a ball or container, with no visible text or symbols.面包设置 - 手工面团 (续)

natural_image
Illustration showing two steps of a food preparation: one applying a round object to a tray, the other pressing a piece of dough on a flat surface (no text or symbols)natural_image
Line drawing of a hand using a brush to apply liquid onto a tray (no text or symbols)natural_image
Line drawing of a oven with an open dough pan containing dough, no text or symbols present面团/手工面团:
食材:
natural_image
Simple line drawing of a container with a lid and arrow indicating downward motion (no text or symbols)插入揉面棒,并确保它位于垂直位置。

natural_image
Illustration showing hands picking strawberries and adding a coin into a container (no text or symbols)natural_image
Illustration of a hand washing a cup and using a water dispenser to lift a bowl (no text or symbols)natural_image
Illustration of two computer monitors with a hand inserting a device into the top panel (no text or symbols)natural_image
Illustration of a hand placing a container into a machine (no text or symbols visible)natural_image
Diagram showing a plug inserted into a socket with a black arrow indicating direction (no text or symbols)拔掉电源插头。让机器完全冷却。
natural_image
Line drawing of a hand cleaning a small object on a surface (no text or symbols)natural_image
Line drawing of a kitchen sink with faucet and sink (no text or symbols)使用温和的带清洁剂的水清洗。

natural_image
Diagram showing a device component with an arrow pointing to a housing (no text or symbols present)natural_image
Line drawing of a hand cleaning a device with a cloth (no text or symbols)用湿布或海绵擦拭上盖的内部和外部。
natural_image
Diagram showing a device with a lid and base, connected to a component (no text or symbols present)重新装上上盖。
注意:
Dist.: Hamilton Beach Brands, Inc., Glen Allen, VA 23060
© 2015 Hamilton Beach Brands, Inc.
以上内容如有改动,恕不预先通知

添加官方微博 微信
开启美食人生
840254202
- 如有疑问?
- SAVE THESE INSTRUCTIONS!
- Quick-Start Guide
- Add Ingredients
- Select Menu
- Start Making Bread
- Control Panel
- Program Cycles
- Basic
- Basic Turbo
- Wheat
- Wheat Turbo
- French
- French Turbo
- Sweet
- Yeast-Free, Gluten-Free Bread Mix
- Rye
- Gluten-Free Recipe
- Dough
- Artisan-Style Dough
- Jam
- Bake Only - Additional Setting
- Program Timetable and Settings
- Program Timetable and Settings (cont.)
- Detailed Instructions
- Detailed Instructions (cont.)
- NOTES:
- Bake Only Menu
- Delay Time
- Power Interruption Program Protection
- Fruit and Nut Dispenser
- Tips: Bread Basics
- Ingredients
- Flour
- All-Purpose Flour
- Bread Flour
- Self-Rising Flour
- Whole-Wheat Flour
- Tip
- Other Ingredients
- Egg
- Salt
- Shortening, Butter, and Vegetable Oil
- Sugar
- Water and Other Liquids (always added first)
- Yeast
- Tips: Use Exact Measurements
- Adding Sequence
- Liquid Ingredients
- Dry Measurements
- Frequently Asked Questions
- May I use a sugar substitute in place of sugar?
- May I omit the salt or sugar from the recipe?
- When do I add raisins, nuts, etc., to the bread?
- Can I open the lid while the breadmaker is operating?
- Can I use my favorite bread recipes in my breadmaker?
- What will happen if I leave the bread in the bread pan after baking?
- Can the recipe be cut in half?
- How can bread mixes be used in the machine and at what setting?
- Bread Settings
- Basic/Basic Turbo (Turbo Water Temp 45°C–50°C):
- Wheat/Wheat Turbo (Turbo Water Temp 45°C–50°C):
- French/French Turbo (Turbo Water Temp 45°C–50°C):
- Sweet:
- Yeast-Free/Gluten-Free Mix (Water Temp 40°C–45°C): (1000g)
- Rye: (1000g)
- Gluten-Free:
- Bread Settings (cont.)
- Bread Setting – Dough
- Bread Setting – Artisan-Style Dough
- Bread Setting – Artisan-Style Dough (cont.)
- Dough/Artisan Dough:
- Bread Setting – Jam
- Jam:
- Ingredients:
- Cleaning
- Troubleshooting
- PROBLEM
- PROBABLE CAUSE/SOLUTION
- 重要安全说明
- 本产品建议于家庭使用。
- 详细操作说明 (续)
- 注意:
- 面包设置 - 手工面团 (续)
- 面团/手工面团:
Brand : HAMILTON BEACH
Model : 29883-CN
Category : Bread maker