BCM1019 - Battery charger Ferm - Free user manual and instructions
Find the device manual for free BCM1019 Ferm in PDF.


| Product type | Battery charger |
| Brand | Ferm |
| Model | BCM1019 |
| Input voltage | 230 V ~ 50 Hz |
| Input power | 145 W |
| Output voltage | 6 V DC / 12 V DC |
| Output current | 7 A (eff.) / 10 A (eff.) |
| Compatible battery type | 6 V or 12 V lead-acid batteries |
| Recommended battery capacity | 10 Ah to 50 Ah |
| Protection | Thermal circuit breaker (automatic reset) |
| Insulation class | Double insulation (class II) – no earth required |
| Usage | Indoor only |
| Included accessories | Set of battery clamps, manual, warranty card |
| Dimensions (approx.) | 20 x 15 x 10 cm |
| Weight (approx.) | 1.5 kg |
| Operating temperature | Ambient temperature, avoid frost and excessive heat |
| Indicator lights | Red light (charging/overload/reversal), green light (battery full) |
| Safety | Wear safety glasses, avoid moisture, use in a ventilated area |
| Maintenance | Clean with a dry cloth, do not use water or harsh solvents |
| Warranty | See enclosed warranty card |
| Recycling | Recyclable packaging; dispose of the device at an appropriate collection point |
Frequently Asked Questions - BCM1019 Ferm
User questions about BCM1019 Ferm
0 question about this device. Answer the ones you know or ask your own.
Ask a new question about this device
Download the instructions for your Battery charger in PDF format for free! Find your manual BCM1019 - Ferm and take your electronic device back in hand. On this page are published all the documents necessary for the use of your device. BCM1019 by Ferm.
USER MANUAL BCM1019 Ferm
FERM® JUST A PERFECT TO
Art. no. BCM1019
Battery charger 10A / 6V-12V
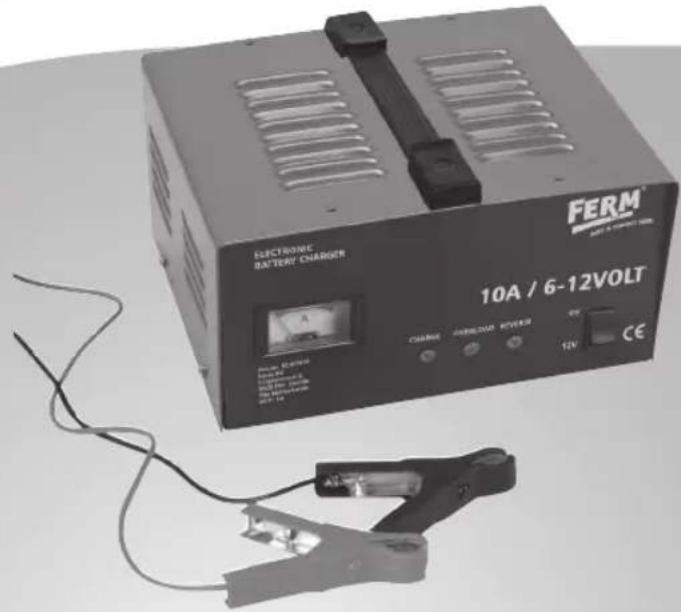
GB USERS MANUAL 03
Thank you for buying this Ferm product.
By doing so you now have an excellent product, delivered by one of Europe's leading suppliers. All products delivered to you by Ferm are manufactured according to the highest standards of performance and safety. As part of our philosophy we also provide an excellent customer service, backed by our comprehensive Warranty. We hope you will enjoy using this product for many years to come.
The numbers in the text refer to the diagrams on pages 2.

Read the operating instructions carefully before using this device. Familiarise yourself with its functions and basic operation. Service the device as per the instructions to ensure that it always functions properly. The operating instructions and the accompanying documentation must be kept in the vicinity of the device.
Know you apparatus
Before you use the Battery charger, carefully read the instructions, especially the safety rules. Observe the instructions for maintenance to ensure your apparatus always operates properly. Before attempting to operate the apparatus, familiarise yourself with the controls and make sure you know how to stop it quickly in an emergency. Save this user's manual and the other documents supplied with this apparatus for future reference.
Contents
- Data
- Safety
- Installation
- Operating the Battery charger
- Maintenance
1. DATA
Technical specifications
Model 10A/6V-12V Input 230V\~50Hz · 145W Output DC6/12V · 7A;10A(EFF) Battery Min. 20Ah / Max. 100 Ah
This apparatus has a overload protection by means of a thermal fuse which will switch on as soon as the electricity is switched off.
Package contents
1 Set battery clamps
1 Manual
1 Warranty card
2. SAFETY
Explanation of symbols

Class II machine - Double insulation - You don't need any earthed plug.

Denotes risk of personal injury, loss of life or damage to the tool in case of non-observance of the instructions in this manual.

Indicates electrical shock hazard.

Indoor use only

Wear safety goggles
General safety instructions
1. Keep the work area clean.
A cluttered work area may cause • accidents.
Make sure the work area is well-lit.
2. Work environment.
Never leave tools in the rain. Do not use tools in damp or wet places. Never use tools near inflammable liquids or gasses.
Ferm
3. Prevent electrical shock.
Keep the power cord away from heat, oil and sharp edges. Avoid skin contact with exposed parts of the power cord or plug.
4. Keep children away.
Never allow children or spectators to touch the tools, keep them at a safe distance from the work area.
5. Store tools in a safe place.
Tools that are not used must be stored in a dry and locked placed, out of the reach of children.
6. Do not force the tool.
The machine will do the job better and safer at the rate for which it was intended. Damage caused by forcing the tool is not covered by the warranty.
7. Use the right type of tool.
Do not use low-powered tools for heavy-duty operations. Never use the machine other than for its intended purpose.
8. Cable.
Never carry the tool by its cable and do not tug at the cable to pull the plug from the socket. Keep the cable away from heat, oil and sharp edges.
9. Maintain the tool with care.
The tool works best and safest if it is kept • clean.
Observe the instructions for maintenance • and changing accessories. Keep the tool dry and free from oil and grease.
10. Disconnect the machine.
Disconnect the machine when you do not use it, before cleaning and when changing accessories and tools.
11. Extension cable for outdoor use.
When working outdoors use only extension cables suitable for this purpose and marked as such. When using machines with earth-connection, use an extension cable with earth-connection.
12. Stay alert.
Watch what you are doing, use your common sense, do not operate the tool when you cannot concentrate on the job.
13. Check the machine for damage.
Before starting the machine, check that all safety devices and damaged parts operate smoothly and efficiently; If not stated otherwise in this manual, damaged safety devices and machine parts must be repaired or replaced by a recognized service centre. Damaged switches must be replaced by a service centre.
Do not use the machine when it cannot be switched on or off.
Special safety instructions
In the design of the battery charger the requirements for safe usage have been taken into account. Any change, adaptation, conversion or other use may interfere with the safety of the apparatus. In addition, the guarantee will no longer be valid because of this.
Check the following things:•
Does the voltage of the battery charger • correspond to the mains voltage. Battery chargers with the indication of 230 Volt can also be used when there is a mains voltage of 220 Volt.
Are the mains lead and the mains plug in • good condition.
Avoid the use of long extension cables for the battery charger.
Do not try to open the housing of the battery, because dangerous substances may be released.
- Do not use the battery charger where there is moisture.
- Do not expose the battery (and the charger) to vivid sunlight and high temperatures.
- During charging the battery acid may start to boil, which is not unusual. Beware of splashing, however, for battery acid is caustic. The battery charger therefore needs to be switched off in order to prevent accidents and to allow the battery to cool down.
During charging so-called detonating gas can be liberated. That is why the filler caps are unscrewed before charging(does not apply to closed batteries, this means Battery chargers without filler caps). Charging has to take place in a thoroughly ventilated space.
- The battery charger does not stop automatically after charging. For this reason it needs to be switched off and disconnected from the battery. Do not leave the battery charger connected to the mains voltage after the battery has been charged completely.
The apparatus needs to be switched off completely in the case of:
- Malfunctioning or damage to the mains plug or mains cable.
• Smoke or stench from scorched insulation.
Ferm

Always wear safety glasses and old clothes during working with the battery, because battery acid is a biting product!
3. INSTALLATION
Before putting the battery charger into operation the following steps need to be taken (Fig. 1):
If the battery is still connected, it needs to be • disconnected,
first the negative terminal (A);•
then the positive terminal (B)!•
It is advisable to remove the battery from the vehicle before charging it.
Check the level of the battery acid. For this • purpose remove the battery stoppers first, then check the acid level and, if necessary, fill up with distilled water (available from the chemists'). The level of the electric charge can be checked with a hydrometer.
Clean the connections and the terminals. This can be done with a steel wire brush or with sandpaper.
Connect the positive clamp of the charger • (red) to the positive terminal (+) of the battery.
Then connect the negative clamp of the charger (black) to the negative terminal (-) of the battery.
Check if the clamps of the charger are firmly connected to the battery.
The following steps need to be taken with the help of the information of the charge control display.
(Caution! (1) Our chargers are only suitable for those accumulators having a residual voltage above 2 V - 4 V. No current flows into batteries having a residual voltage below 2 V - 4 V (2).
The current meter only provides a general indication and not an exact measurement).
The charging process starts after connecting the clamps correctly to the battery and connecting the plug to the mains. The charging current is visible on the display on the front Fig. 2).
The charging process starts when the red light • comes on.
The battery is fully charged when the green light comes on.
Overload
When the charging current becomes too high the red light will indicate that there is an overload and the charging process will stop.
After cooling down, the charger will start automatically again (red light goes out again).
Reverse
The red light indicates that the battery charger is not connected correctly to the battery: the clamps have to be exchanged (red clamp on + and black clamp on -).
6V / 12V
The battery charger can charge batteries of 6V and 12V. For this purpose push the switch at the right side of the front panel in chosen position.
Check charged battery
On the basis of the specific gravity of the battery acid can be gathered if an battery is fully loaded or not. With the help of a specific graviter meter the specific gravity can be appointed.
Empty battery: s.g. = 1.13 kg/dm³
Full battery: s.g. = 1.28 kg/dm³
5. MAINTENANCE
Always remove the plug from the mains socket when the battery charger is being serviced or cleaned. Never use any water or other liquids when cleaning the charger. Keep the cable and your battery charger clean. Some cleaners and solvents (petrol, thinner) can affect or dissolve plastic parts. These products contain a.o. benzene, trichloroethylene, chloride and ammonia.
Defective batteries
Damaged batteries which do not retain their • charge. It is often the case that batteries which are in very bad condition can no longer be charged; they need to be replaced because they do not retain their charge.
• Short circuited batteries.
If, after several hours the battery charger still does not indicate that the battery is being charged, this usually means that one of the elements is short circuited. The battery needs to be replaced.
Ferm
GB
D
Malfunction
If your battery charger no longer functions as it should, this may be due to the following reasons:
The clamp has been connected wrongly.
Check if the right clamp is connected to the right terminal.
The safety switch is switched off.
Battery life
The life of your battery will be considerably longer if the following advice is taken:
Check the liquid level of the battery every month and, if necessary, fill it up with distilled water.
Clean the terminals of your battery regularly to prevent deposit. Put a little bit of vaseline on the terminals.
If the vehicle is seldom used, the battery will discharge. Therefore it needs to be charged regularly to maximum capacity. In this way malfunctioning can be prevented.
If everything has been checked, and the battery charger still does not charge as it should, it needs to be taken to the Service address on the warranty card.
Environment
To prevent damage during transport, the appliance is delivered in a solid packaging which consists largely of reusable material. Therefore please make use of options for recycling the packaging.

Faulty and/or discarded electrical or electronic apparatus have to be collected at the appropriate recycling locations.
Warranty
For the conditions of warranty, please refer to the separately provided warranty card.
BATTERIELADEGERÄT
(GB) We declare under our sole responsibility that this product is in conformity and accordance with the following standards and regulations:

J.A. Bakker-van Ingen
CEO Ferm BV

J. Lodewijk
Quality Manager Ferm Global
It is our policy to continuously improve our products and we therefore reserve the right to change the product specification without prior notice.
Ferm BV • Lingenstraat 6 • 8028 PM • Zwolle The Netherlands
Ferm
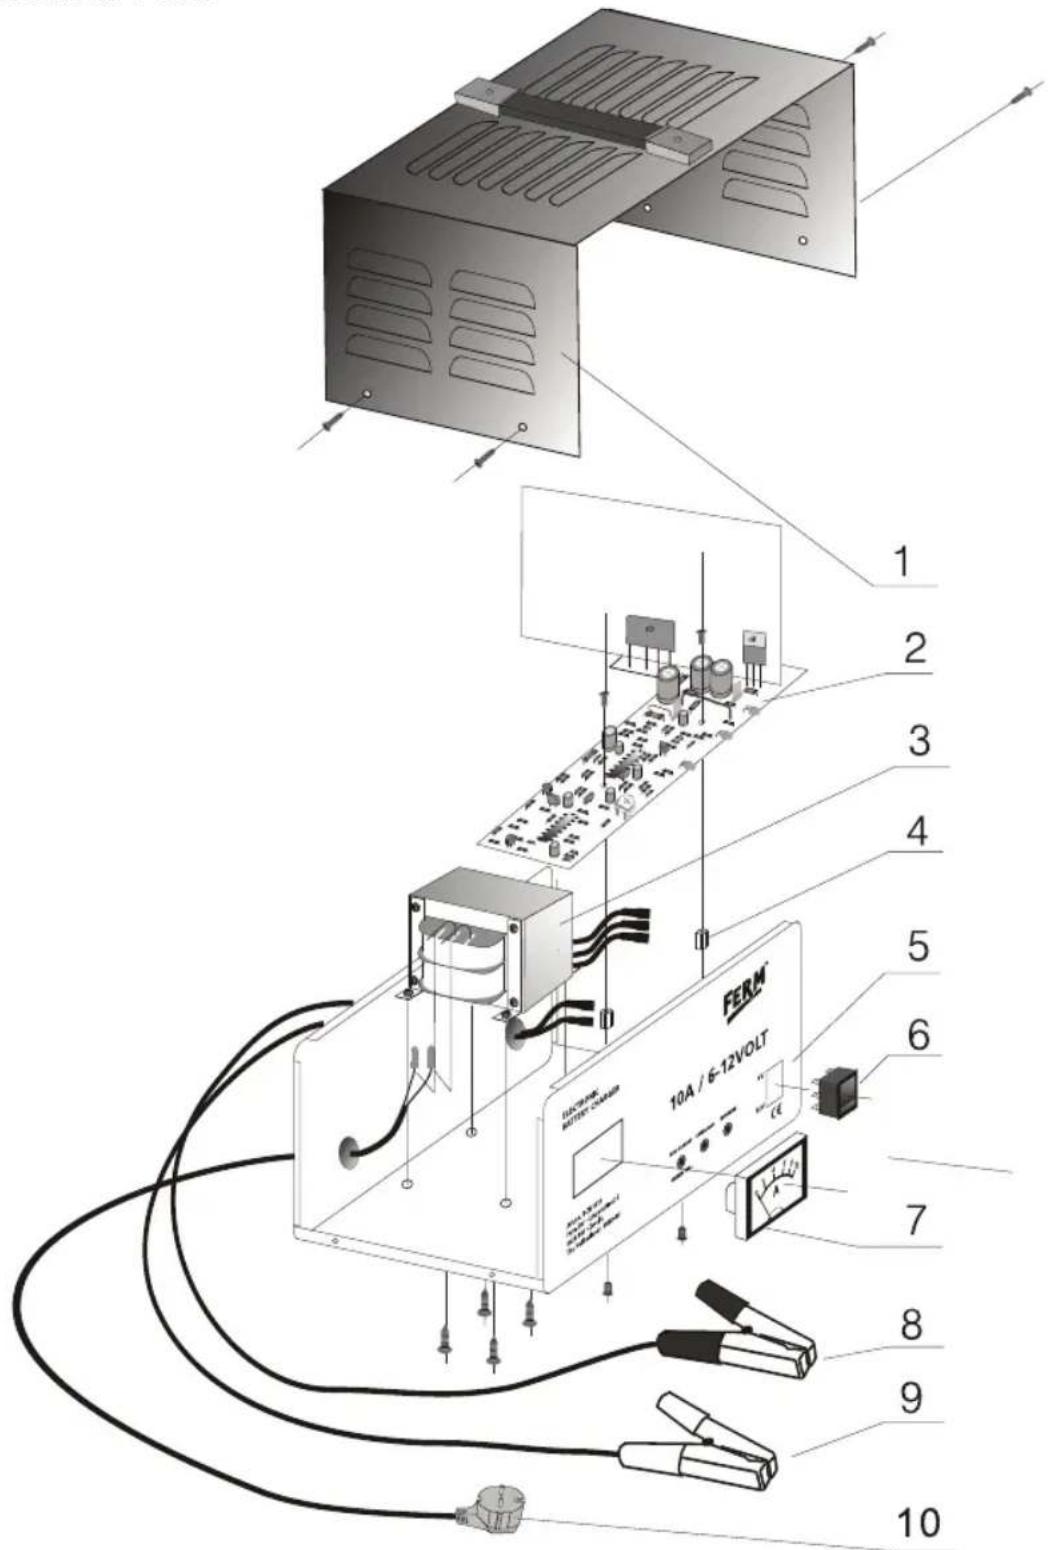
Spare parts list
No. Description Position
| 400237 | Voltage switch | 6 |
| 400235 | - Clamp (black) | 8 |
| 400236 | + Clamp (red) | 9 |
| 409915 | Control circuit | 2 |
Exploded view
Ferm
GB Subject to change

- FERM® JUST A PERFECT TO
- Battery charger 10A / 6V-12V
- Thank you for buying this Ferm product.
- The numbers in the text refer to the diagrams on pages 2.
- Know you apparatus
- Contents
- DATA
- Technical specifications
- Package contents
- SAFETY
- Explanation of symbols
- General safety instructions
- Keep the work area clean.
- Work environment.
- Prevent electrical shock.
- Keep children away.
- Store tools in a safe place.
- Do not force the tool.
- Use the right type of tool.
- Cable.
- Maintain the tool with care.
- Disconnect the machine.
- Extension cable for outdoor use.
- Stay alert.
- Check the machine for damage.
- Special safety instructions
- Check the following things:•
- The apparatus needs to be switched off completely in the case of:
- INSTALLATION
- Overload
- Reverse
- 6V / 12V
- Check charged battery
- MAINTENANCE
- Defective batteries
- D
- Malfunction
- Battery life
- Environment
- Warranty
- BATTERIELADEGERÄT
Brand : Ferm
Model : BCM1019
Category : Battery charger