
Urban-I33S - Cooker EDESA - Free user manual and instructions
Find the device manual for free Urban-I33S EDESA in PDF.


| Product Type | Freestanding Cooker |
| Brand | Edesa |
| Model | Urban-I33S |
| Hob Type | Gas hob with 4 burners |
| Oven Type | Electric oven |
| Oven Capacity | Approx. 58 liters |
| Dimensions (H x W x D) | 85 cm x 60 cm x 60 cm |
| Weight | Approx. 45 kg |
| Energy Source | Gas (hob) and Electricity (oven) |
| Power Supply | 230 V ~ 50 Hz (oven) |
| Oven Functions | Conventional, grill, fan-assisted |
| Cleaning | Enamel interior, removable door |
| Safety Features | Flame failure device on hob, child lock |
| Control Type | Knobs for hob and oven |
| Color | Stainless steel / White |
| Spare Parts Availability | Yes, through authorized service centers |
| Repairability Index | Available on request |
| User Manual Languages | Multiple languages (CA, EN, ES, EU, PT, etc.) |
Frequently Asked Questions - Urban-I33S EDESA
User questions about Urban-I33S EDESA
0 question about this device. Answer the ones you know or ask your own.
Ask a new question about this device
Download the instructions for your Cooker in PDF format for free! Find your manual Urban-I33S - EDESA and take your electronic device back in hand. On this page are published all the documents necessary for the use of your device. Urban-I33S by EDESA.
USER MANUAL Urban-I33S EDESA
natural_image
Silhouettes of a group of people dancing or performing, no text or symbols present





1.3
MANUAL DE INSTRUCCIONES
MANUAL DE INSTRUÇÕES
INSTRUCTION MANUAL
MANUAL D'INSTRUCCIONS
MANUAL DE INSTRUÇÕES
ERABILERA-ESKULIBURUA
Important! Read the entire manual before using the hob
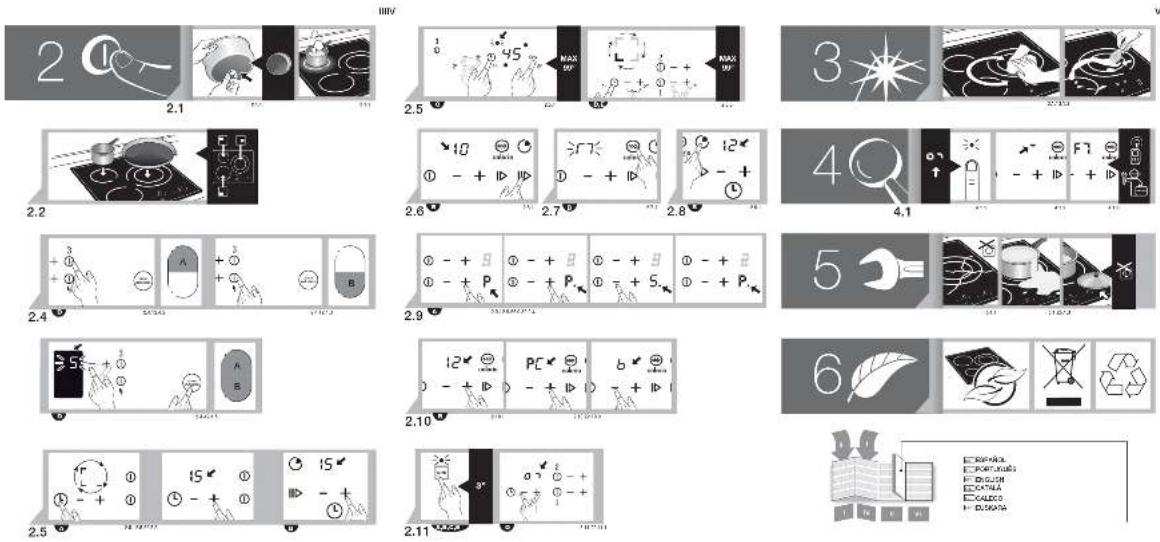
The texts in the manual correspond to the numbered diagrams.

Identifi cation

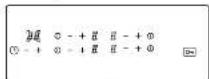
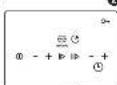
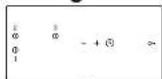
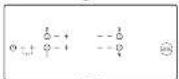
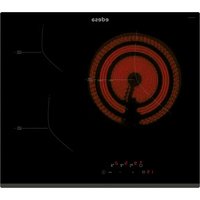
To find out which model of hob you have, compare the number and layout of the rings with control dials "A", "B", "C", "D" or "E" on your appliance with those shown in the illustrations.
1
Installation
1.1 Unpacking the hob. Remove all the protective elements.
1.2 Recess-mounting in a kitchen fi tting.
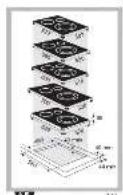
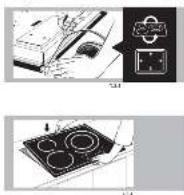
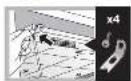
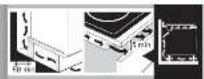
Always take into account the reference plate data (1.2.1), the ventilation areas (1.2.2) and the dimensions of the kitchen fi tting in which you are to recess-mount the plate (1.2.3). Stick the foam seal all around the hob perimeter for good impermeability (1.2.4). Turn the hob around and fi t it into the space (1.2.5). Fix it to the kitchen fi tting with the four clips supplied (1.2.6). Make sure air can circulate from the rear of the hob, exiting from the front (1.2.7).
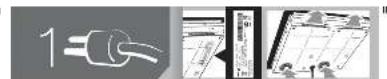
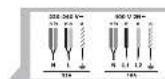
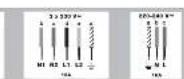
1.3 Mains connection. The hob is supplied with a power cable. 5-wire cable a) yellow and green, b) blue, c) brown, d) black, e) grey (1.3.1, 1.3.2). 3-wire cable a) yellow and green, b) blue, c) brown (1.3.3).
Recommendation: The hob must be installed by an authorised installer following the manufacturer's instructions and diagrams. If an oven of another brand is installed, it must be insulated from the hob. The induction hob must not be installed on top of a dishwasher, washing machine, refrigerator or freezer. Do not use non-removable materials such as silicone. The distance between the edge of the hob and the side or rear wall must be at least 40 mm.
2
Using the hob
Before using your new hob for the first time, remember that induction is a technology whereby heat is transmitted directly to the pan. All the pans you use must therefore have a ferromagnetic base.
2.1 Choosing a pan. It is very important to choose the type of pan so that the best possible hob performance and cooking results are obtained. In principle, any pan is suitable for induction cooking if a magnet sticks to its base. (2.1.1). Place the food to be cooked in the pan. Never heat up an empty pan on the hob. (2.1.2). For radiant vitro-ceramic rings, ceramic, copper and stainless steel pans can also be used. Aluminium pans are not advisable as they could stain the hob glass.
2.2 Choosing a ring. There are several rings you can place the pan on ☐ ☐ ☐ ☐ Choose the best one according to the size of the pan. If the base of the pan is too small, the power indicator will flash and the ring will not switch on, even though the pan is suitable for induction cooking. Make sure you are not using pans with a smaller base diameter than those shown on the chart.
| ring ∅ min. | pan base ∅ | |
| 16 cm | 10 cm | |
| 18 cm | 12 cm | |
| 21 cm | 18 cm | |
| 28 cm | 15 cm | |
Recommendation: Do not drag the pans along the hob glass, as this could cause scratches.
Do not place any metal objects such as knives, forks or pan lids on the hob surface, as they could heat up.
2.3 Switching on the ring. Press the Ⓐ button for the cooking zone you wish to use. “☐” will start to flash. If you do not select a power setting, the cooking zone will switch off automatically.
Stop. Hold down the zone you have used.
① button for the cooking
2.4 Selecting a power setting. Press the +
button to increase the power setting from “ ♦ ” to “ ♦ ” (the highest setting), and the — button to reduce it. When you switch on the hob, you can go directly to “ ♦ ” by pressing the — button.
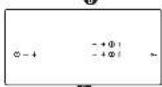
Model "D". Press button "3" (2.4.1) to activate ring "A" (2.4.2). Press button "4" (2.4.1) to activate ring "B" (2.4.3). Use + and — to adjust the power setting.
Maximum zone. Press (2.4.4) to activate rings "A" + "B" (2.4.5). Adjust the power setting using "+" and "-" for ring "3" (2.4.4).
TIME FUNCTIONS
2.5 Selecting the cooking time
Models with "A" controls. Select the ring and desired power setting: 1,2,3.....P. Press The zone to be timed will appear on the display. If several rings are functioning at the same time, press several times to scroll through the rings to be timed (2.5.1). Select the ring you wish to time. Set a time using the + and - buttons (maximum 99 minutes) (2.5.2). The time will count down until it reaches 0, then the ring will switch off and a series of beeps will sound. Press any button to stop the beeps.
NOTE: Only one ring may be timed at once. To cancel the timing, press Ⓤ.
The selected power setting and a "t" will flash alternately on the display for the ring being timed.
Models with "B" controls. Select the desired ring and power setting: 1,2,3....12, celeris. Select the time (maximum 99 minutes) by pressing or on the time icon (2.5). When the cooking time has elapsed, the ring will automatically switch off and a series of beeps will sound. Press any button to stop the beeps.
Models with "C" control. Select the desired ring and power setting. Press ① repeatedly and select the cooking zone to be timed. Press + or to set the cooking time, to a maximum of 99 minutes (2.5.4). The time will count down until it reaches zero, and the ring will emit a series of beeps and switch off. To stop the beeps, press the ○ button. The rings can be timed separately. Viewing the remaining time. If more than one cooking zone is timed, press ① for the corresponding ring.
Models with "D" or "E" control. Select the desired ring and power setting. Press the button repeatedly. The position of the ring to be timed will change from ring to ring (2.5.5).
Select the ring and use + and - to assign a cooking time, to a maximum of 99 minutes. The time will count down until it reaches zero and the ring will emit a series of beeps and switch off. To stop the beeps, press or . The timer can only be used for one ring at a time.
SPECIAL FUNCTIONS
Models with "B" controls
2.6 Direct access function ▶, ▶With the ring switched on, press ▶ or ▶to access power setting 6 and 10, which is the manufacturer's default setting (2.6.1). To change it, with the ring switched off, hold down ▶ or ▶for a few seconds until a beep sounds and 6 or 10 begins to flash. Select the new desired power setting by pressing ▶ or . Validate by pressing the ▶ or ▶button again.
2.7 Céleris function. This function allows the maximum temperature to be rapidly reached, which is useful for quickly heating up or boiling liquids. With the ring switched on, press will appear on the display (2.7.1). When the liquid begins to boil, select the desired power setting by pressing —
Important note: With ⚫ activated, the maximum power setting you can use on an adjacent ring is 6.
2.8 Time function Press to find out the time elapsed since the last time the power setting was changed on the corresponding ring. (2.8.1)
OTHER FUNCTIONS
Models with "A" controls
2.9 P dot (P.) quick heating function: This function allows a higher power setting to be obtained for a certain time duration. Press + repeatedly until you reach P (2.9.1). Press + again and it will go to the P. maximum power setting (2.9.2). Press - and select the desired power setting (2.9.3). After a few seconds, P. will appear on the display (2.9.4). When the time duration has elapsed, it will return to the selected power setting.
Models with "B" controls
2.10 PC quick heat function. This function allows a higher power setting to be obtained for a certain time duration. Press + repeatedly until it reaches 12 (2.10.1). Press + again and it will go to the PC maximum power setting
(2.10.2). Press — and select the desired power setting, minimum 6 (2.10.3). After a few seconds P and the selected power setting will flash alternately on the display. When the corresponding time has elapsed, it will return to the selected power setting.
Recommendations: After selecting power setting P. or P. if you do not select a final cooking power setting, the ring will switch off.
While P. or PC is visible on the display, any change you make to the power setting controls will cancel the function.
2.11 Child lock. Models (A,B,C,E). The hob has a child lock function that blocks the controls. To set the child lock, hold down the button until the pilot light comes on (2.11.1). To release it, repeat this operation until the pilot light switches off.
Model (D). To set the child lock, hold down the + and buttons until the symbol lights up (2.11.2). To release it, repeat this operation until the symbol switches off.
Models “C” “D” “E”. With the child lock set and the hob functioning, the power setting and the lock symbol □ will appear alternately.
Note: In all cases, for safety reasons, the cooking zone can always be switched off by pressing the ⏻ button, even if the child lock is set.
Recommendations: You should preferably use the cooking zones on two opposite sides.
Prevent any pans from knocking against the glass.
Use suitable pans for induction cooling.
Use pans with a thick, fl at base.
Warnings: If you leave any objects on the sensors, a beep will sound and the hob will switch off.
The hob switches off automatically after an estimated safety time has elapsed. This time will vary depending on the power setting selected (1 - 10 hours). AS" or "A" appear on the display.
If you are boiling liquids at high power settings, you will hear a buzzing noise. This is due to the ring frequency coupling and it is normal.
On mixed models with radiant rings, do not touch these zones as it could cause burns.
3
Maintenance and cleaning

As the glass does not heat up much on induction hobs, they are easy to clean. However, you should clean up any spills or splashes as soon as possible with a damp cloth or a piece of laminated paper. For more resistant stains, use specifi c vitro-ceramic cleaning products. For mixed models with radiant rings, the glass reaches a very high temperature. You should clean it as quickly as possible, without letting the spills dry on the glass. To clean heated up stains, use a sponge and soapy water and a special scraper for glass.
Do not use a steam cleaner.
The use of abrasive cleaning products or hard metal scouring pads for cleaning the hob can cause surface scratches and may cause the glass to break.
Remove any sugar stains or residues immediately, as they could damage the hob surface.
4
Troubleshooting

The hob does not switch on. Check it is connected to the mains and check the differential switches.
The differential switches trip. Check the connection.
An indicator light comes on when the hob is plugged in. This is normal. The message disappears after 30 seconds.
A smell is produced when the hob is used for cooking the fi rst few times. Heat up a pan of water on each ring for 12 an hour.
The hob does not switch on and a message appears. Call the technical service.
The hob does not switch on and appears on the display. Remove the child lock (4.1.1).
The hob does not switch on-or F appears on the display and a beep sounds. Clean the hob or remove any objects on the sensors (4.1.2).
- or F7 appears. The electronic circuits have overheated (4.1.3).
The pilot lights fl ash during functioning. An unsuitable pan is being used.
At low power settings, a clacking noise is heard during cooling. This is normal. The hob switches on and off, self-adjusting the selected power setting.
When the hob is switched off, the fan continues running. This is normal. It helps the electronic circuits to cool down.
5
Safety

- The mains circuit supplying the hob must have a single-pole cut-off switch with a separation between contacts of at least 3 mm.
- The installation must be dimensioned to the maximum power indicated on the reference plate and the electrical socket must have a regulatory earth connection.
- If the cable is damaged, it must be replaced by your after-sales service or by similar qualified staff, to avoid hazard.
- The induction rings have a pan detection system. They only heat up if there is a pan on them.
- After each use, switch off the ring at the control panel. Do not leave it to the pan detector.
- If the surface of the glass should crack or break, unplug the appliance from the mains immediately to avoid risk of electric shock. Do not use the hob again until the glass has been replaced. (5.1.1)
- Keep small children away from the hob and use the child lock system to prevent them from playing with the controls.
- This appliance is not intended for use by people (including children) whose physical, sensory, or mental capacities are reduced or who lack experience or knowledge, except under supervision or after receiving instruction regarding use of the appliance from a person responsible for their safety. Use by children should be supervised to prevent them playing with the appliance.
- The hob must be installed by an authorised installer following the manufacturer's instructions and diagrams.
- Residual heat. After intensive use, the cooking zone may remain hot and the letter H will appear. Do not touch these zones.
- Spill-over protection: If any liquids should boil over, or if any objects should be placed on the sensors or cover them, will appear on the display, a beep will sound and the hob will switch off. Clean the glass or remove the object and switch on the hob again (5.1.2, 5.1.3).
- Automatic switch-off: If you forget to switch off the ring, it will switch off automatically after a time lapse of 1 – 10 hours, depending on the power setting selected.
Important! Attention users with pacemakers and active implants: The hob functions in accordance with the current electromagnetic disturbance regulations (2004/108/EC directive). It is designed not to interfere with the functioning of other electrical appliances if they comply with this standard. The induction hob generates magnetic fi elds in its surrounding environment. To prevent any interference between the hob and a pacemaker, the pacemaker must have been designed in accordance with the corresponding regulation. Consult the manufacturer or your doctor with regard to the pacemaker and its conformities.

The environment

The hob is designed with environmental preservation in mind.
Respect the environment. Use the most suitable power settings for each type of cooking. If you wish, on radiant ring models, you can put another pan in the same place as the previous one to use the accumulated heat, as this will save energy. Use a pan lid whenever you can to reduce heat loss by evaporation.
Electrical and electronic equipment waste management.
The symbol 📋 indicates that the appliance must not be disposed of in traditional bins for domestic waste.
Take your hob to a special collection centre. Recycling domestic appliances prevents negative consequences for health and the environment and enables savings on energy and resources. For further information, please contact your local authorities or the shop where you bought the hob.
∅ del focus ∅ mín. fons recipient
| 16 cm 10 cm | |
| 18 cm 12 cm | |
| 21 cm 18 cm | |
| 28 cm 15 cm |
- TIME FUNCTIONS
- Selecting the cooking time
- SPECIAL FUNCTIONS
- Models with "B" controls
- OTHER FUNCTIONS
- Models with "A" controls
- 3
- Maintenance and cleaning
- 4
- Troubleshooting
- 5
- Safety
- The environment
- The hob is designed with environmental preservation in mind.
- Electrical and electronic equipment waste management.
Brand : EDESA
Model : Urban-I33S
Category : Cooker