
Steak CGG-2000B - Grill WILFA - Free user manual and instructions
Find the device manual for free Steak CGG-2000B WILFA in PDF.


| Product Type | Electric Contact Grill |
| Brand | Wilfa |
| Model | Steak CGG-2000B |
| Power Consumption | 2000 W |
| Voltage | 220-240 V ~ 50/60 Hz |
| Dimensions (approx.) | 40 x 30 x 15 cm (15.7 x 11.8 x 5.9 in) |
| Weight | 3.5 kg (7.7 lbs) |
| Grill Plate Material | Non-stick coated aluminum |
| Temperature Control | Adjustable thermostat with indicator light |
| Drip Tray | Removable for easy cleaning |
| Handle | Cool-touch handle for safe operation |
| Indicator Lights | Power and ready lights |
| Cleaning | Non-stick plates wipe clean; drip tray dishwasher safe |
| Safety Features | Automatic shut-off after prolonged use, overheat protection |
| Spare Parts Availability | Replacement plates and drip tray available from Wilfa |
| Repairability | Modular design allows replacement of heating element and plates |
| Warranty | 2 years limited warranty |
Frequently Asked Questions - Steak CGG-2000B WILFA
User questions about Steak CGG-2000B WILFA
0 question about this device. Answer the ones you know or ask your own.
Ask a new question about this device
Download the instructions for your Grill in PDF format for free! Find your manual Steak CGG-2000B - WILFA and take your electronic device back in hand. On this page are published all the documents necessary for the use of your device. Steak CGG-2000B by WILFA.
USER MANUAL Steak CGG-2000B WILFA
natural_image
Front view of a white-walled appliance with digital display and control knobs (no visible text or symbols on main body)Wilfa STEAK
Table grill
Bruksanvisning
Bruksanvisning
Operating Instructions
CCG-2000B
LES ALLE ANVISNINGER F∅R BRUK
LÄS IGENOM ALLA INSTRUKTIONER INNAN PRODUKTEN ANVÄNDS
LÆS ALLE VEJLEDNINGER INDEN BRUG
LUE OHJEET HUOLELLISESTI ENNEN KÄYTTÖÄ
READ ALL INSTRUCTIONS BEFORE USING
F∅R F∅RSTE GANGS BRUK
natural_image
Front view of a black rectangular appliance with control knobs and a circular indicator light (no visible text or symbols)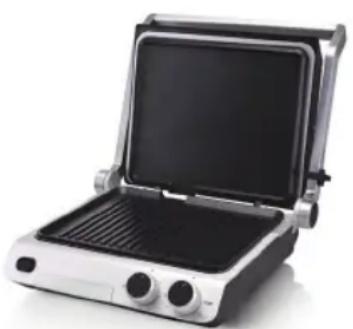
natural_image
Exterior view of a modern flat-screen grater with open lid and side outlets (no text or symbols visible)STELL OG VEDLIKEHOLD
natural_image
Front view of a black rectangular appliance with control knobs and a circular indicator light (no visible text or symbols)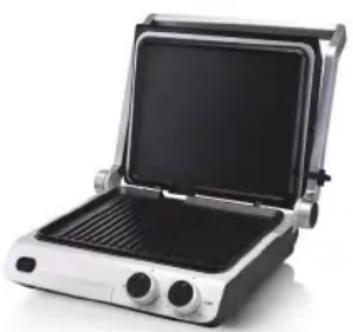
natural_image
Exterior view of a modern stainless steel grater with open lid and side outlets (no text or symbols visible)F∅R IBRUGTAGNING
natural_image
Front view of a stainless steel electric stove with control knobs and a black top panel (no visible text or symbols)natural_image
Open stainless steel grater with black lid and side panels (no visible text or symbols)ENNEN ENSIMMÄISTÄ KÄYTTÖKERTAA
natural_image
Front view of a stainless steel electric stove with control knobs and a black top panel (no visible text or symbols)natural_image
Exterior view of a modern flat-screen grater with open lid and side panels (no text or symbols visible)Read all instructions before use. Read carefully and keep for future reference.
IMPORTANT SAFETY INSTRUCTIONS......5
Product overview....9
Before first use....10
To assemble....11
To use....11
Care and maintenance....14
Technical data....14
IMPORTANT SAFETY INSTRUCTIONS
- WARNING: To reduce the risk of fire, electric shock, or serious personal injury:
- Do not touch hot surfaces. Use the Handle.
- The appliance is not intended to be operated by means if an external timer or separate remote-control system.
- Metallic objects such as knives, forks, spoons and lids should not be placed on the hotplate since they can get hot.
- This product is intended for household use only.
- Do not immerse the power cord, plug, or base in water or liquid.
- Unplug the power cord from the electrical outlet when the product is not in use and before cleaning. Allow the appliance to cool before putting on or taking off parts.
- Do not use accessories that is not recommended by the product manufacturer. Accessories may become hot during use, allow them to cool before handling.
- Do not place the product on or near a hot gas or electric burner, or in a heated oven.
- Use extreme caution when moving a product containing hot oil or other hot liquids.
-
Do not leave unattended while in use.
-
Do not plug or unplug the product into/from an electrical outlet with a wet hand.
• Take proper precautions to prevent the risk of burns, fire, or other personal or property damage, as this product generates heat during use. - If the product falls into water, immediately unplug it from the electrical outlet. IMPORTANT: Do not touch or reach into the water.
- Use in a well-ventilated area. Keep at least 4-6 inches of space on all sides to allow adequate air circulation.
- If the supply cord is damaged, it must be replaced by the manufacturer, its service agent or similarly qualified persons in order to avoid a hazard.
- This product has no user-serviceable parts. Do not attempt to examine or repair it yourself. Only qualified service personnel should perform any servicing; take the product to the appliance repair shop of your choice for inspection and repair.
-
This appliance can be used by children aged from 8 years and above and persons with reduced physical, sensory or mental capabilities or lack of experience and knowledge if they have been given supervision or instruction concerning use of the appliance in a safe way and understand the hazards involved. Children shall not play with the appliance. Cleaning and user maintenance shall not be made by children unless they are older than 8 and supervised.
-
Keep the appliance and its cord out of reach of children less than 8 years.
- This product is intended solely for indoor, non-commercial, non-industrial, household use in cooking/heating food for human consumption. Do not use the product outdoors or for any other purpose.
- Do not allow the power cord to hang where it may be tripped over or pulled (e.g., over the edge of a table or counter), and do not allow the cord to touch hot surfaces.
• Always wear protective oven mitts or heat-resistant gloves when using this product and use utensils. - To disconnect from the electrical outlet, pull directly on the Plug; do not pull on the Power Cord.
- Always use the product on a flat, level, stable, heat-resistant surface.
SPECIAL INSTRUCTIONS:
A short power-supply cord is provided to reduce the risk resulting from becoming entangled in or tripping over a longer cord. Extension cords are available and may be used if care is exercised in their use. If an extension cord is used:
- The marked electrical rating of the extension cord must be at least as great as that of the product.
- The cord should be arranged so that it will not drape over the countertop or tabletop where it can be pulled on by children or tripped over unintentionally.
- The extension cord must be a grounding-type 3-wire cord.
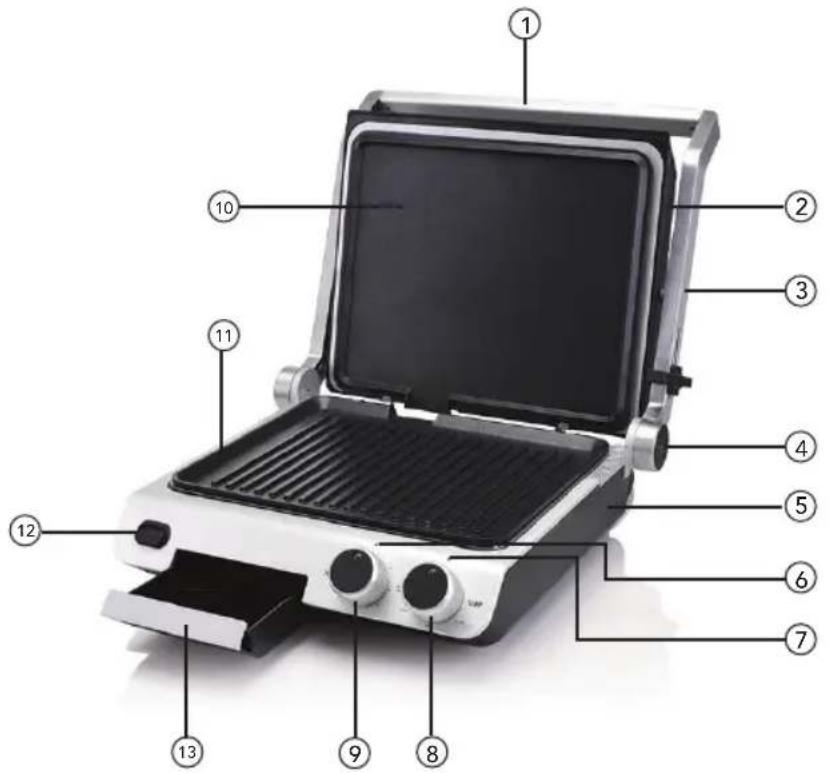
PRODUCT OVERVIEW
① Aluminum handle
② Upper cover
③ Handle right
④ Adjustable hinge
⑤ Base
⑥ Lamp for timer instruction
⑦ Lamp for thermostat instruction
⑧ Thermostat knob
⑨ Timer knob
⑩ Upper grill
⑪ Lower grill
⑫ Eject button
⑬ Oil plate
BEFORE FIRST USE
Press the upper plate release button to remove the upper grill plate and then press the lower plate release button to remove the lower grill plate. Clean the grill plates, the drip cups, and the scraper/cleaning tool in warm, soapy water; rinse and let dry. Dangerous: never immerse the base into or expose it to water.
Reinsert the upper and lower grill plates into their respective positions before use. See the "Inserting/Changing Plates" subsection below for detailed instructions.
NOTE: When using the grill plates for the first time, spray or apply a thin layer of cooking oil onto the nonstick surfaces of the Plates with a paper towel in order to lubricate the nonstick surface. If needed reapply a thin layer of cooking oil throughout the life of the Plates to maintain best nonstick performance.
TO ASSEMBLE
Place the product on a clean, flat, level, stable, heat-resistant surface with at least 10-15 cm of space on all sides to allow adequate air circulation.
Positioning the upper housing:
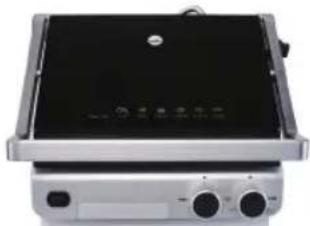
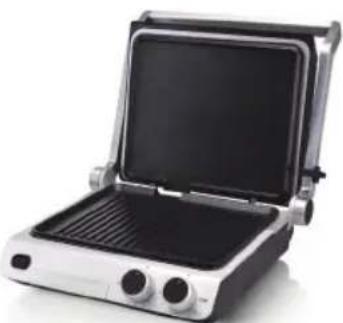
- Closed/heating Position: The upper housing is closed and rests on the base. Use this position when starting/heating the product and when grilling most foods.
natural_image
Front view of a black rectangular appliance with control knobs and a circular indicator (no visible text or symbols)- Open Position: The upper housing is open. Place the product in this position when starting to use the grill function, and when grilling types of foods where using the upper grill plate is not suitable, such as pizza or fish. Lift the handle until the upper housing is at about a 90° angle.
natural_image
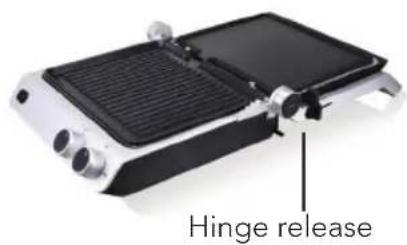
Open kitchen grater with open lid and side panels (no visible text or symbols)- Flat position: The upper housing is open and level with the base, creating two cooking surfaces. Use the product in this position when grilling larger amounts of food. To flatten, pull up on the hinge release and push the handle down.
Inserting/Changing Plates:
- Slide the notches in the rear of the lower grill plate into the retaining hooks, then press down on the front of the plate to snap it into place. Repeat to attach the upper grill plate.
TO USE
WARNING: The grill plates and metal surfaces of the upper housing and handle will become very hot during use. To avoid a burn hazard, wear protective oven mitts or heat-resistant gloves when using and touch only the black portion of the Handle.
NOTICE: Use only heat-resistant wooden, plastic, or silicone utensils to add/remove food. Do not use a metal utensil as it may scratch the surface of the grill plates.
NOTE: The appliance may emit some light smoke the first time it is used. This is normal and will subside with further use.
General information: How to adjust timer and temperature settings
- Close the unit, and turn the thermostat knob to the desired position 1/2/3/4, the respective temperature setting shift as indicated below:
| Setting Temperature | |
| 0 | 0 |
| 1 80-120°C | |
| 2 120-160°C | |
| 3 160-200°C | |
| 4 200-240°C |
- Turn the timer knob to the desired timer setting. NOTE: The appliance needs 5-6 minutes to preheat before the timer shall be set. The timer can maximum be set to 30 minutes, after 30 minutes, the unit will turn off itself. The Windom located at the timer knob shows the what timer options than can be selected, it indicates 5/10/15/20/25/30 minutes.
- When the timer knob is placed at the ZERO position the unit is not active.
- When the timer knob is placed in any other position than ZERO the unit becomes active, this is indicated by the illumination of the timer lamp. The appliance will heat according to the selected temperature setting located at the thermostat knob.
- The timer knob is directly connected to the power supply of this appliance. This means that the timer knob has to be set to a time in order for the thermostat to become active.
- Note that the thermostat will switch on and off during cooking. This is a result of the appliance regulating itself to keep the selected temperature.
- The cooking guidance printed at the of the top glass printed should only be used for reference. Users are encouraged to find out what cooking times and temperatures that suits their food the best.
Contact Grill
Use the appliance to cook burgers, boneless or thin pieces of meat and fish, and vegetables.
- Place food onto the lower grill plate, lower the upper grill plate onto the food (the "Closed" position). The upper grill plate will self-adjust to the thickness of the food. If cooking items in which the upper grill plate is not needed, such as kebabs or fish, leave the product in the "Open" position.
NOTE: In "Closed" position, food will cook quickly since both grill plates cook at the same time.
NOTE: If cooking more than one piece of food at a time, food items should be similar in thickness to ensure that the upper grill plate rests evenly on the food for even cooking.
- When cooking is completed, remove food, unplug the product from the electrical outlet, and allow the product to cool (at least 30 minutes) before moving, disassembling, or cleaning it.
CAUTION: Always unplug the product from the electrical outlet when cooking is complete and when the product is not in use.
Panini Press
Use upper and lower grill plates in the "Closed" position to grill any combination of ingredients (for example, vegetables, meats, and cheeses) layered between two pieces of bread or a folded tortilla/pita.
- Follow steps 1 through 7 in the "Contact Grill" section, above.
- Place food on the lower grill plate and lower the upper grill plate onto the food. The upper housing will self-adjust to the thickness of the food.
NOTE: If cooking more than one piece of food at a time, food items should be similar in thickness to ensure that the upper grill plate rests evenly on the food for even cooking.
- When cooking is completed, remove food, unplug the product from the electrical outlet, and allow the product to cool (about 30 minutes) before moving, disassembling, or cleaning it.
CAUTION: Always unplug the product from the electrical outlet when cooking is complete and when the product is not in use.
Flat Grill
Using the product in the "Flat" position doubles the cooking surface area and allows cooking of items with different thicknesses simultaneously, or cooking foods on different plates to avoid combining flavors. Use for cooking French toast, hash browns, open face sandwiches, and kebabs.
- Place the product in the "Flat" position and plug the power cord into a standard electrical outlet. The power indicator located above the timer knob will illuminate red, indicating power is on.
- Set the cooking time and temperature
NOTE: It may take up to 5-6 minutes to reach the selected cooking temperature. The Ready indicator "7" will illuminate when the product is ready for cooking. The Ready indicator will switch on and off during cooking, indicating the product is heating to maintain the selected cooking temperature.
- Place food onto the grill plates.
- When cooking is completed, remove food, unplug the product from the electrical outlet, and allow the product to cool (about 30 minutes) before moving, disassembling, or cleaning it.
CAUTION: Always unplug the product from the electrical outlet when cooking is complete and when the product is not in use.
CARE AND MAINTENANCE
WARNING: Always make sure that the product is unplugged from the electrical outlet and allowed to completely cool before relocating, disassembling, or cleaning it. NOTICE: Do not use harsh or abrasive cleaners or pads to clean the product.
- After completely cooling, gently remove the grease cup and discard contents.
- Remove any leftover food from the Grill Plates using the scraper/cleaning tool.
- Clean the grill plates, drip cups, and scraper/cleaning in warm, soapy water; rinse and let dry.
WARNING: Do not immerse the base into or expose it to water or other liquids. - Wipe the upper housing and base with a water-dampened sponge and dry with a soft cloth or paper towel.
- Store the product in a cool, dry location.
TECHNICAL DATA
Power Supply: 220-240VAC
Frequency: 50/60 Hz
Wattage: 2000 W
Under the Waste Electrical and Electronic Equipment Directive (WEEE), such waste must be collected separately and processed. If in future you need to discard this product, please do not throw it out with your normal rubbish. Please send this product to a collection point where one is available.

AS WILFA
Industriveien 25
1481 Hagan
Norway wilfa.com

in homes since 1948
- Wilfa STEAK
- F∅R F∅RSTE GANGS BRUK
- STELL OG VEDLIKEHOLD
- F∅R IBRUGTAGNING
- ENNEN ENSIMMÄISTÄ KÄYTTÖKERTAA
- IMPORTANT SAFETY INSTRUCTIONS
- SPECIAL INSTRUCTIONS:
- PRODUCT OVERVIEW
- BEFORE FIRST USE
- TO ASSEMBLE
- Positioning the upper housing:
- Inserting/Changing Plates:
- TO USE
- General information: How to adjust timer and temperature settings
- Contact Grill
- Panini Press
- Flat Grill
- CARE AND MAINTENANCE
- TECHNICAL DATA
Brand : WILFA
Model : Steak CGG-2000B
Category : Grill