
DTCTSC10WT - Smoke detector NEDIS - Free user manual and instructions
Find the device manual for free DTCTSC10WT NEDIS in PDF.


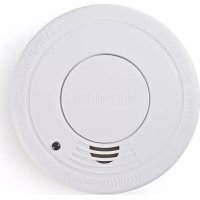
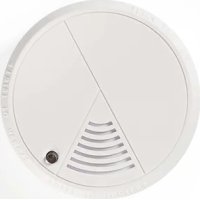
| Product type | Smoke detector |
| Brand | Nedis |
| Model | DTCTSC10WT |
| Dimensions | Approximately 10 cm diameter, 4 cm height |
| Weight | Approximately 200 g (with battery) |
| Power supply | 9V battery (included) |
| Sensor type | Photoelectric sensor |
| Alarm sound level | 85 dB at 3 meters |
| Test function | Test button to verify operation |
| Silence function | Temporary silence button for false alarms |
| LED indicator | Red flashing in case of alarm, green for normal operation |
| Battery life | Approximately 1 year |
| Maintenance and cleaning | Dust with a vacuum cleaner or dry cloth every month |
| Safety | Compliant with CE and EN 14604 standards |
| Spare parts and repairability | Replacement battery available; device not user-serviceable |
| Operating temperature | 0 °C to 40 °C |
| Allowable humidity | 10 % to 85 % RH |
| Installation | Ceiling mounting with screws and wall plugs provided |
Frequently Asked Questions - DTCTSC10WT NEDIS
User questions about DTCTSC10WT NEDIS
0 question about this device. Answer the ones you know or ask your own.
Ask a new question about this device
Download the instructions for your Smoke detector in PDF format for free! Find your manual DTCTSC10WT - NEDIS and take your electronic device back in hand. On this page are published all the documents necessary for the use of your device. DTCTSC10WT by NEDIS.
USER MANUAL DTCTSC10WT NEDIS
MANUAL DE USO (p. 37)
MANUAL (p. 44)
HASZNÁLATI ÚTMUTATÓ (o. 51)
KÄYTTÖOHJE (s. 58)
- Introduction 2
• Safety precautions 2 - Packaging content 2
• Technical specifications 3
• Product and user description 3
• Installation instructions 6 - Maintenance 8
- Warranty 8
- Disclaimer 8
- Disposal 8
Introduction
This battery operated optical smoke alarm sends out a signal through radio frequency to activate other installed DTCTSC10WT/ DTCTSC10WT2 in case smoke is detected. When installing multiple DTCTSC10WT/ DTCTSC10WT2, the smoke alarm that detects smoke will automatically activate all other DTCTSC10WT/ DTCTSC10WT2 to give an early warning audible alarm. This provides extra time to leave the house. Equipped with a learn button and a test button for periodic testing. A smoke alarm has a limited life and should always be replaced 10 years after the date of purchase. Write the purchase date on this manual for future reference. The smoke alarm complies with the EN14604 standard of the Construction Products Directive.
• We recommend that you read this manual before you install the smoke alarm
- Keep this manual in a safe place for future reference
Safety precautions
Do not expose the product to water or moisture
Do not paint over the smoke alarm
Packaging content
- 1x Smoke alarm
- 1x 9 V battery
- 3x 1.5 V AA batteries
- 1x Mounting material
- 1x Manual
Technical specifications
• Radio frequency: 433.92 MHz
- Battery: 1x 9 V DC, 3x 1.5 V AA
- Alarm: > 85 db (3 m)
• Maximum number to connect: unlimited
• Maximum range: 40 metres
- Test button: yes
- Learn button: yes
- Low battery alert: yes
- Operating temperature: -10^ +40^
Product and user description

natural_image
Circular object with a central number 5 and four small dots, no visible text or symbols.- ALARM indicator
- TEST button
Testing the smoke alarm
Like any other electronic device, smoke alarms are not foolproof. Smoke alarms contain electronic components that can fail or wear out at any time.
We recommended that you test the smoke alarm every week to make sure it is working properly.
Push and hold the test button until the alarm sounds for a few seconds. The (red) alarm indicator (1) and (green) learn indicator (4) will flash for a moment. If the alarm does not sound, check if the battery indicator flashes once every 45 seconds. If this is not the case and testing fails, please replace the batteries immediately.
Battery indicator
The battery indicator flashes every 45 seconds to show that the smoke alarm is working properly. When the battery indicator flashes and gives a short beeping sound, it indicates that the battery has a low capacity and should be replaced immediately.
3. LEARN button
Follow the next steps to set the MAIN smoke alarm and ASSISTANT smoke alarm(s) to create a smoke alarm system with 2 or more DTCTSC10WT/DTCTSC10WT2.
- Press the LEARN button two times. The LEARN indicator turns from red to green. This smoke alarm will be the MAIN smoke alarm. Ensure the LEARN indicator is green before proceeding.
- Press the LEARN button of the ASSISTANT smoke alarm(s) once. The ALARM indicator(s) turns on red. Ensure the ALARM indicator(s) are red before proceeding.
- Press the TEST button of the MAIN smoke alarm for several seconds in order to send out the learn signal to the ASSISTANT smoke alarm(s). The ALARM indicator flashes and the smoke alarm sounds. The ASSISTANT smoke alarm(s) receive the signal and sounds.
- Press the TEST button on each ASSISTANT smoke alarm(s) for several seconds in order to send out the learn signal to the MAIN smoke alarm. The MAIN smoke alarm receives the signal and sounds.
Note: the number of smoke alarms is unlimited. The maximum range between
2 smoke alarms to communicate with each other is 40 metres.
4. LEARN indicator
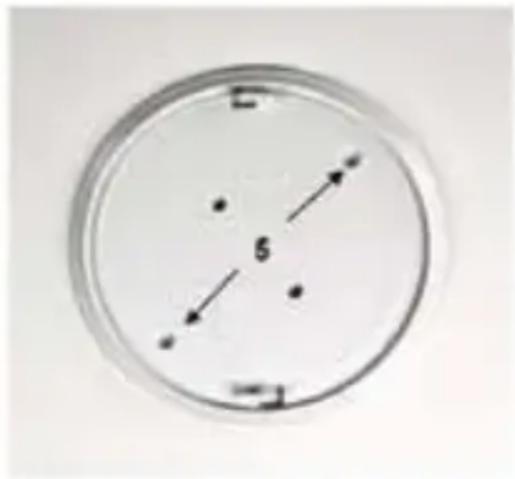
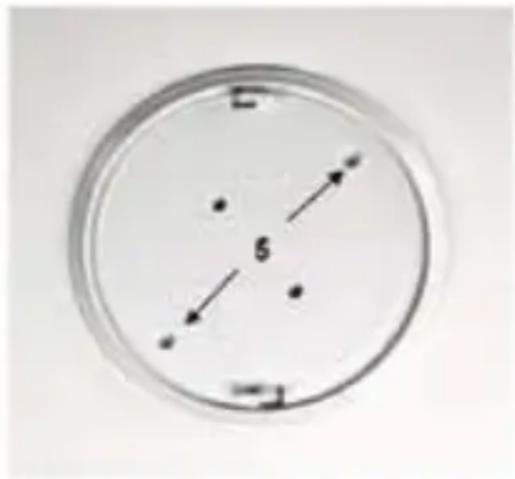
5. Mounting plate and holes
Use the supplied screws and plugs to mount the mounting plate to the ceiling.
nedis
-
Remove the mounting place Turn the mounting plate of the smoke alarm counter clockwise to get access to the battery compartment of the smoke alarm.
-
Battery compartment 9 V battery
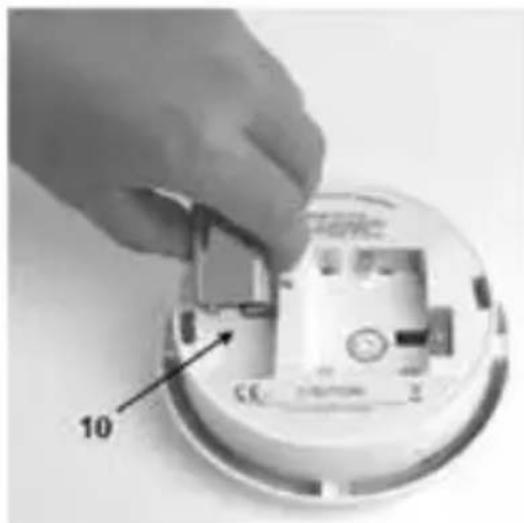
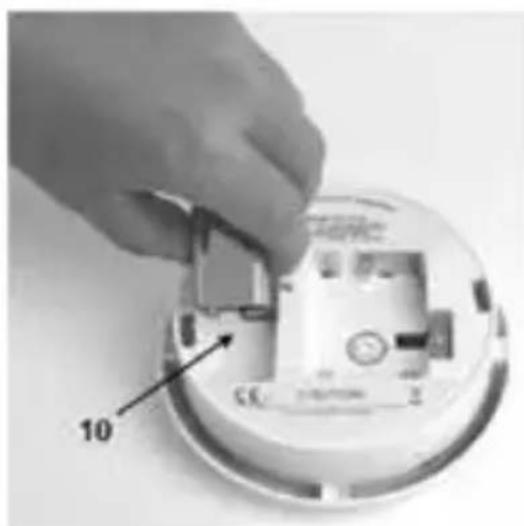
- Battery compartment 1.5 V AA battery
- Safety catch
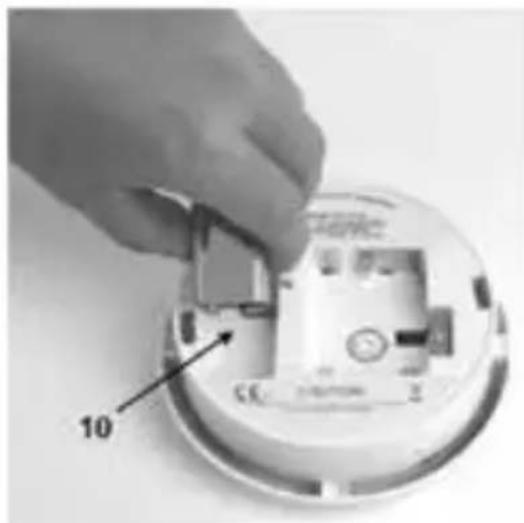
The safety catch prevents installing the smoke alarm on the mounting plate without inserting the battery first. Note: push the safety catch of the 1.5 V AA battery into the battery compartment when placing the batteries.
- Placing the 9 V battery Take off the plastic seal of the 9 V battery and place the 9 V battery in the battery compartment. Conform to the polarity markings inside the battery compartment.

natural_image
Close-up of hands holding a white circular device with black curved arrows indicating rotation or flow (no text or symbols visible)

natural_image
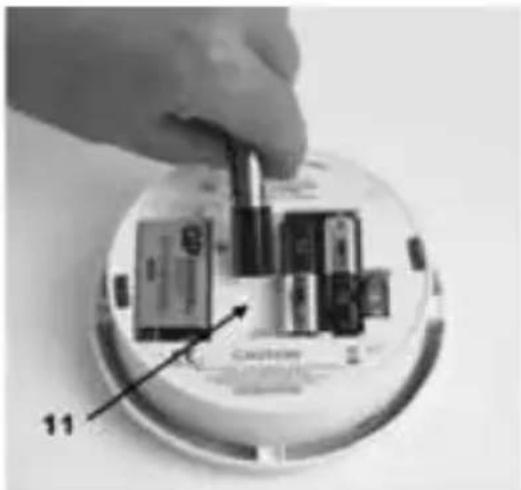
Close-up of a hand installing or adjusting a device on a circular device (no visible text or symbols)- Placing the 1.5 V AA batteries Take off the plastic seal of the 1.5 V AA batteries and place the 1.5 V AA batteries in the battery compartment. Place the 1.5 V AA batteries conforming to the polarity markings inside the battery compartment.
natural_image
Hand inserting a card into a circular device (no visible text or symbols)After placing the battery, use the test button to see if the smoke alarm works properly.
(See Testing the smoke alarm.)
When the mounting plate is mounted on the ceiling and the smoke alarm is tested after inserting the batteries, place the smoke alarm on the mounting plate by turning it clockwise.
See the following chapter for where to mount the smoke alarm(s).
Installation instructions
Install a smoke alarm in every room or area on every level of the home.
Smoke may not reach the smoke alarm if it's installed in only one room or area. If a fire starts in another room or area to where the smoke alarm is installed, the smoke alarm will not detect the smoke, or will detect it too late to alert the household members. A smoke alarm will not promptly detect a fire except in the room or area in which it is installed.
Place at least one smoke alarm in every room/area between the bedroom and the exit of the house.
We recommended that you make an emergency escape plan, and practice this with the members of your household, in case of an emergency.
The requirements for the installation of the smoke alarm may differ slightly by region. Please contact your local authorities for any additional requirements.
Example installation of smoke alarms:
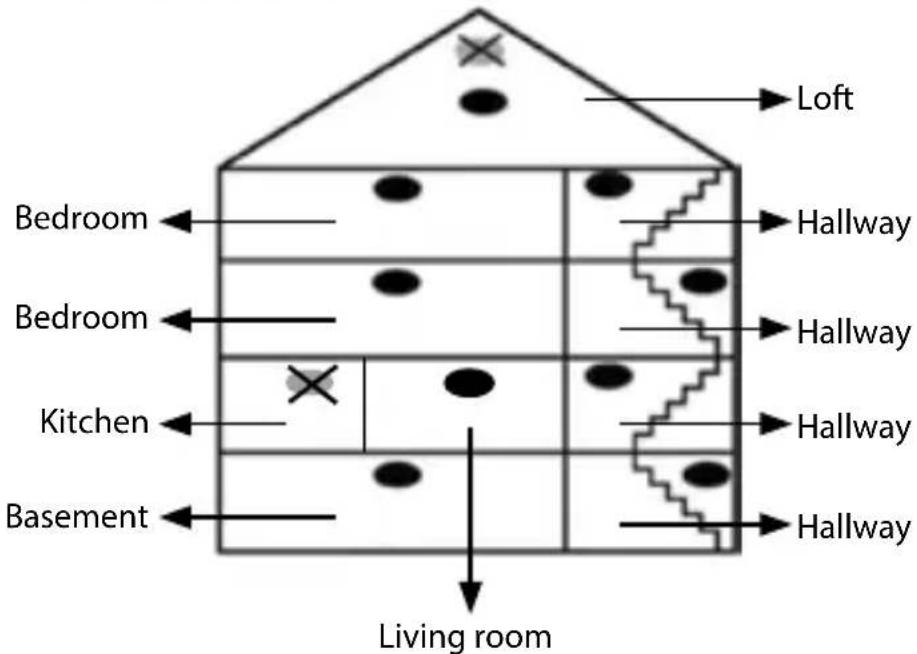
On ceilings
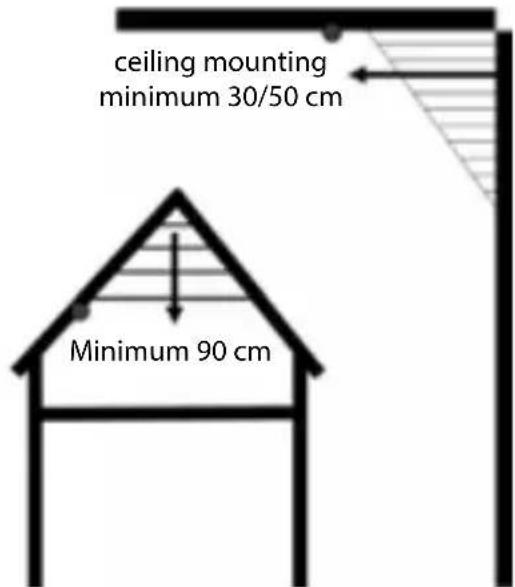
Install smoke alarms as close to the centre of the ceiling as possible. If this is not possible, install the smoke alarm at least 30 to 50 cm from the wall.
(Due to dead air spaces)
Rooms with a gabled ceiling
Install the smoke alarm 90 cm from the highest point.
(Due to dead air spaces)
Note: when installing a smoke alarm in a hallway that is 7.5 metres or longer, we recommended that you install a smoke alarm at the beginning and at the end of the hallway.
Do not install a smoke alarm
- In a humid, dusty and smoky environment
- In rooms or areas where temperatures are below 4 °C or above 38 °C
- In the kitchen, bathroom or garage
Maintenance
We recommended that you clean the smoke alarm once a month. Gently vacuum the outside of the smoke alarm with the soft brush attachment of the vacuum cleaner. Do not use water, cleaning solvents or abrasives.
Warranty
No guarantee or liability can be accepted for any changes and modifications of the product or damage caused due to incorrect use of this product.
Disclaimer
Designs and specifications are subject to change without prior notice. All logos, brands and product names are trademarks or registered trademarks of their respective holders and are hereby recognised as such.
Disposal

- This product is designated for separate collection at an appropriate collection point.
Do not dispose of this product with household waste.
- For more information, contact the retailer or the local authority responsible for waste management.
This product has been manufactured and supplied in compliance with all relevant regulations and directives, valid for all member states of the European Union. It also complies to all applicable specifications and regulations in the country of sales. Formal documentation is available upon request. This includes, but is not limited to: Declaration of Conformity (and product identity), Material Safety Data Sheet, product test report.
Please contact our customer service desk for support:
via website: http://www.nedis.com/en-us/contact/contact-form.htm
via e-mail: service@nedis.com
via telephone: +31 (0)73-5991055 (during office hours)
NEDIS B.V., De Tweeling 28, 5215 MC 's-Hertogenbosch, THE NETHERLANDS

Model: LM-101LG
DoP: 201308060001
0832-CPR-FR0033
EN 14604:2005/AC:2008
Smoke alarm devices


Intended fire safety and installed in buildings
Essential characteristic 1: Pass
Essential characteristic 2: Pass
Essential characteristic 3: Pass
Essential characteristic 4: Pass
Essential characteristic 5: Pass
Essential characteristic 6: Pass
Essential characteristic 7: Pass
Essential characteristic 8: Pass
Inhaltsverzeichnis
natural_image
Circular object with a central number 5 and four small dots, no visible text or symbols.natural_image
Close-up of hands holding a white circular device with black curved arrows indicating rotation or direction (no text or symbols visible)
natural_image
Close-up of a hand installing or adjusting a device on a circular device (no visible text or symbols)natural_image
Close-up of a hand inserting a CD to a circular device, showing internal components and a numbered label (11) with arrows pointing to the component.natural_image
Circular petri dish with a central scale marked '5' and four small dots, no text or symbols present.natural_image
Close-up of hands holding a white circular device with curved black arrows indicating rotation or move (no text or symbols visible)

natural_image
Close-up of a hand installing or adjusting a device on a circular device (no visible text or symbols)natural_image
Close-up of a hand inserting a CD into a circular device (no visible text or symbols)natural_image
Four black-and-white recycling symbols: person walking, circular arrow, recycling symbol, and hourglass (no text or labels)natural_image
Circular object with a central number '5' and four small dots, no visible text or symbols.- ALARM-indicator
- TEST-knop
De rookmelder testen
natural_image
Close-up of hands holding a white circular device with black curved arrows indicating rotation (no text or symbols)natural_image
Close-up of a hand installing or adjusting a device on a circular device (no visible text or symbols)natural_image
Hand inserting a card into a circular device (no visible text or symbols)natural_image
Four black-and-white recycling symbols: person walking, circular arrow, recycling cycle, and hourglass (no text or labels)natural_image
Circular object with a central number 5 and four small dots, no visible text or symbols.natural_image
Close-up of hands holding a white circular device with curved black arrows indicating rotation or move (no text or symbols visible)
natural_image
Hand placing a component into a circular device with a numbered label (10), no visible text or symbols on the device itself.natural_image
Close-up of a hand inserting a CD into a circular device (no visible text or symbols)natural_image
Four black-and-white recycling symbols: person walking, circular arrow, recycling cycle, and hourglass (no text or labels)natural_image
Circular object with a central number 5 and four small dots, no visible text or symbols.natural_image
Close-up of hands holding a white circular device with black curved arrows indicating rotation or flow (no text or symbols visible)
natural_image
Close-up of a hand installing or adjusting a device on a circular device (no visible text or symbols)natural_image
Close-up of a hand inserting a CD to a circular device, showing internal components and a numbered label (11) with arrows pointing to the component.natural_image
Four black-and-white recycling symbols: person walking, circular arrow, recycling symbol, and hourglass (no text or labels)natural_image
Circular object with a central number 5 and four small dots, no visible text or symbols.natural_image
Close-up of hands holding a white circular device with curved black arrows indicating rotation or move (no text or symbols visible)natural_image
Close-up of a hand installing or adjusting a device on a circular device (no visible text or symbols)natural_image
Hand inserting a card into a circular device (no visible text or symbols)natural_image
Circular object with a central number 5 and four small dots, no visible text or symbols.natural_image
Close-up of hands holding a white circular device with curved black arrows indicating rotation or flow (no text or symbols visible)

natural_image
Hand placing a component into a circular device with a numbered label (10), no visible text or symbols on the device itself.nedis
natural_image
Hand inserting a card into a circular device (no visible text or symbols)natural_image
Circular object with a central number 5 and four small dots, no visible text or symbols.natural_image
Close-up of hands holding a white circular device with black curved arrows indicating rotation or flow (no text or symbols visible)nedis
SUOMI
- Paristotila 9 V paristolle
- Paristotila 1,5 V AA-paristoille
- Turvasuojus
natural_image
Close-up of a hand installing or adjusting a device on a circular device (no visible text or symbols)natural_image
Close-up of a hand inserting a card into a circular device with a labeled component (no readable text or symbols)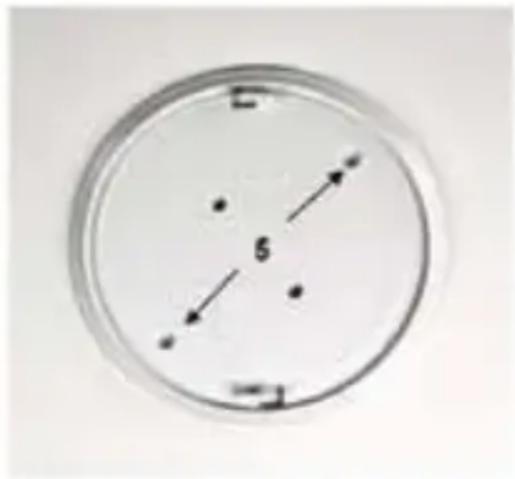
natural_image
Circular object with a central number 5 and four small dots, no visible text or symbols.- LARM-Indikator
- TEST-knapp
Att testa rökdetektorn
natural_image
Close-up of hands holding a white circular device with black curved arrows indicating rotation or flow (no text or symbols visible)

natural_image
Close-up of a hand installing or adjusting a device on a circular device (no visible text or symbols)natural_image
Hand inserting a card into a circular device (no visible text or symbols)natural_image
Circular object with a central number 5 and four small dots, no visible text or symbols.natural_image
Close-up of hands holding a white circular device with a black curved arrow and icons, no visible text or symbols.nedis
natural_image
Close-up of a hand installing or adjusting a device on a circular device (no visible text or symbols)natural_image
Close-up of a hand inserting a card into a circular device with a labeled component (no readable text or symbols)natural_image
Circular object with a central number 5 and four small dots, no visible text or symbols.- Indicator ALARMĂ
- Buton TESTARE
Testarea alarmei de fum
natural_image
Close-up of hands holding a white circular device with curved black arrows indicating rotation or move (no text or symbols visible)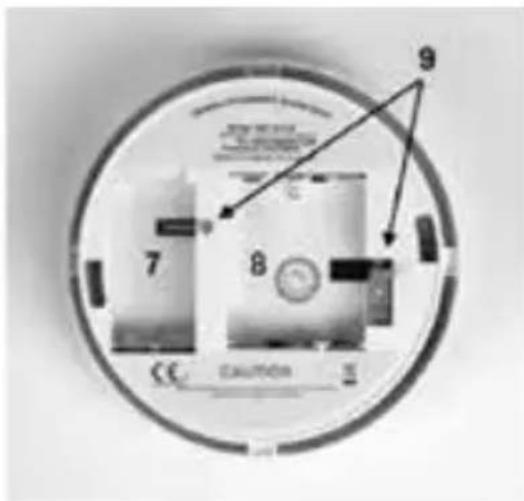

natural_image
Close-up of a hand installing or adjusting a device on a circular device (no visible text or symbols)natural_image
Hand inserting a card into a circular device (no visible text or symbols)natural_image
Four black-and-white recycling symbols: person walking, circular arrow, recycling curve, and hourglass (no text or labels)natural_image
Circular object with a central number 5 and four small dots, no visible text or symbols.natural_image
Close-up of hands holding a white circular device with black curved arrows indicating rotation or move (no text or symbols visible)

natural_image
Hand placing a component into a circular device with a numbered label (10), no visible text or symbols on the device itself.nedis
natural_image
Close-up of a hand inserting a CD to a circular device, showing internal components and a numbered label (11) with arrows pointing to the component.natural_image
Circular petri dish with a central scale marked '5' and four small dots, no text or symbols present.- ALARM-indikator
- TEST-knap
natural_image
Close-up of hands holding a white circular device with a curved arrow and icons, no visible text or symbols.- Batterirum til 9 V batteri
- Batterirum til 1,5 V AA batteri
- Sikkerhedsanordning

natural_image
Close-up of a hand inserting a component into a device housing (no visible text or symbols)
natural_image
Hand inserting a card into a circular device with a pen inserted (no visible text or symbols)natural_image
Four black-and-white recycling symbols: person walking, circular arrow, recycling cycle, and crossed-out box (no text or labels)natural_image
Circular petri dish with a central scale marked '5' and four small dots, no text or symbols present.natural_image
Close-up of a hand holding a white circular device with black arrows indicating flow or direction (no text or symbols visible)nedis
- Batterirom 9 V-batteri
- Batterirom 1,5 V AA-batteri
- Sikkerhetshake
natural_image
Close-up of a hand installing or adjusting a device on a circular device (no visible text or symbols)- Sette inn 1,5 V AA-batteri
natural_image
Close-up of a hand inserting a card into a circular device with a labeled component (no readable text or symbols)Merknad: når du installerer en røykvarsler i en gang som er 7,5 meter eller lenger, anbefaler vi at du installerer én røykvarsler i begynnelsen og én i enden av gangen. Ikke installer en røykvarsler
natural_image
Circular object with a central number 5 and four small dots, no visible text or symbols.natural_image
Close-up of hands holding a white circular device with curved black arrows indicating rotation or flow (no text or symbols visible)

natural_image
Hand installing a wall-mounted device component with a numbered label (10), no visible text or symbols on the device itself.natural_image
Hand inserting a card into a circular device (no visible text or symbols)natural_image
Circular object with a central number 5 and four small dots, no visible text or symbolsnatural_image
Close-up of hands holding a white circular device with black curved arrows indicating rotation or flow (no text or symbols visible)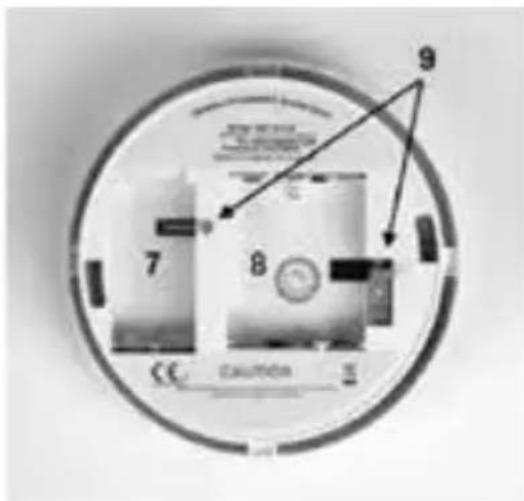
natural_image
Close-up of a hand installing or adjusting a device on a circular device (no visible text or symbols)natural_image
Close-up of a hand inserting a card into a circular device (no visible text or symbols)natural_image
Circular object with a central number 5 and four small dots, no visible text or symbols.natural_image
Close-up of hands holding a white circular device with black curved arrows indicating rotation or flow (no text or symbols visible)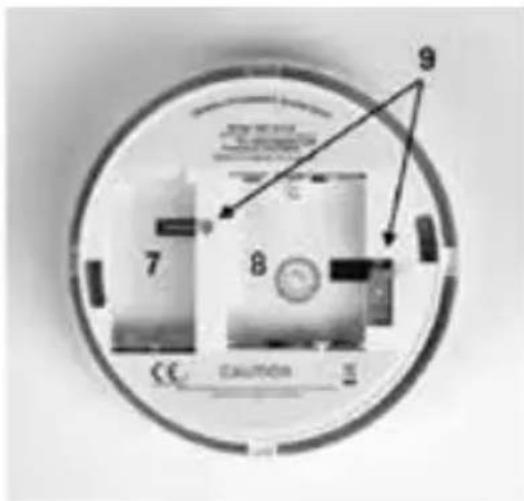
- 9 V pil yerleştirme
natural_image
Close-up of a hand installing or adjusting a device on a circular device (no visible text or symbols)nedis
natural_image
Close-up of a hand inserting a component into a circular device with battery modules (no visible text or symbols)


- Introduction
- Safety precautions
- Packaging content
- Technical specifications
- Battery indicator
- LEARN button
- LEARN indicator
- Mounting plate and holes
- nedis
- Installation instructions
- On ceilings
- Rooms with a gabled ceiling
- Do not install a smoke alarm
- Maintenance
- Warranty
- Disclaimer
- Disposal
- Inhaltsverzeichnis
Brand : NEDIS
Model : DTCTSC10WT
Category : Smoke detector