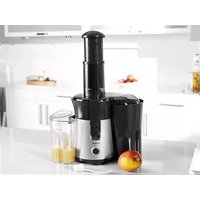
SFE 450 A1 - Juicer SILVERCREST - Free user manual and instructions
Find the device manual for free SFE 450 A1 SILVERCREST in PDF.


| Product Type | Citrus Juicer / Juice Extractor |
| Brand | SilverCrest |
| Model | SFE 450 A1 |
| Power Supply | 220–240 V ~ 50 Hz |
| Rated Power | 450 W |
| Speed Settings | 2 (Level I for juicy fruits, Level II for drier fruits) |
| Continuous Operation Time (CO Time) | 30 minutes |
| Protection Class | II (double insulated) |
| Main Material | Plastic (housing, containers) |
| Juice Container Capacity | Approx. 1 L (estimated, not specified) |
| Pulp Container Capacity | Approx. 0.5 L (estimated, not specified) |
| Included Accessories | Stodger, nylon brush, separate juice collector with foam separator |
| Dishwasher Safe Parts | Stodger, juice container, housing lid, separate juice collector, pulp container |
| Filter Cleaning | Hand wash with nylon brush; not dishwasher safe |
| Safety Features | Safety clasps that must be closed for operation; automatic shut-off if clasps open |
| Cable Storage | Cable rewind on underside |
| Warranty | 3 years |
| Intended Use | Juicing well-ripened fruits and vegetables (not for rhubarb, raisins, or fibrous produce) |
Frequently Asked Questions - SFE 450 A1 SILVERCREST
User questions about SFE 450 A1 SILVERCREST
0 question about this device. Answer the ones you know or ask your own.
Ask a new question about this device
Download the instructions for your Juicer in PDF format for free! Find your manual SFE 450 A1 - SILVERCREST and take your electronic device back in hand. On this page are published all the documents necessary for the use of your device. SFE 450 A1 by SILVERCREST.
USER MANUAL SFE 450 A1 SILVERCREST
GR Juicer Operating instructions
CONTENT PAGE
Intended Application 2
Technical data 2
Items supplied 2
Operating Elements 2
Important safety instructions 2
Assembling and operating the appliance 4
Preparing the fruits/vegetables 4
Juicing 5
Emptying the pulp container and the filter 6
Disassembly of the juice extractor 6
Cleaning and Care 6
Storage 7
Disposal 7
Warranty and Service 7
Importer 7
Troubleshooting 8
Recipes 9
Carrot-Apple Drink with Yogurt 9
Pumpkin Drink 9
Blackberry Cocktail 9
Breakfast Drink 9
Melon Cocktail 10
Vitamin C Drink 10
Pineapple-Mango Drink 10
Mango-Vanilla-Soy Drink 10
Beetroot Drink 11
Fruit Drink 11
Read the operating instructions carefully before using the device for the first time and preserve this booklet for later reference. Pass this manual on to whoever might acquire the device at a future date.
Intended Application
The appliance is both intended and suitable for the juicing of well ripened and peeled fruits and vegetables. Only foodstuffs may be processed with the appliance. Only the original attachments and accessories, as described herein, may be used. Any other use or modification is considered improper use and brings with it the great risk of serious accidents.
The manufacturer declines to accept responsibility for damage(s) arising out of usage that is contrary to the instructions specified below. Not for commercial use.
Technical data
Mains voltage: 220 - 240 V \~ 50 Hz
Rated power: 450 W
CO time: 30 Minutes
Protection class: II / ☐
CO Time
The C.O. Time (Continuous Operation) details how long an appliance may be used without the motor overheating and being damaged. After the appliance has run for this period it must be switched off until the motor has cooled itself down.
Items supplied
Juicer
Nylon brush (in the stodger)
Operating instructions
Operating Elements
① Stodger
② Loading shaft
③ Housing lid
4 Clasps
⑤ Juice container
6 Juice outlet
⑦ Appliance base
8 Power cable with plug
⑨ On/Off switch (2 speed levels)
10 Cable rewind
⑪ Container (for fruit pulp and vegetable mash)
12 Filter
13 Drive shaft
14 Nylon brush (in the stodger on delivery)
15 separate juice collector with foam separator (on delivery, packed in the container for pulp and mash)
Important safety instructions
The following safety instructions must always be adhered to when using electrical appliances: These instructions will help you avoid severe personal injuries and/or serious damage(s), and enable you to achieve better working results.
Please read the following information regarding safety measures and appropriate usage carefully. Before you begin reading this information, please unfold the page with the illustrations and familiarize yourself with all functions of the appliance. Carefully preserve these directions and pass them on, if and when necessary, to third parties too.
- This appliance is not intended for use by individuals (including children) with restricted physical, physiological or intellectual abilities or deficiencies in experience and/or knowledge unless they are supervised by a person responsible for their safety or receive from this person instruction in how the appliance is to be used. Children should be supervised to ensure that they do not play with the appliance.

To avoid potentially fatal electric shocks:
- The voltage of the power source must match the details given on the plate affixed to the appliance.
- Arrange for defective power plugs and/or cables to be replaced at once by qualified technicians or our Customer Service Department.
- Should the appliance not operate correctly, or become damaged, arrange for it to be examined and repaired by Customer Services as soon as possible.
- Do not expose the appliance to rain and never use it in a humid or wet environment. Take steps to ensure the power cable never becomes wet or moist during use.

NEVER immerse the appliance base in water or any other liquid!

To avoid the risks of fire or injuries:
- Never leave the appliance unattended whilst in use.
- Caution! Keep children away from the power cable and the appliance. Children frequently underestimate the danger from electrical appliances.
- Ensure that the appliance stands with a safe and secure positioning.
- Ensure that the power cable is at all times easily accessible and that no one can trip over it.
- To avoid injuries, ensure that all the component parts are correctly connected and installed.
- Before switching the appliance on, ensure that the lid has been correctly and firmly closed with the clamps. If not, the appliance will not start. Should the clamps become loose during operation, the appliance stops automatically.

When working with the appliance, NEVER insert your hands or other objects into the loading shaft. This could lead to grave personal injuries or serious damage to the appliance. If pieces of fruit or vegetable cannot be removed with the stodger, switch the appliance off, remove the plug from the power socket and open the appliance.
- Risk of Injury! The cutter is very sharp. Handle it very carefully.
- DO NOT use the appliance if the rotating sieve is damaged.
- Do not touch any rotating parts.
- Turn the appliance off after use and remove the power plug from the wall socket. Only when the motor has come to a complete stop may the appliance be disassembled.

NEVER use the appliance:
- if the filter/sieve, power cable or power plug are damaged,
- in the case of malfunctions, or if it has otherwise been damaged or dropped. Send the appliance to Customer Services for checking and/or repair.
- The use of attachments and accessories not recommended or sold by the manufacturer can cause fire, electric shocks and/or personal injuries.
Tips for safety:
- In cases of danger, immediately remove the power plug from the wall socket.
- Use the appliance exclusively for the purposes described in these operating instructions.
- Always be alert! Always pay attention to what you are doing and act with common sense. Never use the appliance when you are distracted or don't feel well.
- Ensure that the appliance is correctly and completely assembled before taking it into use. The appliance can first be taken into use when the clamps have been closed.
- After every use of the juice extractor ensure that the On/Off switch is moved to the position "Off" ("0"). The motor must come to a complete stop before you begin to disassemble the appliance.
- Remove the power plug from the wall socket when the appliance is taken out of use, when removing components and before cleaning it.
- Do not use the appliance outdoors.
Assembling and operating the appliance
- Select a safe and secure positioning for the juice extractor. For optimal handling we recommend that the appliance is positioned with the power cable running from the rear of the appliance to the wall socket. All operating elements can now be directly and easily handled:
- at the front, the On/Off switch ⑨,
- to the left, the container for fruit pulp and vegetable mash 11
- to the right, the outlet pipe for the juice ⑥.
Warning:
Ensure that the appliance is switched off and the plug removed from the wall socket before assembling the appliance. If you do not, there is a great risk that you could injure yourself.
- Place the juice catchment bowl ⑤ on the appliance base ⑦, so that the three tenons and the juice outlet ⑥ are securely caught in the recesses.
- Place the filter 12 on the drive shaft 13 and press it down so that it perceptibly engages. Ensure that it is firmly seated before continuing with the assembly.
- Place the housing lid ③ on the juice catchment bowl ⑤, so that the loading shaft ② is sitting above the cutters of the filter ⑫.
- Ensure that the housing lid ③ is sitting firmly in the recesses of the juice catchment bowl ⑤. Lift the clasps ④ and hook them into the notches on the housing lid ③.
- Press the lower part of the claps ④ against the appliance until they engage.
- Slide the container for fruit pulp and vegetable mash ⑪ from below under the ejection shaft.
- Push the foam separator plate in the separate juice collector 15 and then put the lid on. Place the separate juice collector 15 next to the appliance so that the juice outlet 6 projects into the juice collector 15.
- Insert the power plug ⑧ into the wall socket.
Preparing the fruits/vegetables
- Important: Use only well ripened fruit, as otherwise the filter 12 could become quickly blocked. This would require repeated cleaning of the filter 12.
- Wash or peel the fruits/vegetables that you wish to process.
- Large seeds or stones should always be removed before filling the appliance.
- Stone fruit (such as apples, pears) can be processed with the skin and seed centres. Remove all other stones (peaches, plums etc.), all large seeds (melons etc.) and stalks to avoid possible damage to the appliance.
- Fruits and vegetables with thick peels (e.g. citrus fruits, melons, kiwis, beets) must always be peeled first.
• The main stalk is to be removed from grapes.
- Cut the fruit or vegetables into pieces that are sized to fit into the loading shaft ②.
- Before juicing, place the carrots in water for about 24 hours. Afterwards, guide them one after the other into the filling shaft ②: thereby, the thicker end of the carrot, where the leaves were, must be facing down and the thinner root tip must be upmost.
(i) Note:
Raisins are not suitable for juicing as they contain too little juice. Rhubarb or other fibrous vegetables/fruits are not suitable for juicing as the fibres block the juice extractor.
Juicing
Warning:
DO NOT operate the juice extractor for longer than 30 minutes (CO-Time) without a break. After 30 minutes of continuous use allow the juice extractor to cool down. Otherwise the appliance could be damaged.
Warning:
NEVER insert your hands or other objects into the loading shaft ② when working with the appliance. This could lead to grave personal injuries and/or serious damage to the appliance.
- Switch the appliance on at the On/Off switch ⑨.
For fruit varieties that contain a lot of juice use speed setting 1.
For drier fruits select speed level II.
- Hold the stodger ① in one hand and feed the fruit and vegetable pieces with the other hand into the loading shaft ②. ALWAYS use the stodger ① to carefully press the fruit/vegetable pieces into the loading shaft ②. Whilst the loaded fruit/vegetables are being processed, insert further pieces into the loading shaft. Do not switch the appliance off.
(i) Note:
To avoid fruit or vegetables becoming blocked in the loading shaft ②, only fill it when the appliance is switched on. Should fruit or vegetable pieces become stuck in the loading shaft ② and they cannot be promptly freed with the stodger ①, proceed as follows to avoid damage to the appliance:
- Immediately switch the appliance off and remove the power plug ⑧ from the wall socket.
- Loosen the clasps ④ and remove the housing lid ③.
- Remove the fruit or vegetable pieces causing the blockage.
-
Reassemble the appliance and continue with juice extraction.
-
Always switch the appliance off immediately after all of the fruit/vegetables have been processed.
Warning:
To avoid blockage of the juice outlet ⑥ and/or damage to the appliance, regularly clean the juice outlet ⑥ and juice container ⑤, and always after every usage.
Emptying the pulp container and the filter
You can extract juices continuously until the container for fruit pulp and vegetable mash ⑪ is completely full.
Warning:
Remove the plug from the power source when emptying the filter 12. This prevents an unintended starting of the motor.
When the extracted juices suddenly become thicker, or when you hear that the motor is running slower, the filter 12 must be emptied. When you have removed the fruit pulp/vegetable mash, reassemble the appliance.
Disassembly of the juice extractor
If you wish to disassemble the juice extractor, e.g. to clean it, proceed as follows:
- Remove the power plug from the wall socket ⑧.
- Open the clasps 4.
- Remove the housing lid ③ with the stodger ①.
- Carefully lift up the juice container ⑤. With this, the filter ⑫ releases itself from the drive shaft ⑬.
You can now take the filter ⑫ out of the juice container ⑤.
Cleaning and Care
Warning:
ALWAYS remove the power plug from the wall socket before removing or installing accessories and before cleaning the appliance. To avoid blockage of the juice outlet and/or damage to the appliance, all appliance and ancillary parts must be regularly, and after every use, cleaned free of fruit pulp and vegetable mash.
(i) Note:
DO NOT use any aggressive cleaning agents to clean the juice extractor. The appliance and its ancillaries may not be cleaned in boiling water.
Warning:
To avoid receiving an electrical shock, NEVER submerse the motor/appliance base ⑦ in water or other fluids.
- Switch the appliance off at the On/Off switch ⑨.
- Soiling or overflowing fruit juices should be cleared away immediately, as fruit stains are difficult to remove later.
- For cleaning the appliance housing and the power cable, use a cloth that is only lightly moistened.
- Clean the stodger ①, the separate juice collector ⑮, the housing lid ③ and the container for fruit pulp and vegetable mash ⑪ in warm soapy water and then carefully rinse them off.
The stodger ①, the juice container ⑤, the housing lid ③, the separate juice collector ⑮ and the container for fruit pulp and vegetable mash ⑪ are suitable for cleaning in a dishwasher and can be cleaned there. To clean the filter ⑫, use the supplied nylon brush ⑭:
- Turn the lid of the stodger ① until the arrow points to the opened lock on the stodger shaft. You can now remove it. The nylon brush ⑭ is inside the stodger ①. To re-close the lid, place it on the stodger so that the arrow points to the opened lock. Then turn it until the arrow points at the closed lock ⑩ The lid now sits firmly.
- Hold the filter 12 (with the underside upwards) under running water and clean it with the nylon brush 14.
Colouring:
- Some fruits or vegetables could permanently discolour parts of the juice extractor. This is not damaging and does not impair the appliance in its functions.
Storage
If you do not intend to use the juice extractor for an extended period, wrap the cable around the cable rewind 10 on the underside of the appliance.
Disposal
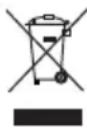
Do not dispose of the appliance in your normal domestic waste. This appliance is subject to the European Guidelines 2002/96/EC.
Dispose of the appliance through an approved disposal centre or at your community waste facility. Observe the currently applicable regulations. In case of doubt, please contact your local waste disposal centre.

Dispose of all packaging materials in an environmentally friendly manner.
Warranty and Service
The warranty for this appliance is for 3 years from the date of purchase. The appliance has been manufactured with care and meticulously examined before delivery. Please retain your receipt as proof of purchase. In the event of a warranty claim, please make contact by telephone with our Service Department. Only in this way can a post-free despatch for your goods be assured.
The warranty covers only claims for material and manufacturing defects, but not for transport damage, for wearing parts or for damage to fragile components, e.g. buttons or batteries. This product is for private use only and is not intended for commercial use. The warranty is void in the case of abusive and improper handling, use of force and internal tampering not carried out by our authorized service branch. Your statutory rights are not restricted in any way by this warranty.
The warranty period will not be extended by repairs made under warranty. This applies also to replaced and repaired parts. Any damage and defects extant on purchase must be reported immediately after unpacking the appliance, at the latest, two days after the purchase date. Repairs made after the expiration of the warranty period are subject to payment.

Service Great Britain
Tel.: 0871 5000 720 (£ 0.10/Min.)
E-Mail: kompernass@lidl.gb
IAN 66712

Service Ireland
Tel.: 1890 930 034
(0,08 EUR/Min., (peak))
(0,06 EUR/Min., (off peak))
E-Mail: kompernass@lidl.ie
IAN 66712
Importer
KOMPERNASS GMBH
BURGSTRASSE 21
44867 BOCHUM, GERMANY
www.kompernass.com
| Problem Possible Causes Possible solutions | ||
| The appliance does not function. | The power plug 8 is not connected. | Connect the appliance to a power socket. |
| The appliance is not switched on. | Switch the appliance on with the On/Off switch 9. | |
| The clasps 4 are not secured. | Secure the clasps 4. | |
| The motor stays still while juicing or it turns noticeably slow or un-regularly. | The filter 12 is blocked. | Immediately switch the appliance off and disconnect the power plug 8. Eliminate the blockage (see chapter "Juicing"). |
| The vegetable mash is moist and you obtain too little juice. | You are working too fast. Work a little slower. | |
| The filter 12 is blocked. | Clean the filter 12 (see chapter "Cleaning and Care"). | |
| The juice wells out between the edge of the housing lid 3 and the juice container 5. | You are working too fast. Work a little slower. | |
| The filter 12 or the juice outlet 5 is blocked. | Clean the filter 12 and the juice container 5 (see chapter "Cleaning and Care"). | |
| The wrong speed setting has been selected. | Select speed setting I at the On/Off switch 9. | |
| The juice sprays from the juice outlet 6. | You are working too fast. | Work a little slower. |
| Do not press so hard with the stodger 1 when inserting more product. | ||
| The wrong speed setting has been selected. | Select speed setting I at the On/Off switch 9. | |
| During the processing juice runs down from the appliance base 7. | The filter 12 or the juice outlet 6 is blocked. | Clean the filter 12 and the juice outlet 6 (see chapter "Cleaning and Care"). |
| The wrong speed setting has been selected. | Select speed setting I at the On/Off switch 9. | |
Carrot-Apple Drink with Yogurt
2 People
Ingredients
4 Carrots
1 Apple
1 Orange
125 g Yogurt
Preparation
- Prepare the fruit as per the instructions given in the instruction manual for the juicer.
- Juice the carrots, apple and the orange.
- Combine the juices and then stir them into the yogurt.
Pumpkin Drink
2 People
Ingredients
150 g Hokkaido pumpkin flesh
2 large Carrots
1 Pear
maybe a little water
Preparation
- Prepare the fruit according to the instructions given in the instruction manual for the juicer.
- Simmer the Hokkaido pumpkin flesh in a small pot with a little water for about 10 minutes and then let it cool.
- Juice the carrots and the pear in the juicer.
- Place the carrot and pear juice with the pumpkin flesh into a tall container and then mix everything well with a hand blender.
- Should the drink still be too viscous you can add a little water.
Blackberry Cocktail
2 People
Ingredients
1 handful of Blackberries
3 Carrots
1 Pear
1 Apple
1 Orange
Preparation
- Prepare the orange, pear, apple and the carrots as per the instructions given in the instruction manual for the juicer.
- Juice the orange, pear, apple and the carrots in the juicer.
- Place everything together with the blackberries in a tall mixing vessel.
- Puree the ingredients.
Breakfast Drink
2 People
Ingredients
4 to 5 Carrots
2 Apples
1 tsp. Olive oil
Preparation
- Prepare the carrots and apples as per the instructions given in the instruction manual for the juicer.
- Juice the carrots first and then the apples.
- Add the olive oil.
- Stir everything well.
Melon Cocktail
2 People
Ingredients
1/2 Sugar melon
3 Carrots
1 Apple
A few drops of cooking oil
Preparation
- Prepare the melon, carrots and the apple as per the instructions given in the instruction manual for the juicer.
- Juice first the melon, then the carrots and finally the apple.
- Then add a little cooking oil and stir everything well.
Vitamin C Drink
2 People
Ingredients
3 Kiwis
3 Carrots
1 Apple
1 Orange
2 tbsp Wheat germ oil
Preparation
- Prepare the kiwis, the carrots, the orange and the apple and as per the instructions given in the instruction manual for the juicer.
- Juice first the kiwis, then the orange, as well as the carrots and the apple.
- Then add the 2 tbsp wheat germ oil and stir everything well.
Pineapple-Mango Drink
2 People
Ingredients
1/2 Pineapple
1/2 Mango
1 Apple
1 Orange
2 tbsp Wheat germ oil
Preparation
1 Prepare the fruit as per the instructions given in the instruction manual for the juicer.
2. Juice first the pineapple, then the mango.
3. Juice the apple and the orange.
4. Mix the juices together.
5. Then add the 2 tbsp wheat germ oil and stir everything well.
Mango-Vanilla-Soy Drink
3 - 4 People
Ingredients
1/2 Mango
2 Carrots
1 Apple
1 Orange
approx. 200 ml Vanilla Soy Milk
Preparation
- Prepare the fruit as per the instructions given in the instruction manual for the juicer.
- Juice first the carrots and then the apple.
- Juice the orange.
- Peel the mango and cut it into pieces.
- Mix the juices together and then add the mango pieces.
- Puree everything well with a hand blender.
- Lastly, add the vanilla soy milk and mix everything well once again.
Beetroot Drink
2 People
Ingredients
2 small Beetroots
2 Carrots
1 Apple
1 tbsp. Cooking oil
Preparation
- Prepare the fruit as per the instructions given in the instruction manual for the juicer.
- Juice the beetroot, carrots and the apple.
- Mix the juices together and then add the tablespoon of cooking oil.
Fruit Drink
2 People
Ingredients
3 Carrots
1 Banana
1/2 Mango
1 Apple
1 Orange
1/2 tbsp. oil
Preparation
- Prepare the fruit as per the instructions given in the instruction manual for the juicer.
- Juice the carrots, the mango, the apple and then the orange.
- Cut the banana into small pieces.
- Mix the juices, add the banana pieces and then puree everything well with a hand blender.
- Finally, add the 1/2 tablespoon of oil and mix everything well.
Note
These recipes are provided subject to change. All ingredients and preparation information are guiding values. Expand these recipe suggestions based on your personal experiences.
SPIS TREŚCI STRONA
- CONTENT PAGE
- INTENDED APPLICATION 2
- TECHNICAL DATA 2
- ITEMS SUPPLIED 2
- OPERATING ELEMENTS 2
- IMPORTANT SAFETY INSTRUCTIONS 2
- ASSEMBLING AND OPERATING THE APPLIANCE 4
- PREPARING THE FRUITS/VEGETABLES 4
- JUICING 5
- EMPTYING THE PULP CONTAINER AND THE FILTER 6
- DISASSEMBLY OF THE JUICE EXTRACTOR 6
- CLEANING AND CARE 6
- STORAGE 7
- DISPOSAL 7
- WARRANTY AND SERVICE 7
- IMPORTER 7
- TROUBLESHOOTING 8
- RECIPES 9
- INTENDED APPLICATION
- TECHNICAL DATA
- CO TIME
- ITEMS SUPPLIED
- OPERATING ELEMENTS
- IMPORTANT SAFETY INSTRUCTIONS
- TO AVOID POTENTIALLY FATAL ELECTRIC SHOCKS
- TO AVOID THE RISKS OF FIRE OR INJURIES
- NEVER USE THE APPLIANCE
- TIPS FOR SAFETY
- ASSEMBLING AND OPERATING THE APPLIANCE
- WARNING
- PREPARING THE FRUITS/VEGETABLES
- NOTE
- JUICING
- EMPTYING THE PULP CONTAINER AND THE FILTER
- DISASSEMBLY OF THE JUICE EXTRACTOR
- CLEANING AND CARE
- COLOURING
- STORAGE
- DISPOSAL
- WARRANTY AND SERVICE
- SERVICE GREAT BRITAIN
- SERVICE IRELAND
- IMPORTER
- CARROT-APPLE DRINK WITH YOGURT
- INGREDIENTS
- PREPARATION
- PUMPKIN DRINK
- BLACKBERRY COCKTAIL
- BREAKFAST DRINK
- MELON COCKTAIL
- VITAMIN C DRINK
- PINEAPPLE-MANGO DRINK
- MANGO-VANILLA-SOY DRINK
- BEETROOT DRINK
- FRUIT DRINK
- SPIS TREŚCI STRONA
Brand : SILVERCREST
Model : SFE 450 A1
Category : Juicer