SVDIRB12E - Radio Sandstrøm - Free user manual and instructions
Find the device manual for free SVDIRB12E Sandstrøm in PDF.


| Product Type | Household Appliance |
| Model | SVDIRB12E |
| Brand | Sandstrøm |
| Dimensions (L x W x H) | Approx. 30 cm x 25 cm x 120 cm |
| Weight | Approx. 4.5 kg |
| Power Supply | Rechargeable battery, 22.2V Li-ion |
| Battery Capacity | 2500 mAh |
| Charging Time | Approx. 5 hours |
| Running Time | Up to 45 minutes on normal mode |
| Suction Power | 25 kPa |
| Dust Capacity | 0.6 L |
| Filtration System | HEPA washable filter |
| Noise Level | 78 dB(A) |
| Accessories Included | Crevice tool, brush, extension wand |
| Operating Modes | Standard, Turbo |
| Indicator Lights | Battery level, filter cleaning reminder |
| Maintenance | Clean filter regularly, empty dustbin after use |
| Safety Features | Overheat protection, automatic shut-off |
| Spare Parts Availability | Battery, filter, brush roll available separately |
| Repairability Index | 7.5 / 10 (based on modular design) |
Frequently Asked Questions - SVDIRB12E Sandstrøm
User questions about SVDIRB12E Sandstrøm
0 question about this device. Answer the ones you know or ask your own.
Ask a new question about this device
Download the instructions for your Radio in PDF format for free! Find your manual SVDIRB12E - Sandstrøm and take your electronic device back in hand. On this page are published all the documents necessary for the use of your device. SVDIRB12E by Sandstrøm.
USER MANUAL SVDIRB12E Sandstrøm
Safety Warnings....5
Unpacking 8
Product Overview....9
Front View....9
Rear View....10
Remote Control....11
Removing the Insulating Strip from the Remote Control ....12
Battery Replacement for the Remote Control....12
-Handling the Battery 13
-Handling the Remote Control....13
Remote Control Operation Range....13
Connections 14
Using Earphones 14
Connecting an Auxiliary Equipment....14
Mains Power....15
Battery Power 15
Connecting to Internet....16
Connecting to Your Home Network....16
-Wired network 16
-Wireless network....17
-Connecting to Computer....18
General Operation....19
Powering ON/OFF....19
Selecting Modes....19
Adjusting the Volume....19
MUTE Function 19
Connecting to Network....19
Internet Radio Operation....20
Last Listened....20
Station List....21
Storing Stations....21
Recalling a Stored Station....22
Music Player Operation....22
Media Sharing 22
Playback 23
Previous and Next....23
Fast Rewind and Fast Forward....23
Shuffle Mode 23
Repeat Mode 23
Prune servers....23
DAB Operation....24
Station List....24
Auto Scan....24
Manual Tuning 24
Prune Invalid....25
DRC (Dynamic Range Compression)....25
Station Order 25
Storing Stations 25
Recalling a Stored Station....26
FM Operation 26
Auto Scan....26
Manual Tune 26
Scan Setting 26
Audio Setting 27
Storing Stations....27
Recalling a Stored Station....27
AUX IN Operation 28
Auxiliary Input....28
Sleep Setting (AC Operation Only)....29
Alarm Clock Setting (AC Operation Only)....30
Settings the Alarms....30
Snooze Function 30
Settings 31
Equaliser....31
Network....31
Time/Date 32
Language 33
Factory reset 33
Software update....33
Setup wizard....33
Info 33
Maintenance 34
Cleaning the Unit....34
Hints and Tips....34
Specifications....35
Innhold
NO
Manuell innstilling....52
Fjern ugyldige 53
AUX IN hantering....84
Extraingångar....84
DRC (Dynamic Range Compression).... 109
Asemajärjestys 109
Asemien tallentaminen 109
Tallennetun aseman nouto 110
FM-käyttö 110
DRC (Dynamic Range Compression).... 137
Kanalrækkefølge 137
- Read all the instructions carefully before using the unit and keep them for future reference.
- Retain the manual. If you pass the unit onto a third party make sure to include this manual.
- Check that the voltage marked on the rating label matches your mains voltage.
Damage
- Please inspect the unit for damage after unpacking.
- Do not continue to operate the unit if you are in any doubt about it working normally, or if it is damaged in any way - switch off, withdraw the mains adapter and consult your dealer.
Location of Unit
- The unit must be placed on a flat stable surface and should not be subjected to vibrations.
- Do not place the unit on sloped or unstable surfaces as the unit may fall off or tip over.
- The mains socket must be located near the unit and should be easily accessible.
Temperature
- Avoid extreme degrees of temperature, either hot or cold. Place the unit well away from heat sources such as radiators or gas/electric fires.
- Avoid exposure to direct sunlight and other sources of heat.
Naked Flames
- Never place any type of candle or naked flame on the top of or near the unit.
Moisture
- To reduce the risk of fire, electric shock or product damage, do not expose this unit to rain, moisture, dripping or splashing. No objects filled with liquids, such as vases, should be placed on the unit.
- If you spill any liquid into the unit, it can cause serious damage. Switch it off at the mains immediately. Withdraw the mains adapter and consult your dealer.
Ventilation
• To prevent the risk of electric shock or fire hazard due to overheating, ensure that curtains and other materials do not obstruct the ventilation vents.
- Do not install or place this unit in a bookcase, built-in cabinet or in another confined space. Ensure the unit is well ventilated.
Safety
- Always disconnect the unit from the mains supply before connecting/disconnecting other devices or moving the unit.
- Unplug the unit from the mains socket during a lightning storm.
Mains Adapter Cable
- Make sure the unit is not resting on top of the mains adapter cable, as the weight of the unit may damage the cable and create a safety hazard.
Interference
- Do not place the unit on or near appliances which may cause electromagnetic interference. If you do, it may adversely affect the operating performance of the unit, and cause a distorted picture or sound.
Mains Adapter
- The mains adapter will continue to draw electricity from the mains supply when plugged in the mains socket. In the interests of safety and to avoid unnecessary energy consumption, never leave the adaptor plugged in the mains socket while unattended for long periods of time. Disconnect the adaptor from the power supply.
Earphones
- Listening to loud sounds for prolonged periods of time may permanently damage your hearing.
- Before putting on earphones, turn the volume down then put the earphones on and slowly increase the volume until you reach a comfortable listening level.
Supervision
- Children should be supervised to ensure that they do not play with the unit and the remote control.
- Never let anyone especially children push anything into the holes, slots or any other openings in the case - this could result in a fatal electric shock.

CAUTION
RISK OF ELECTRIC SHOCK DO NOT OPEN


The lightning flash with arrowhead symbol, within an equilateral triangle, is intended to alert the user to the presence of uninsulated "dangerous voltage" within the unit's enclosure that may be of sufficient magnitude to constitute a risk of electric shock.

The exclamation point within an equilateral triangle is intended to alert the user to the presence of important operating and maintenance (servicing) instructions in the manual accompanying the unit.
Service
- To reduce the risk of electric shock, do not remove screws. The unit does not contain any user-serviceable parts. Please leave all maintenance work to qualified personnel.
- Do not open any fixed covers as this may expose dangerous voltages.
Maintenance
Thank you for purchasing your new Sandstrøm Internet / DAB+ / FM Radio.
We recommend that you spend some time reading this instruction manual in so that you fully understand all the operational features it offers. You will also find some hints and tips to help you resolve any issues.
Read all the safety instructions carefully before use and keep this instruction manual for future reference.
Unpacking
Remove all items from the packaging. Retain the packaging. If you dispose of it please do so according to local regulations.
The following items are included:

natural_image
Front view of a standard analog multimeter with display and control knobs (no visible text or labels)The Unit

Remote Control

natural_image
Illustration of a cable and plug with a terminal connector (no text or symbols)Mains Adapter

Instruction Manual
Front View

- LCD Display
- INFO Button
Displays information on the display.
- MENU Button
Displays the main menu. - ⏻ Button
Switches the unit between the STANDBY and ON mode. - BACK Button
Returns to the previous menu. - MODE Button
Selects between Internet Radio, Music Player, DAB, FM and AUX mode. - ALARM Button
- SLEEP/SNOOZE Button
- Battery Charge Indicator
- Speaker
- MEMORY Button
- Presets a radio station.
- Recall a preset station.
- ▶■ Button
Plays/pauses/resumes playback in Music Player mode.
- VOLUME +/- Buttons
Increases and decreases the volume.
- ▶▶▶ Button
• Skips forwards to next tracks in Music Player mode.
- Allows fast forwarding of the current track in Music Player mode.
• Searches for a radio station going forwards through accessible radio frequencies.
- Remote Control Sensor
Receives signal from the remote control.
- Button
• Skips backwards to previous tracks in Music Player mode.
- Allows fast reversing of the current track in Music Player mode.
• Searches for a radio station going backwards through accessible radio frequencies.
-
SCROLL Dial / SELECT Button
-
Navigates up/down on the menu screen and adjusts certain settings.
- Confirms the selection on a menu screen.
Rear View
GB

- EARPHONES Socket
- AUX IN Socket
-
NETWORK Socket
-
FM Aerial
- DC IN Socket
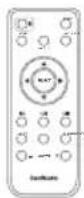
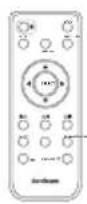
Remote Control
- Button
Switches the unit between the STANDBY and ON mode.
- MENU Button
Displays the main menu.
-
SLEEP/SNOOZE Button
-
Buttons
Navigate on the menu screen and adjusts certain settings.
SELECT Button
Confirms the selection on a menu screen.
-
Button
-
Skips backwards to previous tracks in Music Player mode.
- Allows fast reversing of the current track in Music Player mode.
-
Searches for a radio station going backwards through accessible radio frequencies.
-
Button
• Skips forwards to next tracks in Music Player mode.
- Allows fast forwarding of the current track in Music Player mode.
- Searches for a radio station going forwards through accessible radio frequencies.
- MUTE Button
Silences the unit or restores the sound
- MEMORY Button
Presets a radio station.

- MODE Button
Selects between Internet Radio, Music Player, DAB, FM and AUX mode.
- INFO Button
Displays information on the display.
- ▶ II Button
Plays/pauses/resumes playback in Music Player mode.
-
ALARM Button
-
VOLUME +/- Buttons
Increases and decreases the volume.
Removing the Insulating Strip from the Remote Control
Remove the insulating mylar strip from the battery if the battery is being used for the rst time . It is located at the bottom backside of the remote control.

natural_image
Line drawing of a finger pressing down on a curved object with an arrow indicating force (no text or symbols)Battery Replacement for the Remote Control
The remote control requires a CR2032, 3V Lithium battery.
-
Using a paperclip, carefully pry open the battery release tab in the direction.
-
Pull out the battery holder and remove the old battery.
-
Replace with a new battery.
-
Insert the battery holder back into the remote control.

flowchart
graph TD
    A["Rectangular case with internal connector"] --> B["Internal component with battery symbol"]
    B --> C["Cell component with arrow indicating direction"]
    C --> D["Cell component with arrow indicating direction"]
    D --> E["Cell component with arrow indicating direction"]
Handling the Battery
- Improper or incorrect use of batteries may cause corrosion or battery leakage, which could cause fire, personal injury or damage to property.
- Install the battery correctly in the battery compartment. Normally the battery's positive polarity (+) will face up.
- When the battery is exhausted, the remote control will not function.
- Only use the battery type indicated in this manual.
- Do not dispose of the used battery as domestic waste. Dispose of it in accordance with local regulations.
- Small button cell batteries such as the one used in the remote control are easily swallowed by young children and this is dangerous. Keep loose button cells away from young children and make sure that the battery is secure in the remote control. Seek medical advice if you believe a battery cell has been swallowed.
Handling the Remote Control
- If you are finding it difficult to remove the battery, use a paperclip to slide the battery tab.
- Do not drop the remote control.
- Do not allow anything to impact the remote control.
- Do not spill water or liquid on the remote control.
- Do not place the remote control on a wet object.
- Do not place the remote control under direct sunlight or near sources of excessive heat.
- Remove the battery from the remote control when not in use for a long period of time, as corrosion or battery leakage may occur and result in physical injury, and/or property damage, and/or fire.
Remote Control Operation Range
- The remote control sensor on the front unit is sensitive to the remote control's commands up to a maximum of 5 metres away and within a maximum of a 60^ arc.
- Please note that the operating distance may vary depending on the brightness of the room

Connections
GB
Using Earphones
Turn down the volume before connecting the earphones. Slowly raise the volume with the earphones on until you reach your desired volume. When earphones are connected, the speaker is automatically muted.

Long-term exposure to loud music may cause hearing damage. It is best to avoid extreme volume when using earphones, especially for extended periods.

Connecting an Auxiliary Equipment
Connect the AUX IN socket at the rear of the unit to the line output sockets on the auxiliary equipment using a 3.5mm to RCA stereo audio cables (not included), as illustrated below.

Mains Power
- This unit is designed to operate with a DC 12V 1.5A power supply.
- Connecting the unit to any other power source may cause damage to the unit.
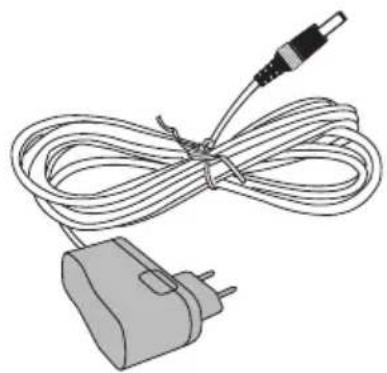
Unwind the cable to its full length. Connect the end of the cable to the DC IN Socket at the rear of the unit then connect the mains adapter to the mains socket. Make sure the mains adapter is firmly inserted into the mains socket. The unit is now connected and ready to use.
- To switch the unit off completely, remove the mains adapter from the mains socket.

natural_image
Line drawing of a device rear panel connected to a cable with an attached plug (no text or symbols)
Ensure all connections are connected before connecting to the mains power socket.
Battery Power
- Connect the mains adapter to the DC IN socket on the unit. Connect the other end to the mains socket.
- Battery will automatically start charging whilst in STANDBY mode, the BATTERY CHARGE indicator will flash green. When the battery is charged to full capacity, the BATTERY CHARGE indicator will illuminate green.
- Remove the mains adapter. The battery is now ready for use.

- The battery is partially charged at shipment. Charge the battery to full for the first time use. It takes about 12 hours at fully charged.
- When the radio is connected to the mains and in use, the battery will be recharged but at a much slower rate.
- Do not disconnect the mains power adapter during charging.
- It is normal for the battery to become warm during charging.
- Do not use the battery under high temperature or near heat sources.
- During battery operation, if the battery becomes flat, the "Battery Charge" indicator will show flashing red, you should change to AC operation and go for the battery recharge.

During battery operation, the button will work as a POWER ON/OFF button. The display will be totally off when the radio is powered off. The display backlight will be dimmed in few seconds after radio power on, and it will be turned to full brightness for 5 seconds on every button press.
Connecting to Internet
Connecting to Your Home Network
This radio can be connected to a local area network (LAN) via the LAN port at the rear of the unit.
Wired network
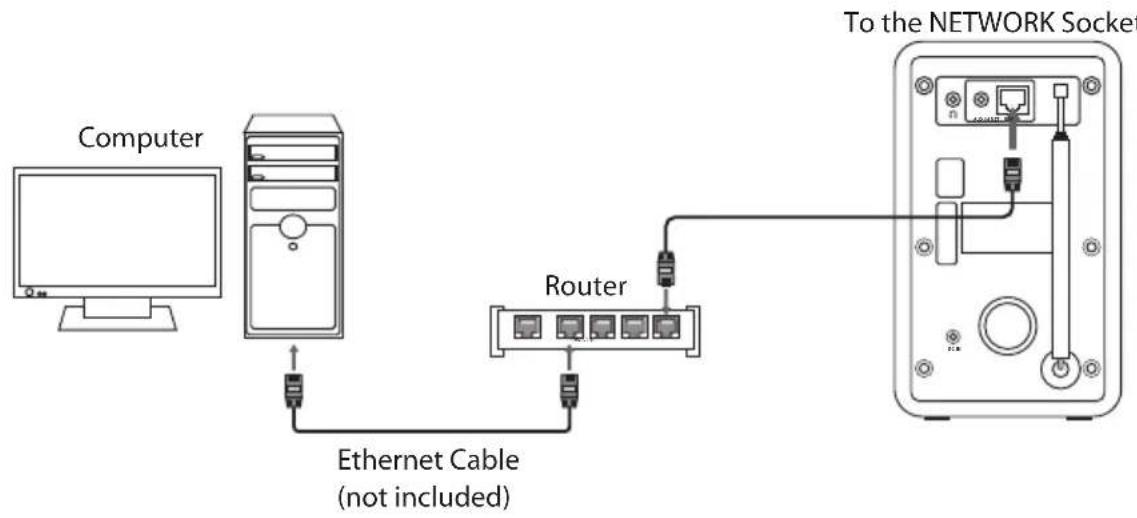
Connect the NETWORK socket on the unit to the corresponding port on your Router using a commercially available LAN or Ethernet cable (CAT5 or better with RJ45 connector).
Using a wired network provides a better performance, than a wireless connection because the attached devices connect directly to the network and are not subject to radio frequency interference.

flowchart
graph TD
    A["Internet"] --> B["Wired Router"]
    B --> C["Ethernet Cable (not included)"]
    C --> D["To the NETWORK Socket"]
    style A fill:#f9f,stroke:#333
    style D fill:#bbf,stroke:#333

- This unit cannot be connected to a standalone modem directly. A router or a modem incorporated with a router has to be used.
- When plugging or unplugging the LAN cable, hold the plug portion of the cable. When unplugging, do not pull on the LAN cable but unplug while pressing down on the lock.
- Do not connect a modular phone cable to the NETWORK socket.
- Since there are various connection configurations, please follow the specifications and instructions of your telecommunication carrier, Internet service provider, and router setting guidebook.
Wireless network
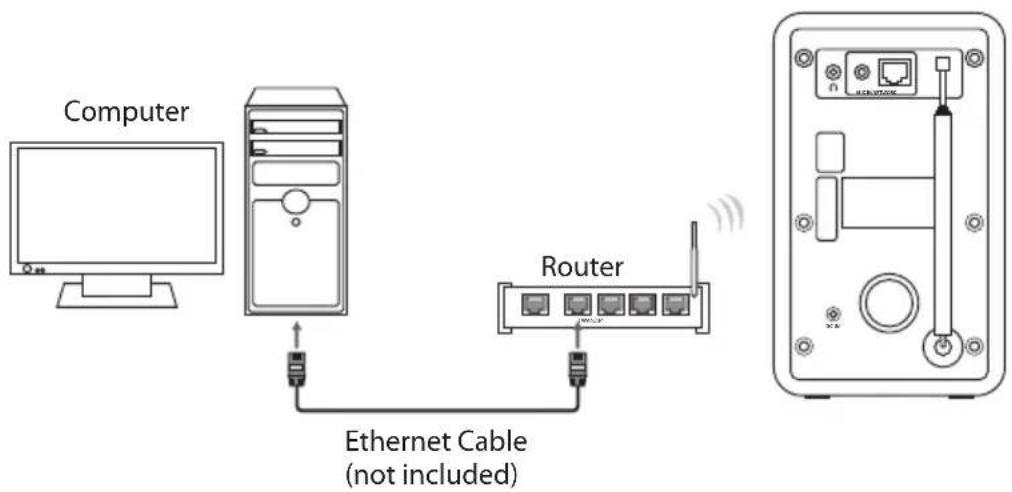
Another connection option is to use an Access Point or a wireless router. In the example configuration for a wireless connection below, the unit would be able to access content from your computer connected to the same wireless network. The network configuration and connection method may vary depending on the equipment in use and the network environment. The unit is equipped with a wireless module, which supports 802.11b/g standards.
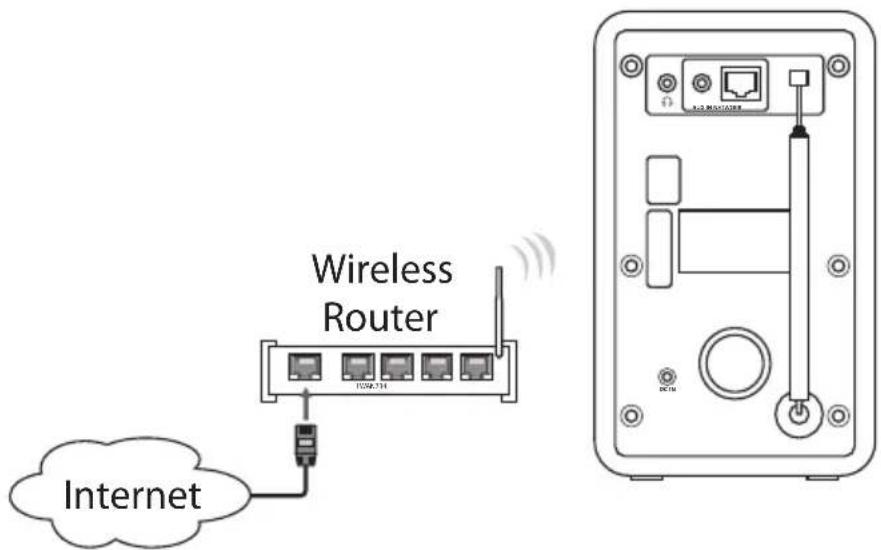

- This unit cannot be connected to the standalone modem directly. A router or a modem incorporated with a router has to be used.
- Since there are various connection configurations, please follow the specifications and instructions of your telecommunication carrier, Internet service provider, and router setting guidebook.
Connecting to Computer
This radio can be connected to a computer via a wired/wireless router. To playback music files from a computer, make sure the unit and computer are in the same network.
flowchart
graph TD
    A["Computer"] --> B["Router"]
    B --> C["To the NETWORK Socket"]
    B --> D["Ethernet Cable (not included)"]
    D --> B
Powering ON/OFF
When you first connect the unit to the mains socket. The unit will be in STANDBY mode.
- Press the ⏻ button on the unit or the remote control to switch the unit on.
- Press the ⏻ button on the unit or the remote control to switch the unit back to standby on mode.
- Disconnect the mains adapter from the mains socket if you want to switch the unit off completely.
Selecting Modes
- Press the MODE button on the unit or the remote control to switch between modes (Internet radio, Music player, DAB radio, FM radio, AUX in).
- Alternatively press the MENU button on the unit or the remote control to display the function menu. Turn the SCROLL dial on the unit or press the ▲▼ buttons on the remote control repeatedly to highlight "Main Menu". Press the SELECT button on the unit or the remote control to enter to the main menu.
- Turn the SCROLL dial on the unit or press the ▲▼ buttons on the remote control repeatedly to select the mode as follow.

flowchart
graph TD
    A["Internet radio"] --> B["Music player"]
    B --> C["DAB"]
    C --> D["FM"]
    D --> E["AUX in"]
    E --> F["Sleep"]
    F --> G["Alarms"]
    G --> H["System settings"]
    H --> A
- Press the SELECT button on the unit or the remote control to select your desired mode. The selected mode will shown on display.
Adjusting the Volume
Press the VOLUME +/- buttons on the unit or the remote control to adjust the volume to the desired level.
MUTE Function
Press the MUTE button on the remote control to mute/restore the sound.
Connecting to Network
When you first listen to Internet Radio, you must connect to the Internet via either a wired or wireless network. Setup the Internet network as follow:
- Press the ⬤ button on the unit or the remote control to switch on the unit. The main menu will show on the display.
-
Press the MODE button on the unit or the remote control repeatedly to select Internet radio mode, and press the SELECT button on the unit or the remote control to select.
-
Turn the SCROLL dial on the unit or press the ▲▼ buttons on the remote control to select a region of your choice, and then press the SELECT button on the unit or the remote control to confirm. The display will show SSID (the Service Set Identifier) of all the available Internet networks after scanning.
- Turn the SCROLL dial on the unit or press the ▲▼ buttons on the remote control to select a desired SSID / [Rescan] / [Wired] / [Manual config].
SSID Select desired wireless network.
Rescan Scan for available networks.
Wired Select wired network (connect with Ethernet).
Manual config Select wired/wireless network with DHCP enable/disable.
- After a successful connection to the network, the Internet radio menu will show on the display.

When the wireless network selected is WEP/WPA secured, a password has to be input for a successful connection. Use the SCROLL dial and the SELECT button on the unit or the ◀▲▼▶, SELECT buttons on the remote control to insert the characters. After inputting the complete password, highlight "OK" and then press the SELECT button to confirm.
Internet Radio Operation
- When the power is on, press the MODE button on the unit or the remote control repeatedly to select Internet radio mode.
- The unit will display a list of available stations. Turn the SCROLL dial on the unit or press the ▲▼ buttons on the remote control to select a station you want to listen.
- During Internet Radio mode, press the MENU button on the unit or the remote control to access the menu. You can choose between Last listened, Station list, System settings and Main menu.
Last Listened
- Turn the SCROLL dial on the unit or press the ▲▼ buttons on the remote control to select history of stations that you have listened to before.
- Press the SELECT button on the unit or the remote control to confirm.
Station List
- Turn the SCROLL dial on the unit or press the ▲▼ buttons on the remote control to select the following options, and then press the SELECT button on the unit or the remote control to confirm.
| My Favourites | Favourites are stored in the Internet radio portal and are available to all Internet radios that are registered with the same account. You must register the radio in the Internet radio portal before making use of the favourites.To register your radio with the portal (www.wifiradio-frontier.com). Access code can be found from “Station list > Help > Get access code”.To store a favourite station, press and hold the SELECT button until the display shows “Favourite added”. The station will then save in the list of favourites. |
| Stations• Select | the stations from various categories in the menu:Location, Genre, Popular Stations, New Stations.You can also search stations using various keywords.The name and a description of your selected station will show on the display.Press the INFO button repeatedly to view further information for the station. Informations displayed cycling through name/description, genre/location, reliability, bitrate/codec/sampling rate, playback buffer and current date. |
| Podcasts• Select | podcasts from the categories in the Podcast menu:Location, Genre.You can also select a particular episode by entering keywords to search podcasts. |
| My added stations | Even though the Internet radio portal contains thousands of stations, you may want to listen to stations not listed. You can add your own stations via the portal (www.wifiradio-frontier.com).These added stations are accessible by selecting “Station list > My added stations > [Station]” |
Storing Stations
You can store up to 10 of your favourite stations to the memory. This will enable you to access your favourite stations quickly and easily.
- To store a preset, you must first be listening to the station that you would like to save.
- Press and hold the MEMORY button on the unit or the remote control. "Save to Preset" menu will display.
- Turn the SCROLL dial on the unit or press the ▲▼ buttons on the remote control to choose a preset number of your choice.
- Press the SELECT button on the unit or the remote control to confirm.
- The station will be stored and the station name will show on the display.
- BBC Radio 1
- [Not set]
- [Not set]
- BBC Radio 2
- [Not set]

Save to Preset

Recalling a Stored Station
- Once you have saved a station, you can recall a preset menu by pressing the MEMORY button on the unit or the remote control. "Recall from Preset" menu will show on the display.
- Turn the SCROLL dial on the unit or press the buttons on the remote control to select a preset station you wish to listen.
- Press the SELECT button on the unit or the remote control to confirm.
- "P#" will show on the display to indicate the station is preset (P1-P10).
Recall from Preset
- BBC Radio 1
- [Not set]
- [Not set]
- BBC Radio 2
- [Not set]

Music Player Operation

This function is for more advanced users.
The built-in Music Player allows you to play unprotected audio files (AAC, MP3, WMA, FLAC) stored on a networked computer. To play music from the computer, you must setup a shared file or media library on the computer.
- Press the MODE button on the unit or the remote control repeatedly to select Music player mode.
Media Sharing
Please ensure that your computer is available on the network, and that your computer is set up to allow sharing your media folders or files. Check how to setup a folder for sharing from your computer's instruction manual.
- During Music player mode, turn the SCROLL dial on the unit or press the ▲▼ buttons on the remote control to select Shared media, and then press the SELECT button on the unit or the remote control to scan for all the available share media folders or files.
- The display will show all found media folders from the network. Turn the SCROLL dial on the unit or press the ▲▼ buttons on the remote control and select the computer that you wish to connect to.
- The unit will search for all shared media from the computer.
- Turn the SCROLL dial on the unit or press the ▲▼ buttons on the remote control and select your desire shared media, then press the SELECT button on the unit or the remote control.
- This unit cannot access your computer, until your computer allows it to.
Playback
- The desired track will playback by pressing the SELECT button.
- During playback, press the ▶ button on the remote control to pause playback.
- Press the ▶ button again to resume normal playback.
Previous and Next
- During playback, press the button on the unit or the remote control to skip to the beginning of the current track. Press the button again to skip to the previous track.
- During playback, press the ▶ button on the unit or the remote control to skip to the next track.
Fast Rewind and Fast Forward
- During playback, press and hold the button on the unit or the remote control to fast rewind the current track
- During playback, press and hold the ▶ button on the unit or the remote control to fast forward the current track.
Shuffle Mode
- During Music Player mode, press the MENU button then turn the SCROLL dial on the unit or press the ▲▼ buttons on the remote control to select Shuffle play.
- Press the SELECT button repeatedly on the unit or the remote control to turn shuffle play on/off.
Repeat Mode
- During Music Player mode, press the MENU button then turn the SCROLL dial on the unit or press the ▲▼ buttons on the remote control to select Repeat play.
- Press the SELECT button repeatedly on the unit or the remote control to turn repeat play on/off.
Prune servers
You may remove those servers no longer used.
- During Music Player mode, press the MENU button then turn the SCROLL dial on the unit or press the ▲▼ buttons on the remote control to select Prune servers.
- Turn the SCROLL dial on the unit or press the ▲▼ buttons on the remote control to select YES to remove servers that are no longer available. Press the SELECT button on the unit or the remote control to confirm.
DAB Operation
- Press the MODE button on the unit or the remote control repeatedly to select DAB mode.
- The unit will automatically enter into the DAB mode and perform auto scan function. During the scan the display will show "Scanning..." that indicates the progress of the scan and the amount of stations that have been found so far.
- Once the scan has finished, the unit will display a list of the found stations. Explore the found stations by turning the SCROLL dial on the unit or pressing the ▲▼ buttons on the remote control. When you find a station that you would like to listen to, press the SELECT button on the unit or the remote control.
Station List
During DAB mode, press the MENU button on the unit or the remote control, and then turn the SCROLL dial on the unit or press the ▲▼ buttons on the remote control to select Station list, and then press the SELECT button on the unit or the remote control. A list of DAB stations will show on the display.
Auto Scan
- During DAB mode, press the MENU button on the unit or the remote control, and then turn the SCROLL dial on the unit or press the ▲▼ buttons on the remote control to select Scan, and then press the SELECT button on the unit or the remote control. The display will show "Scanning..." and a progressing slide bar. This may take a few minutes, depending on the number of stations found.
- All the stations that have been found will be automatically stored. To explore the found stations, turn the SCROLL dial on the unit or press the ▲▼ buttons on the remote control. Press the SELECT button on the unit or the remote control to start playing the desired station.
Manual Tuning
As well as the auto tune function, you can manually tune the receiver. This can help you when aligning your aerial or when adding stations that were missed while auto tuning.
- During DAB mode, press the MENU button on the unit or the remote control, and then turn the SCROLL dial on the unit or press the ▲▼ buttons on the remote control to select Manual tune, and then press the SELECT button on the unit or the remote control to confirm.
- Turn the SCROLL dial on the unit or press the ▲▼ buttons on the remote control to cycle through the DAB channels, which are numbered from 5A to 13F.
- After selecting your desired channel number, press the SELECT button to confirm. The display will show the channel number, the frequency, the multiplex name and the signal strength.
- Press the SELECT button to listen to this channel, or turn the SCROLL dial on the unit or press the ▲▼ buttons on the remote control to select other channels.
Prune Invalid
You may remove all unavailable stations form the list.
- During DAB mode, press the MENU button on the unit or the remote control, and then turn the SCROLL dial on the unit or press the ▲▼ buttons on the remote control to select Prune invalid. Press the SELECT button on the unit or the remote control to confirm.
- Turn the SCROLL dial on the unit or press the ◀▶buttons on the remote control to select YES to confirm delete. Or select NO to cancel.
DRC (Dynamic Range Compression)
If you are listening to music with high dynamic range in a noisy environment, you may wish to compress the audio dynamic range.
- During DAB mode, press the MENU button on the unit or the remote control, and then turn the SCROLL dial on the unit or press the ▲▼ buttons on the remote control to select DRC. Press the SELECT button on the unit or the remote control to confirm.
- Turn the SCROLL dial on the unit or press the ◀▶buttons on the remote control to select DRC high/low/off. Press the SELECT button on the unit or the remote control to confirm the setting.
Station Order
You may wish to arrange the station listing order.
- During DAB mode, press the MENU button on the unit or the remote control, and then turn the SCROLL dial on the unit or press the ▲▼ buttons on the remote control to select Station order. Press the SELECT button on the unit or the remote control to confirm.
- Turn the SCROLL dial on the unit or press the ◀▶ buttons on the remote control to select Alphanumeric/Ensemble/Valid order. Press the SELECT button on the unit or the remote control to confirm the setting.
Storing Stations
You can store up to 10 of your favourite stations to the memory. This will enable you to access your favourite stations quickly and easily.
- To store a preset, you must first be listening to the station that you would like to save.
- Press and hold the MEMORY button on the unit or the remote control. "Save to Preset" menu will show on the display.
- Turn the SCROLL dial on the unit or press the ▲▼ buttons on the remote control to choose a preset number of your choice.
- Press the SELECT button on the unit or the remote control to confirm.
- The station will be stored and the station name will show on the display.
![Save to Preset 1. BBC Radio 1 2. [Not set] 3. [Not set] 4. BBC Radio 2 5. [Not set]](/content/2026/05/871198/images/34be4993d96b2bd0d783b351454f0e94bf710dda09e397b578e7869ffb49861b.jpg)
Recalling a Stored Station
- Once you have saved a station, you can recall a preset menu by pressing the MEMORY button on the unit or the remote control. "Recall from Preset" menu will show on the display.
- Turn the SCROLL dial on the unit or press the ▲▼ buttons on the remote control to select a preset station you wish to listen to.
- Press the SELECT button on the unit or the remote control to confirm.
- "P#" will show on the display to indicate the station is preset (P1-P10).

Recall from Preset
- BBC Radio 1
- [Not set]
- [Not set]
- BBC Radio 2
- [Not set]
FM Operation
Press the MODE button on the unit or the remote control repeatedly to select FM mode.
Auto Scan
To search for an FM station, press and hold the buttons on the unit or the remote control, or press the SELECT button on the unit or the remote control to start the auto scan. Once a station has been found, the scanning will stop automatically.
Manual Tune
To tune FM frequency manually, turn the SCROLL dial on the unit or press the ▲▼ buttons on the remote control until your desired frequency is reached.

With FM radio it may be necessary to fine tune each station by turning the SCROLL dial on the unit or pressing the ▲buttons on the remote control repeatedly. Each press will adjust the frequency by 0.05MHz. If reception is still poor adjust the position of the aerial or try moving the radio to another location.
Scan Setting
- Press the MENU button on the unit or the remote control to access the main menu.
- Turn the SCROLL dial on the unit or press the ▲▼ buttons on the remote control to select Scan setting, and then press the SELECT button on the unit or the remote control.
- Turn the SCROLL dial on the unit or press the ◀▶buttons on the remote control to select YES to receive a strong signal only.
- Press the SELECT button on the unit or the remote control to confirm.
Audio Setting
- Press the MENU button on the unit or the remote control to access the main menu.
- Turn the SCROLL dial on the unit or press the ▲▼ buttons on the remote control to select Audio Setting, and then press the SELECT button on the unit or the remote control.
- Turn the SCROLL dial on the unit or press the ◀▶buttons on the remote control to select YES to listen to mono only, or NO to let the unit select Stereo or Mono automatically.
- Press the SELECT button on the unit or the remote control to confirm.
Storing Stations
You can store up to 10 of your favourite stations to the memory. This will enable you to access your favourite stations quickly and easily.
- To store a preset, you must first be listening to the station that you would like to save.
- Press and hold the MEMORY button on the unit or the remote control. "Save to Preset" menu will show on the display.
- Turn the SCROLL dial on the unit or press the ▲▼ buttons on the remote control to choose a preset number of your choice.
- Press the SELECT button on the unit or the remote control to confirm.
- The station will be stored and the station name will show on the display.

Save to Preset
- 90.30MHz
- 100.00MHz
- [Not set]
- [Not set]
- [Not set]

Recalling a Stored Station
-
Once you have saved a station, you can recall a preset menu by pressing the MEMORY button on the unit or the remote control. "Recall from Preset" menu will show on the display.
-
Turn the SCROLL dial on the unit or press the ▲▼ buttons on the remote control to select a preset station you wish to listen to.
-
Press the SELECT button on the unit or the remote control to confirm.
-
"P#" will show on the display to indicate the station is preset (P1-P10).

Recall from Preset
- 90.30MHz
- 100.00MHz
- [Not set]
- [Not set]
- [Not set]

AUX IN Operation
Auxiliary Input
- Before connecting to the mains socket, use the AUX IN cable (not included) to connect to your external audio device through the AUX IN socket at the rear of the unit.
- Connect the mains adapter to the mains socket. The unit will enter Standby mode.
- Press the ⏻ button on the unit or the remote control to switch the unit on.
- To select your operation source, press the MODE button on the unit or the remote control repeatedly to select AUX in mode.
- In AUX in mode, you may operate your audio device directly for playback features.
- Use the VOLUME +/- buttons on the unit or the remote control to adjust the volume level.
- When you have finished listening, turn off the power of the connected external audio device. Press the MODE button on the unit to return to Internet radio, DAB or FM mode, especially if wake up alarms are programmed.

- When connecting the external audio device, refer to the owner's manual of the external device, as well as this manual.
• Examples of External Audio Devices that can be connected to the unit are: Portable MP3 Players, Cassette Players, Mini Disc Players, DVD players, etc.

- To further enhance energy saving, if the unit is left in AUX in mode and without any user operation for three hours, the unit will switch to standby automatically.
- To toggle select this function between on & off- In AUX in mode, press and hold the INFO button for longer than two seconds, the display will show "ECO ON" or ECO OFF".
Sleep Setting (AC Operation Only)
This function allows you to program the unit to turn to standby mode by itself after a set period of time.
- To activate the sleep function, press the SLEEP/SNOOZE button repeatedly. The time will change in the below sequence on every press:

- When your desired sleep time appears in the display, stop pressing the button and the sleep function will be activated in two seconds. "©" will show on the display. Also the time remaining until switch off is displayed next to the symbol in the display.
- When the sleep timer counts down to zero, the unit will turn to standby mode. To turn the sleep function off while the sleep timer is still counting down, press the SLEEP/SNOOZE button repeatedly to select "SLEEP OFF"."will disappear from the display.
- Press the SLEEP/SNOOZE button once to show the sleep timer status on the display when it is turned on.

Alternatively,
- Press the MENU button on the unit or the remote control to display the function main menu. Turn the SCROLL dial on the unit or press the ▲▼ buttons on the remote control to select Main menu, and then press the SELECT button on the unit or the remote control.
- Turn the SCROLL dial on the unit or press the ▲▼ buttons on the remote control to select Sleep mode, and then press the SELECT button on the unit or the remote control.
- Turn the SCROLL dial on the unit or press the ▲▼ buttons on the remote control to select sleep timer. Press the SELECT button on the unit or the remote control to confirm.
Alarm Clock Setting (AC Operation Only)
- Press the ALARM button on the unit or the remote control to access the Alarms setting menu.
- In ON mode, press the ALARM button on the unit or the remote control repeatedly to turn Alarm 1 or Alarm 2 on/off.
Settings the Alarms
- During Alarms mode, turn the SCROLL dial on the unit or press the ▲▼ buttons on the remote control to select Alarm 1 or Alarm 2, then press the SELECT button on the unit or the remote control to confirm.

Alarms
Alarm 1: off [00:00]
Alarm 2: off [00:00]

Alarm 1
Enable: Off
Time: 00:00
Mode: Internet radio
Preset: Last listened
Volume: 20

- Turn the SCROLL dial on the unit or press the ▲▼ buttons on the remote control to select the following settings, and then press the SELECT button on the unit or the remote control.
- Turn the SCROLL dial on the unit or press the ▲▼ buttons on the remote control to adjust the following settings.
| Enable • Off – the alarm function will be disabled.• Daily – the alarm will be active everyday• Once – the alarm will be active only once.• Weekends – the alarm will be active on Saturday and Sunday.• Weekdays – the alarm will be active from Monday to Friday. | |
| Time Adjust the hour and minute digits. | |
| Mode | Choose Buzzer, Internet Radio, DAB or FM mode. |
| Preset | Choose Last listened or Saved preset station. (not available for Buzzer mode) |
| Volume Adjust the volume level 0-32. | |
| Save Save and confirm the alarm setting. | |
- Press the SELECT button on the unit or the remote control to select.
- The alarm setting is now complete.
- The display will show the current time and alarm time on the display during standby mode.
Snooze Function
When the alarm has triggered, press the SNOOZE button to temporarily switch off the alarm for 5 minutes. To turn off the alarm when it sounds, press the ⏻ or ALARM buttons on the unit or the remote control.
Settings
Press the MENU button on the unit or the remote control to display the menu. Turn the SCROLL dial on the unit or press the ▲▼ buttons on the remote control to select System settings mode, and then press the SELECT button on the unit or the remote control.
Equaliser
- During System settings mode, turn the SCROLL dial on the unit or press the ▲▼ buttons on the remote control to select Equaliser, and then press the SELECT button on the unit or the remote control.
- Turn the SCROLL dial on the unit or press the ▲▼ buttons on the remote control to select the desired equaliser, and then press the SELECT button on the unit or the remote control.

flowchart
graph LR
    A["Normal Flat Jazz-Rock Movie"] --> B["Classic"]
    C["My EQ profile setup My EQ"] <--_D["News Pop"]
Network
- During System settings mode, turn the SCROLL dial on the unit or press the ▲▼ buttons on the remote control to select Network, and then press the SELECT button on the unit or the remote control.
- Turn the SCROLL dial on the unit or press the ▲▼ buttons on the remote control to select the following settings, and then press the SELECT button on the unit or the remote control.
| Network wizard SSID – select the desire wireless network. Rescan – Scan for available networks. Wired – select wired network. Manual config – select wired/wireless network with DHCP enable/disable. |
| PBC Wlan setup Select PBC on the unit and press the PBC button on the modem device that you wish to connect with. Press the SELECT button to continue. |
| View settings Display the setting on the unit. |
| Wlan region Select a country of your choice. |
| Manual settings Select wired/wireless network with DHCP enable/disable. |
| Network profile View the connected network. |
- Press the BACK button on the unit or the ◀ button on the remote control to cancel the setting and return back to the previous menu.
Time/Date
The Time/Date can be automatically set once it has been connected to the Internet. DAB or FM radio station with time/date information. You may also adjust the Time/Date manually.
- During System settings mode, turn the SCROLL dial on the unit or press the ▲▼ buttons on the remote control to select Time/Date, press the SELECT button on the unit or the remote control.
- Turn the SCROLL dial on the unit or press the ▲▼ buttons on the remote control to select Set Time/Date, press the SELECT button on the unit or the remote control.
- The display shows "Set Time/Date". Turn the SCROLL dial on the unit or press the ▲▼ buttons on the remote control to adjust the date digits, and then press the SELECT button on the unit or the remote control.
- Turn the SCROLL dial on the unit or press the ▲▼ buttons on the remote control to adjust the month digits, and then press the SELECT button on the unit or the remote control.
- Turn the SCROLL dial on the unit or press the ▲▼ buttons on the remote control to adjust the year digits, and then press the SELECT button on the unit or the remote control.
- Turn the SCROLL dial on the unit or press the ▲▼ buttons on the remote control to adjust the hour digits, and then press the SELECT button on the unit or the remote control.
- Turn the SCROLL dial on the unit or press the ▲▼ buttons on the remote control to adjust the minute digits, and then press the SELECT button on the unit or the remote control.
- The date and time settings are now completed.
For other settings under Time/Date, turn the SCROLL dial on the unit or press the ▲▼ buttons on the remote control to select the following options, and then press the SELECT button on the unit or the remote control.
Turn the SCROLL dial on the unit or press the ▲▼ buttons on the remote control to adjust.
| Auto update Update from DAB / FM / Network. | |
| Set format 12 / 24 hour format. | |
| Set timezone Select a time zone. (Only available when Auto update from Network is on.) | |
| Daylight savings Select daylight savings. (Only available when Auto update from Network is on.) |
- Press the SELECT button on the unit or the remote control to confirm.

The default auto time update setting is "Update from Network". If you would like to manual set the time, it is recommended to turn the Auto update function off.
Language
- During the system settings mode, turn the SCROLL dial on the unit or press the ▲▼ buttons on the remote control to select Language, and then press the SELECT button on the unit or the remote control.
- Turn the SCROLL dial on the unit or press the ▲▼ buttons on the remote control to change the display language of your choice.
- Press the SELECT button on the unit or the remote control to confirm.
Factory reset
- During the system settings mode, turn the SCROLL dial on the unit or press the ▲▼ buttons on the remote control to select Factory reset, and then press the SELECT button on the unit or the remote control.
- Turn the SCROLL dial on the unit or press the ▲▼ buttons on the remote control to select YES, and then press the SELECT button on the unit or the remote control to proceed.
Software update
- During the system settings mode, turn the SCROLL dial on the unit or press the ▲▼ buttons on the remote control to select Software update, and then press the SELECT button on the unit or the remote control.
- Turn the SCROLL dial on the unit or press the ▲▼ buttons on the remote control to select Auto-check setting or Check now, and then press the SELECT button on the unit or the remote control.
Setup wizard
The setup wizard is available in the system settings section, you can run through this to configure settings for date/time and network. Once this has finished, your radio is ready to use.

No need to run through the setup wizard if a wired network is used.
Info
During the system settings mode, turn the SCROLL dial on the unit or press the ▲▼ buttons on the remote control to select Info, and then press the SELECT button on the unit or the remote control to view the software version of this unit.
Maintenance
Cleaning the Unit
GB

Ensure the unit is fully unplugged from the mains socket before cleaning.
• To clean the unit, wipe the case with a slightly moist, lint-free cloth.
- Do not use any cleaning fluids containing alcohol, ammonia or abrasives.
- Do not spray an aerosol at or near the unit.
Hints and Tips
If a problem does occur, it may often be due to something very minor. The following table contains various tips.
| Menu Description | |
| No power. · Ensure the mains | adapter is properly connected.Make sure that the unit is turned on. |
| The remote control does not function. | · Use the remote control nearer to the unit.Point the remote control at the remote sensor on the unit.Replace the battery in the remote control with a new one.Make sure the plastic sheet has been removed from the remote control.Remove any obstacles between the remote control and the unit. |
| The unit does not respond when pressing any buttons | · The unit may freeze up during use. Switch the unit off and then on again to reset the unit. |
| File from computer device does not play | · Check the file format.The latest version of Windows media player is required and the unit must be added under the Library - Media sharing menu (on the computer) |
| Radio | |
| Poor FM reception. · Make | sure the FM aerial wire is fully extended.Electrical interference in your home can cause poor reception. Move the unit away from them (especially those with motors and transformers). |
| Desired station not found. | · Weak signal. Use the Manual Tune function. |

If any anomaly is encountered, unplug the mains adapter and reconnected again.
Specifications
| Model SVDIRB12E / SVDIRW12E | |
| Power Supply AC/DC | AdapterInput: AC 100-240V ~ 50/60HzOutput: DC 12V 1.5A |
| Power Output 5W (3W in Battery Mode) | |
| Wi-Fi Connectivity 802.11b/g Standards | |
| Radio Frequency Range DAB 174 - 240 MHzFM 87.5 - 108 MHz | |
| Weight: 1.36kg | |
| Dimensions: 115(L) x 128mm(W) x 190mm(H) | |
Features and specifications are subject to change without prior notice.
natural_image
Front view of a standard analog multimeter with display and control knobs (no visible text or labels)Enheten
Fjernkontroll

natural_image
Illustration of a cable-wrapped power plug with a terminal connector (no text or symbols)Strømledning

Instruksjonsmanual
Sett forfra

- LCD-skjerm
- INFO-knapp
natural_image
Line drawing of a finger pressing down on a curved object with an arrow indicating force (no text or symbols)NO
Skifte ut batteriet i fjernkontrollen
flowchart
graph TD
    A["Initial component"] --> B["Internal component with plastic housing"]
    B --> C["Assembly steps: first → second → third → final"]
    C --> D["Final product with battery"]
natural_image
Diagram of a device rear panel with headphones, ports, and connectors (no text or symbols)natural_image
Line drawing of a device rear panel connected to a cable with a plug, showing ports and wiring (no text or symbols)NO

Alarm 1: off [00:00]
Alarm 2: off [00:00]

Alarm 1
Enable: Off
Time: 00:00
Mode: Internet radio
Preset: Last listened
Volume: 20

natural_image
Line drawing of a cable tied with a plug, no text or symbols presentNätadapter
Instruktionsbok
Vy framifrån

- HÖRLURS uttag
- AUX IN uttag
-
NÄTVERKS uttag
-
FM-antenn
- DC IN uttag
Fjärrkontroll
natural_image
Line drawing of a finger pressing down on a curved object with an arrow indicating force (no text or symbols)SE
Byta batteri i fjärrkontrollen
flowchart
graph TD
    A["Rectangular case with internal component"] --> B["Internal component with coin symbol"]
    B --> C["Cell with coin symbol"]
    C --> D["Battery-like package with internal components"]
Ansluta extrautrustning
natural_image
Line drawing of a device rear panel connected to a cable with a connector, showing ports and wiring (no text or symbols)
Alarm 1: off [00:00]
Alarm 2: off [00:00]

Alarm 1
Enable: Off
Time: 00:00
Mode: Internet radio
Preset: Last listened
Volume: 20

natural_image
Illustration of a cable tied with a plug and connector (no text or symbols)Verkkolaite

Käyttöopas
natural_image
Line drawing of a finger pressing down on a curved object with an arrow indicating force (no text or symbols)FI
flowchart
graph TD
    A["Initial component"] --> B["Assembly of plastic part with internal contacts"]
    B --> C["Assembly of battery-like component with internal contacts and internal contacts"]
    C --> D["Final assembly with battery-like component"]
Pariston käsittely
natural_image
Line drawing of a device rear panel connected to a cable with a plug, showing ports and wiring (no text or symbols)
DRC (Dynamic Range Compression)
Alarm 1: off [00:00]
Alarm 2: off [00:00]
Alarm 1
Enable: Off
Time: 00:00
Mode: Internet radio
Preset: Last listened
Volume: 20

natural_image
Front view of a standard analog multimeter with display and control knobs (no visible text or labels)Enheden
Fjernbetjening
natural_image
Line drawing of a cable with a plug and connector, no text or symbols presentStrømadapter

Brugervejledning
Produktoversigt
Set forfra

- LCD-skærm
- INFO knap
natural_image
Line drawing of a finger pressing down on a curved object with an arrow indicating force (no text or symbols)DK
Batteriudskiftning for fjernbetjeningen
flowchart
graph TD
    A["Initial component"] --> B["Assembly of battery chip"]
    B --> C["Assembly of battery chip with plastic film"]
    C --> D["Assembly of battery chip with plastic film and battery plate"]
natural_image
Diagram of a device rear panel with earphones and ports, showing internal components and connections (no text or symbols)DK
Forbinde ekstraudstyr
natural_image
Line drawing of a device rear panel connected to a cable with a plug, showing ports and wiring (no text or symbols)DK
Strøm fra batterier
DRC (Dynamic Range Compression)
Alarm 1: off [00:00]
Alarm 2: off [00:00]

Alarm 1
Enable: Off
Time: 00:00
Mode: Internet radio
Preset: Last listened
Volume: 20

This symbol on the product or in the instructions means that your electrical and electronic equipment should be disposed at the end of its life separately from your household waste. There are separate collection systems for recycling in the EU.
For more information, please contact the local authority or your retailer where you purchased the product.
Notes for battery disposal
The batteries used with this product contain chemicals that are harmful to the environment.
To preserve our environment, dispose of used batteries according to your local laws or regulations. Do not dispose of batteries with normal household waste.
For more information, please contact the local authority or your retailer where you purchased the product.
All trademarks are the property of their respective owners and all rights are acknowledged.
NO

- Innhold
- Damage
- Location of Unit
- Temperature
- Naked Flames
- Moisture
- Ventilation
- Safety
- Mains Adapter Cable
- Interference
- Mains Adapter
- Earphones
- Supervision
- Service
- Maintenance
- Unpacking
- Front View
- Rear View
- Remote Control
- Removing the Insulating Strip from the Remote Control
- Battery Replacement for the Remote Control
- Handling the Battery
- Handling the Remote Control
- Remote Control Operation Range
- Connections
- Using Earphones
- Connecting an Auxiliary Equipment
- Mains Power
- Battery Power
- Connecting to Internet
- Connecting to Your Home Network
- Wired network
- Wireless network
- Connecting to Computer
- Powering ON/OFF
- Selecting Modes
- Adjusting the Volume
- MUTE Function
- Connecting to Network
- Internet Radio Operation
- Last Listened
- Station List
- Storing Stations
- Save to Preset
- Recalling a Stored Station
- Recall from Preset
- Music Player Operation
- Media Sharing
- Playback
- Previous and Next
- Fast Rewind and Fast Forward
- Shuffle Mode
- Repeat Mode
- Prune servers
- DAB Operation
- Auto Scan
- Manual Tuning
- Prune Invalid
- DRC (Dynamic Range Compression)
- Station Order
- FM Operation
- Manual Tune
- Scan Setting
- Audio Setting
- AUX IN Operation
- Auxiliary Input
- Sleep Setting (AC Operation Only)
- Alternatively,
- Alarm Clock Setting (AC Operation Only)
- Settings the Alarms
- Alarms
- Alarm 1
- Snooze Function
- Settings
- Equaliser
- Network
- Time/Date
- Language
- Factory reset
- Software update
- Setup wizard
- Info
- Cleaning the Unit
- Hints and Tips
- Specifications
- Sett forfra
- Skifte ut batteriet i fjernkontrollen
- Vy framifrån
- Fjärrkontroll
- Byta batteri i fjärrkontrollen
- Ansluta extrautrustning
- Pariston käsittely
- Produktoversigt
- Set forfra
- DK
- Batteriudskiftning for fjernbetjeningen
- Forbinde ekstraudstyr
- Strøm fra batterier
- Notes for battery disposal
- NO
Brand : Sandstrøm
Model : SVDIRB12E
Category : Radio