S10DPF16 - Digital photo frame Sandstrøm - Free user manual and instructions
Find the device manual for free S10DPF16 Sandstrøm in PDF.


| Type de produit | Digital photo frame |
| Modèle | S10DPF16 |
| Marque | Sandstrøm |
| Taille d'écran | 10 inches |
| Résolution d'écran | 1024 x 768 pixels |
| Rapport d'aspect | 4:3 |
| Luminosité | 160 cd/m² |
| Contraste | 600:1 |
| Connectivité | USB 2.0 x 1, SD/MMC Card Slot x 1 |
| Formats de fichier supportés | JPEG |
| Capacité maximale de stockage externe | Up to 32GB |
| Alimentation | 5V ⎓ 1.5A (via adaptateur secteur fourni) |
| Consommation électrique | 5 W |
| Dimensions (L x P x H) | 225 x 50 x 187 mm |
| Poids net | 359 g |
| Fonctions | Visionnage de photos, diaporama, vue calendrier, réglages |
| Entretien et nettoyage | Nettoyer avec un chiffon doux et sec, débrancher avant nettoyage |
| Sécurité | Utilisation en intérieur uniquement, ne pas exposer à l'humidité ou à des sources de chaleur |
| Pièces détachées et réparabilité | Contacter Partmaster (UK) pour les accessoires et pièces |
| Informations générales | Visitez www.knowhow.com/knowledgebank |
Frequently Asked Questions - S10DPF16 Sandstrøm
User questions about S10DPF16 Sandstrøm
0 question about this device. Answer the ones you know or ask your own.
Ask a new question about this device
Download the instructions for your Digital photo frame in PDF format for free! Find your manual S10DPF16 - Sandstrøm and take your electronic device back in hand. On this page are published all the documents necessary for the use of your device. S10DPF16 by Sandstrøm.
USER MANUAL S10DPF16 Sandstrøm
natural_image
Black-and-white photo of four children playing in a stream, surrounded by trees and rocks (no text or symbols visible)Contents
Safety Warnings....4
Unpacking 6
Product Overview....7
Front & Rear View 7
Top View 7
Preparations....8
Connecting to the Mains Power 8
Inserting a Memory Card / USB Device 8
Selecting the Memory Device 9
Viewing Photos....9
Viewing Thumbnails....9
Calendar View 10
Playing a Slideshow....10
Setting 11
Maintenance 13
Hints and Tips.... 13
Specifications.... 14
Main Unit....14
Mains Adapter 14
Safety Warnings
Read all the instructions carefully before using the unit and keep them for future reference.
Retain the manual. If you pass the unit onto a third party make sure to include this manual.
Check that the voltage marked on the rating label matches your mains voltage.
Damage
- Please inspect the unit for damage after unpacking.
- Do not continue to operate the unit if you are in any doubt about it working normally, or if it is damaged in any way - switch off, unplug from the mains socket and consult your dealer.
Location of Unit
- The unit must be placed on a flat stable surface and not subjected to vibrations.
- Do not place the unit on sloped or unstable surfaces as the unit may fall off or tip over.
- The mains socket must be located near the unit and should be easily accessible.
- This unit is designed for indoor use only.
Temperature
- Avoid extreme degrees of temperature, either hot or cold. Place the unit well away from heat sources such as radiators or gas / electric fires.
- Avoid exposure to direct sunlight and other sources of heat.
Naked Flames
- Never place any type of candle or naked flame on the top of or near the unit.
Moisture
- To reduce the risk of fire, electric shock or product damage, do not expose this unit to rain, moisture, dripping or splashing. No objects filled with liquids, such as vases, should be placed on the unit.
- If you spill any liquid into the unit, it can cause serious damage. Switch it off at the mains immediately. Withdraw the mains plug and consult your dealer.
Mains Adapter


Use mains adapter listed in the user manual only.
- The mains adapter will continue to draw electricity from the mains supply when plugged in the mains socket. In the interests of safety and to avoid unnecessary energy consumption, never leave the adapter plugged in the mains socket while unattended for long periods of time. Disconnect the adapter from the power supply.
- Make sure the unit or unit stand is not resting on top of the mains adapter cable, as the weight of the unit may damage the cable and create a safety hazard.
Interference
- Do not place the unit on or near appliances which may cause electromagnetic interference. If you do, it may adversely affect the working performance of the unit, and cause a distorted sound.
- Supervision
• Children should be supervised to ensure that they do not play with the unit.
- Never let anyone especially children push anything into the holes, slots or any other openings in the case - this could result in a fatal electric shock.
Service
- To reduce the risk of electric shock, do not remove screws. The unit does not contain any user-serviceable parts. Please leave all maintenance work to qualified personnel.
- Do not open any fixed covers as this may expose dangerous voltages.
Maintenance
- Ensure to unplug the unit from the power supply before cleaning.
- Do not use any type of abrasive pad or abrasive cleaning solutions as these may damage the unit's surface.
- Do not use liquids to clean the unit.
Note about LCD screen
- The LCD screen is manufactured using high-precision technology. However, some tiny black points and/or bright points (red, blue or green in colour) may constantly appear on the LCD screen. These points are generated in the manufacturing process and are normal.
Thank you for purchasing your new product.
We recommend that you spend some time reading this instruction manual in order that you fully understand all the operational features it offers. You will also find some hints and tips to help you resolve any issues.
Read all the safety instructions carefully before use and keep this instruction manual for future reference.
Unpacking
Remove all items from the packaging. Retain the packaging. If you dispose of it please do so according to local regulations.
The following items are included:

natural_image
Blank rectangular frame with rounded corners (no text or symbols)Main Unit

Mains Adapter

Instruction Manual

If items are missing or damaged, please contact Partmaster (UK only).
Tel: 0344 800 3456 for assistance.
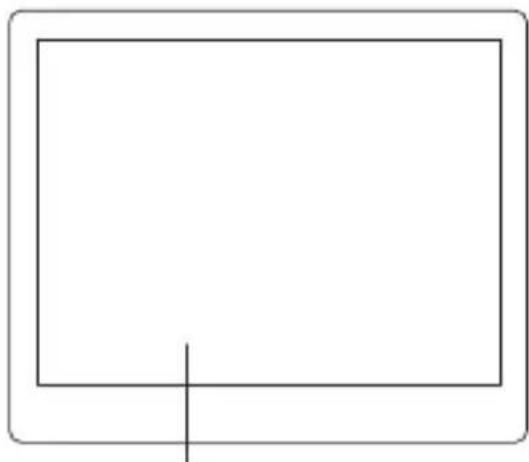
Front & Rear View
natural_image
Simple line drawing of a rectangular frame with a vertical line at the bottom (no text or symbols)- LCD Display
- SD / SDHC / MMC card slot

- USB Port
- DC IN socket
Top View

1. Button
• To access the menu.
- Return to previous screen.
2. Button
- Return to main menu.
- Switch the unit on/off.
3. ▶||Button
Start/pause/resume playback.
4. Buttons
- Navigate Left/Right on the menu screen and adjust certain settings.
▲▼ Buttons
- Navigate Up/Down on the menu screen and adjust certain settings.
Preparations
Connecting to the Mains Power
- Connect the supplied mains adapter to the unit, and then plug into the mains socket.
- Press Ⓗ to switch the unit on.
- Press and hold ⬆ to switch the unit off.

natural_image
Simple line drawing of a device connected to a wall-mounted power plug (no text or symbols)Inserting a Memory Card / USB Device
This frame can only play images (JPEG). If files in other formats are played, please use your computer to convert the images to a readable format.
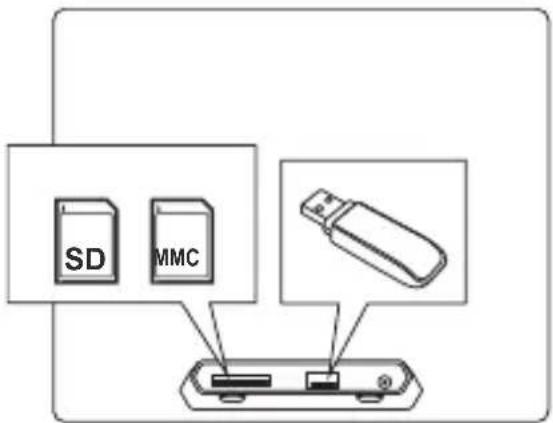

- The unit can only play image (JPEG file format) in USB or CARD operation. All other type file will not be shown.
- If your USB device or memory card is not loaded with images, the format of your USB device or memory card might not be compatible with the unit.
• This unit supports USB versions 1.1, 2.0 and 3.0. - The unit can support USB devices and memory cards with up to 32GB of memory.
- The unit may not be compatible with all USB devices and memory cards, this is not an indication of a problem with the unit.
Selecting the Memory Device
The unit can only display one memory device's contents at a time. If more than one memory device is connected, select the desired memory device to be displayed by pressing ▲ the memory device screen.
When a memory device is inserted into the unit, it will be automatically enter thumbnails screen.
- Press ⏻ to enter the main menu.
- Press ▲▼ to select the desired memory device, then press ▶to confirm.

Viewing Photos
Viewing Thumbnails
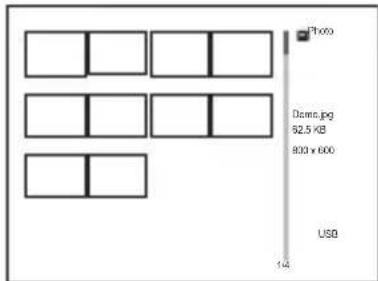
In Photo screen, the photos on the selected memory device can be displayed on the screen as thumbnails.
- Press ◀ to select Photo on the main menu and press ▶ to enter thumbnails screen.
- The files / folders are displayed on the screen as playlist.
- To navigate through the thumbnails or move to the next or previous page of the thumbnails, press ◀ ▲ ▼ ▶
- Press ↩ or ↗ to exit.

Playing a Slideshow
In thumbnails screen, select a photo and then press ▶to start a slideshow from the current photo.
- To pause the slideshow and view a single photo, press ▶To resume the slideshow, press ▶again.
- Press → to exit the slideshow and view the photos in thumbnails.
While in pause mode:
- To skip to previous or next photo, press ▲▼.
- Press → to return or press to exit to the main menu.
Calendar View
- Press ◀▶ select Calendar on the main menu and press ▶ to confirm.
- Display will show time / calendar with photo slideshow.
- Press ▲▼ to select next/previous month.
- Press ◀▶to select next/previous photo.
- Press ⊃ or to exit.


Setting
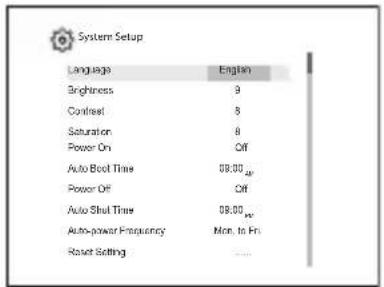
The setting screen lets you customise and configure your unit.
- Press ◀ to select Setting on the main menu and then press ▶ to confirm. The setup menu will be displayed.
- Press ▲▼ to select a setup menu then press ▶∥ to confirm.
- Press ▲▼ to select a setting option. Press ◀▶ to adjust setting, then press ▶to confirm.
- Press → to return or press → to exit to the main menu.


| Photo Setup | |
| Display Mode Select initial display mode. | |
| Display Ratio Select the aspect ratio of the viewing screen. | |
| Slideshow Duration Select interval time for slideshow. | |
| Slideshow Repeat Select a repeat mode.Single repeat mode is only applicable for single window slide mode. | |
| Slideshow Effect Select the style of photo transition while playing a slideshow. | |
| Calendar Setup | |
| Date Set the date. | |
| Set Time Format Select the time format. | |
| Clock Time Set the time. | |
| System Setup | |
| Language Select the system display language. | |
| Brightness Adjust the display brightness. | |
| Contrast Adjust the display contrast. | |
| Saturation Adjust the display saturation. | |
| Power On Enable/Disable auto power on. | |
| Auto Boot Time Set a timer on. | |
| Power Off Enable/Disable auto power off. | |
| Auto Shut Time Set a timer off. | |
| Auto-power Frequency Select the frequency for unit wake up. | |
| Reset Setting Select to reset all settings to default. | |
| Version Display current software version. | |
Cleaning the Unit

Ensure the unit is fully unplugged from the mains socket before cleaning.
• To clean the unit, wipe the case with a slightly moist, lint-free cloth.
- Do not use any cleaning fluids containing alcohol, ammonia or abrasives.
- Do not spray aerosol at or near the unit.
Hints and Tips
If a problem occurs, it may often be due to something very minor. The following table contains various tips:
| Problem Solution | |
| No power • Ensure the mains cable is connected securely at both ends.• Make sure that the ON mode is selected. | |
| The image is distorted or blurred | • Resolution of the image is too low. Try playing a file with a higher resolution. |
| Photo display seems slow | • Use lower resolution photos. |
| The unit does not respond when pressing any buttons | • The unit may freeze up during use. Switch the unit off and then on again at the mains socket to reset the unit. |
| Unable to insert USB device or memory card | • Insert the USB device or memory card the other way round. |
| Cannot play some files from USB device or memory card | • Check the file format.• Only JPEG file formats are supported.• Check if the USB device or memory card is compatible. |
Specifications
Main Unit
| Model S10DPF16 | |
| Power Input 5V | ==1.5A |
| Power Consumption 5 W | |
| Display Digital TFT LCD | |
| Panel Size 10 inches | |
| Aspect Ratio 4:3 | |
| Contrast 600:1 | |
| Brightness 160 cd/m | 2 |
| Resolution 1024 x 768 pixels | |
| Connectivity USB 2.0 x 1, SD/MMC Card Slot x 1 | |
| Supported Peripheral Devices | SD, SDHC, MMC,USB flash drive |
| Supported File Format JPEG | |
| Dimension (L x W x H) 225 x 50 x 187 mm | |
| Net Weight 359g |
Mains Adapter
| Model GKYPS0150050EU1 | |
| Manufacturer SHENZHEN GUANGKAIYUANTECHNOLOGY CO., LTD. | |
| Power Supply Input: 100-240V~ 50/60Hz 0.5AOutput: 5V = 1.5A | |

For general information about this appliance and handy hints and tips, please visit www.knowhow.com/knowledgebank or call 0344 561 1234.

Visit Partmaster.co.uk today for the easiest way to buy electrical spares and accessories. With over 1 million spares and accessories available we can deliver direct to your door the very next day. Visit www.partmaster.co.uk
or call 0344 800 3456 (UK customers only). Calls charged at National Rate.
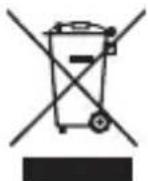
The symbol on the product or its packaging indicates that this product must not be disposed of with your other household waste. Instead, it is your responsibility to dispose of your waste equipment by handing it over to a designated collection point for the recycling of waste electrical and electronic equipment. The separate collection and recycling of your waste equipment at the time of disposal will help conserve natural resources and ensure that it is recycled in a manner that protects human health and the environment.
For more information about where you can drop off your waste for recycling, please contact your local authority, or where you purchased your product.
DSG Retail Ltd. (co. no. 504877)
1 Portal Way, London, W3 6RS, UK
IB-S10DPF16-160504V1
- Contents
- Safety Warnings....4
- Unpacking 6
- Product Overview....7
- Preparations....8
- Viewing Photos....9
- Calendar View 10
- Setting 11
- Maintenance 13
- Hints and Tips.... 13
- Specifications.... 14
- Safety Warnings
- Damage
- Location of Unit
- Temperature
- Naked Flames
- Moisture
- Mains Adapter
- Interference
- Service
- Maintenance
- Note about LCD screen
- Thank you for purchasing your new product.
- Unpacking
- Front & Rear View
- Top View
- Button
- Button
- ▶||Button
- Buttons
- ▲▼ Buttons
- Preparations
- Connecting to the Mains Power
- Inserting a Memory Card / USB Device
- Selecting the Memory Device
- Viewing Photos
- Viewing Thumbnails
- Playing a Slideshow
- Calendar View
- Setting
- Cleaning the Unit
- Hints and Tips
- Specifications
Brand : Sandstrøm
Model : S10DPF16
Category : Digital photo frame