Basic Pro - Fitness Equipment Joy Sport - Free user manual and instructions
Find the device manual for free Basic Pro Joy Sport in PDF.


| Product Type | Multi-Function Home Gym |
| Brand | Joy Sport |
| Model | Basic Pro |
| Dimensions (approx.) | 150 x 80 x 200 cm |
| Weight (approx.) | 80 kg |
| Maximum User Weight | 120 kg |
| Material | Steel frame, rubber pads |
| Assembly Required | Yes (detailed manual included) |
| Main Exercises | Leg extension, arm curl, chest press, pec deck, shoulder press |
| Weight Stack | Plate-loaded; estimated max 50 kg |
| Safety Features | Rubber caps, secure bolts, bumper pads |
| Maintenance | Lubricate moving parts; check bolts regularly |
| Warranty | 12 months (manufacturing defects) |
| Country of Import | Netherlands (Fitness-Import) |
Frequently Asked Questions - Basic Pro Joy Sport
User questions about Basic Pro Joy Sport
0 question about this device. Answer the ones you know or ask your own.
Ask a new question about this device
Download the instructions for your Fitness Equipment in PDF format for free! Find your manual Basic Pro - Joy Sport and take your electronic device back in hand. On this page are published all the documents necessary for the use of your device. Basic Pro by Joy Sport.
USER MANUAL Basic Pro Joy Sport
natural_image
Line drawing of a gym machine with adjustable arm and legs (no text or symbols)Joy Sport Importeur
Fitness-Import
Timmermannsweg 46
5813 AP Ysselsteyn (LB)
info@joysport.nl
www.joysport.nl
Geachte klant,
5813 AP Ysselsteyn (LB)
info@joysport.nl
www.joysport.nl
STAP 2
STAP 3
STAP 5

USER MANUAL
Joy Sport
Basic Pro

natural_image
Line drawing of a gym machine with adjustable arm and legs (no text or symbols)Joy Sport Importer
Fitness-Import
Timmermannsweg 46
5813 AP Ysselsteyn (LB)
info@joysport.nl
www.joysport.nl
Dear customer,
We want to thank you for having chosen a JOY SPORT product, and wish you a lot of fun and success during training with your JOY SPORT exercisers.
Please note and follow the enclosed safety and assembly instructions carefully.
If you have questions please do not hesitate to contact us.
Guarantee,
This guarantee covers all manufacturing and material flaws on JOY SPORT products purchased from an authorized JOY SPORT dealer for a period of 12 months from purchase.
If you wish to make a claim under the guarantee, JOY SPORT shall be entitled to repair or replace the defective unit or part at its discretion.
The owner of the unit must pay for the transport costs and any dealer's workshop costs.
To make a claim under the guarantee, take your guarantee card to your dealer. The dealer will then take the necessary action.
If this is not possible, contact your national JOY SPORT importer.
The following are not covered by the guarantee : normal wear and tear and the consequences of improper treatment or damage caused by the purchaser or third persons and faults which are due to other circumstances.
Claims may not be made under the guarantee if modifications have been made to the original construction or equipment or if JOY SPORT original parts were not used to repair the unit.
In no event the manufacturer shall be liable for incidental or consequential losses, damages or expenses in connection with exercise products.
Fitness-Import
Timmermannsweg 46
5813 AP Ysselsteyn (LB)
info@joysport.nl
www.joysport.nl
- Place rubber cap (42) into both ends of left base (3).
- Insert guide rods (2) to left base (3).
- Attach main base (1) to left base (3) fasten all bolts by using tool.
- Attach vertical beam (10) to mainbese (1).

STEP 2
-
Attach the rubber dount (9) into the guide rod (2).
-
Slide the weight plate (8) and top plate (6) over guide rod (2).
Groove for selector pin on weight plates should face down.
-
Install 1" round bushing (38) into the selector shaft (5) with pin (47) then attach the selector shaft (5) into the top plate (6).
-
Place 50mm square cap (41) into both ends of front base (1).
-
Place rubber cap (70) into both ends of right base (4).
-
Attach right base (4) to main base (1) as shown.

STEP 3
- Place 50mm square cap (41) into both ends of top cross beam (12).
- Attach top cross beam (12) onto the vertical beam (10) from top side and connect the guide rods (2) to the top cross beam (12) as shown.
- Attach rubber bumper (37) to the vertical beam (10).
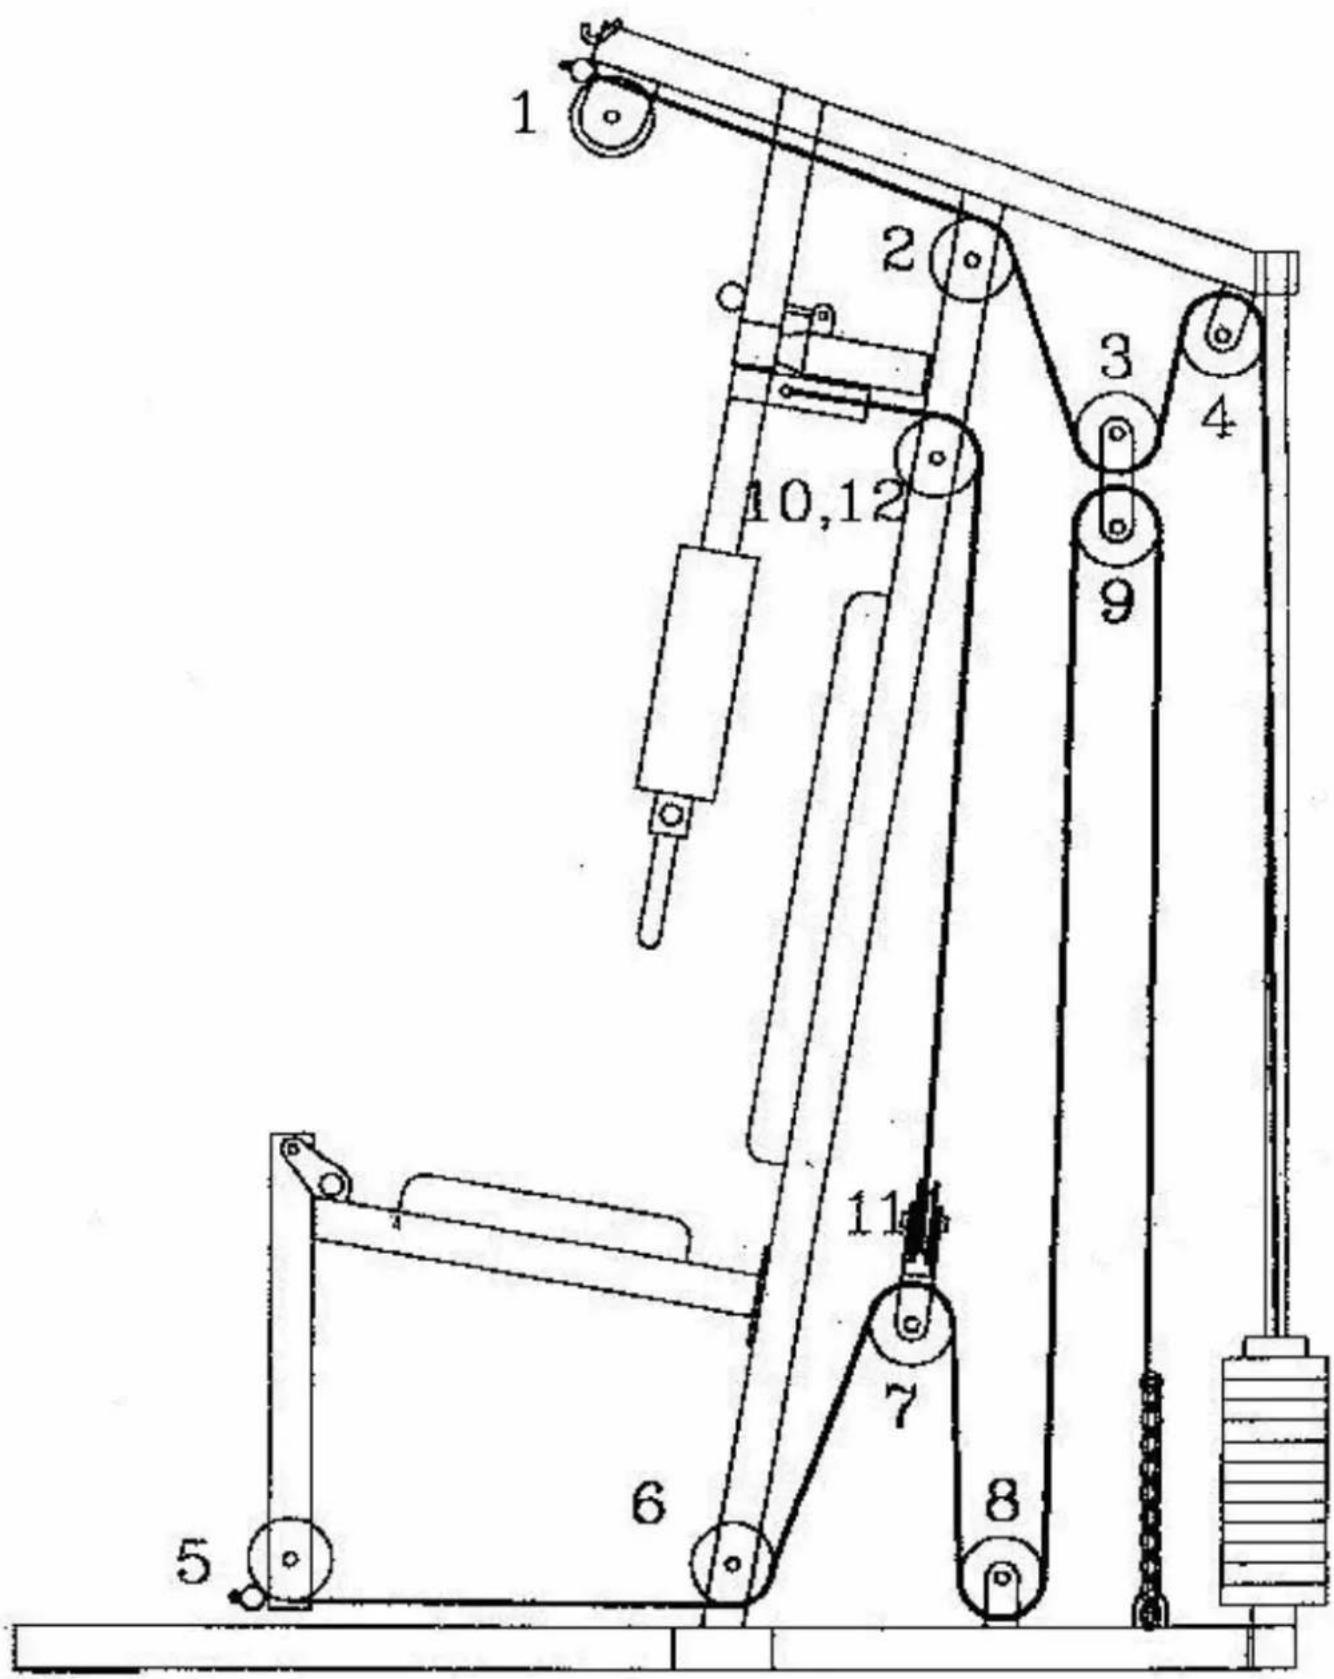
- Attach pulley block (21) to the vertical beam (10), use M8* 65mm bolt (57) with M8 washer (69) and M8 nuts (64).
- Intsall press pin (18) to the vertical beam (10) with M8* 65mm bolt (57), M8 washer (69) and M8 nuts (64).

STEP 4
- Place 50mm square cap (41) into both ends of leg extension / arm curl bar (14).
- Attach seat assembly (13) to vertical beam (10), with bolts (50), nuts (63) and washers (68) asshown.
- Attach leg extension / arm curl bar (14) to seat assembly (13).
- Attach back seat (20) to vertical beam (10) as shown.
- Attach seat (19) to seat assembly (13) as shown.
- Slide pad holders (32) into the hole provided.
- Slide leg extension/curl pads (29) onto pad holders (32).
- Place 1" round cap (40) into pad holders (32).

STEP 5
- Place 50mm square cap (41) into both ends of press bar (15).
- Install oil bushing (71) into the press bar (15) as shown.

STEP 6
- Attach press bar (15) to top cross beam (12) with press bar shaft (46) and oil bushing (71) washer (65) bolt (61) as shown.
- Attach pec deck pads (28) and hand grip (36) slide onto pec deck arm (16 & 17).
- Attach handle pipe (43) and hand grip (36) to pec deck arm (16 & 17) with bolt (54), washer (68) as shown.
- Install pec deck arm (16 & 17) to press bar (15) with washer (65) and nylon nuts (61) as shown.


Brand : Joy Sport
Model : Basic Pro
Category : Fitness Equipment