WMA 3.2 - Wall mount Andersson - Free user manual and instructions
Find the device manual for free WMA 3.2 Andersson in PDF.


| Product Type | Wall Mount |
| Brand | Andersson |
| Model | WMA 3.2 |
| VESA Compatibility | 200x100 to 800x600 mm |
| Maximum Weight Capacity | 60 kg (estimated) |
| Material | Steel |
| Color | Black |
| Tilt Range | -2° to +10° |
| Swivel Range | ±180° |
| Rotation Range | ±90° |
| Leveling Adjustment | ±3° |
| Distance from Wall | 59 to 450 mm |
| Wall Plate Dimensions | 800 x 630 mm (approx.) |
| Depth of Wall Plate | 47.1 mm |
| Mounting Types | Solid concrete, Wood stud |
| Included Accessories | Bubble level, locking cord, cable management clips, screws, washers, wrench |
| Screen Sizes Supported | Up to 914 mm (36 in.) diagonal (estimated) |
| Special Features | Locking mechanism, magnetic removable bubble level |
| Warranty | Not specified |
Frequently Asked Questions - WMA 3.2 Andersson
User questions about WMA 3.2 Andersson
0 question about this device. Answer the ones you know or ask your own.
Ask a new question about this device
Download the instructions for your Wall mount in PDF format for free! Find your manual WMA 3.2 - Andersson and take your electronic device back in hand. On this page are published all the documents necessary for the use of your device. WMA 3.2 by Andersson.
USER MANUAL WMA 3.2 Andersson
natural_image
Black metal mechanical frame with attached wires, no visible text or symbolsCopyright
This manual is the copyright of CI no 556520-4137. No part of this manual may be revised, copied or transmitted in any way without written permission from CI no 556520-4137.
Statement
This manual does not provide any warranty or related declarations. All information in this manual including the product specification, pictures and literatures is just for reference, CI no 556520-4137 reserves the rights to update contents of this manual without further notice.
A note about recycling
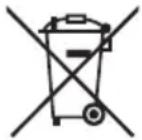
This product's packaging materials are recyclable and can be reused. This product and the accessories packed together are the applicable product to the WEEE directive except batteries. Please dispose of any materials in accordance with your local recycling regulations. When discarding the unit, comply with your local rules or regulations. Batteries should never be thrown away or incinerated but disposed of in accordance with your local regulations concerning chemical wastes.
The Ground Truth image displays a single, solid horizontal line. According to Rule 2 (UNDERSCORE & LINE RULES), this is a stylistic or background line, not a placeholder underscore. Therefore, the OCR result must ignore it and output nothing or only meaningful text. The provided OCR content is "____", which consists of four underscores. This is an incorrect interpretation of the line as a placeholder, violating the rule that stylistic lines must be ignored. The OCR has hallucinated underscores where none should exist based on the GT's visual context. Hence, the OCR result is inconsistent with the Ground Truth.
Upphovsrätt

The Ground Truth image displays a single, solid horizontal line. According to Rule 2 (UNDERSCORE & LINE RULES), this is a stylistic or background line, not a placeholder underscore. Therefore, the OCR result must ignore it and output nothing or only meaningful text. The provided OCR content is "____", which consists of four underscores. This is an incorrect interpretation of the line as a placeholder, violating the rule that stylistic lines must be ignored. The OCR has hallucinated underscores where none should exist based on the GT's visual context. Hence, the OCR result is inconsistent with the Ground Truth.

Opphavsrett

The Ground Truth image displays a single, solid horizontal line. According to Rule 2 (UNDERSCORE & LINE RULES), this is a stylistic or background line, not a placeholder underscore. Therefore, the OCR result must ignore it and output nothing or only meaningful text. The provided OCR content is "____", which consists of four underscores. This is an incorrect interpretation of the line as a placeholder, violating the rule that stylistic lines must be ignored. The OCR has hallucinated underscores where none should exist based on the GT's visual context. Hence, the OCR result is inconsistent with the Ground Truth.
English
Safety Instructions 4
Dimensions 4
Overview and Component Checklist 5
Step 1A - Mount on Solid Concrete 6
Step 1B - Mount on Wood Stud Wall 6
Step 2 - Attaching Brackets to Screen 7
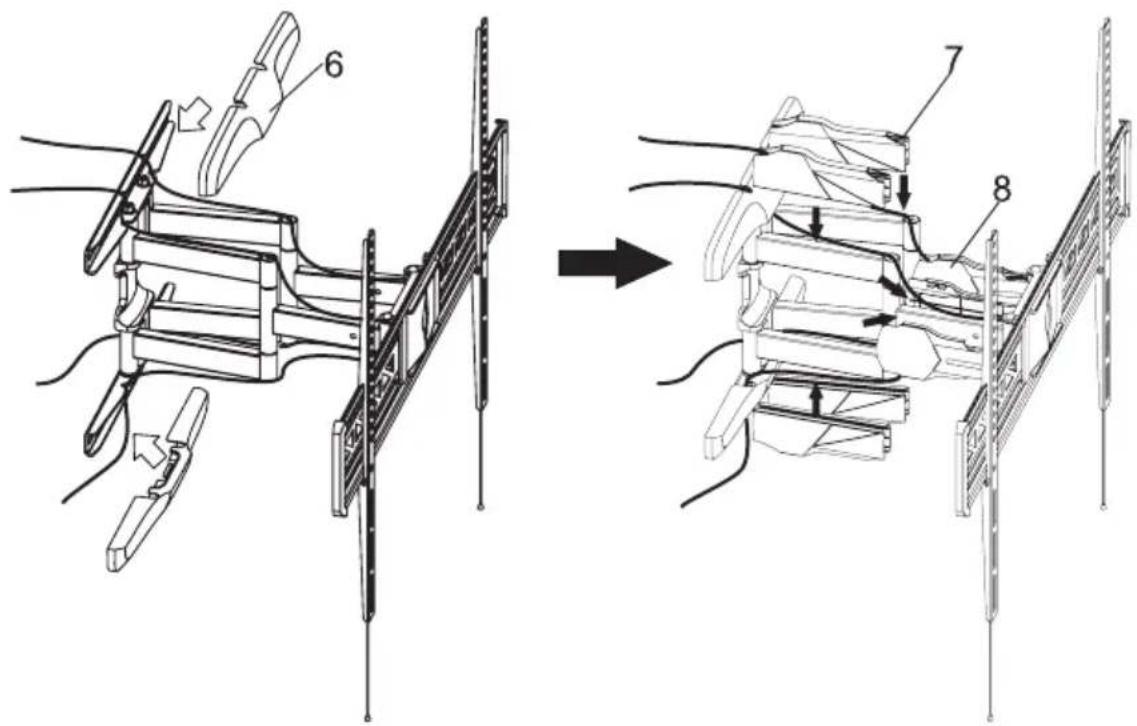
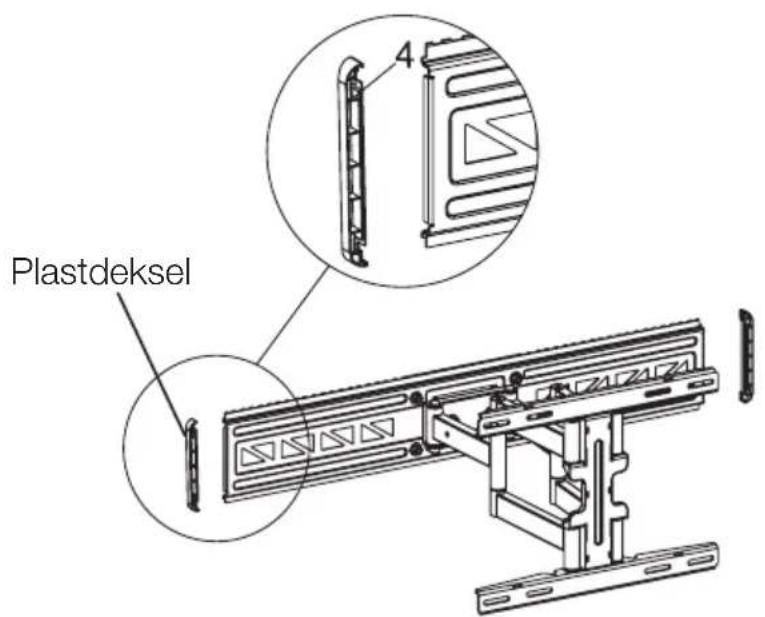
Step 3 - Install Side Plastic Covers 7
Step 4 - Hang the TV Onto the Wall Plate 8
Step 5 - Adjustment 8-9
Svenska
→ Do not begin the installation until you have read and understood all the instructions and warnings contained in this installation sheet. If you have any questions regarding any of the instructions or warnings, please contact customer service for support.
→ This mounting bracket was designed to be installed and utilised ONLY as specified in this manual. Improper installation of this product may cause damage or serious injury.
→ This product should only be installed by someone with good mechanical ability who has basic building experience and fully understands this manual.
→ Make sure that the supporting surface will safely support the combined weight of the equipment and all attached hardware and components
→ If mounting to wood wall studs, make sure that mounting screws are anchored into the center of the studs. The use of a stud finder is highly recommended.
→ Always use an assistant or mechanical lifting equipment to safely lift and position the equipment.
→ Tighten screws firmly, but do not over tighten. Over tightening can cause damage to the items, greatly reducing their holding power.
→ This product is intended for indoor use only. Using this product outdoors could lead to product failure and personal injury.
→ Check that the bracket is secure and safe to use at regular intervals (at least every third month).
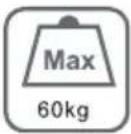
→ Do not exceed maximum listed weight capacity. Serious injury or property damage may occur!
Dimensions

Overview and Component Checklist
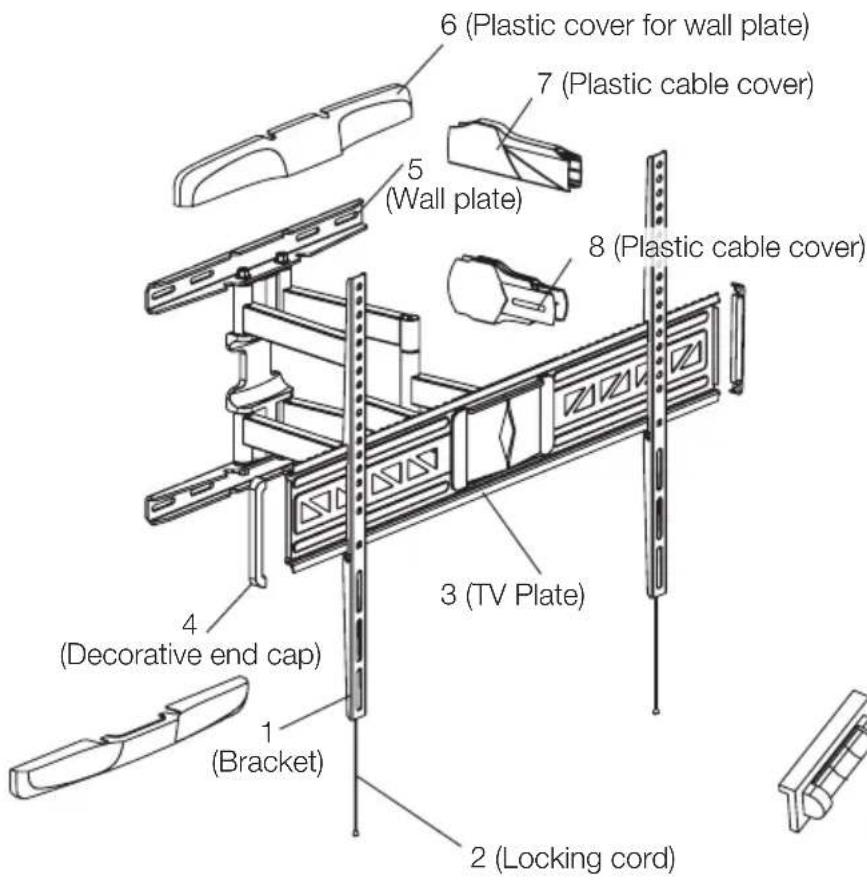
Important: Ensure that you have received all parts according to the component checklist prior to installation. If any parts are missing or faulty, contact customer service for support.
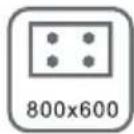
VESA:
200×100- 800×600




Magnetic removable bubble level

M6X16MM A (4PCS)

M8X16MM B1 (4PCS)

M8X25MM B2 (4PCS)

M10X16MM C (4PCS)
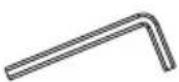
6x6 Wrench

M8 Washer D (10PCS)

M10 Washer E (4PCS) F


Step 1A - Mount on Solid Concrete
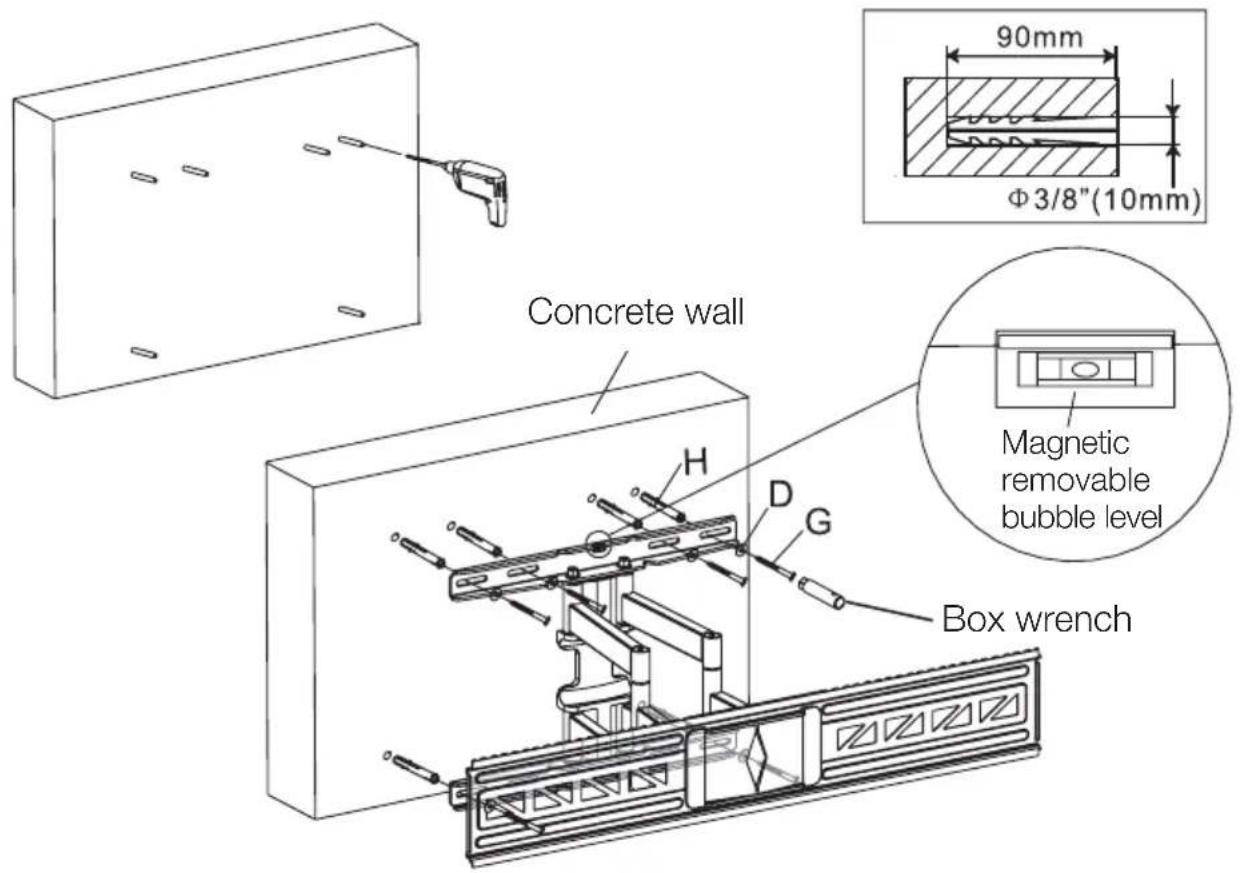
Step 1B - Mount on Wood Stud Wall

Step 2 - Attaching Brackets to Screen
Attaching to screen with flat back:

Attaching to screen with curved back or obstruction:

Washers:

: (D) Small hole for M6 and M8 screws : (E) Medium hole for M10 screws
Step 3 - Install Side Plastic Covers

Step 4 - Hang The TV Onto The Wall Plate
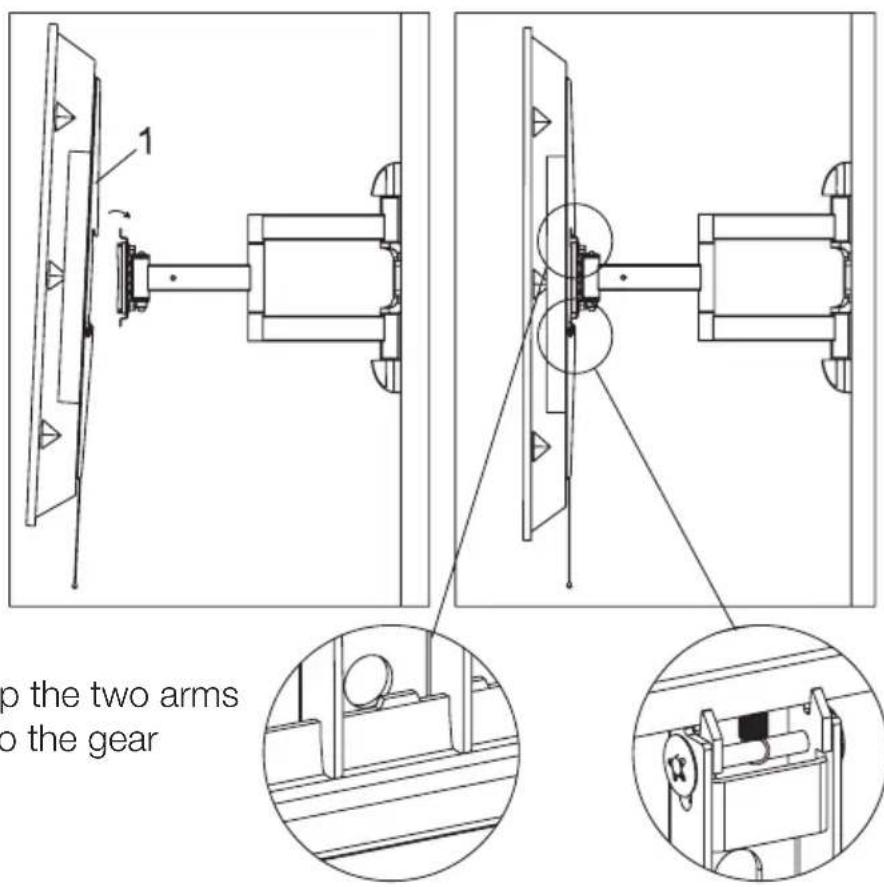
Clip the two arms into the gear
Step 5 - Adjustment

- Press the brackets after you put them on the wall plate. They will be locked onto the wall plate.

natural_image
Pure diagram of a vertical panel with an arrow pointing to the left side (no text or symbols)- Pull down two strings together to unlock the brackets from the wall plate. Then you can take the brackets down.

natural_image
Diagram showing two pulley systems with downward arrows indicating force or movement (no text or symbols)- Open this button to cut the strings if you wish to make them shorter.
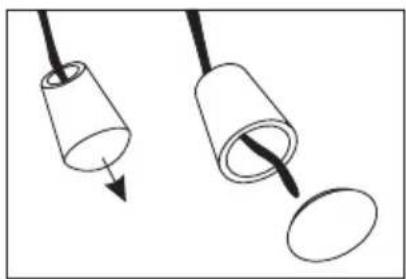
natural_image
Diagram showing two cylindrical objects with arrows pointing to a separate circular object (no text or symbols)Brickor:


natural_image
Pure diagram of a vertical panel with a black arrow pointing to the left side (no text or symbols)natural_image
Two hand-pulling diagrams showing downward force application on a device (no text or symbols)natural_image
Diagram showing two cylindrical objects with arrows indicating direction, one emitting a droplet (no text or symbols)Advarsel
Skiver

: (D) lite hull for M6- og M8-skruer : (E) medium hull for M10-skruer
Steg 3 - Feste plastdeksel

natural_image
Pure diagram of a vertical panel with a black arrow pointing to the left side (no text or symbols)natural_image
Two hand-painted diagrams showing a pulley system with weights and downward arrows (no text or symbols)
natural_image
Diagram showing two cylindrical objects with arrows indicating direction, one emitting a droplet (no text or symbols)- Copyright
- Statement
- A note about recycling
- Upphovsrätt
- Opphavsrett
- English
- Svenska
- Dimensions
- Overview and Component Checklist
- VESA:
- Step 2 - Attaching Brackets to Screen
- Step 3 - Install Side Plastic Covers
- Step 4 - Hang The TV Onto The Wall Plate
- Step 5 - Adjustment
- Advarsel
- Steg 3 - Feste plastdeksel
Brand : Andersson
Model : WMA 3.2
Category : Wall mount