
HRS 3400 - Receiver XORO - Free user manual and instructions
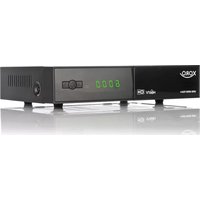
Find the device manual for free HRS 3400 XORO in PDF.


| Product Type | DVB-S Digital Satellite Receiver |
| Dimensions (W x H x D) | 220 x 120 x 43 mm |
| Net Weight | 0.8 kg (including remote control) |
| Power Supply | AC 100–265 V, 50/60 Hz |
| Power Consumption (Active) | < 18 W |
| Power Consumption (Standby) | < 1 W |
| Input Frequency Range | 950 – 2150 MHz |
| LNB Power Output | 13/18 V, max. 500 mA |
| Symbol Rate | 2 – 45 Mbps |
| Video Decoding | MPEG-2 MP@ML, PAL 720×576, NTSC 720×480 |
| Audio Decoding | MPEG-1 Layer 2 (MP2), MP3, WMA; Sample rates 32, 44.1, 48 kHz |
| Video Output | 2× SCART (TV & VCR), RGB or CVBS selectable |
| Audio Output | Coaxial digital (RCA) |
| USB Port | USB 2.0 High Speed |
| Card Reader | SD, SDHC, MMC, MS |
| Channel Memory | 4800 TV & Radio stations |
| Recording | Direct to USB or card (PVR Ready) |
| Multimedia Playback | JPEG, MP3, WMA, MPEG-1/2/4 (AVI, MPG, MPEG) |
| EPG | 7-day Electronic Program Guide |
| Parental Control | Channel lock, menu lock, parental rating |
| Accessories Included | Remote control, user manual, international warranty card |
Frequently Asked Questions - HRS 3400 XORO
User questions about HRS 3400 XORO
0 question about this device. Answer the ones you know or ask your own.
Ask a new question about this device
Download the instructions for your Receiver in PDF format for free! Find your manual HRS 3400 - XORO and take your electronic device back in hand. On this page are published all the documents necessary for the use of your device. HRS 3400 by XORO.
USER MANUAL HRS 3400 XORO
FREE TO CHOOSE INNOVATIONS
XORO®
DVB-5 Receiver with USB, 5D Card Reader and PVR Ready
HR 3400


natural_image
Black YORO Digi TV receiver with digital display and control buttons (no readable text beyond branding)natural_image
Completely blank white image with no visible content, text, or symbols.


[Non-Text]


Inhaltsangabe

natural_image
Symbol of a trash bin crossed out by two diagonal lines (no text or numbers present)Deutsch
natural_image
Green recycling symbol with three chasing arrows forming a triangle (no text or labels)natural_image
Circular logo with a green and yellow spiral design, no text or symbols present.natural_image
Technical line drawing of a mechanical assembly with no visible text or symbols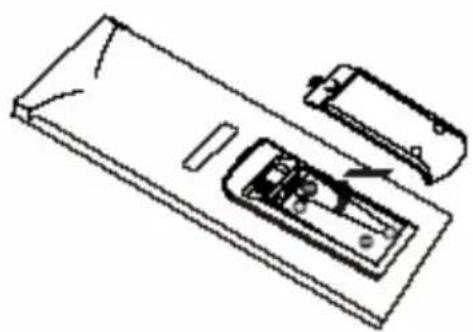
natural_image
Line drawing of a device with internal components and a separate car (no text or symbols)
Audio Srache (Audio Language)
Zeitzone (Time Zone)
| Program Info | |||
| Satellite Name | ASTRA 1E,1F,1G | ||
| Program Name | arte | ||
| Program No | 0004 | Down Frequency | 10742 |
| Local Frequency | 9750 | Symbol Rate | 21995 |
| Polarity | H | Video PID | 0401 |
| 22K Tone | OFF | Audio PID | 0402 |
| DISEqC | OFF | ||
| Strength | 86% | ||
| Quality | 75% | ||
natural_image
Close-up of a metallic electrical connector with two mounting holes (no visible text or symbols)Unterstützte Medien
AUS
OTR (One Button Recording)
TV
Installation
High Frequency Tuner
Input Frequency Range 950 – 2150 MHz
LNB Power: 13 / 18 V with 500 mA
RF Input Connector: IEC 60196-24 (F type)
RF Loop through Connector IEC 60196-24 (F type)
Input impedance: 75Ω
Waveform: QPSK
Symbol rate: 2 - 45 Mbps
Video, Audio decoding
Video decoding: ISO/IEC13818-2 MPEG2 (MP@ML) Compatible
Video resolution: PAL 720 × 576
NTSC 720 x 480
Aspect Ratio: 4:3 PS & LB, 16:9
Videotext: Support DVB-ETS300472
Audio decoding: ISO 11172-3
Audio Sample rate: 32, 44.1, 48 KHz
Power Specification
Input Power: AC 100—240 Volt, 50/60 Hz
Power consumption: < 18 Watt
Stand-By consumption: < 1 Watt
Ambient condition
Temperature: 0—40° Celsius
Humidity: 90%
Ports
USB Port: USB 2.0
Card Reader: SD, SDHC, MMC and MS cards
Video: 2x SCART (TV & VCR)
Audio: Coaxial RCA
Device
Net Weight: 0.80 Kg (including FB)
Unit size: 220 x 120 x 43 mm
Hinweis:
Accessories / Features 8
Control Element
Front Panel 9
Rear Panel 9
Remote Control
Insert battery and operation 10
Buttons 11
Connection
TV / Aerial 12
External audio decoder or amplifier 13
First Time Installation
First Time Installation 14
Operation
Important buttons and there functions 22
Multimedia Player
USB Port 28
My Album 29
My Music 30
My Movies 31
Recorder
Recording Preferences 34
Recording Device 35
Recorded List 36
Time Shift 37
Setup
Main Menu 38
T V 3 9
Multimedia 43
Settings 43
Accessories 48
Troubleshooting 49
Specification 5 1
Glossary 5 2
SAFETY INFORMATION

English

The lightning flash with an arrowhead symbol within an equilateral triangle is intended to alert the user of the presence of un-insulated "dangerous voltage" within the product's enclosure that may be of sufficient magnitude to constitute a risk of electric shock to persons.

The exclamation point within an equilateral triangle is intended to alert the user of the presence of important operating and maintenance (servicing) instructions in the literature accompanying the appliance.
THIS DEVICE COMPLIES WITH PART 15 OF THE FCC RULES. OPERATION IS SUBJECT TO THE FOLLOWING TWO CONDITIONS: (1) THIS DEVICE MAY NOT CAUSE HARMFUL INTERFERENCE, AND (2) THIS DEVICE MUST ACCEPT ANY INTERFERENCE RECEIVED. INCLUDING INTERFERENCE THAT MAY CAUSE UNDESIRED OPERATION.
User Manual
- All the safety and operating instructions should be read before the product is operated.
- Retain Instructions - The safety and operating instructions should be retained for future reference.
- All warnings on the product and in the operating instructions should be adhered to.
- All operating and use instructions should be followed.
Power Supply
- Never touch the plug with wet hands.
- If you want to pull the plug out of the plug socket, always pull directly on the plug. Never pull on the cable as it could tear.
- Make sure that the power cable is not bent, caught or run over and that it does not come into contact with heat sources.
- Make sure that the power cable is not wound around the device while in operation.
- Never place the machine on the power cable while it is being operated.
- Only use extension cables that are designed for the power consumption level of the machine.
- Keep the appliance away from rain and any moisture.
- Only operate the machine if the electrical voltage stated on the type plate beneath the machine agrees with the voltage on your plug socket. The wrong voltage can destroy the machine.
- Do not stand vases etc. on the appliance. Water could seep into the appliance.
- Do not open the appliance.
- Pull out the mains plug if the appliance is not to be used over a longer period of time.
- Take care that nobody can trip over the power supply cable.
Operation and Position
- Reception of digital satellite channels (DVB-S).
- Do not connect accessories on the box which are not defined by the manufacture.
-
Do not place this product on an unstable cart, stand, tripod, bracket, or table. The product may fall, causing serious injury to a child or adult, and serious damage to the product. Use only with a cart, stand, tripod, bracket, or table recommended by the manufacturer, or sold with the product. Any mounting of the product should follow the manufacturer's instructions, and should use a mounting accessory recommended by the manufacturer.
-
A product and cart combination should be moved with care. Quick stops, excessive force, and uneven surfaces may cause the product and cart combination to overturn.
-
The device is able to show a still image on the TV screen or monitor over an unlimited period of time. This can cause damage to the screen. It is therefore advisable to activate the screen saver. Or switch the player off, if the device is not in use.
-
Do not uses the device permanent in the 4:3 mode. This can cause damage to the TV screen.
-
Do not increase the volume when the box is just playing very quiet sections. This cold damage the speaker if very loud passages starts all of a sudden after the quiet section.
-
Switch the box off by the Off/On switch if it is not going to used for a longer period of time. Please unplug the power cable from the wall outlet.
-
Disconnect the main plug during thunderstorms.
-
Slots and openings in the cabinet are provided for ventilation and to ensure reliable operation of the product and to protect it from overheating, and these openings must not be blocked or covered.
-
The openings should never be blocked by placing the product on a bed, sofa, rug, or other similar surface.
-
This product should not be placed in a built-in installation such as a bookcase or rack unless proper ventilation is provided or the manufacturer's instructions have been adhered to.
-
Protect the device against weather influences, moistures and high temperature.
-
Never spill liquid of any kind on the product.
-
Do not expose the device and the remote control to direct sunlight.
USB Port
Due to the legal requirements of CE-conformity, the customer is asked to only connect USB-Sticks to the USB port
Defect
- Servicing - Do not attempt to service this product yourself as opening or removing covers may expose you to dangerous voltage or other hazards. Refer all servicing to qualified service personnel.
- Damage Requiring Service - Unplug this product from the wall outlet and refer servicing to qualified service personnel under the following conditions:
a. When the power-supply cord or plug is damaged.
b. If liquid has been spilled, or objects have fallen into the product.
c. If the product has been exposed to rain or water.
d. If the product does not operate normally by following the operating instructions. Adjust only those controls that are covered by the operating instructions as an improper adjustment of other controls may result in damage and will often require extensive work by a qualified technician to restore the product to its normal operation.
e. If the product has been dropped or damaged in any way, and
- When the product exhibits a distinct change in performance this indicates a need for service.
- When replacement parts are required, be sure the service technician has used replacement parts specified by the manufacturer or have the same characteristics as the original part. Unauthorized substitutions may result in fire, electric shock, or other hazards.
- Nicotine can damage the electronic components. In case of service regarding too much nicotine, than the warranty/guarantee expired.
- Please read in the section Troubleshooting our service address and phone number.

Recycling Information
Recycling of electronic devices
This product is designed and manufactured with high quality materials and components which can be recycled and reused.
This symbol means that electrical and electronic equipment, at their end-of-life, should be disposed of separately from your household waste.
Please, dispose of this equipment at your local community waste collection/recycling centre. In the European Union there are separate collection systems for used electrical and electronic product. Please, help us to conserve the environment we live in!
natural_image
Symbol of a trash bin with crossed lines indicating no waste or restriction, and a solid black rectangle below (no text or labels)Recycling of paper and carton
The material recycling symbol on the carton and user manual denotes that they are recyclable. Dispose them not with the normal household waste.

natural_image
Green recycling symbol with four chasing arrows forming a triangle (no text or labels)Recycling of plastic parts
The material recycling symbol on the plastic parts denotes that they are recyclable. Dispose them not with the normal household waste.

Green Dot
natural_image
Circular logo with a green and yellow spiral design, no text or symbols present.Package Contents
When opening the package of this DVB-S receiver please make sure that the following accessories are included:
- HRS 3400
- Remote control
- User manual
• International warranty card
Notes:
• If any item should be damaged or missing, please contact your dealer without delay.
- Keep the packaging materials, you may need them to transport your player in the future.
- Always transport or send the player in its original packing.
- Do not change or modify any components of the device or accessories.
Features
• DVB-S Receiver for digital free-to-air TV
- USB port
- Card Reader for SD, SDHC, MMC and MS cards
- Direct Recording on USB media or on Card Media (PVR Ready)
- Playback of Video (MPEG-1, MPEG-2, MPEG-4), Pictures (JPEG) and Music (MP3, WMA) from USB media or Cards
- Fast program scan - automatic scan and manual scan
- Various channel editing function
• Memory for 4800 TV & Radio stations
- Parental lock
• Electronic Program Guide (EPG)
- Videotext function
• Supports SCART-RGB video output
Standard Settings
OSD Language: English
Aspect Ration:
Video output:
LNB Type: Universal / Digital
4:3 PS
SCART RGB
CONTROL ELEMENTS
Front Panel
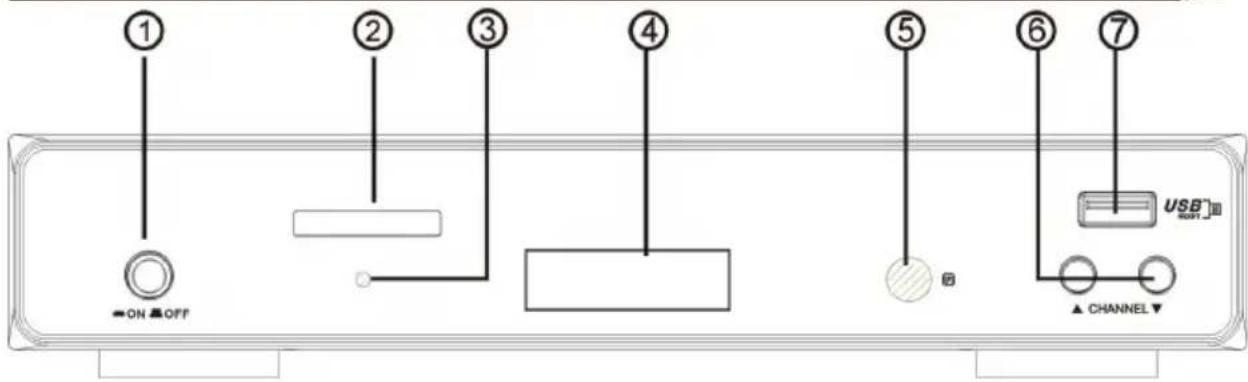
- Power button
- Card Reader for SD, SDHC, MMC and MS cards
- Power indication light
- LED Display
- Remote Control Sensor
- Channel button
- USB 2.0 port
Note:
The Power indication light shows the status of the device (Red = Stand-By; Green = Active).
Rear Panel
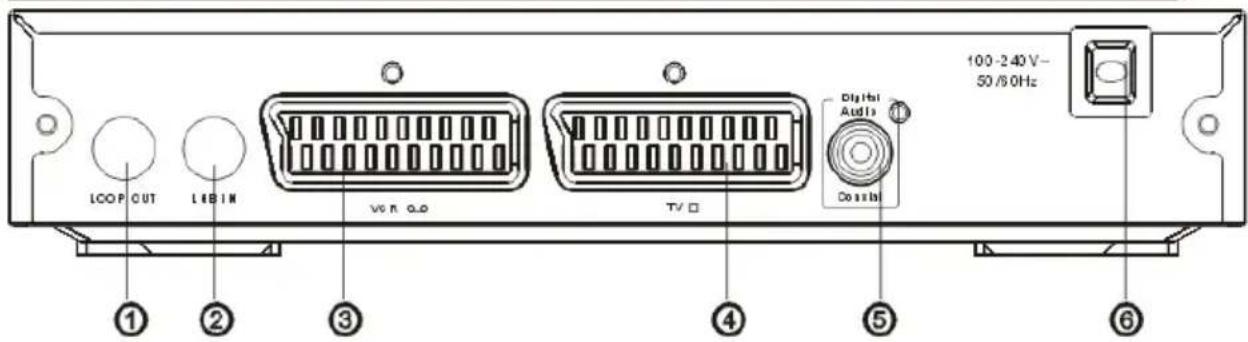
Description of the elements:
- RF Output (loop through)
- RF input jack—IEC 60196-24 (F Type)
- SCART Input for VCR or DVD-player
- SCART jack
- Digital audio coaxial output jack
- AC power cord
Note:
Please unplug the power cord and keep it orderly when the unit shall not be used for a long time in case that the power cord may get scratched and thus lead to electric leak and shock.
Remote Control
Insert batteries and operationradius
- Insert the battery into the receptacle and insert the receptacle into the remote.
- For the best results, aim the remote towards at the player, screweiving window. Stay within 5 meter and angles of 60 degrees or less.
• Under normal use the battery will last for one year. - Remove battery during storage or when you are not using the Setup Boxr for a long time.
Notes:
- Weak batteries can leak and several damage by the remote control.
- Leaking out battery acid can damage your health.
- Remove the battery from the battery compartment as soon as it is exhausted or if the remote control is not going to be used for a longer period of time.
- Wipe up leaked out battery acid with a cloth.
- In case of skin contact immediately wash the affected area.
- Seek medical advice if battery acid has been swallowed. In case of contact with your eyes wash out the eyes and seek medical advice.

natural_image
Technical line drawing of a mechanical component with no visible text or symbols
natural_image
Technical line drawing of a device with internal components and a separate housing (no text or symbols)
Buttons of the remote control
-
Mute button
-
Numeric Buttons
-
RECALL button
-
Information button (INFO)
-
Subtitle button
-
Exit button
-
Channel up (CH+) or navigation up
-
Volume + button or navigation right
-
OK button
-
Green button for Videotext or Record list
-
Red button for Videotext
-
Blue button for Videotext or STOP by playback
-
Yellow button for Videotext or TV/RADIO button
-
Record button
-
Fast Forward (>>) by playback or Time Shift
-
DTV/VCR button to activate SCART VCR input
-
STANDBY button
-
Favorite Button (FAV)
-
Audio button
-
Menu button
-
EPG button
-
Volume - button or navigation left
-
Channel down (CH-) or navigation down
-
Videotext (TTX)
-
PAUSE button
-
Fast Rewind button by playback or Time Shift
Note:
The same buttons on the remote control and the front panel have the same functions; either alternative shall work.
To TV Set and Aerial
Basic connection:
- Ensure that the power switches of this unit and other equipment to be connected, are turned off before commencing connection
- Read attentively the instructions before connecting other equipments
- Ensure that you observe the color-coding when connecting audio and video cords
- Please connect the unit with TV by only one kind of video output format, and setup a suitable output mode (including signal mode and signal code type), otherwise there will be image distortion.
REMARKS:
User can choose any proper connection format according to the jacks of the TV set.
CONNECTING TO TV SET AND TO THE DISH
The schematic pictures show the connection between the HRS 3400, the TV set and to the satellite dish.
How to connect:
A. Plug a SCART cable to the SCART TV connector of the DVB-S receiver and the other end to the TV set.
B. Plug the antenna cable to the input, called LNB In. Screw the connector tightly.
C. Please pay attention that all plugs are connected correctly.
D. Connect the power cable and the plug to the wall outlet.
E. Switch on the HRS 3400 when the power indication light shows a red light.
F. Choose on your TV set the SCART input

Note:
By using the loop through connector you can connect for example a second DVB-S Receiver.
To external decoder or amplifier
Connect the Coaxial cable for transmission of digital Audio signals to your playback device or your amplifier. Enjoy the more realistic sound by connecting an amplifier and speaker system.
- Insert the audio plug into the socket on the right-hand side of the device.
- Plug the Audio jack into the corresponding socket on your playback device or your amplifier.
Note:
The cable is not part of the accessories.

First Time Installation
Settings
Please install before starting the device all cable connections to the satellite dish and to the TV set.
By the first time using of the HRS 3400 the First Time Installation appears on the screen. This menu includes two options:

- General Setting
- My Dish
In the menu General Setting you can find the settings for language and others. You can change between the two option by the navigation buttons UP and DOWN. If one of both has a dark blue background, than the option is active. Start the option by pressing the OK button.
The single settings can be change by pressing the navigation buttons RIGHT and LEFT. The menu you can cancel or quit by the EXIT button.
General Setting
In this menu you can change the options for OSD language, Audio language, Subtitle language, Auto Time Zone and Time Zone.
OSD Language
Here you can set the OSD language. Change the language by using the navigation buttons RIGHT and LEFT. The new language will be set automatically.

Audio Language
With this option you can define the first language which is provide by DVB-S broadcast. By setting the OSD language the Audio language will be set also automatically.
Subtitle Language
Here you can define, if you want to display Subtitles and in which language they appears on the screen.
Note:
Subtitles are not transmitted by every TV channel.
First Time Installation
Settings
Auto Time Zone
Here you can set the Time Zone setting automatically. The information will be taken from the EPG information.
You can set also the Time Zone manually. Here for choose the setting OFF and than the next option is active.
Time Zone
Press the navigation buttons LEFT or RIGHT until your time (depending on Greenwich Meridian) appears on the screen. Plus values are in east direction and minus values in west direction.
My Dish
Before you continue the next steps, you shall be sure about the satellite installation system. Depend of the different way to install the dish and orientation, different kind of options are available.
1. Single connection between Satellite / LNB and Receiver
If you orientates the dish to a specific satellite and you use a single or Multi-LNB. Each LNB is directly connected with the cable to the receiver, than you uses these settings.
Switch off the two options Switch Type and Toneburst.
- Switch Type None
- Toneburst Off
Navigate to the third option until the is highlighted with dark blue. Start this option by pressing the OK button. The list is empty. Now you can add a satellite.


Press the RED button to add a satellite. A list of presets satellites appears on the screen. Choose the satellite which is orientated by the dish and confirm the selection by pressing the OK button.
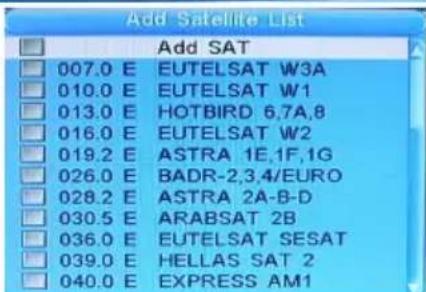
First Time Installation
My Dish - Single Connection
A new window appears on the screen with the parameters and settings of the satellite. Please pay attention that the LNB Type is made on Universal.
LNB Type
The options are:
Normal C Searching by analogue TV channels in low frequencies
Normal Cu Searching by analogue TV channels in low frequencies
Universal Searching for analogue and digital TV channels
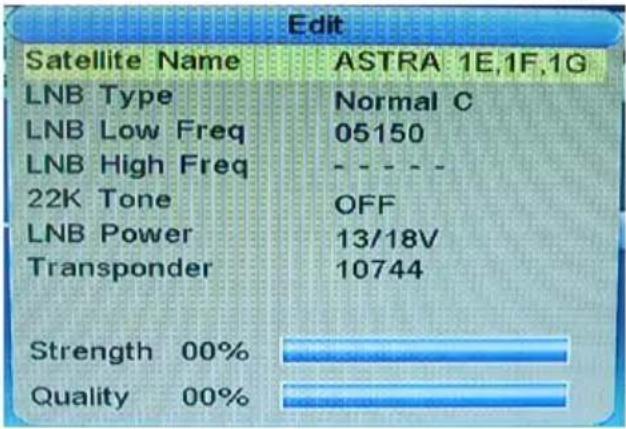
LNB Low and High Frequency
By using the settings of LNB Type the low and high frequencies are set automatically.
22K Tone
By using the LNB Type Universal the setting for 22k Tone is set automatically to AUTO. This setting is responsible to find analogue and digital TV channels.
By using the 22-kHz signal in conjunction with a universal LNB is the entire Astra satellite system to receive (analogue and digital) with a single 60cm antenna. To receive digital TV and radio signals will therefore only one set-top box for digital television, are required.
LNB Power
The LNB needs for receiving digital TV channels a power of 13 V and 18V. Please use the setting 13/18V, otherwise not all TV channels can be found.
In case of LNB Power is Off, the LNB do not get any power from the satellite receiver and no channels can be found and received.
Transponder
This setting needs normally no changes.
Transponders are used in principle to a signal that comes from an earth station to a satellite prepare, so that the end-user (TV, telephone, computer), the optimum signal sent and received can be recovered. A transponder is working on the whole as a kind of amplifiers and frequency converters. It receives multiple signals at a certain frequency from an earth station, amplifies these filters out interference, put it into another (the receiver dependent) frequency levels increased again and sends the signals back to Earth.
My Dish—Single Connection
Strength
The received signal strength is shown in percentage and in the bar.
Quality
The received signal quality is shown in percentage and in the bar. Lower values are an indication for more artifacts, freeze pictures and other picture distortions.
Press the OK button and you can then adjust the other parameters of the scan. Press the BLUE button on the remote control and access to the final parameters for the search.
The searching and founded the TV channels, you can affect the order in which Scan Mode. A standard search or a "blind" Search.
Scan Mode
The two options are:

English
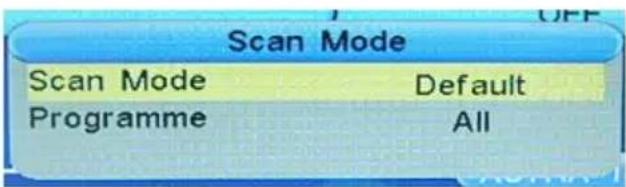
Default The searching runs in
depending of the preset satellite and transponder lists.
Blind With this option the searching runs without reading the transponder list and every received signal will be analyzed.
Note:
Often there are changes by the transponder list. So please use the setting Blind.
Programme
Allows you to decide whether you want to search only free channels or pay-TV. The pay-TV is encrypted and can usually only a very few times in clear to be seen. Approx. 2 / 3 of all TV channels are encrypted and can not therefore ASTRA with the recipient decrypts to be seen.
Note:
In the selection is only open after a successful scan, the TV channel list much more manageable.
First Time Installation
My Dish—Single Connection with Toneburst
Now, all search parameters are set and the scan can run. Press the OK button and the scan begins.
All received TV and radio stations are displayed in the two lists. After the scan, the TV and radio stations are stored in the two lists and the unit goes into the live image of the first TV station.

2. Single connection between Satellite / LNB and Receiver with Toneburst
Toneburst is an additional switching criterion that can deliver what the receiver. This signal does not include digital commands, but it can nevertheless be evaluated by most of the switches for position switching.
LNB Switch None
Toneburst On
Now you can insert two satellite.
A new window appears on the screen with the parameters and settings of the satellite. Please pay attention that the LNB Type is made on Universal.
After all settings are running you can start searching. Here you have the option of the two selected satellites scan individually or both of them together.
BLUE Single Satellite Search
RED Both Satellite Search in one run

flowchart
graph TD
    A["LNB Umschaltung"] --> B["19.2 E"]
    C["Toneburst"] --> D["16.0 E"]
    B --> E["Toneburst"]
    D --> E
    E --> F["A"]
    E --> G["B"]
    F --> H["ASTRA IE,IF,IG"]
    G --> I["EUTELSAT W2"]


My Dish—Using DiSEqC 1.0/1.1
Press the RED or BLUE button and you can influence the search and found the TV to where you are either with Scan Mode, a standard search or perform a "blind" search (explained in detail on page 17).

Now, all search parameters are set and the scan can run. Press the OK button and the scan begins.
All received TV and radio stations are displayed in the two lists. After the scan, the TV and radio stations are stored in the two lists and the unit goes into the live image of the first TV station.
3. Using more than two satellite by DiSEqC 1.0/1.1
The distribution of analogue and digital signals from the Astra and Eutelsat is using DiSEqC ^TM (Digital Satellite Equipment Control, in other words: Deißäck) is possible if only one cable to be laid to the satellite receiver. This new tax system complements the conventional switching criteria, 14/18 Volt or 22 kHz, and removes the restrictions on maximum 4 switching states. In the simplest version of DiSEqC ^TM is used between two universal LNBs switch to. The 22 kHz switching circuit is used for the lower and upper frequency band LNB.
DiSEqC 1.0 controls up to four LNBs with the command position A / B and Option A / B. DiSEqC 1.1 controls up to 64 LNBs, it will switch in several levels of government. For 16 LNBs, take for example four 4 / 1 DiSEqC 1.0 switch, whose outputs are then placed on the inputs of a 4 / 1 DiSEqC 1.1 switch.
After selecting a configuration of the satellites could look like. Also look here at the settings for each satellite that the LNB type was chosen correctly. Are required for receiving digital TV, the digital setting (Universal).
After all settings are running you can start searching. Here you have the option of the two selected satellites scan individually or both of them together.

flowchart
graph TD
    A["LNB Umschaltung"] --> B["DiSEqC"]
    C["Toneburst"] --> B
    B --> D["LNB1"]
    B --> E["LNB2"]
    B --> F["LNB3"]
    B --> G["LNB4"]
    D --> H["EUTELSAT W3A"]
    E --> I["HOTBIRD 6.7A.8"]
    F --> J["ASTRA 1E.1F.1G"]
    G --> K["BUBESAT W2"]
BLUE Single Satellite Search
RED Both Satellite Search in one run
YELLOW Delete all Satellite
GREEN Delete the selected Satellite
First Time Installation
My Dish—Using DiSEqC 1.0/1.1
Press the RED or BLUE button and you can influence the search and found the TV to where you are either with Scan Mode, a standard search or perform a "blind" search (explained in detail on page 17).
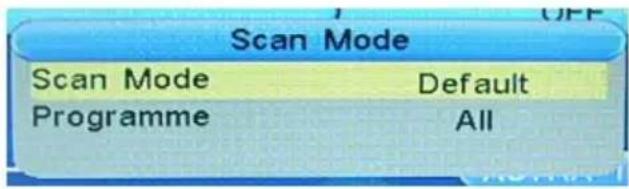
Now, all search parameters are set and the scan can run. Press the OK button and the scan begins.
All received TV and radio stations are displayed in the two lists. After the scan, the TV and radio stations are stored in the two lists and the unit goes into the live image of the first TV station.
4. Using more than two satellite by DiSEqC 1.0/1.1 with Toneburst
In combination of DiSEqC 1.0/1.1 and Toneburst you can use instead of between 4 satellite has a total of 8 different satellites.
Select all the satellites. With the DOWN navigation key you can control the second page of the satellites.
After all settings are running you can start searching. Here you have the option of the two selected satellites scan individually or both of them together.

flowchart
graph TD
    A["Seite 2J2"] --> B["DiSeqC"]
    B --> C["LNB3 A"]
    B --> D["LNB3 B"]
    B --> E["LNB4 A"]
    B --> F["LNB4 B"]
    C --> G["KEINE"]
    D --> H["KEINE"]
    E --> I["KEINE"]
    F --> J["KEINE"]
BLUE Single Satellite Search
RED Both Satellite Search in one run
YELLOW Delete all Satellite
GREEN Delete the selected Satellite
Press the RED or BLUE button and you can influence the search and found the TV to where you are either with Scan Mode, a standard search or perform a "blind" search (explained in detail on page 17).
Now, all search parameters are set and the scan can run. Press the OK button and the scan begins.
All received TV and radio stations are displayed in the two lists. After the scan, the TV and radio stations are stored in the two lists and the unit goes into the live image of the first TV station.
First Time Installation
My Dish—Using DiSEqC 1.2/USALS
5. Using more than two satellite by DiSEqC 1.2 / USALS
DiSEqC 1.2 provides additional control of three plants by DiSEqC commands, via a single coaxial cable. Of the motor's staff was also a record producer (rod USALS) defined which is to find the satellite position is particularly simple. With the appropriate receiver is sufficient to enter the geographical position and the satellites are found automatically - provided that the curved path of the rotary engine has been correctly set mechanically.
Select the option LNB DiSEqC switch setting 1.2/USALS.
You now have two ways to make the settings, either via a DiSEqC 1.2 or USALS.
DiSEqC 1.2
Choose from the satellites, you can achieve with your motorized satellite dish.
Press the BLUE button and you can influence the search and found the TV to where you are either with scanning Mod. (Scan Mode) a standard search or perform a "blind" search (explained in detail on page 17).

English
Now, all search parameters are set and the scan can run. Press the OK button and the scan begins.
All received TV and radio stations are displayed in the two lists. After the scan, the TV and radio stations are stored in the two lists and the unit goes into the live image of the first TV station.
USALS
Define the search parameters by the options Set Limit, Set Area and Set LNB
Set Limit Definition of angle of rotation in west and east direction
Set Area Define the area where the dish are placed
Set LNB Choose the parameters of the LNB
Operation
Important buttons and there functions
Channel List
You can access to the channel list by pressing the OK button. The operation in the channel list is done by following buttons:
▲/▼ Previous or Next TV channel ◀/▶ Previous or Next page of the channel list
YELLOW Change to Favourite
BLUE Change to Satellite OK Change to the selected TV channel
EXIT Quit of the channel list
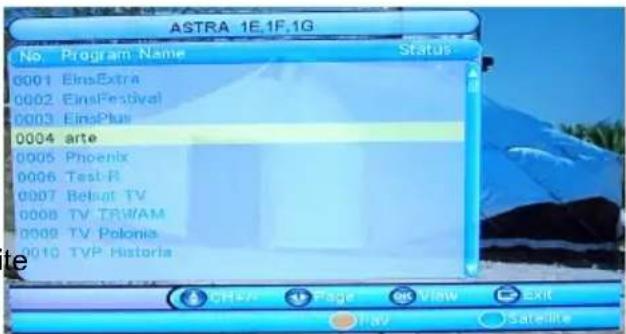
Note:
The TV and Radio list are very similar during operation.
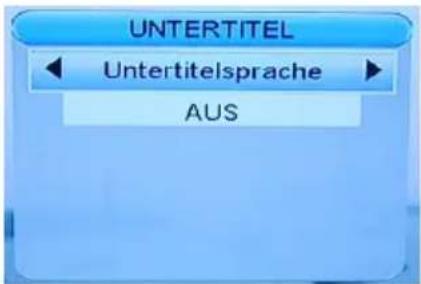
Subtitle
If you want to display to a TV program subtitles, press the SUBTITLE button. If subtitles are available, then you can activate it by pressing the OK button.
Note:
Not all TV broadcaster supporting Subtitles.
Audio Language and Sound Tracks
If you press during the live image the AUDIO button on the remote, you can access the audio settings of the TV.
The following three options, channel, Audio PID, and audio channel. The two options include further sub-options. Can each of these measures vary with the ◀ / ▶ buttons.
The shift of the two main options audio mode and audio track can be reached via the ▲ / ▼ buttons.

Audio-Track Change the audio language, or change the sound track
Audio-PID Shows the address of the sound track inside of the transport stream
Audio Modus Definition of the sound output (Stereo, Right, Left)
Note:
If you switches to the AC-3 soundtrack, then there no sound is output via SCART. The sound is only available through the digital coaxial output in conjunction with an external audio decoder (Dolby Digital Amplifier).
Important buttons and there functions
Information
When you press the INFO button, then you get a variety of Information. The first pressing the INFO button will take you to the overview: TV station names, active TV program, the next TV program whether Videotext is available and so on.
Pressing the INFO button displays the EPG information of the active television program.
When re-pressing the INFO button to get an overview of the frequency of the TV channel, date, specific information of the DVB-S transmission and the two other important parameters of "signal strength" and "signal quality".
Videotext
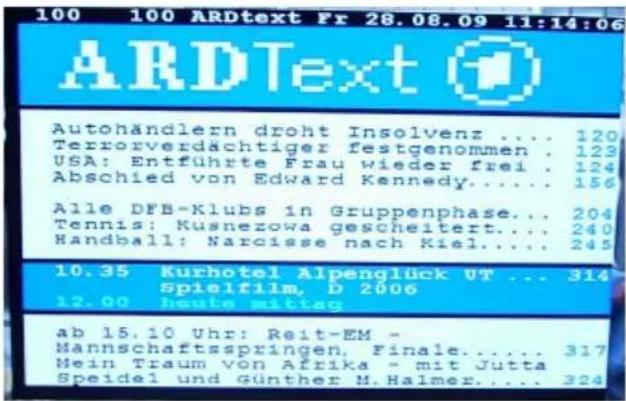
The Videotext window you can start by pressing the TEXT button. Navigation of the Videotext window are:
- Numeric button for access to the different Videotext pages
- ◀/▶ button for one page back or forward
- EXIT to quit the videotext window


| Program Info | |||
| Satellite Name | ASTRA 1E,1F,1G | ||
| Program Name | arte | ||
| Program No | 0004 | Down Frequency | 10742 |
| Local Frequency | 9750 | Symbol Rate | 21995 |
| Polarity | H | Video PID | 0401 |
| 22K Tone | OFF | Audio PID | 0402 |
| DiSEqC | OFF | ||
| Strength | 86% | ||
| Quality | 75% | ||
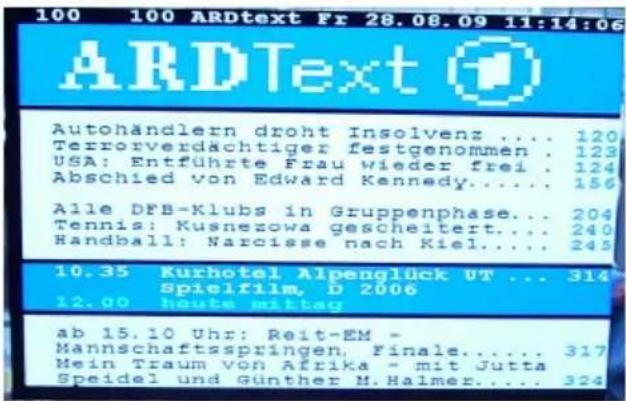
With the buttons ◀/▶ you can change the volume output.
TV/Radio
Press the TV/Radio button to switch between TV and Radio channels.
Change TV channel
Press the ▲/▼ buttons (CH+/CH-) to change the TV channel.
Navigation by the Menu
Uses the navigation buttons to move between the settings.
Operation
Important buttons and there functions
EPG
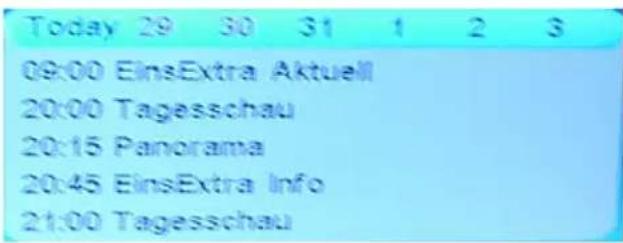
Press the EPG button to start the EPG Guide. Following picture appears on the screen. The EPG window is organizes into:
RIGHT TOP Actually date and Time LEFT TV channel list MIDDLE Day of the Week and date RIGHT BOTTOM 7-days EPG overview BOTTOM Help information for navigation

You can operate inside of the EPG window by using:
▲/▼ Previous or next TV channel
BLUE Change to another Satellite
◄/► Change from Channel list into the 7-day EPG overview
EXIT Quit of the EPG window
7-days EPG Overview
Using the buttons ◀ / ▶ move from the channel list in the 7-day overview. Now you have more buttons and functions for the operation are available.
▲/▼ Previous or next TV program
◄/► Change to the next day of the 7-day EPG overview
OK Display of the detailed EPG information
RED The selected TV program is booked and transferred into the Timer Programming list
EXIT Quit of the Channel List
Detailed EPG Information
If you have selected in the 7-day overview to a broadcast and press the OK button, then appear the complete information of the broadcast. If the text is larger than in the window fits into it, so you can scroll with the
◀ / ▶ keys to the other pages. Press EXIT to quit the details.
Detail
Important buttons and there functions
Timer Programming
If you have pressed in the 7-day overview the RED button on a highlighted item, then the information will be transferred to the timer. The information such as sender, date and time are automatically taken from the EPG.
It is advisable, as a rule, the start time and stop-min period around a few minutes (eg, 3-5 Changing.), Because the programs never start on time.
Other parameters are mode and timer mode. The mode defines whether a show-off or to be added regularly. The timer mode should be changed for a host of TIMER for inclusion. The mission is now scheduled to appear: Select the timer program list.
Note:
Do not forget to connect the USB storage on the USB. Otherwise no recording can be do.

English

RED, GREEN, YELLOW and BLUE
This button have different functionality.
Recording
If you want to record the current TV program simply and quickly, first connect a USB memory to the USB port or a card to the card reader and then press the REC button. The recording starts immediately. You can stop the recording by pressing the STOP button. Confirm the safety query with the OK button.
The recording takes place in a file suffix with TS.
Operation
Important buttons and there functions
Recording List
The recorded program can be reached directly via the RECLIST button. All previous recordings will be displayed there.
The operation in the list of recordings is via the keypad:

▲/▼ Previous or next recording
◄/► Change to the next or previous page in the list
OK Starts the playback
RED The selected recording will be deleted
INFO Display of information about the USB storage
EXIT Quit of the Recording list
Playback of recorded files
When you play from the Recording list, press the OK button. During playback, you have more buttons available:
YELLOW Jumps 10% back
BLUE Jumps 10% forward
Fast Forward
<< Fast Rewind
|| Pause. Continue of playback press || again
▲/▼ Pre-stop of the playback
EXIT Quits the playback

Information of the USB storage
When you press during the Record List the INFO button, then appears an information window on the attached storage on the screen.
You can format the memory.
Press the EXIT key to stop the ad.

Important buttons and there functions
Delete a Recorded File
If you press on a selected entry in the list of recordings the RED button, you can delete the file from the USB memory. Confirm the safety query with the OK button and the file is deleted from the USB memory.
Freeze a live picture
You have the ability to freeze the live image. Press the PAUSE button on the remote control. The break ends with each additional keystroke.
Favourites
If you have defined favourites, then you can access with the FAV button on the remote control directly at the Favourite List. The operation within the favourites list is as follows:
▲/▼ Previous or next TV channel
◄/► Change to the next or previous page in the list
OK Starts the TV channel
YELLOW Changes between the favourite list and all lists
BLUE Changes between Favourite, Satellite and All Lists
EXIT Quit of the Favourite list
Multimedia Player
USB Port
If you want to uses the USB port, please connect an USB storage to the USB plug.
Supported File Formats
From USB port you can playback picture in JEPG or GIF file format. You can playback music file with MP3 or WMA file format. You can playback video files in MPEG-1, MPEG-2 and MPEG-4 format. Do use only files with the suffix "mpg" and "avi".
natural_image
Close-up of a metallic electrical connector with two small square holes, shown against a black background (no text or symbols visible)Supported USB storages
The USB port supports a lot of USB-Sticks from different manufacture and different sizes. For recording and/or Time Shift we suggest to uses USB-Sticks with minimum of 8 GB size.
USB Port
Due to the legal requirements of CE-conformity, the customer is asked to only connect USB-Sticks to the USB port.
Card Reader
The Card Reader of the HRS 3400 accepts SD, SDHC, MMC and MS memory cards.
Please connect the memory cards carefully to the card reader. Please pay attention that the label of the card memory is readable on the top.

Supported File Formats
From Card memory you can playback picture in JEPG or GIF file format. You can playback music file with MP3 or WMA file format. You can playback video files in MPEG-1, MPEG-2 and MPEG-4 format. Do use only files with the suffix "mpg" and "avi".
Supported Card storages
The Card Reader supports a lot of card memories from different manufacture and in different sizes. For using the record and/or the Time Shift function we suggest to uses only SDHC cards with a minimum size of 4 GB.
My Album
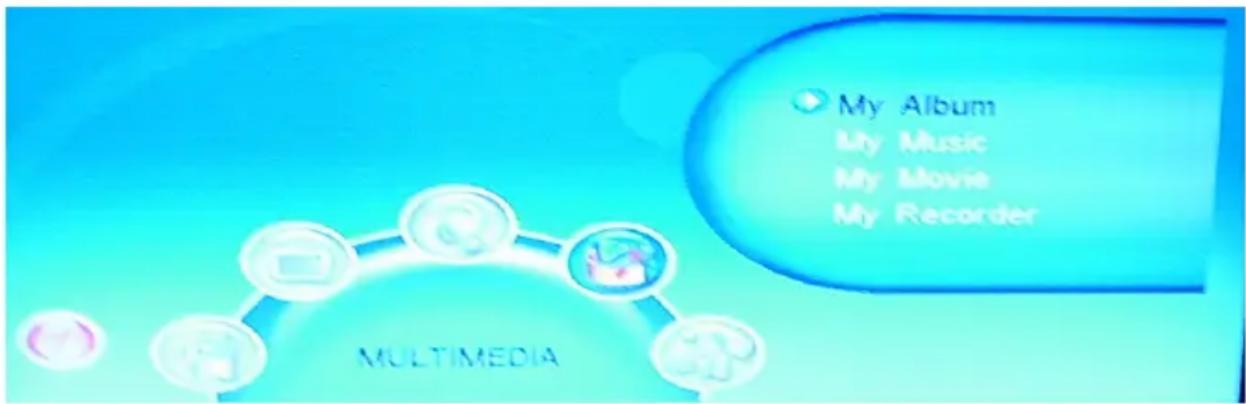
If you want to play pictures, music or videos from USB or card, go to the media player of the device. Plug in the USB or Card memory first, and press during the live image the MENU button.
Displayed until you press the ◀ / ▶ keys to multimedia is.
The four sub menu's are:
- My Album
- My Music
- My Movies
- My Recorder
My Album
If you want to display images with the HRS 3400, connect a storage and access to the My Pictures menu by pressing the OK button. Please organize your storage so far that there are all the pictures in a folder.
After successful reading of the memory, you will be prompted for the folder. Press the BLUE button on the remote and then select the File Browser from the folder containing the images with the OK button. The images are then displayed in the file browser in a list.
▲/▼ Changes to the previous or next picture or folder
◀/▶ Changes to folder and file list in the file browser
OK Starts the playback of the picture
INFO Displays information regarding the storage
EXIT Starts the Thumbnail overview of the pictures
Multimedia Player
My Album
By the Thumbnail Overview you have similar operation like in the file browser:
▲/▼ Changes to the above or bottom picture
◀/▶ Changes to previous or next pictures
OK Starts the playback of the picture
BLUE Back to the file browser view
EXIT Quits of the Thumbnail display and changes directly into the main menu
If many image files in the folder, it can take a bit more time until all the images are displayed. You will be informed of a status indicator (in percent).

If you have started a picture with the OK button, then you are more functions available.
RED Starts Zoom function
YELLOW Invert the picture vertical
BLUE Invert the picture horizontal
GREEN Can be start a music file during displaying the pictures
▲/▼ Change to the previous or next picture
◄/► Rotates the picture in every step of 90°
EXIT Quits into the Thumbnail overview
Zoom function
Press the RED button and the Zoom function starts. By pressing more than one time the RED button the Zoom factor changes in the following steps:
$$ 100 \% \longrightarrow 150 \% \longrightarrow 200 \% \longrightarrow 25 \% \longrightarrow 50 \% \longrightarrow 100 \% $$
Within the zoom feature you have the option to move the image magnification with the arrow keys to move and therefore have different sections in the centre.
Music playback during the picture displaying
When you press the GREEN button while playing a picture, then the file browser appears on the screen. Locate a folder with music files. Start the selected track by pressing the OK button. The other features are described on the next page, under "My Music".
Press the EXIT button to switch back to the image displaying.


Multimedia Player
My Music
If you want to play music files with the HRS 3400, connect a USB or card storage and access to the My Music menu by pressing the OK button. After successful reading of the memory, you will be prompted for the folder. Then select the file browser from the folder containing the music files with the OK button. The images are then displayed in the file browser in a list. Left side shows the folder structure and the right side of the files.
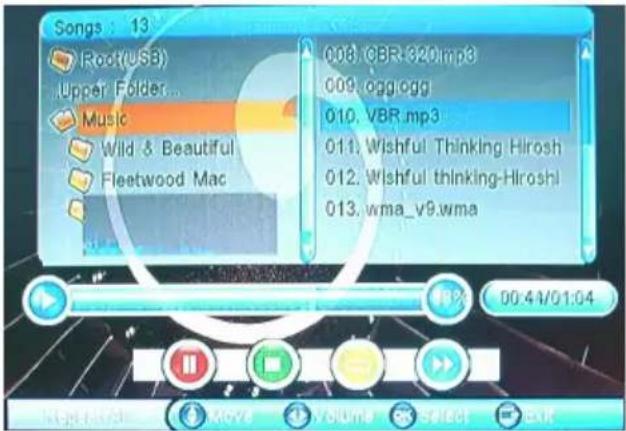
RED Starts the playback
YELLOW Selects the repetition mode "Single", "All", "Random"
BLUE Fast forward with the speed x2, x3 and x4
GREEN Quits the Music playback, back to file browser
▲/▼ Change to the previous or next music file or folder
Changes between folder and file list in the file browser
INFO Displays of information about the USB storage
EXIT Quits the music playback and returns into the main menu
Fast Forward
If you press while playing music the BLUE button, then you start the fast forward. Each press the BLUE button increases the speed. The velocities change as follows:
$$ x 1 \longrightarrow x 2 \longrightarrow x 3 \longrightarrow x 4 \longrightarrow x 1 $$
Notes:
To return to normal speed, you can use only the BLUE button.
Change the Volume
During the music playback you can change the volume by using the ◀/▶ button.
Supported File Formats
The HRS 3400 supports music files with follow specification:
Format: MP3 and WMA
Sampling Frequency: 8 - 48 kHz (MP3) or 32 - 48 kHz (WMA)
Bit rate: 8 to 320 kbps (MP3) or 32 to 192 kbps (WMA)
My Movies
If you want to play movie files with the HRS 3400, connect a USB or card storage and access to the My Movies menu by pressing the OK button.
MPEG-4 disc compatibility with this player is limited as follows:
- Available resolution size of the MPEG-4 file is under 720x576 (W x H) pixel.
- The file name of the MPEG-4 subtitle is available by 15 characters.
- If there is impossible code to express in the MPEG-4 file, it may be displayed as " _ " mark on the display.
- If the number of the screen frame is over 30 per second, this unit may not operate normally.
- If the video and audio structure of recorded file is not interleaved, either video or audio is outputted.
- Playable MPEG-4 file ".avi ", ".mpg ", ".mpeg".
- Different MPEG-4 codices are supported. There must be encoded with are MPEG-4 part 2 (MPEG-4 SP/ASP) standard.
- Container formats like "MKV", "MP4", "MOV" or similar are not supported.
- No video files with a codec VC-1, H.264 or any container of MP4, MKV, 3GP or QT care not supported by the player.
- Supported audio formats in the video files are:
- MPEG-4: AC3 or MP3
- MPEG1/2: MPEG-1 Layer 2 (MP2, MPA)
- Sampling Frequency: 8 - 48 kHz (MP3), 24 - 48 kHz (AC3, MP2)
• Bit Rate: 8 - 320 kbps (MP3), 92 - 256/448 kbps (MP2/AC3)
Note:
AC3 audio in movie files can only be played back only on the digital audio output and a corresponding Dolby Digital decoder. Take only the SCART output, then you will hear no sound from these files.
After successful reading of the memory, you will be prompted for the folder. Then select the file browser from the folder containing the movie files with the OK button. The images are then displayed in the file browser in a list. Left side shows the folder structure and the right side of the files.
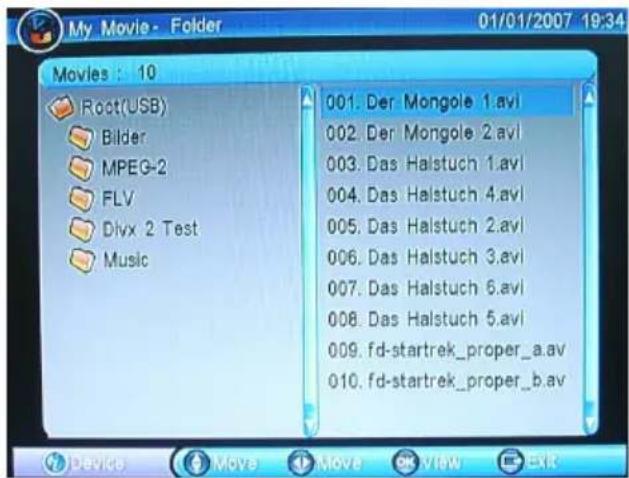
▲/▼ Change to the previous or next movie file or folder
◀/▶ Changes between folder and file list in the file browser
INFO Displays of information about the storage
OK Starts the playback
EXIT Quits the music playback and returns into the main menu
My Movies
Select a movie and start it with the OK button. Top Left is the file name, which has played time and elapsed time. Among the aids to navigation will be displayed. You can always show with the INFO button. After 10 seconds it shuts off automatically.

To cancel the playback, please press the EXIT button on the remote control. The device returns into the file browser.
The buttons for navigation and operation are:
RED Starts the playback, m Pause the playback
YELLOW Fast Rewind
BLUE Fast Forward
GREEN Slow playback
▲/▼ Change to the previous or next movie file
◄/► Changes the volume
EXIT Quits the music playback and returns into the main menu
Star the playback, Pause the playback
Start playback of a movie with the OK or RED button. Pressing it causes the RED button, that the film is interrupted and the pause mode is active. The playback, you can continue with the RED button.
Stop the playback
Press the EXIT button to cancel/stop the playback.
Slow Motion
During playback, press the GREEN button, then holds the picture. With the BLUE button to set the speed for the slow play. The velocities change with each keystroke as follows:
$$ \text { Pause } \longrightarrow x 1 / 2 \longrightarrow x 1 / 4 \longrightarrow x 1 $$
Fast Forward or Fast Rewind
With the YELLOW and BLUE button you can quickly coil within the film backwards and forwards. The velocities change with each keystroke as follows:
$$ X 1 \longrightarrow x 2 \longrightarrow x 4 \longrightarrow x 8 \longrightarrow x 1 6 \longrightarrow x 3 2 \longrightarrow x 1 $$
Recorder
Select Multimedia from the main menu and press the OK button. Then select the option My recordings and start it also with the OK button.
It is now following three options:
- Recorded List
- Recording Device
• Recording Preference

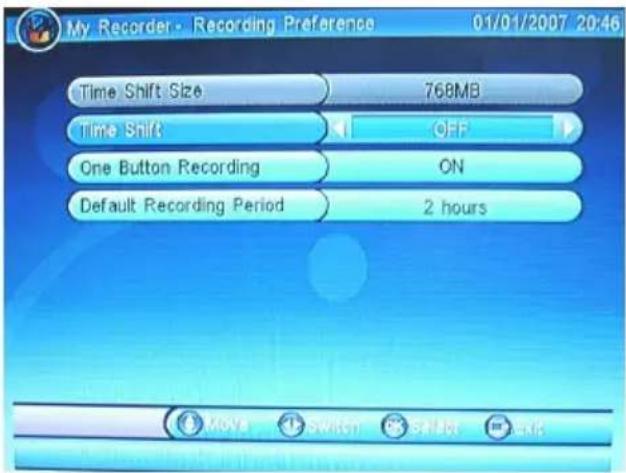
Recording Preference
Here you can set the parameter for Time Shift, Time Shift Size, One Button Recording and Default Recording Period.
Time Shift
The option Time Shift includes three settings.
AUTO
The Time Shift function is every time active and the active TV channel will be record every time.
PAUSE
The Time Shift function starts only when you press the PAUSE button.

OFF
The Time Shift Function is disabled.
Time Shift Size
The size of the time shift file is always dependent on storage size or how much free memory is available. Normally 30—40% of the memory will be used for the Time Shift function.
One Button Recording (OTR)
This option includes two settings.
ON
Press the RECORD button on the remote control and the recording will start immediately. It draws upon the standard of recording time.
OFF
If you choose this option, you will be prompted after pressing the RECORD button to set the recording time.
Recording Device
With this menu you can format the USB memory. The window consists of the submenus:
- Device
- Slot
- Partition
And an information display via the USB memory. In the lower part of the window you will find the keys to changing the options and format the memory.

English
Device
In case of both kind of memories (USB stick or Card) are connected with the HRS 3400, than you can change with the ◀/▶ arrow button the device.
Slot
In case of both kind of memories (USB stick or Card) are connected with the HRS 3400, than you can change with the ◀/▶ arrow button the device.
Partition
USB flash disc or Cards typically contains only one partition. This allows for the use of USB sticks or Card as a rule only one partition available, then the option can not be changed.
Format the Storage
If you want to format the memory, then press the GREEN button. Confirm the safety query with the OK button and the memory is formatted. In the case of memory with multiple partitions of the whole memory is formatted.
When you press the RED button, then only the selected partition is formatted.
Press the EXIT button to cancel the format during the security check.
Note:
When formatting, all existing data will be deleted.
Recorder
Recorded List
With this menu you can view the recorded TV shows in a list. Walking along the road from the main menu you can also jump on the REC LIST button to start the live image.
This list contains all of the images are displayed. The following keys help you to operate in this window:

▲/▼ Change to the previous or next file
Changes between previous or next page in the file browser
INFO Displays of information about the storage
OK Starts the playback in the preview window
RED Delete a file
EXIT Quits the music playback and returns into the main menu
Playback
Select a file if you want to play it, press the OK button. One-time press the OK button causes a representation of the file in the preview window without sound. Press the OK button twice to start playback in full screen. In addition, you now have even more playback functions are available:
<< Fast Rewind
Fast Forward
YELLOW Jumps 10% back in the file
BLUE Jumps 10% forward in the file
PAUSE Pause the playback
STOP Cancel the playback
Delete a file
Select the arrow keys UP or DOWN a file from which you want to delete and press the RED button. Confirm the deletion by pressing the OK button or break this off with the EXIT button.
Recorder
Time Shift
If you have enabled the option, the time shift recording settings option, you can use this. The options are:
AUTO
The Time Shift function is every time active and the active TV channel will be record every time.
PAUSE
The Time Shift function starts only when you press the PAUSE button.
OFF
The Time Shift Function is disabled.
When time shift automatically runs in the background, then you have the option of the image using the PAUSE button to interrupt. The keys >> or << you can spool forward or backward.
If the Time Shift function is activated only with the PAUSE button, then you have the same functionality of the service available. Fast forward or fast rewind are available through the buttons << and >>.
Settings
The main menu of the DVB-S receiver can be open by pressing the MENU button. The sub-menus are:
• TV with TV list and EPG
• Radio with Radio list and Information
• Multimedia with My Album, My Music, My Movies and My Recorder
• Accessories with the game Gomoku, Calendar and Calculator
- Settings with Installation, TV settings, Password, Advance Timer, Default setting and SW Update

TV
The TV menu contains the submenus TV list and EPG display. With the TV you edit the list found by one or more TV channels via satellite
TV List
With the TV menu list, you have the possibility to found TV to suit your needs sorting and editing. The following tools are available:
- Favourite
- Lock
- Edit
- Move
- Sort
- Skip
- Delete
- Search

Each time you start the TV favourites list, the tool is active first. Using the ◀ / ▶ keys to change the tools.
With the following buttons you can operate the TV list:
▲/▼ Change to the previous or next TV channel
◄/► Changes the tool
EXIT Quits
YELLOW Save the changes
BLUE Change the satellite displaying
Define Favourite
Select the TV channel you want to put in the Favourites list. Using the ▲ / ▼ buttons to select the TV channel. You can create a total of 8 favourite lists. Do this, press the numeric keys 1 to 8
The predefined favourite categories with the associated key (1 to 8) are:
- News
- Sport
- Movies
- Musik
- Shopping
- Travel
- Boys
- Girls
Operation:
- Select a TV channel and press as the button 1 to save this station in the first favourites list.
- To save the selected or selected TV stations in or the lists, press the YELLOW button.
- Confirm the changes with the OK button, or cancel the operation with the EXIT button.
If you have accepted the changes, then you have with the FAV button to access the Favourites list(s). In the Favourites list, you can change the YELLOW button to display different lists and favourites.
Lock a TV channel
Do you want to block certain TV channels, so choose in the list by pressing the TV tool locks in which you ▶ button to bottom links appear locks. Select using the ▲ / ▼ buttons to select the appropriate TV and press the OK button. At the selected TV channel will see a lock icon. Save the changes with the YELLOW button and confirm the dialog with the OK button. The blocking is only active when the menu settings and password option is enabled channel locks.
If you want to watch the locked TV, then you will be asked for a move to the locked TV channels for the password. Enter the password and then you can watch the TV channel.
Settings
Edit a TV channel
Do you want to edit individual TV stations, says in the TV list and select the Edit tool by pressing the ▶ button below to edit links appear. Select using the ▲ / ▼ buttons to select the appropriate TV and press the OK button. Now you can change the TV channel name, the lower frequency and symbol rate.
Highlight the station name (the active element is dark blue) were deposited and then press the OK button to edit the station name.
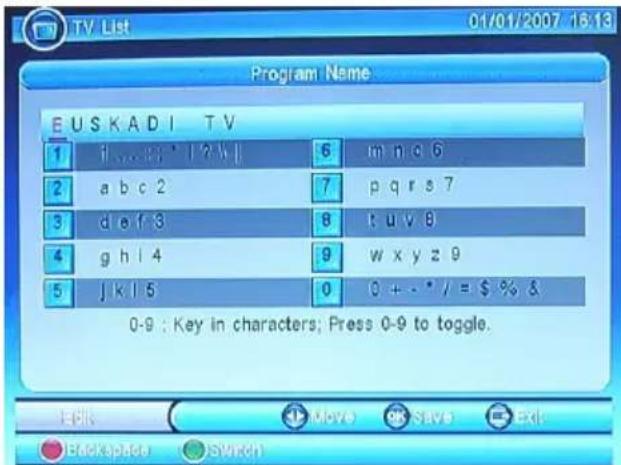
The change of name takes place with the numeric keys in the SMS-style. Thus, for example, contains the key "2", the letter "a", "b", "c" and "2". Do you want to now create a "b", so you need to twice the "2" key.
Operation:
◀/▶
Change position
GREEN
Change to
RED Delete the previous character
OK Save the new name
EXIT Quit the edit menu
With the OK button to save the changed name. Press the EXIT button to return to the previous menu screen without saving.
Press the EXIT button to exit the edit menu and return to the TV list.

Move a TV channel
Do you want to move a single TV channel, select the Move tool, press the TV list, where you button to move the bottom links appear. Select using the ▲ / ▼ buttons to select the appropriate TV and press the OK button. The selected TV channel will be ticked. Using the ▲ / ▼ buttons to move the TV to the new position. Looking for a new station square in the list and press the OK button. The TV station will be stored at this point. Save the change with the YELLOW button and confirm with the OK button.
Sort the TV channels
Do you want to rearrange the TV channel list, then select the TV button, the tool list sorting, in which you ▶ button to bottom links appear sorting. Two possible sort options are available:
• Alphanumeric (from A to Z)
• Pay for Free Channel
With the RED button, you can change the channel in order from A to Z. Press the RED button reverses the order of up to Z A.
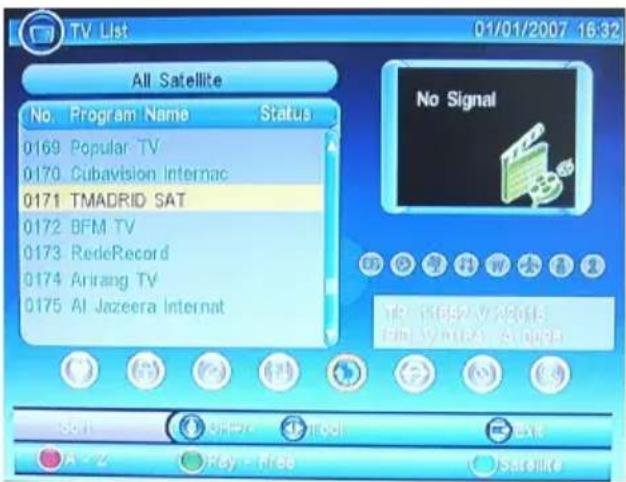
With the GREEN button, you can sort by pay-
TV or free channels. Try pressing the GREEN button and the recipient to open them sorted by pay channels. Pressing the GREEN button reverses the order.
Press the EXIT key to stop the sorting. Confirm the change by pressing the OK button.
Skip a TV channel
Would you like some TV stations in the navigation to jump so choose in the list, press the TV tool skipping in which you ▶ button until the bottom appears to skip links. Select using the ▲ / ▼ buttons to select the appropriate TV and press the OK button. The TV channel is marked with a symbol. Save the changes with the YELLOW button and confirm the query with the OK button.
Note:
- When navigating this TV channel will now always skipped, and can not be selected using the ▲ / ▼ buttons.
- Only by the numeric input can be accessed at this station.
Delete a TV channel
Do you want to delete a single TV channel, so choose in the list, press the TV Tool Delete where you ▶ button until Delete appears below links. Select using the ▲ / ▼ buttons to select the appropriate TV and press the OK button. The selected TV channel will be marked with a cross symbol. Save the changes to the YELLOW button and confirm the dialog with the OK button.
The selected TV channel will be removed from the list.
Settings
Search a TV channel
Want to search some TV, then choose in the list, press the TV search tool, where you ▶ button to bottom links appear searches. Select using the ▲ / ▼ buttons to select the appropriate TV and press the OK button.
Enter the text style, the station name that you want to find in the TV list.
After entering the station name, press the OK button and the desired TV station is in the TV channel list appears, if it exists.

EPG
Under this menu, you can view the EPG information of TV channels. Detailed description of the EPG function you can see on page 24.
Radio
The menu contains the submenus TV Radio list and EPG display. With the Edit menu, radio list, you found the TV from one or more satellites.
They have the same options in radio list as in the TV list. Please read the individual steps in the TV list (pages 38 to 41).
Multimedia
The Multimedia menu contains submenus, My Pictures, My Music, My Movies and My recordings. Detailed descriptions of these menus and their functioning, refer to pages 28 to 37.
Setup
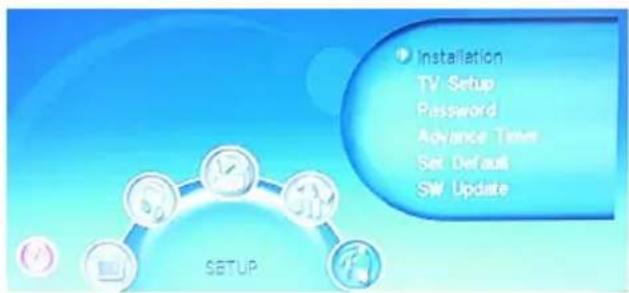
The Setup Menu includes following sub-menus:
- Installation
- TV Setup
- Password
- Advance Timer
- Set Default
- SW-Update
English
Installation
The Installation menu includes following sub-menus:
- Settings
- My Dish
- Transponder
Please refer the description in this manual on pages 14 to 21. All settings and parameters are described.
TV Setup
These settings are responsible for the kind of displaying the picture on the screen. The sub-menus are:
- TV Format
- TV Mode
- OSD Transparency
- Banner Display Time
- Video Output
Using the ▲ / ▼ keys to navigate the menus. Using the ◀ / ▶ keys to change the options. With the EXIT button to exit the TV settings, and implement the changes immediately and stored.

With this menu, enter the type of your TV television. Please pay attention to the aspect ratio of your TV device and select it from the list.
If you have a 16:9 TV device, then you should select the option 16:9 CAR.
If you have a 4:3 TV device, then you can select 4:3 LB.
TV Mode
In this menu you can choose between PAL, NTSC and AUTO. Use the AUTO option and then will always automatically select the correct setting.
OSD Transparency
With this option you can adjust the transparency of the OSD or messages. High values cause no transparency and low values have resulted in increasing transparency.
Banner Display Time
Here you can define the displaying time of the messages.
Video Output
With this option, you define the way down the video output. You can choose between RGB and CVBS. If your TV supports RGB interface device via the SCART, then you should use this option. RGB provides a better picture quality compared to Composite.
Password
In the Password menu you can define different locking features. The submenus are:
- Menu lock
- Channel Lock
- Parental Control
- Change Password
Using the ▲ / ▼ keys to navigate the menus. Using the ◀ / ▶ keys to change the options. With the EXIT button to exit the TV settings, and implement the changes immediately and stored.

With this option you can lock the menus and settings. Do you want to access it, you must always enter the password. The default password is 6 6 6 6.
The option to the menu lock is on. The Off option turns off the menu lock.
Channel Lock
Use this option to switch the channel lock on or off. If you lock in the list of individual TV channels like TV, then this option must be active (On). If not, then the lock has no effect.
Parental Control
With this option you can define the level of the ESRB. The setting switches off the Unlimited. The higher the value (to 18), the more restrictive is the level of the ESRB.
Note:
This option can only be efficient, if the relevant information will also be sent to the transmitters. This is rarely the case in Europe.
Change Password
With this option you can change the default password. The default password is 6 6 6 6. Do you want to change the password, then change the option from No to Yes. After changing you will be prompted for the old password.
- Enter 6 6 6 6 on the remote control
- Enter the new four-digit password
- Repeat the new four-digit password
- Then a message appears on the screen that the new password has been changed.
Timer Settings
With this menu you can program the timer. Either you have already a running program from EPG and then you can modify them. Of course you can also manually program the timer. Press the RED button to add another timer added.
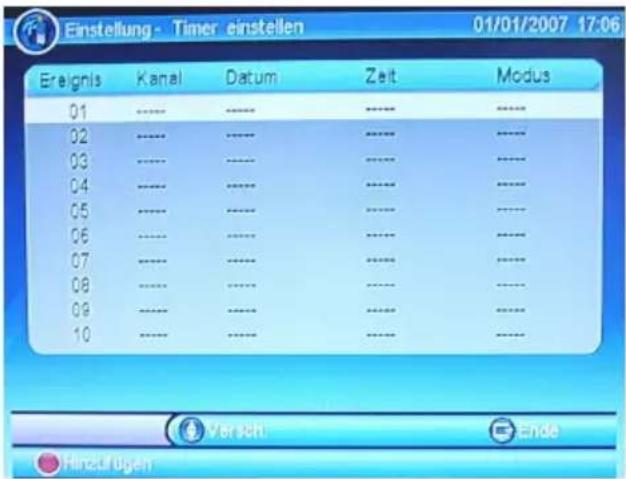
Settings
Following option you can edit:
- Channel Type
- Channel No.
- Channel Name
- Start Date
- Start Time
- Stop Time
- Mode
- Timer Mode
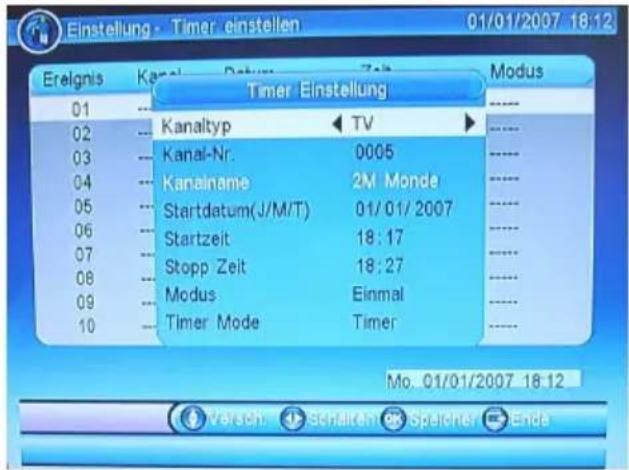
Here you can choose between TV or Radio.
Channel No.
Please choose the channel no which shall be record.
Channel Name
The channel name corresponds with the channel no. There is no editing necessary.
Start Date
Insert the date, when the recording shall be starts.
Start Time
Insert the time, when the recording shall be starts.
Note:
Insert a few minutes before of the time, because often the TV program do not start exactly.
Stop Time
Insert the time, when the recording shall be stops.
Note:
Insert a few minutes after of the time, because often the TV program do not ends exactly.
Mode
Here you can define the recording mode. The options are:
- Single
- Daily
- Weekly
• Monthly
Timer Mode
Lets you define the timer mode. The options are timer or recording. If you select recording, then start with the previous setting the recording.
Note:
If you want to run a recording, then it must be connected to a USB memory.
Confirm the programming with OK button and it will appear in the timer list.
With the RED button, you can edit the settings.
With the GREEN button you can delete the programming.
Press the EXIT button to exit timer setting.
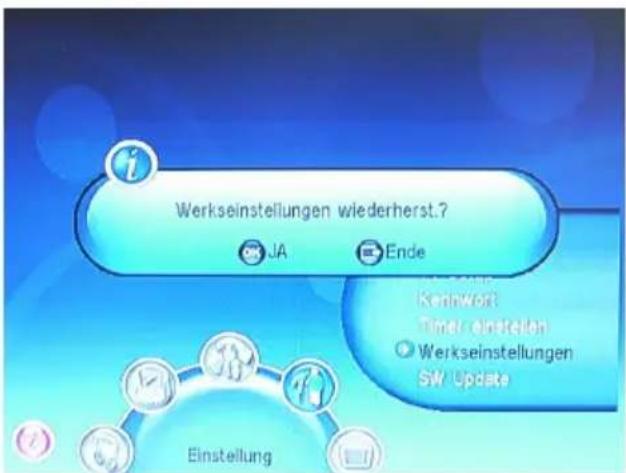
Set Default
You have the possibility to undo all the settings and changes, where you load the default settings. Go to the option and may confirm with the OK button.
Note:
All settings are reset. You must then continue to perform the search again.
The menu SW update contains two options:
- Update via USB or Card storage
- Backup via USB or Card storage
You have the opportunity to update the software via USB or Card memory.
Start this feature with the OK button.

The memory should only contain only the update file. If the file is found, then the process will start automatically.
During the backup, you can save the user database to memory. This contains your personal settings, the selected satellite and the TV channels found. Press the OK button to save the database. A short message appears on the screen.
Accessories
The accessory includes a game Gomoku (5 wins), a calendar and a simple calculator.
Check the following guide for the possible cause of a problem before contacting service. Technical Support of Xoro/MAS:
| Symptom | Correction |
| No DVB-T reception / serious distortion by mosaics or artefacts/ freeze pictures | No DVB-S reception in your region.Realign the dish. Please pay attention to the direction of the satellite.Please use a bigger dish.Retry the Auto Scan. |
| No power | Plug the power cord into the outlet tightly and turn on the power. |
| Can not scan programs | Adjust the dishRefer settings for searching |
| No picture / no coloured pictures | Control the connection to the TV set.Control the video output mode in the setup.PressDTV/VCRbutton. Maybe you sets the second SCART (VCR) into the input mode.TV channel or program is scrambled |
| Remote control does not work | Change the batteries.Operate within normal range (max. 5 meters, 30°)The sensor is pointed to by bright light. |
| No sound | Cancel Mute. PressMUTEbuttonIncrease volume. PressVOL+buttonPay attention to connection to TV set or amplifier. |
| Audio / Subtitle without function or can no choose | Change audio track (pressAUDIObutton)Change subtitle track (pressSUBTITLEbutton)Other audio track is not supportedSubtitles are not supported by broadcaster |
| No Recording | No USB or Card memory are connected.No free space on the storage. |
| Recording has jerkings or other mal functions | The connected storage is too slow. Please use only USB-Sticks with 8 GB or higher. Please uses only SDHC cards.Please control the reception quality of the dish and align them for getting better quality. |
Troubleshooting
Image quality
The image quality in DVB-S is different in each country. In essence, the quality is affected by the bit rate used and the Reception.
The transmitted bit rate is determined by individual TV stations and which can only be changed. If you are receiving strong mosaics, artefacts or a blurred image, you may be trying to change the position of the basin in order to ensure a better reception. However, it is for example not even with conditions to ensure optimal reception on some TV stations, better quality, because the transmitted bit rates are too low.
Here are some examples of the different bit rates for Germany:
ZDF 4000 to 5500 kbps
ARD 6000 to 6000 kbps
Third Program 2500 to 7000 kbps
Private TV stations 1800 to 5000 kbps
The higher the bit rate is sent, the better the picture quality can be and the image contains fewer artefacts, mosaics or interference.
The sharpness of the image depends also on the bit rate in addition to the resolution and sent us, the source material. Generalization can be said that the higher the resolution, the sharper the picture. Some TV stations broadcast with smaller resolutions than others.
Here are some examples of Germany, the different resolutions:
Public Legal TV 720x576 or 704x576 pixels
Individual Private TV Channel 544x576 or 528x576 pixels
The reception conditions, you can have impact on themselves. Frequent signs of a poor reception for example, is a frozen image or the message "No Signal".
Align the satellite dish exactly. Very heavy rain or snow fall also affects the quality of reception.
General data
Power supply AC 100-265 V with 50/60Hz
Power Consumption < 18 Watts
< 1 Watt in Stand-By
Dimensions 220 x 120 x 43 mm (WxHxD)
Net weight 0.8 kg (incl. remote control)
TV-Tuner
RF input Connector IEC 60196-24 (F-Type)
RF Output Connector IEC 60196-24 (F-Type)
Input Frequency 950 - 2150 MHz
Impedance 75 Ohm
LNB Power 13 / 18 V, max. 500 mA
Waveform QPSK
Symbol Rate 2 - 45 Mbps
Video Decoder
Standard ISO/IEC 13818-2 MPEG MP@ML Compatible
Aspect Ratio 4:3 PS & LB/ 16:9
Resolution 720 x 576 (PAL)
720 x 480 (NTSC)
Videotext Support DVB-ETS300472
Output Level 1.0 V p_p, 75 W
Audio Decoder
Standard ISO/IEC 11172-3
Sampling Frequency 32, 44.1 & 48 kHz
Output Mode Stereo, Left/Right, Mono
Output Level 0.775 Vrms, unbalanced
Connector
USB USB 2.0 high Speed
Card Reader SD, SDHC, MMC and MS cards
Video 2x SCART (TV or VCR)
Audio Coaxial RCA
Operating conditions
Temperature 0 - 40° C
Humidity 5 - 90% (non condensing)
Note:
Weight and dimensions are not absolutely exact values. Specifications are subject to change
Gloassary
5.1
5.1-multichannel encoding means, that 5 audio channels with full frequency response are present (left, center, right, surround left, surround right) plus a subwoofer channel (represented by the „1”) providing deep humming frequencies you are used to know from modern cinemas. Both Dolby Digital ^® (including AC3) and DTS ^® support 5.1-coding and – decoding.
Aspect ratio: 4:3 and 16:9
Full Frame refers to programs developed for TV display with an aspect ratio of 4:3. Wide-screen refers to programs developed for screens with an aspect ratio of 16:9. If a widescreen program is displayed on a 4:3 screen, the picture will have black borders on top and bottom.
Coaxial
Coaxial is a digital transmission standard for audio data transfer. Coaxial can transmit digital audio tracks from one source to another without having to leave the digital transmission, which would result in worse quality.
CVBS
Composite Video Interface. The video signal is transmitted via a single signal line. CVBS should only be used, if your playback device does not offer other interfaces for connection with you Xoro TV set, as CVBS due to technical reasons delivers worst quality of all available interfaces (please also refer to YUV, S-Video, SCART and RGB). The CVBS interface can easily be identified from the yellow colour of the RCA jack.
Dolby Digital 5.1
Dolby Digital 5.1 is a system for transmission and storage of 5.1 channel sound on digital media as DVD, digital TV and satellite transmission. Different from the codecs Dolby Surround® and Pro Logic® who do not work with channel separation to encode the surround sound in a stereo recording, Dolby Digital® is a discrete system where the different audio channels keep completely separated during encoding and decoding. Dolby Digital 5.1 is industry standard for coding of DVD movies with surround sound.
DVB MPEG-2
DVB is the abbreviation of Digital Video Broadcasting, which is a standardization group. DVB-T is one type of DVB mode (T=Terrestrial). MPEG is the abbreviation of Motion Picture Experts Group, a working group which defines international standards for audio and video digital compression. The MPEG-2 standards are mainly applied in digital TV signals.
FEC
FEC stands for Forward Error Correction, applied to correct signal transmission errors between antennas and the receiver.
NTSC
Widespread TV standard, especially in US and Asia. 525 (480 viewable) Lines and 60 Hz refresh rate. Describes the way the video information (brightness, colour, refresh rate etc.) is
transmitted. Within Europe, this video standard only appears on imported media (like US DVDs).
OSD
The OSD (On Screen Display) is all the menus and options shown on the screen.
PAL
European TV standard. PAL stands for Phase Alternation Line; refresh rate: 50 Hz, vertical line resolution: 625 Lines, 576 visible lines. Describes the way the video information (brightness, colour, refresh rate etc.) is transmitted.
PID
The PID code (Packed Identification) is the identification number of audio and video signals in the digital data flow/stream of DVB MPEG-2 signals. With this code, the receiver transmits audio and video signals to a specific address.
RGB
Red Green Blue. Describes the way of transmission and display of video signals. The three in TV systems used colours red, green and blue are transmitted separately. When used for connection between playback device and TV set, it delivers a quality similar to YUV.
Subtitles
There are printed lines appearing at the bottom of the screen which are the translation or transcription of the dialogues.


FREE TO CHOOSE INNOVATIONS

XORO by MAS Elektronik AG
Pollhornbogen 19
21107 Hamburg
Deutschland
Tel: +49(040) 77 11 09 17
Fax: + 49(040) 76 73 33 15
xoro@mas.de
www.xoro.de

natural_image
Green recycling symbol with three chasing arrows forming a triangle (no text or labels)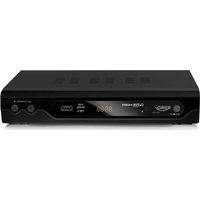



- XORO®
- Inhaltsangabe
- Audio Srache (Audio Language)
- Zeitzone (Time Zone)
- Unterstützte Medien
- AUS
- OTR (One Button Recording)
- TV
- Installation
- High Frequency Tuner
- Video, Audio decoding
- Power Specification
- Ambient condition
- Ports
- Device
- SAFETY INFORMATION
- English
- User Manual
- Power Supply
- Operation and Position
- USB Port
- Defect
- Recycling Information
- Recycling of electronic devices
- Recycling of paper and carton
- Recycling of plastic parts
- Green Dot
- Package Contents
- Notes:
- Features
- Standard Settings
- CONTROL ELEMENTS
- Remote Control
- Insert batteries and operationradius
- Buttons of the remote control
- Note:
- To TV Set and Aerial
- Basic connection:
- REMARKS:
- CONNECTING TO TV SET AND TO THE DISH
- How to connect:
- To external decoder or amplifier
- First Time Installation
- Settings
- General Setting
- OSD Language
- Audio Language
- Subtitle Language
- Auto Time Zone
- Time Zone
- My Dish
- Single connection between Satellite / LNB and Receiver
- My Dish - Single Connection
- LNB Type
- LNB Low and High Frequency
- 22K Tone
- LNB Power
- Transponder
- My Dish—Single Connection
- Strength
- Quality
- Scan Mode
- Programme
- My Dish—Single Connection with Toneburst
- Single connection between Satellite / LNB and Receiver with Toneburst
- My Dish—Using DiSEqC 1.0/1.1
- Using more than two satellite by DiSEqC 1.0/1.1
- Using more than two satellite by DiSEqC 1.0/1.1 with Toneburst
- My Dish—Using DiSEqC 1.2/USALS
- Using more than two satellite by DiSEqC 1.2 / USALS
- DiSEqC 1.2
- USALS
- Operation
- Important buttons and there functions
- Channel List
- Subtitle
- Audio Language and Sound Tracks
- Information
- Videotext
- TV/Radio
- Change TV channel
- Navigation by the Menu
- EPG
- 7-days EPG Overview
- Detailed EPG Information
- Detail
- Timer Programming
- RED, GREEN, YELLOW and BLUE
- Recording
- Recording List
- Playback of recorded files
- Information of the USB storage
- Delete a Recorded File
- Freeze a live picture
- Favourites
- Multimedia Player
- Supported File Formats
- Supported USB storages
- Card Reader
- Supported Card storages
- My Album
- Zoom function
- My Music
- Fast Forward
- My Movies
- MPEG-4 disc compatibility with this player is limited as follows:
- Recorder
- Recording Preference
- Time Shift
- AUTO
- PAUSE
- OFF
- Time Shift Size
- One Button Recording (OTR)
- ON
- Recording Device
- Slot
- Partition
- Format the Storage
- Recorded List
- Playback
- Delete a file
- TV List
- Define Favourite
- Operation:
- Lock a TV channel
- Edit a TV channel
- Move a TV channel
- Sort the TV channels
- Skip a TV channel
- Delete a TV channel
- Search a TV channel
- Radio
- Multimedia
- Setup
- TV Setup
- TV Mode
- OSD Transparency
- Banner Display Time
- Video Output
- Password
- Channel Lock
- Parental Control
- Change Password
- Timer Settings
- Following option you can edit:
- Channel No.
- Channel Name
- Start Date
- Start Time
- Stop Time
- Mode
- Timer Mode
- Set Default
- Accessories
- Troubleshooting
- Image quality
- General data
- TV-Tuner
- Video Decoder
- Audio Decoder
- Connector
- Operating conditions
- Gloassary
- 5.1
- Aspect ratio: 4:3 and 16:9
- Coaxial
- CVBS
- Dolby Digital 5.1
- DVB MPEG-2
- FEC
- NTSC
- OSD
- PAL
- PID
- RGB
- Subtitles
- XORO by MAS Elektronik AG
Brand : XORO
Model : HRS 3400
Category : Receiver